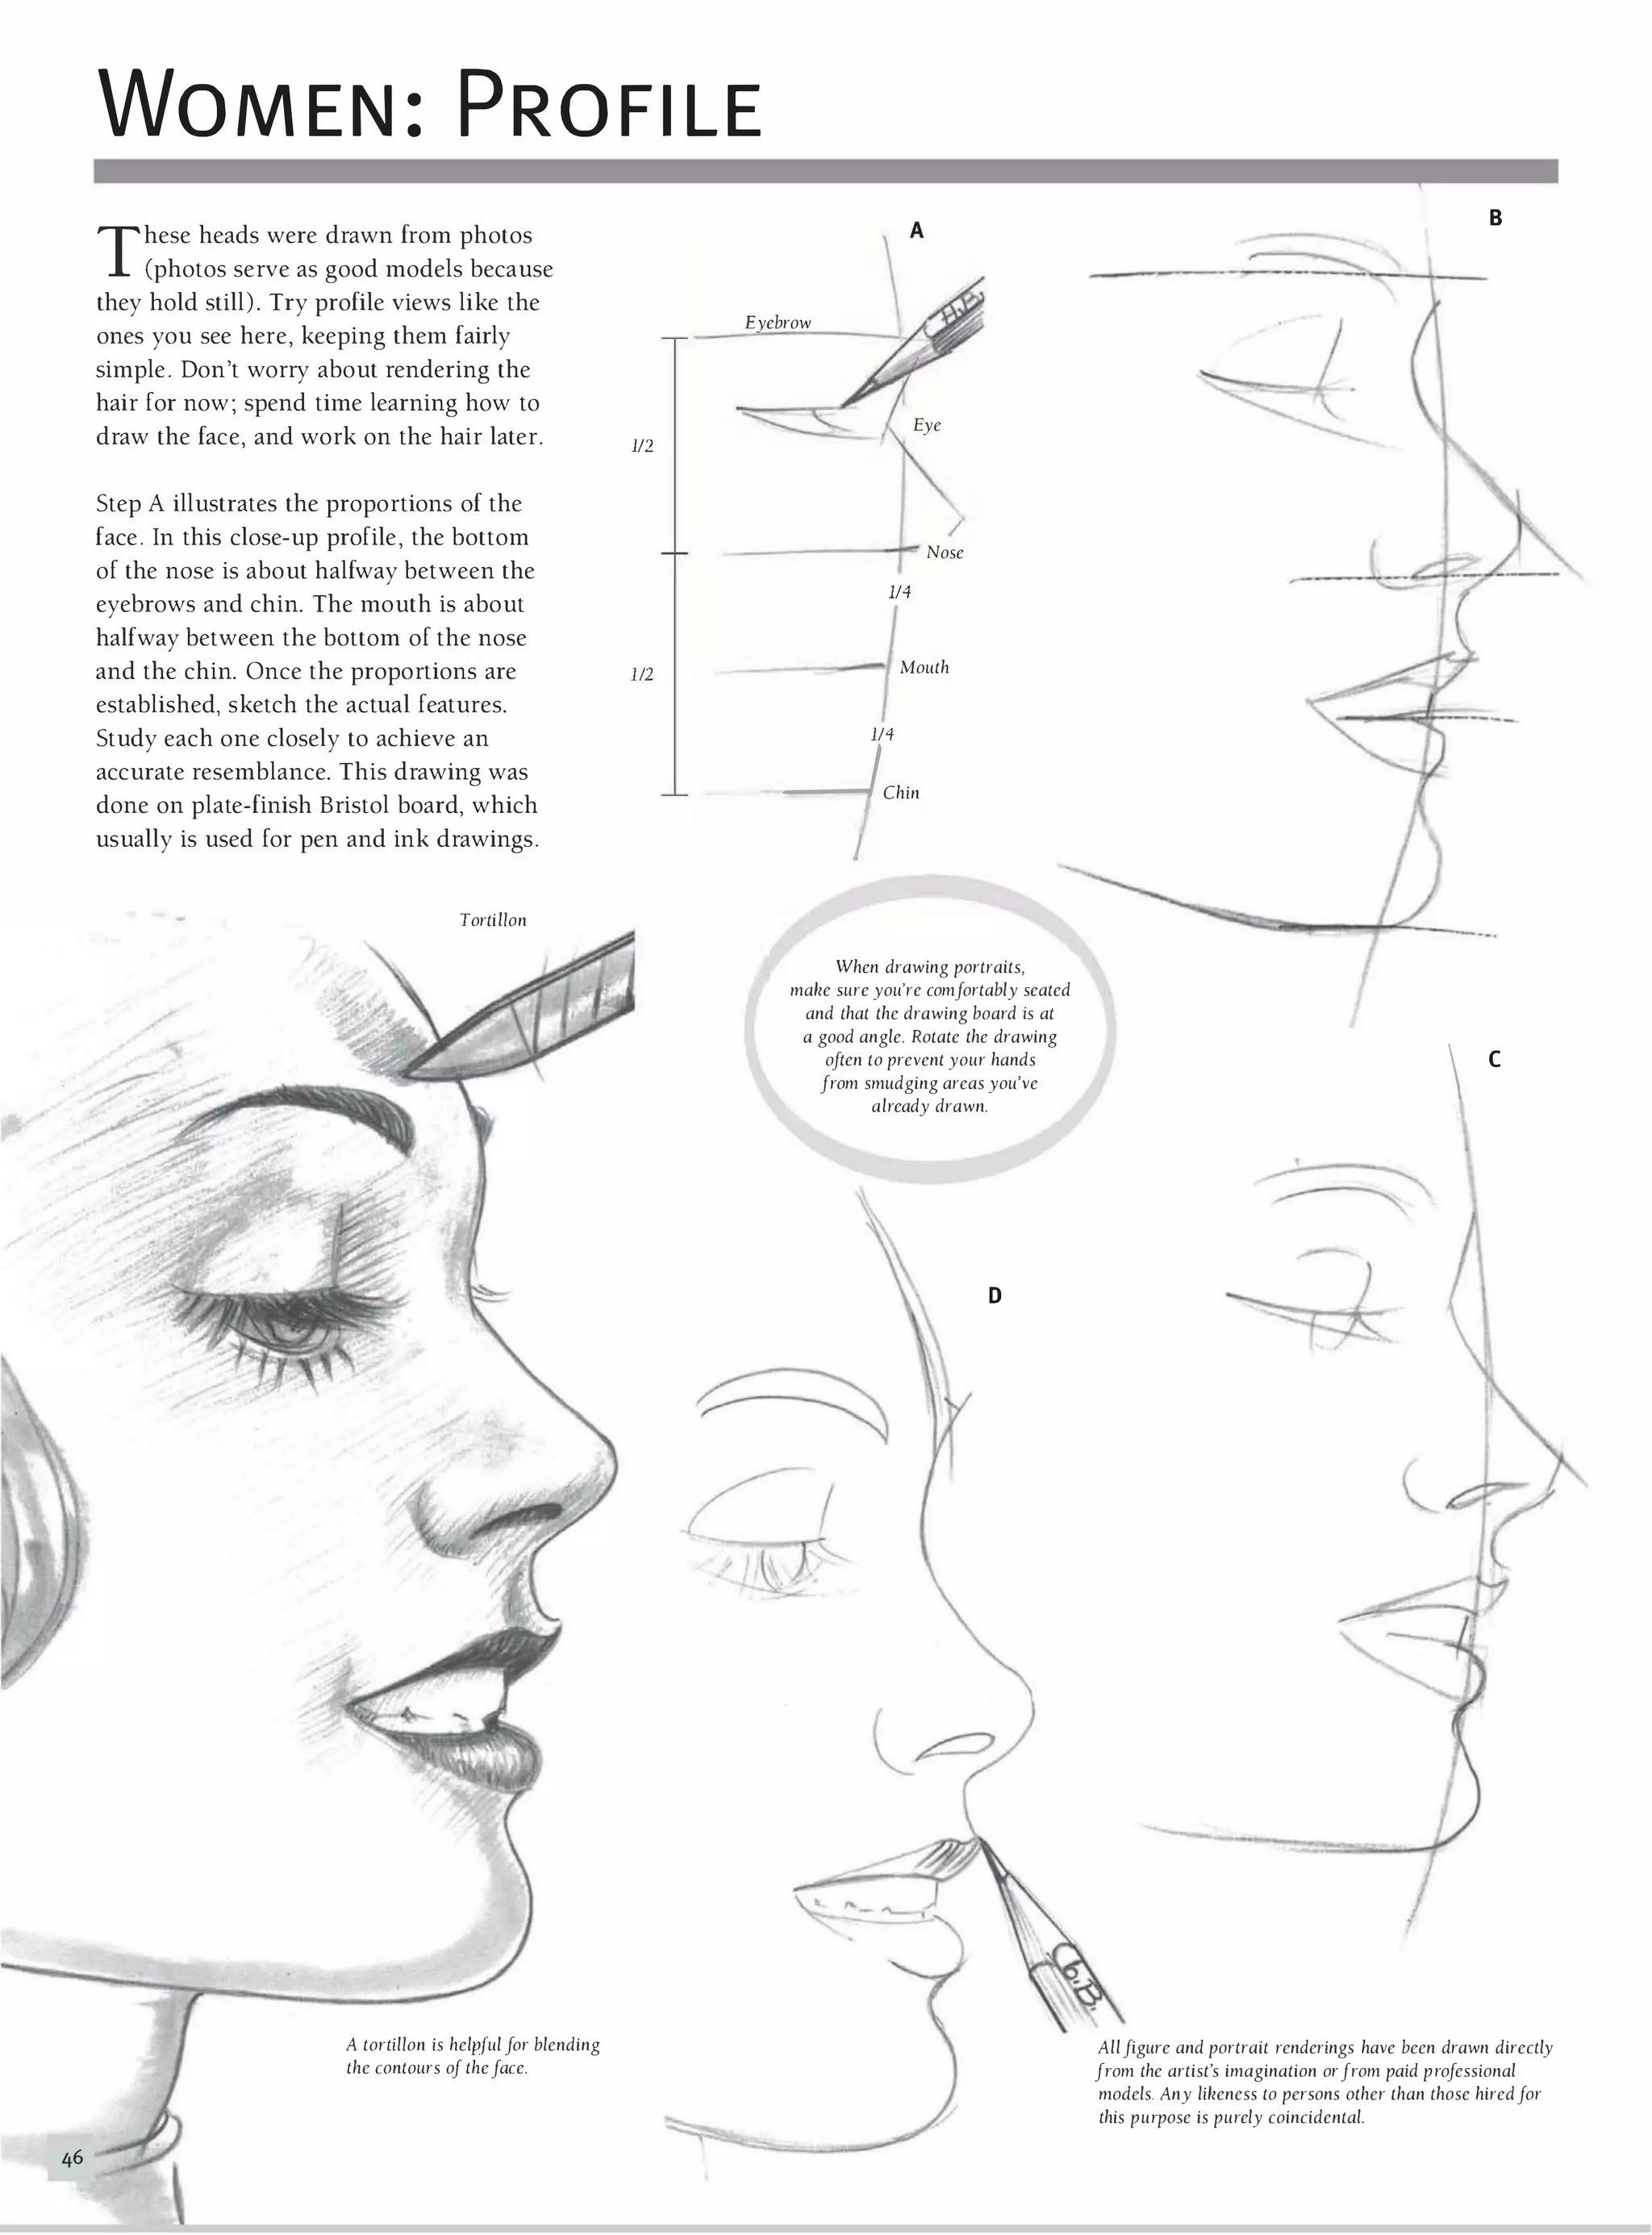
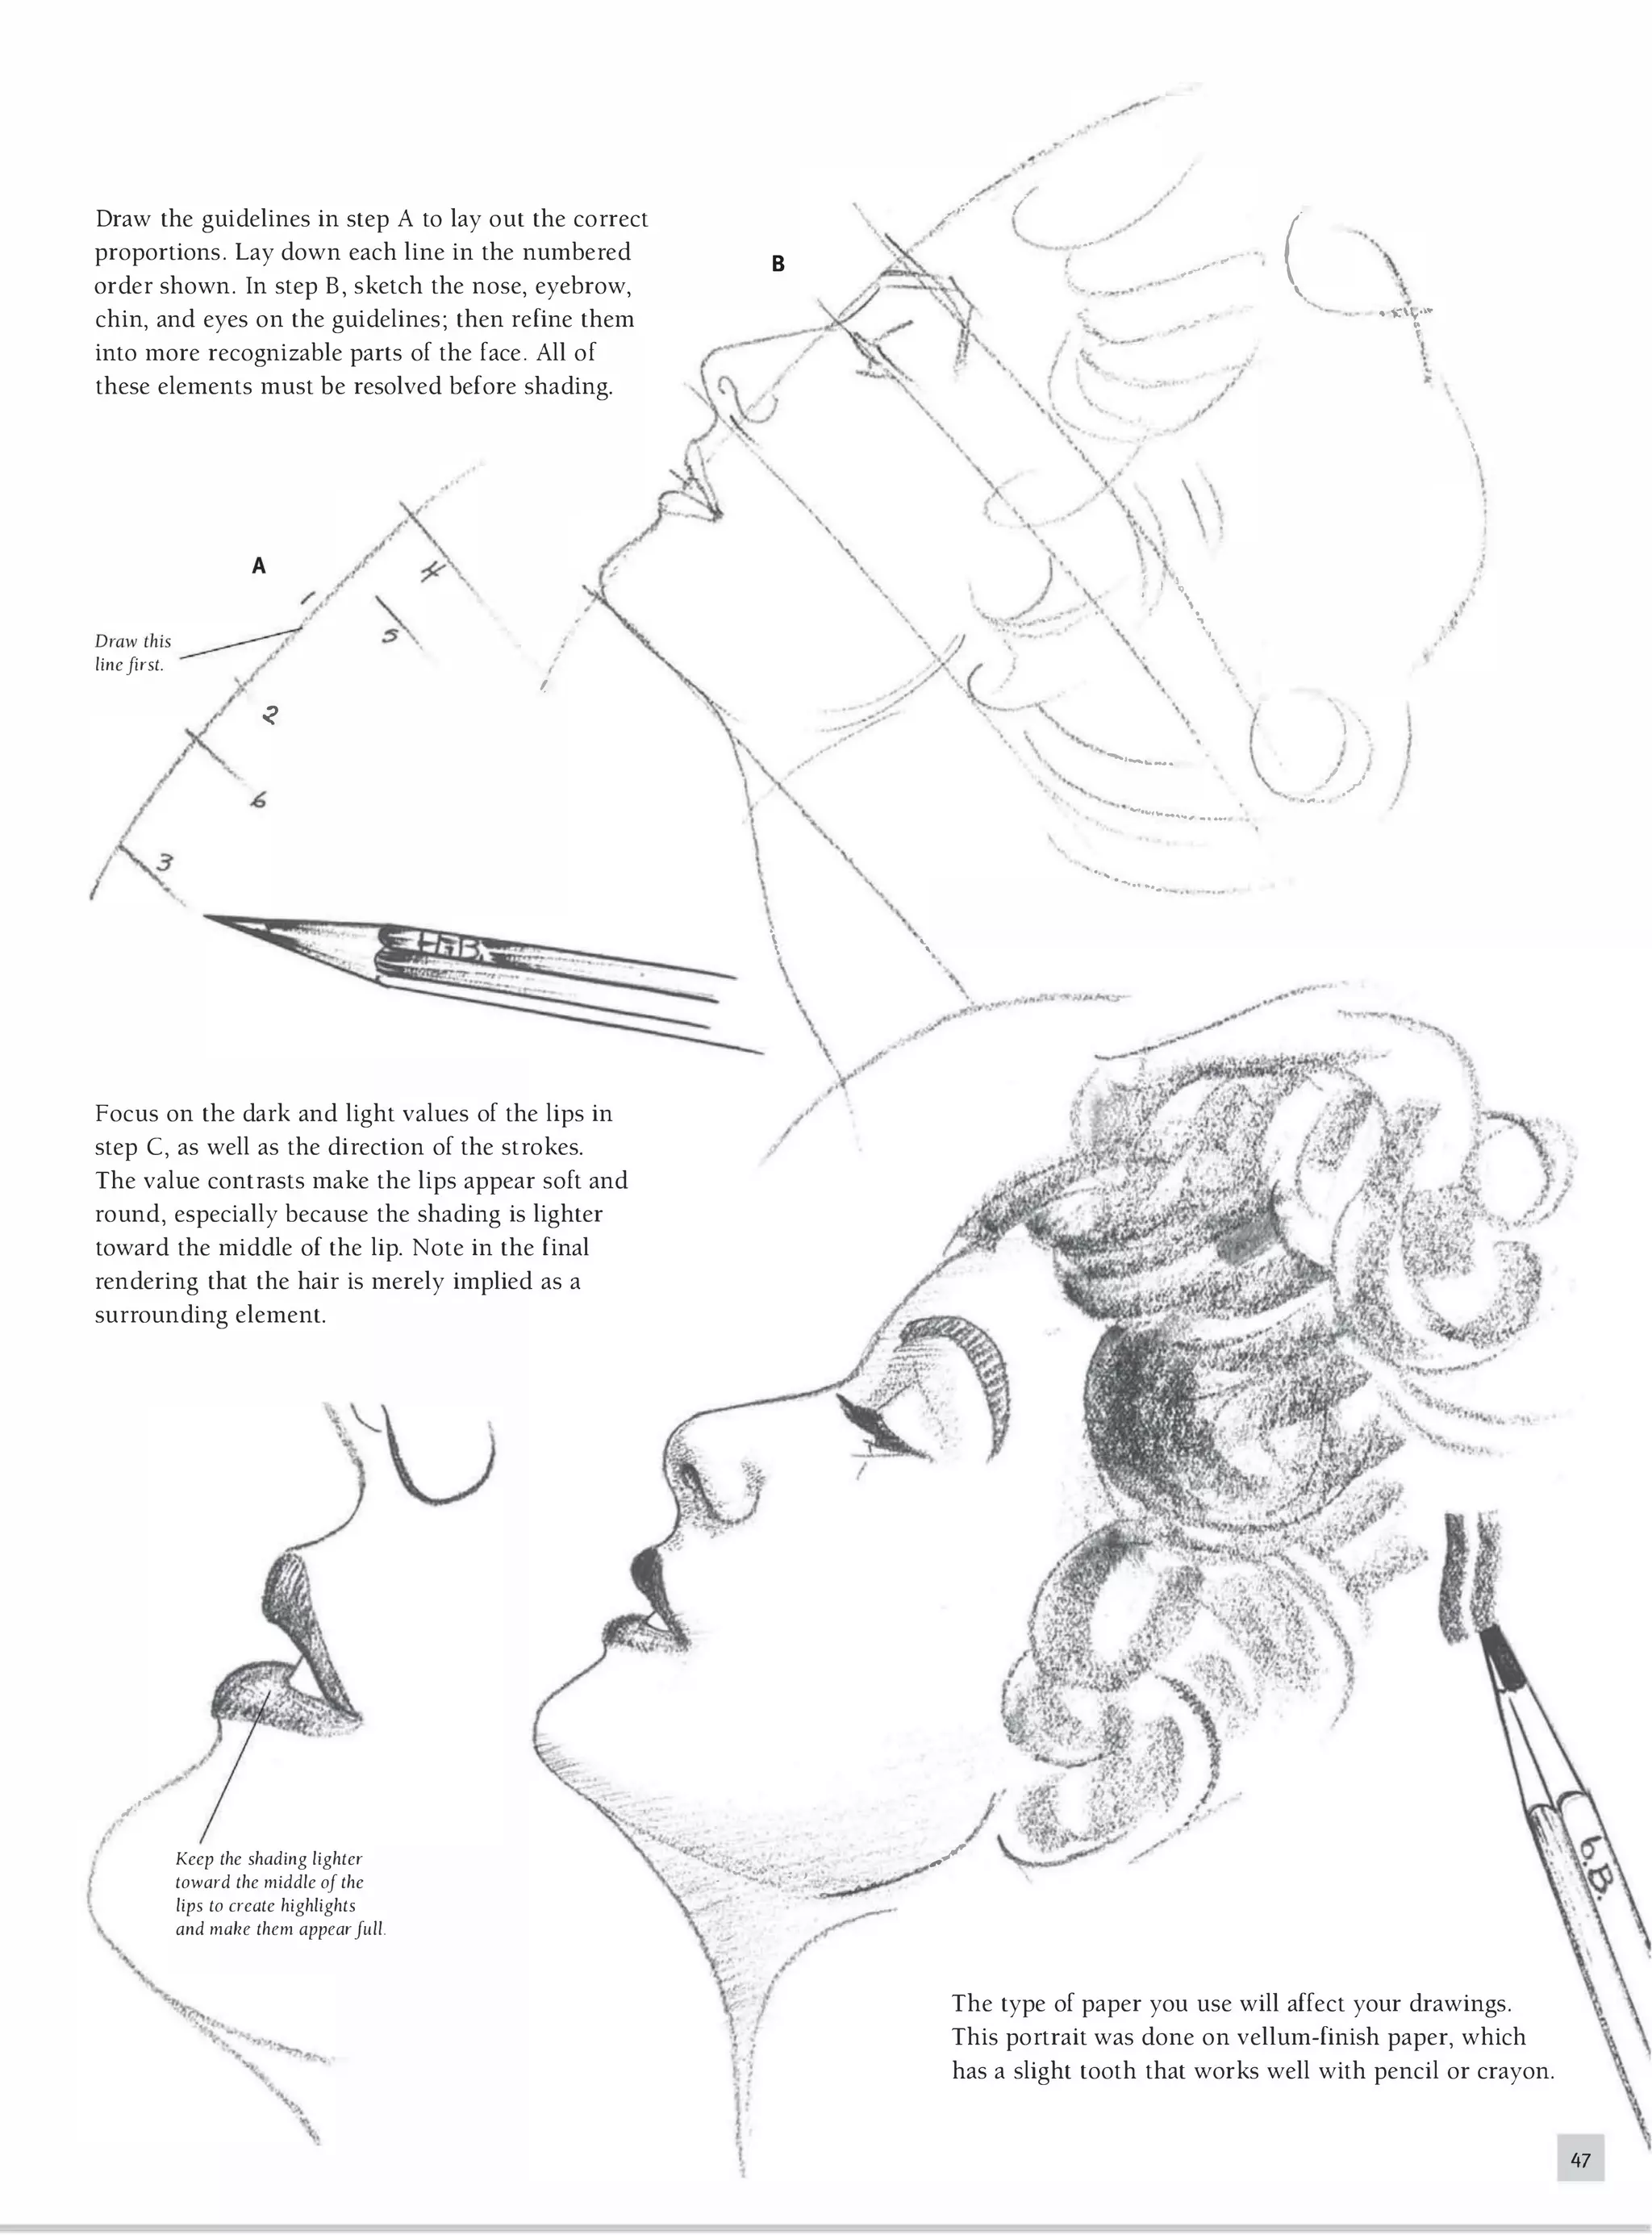
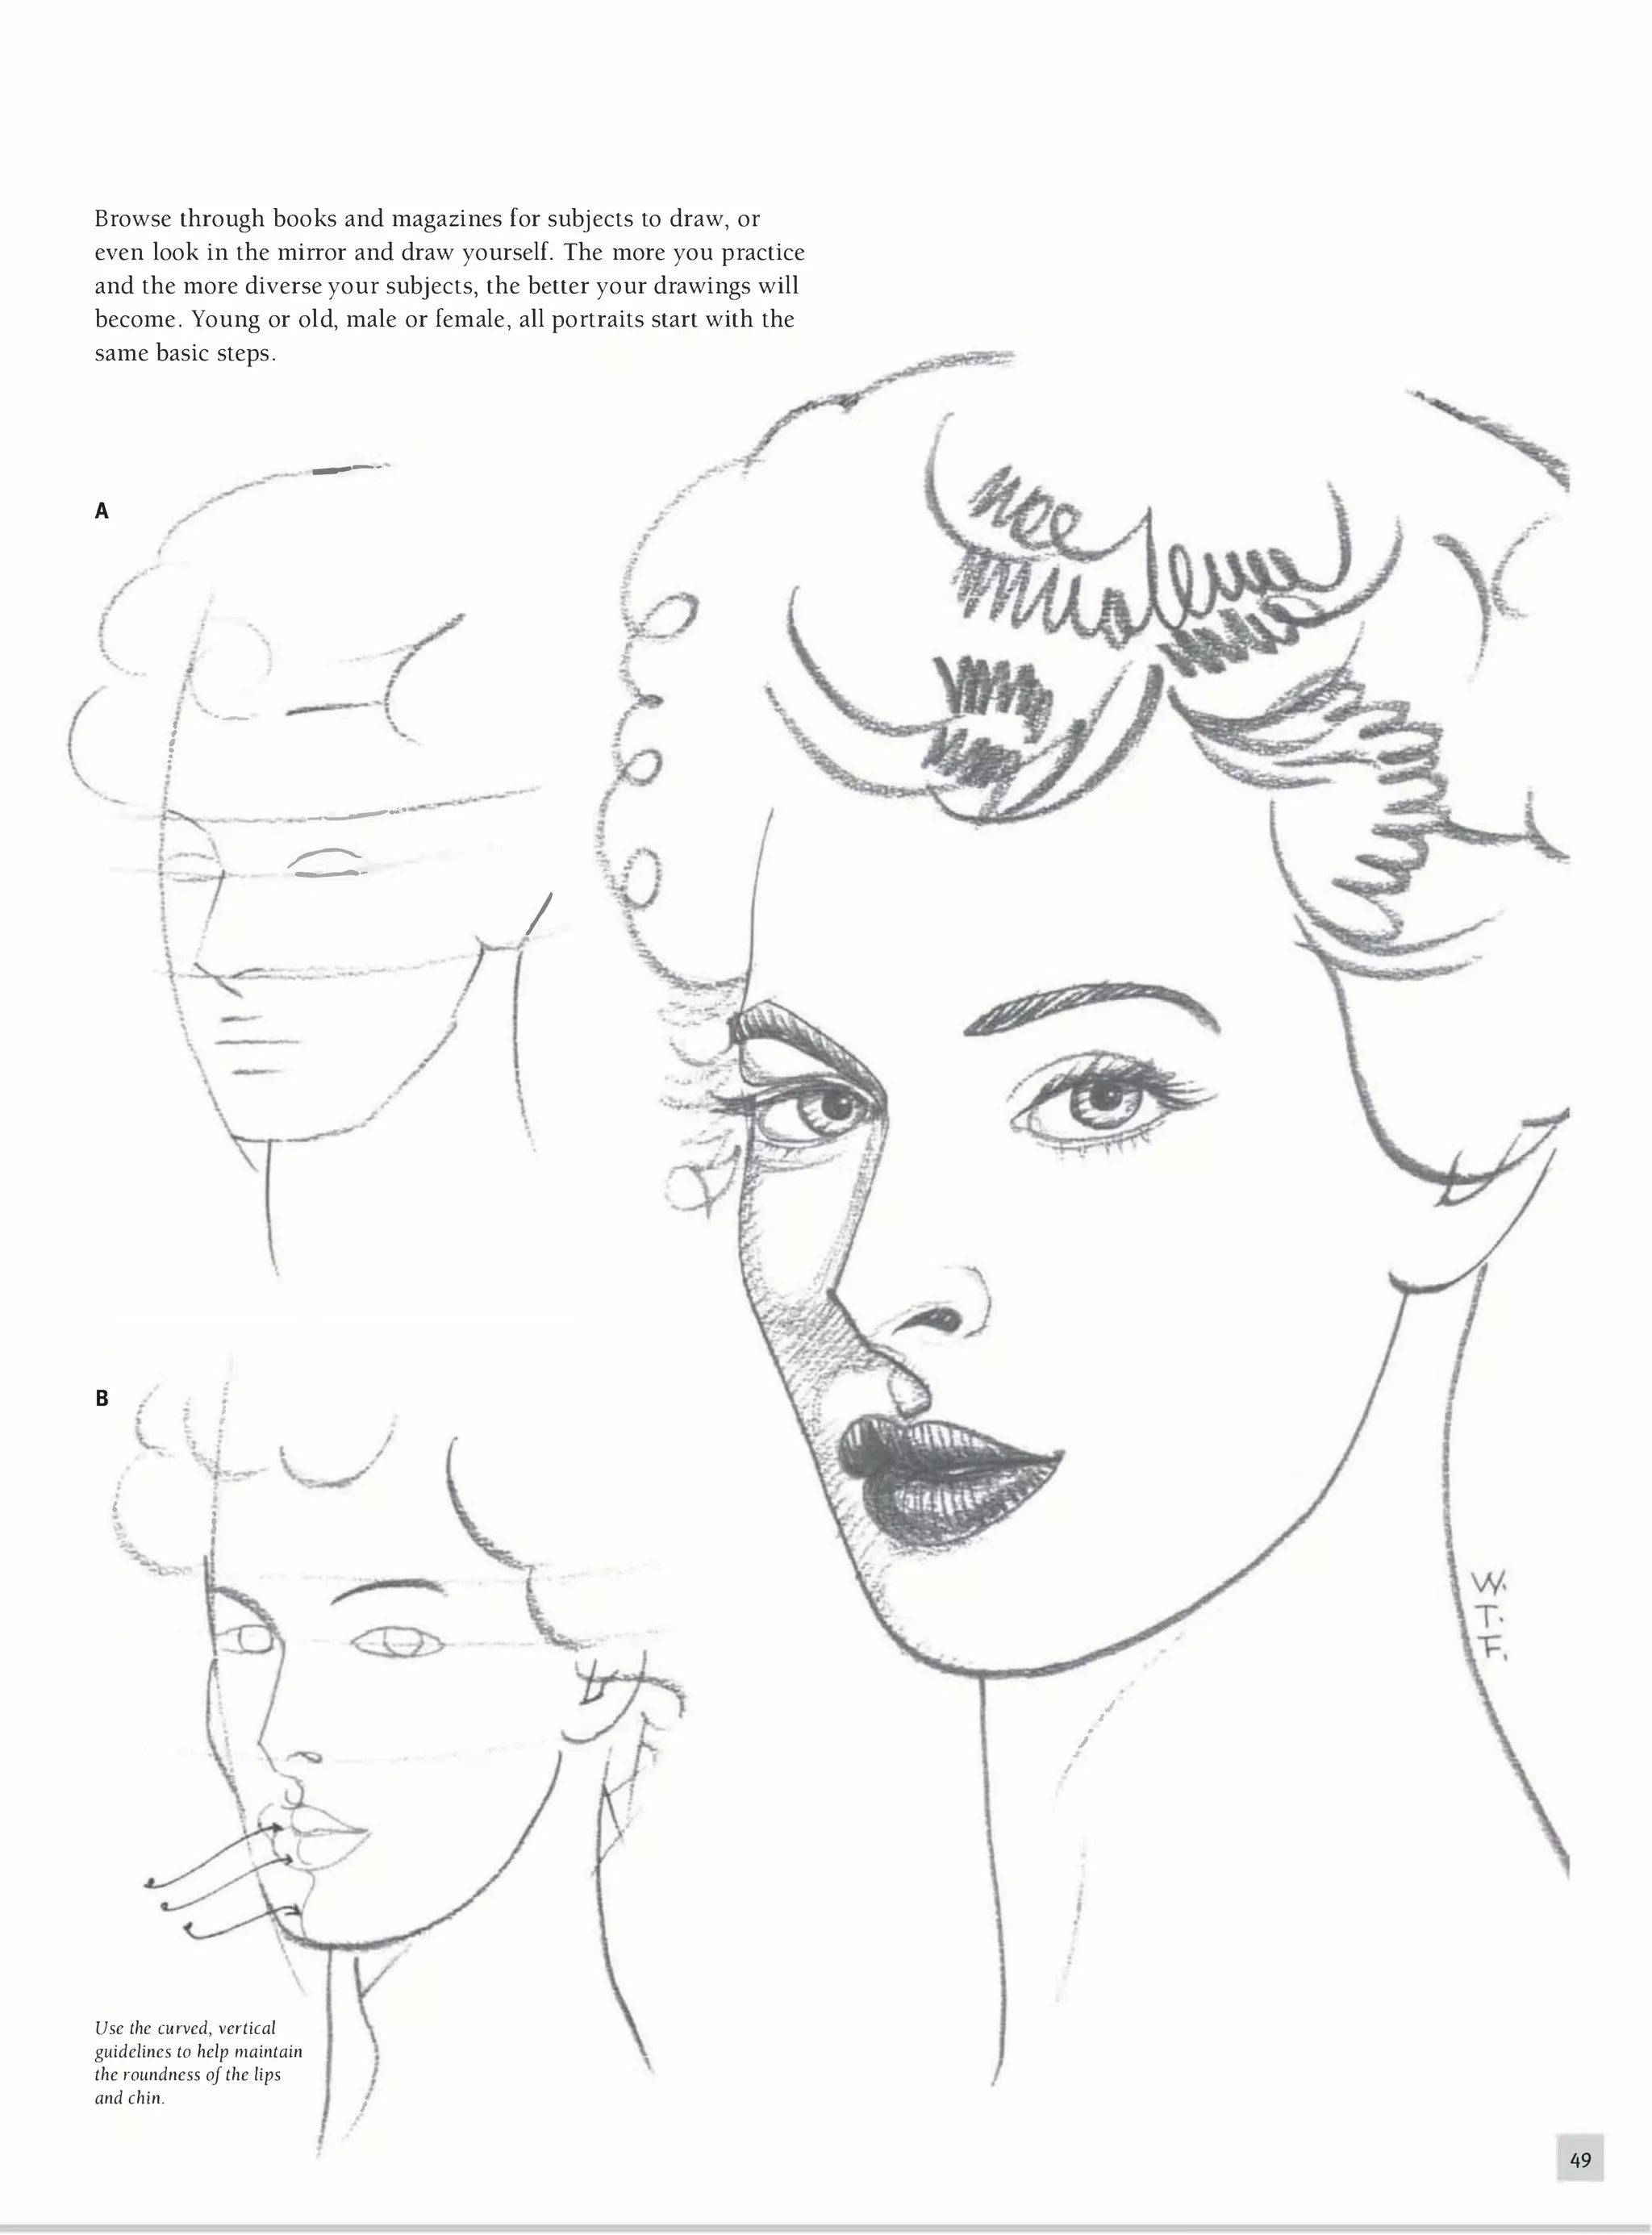
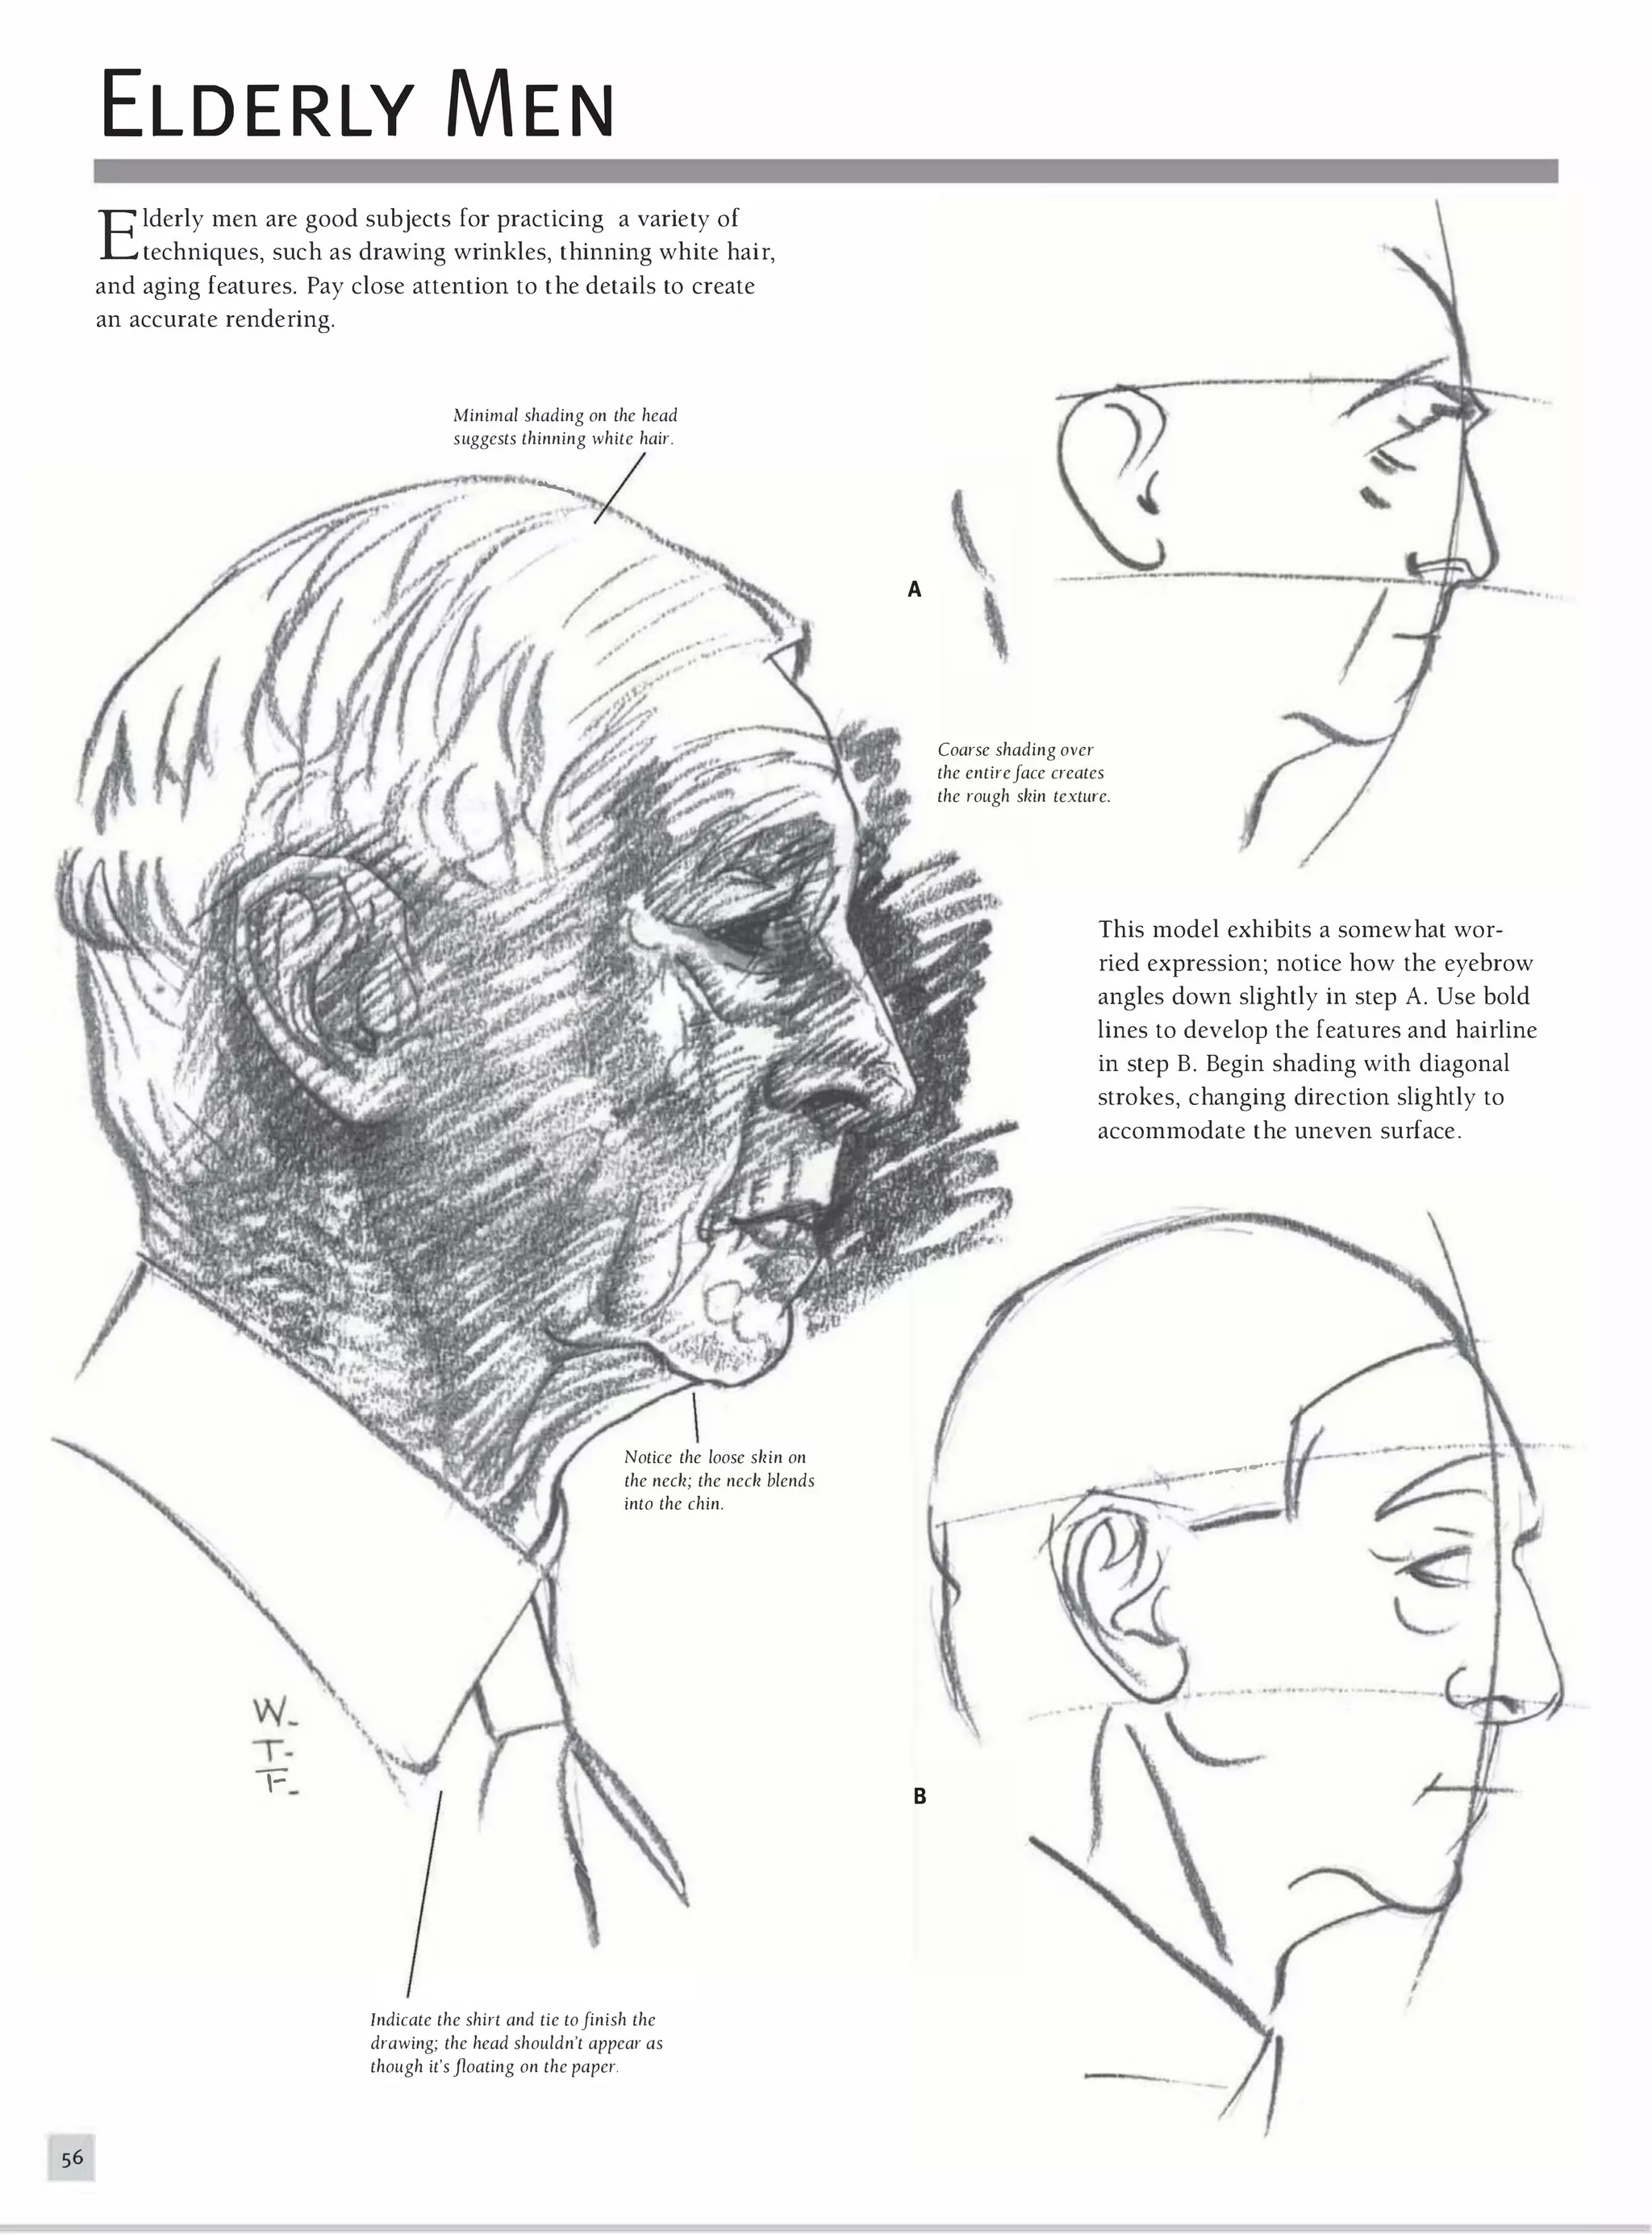
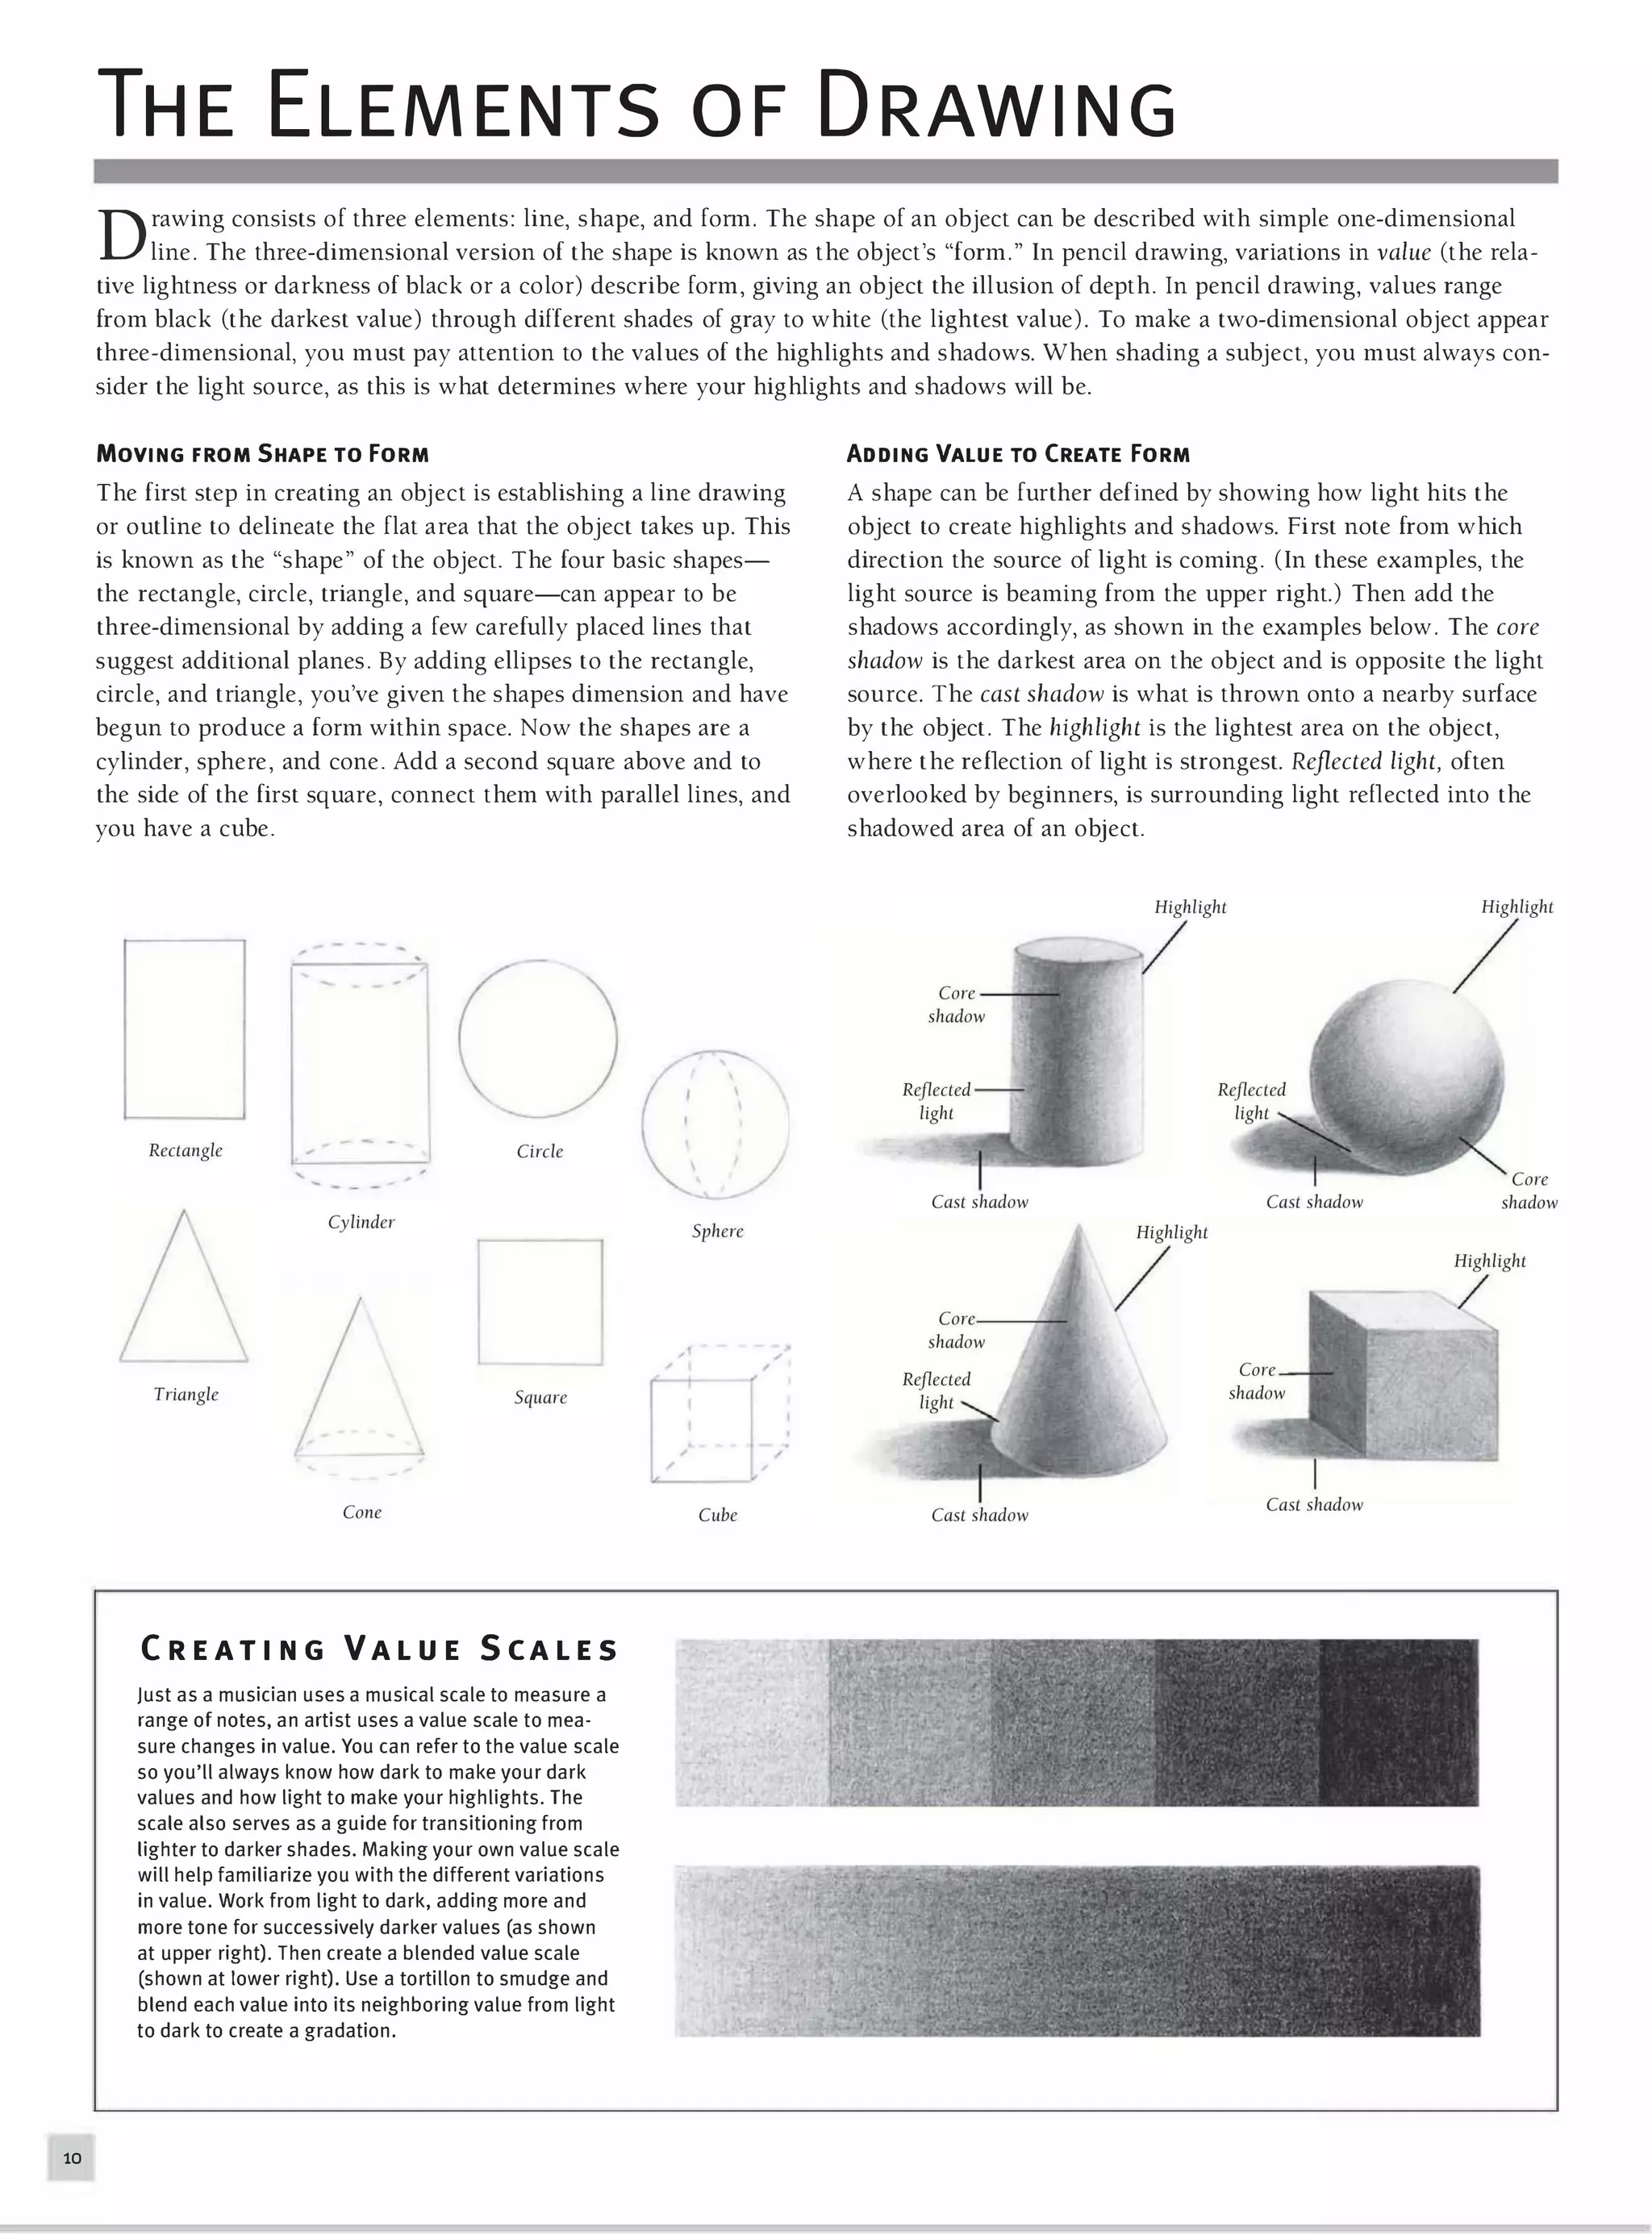
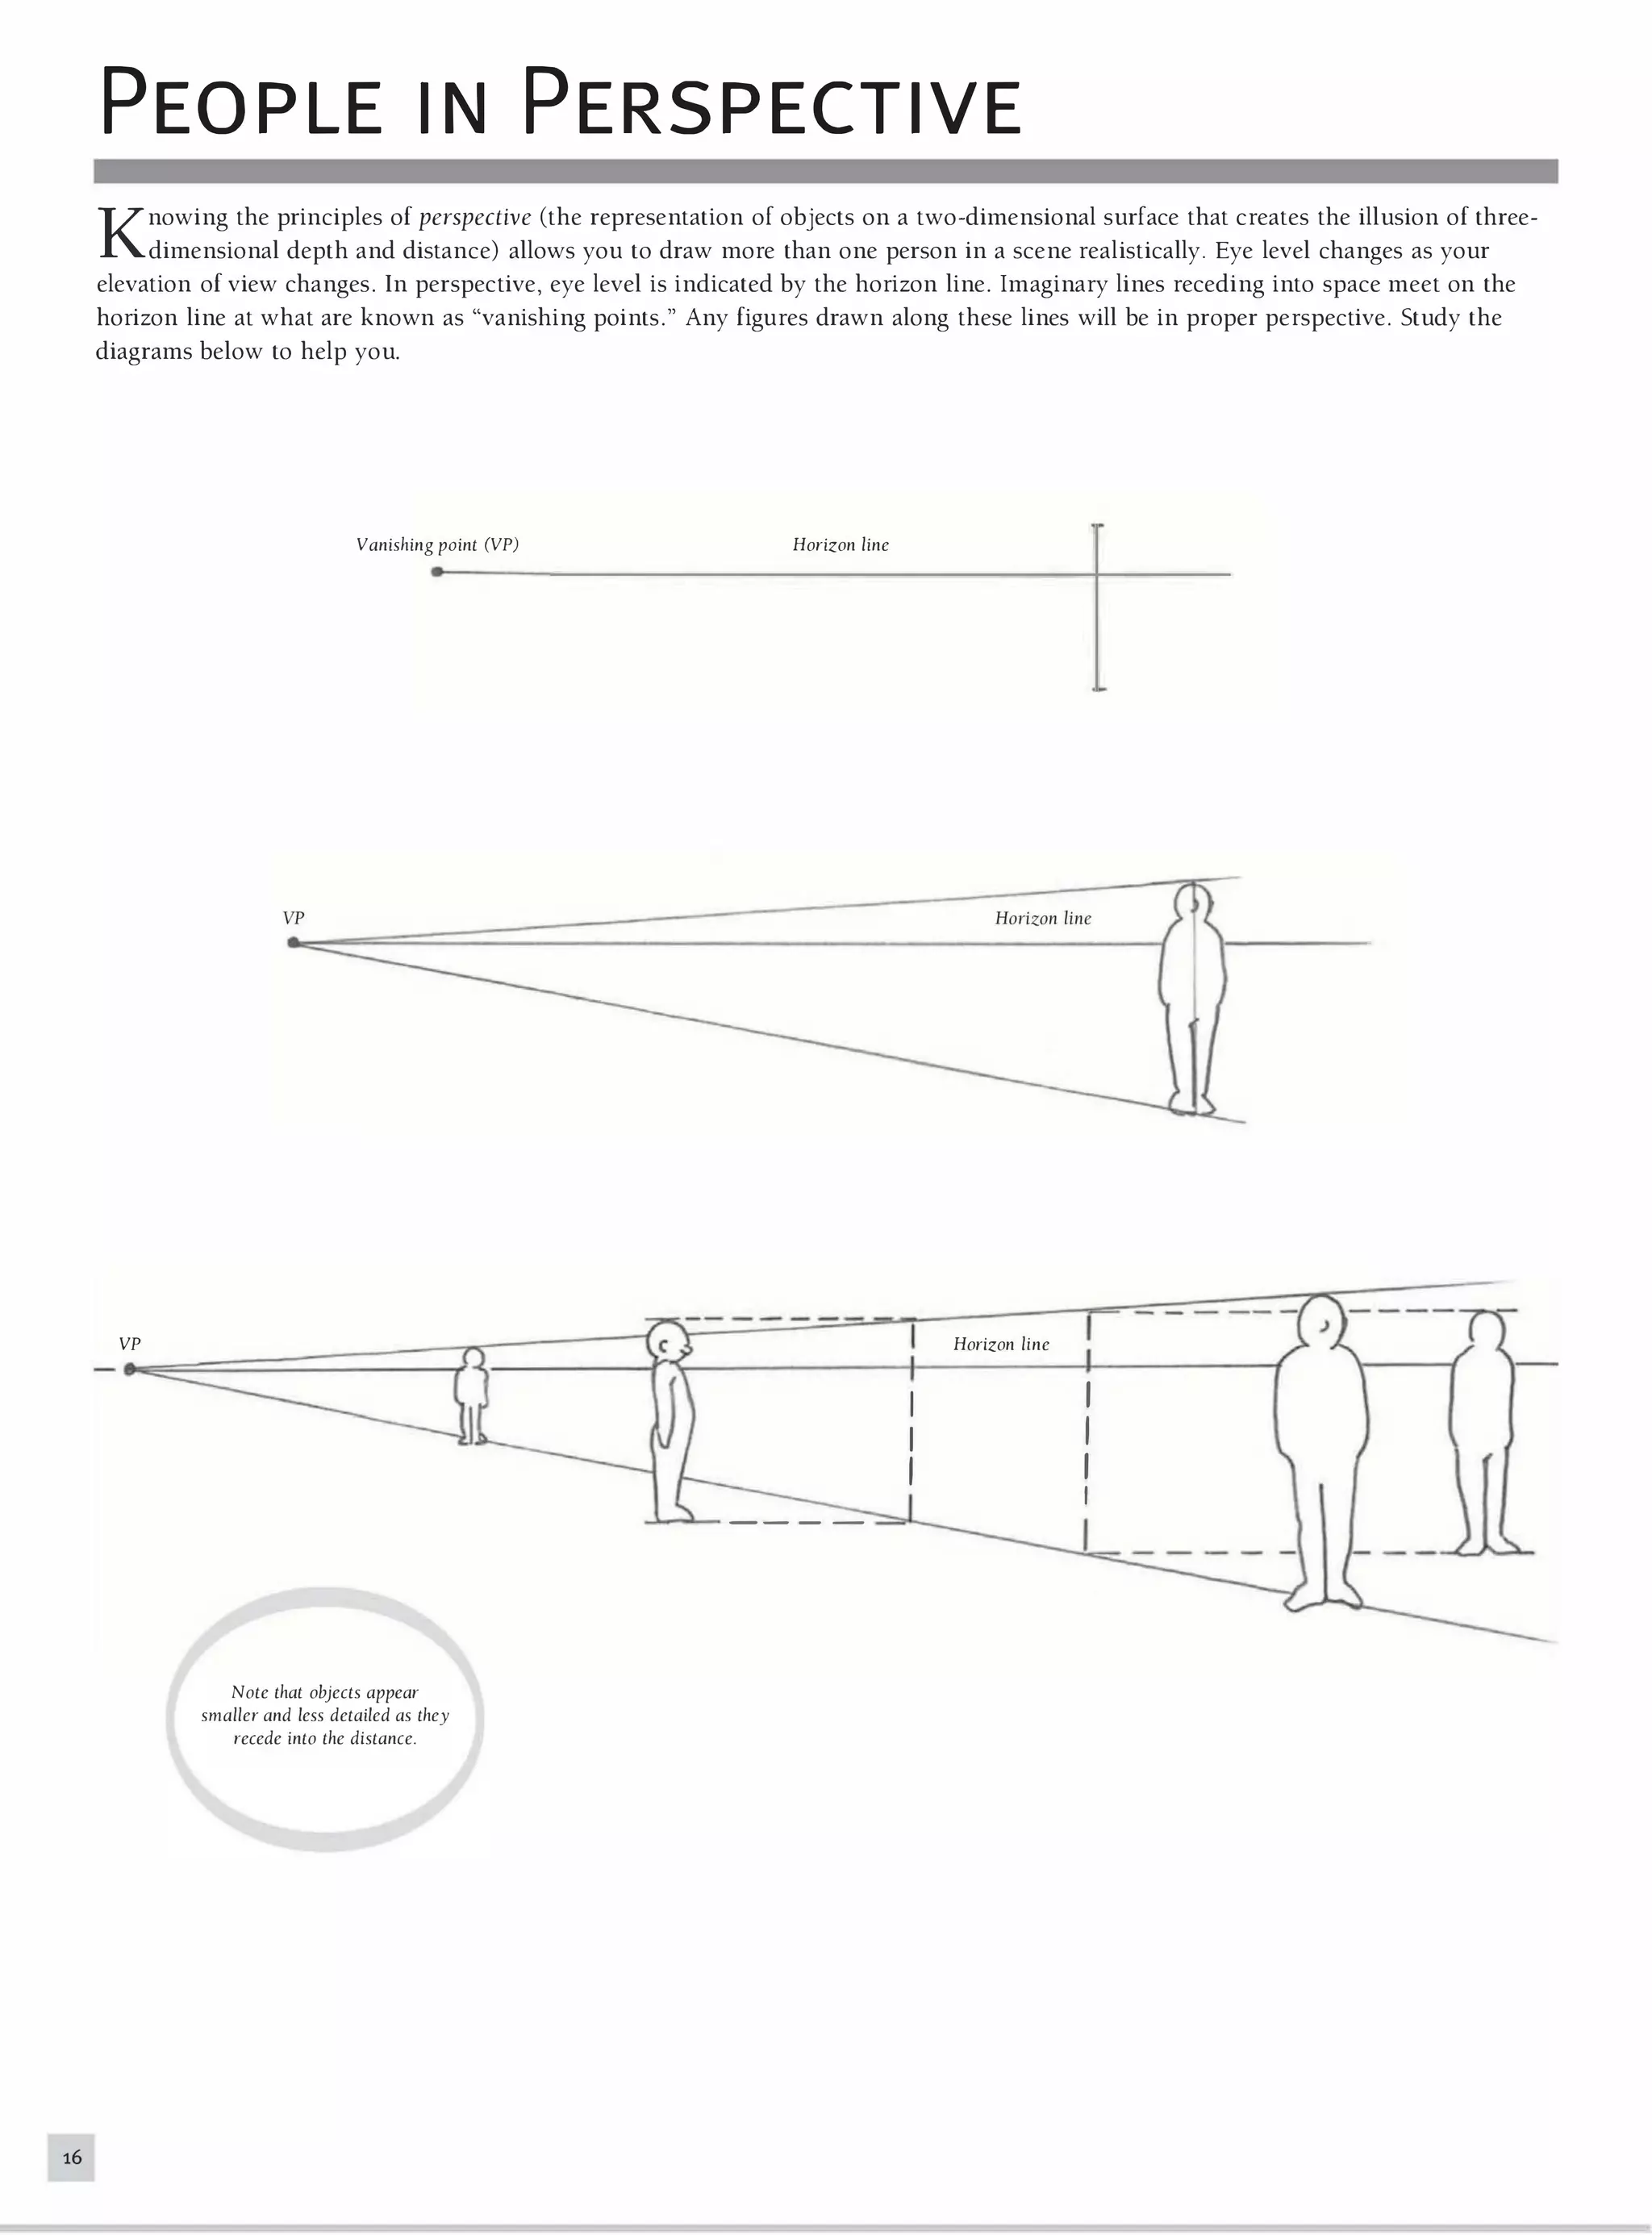
This document provides an introduction to drawing people. It discusses the necessary tools and materials for drawing, including pencils, paper, erasers, and other supplies. It also covers the basic elements of drawing such as line, shape, form, and using value and shading to create the illusion of three-dimensional depth. The document demonstrates how to create value scales for measuring shades and transitions between light and dark. It also shows how to apply shading to basic shapes to depict form and the effects of light sources on shadows and highlights. Finally, it provides tips for learning to see proportions accurately and placing people in compositions.


![34
SKETCH ING TH E LEG: FRONT VI EW
A
-+---''r'-='/--r-- A. great trochanter
I
B. femur
C. outer epicondyle
D. inner epicondyle
E. patella
F. tibial tuberosity
G. head of thefibula
H. fibula
1. tibia
]. inner malleolus
K. outer malleolus
Bones The femur (B), with its great trochanter at the top (A) and outerepicandyles (e)
and innerepicandyles (D) at the base, is the heaviest and longest bone of the skeletal sys
tern. The knee cap (patella) sits in between the outer epicandyles and innerepicandyles on
the patellar surface. The lower leg consists ofthe thick tibia (I) and the slender fibula (H).
The tibial tuberosity (F) and head ofthe fibula (G) are important landmarks at the top, as
are the ankle bones (the innermalleolus and outer malleolus).
Muscles The upper leg has four major muscle masses: vastus externus, which attaches
to the knee cap (E); rectus femoris, which engulfs the patella (E) and continues toward the
tibial tuberosity (F); vastus internus, a medial bulge; and the adductorgroup on the inside
ofthe leg. There also are two other masses: the tensorfascia lata and the sartorius. The
sartorius is the longest muscle in the body. The lower leg has six long muscles visible:
gastrocnemius, protruding on both sides; tibialis anterior, running along the shin toward
the big toe; soleus; flexordigitorum longus; extensor digitorum longus; and peroneus
longus.
tensorfascia lata
adductor group
vasius exlernus
reclusfemoris
vastus internus
sartorius
D
gastrocnemius
tibialis anterior
soleLlS
flexor digitorum longus
extensor digitorum longus
peroneus longus
Drawing Tips The legs angle in toward the middle, positioning the body's weight over
the gravitational center. (See figures 1 and 2.) The muscle masses on the outside ofthe leg
are higher than those on the inside. (See figure 3.) The ankles are just the reverse-high
inside, low outside.
)
Figure 1 Figure 2 Figure 3](https://image.slidesharecdn.com/theartofdrawingpeople-130513041204-phpapp02/75/The-art-of-drawing-people-36-2048.jpg)


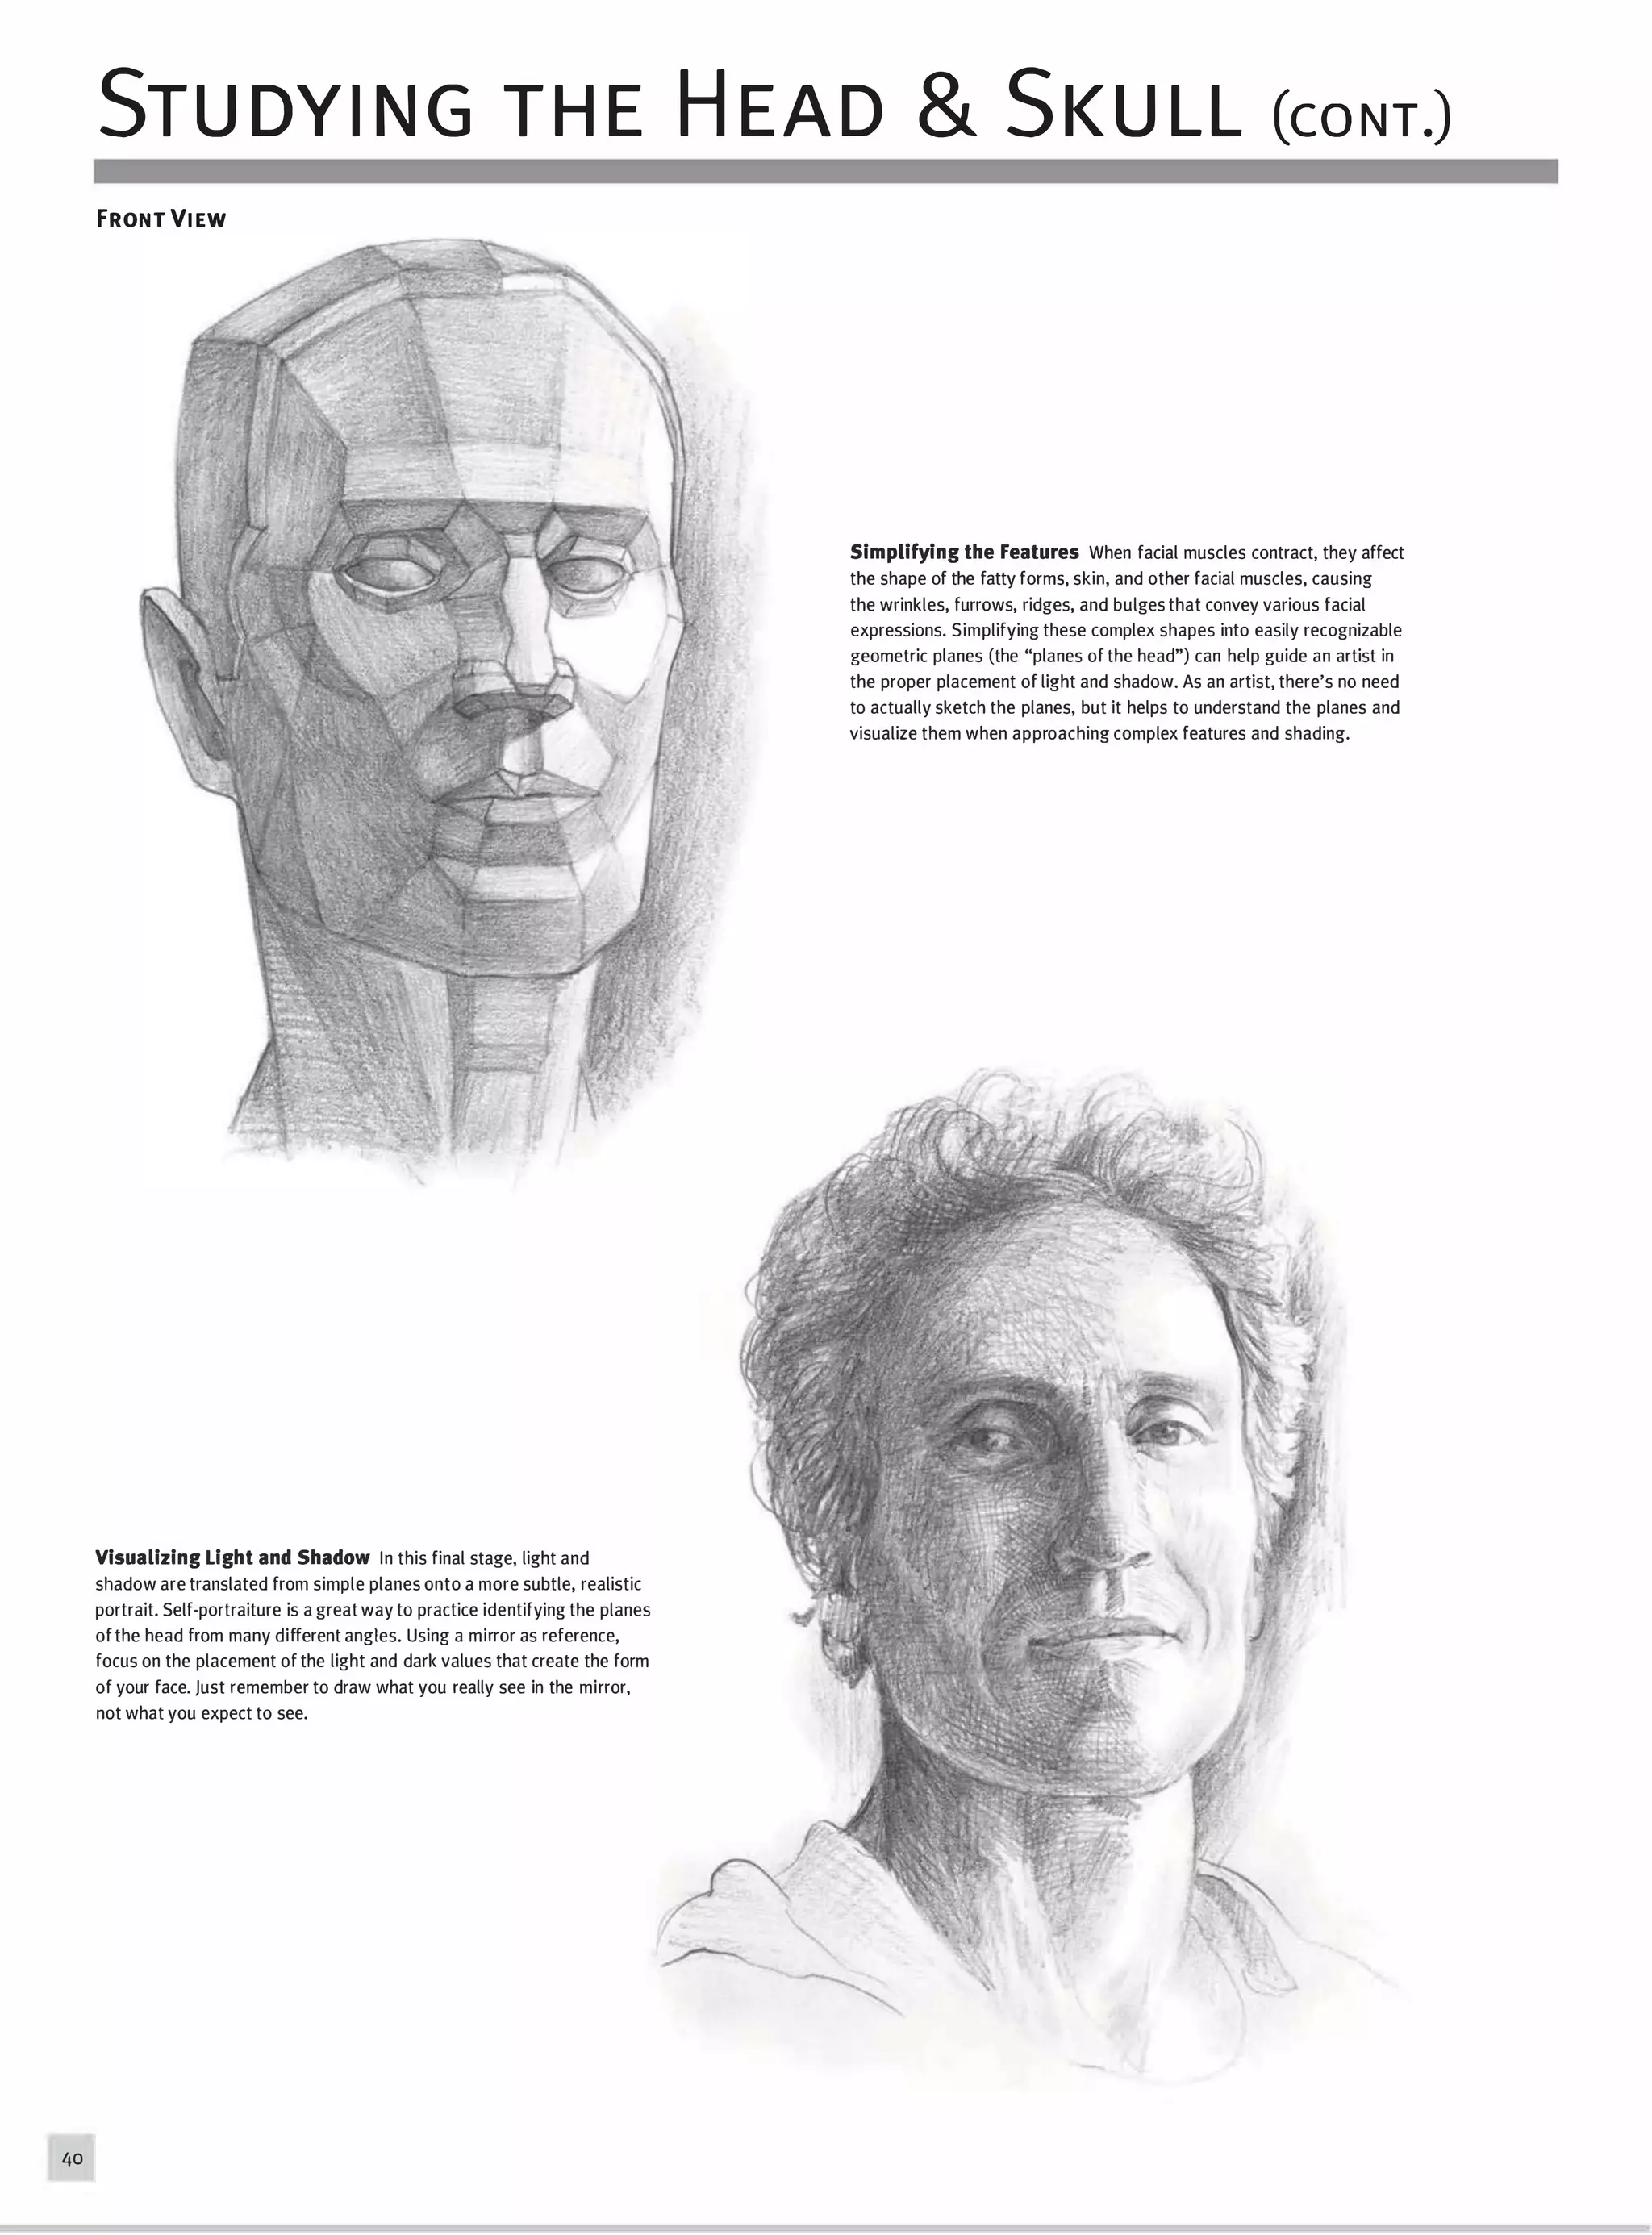
![FRONT VIEW
A
A. frontalis
B. temporalis
C. obicularis oculi
D. nasalis
E. levator labii superioris
F. zygomaticus minor
G. zygomaticus major
H. masseter
l. risorius
]. depressor anguli oris
K. depressor labii inferioris
L. mentalis
M. obicularis oris
N. procerus
O. occipitalis
P. trapezius
Q. sternocleidomastoid
N
M
Most of the facial muscles originate from bone and insert into muscle fibers
of other facial muscles. They do not create surface form directly, as the skel
etal muscles do, because they are much more delicate and usually concealed
by facial fat. The visible forms on the face are created by several factors
skin, fatty tissue, underlying skull, cartilage, eyeballs, and some muscles.
SIDE VIEW
39](https://image.slidesharecdn.com/theartofdrawingpeople-130513041204-phpapp02/75/The-art-of-drawing-people-41-2048.jpg)