The Boy who Cried Wolf - Diorama
•
0 likes•6,599 views

Free stories, books, ebooks, videos, coloring pages and activities for children of all ages - www.freekidstories.com

Recommended
More Related Content
What's hot
What's hot (20)
More from Freekidstories
More from Freekidstories (20)
Recently uploaded
Recently uploaded (20)
The Boy who Cried Wolf - Diorama
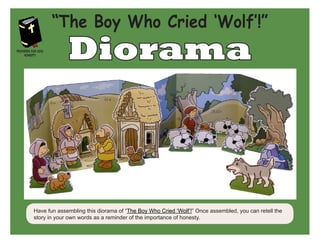
- 1. Diorama Have fun assembling this diorama of “The Boy Who Cried ‘Wolf’!” Once assembled, you can retell the story in your own words as a reminder of the importance of honesty. “The Boy Who Cried ‘Wolf’!” Proverbs for Kids: Honesty
- 2. A shepherd boy, bored while watching the sheep, thought of a plan to bring the villagers to him. “Wolf! Wolf!” he cried. He hoped the villagers would come running to chase away the wolf. The villagers came, but there was no wolf. The shepherd boy laughed. The villagers left angrily. Soon the shepherd boy was bored, so again he cried, “Wolf! Wolf!”
- 3. Once again, the villagers came running to help, but still there was no wolf. Sometime later, after the villagers had returned to their village, a real wolf appeared. “Wolf! Wolf!” cried the frightened shepherd boy. But the villagers said, “He’s just trying to trick us again.” And no one went to help save the shepherd and sheep from the wolf.
- 4. Authored, illustrated, and designed by Didier Martin. Featured on My Wonder Studio. Copyright © 2021 by Didier Martin. All rights reserved. • scissors • glue stick or white glue • metal ruler to make a straight cut or score • old pen with no ink for scoring • optional: paper cutting knife TOOLS NEEDED After downloading, print all pages of the diorama on card stock or heavier paper (160 g. recommended). (Note: If you plan to use the color version, you only need to print pages 6–12. Print pages 13–19 if you plan to color the diorama.) PRINTING Diorama Assembly Instructions Assembling the backgrounds Roughly cut out the background pieces as explained in “Cutting” on the following page. After scoring along the dotted lines, finish cutting out the background pieces. Then for each of the background pieces, fold and glue the two tabs under the floor.
- 5. • Be careful when using scissors or a paper cutting knife. • Glue, scissors, and other tools may be dangerous, so be sure to keep them out of the reach of young children. Caution • A cardstock model piece is usually cut out in two stages. • First, the piece is separated from the rest of the pieces by cutting roughly around it with scissors. Don’t cut along the lines at this step. • Once the piece is separated, you can work on it without damaging other pieces. It’s best to do the scoring before proceeding to the final cutting. Cutting • Score the fold lines to make a crisp straight fold. It’s especially important for the smallest pieces to be scored before folding. • To score, place a metal ruler along the fold line, and then press with a dull point along the fold line to compress the paper. Scoring Assembling the figures • Cut out the figure in two steps as explained in “Cutting.” Score along the dotted lines, and then fold as shown in the above illustration. • Glue the two sides together. (Important: Do not put glue on the back of the two tabs.) • Wait a few minutes for the glue to dry, and then cut along each figure in the light gray area. (Note: You don’t need to cut right along the black line; you can leave a few millimeters of gray around the figure.) • Glue the figure tabs to the small rectangle to reinforce the figure. • When dry, trim a little around the base of the figure.