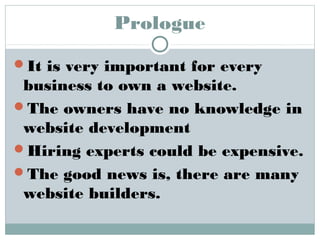
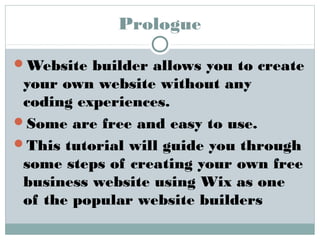
Tutorial : Easily Create Your 
Own Free Business Website 
With Wix 
BY: JOANNE TJIA 
COURTESY: SOCIAL GADGET NEWS 
WWW.SOCIALGADGETNEWS.COM
Website display using website builder Wix 
Website display using web builder Wix
Prologue 
It is very important for every 
business to own a website. 
The owners have no knowledge in 
website development 
Hiring experts could be expensive. 
The good news is, there are many 
website builders.
Prologue 
Website builder allows you to create 
your own website without any 
coding experiences. 
Some are free and easy to use. 
This tutorial will guide you through 
some steps of creating your own free 
business website using Wix as one 
of the popular website builders
Step 1. Create account on Wix 
Sign up and log in to your 
account on Wix.com 
Wix provides free and premium 
Later, you can always upgrade to 
premium to get more benefits 
and features.
Step 2. Choose a template 
Create a site by clicking 
the “Create a site” button 
Choose template in a page 
Wix provides many templates 
based on categories that suits your 
business, for instance: a fashion 
retail website.
Template panel
Step 3. Edit a template 
Customize the template by 
simply clicking the“Edit” button 
located below the template. 
Customize your template with its 
drag and drop functionality in 
the Wix HTML5 editor, 
Customize a template with Wix 
editor is easy and fun.
Step 4. Add or edit page (1/3) 
The first page appears on the 
editor is the homepage. 
At the top of the page there is a 
drop down menu called “page” 
Navigate through pages that have 
been provided by the template.
Pages panel
Step 4. Add or edit page (2/3) 
Add page by clicking the pages 
button located at the left side of 
the editor. 
The pages panel will be appeared. 
Drag and drop pages to arrange 
the order of the pages. 
Add page by clicking on the “Add 
page” button
Step 4. Add or edit page (3/3) 
Choose a page layout that suitable 
with the page topic. 
Don’t forget to name your page, 
and to decide whether the page 
will be a main page or a sub page. 
Edit the pages by clicking the 
page name on the pages panel.
Step 5. Edit the design (1/3) 
Customize the look and feel of your 
site to look exactly how you want in 
background, colors, and font. 
Click on the “Design” button 
Click on the “background” button 
Background panel will be 
displayed. 
The same step is required for colors 
and font as well.
Step 5. Edit the design (2/3) 
Change the background as you 
want, even upload your own 
image. 
Pick color palette to transform 
your site into exactly what you 
like, even you can create your own 
color palette by simply clicking 
the “Customize palette” button.
Step 5. Edit the design (3/3) 
Change your site’s font scheme. 
Choose font type that fits your 
site theme, and customize fonts 
for each design element such as 
title, menu, heading and body.
Background panel
Colour panel
Fonts panel
Step 6. Edit and Add Elements (title, 
image, paragraph, etc) (1/2) 
Edit some elements or add more 
elements to your site. 
Change the template elements such as 
title, images and paragraphs by 
simply double clicking on the element. 
Change the homepage title, just 
double click on it and put any text you 
like in it.
Step 6. Edit and Add Elements (title, 
image, paragraph, etc) (2/2) 
Change the default images by double 
click on the image and add more 
images by clicking on the “Add 
images” button or upload images from 
your computer. 
Add more elements into your site if 
the content available is insufficient by 
clicking the “Add”button
Edit elements
Add images
Add elements
Step 7. Save and publish your 
website 
Save your custom template by clicking 
on the “save”. 
Enter your site name that will also be 
used as your site URL. For example: 
URL will be 
:http://yourusername.wix.com/j-clothing 
Publish your brand new website 
Try to access your site a few moments 
after you published it
Save panel
Congratulations! 
You have your own business 
website 
For more further details tutorial, click here 
SocialGadgetNews. 
If you have any questions regarding this tutorial, 
please submit to comments in our website. 
Thank you!

Wix

  • 1.
    Tutorial : EasilyCreate Your Own Free Business Website With Wix BY: JOANNE TJIA COURTESY: SOCIAL GADGET NEWS WWW.SOCIALGADGETNEWS.COM
  • 2.
    Website display usingwebsite builder Wix Website display using web builder Wix
  • 3.
    Prologue It isvery important for every business to own a website. The owners have no knowledge in website development Hiring experts could be expensive. The good news is, there are many website builders.
  • 4.
    Prologue Website builderallows you to create your own website without any coding experiences. Some are free and easy to use. This tutorial will guide you through some steps of creating your own free business website using Wix as one of the popular website builders
  • 5.
    Step 1. Createaccount on Wix Sign up and log in to your account on Wix.com Wix provides free and premium Later, you can always upgrade to premium to get more benefits and features.
  • 6.
    Step 2. Choosea template Create a site by clicking the “Create a site” button Choose template in a page Wix provides many templates based on categories that suits your business, for instance: a fashion retail website.
  • 7.
  • 8.
    Step 3. Edita template Customize the template by simply clicking the“Edit” button located below the template. Customize your template with its drag and drop functionality in the Wix HTML5 editor, Customize a template with Wix editor is easy and fun.
  • 9.
    Step 4. Addor edit page (1/3) The first page appears on the editor is the homepage. At the top of the page there is a drop down menu called “page” Navigate through pages that have been provided by the template.
  • 10.
  • 11.
    Step 4. Addor edit page (2/3) Add page by clicking the pages button located at the left side of the editor. The pages panel will be appeared. Drag and drop pages to arrange the order of the pages. Add page by clicking on the “Add page” button
  • 12.
    Step 4. Addor edit page (3/3) Choose a page layout that suitable with the page topic. Don’t forget to name your page, and to decide whether the page will be a main page or a sub page. Edit the pages by clicking the page name on the pages panel.
  • 13.
    Step 5. Editthe design (1/3) Customize the look and feel of your site to look exactly how you want in background, colors, and font. Click on the “Design” button Click on the “background” button Background panel will be displayed. The same step is required for colors and font as well.
  • 14.
    Step 5. Editthe design (2/3) Change the background as you want, even upload your own image. Pick color palette to transform your site into exactly what you like, even you can create your own color palette by simply clicking the “Customize palette” button.
  • 15.
    Step 5. Editthe design (3/3) Change your site’s font scheme. Choose font type that fits your site theme, and customize fonts for each design element such as title, menu, heading and body.
  • 16.
  • 17.
  • 18.
  • 19.
    Step 6. Editand Add Elements (title, image, paragraph, etc) (1/2) Edit some elements or add more elements to your site. Change the template elements such as title, images and paragraphs by simply double clicking on the element. Change the homepage title, just double click on it and put any text you like in it.
  • 20.
    Step 6. Editand Add Elements (title, image, paragraph, etc) (2/2) Change the default images by double click on the image and add more images by clicking on the “Add images” button or upload images from your computer. Add more elements into your site if the content available is insufficient by clicking the “Add”button
  • 21.
  • 22.
  • 23.
  • 24.
    Step 7. Saveand publish your website Save your custom template by clicking on the “save”. Enter your site name that will also be used as your site URL. For example: URL will be :http://yourusername.wix.com/j-clothing Publish your brand new website Try to access your site a few moments after you published it
  • 25.
  • 26.
    Congratulations! You haveyour own business website For more further details tutorial, click here SocialGadgetNews. If you have any questions regarding this tutorial, please submit to comments in our website. Thank you!