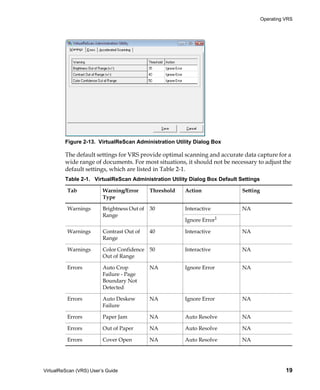
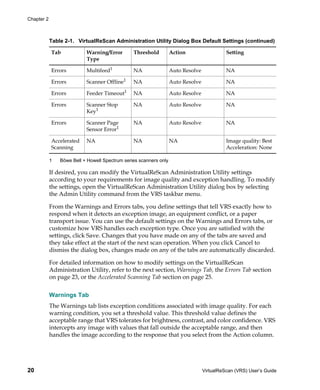
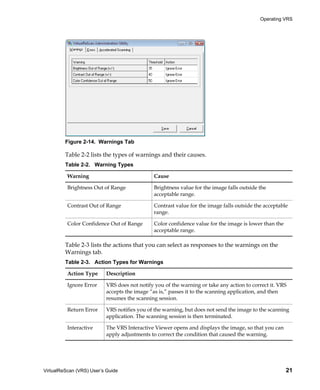
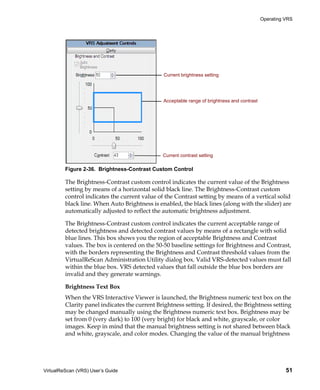
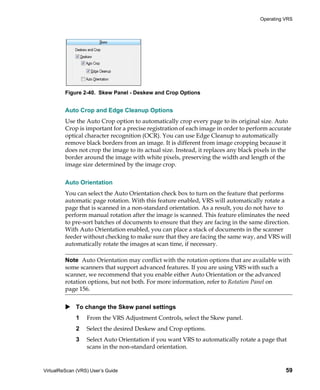
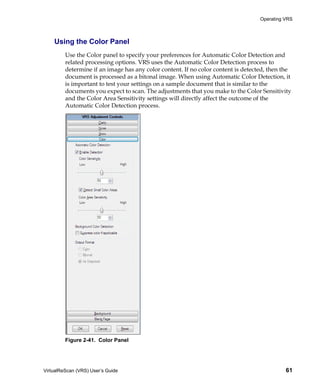
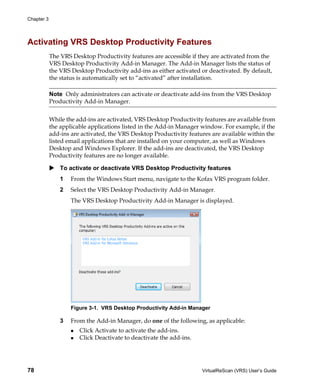
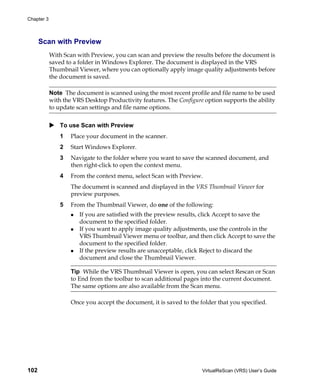
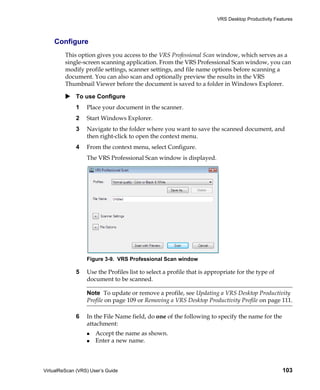
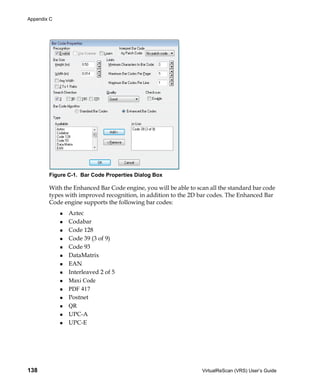
This document is the user's guide for VirtualReScan 4.2. It provides information on operating VirtualReScan (VRS), a software for processing scanned images. The guide covers selecting scan sources, configuring VRS settings before scanning, using the VRS Interactive Viewer interface, and previewing images. It also describes the VRS workflow, available features, certified scanning applications, and the difference between certified and non-certified scanners.


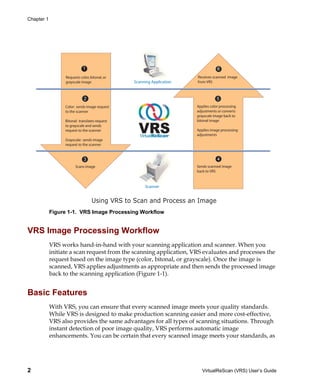


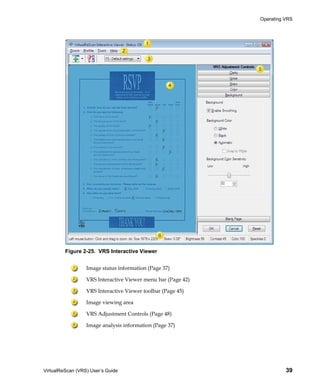
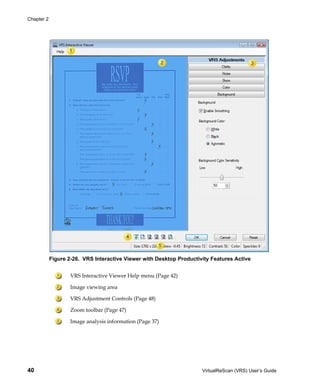


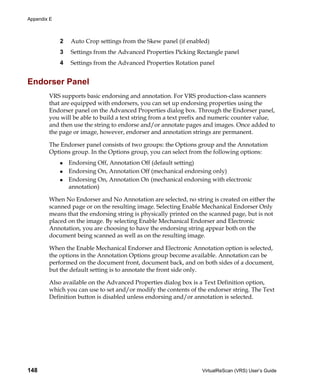
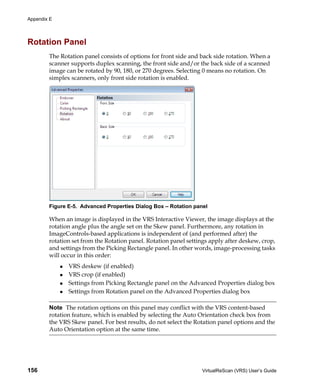
![Advanced Properties
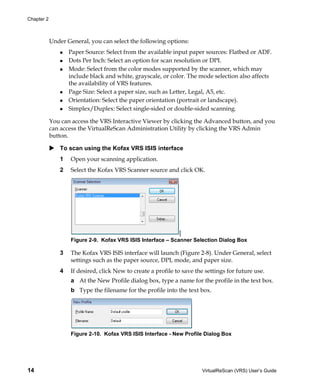
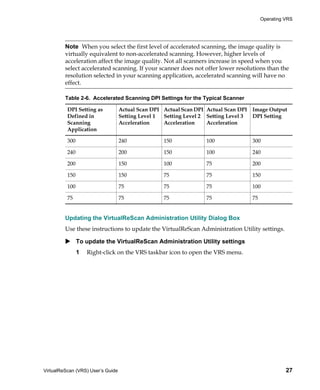
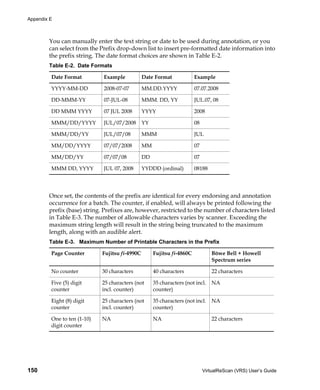
Text Definition Dialog Box
When the options for either Enable Mechanical Endorser Only or Enable Mechanical
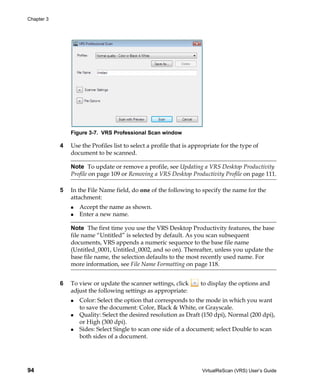
Endorser and Electronic Annotation are enabled, selecting the Text Definition button
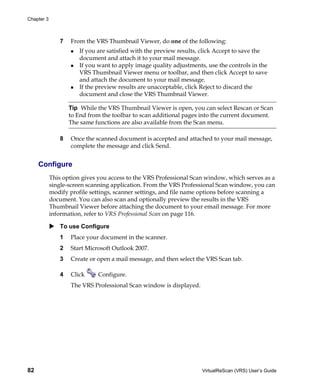
from the Advanced Properties dialog box launches the Text Definition dialog box.
Use this dialog box to customize the endorser and/or annotation string. You can use
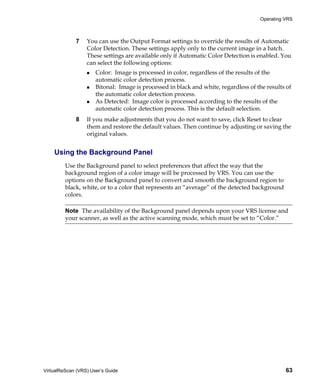
the Text Definition dialog box to specify endorsing string settings, such as:
Prefix (selection of text and date format)
Location of the string relative to the top and left of the page
Number of digits in the page counter
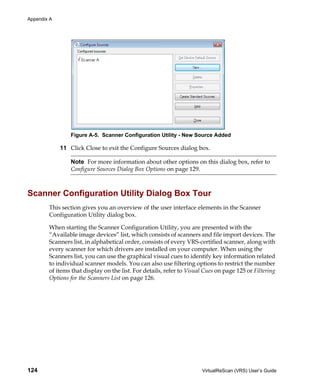
Start number for the page counter
Step Value (increment or decrement values) for the page counter
Figure E-2. Text Definition Dialog Box
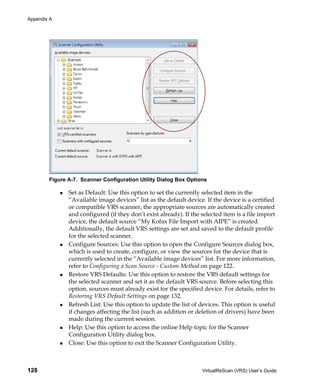
Prefix
The Prefix is an optional sequence of characters that you can set to precede the rest of
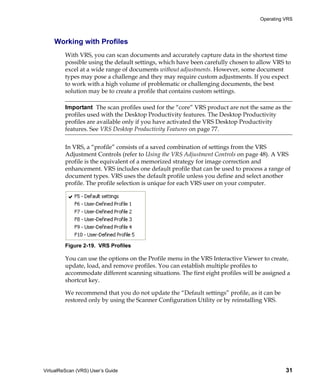
your imprinting string. Typically, the prefix consists of a text string and a date. If no
prefix is manually entered into the Prefix box, an empty string will be returned. When
creating a text string, you need to limit it to the characters in Table E-1.
Table E-1. Acceptable Prefix Text String Characters
space
0-9
% - _/#.][()=+< > &
A-Z
a-z
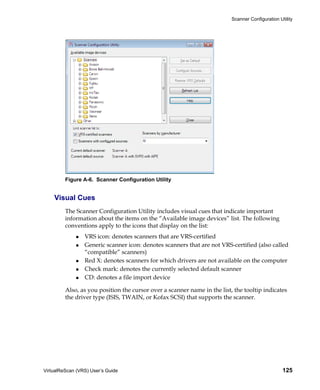
VirtualReScan (VRS) User’s Guide 149](https://image.slidesharecdn.com/vrsuserguide-091126051510-phpapp02/85/Vrs-User-Guide-159-320.jpg)


![Wp br v7_a_vmware_architects_favorite_features[1]](https://cdn.slidesharecdn.com/ss_thumbnails/wpbrv7avmwarearchitectsfavoritefeatures1-131003071359-phpapp01-thumbnail.jpg?width=640&height=640&fit=bounds)


