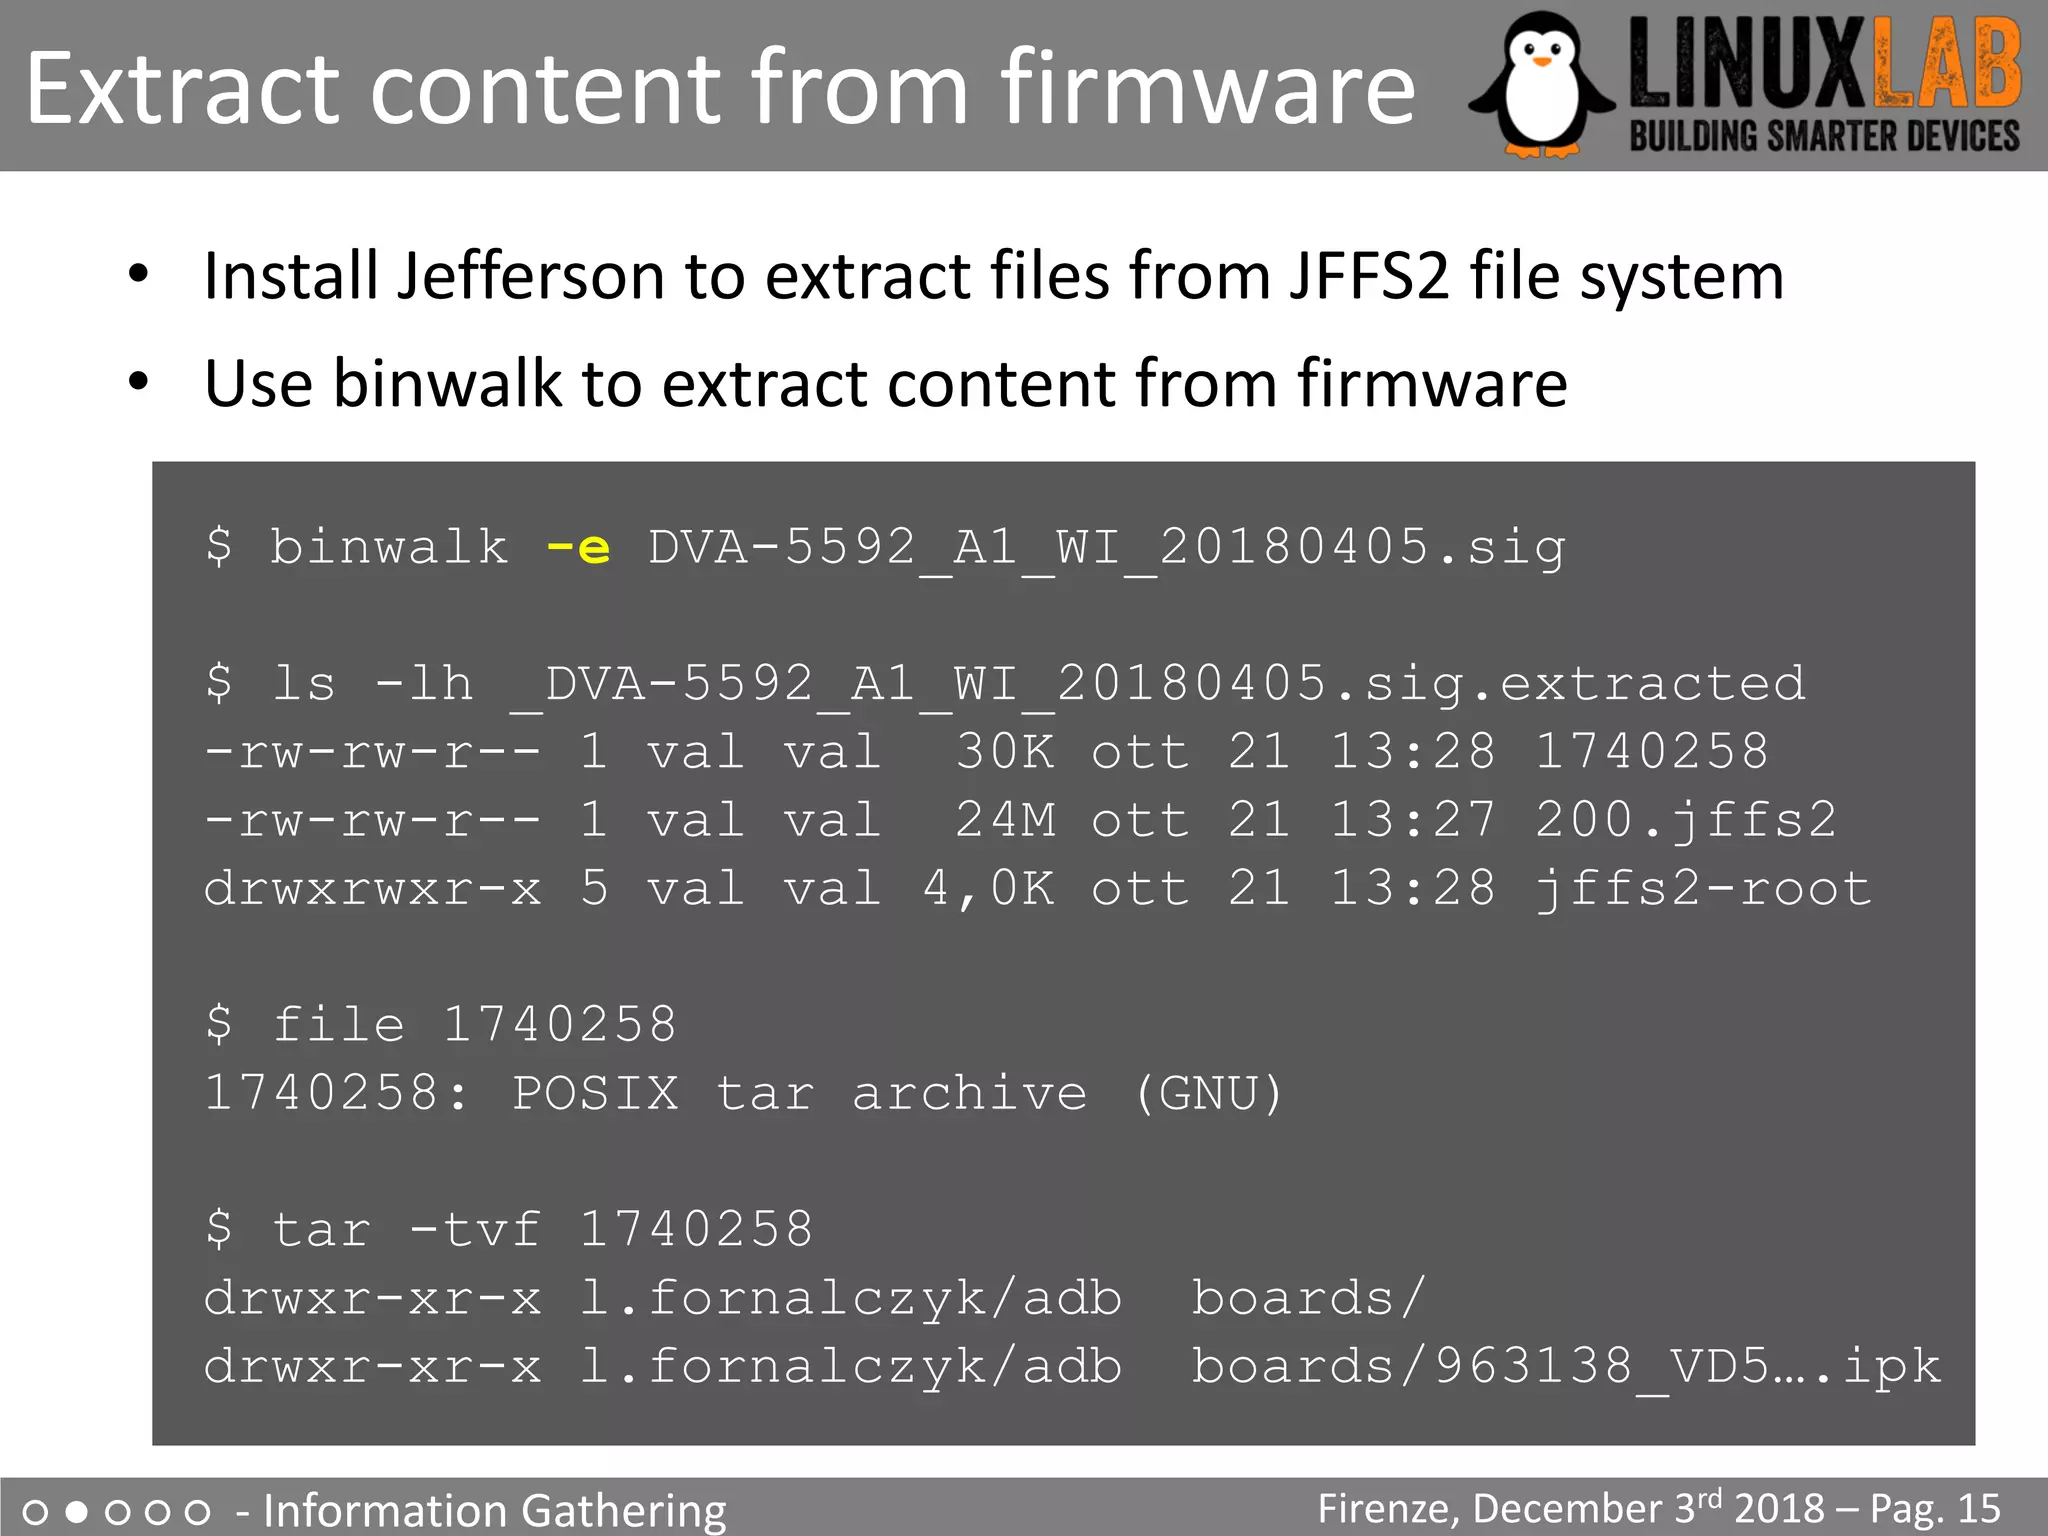
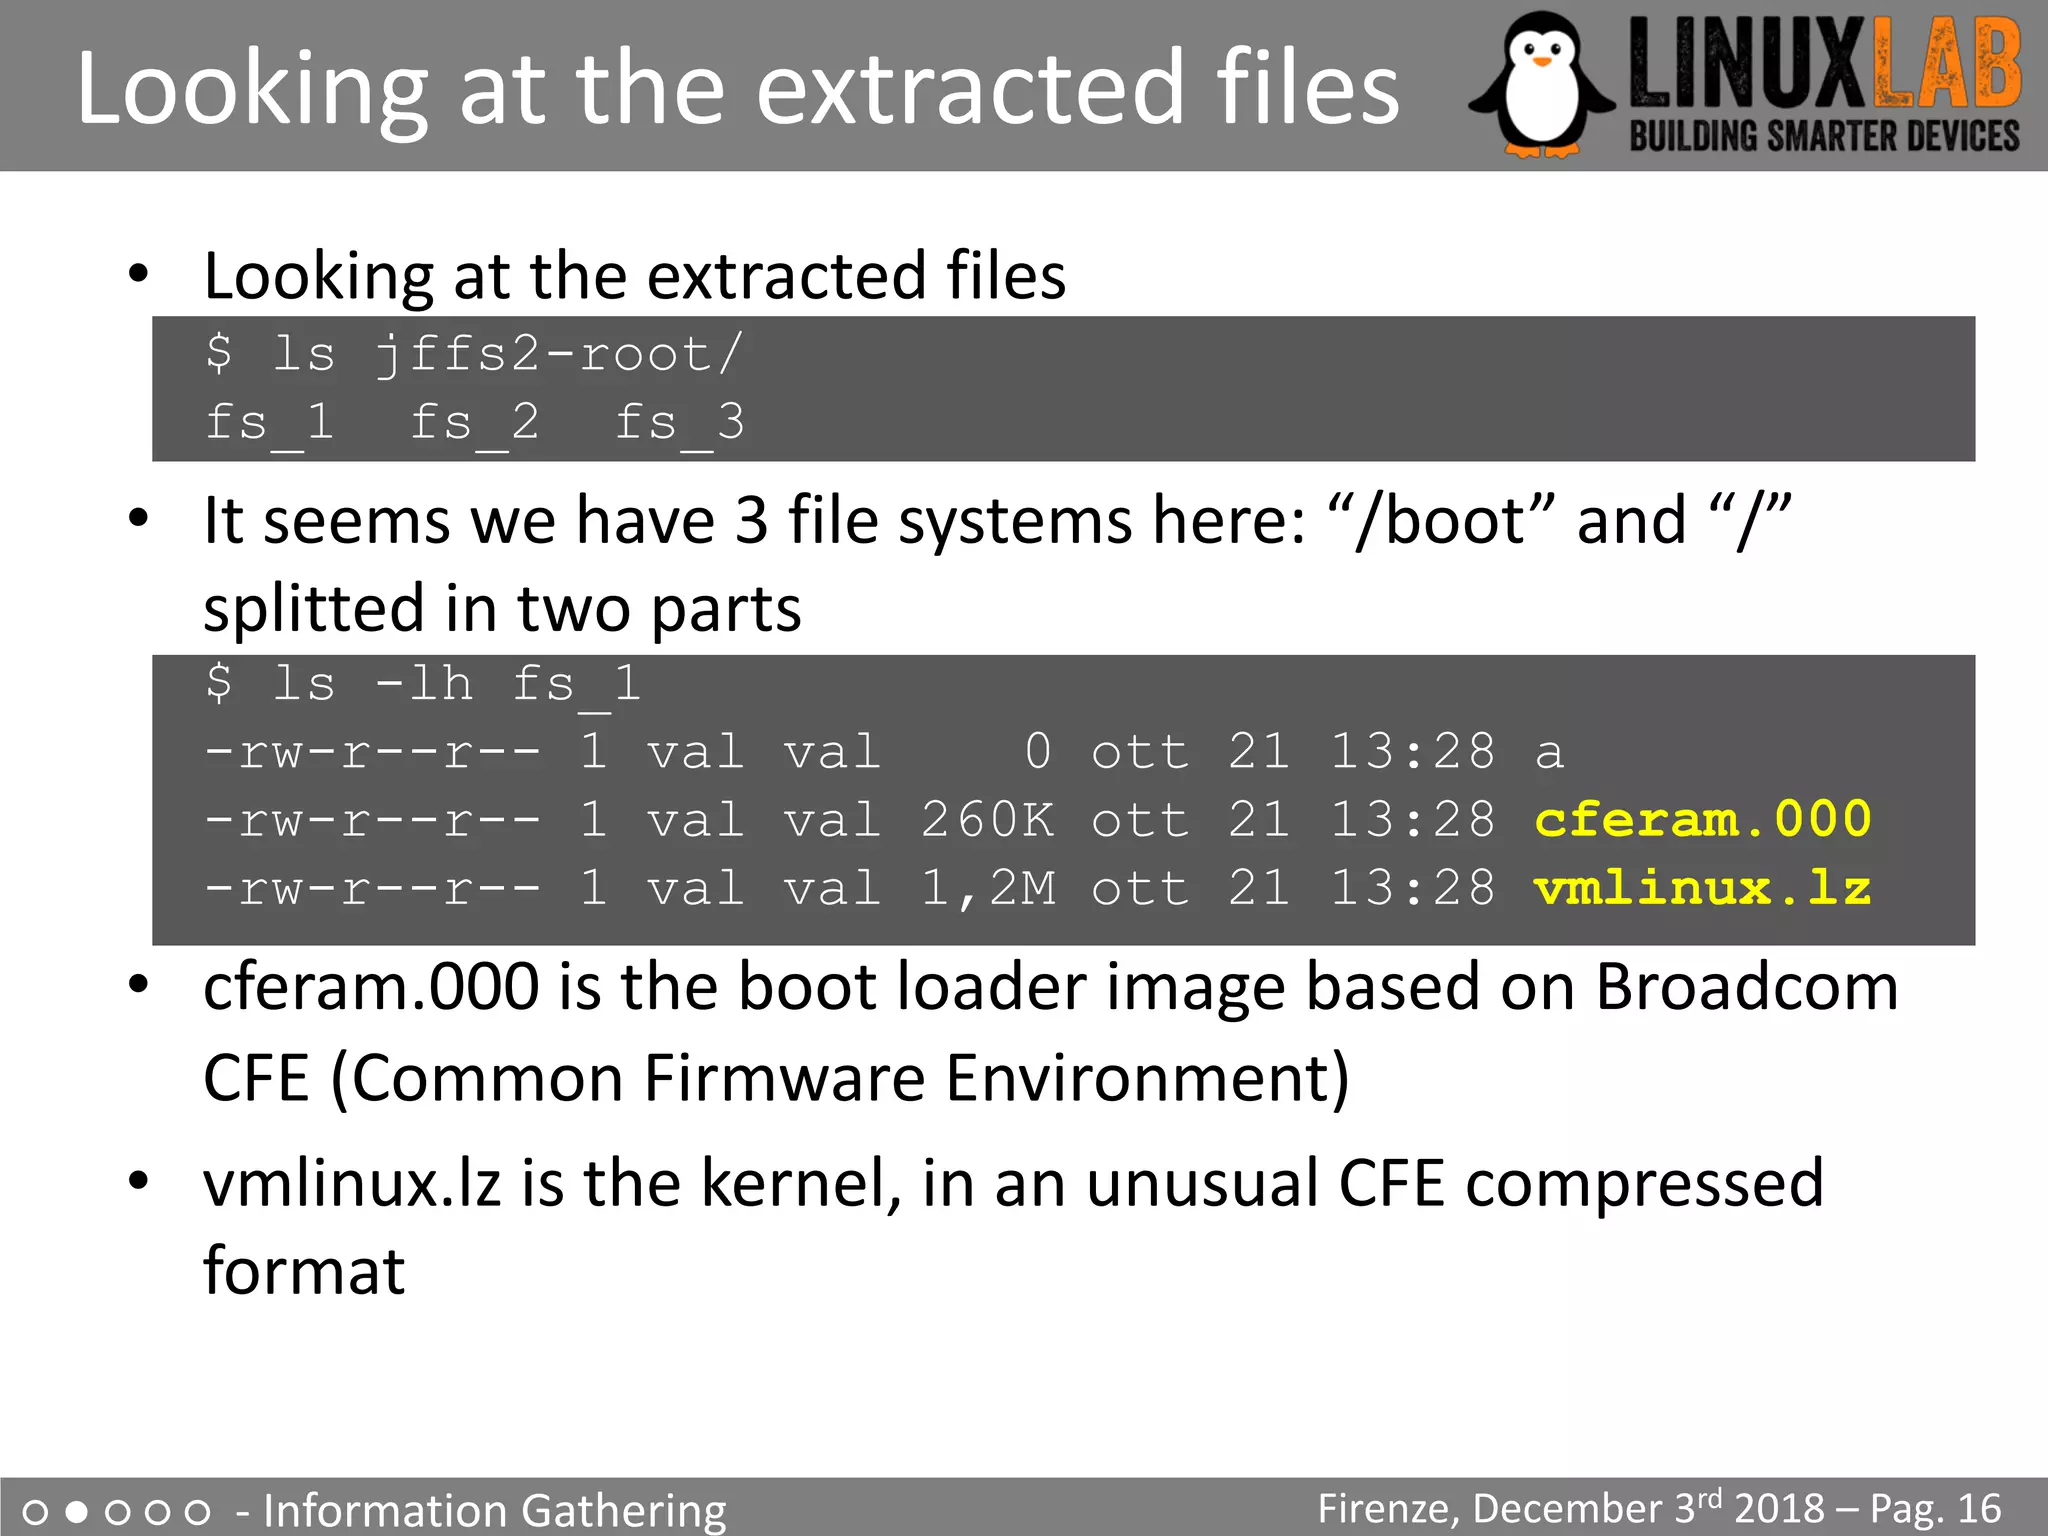
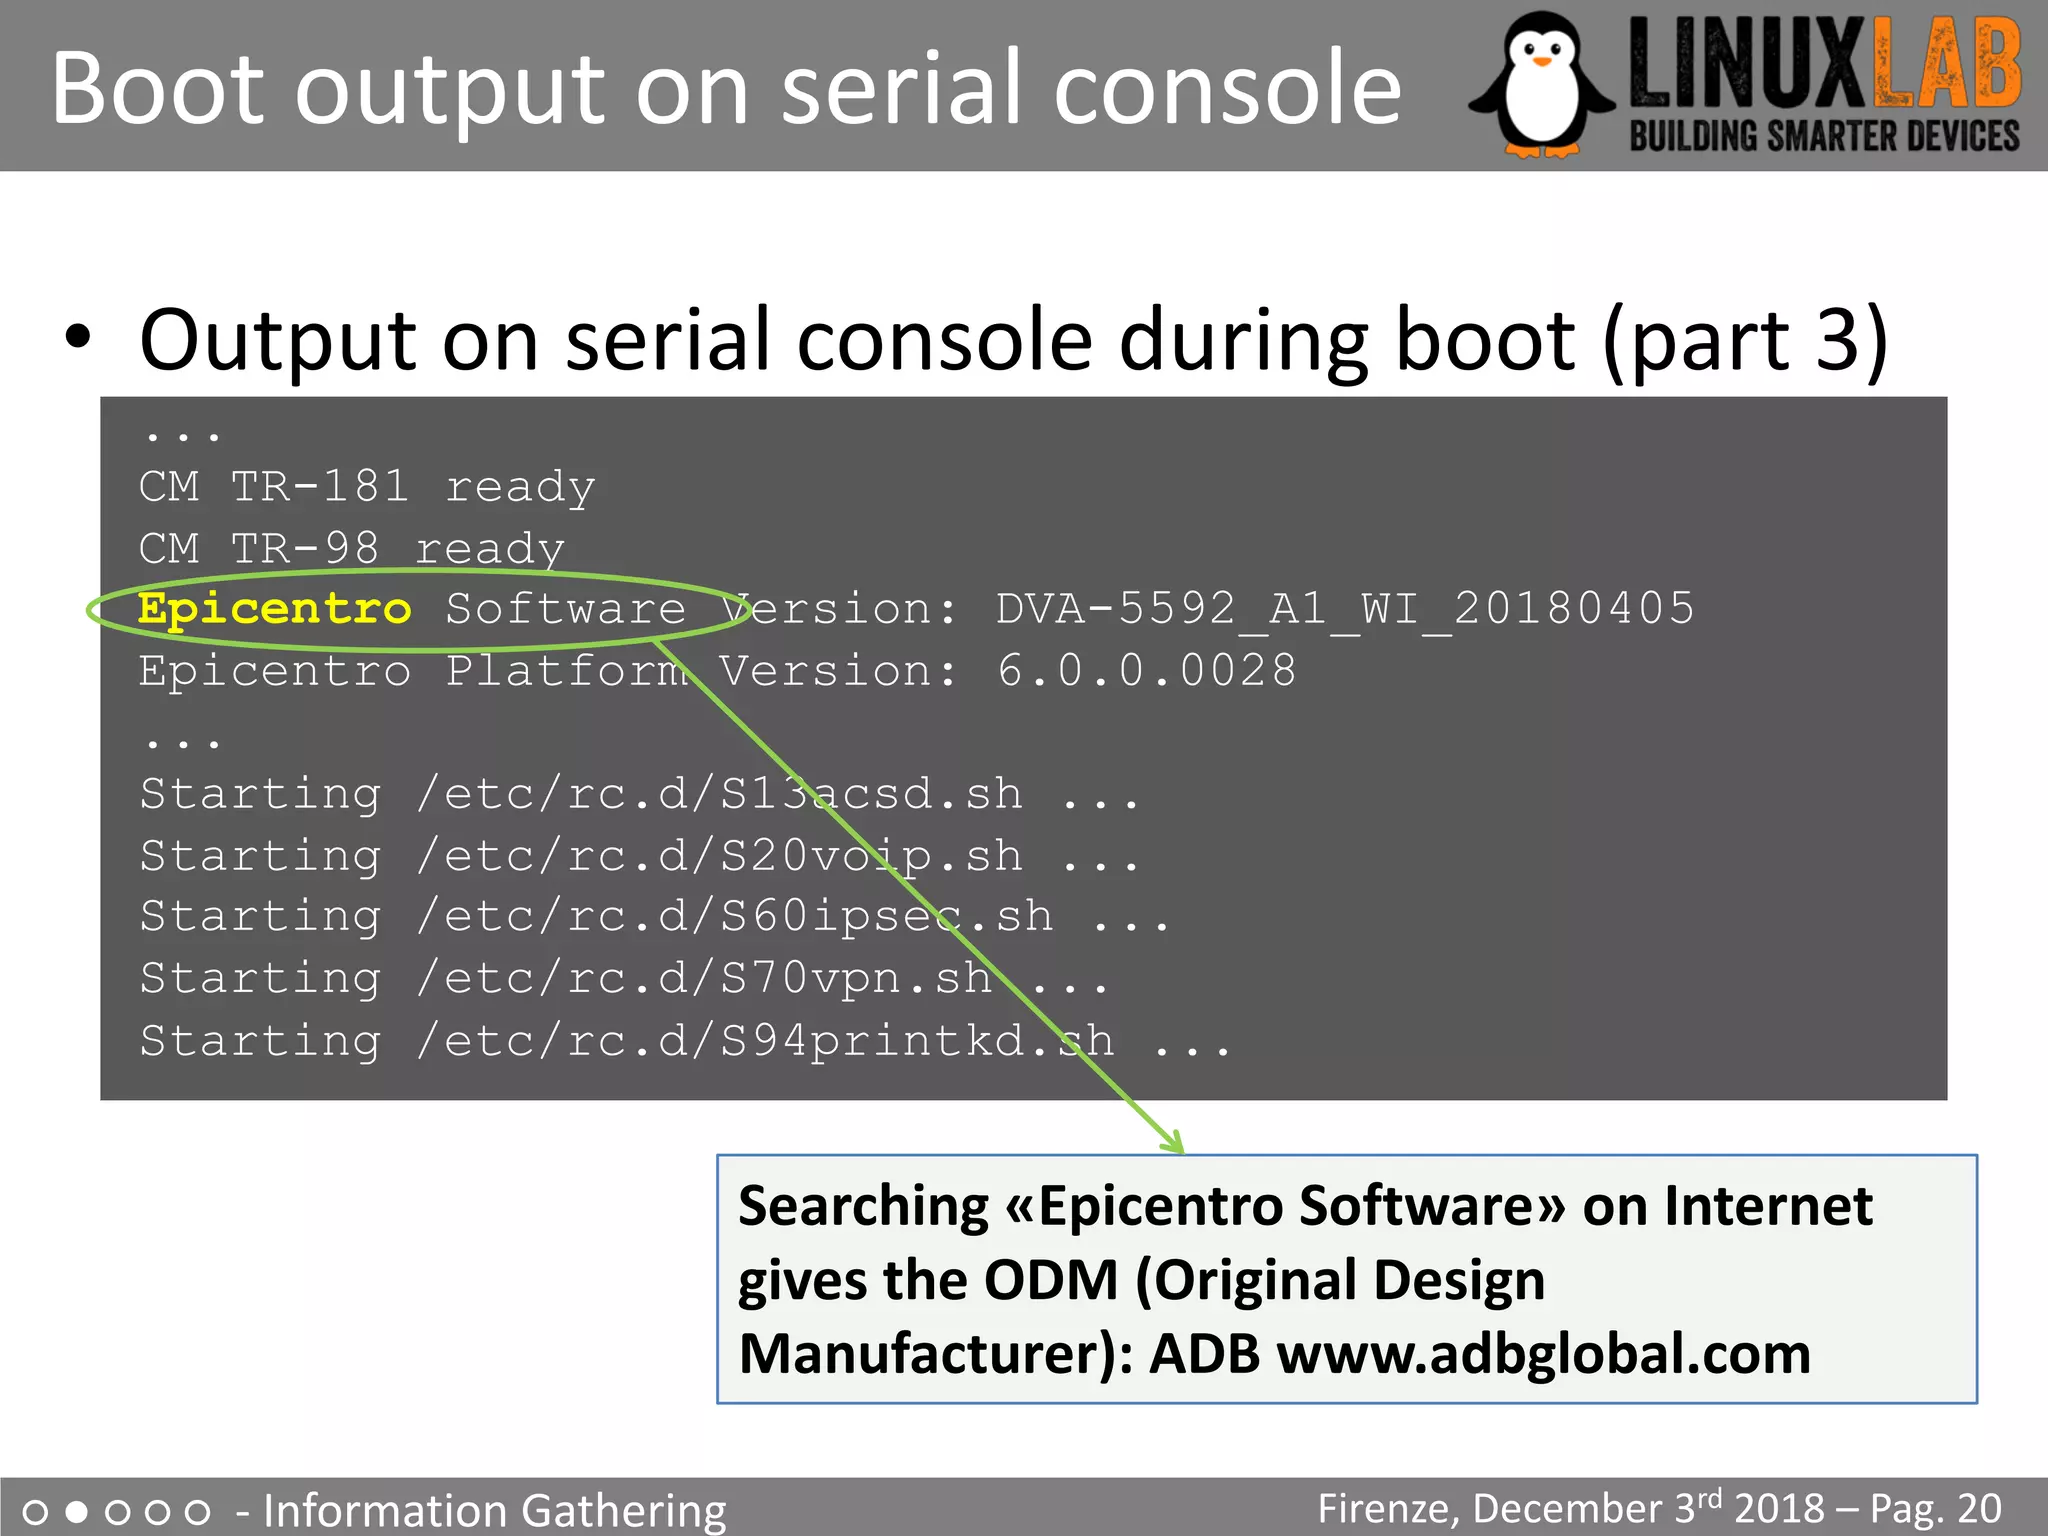
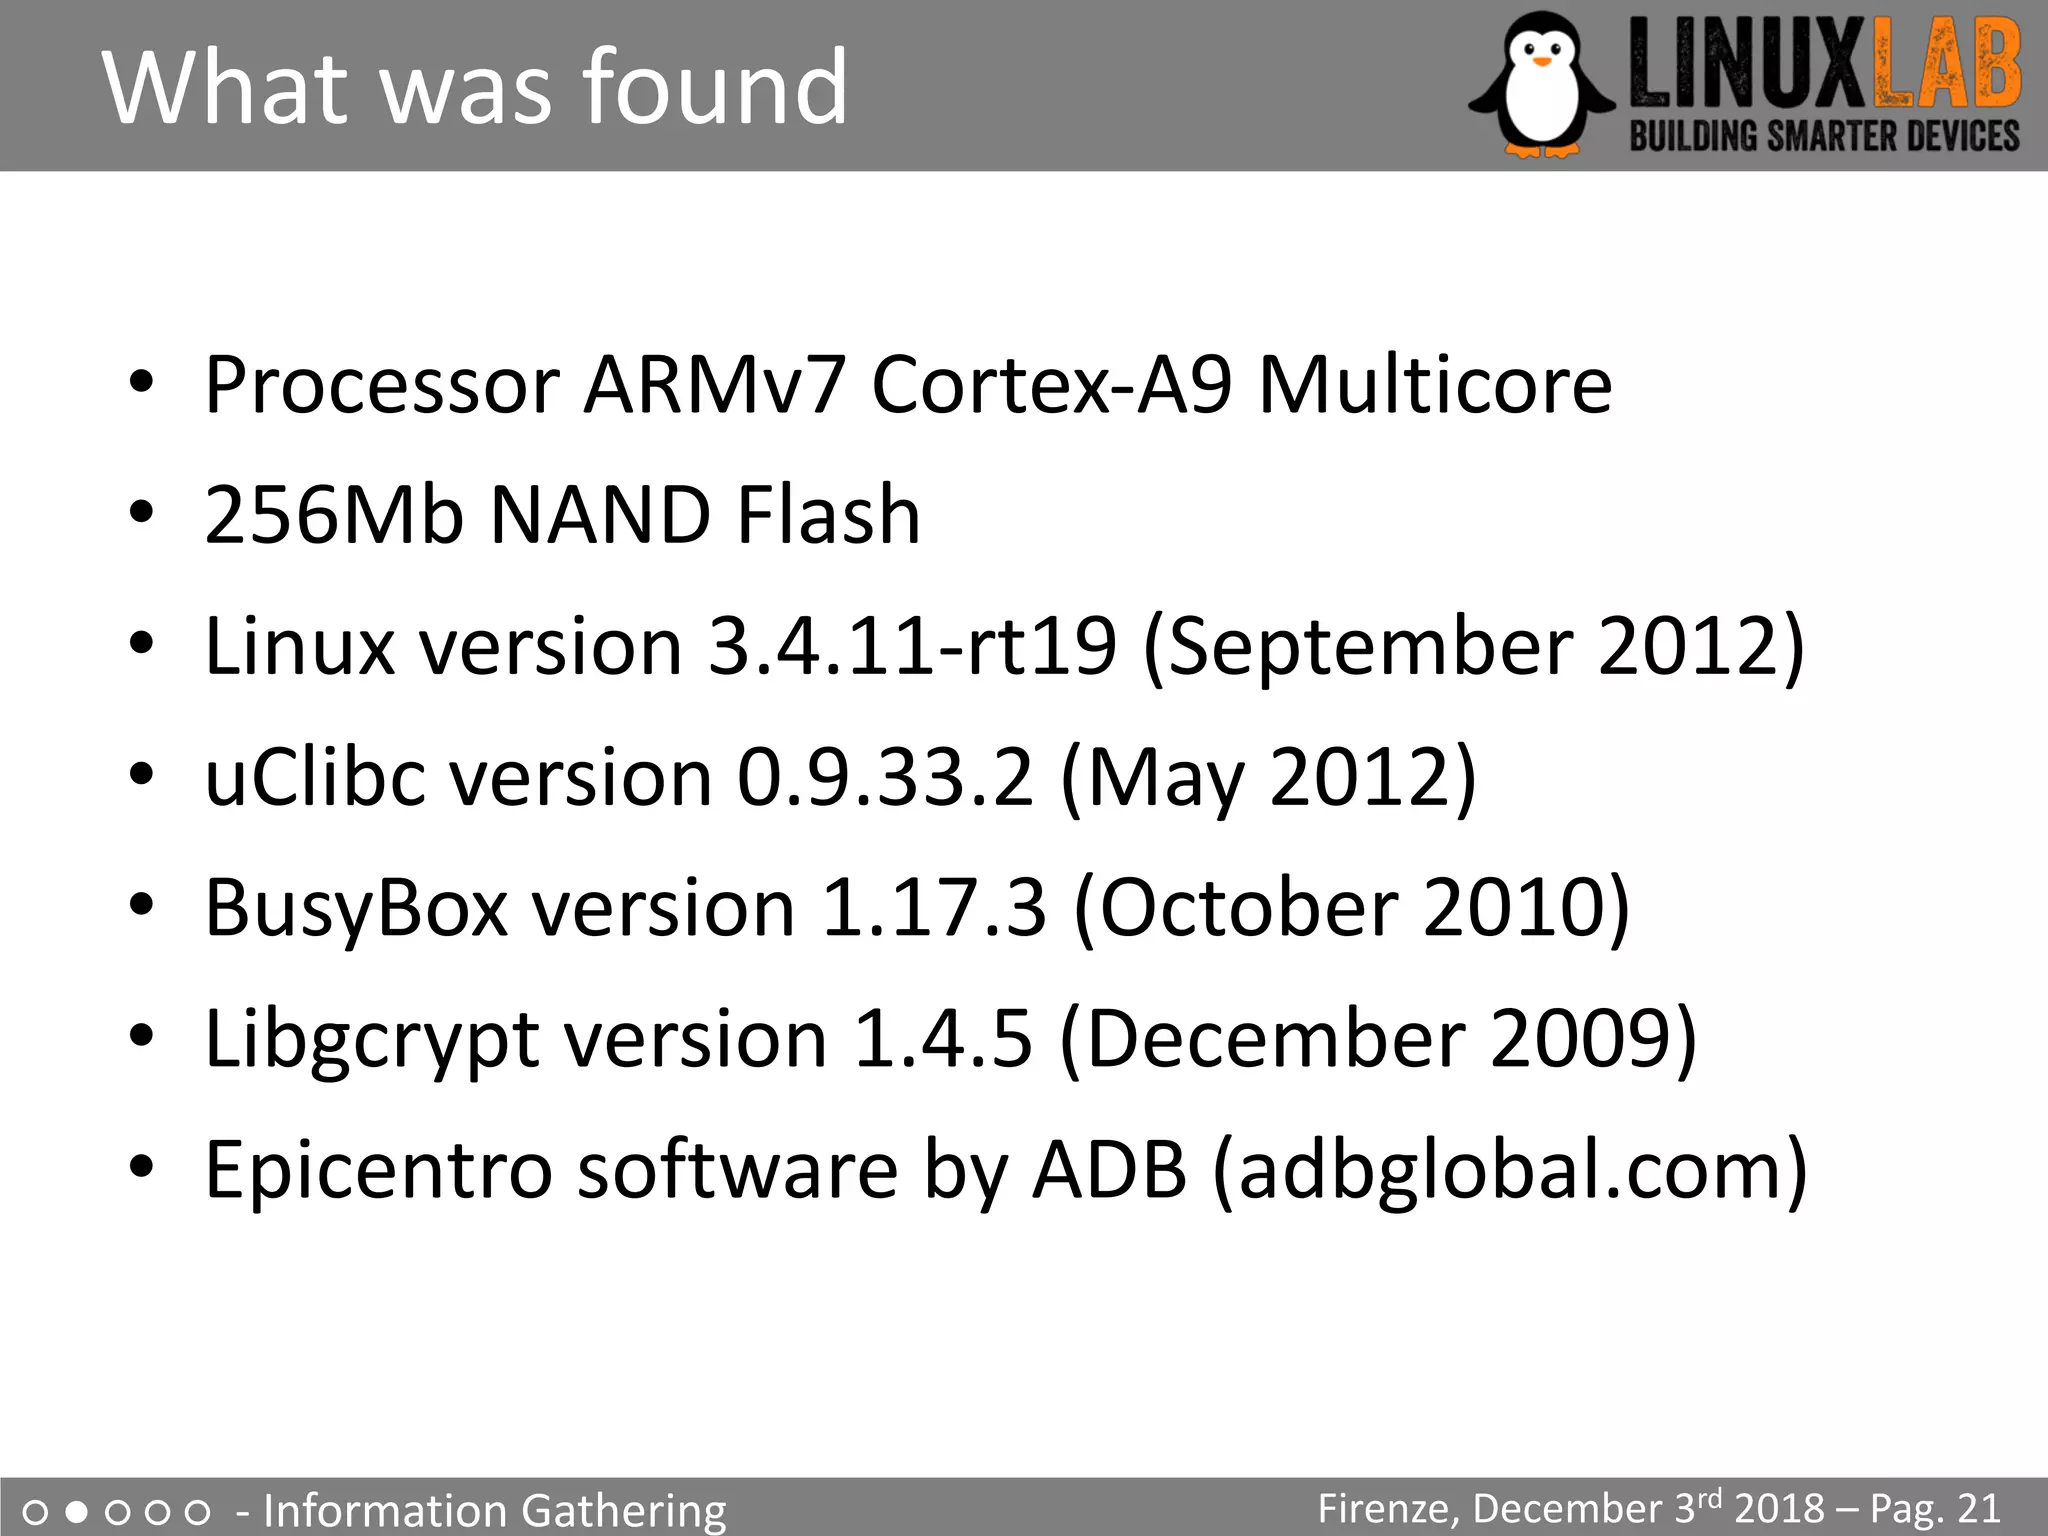
The document is a comprehensive guide on reverse engineering IoT devices, with a specific focus on a home router example. It outlines the reverse engineering process, including information gathering, emulation environment setup using QEMU, firmware analysis, and modification procedures. Techniques and tools for extracting firmware and analyzing components are detailed, alongside the necessary steps to create an emulation environment for further development.

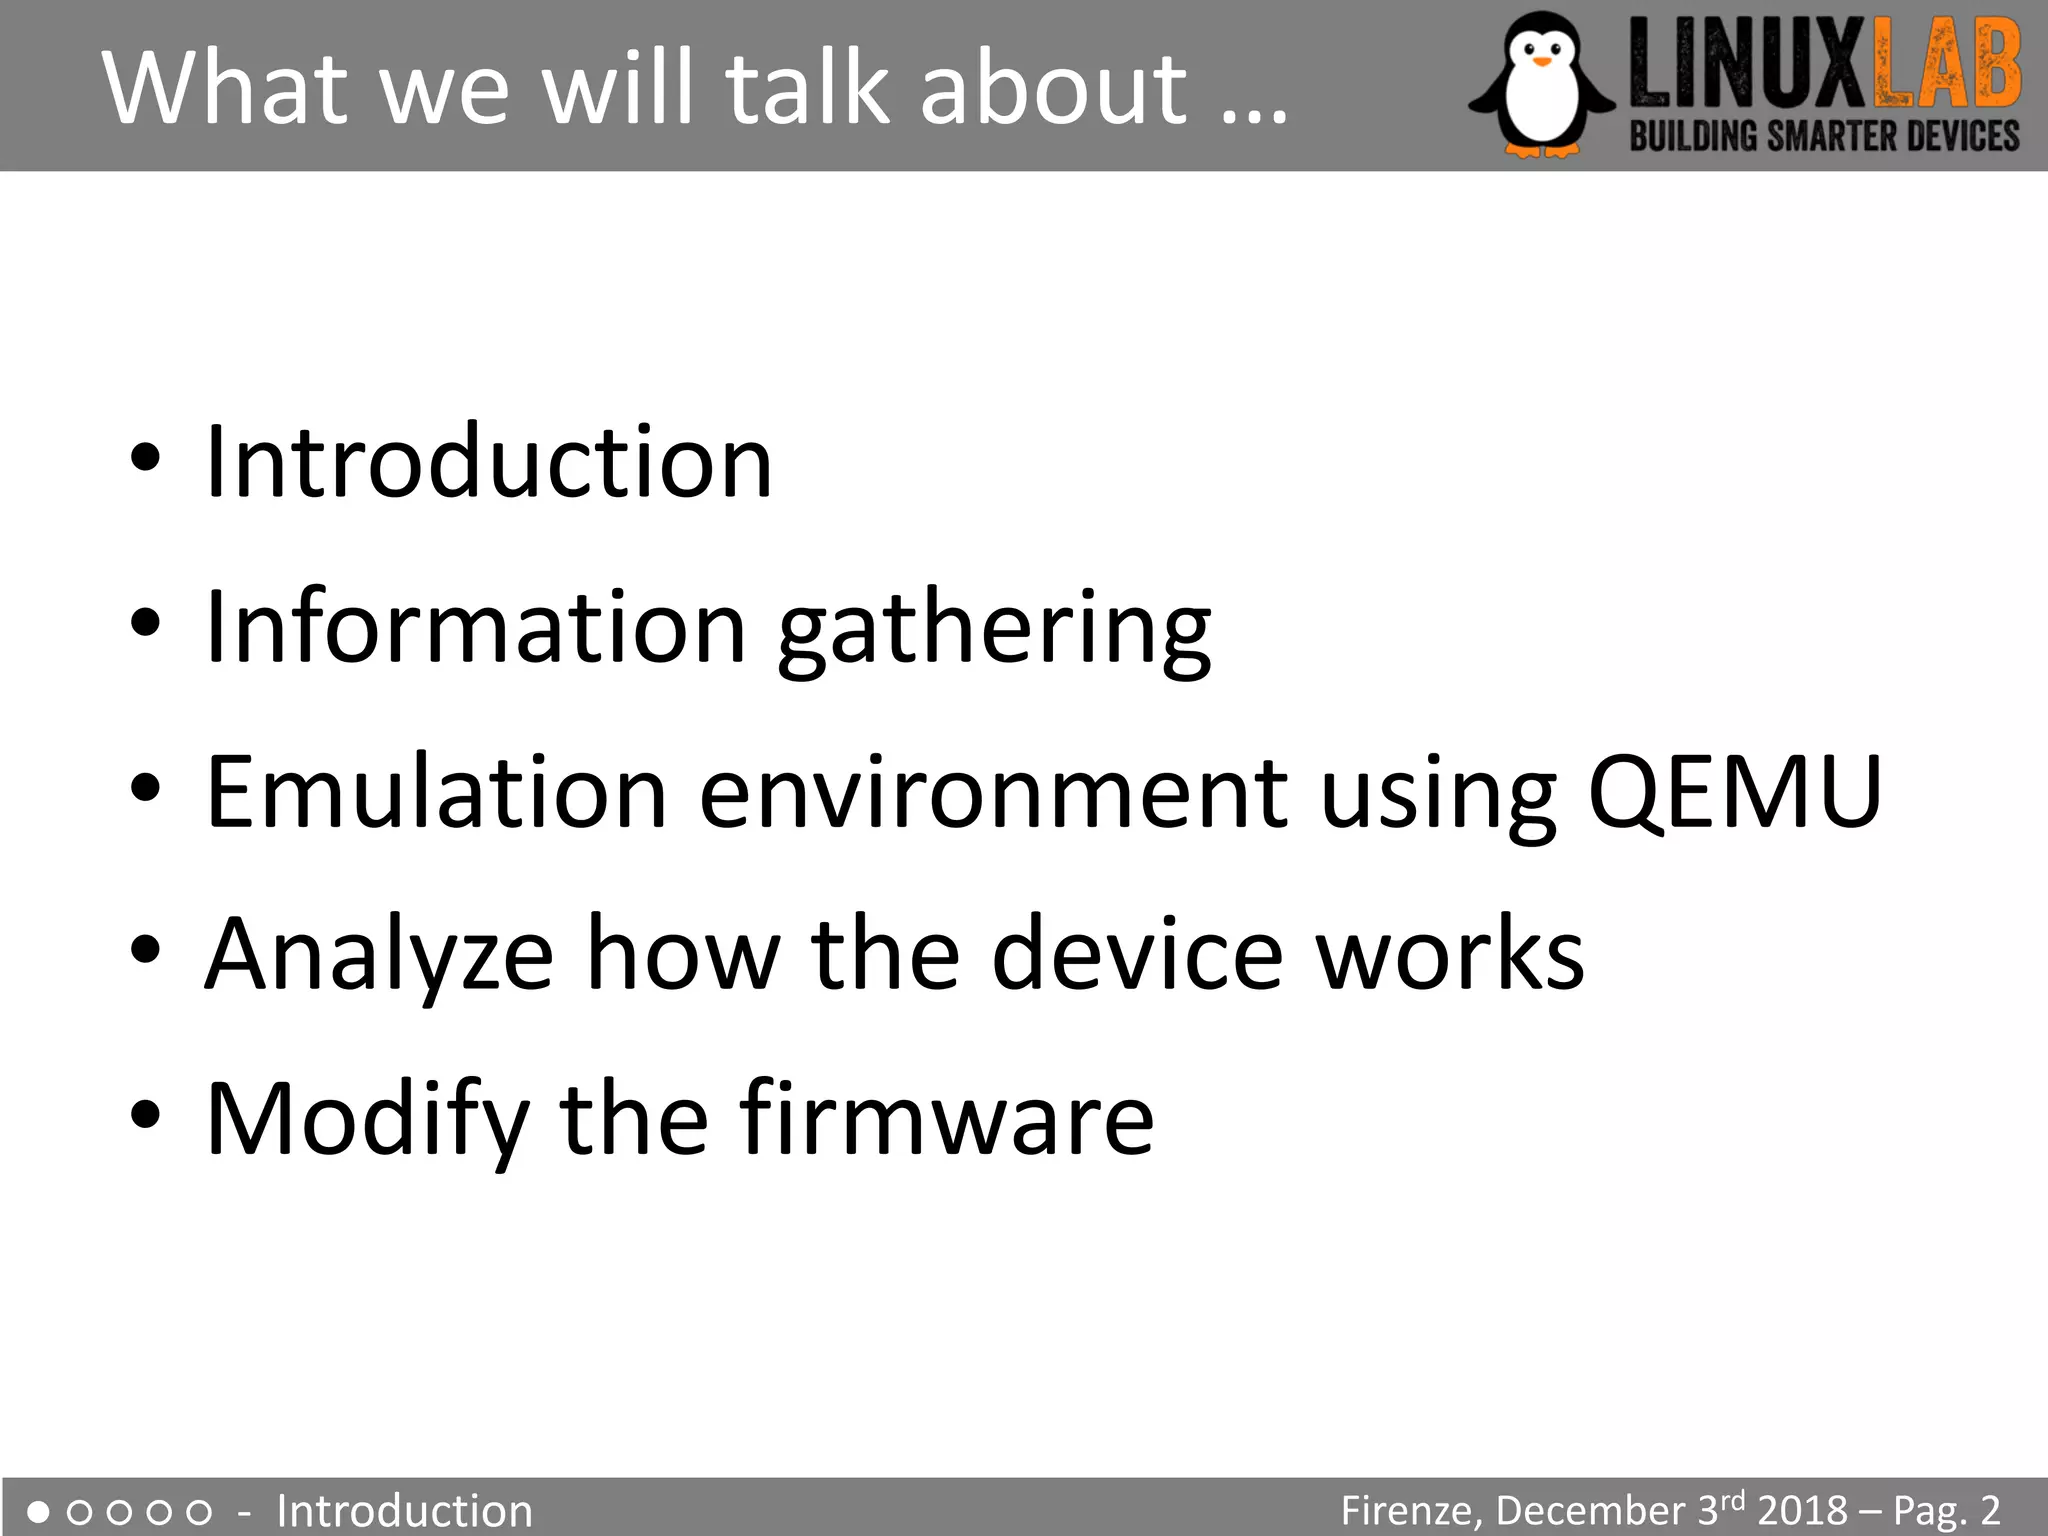


![○ ● ○ ○ ○ - Information Gathering
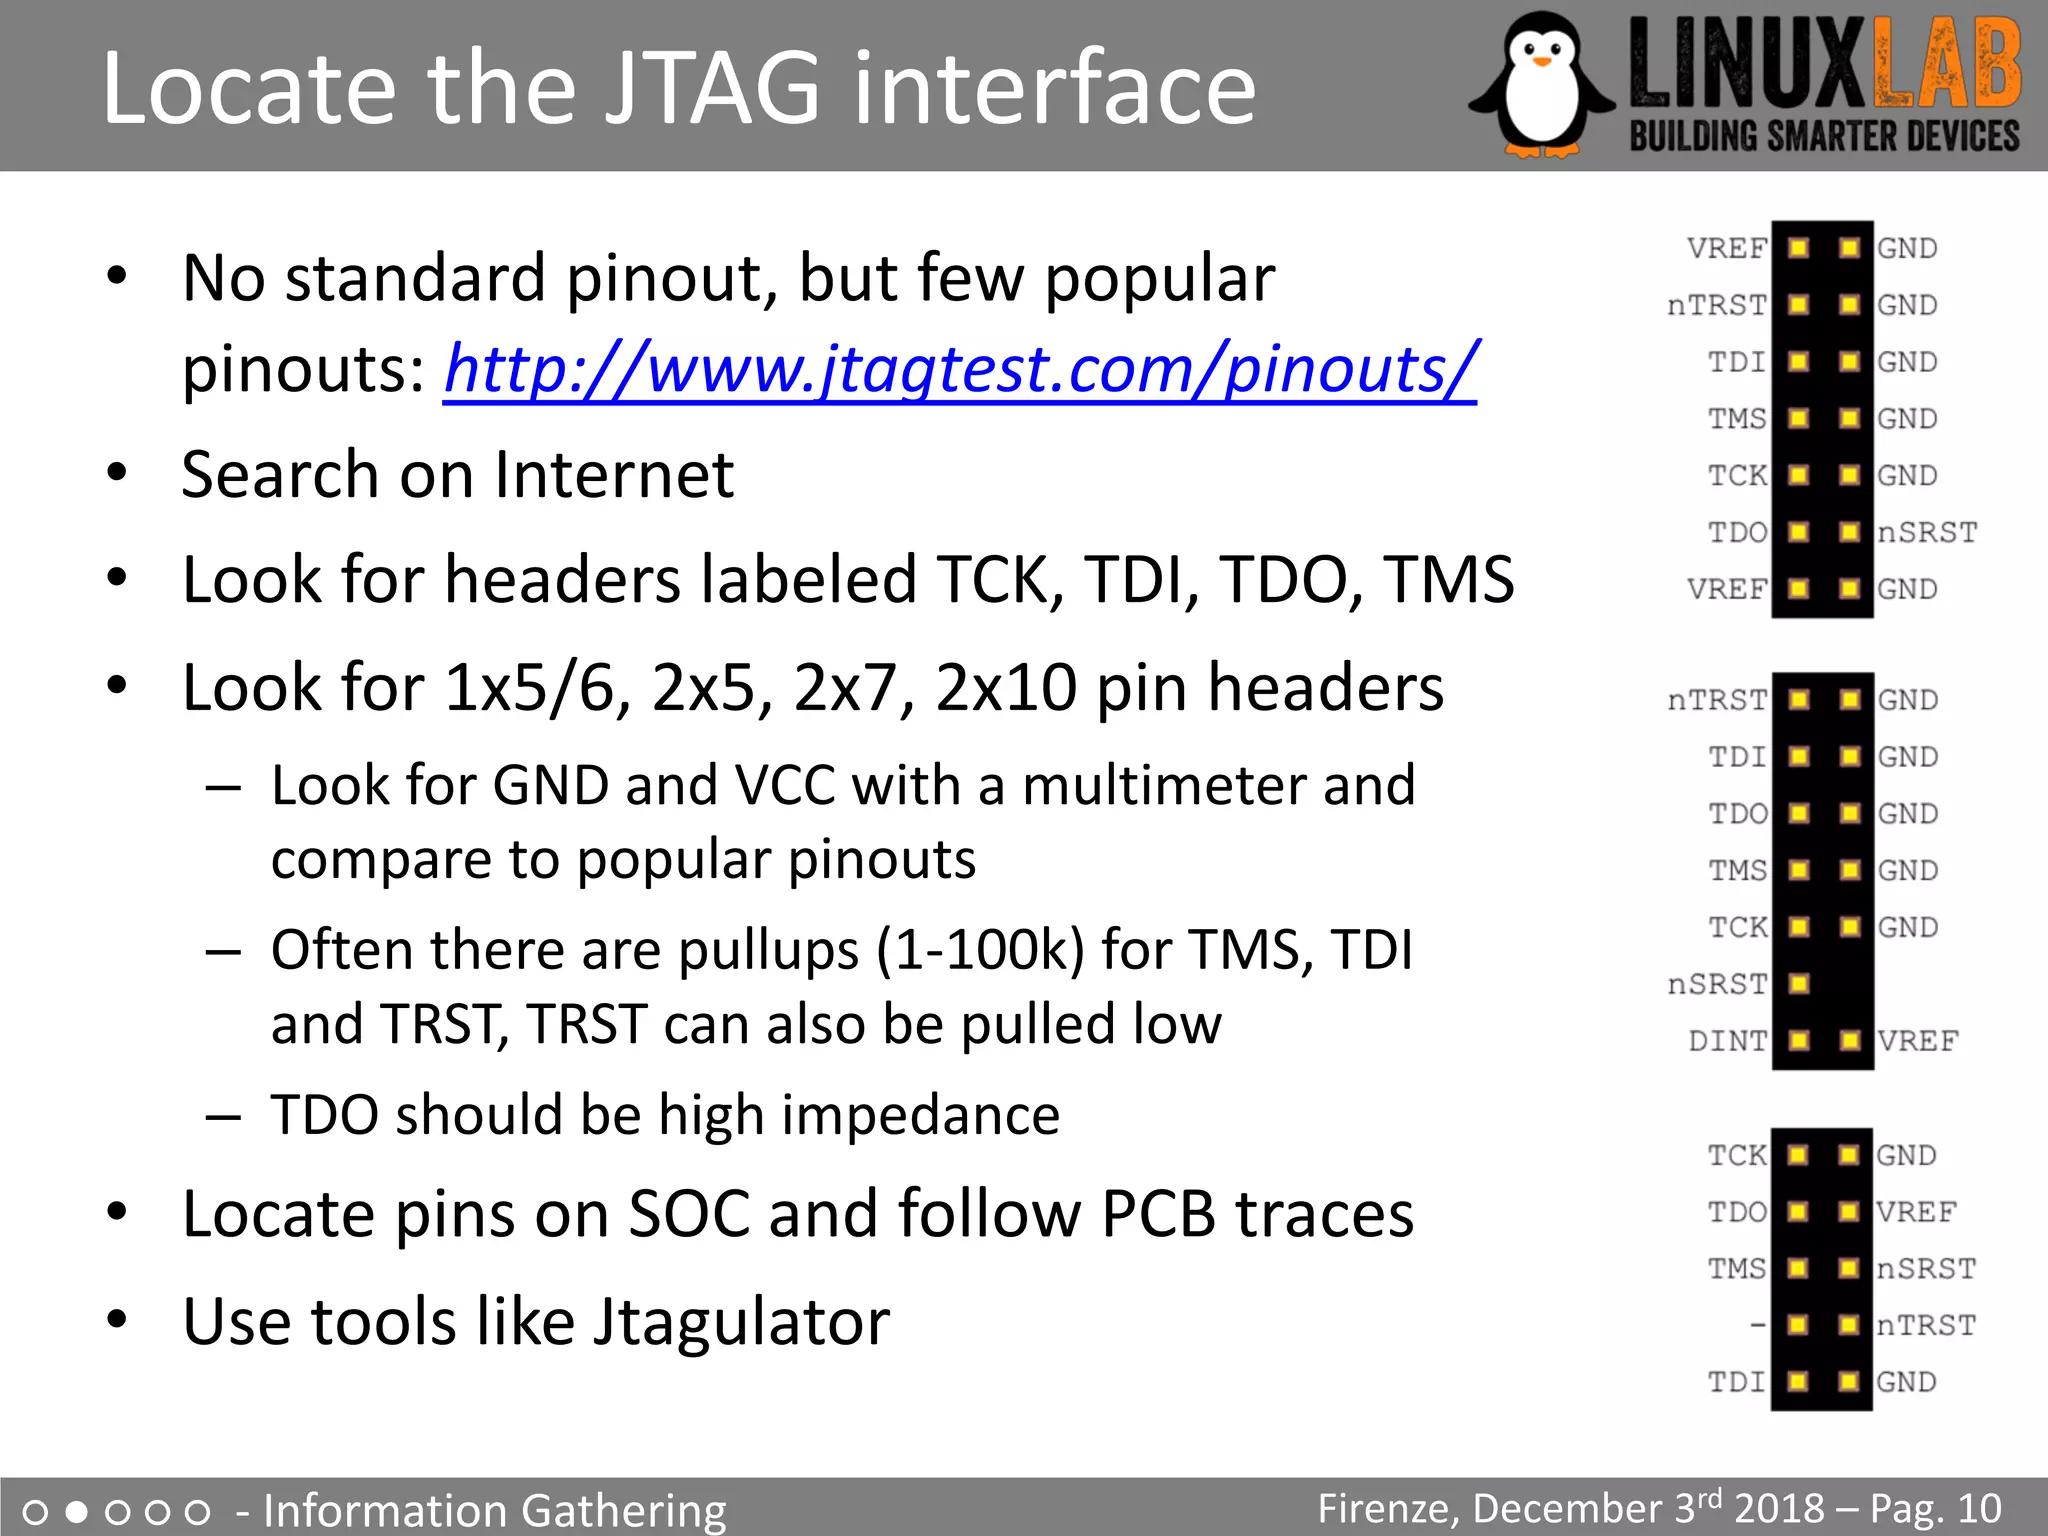
Looking at other files
Firenze, December 3rd 2018 – Pag. 17
• /sbin/init is missing (but it’s not true), busybox is there
$ ls -lh fs_2/bin/busybox
-rwsr-sr-x 1 val val 382K fs_2/bin/busybox
$ strings fs_2/bin/busybox
…
BusyBox v1.17.3 (2018-04-11 12:29:54 CEST)
…
$ arm-linux-readelf -a fs_2/bin/busybox
…
… program interpreter: /lib/ld-uClibc.so.0]
$ ls -lh fs_2/lib/ld-uClibc*
-rwxr-xr-x ld-uClibc-0.9.33.2.so
lrwxrwxrwx ld-uClibc.so.0 -> ld-uClibc-0.9.33.2.so
$ ls -l fs_3/lib/libgcrypt.so.11*
lrwxrwxrwx libgcrypt.so.11 -> libgcrypt.so.11.5.3
-rwxr-xr-x libgcrypt.so.11.5.3](https://image.slidesharecdn.com/digiampietro-introductiontoiotreverseengineeringwithanexampleonahomerouter-181212210902/75/Valerio-Di-Giampietro-Introduction-To-IoT-Reverse-Engineering-with-an-example-on-a-home-router-17-2048.jpg)
![○ ● ○ ○ ○ - Information Gathering
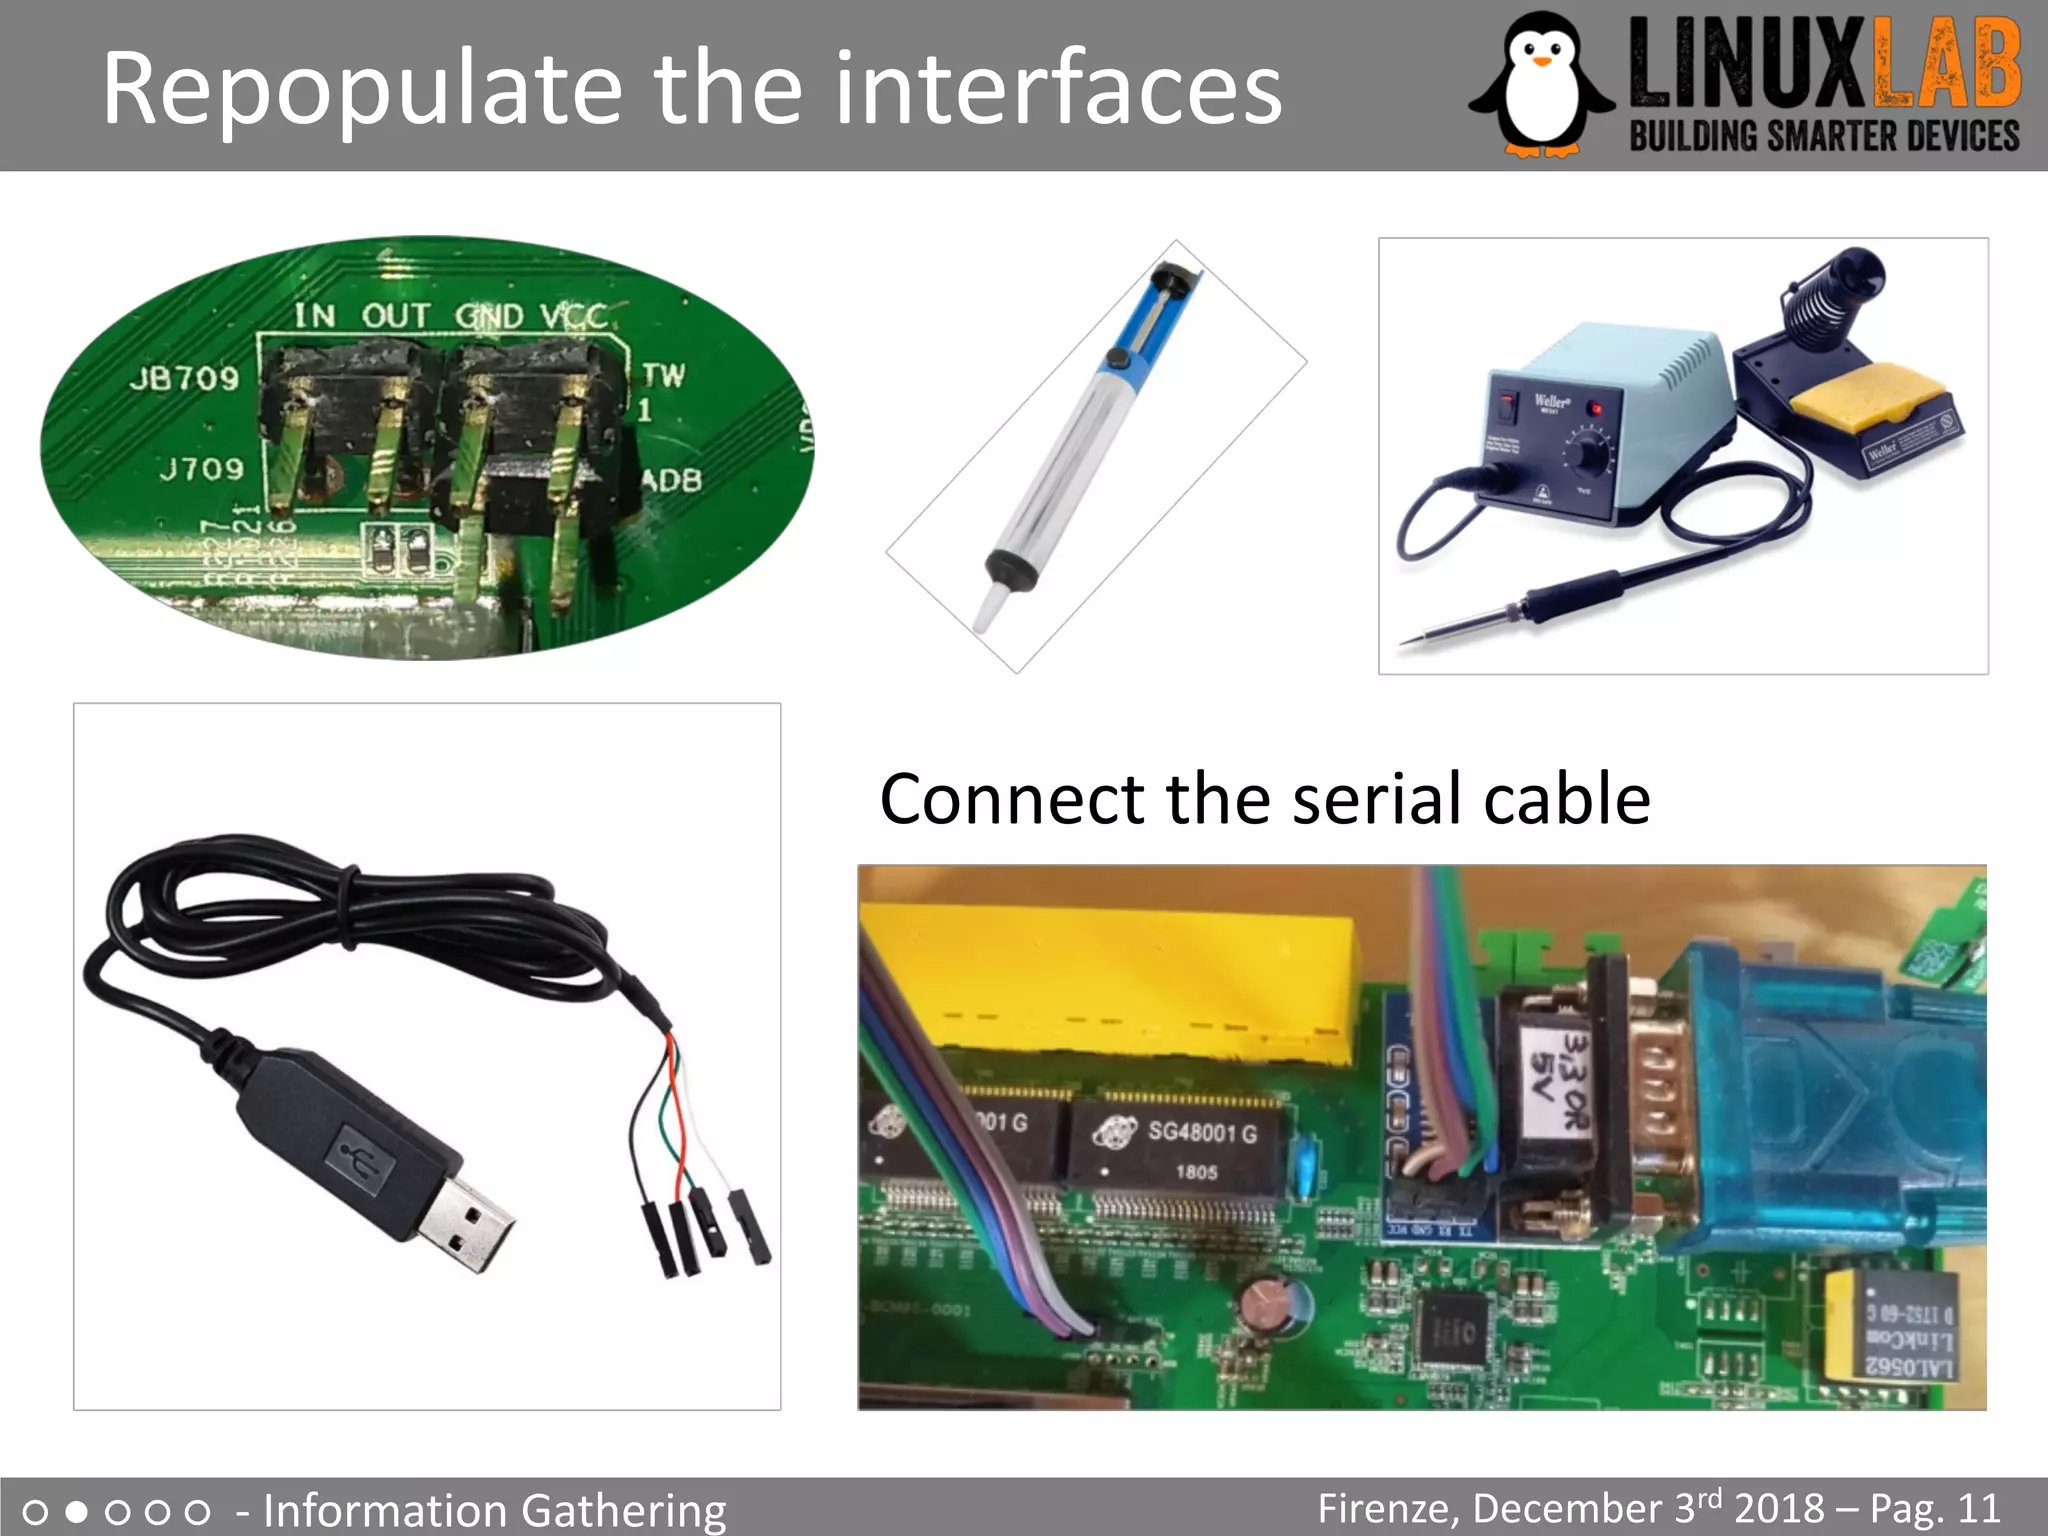
Boot output on serial console
Firenze, December 3rd 2018 – Pag. 18
• Output on serial console during boot
...
CFE version 1.0.38-118.3-S for BCM963138 (32bit,SP,LE)
generic
...
Chip ID: BCM63136B0, ARM Cortex A9 Dual Core: 1000MHz
Total Memory: 268435456 bytes (256MB)
NAND ECC BCH-4, page size 0x800 bytes, spare size 64 bytes
NAND flash device: , id 0xc2da block 128KB size 262144KB
...
Linux version 3.4.11-rt19 (l.fornalczyk@quelo) (gcc version
4.5.4 20120306 (prerelease) (Linaro GCC 4.5-2012.03) )
...
CPU: ARMv7 Processor [414fc091] revision 1 (ARMv7)
...
jffs2: version 2.2 (NAND) (SUMMARY) (ZLIB) (LZMA) (RTIME)
...](https://image.slidesharecdn.com/digiampietro-introductiontoiotreverseengineeringwithanexampleonahomerouter-181212210902/75/Valerio-Di-Giampietro-Introduction-To-IoT-Reverse-Engineering-with-an-example-on-a-home-router-18-2048.jpg)
![○ ● ○ ○ ○ - Information Gathering
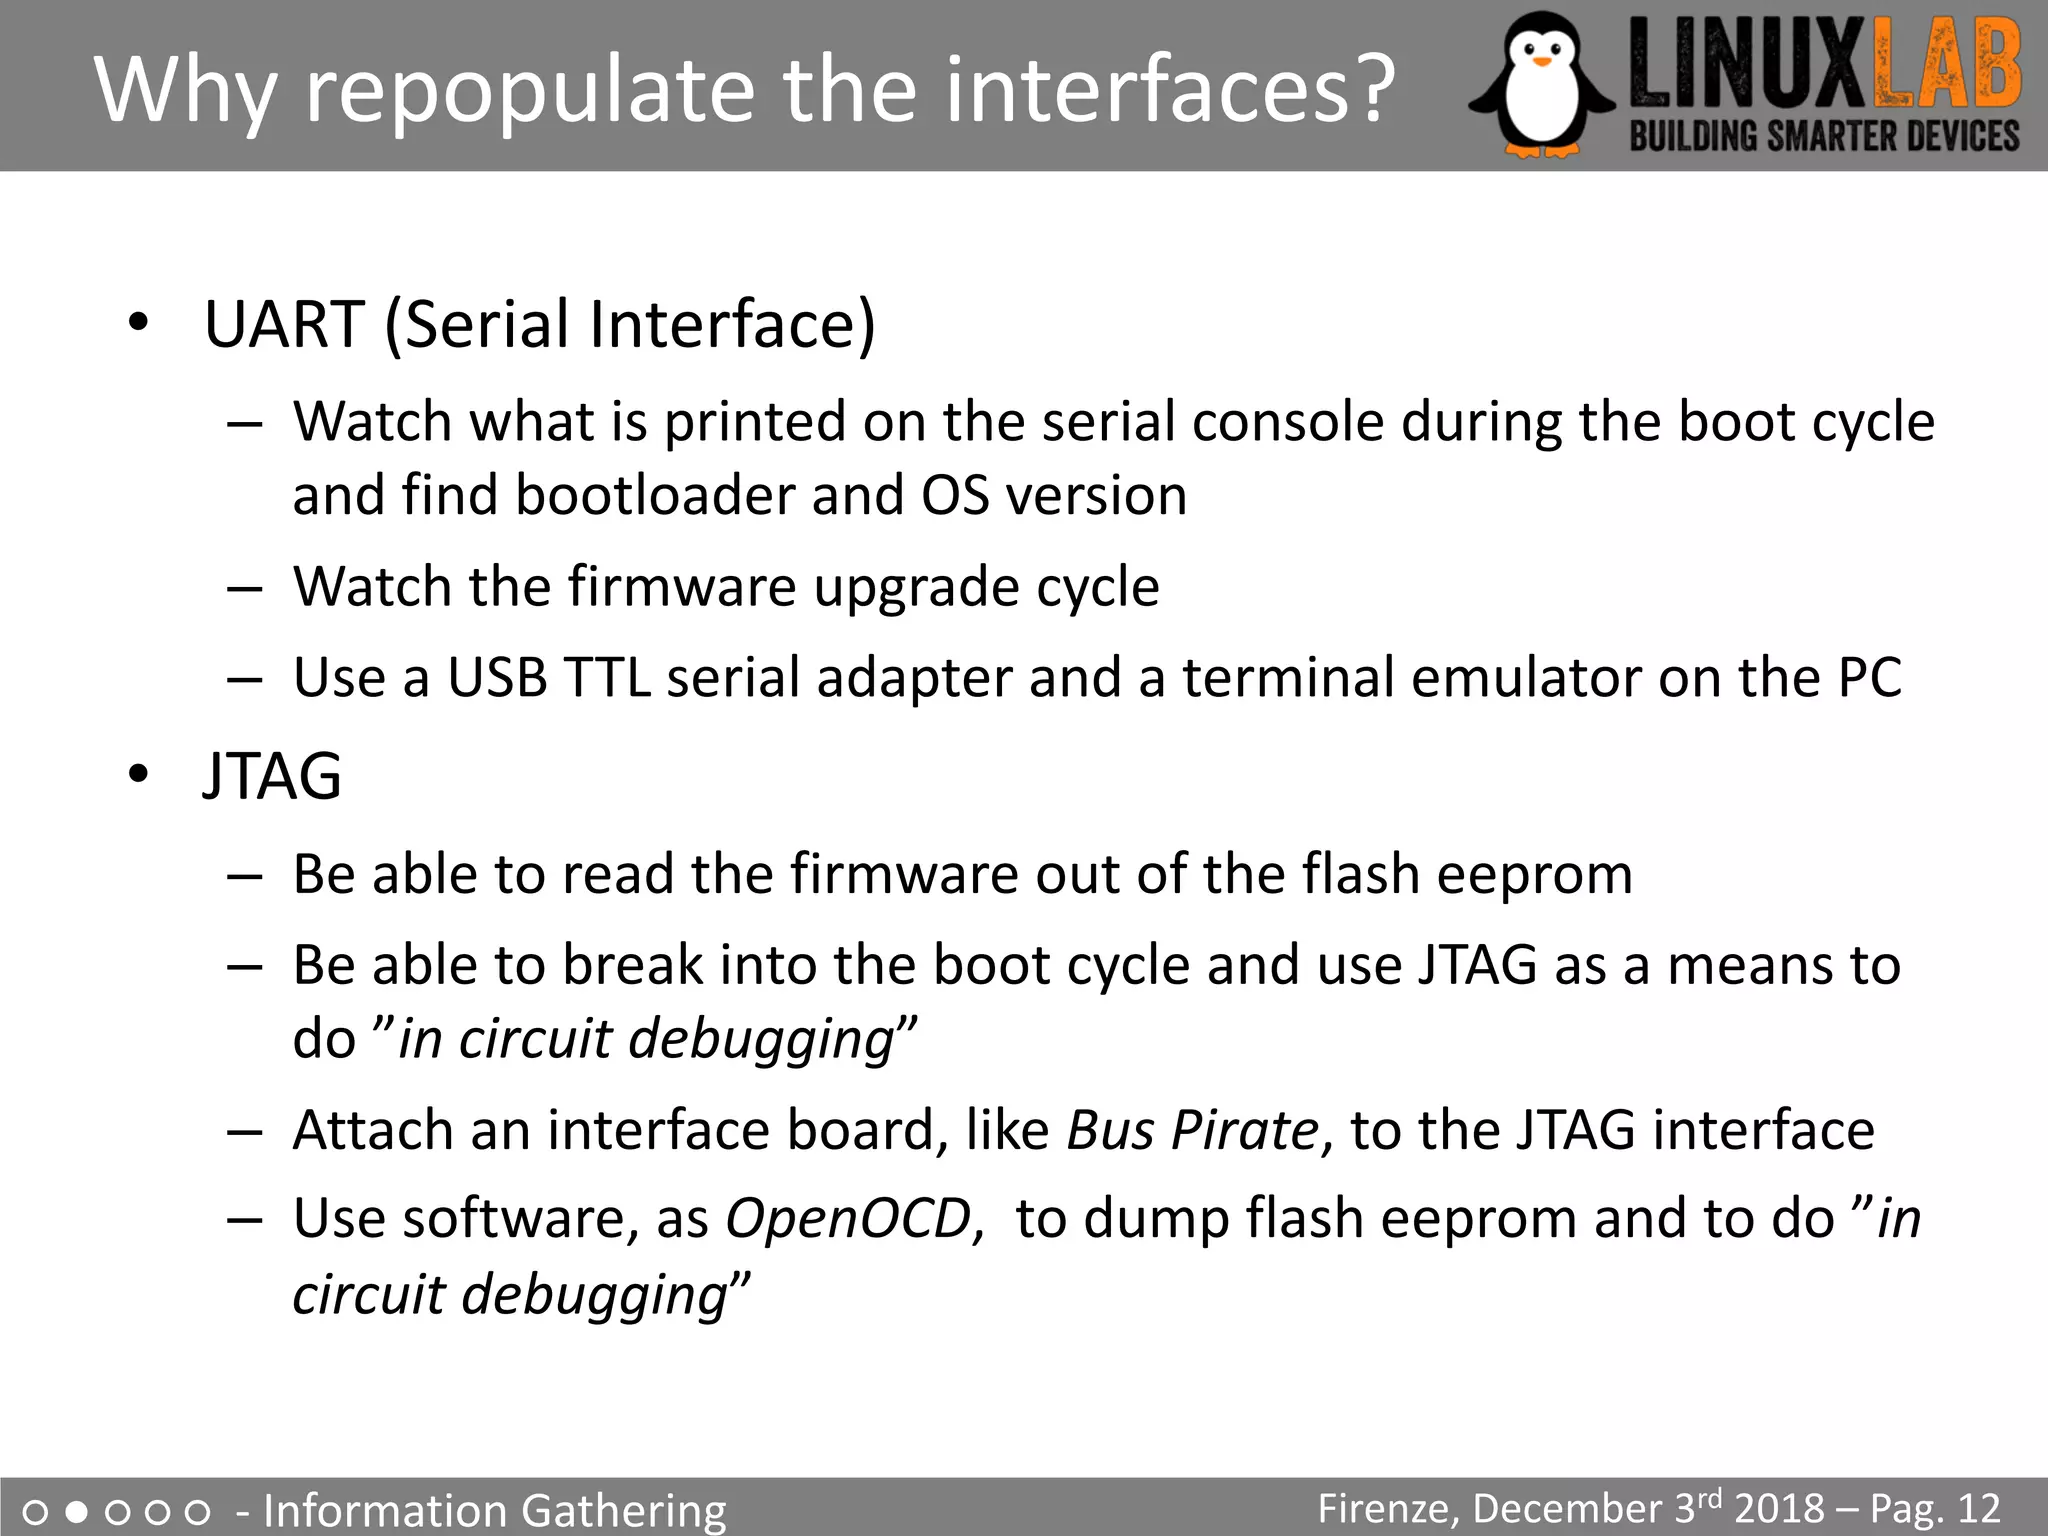
Boot output on serial console
Firenze, December 3rd 2018 – Pag. 19
• Output on serial console during boot (part 2)
...
[2.502000] Found YAPS PartitionSplit Marker at 0x080FFF00
[2.503000] Creating 8 MTD partitions on "brcmnand.0":
[2.504000] 0x000000000000-0x000000020000 : "CFE”
[2.506000] 0x000007f00000-0x000008100000 : "bootfs_1”
[2.508000] 0x000008100000-0x00000fbc0000 : "rootfs_1”
[2.510000] 0x000000020000-0x000007ce0000 : "upgrade”
[2.512000] 0x00000fbc0000-0x00000fdc0000 : "conf_fs”
[2.513000] 0x00000fdc0000-0x00000fe00000 : "conf_factory”
[2.515000] 0x00000fe00000-0x000010000000 : "bbt”
[2.517000] 0x000000000000-0x000010000000 : "flash”
...
Init started: BusyBox v1.17.3 (2018-04-11 12:29:54 CEST)
starting pid 235, tty '': '/etc/init.d/rcS S boot’
Starting boot.sh ...
Restore passwd ....
Restore group ....
Starting /etc/rc.d/S11services.sh ...
Starting Configuration Manager (B)
/etc/inittab
::sysinit:/etc/init.d/rcS S boot
::shutdown:/etc/init.d/rcS K shutdown
tts/0::askfirst:/bin/login
ttyS0::askfirst:/bin/login](https://image.slidesharecdn.com/digiampietro-introductiontoiotreverseengineeringwithanexampleonahomerouter-181212210902/75/Valerio-Di-Giampietro-Introduction-To-IoT-Reverse-Engineering-with-an-example-on-a-home-router-19-2048.jpg)

![○ ○ ○ ● ○ - Analyze how the device works
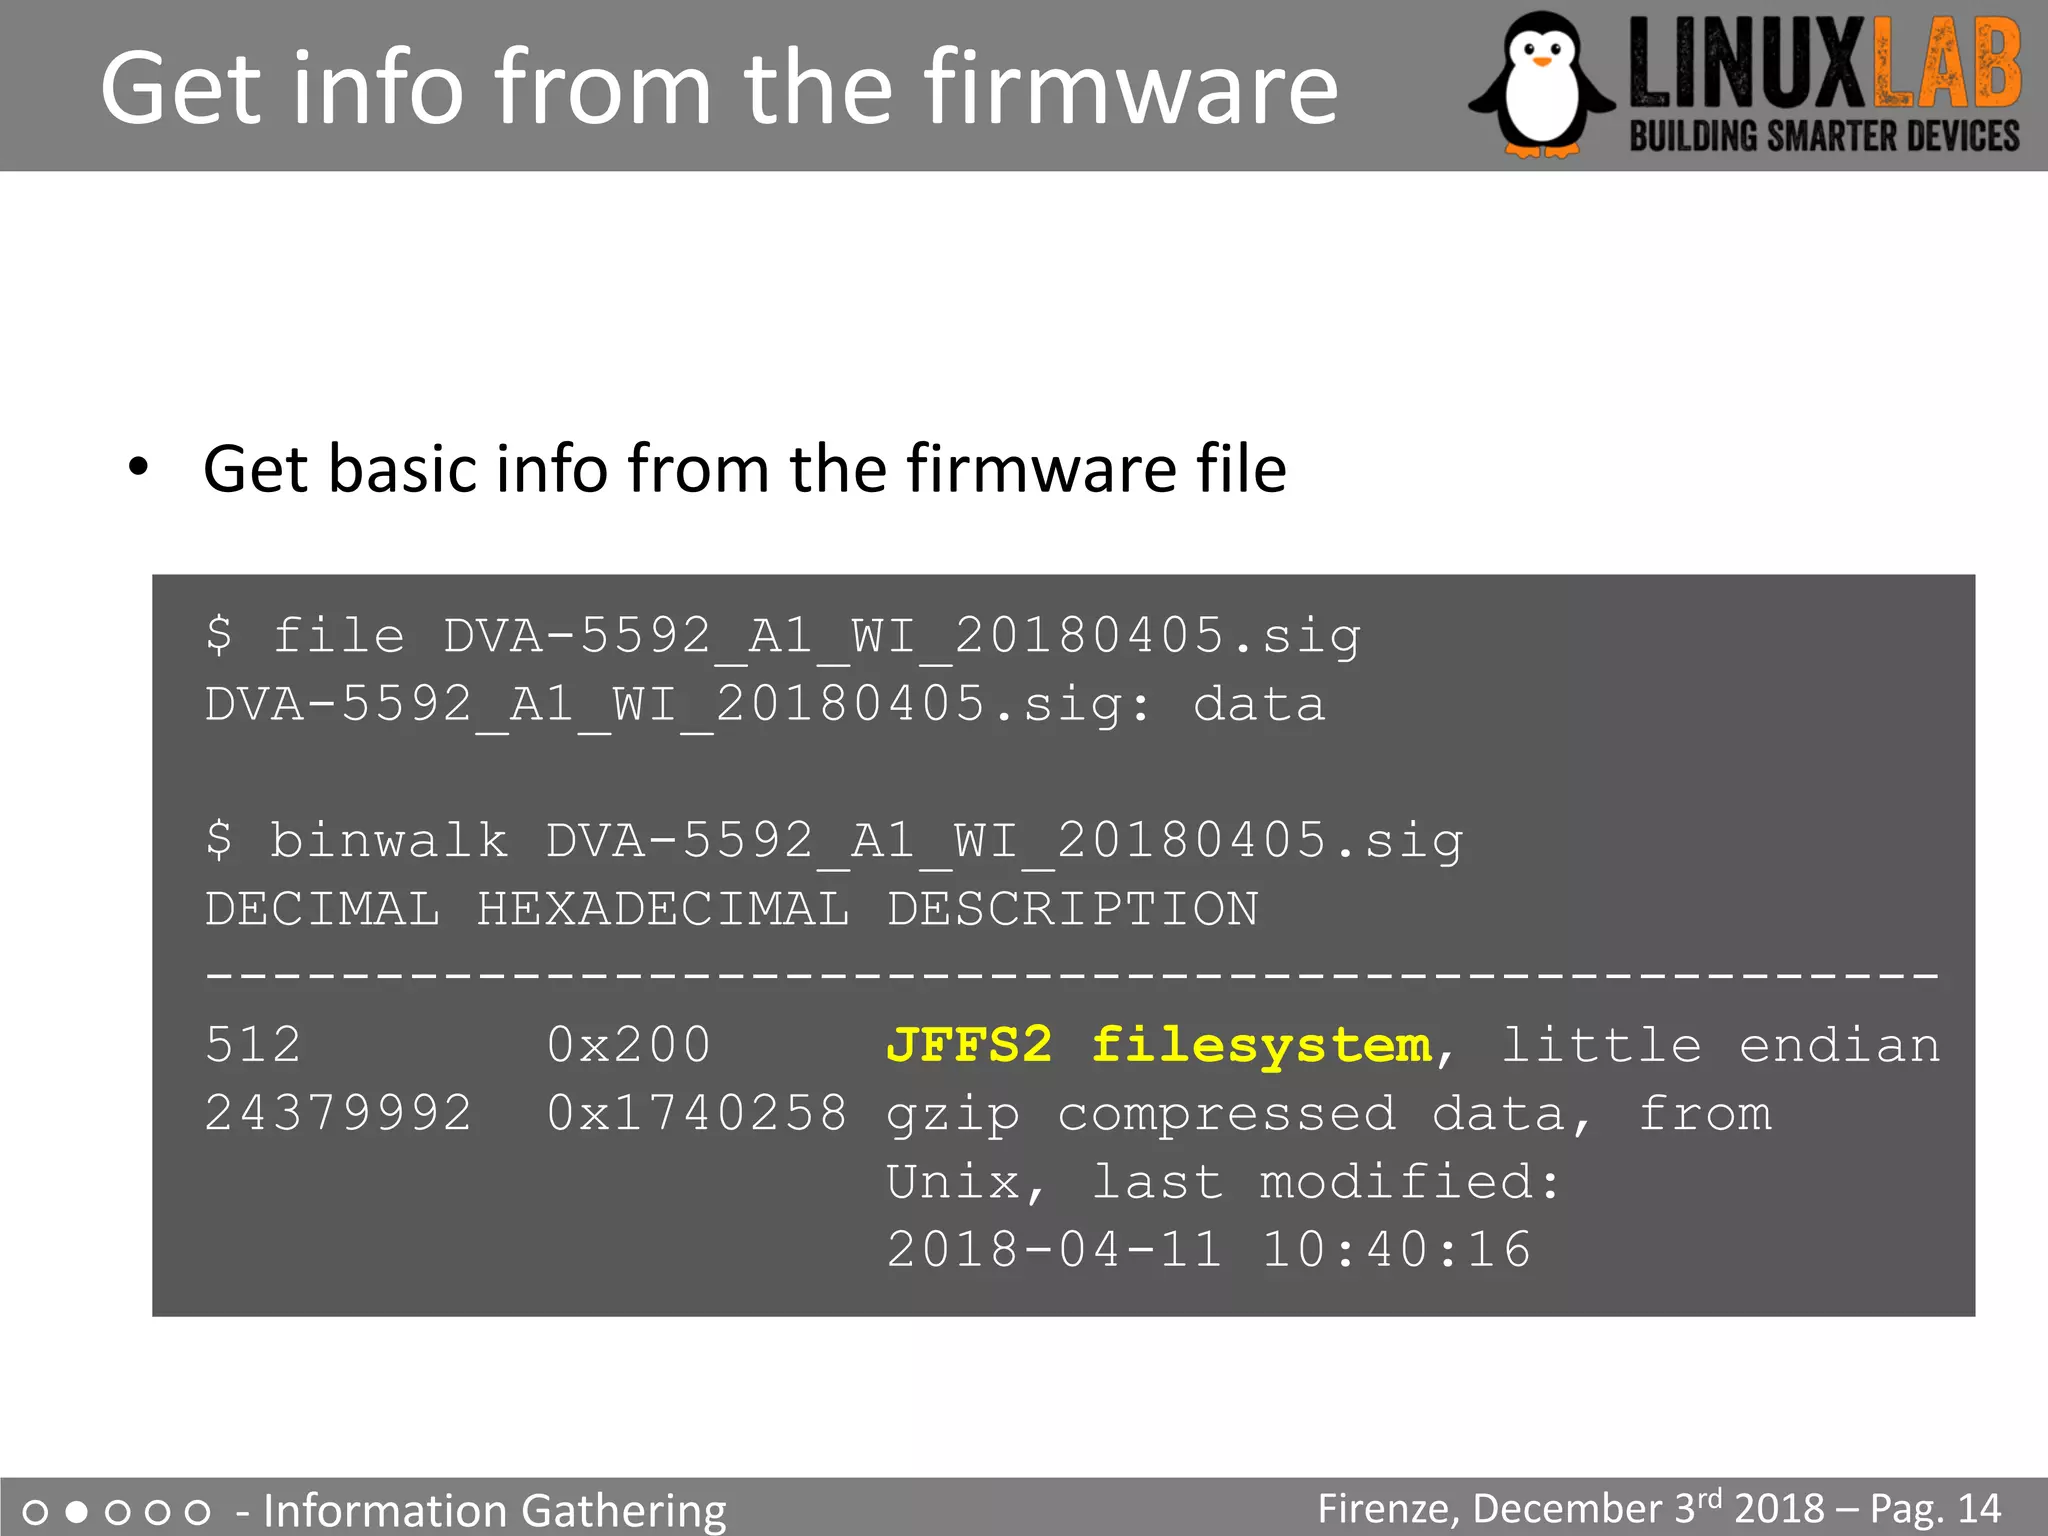
The upgrade process
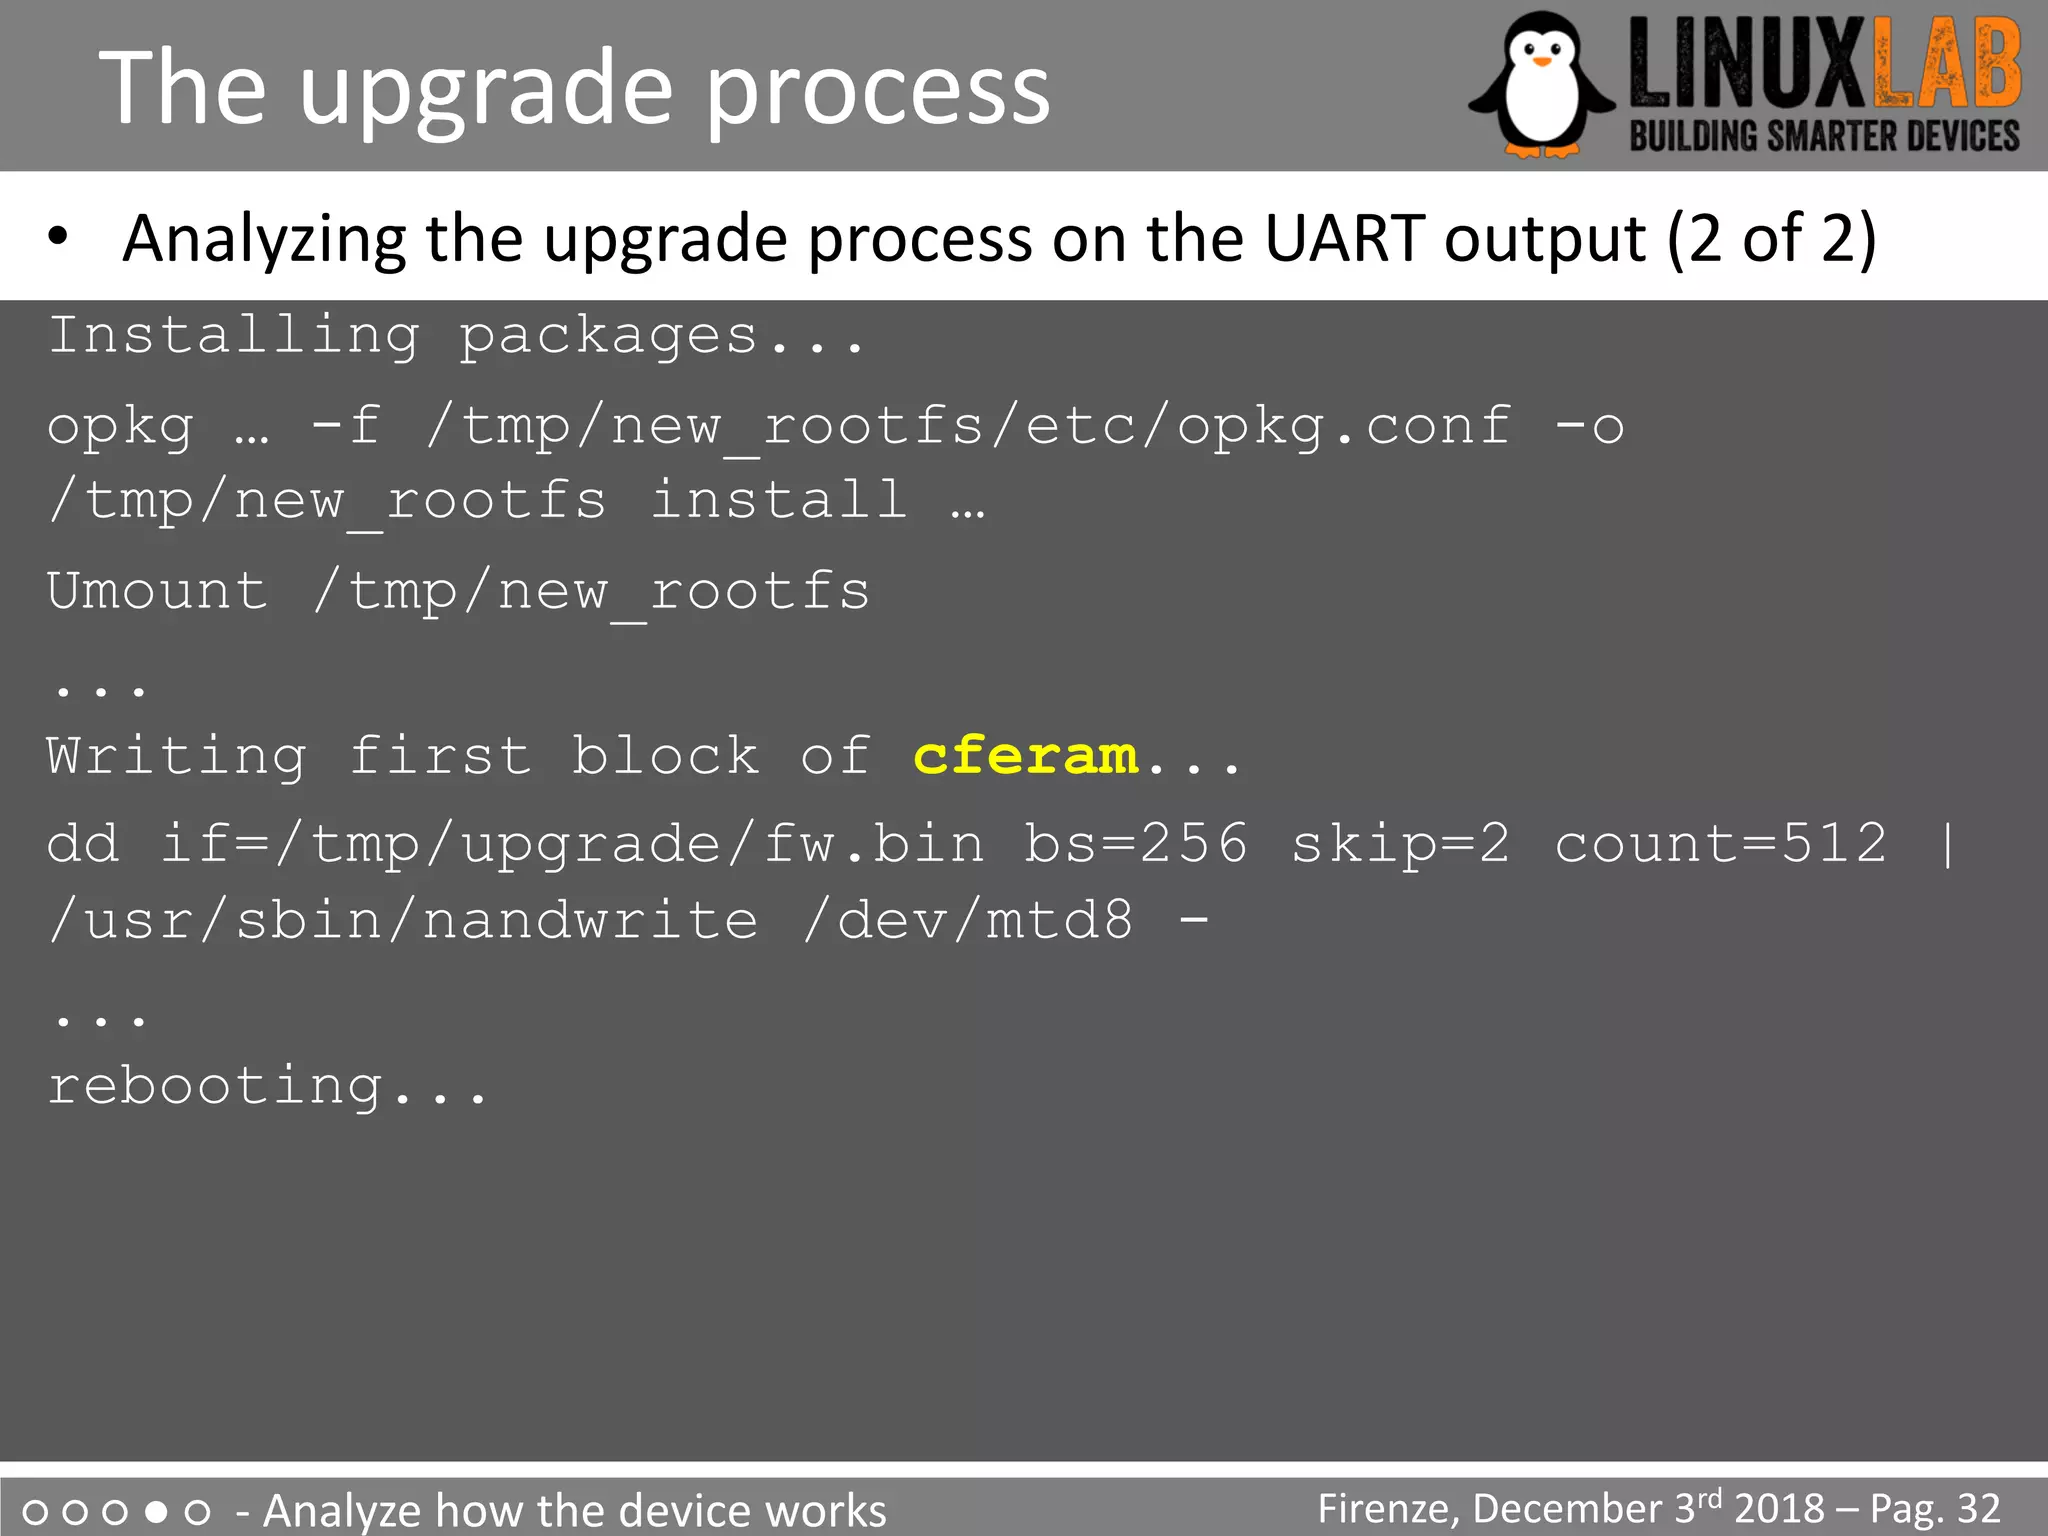
• Analyzing the upgrade process on the UART output (1 of 2)
Start pid 4 /usr/sbin/upgrade-prepare.sh cwmp
...
/usr/sbin/upgrade.sh
Signature OK
...
/usr/sbin/flash_eraseall
-j -p 0 -l 8 /dev/mtd3
...
Writing boot & root filesystems...
dd if=/tmp/upgrade/fw.bin bs=256 skip=514 count=94720
| /usr/sbin/nandwrite -s 524288 /dev/mtd3 –
...
[…] Found YAPS PartitionSplit Marker at 0x080FFF00
[…] Creating 2 MTD partitions on "brcmnand.0":
[…] 0x000007f00000-0x000008100000 : "bootfs_2”
[…] 0x000008100000-0x00000fcc0000 : "rootfs_2"
Firenze, December 3rd 2018 – Pag. 31
Boot and
Root file
system
FIRMWARE FILE
514 * 256
(514+94720)*256](https://image.slidesharecdn.com/digiampietro-introductiontoiotreverseengineeringwithanexampleonahomerouter-181212210902/75/Valerio-Di-Giampietro-Introduction-To-IoT-Reverse-Engineering-with-an-example-on-a-home-router-31-2048.jpg)
![○ ○ ○ ● ○ - Analyze how the device works
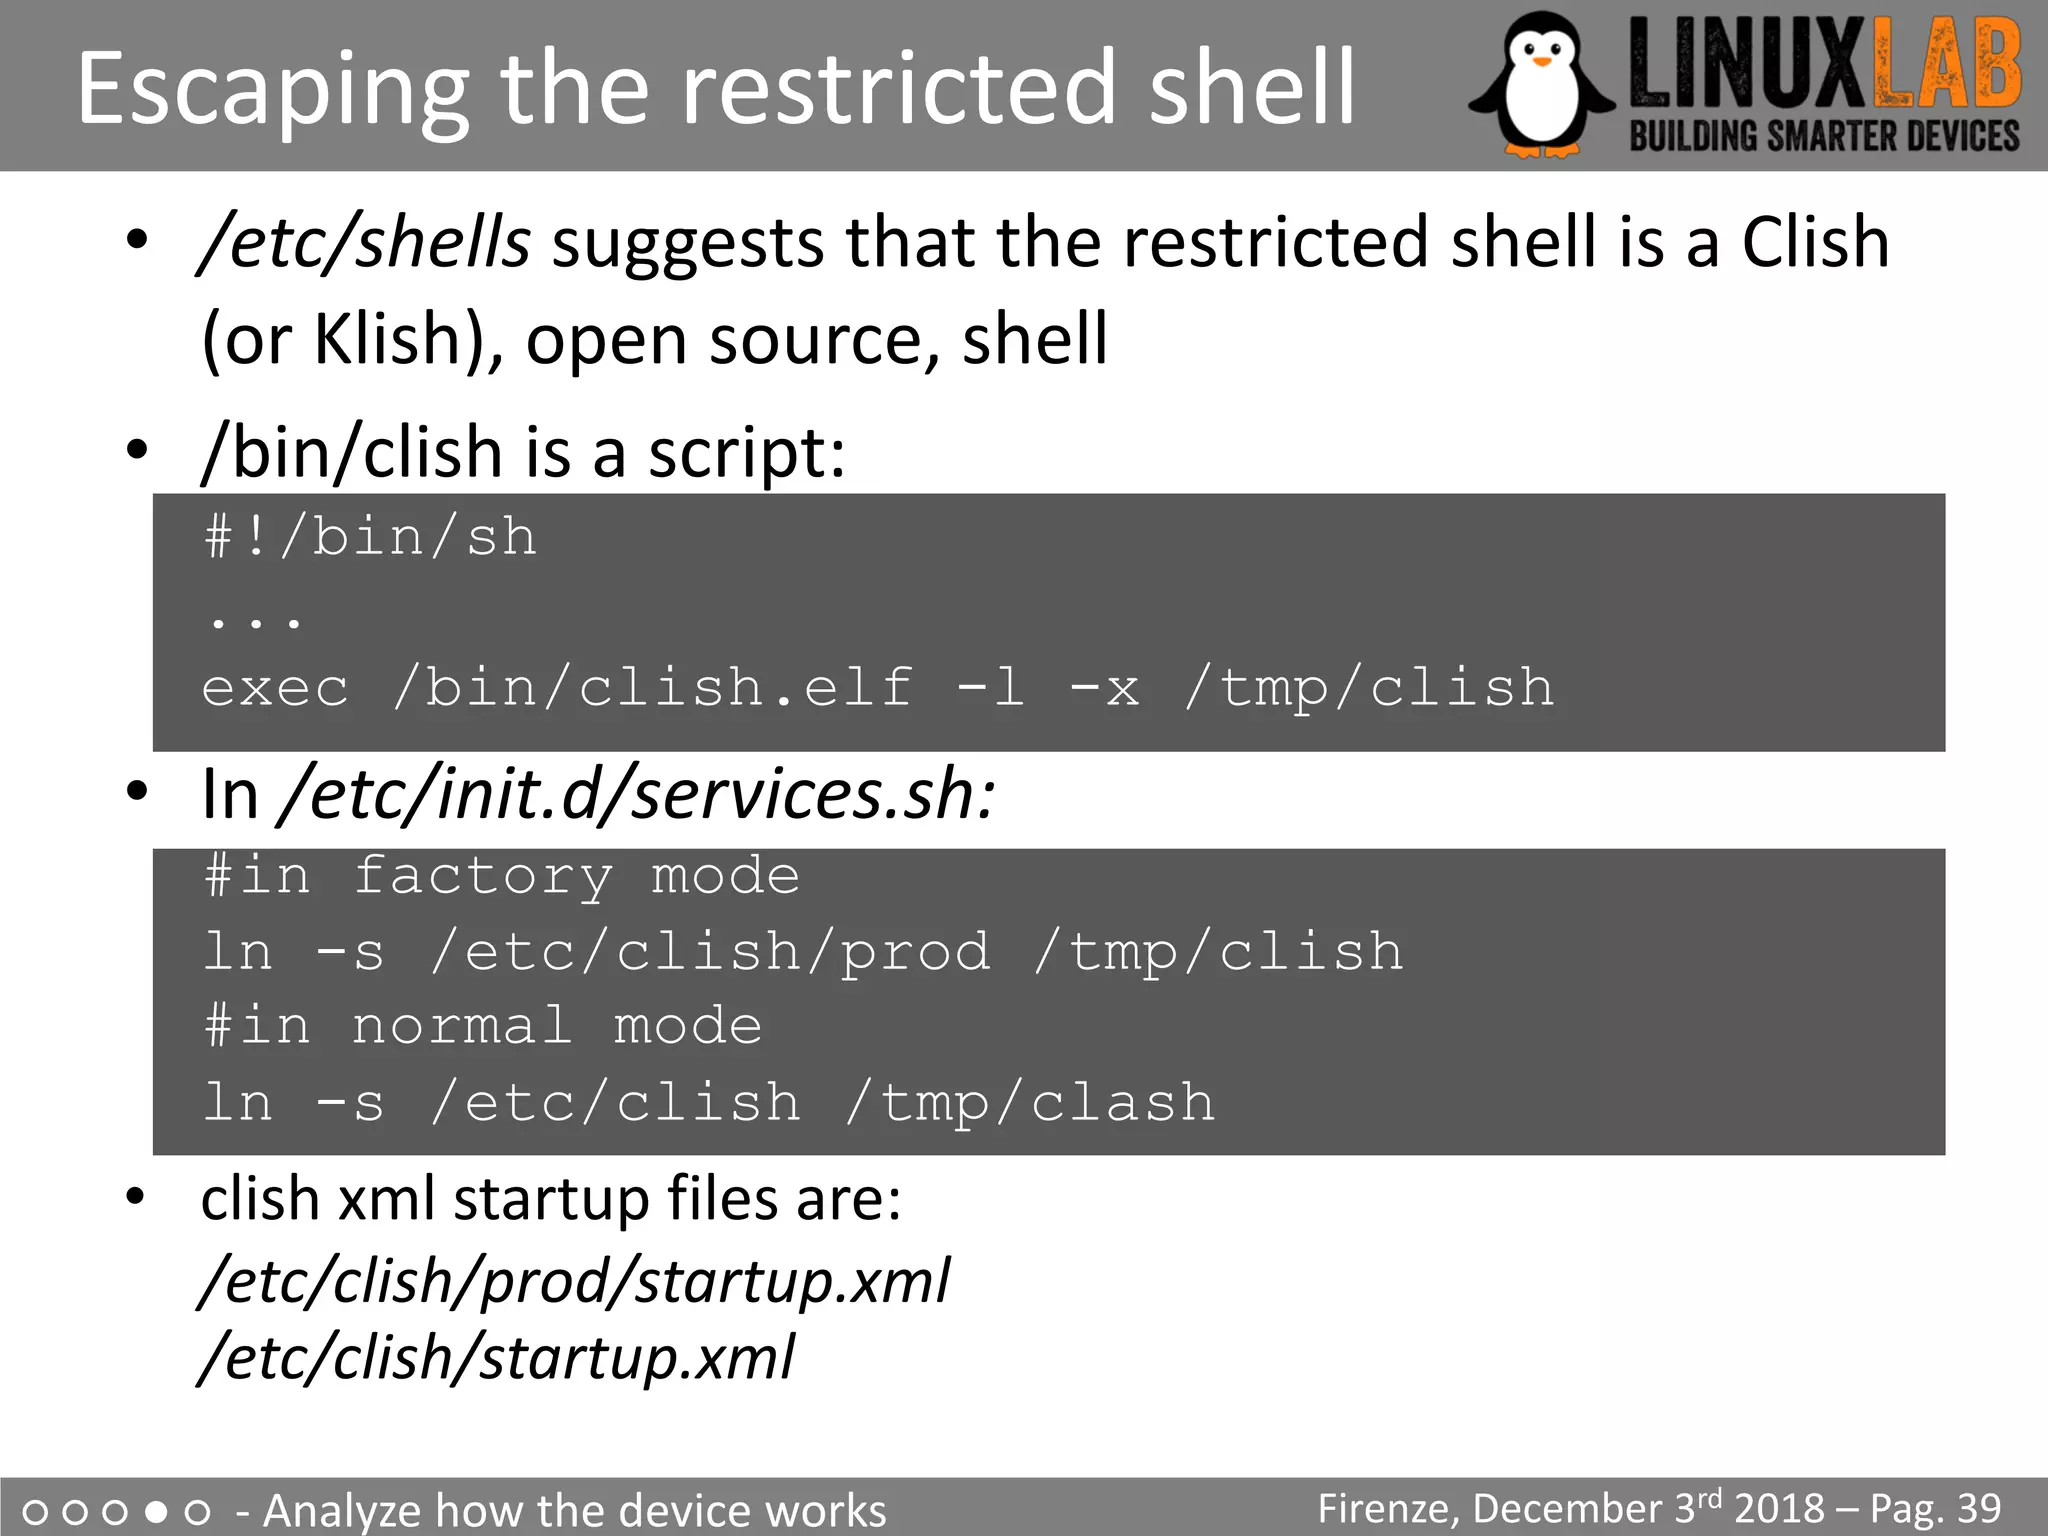
Restricted shell
Firenze, December 3rd 2018 – Pag. 38
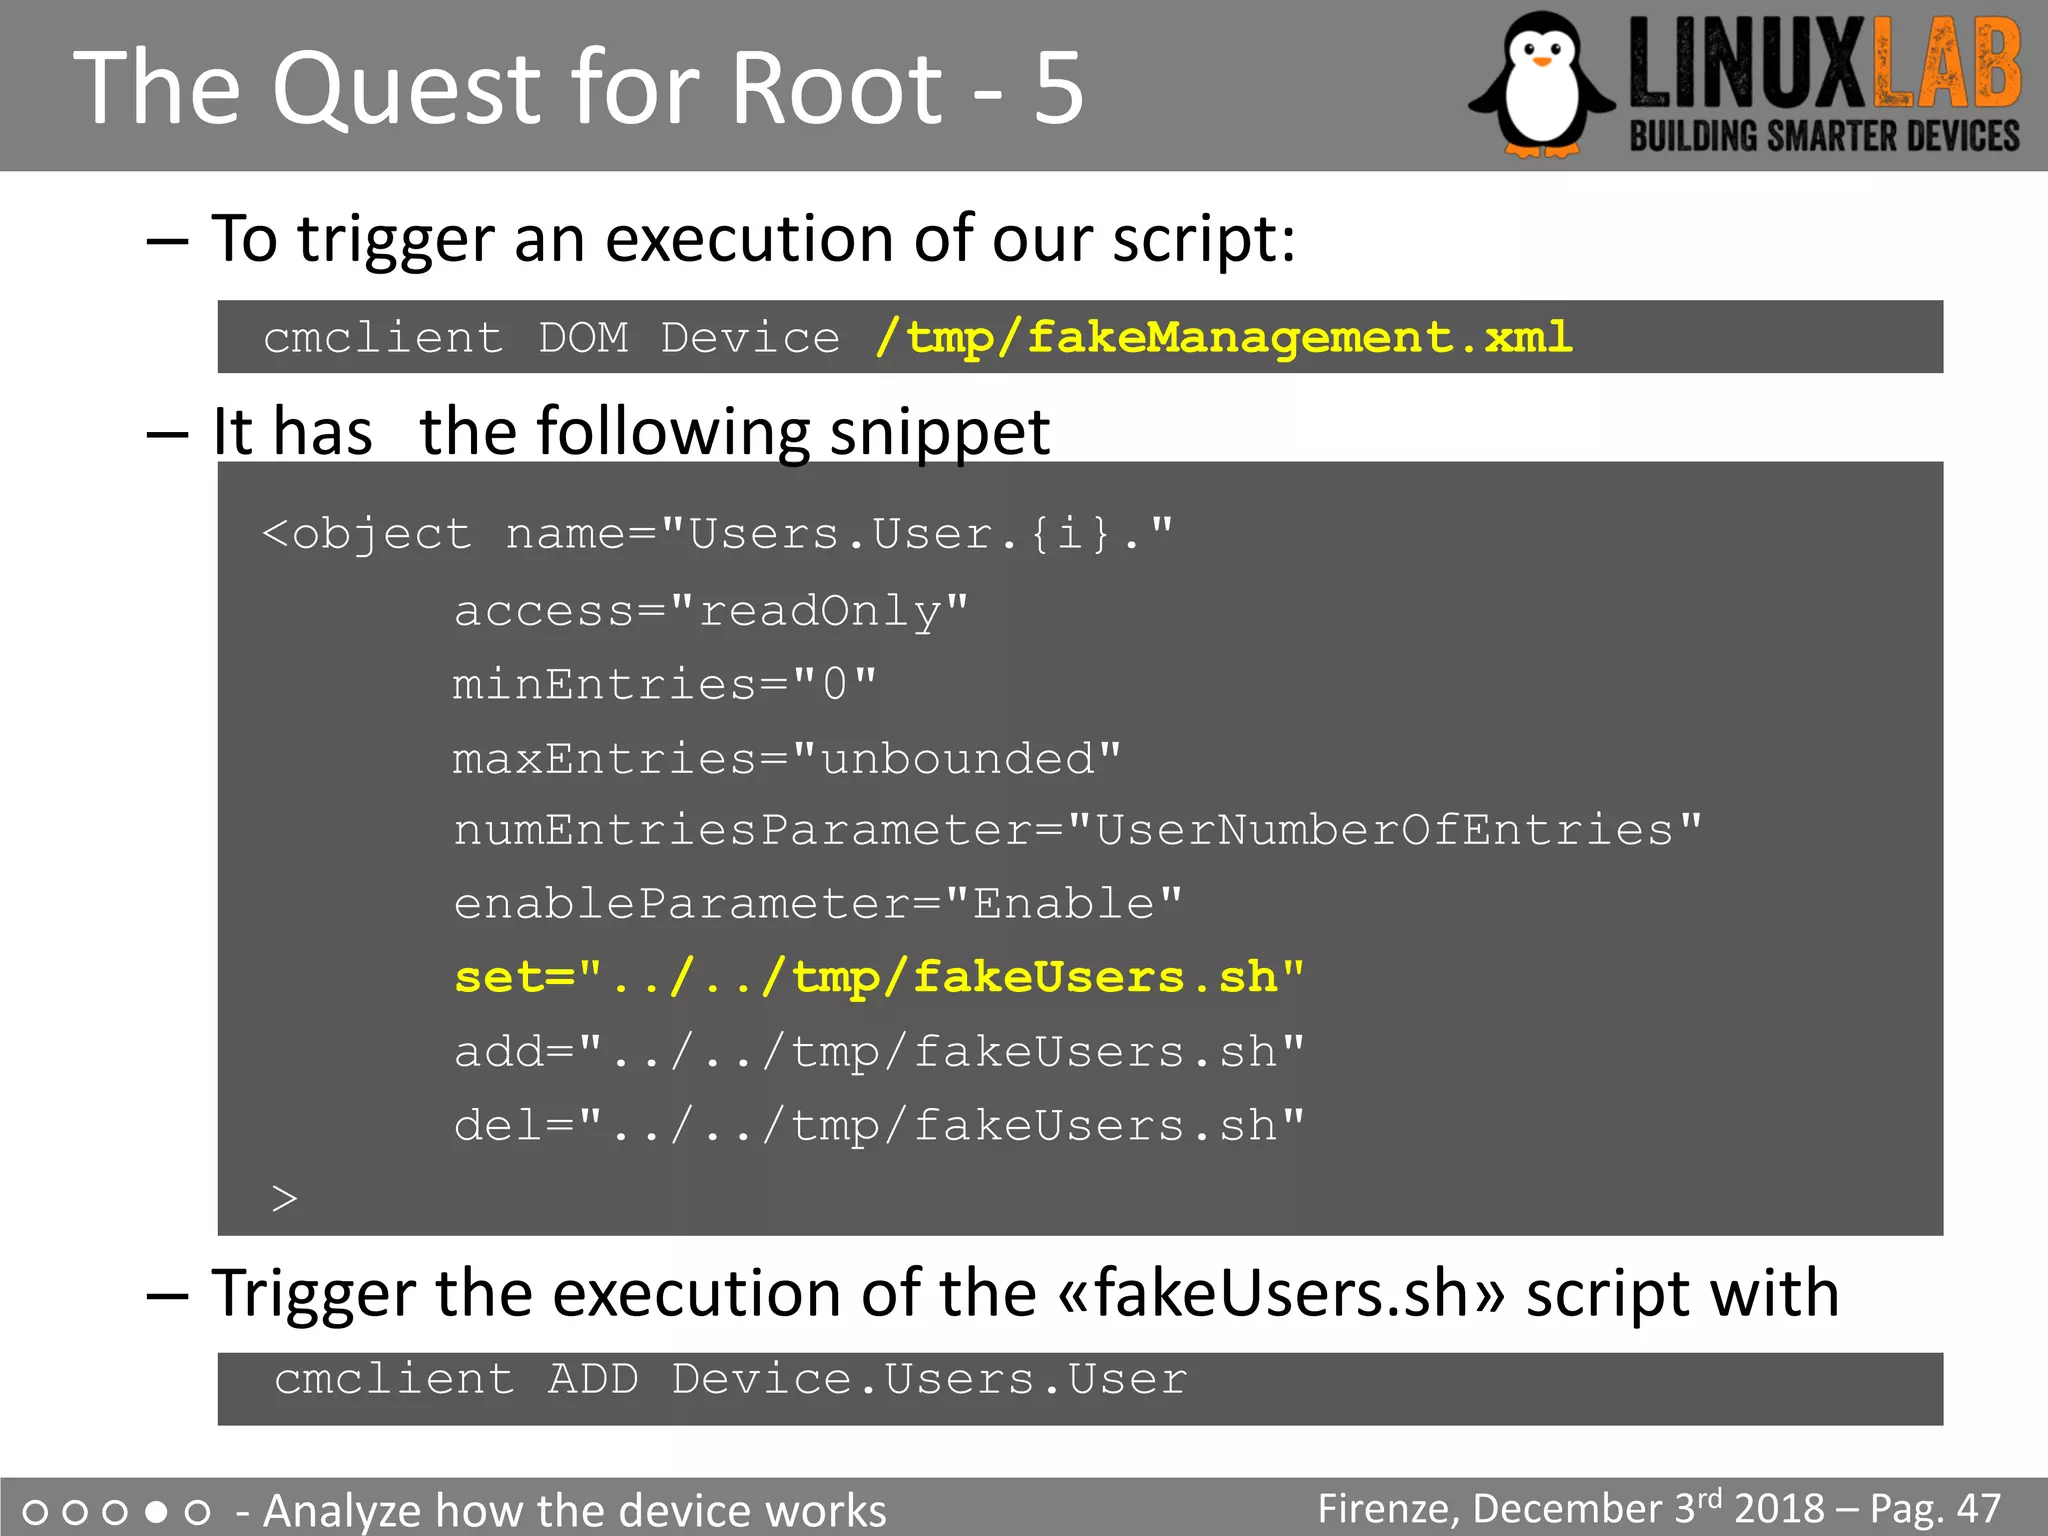
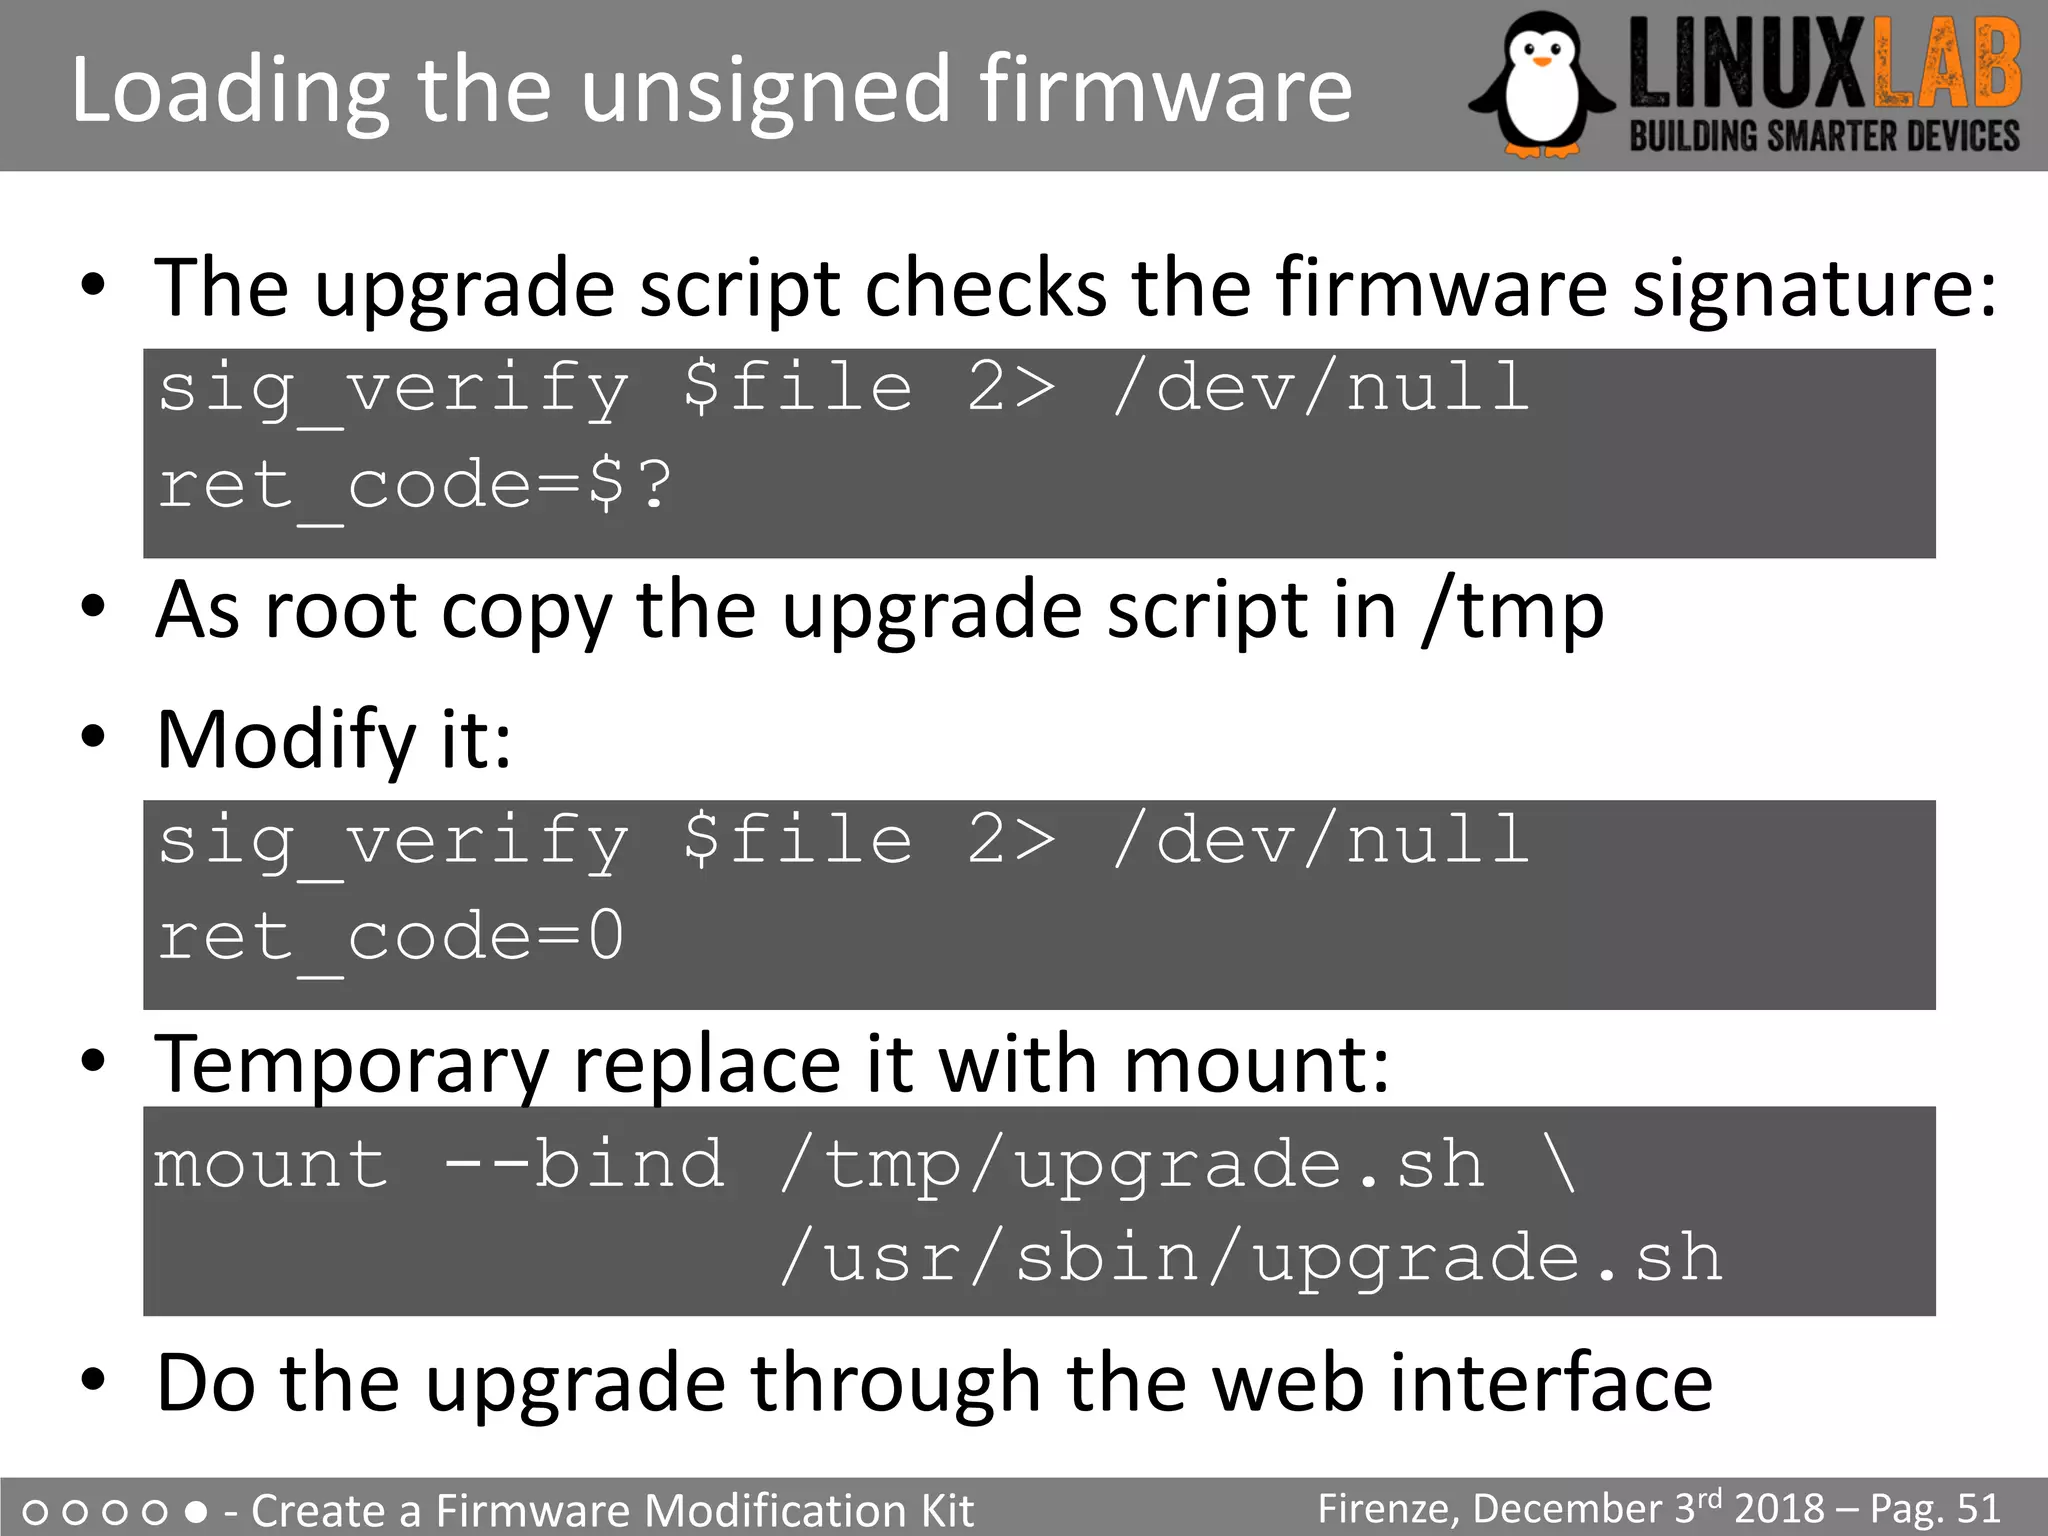
• Firmware modification through the upgrade process
seems impossible
• The router allows telnet/ssh but present a Cisco-like
restricted shell
$ telnet 192.168.1.1
Connected to 192.168.1.1.
Escape character is '^]'.
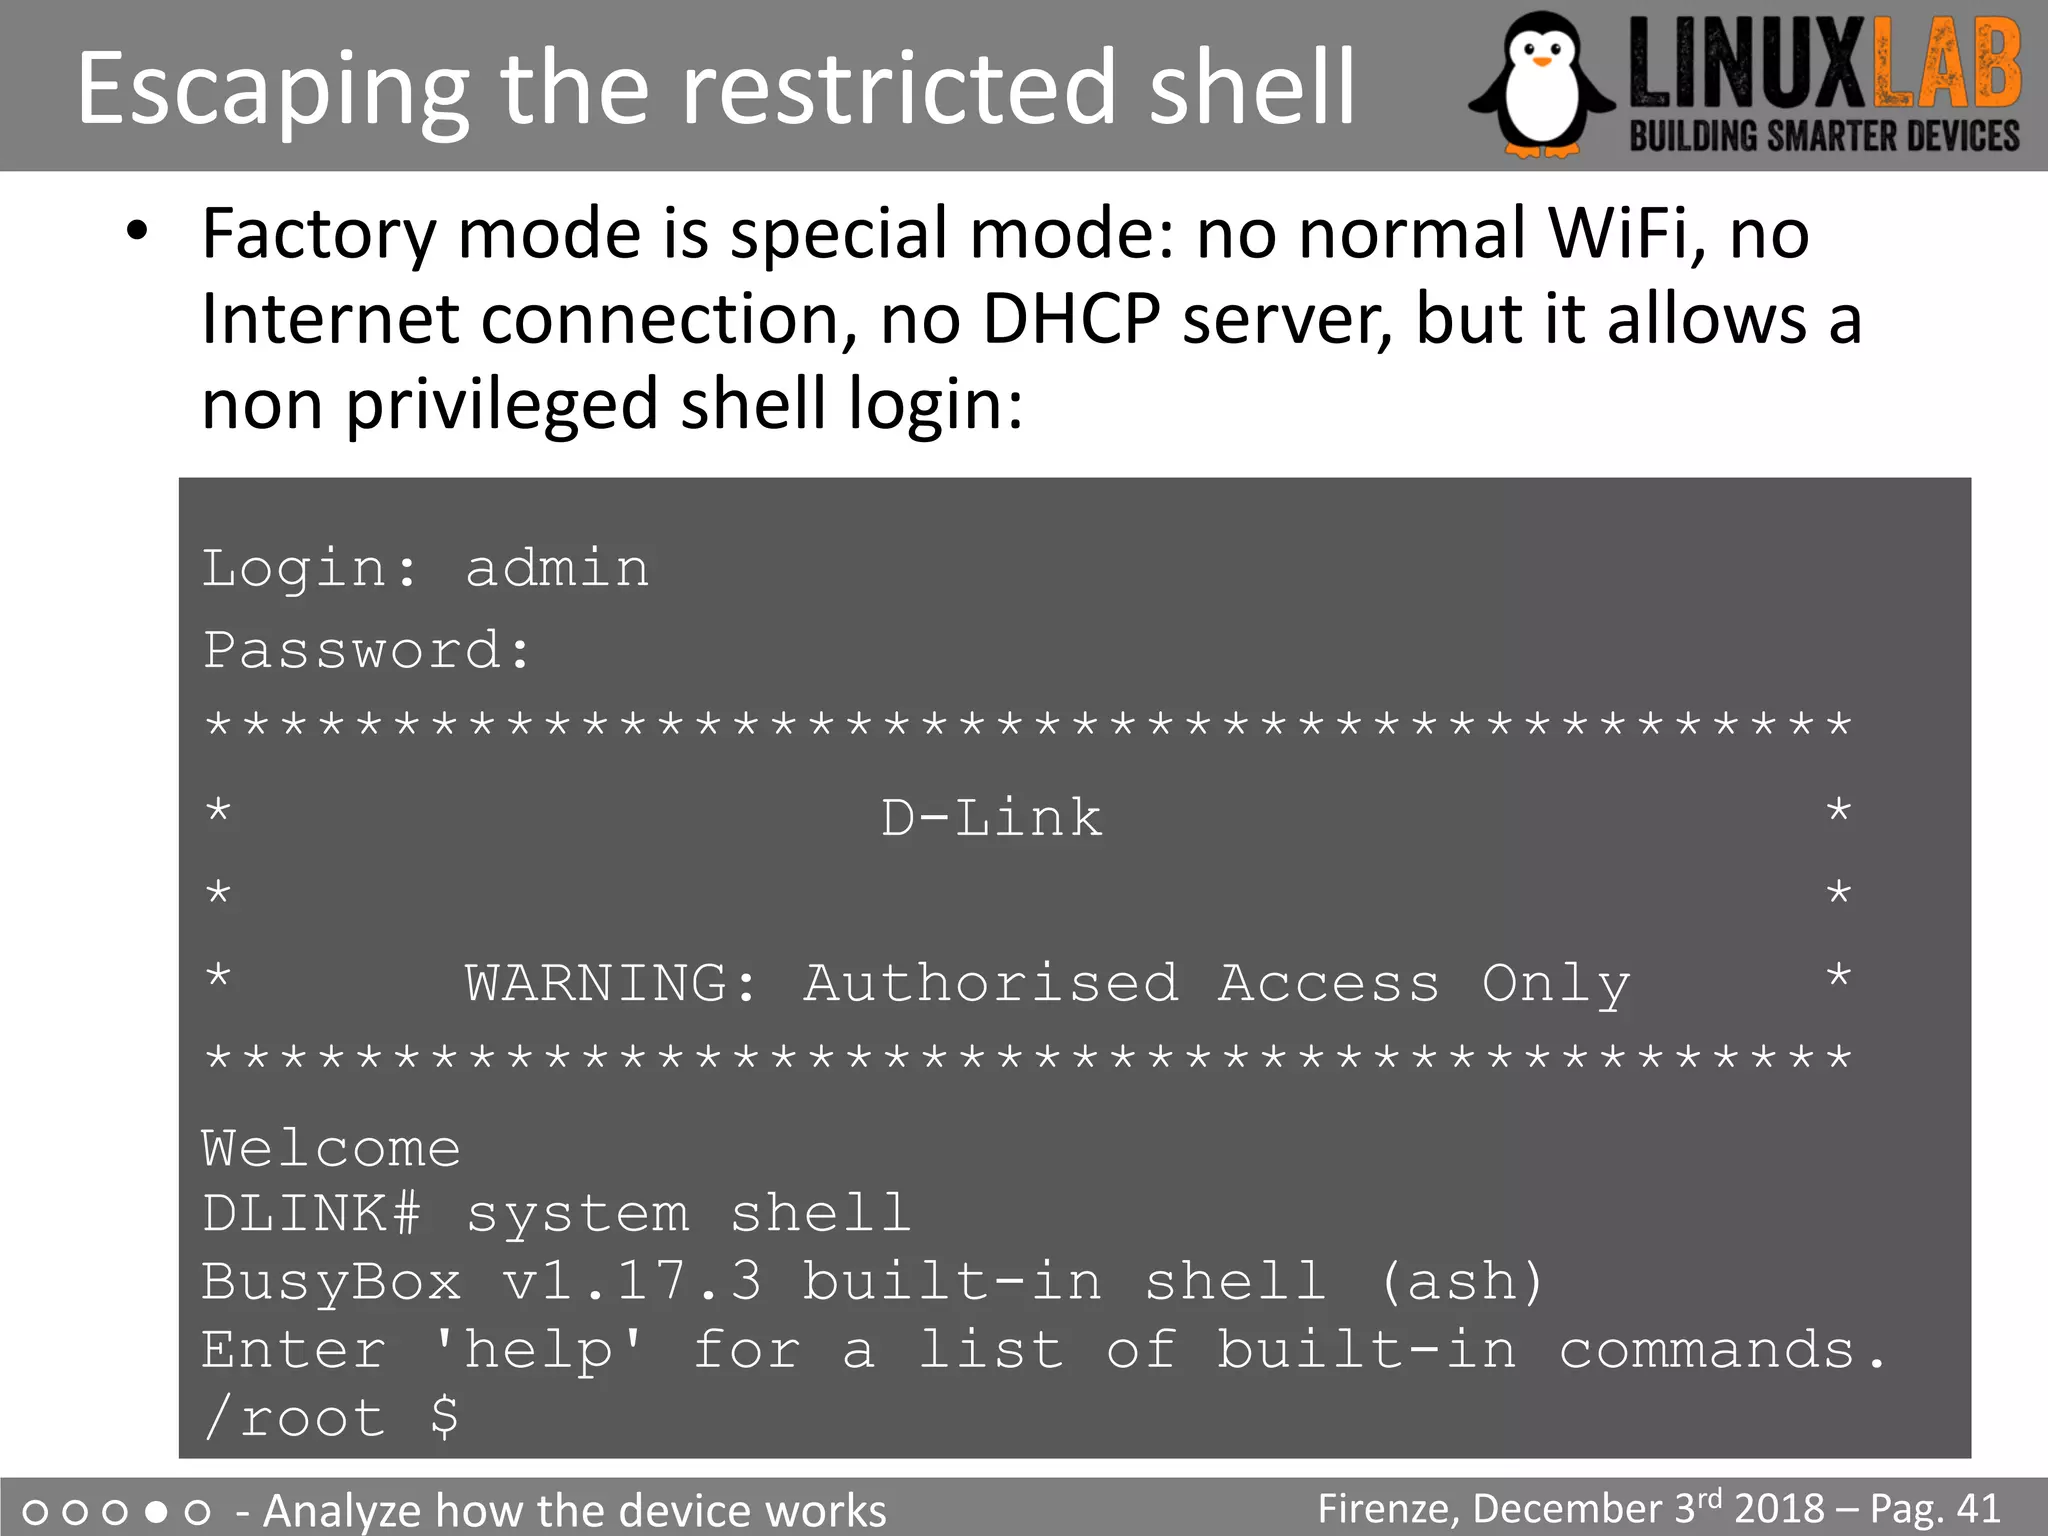
Login: admin
Password:
********************************************
* D-Link *
* WARNING: Authorised Access Only *
********************************************
Welcome
DLINK#](https://image.slidesharecdn.com/digiampietro-introductiontoiotreverseengineeringwithanexampleonahomerouter-181212210902/75/Valerio-Di-Giampietro-Introduction-To-IoT-Reverse-Engineering-with-an-example-on-a-home-router-38-2048.jpg)