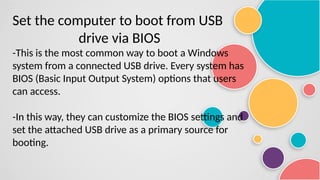
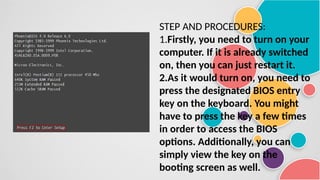
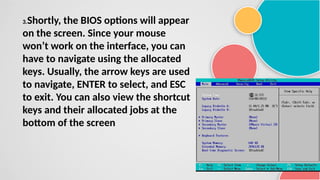
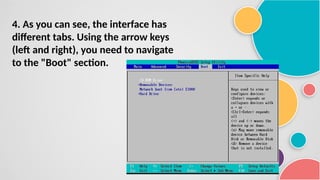
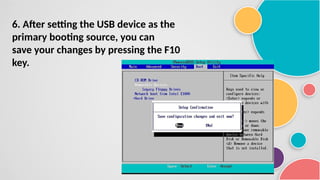
B I O S
USB BOOTING
Set the computer to boot from USB
drive via BIOS
-This is the most common way to boot a Windows
system from a connected USB drive. Every system has
BIOS (Basic Input Output System) options that users
can access.
-In this way, they can customize the BIOS settings and
set the attached USB drive as a primary source for
booting.
STEP AND PROCEDURES:
1.Firstly, you need to turn on your
computer. If it is already switched
on, then you can just restart it.
2.As it would turn on, you need to
press the designated BIOS entry
key on the keyboard. You might
have to press the key a few times
in order to access the BIOS
options. Additionally, you can
simply view the key on the
booting screen as well.
3.Shortly, the BIOS options will appear
on the screen. Since your mouse
won’t work on the interface, you can
have to navigate using the allocated
keys. Usually, the arrow keys are used
to navigate, ENTER to select, and ESC
to exit. You can also view the shortcut
keys and their allocated jobs at the
bottom of the screen
4. As you can see, the interface has
different tabs. Using the arrow keys
(left and right), you need to navigate
to the "Boot" section.
5. From here, you can see the priority
of the sources used by the BIOS.
Now, using the + (add) and the –
(minus) key, you can set the priority
of the Removable Devices at the
top.
6. After setting the USB device as the
primary booting source, you can
save your changes by pressing the F10
key.
7. Just accept the changes and exit the
interface by pressing the ESC key. Connect
a bootable USB drive to the system and let
it be used as a primary source by BIOS.
THANK YOU

USB BIOS BOOTING.pptx for a ICT Teachers

  • 1.
    B I OS USB BOOTING
  • 2.
    Set the computerto boot from USB drive via BIOS -This is the most common way to boot a Windows system from a connected USB drive. Every system has BIOS (Basic Input Output System) options that users can access. -In this way, they can customize the BIOS settings and set the attached USB drive as a primary source for booting.
  • 3.
    STEP AND PROCEDURES: 1.Firstly,you need to turn on your computer. If it is already switched on, then you can just restart it. 2.As it would turn on, you need to press the designated BIOS entry key on the keyboard. You might have to press the key a few times in order to access the BIOS options. Additionally, you can simply view the key on the booting screen as well.
  • 4.
    3.Shortly, the BIOSoptions will appear on the screen. Since your mouse won’t work on the interface, you can have to navigate using the allocated keys. Usually, the arrow keys are used to navigate, ENTER to select, and ESC to exit. You can also view the shortcut keys and their allocated jobs at the bottom of the screen
  • 5.
    4. As youcan see, the interface has different tabs. Using the arrow keys (left and right), you need to navigate to the "Boot" section.
  • 6.
    5. From here,you can see the priority of the sources used by the BIOS. Now, using the + (add) and the – (minus) key, you can set the priority of the Removable Devices at the top.
  • 7.
    6. After settingthe USB device as the primary booting source, you can save your changes by pressing the F10 key.
  • 8.
    7. Just acceptthe changes and exit the interface by pressing the ESC key. Connect a bootable USB drive to the system and let it be used as a primary source by BIOS.
  • 9.