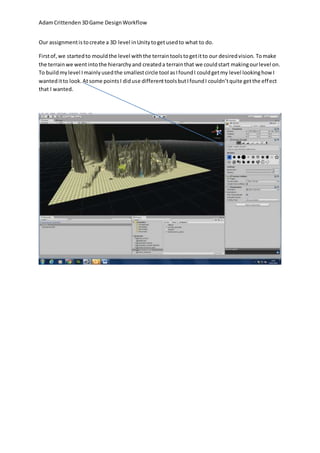
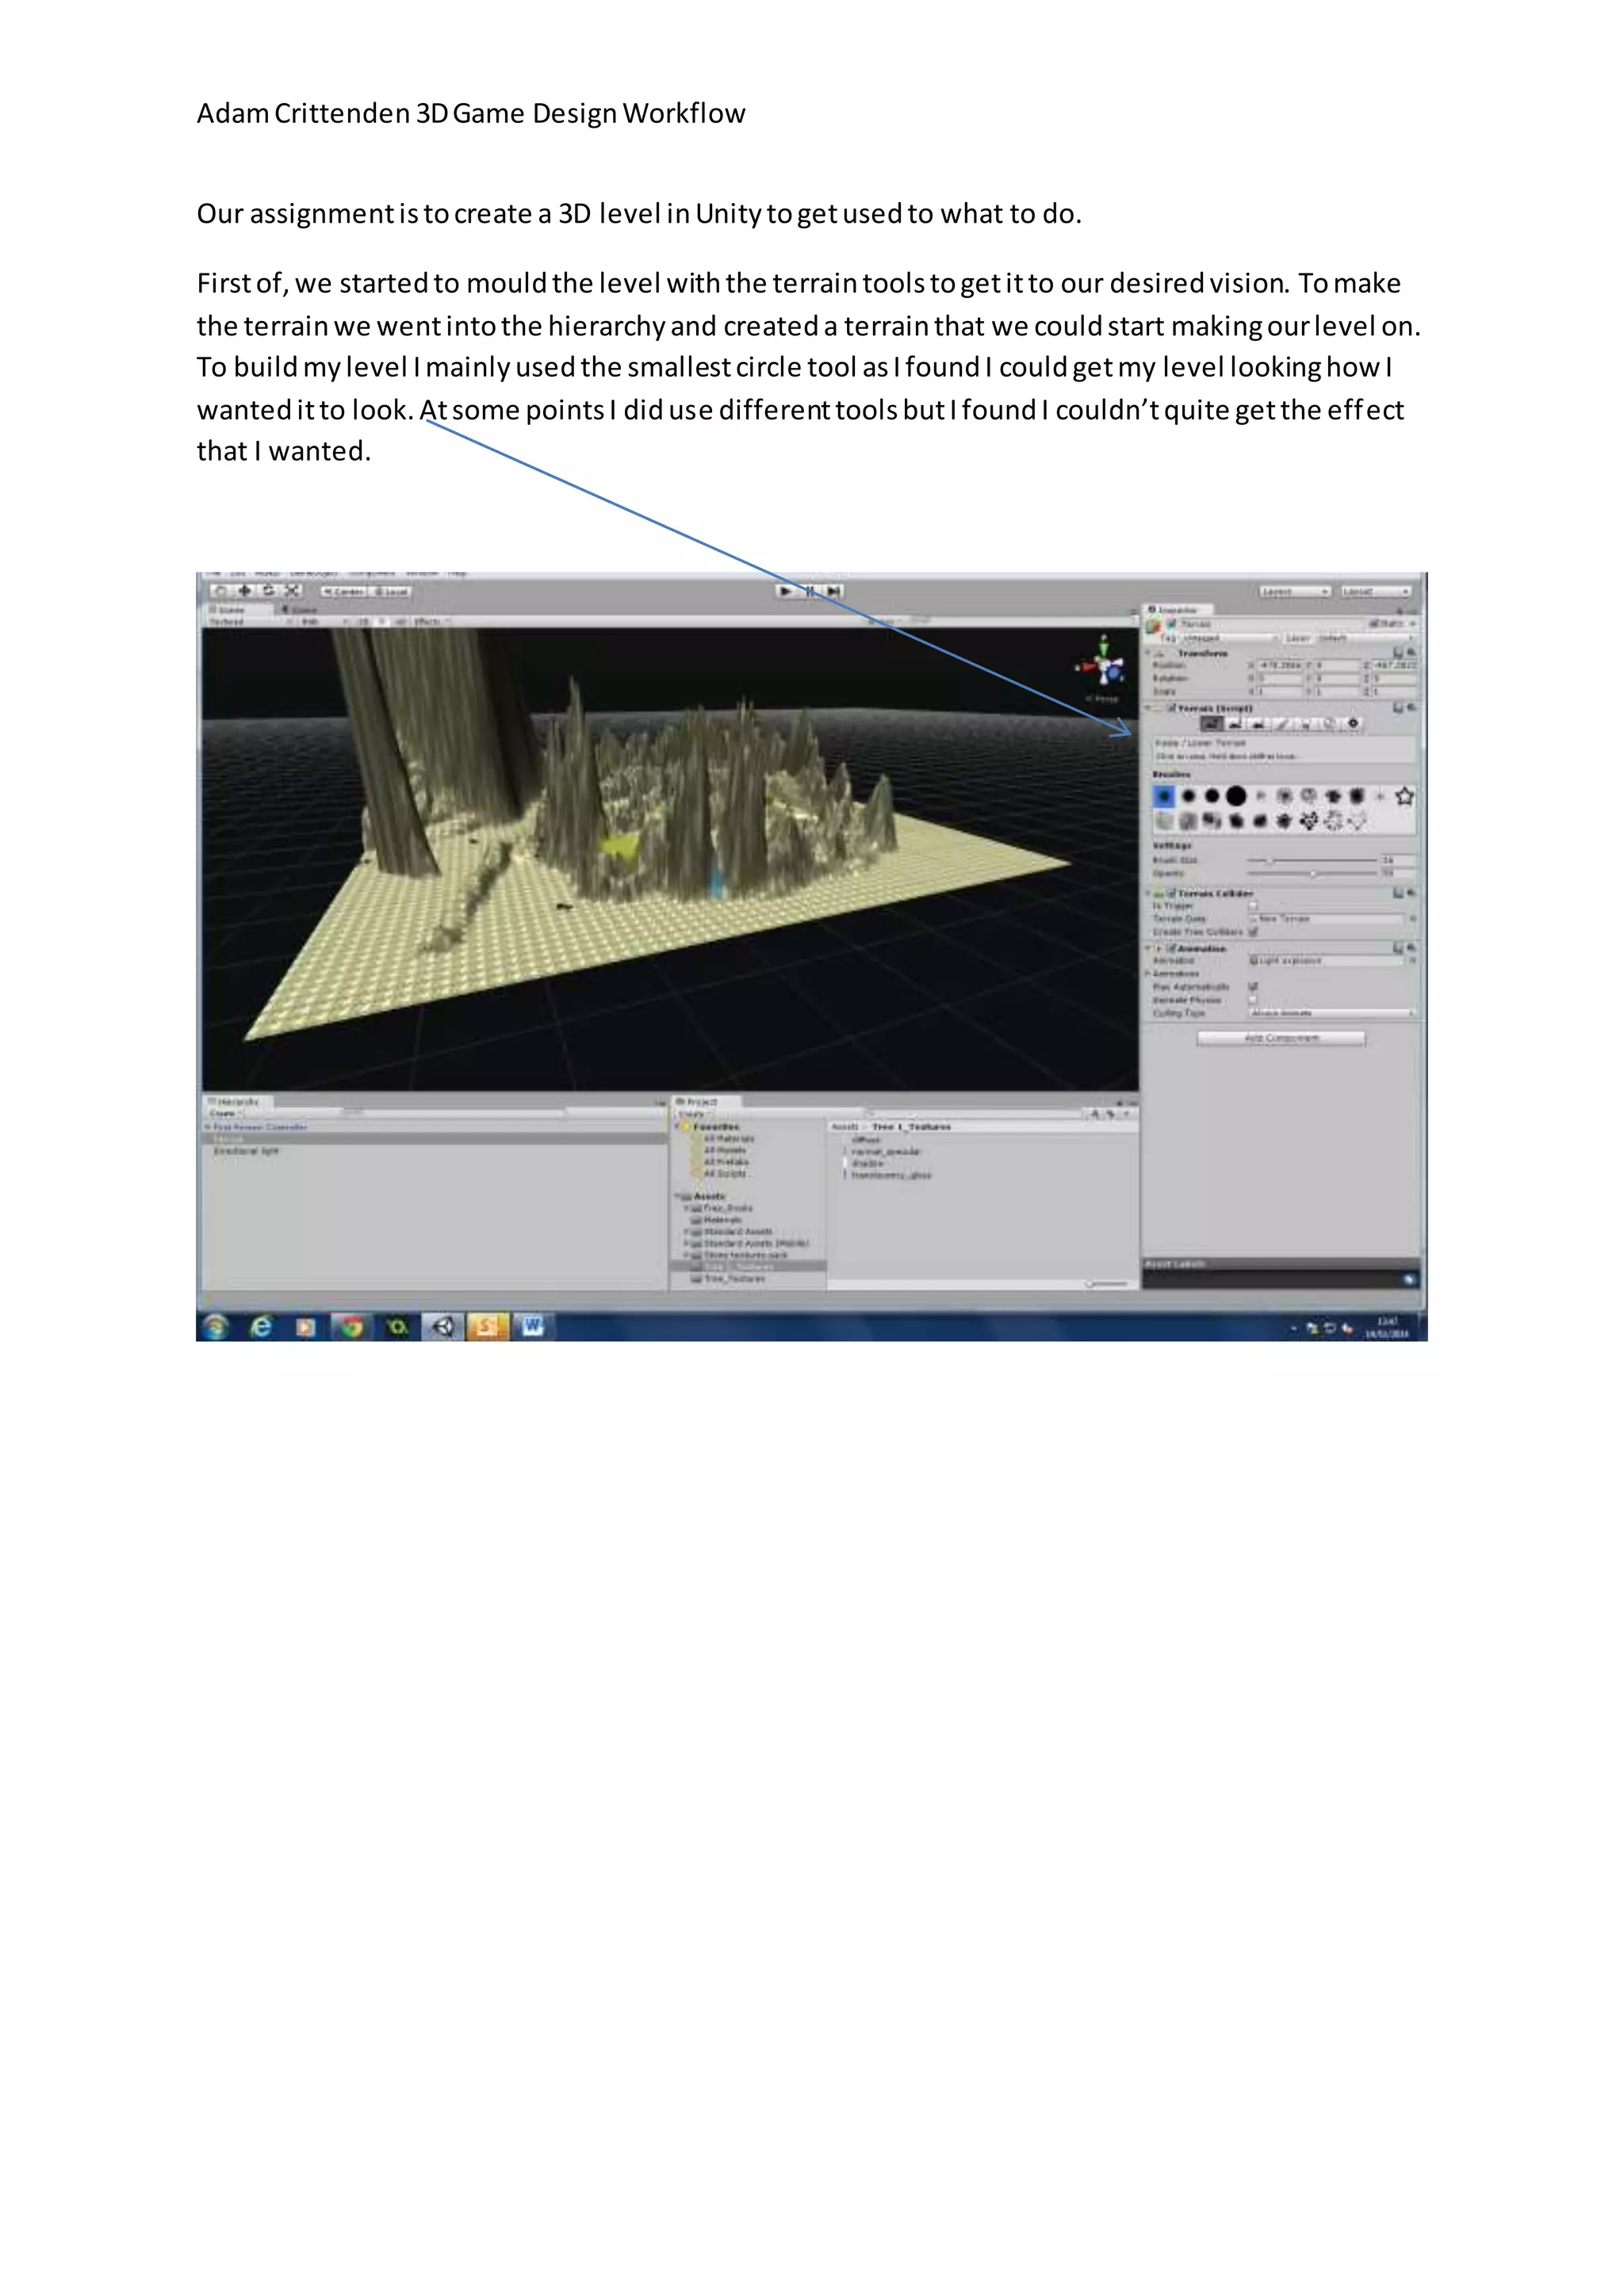
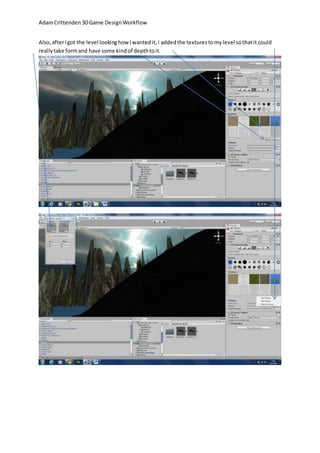
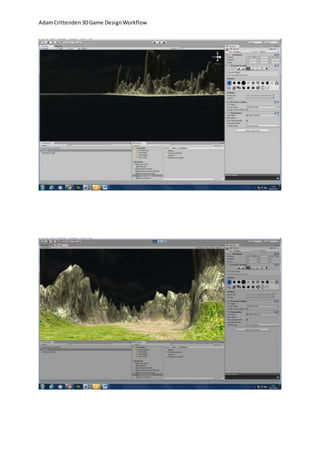
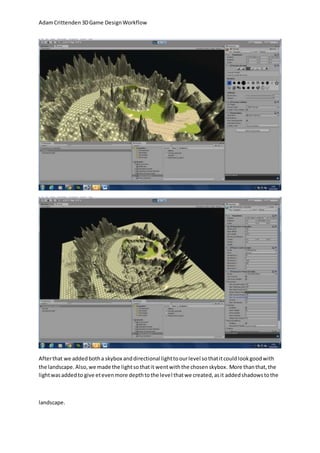
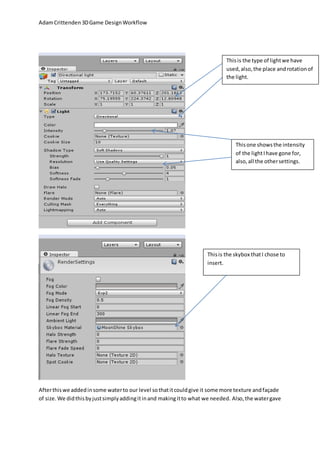
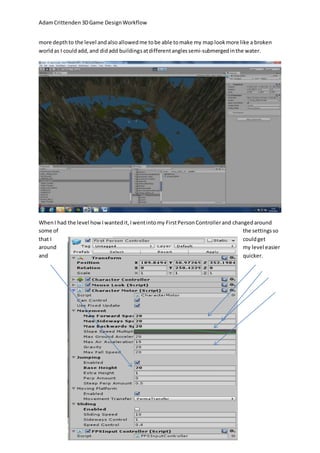
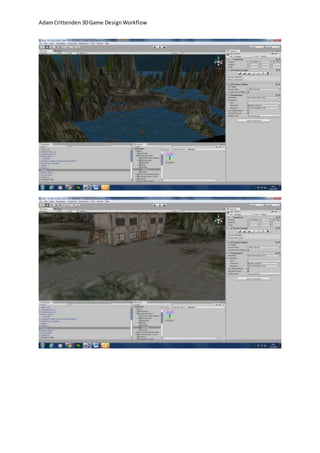
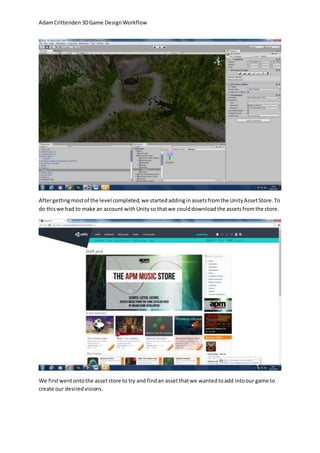
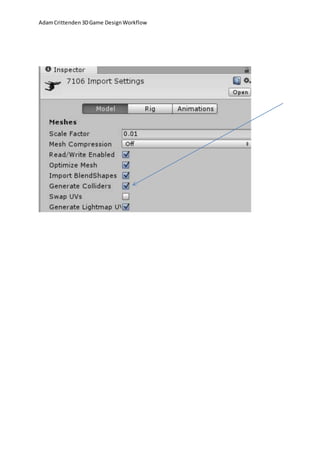
Adam Crittenden 3D Game Design Workflow 
Our assignment is to create a 3D level in Unity to get used to what to do. 
First of, we started to mould the level with the terrain tools to get it to our desired vision. To make 
the terrain we went into the hierarchy and created a terrain that we could start making our level on. 
To build my level I mainly used the smallest circle tool as I found I could get my level looking how I 
wanted it to look. At some points I did use different tools but I found I couldn’t quite get the effect 
that I wanted.
Adam Crittenden 3D Game Design Workflow 
Also, after I got the level looking how I wanted it, I added the textures to my level so that it could 
really take form and have some kind of depth to it.
Adam Crittenden 3D Game Design Workflow
Adam Crittenden 3D Game Design Workflow 
After that we added both a skybox and directional light to our level so that it could look good with 
the landscape. Also, we made the light so that it went with the chosen skybox. More than that, the 
light was added to give et even more depth to the level that we created, as it added shadows to the 
landscape.
Adam Crittenden 3D Game Design Workflow 
This is the type of light we have 
used, also, the place and rotation of 
the light. 
This one shows the intensity 
of the light I have gone for, 
also, all the other settings. 
This is the skybox that I chose to 
insert. 
After this we added in some water to our level so that it could give it some more texture and façade 
of size. We did this by just simply adding it in and making it to what we needed. Also, the water gave
Adam Crittenden 3D Game Design Workflow 
more depth to the level and also allowed me to be able to make my map look more like a broken 
world as I could add, and did add buildings at different angles semi-submerged in the water. 
When I had the level how I wanted it, I went into my First Person Controller and changed around 
some of the settings so 
that I could get 
around my level easier 
and quicker.
Adam Crittenden 3D Game Design Workflow
Adam Crittenden 3D Game Design Workflow 
After getting most of the level completed, we started adding in assets from the Unity Asset Store. To 
do this we had to make an account with Unity so that we could download the assets from the store. 
We first went onto the asset store to try and find an asset that we wanted to add into our game to 
create our desired visions.
Adam Crittenden 3D Game Design Workflow 
After we found an asset that we wanted, we would click the “open in unity” button which would 
bring up a window in Unity where we could download the asset from. 
Once we had downloaded it, we were able to just drag the prefab of the asset into our game, make 
it the right size and voila. Also, to just make sure that it had a collider, we would go into the asset 
and make sure that generate colliders was on.
Adam Crittenden 3D Game Design Workflow

Unity workflow

  • 1.
    Adam Crittenden 3DGame Design Workflow Our assignment is to create a 3D level in Unity to get used to what to do. First of, we started to mould the level with the terrain tools to get it to our desired vision. To make the terrain we went into the hierarchy and created a terrain that we could start making our level on. To build my level I mainly used the smallest circle tool as I found I could get my level looking how I wanted it to look. At some points I did use different tools but I found I couldn’t quite get the effect that I wanted.
  • 2.
    Adam Crittenden 3DGame Design Workflow Also, after I got the level looking how I wanted it, I added the textures to my level so that it could really take form and have some kind of depth to it.
  • 3.
    Adam Crittenden 3DGame Design Workflow
  • 4.
    Adam Crittenden 3DGame Design Workflow
  • 5.
    Adam Crittenden 3DGame Design Workflow After that we added both a skybox and directional light to our level so that it could look good with the landscape. Also, we made the light so that it went with the chosen skybox. More than that, the light was added to give et even more depth to the level that we created, as it added shadows to the landscape.
  • 6.
    Adam Crittenden 3DGame Design Workflow This is the type of light we have used, also, the place and rotation of the light. This one shows the intensity of the light I have gone for, also, all the other settings. This is the skybox that I chose to insert. After this we added in some water to our level so that it could give it some more texture and façade of size. We did this by just simply adding it in and making it to what we needed. Also, the water gave
  • 7.
    Adam Crittenden 3DGame Design Workflow more depth to the level and also allowed me to be able to make my map look more like a broken world as I could add, and did add buildings at different angles semi-submerged in the water. When I had the level how I wanted it, I went into my First Person Controller and changed around some of the settings so that I could get around my level easier and quicker.
  • 8.
    Adam Crittenden 3DGame Design Workflow
  • 9.
    Adam Crittenden 3DGame Design Workflow After getting most of the level completed, we started adding in assets from the Unity Asset Store. To do this we had to make an account with Unity so that we could download the assets from the store. We first went onto the asset store to try and find an asset that we wanted to add into our game to create our desired visions.
  • 10.
    Adam Crittenden 3DGame Design Workflow After we found an asset that we wanted, we would click the “open in unity” button which would bring up a window in Unity where we could download the asset from. Once we had downloaded it, we were able to just drag the prefab of the asset into our game, make it the right size and voila. Also, to just make sure that it had a collider, we would go into the asset and make sure that generate colliders was on.
  • 11.
    Adam Crittenden 3DGame Design Workflow