Download as PDF, PPTX


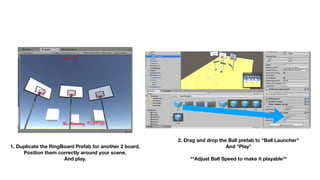
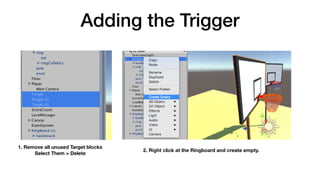
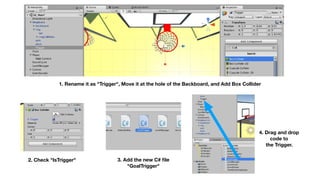
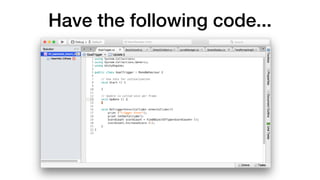
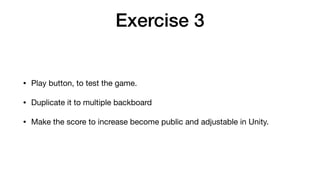
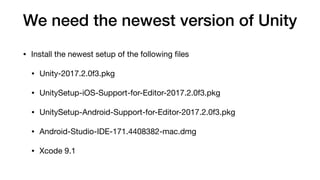
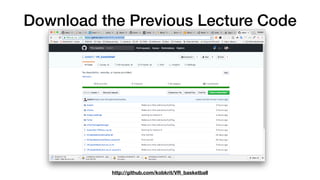
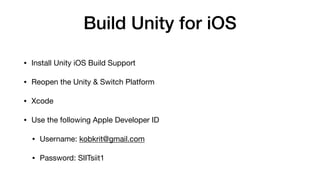
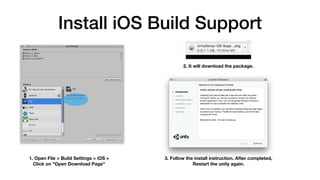
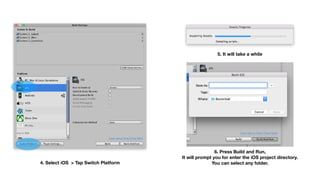
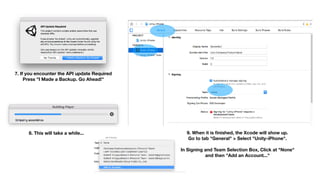
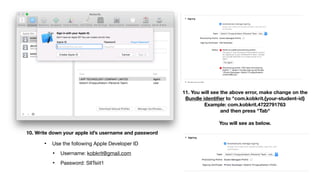
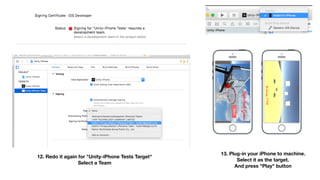
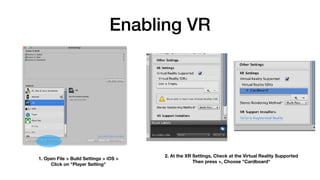
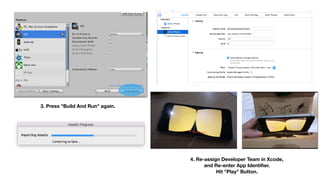
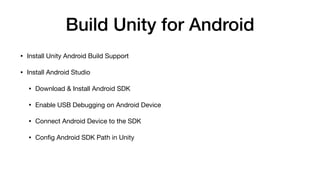
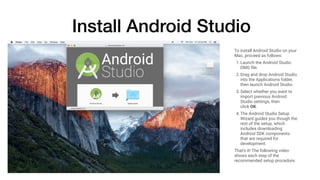
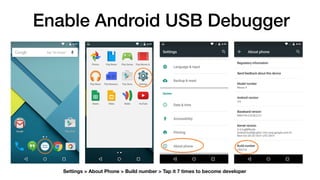
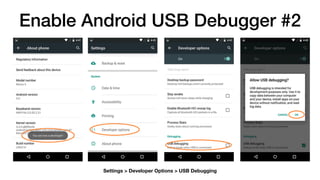
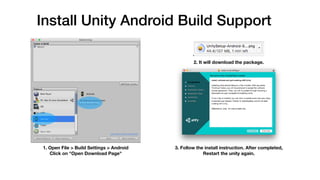
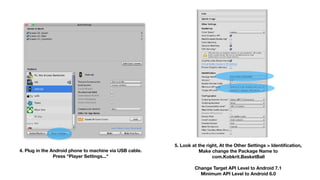
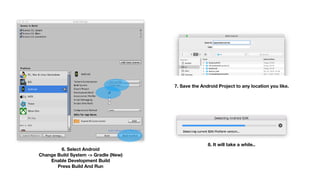

1. The document discusses deploying a Unity game to iOS and Android for Google Cardboard virtual reality. It provides steps for building the Unity project for both platforms, including configuring plugins, signing with developer credentials, and enabling VR support. 2. Instructions are given for setting up the development environments for both iOS and Android, including downloading SDKs and plugins. 3. The steps also cover configuring project settings in Unity for both platforms, such as changing bundle identifiers and package names, and enabling VR support for Cardboard.


![[ICE 2025] Quick Prototyping with Unity & CoPilot.pptx](https://cdn.slidesharecdn.com/ss_thumbnails/ice2025quickprototypingwithunitycopilot-250819033823-549f06c1-thumbnail.jpg?width=640&height=640&fit=bounds)


![[React-Native Tutorial 10] Camera Roll / Gallery / Camera / Native Modules by...](https://cdn.slidesharecdn.com/ss_thumbnails/l10-cameraroll-selfiescoreboard-161101033101-thumbnail.jpg?width=640&height=640&fit=bounds)


![[Lecture 2] AI and Deep Learning: Logistic Regression (Theory)](https://cdn.slidesharecdn.com/ss_thumbnails/lecture2-ink-180216131533-thumbnail.jpg?width=640&height=640&fit=bounds)

![[Lecture 4] AI and Deep Learning: Neural Network (Theory)](https://cdn.slidesharecdn.com/ss_thumbnails/lecture4ink-180216131712-thumbnail.jpg?width=640&height=640&fit=bounds)


![[Lecture 3] AI and Deep Learning: Logistic Regression (Coding)](https://cdn.slidesharecdn.com/ss_thumbnails/lecture3empty-180216132805-thumbnail.jpg?width=640&height=640&fit=bounds)


