Tyre Protector - Permanent Puncture PreventionGeoff24
Tyre Protector is a puncture prevention solution that is used in the construction and mining industries amongst others.
It is injected into the tyre and will remain dormant until required, typically following intrusion of sharp objects.
It automatically seals the hole and you can continue on your way without incurring expensive downtime.
E-mail tyreprotectorlimited@gmail.com for more details
You are all ready for a good ride with friends and fellow riders. You safety check your ride to make sure it is roadworthy, the front tire is flat. You are in luck, the tube inside the tire is the problem, not the tire, and you will only have to get a new inner tube. You decide to do the tire fix yourself.
TechnoFleet is a team of engineers with a rich experience in Information Technology, Tyre and Transport industry.
We understand that your fleet is at the heart of your business and your daily challenge is to deliver your goods, your passengers and your services to your clients.
Our mission is to support you in your day-to-day challenges; maximizing your vehicle’s up-time so that your fleet is always mobile.
Wheels and Tyres: Types of Wheels, Construction, Structure and Function, Forces acting on wheels,
Wheel Dimensions, Wheel Balancing, and Wheel Alignment. Structure and Function of Tyres, Static and
Dynamic Properties of Pneumatic Tyres, Types of Tyres, Materials, Tyre Section & Designation, Factors
affecting Tyre Life, Tyre Rotation.
Bearings: Functions; classification of bearings; bearing materials; automotive bearings.
When it comes to forklift tires, chunking, cracking and general wear can be problematic. Tire chunking is exactly what it sounds like. When driven repeatedly over debris, inside or outside the warehouse, pieces of rubber fall off of the tires and leave chunks missing. Instead of a smooth ride, the operator now has to deal with extra bouncing and vibration from the equipment. This can increase driver fatigue or potentially lead to other physical concerns. A driver who is less alert from jarring (and possibly frustrated) because of machinery operation is a hazard to himself and other employees. Keep your employees safe and productive by keeping tire wear in check.
Automobile or Automotive Tires:-
Functions (cushion and traction),
Parts (Beads, Body Plies, Tread, Sidewall, Liner, Belts) Overview of Tyre
Types ( All-terrain Tires, Mud tires, Winter Tires, All weather Tires, performance tires).
Load index and speed rating.
Designation and Dimension of Tires.
length width height diameter type of tires
tire construction :( Bias Ply Tires, Radial Tyres, Belted Bias Tires.)
Advantage and disadvantages of tires construction
Tube type tires
tubless tires
Difference between tubeless and tube type tires
Expiry date of tires
tyre problems
steering geometry leads tire problems
Under inflated tires
over inflated tires
proper inflated tires
Tubeless tires are designed in such a manner that the tire itself functions like a tube. The plies of the tire are similar whether it is a radial tire or a tubeless tire, but the difference is the presence of a inner lining layer that is made up of halogen butyl rubber such as chlorobutyl or bromobutyl rubber. This rubber has a special property of sealing any small puncture caused by a small nail or any other sharp object. This means that even if there is any mishap with a nail and a small puncture is caused by it, the tire seals the leakage itself by closing the leakage and the vehicle can cover distances up to 200 km without having to stop or getting the assistance of a mechanic to get the tire repaired.
Difference between tubes and tubeless tyresShiva Nand
Tubeless tyres and tubed tyres are the two major choice people have but before making a selection of either of the two types it is important to understand the nitty-gritties of the same
This presentation give the total overview of aircraft tyre from manufacturing to storage to basic design criteria and selection of main wheel, nose wheel. This ppt gives brief view into manufacturing process, precaution in storage and types of wear occurring in tire
The timely inspection and repair can prolong your tire's life and limit expense on it. Whether you have driven hundreds of miles or not but taking care of the tires once in a month definitely increases your safety and mileage. Apart from that, It's always important to know when the vehicle needs a tire replacement and repair. Check the slides here to know all the necessary steps of tire care.
This is the Highly Detailed factory service repair manual for the2004 HONDA ODYSSEY, this Service Manual has detailed illustrations as well as step by step instructions,It is 100 percents complete and intact. they are specifically written for the do-it-yourself-er as well as the experienced mechanic.2004 HONDA ODYSSEY Service Repair Workshop Manual provides step-by-step instructions based on the complete dis-assembly of the machine. It is this level of detail, along with hundreds of photos and illustrations, that guide the reader through each service and repair procedure. Complete download comes in pdf format which can work under all PC based windows operating system and Mac also, All pages are printable. Using this repair manual is an inexpensive way to keep your vehicle working properly.
Service Repair Manual Covers:
Maintenance
Engine
Control System
Mechanical
Fuel Service Specifications
Emission Control
Intake Exhaust Cooling
Lube
Ignition Starting Charging
Auto Transmission Clutch
Manual Transmission
Transfer Propeller Shaft
Drive Shaft
Differential
Axle Suspension
Tire & Wheel
Brake Control
Brake
Parking Brake
Steering Column
Power Steering
Air Condition
Suppl Restraint System
Seat Belt
Engine Immobilizer
Cruise Control
Wiper & Washer
Door Lock
Meter Audio/Visual
Horn
Windshield/Glass Mirror
Instrument Panel
Seat
Engine Hood/ Door
Exterior & Interior
Electrical
Multiplex/ Can Communication
And much more
File Format: PDF
Compatible: All Versions of Windows & Mac
Language: English
Requirements: Adobe PDF Reader
NO waiting, Buy from responsible seller and get INSTANT DOWNLOAD, Without wasting your hard-owned money on uncertainty or surprise! All pages are is great to have2004 HONDA ODYSSEY Service Repair Workshop Manual.
Looking for some other Service Repair Manual,please check:
https://www.aservicemanualpdf.com/
Thanks for visiting!
8
2003 HONDA ODYSSEY Service Repair Manualhkksejkdmm
This is the Highly Detailed factory service repair manual for the2003 HONDA ODYSSEY, this Service Manual has detailed illustrations as well as step by step instructions,It is 100 percents complete and intact. they are specifically written for the do-it-yourself-er as well as the experienced mechanic.2003 HONDA ODYSSEY Service Repair Workshop Manual provides step-by-step instructions based on the complete dis-assembly of the machine. It is this level of detail, along with hundreds of photos and illustrations, that guide the reader through each service and repair procedure. Complete download comes in pdf format which can work under all PC based windows operating system and Mac also, All pages are printable. Using this repair manual is an inexpensive way to keep your vehicle working properly.
Service Repair Manual Covers:
Maintenance
Engine
Control System
Mechanical
Fuel Service Specifications
Emission Control
Intake Exhaust Cooling
Lube
Ignition Starting Charging
Auto Transmission Clutch
Manual Transmission
Transfer Propeller Shaft
Drive Shaft
Differential
Axle Suspension
Tire & Wheel
Brake Control
Brake
Parking Brake
Steering Column
Power Steering
Air Condition
Suppl Restraint System
Seat Belt
Engine Immobilizer
Cruise Control
Wiper & Washer
Door Lock
Meter Audio/Visual
Horn
Windshield/Glass Mirror
Instrument Panel
Seat
Engine Hood/ Door
Exterior & Interior
Electrical
Multiplex/ Can Communication
And much more
File Format: PDF
Compatible: All Versions of Windows & Mac
Language: English
Requirements: Adobe PDF Reader
NO waiting, Buy from responsible seller and get INSTANT DOWNLOAD, Without wasting your hard-owned money on uncertainty or surprise! All pages are is great to have2003 HONDA ODYSSEY Service Repair Workshop Manual.
Looking for some other Service Repair Manual,please check:
https://www.aservicemanualpdf.com/
Thanks for visiting!
8
This is the Highly Detailed factory service repair manual for the2001 HONDA ODYSSEY, this Service Manual has detailed illustrations as well as step by step instructions,It is 100 percents complete and intact. they are specifically written for the do-it-yourself-er as well as the experienced mechanic.2001 HONDA ODYSSEY Service Repair Workshop Manual provides step-by-step instructions based on the complete dis-assembly of the machine. It is this level of detail, along with hundreds of photos and illustrations, that guide the reader through each service and repair procedure. Complete download comes in pdf format which can work under all PC based windows operating system and Mac also, All pages are printable. Using this repair manual is an inexpensive way to keep your vehicle working properly.
Service Repair Manual Covers:
Maintenance
Engine
Control System
Mechanical
Fuel Service Specifications
Emission Control
Intake Exhaust Cooling
Lube
Ignition Starting Charging
Auto Transmission Clutch
Manual Transmission
Transfer Propeller Shaft
Drive Shaft
Differential
Axle Suspension
Tire & Wheel
Brake Control
Brake
Parking Brake
Steering Column
Power Steering
Air Condition
Suppl Restraint System
Seat Belt
Engine Immobilizer
Cruise Control
Wiper & Washer
Door Lock
Meter Audio/Visual
Horn
Windshield/Glass Mirror
Instrument Panel
Seat
Engine Hood/ Door
Exterior & Interior
Electrical
Multiplex/ Can Communication
And much more
File Format: PDF
Compatible: All Versions of Windows & Mac
Language: English
Requirements: Adobe PDF Reader
NO waiting, Buy from responsible seller and get INSTANT DOWNLOAD, Without wasting your hard-owned money on uncertainty or surprise! All pages are is great to have2001 HONDA ODYSSEY Service Repair Workshop Manual.
Looking for some other Service Repair Manual,please check:
https://www.aservicemanualpdf.com/
Thanks for visiting!
8
This is the Highly Detailed factory service repair manual for the2002 HONDA ODYSSEY, this Service Manual has detailed illustrations as well as step by step instructions,It is 100 percents complete and intact. they are specifically written for the do-it-yourself-er as well as the experienced mechanic.2002 HONDA ODYSSEY Service Repair Workshop Manual provides step-by-step instructions based on the complete dis-assembly of the machine. It is this level of detail, along with hundreds of photos and illustrations, that guide the reader through each service and repair procedure. Complete download comes in pdf format which can work under all PC based windows operating system and Mac also, All pages are printable. Using this repair manual is an inexpensive way to keep your vehicle working properly.
Service Repair Manual Covers:
Maintenance
Engine
Control System
Mechanical
Fuel Service Specifications
Emission Control
Intake Exhaust Cooling
Lube
Ignition Starting Charging
Auto Transmission Clutch
Manual Transmission
Transfer Propeller Shaft
Drive Shaft
Differential
Axle Suspension
Tire & Wheel
Brake Control
Brake
Parking Brake
Steering Column
Power Steering
Air Condition
Suppl Restraint System
Seat Belt
Engine Immobilizer
Cruise Control
Wiper & Washer
Door Lock
Meter Audio/Visual
Horn
Windshield/Glass Mirror
Instrument Panel
Seat
Engine Hood/ Door
Exterior & Interior
Electrical
Multiplex/ Can Communication
And much more
File Format: PDF
Compatible: All Versions of Windows & Mac
Language: English
Requirements: Adobe PDF Reader
NO waiting, Buy from responsible seller and get INSTANT DOWNLOAD, Without wasting your hard-owned money on uncertainty or surprise! All pages are is great to have2002 HONDA ODYSSEY Service Repair Workshop Manual.
Looking for some other Service Repair Manual,please check:
https://www.aservicemanualpdf.com/
Thanks for visiting!
8
In this presentation, you'll learn the basics of brakes and tires, how to save money on brake repairs, how to help your brakes last longer, the parts of the brake system, tire changes, tire specifications, tire pressure, wear bar, camber, caster, toe, tire disposal, and how to change a tire.
Fancy yourself a DIY mechanic? Haven’t got the cash to take your car to the body shop?
Fortunately, there are some basic car repairs that you can do to turn your vehicle into a well-oiled machine.
With MOTs legally required at least once a year, it pays to know how to keep your motor running.
Save yourself time, energy and money by following our simple guide.
Credit: https://carvine.co.uk
Taking good Care of your tires does not have to be difficult or time consuming. By following these tips, you can ensure safe performance, top mileage and longer tire life for your car.
http://www.nokiantyres.com/
Fleet management these days is next to impossible without connected vehicle solutions. Why? Well, fleet trackers and accompanying connected vehicle management solutions tend to offer quite a few hard-to-ignore benefits to fleet managers and businesses alike. Let’s check them out!
𝘼𝙣𝙩𝙞𝙦𝙪𝙚 𝙋𝙡𝙖𝙨𝙩𝙞𝙘 𝙏𝙧𝙖𝙙𝙚𝙧𝙨 𝙞𝙨 𝙫𝙚𝙧𝙮 𝙛𝙖𝙢𝙤𝙪𝙨 𝙛𝙤𝙧 𝙢𝙖𝙣𝙪𝙛𝙖𝙘𝙩𝙪𝙧𝙞𝙣𝙜 𝙩𝙝𝙚𝙞𝙧 𝙥𝙧𝙤𝙙𝙪𝙘𝙩𝙨. 𝙒𝙚 𝙝𝙖𝙫𝙚 𝙖𝙡𝙡 𝙩𝙝𝙚 𝙥𝙡𝙖𝙨𝙩𝙞𝙘 𝙜𝙧𝙖𝙣𝙪𝙡𝙚𝙨 𝙪𝙨𝙚𝙙 𝙞𝙣 𝙖𝙪𝙩𝙤𝙢𝙤𝙩𝙞𝙫𝙚 𝙖𝙣𝙙 𝙖𝙪𝙩𝙤 𝙥𝙖𝙧𝙩𝙨 𝙖𝙣𝙙 𝙖𝙡𝙡 𝙩𝙝𝙚 𝙛𝙖𝙢𝙤𝙪𝙨 𝙘𝙤𝙢𝙥𝙖𝙣𝙞𝙚𝙨 𝙗𝙪𝙮 𝙩𝙝𝙚 𝙜𝙧𝙖𝙣𝙪𝙡𝙚𝙨 𝙛𝙧𝙤𝙢 𝙪𝙨.
Over the 10 years, we have gained a strong foothold in the market due to our range's high quality, competitive prices, and time-lined delivery schedules.
Things to remember while upgrading the brakes of your carjennifermiller8137
Upgrading the brakes of your car? Keep these things in mind before doing so. Additionally, start using an OBD 2 GPS tracker so that you never miss a vehicle maintenance appointment. On top of this, a car GPS tracker will also let you master good driving habits that will let you increase the operational life of your car’s brakes.
Symptoms like intermittent starting and key recognition errors signal potential problems with your Mercedes’ EIS. Use diagnostic steps like error code checks and spare key tests. Professional diagnosis and solutions like EIS replacement ensure safe driving. Consult a qualified technician for accurate diagnosis and repair.
In this presentation, we have discussed a very important feature of BMW X5 cars… the Comfort Access. Things that can significantly limit its functionality. And things that you can try to restore the functionality of such a convenient feature of your vehicle.
5 Warning Signs Your BMW's Intelligent Battery Sensor Needs AttentionBertini's German Motors
IBS monitors and manages your BMW’s battery performance. If it malfunctions, you will have to deal with an array of electrical issues in your vehicle. Recognize warning signs like dimming headlights, frequent battery replacements, and electrical malfunctions to address potential IBS issues promptly.
"Trans Failsafe Prog" on your BMW X5 indicates potential transmission issues requiring immediate action. This safety feature activates in response to abnormalities like low fluid levels, leaks, faulty sensors, electrical or mechanical failures, and overheating.
What Does the PARKTRONIC Inoperative, See Owner's Manual Message Mean for You...Autohaus Service and Sales
Learn what "PARKTRONIC Inoperative, See Owner's Manual" means for your Mercedes-Benz. This message indicates a malfunction in the parking assistance system, potentially due to sensor issues or electrical faults. Prompt attention is crucial to ensure safety and functionality. Follow steps outlined for diagnosis and repair in the owner's manual.
What Exactly Is The Common Rail Direct Injection System & How Does It WorkMotor Cars International
Learn about Common Rail Direct Injection (CRDi) - the revolutionary technology that has made diesel engines more efficient. Explore its workings, advantages like enhanced fuel efficiency and increased power output, along with drawbacks such as complexity and higher initial cost. Compare CRDi with traditional diesel engines and discover why it's the preferred choice for modern engines.
Core technology of Hyundai Motor Group's EV platform 'E-GMP'Hyundai Motor Group
What’s the force behind Hyundai Motor Group's EV performance and quality?
Maximized driving performance and quick charging time through high-density battery pack and fast charging technology and applicable to various vehicle types!
Discover more about Hyundai Motor Group’s EV platform ‘E-GMP’!
Why Is Your BMW X3 Hood Not Responding To Release CommandsDart Auto
Experiencing difficulty opening your BMW X3's hood? This guide explores potential issues like mechanical obstruction, hood release mechanism failure, electrical problems, and emergency release malfunctions. Troubleshooting tips include basic checks, clearing obstructions, applying pressure, and using the emergency release.
Why Is Your BMW X3 Hood Not Responding To Release Commands
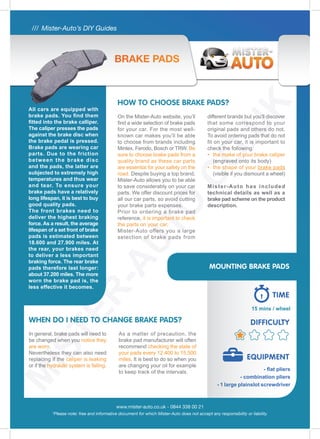
Brake pads
1. /// Mister-Auto’s DIY Guides
www.mister-auto.co.uk - 0844 338 00 21
*Please note: free and informative document for which Mister-Auto does not accept any responsibility or liability.
MOUNTING BRAKE PADS
15 mins / wheel
EQUIPMENT
DIFFICULTY
TIME
All cars are equipped with
brake pads. You find them
fitted into the brake calliper.
The caliper presses the pads
against the brake disc when
the brake pedal is pressed.
Brake pads are wearing car
parts. Due to the friction
between the brake disc
and the pads, the latter are
subjected to extremely high
temperatures and thus wear
and tear. To ensure your
brake pads have a relatively
long lifespan, it is best to buy
good quality pads.
The front brakes need to
deliver the highest braking
force. As a result, the average
lifespan of a set front of brake
pads is estimated between
18.600 and 27.900 miles. At
the rear, your brakes need
to deliver a less important
braking force. The rear brake
pads therefore last longer:
about 37.200 miles. The more
worn the brake pad is, the
less effective it becomes.
BRAKE PADS
On the Mister-Auto website, you’ll
find a wide selection of brake pads
for your car. For the most well-
known car makes you’ll be able
to choose from brands including
Mintex, Ferodo, Bosch or TRW. Be
sure to choose brake pads from a
quality brand as these car parts
are essential for your safety on the
road. Despite buying a top brand,
Mister-Auto allows you to be able
to save considerably on your car
parts. We offer discount prices for
all our car parts, so avoid cutting
your brake parts expenses.
Prior to ordering a brake pad
reference, it is important to check
the parts on your car.
Mister-Auto offers you a large
selection of brake pads from
different brands but you’ll discover
that some correspond to your
original pads and others do not.
To avoid ordering pads that do not
fit on your car, it is important to
check the following:
• the make of your brake caliper
(engraved onto its body)
• the shape of your brake pads
(visible if you dismount a wheel)
Mister-Auto has included
technical details as well as a
brake pad scheme on the product
description.
HOW TO CHOOSE BRAKE PADS?
WHEN DO I NEED TO CHANGE BRAKE PADS?
In general, brake pads will need to
be changed when you notice they
are worn.
Nevertheless they can also need
replacing if the caliper is leaking
or if the hydraulic system is failing.
As a matter of precaution, the
brake pad manufacturer will often
recommend checking the state of
your pads every 12.400 to 15.500
miles. It is best to do so when you
are changing your oil for example
to keep track of the intervals.
- flat pliers
- combination pliers
- 1 large plainslot screwdriver
2. /// Mister-Auto’s DIY Guides
www.mister-auto.co.uk - 0844 338 00 21
*Please note: free and informative document for which Mister-Auto does not accept any responsibility or liability.
WHAT DO I LOOK AT WHEN CHECKING MY BRAKE PADS FOR SIGNS OF
WEAR?
• If your brake pads are not
equipped with a brake pad
wear contact, you’ll only need
to check your brake fluid
levels. The thinner your brake
pads become, the more brake
fluid the hydraulic braking
system needs to press them
against the brake disc. So, if
your brake pads are getting
too thin, your brake fluid levels
will reach the bottom of the
reservoir.
• However, if your brake pads
do have a wear contact, a
dashboard warning light will
come on when it becomes
necessary to replace them. This
does not mean that as soon as
the indicator lights up, you need
to rush to the nearest garage or
change your brake pads on the
same day. From the point that
your brake pad light comes on,
you’ll be able to safely drive for
another 2000 miles. After that,
you’ll risk damaging the brake
disc if you continue to use worn
brake pads. If the latter have
next to no friction material left,
the metal backing will run on
the brake disc, and scratch it.
• Besides these two checks, it is
possible to dismount a wheel
and literally look at the brake
pads. You’ll need about ¼
inch of friction material to drive
safely. If less than ¼ of pad is
left, we strongly recommend
you replace your brake pads
as quickly as possible.
• If you have a relatively light car,
you probably won’t have disc
brakes at the rear but drum
brakes. In that case, to check
the lining on the rear brakes
count the number of visible
teeth on the hand brake when
blocking your car. If you see
more than 6 teeth, you will need
to replace your brake shoe
lining.
• Do not fill up the
brake fluid reservoir
without checking
the state of your brake
pads: if the brake pads
are worn, they won’t have
a enough friction material
anymore. As a result, they will
be stuck against the brake disc
and the piston is permanently
pushed outwards. When you
look at your brake fluid lev-
els, they are likely to be rather
low. Don’t let these levels fool
you though, they are only low
because the piston is pushed
out. To see if you have enough
brake fluid, dismount the brake
pads and push the piston back
into the caliper. The brake fluid
will flow back through the hose
and indicate a higher and prob-
ably normal level. You can see
that if you had just topped up
the brake fluid without think-
ing twice, the reservoir would
have overflowed after fitting
new brake pads with more fric-
tion material.
• Prepare your new brake pads:
brand new brake pads are
often a bit shiny. Lightly file
the friction material on the
brake pads to ensure they
completely touch the disc and
don’t slide over the disc when
you’re braking. The larger the
braking surface of the pads,
the more you will get from your
braking force.
• S l o w l y w e a r y o u r n e w
brake pads: avoid heavy
or emergency braking the
first 125 to 185 miles after
mounting new brake pads.
They need a little time to set to
the shape of the brake discs.
• Check your other disc brake
parts: before mounting your
brake pads, check the state
of your brake discs. The latter
need to be thicker than 1
mm. If they are thinner, you
will need to change them as
soon as possible and avoid
fitting your new pads onto
worn discs. They will wear
unevenly if you do. The same
goes if you see that your
brake discs are scratched,
scorn or warped. Do not wait
too long before you replace
them then. Don’t forget to also
check how the brake pads are
worn. If you see for example
that one brake pad is more
worn than the other or if their
wear is uneven, it might be
necessary to clean or even
completely replace your brake
caliper.
TIPS FROM MISTER-AUTO
BRAKE PADS
3. /// Mister-Auto’s DIY Guides
www.mister-auto.co.uk - 0844 338 00 21
*Please note: free and informative document for which Mister-Auto does not accept any responsibility or liability.
Park your car on a flat and well-lit surface. Start by loosening
your wheel bolts. Take your jack and lift the car. Fix the
vehicle on axle stands and ensure it is well stabilised and
level. Then completely dismount the wheel. If you have
wheel trims, you’ll only need to pull to take them off.
Push the piston back into the brake calliper. Drive a
screwdriver between the inner brake pad and the disc
and to create a lever with which to push the piston. If
the brake pads are very worn, they will be stuck against
the disc.
Step
Step
Step
1
2
HOW DO I MOUNT NEW BRAKE PADS?
REPLACING BRAKE PADS IN EIGHT EASY STEPS
Replacing brake pads is an easy
task that anyone can carry out them-
selves. Ensure to closely follow the
next steps though:
• Start by parking your car onto a
well-lit, flat surface. When lifting
your car with a trolley jack, ensure
it is sufficiently stable and level.
Prefer the use of wheel ramps
or axel stands as they provide
more stability than a jack.
Underneath your car you’ll find
the manufacturer’s instructions
for lifting your car.
• Arrange all your tools and parts
well to avoid losing anything. Put
your wheel nuts upside down
on their heads, in a neat row to
avoid losing one or damaging the
screw-side. Prior to mounting your
new brake pads, you’ll need to
dismount the old ones. Pay close
attention to the order in which you
dismount the different parts to put
them back in the opposite order.
Also, be sure to complete one
side before starting on the other.
That way you cannot get mixed
up and if you are uncertain about
anything, you can easily check on
the other wheel.
• Equip yourself with all the
necessary tools before starting.
The caliper guide pins in particular
are tightly screwed. To loosen
them, you’ll need special tools to
avoid any damage.
• Push back the piston ensuring
you don’t accidentally damage
the rubber boot with your tools.
The easiest and safest way of
doing this is in fact using the
brake pad closest to the piston as
a lever to push the latter back into
the calliper. Wedge a screwdriver
between the brake pad to create
the lever.
• Finally, remember to well tighten
the bolts and nuts and to check
you have mounted all the parts.
Then use the brake pedal to
press the brake pads against the
disc. It is highly important not to
forget this final step. If omitted,
you won’t have any braking force
when you are pressing the brake
pedal when driving for the first
time with new pads.
Unscrew the calliper. Use two combination spanners or
ratchet spanners to loosen the inner guide pin and unplug
the brake pad wear contact if you have one.3
Unscrew the caliper
Push back the piston
BRAKE PADS
4. /// Mister-Auto’s DIY Guides
www.mister-auto.co.uk - 0844 338 00 21
*Please note: free and informative document for which Mister-Auto does not accept any responsibility or liability.
Clean the pads’ seat by brushing or scratching.
Connect the brake pad wear contact (if present).
Press the new brake pads into the calliper. Put some bolt sealant, which is usually included with
the brake pads, onto the bolts to be able to tighten them properly. Then push the calliper back into
place and secure the guide pin. If carried out correctly, the parts should fit together like a jigsaw.
Press the brake pedal several times to ensure the brake pads are well applied to the brake disc.
Once you’ve lowered the vehicle back to the ground, remember to secure the wheel bolts to ensure
the wheel is well connected to the axle.
5
7
6
8
Lift the calliper and take out the brake pads by hand.
4
Lift the caliper and take out the brake
pads
Grease the brake pad seat
Grease the calliper guide pins Result
Finish
BRAKE PADS
Step
Step
Step
Step
Step