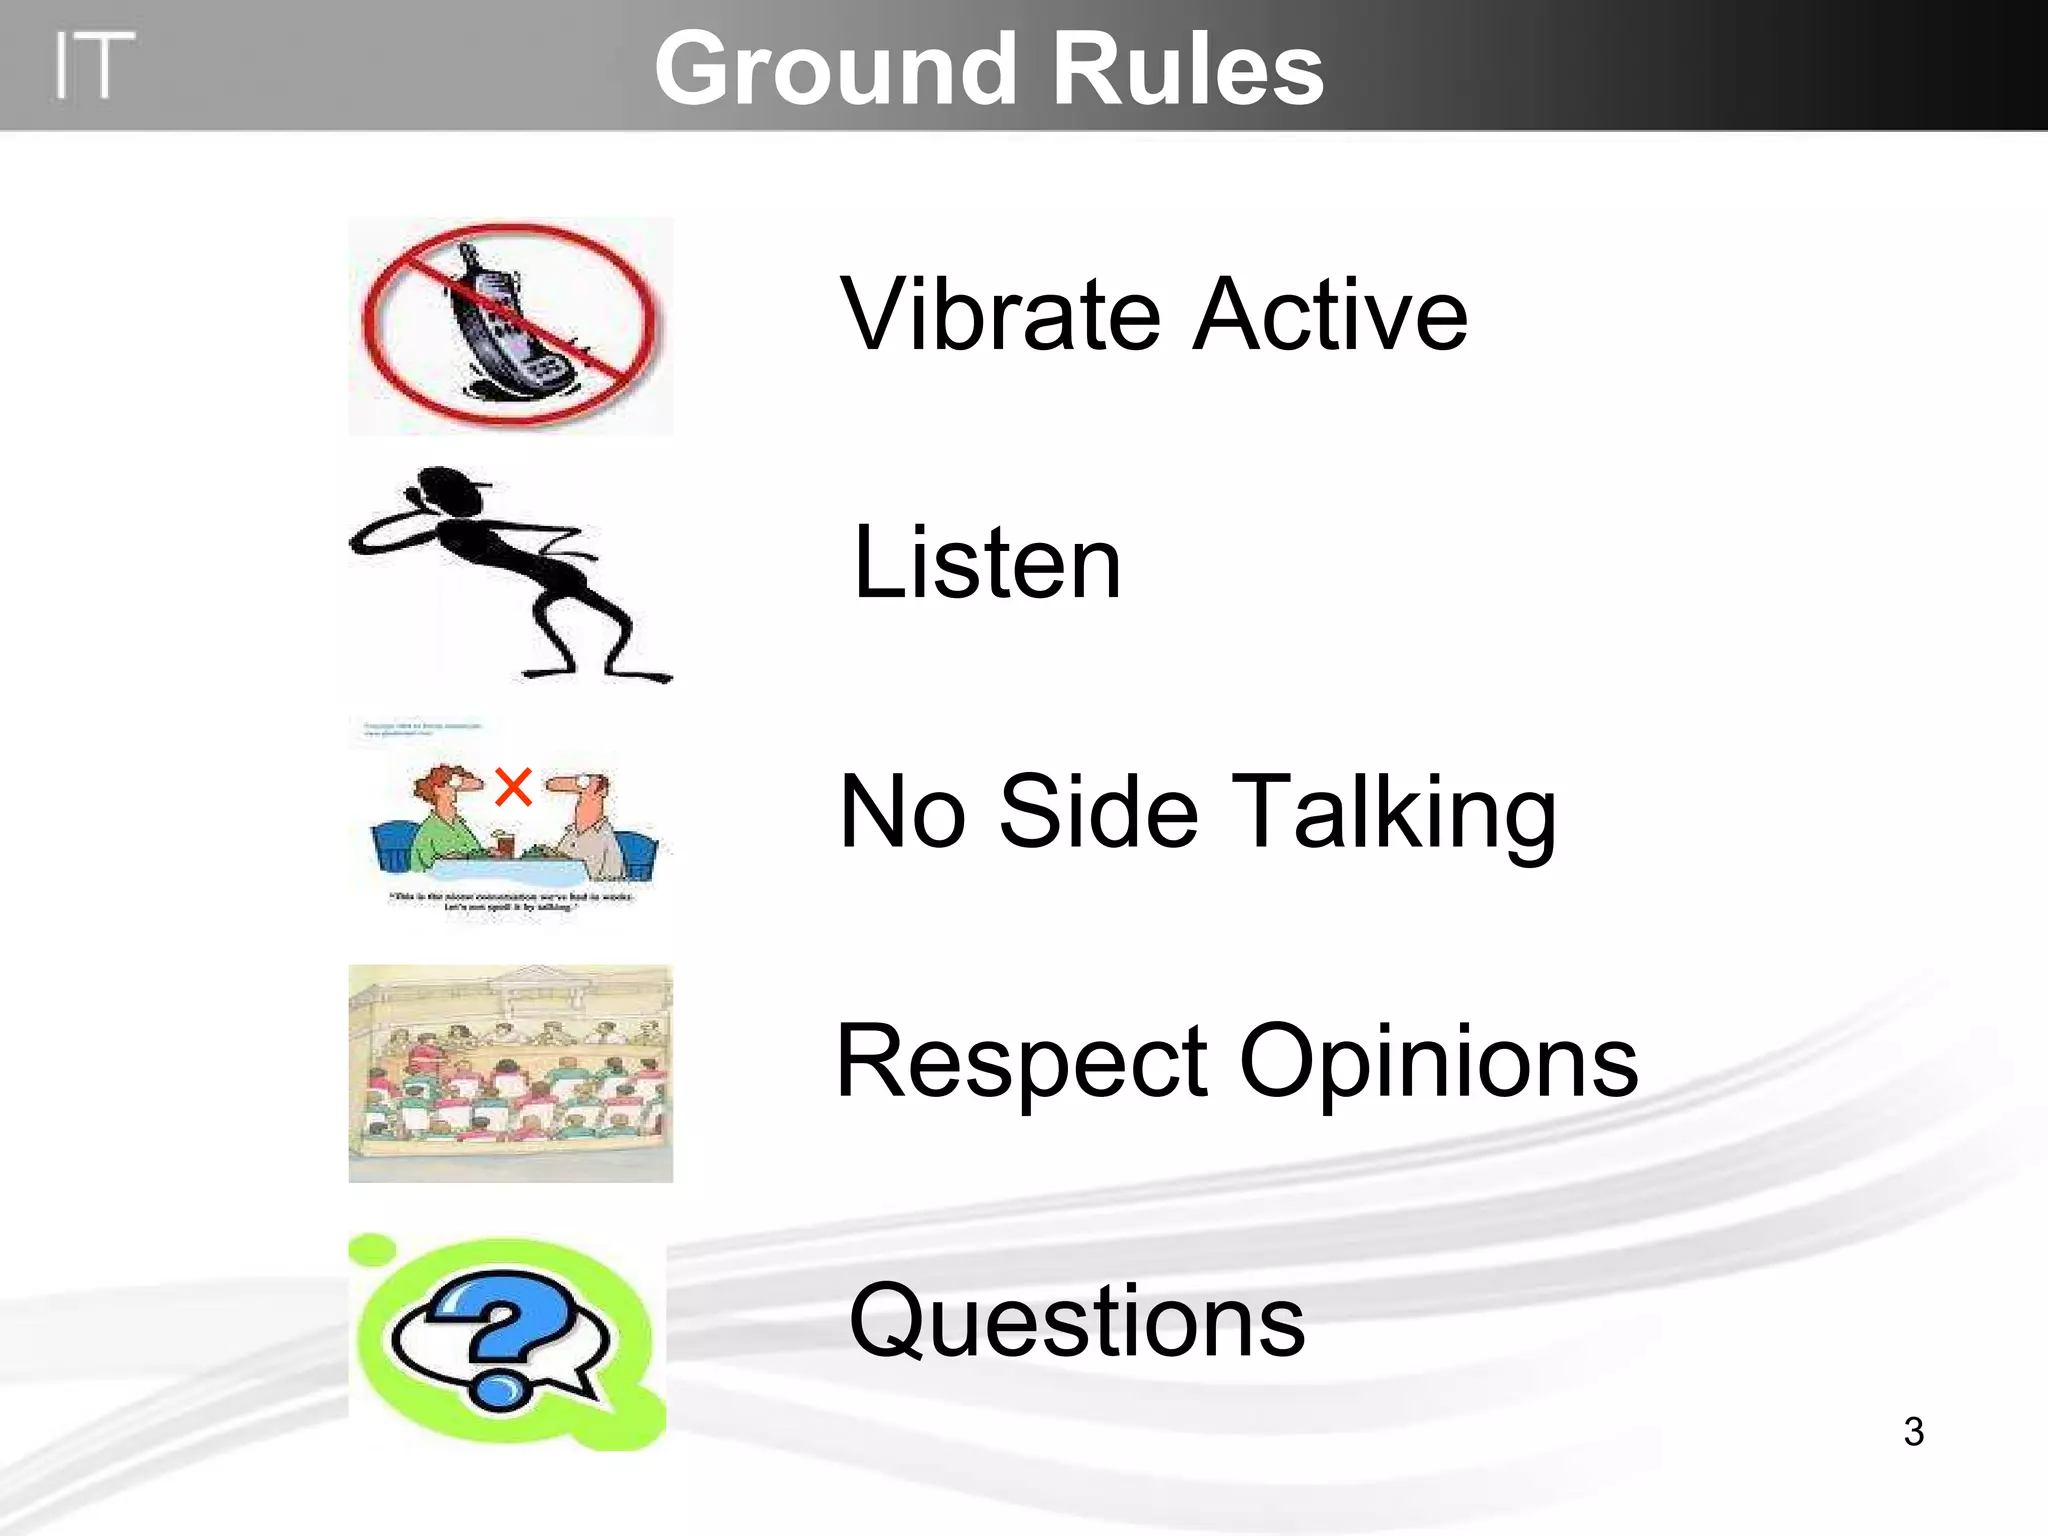
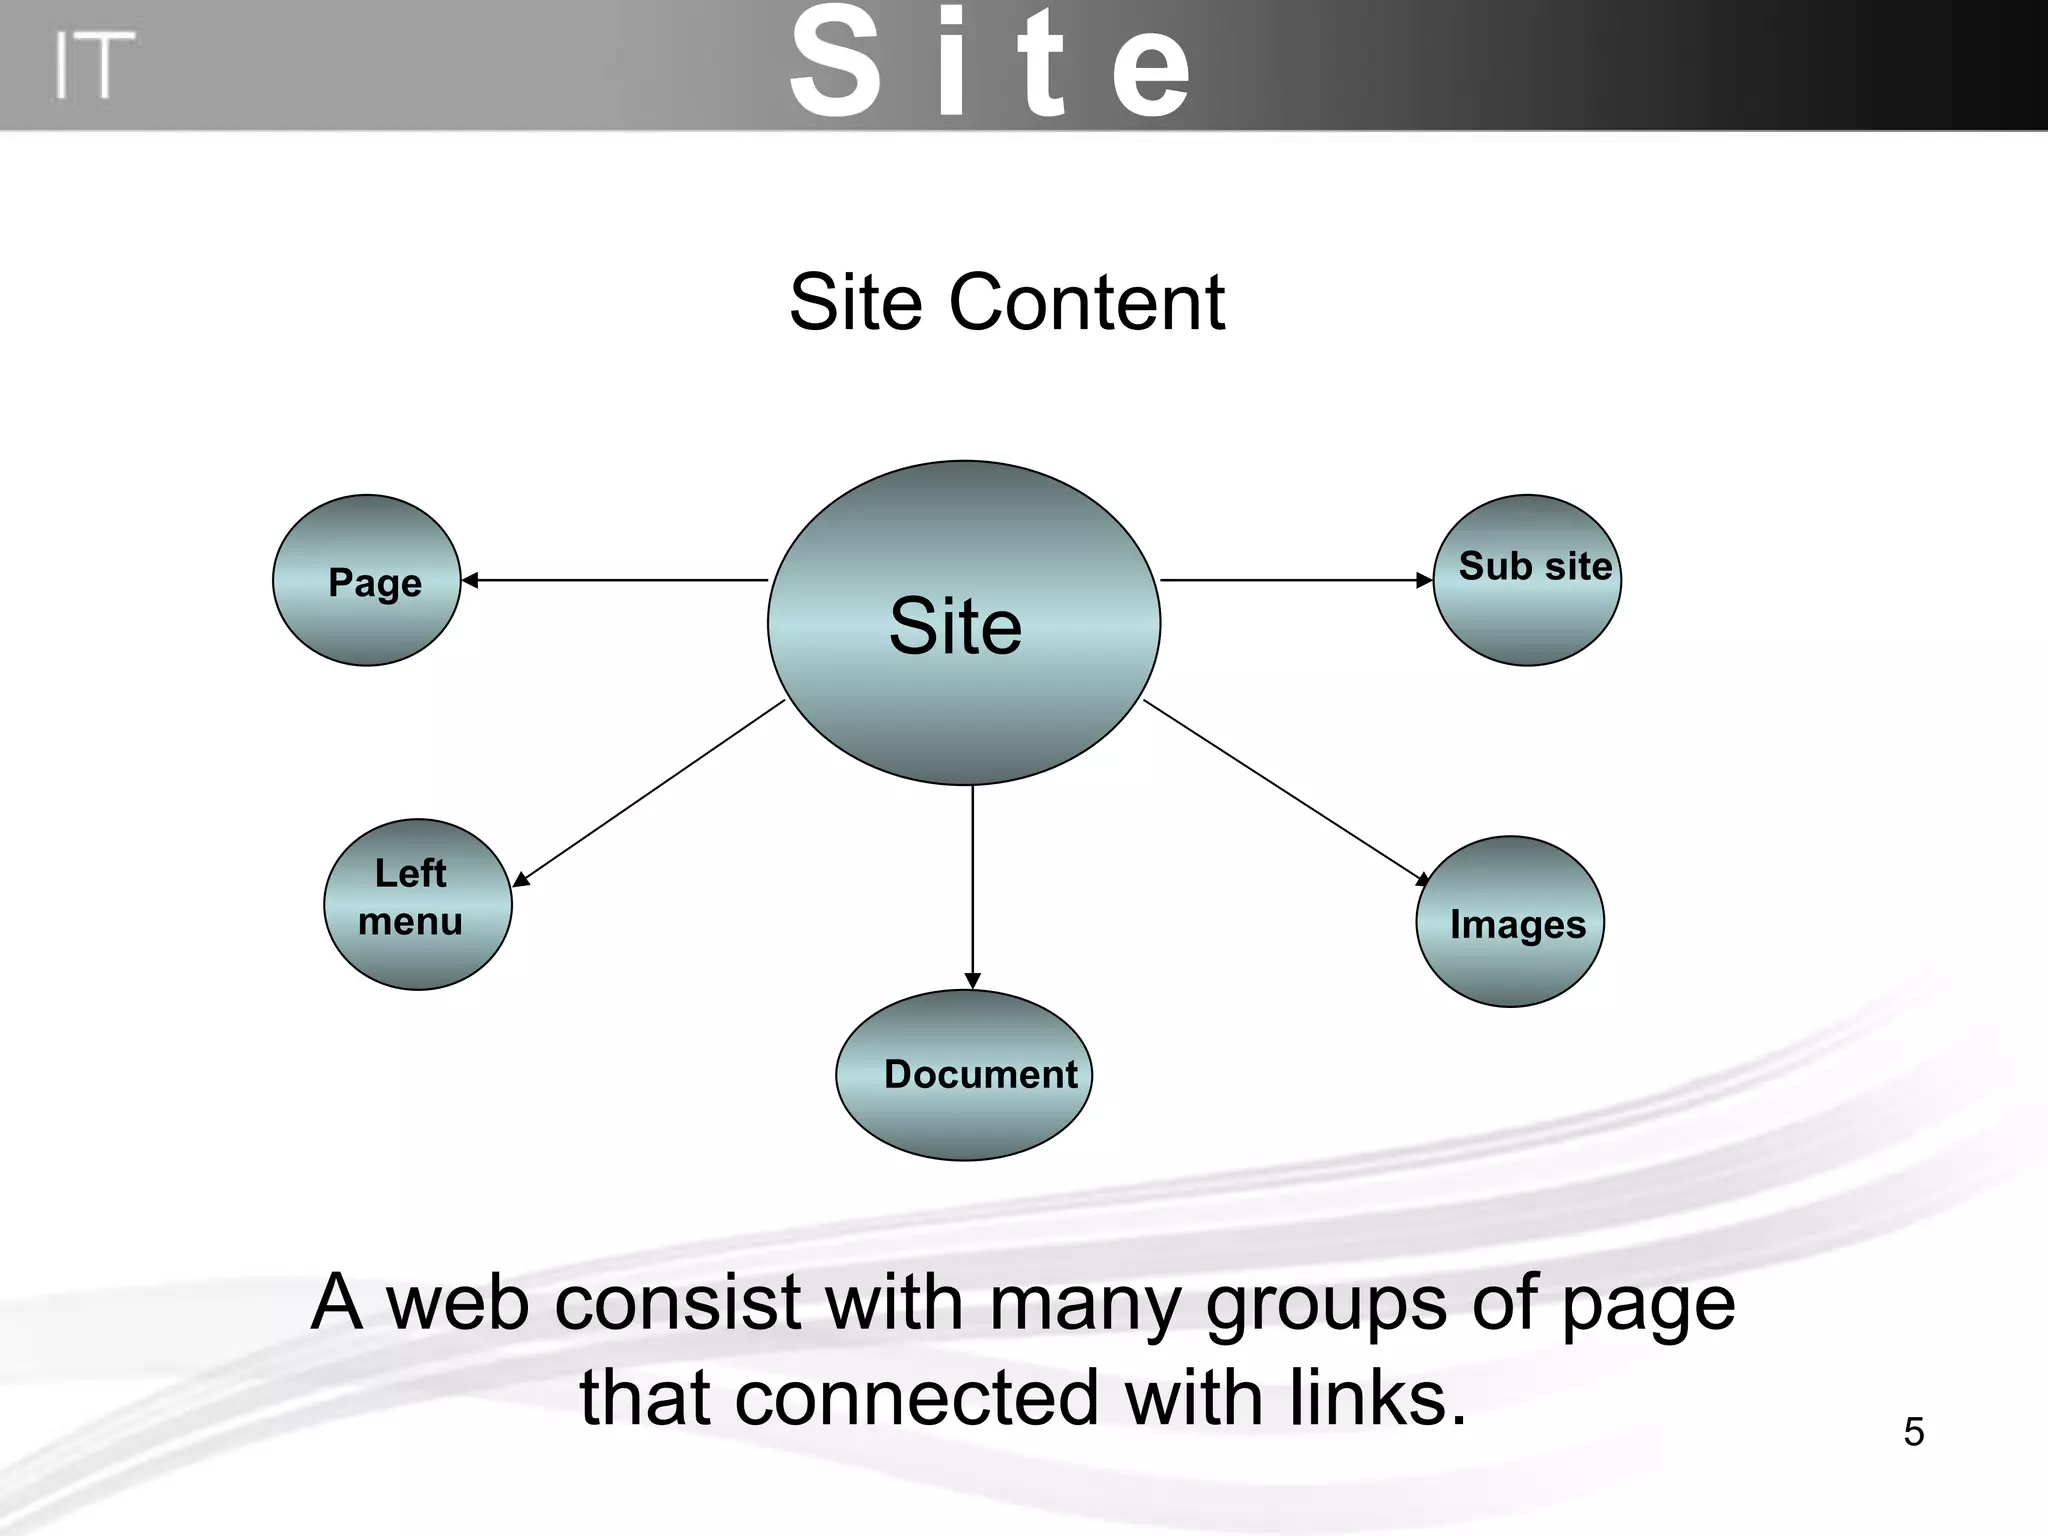
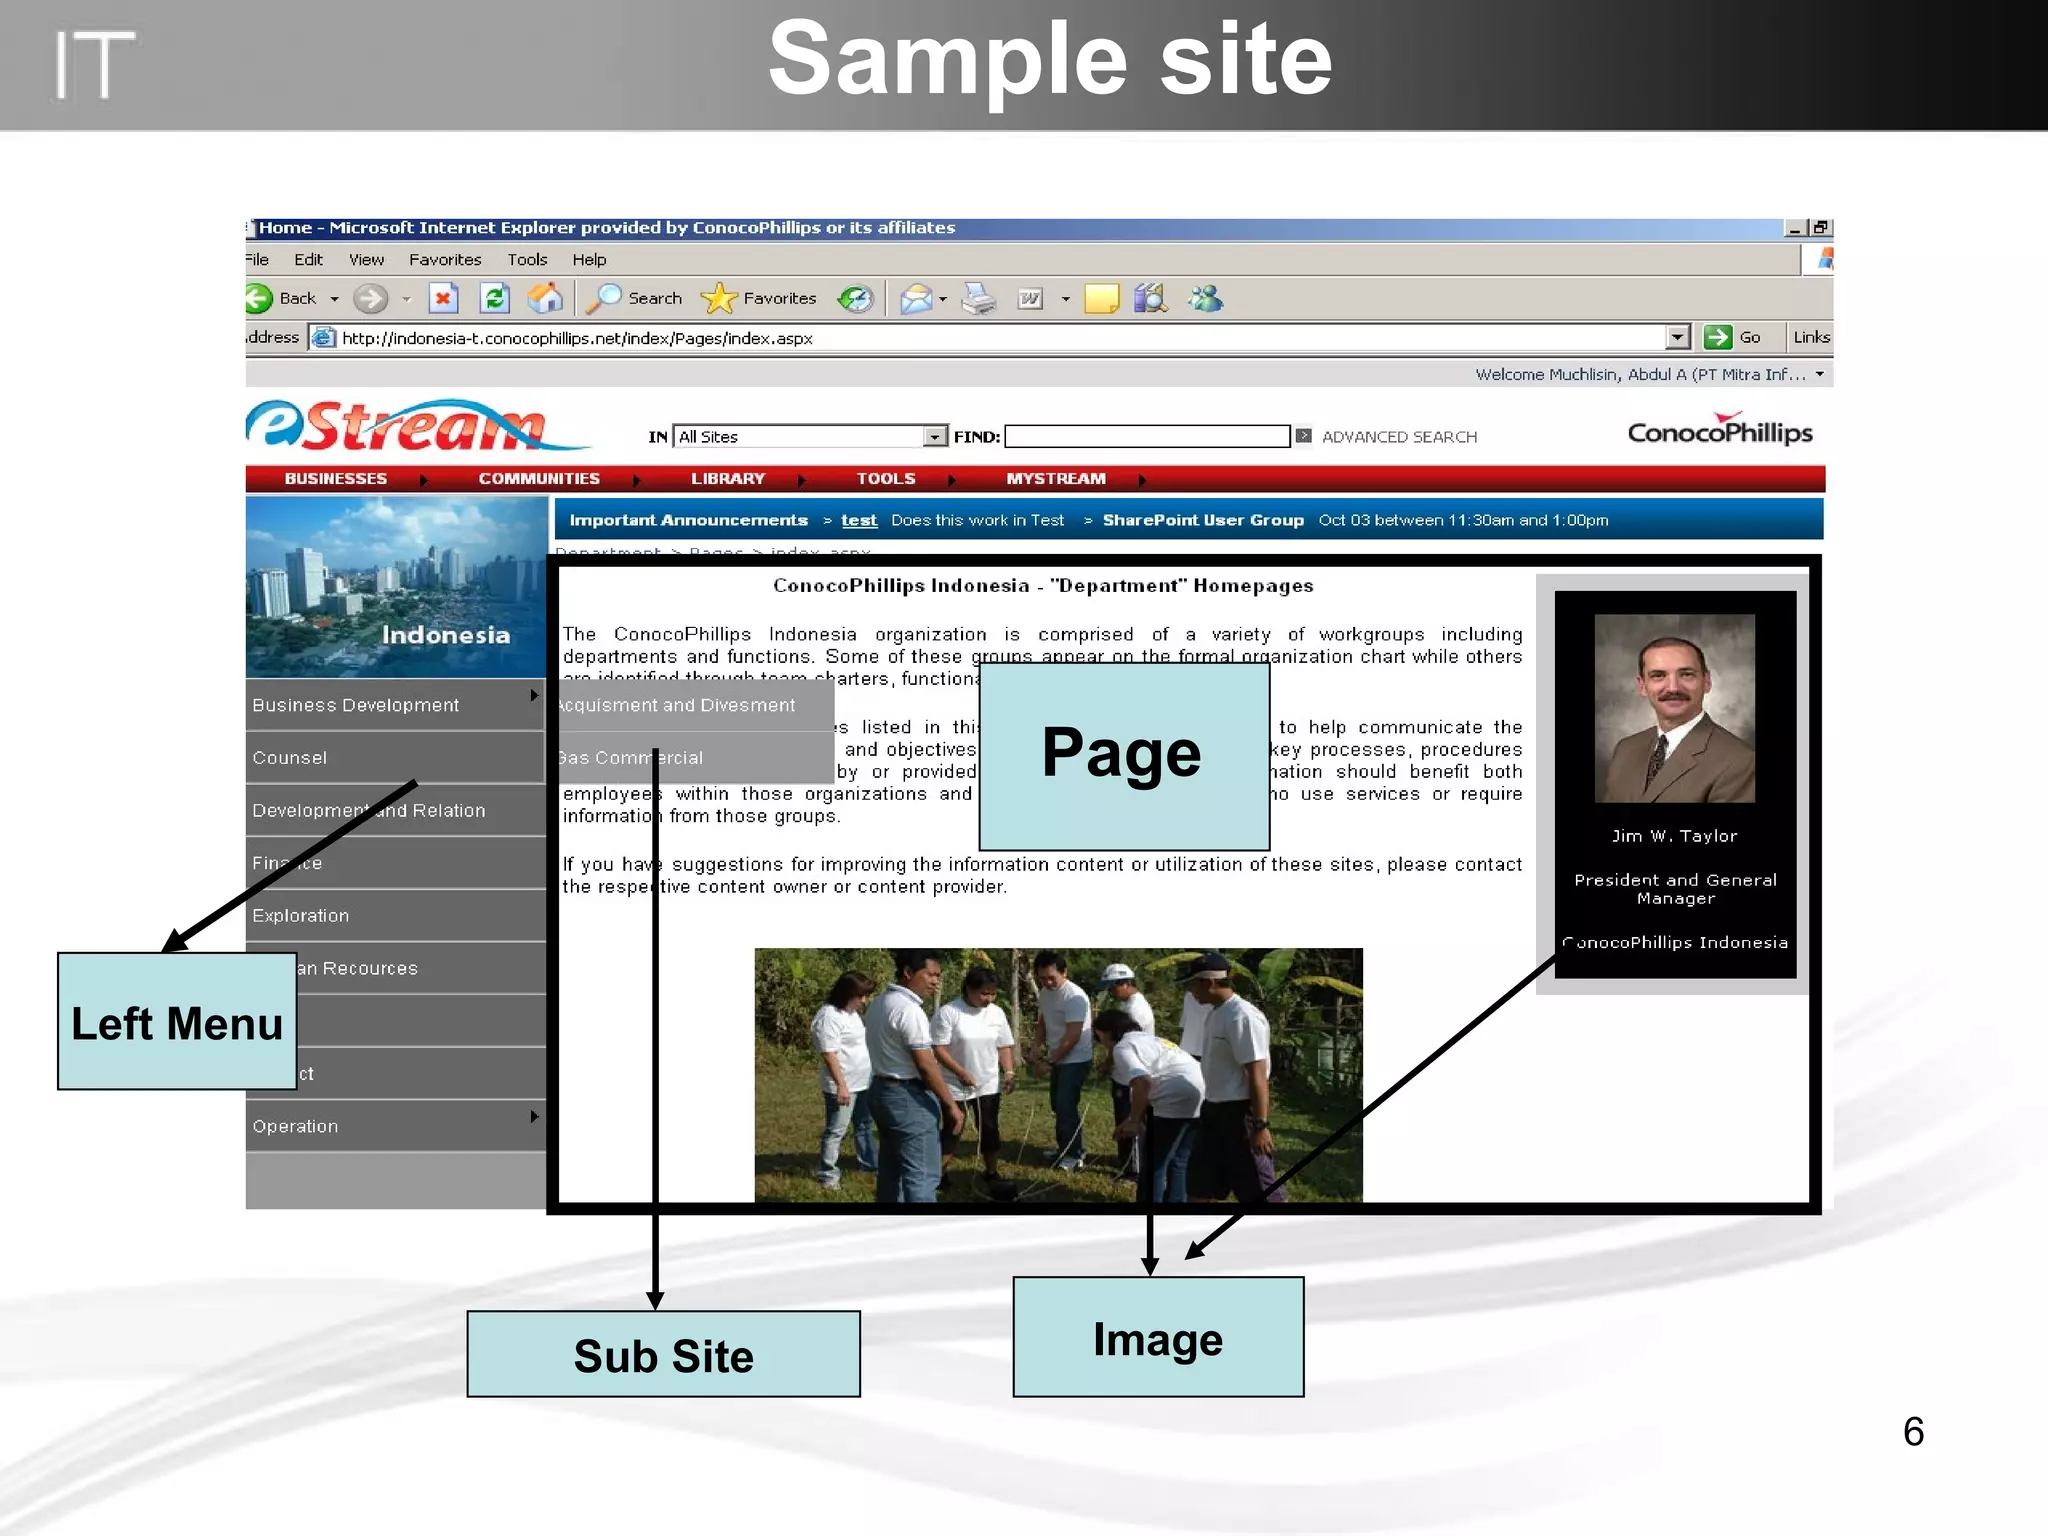
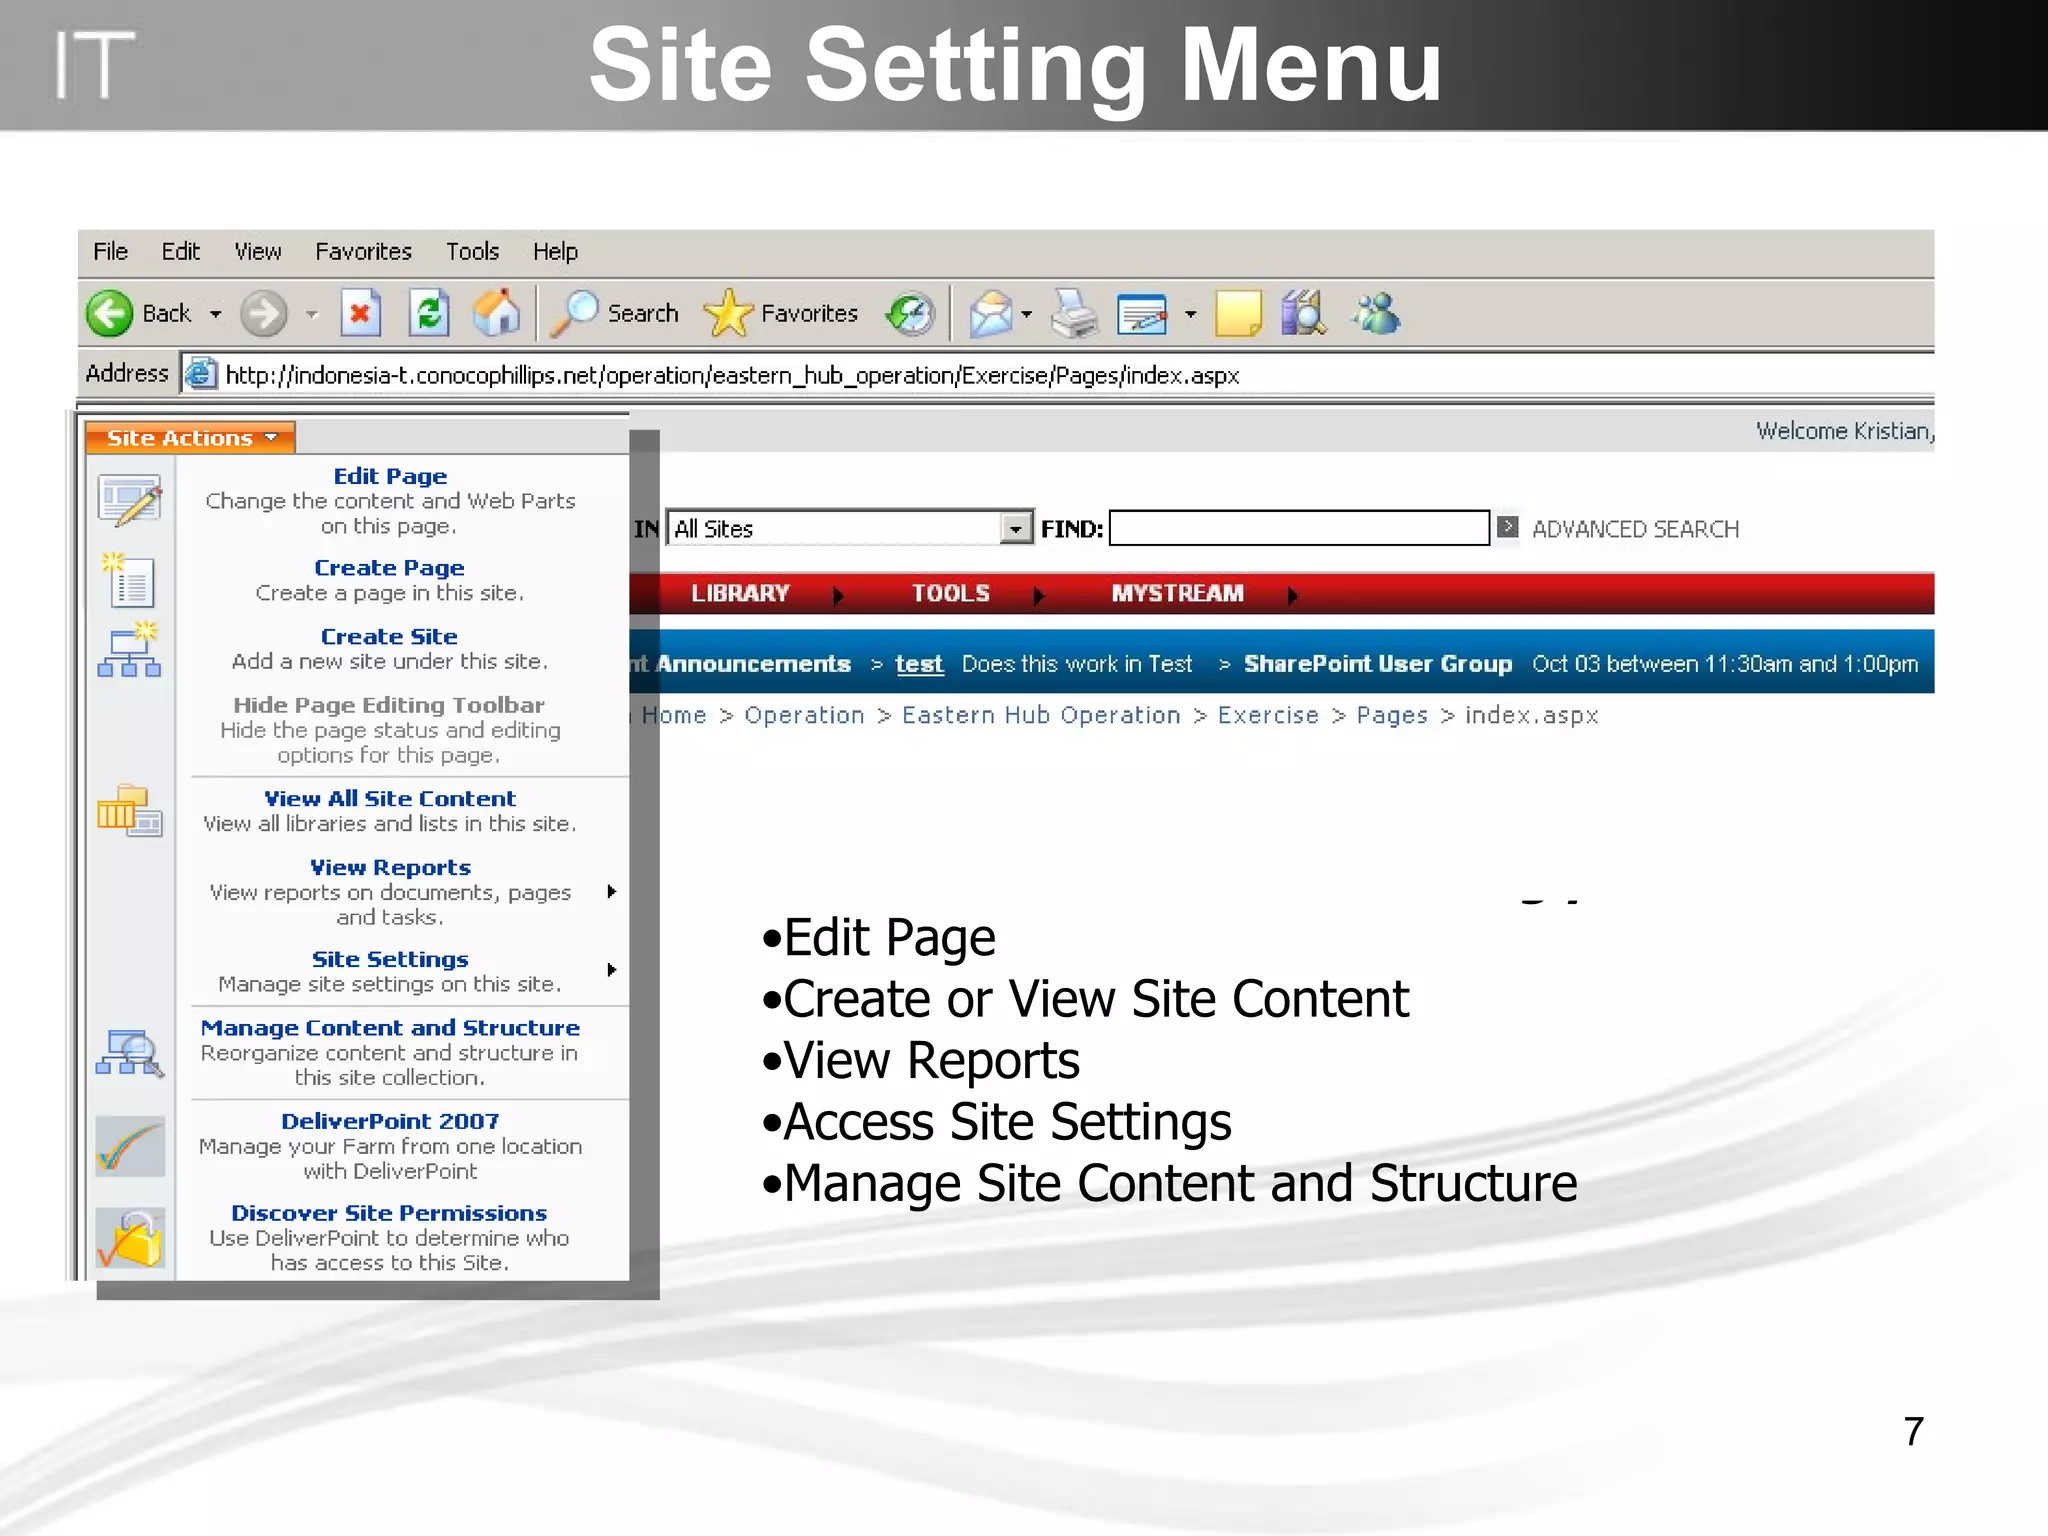
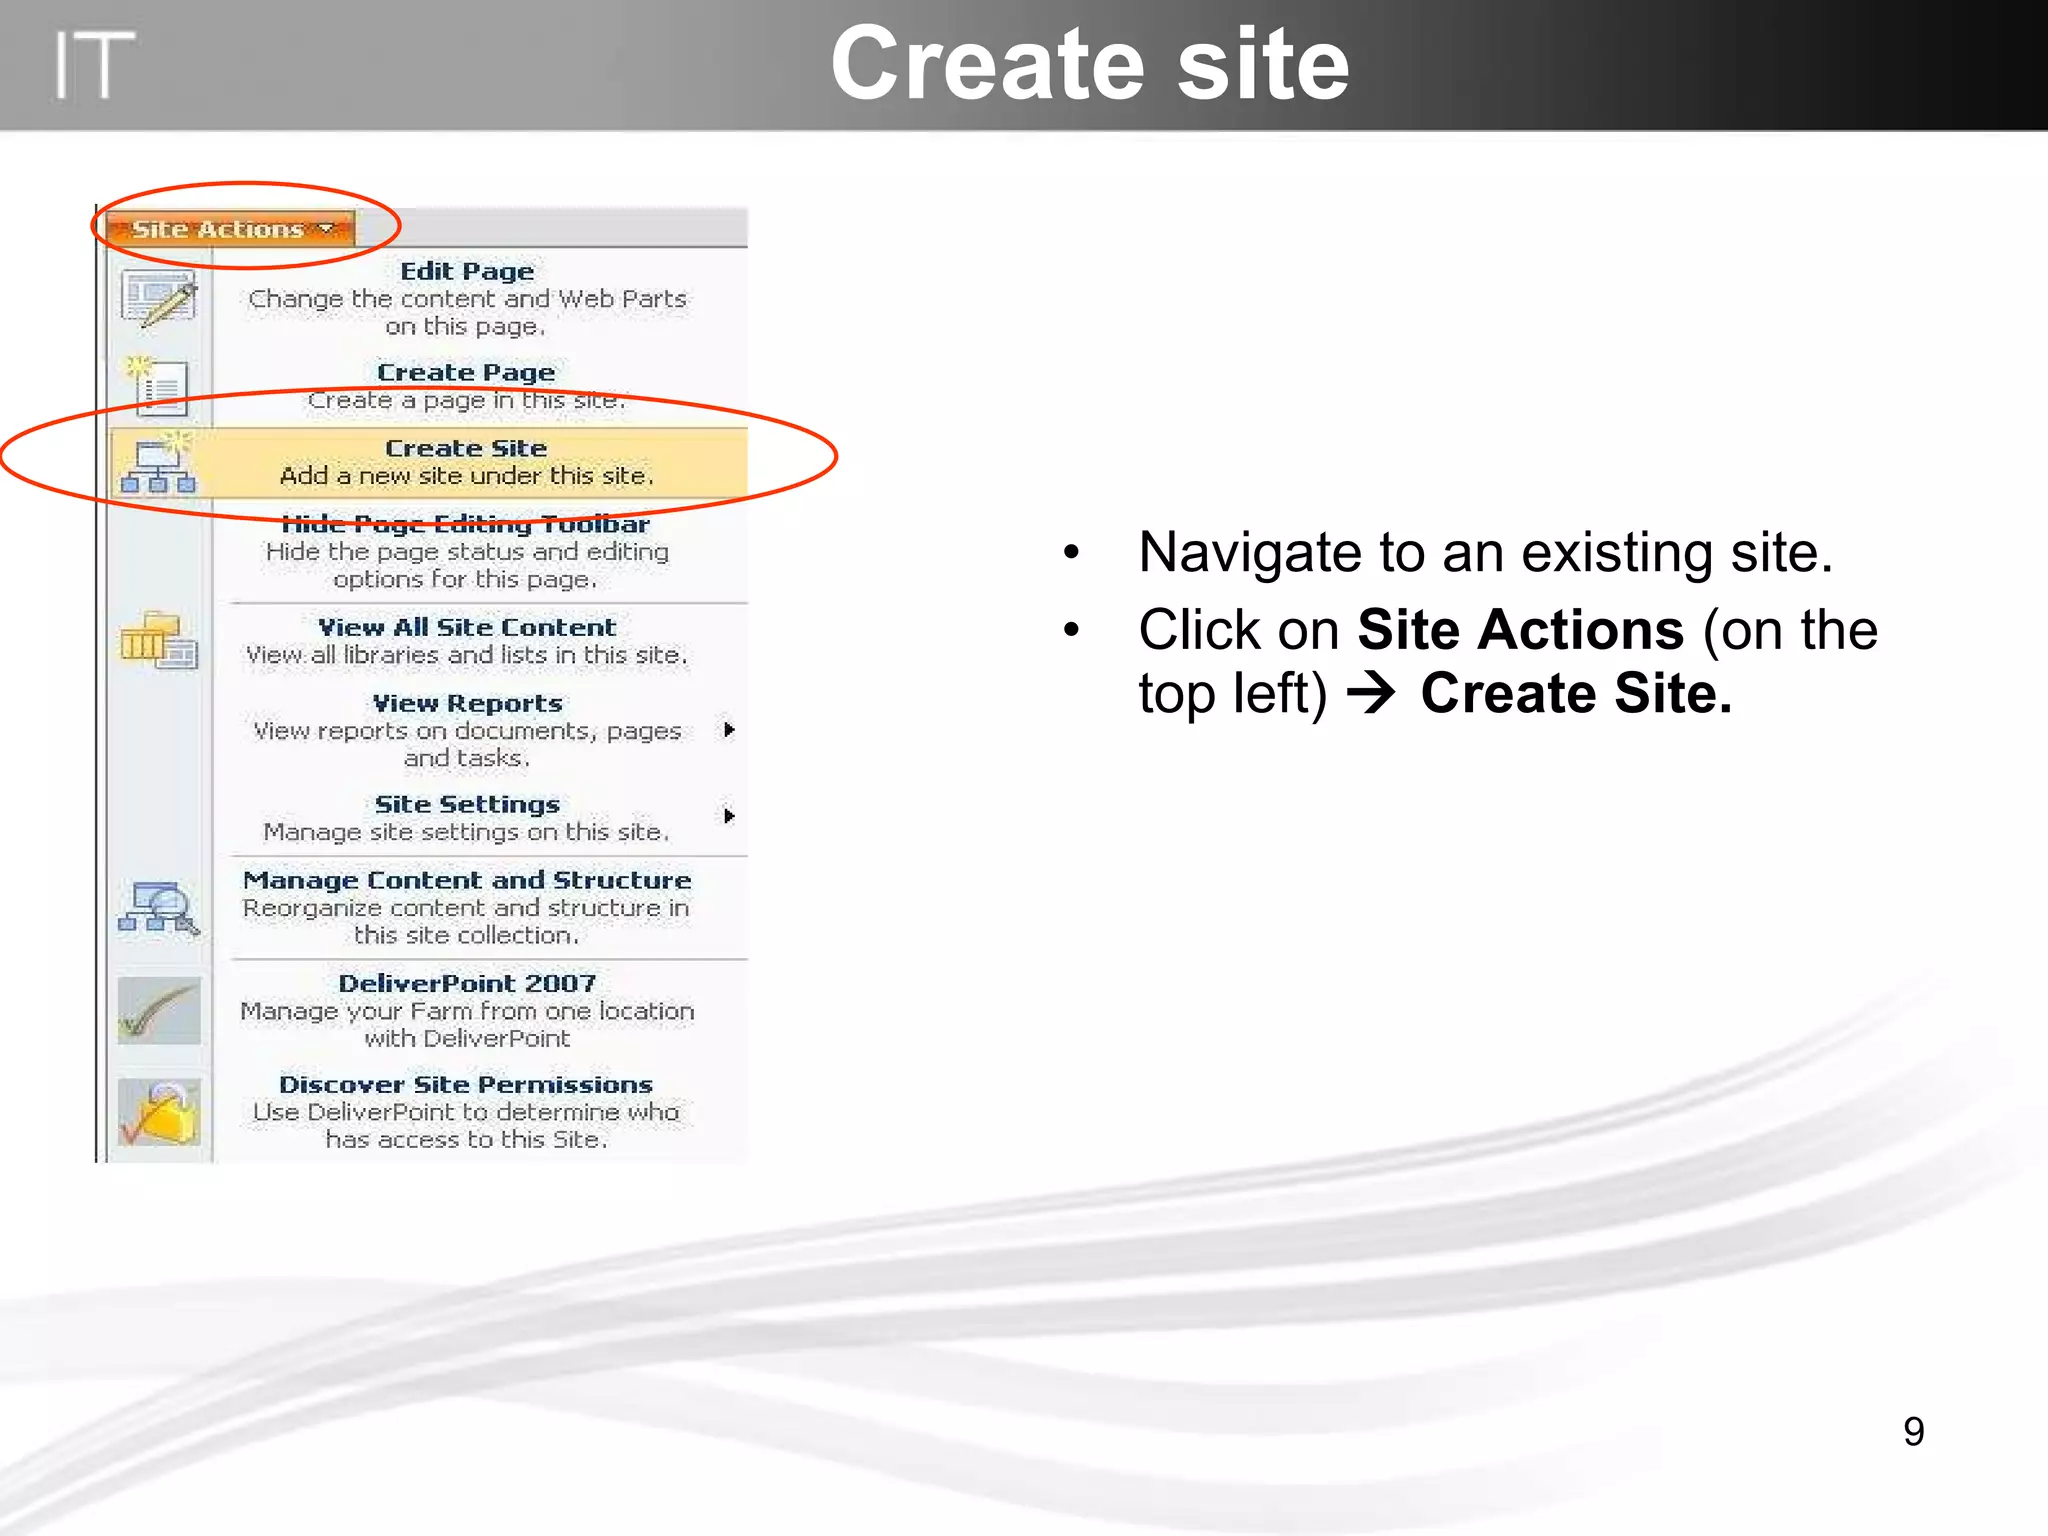
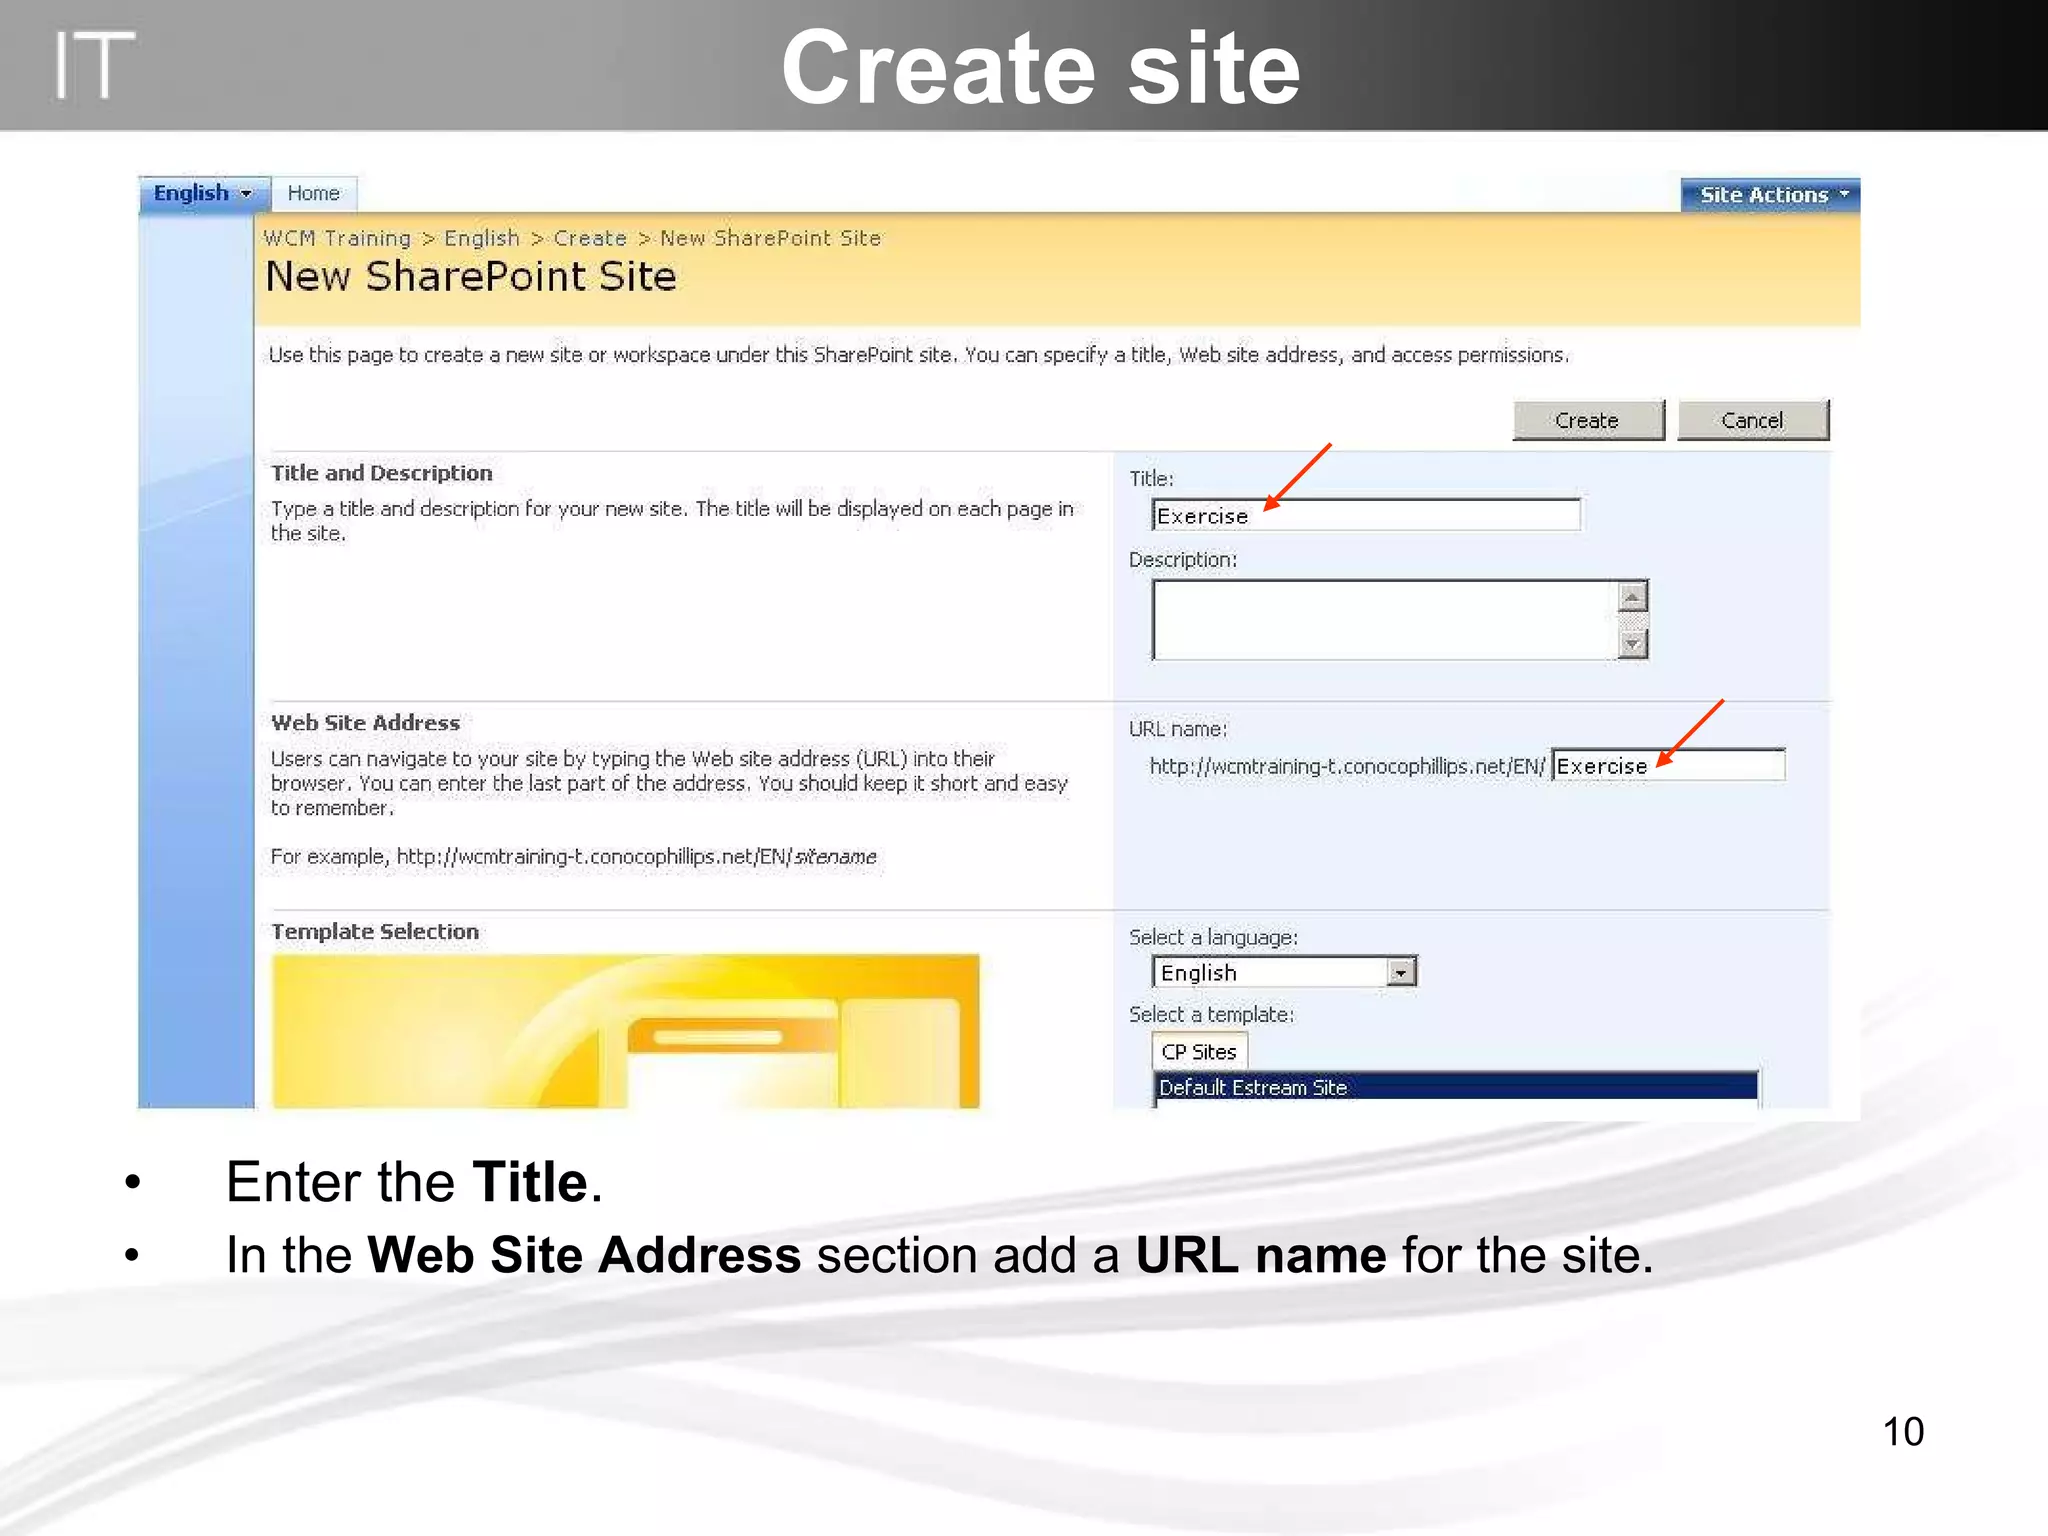
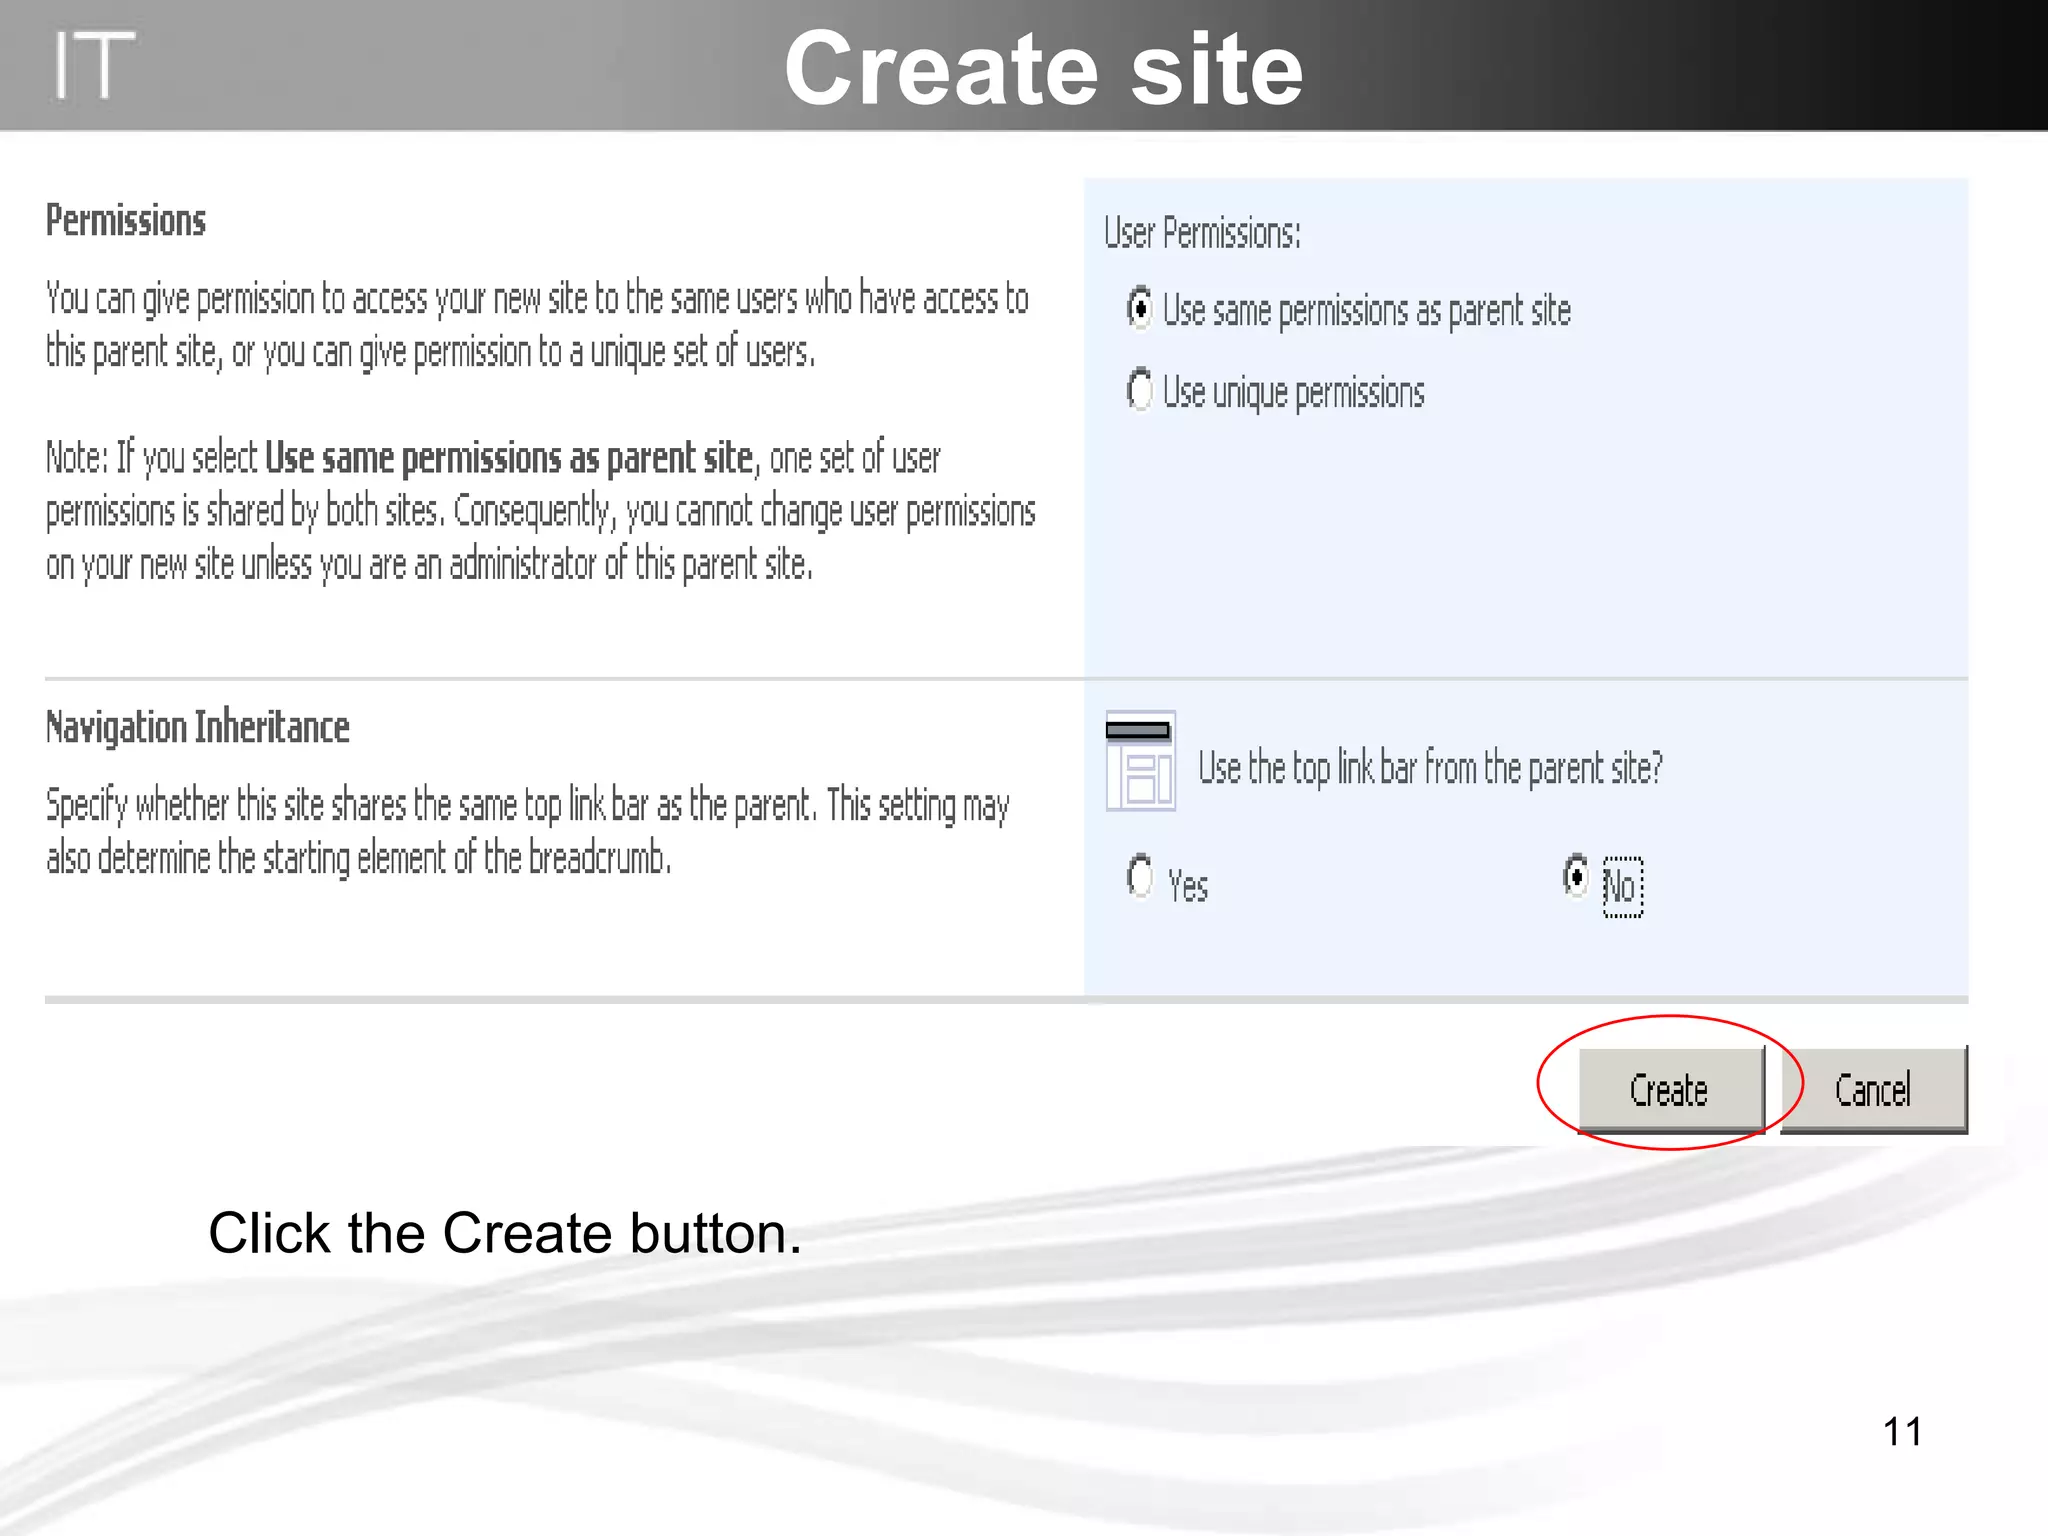
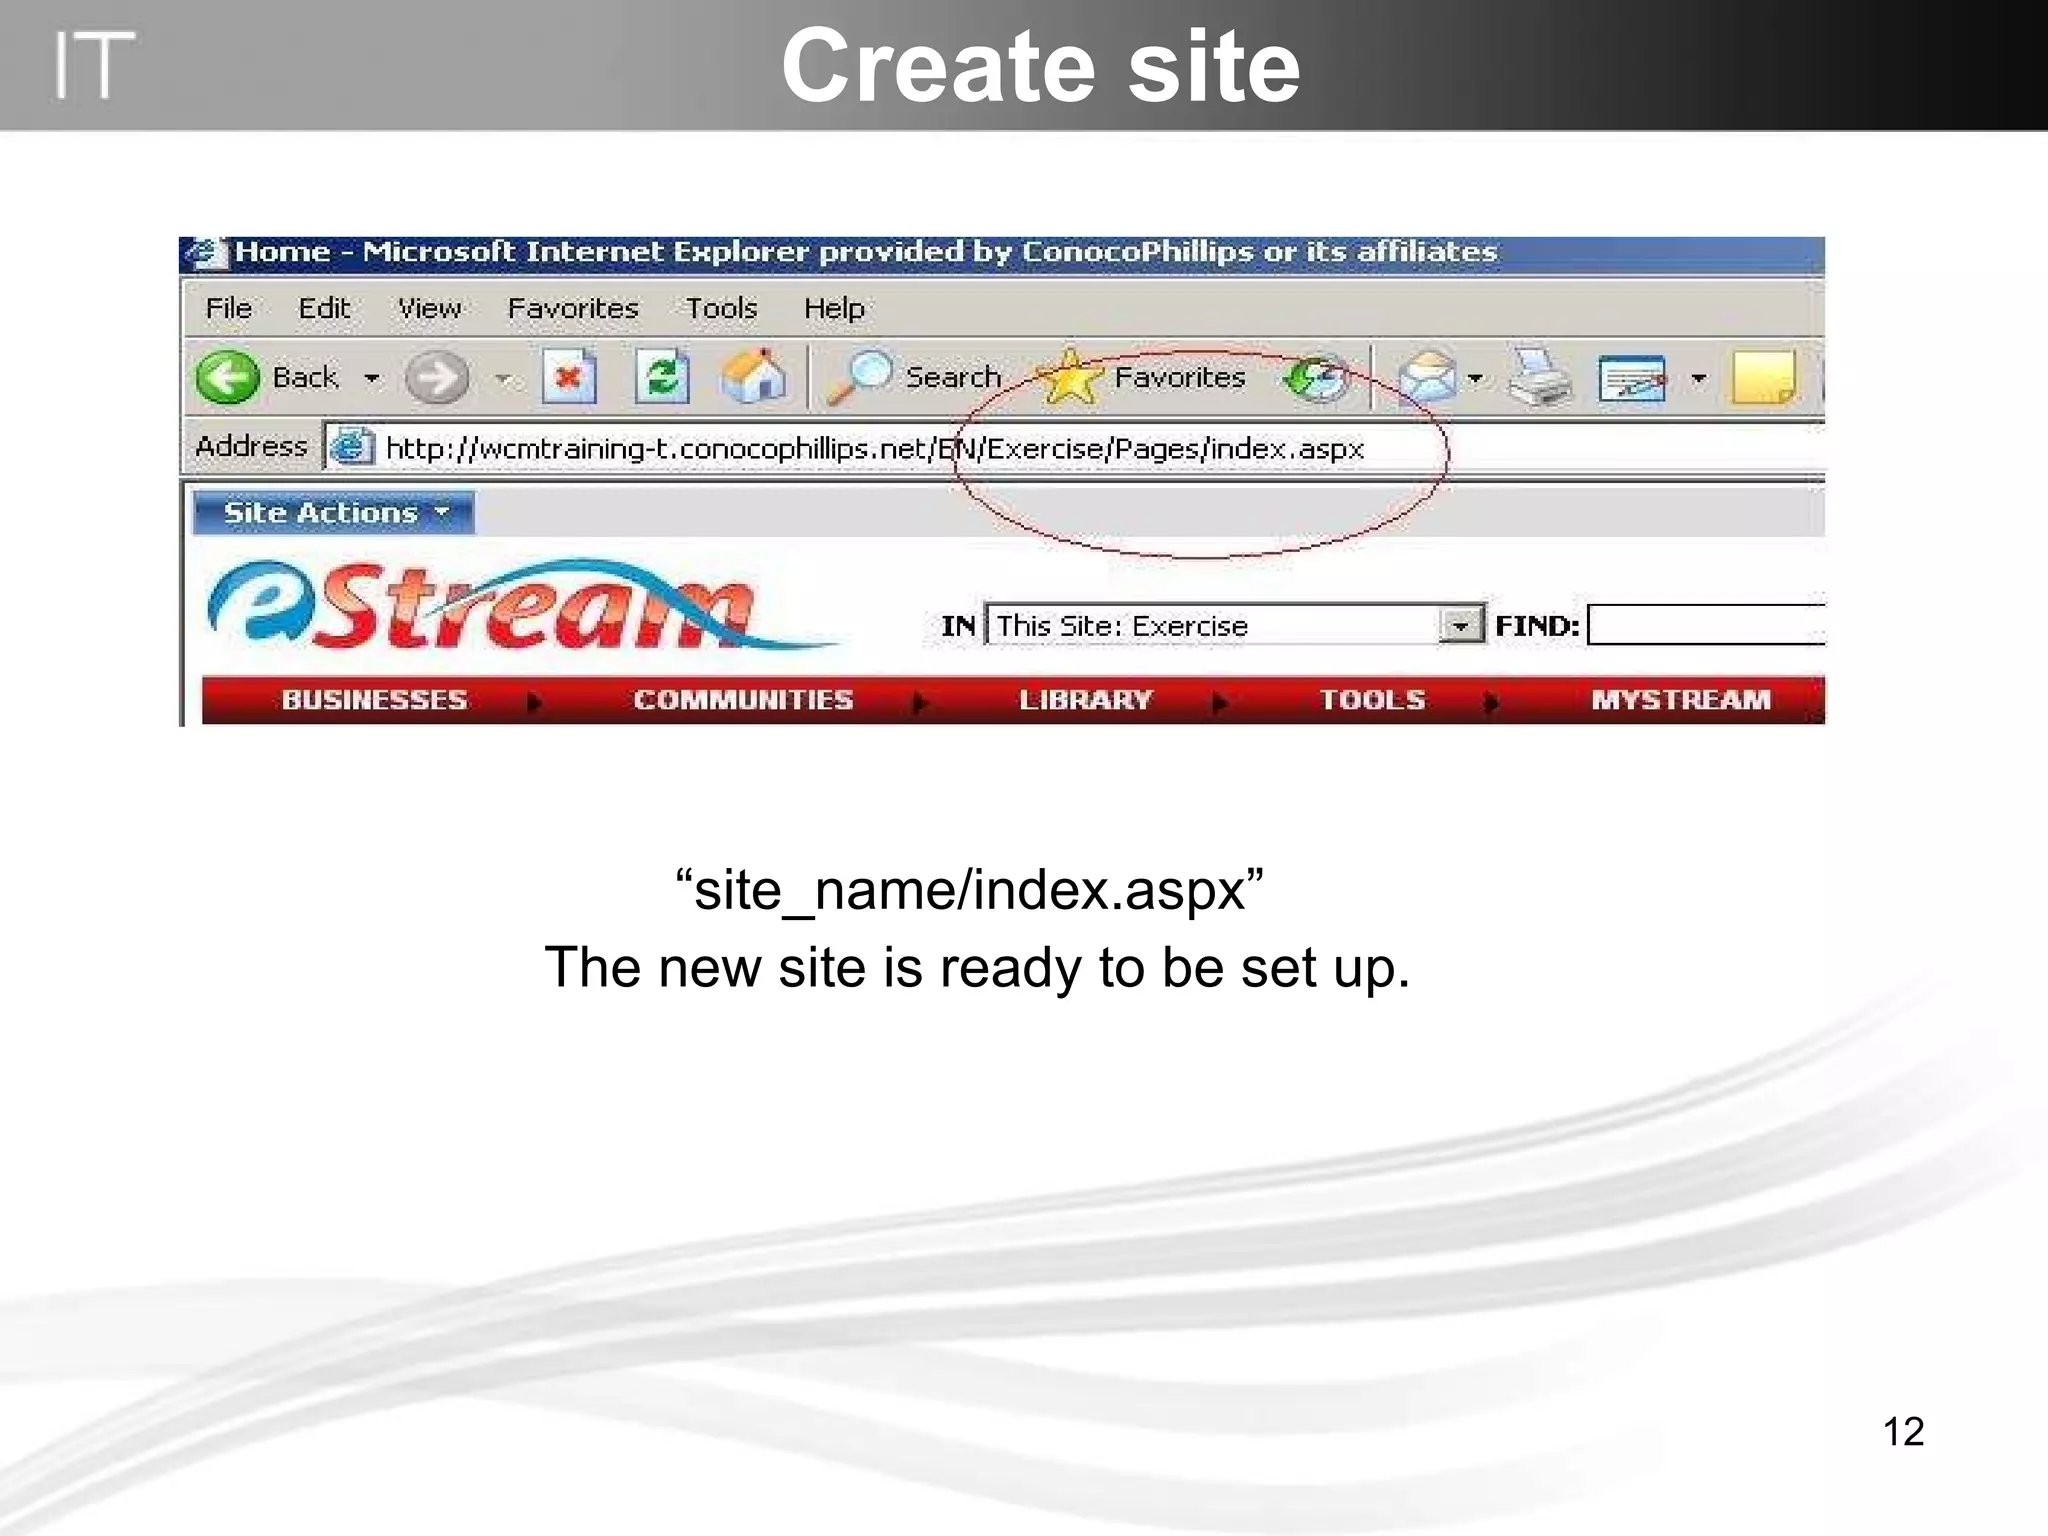
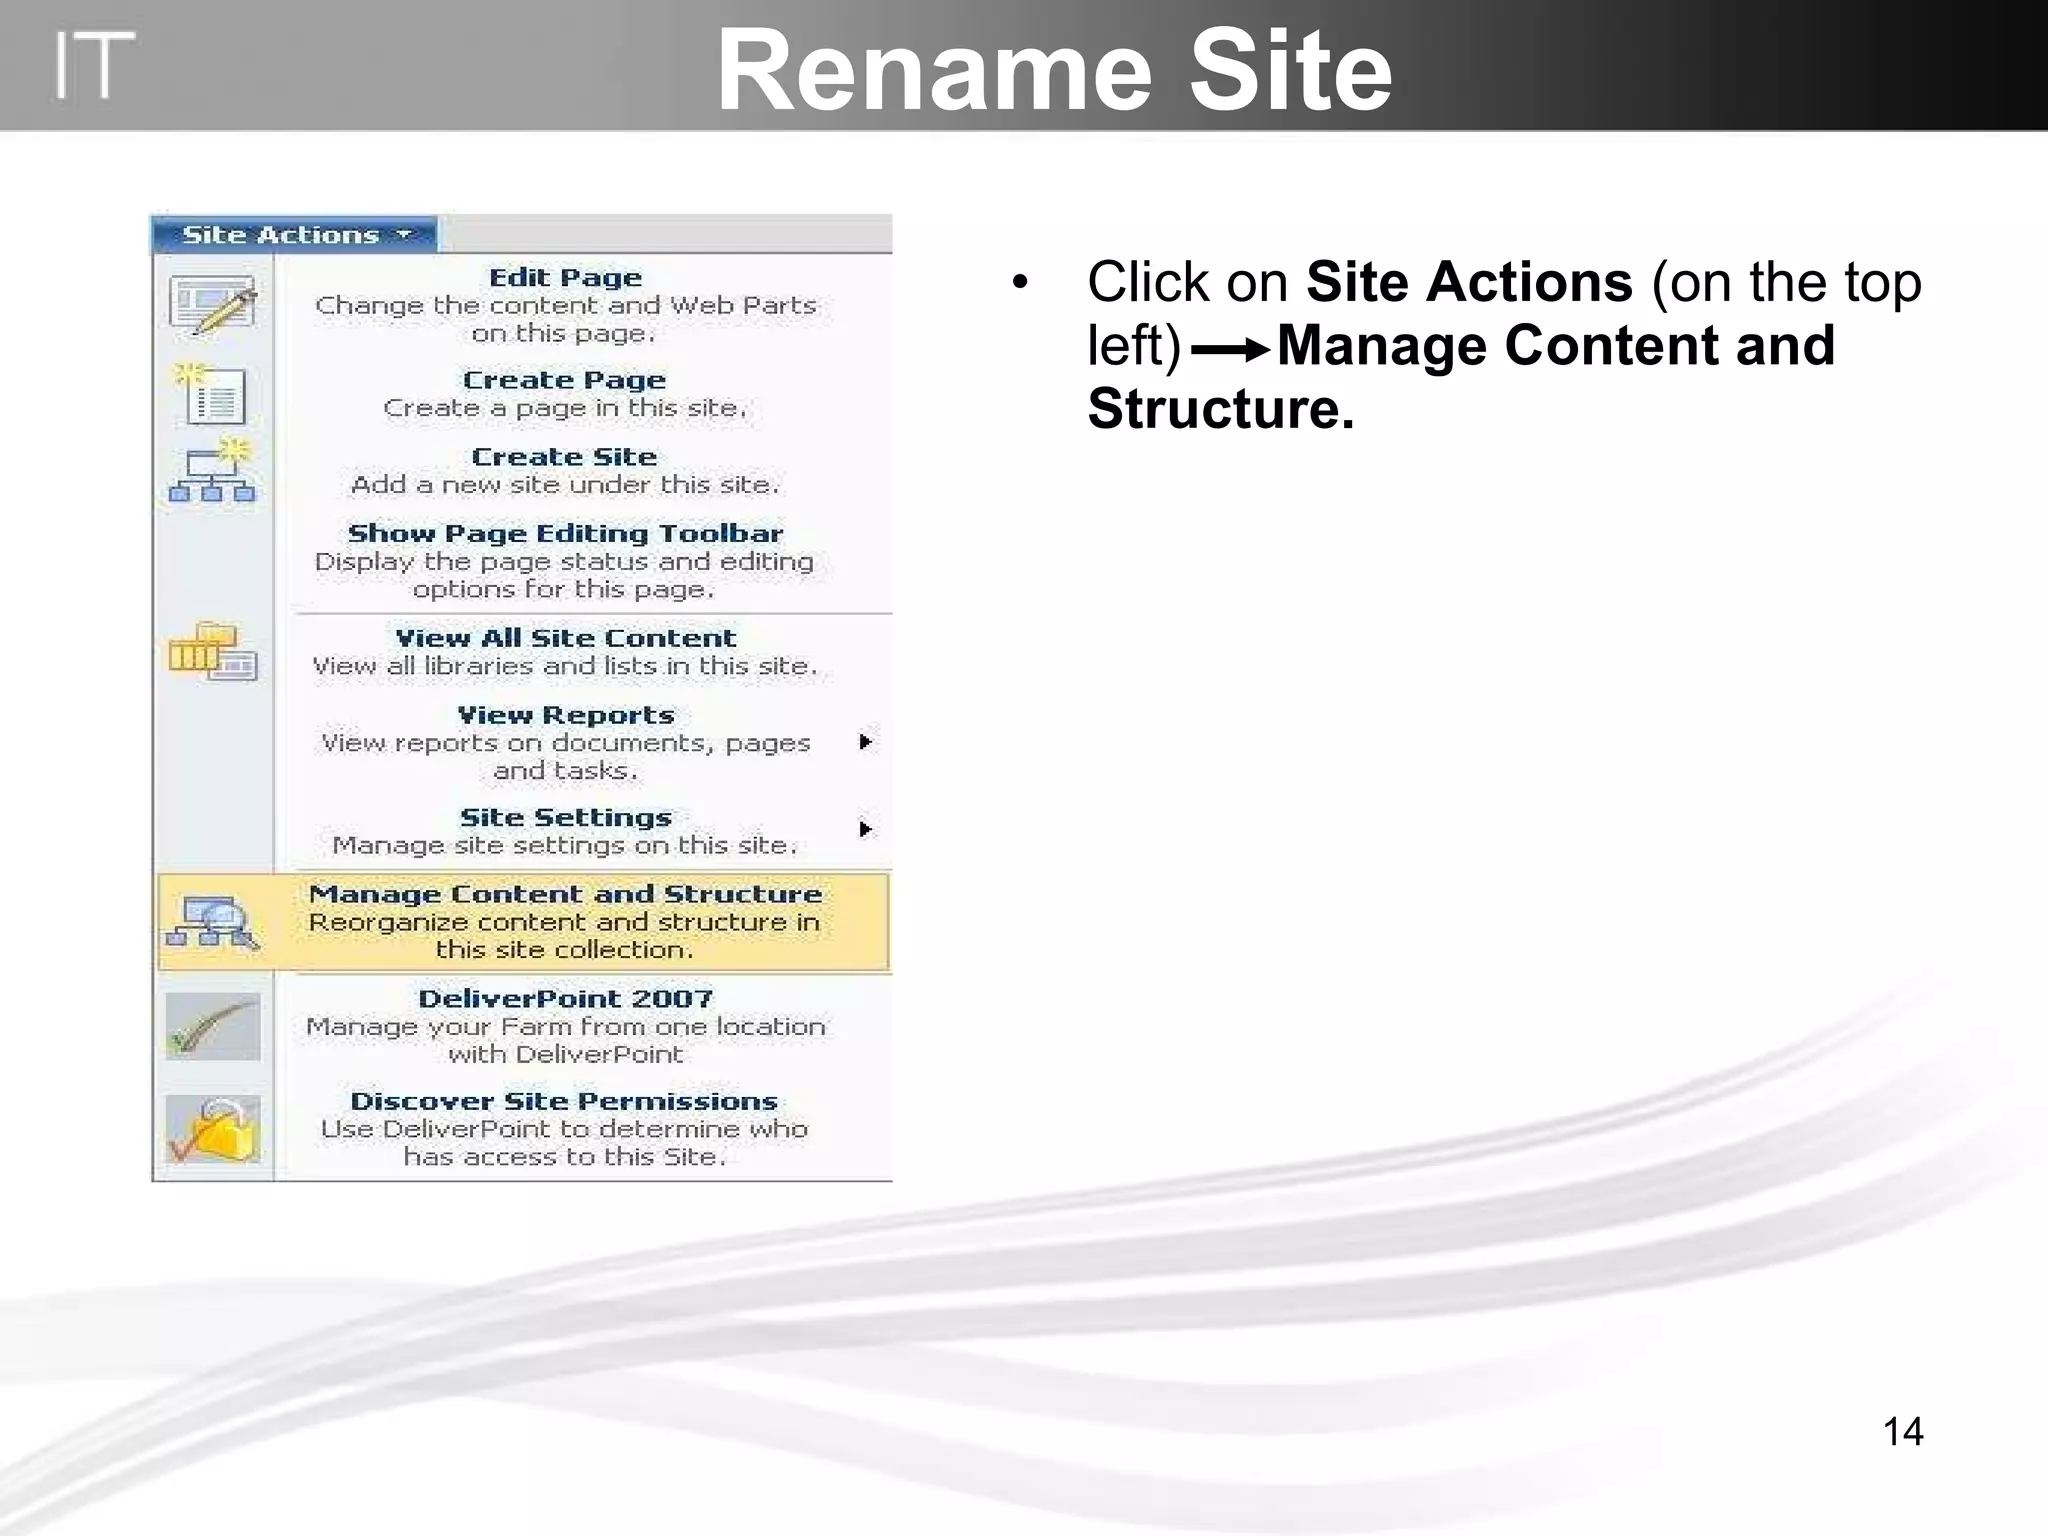
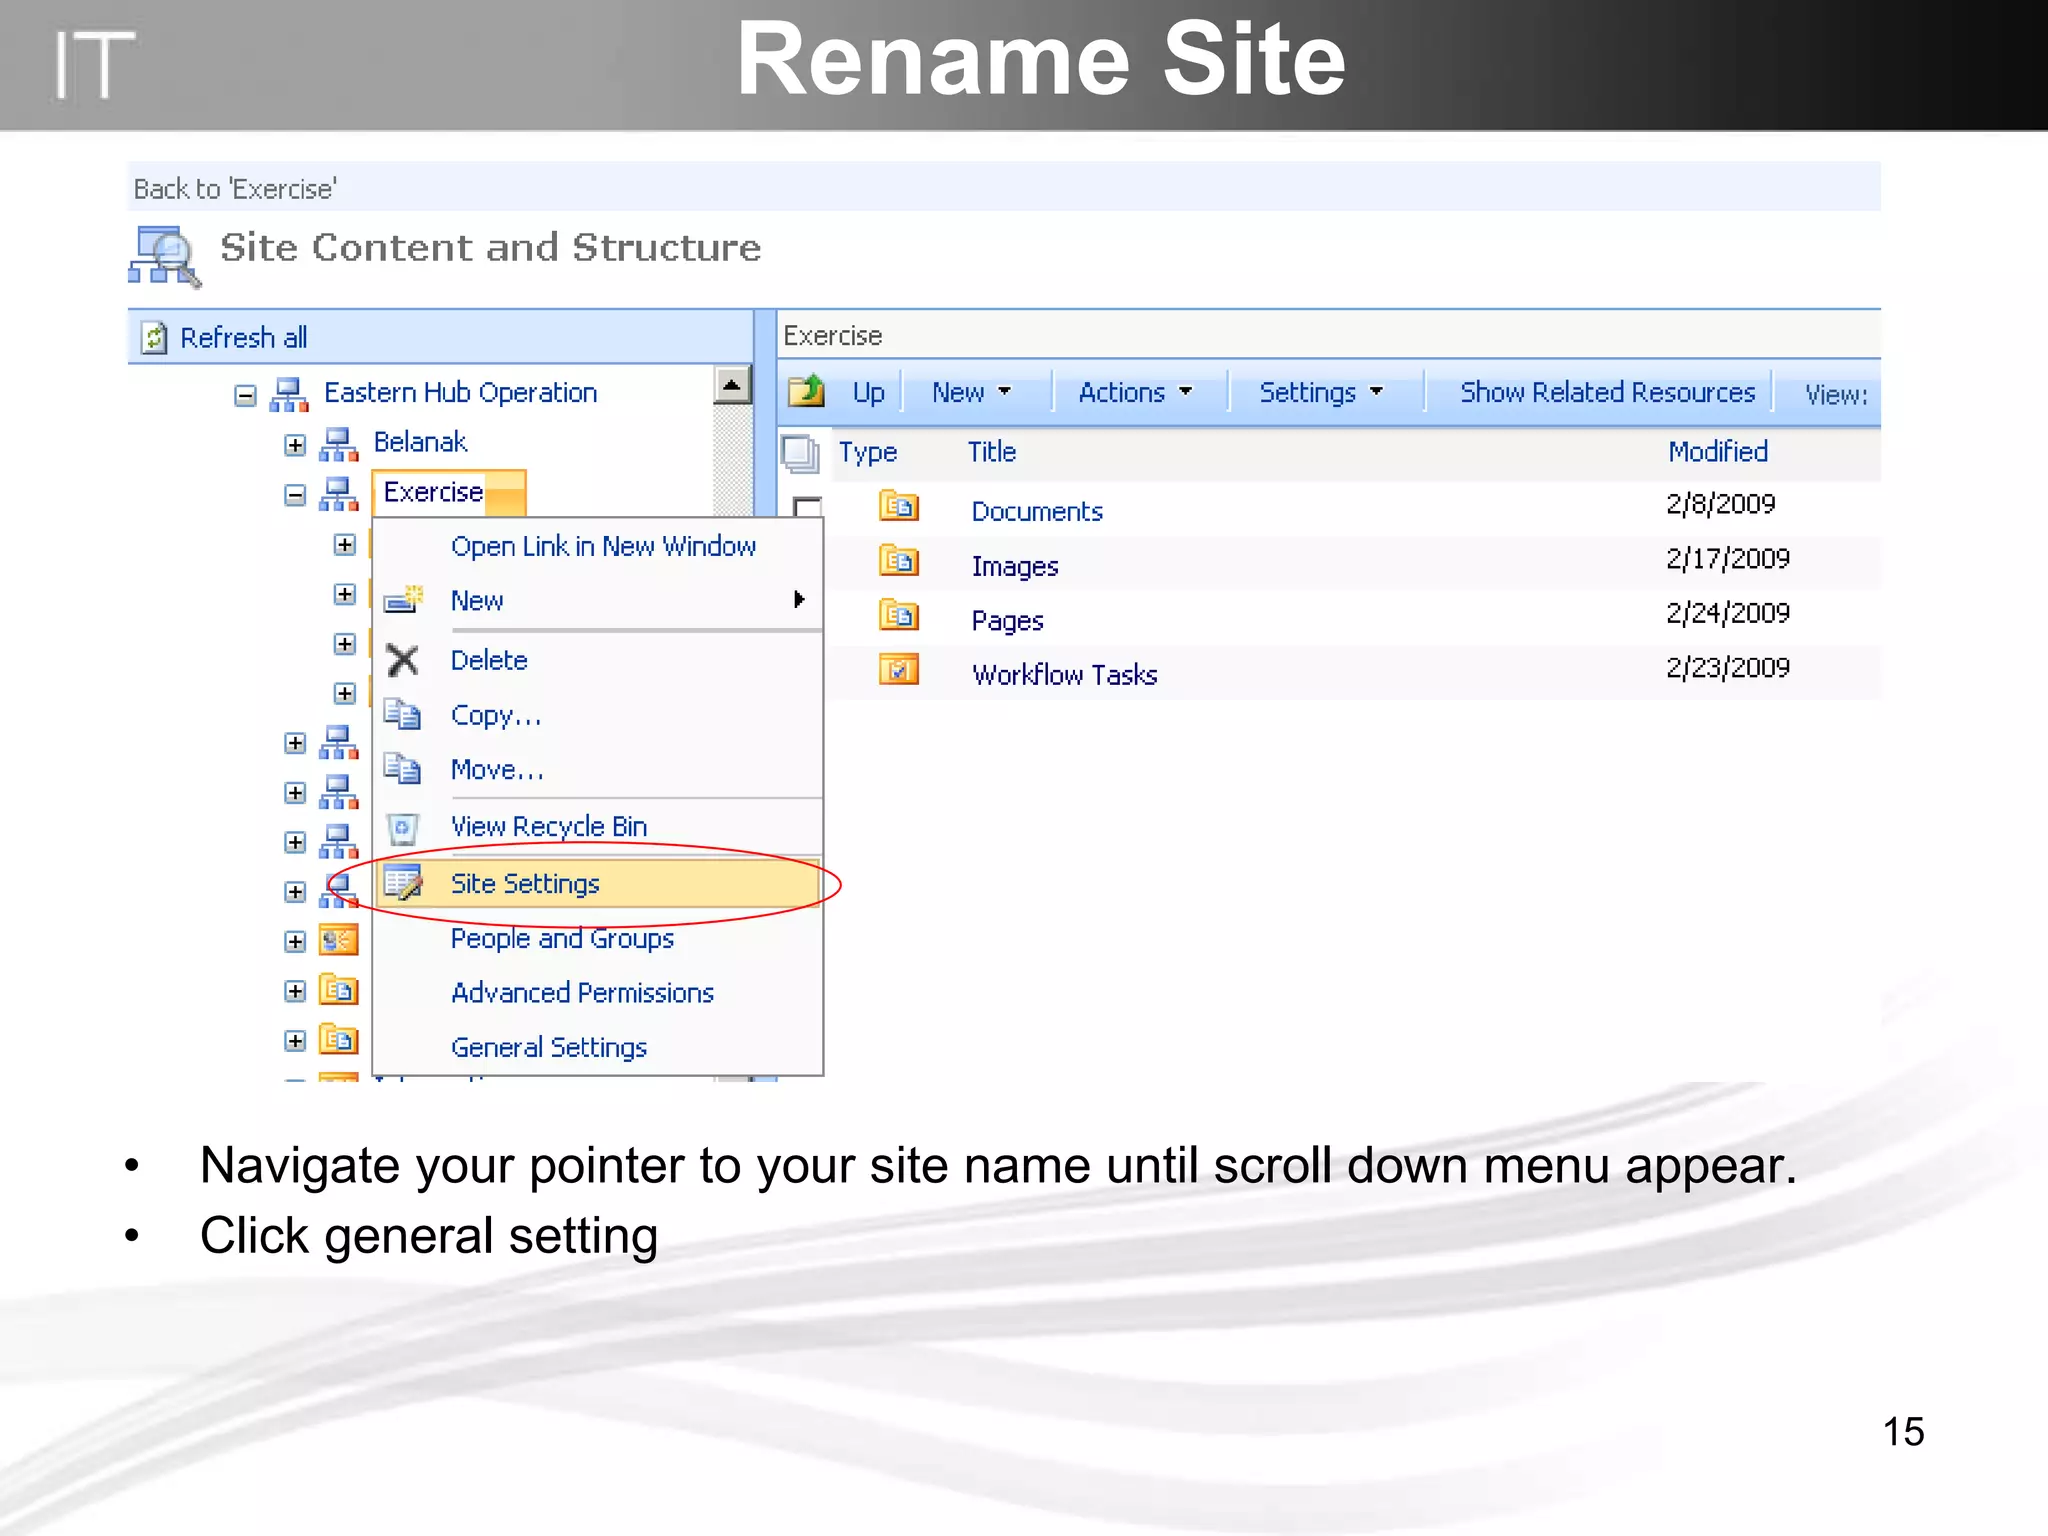
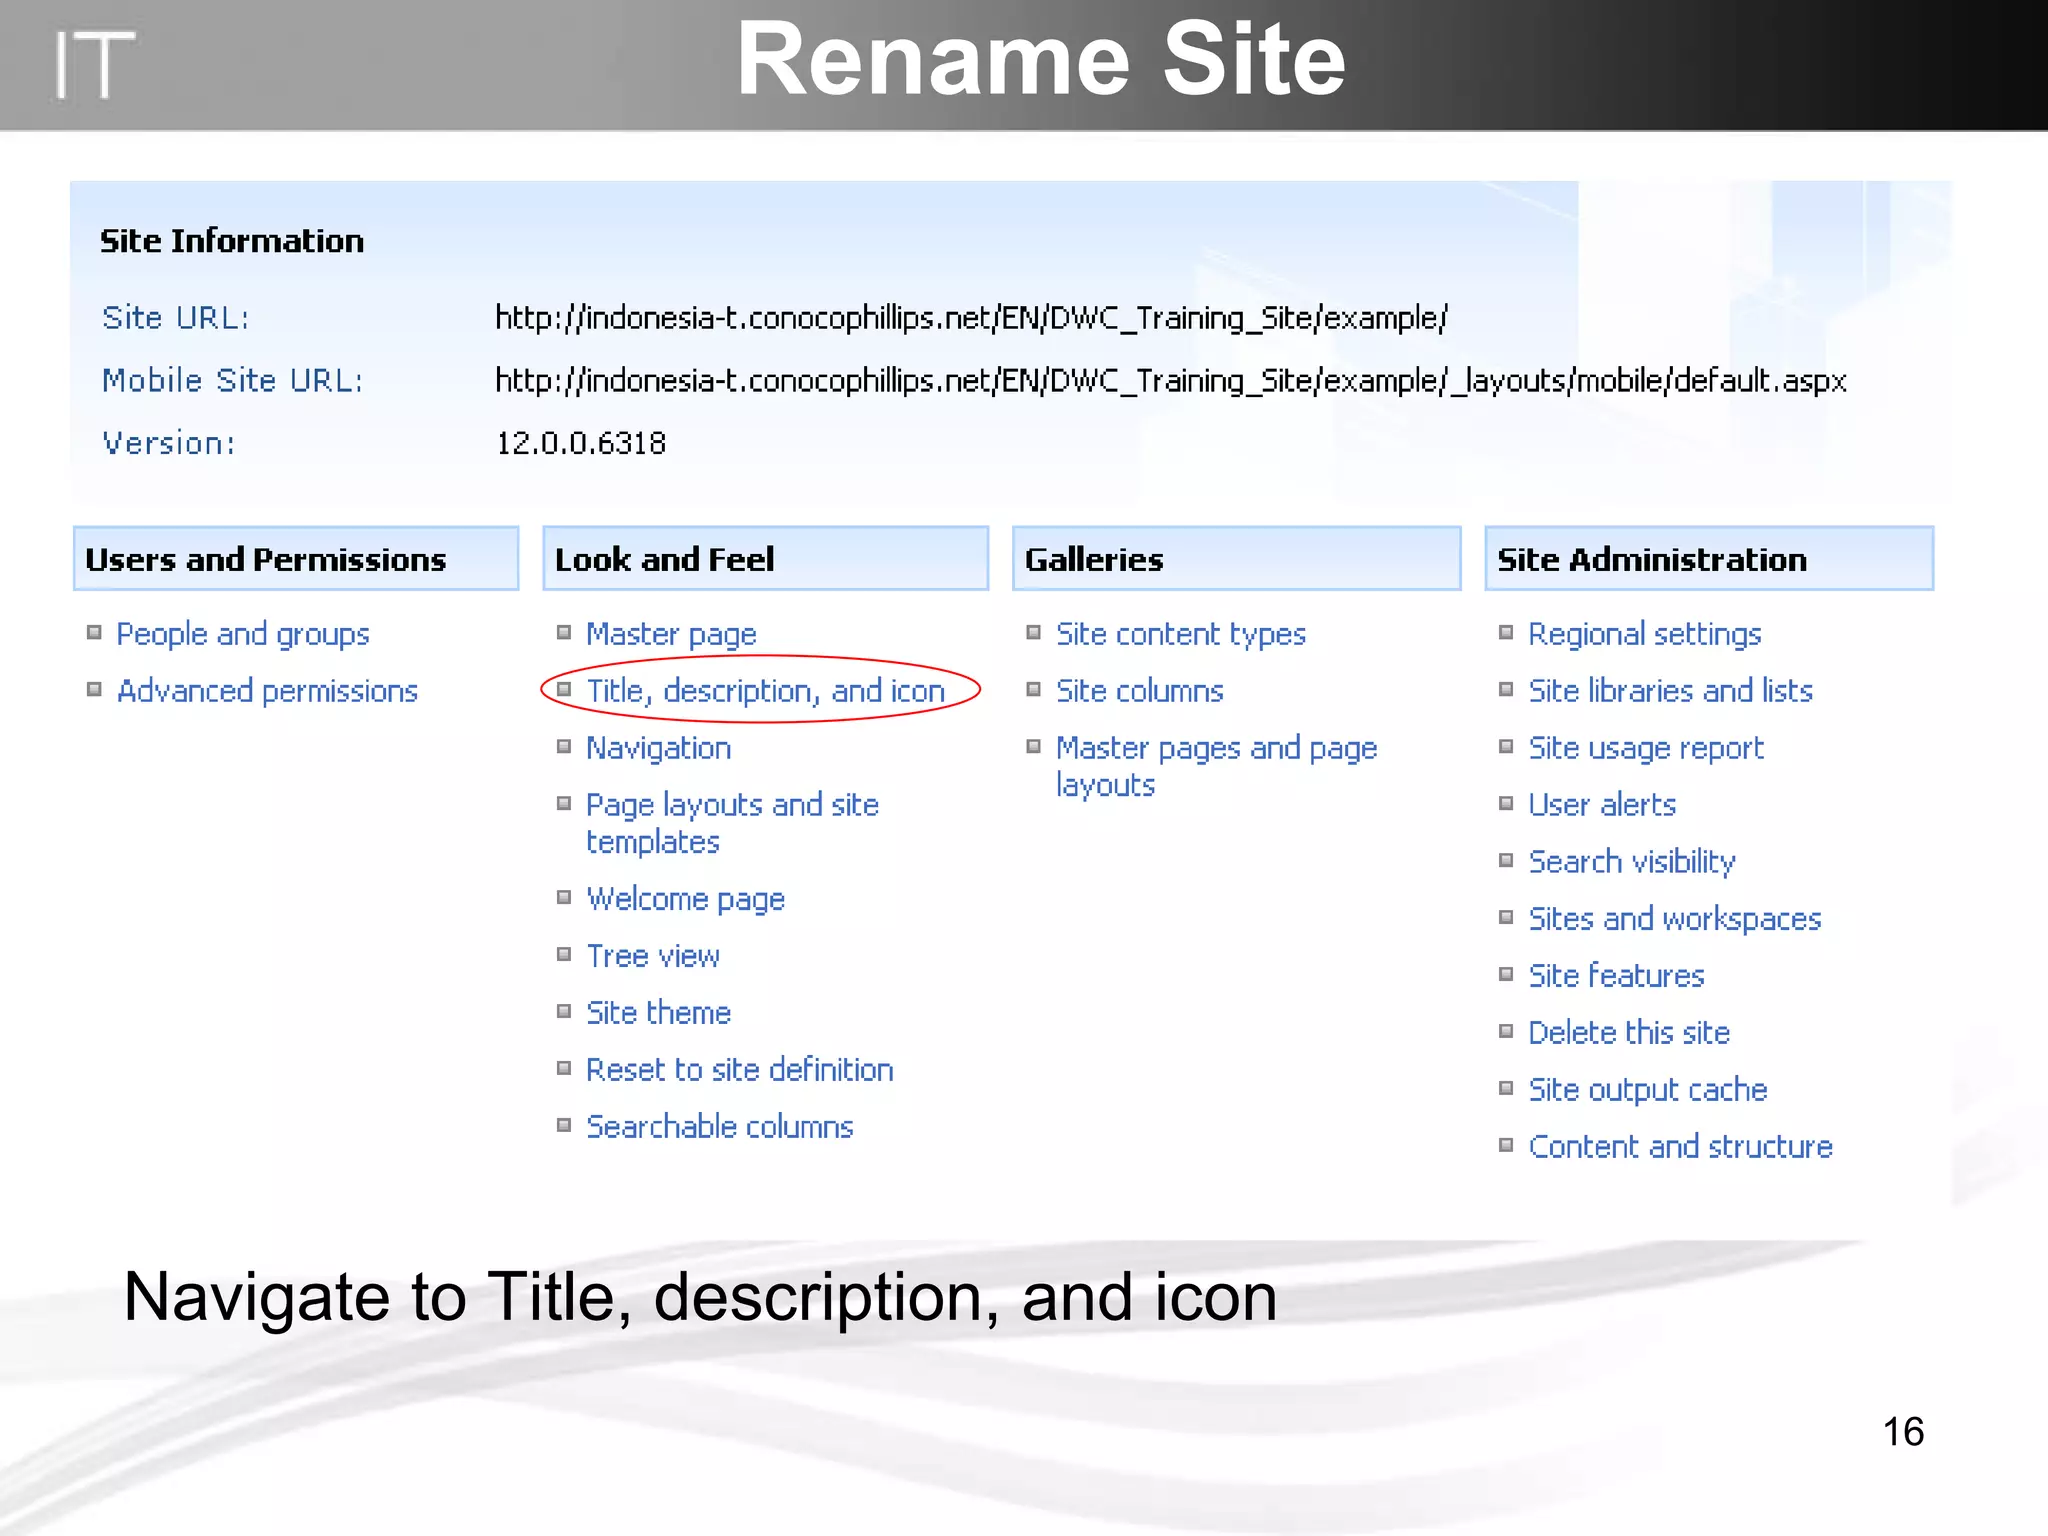
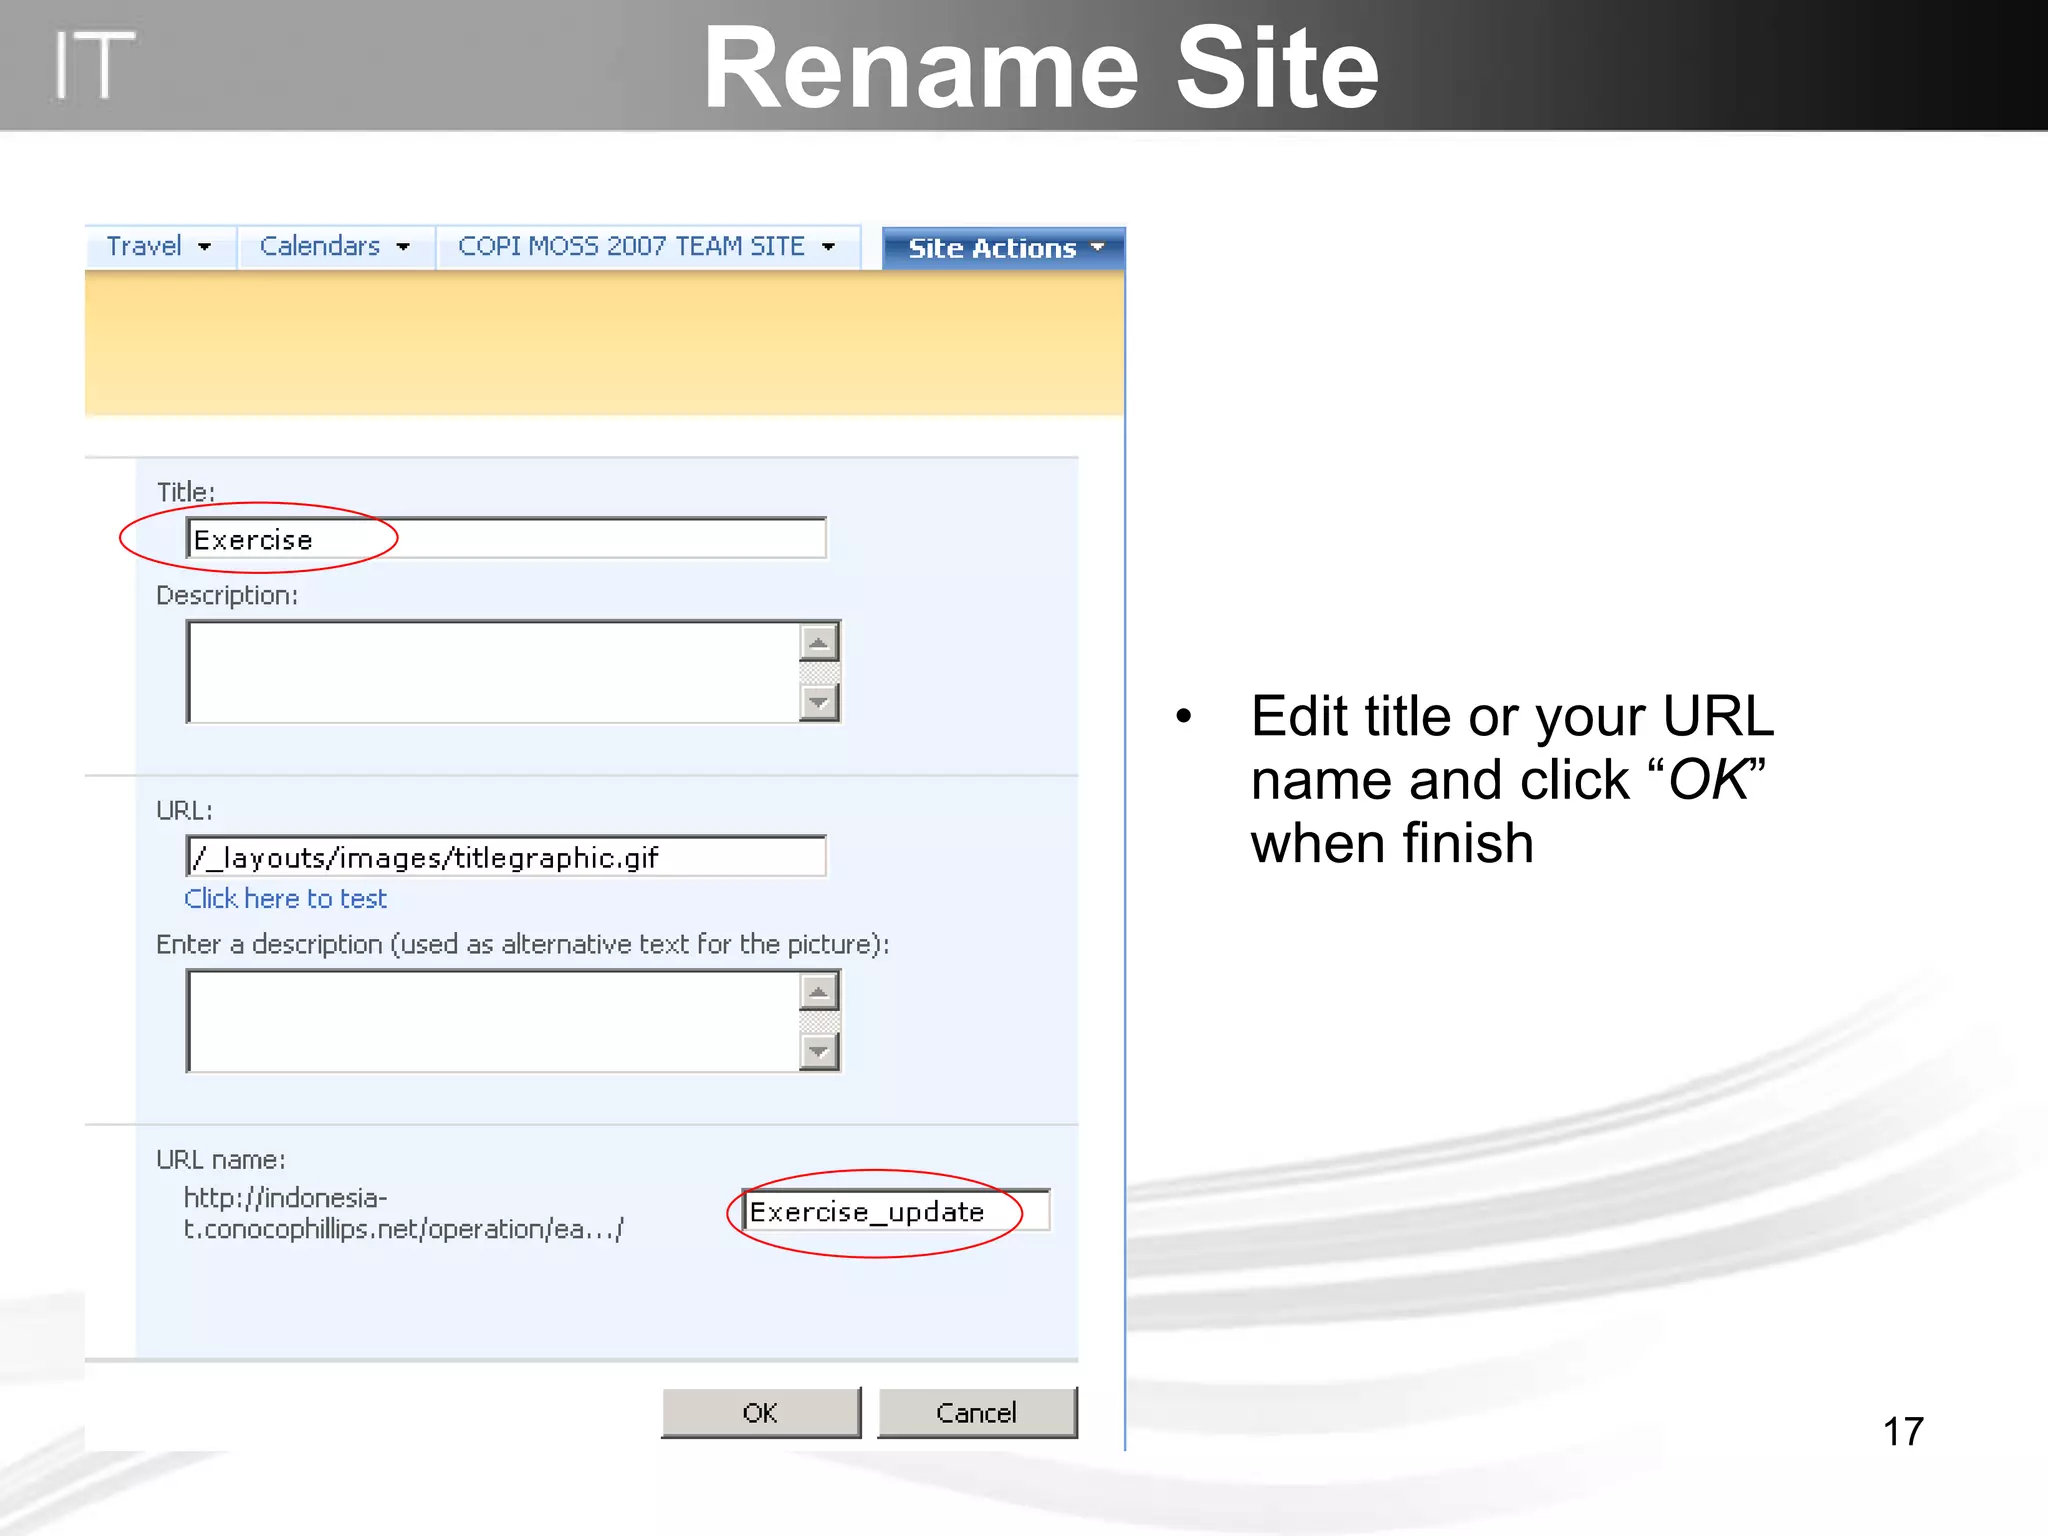
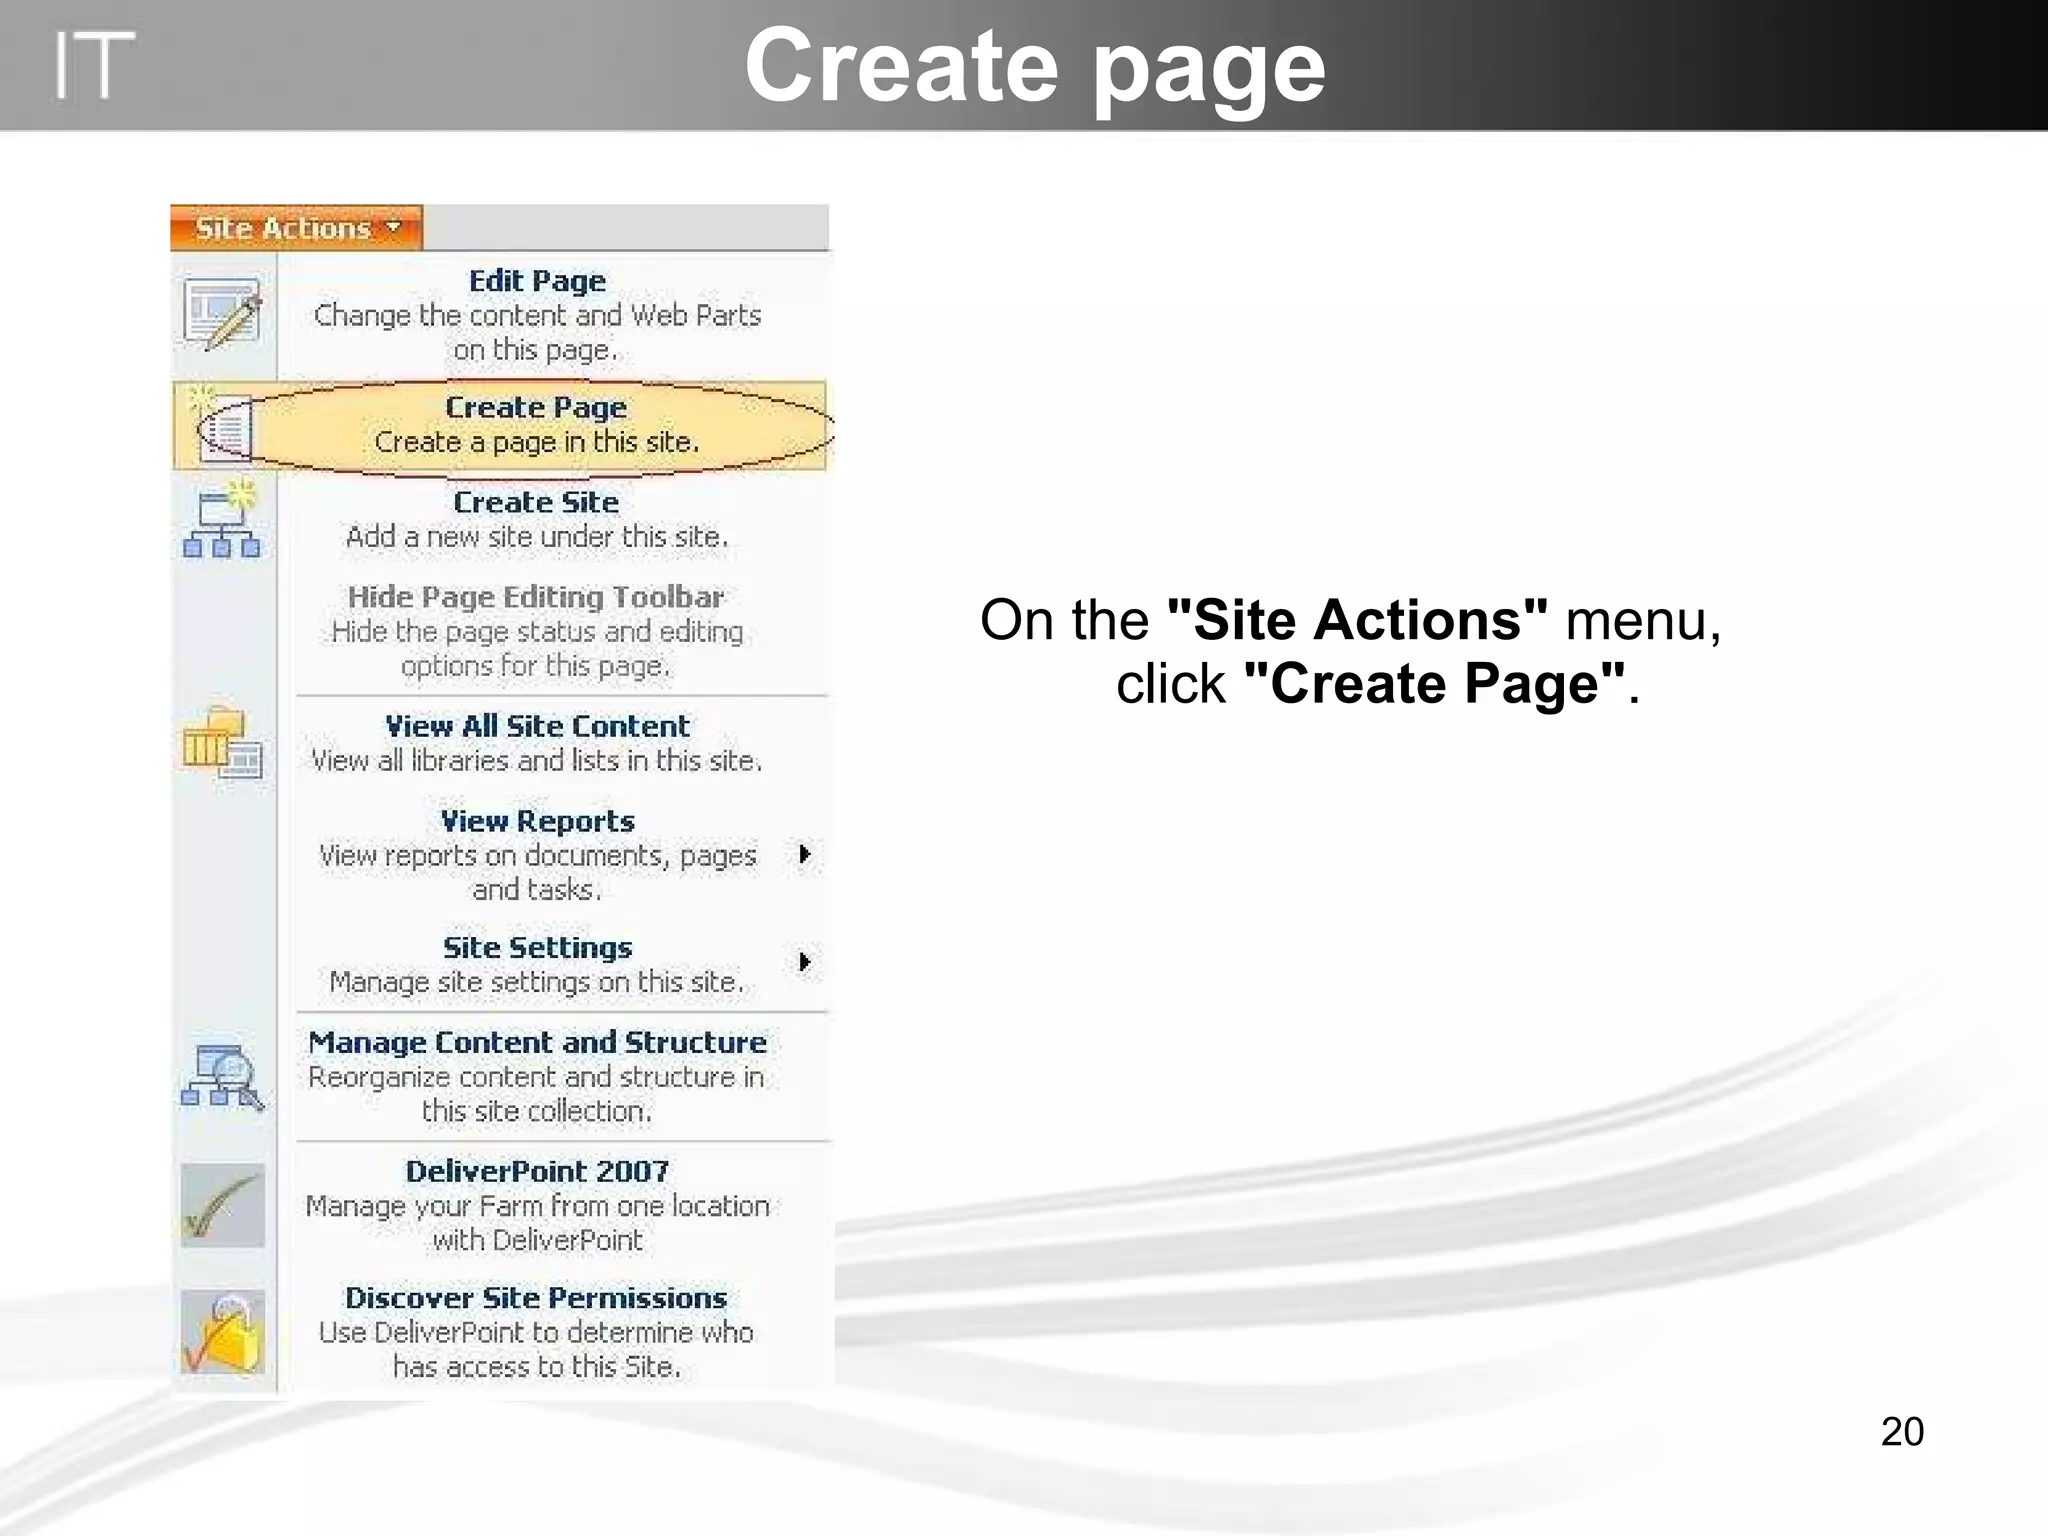
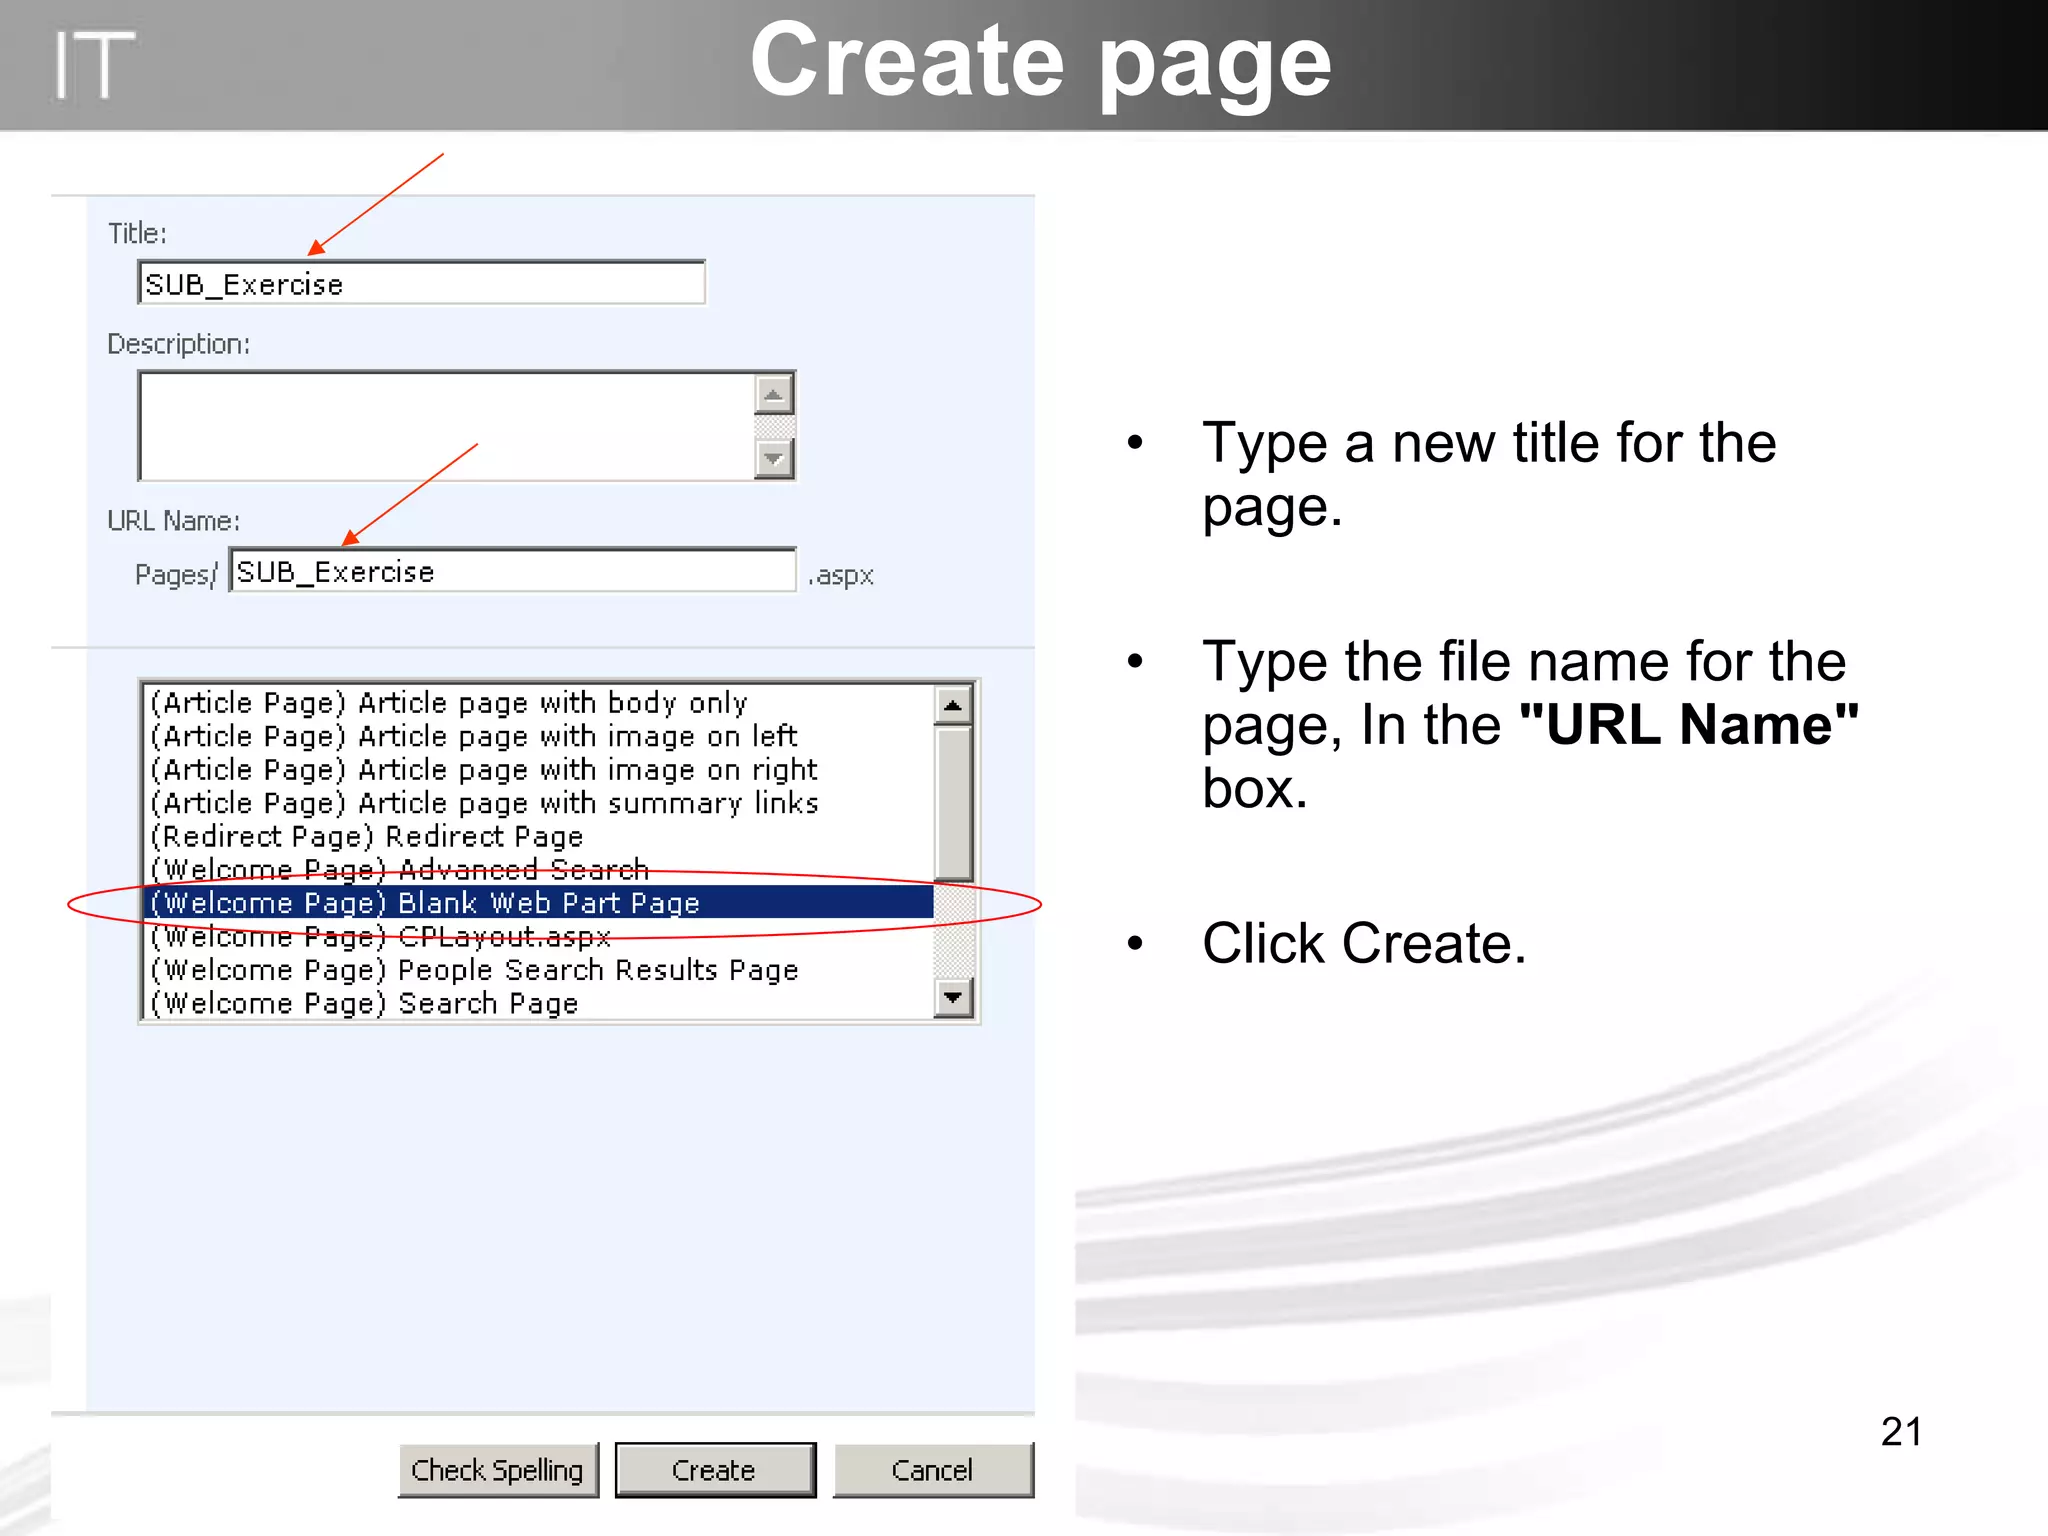
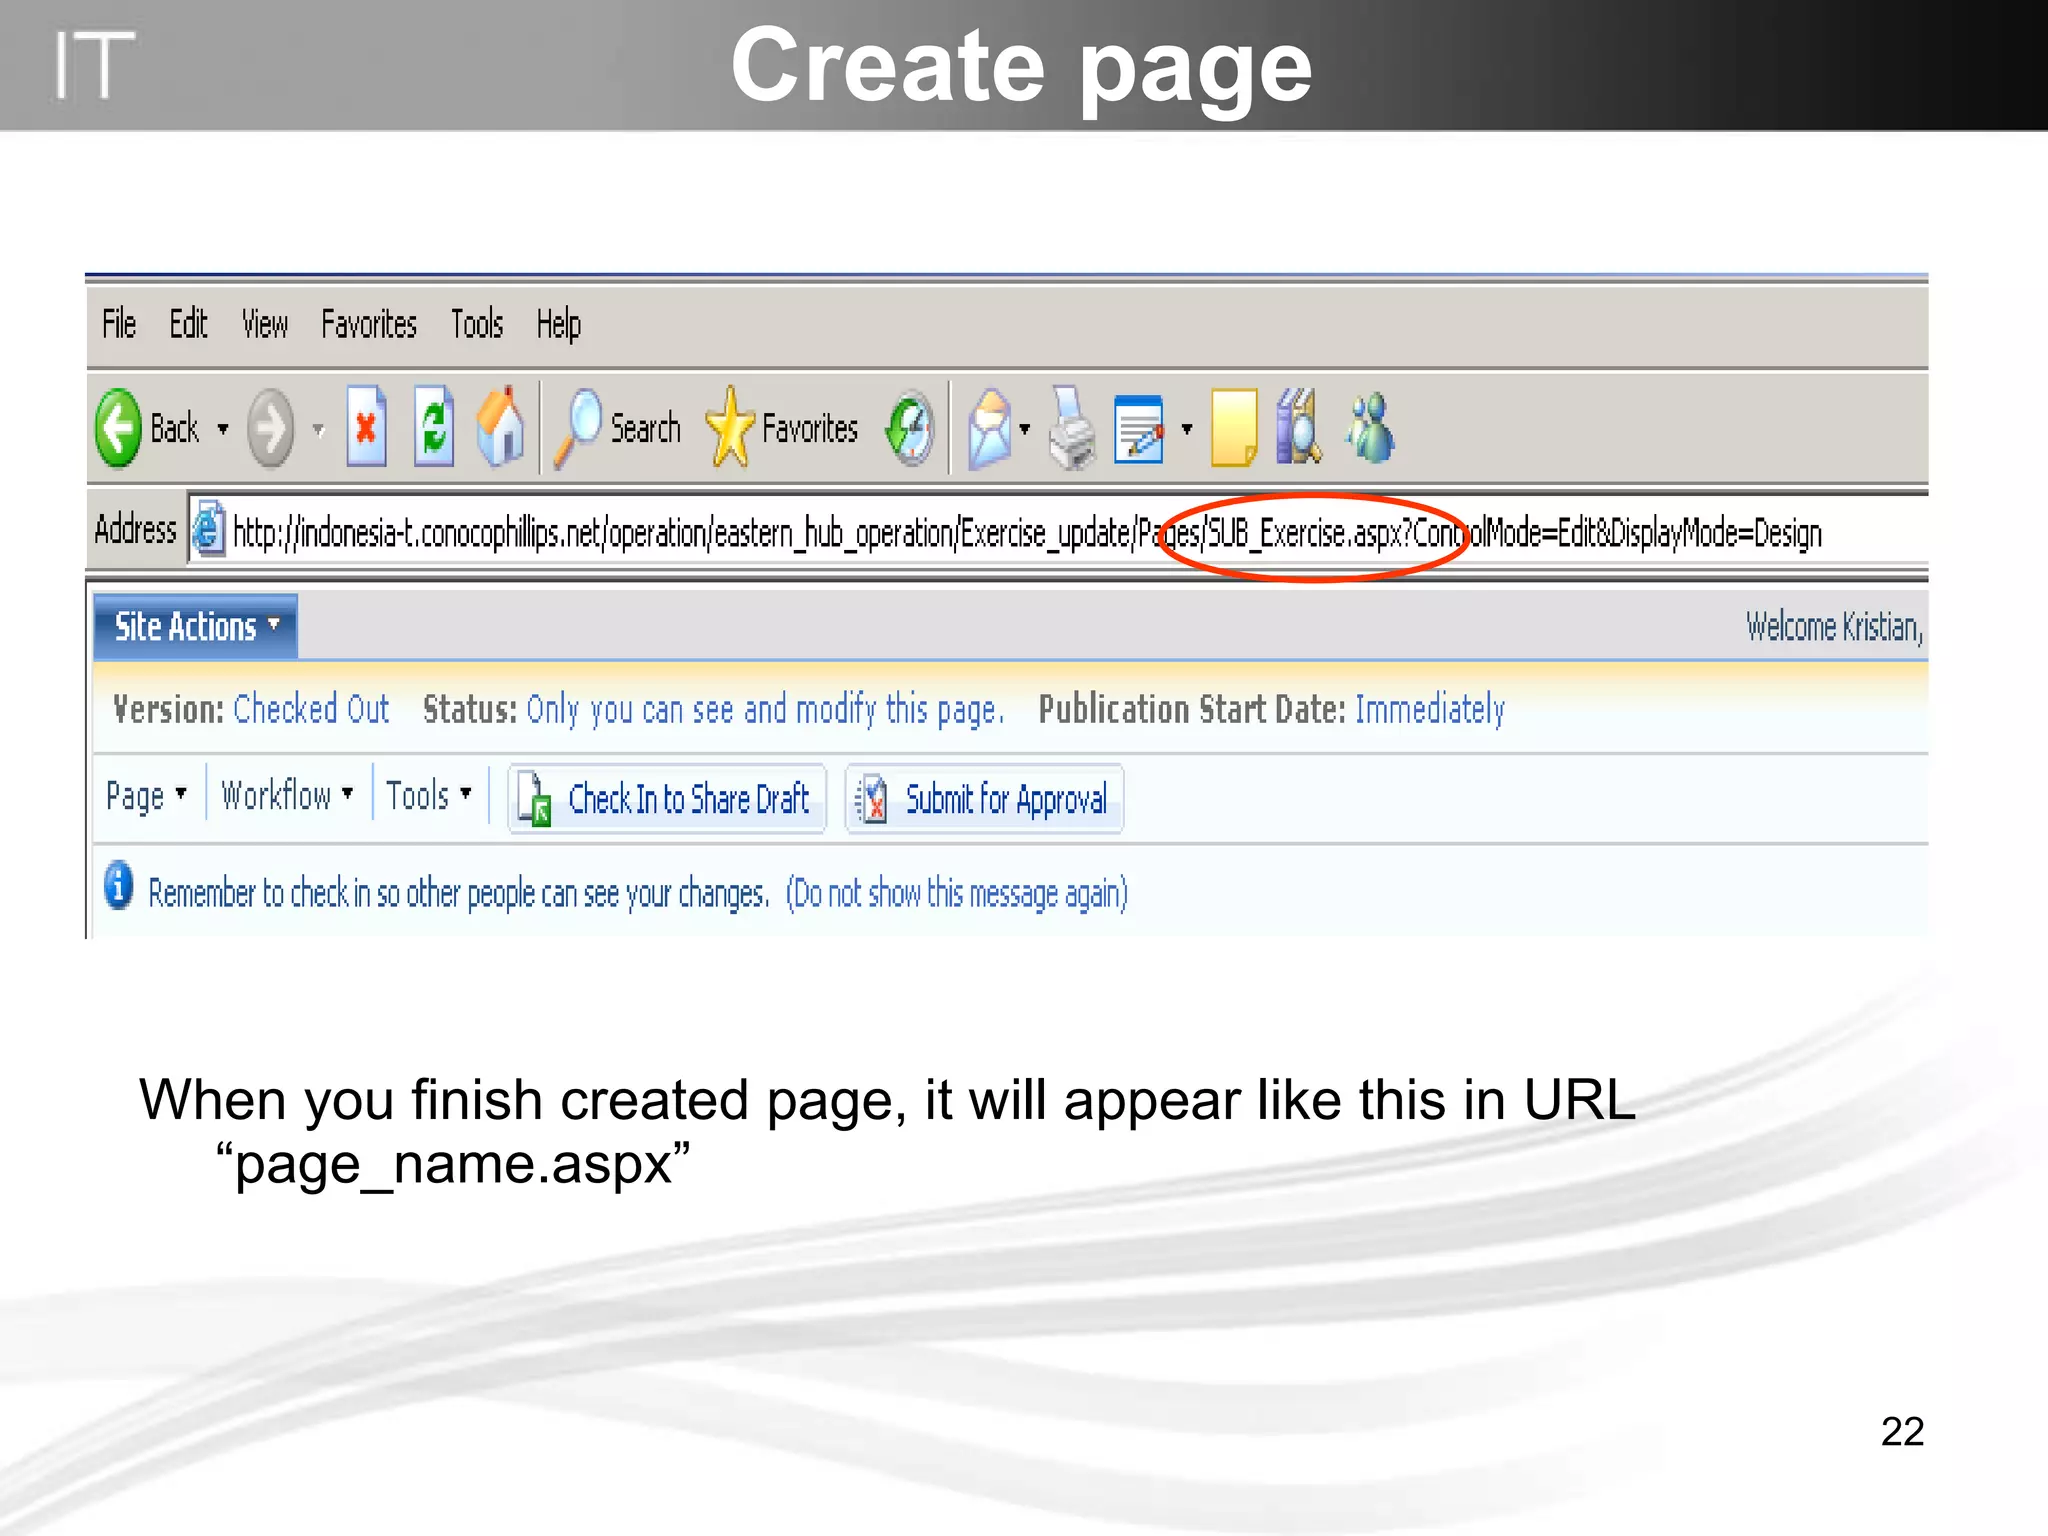
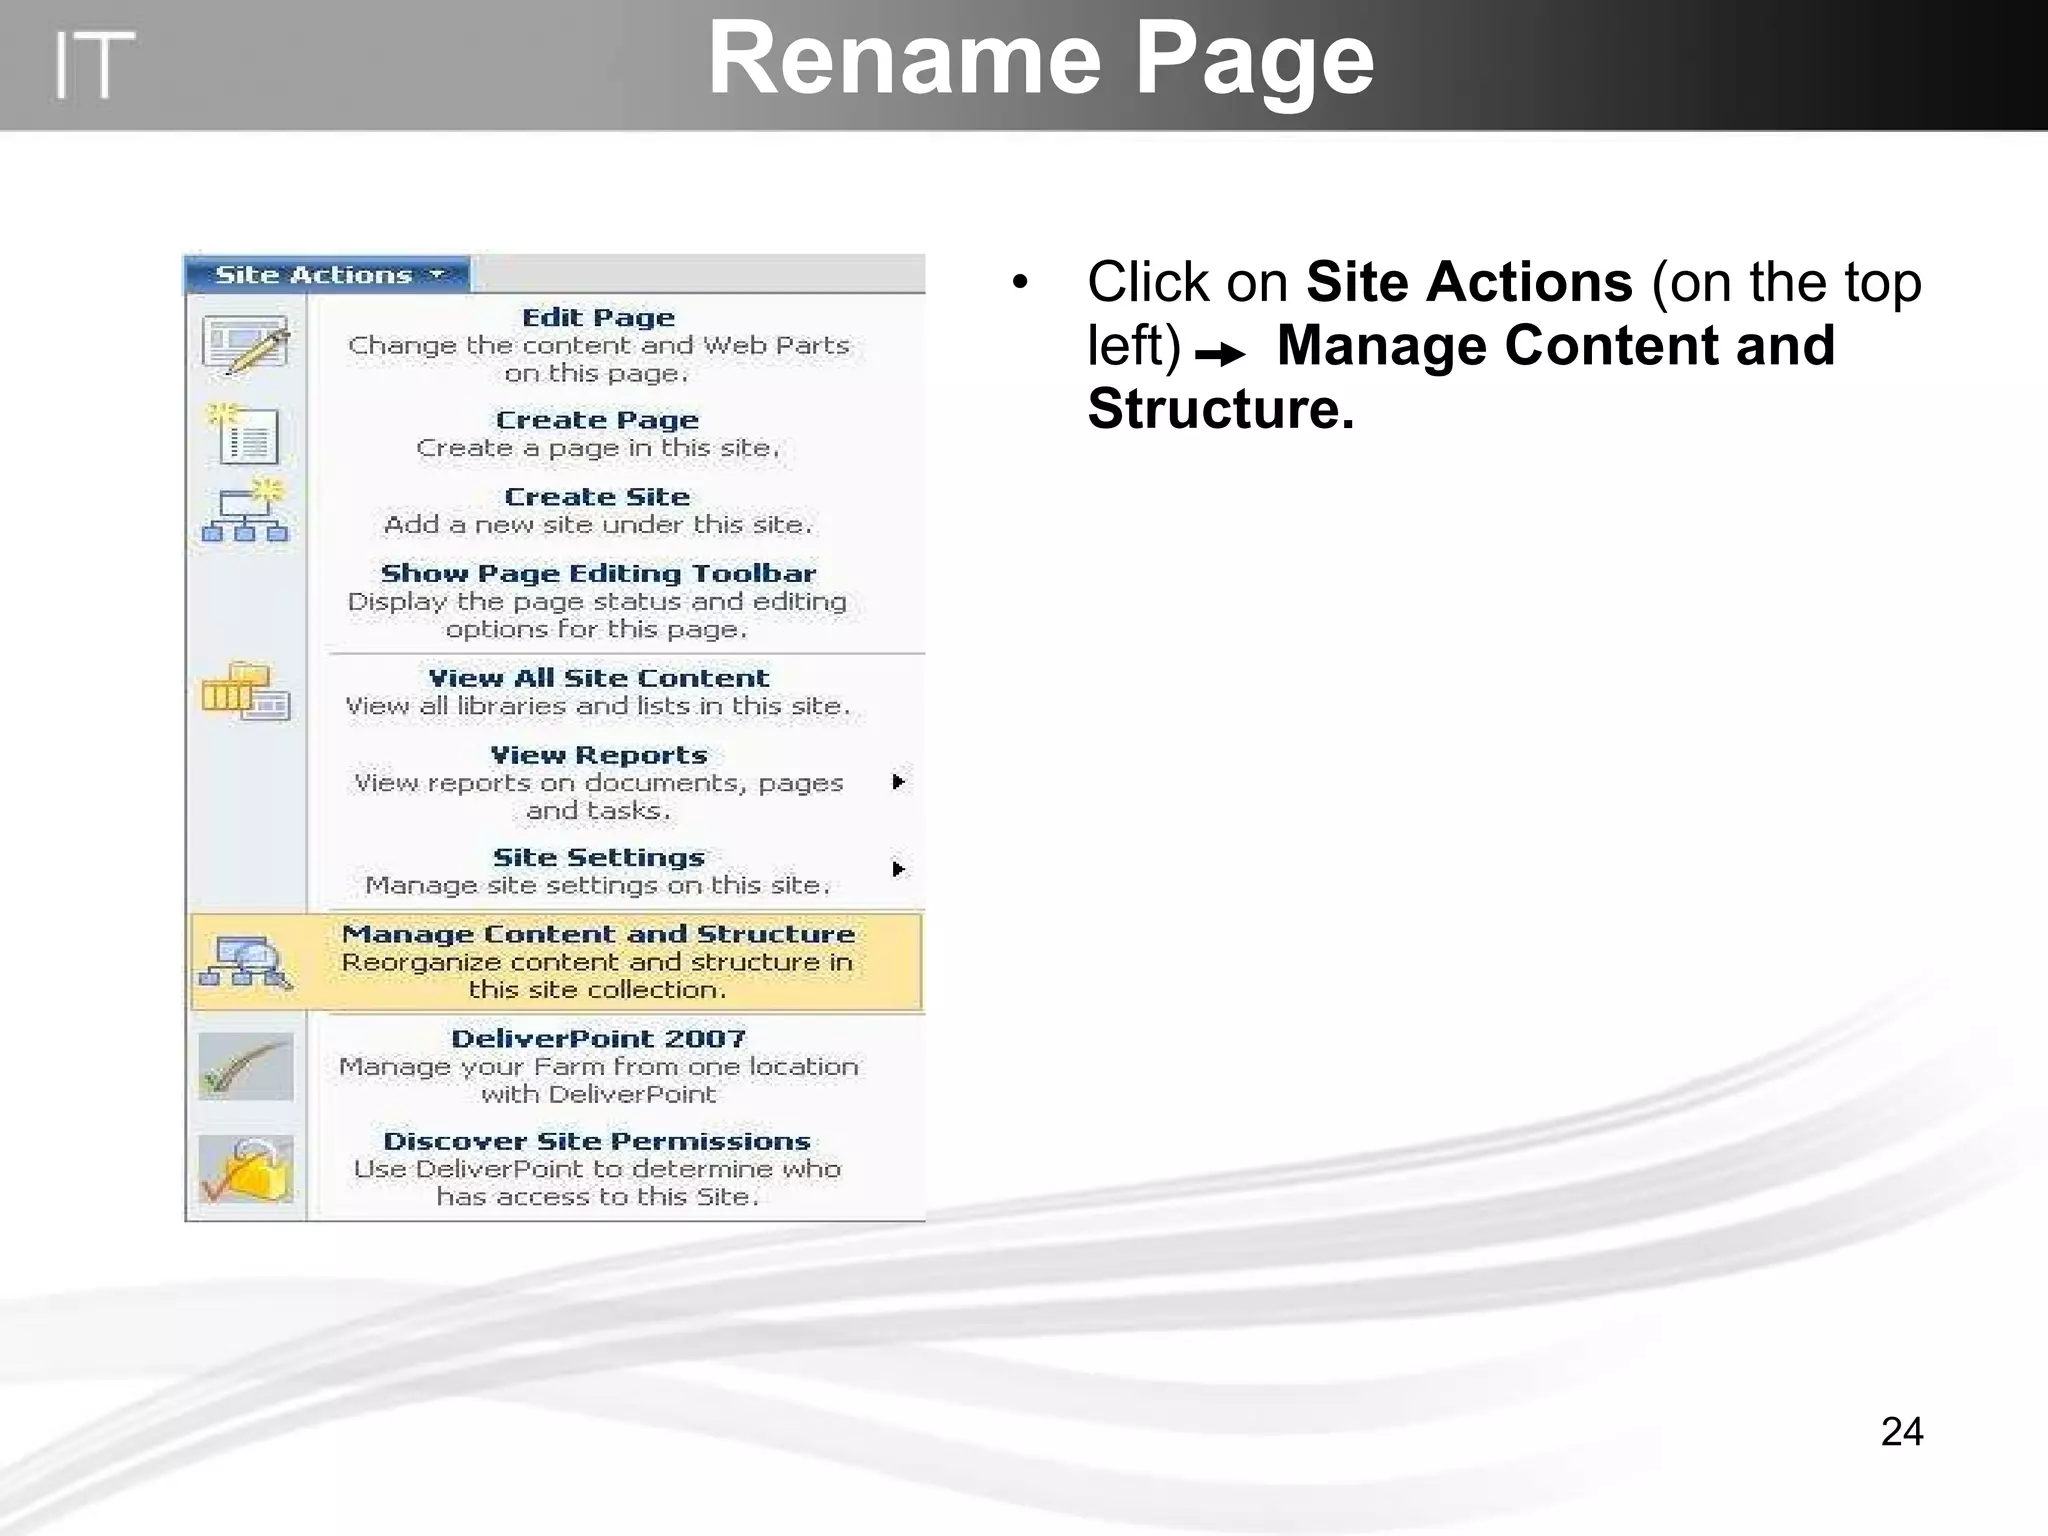
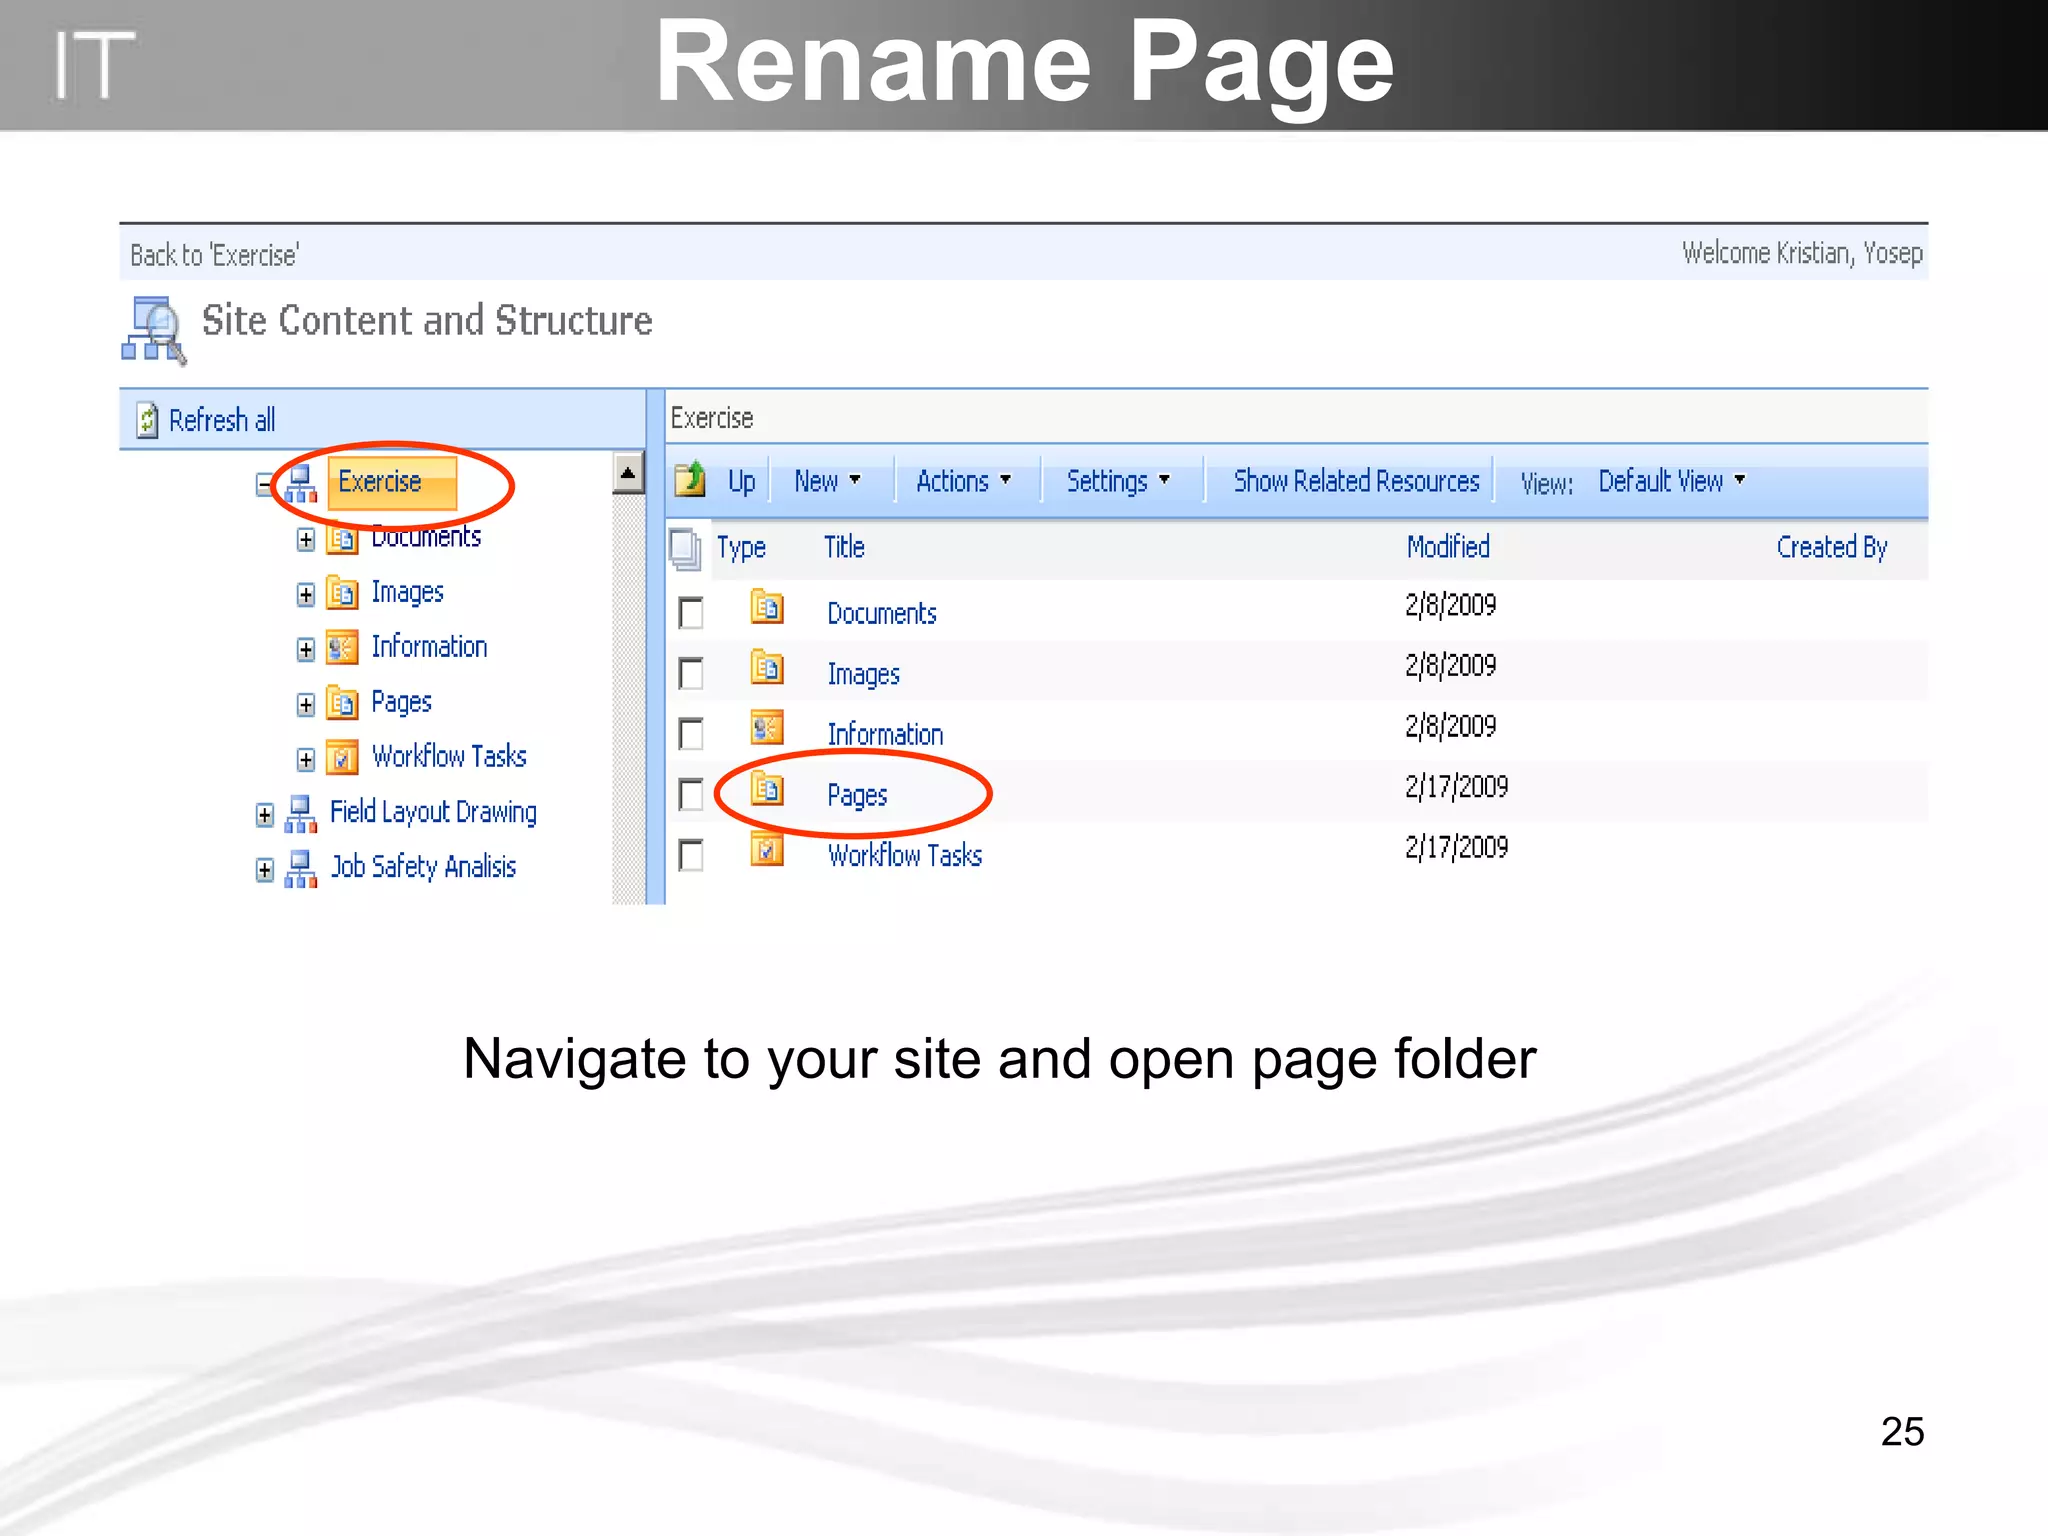
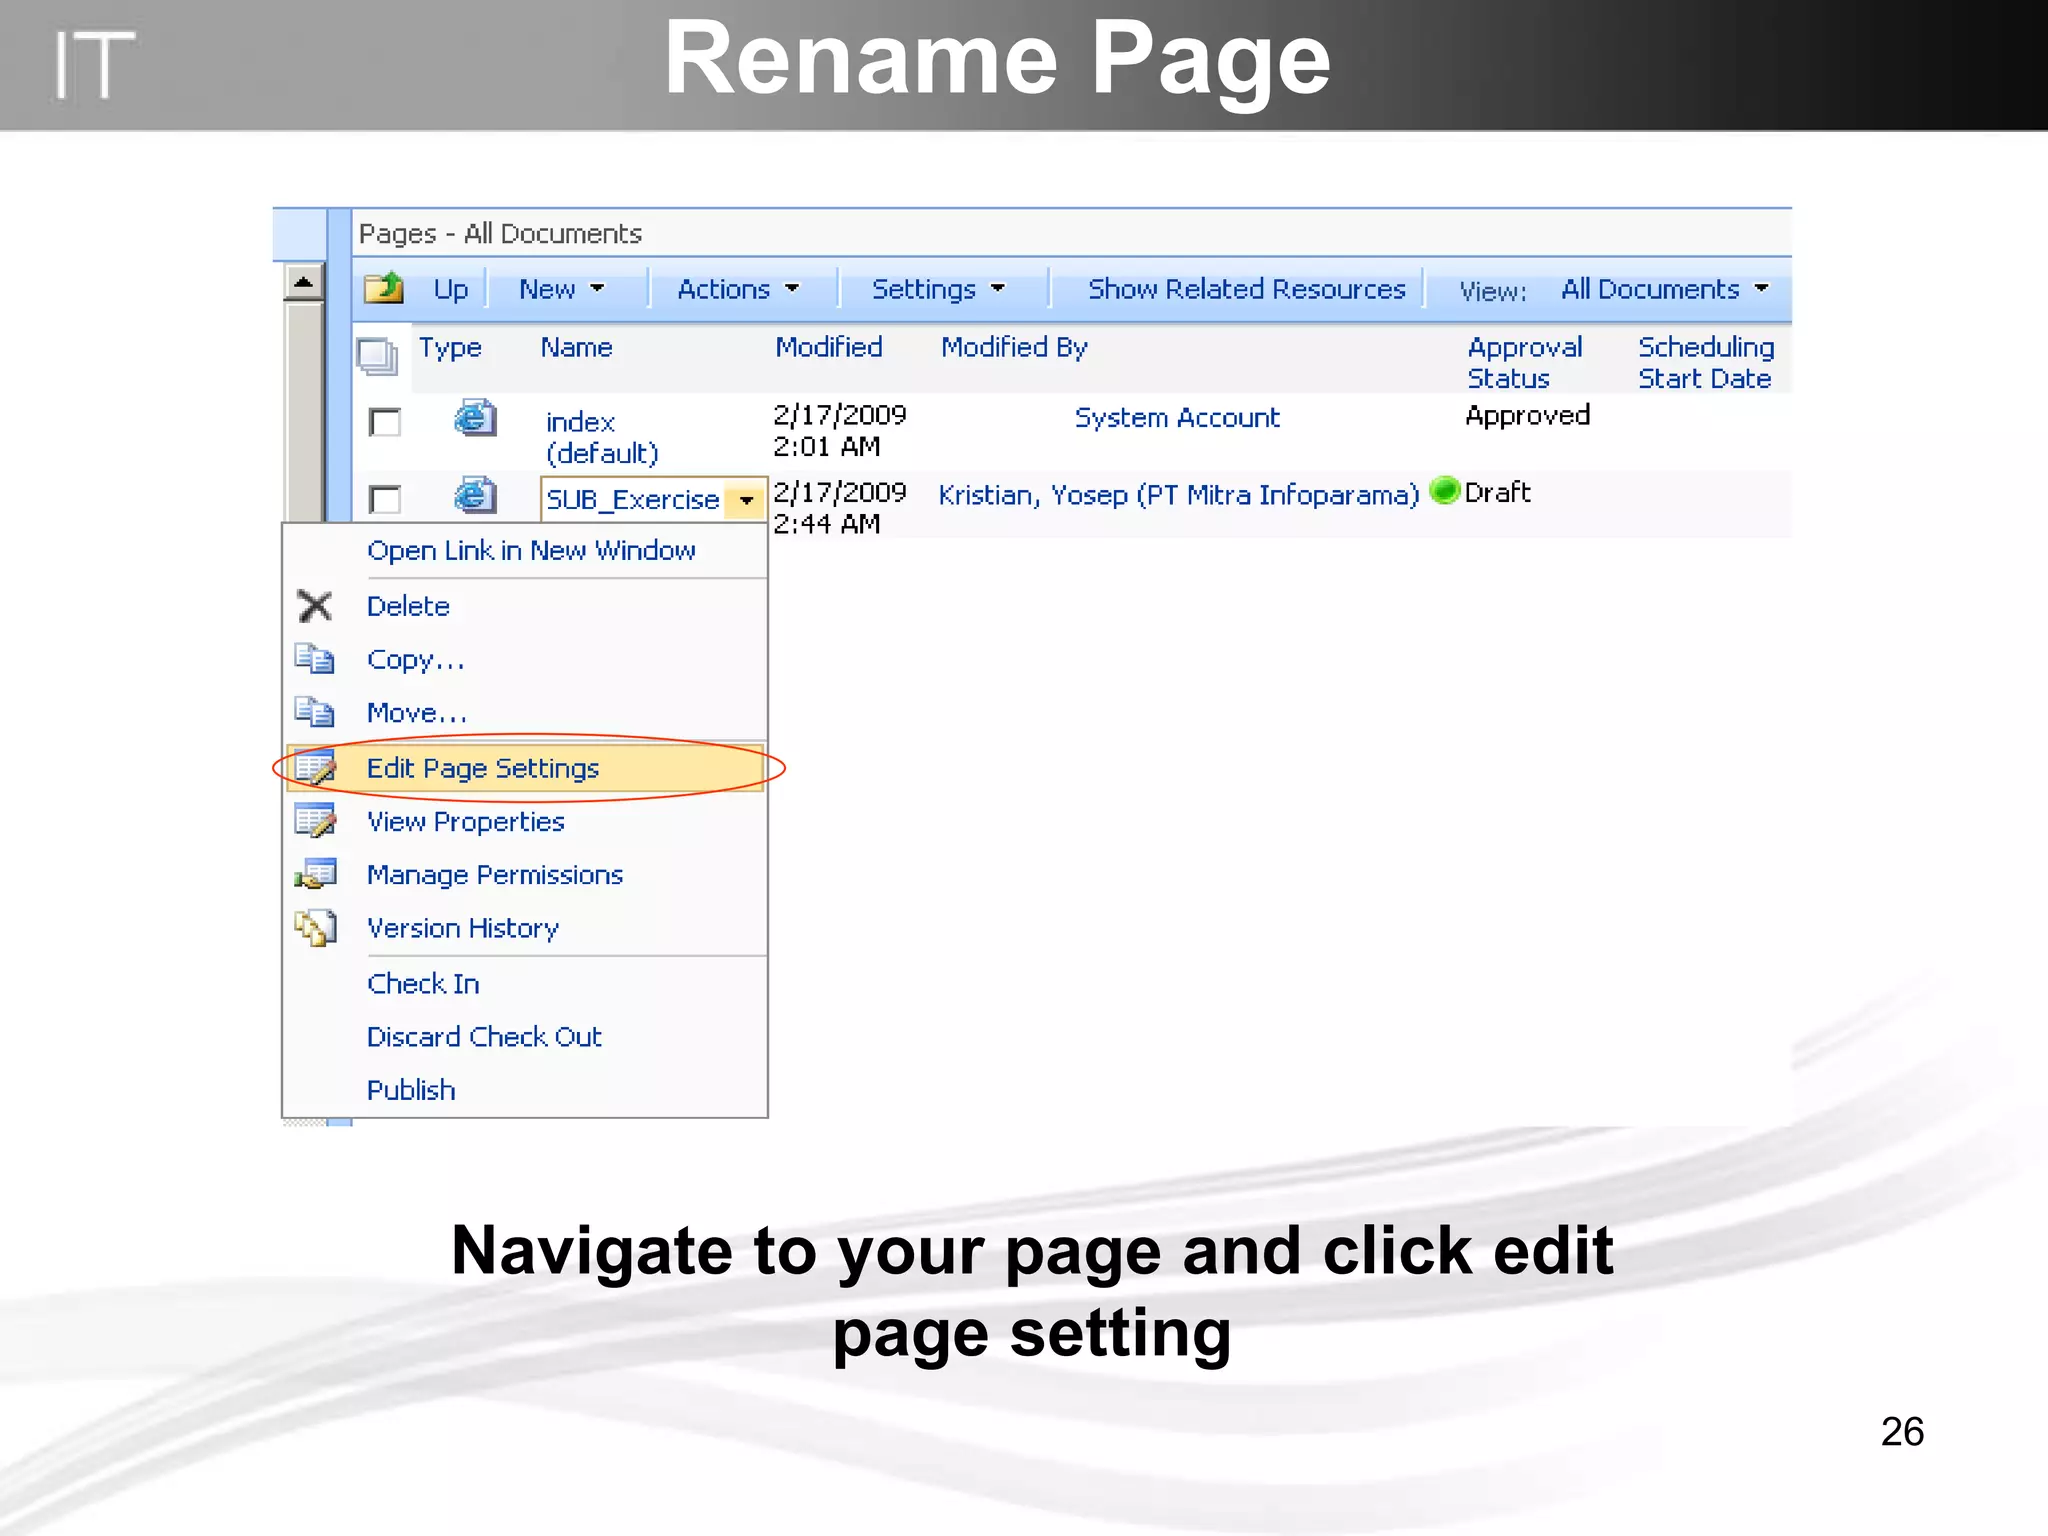
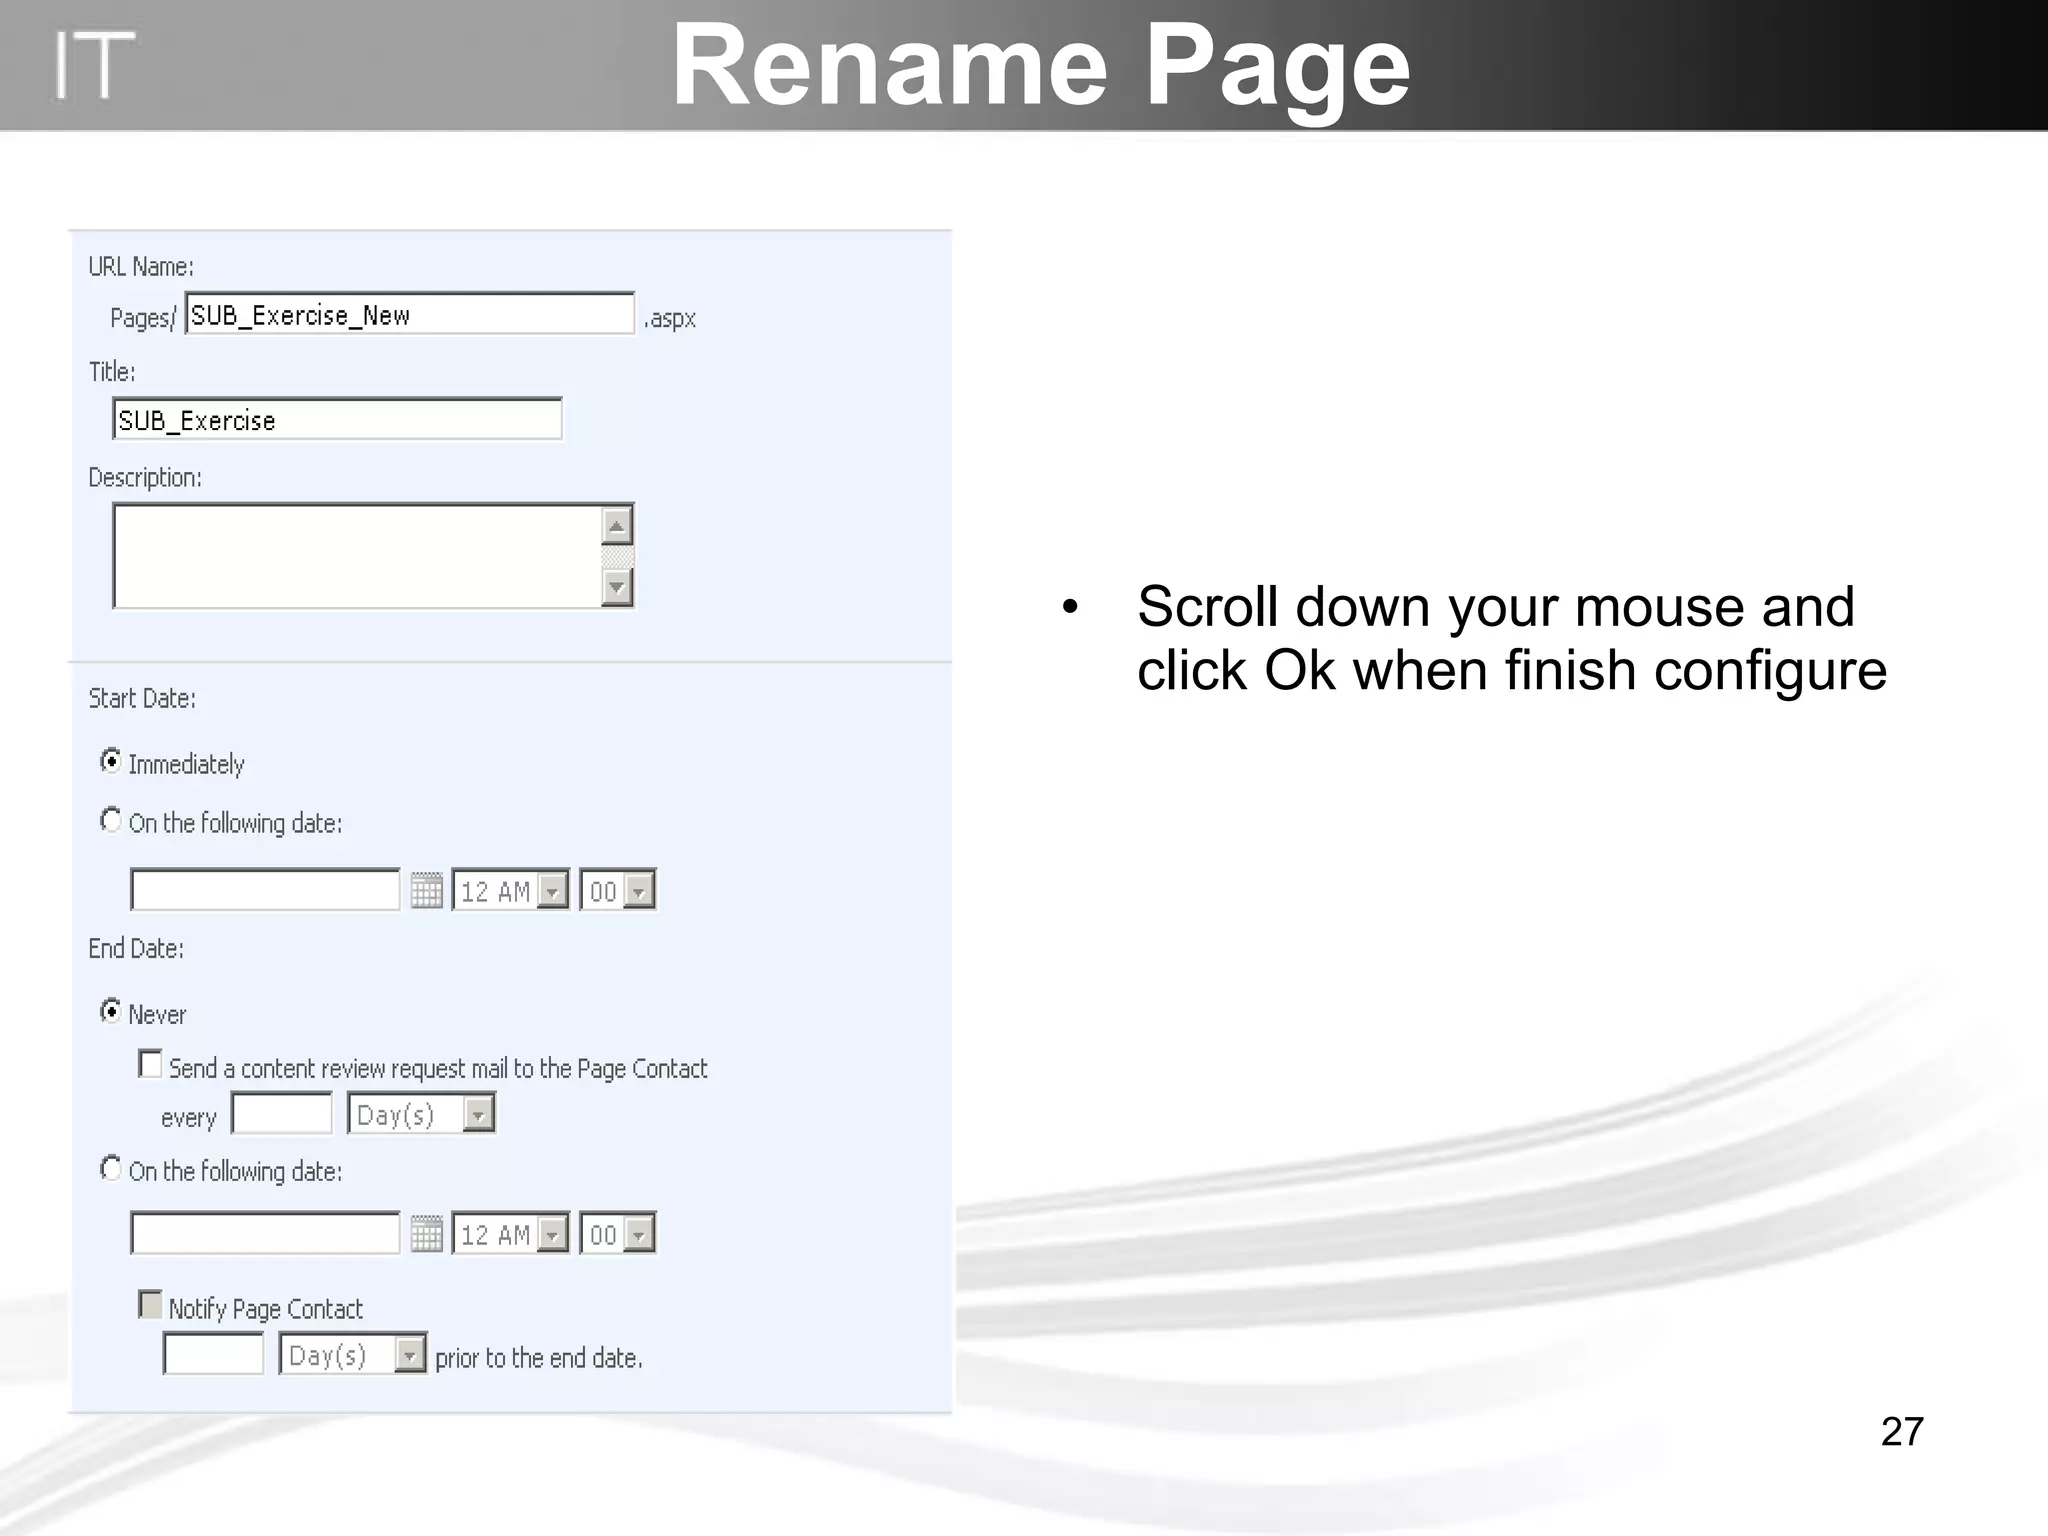
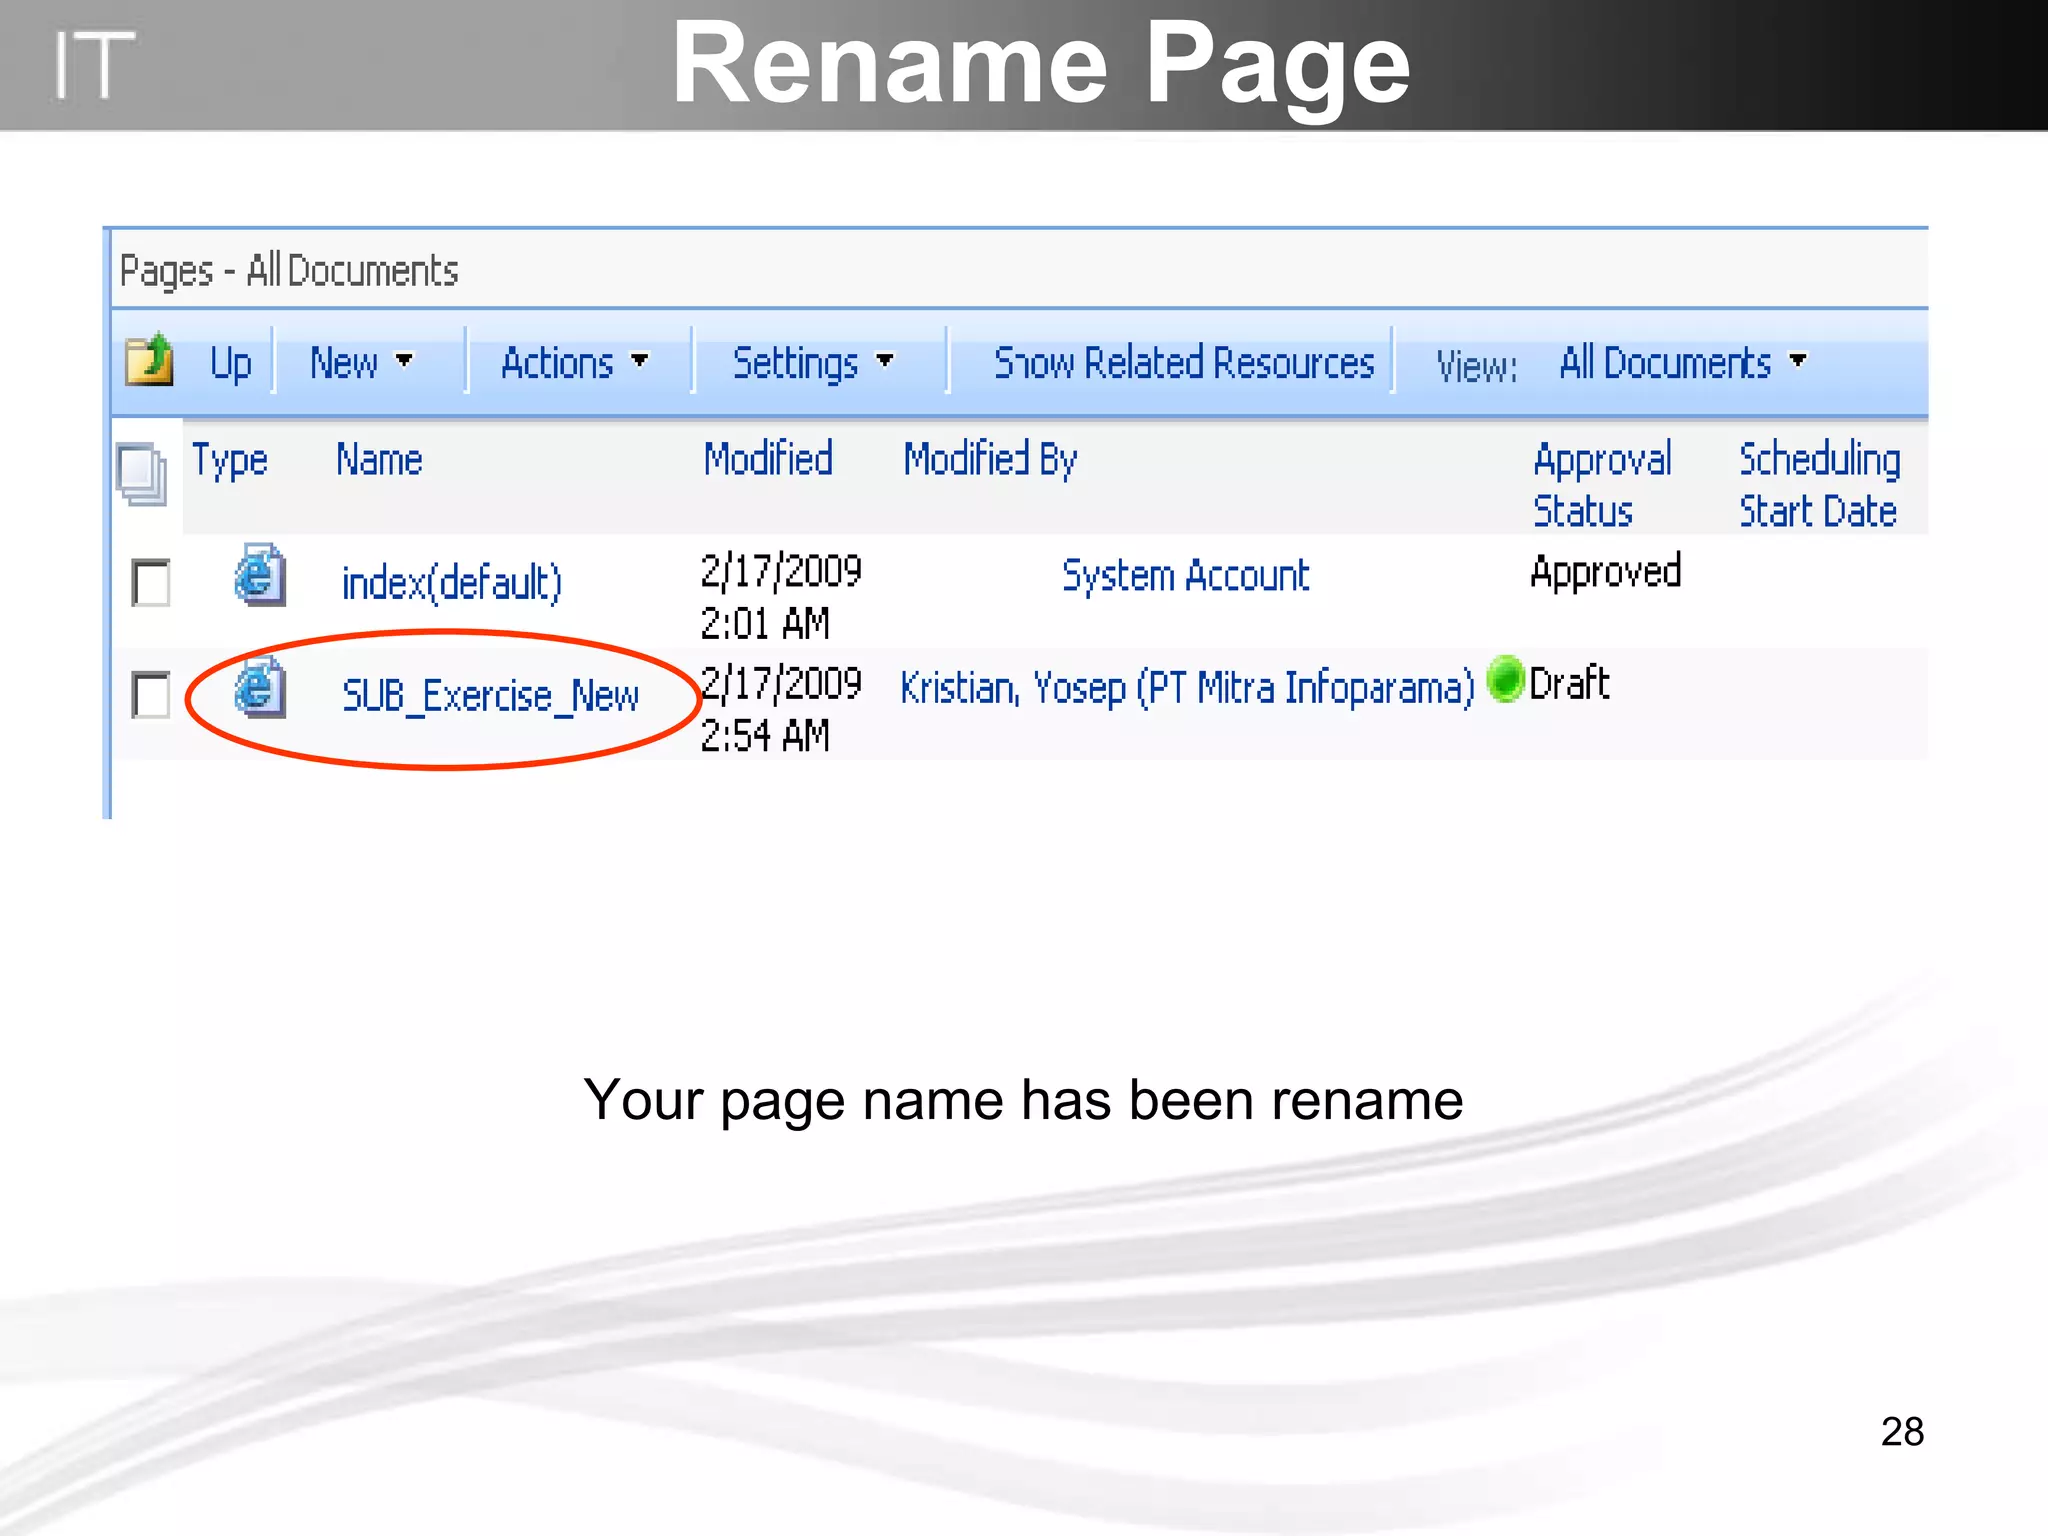
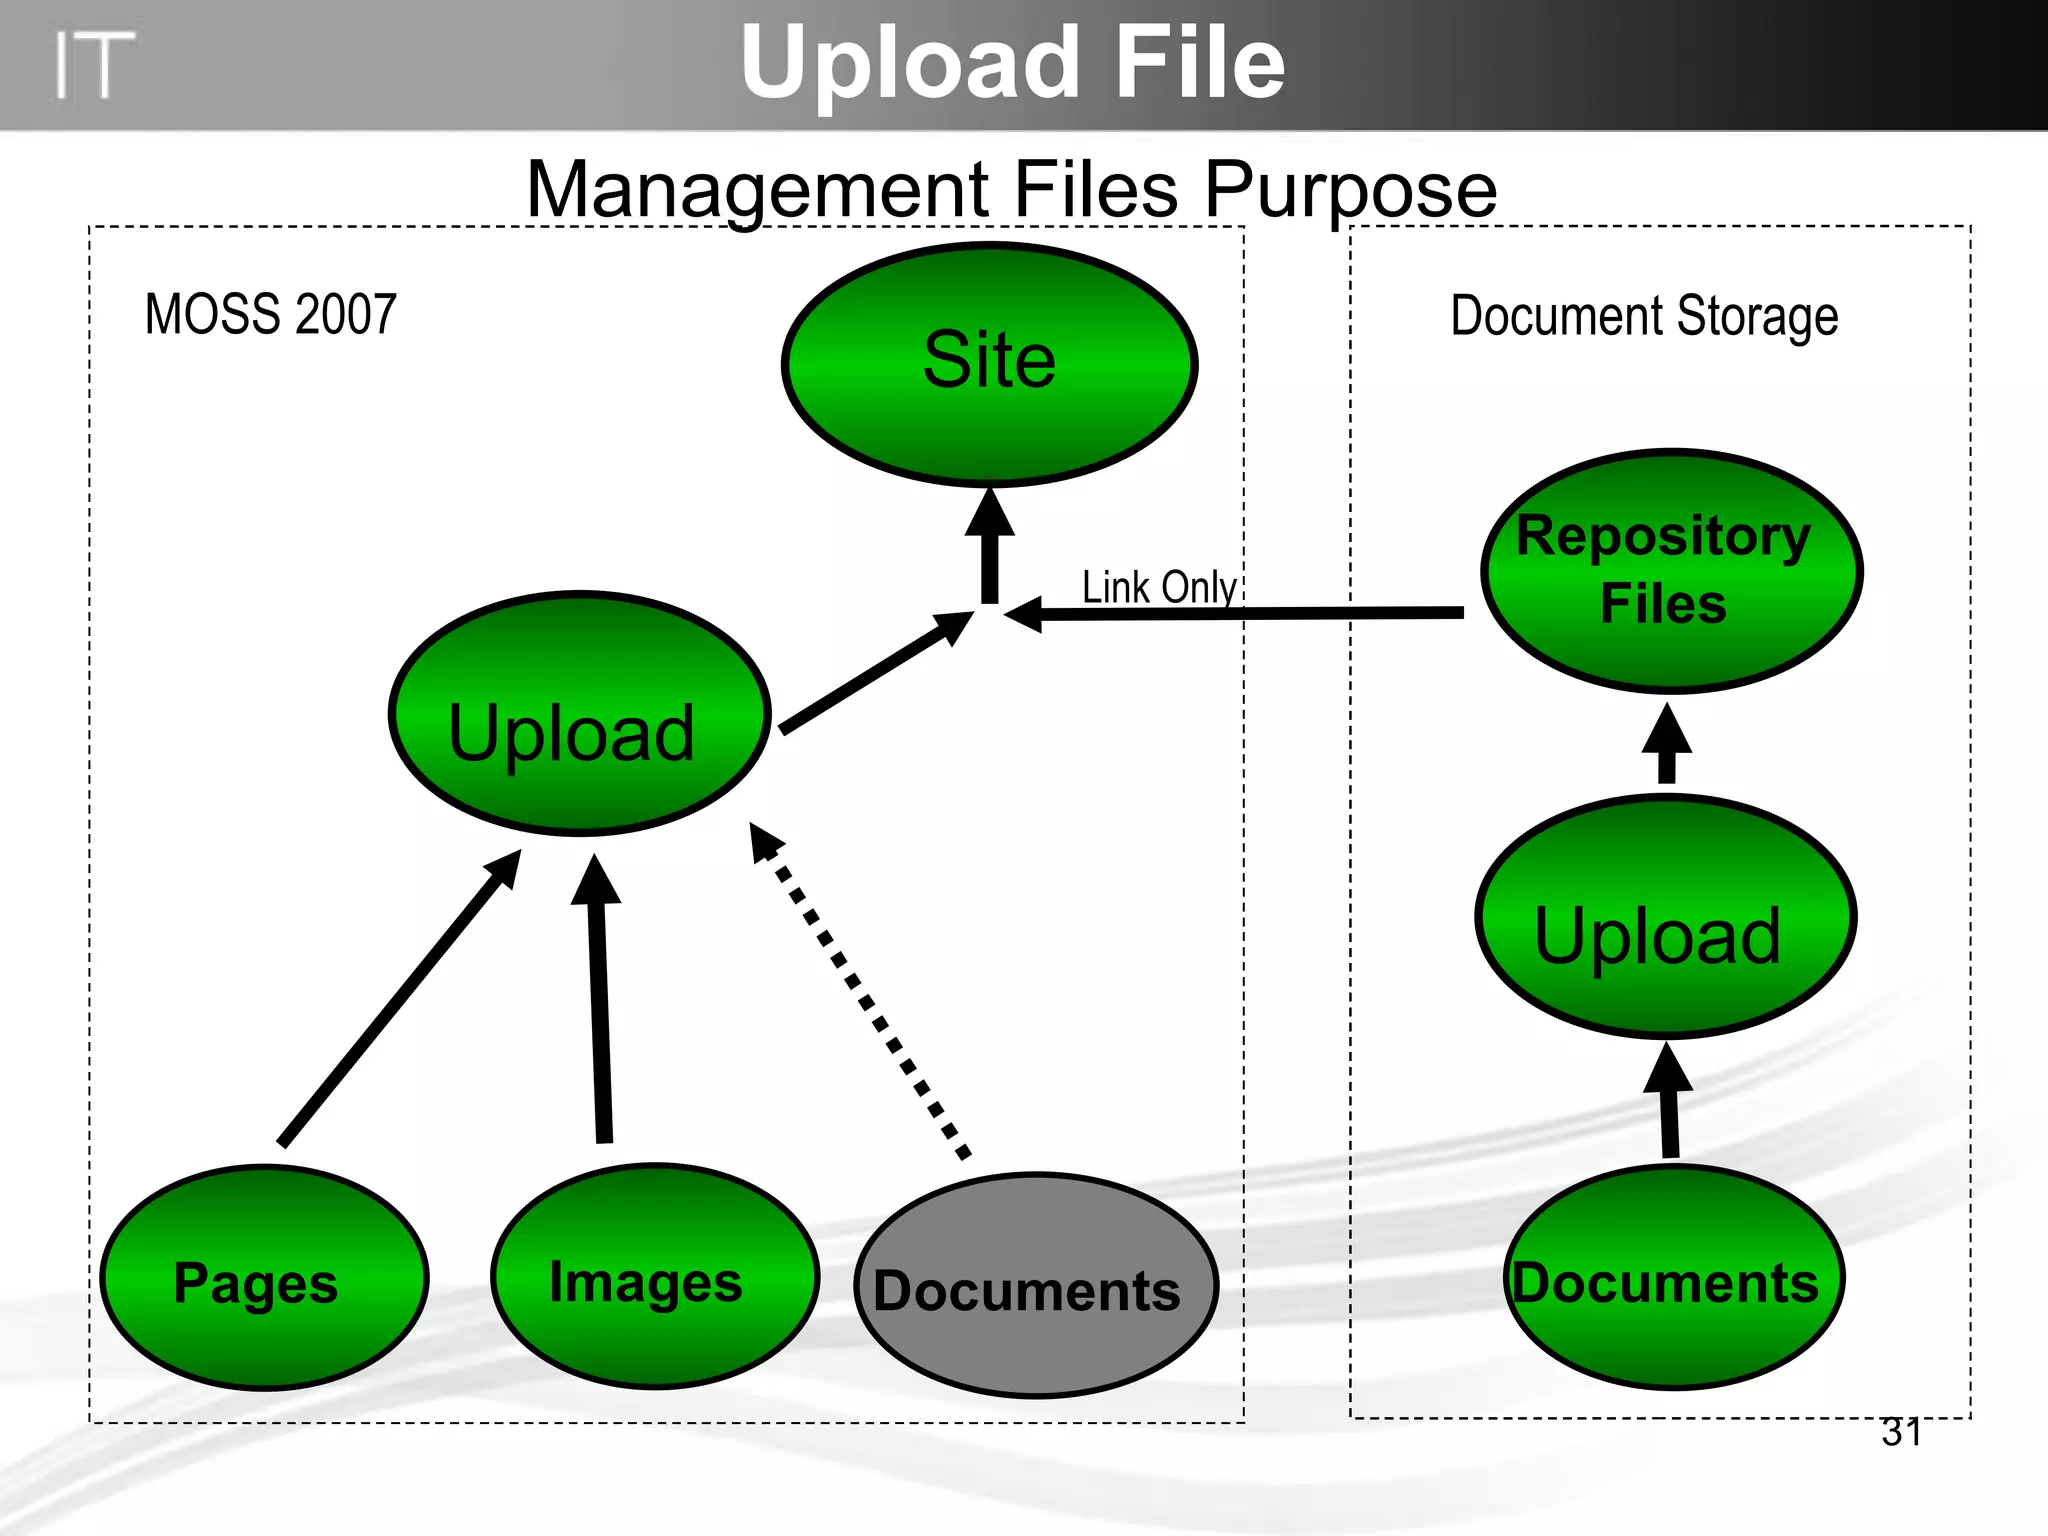
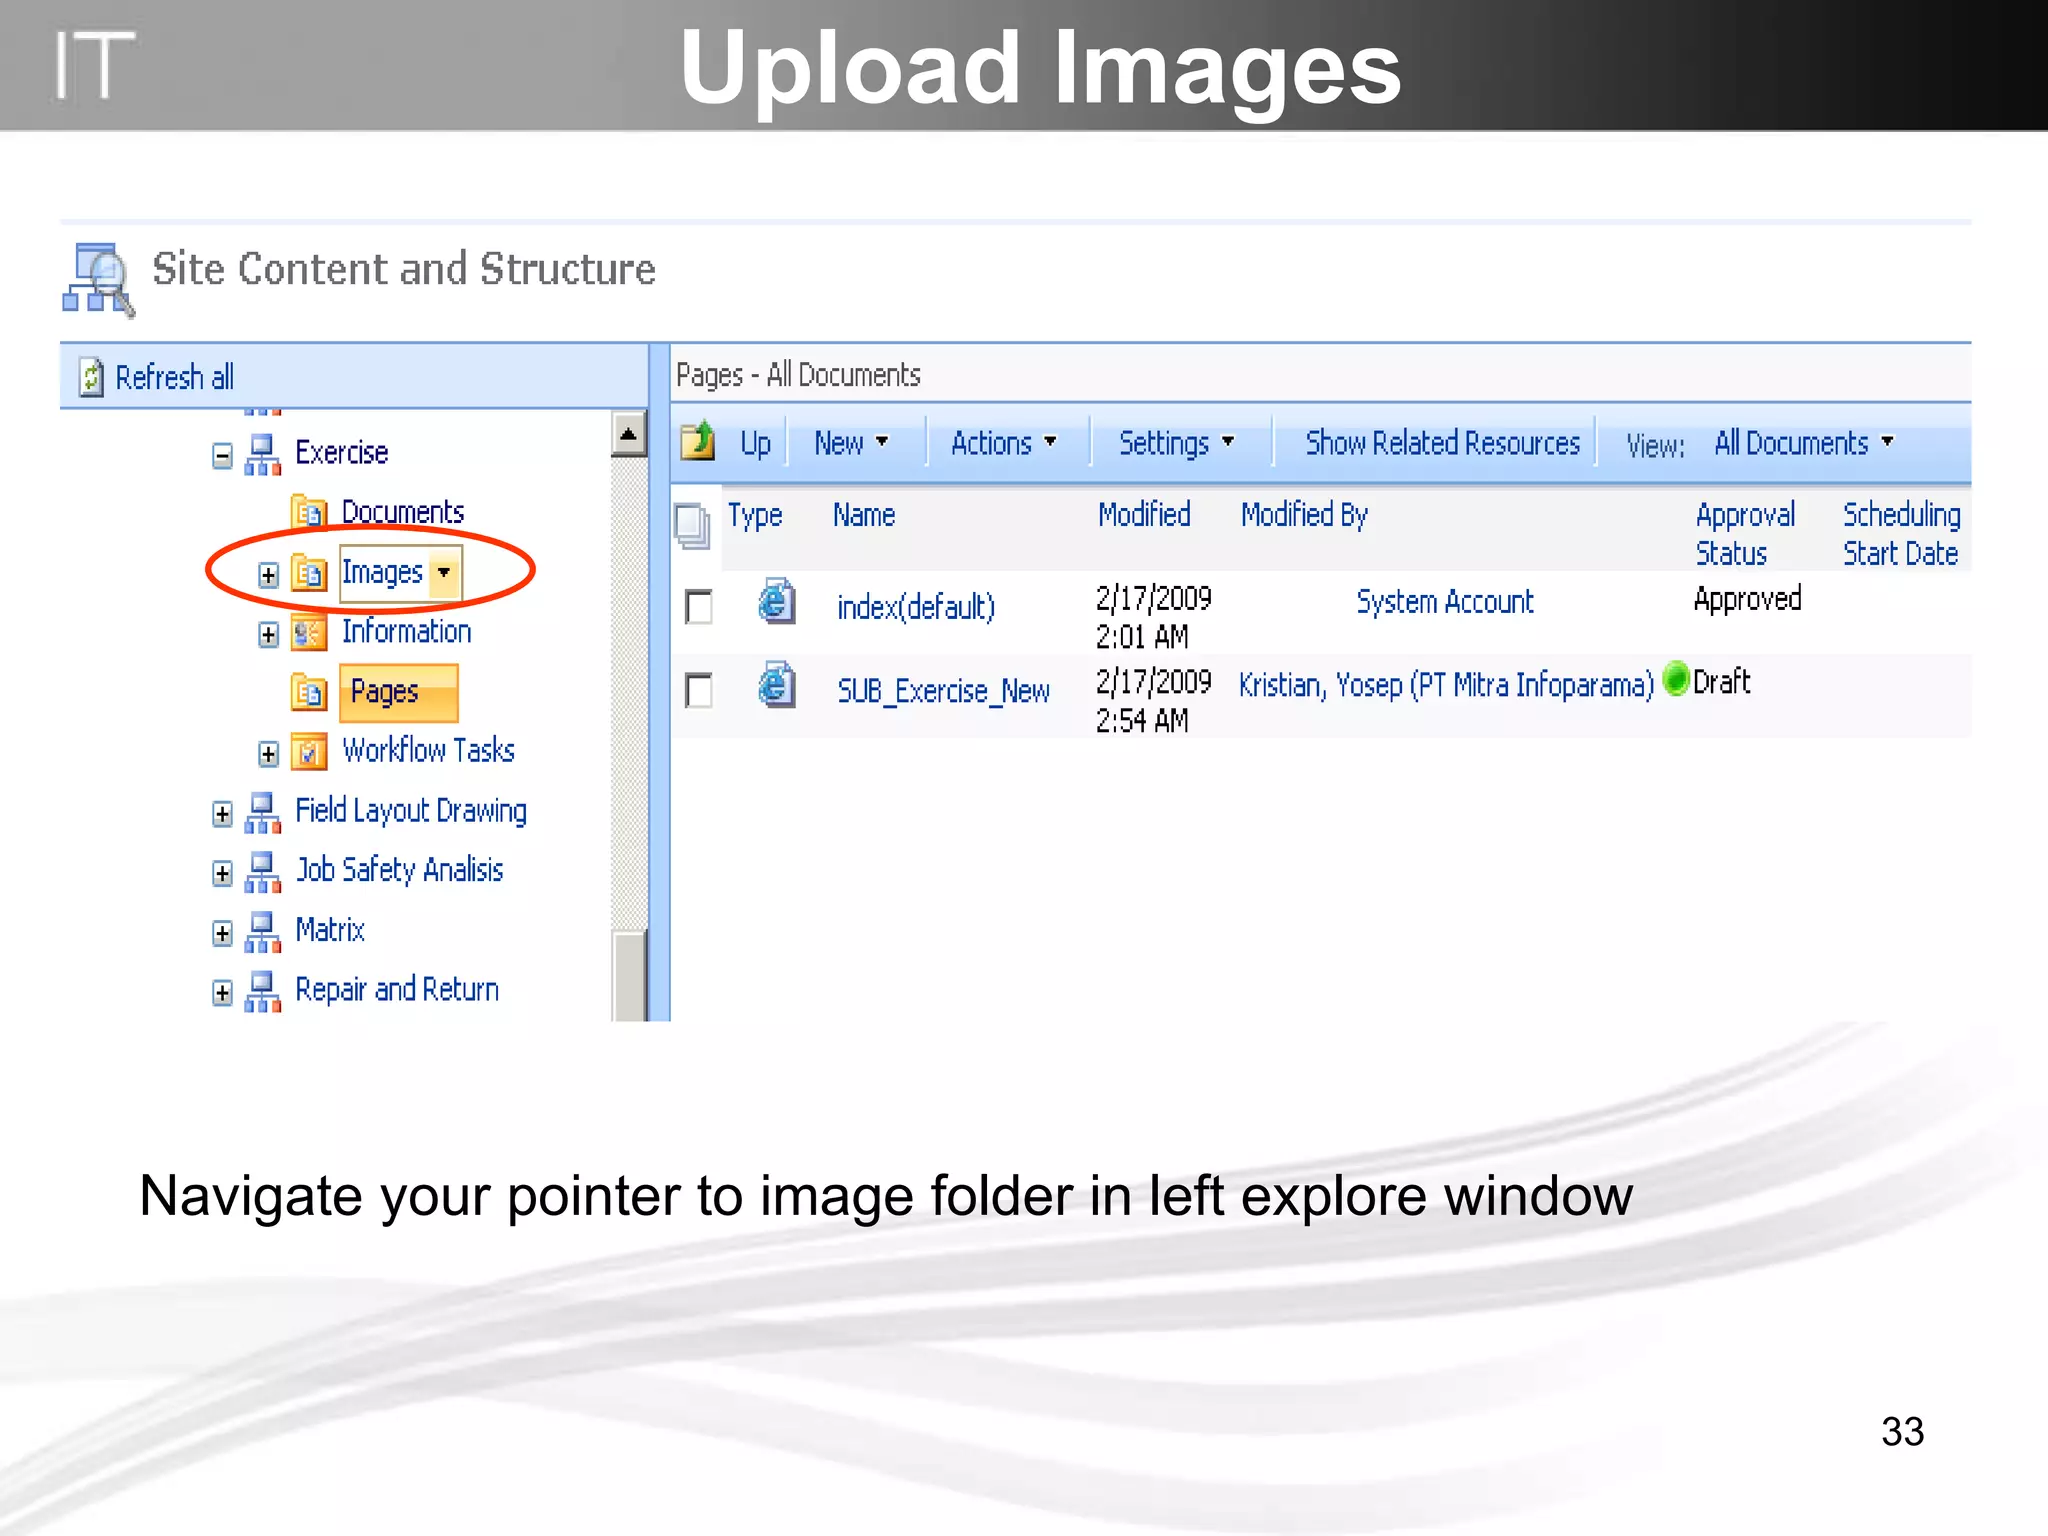
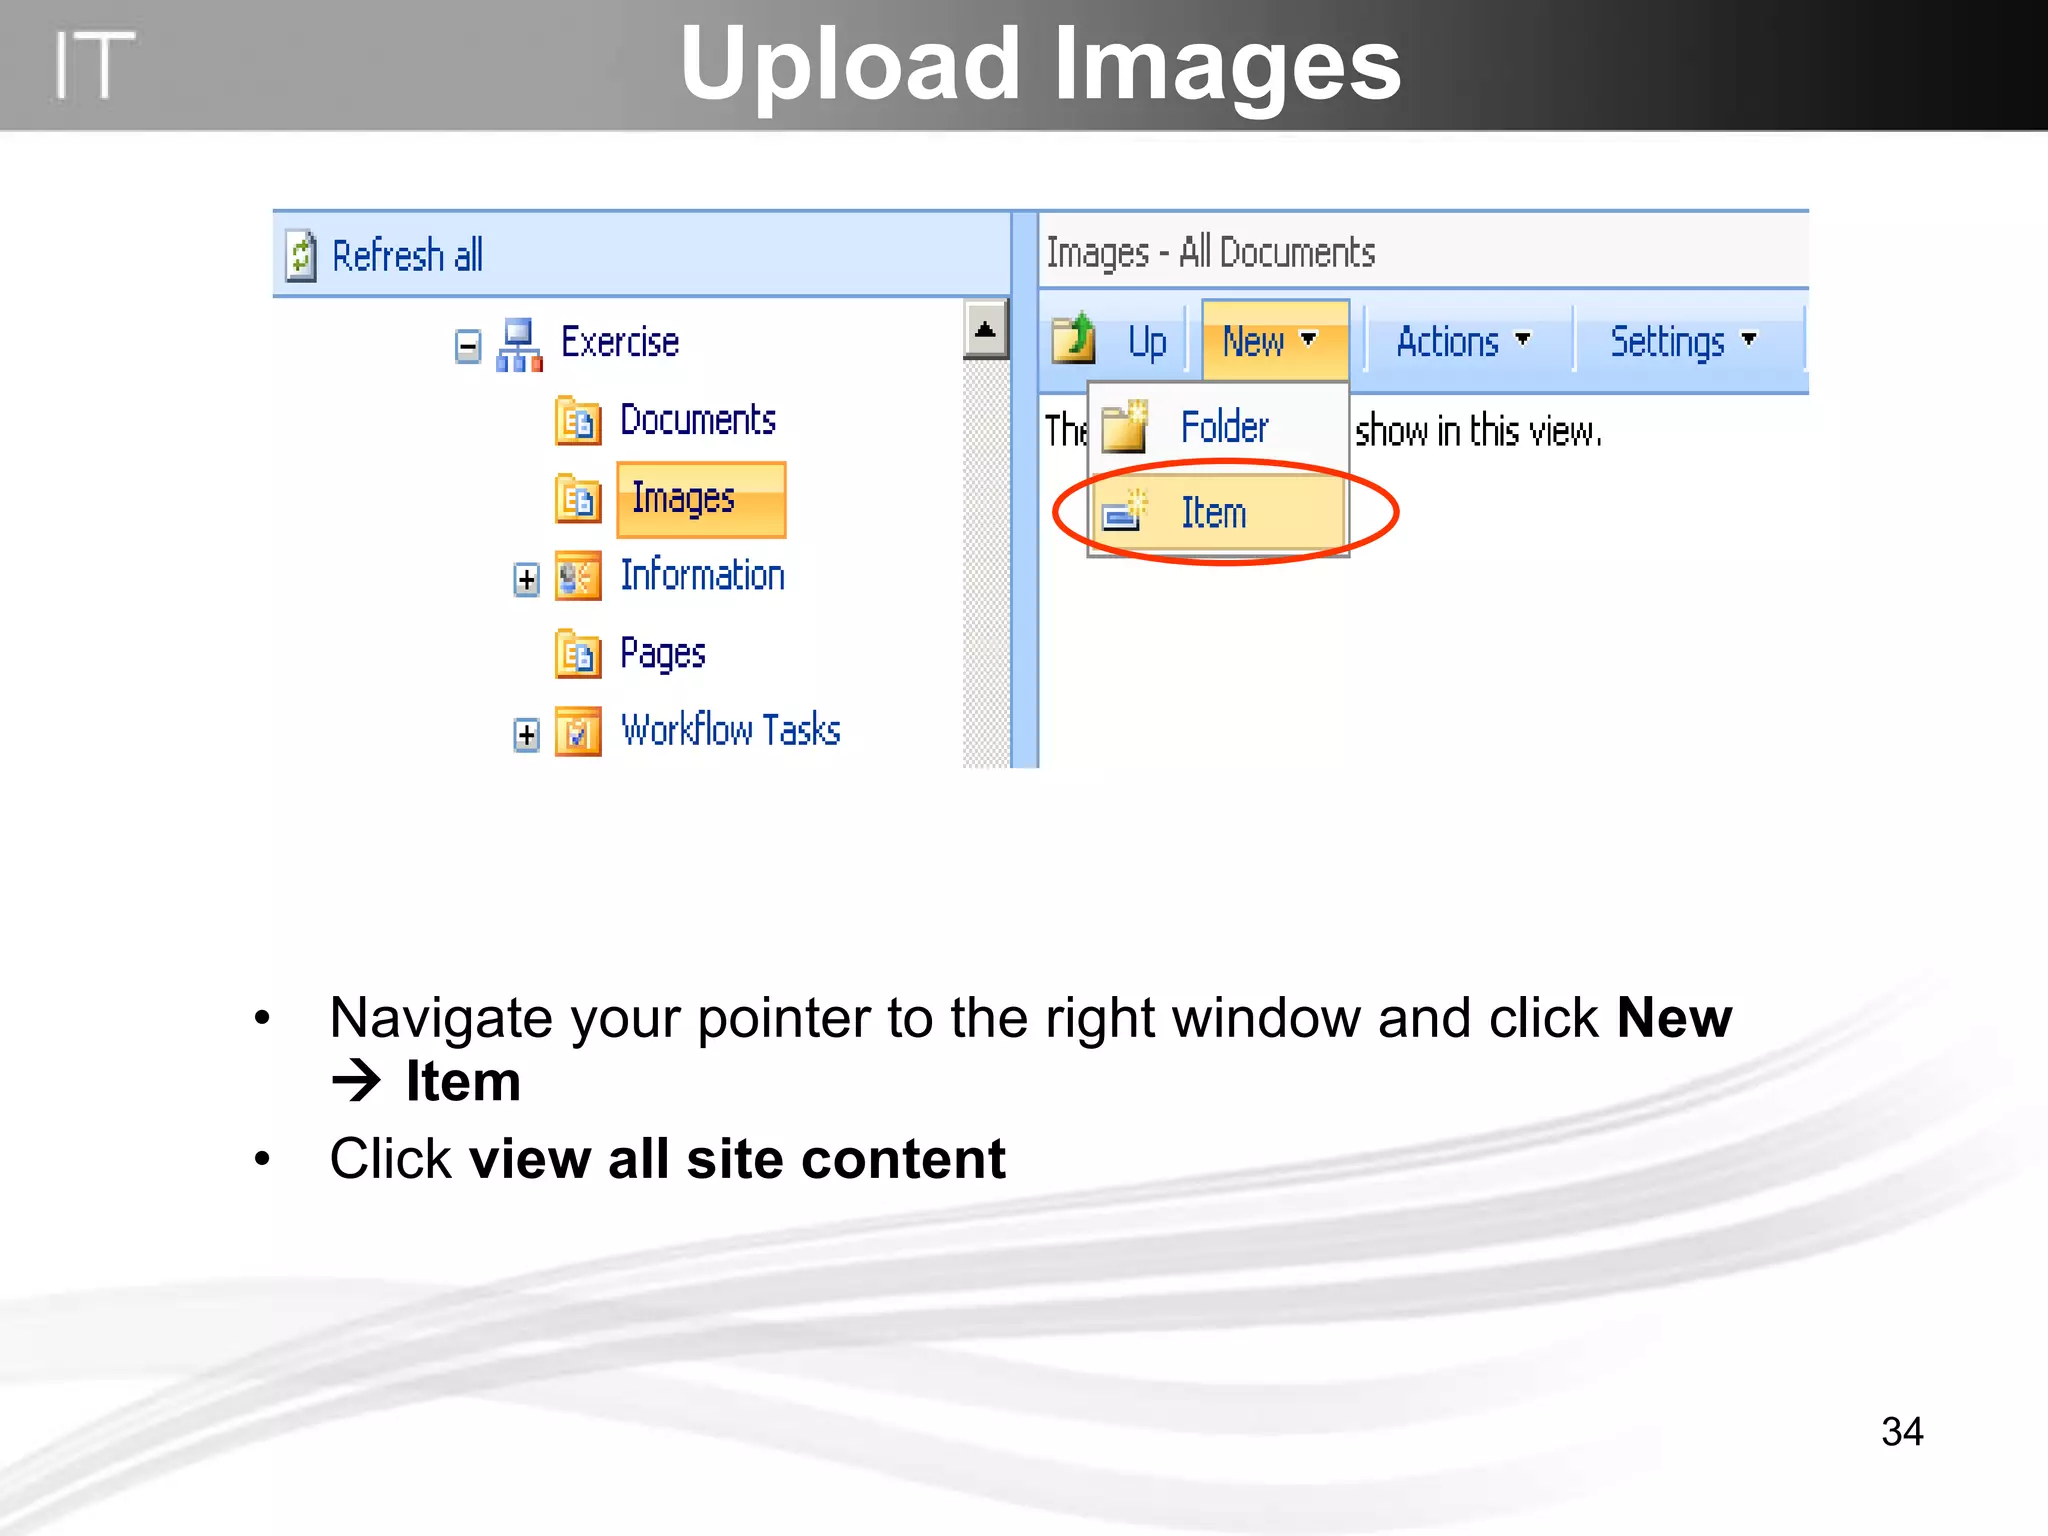
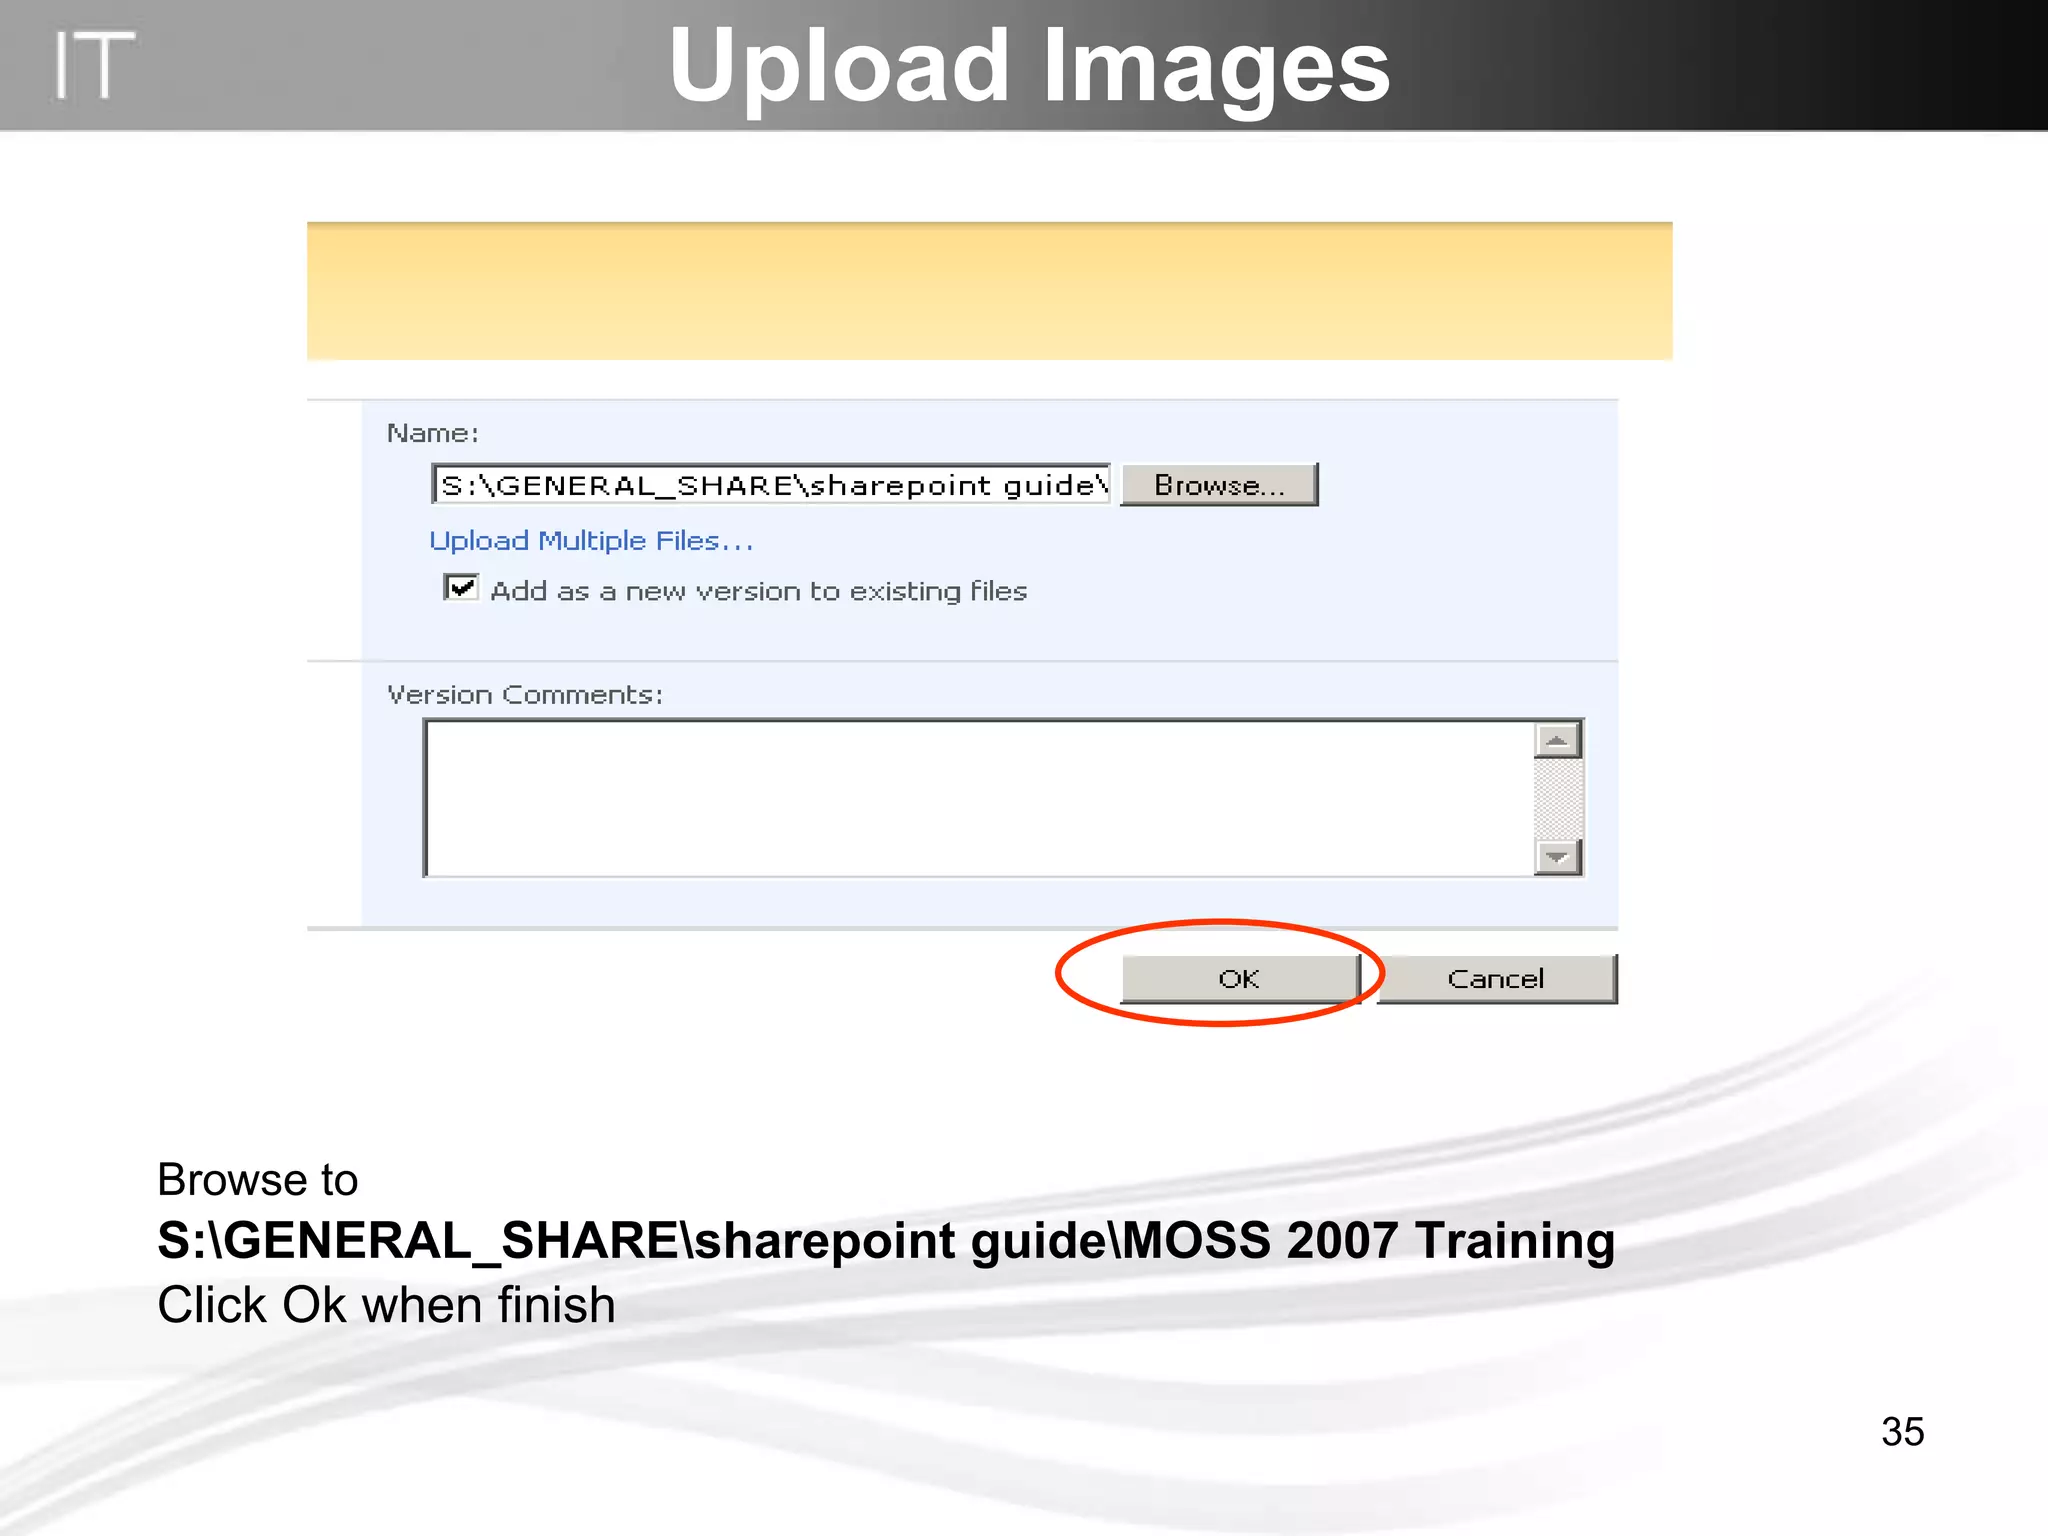
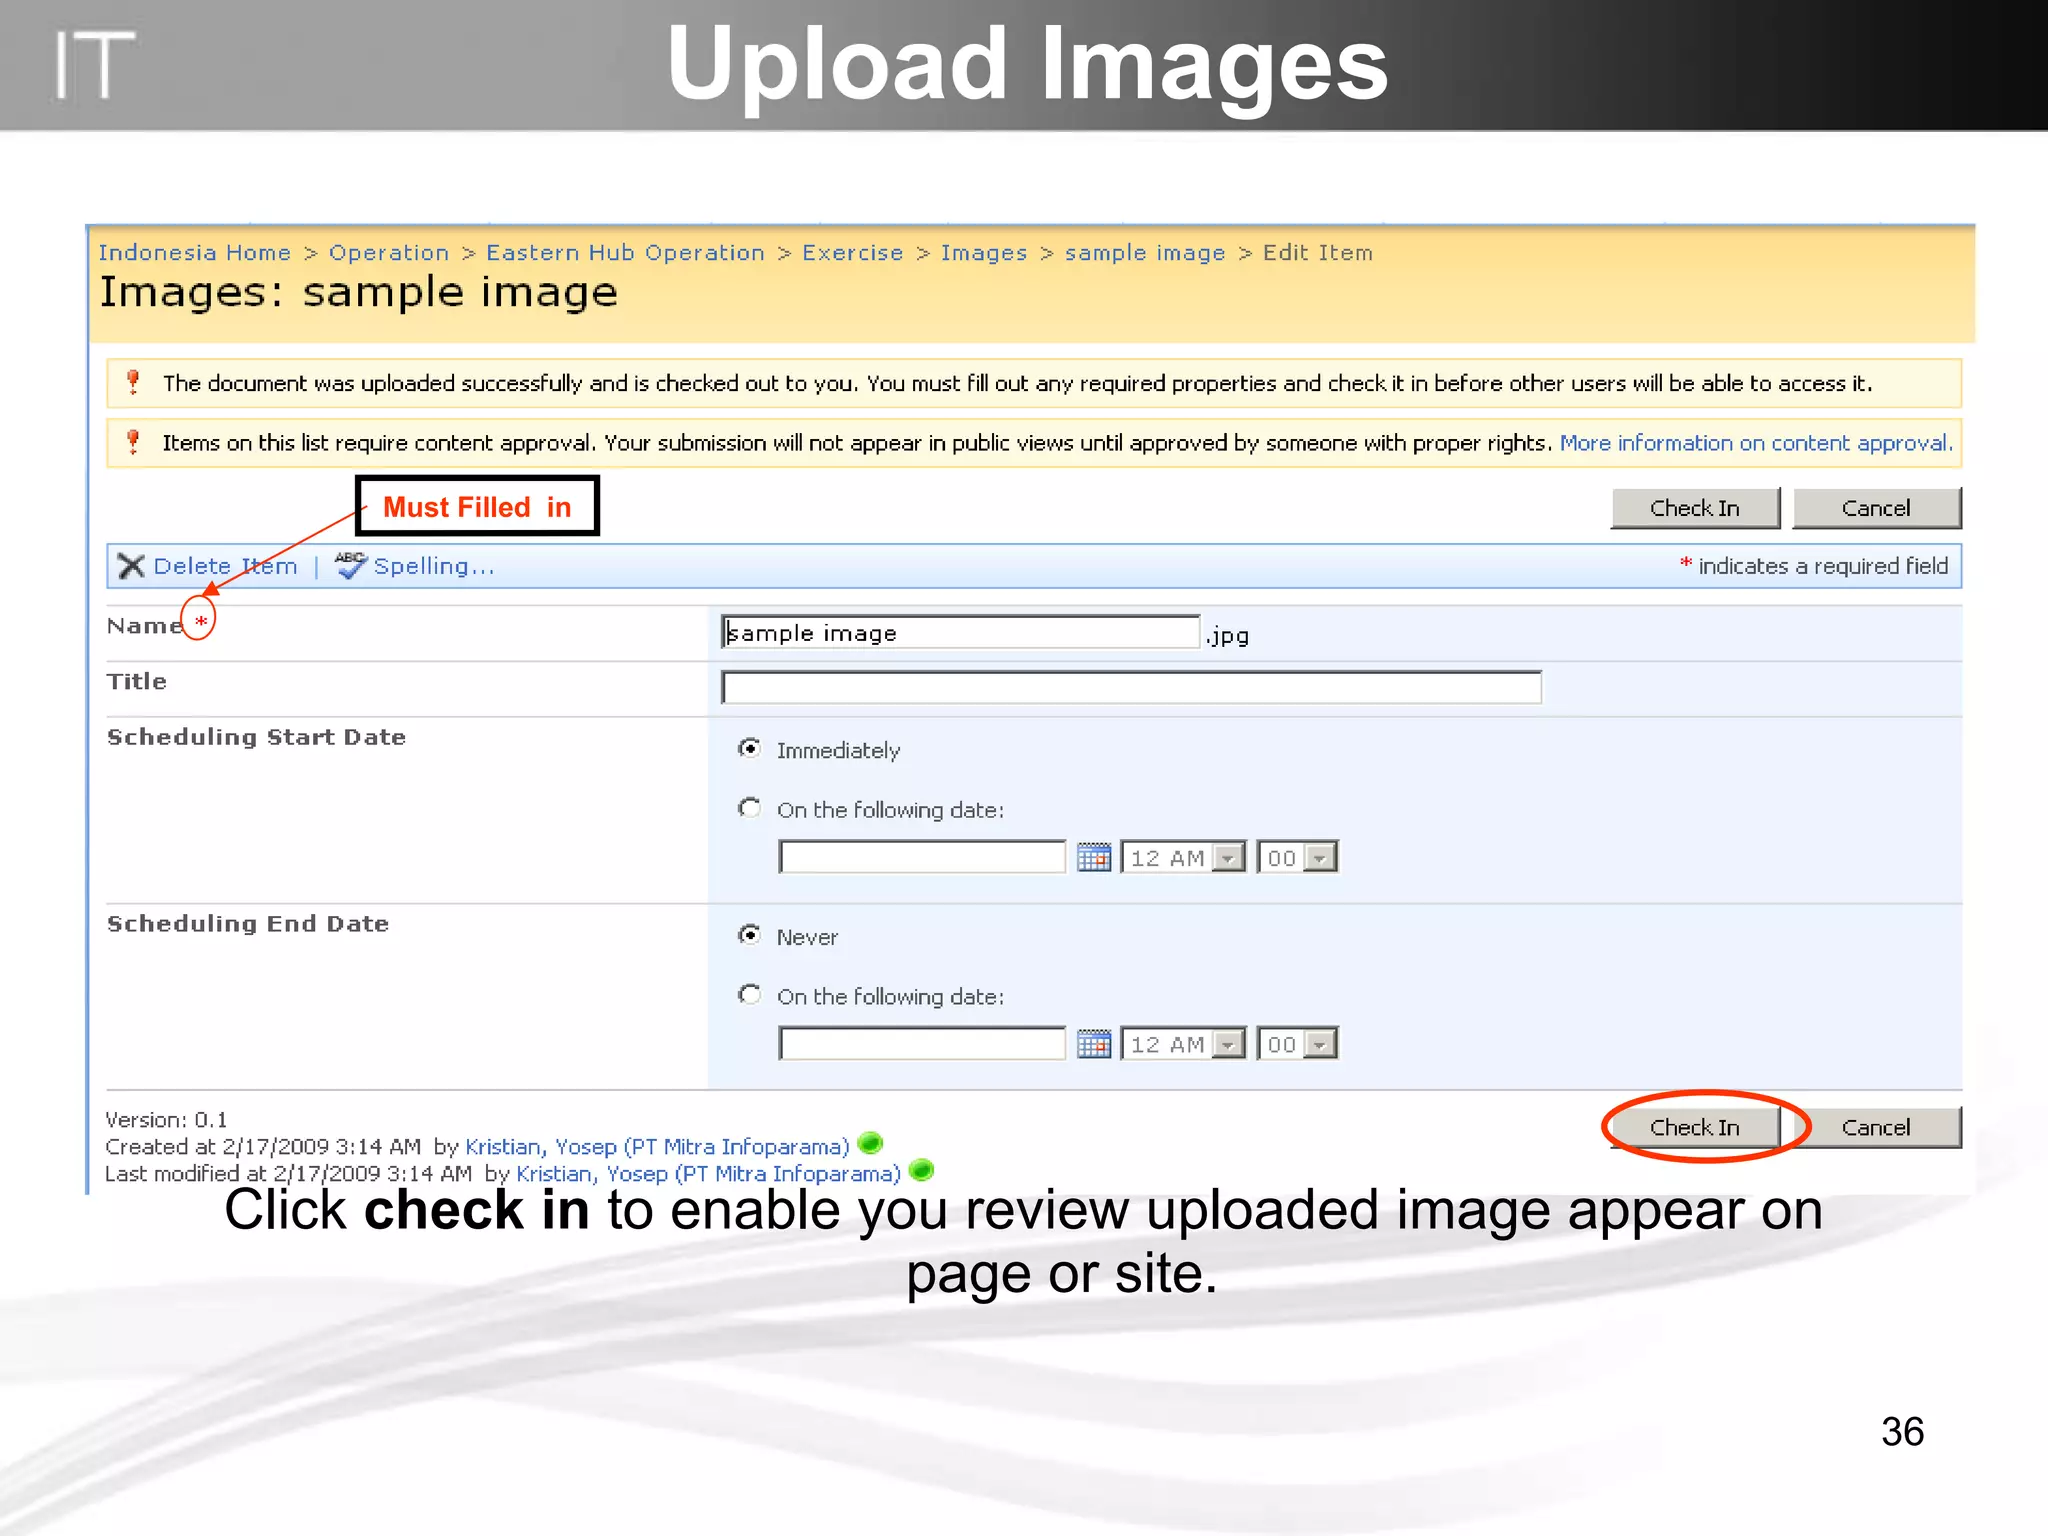
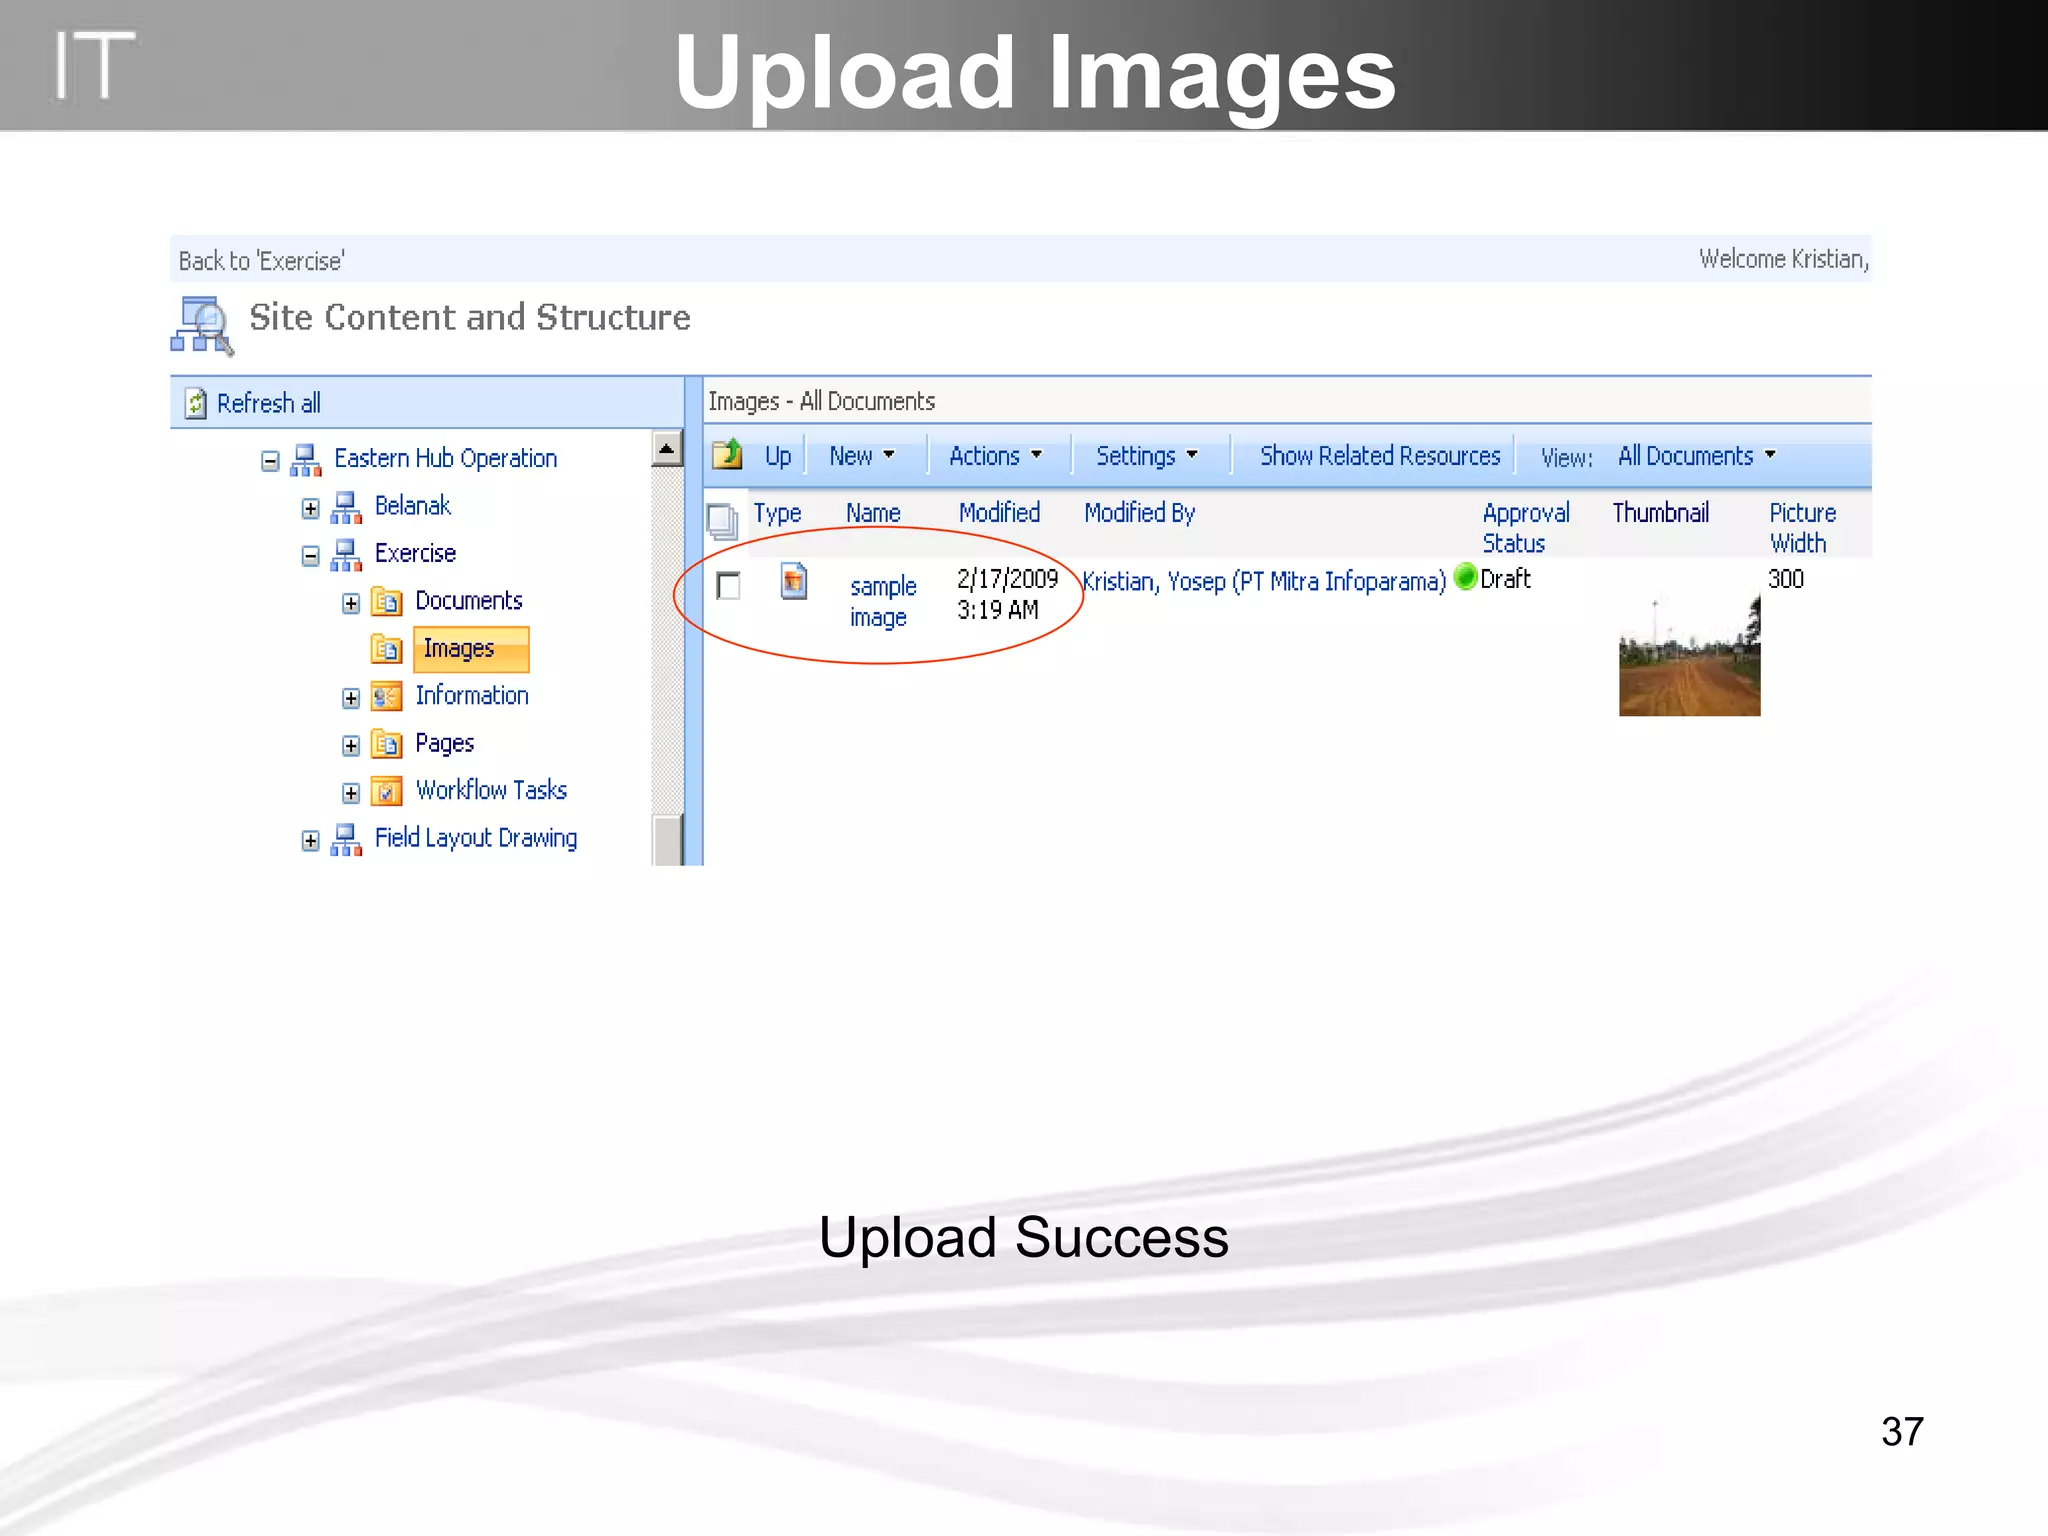
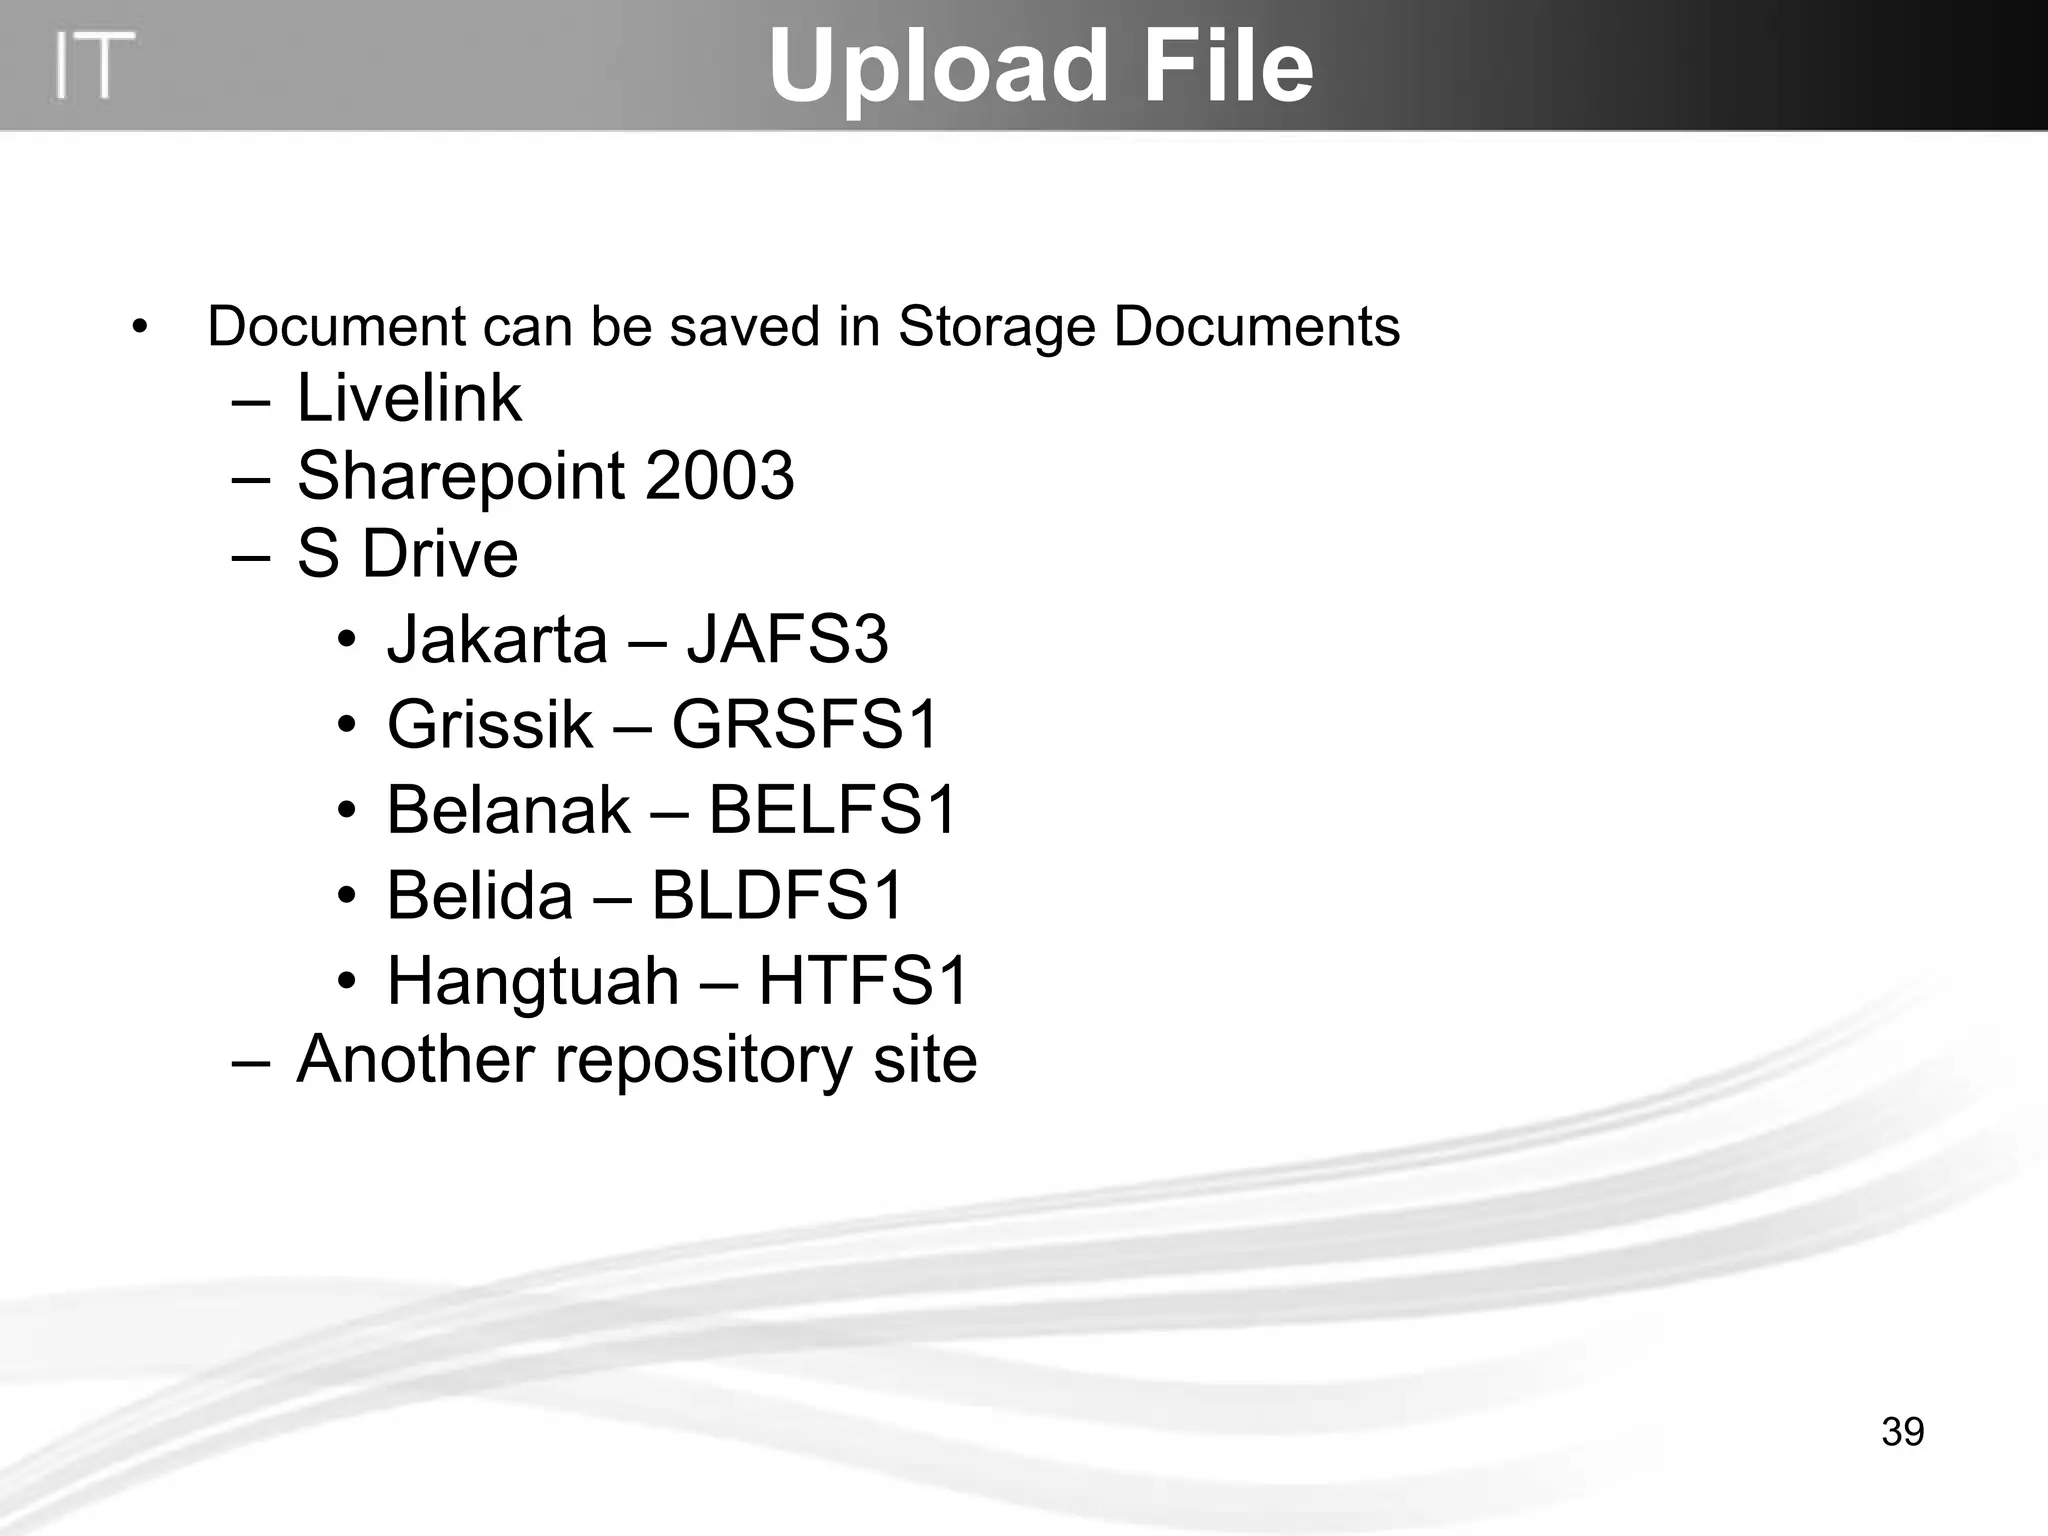
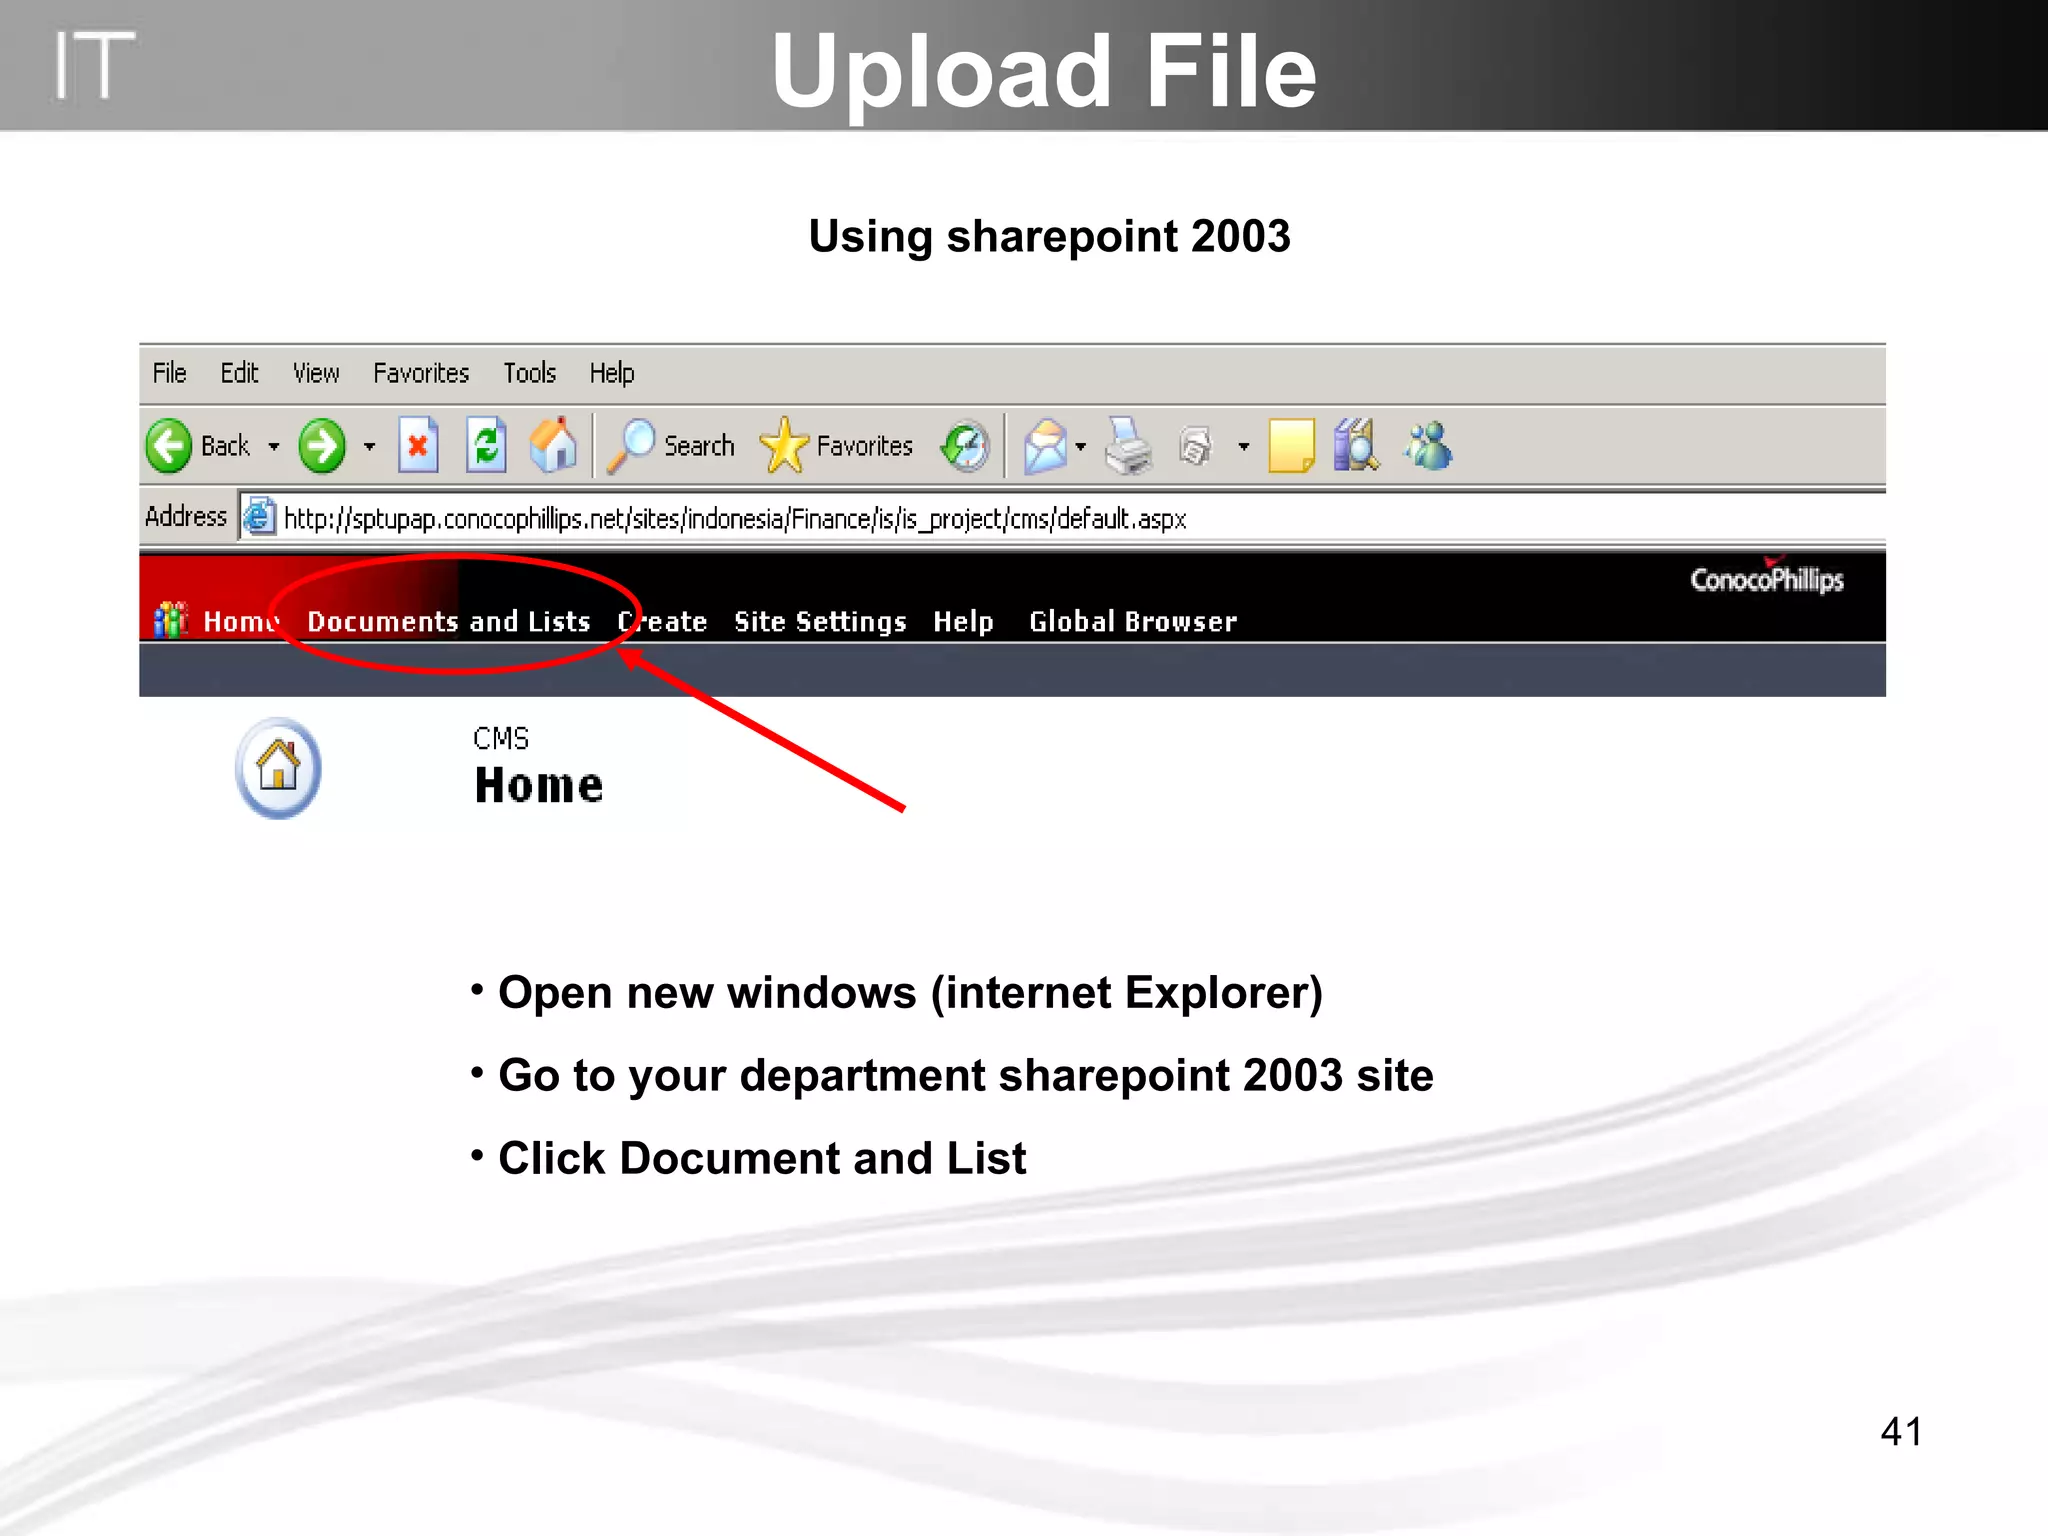
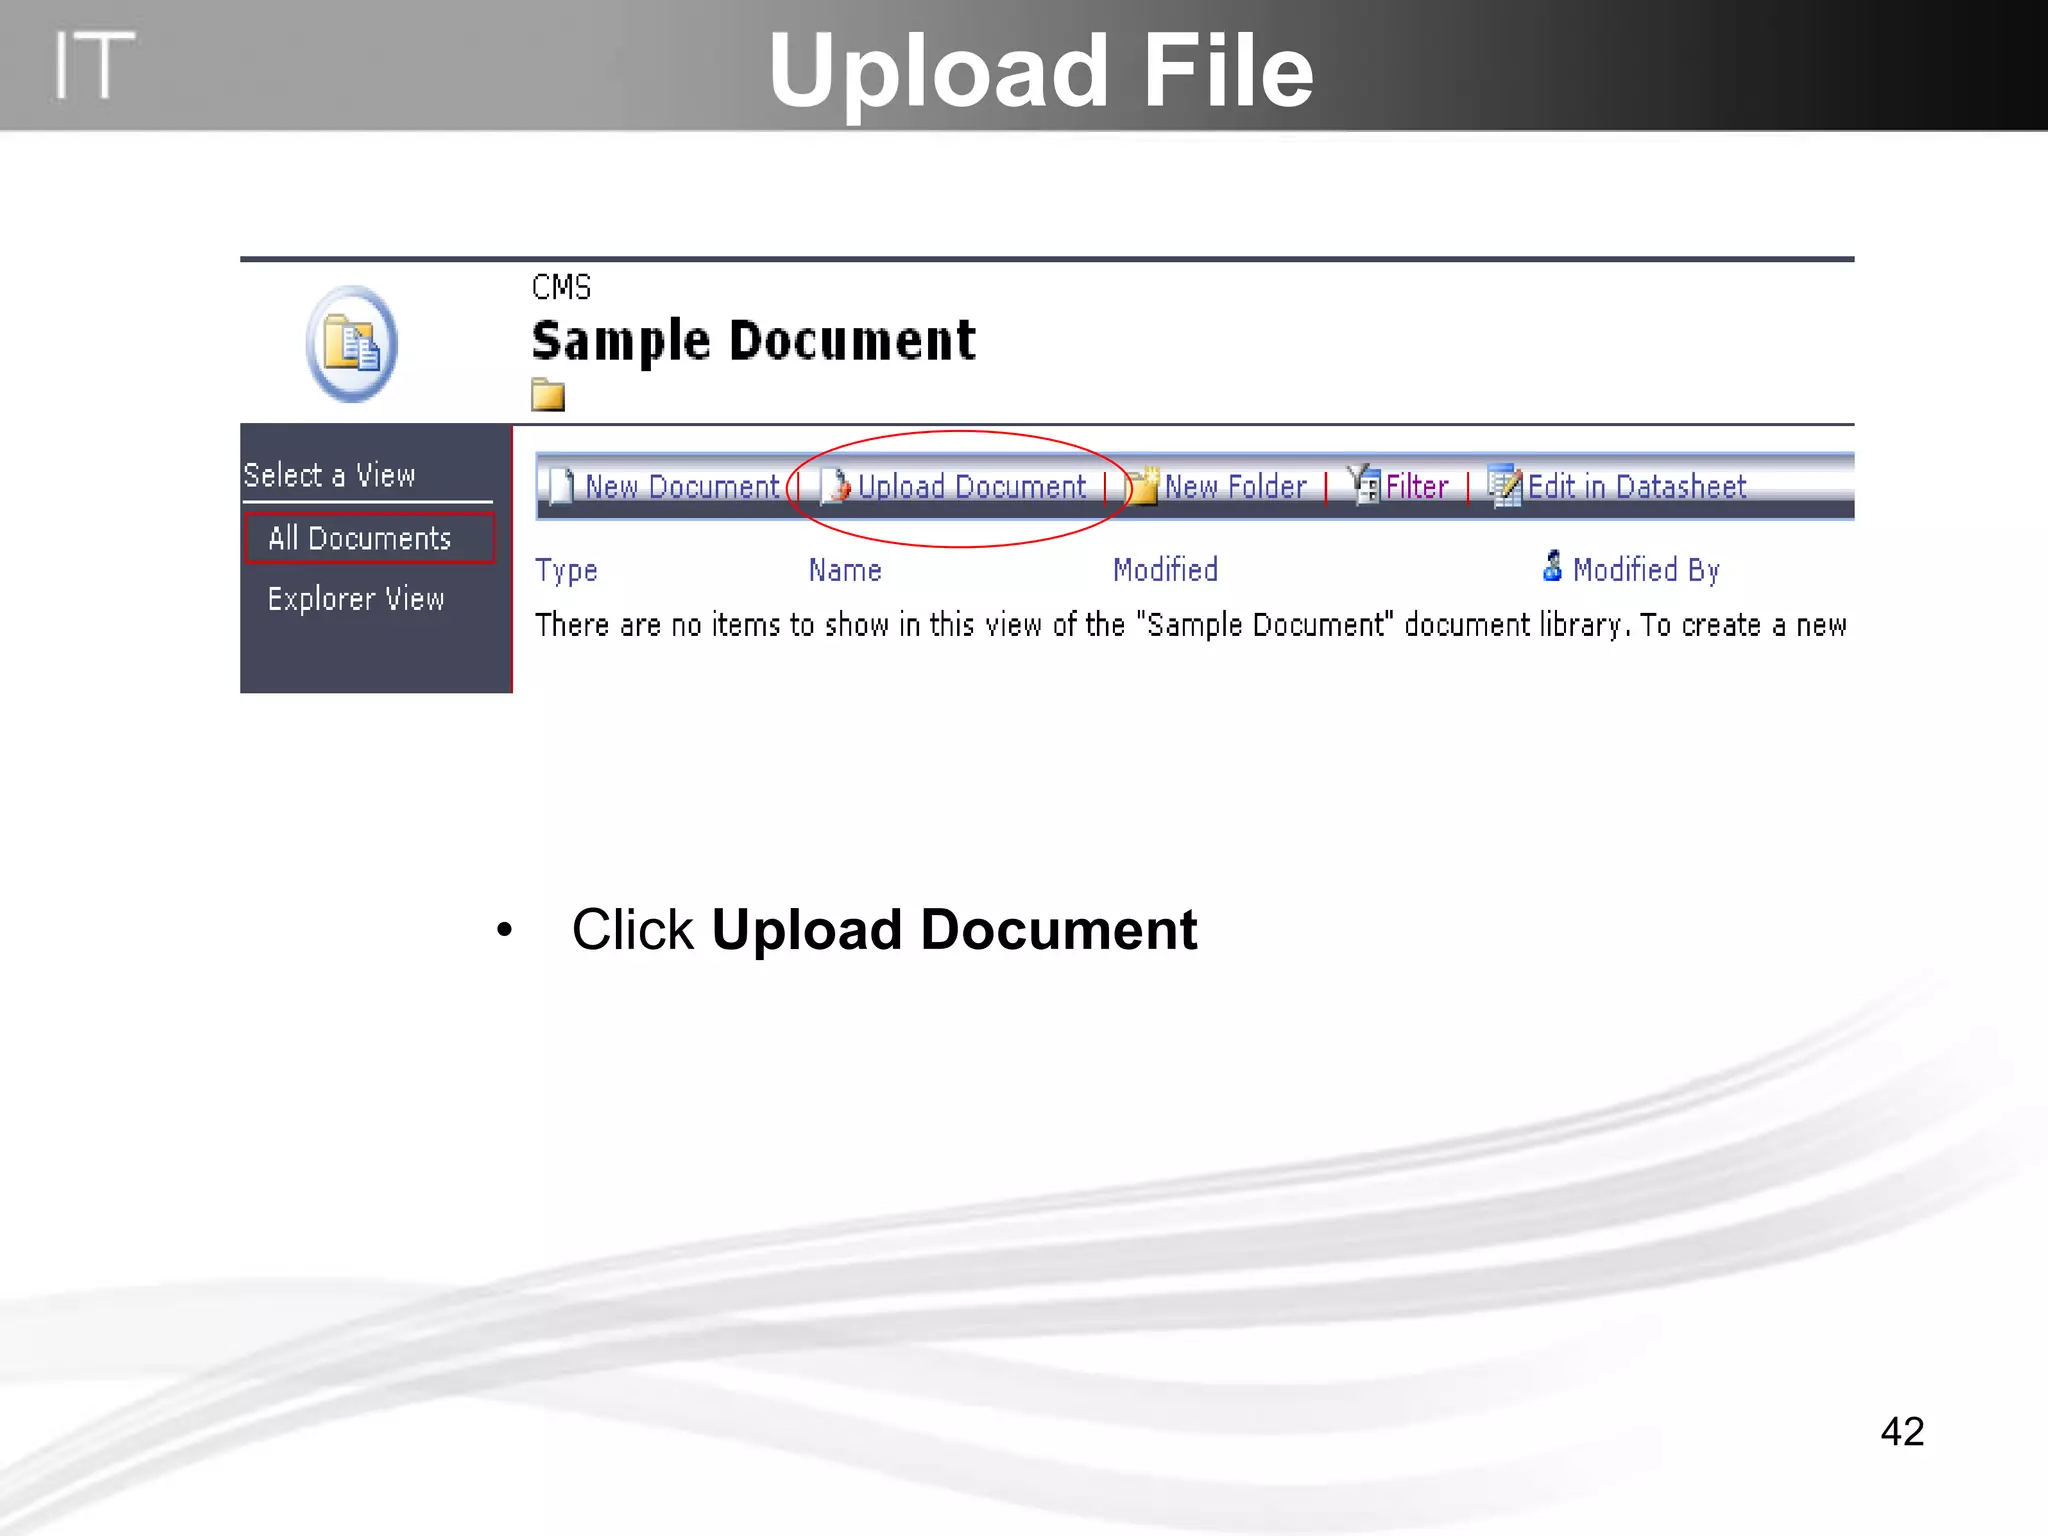
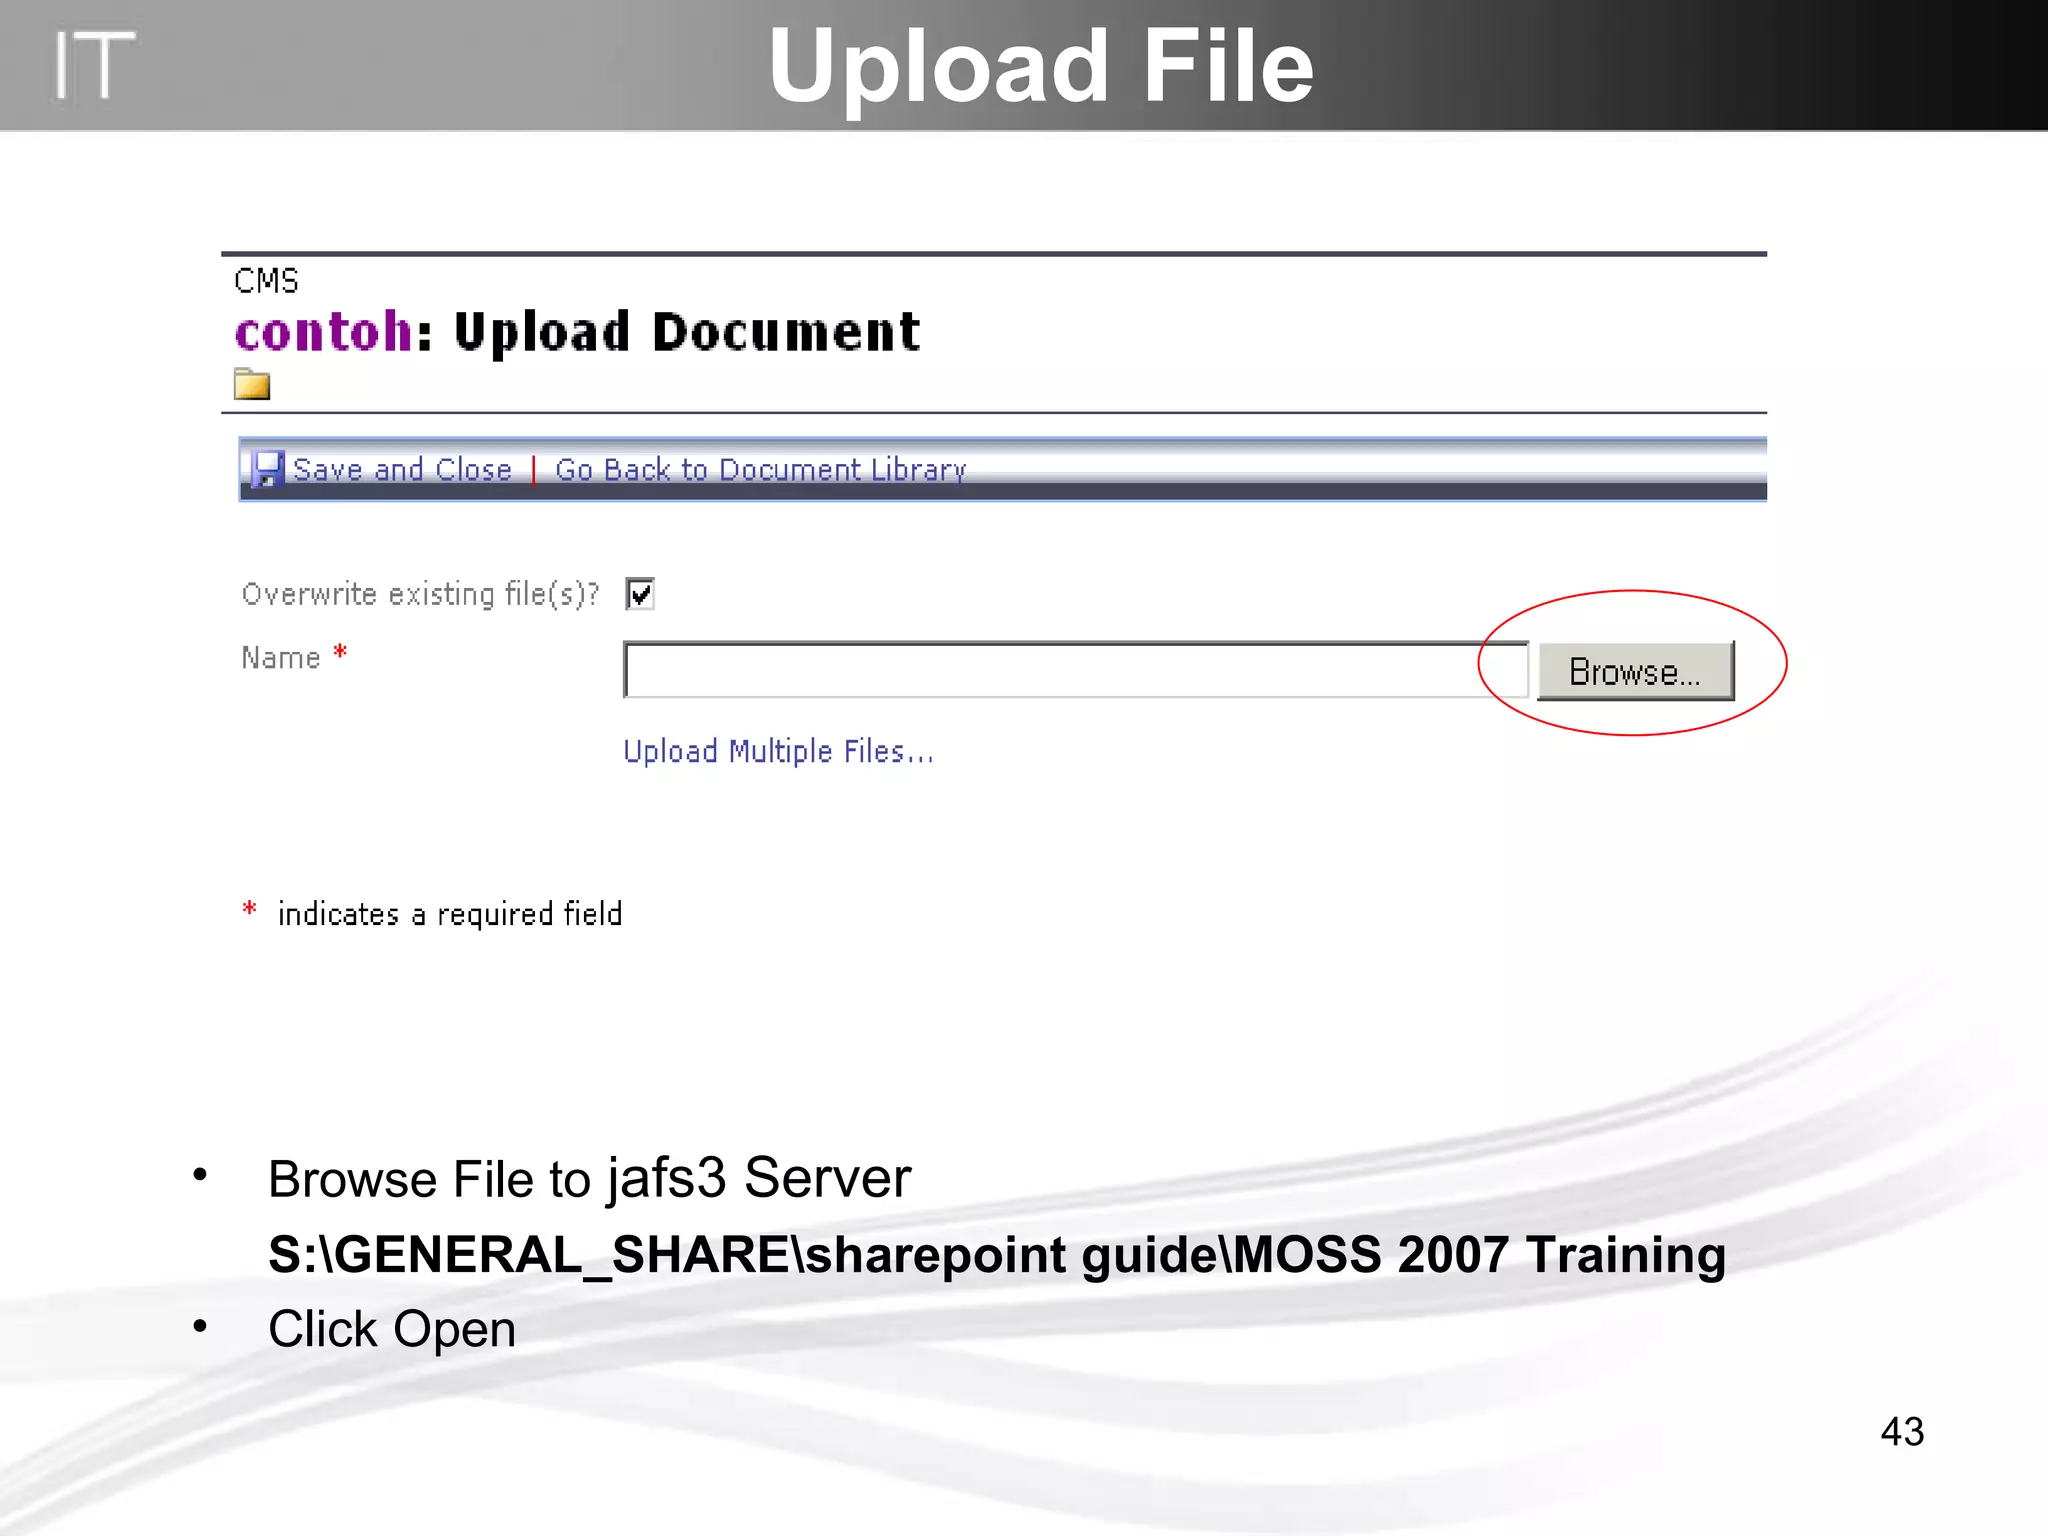
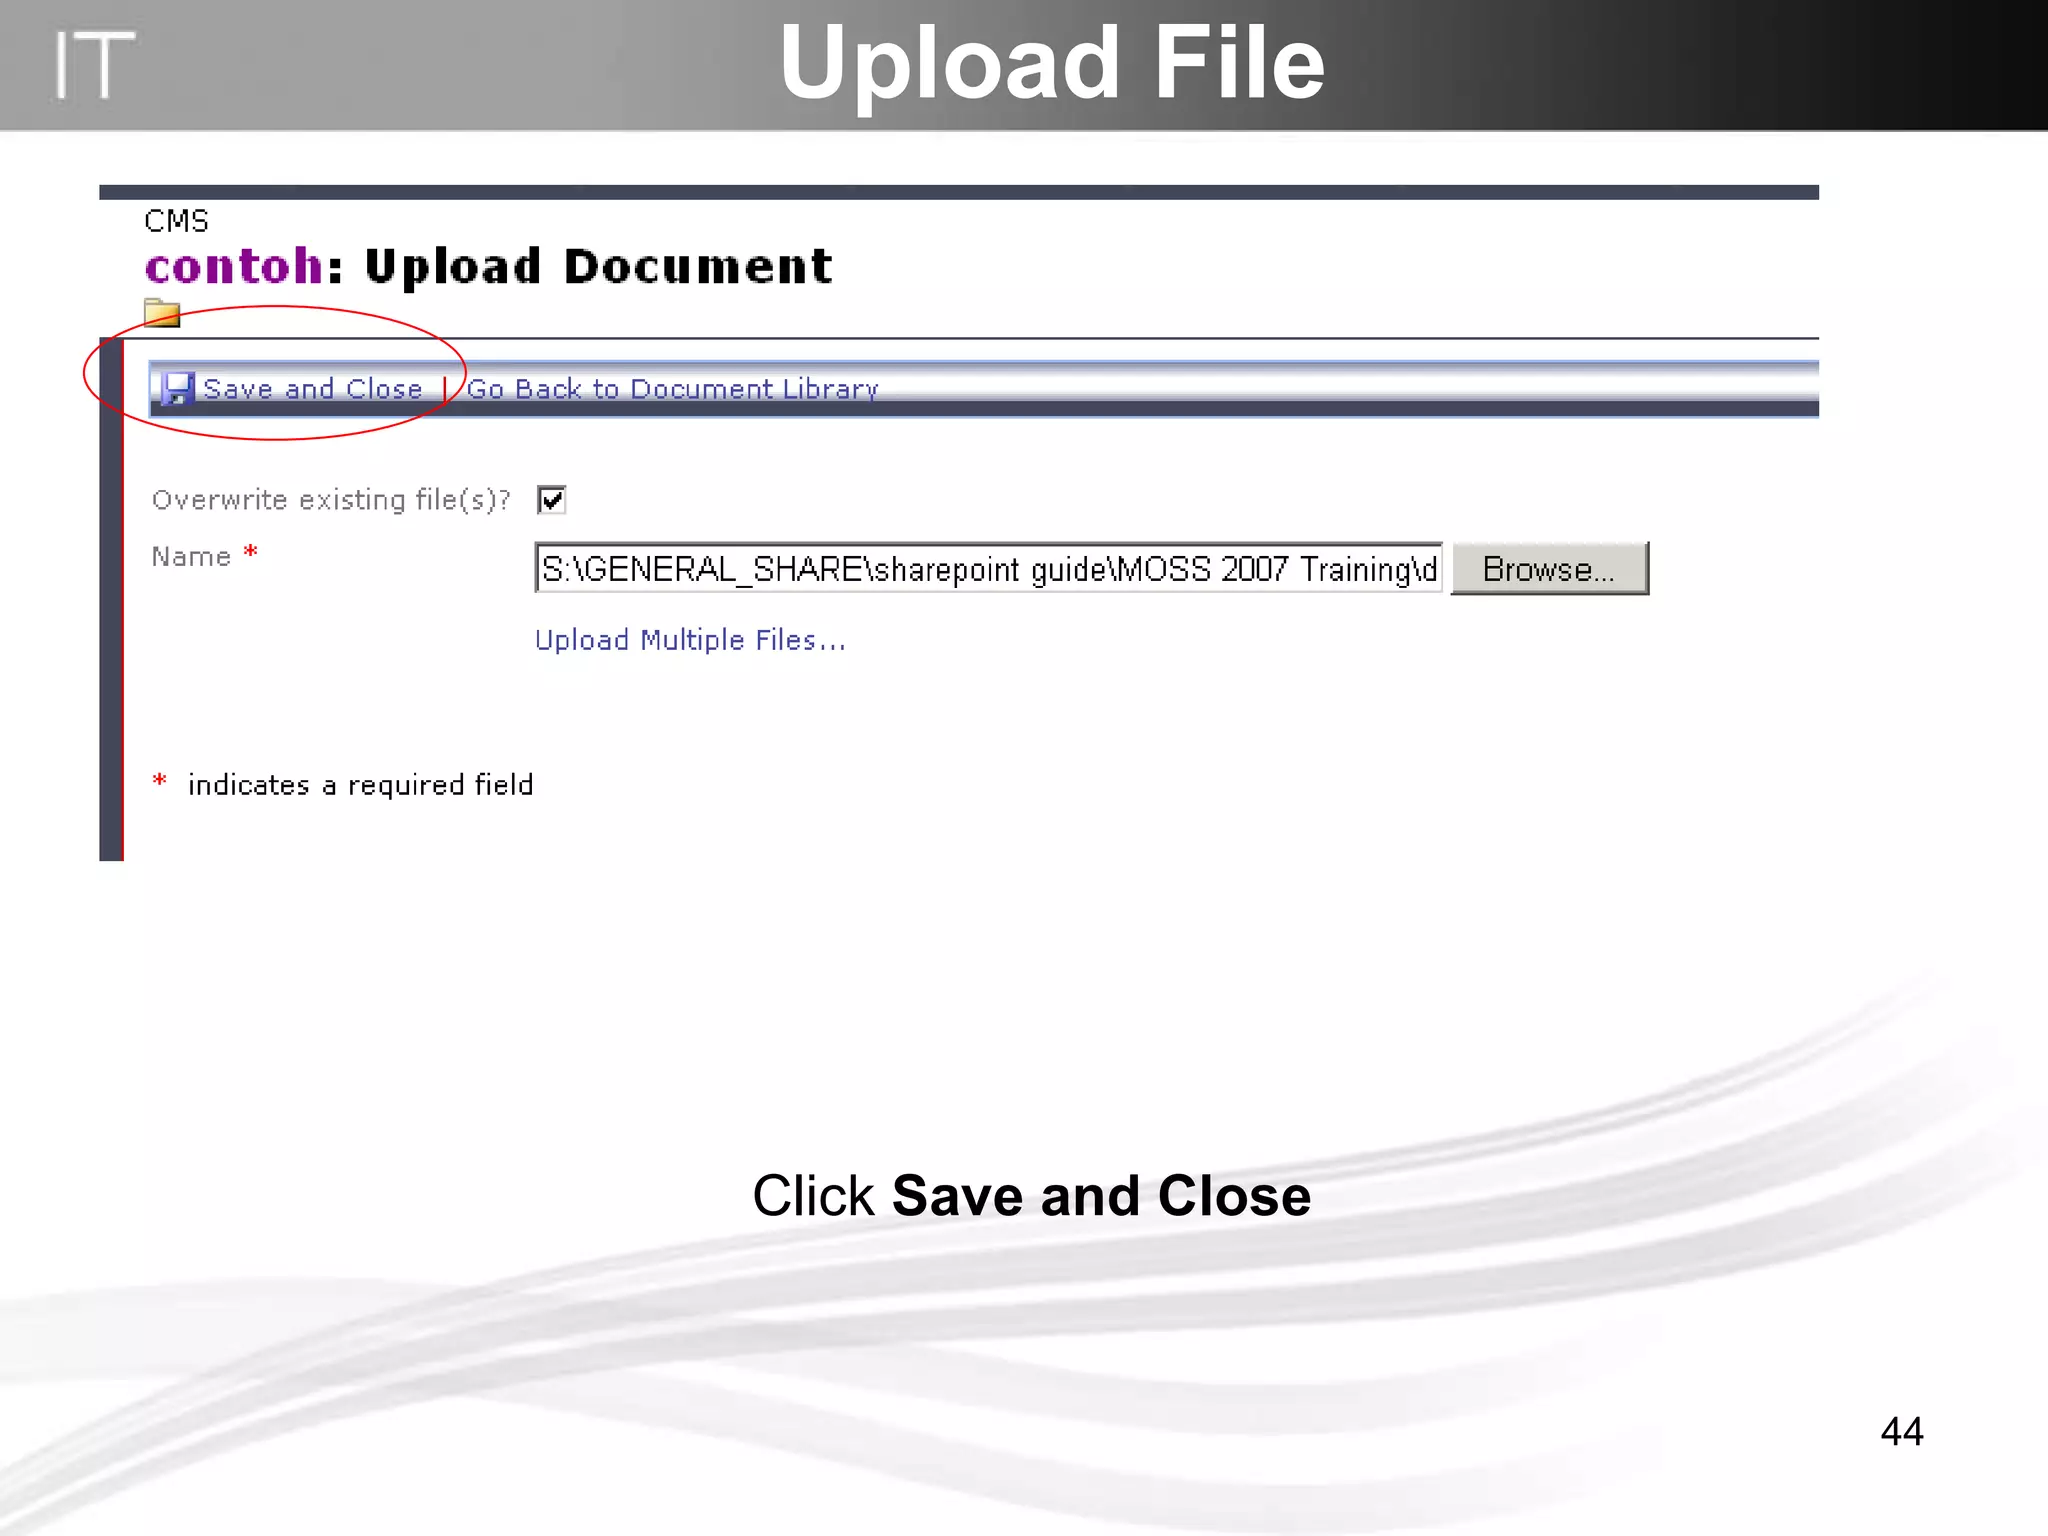
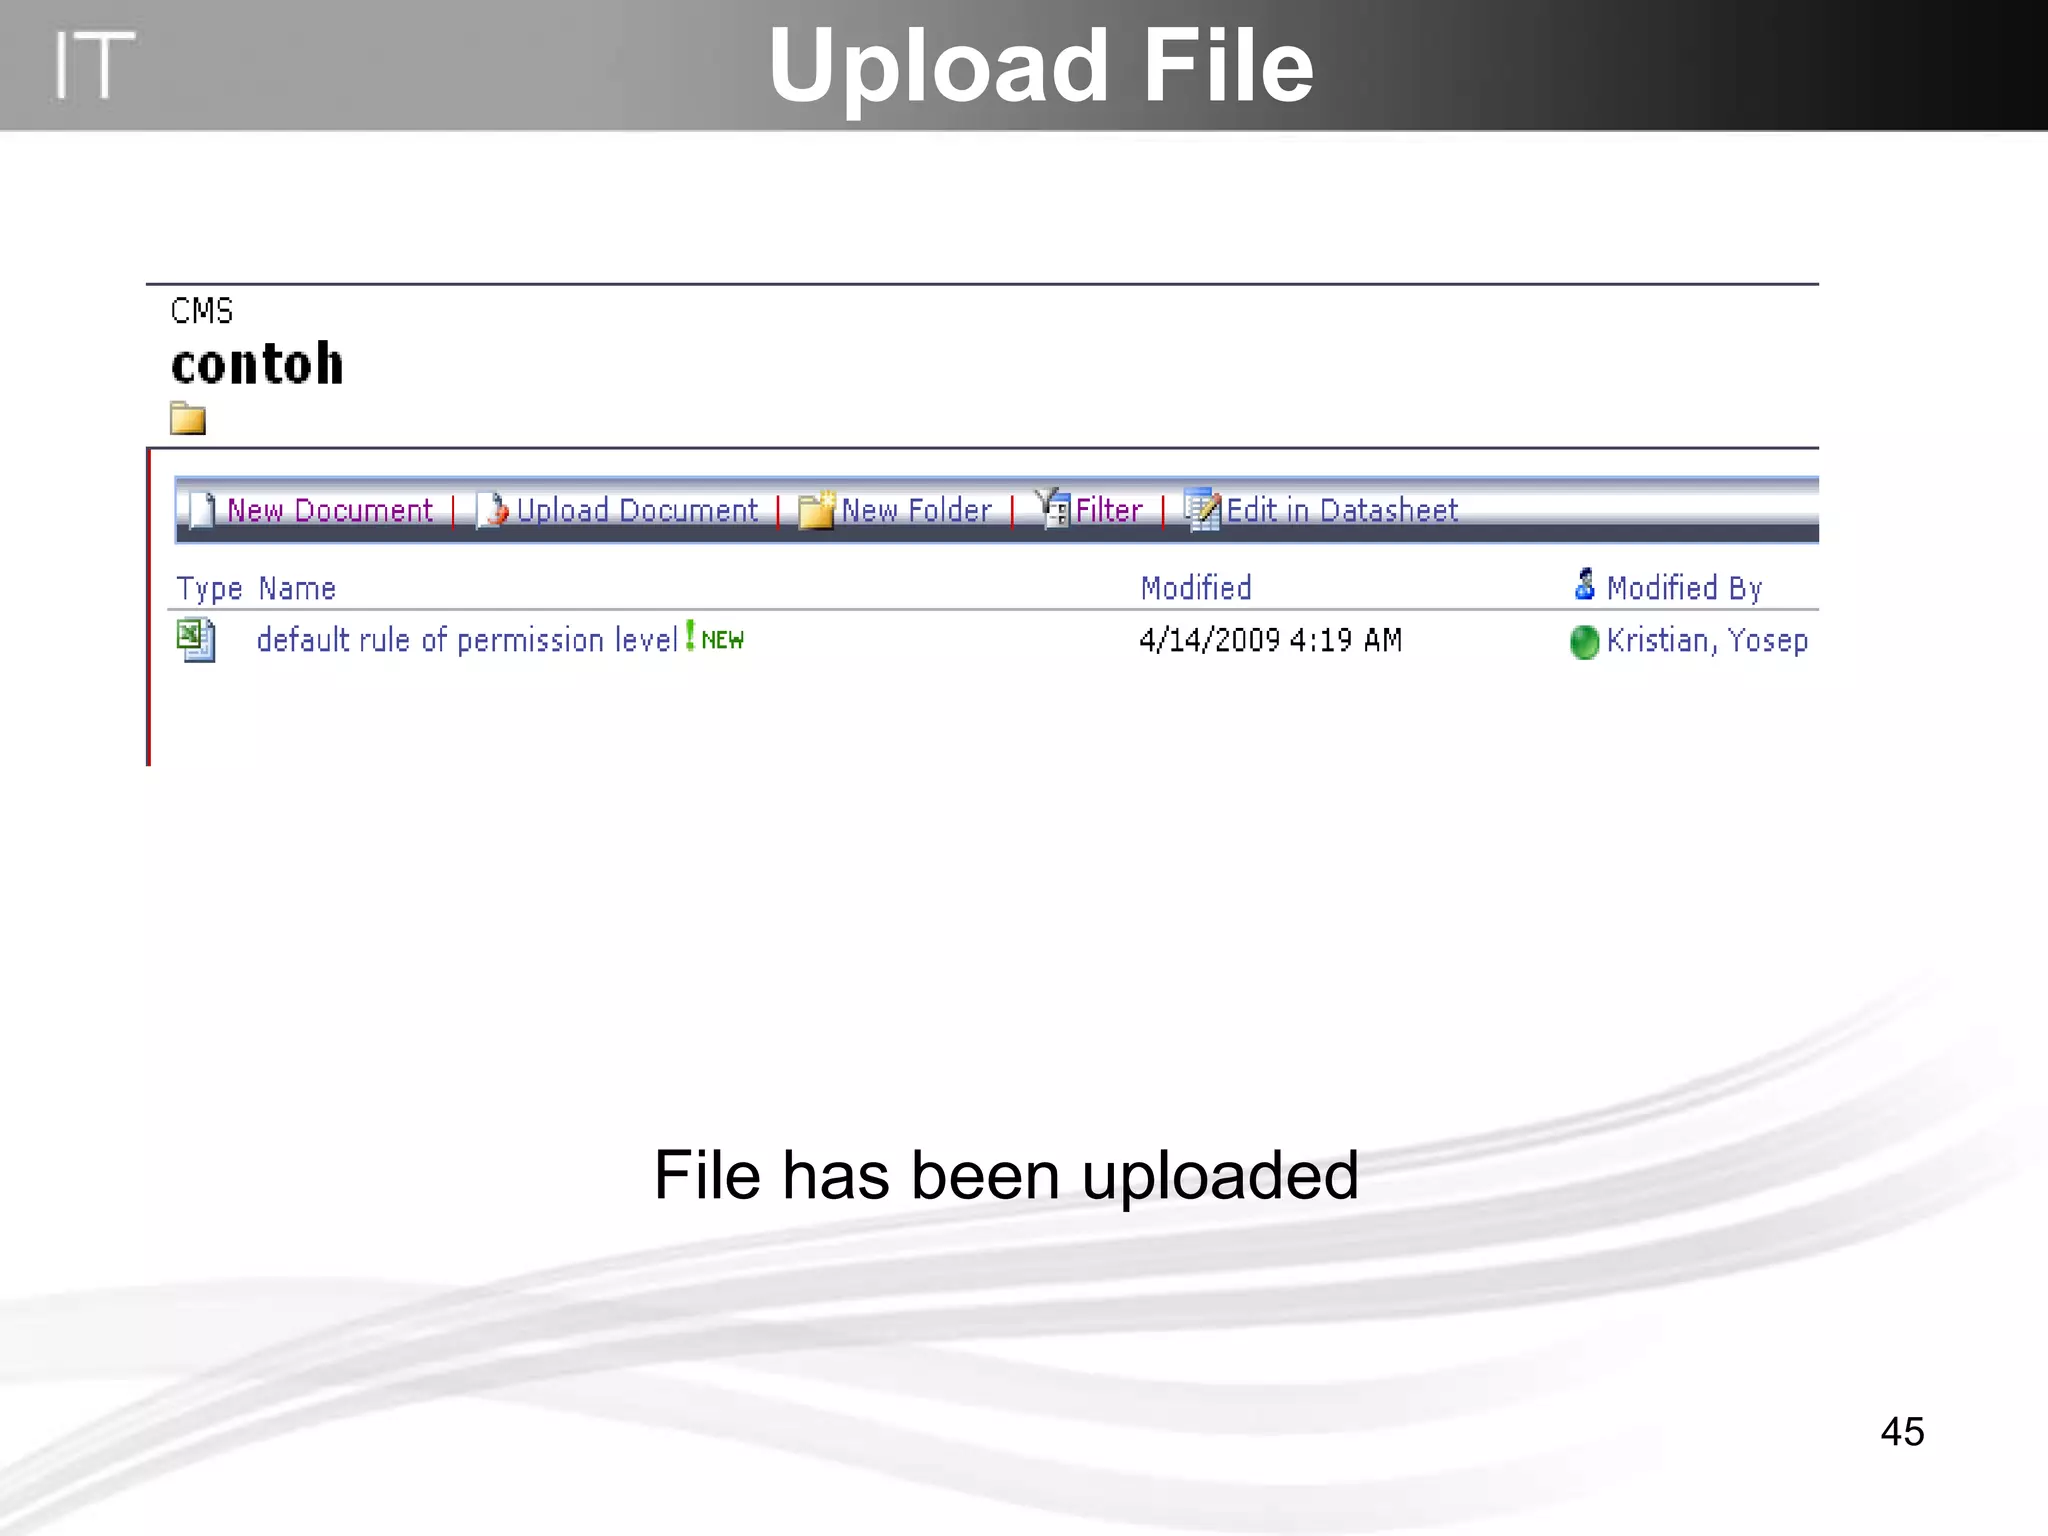
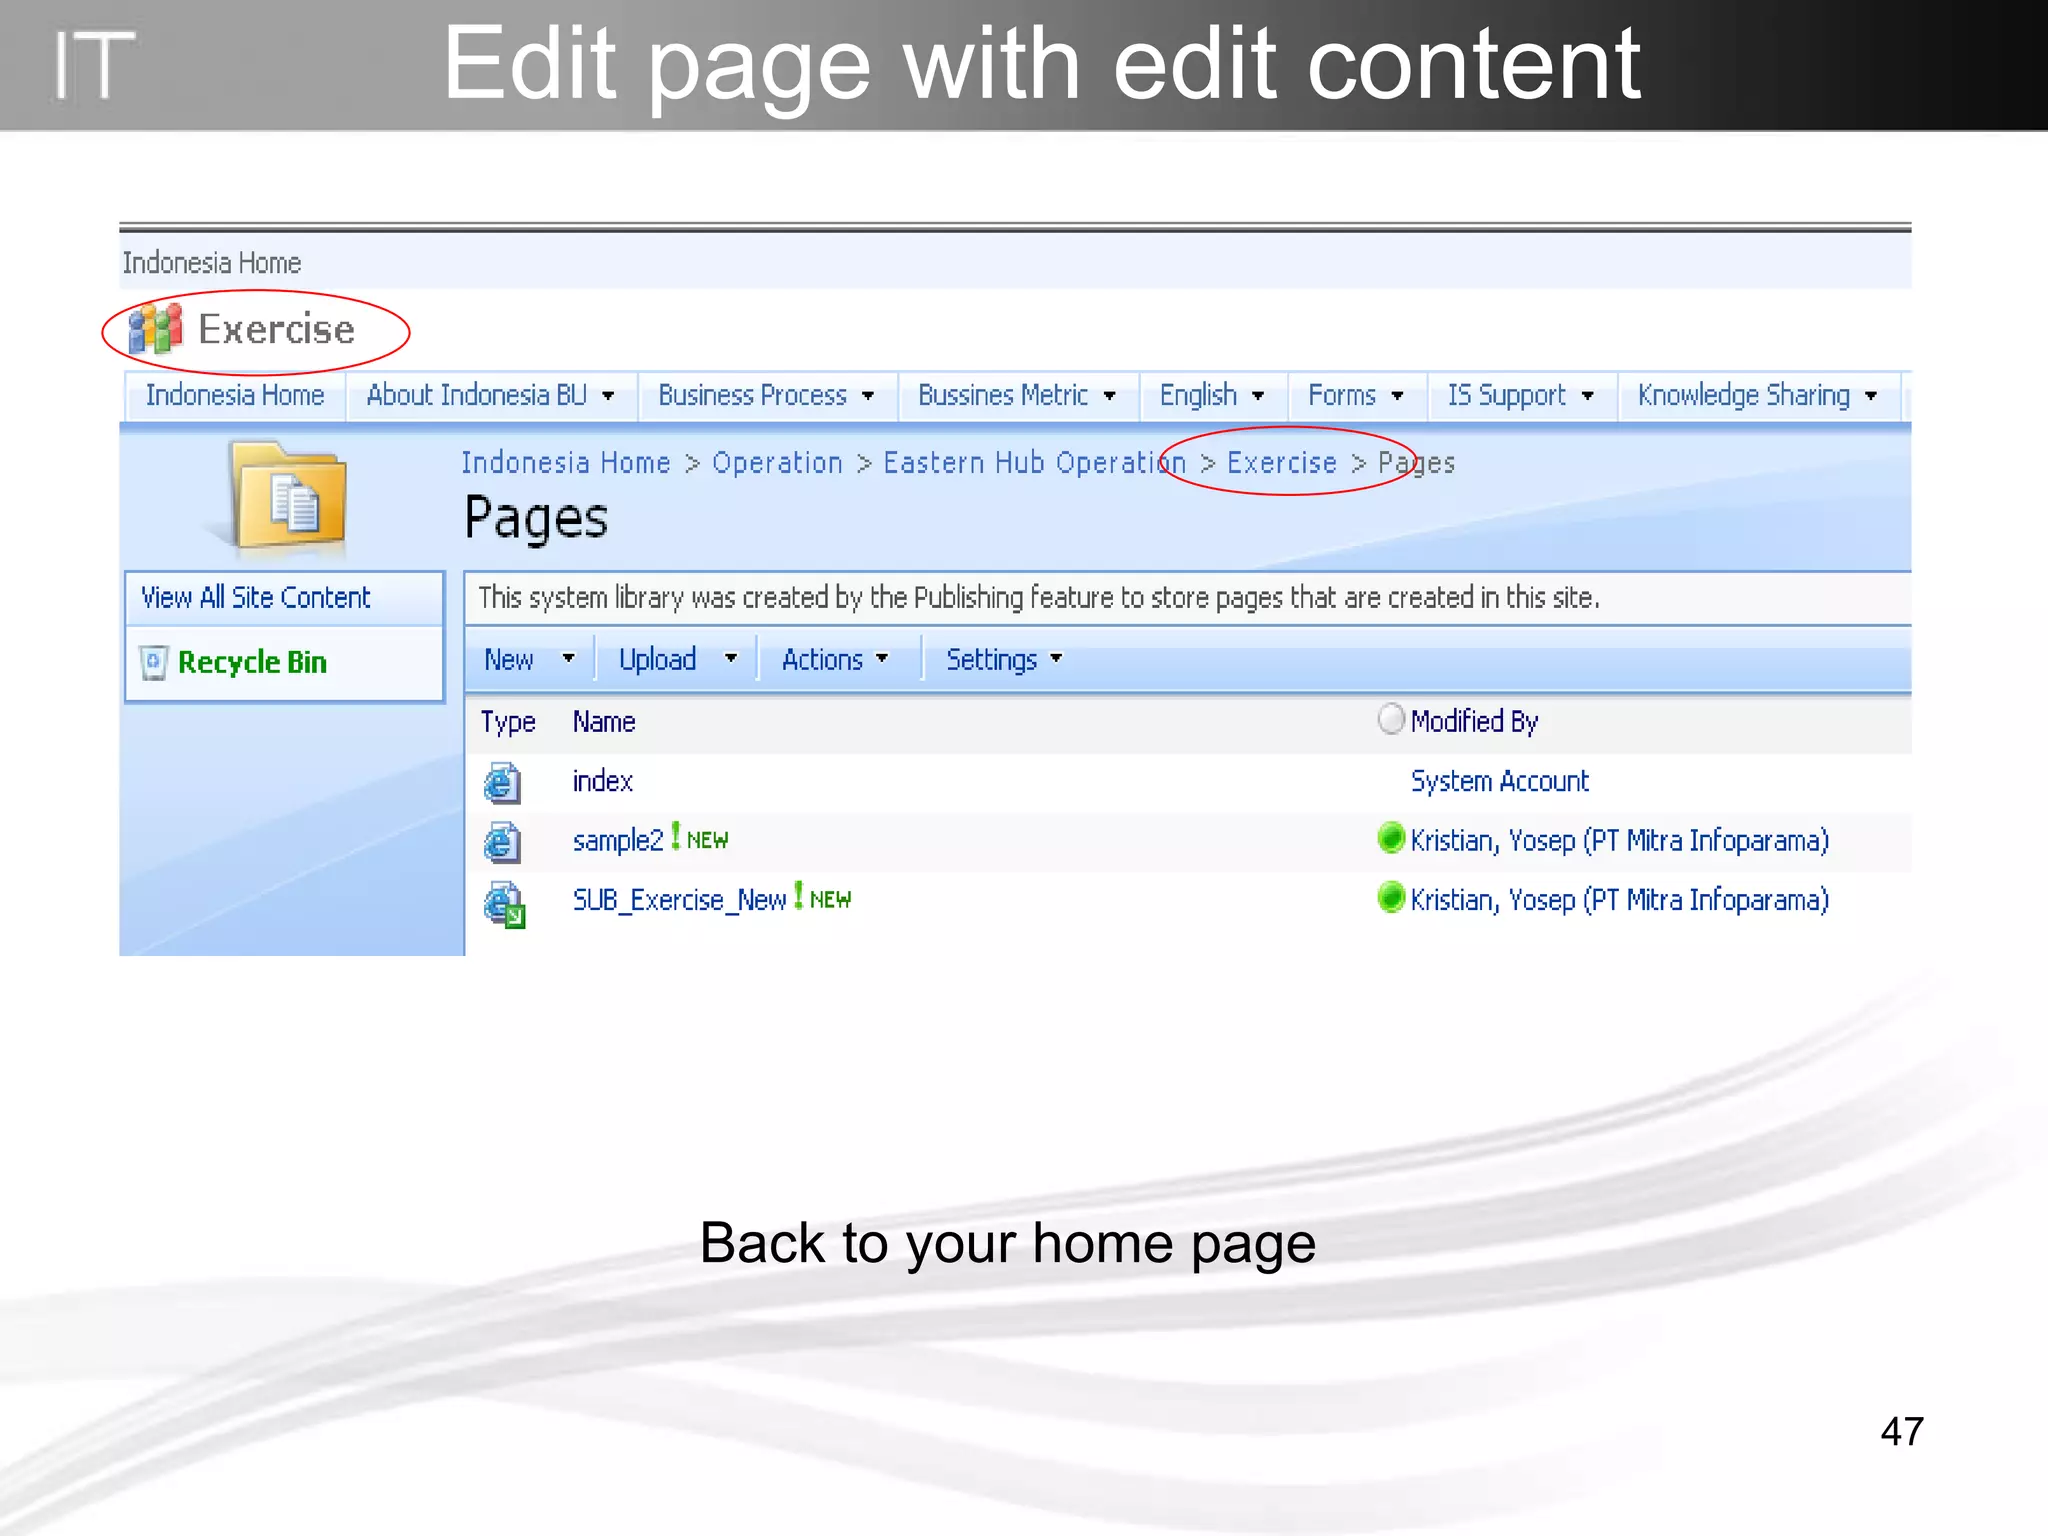
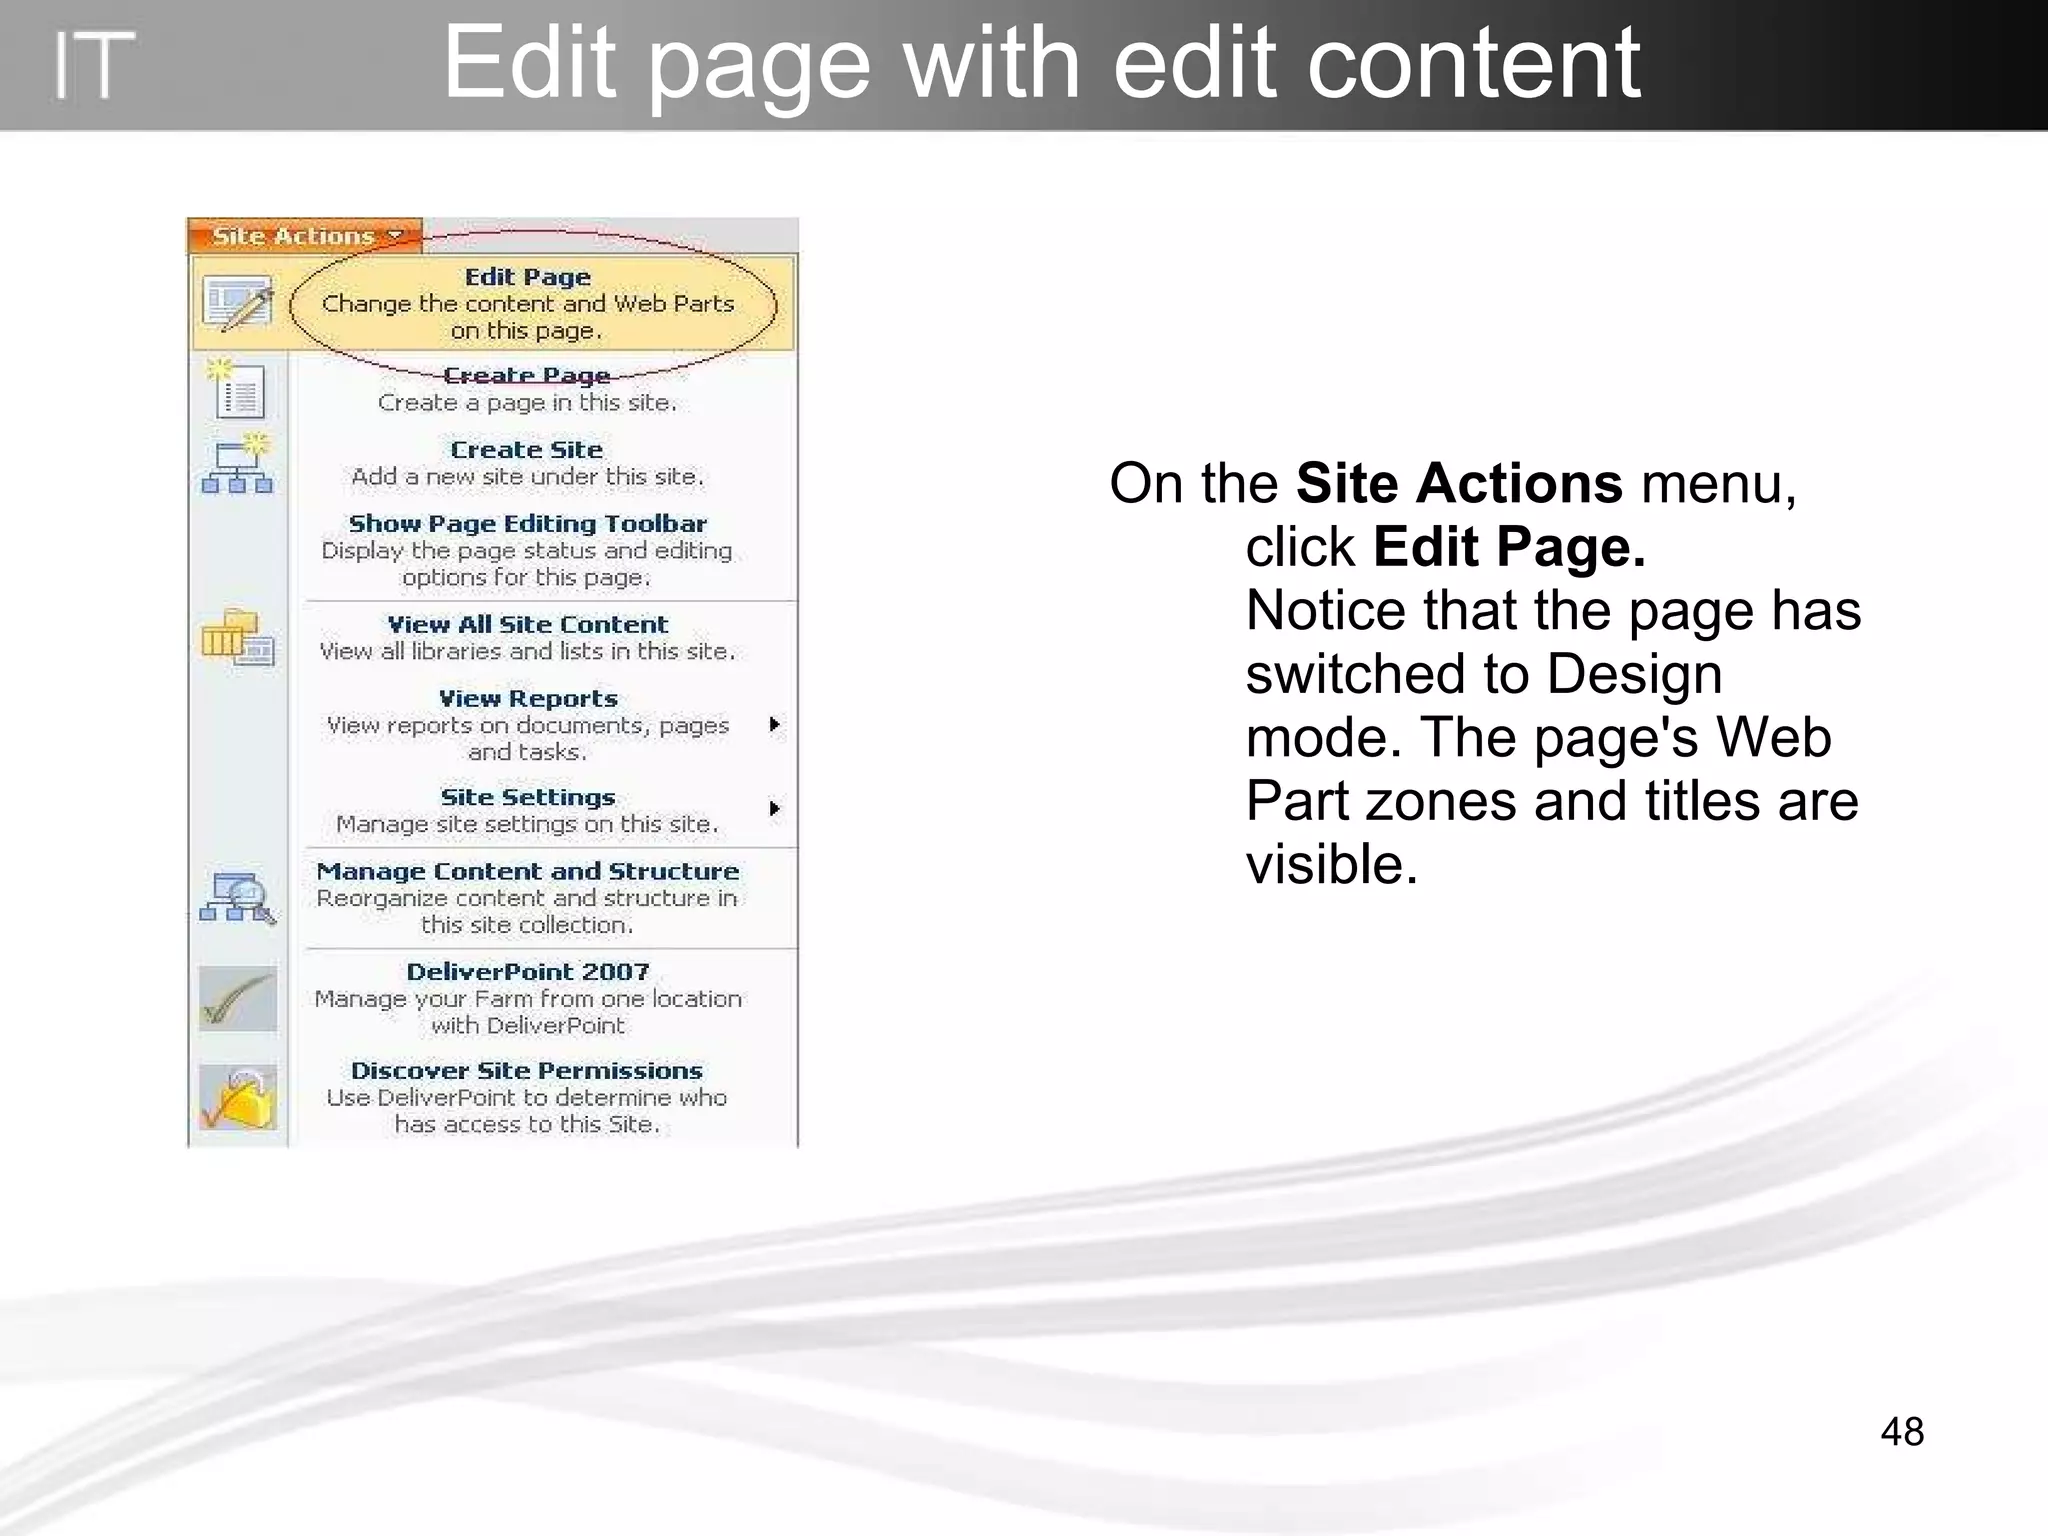
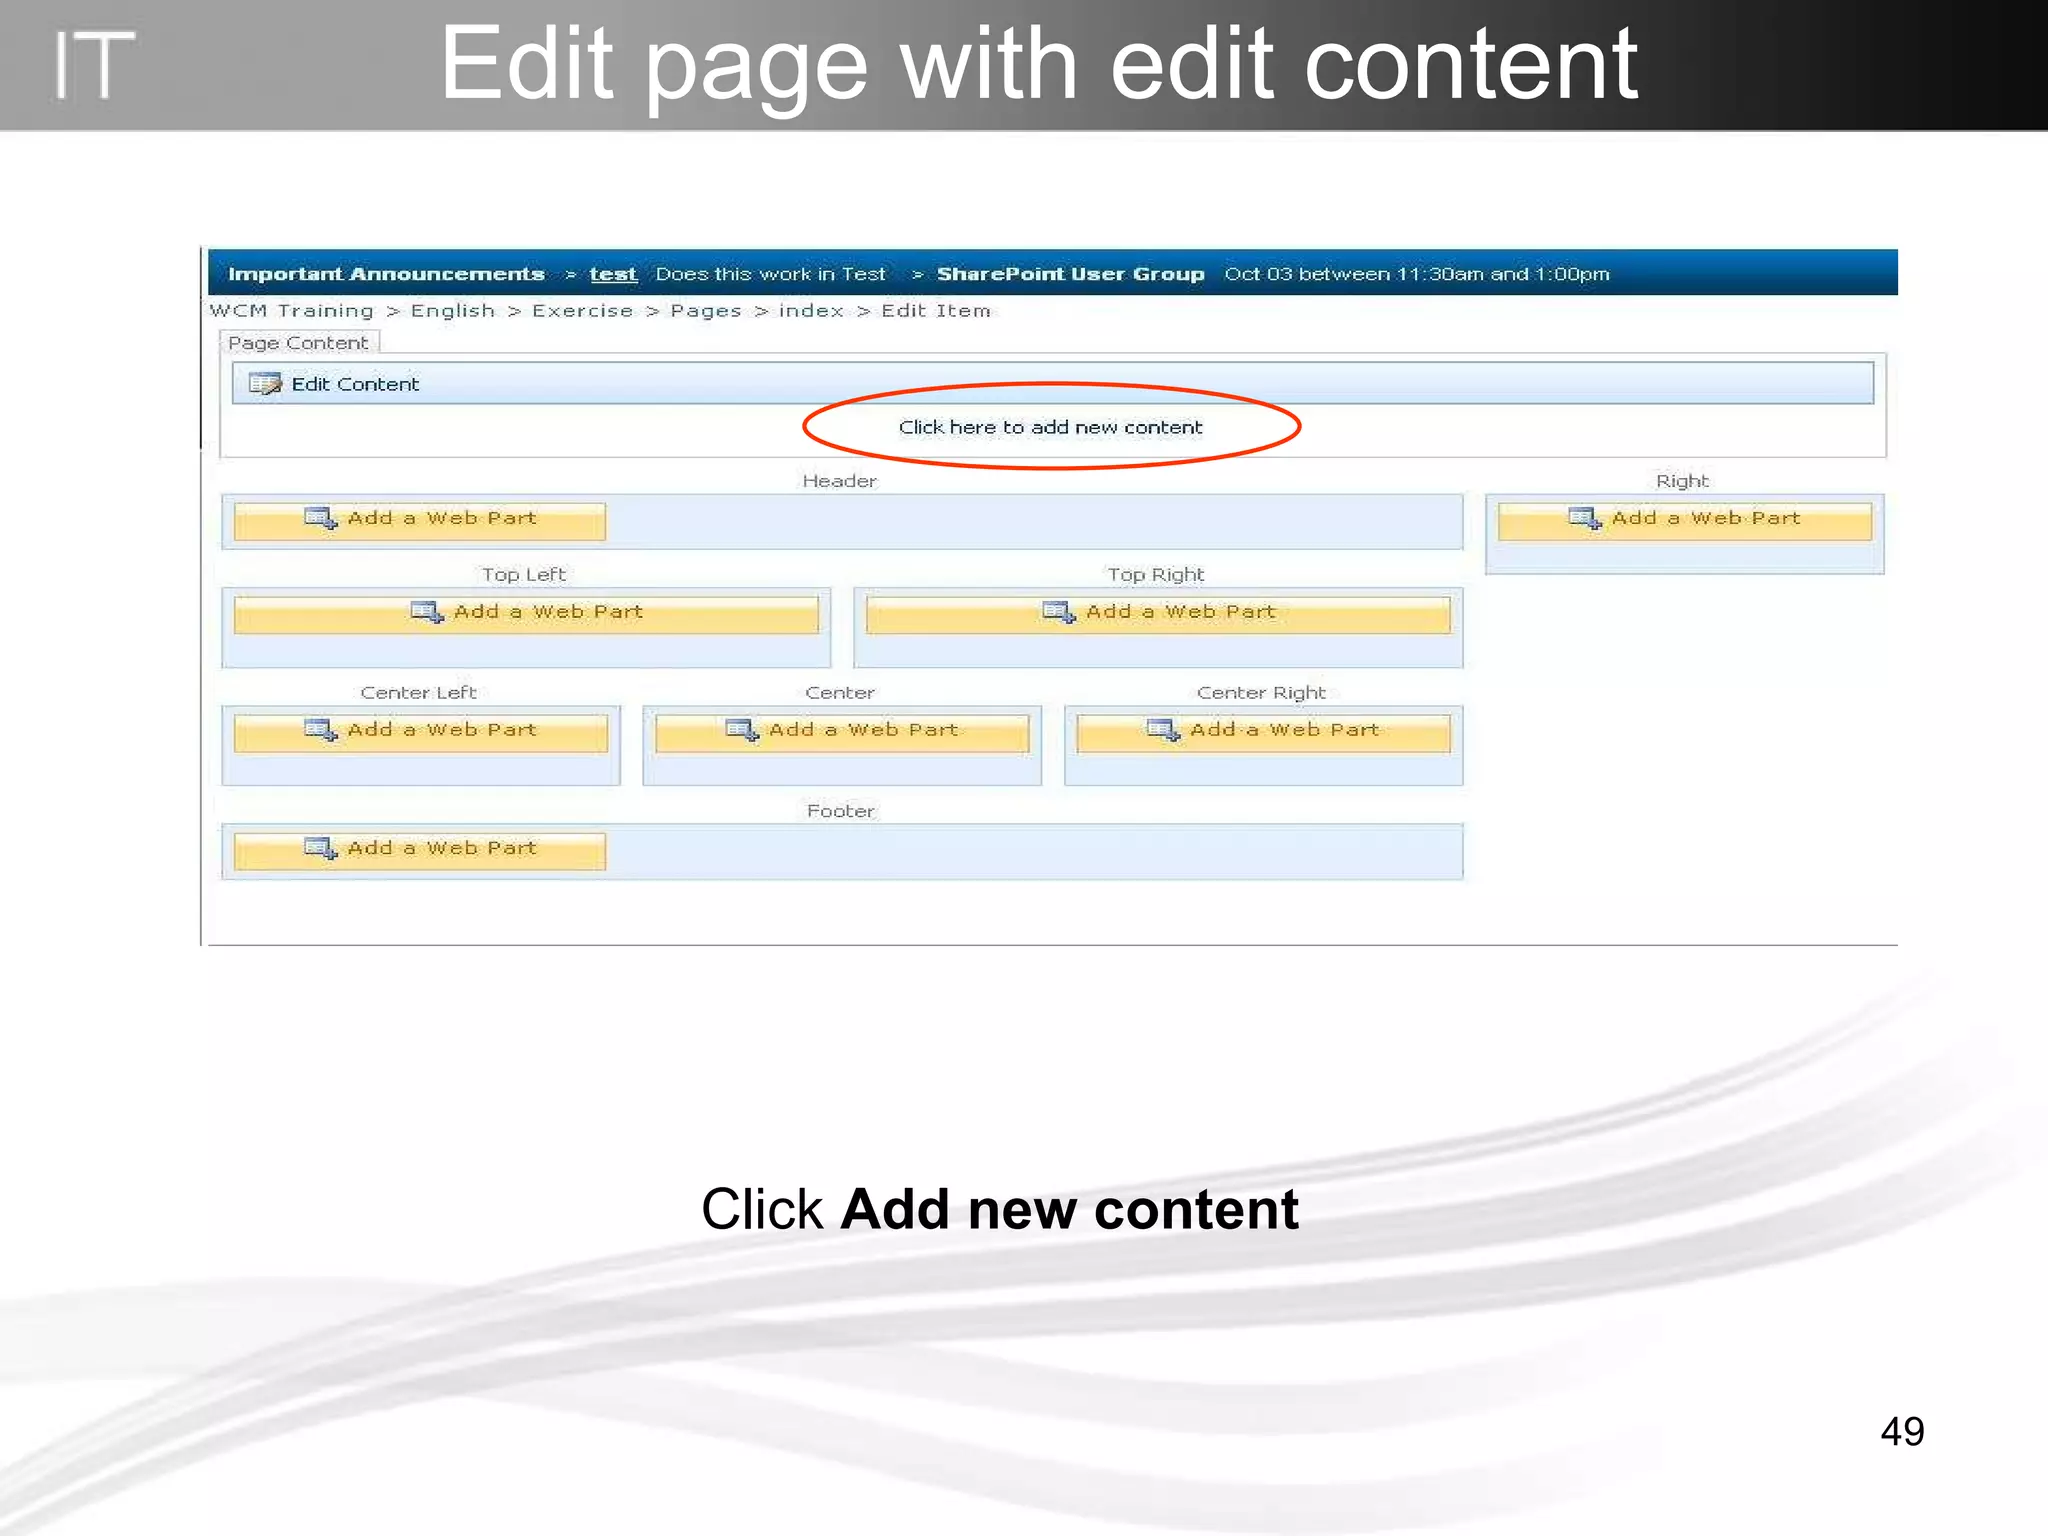
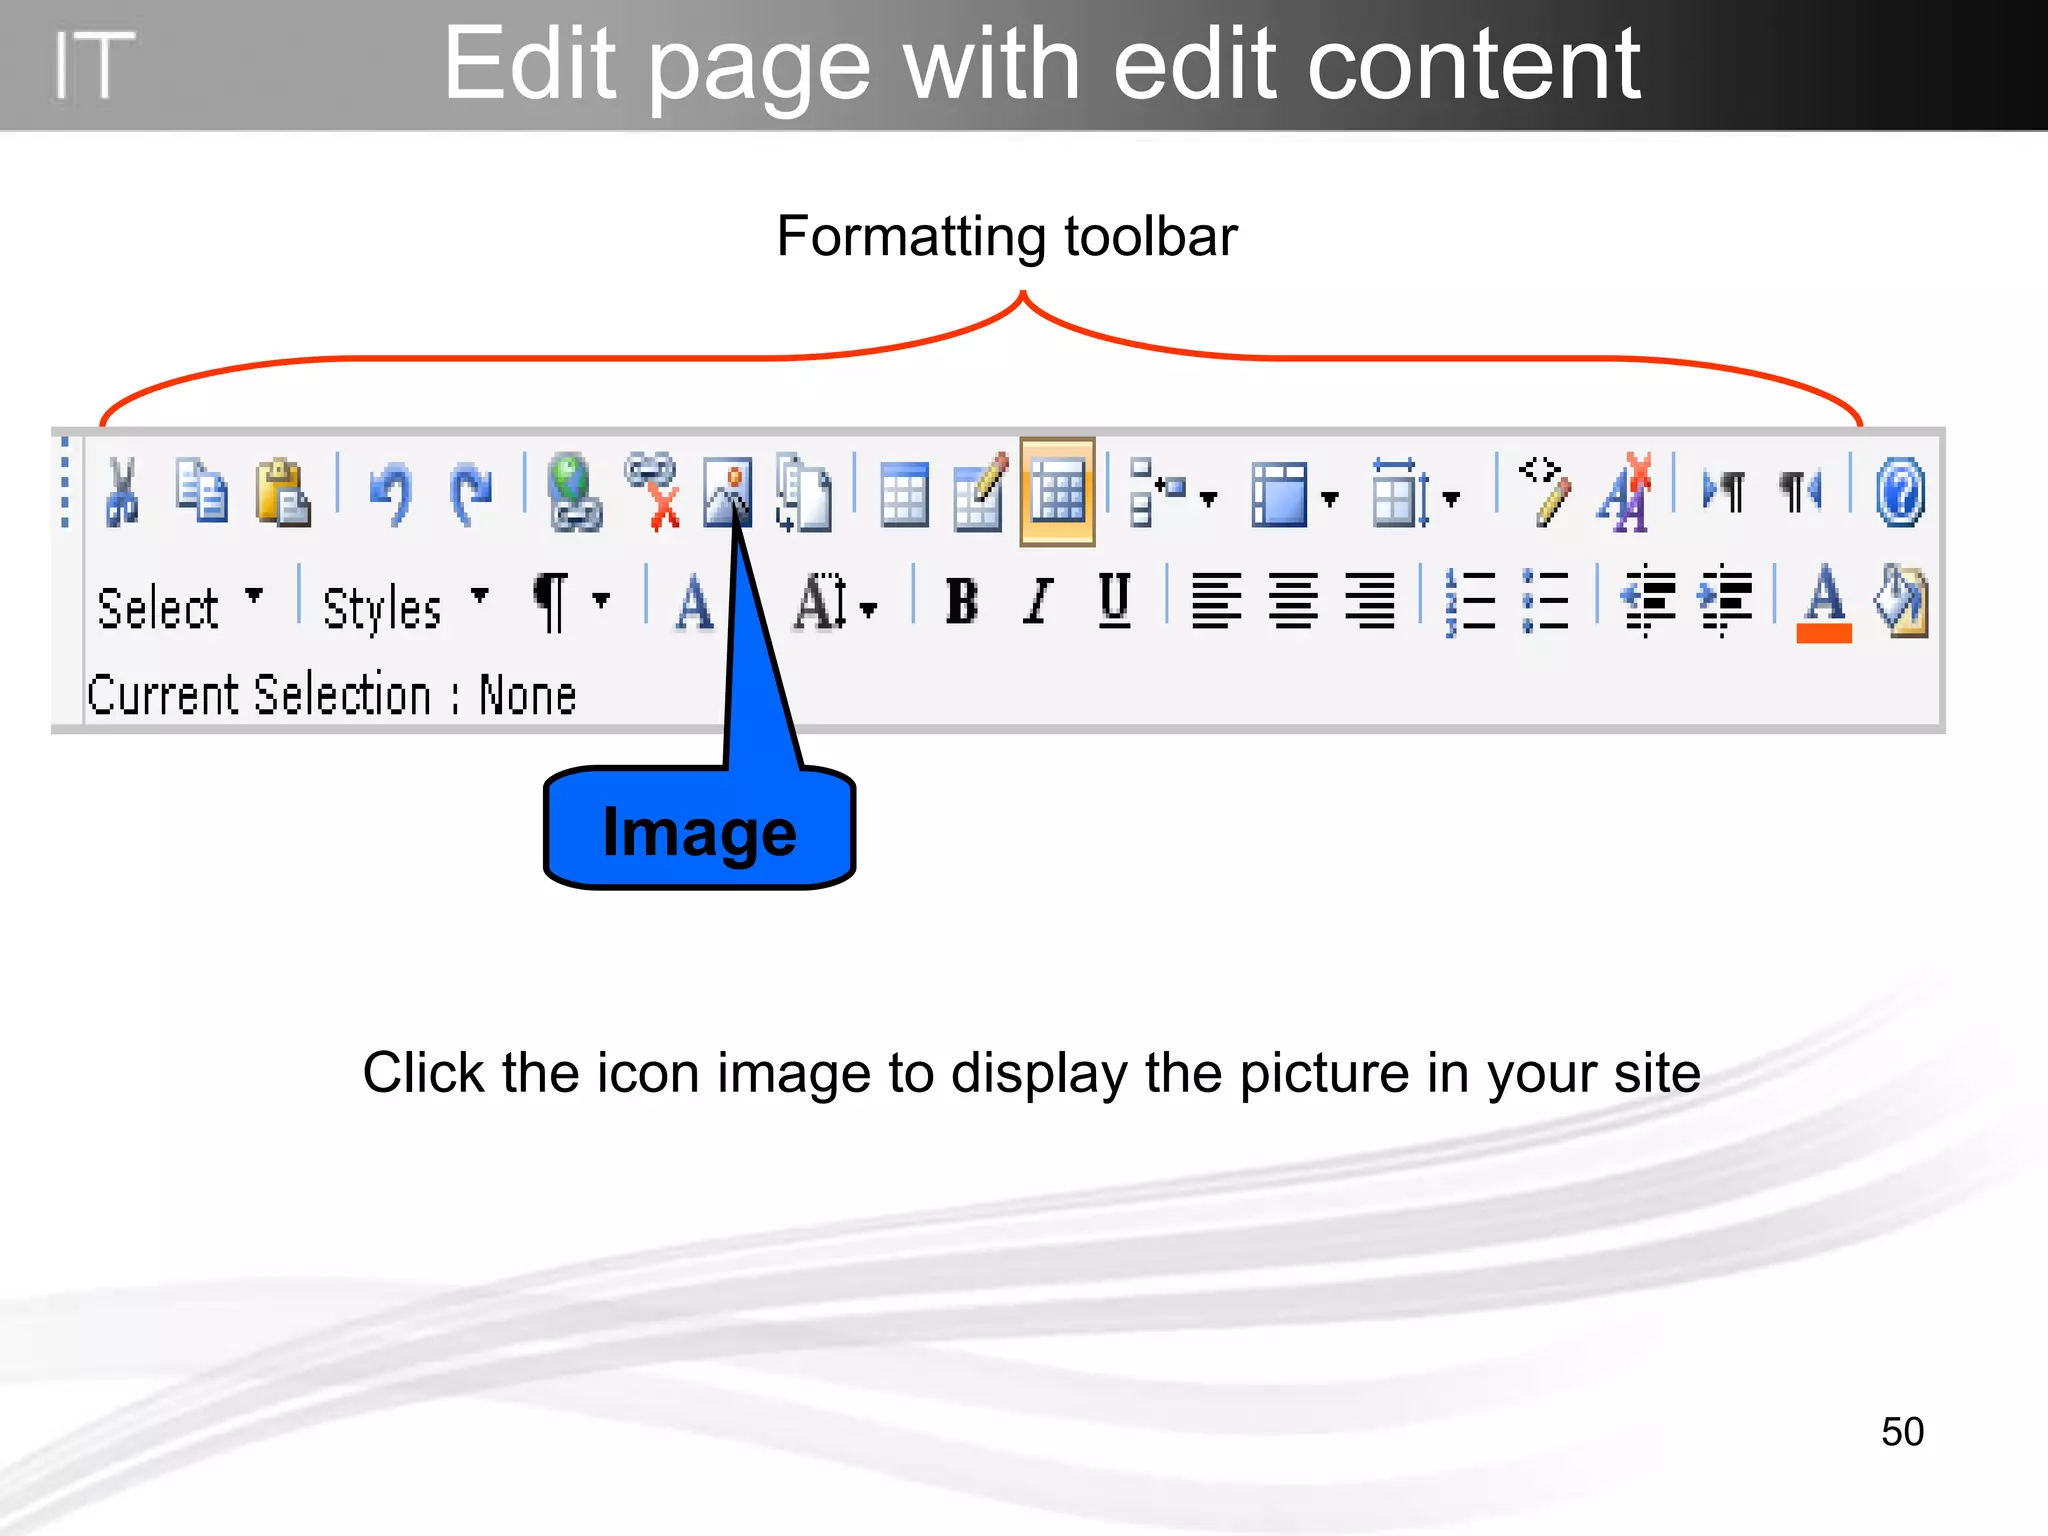
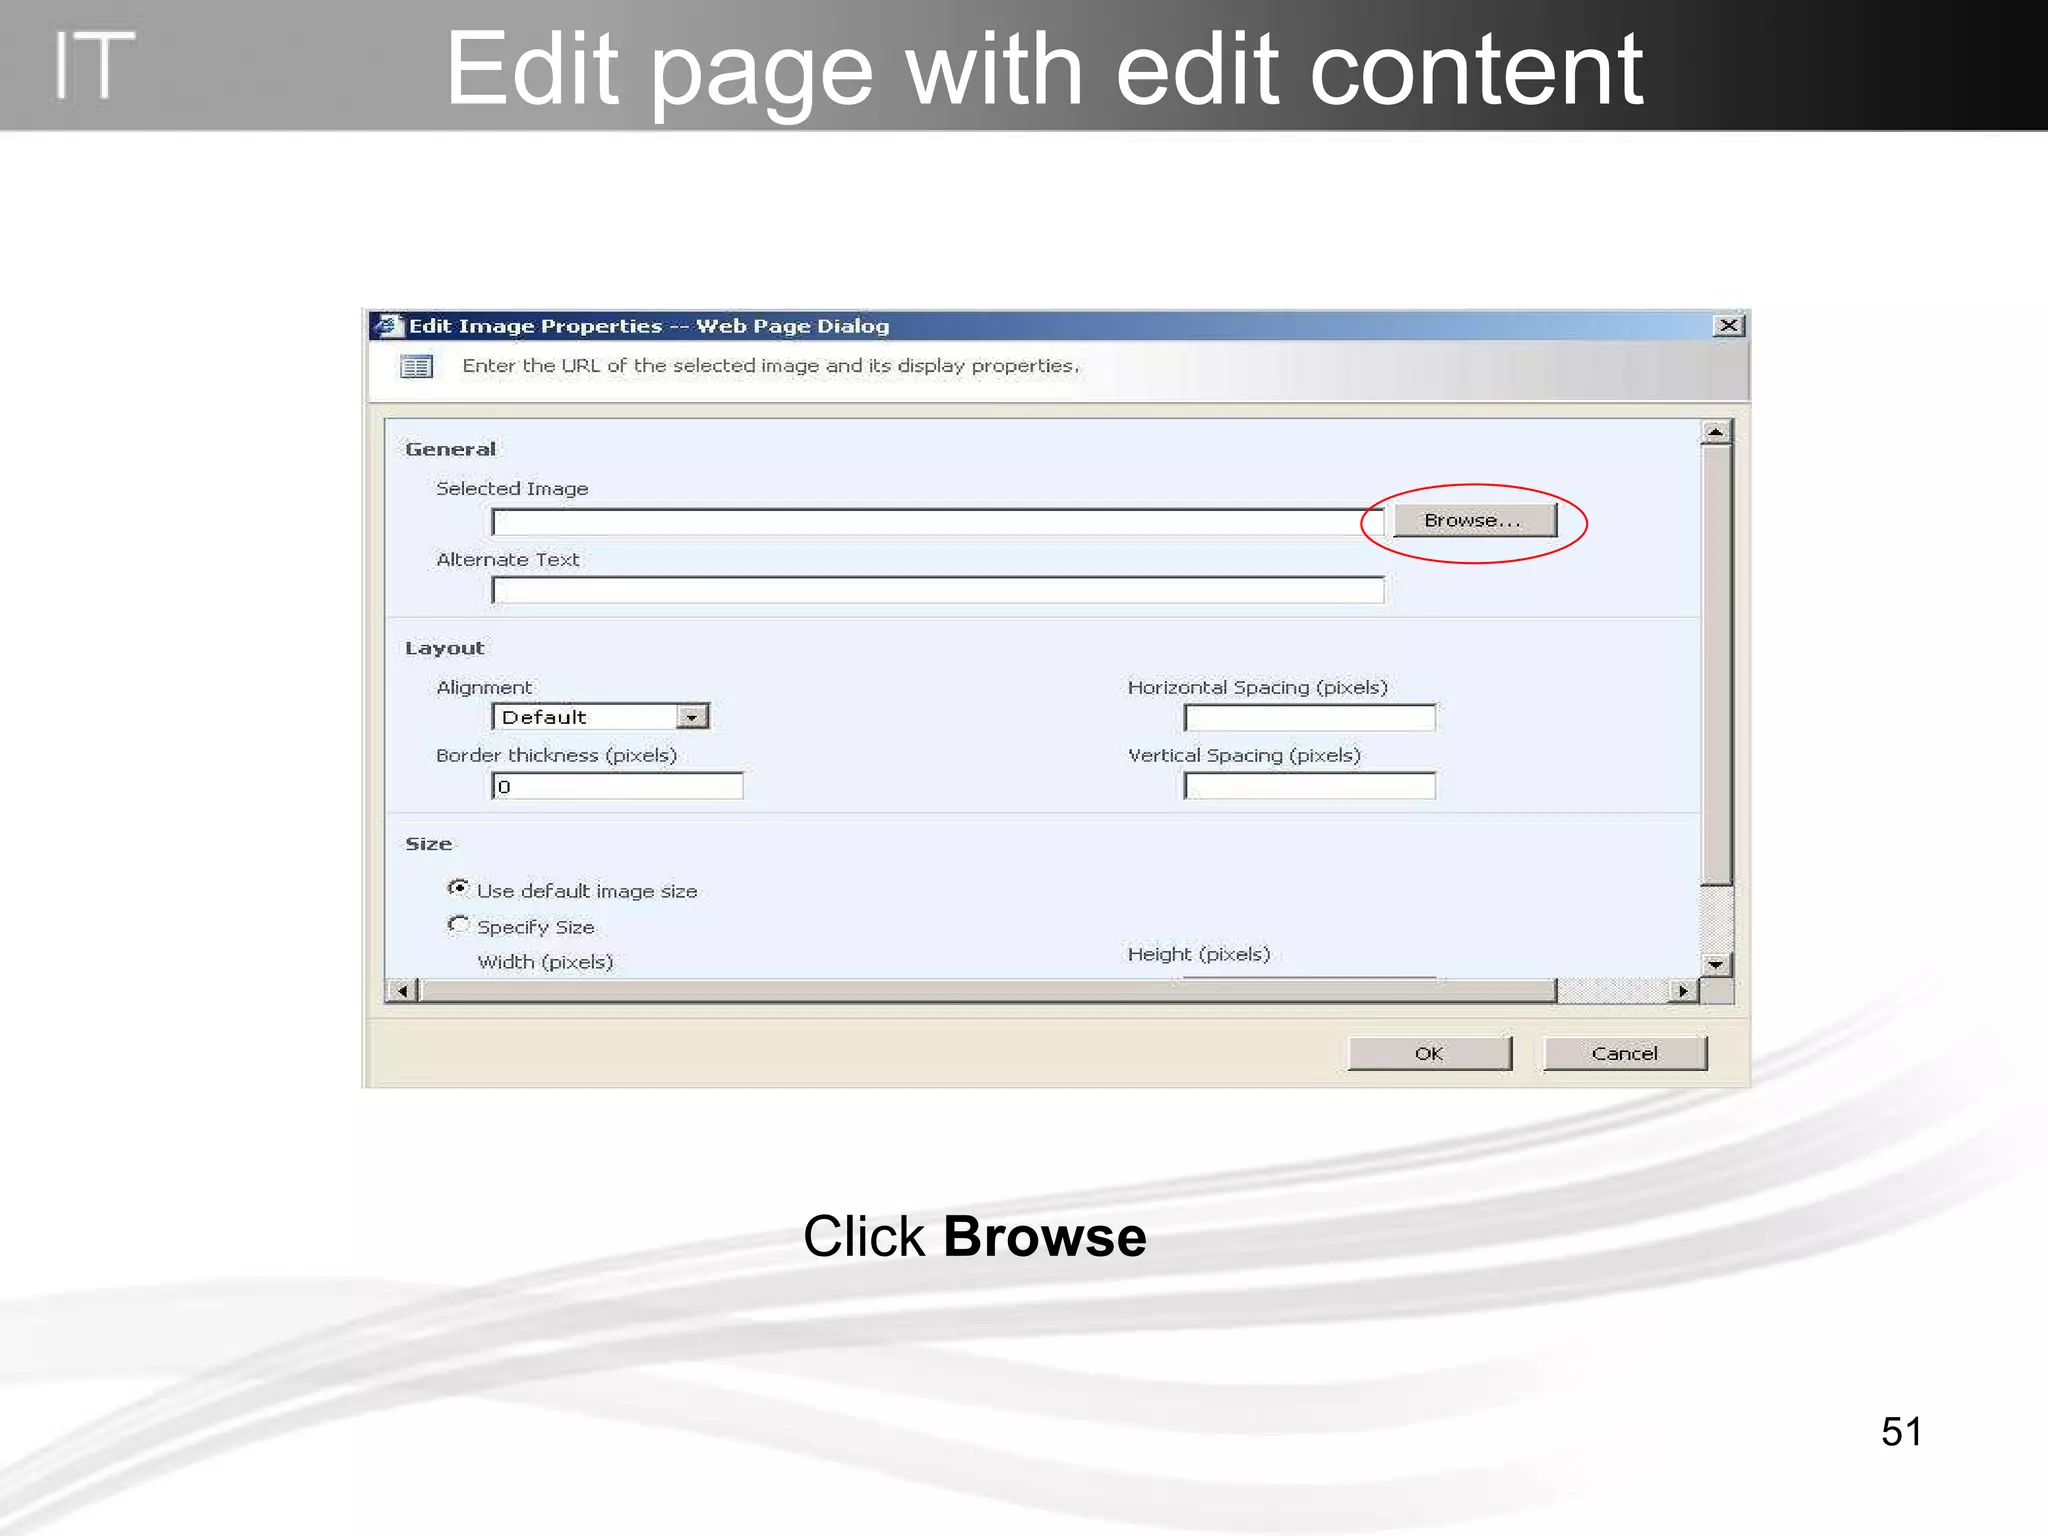
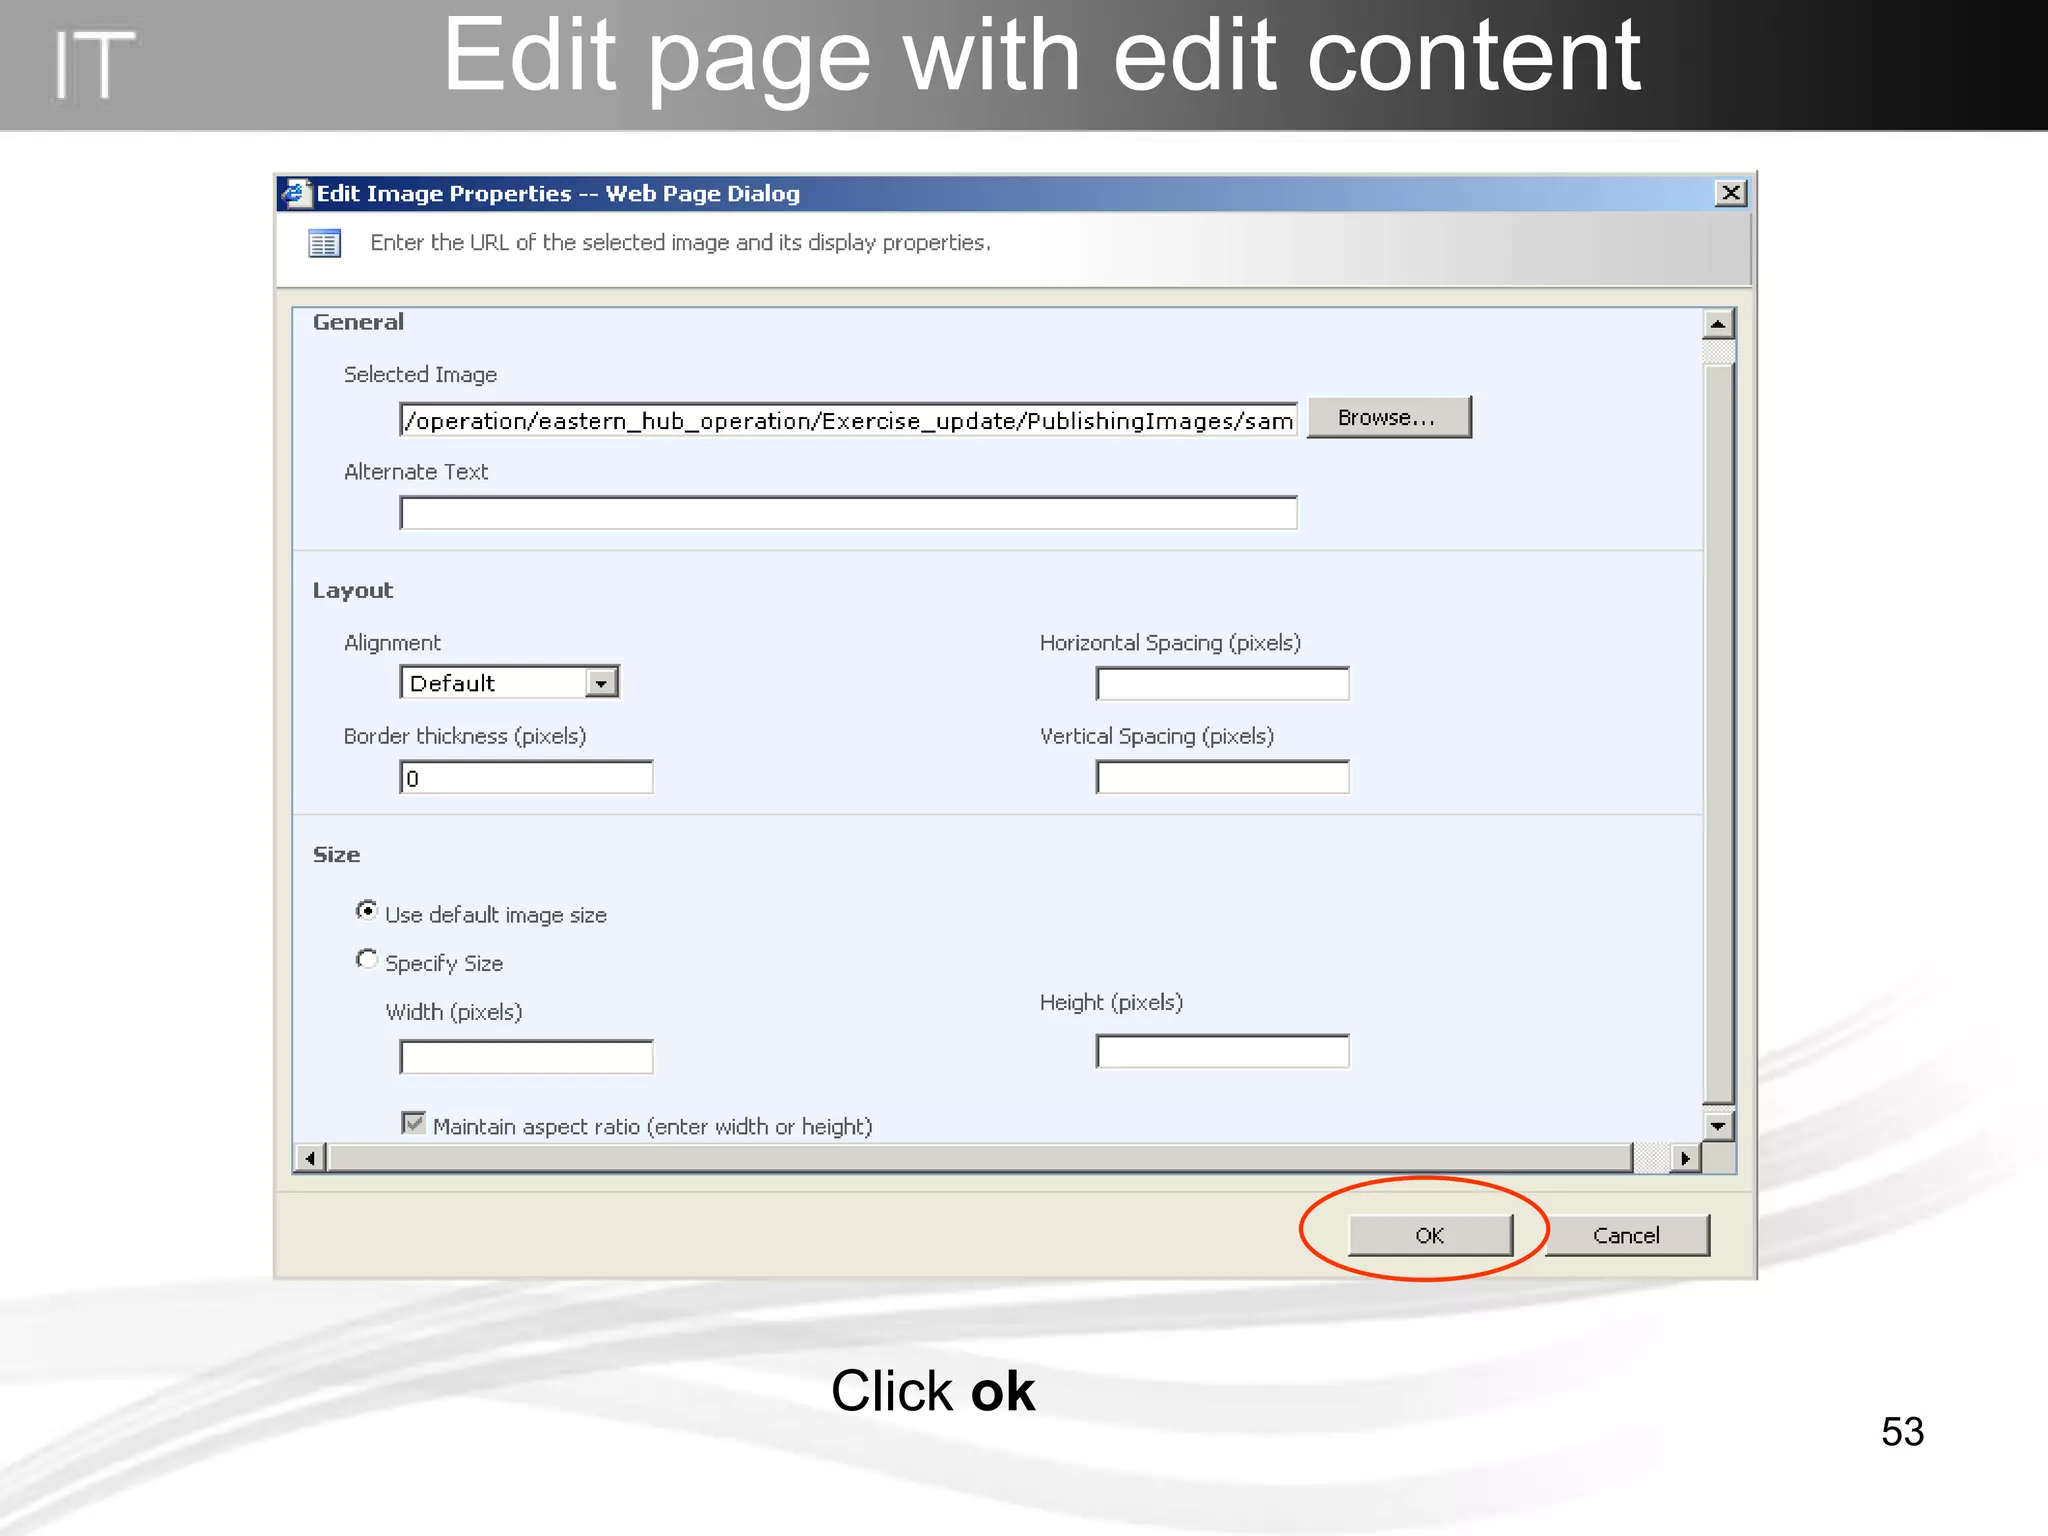
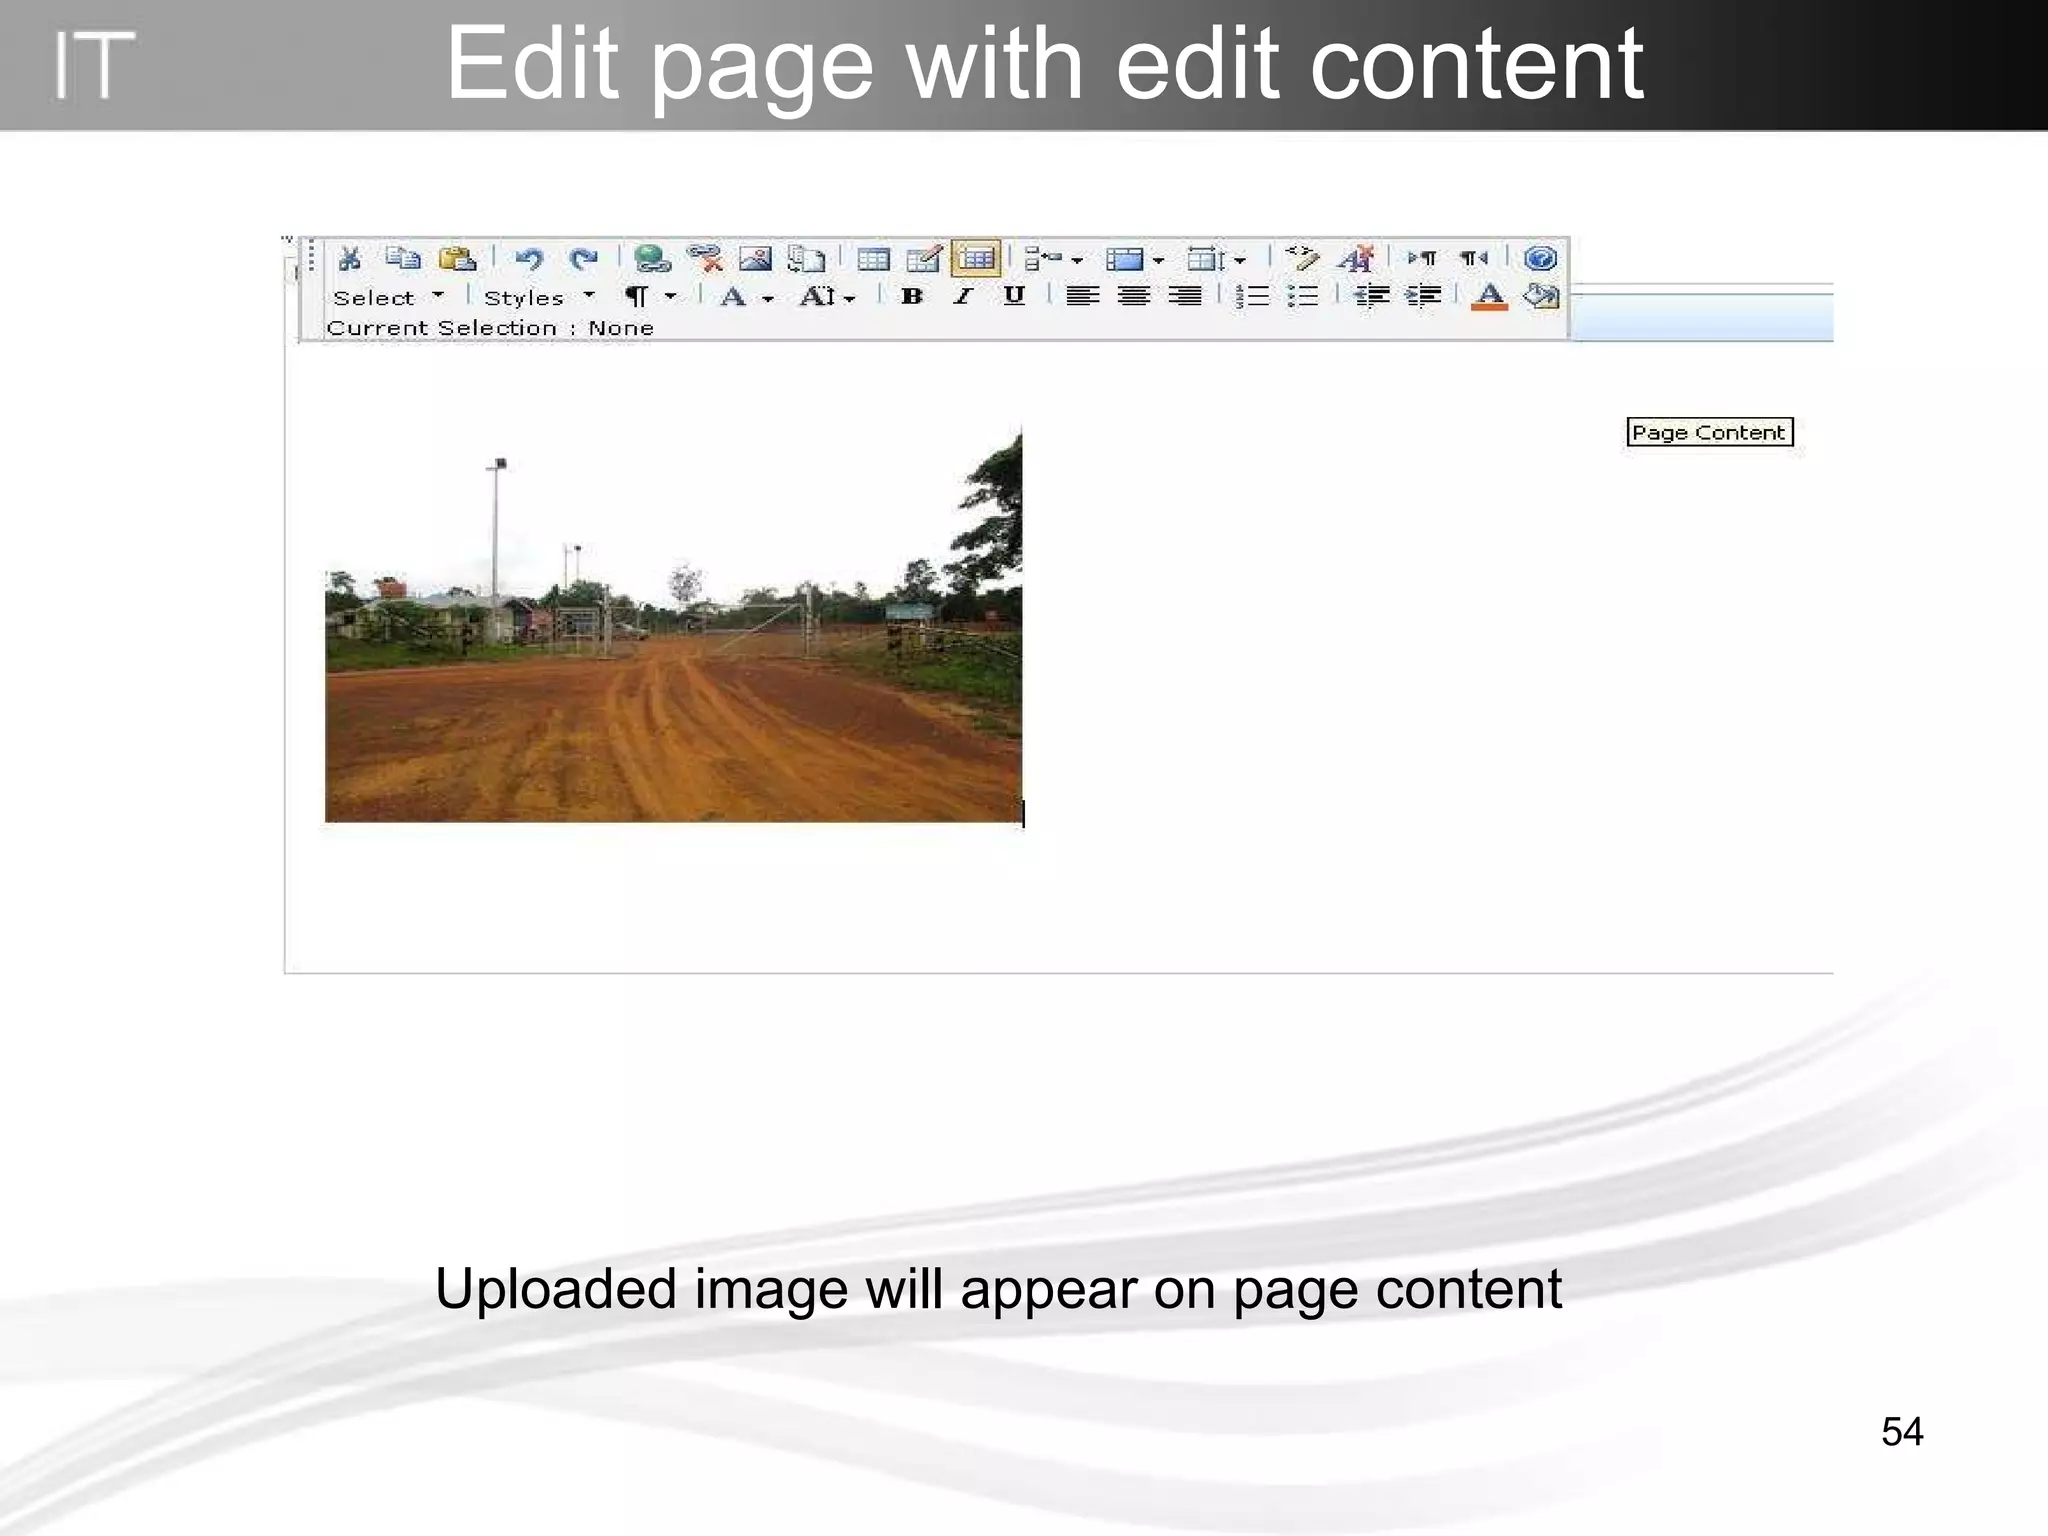
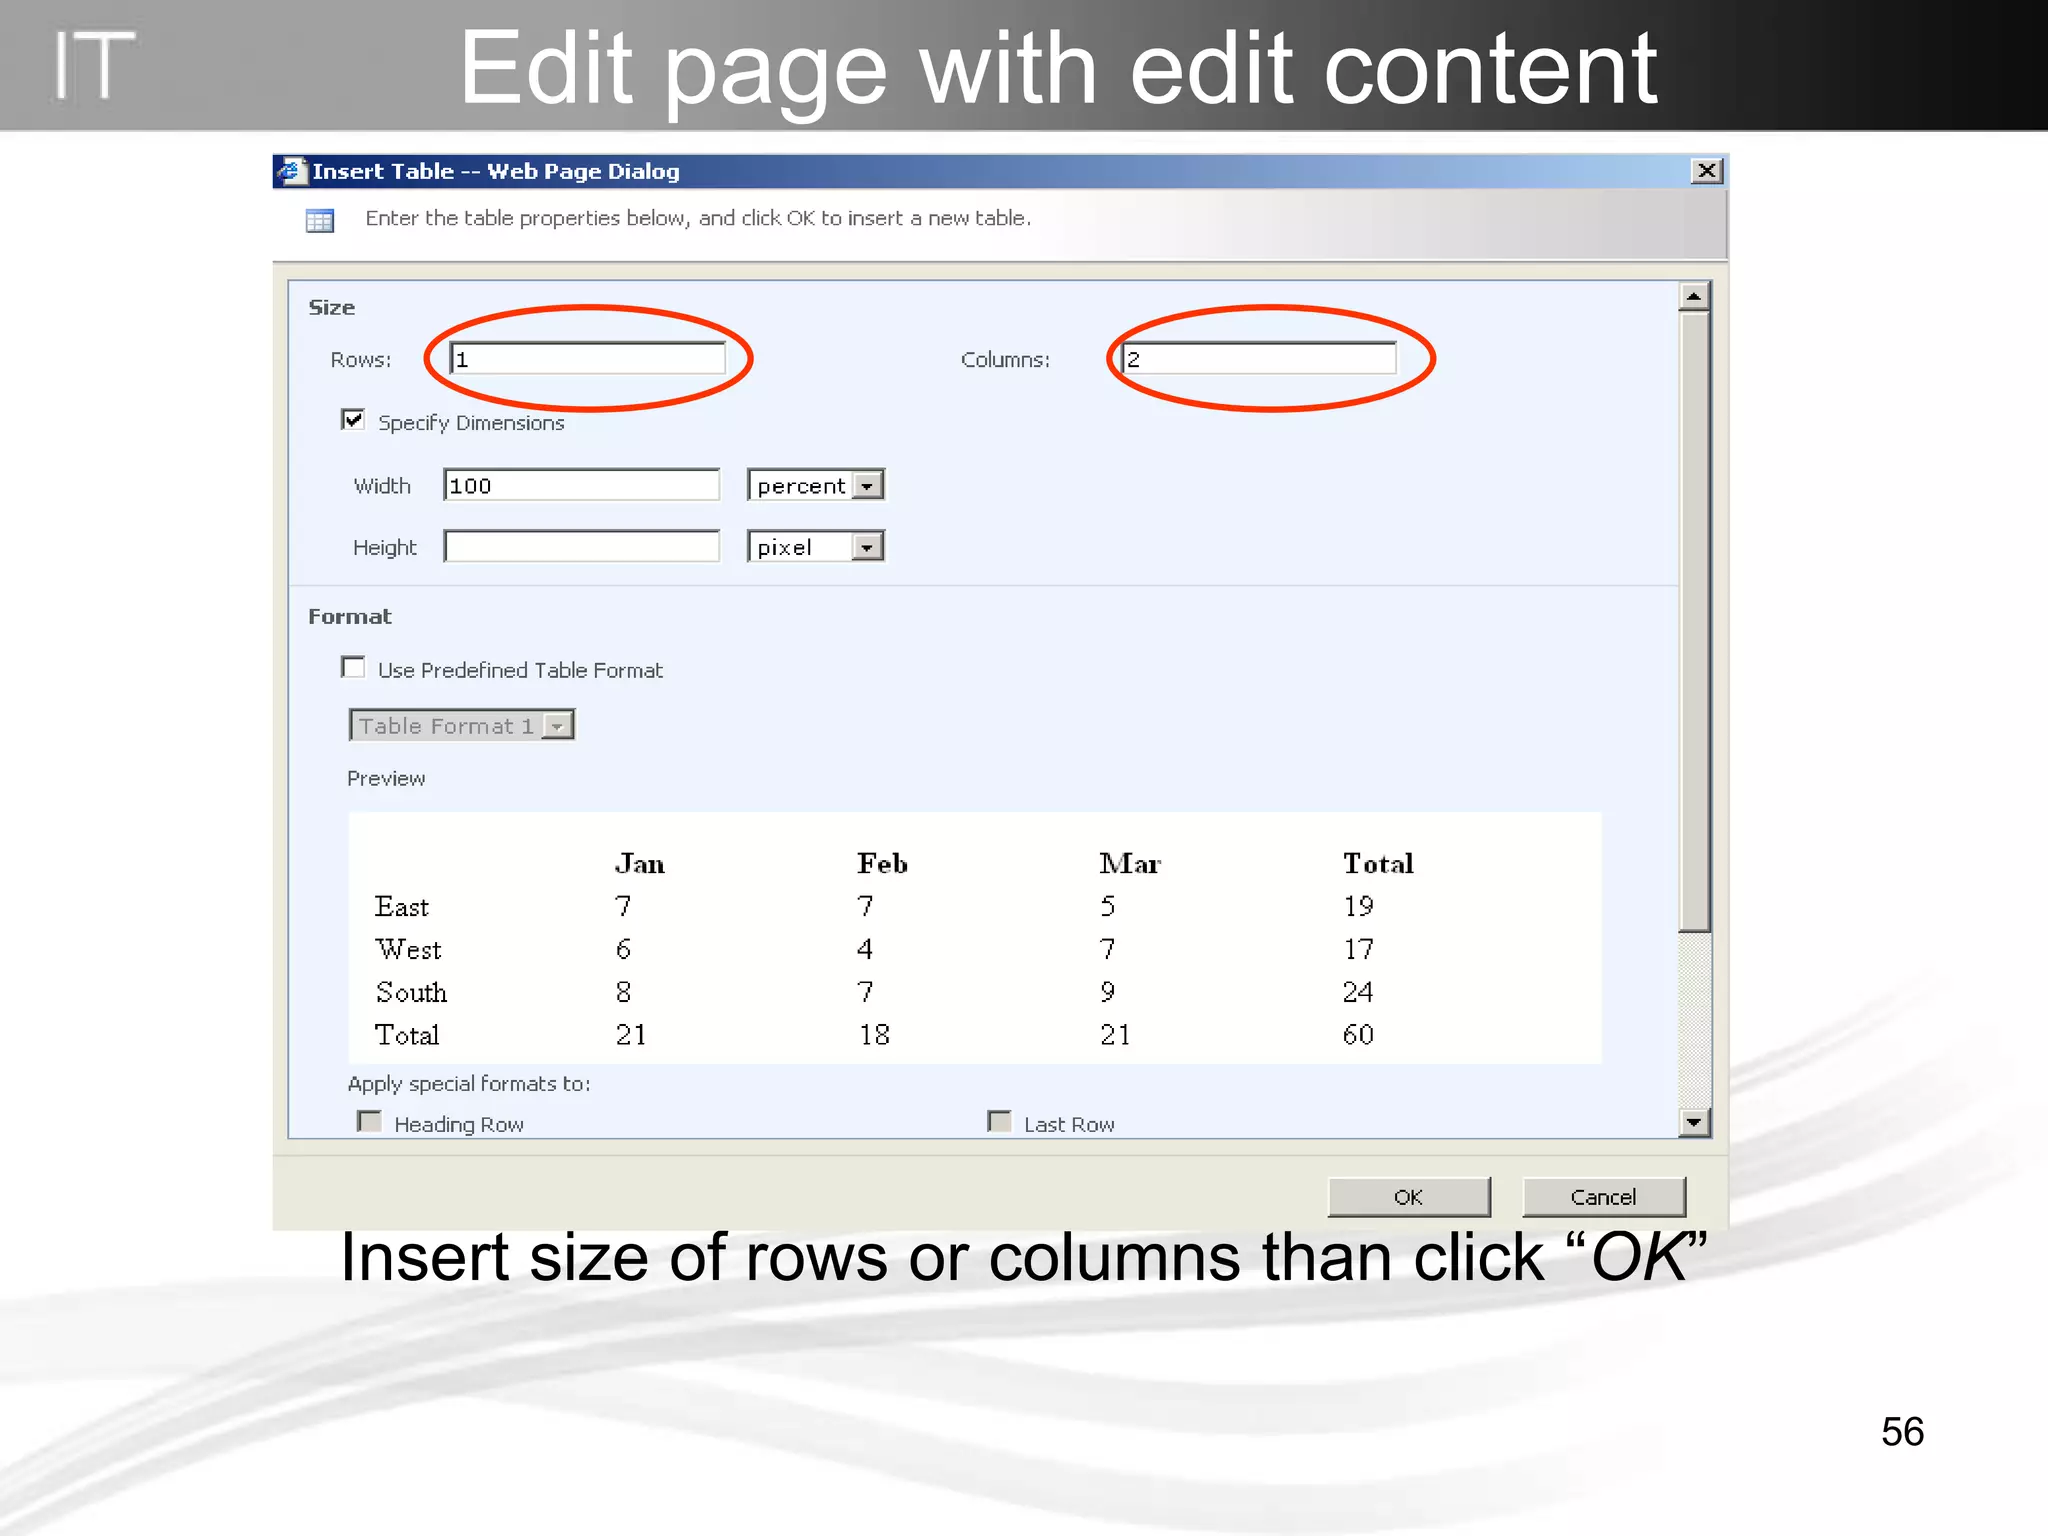
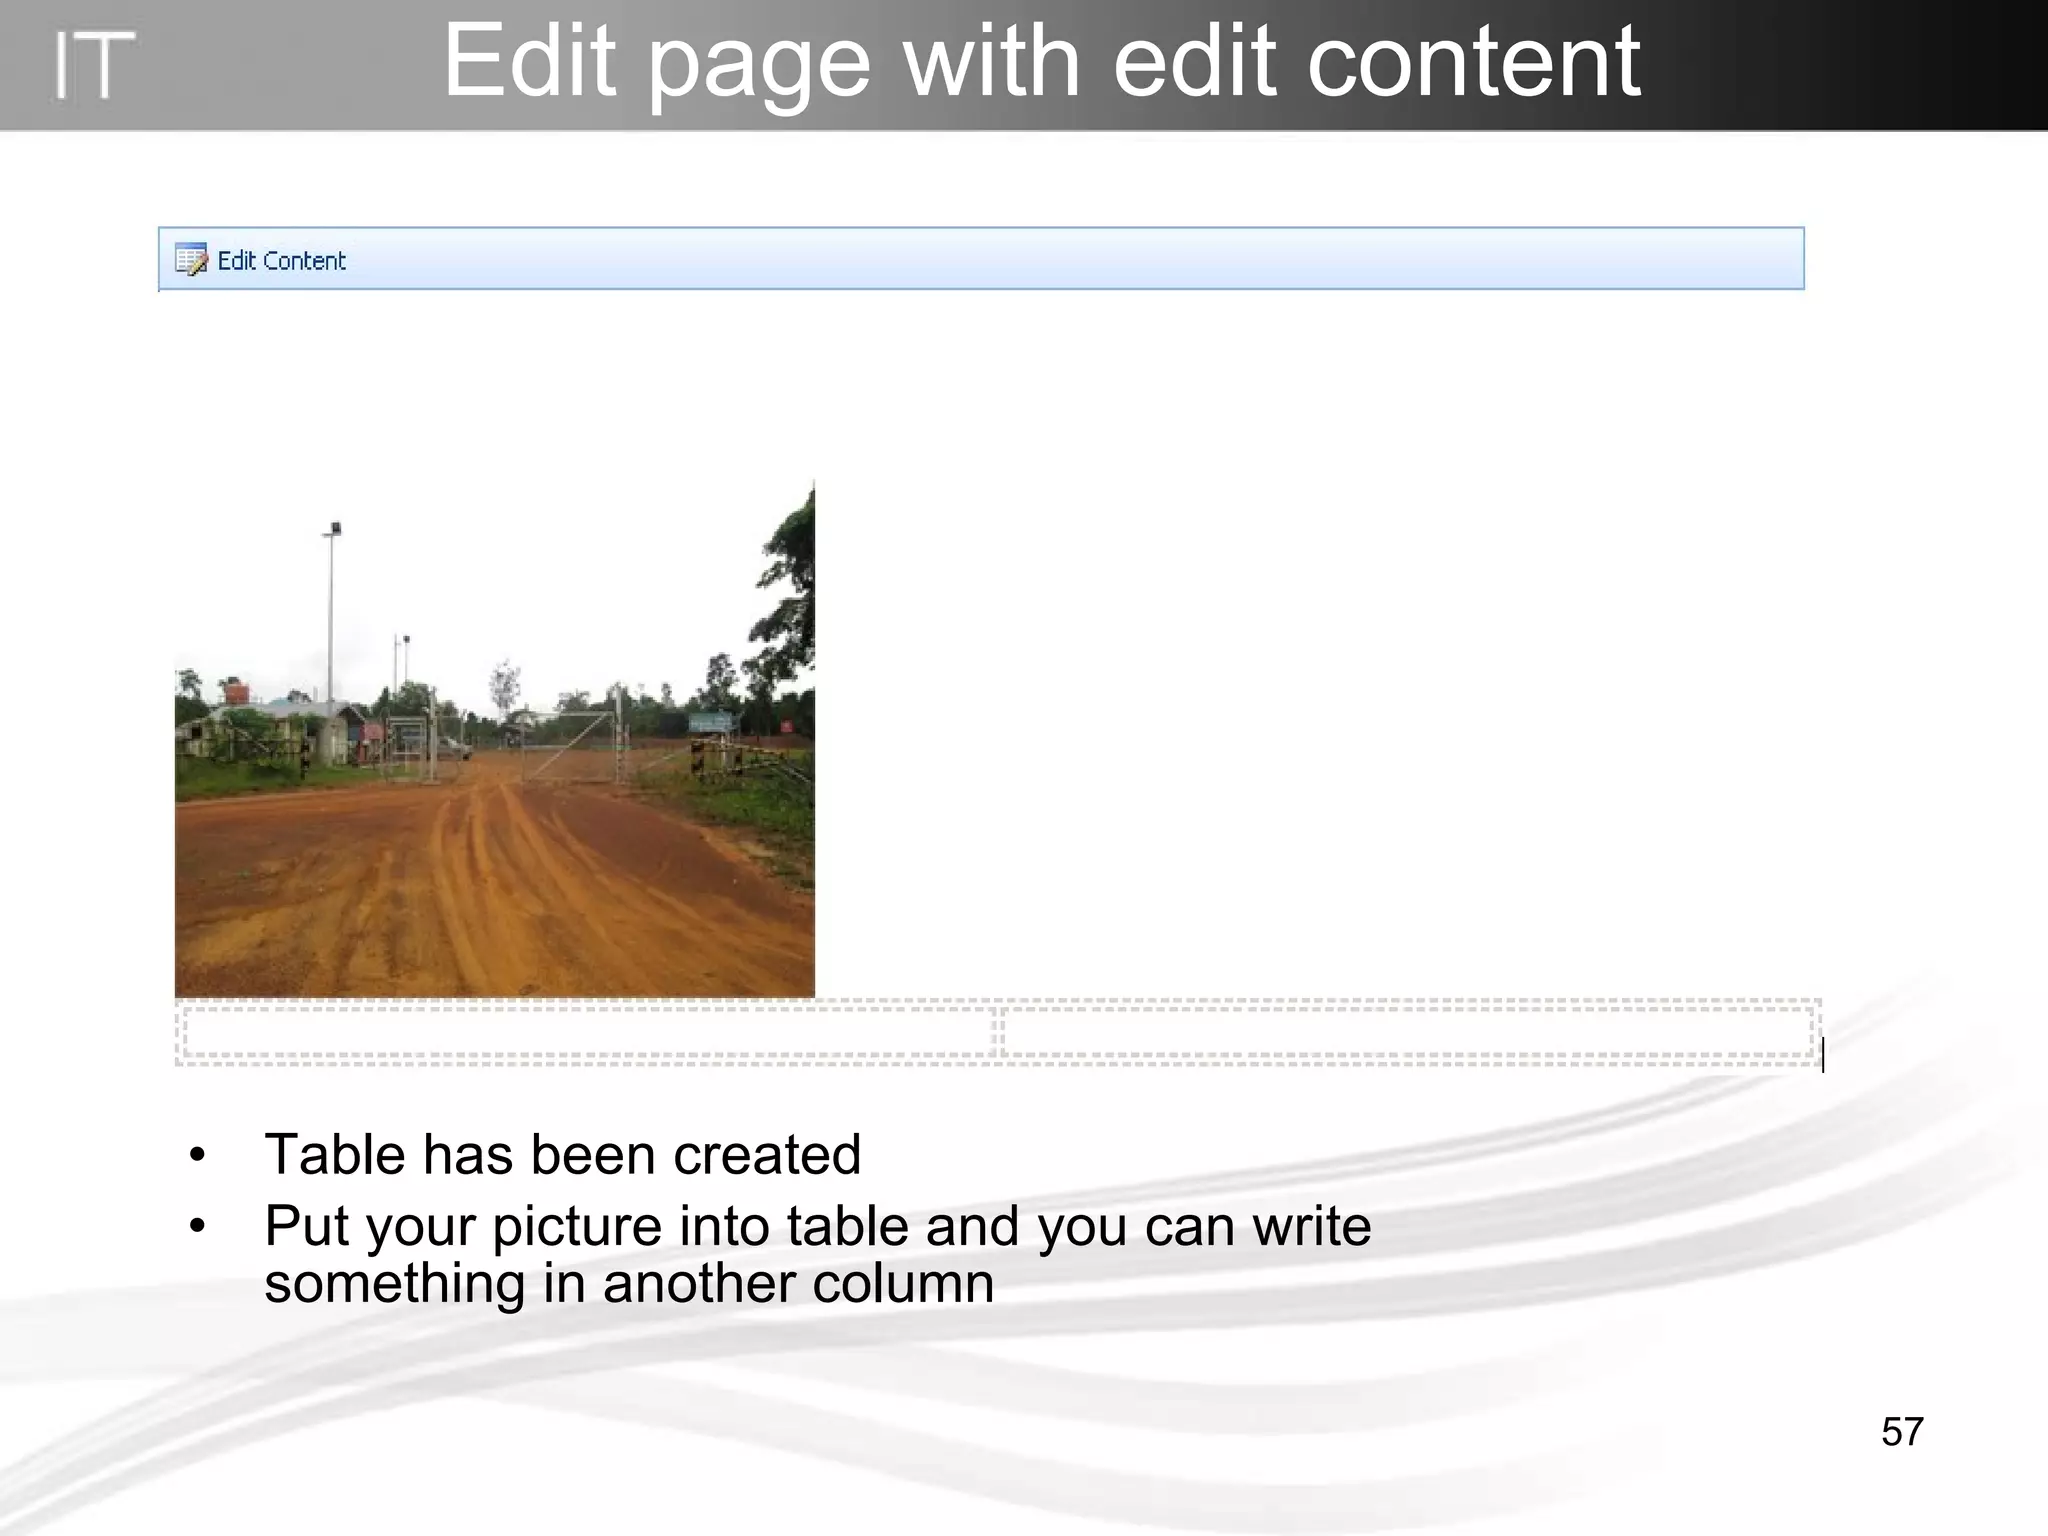
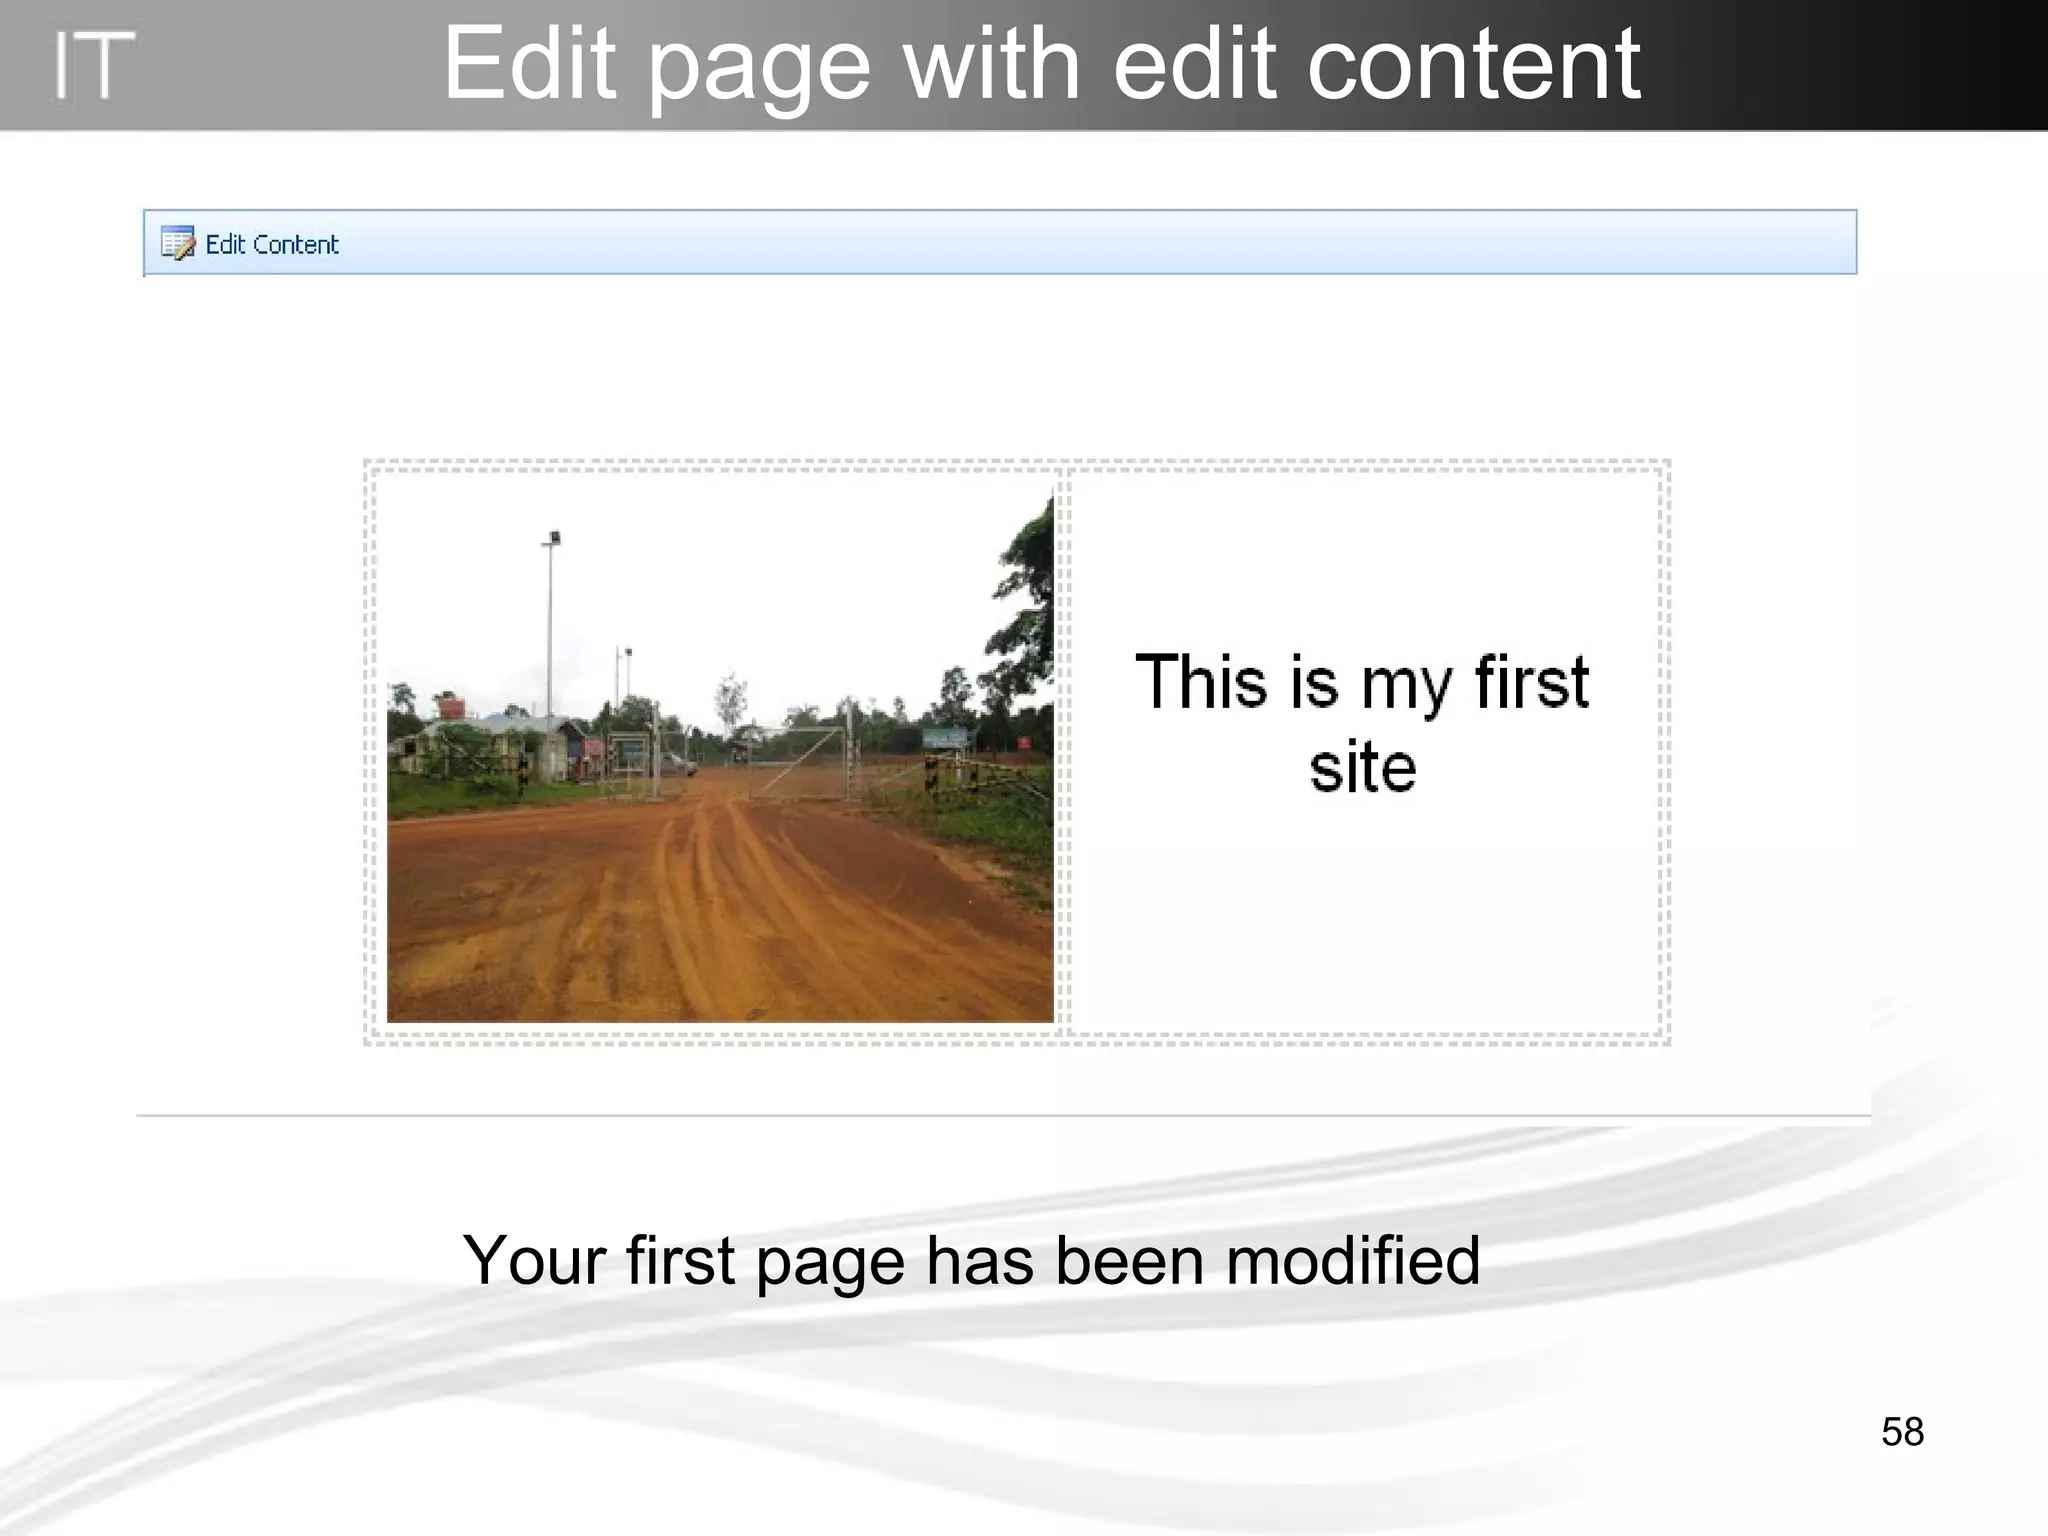
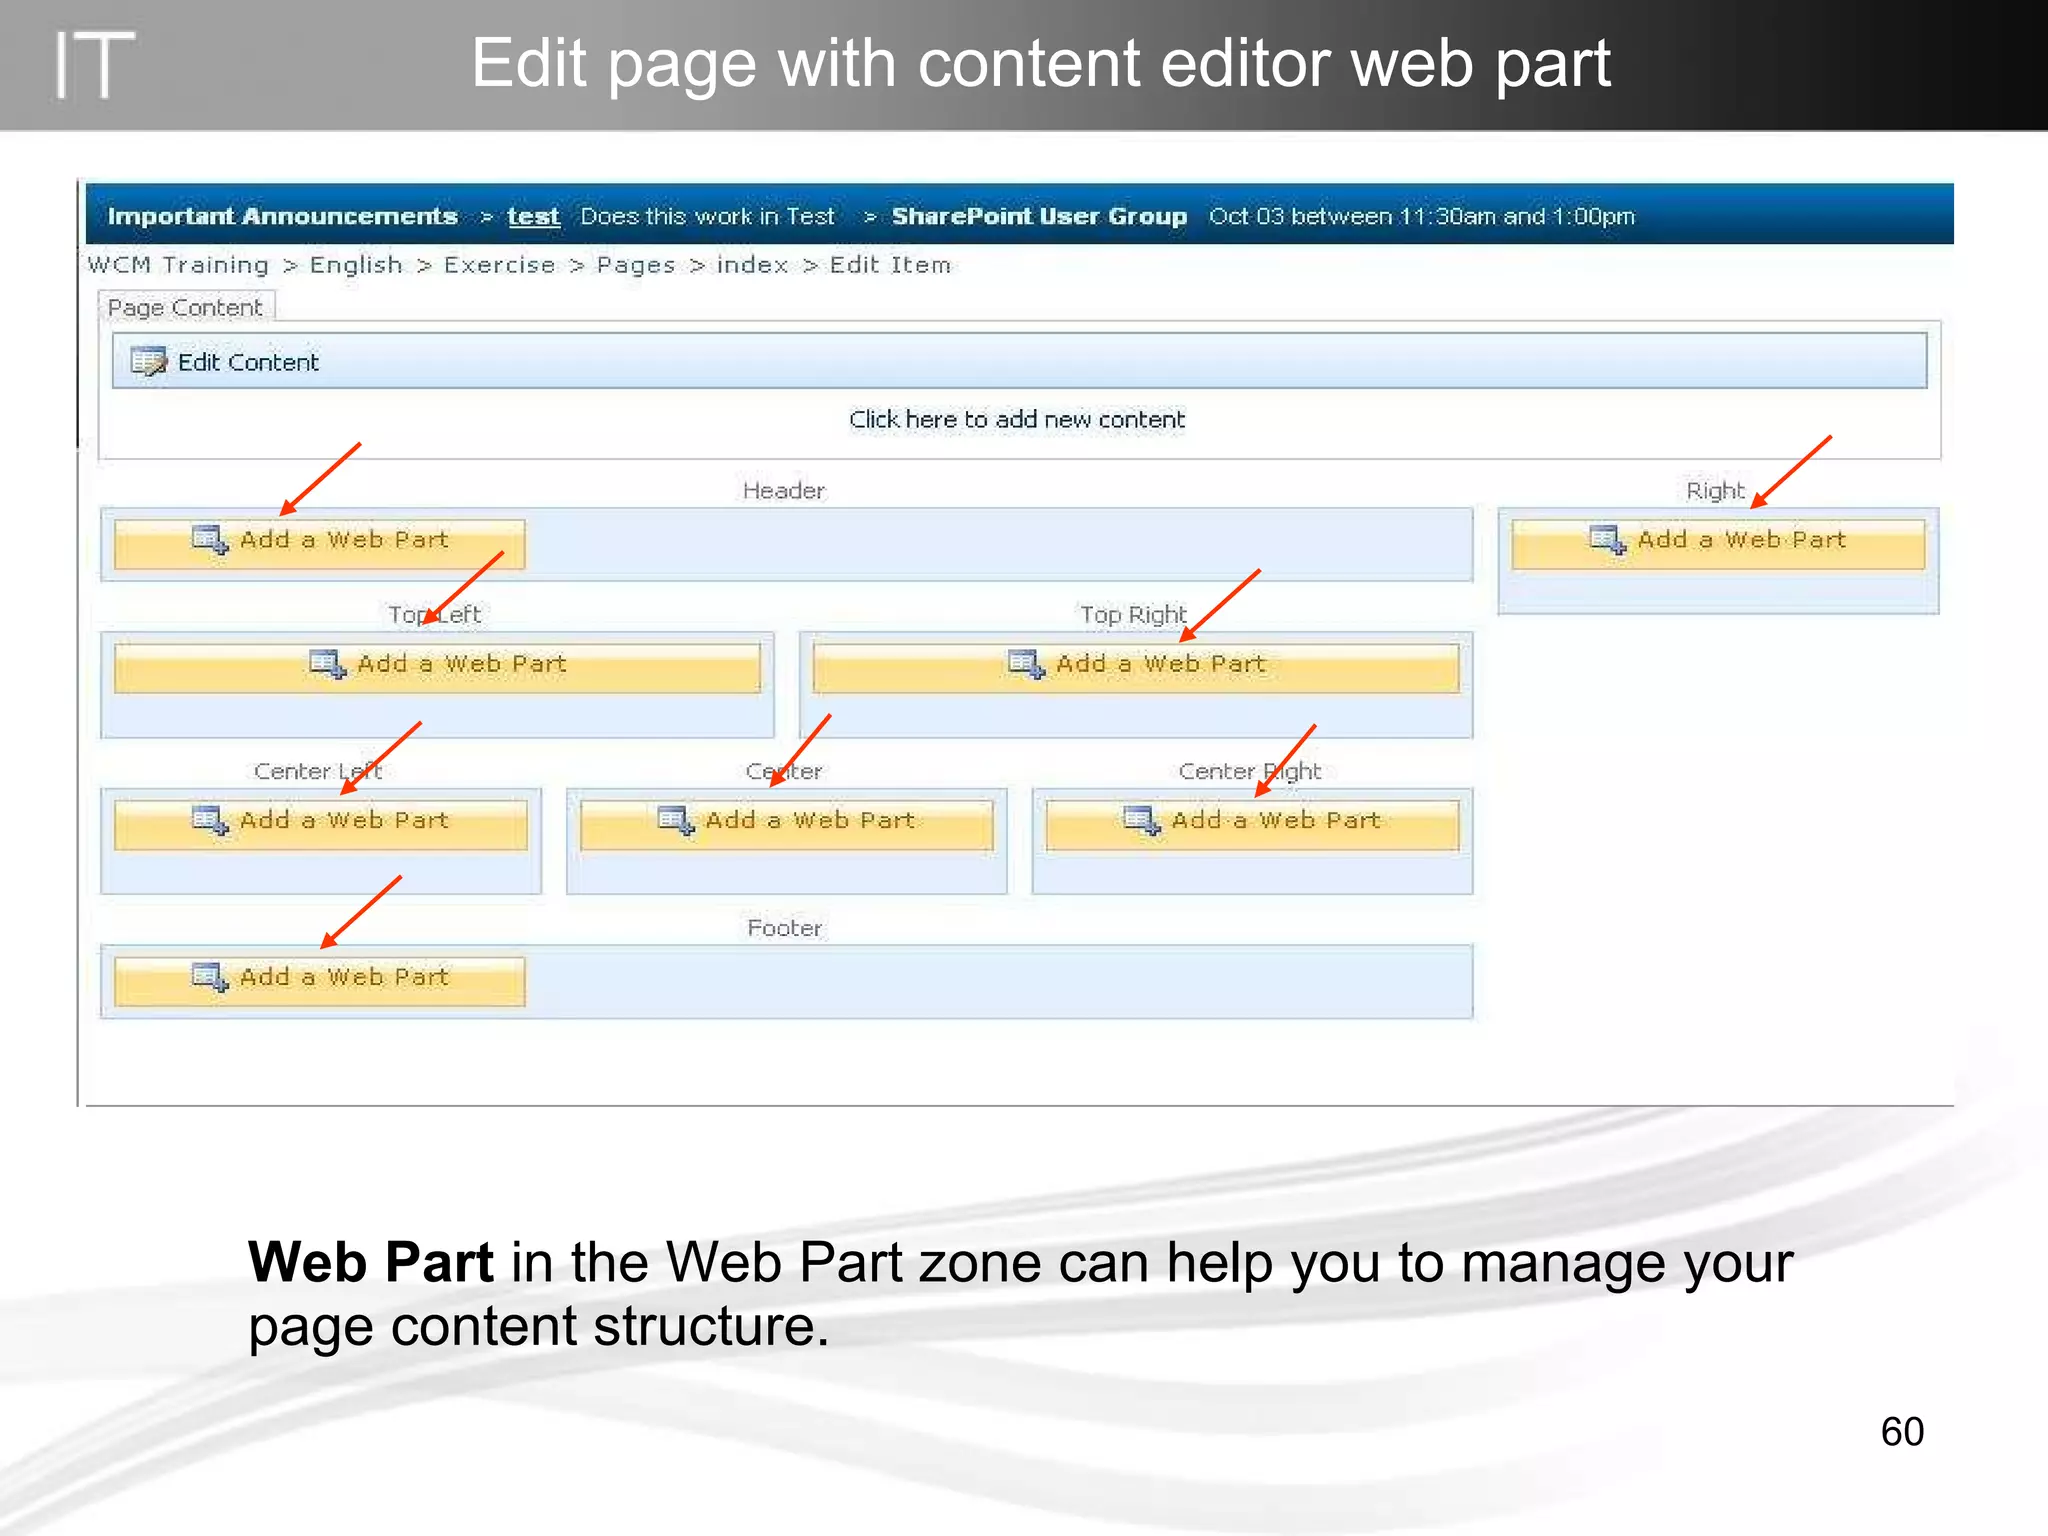
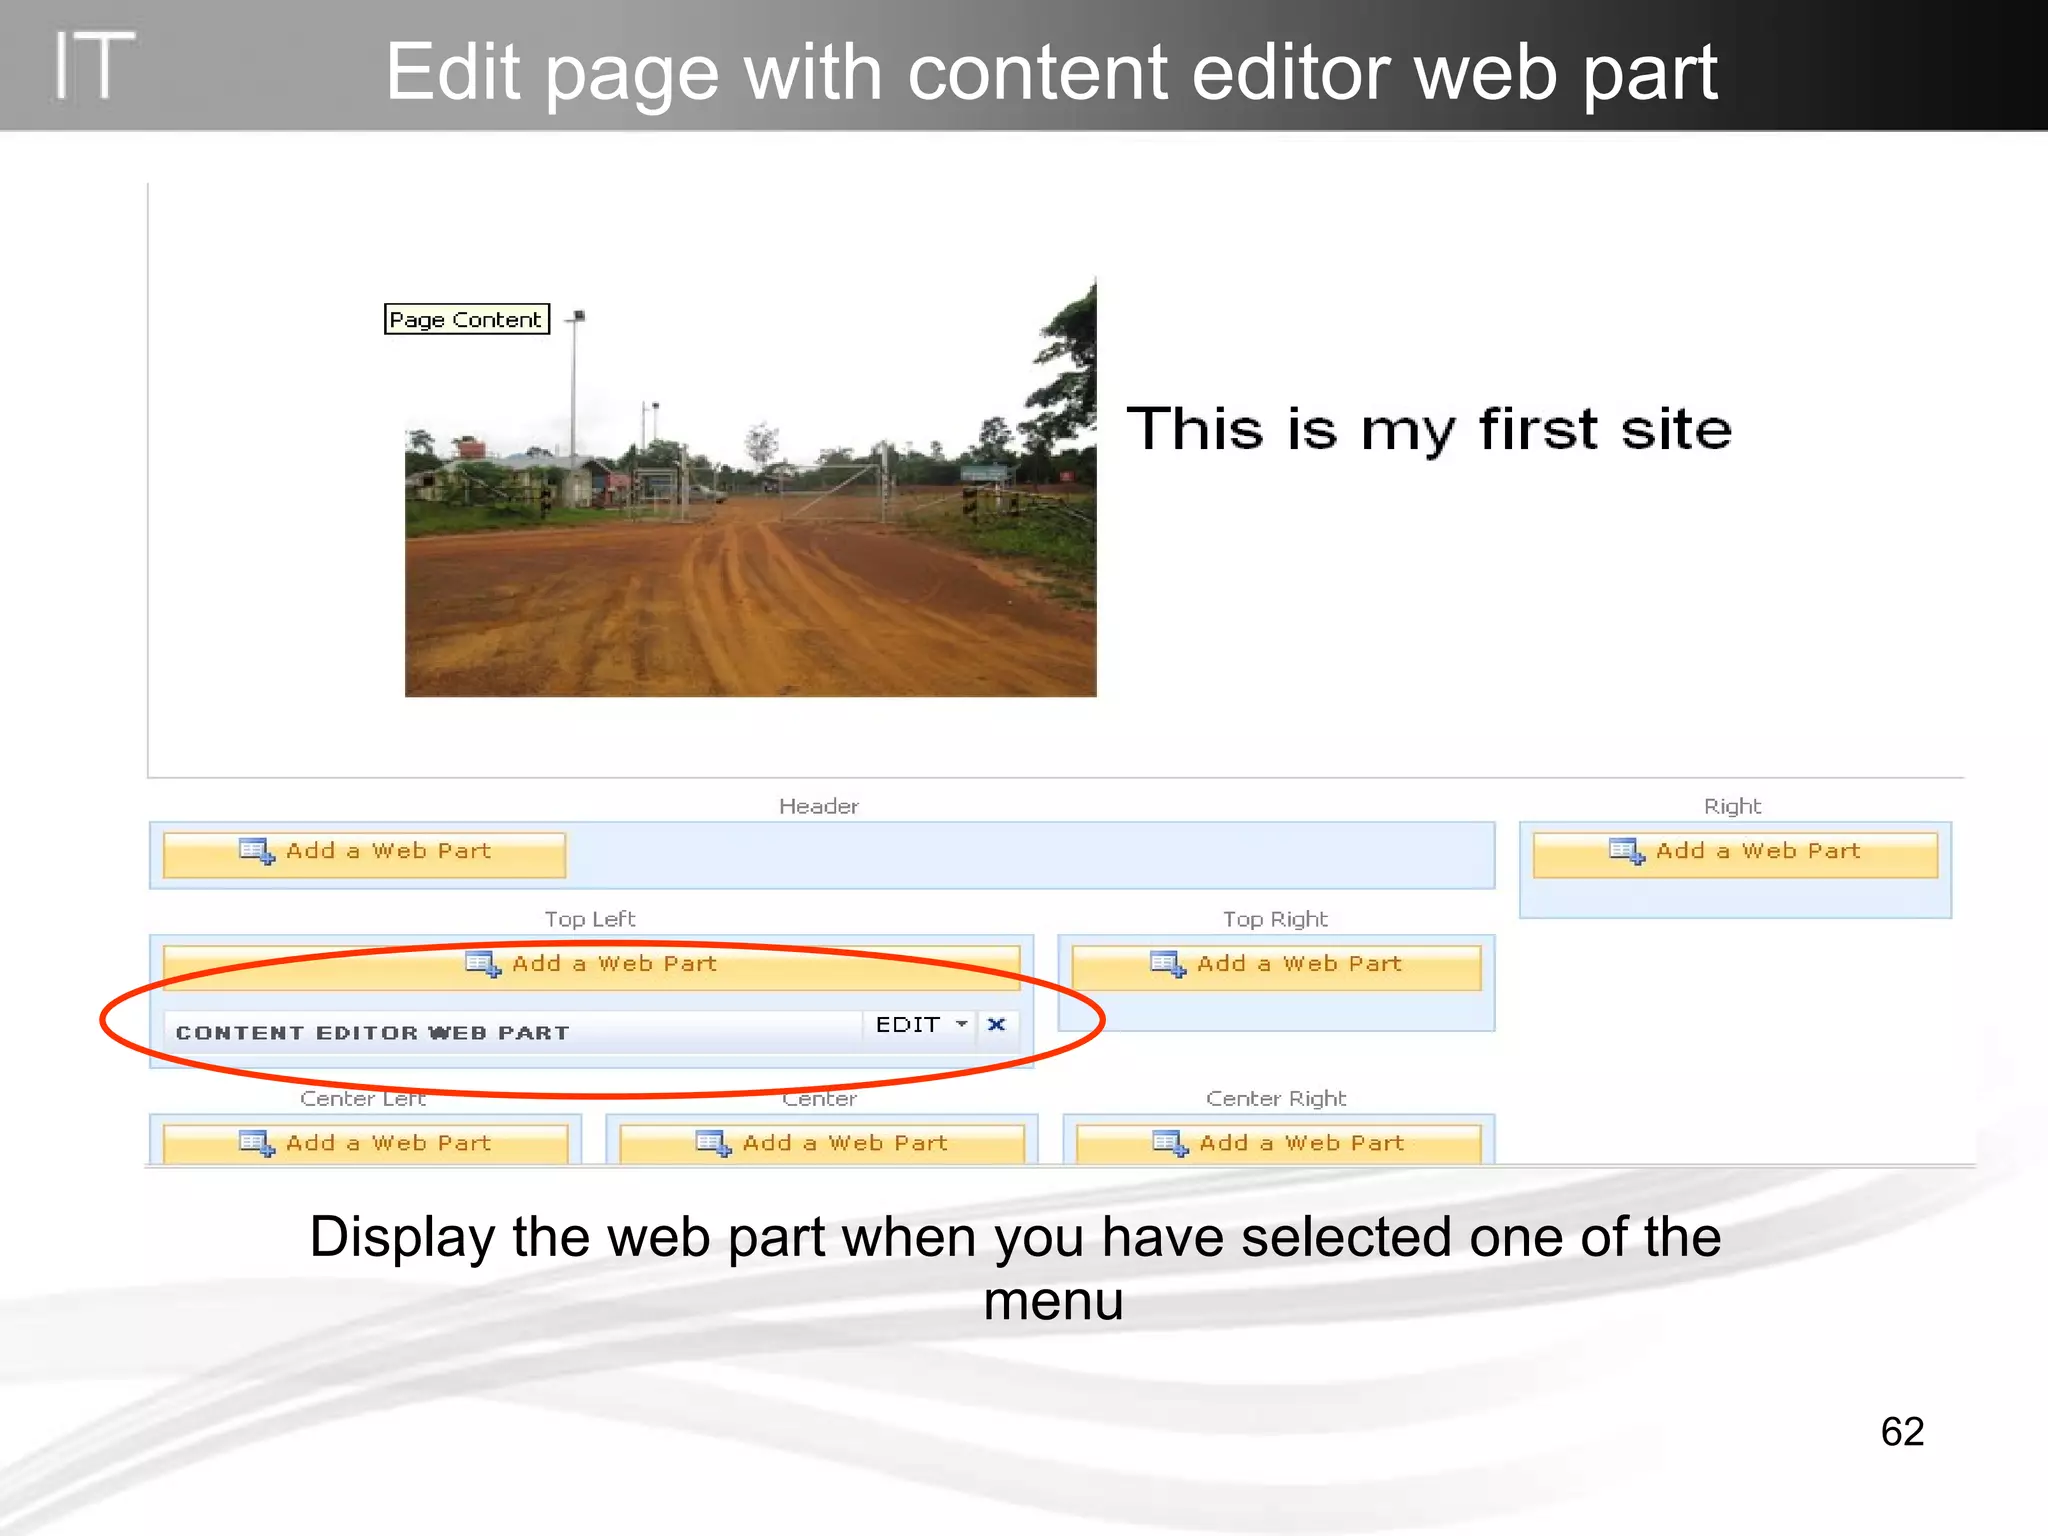
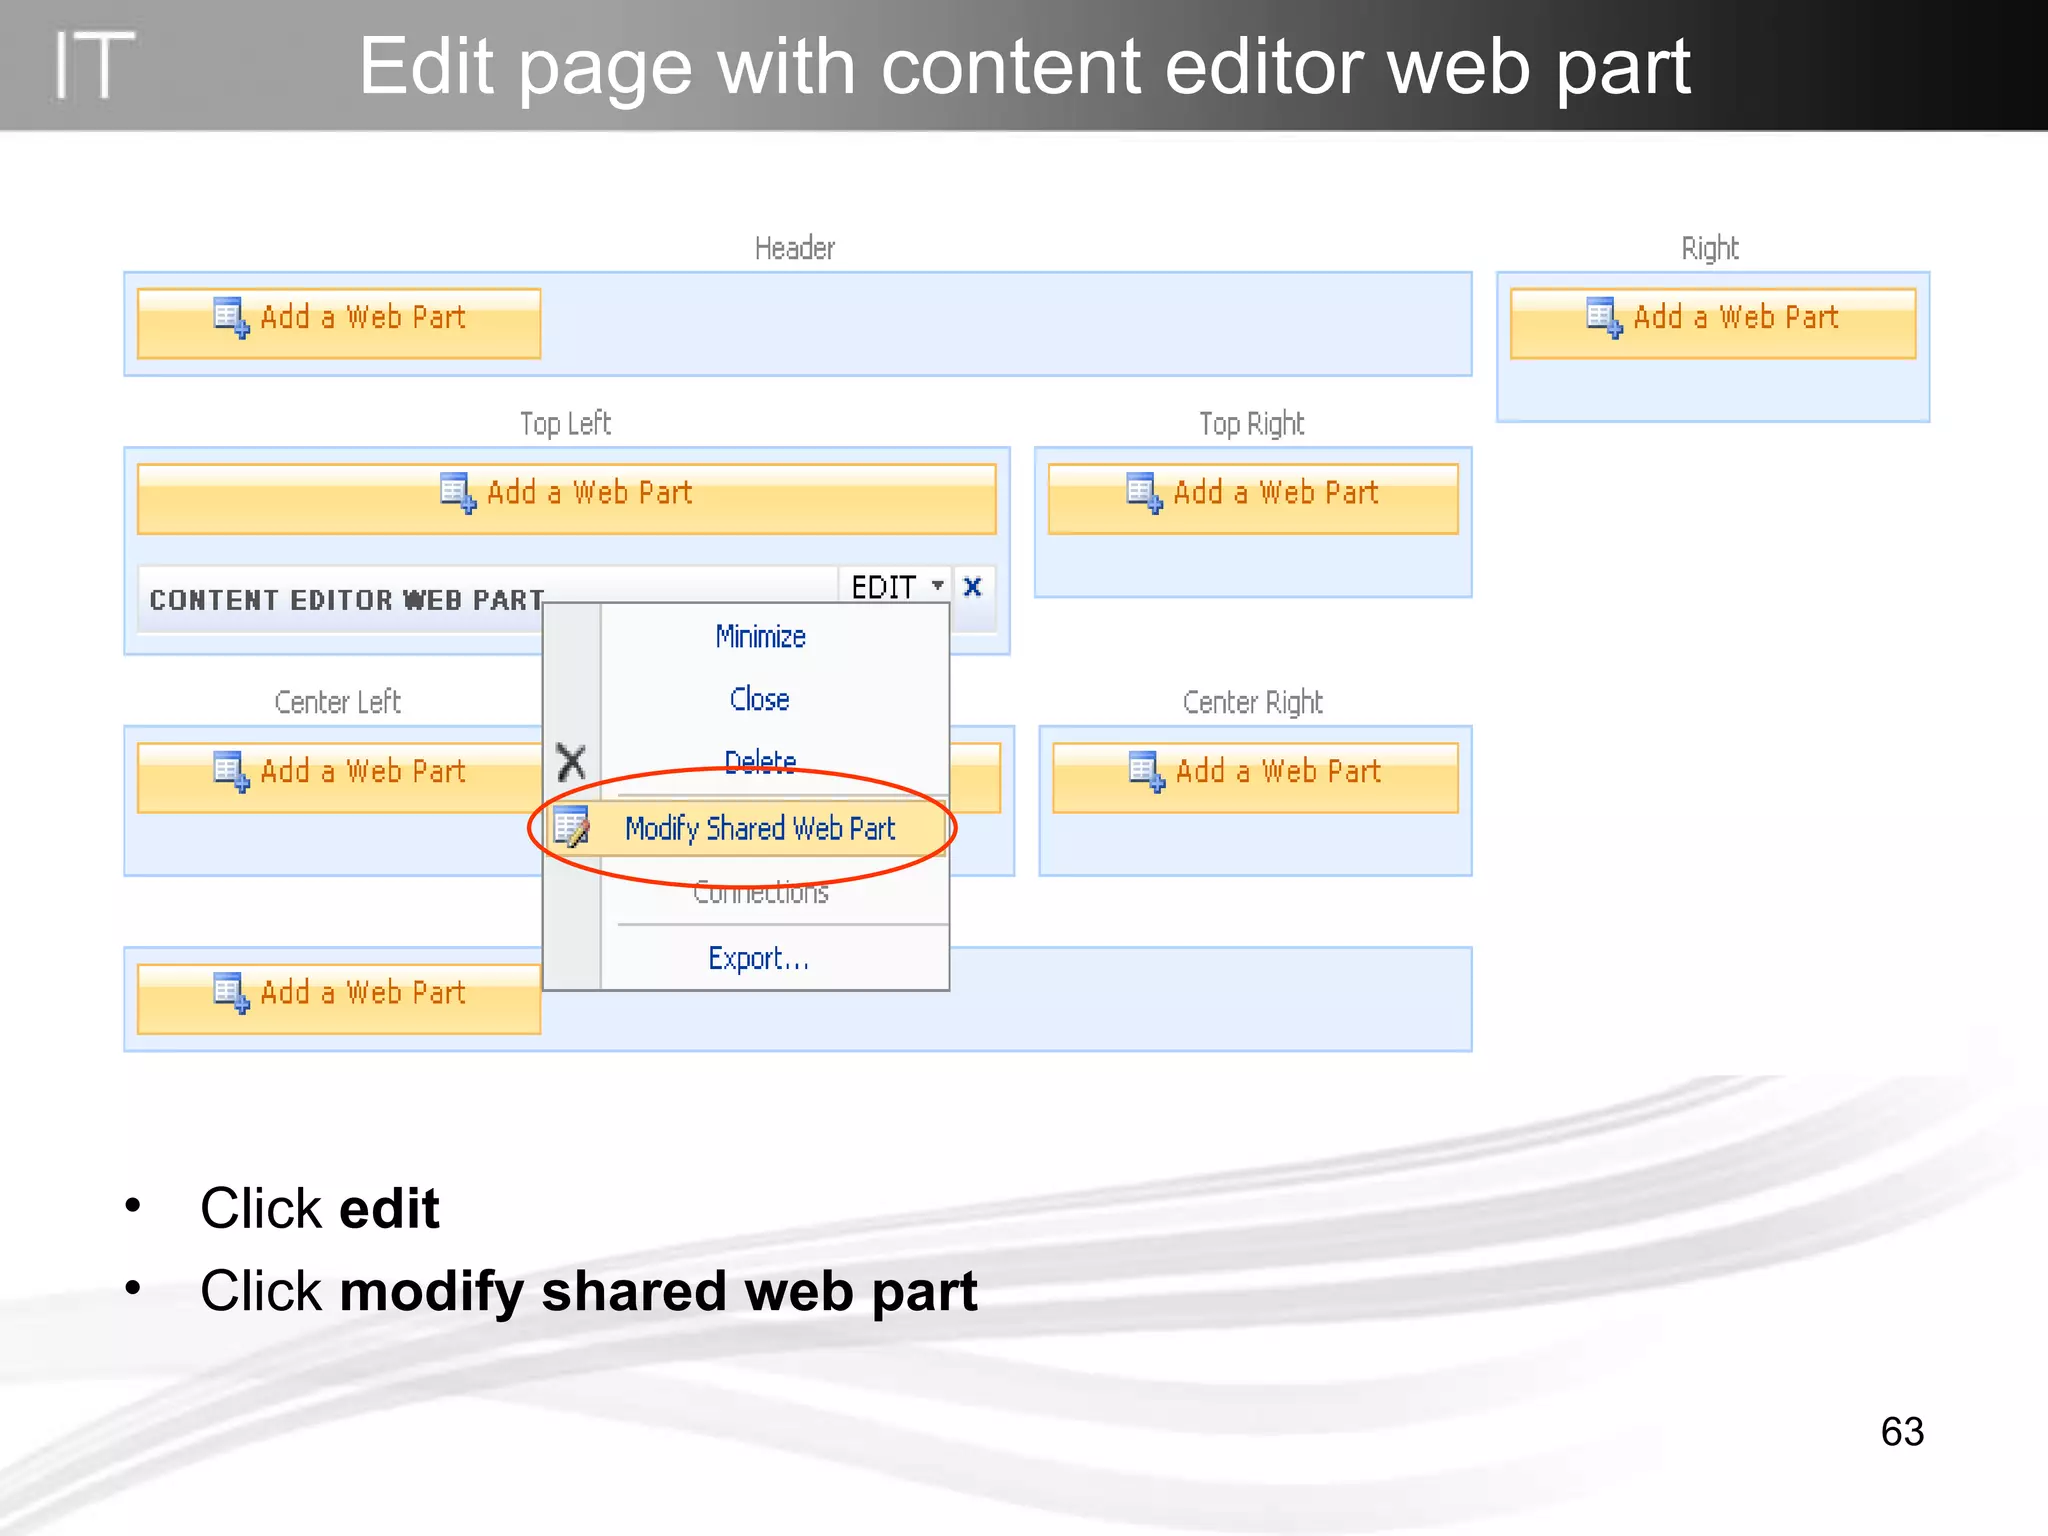
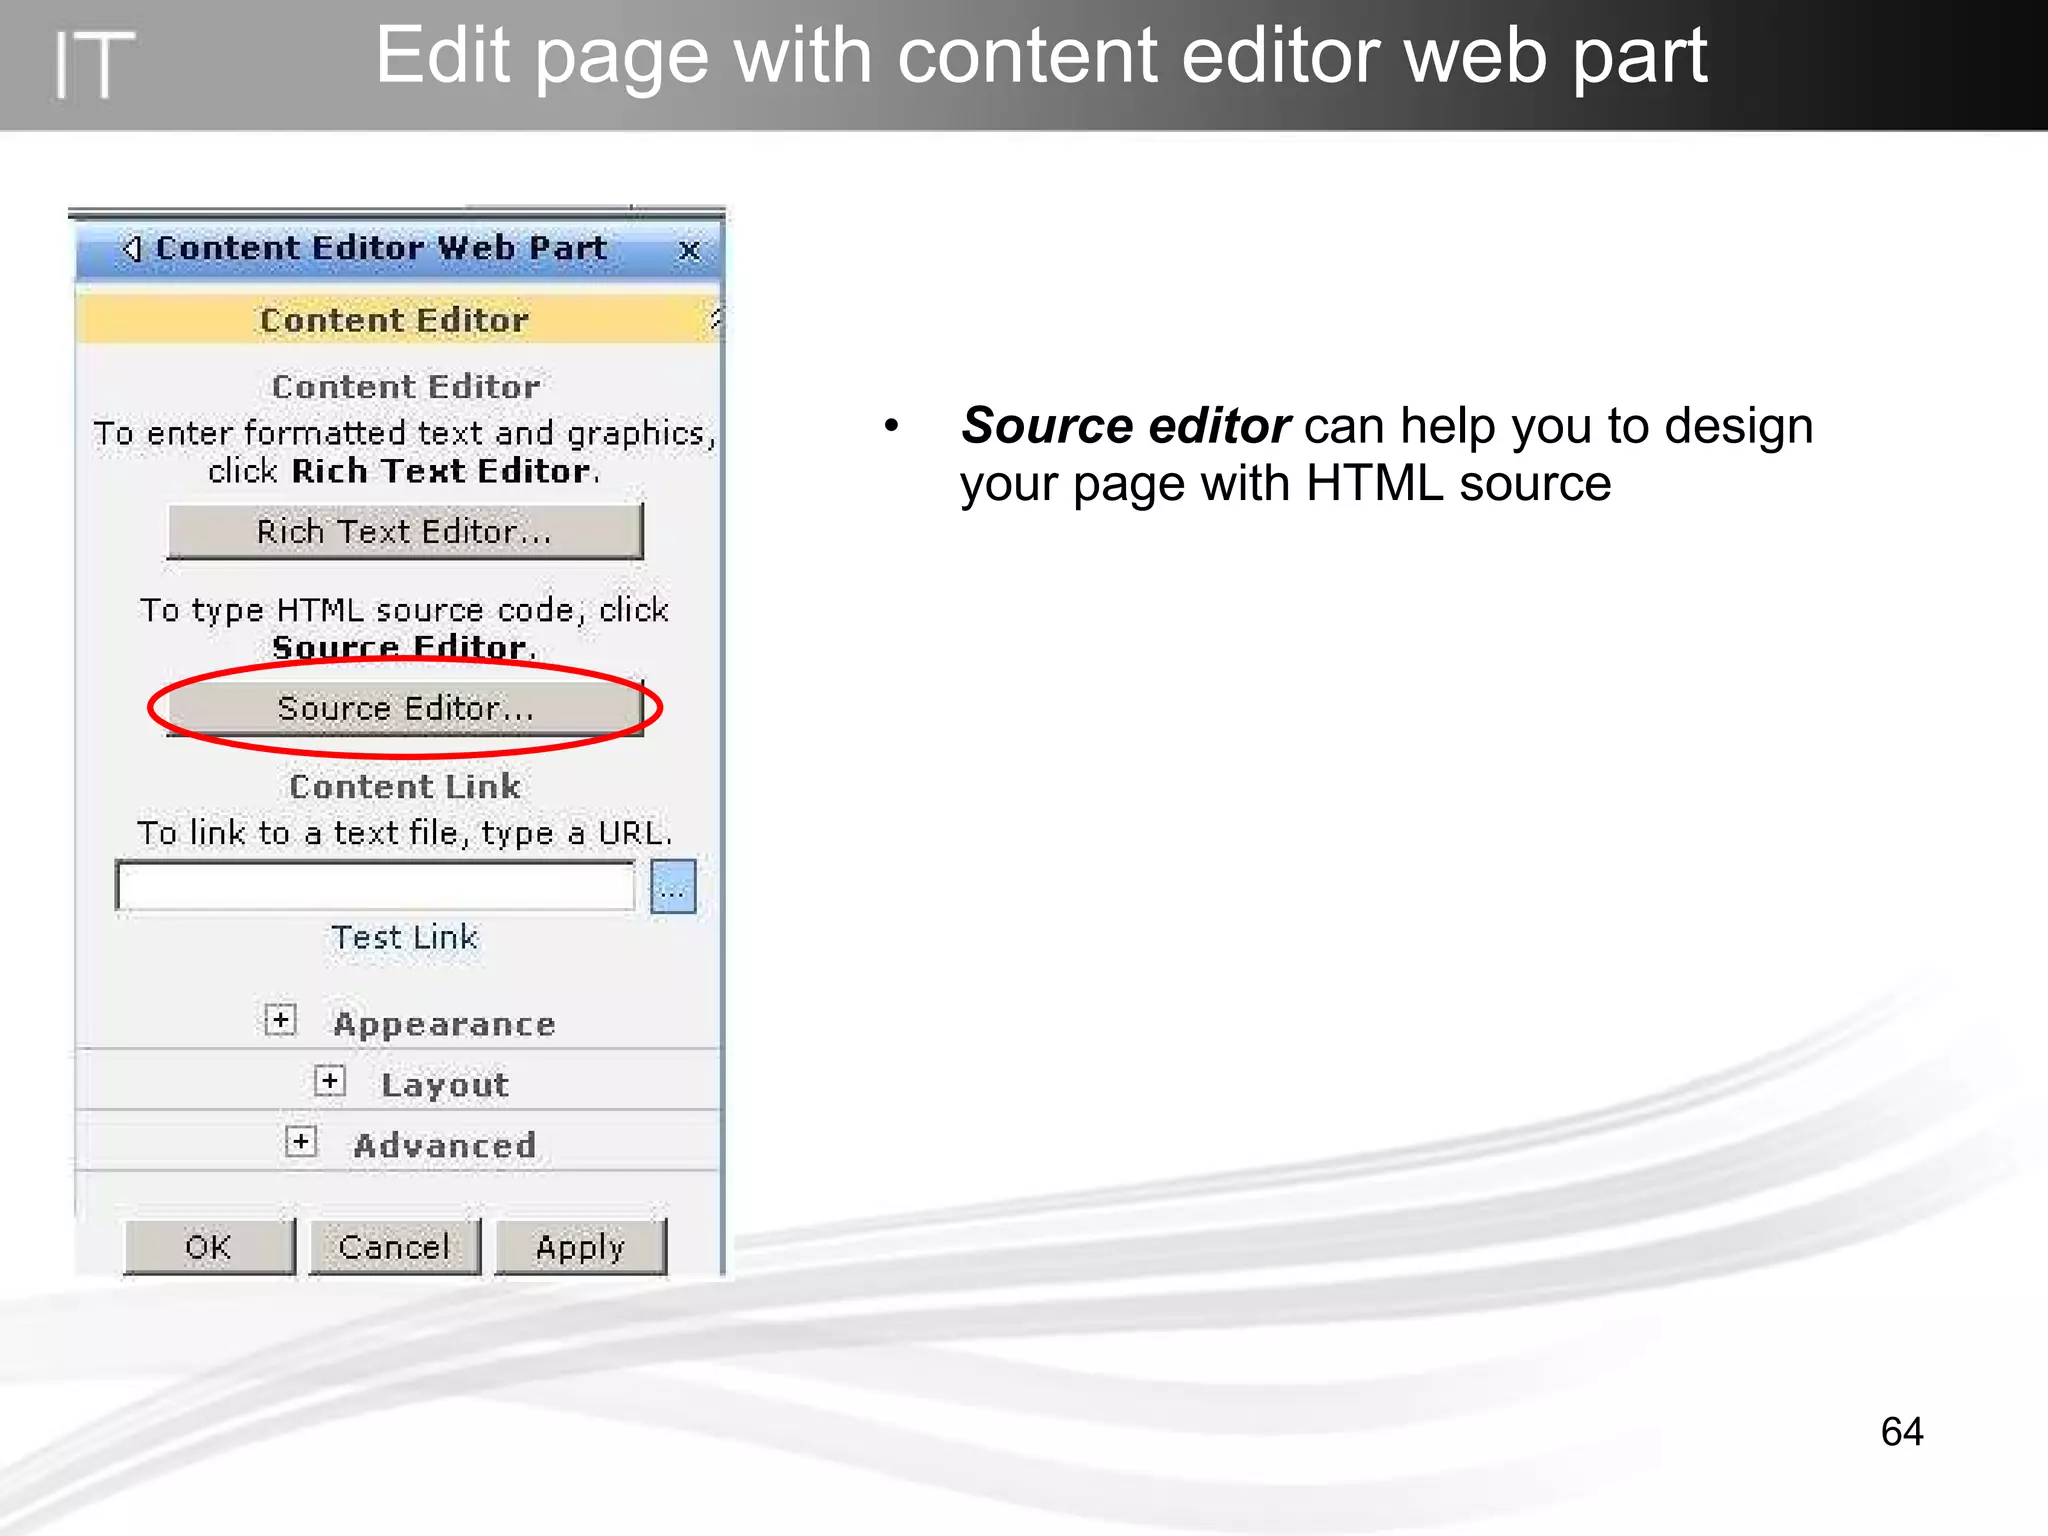
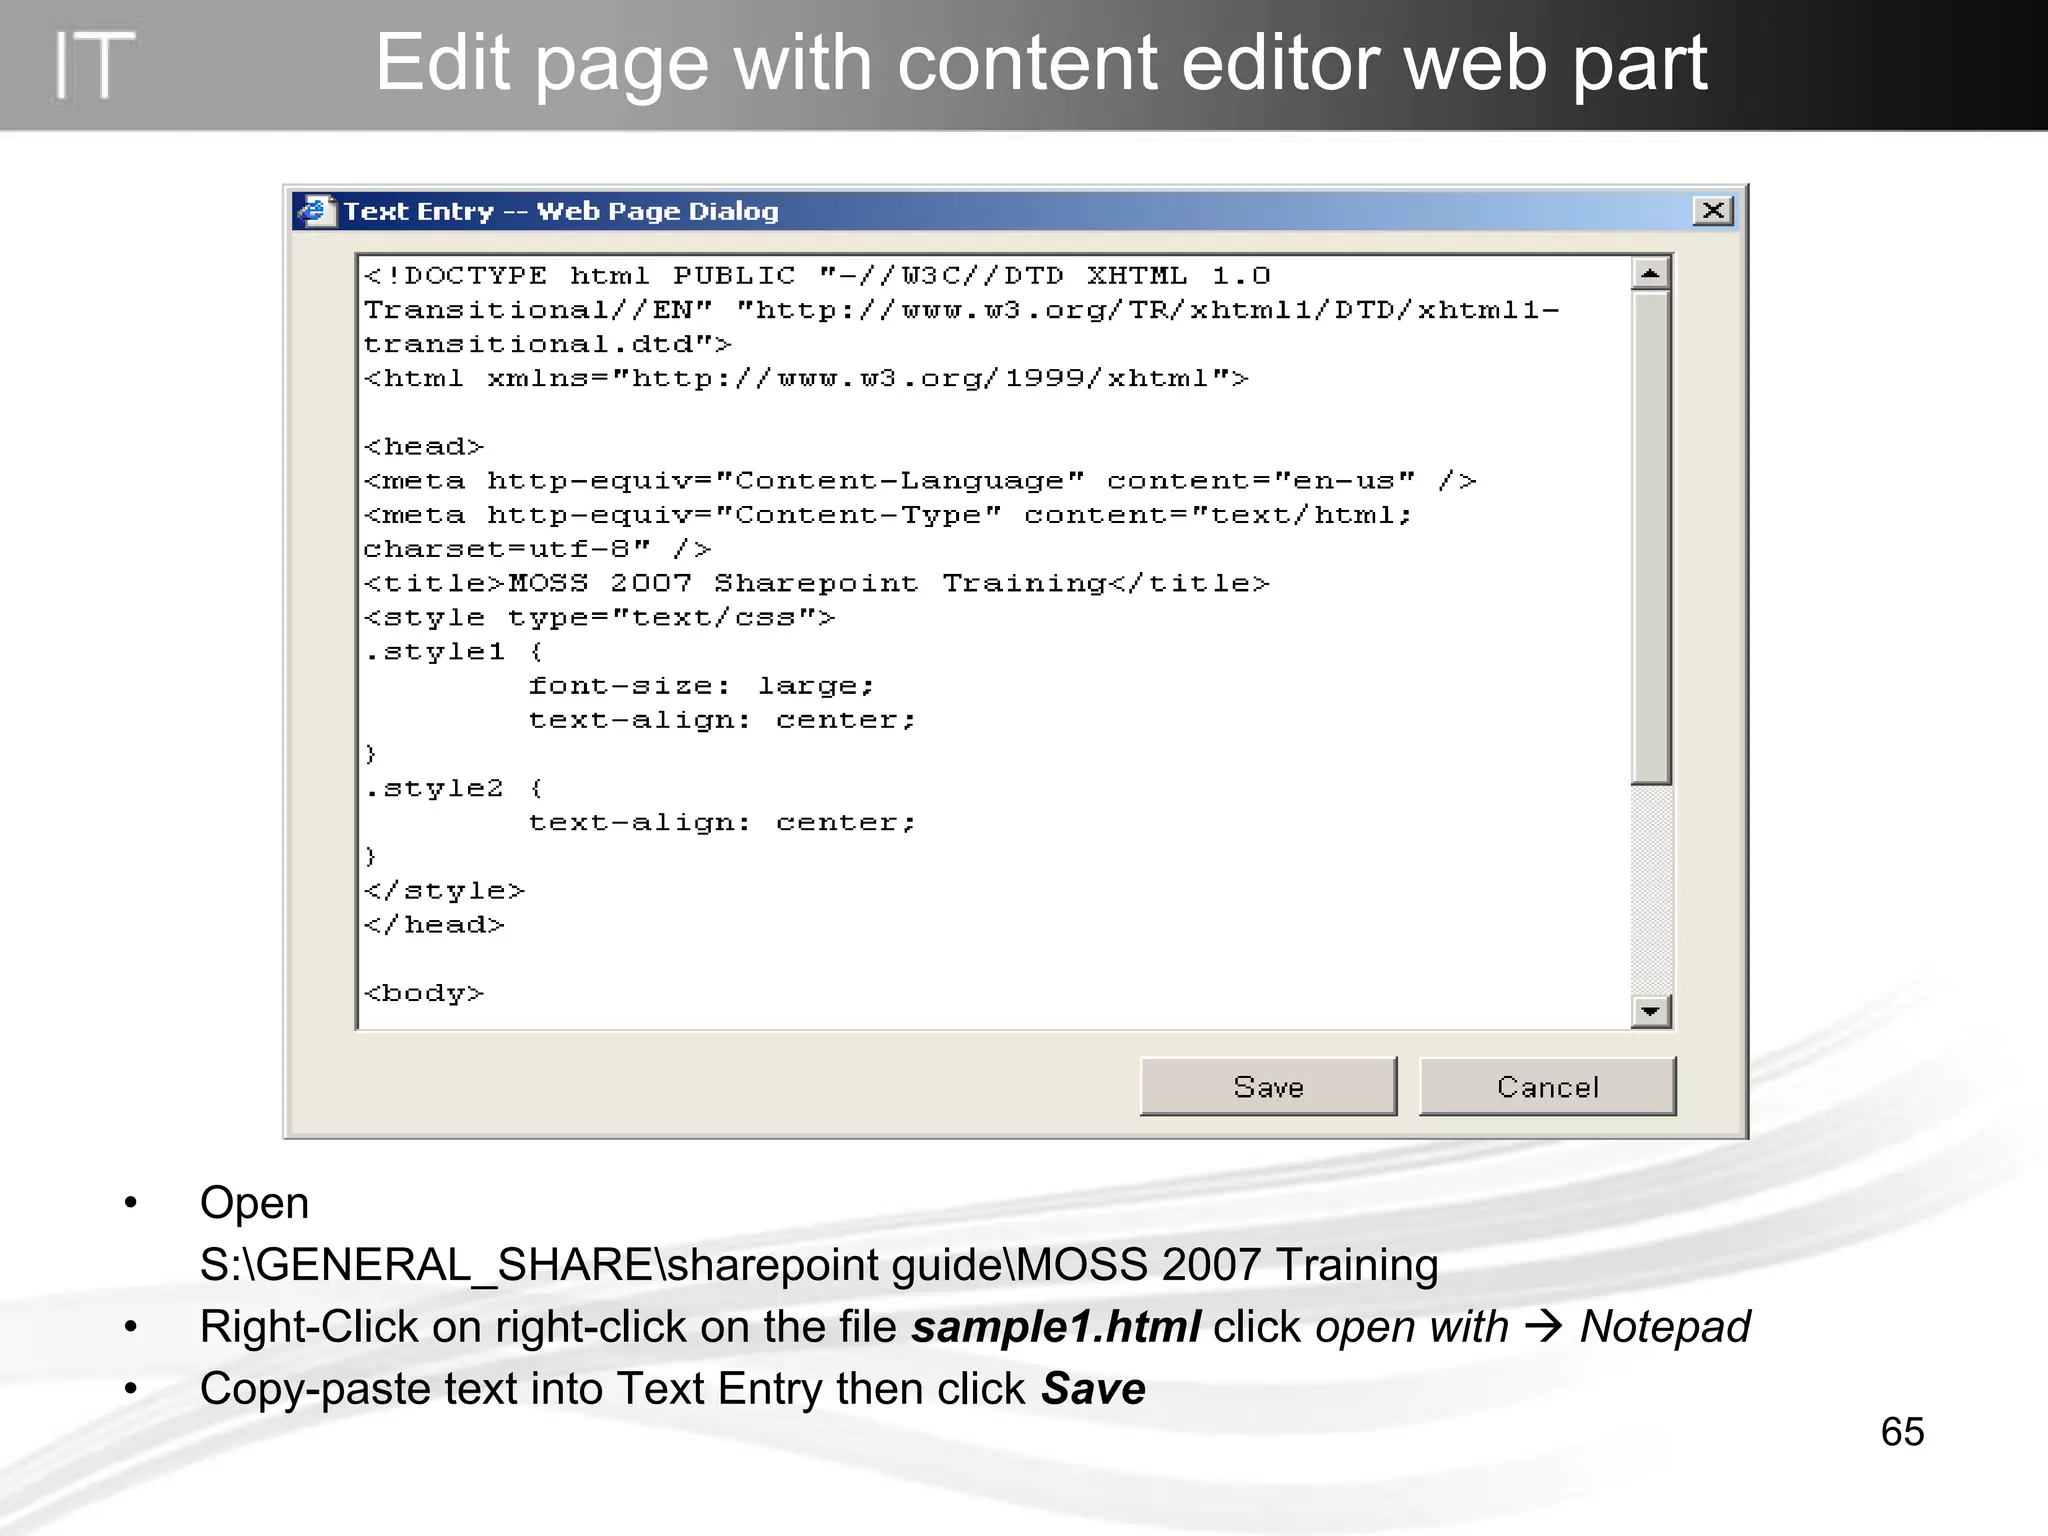
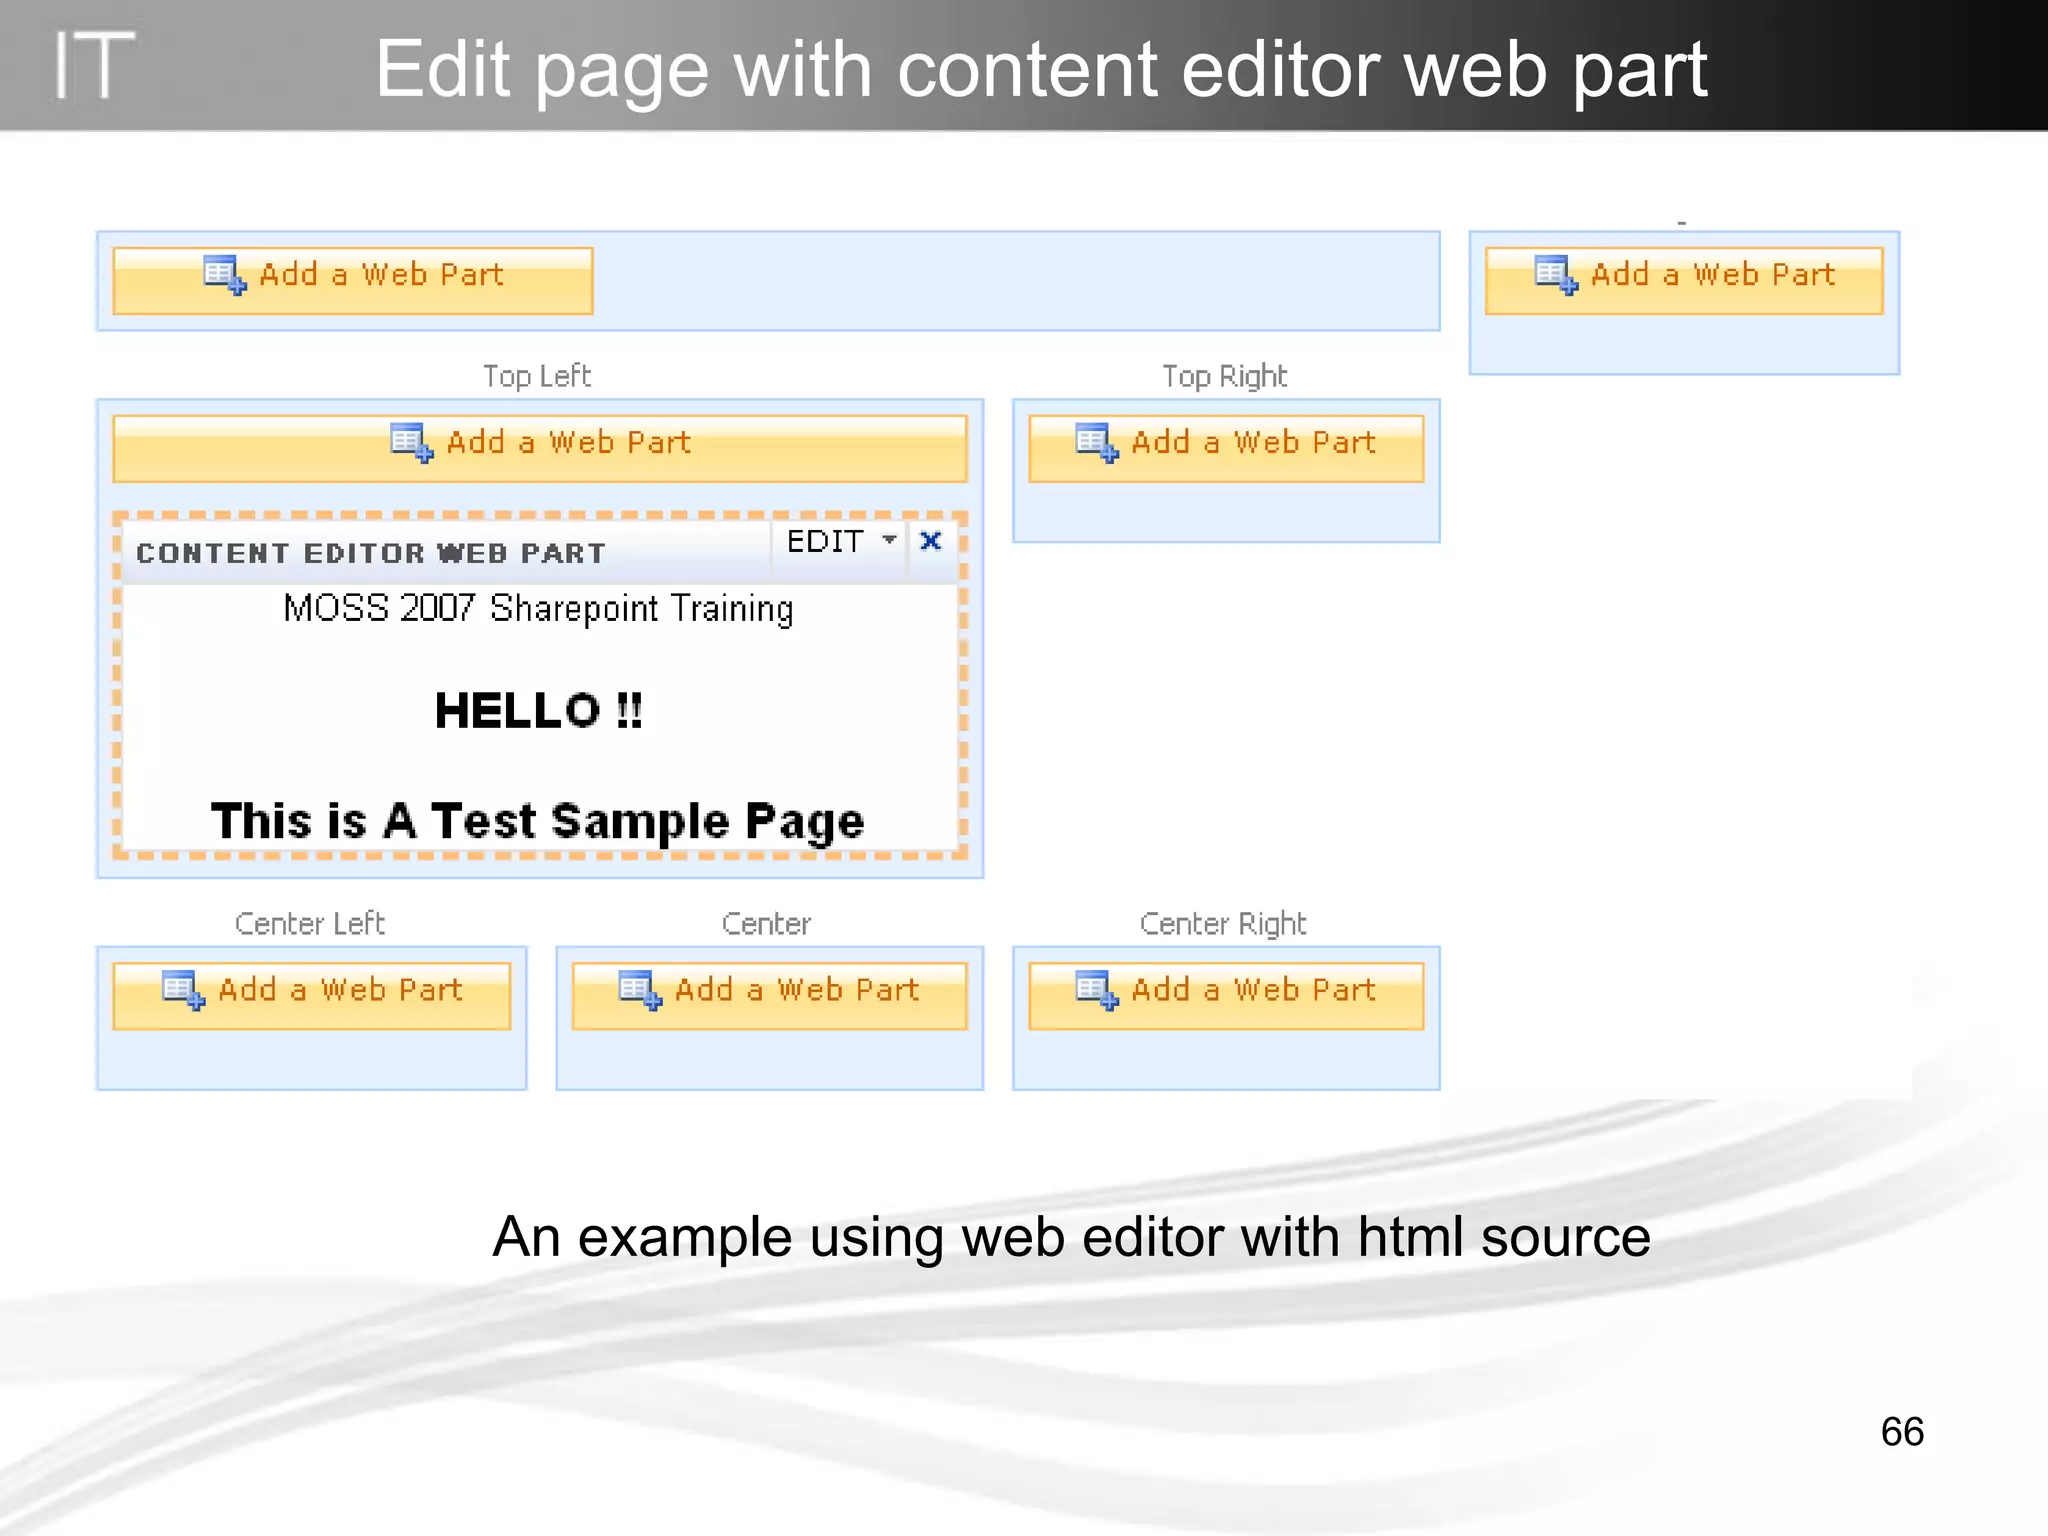
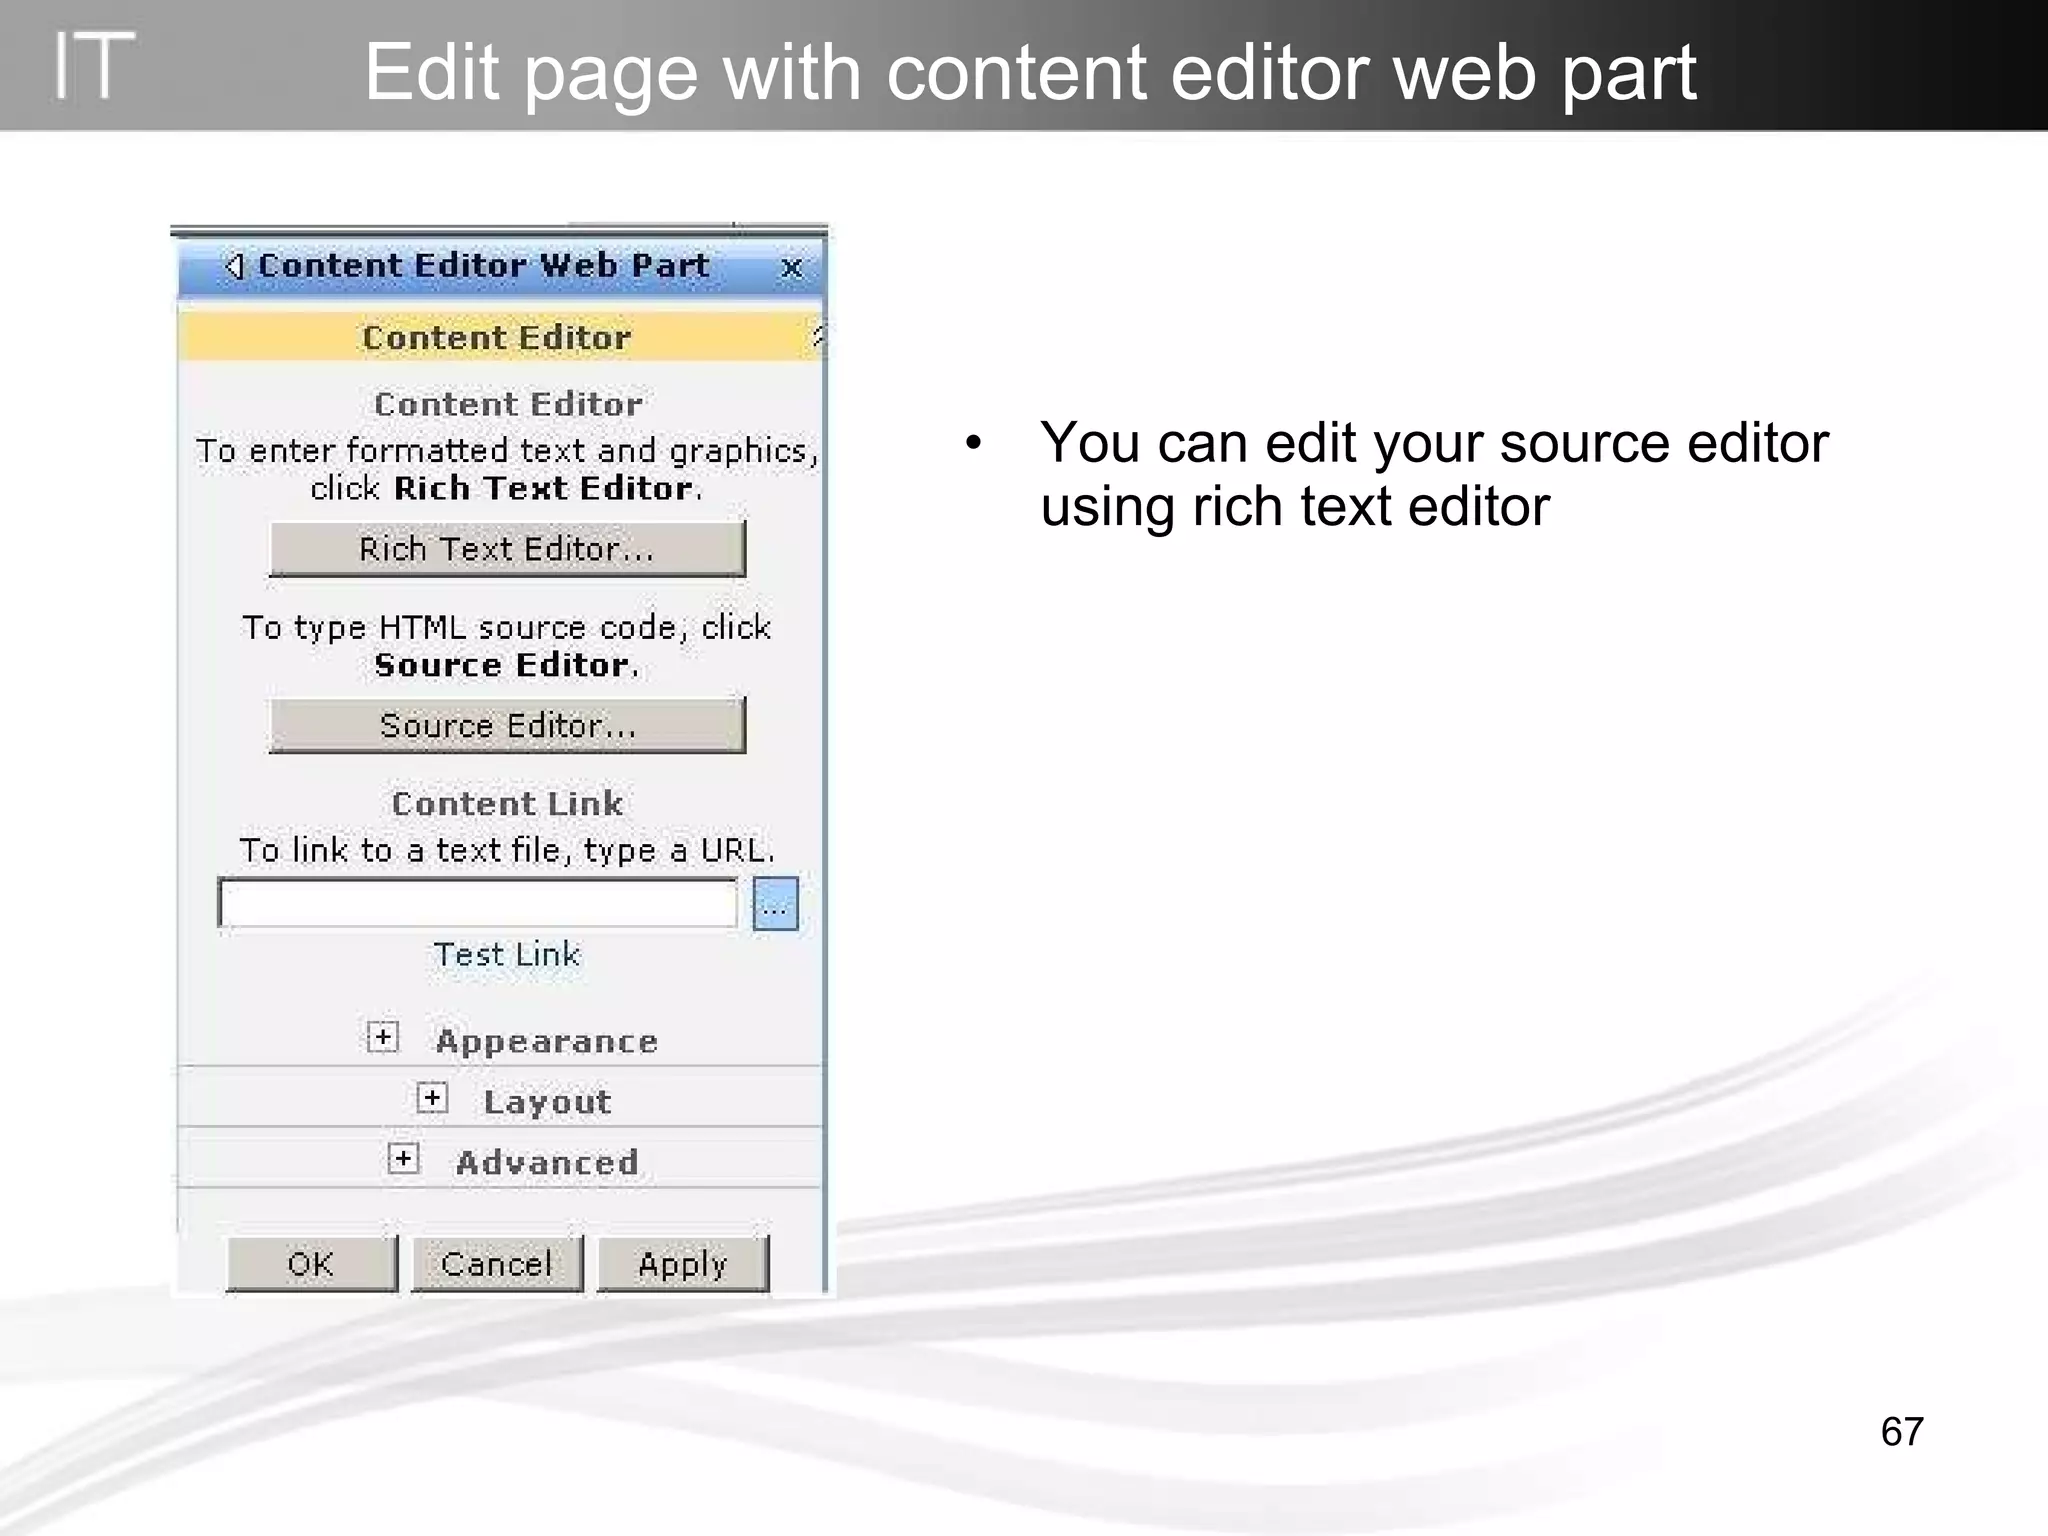
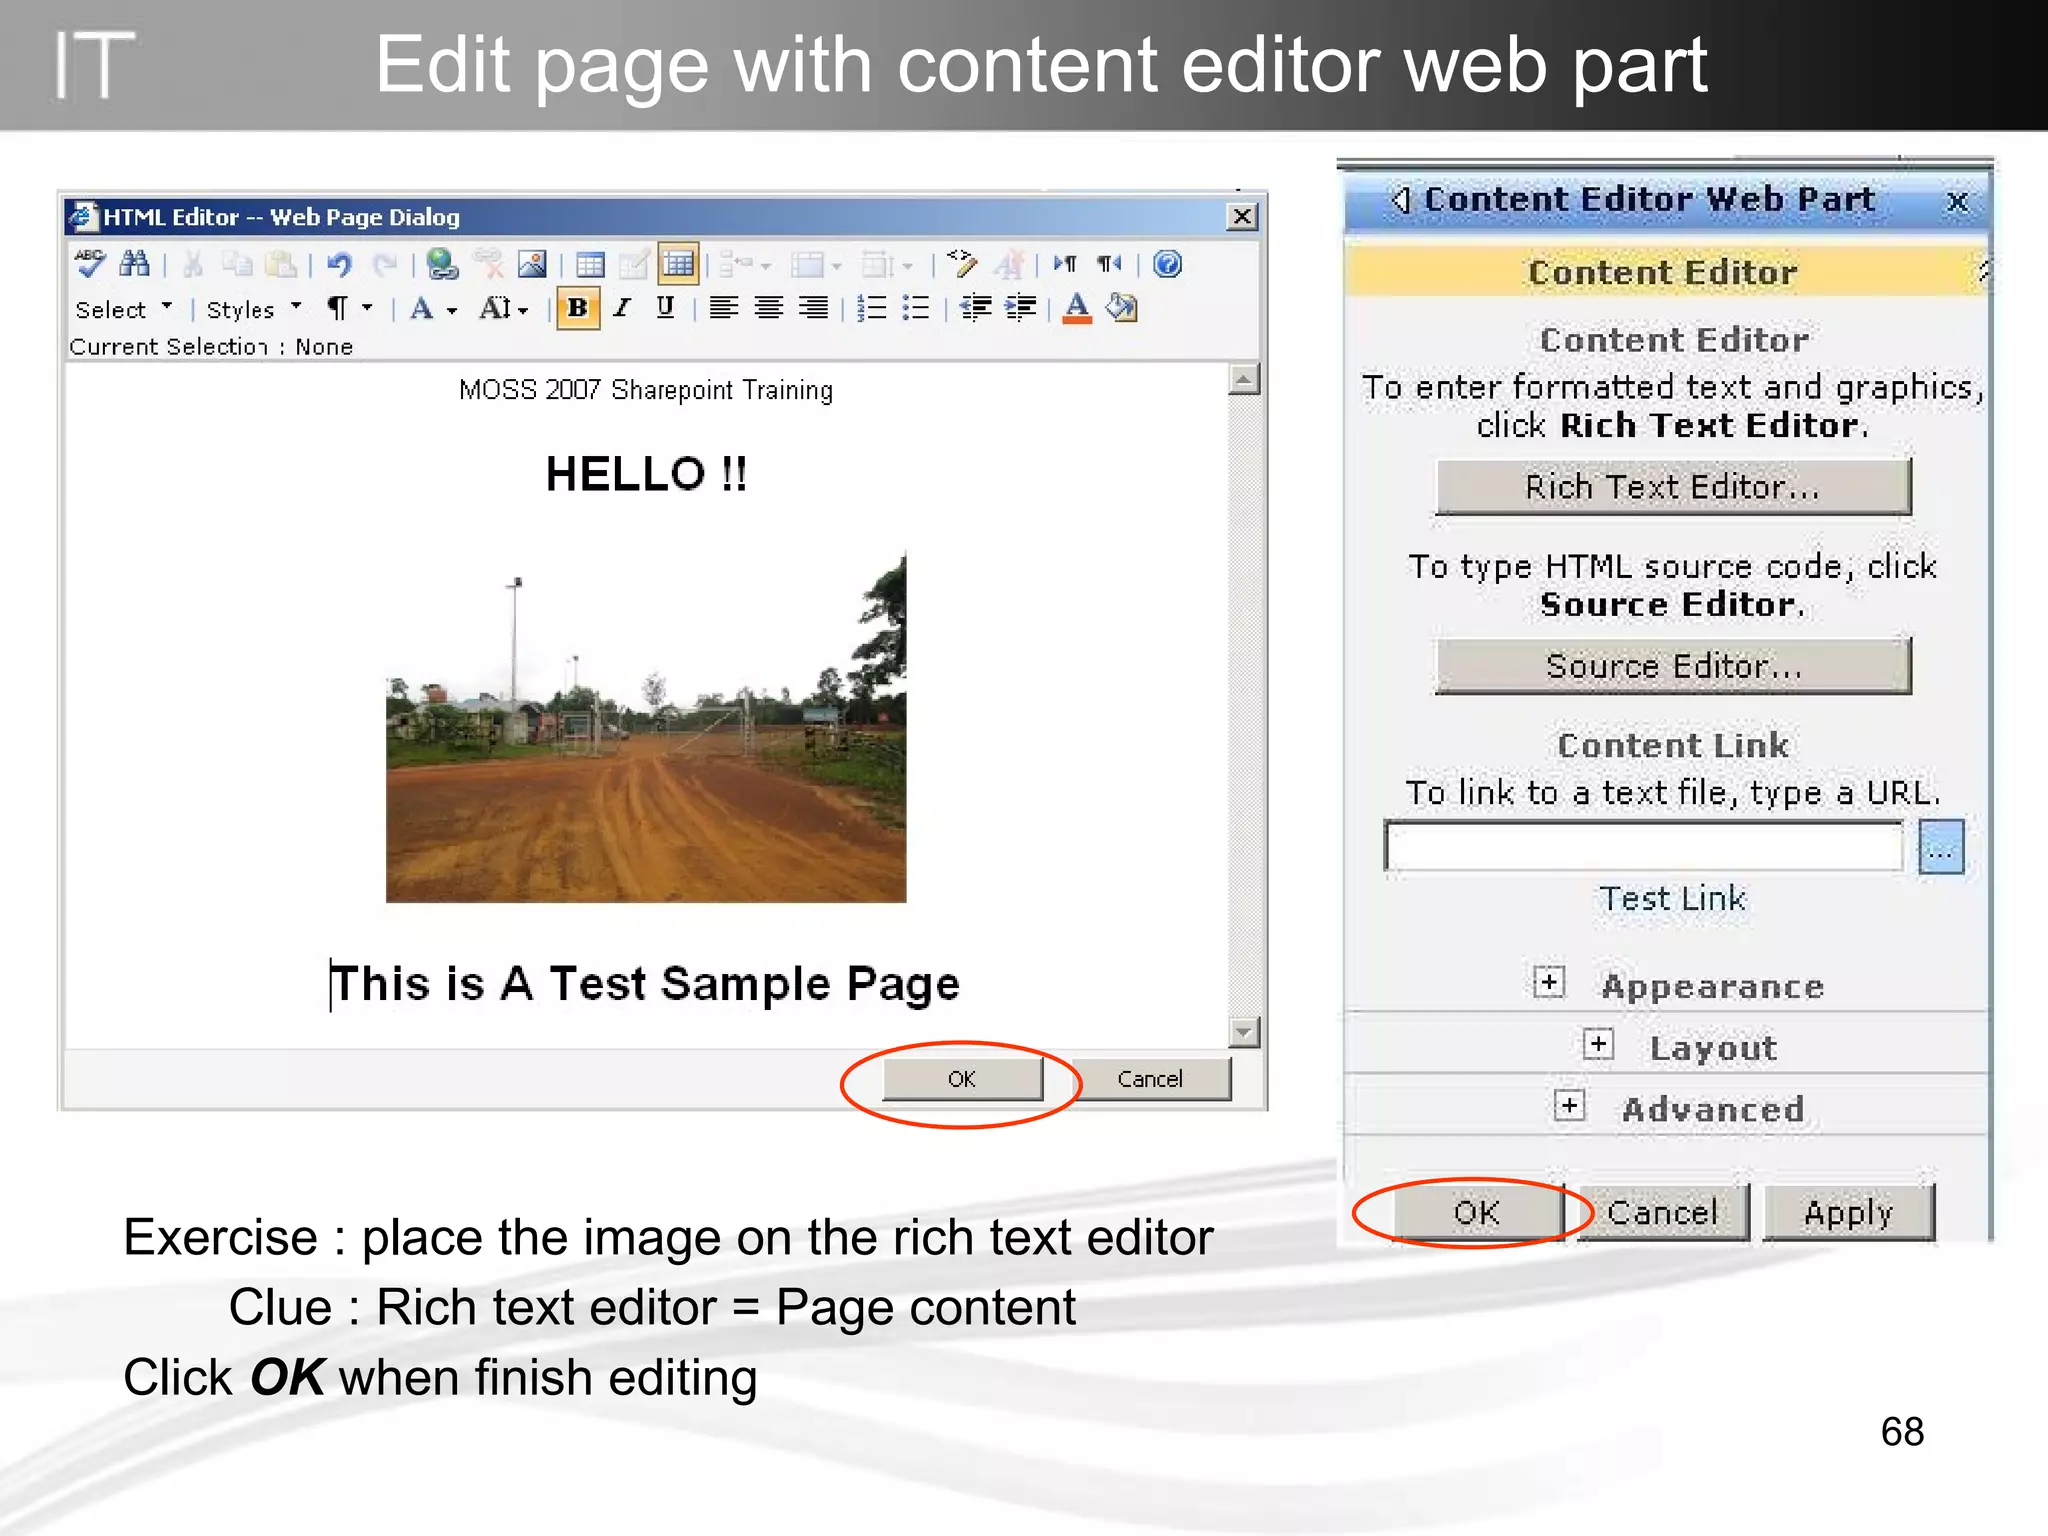
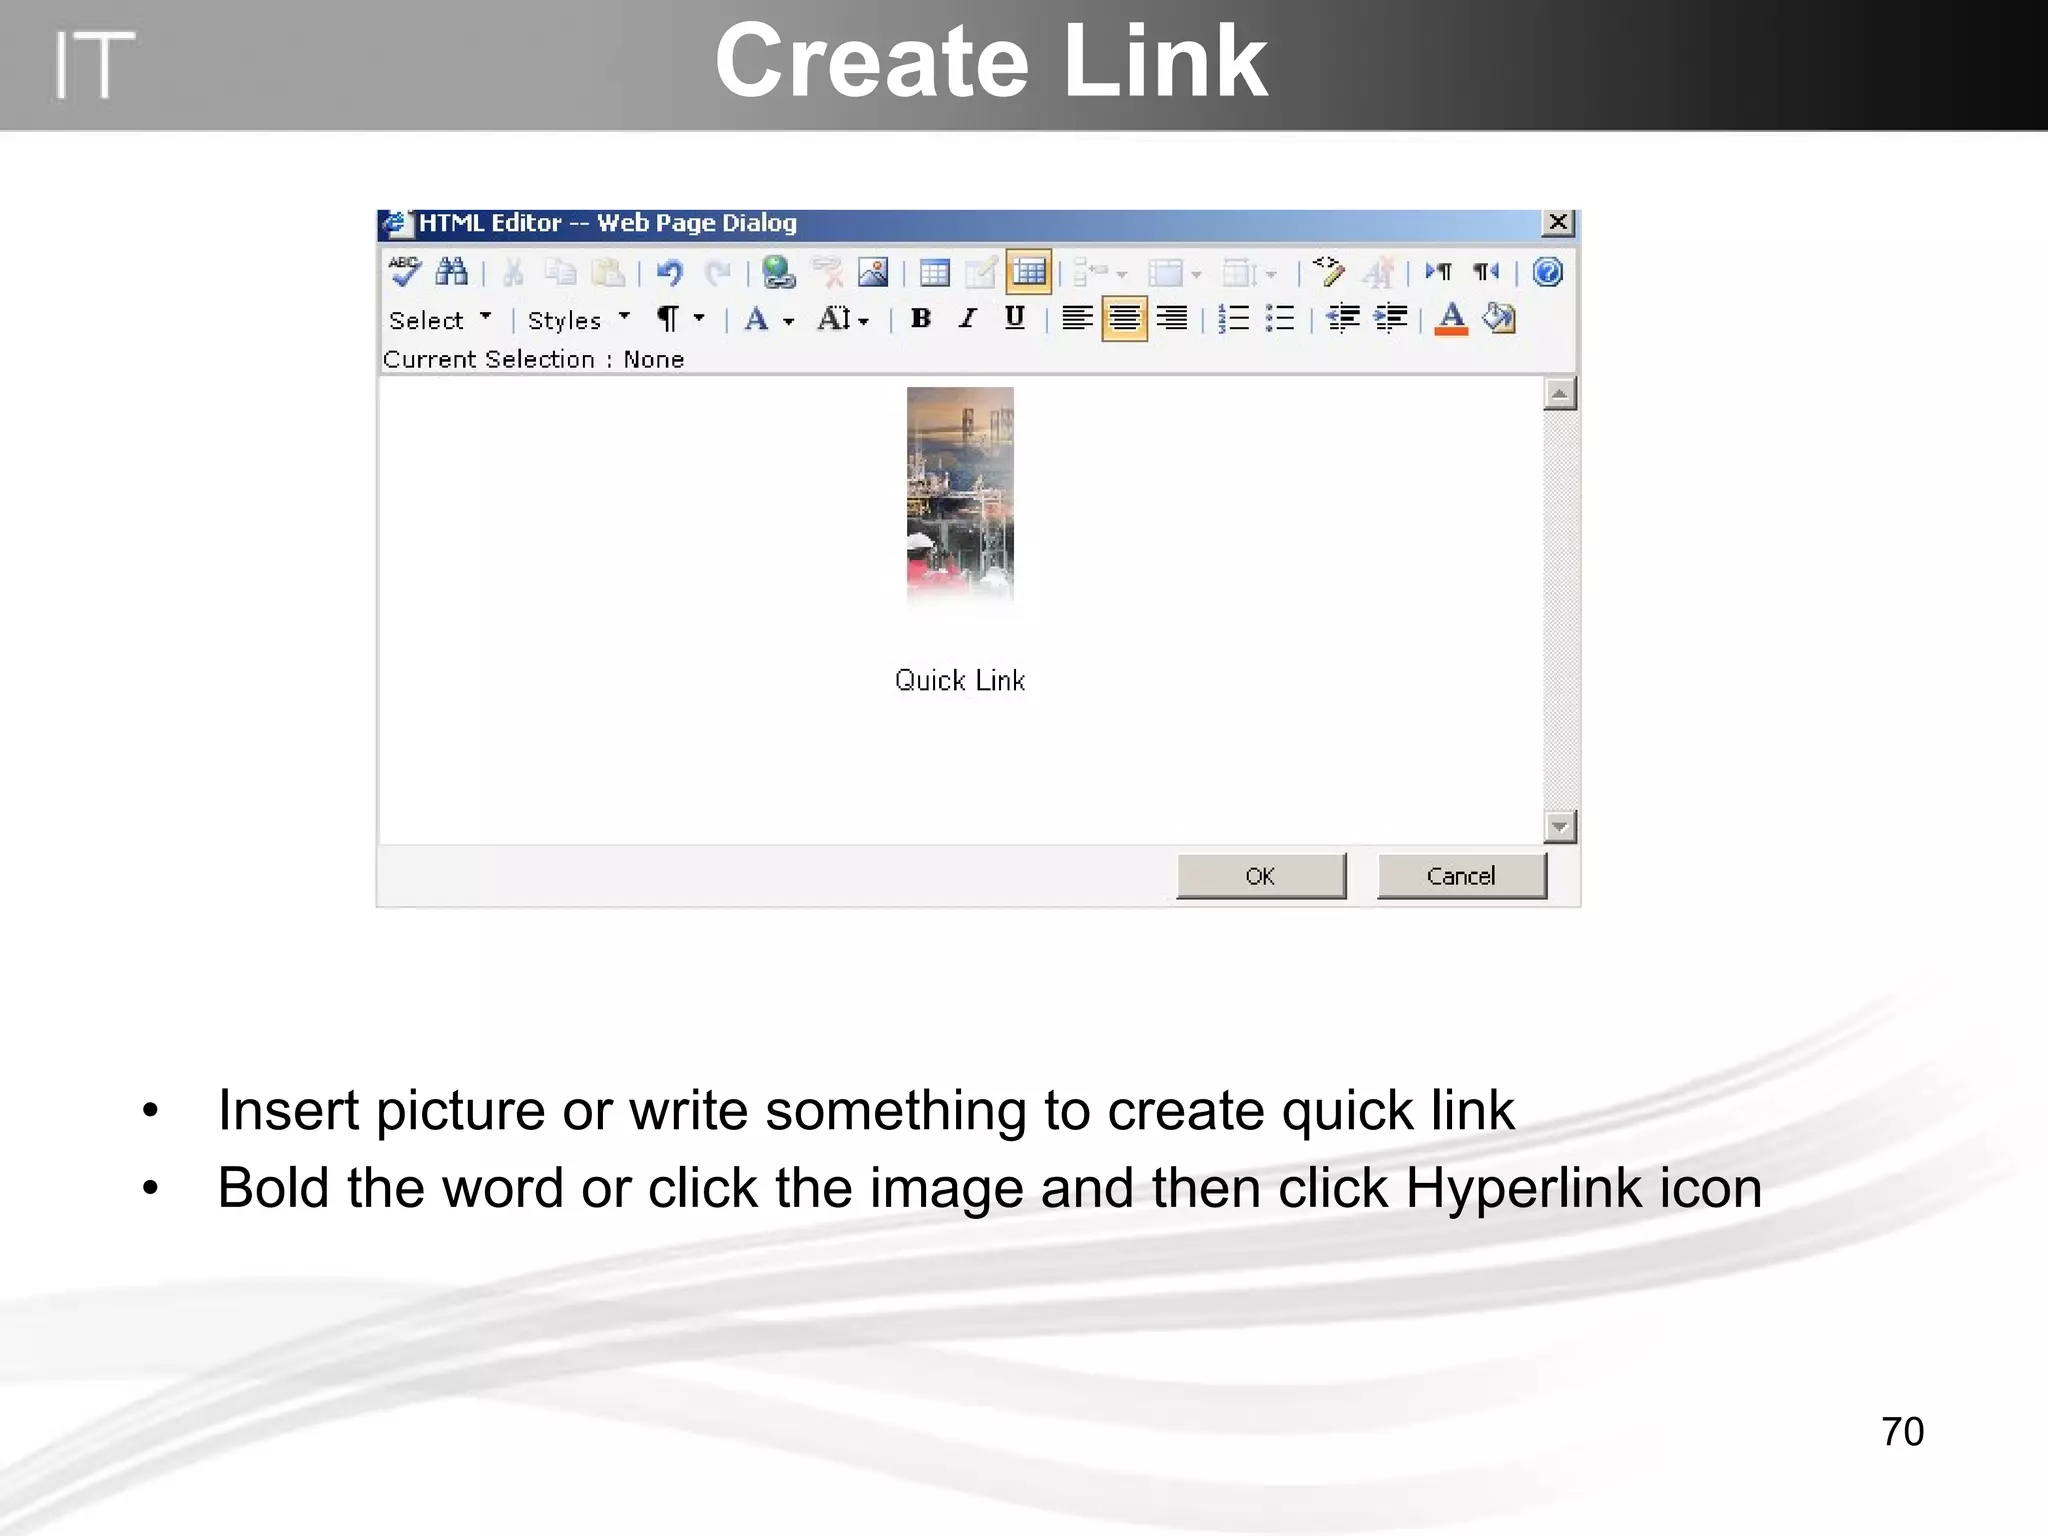
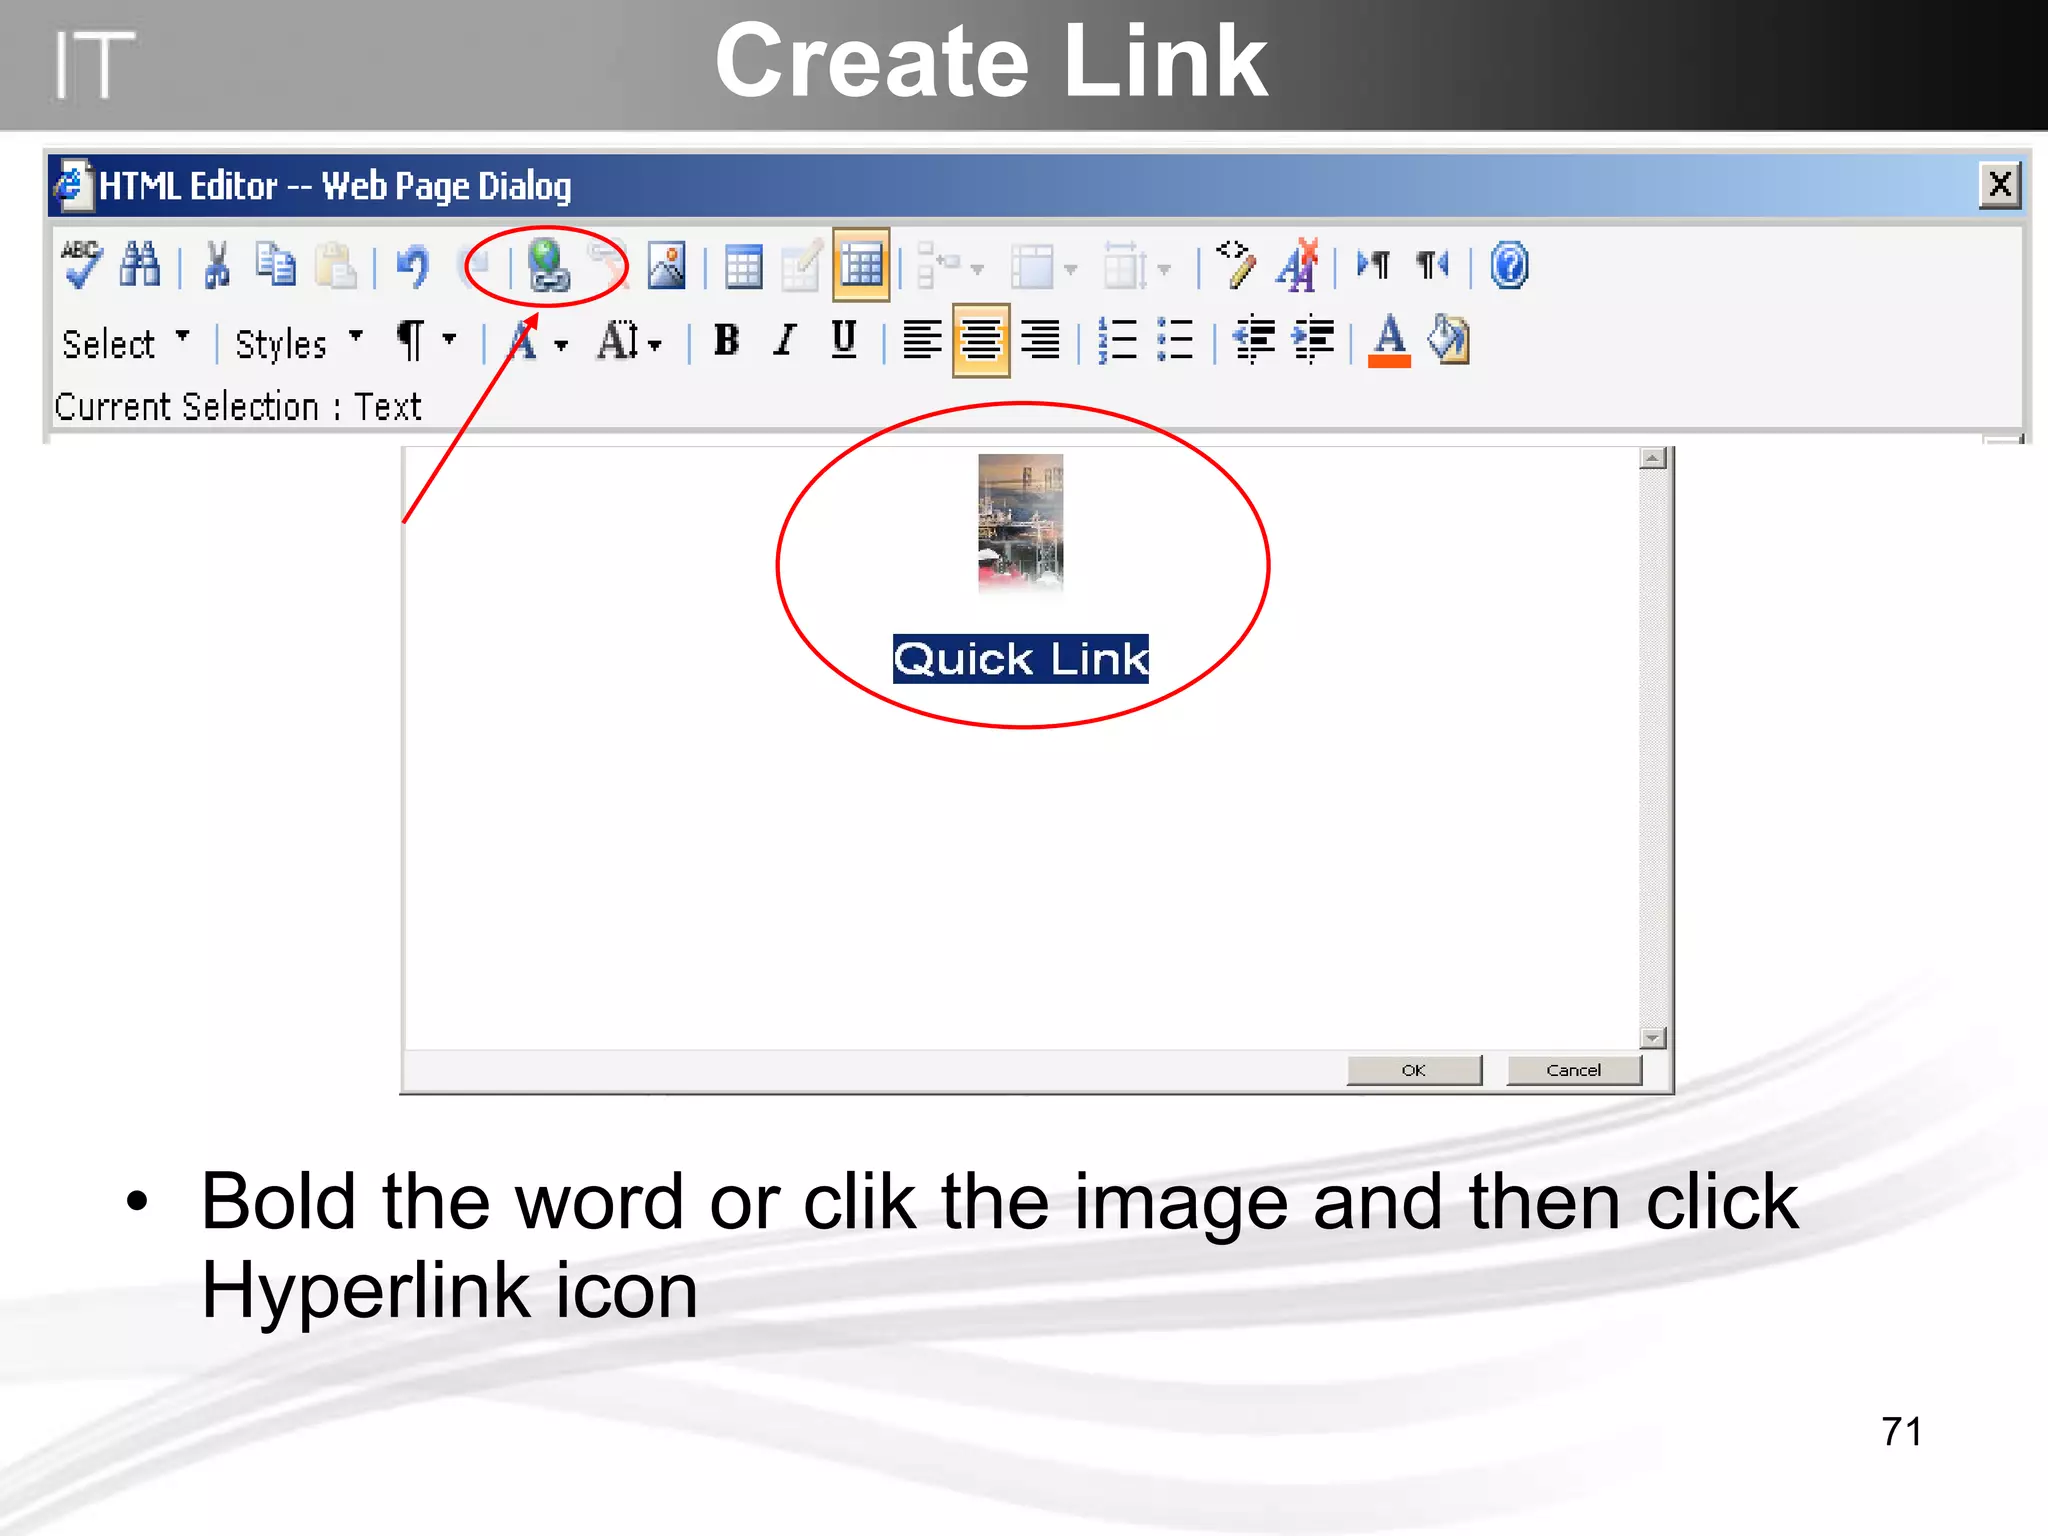
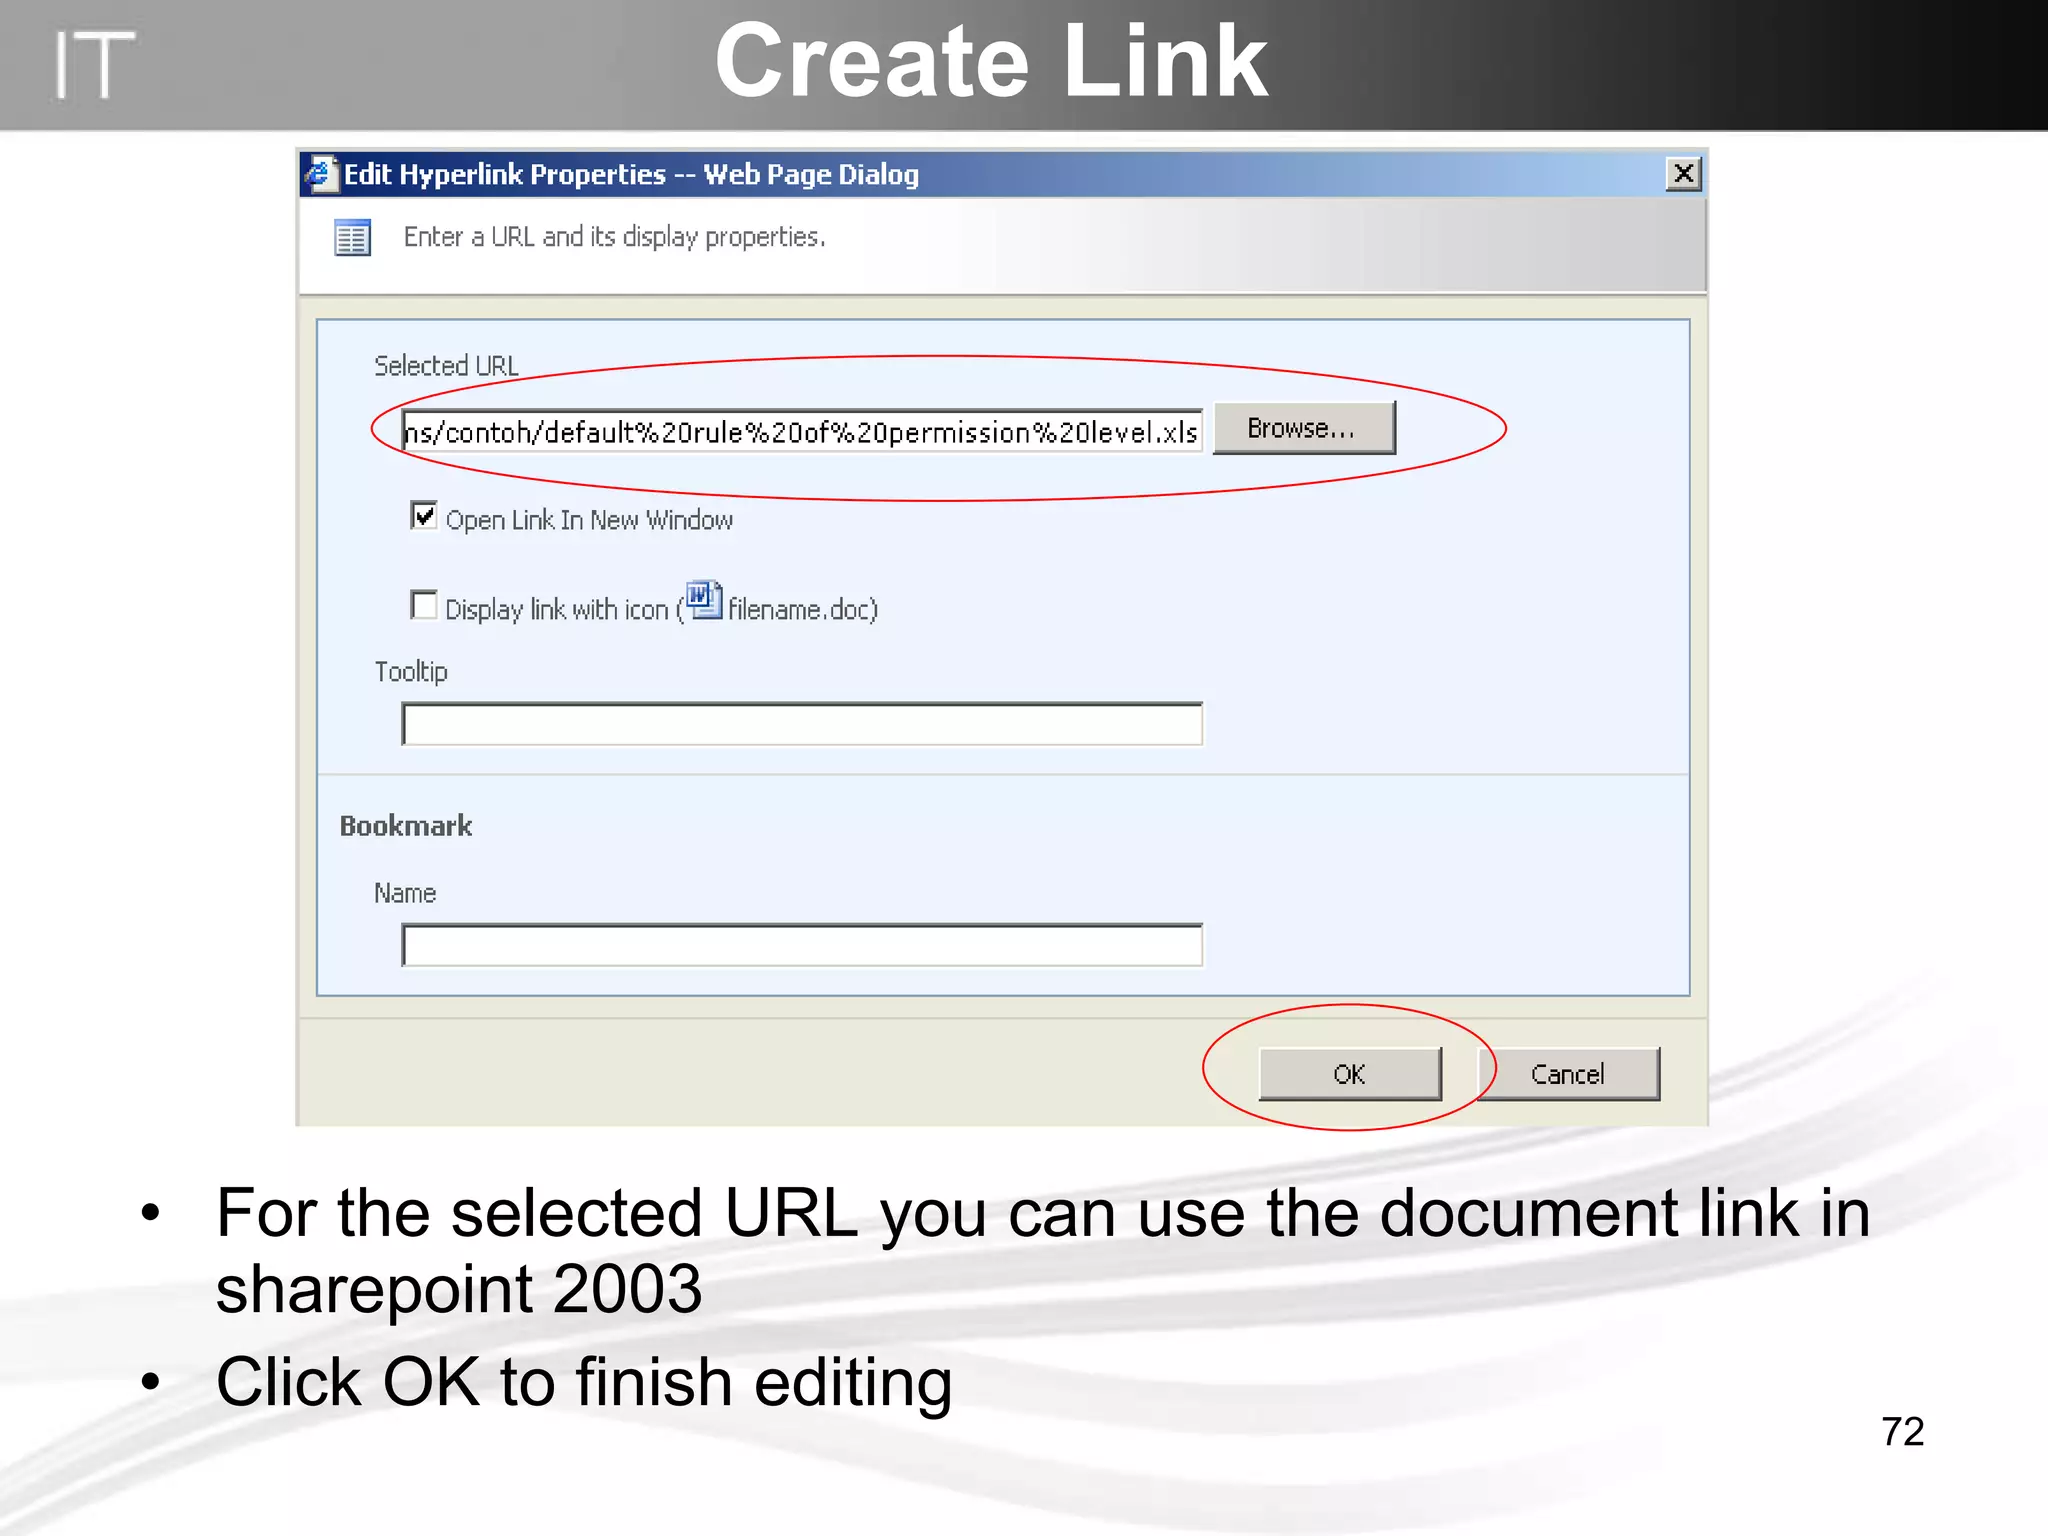
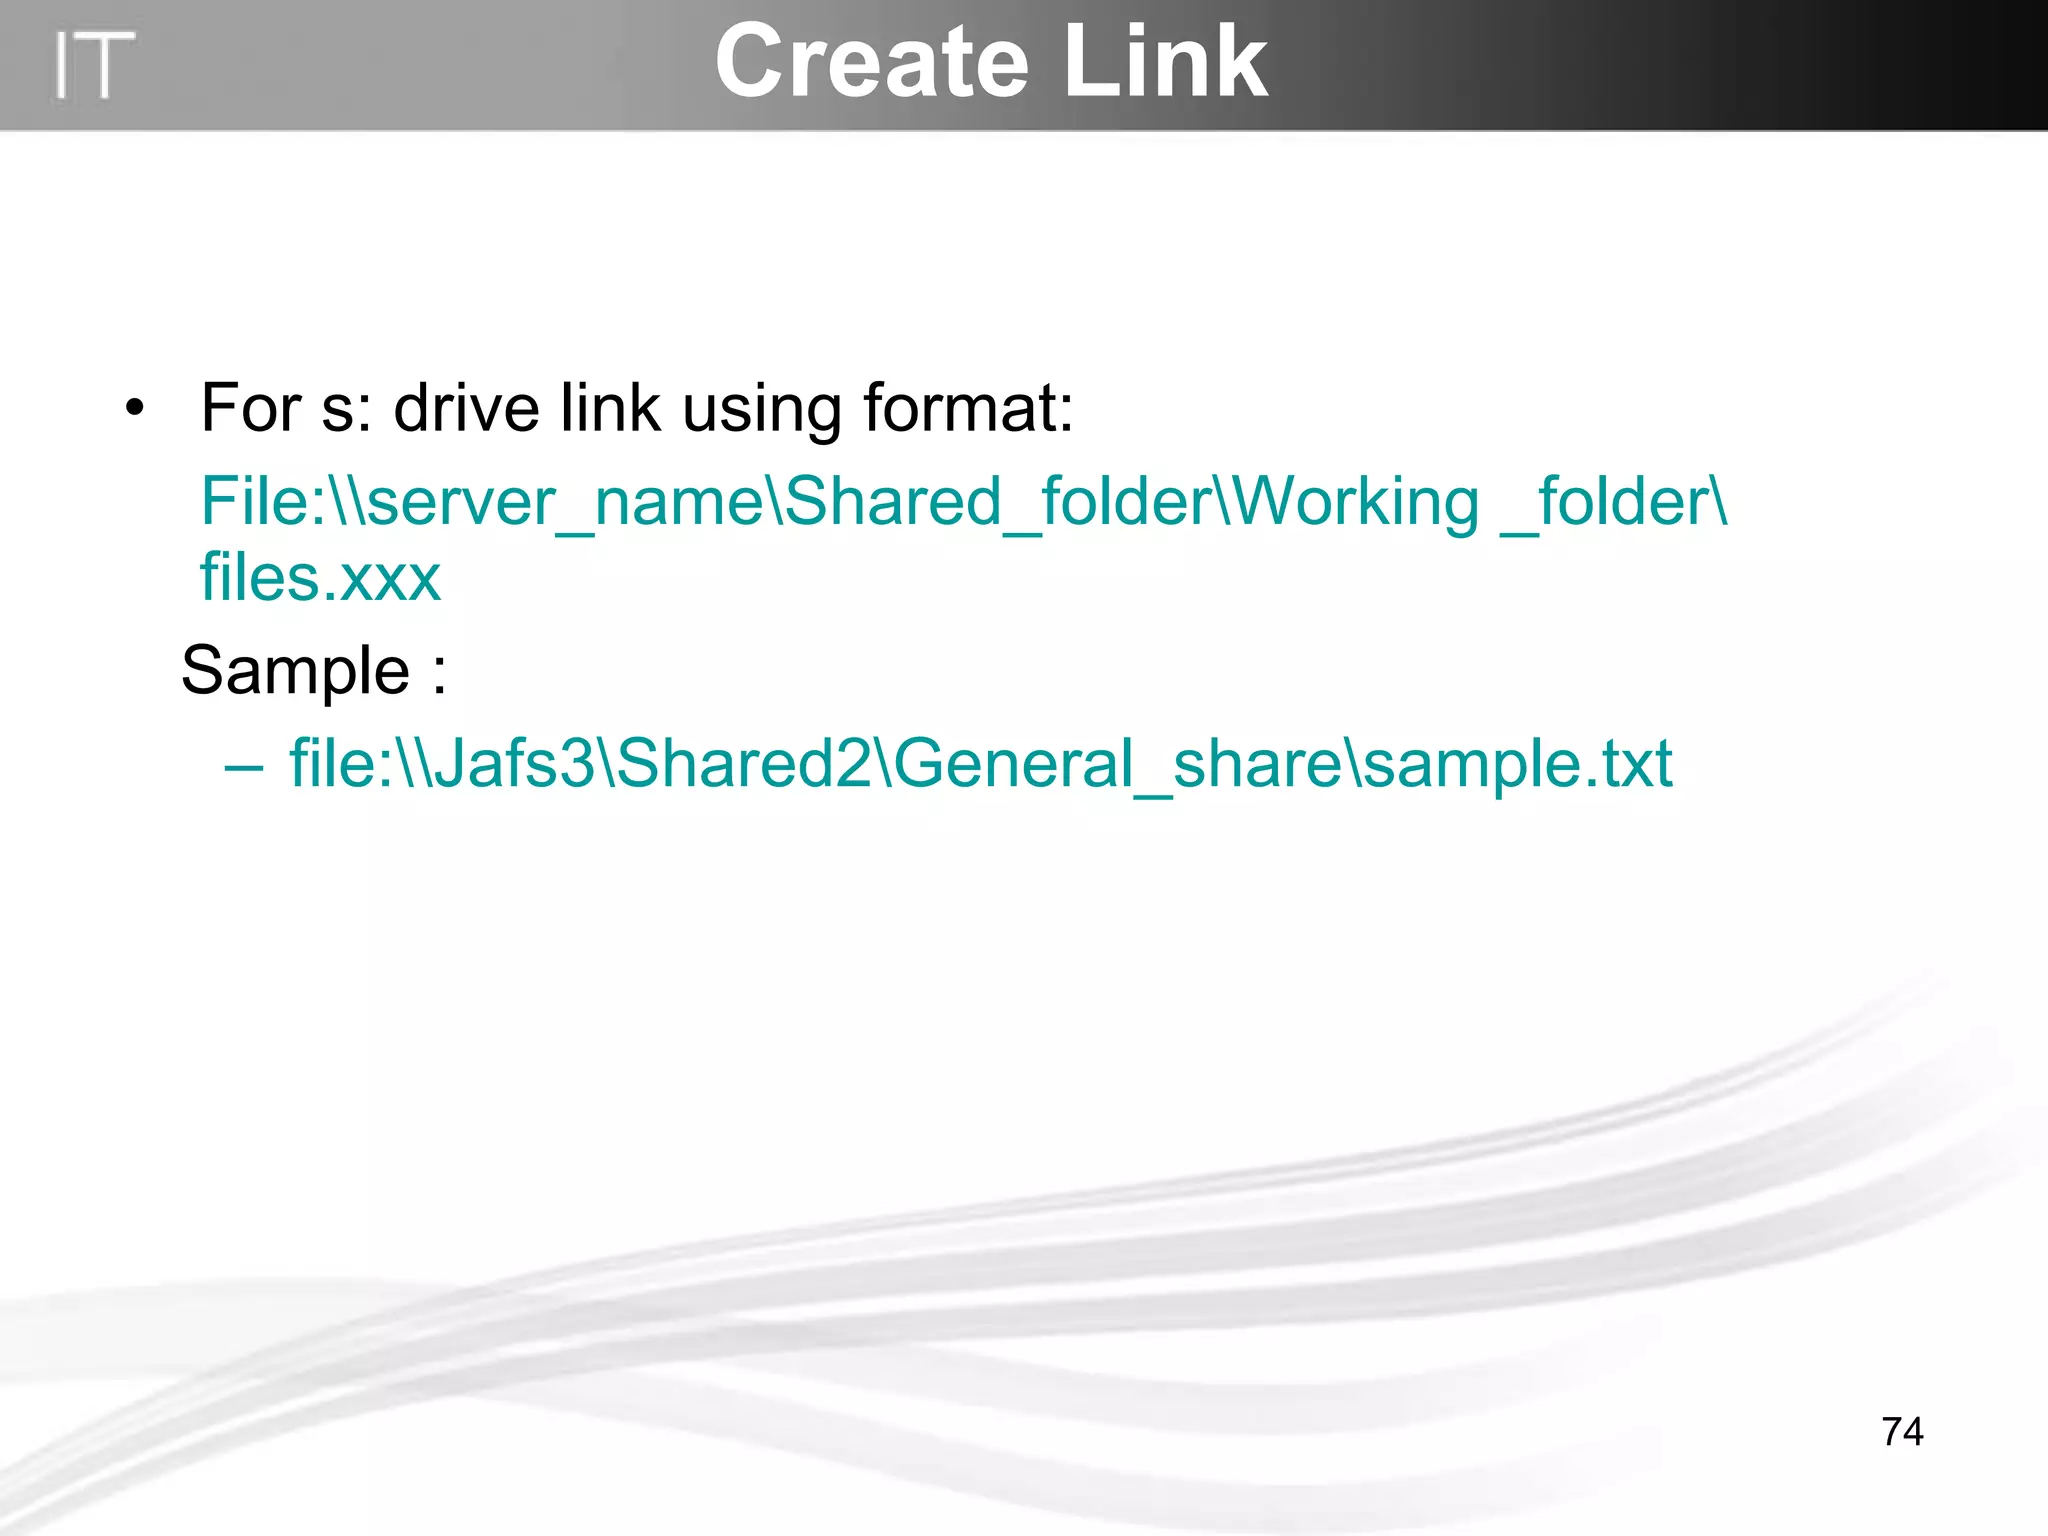
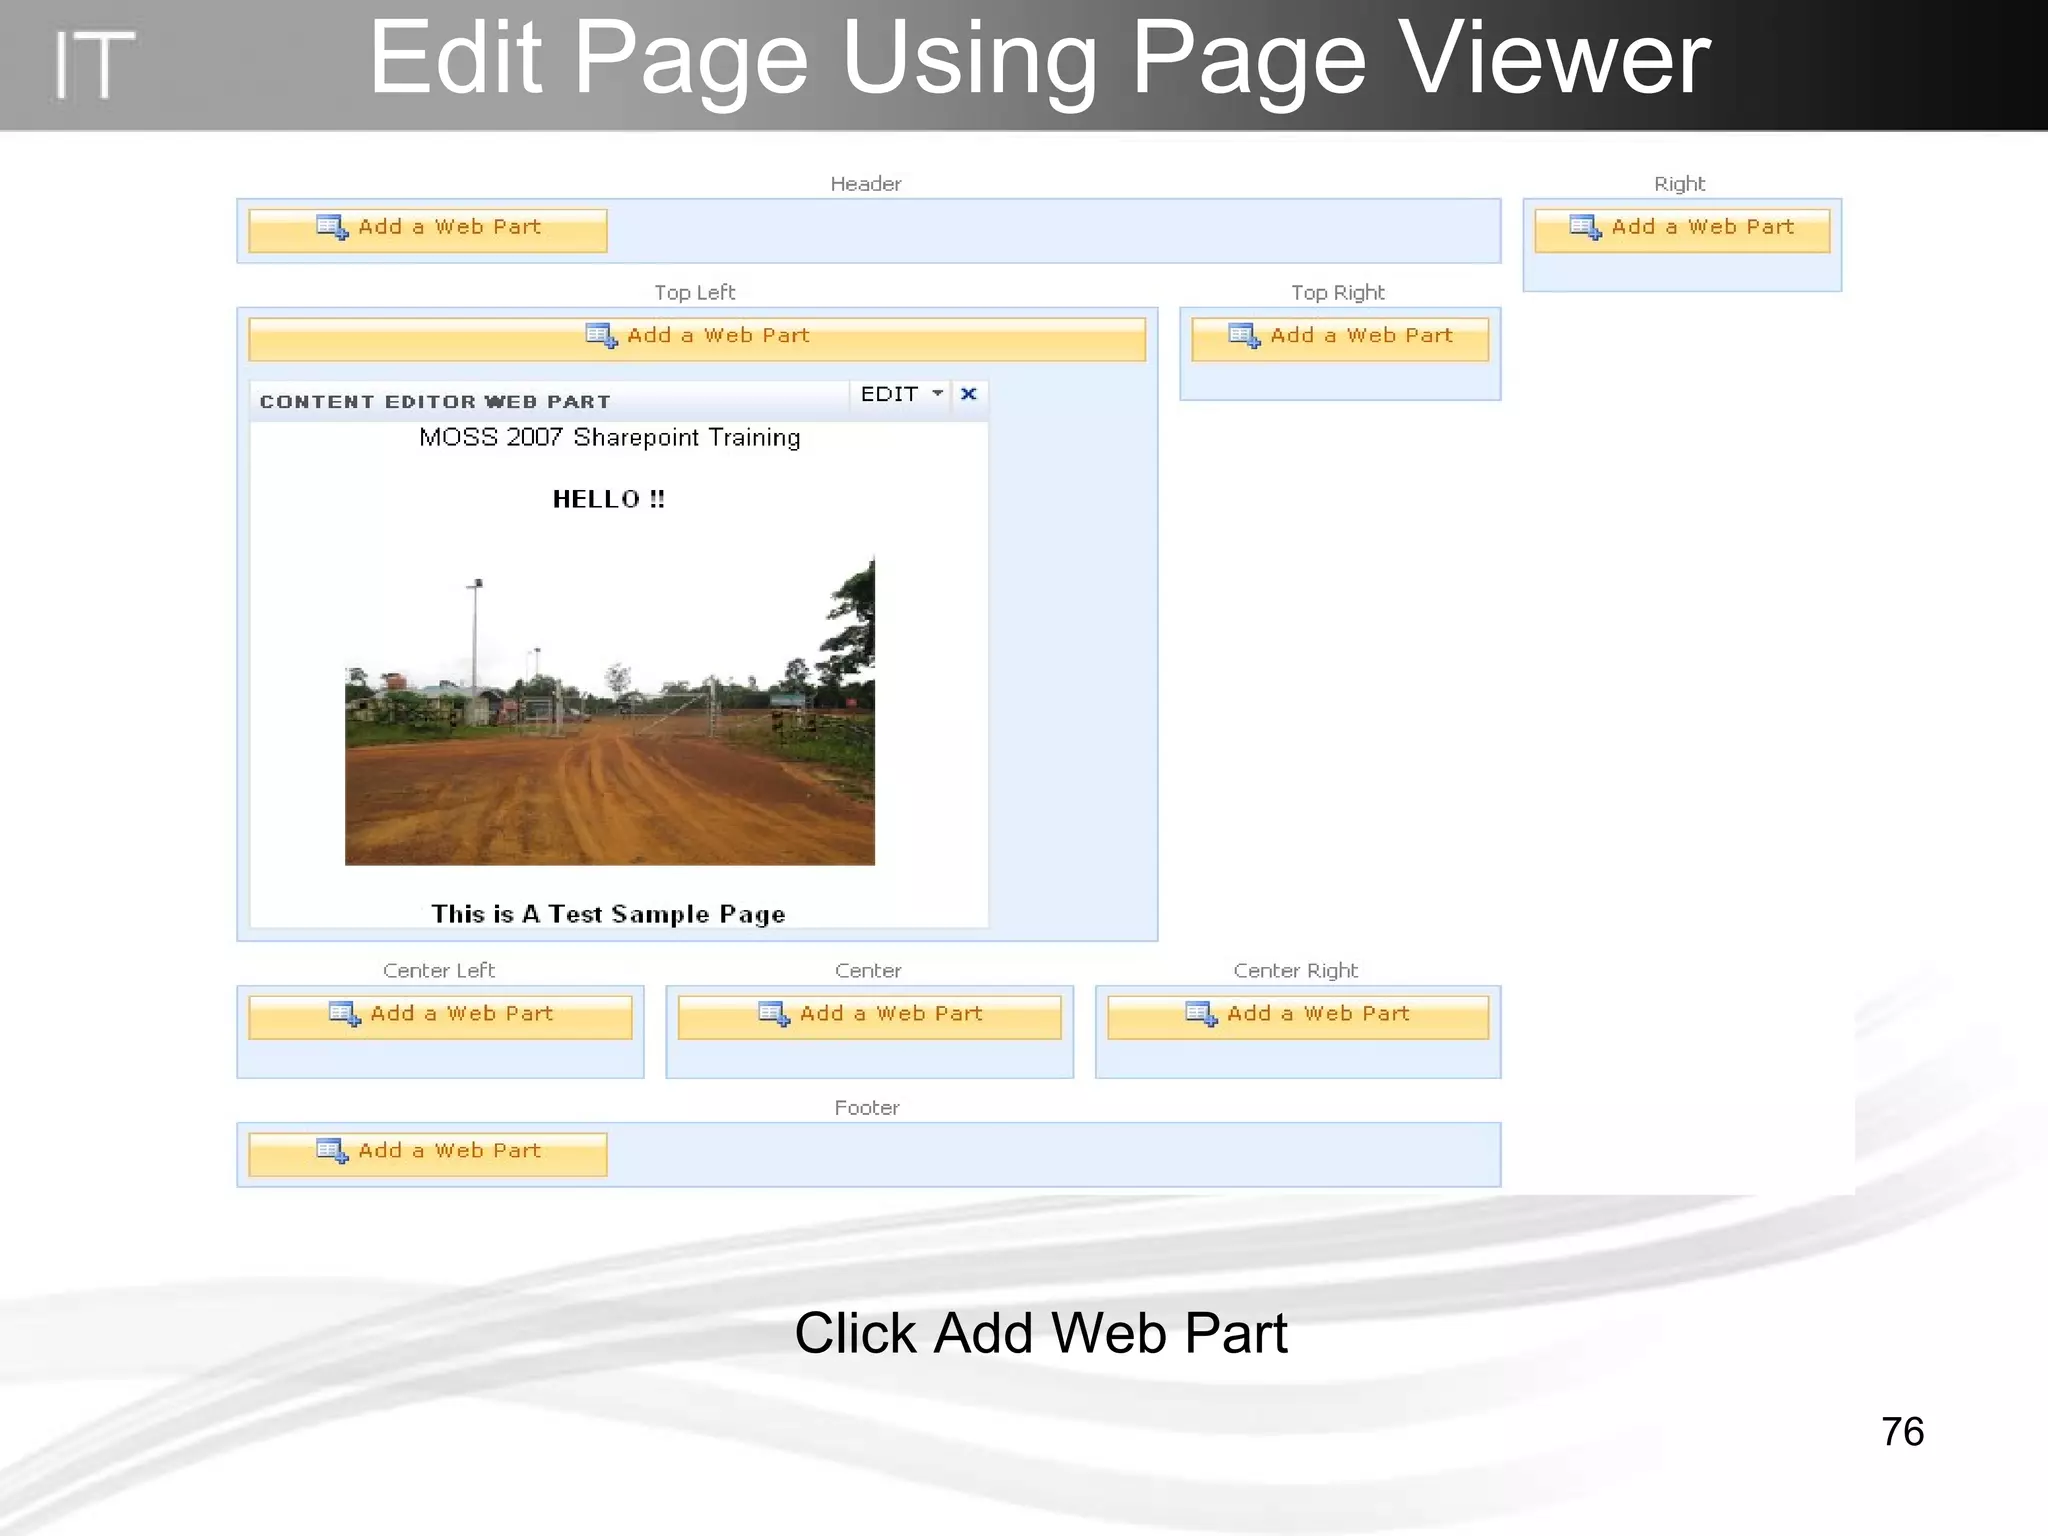
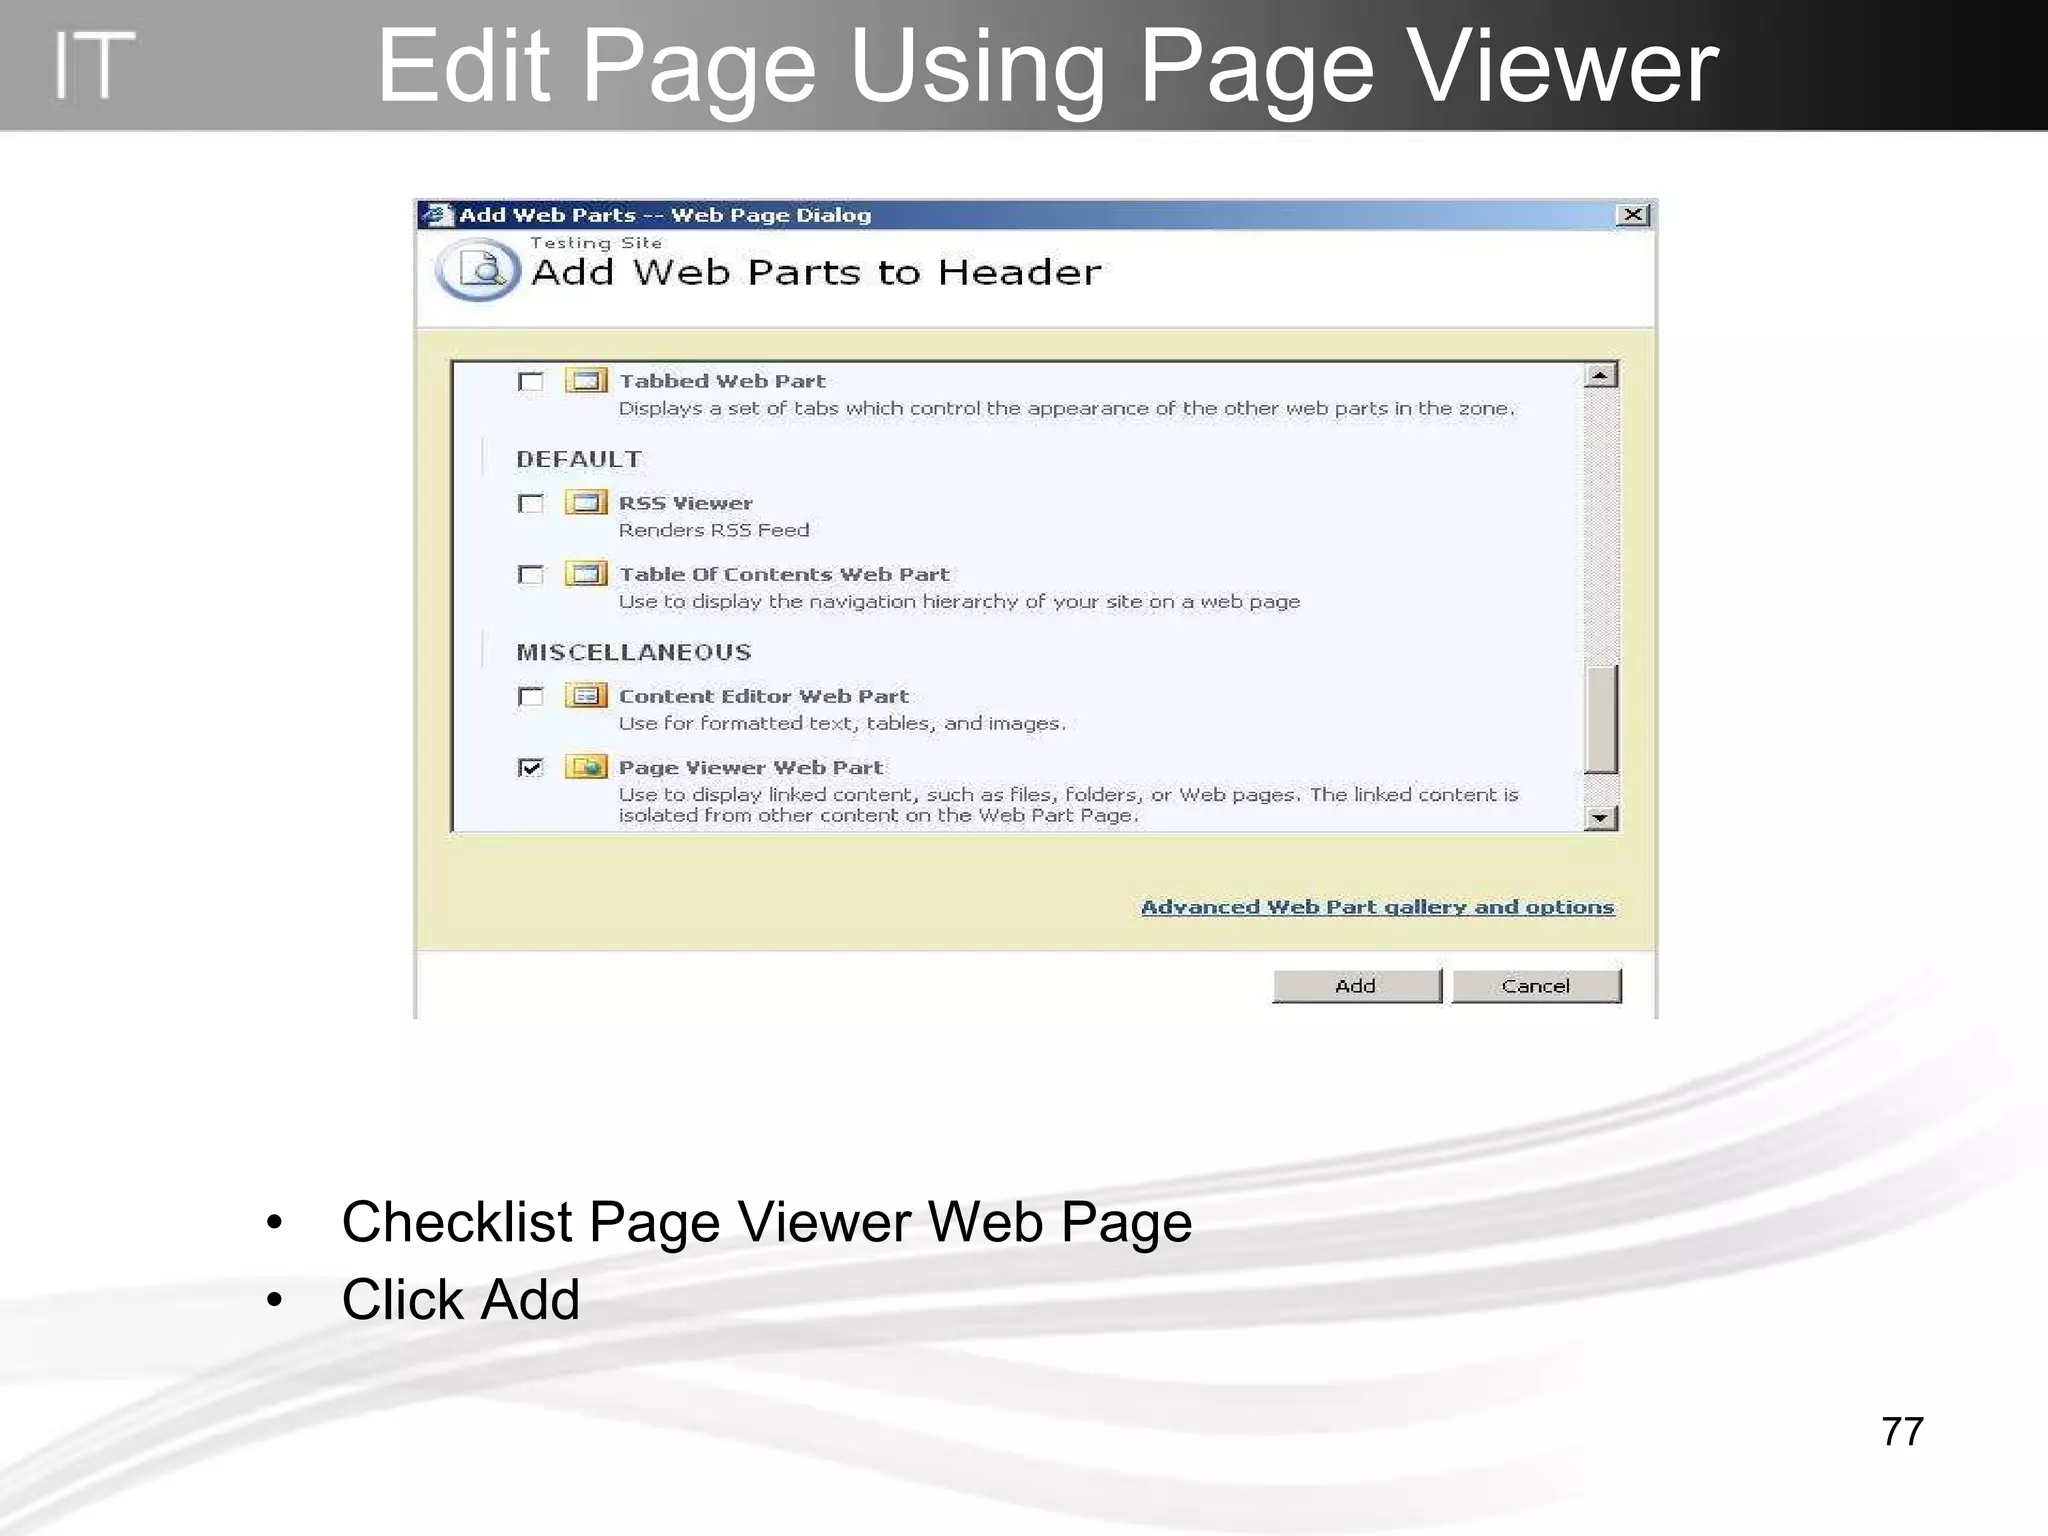
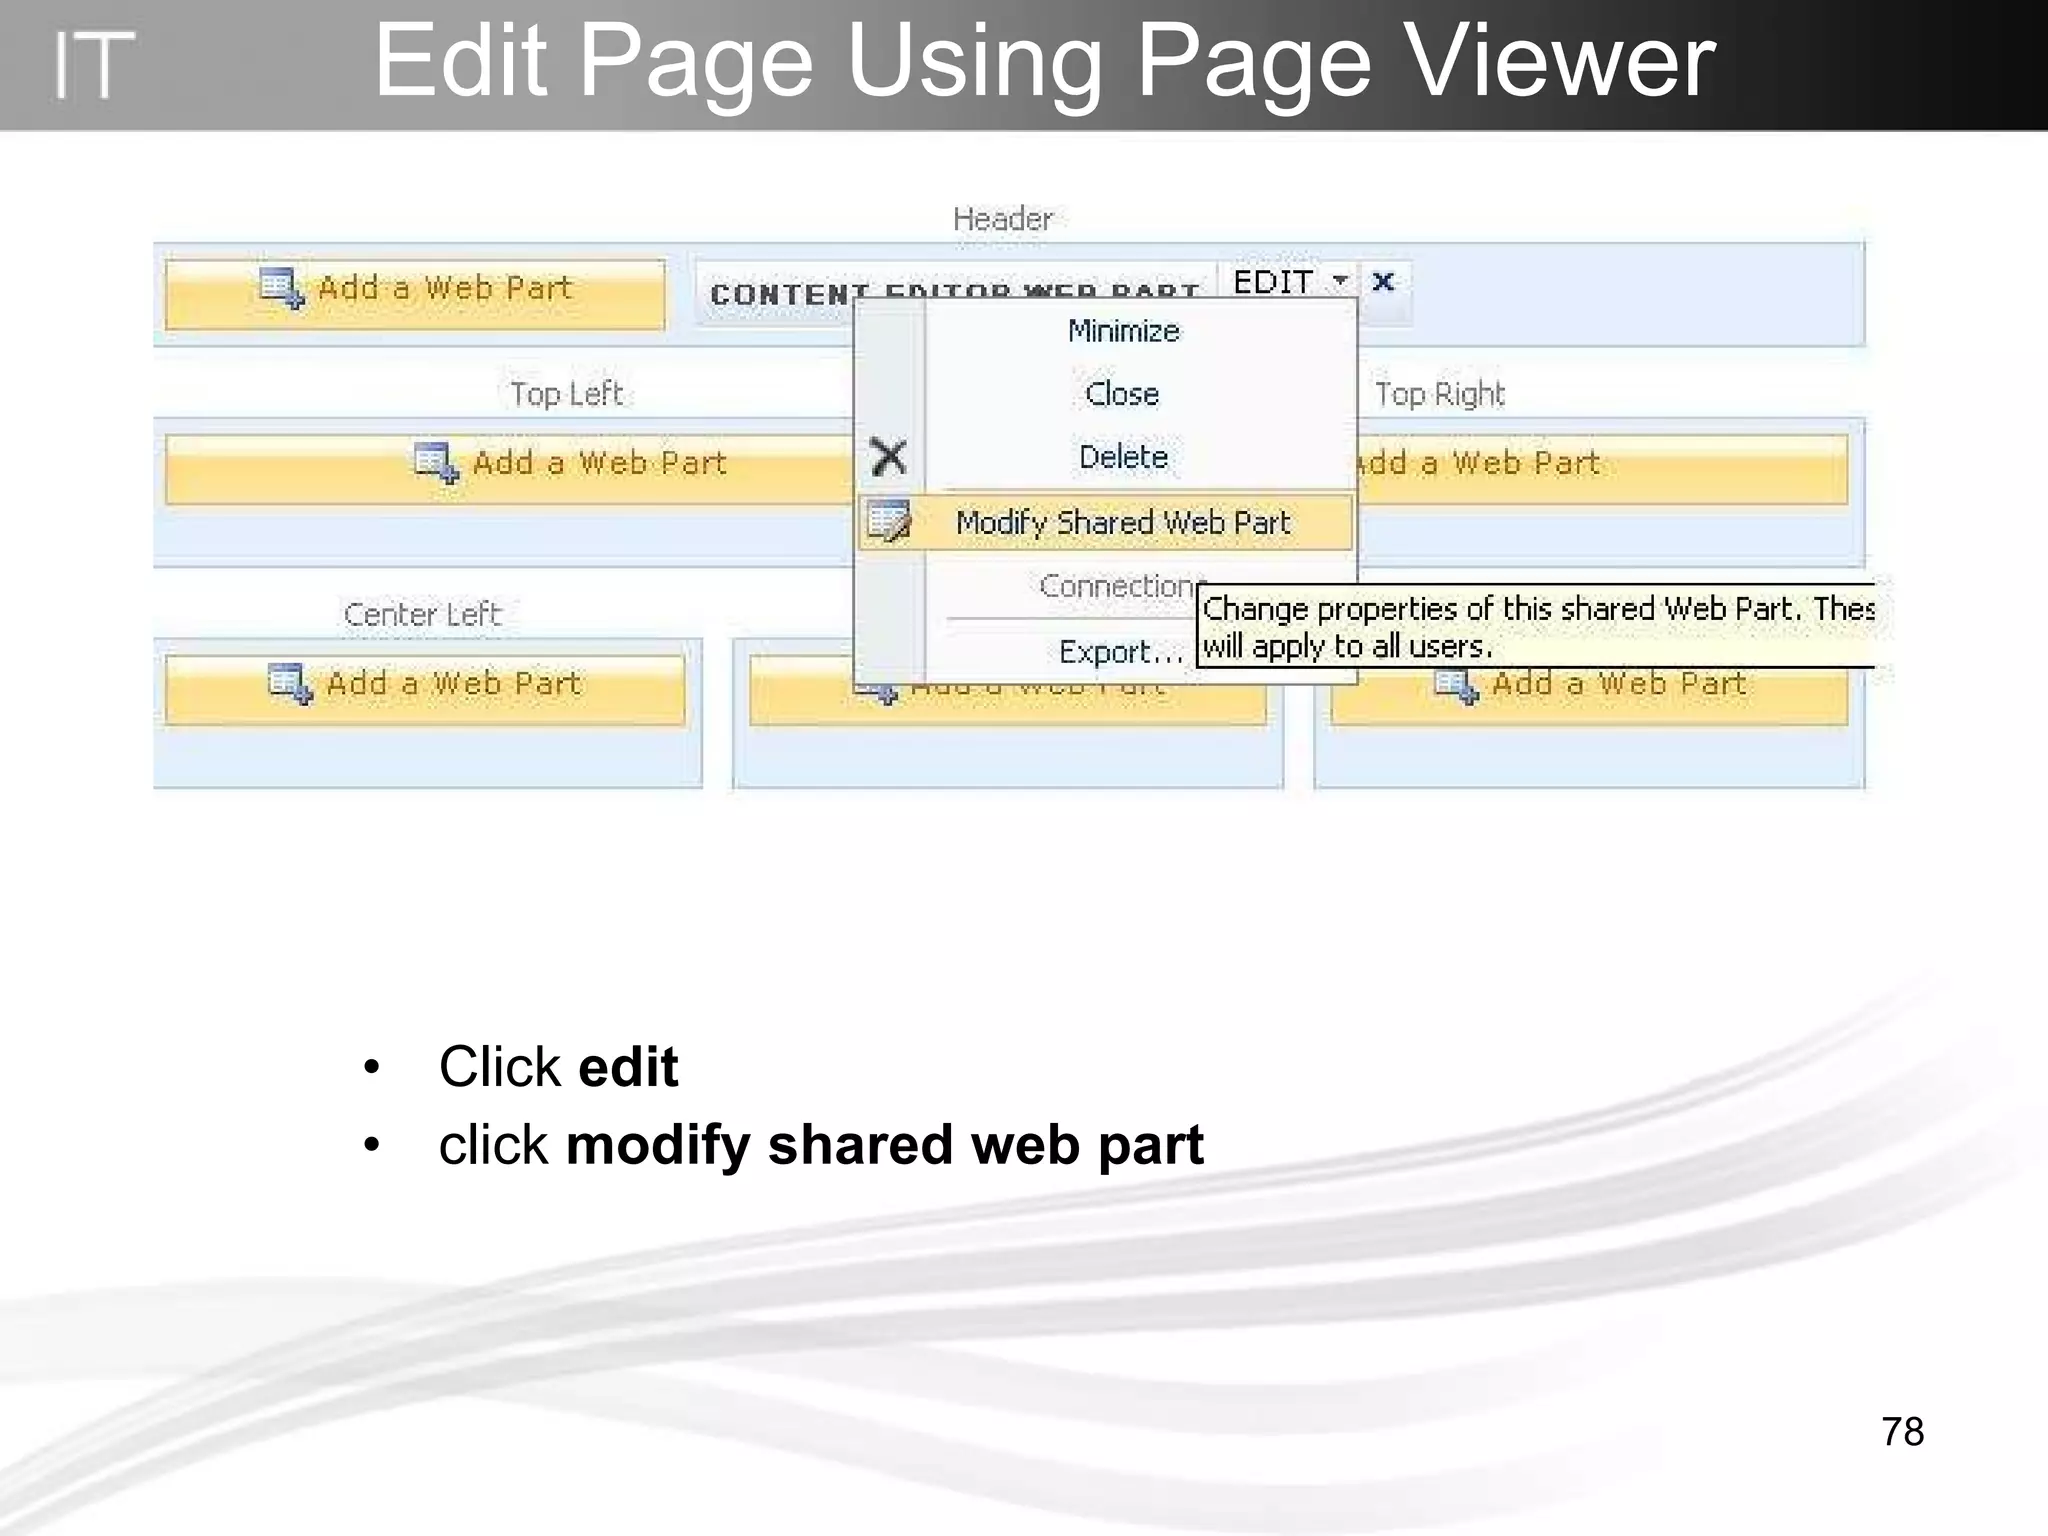
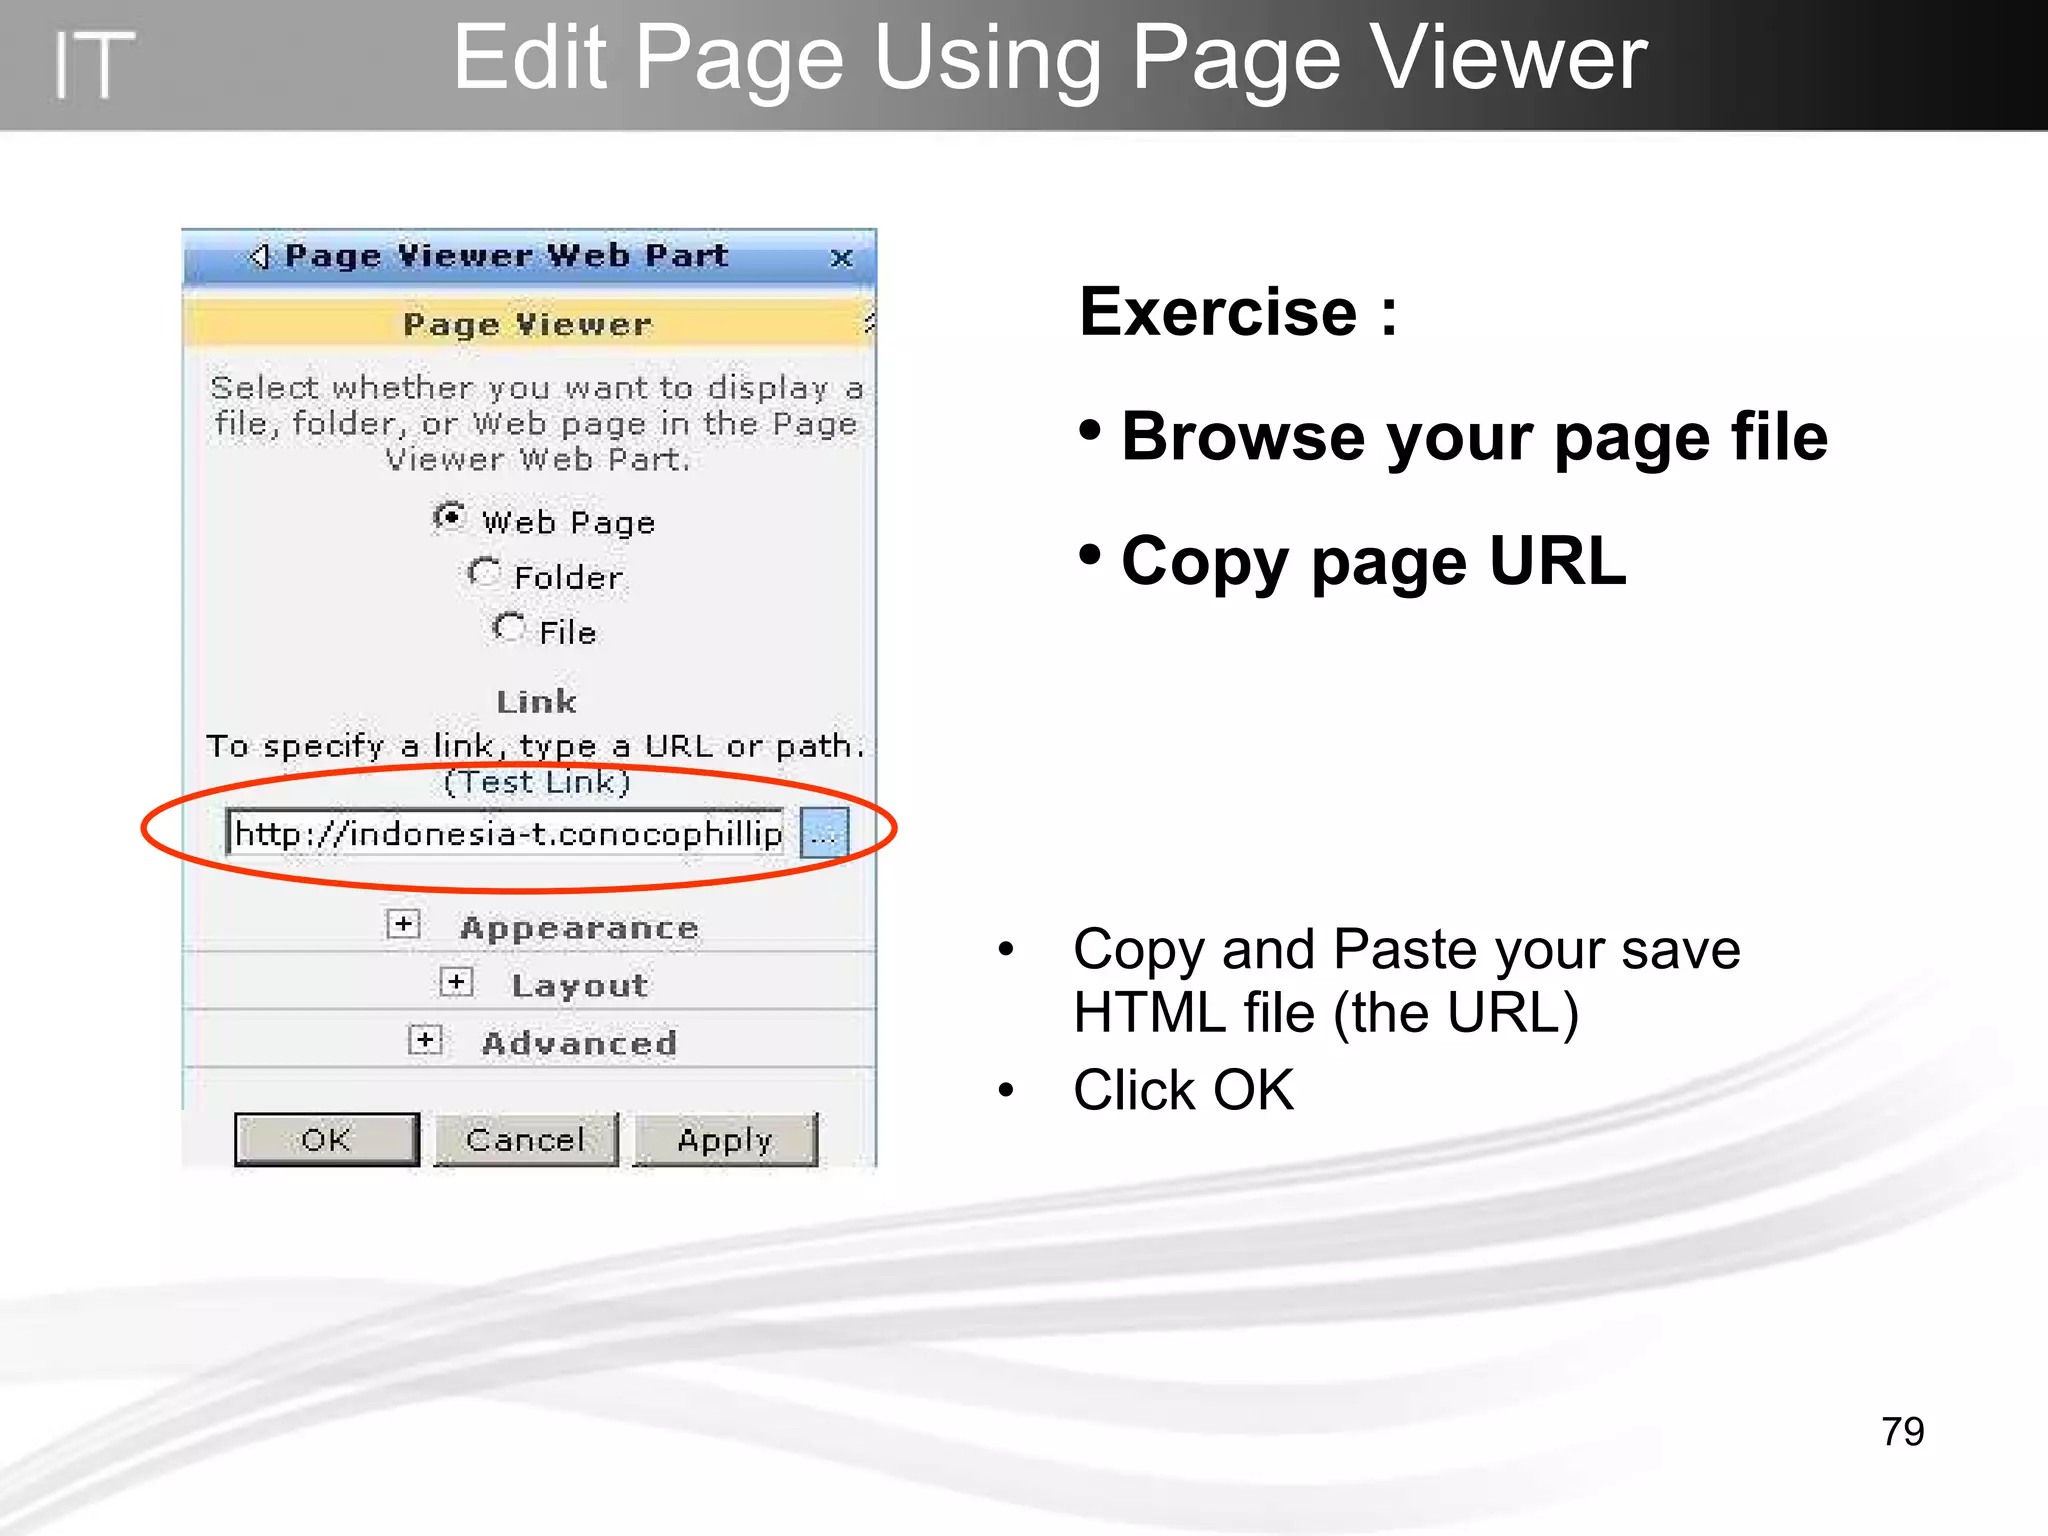
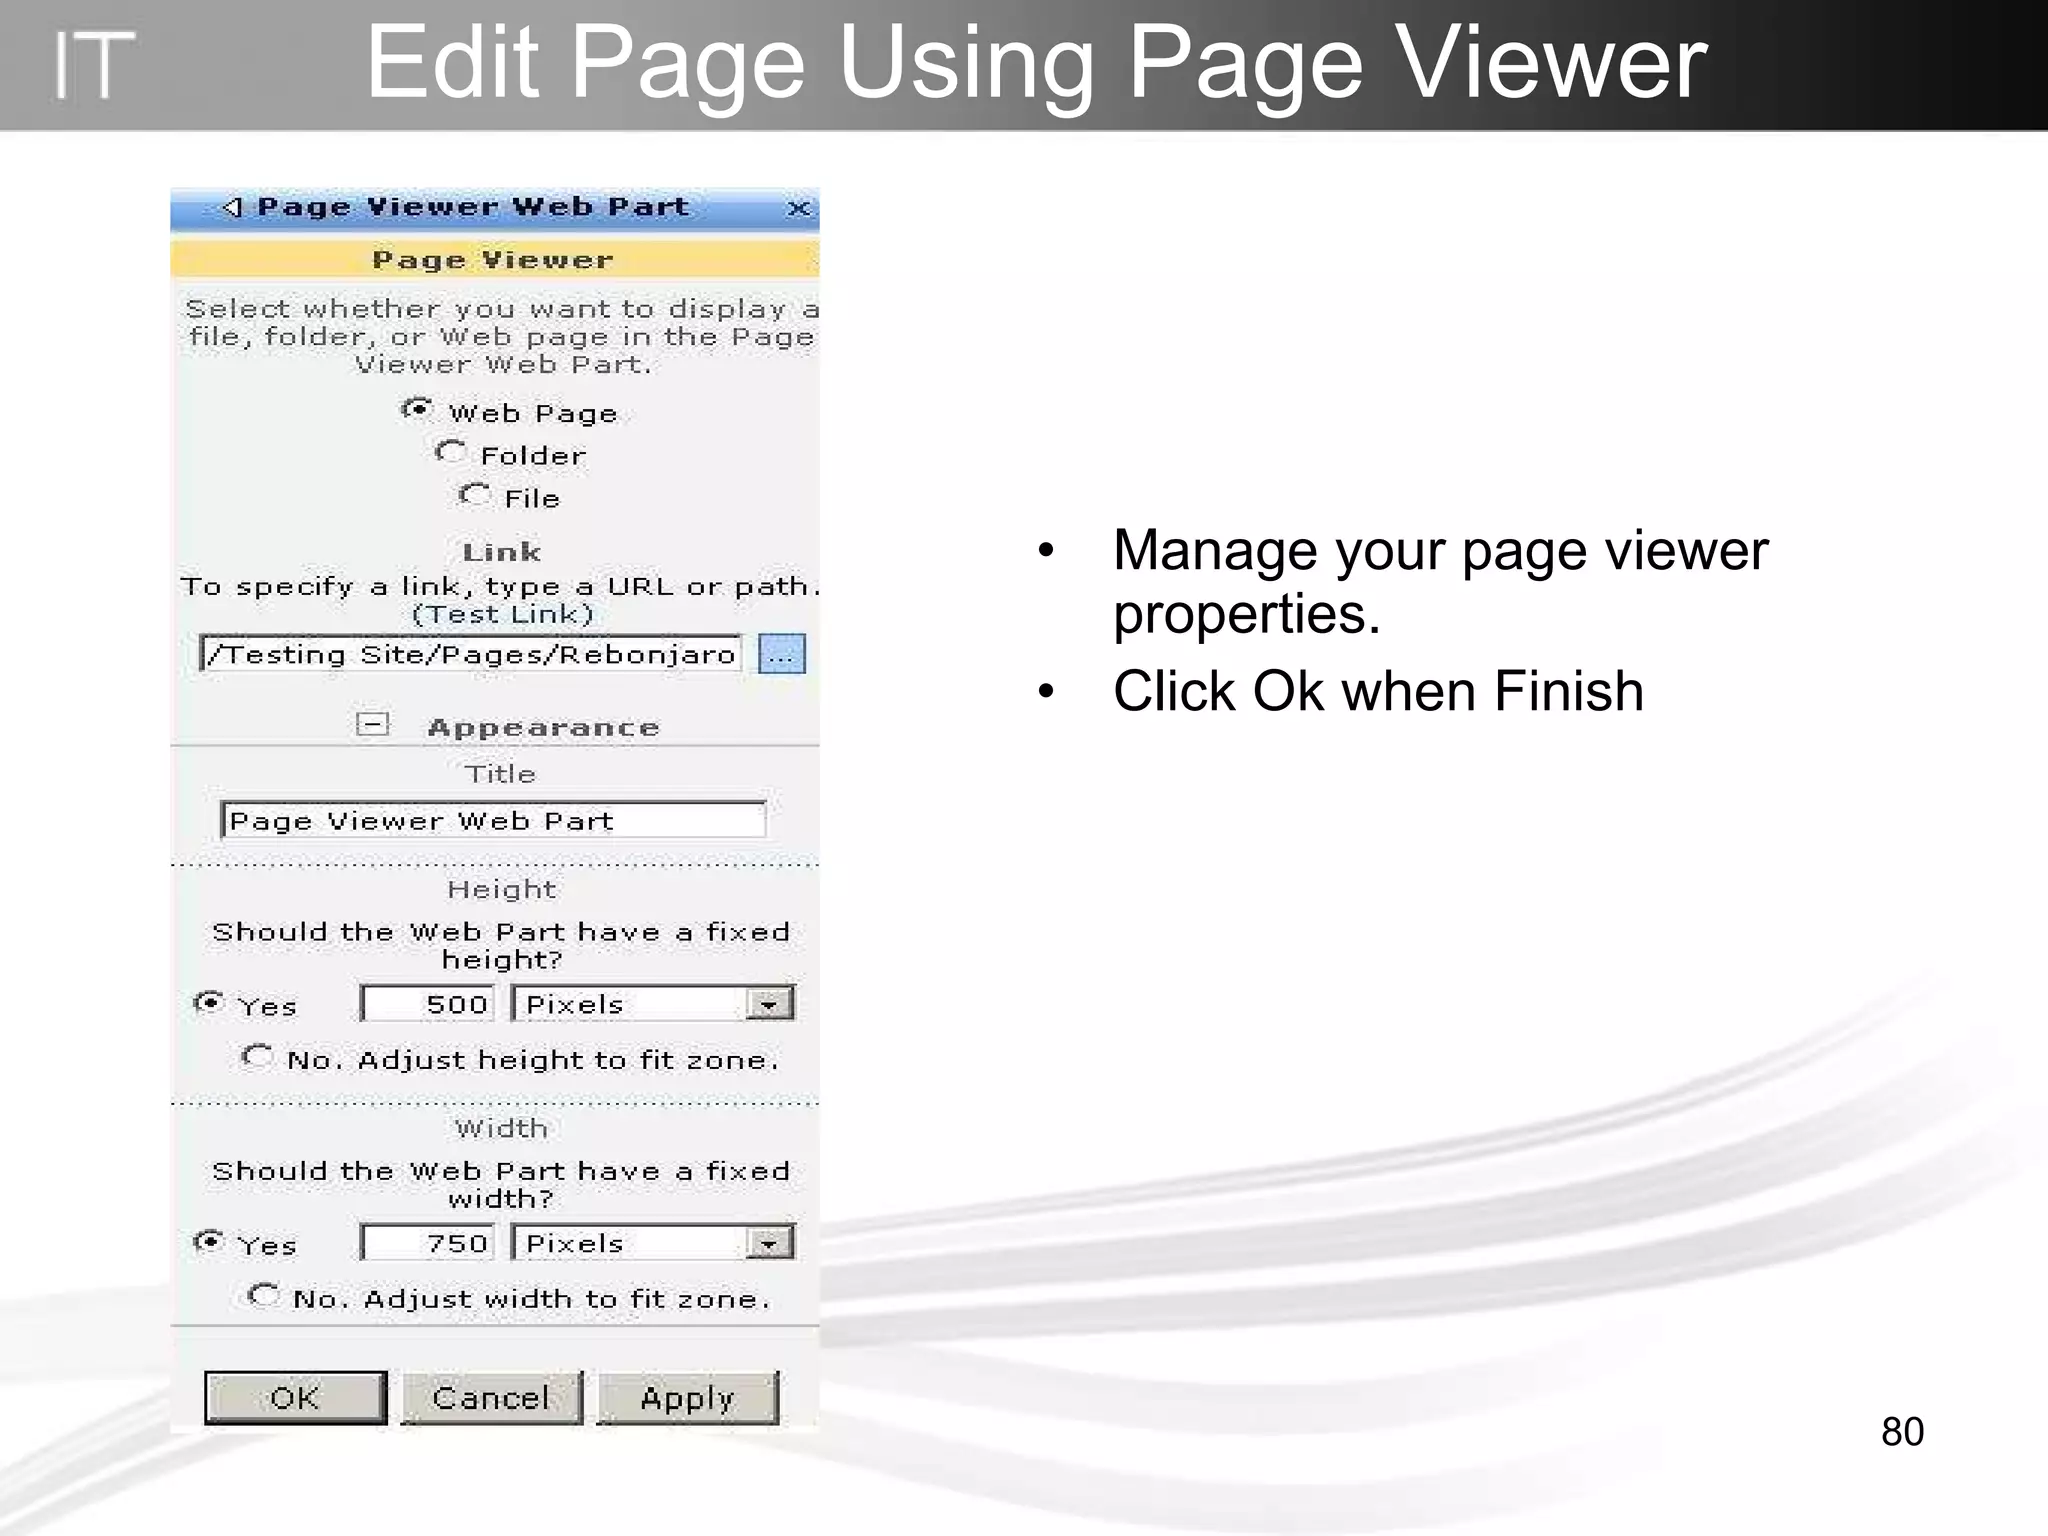
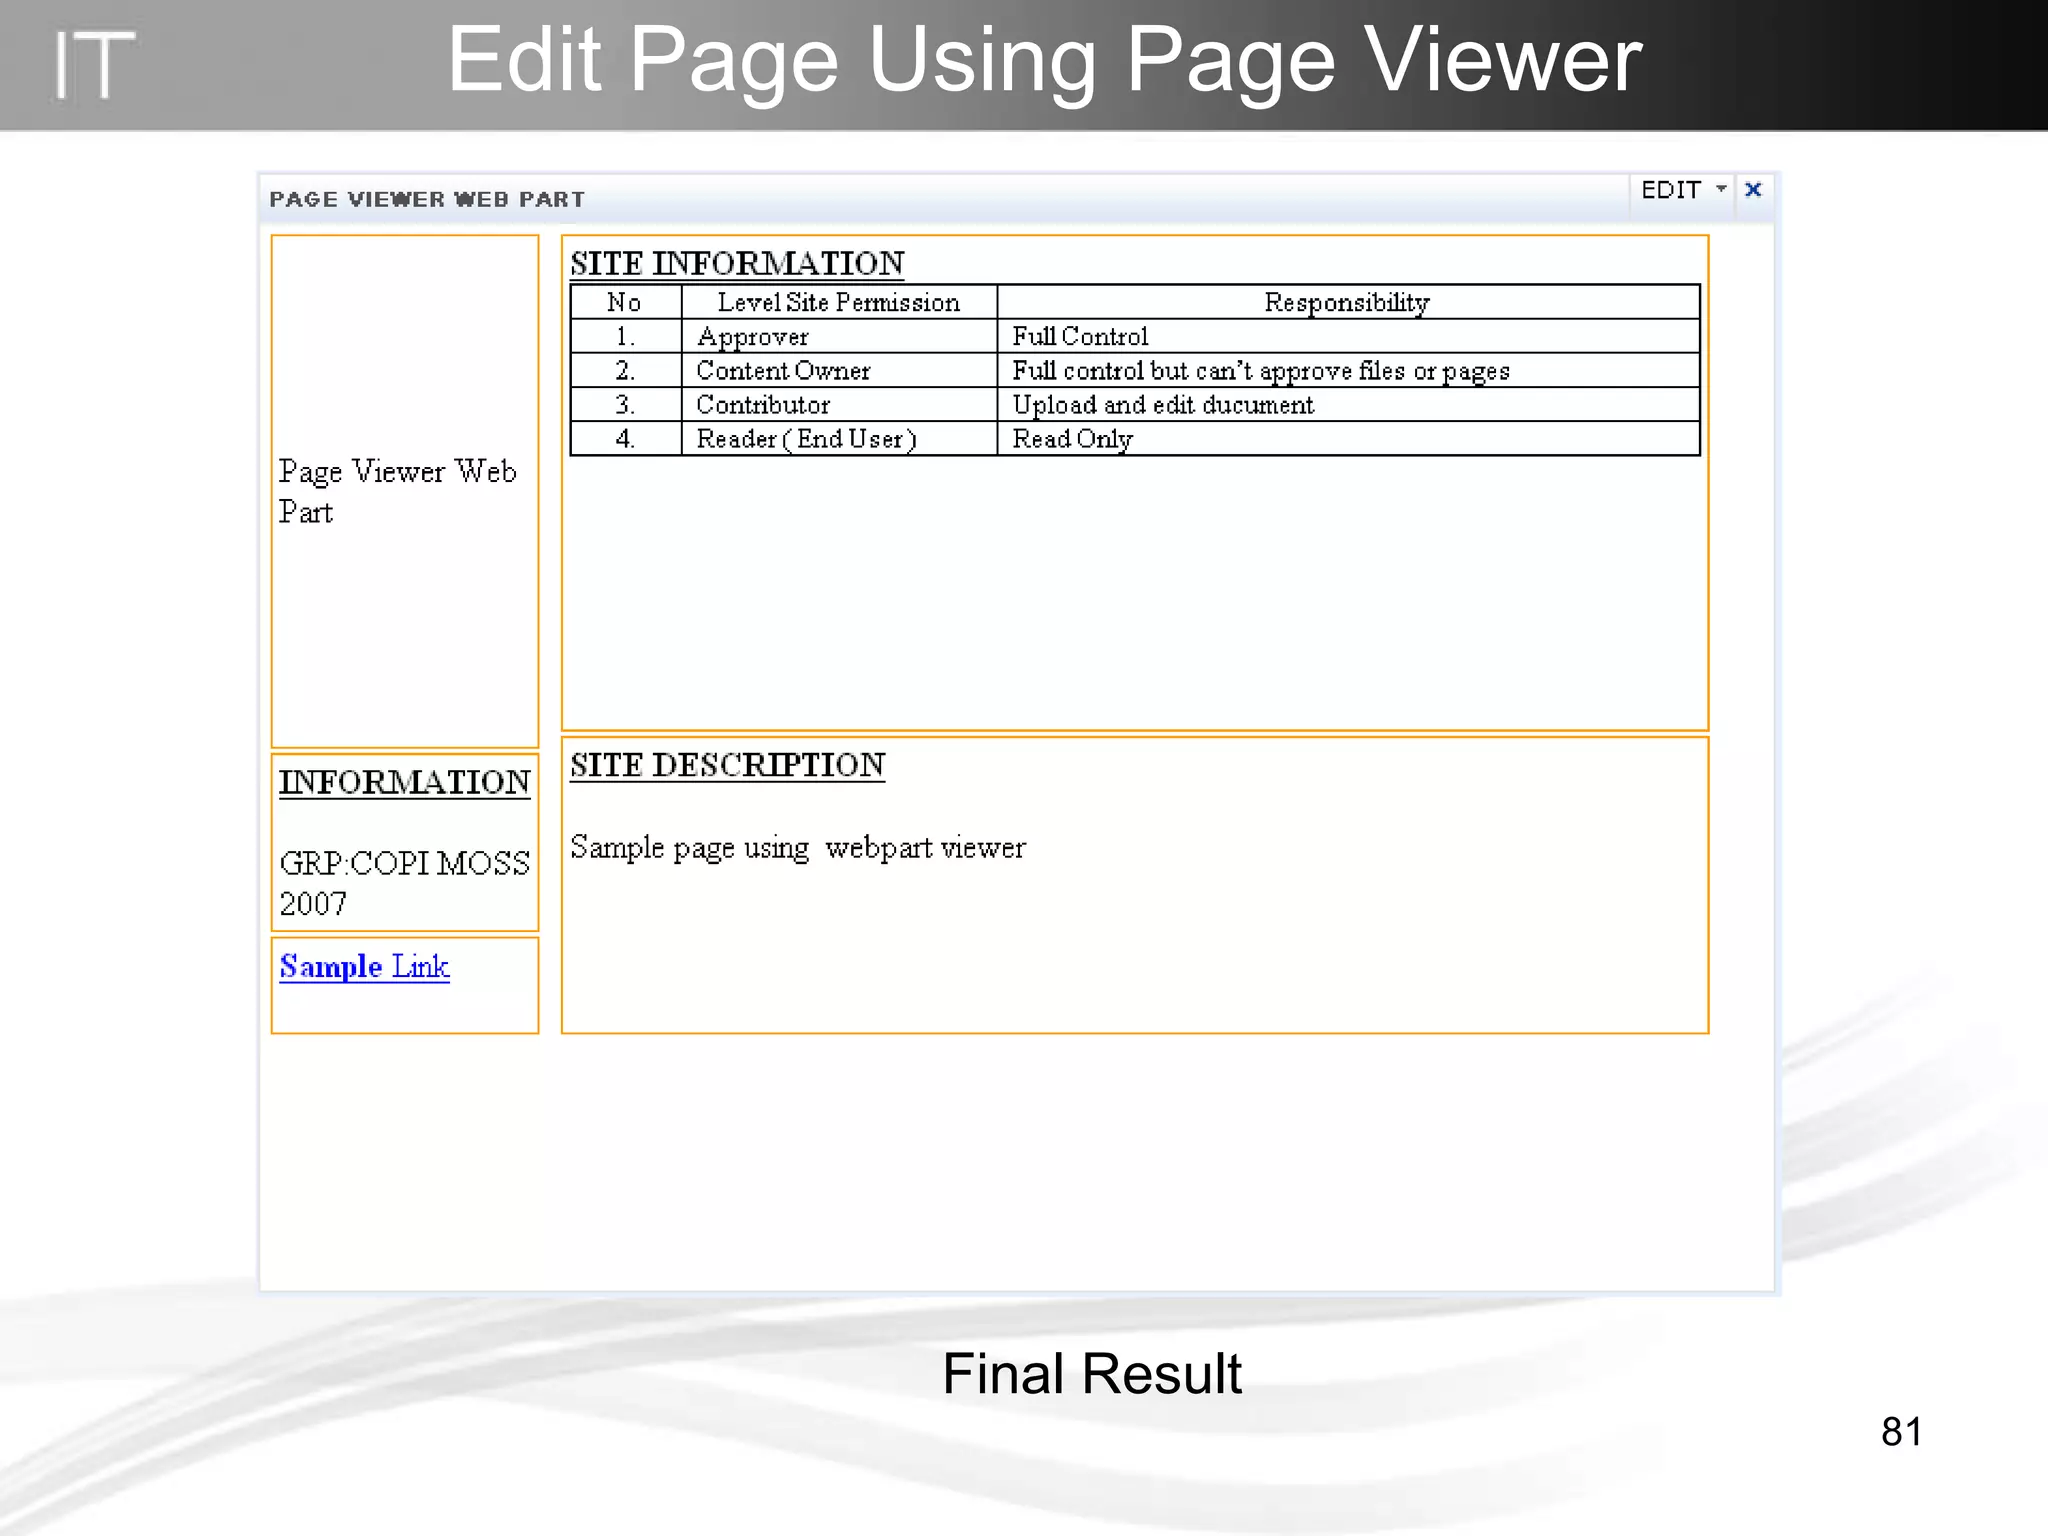
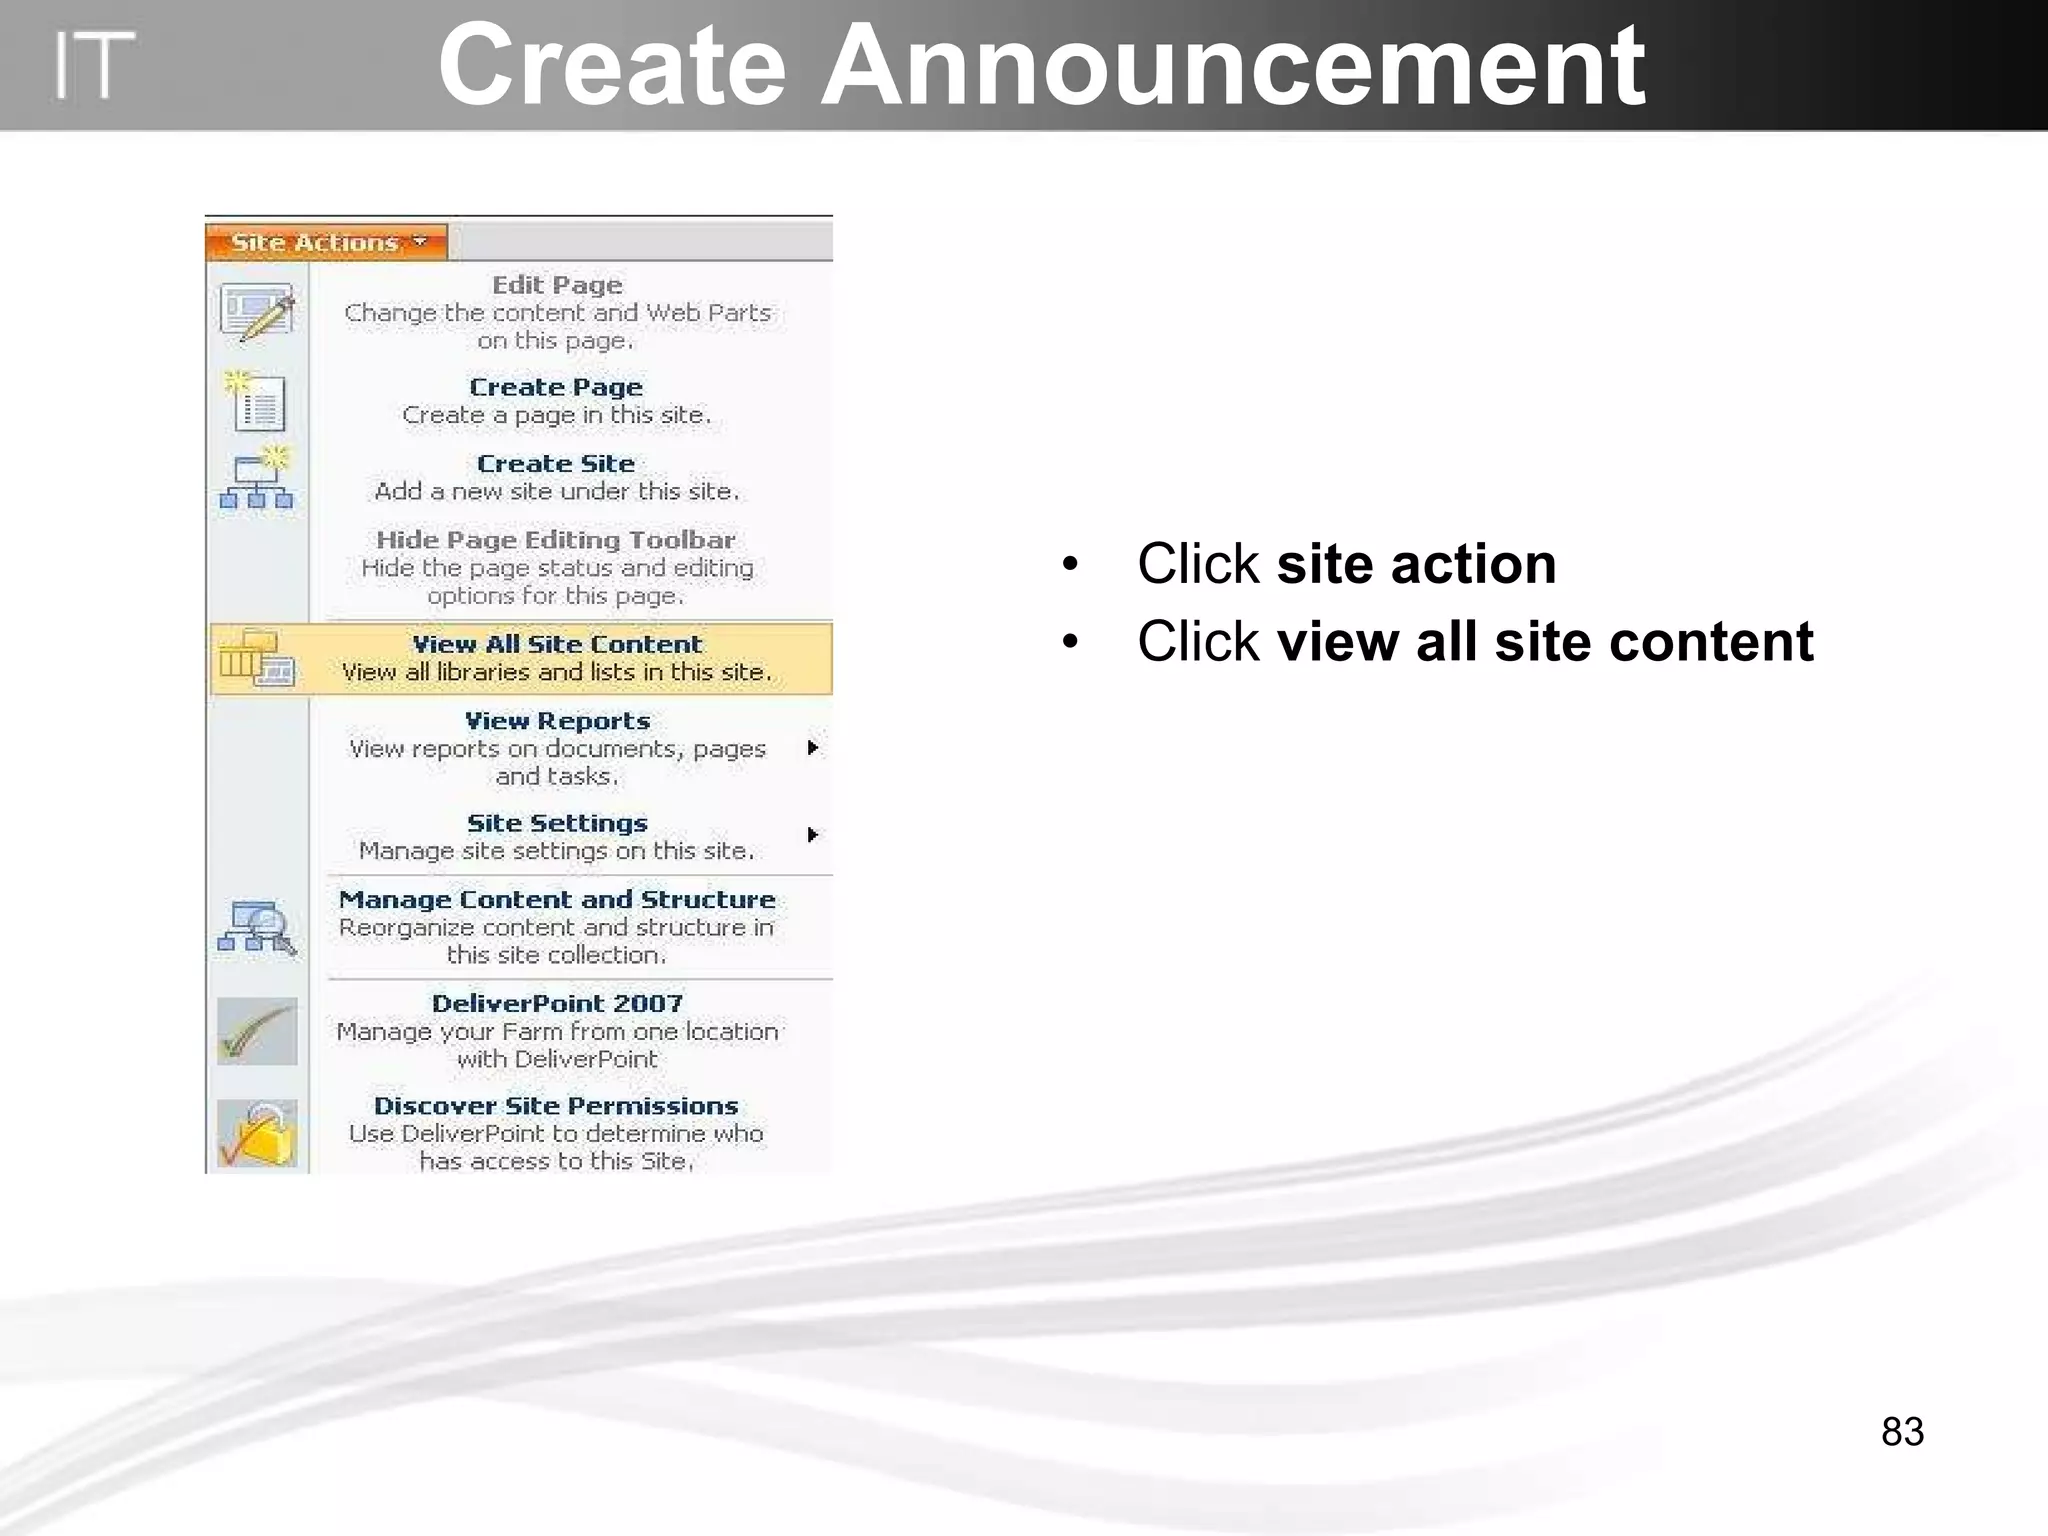
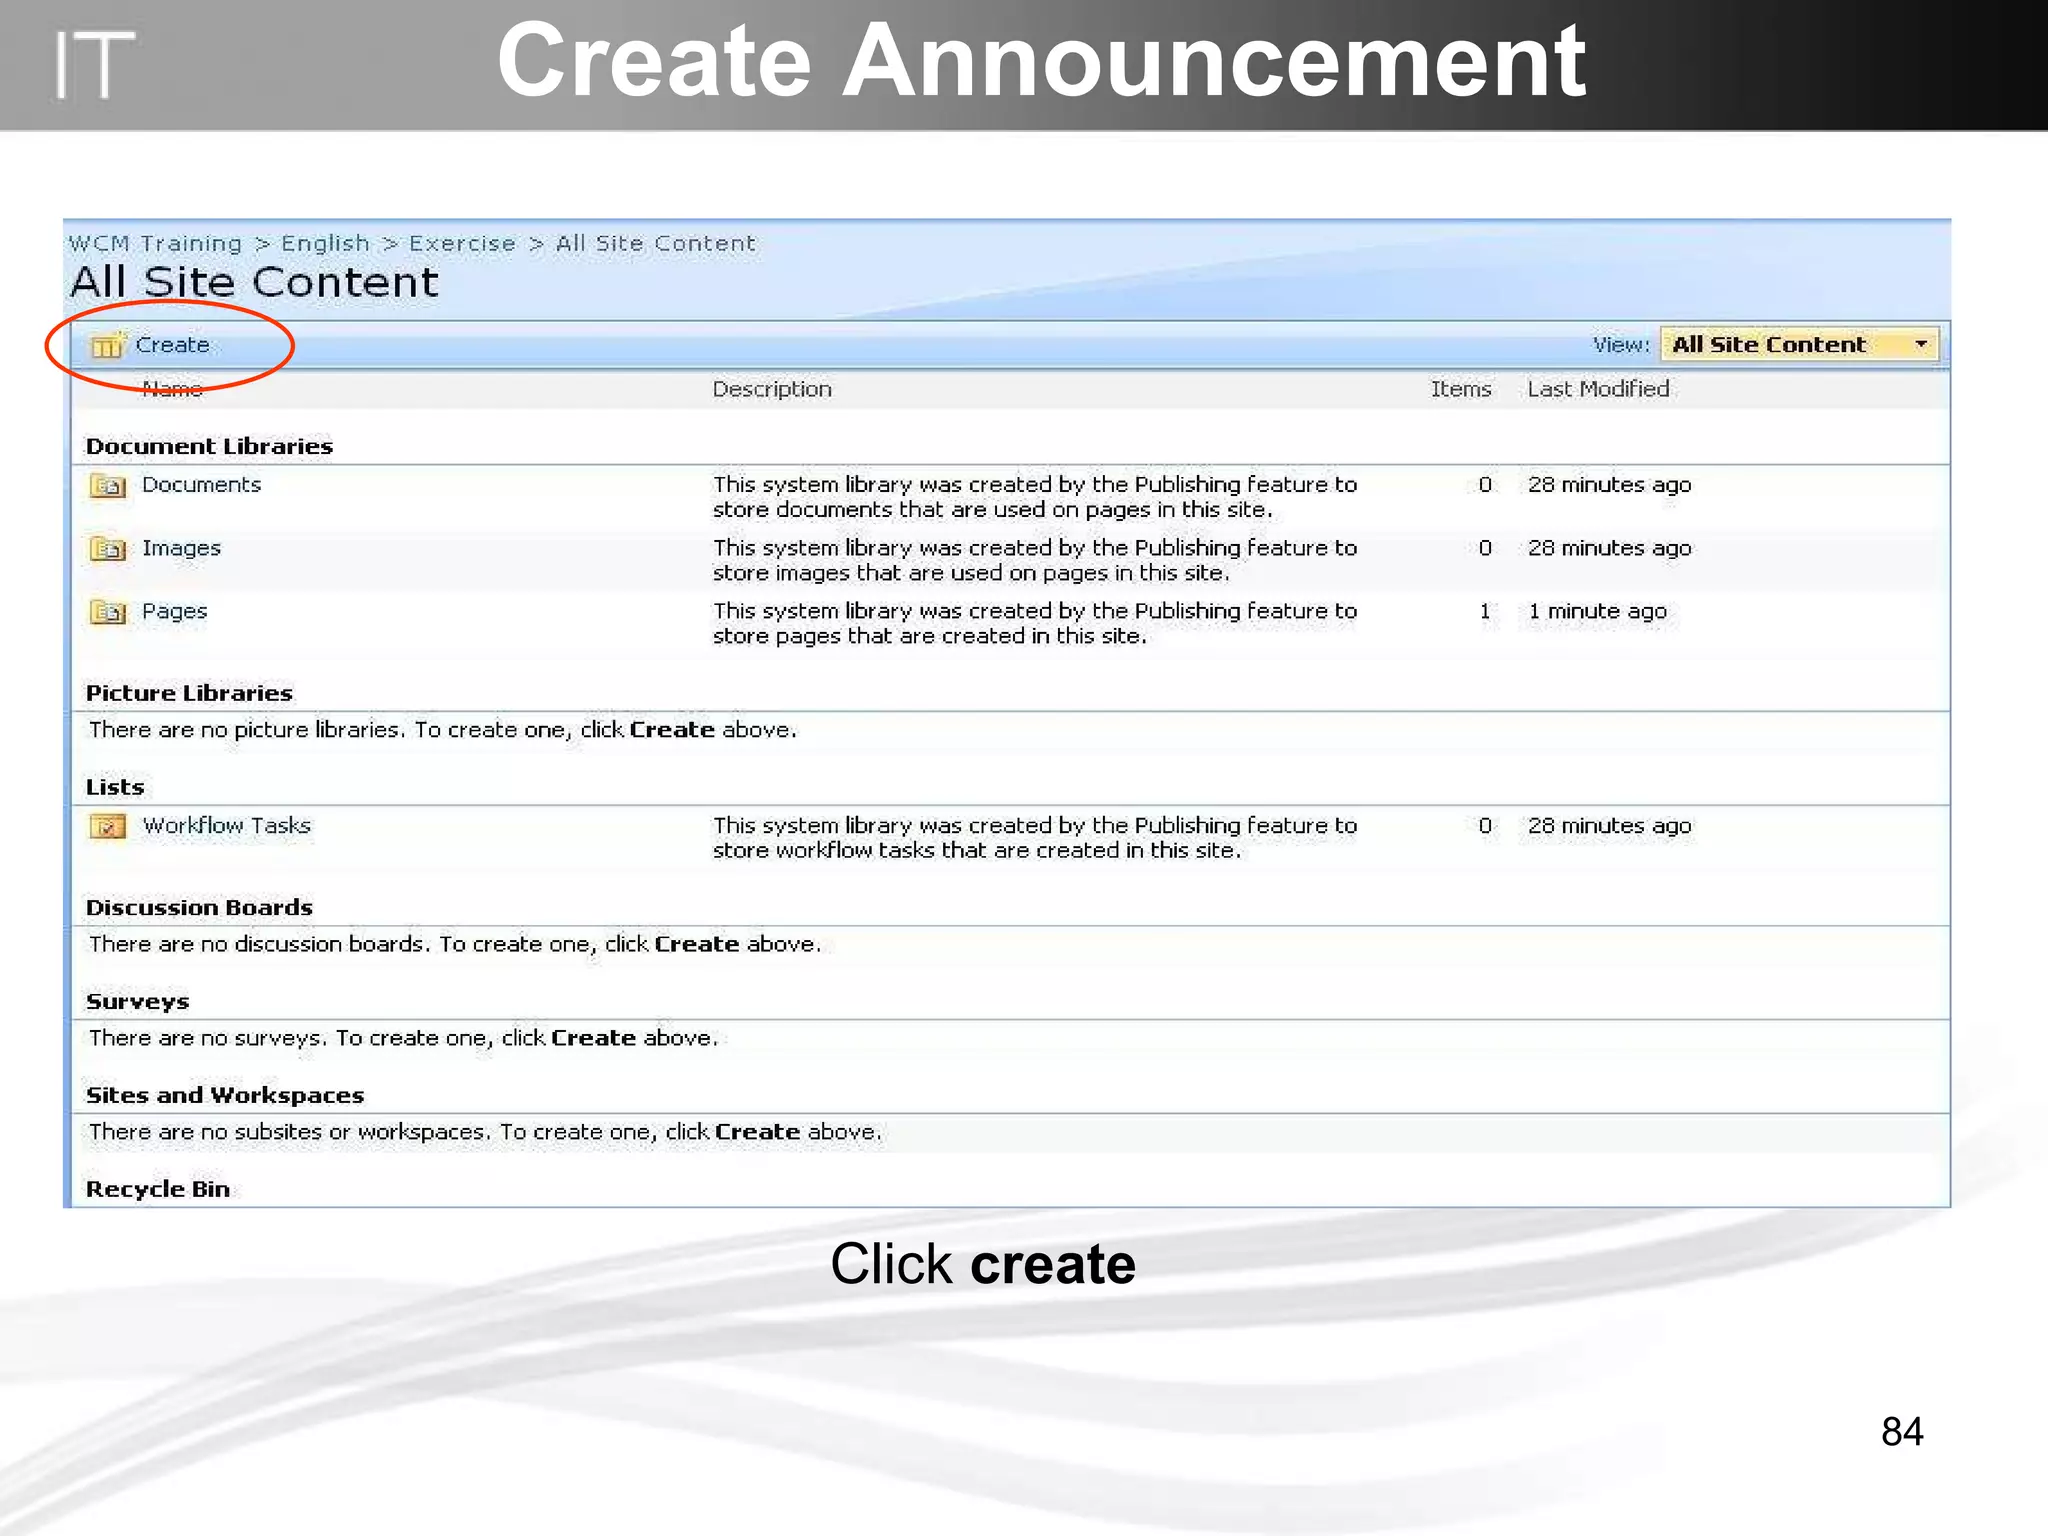
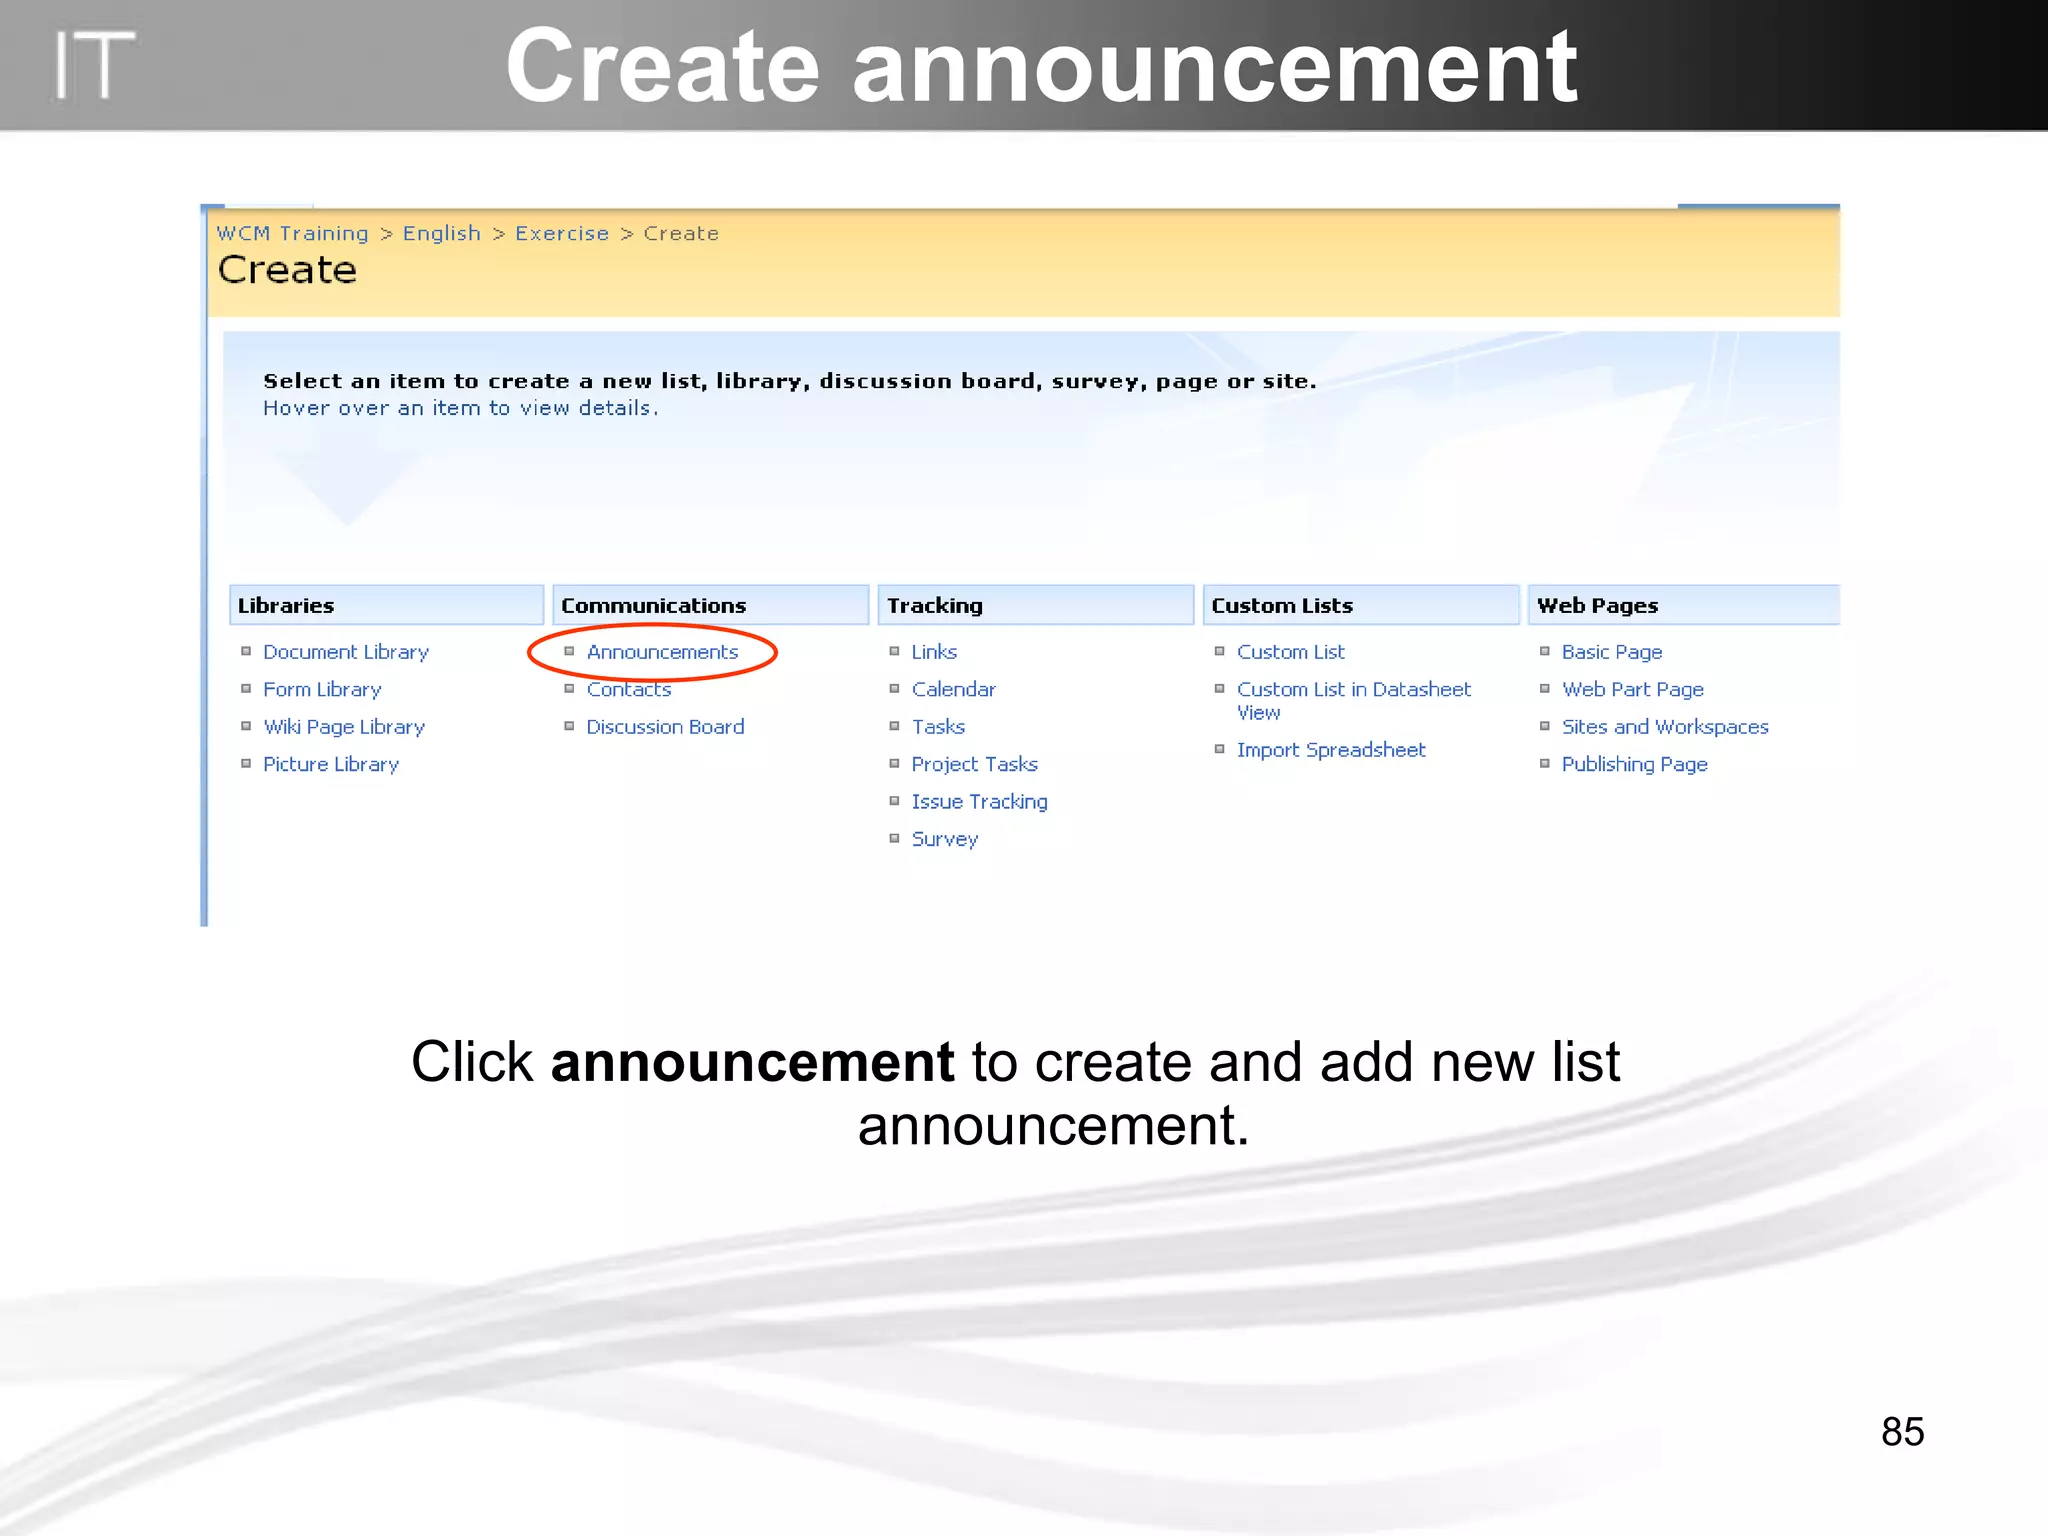
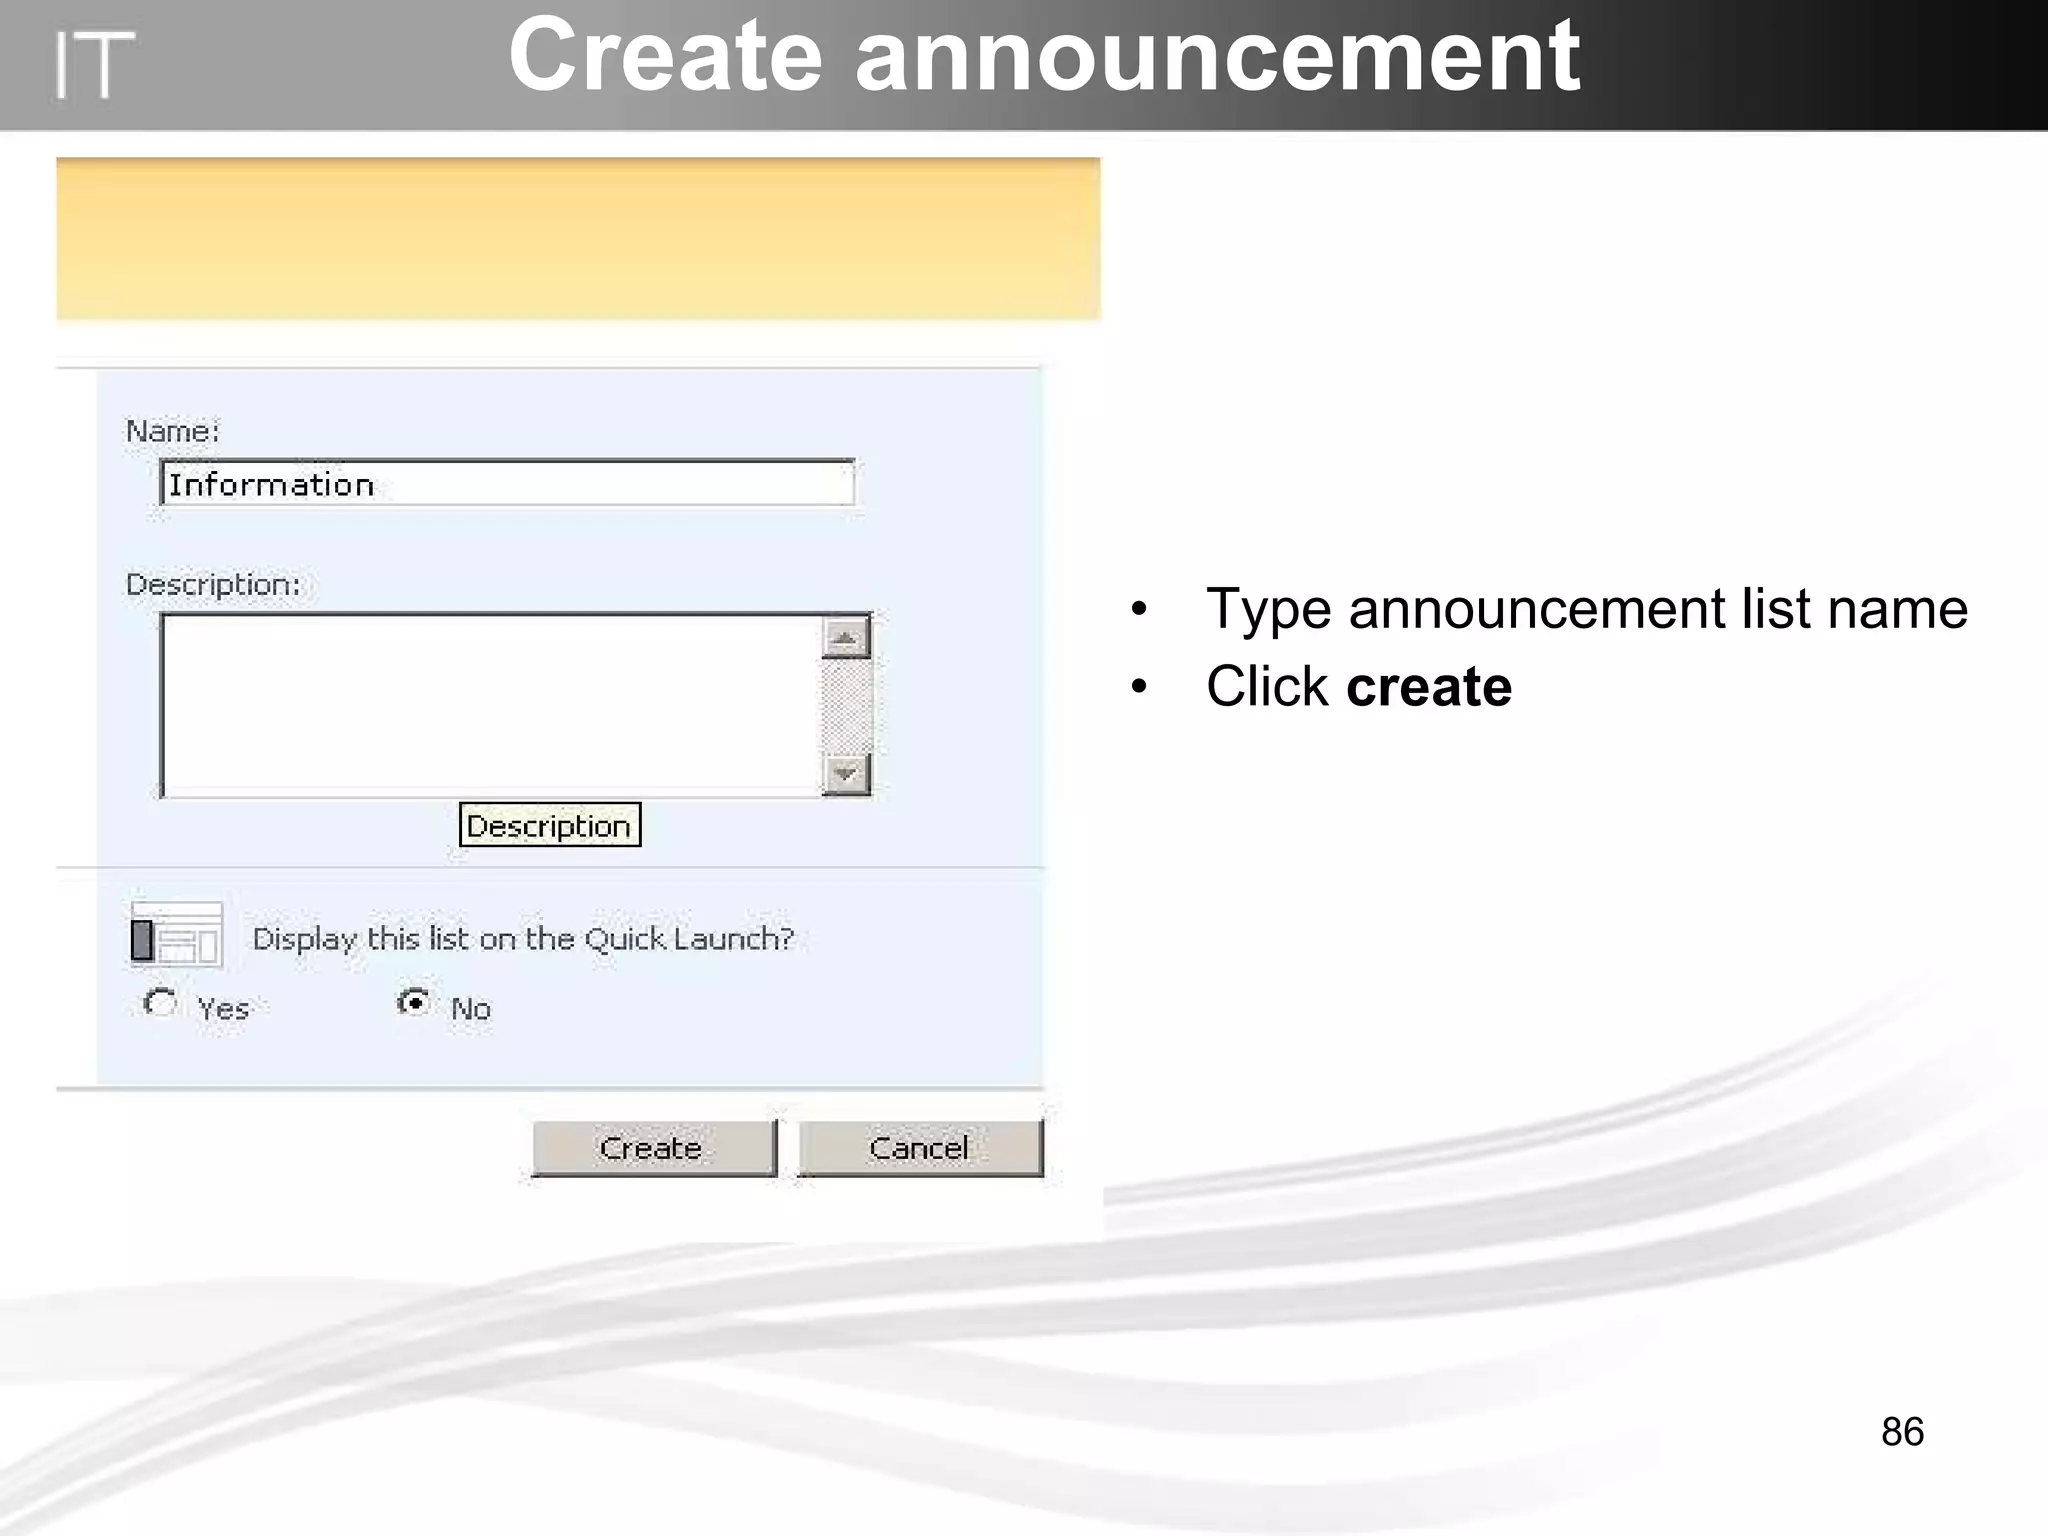
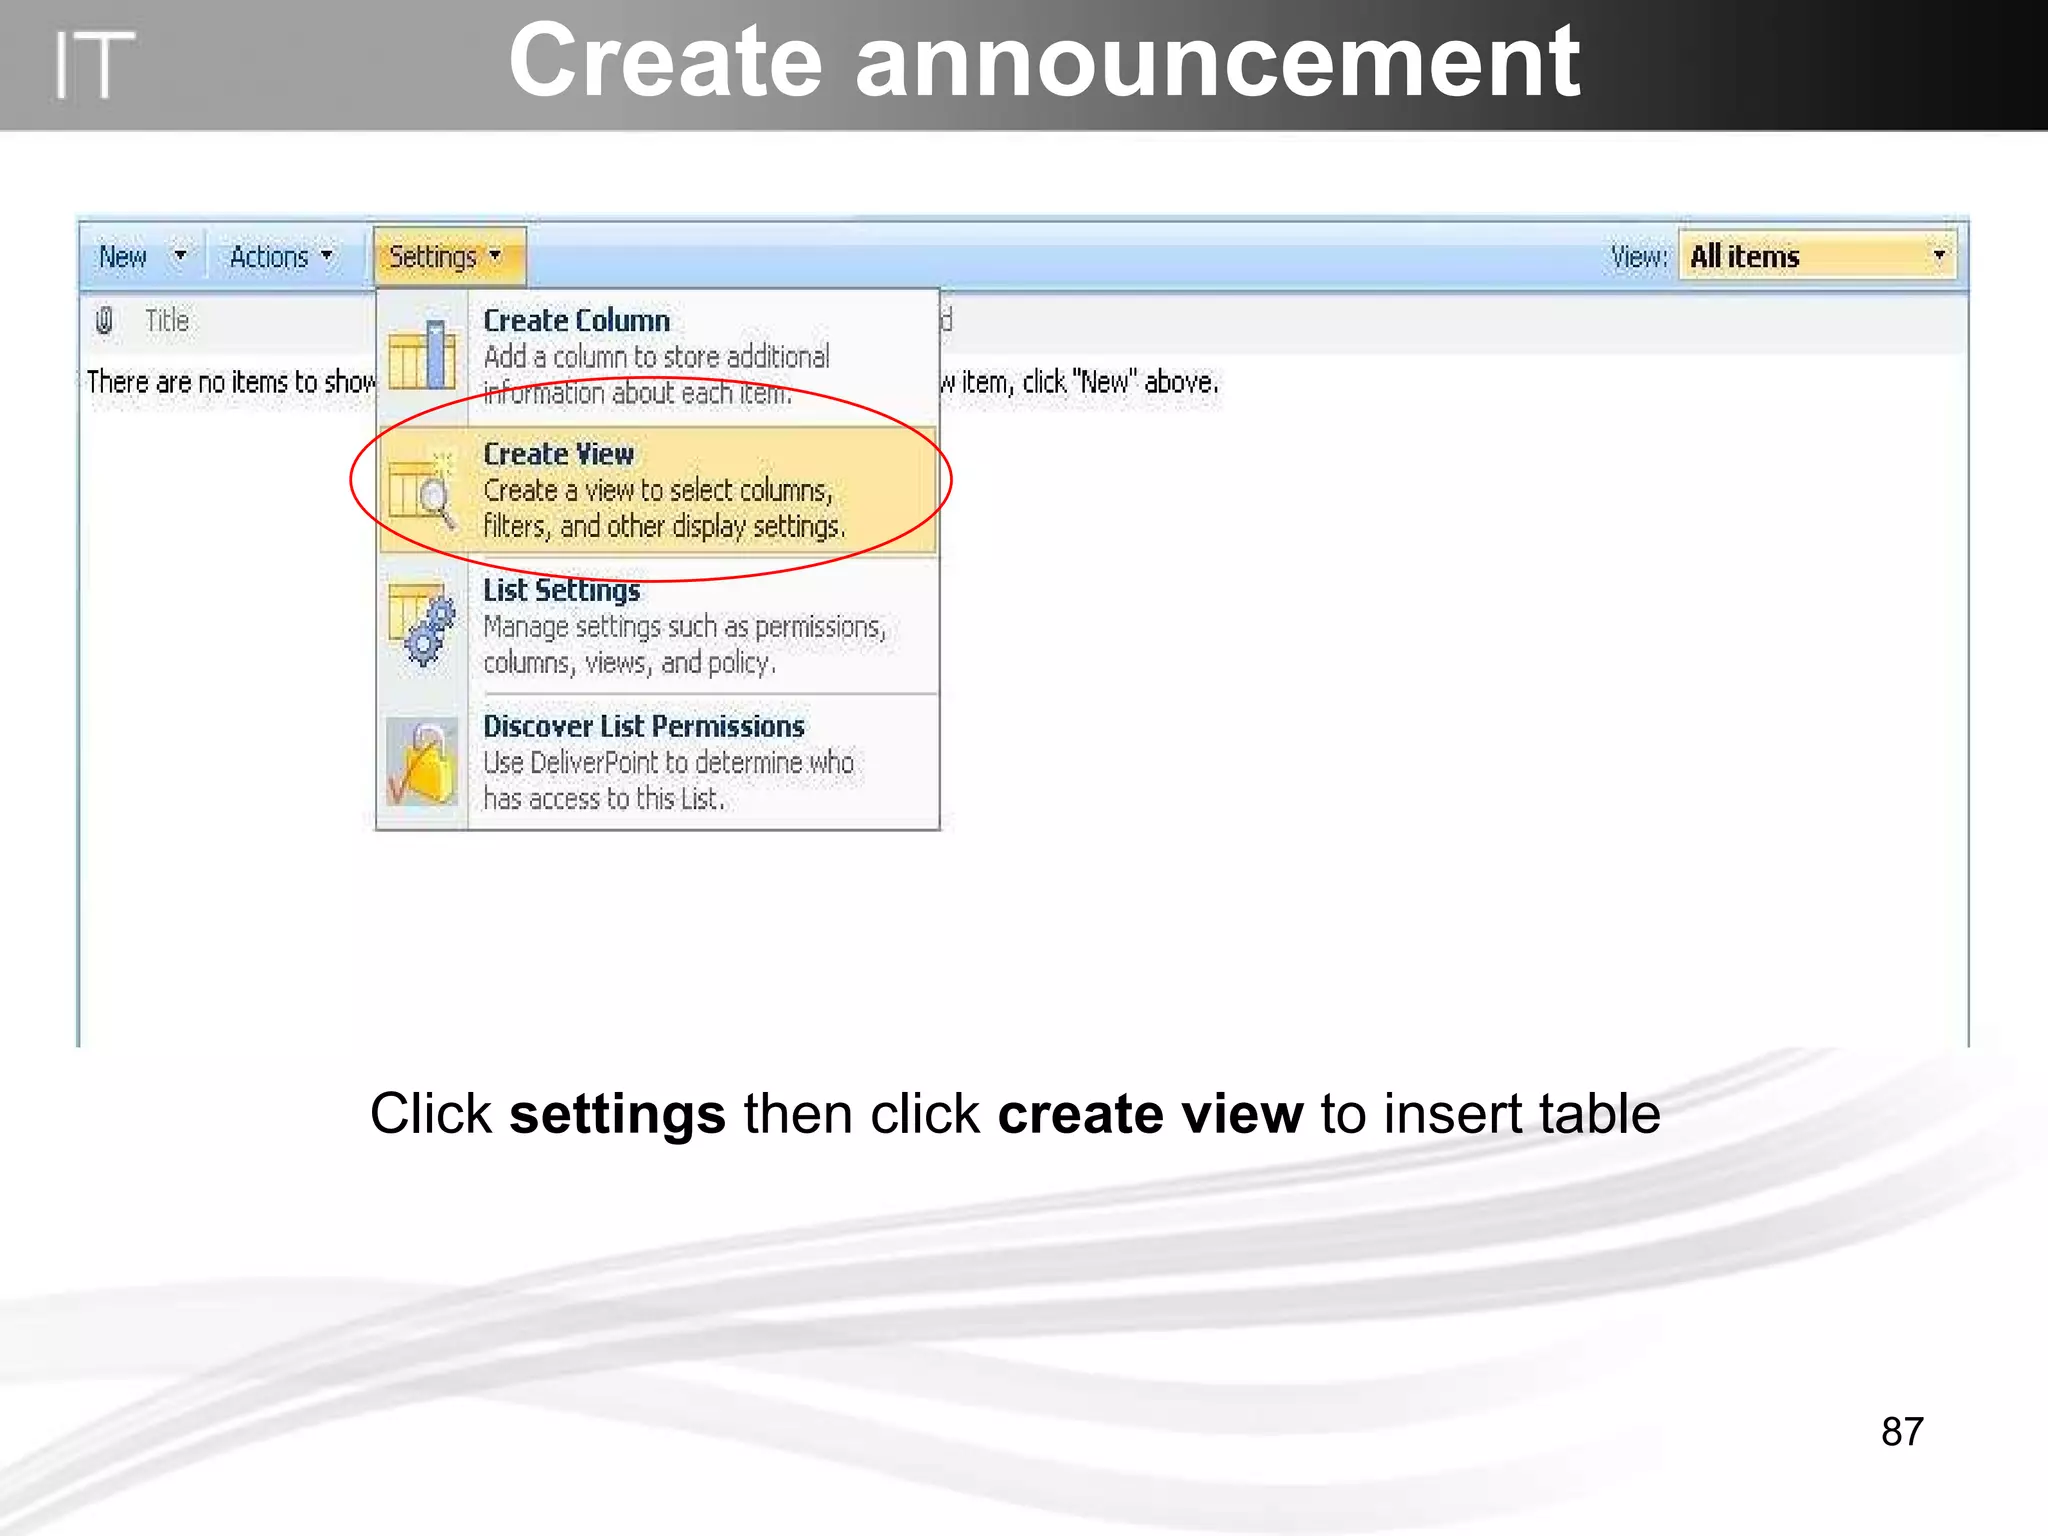
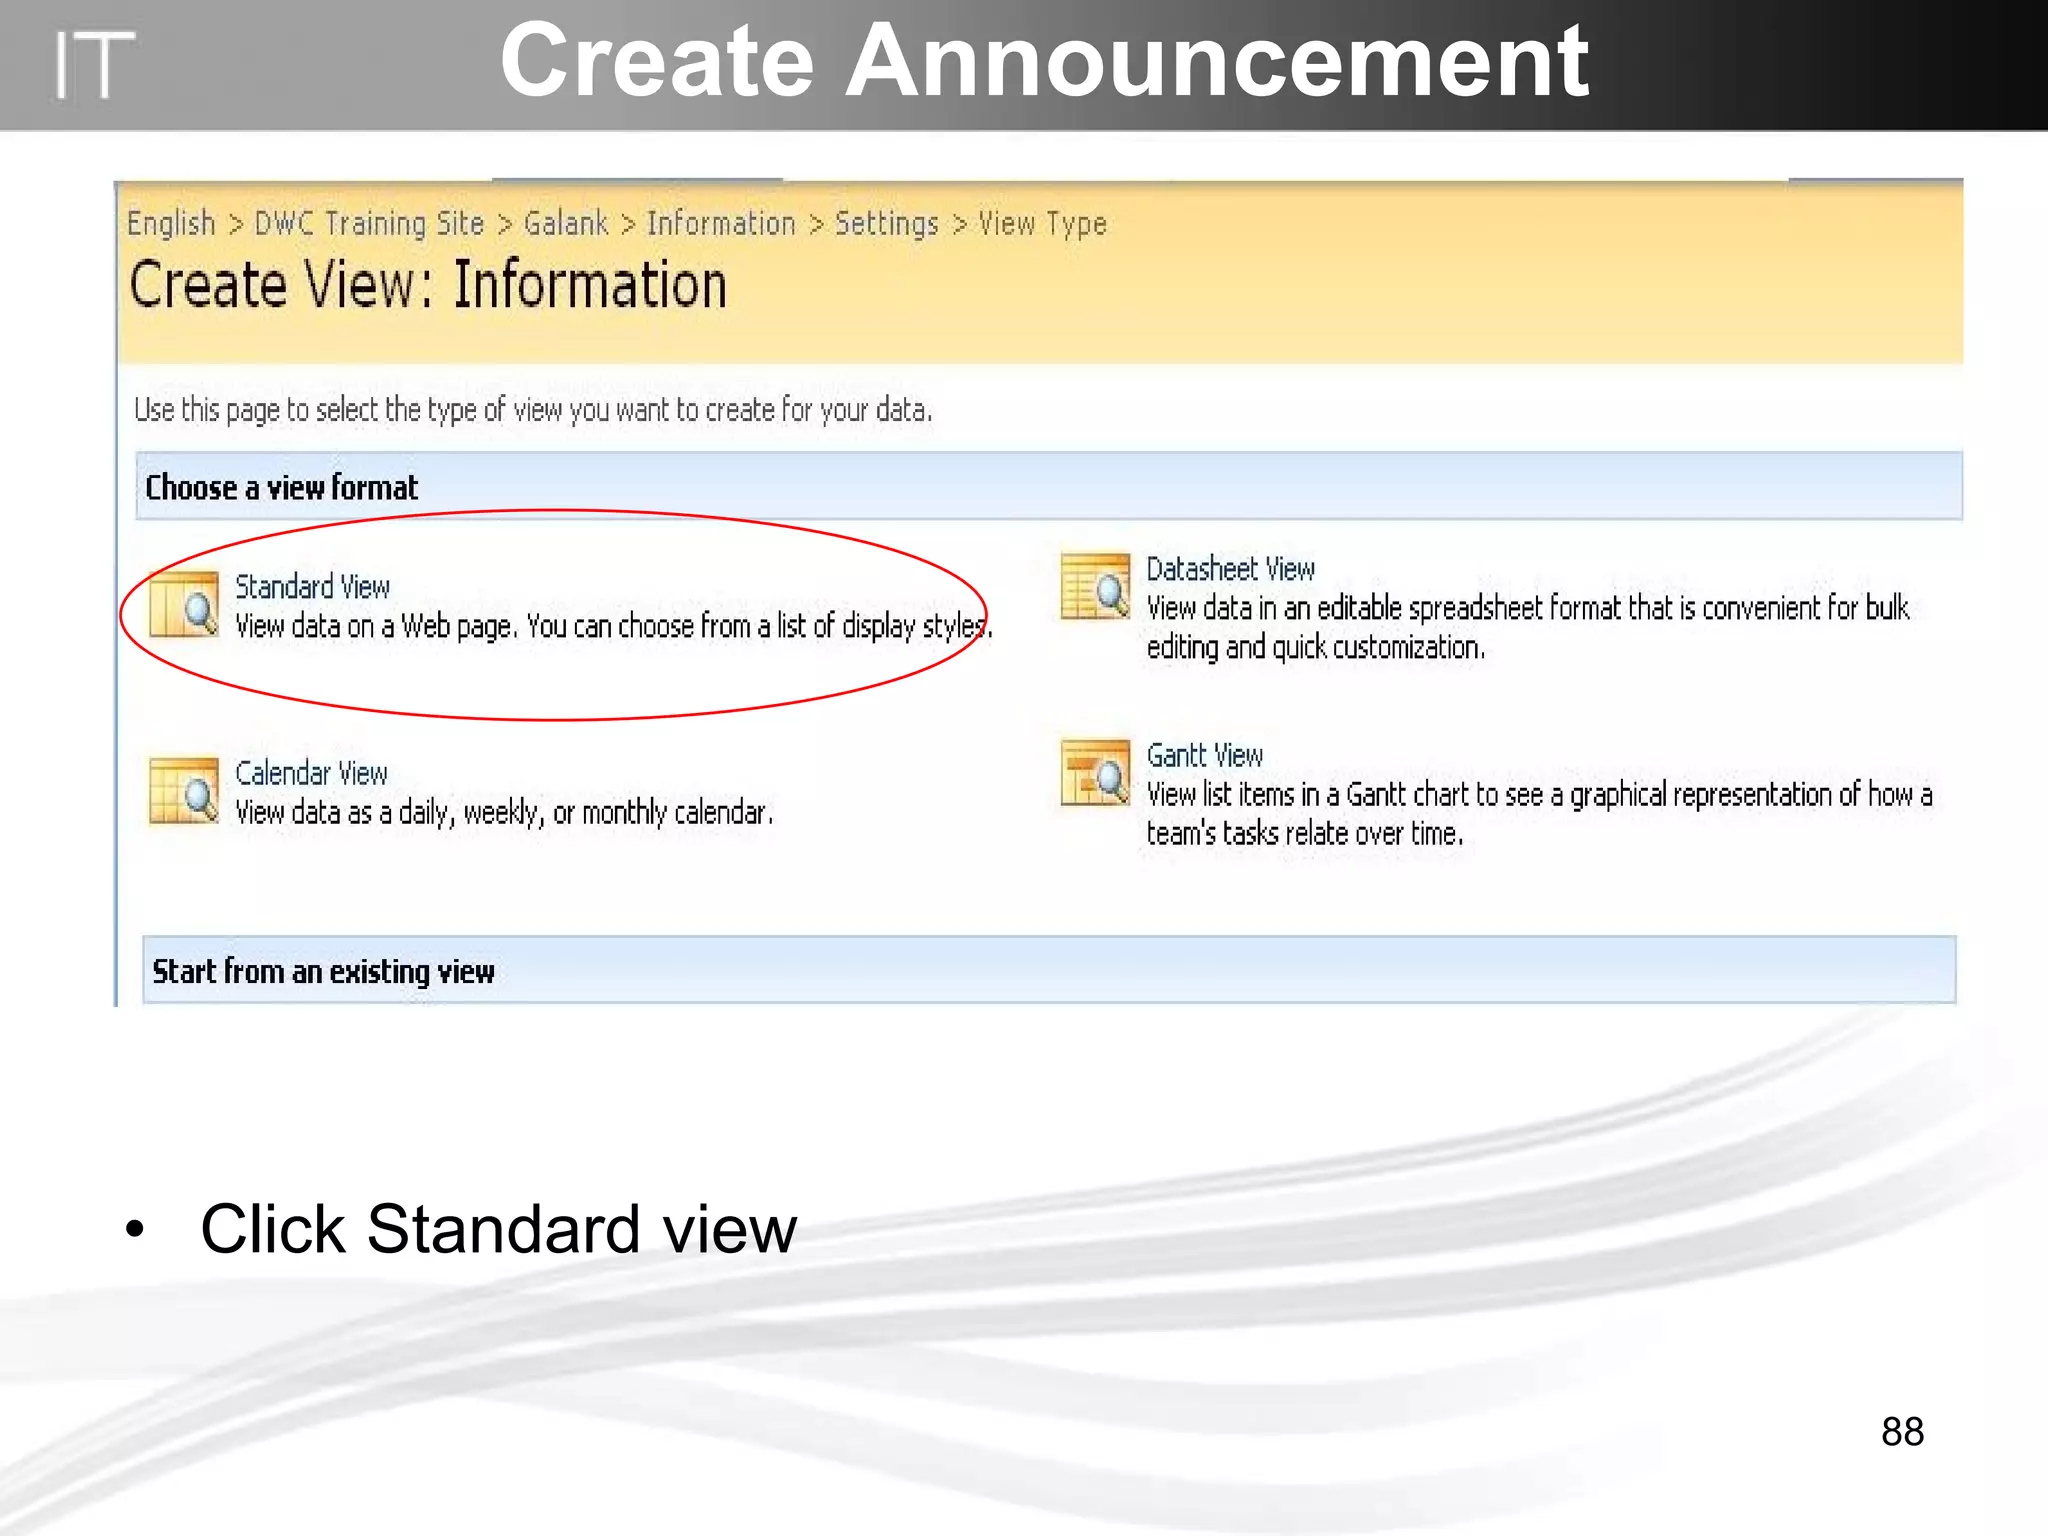
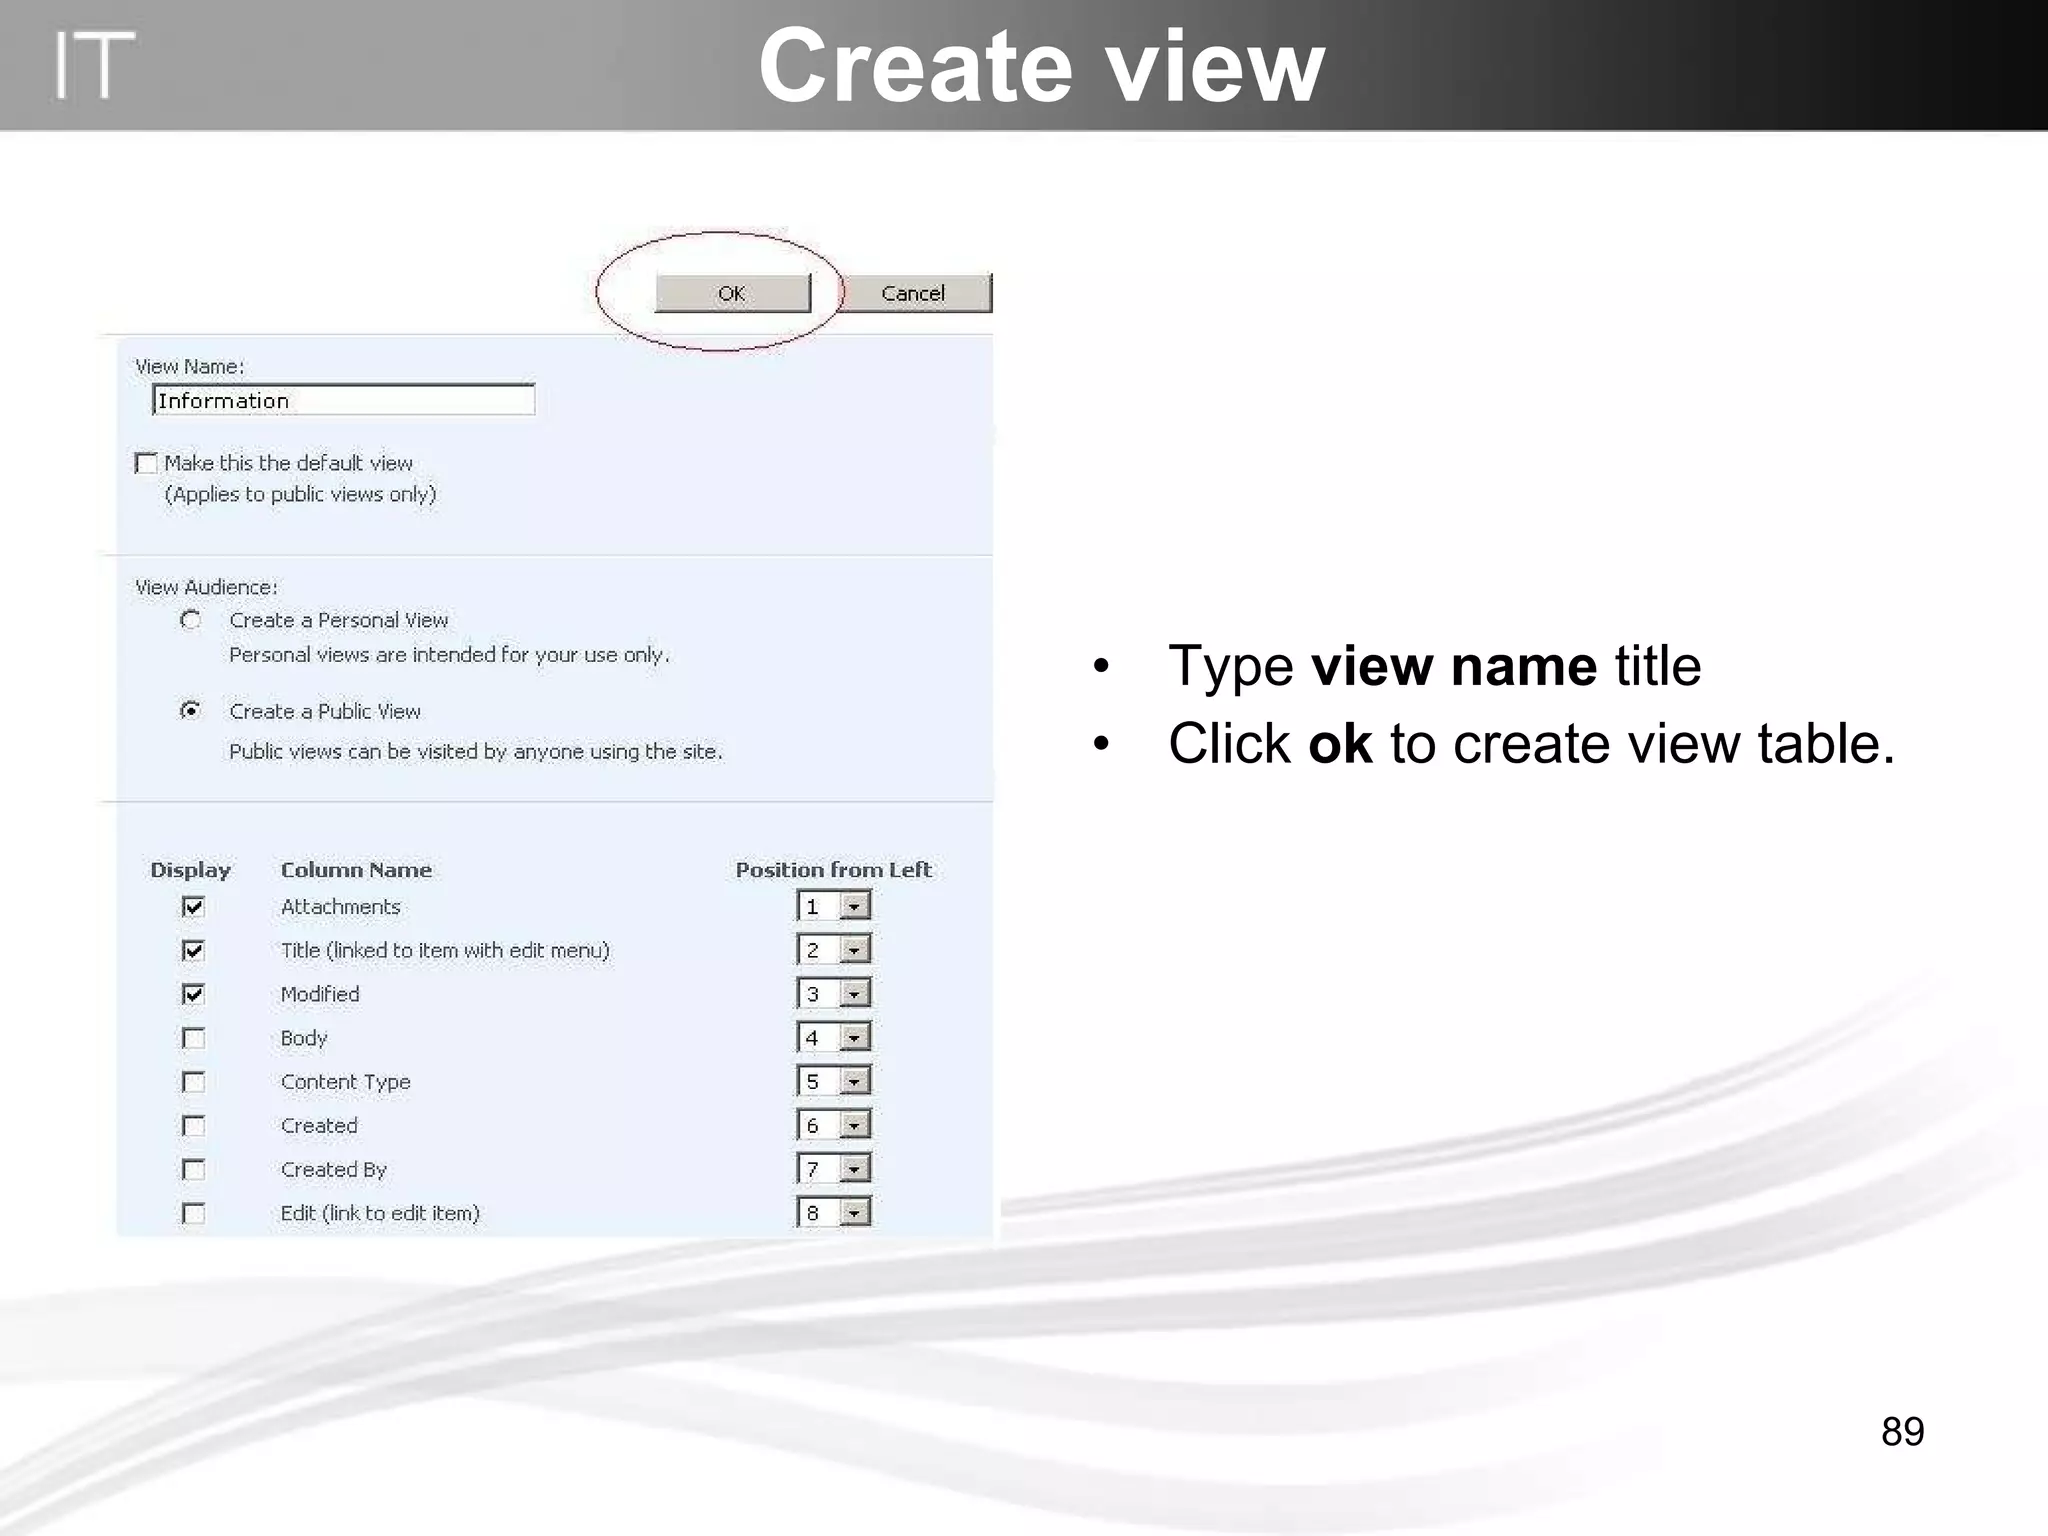
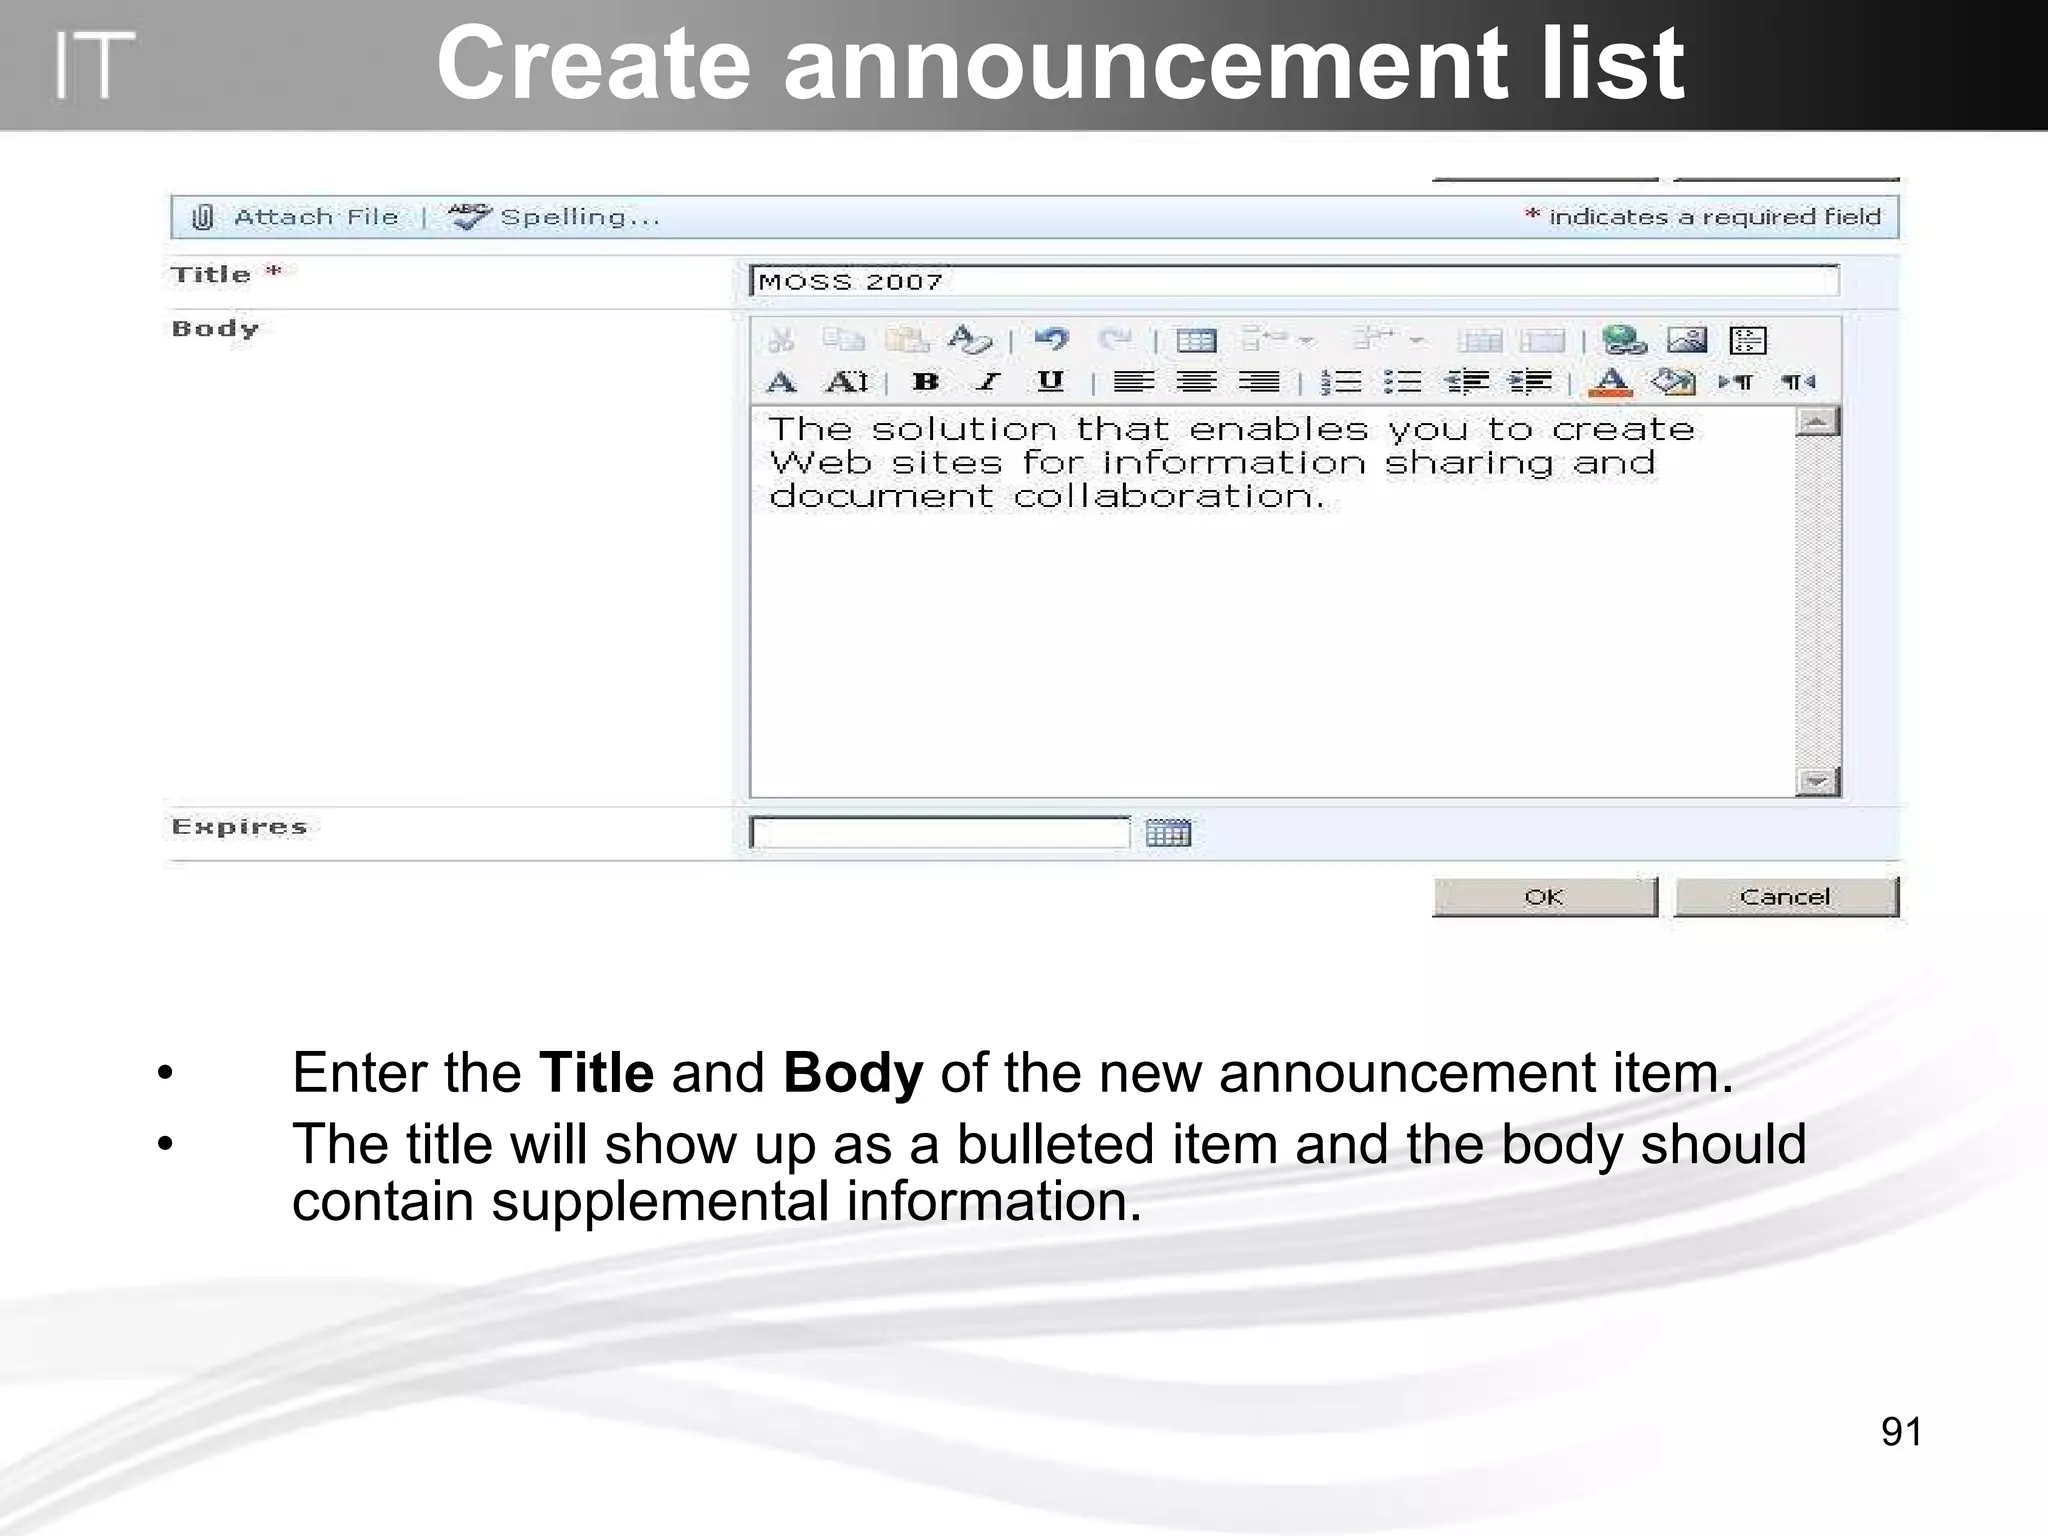
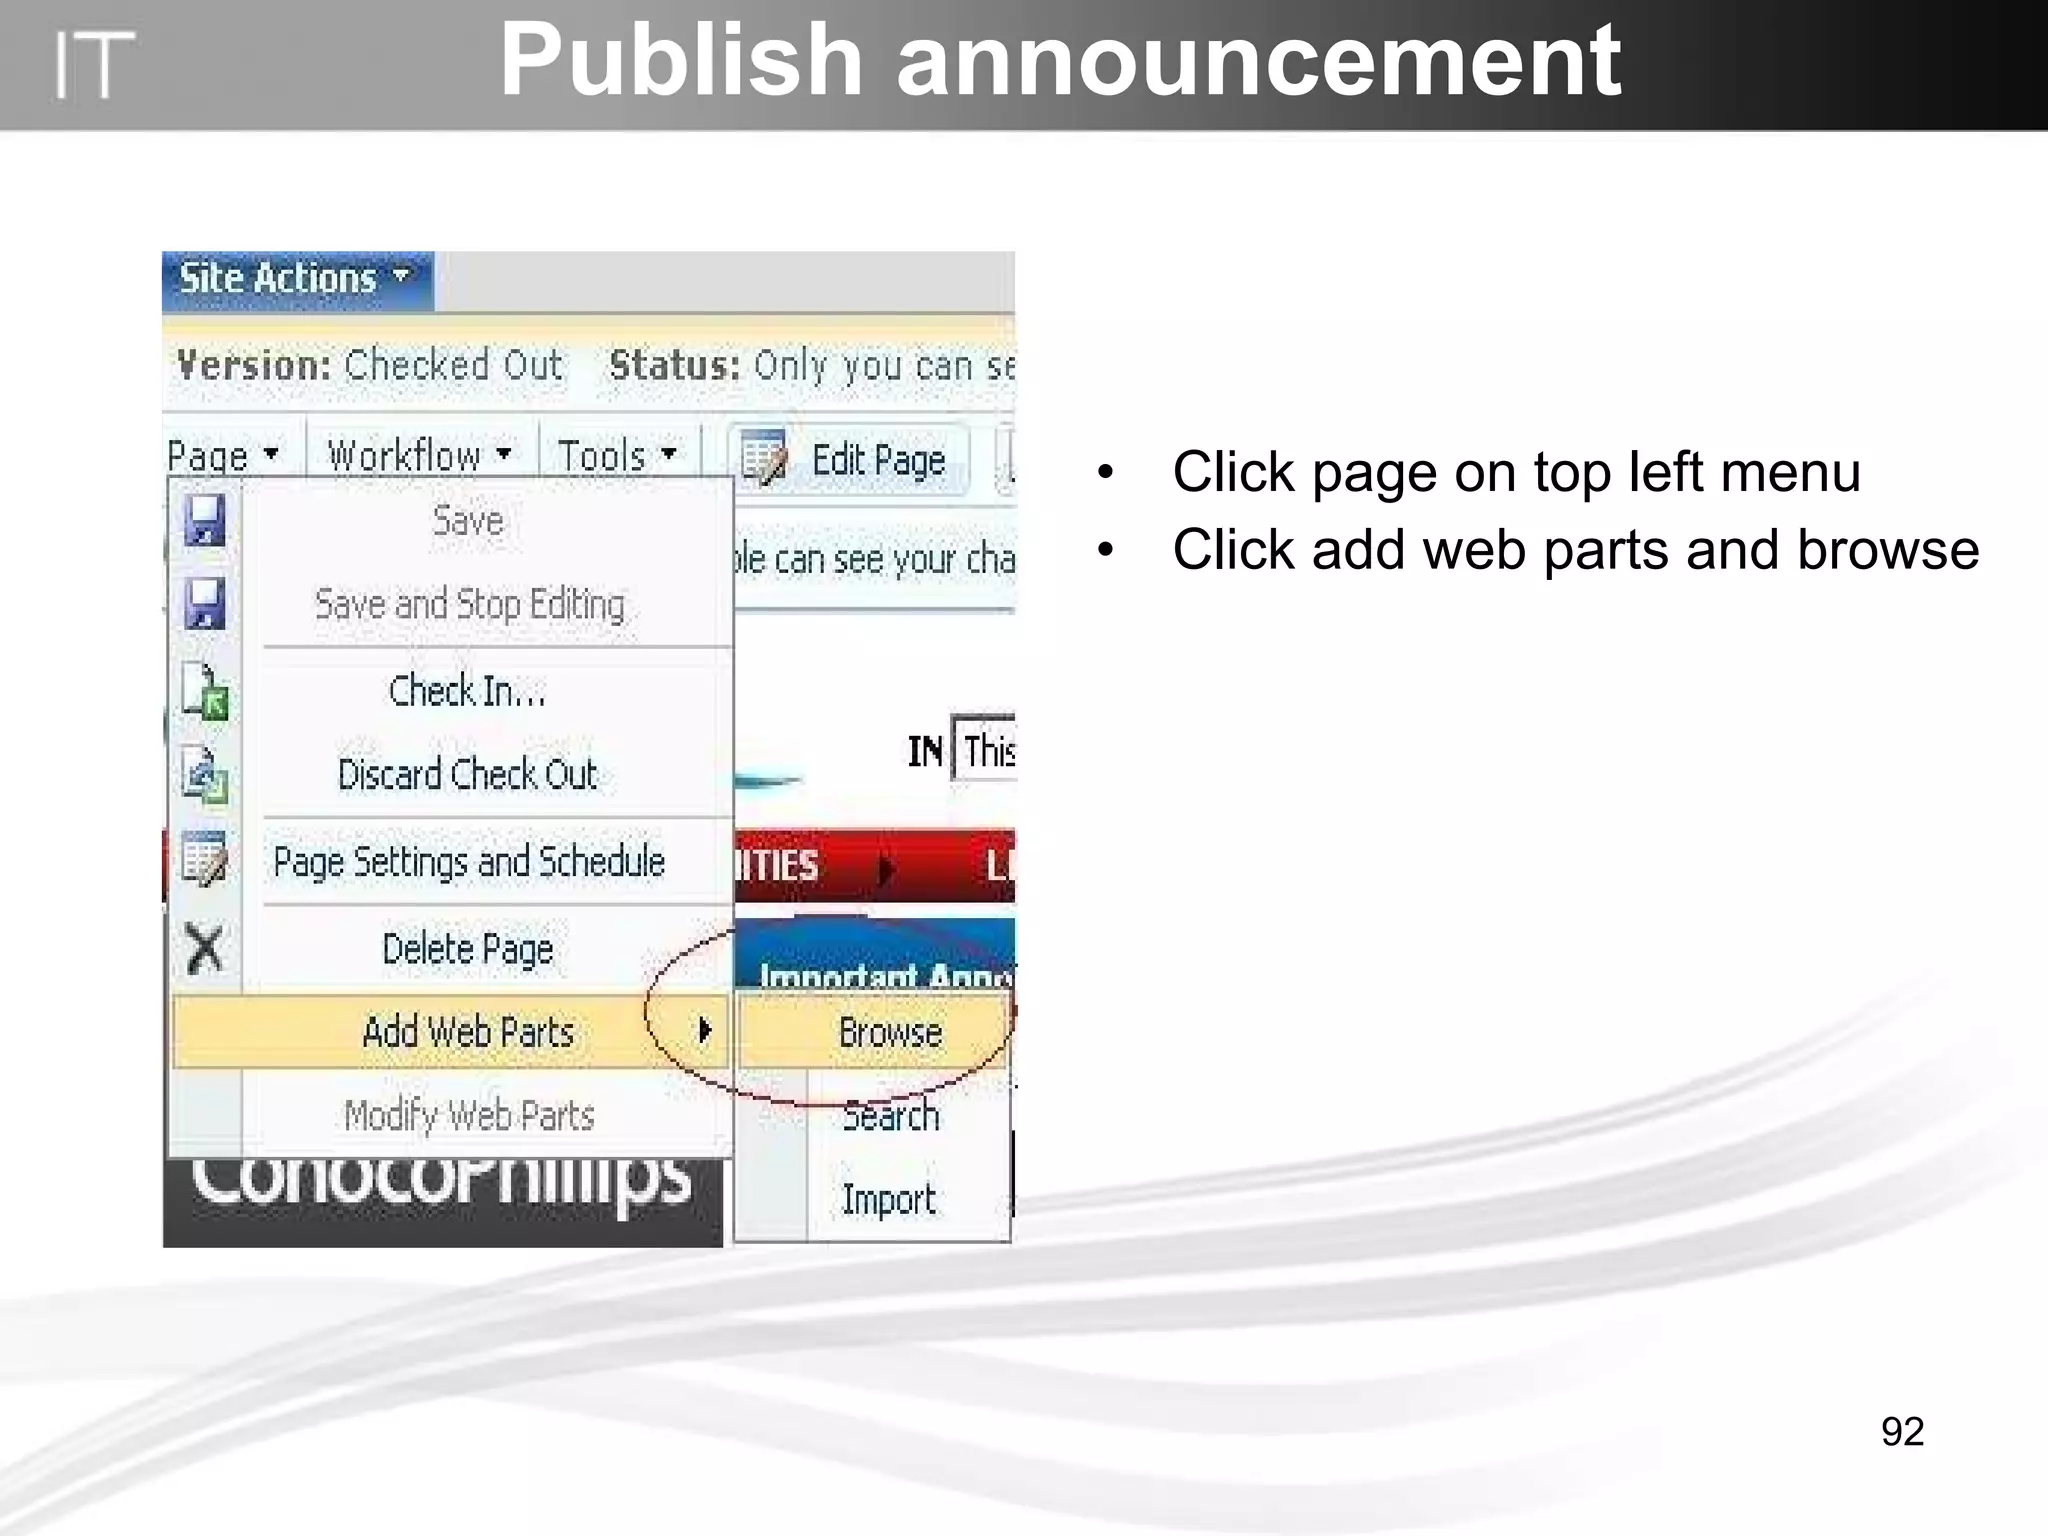
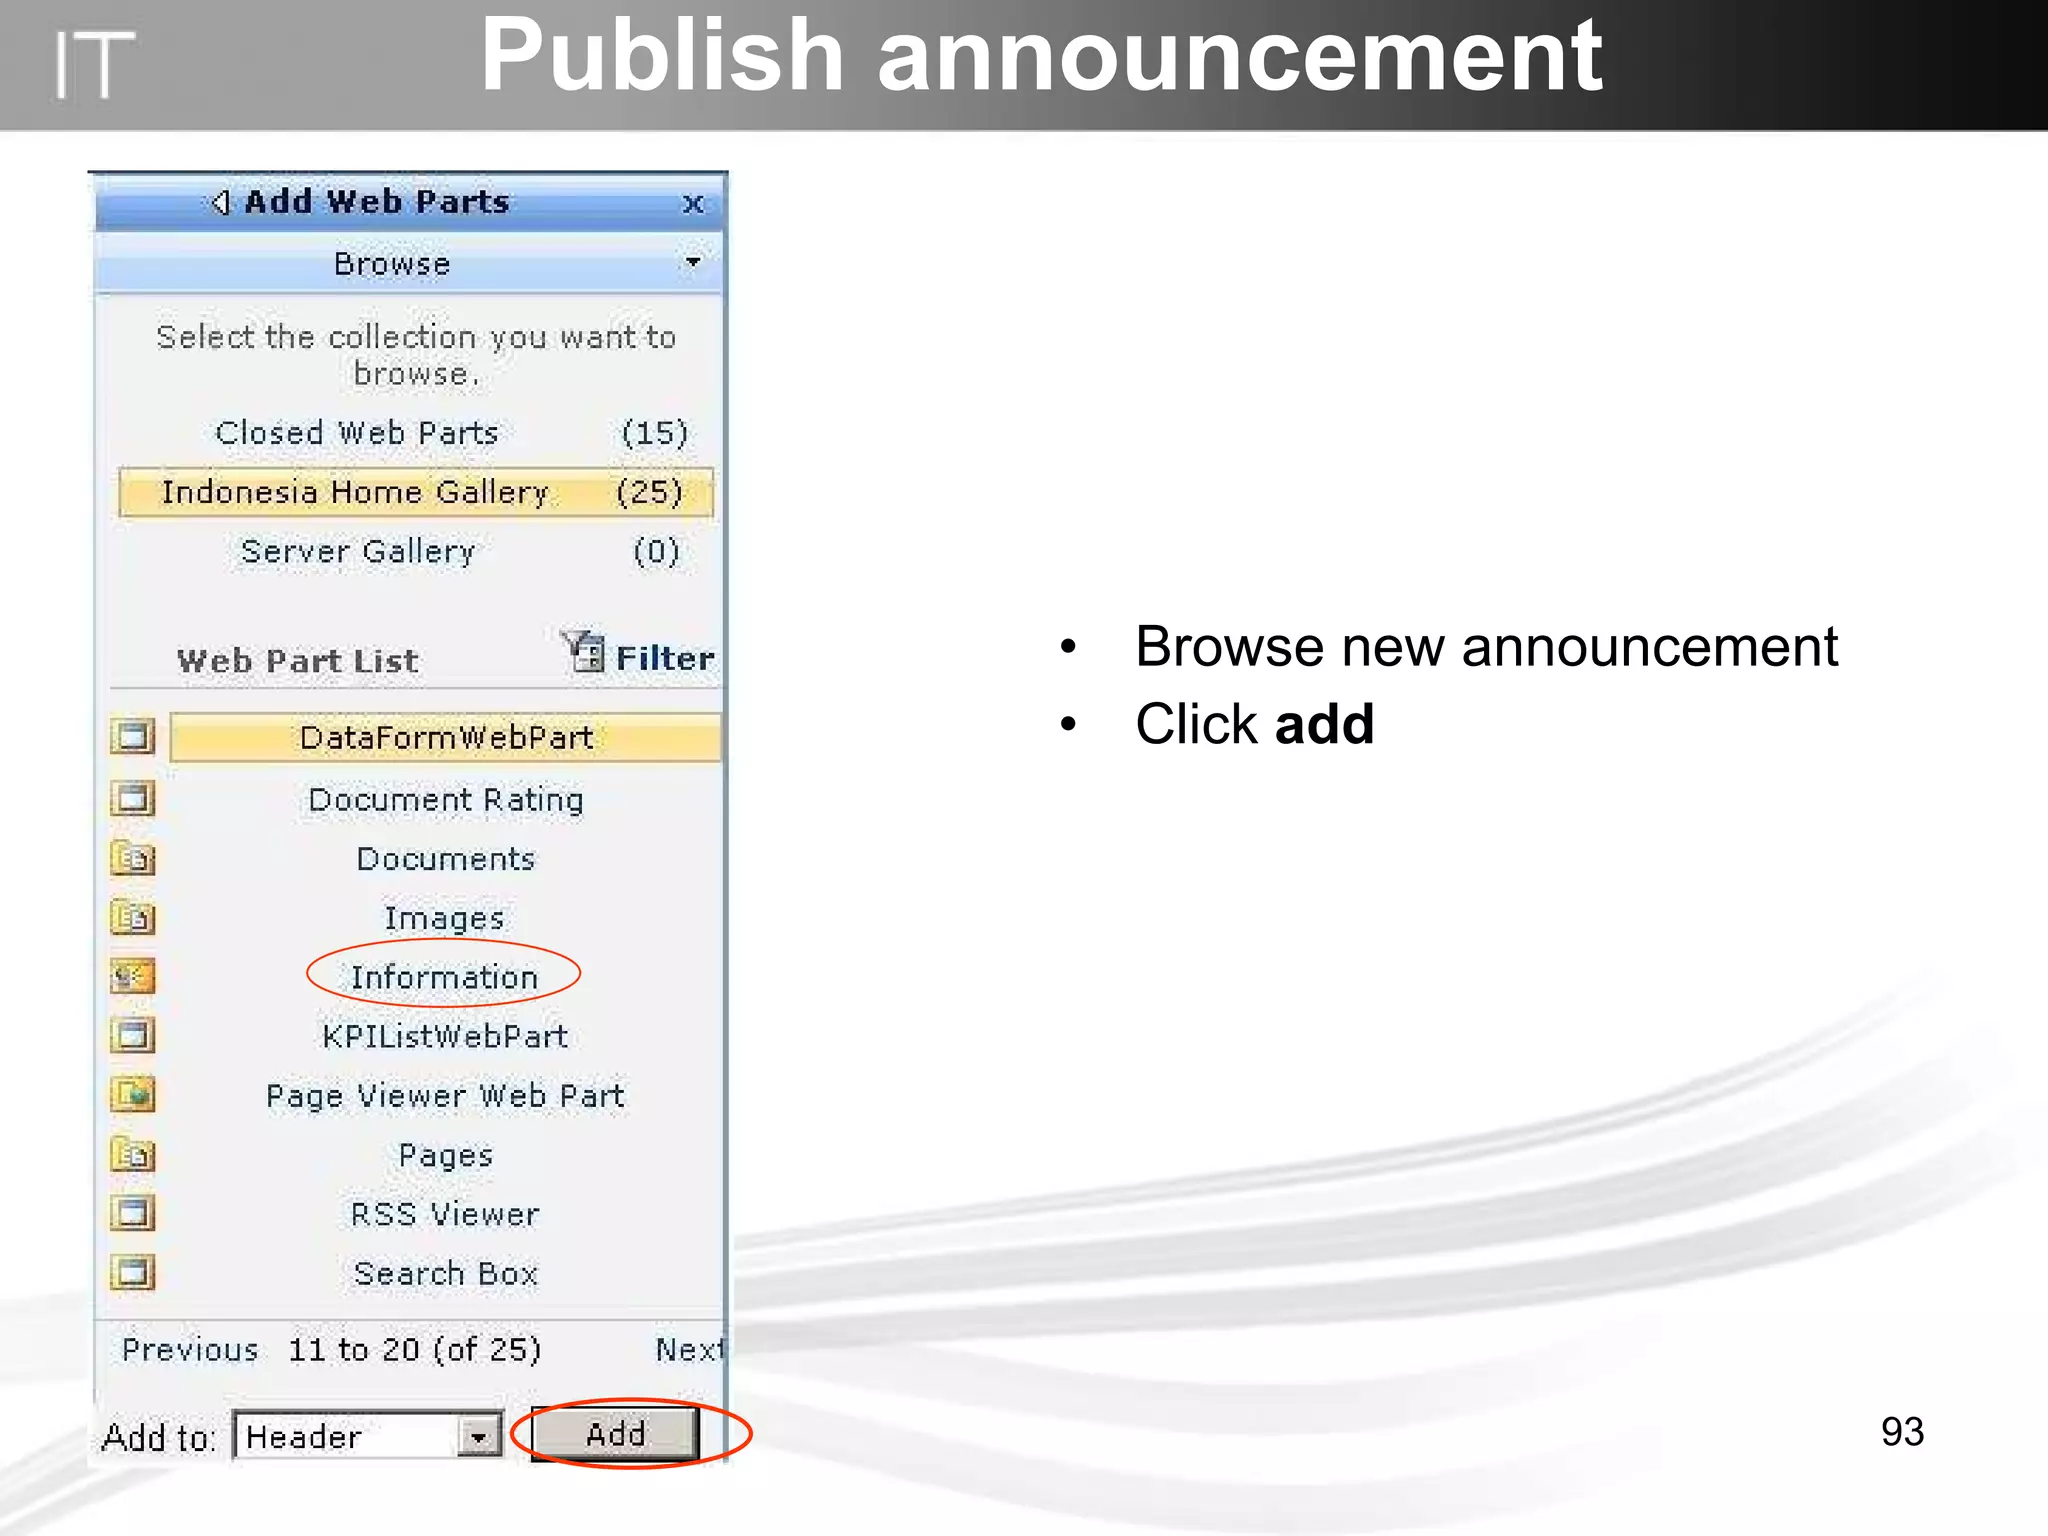
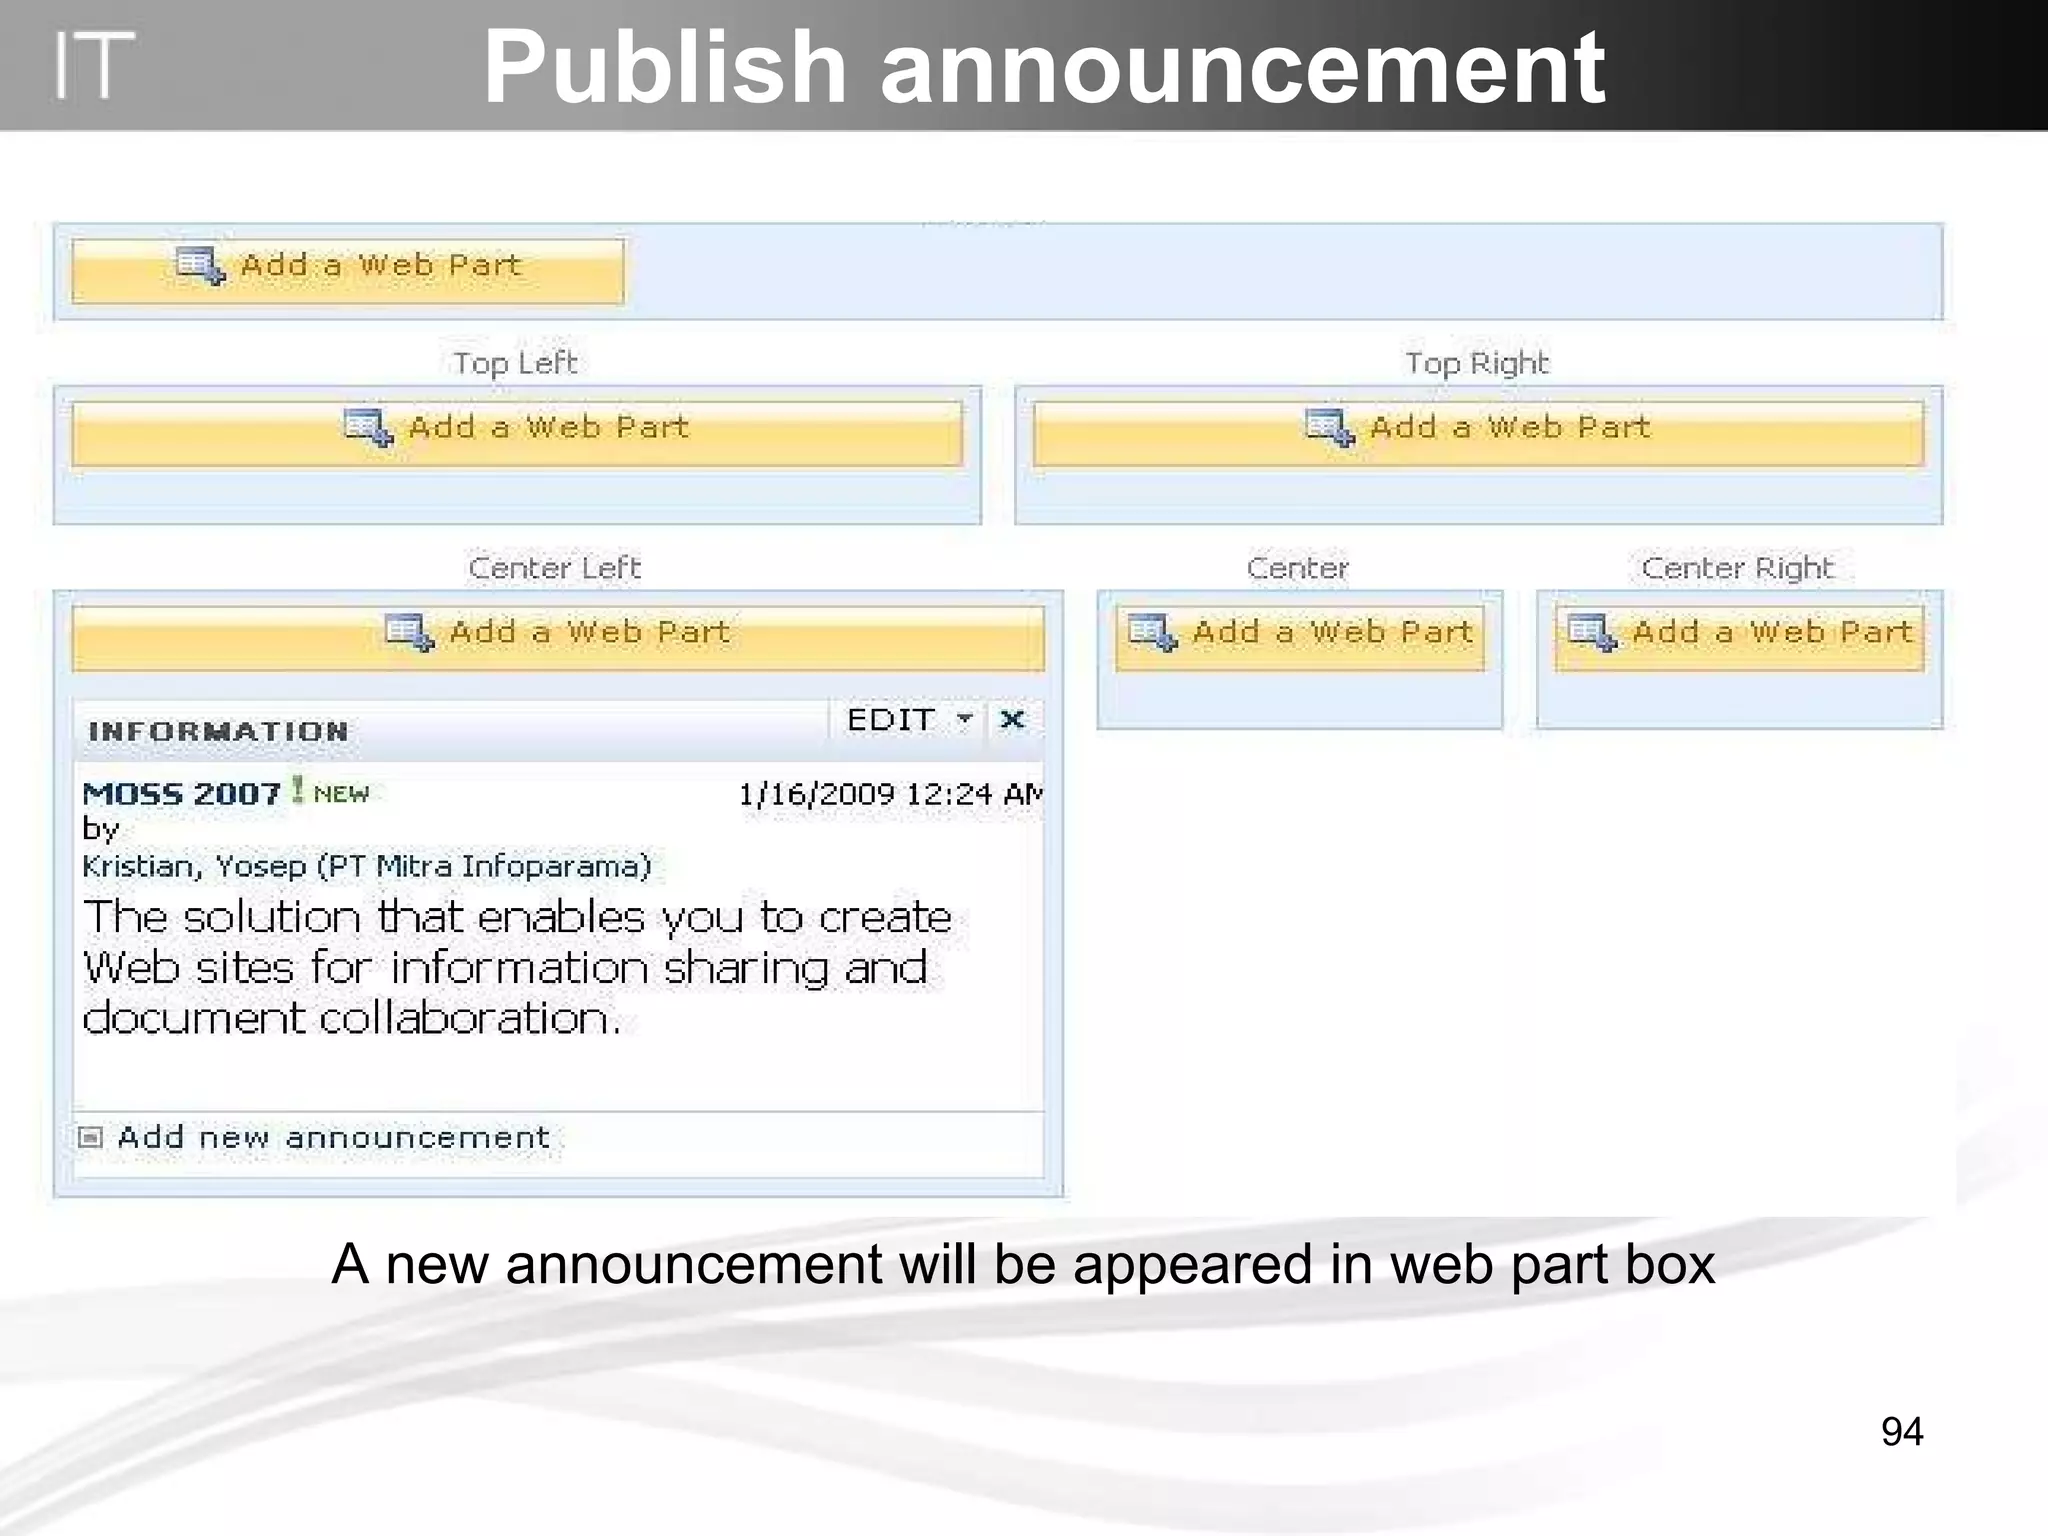
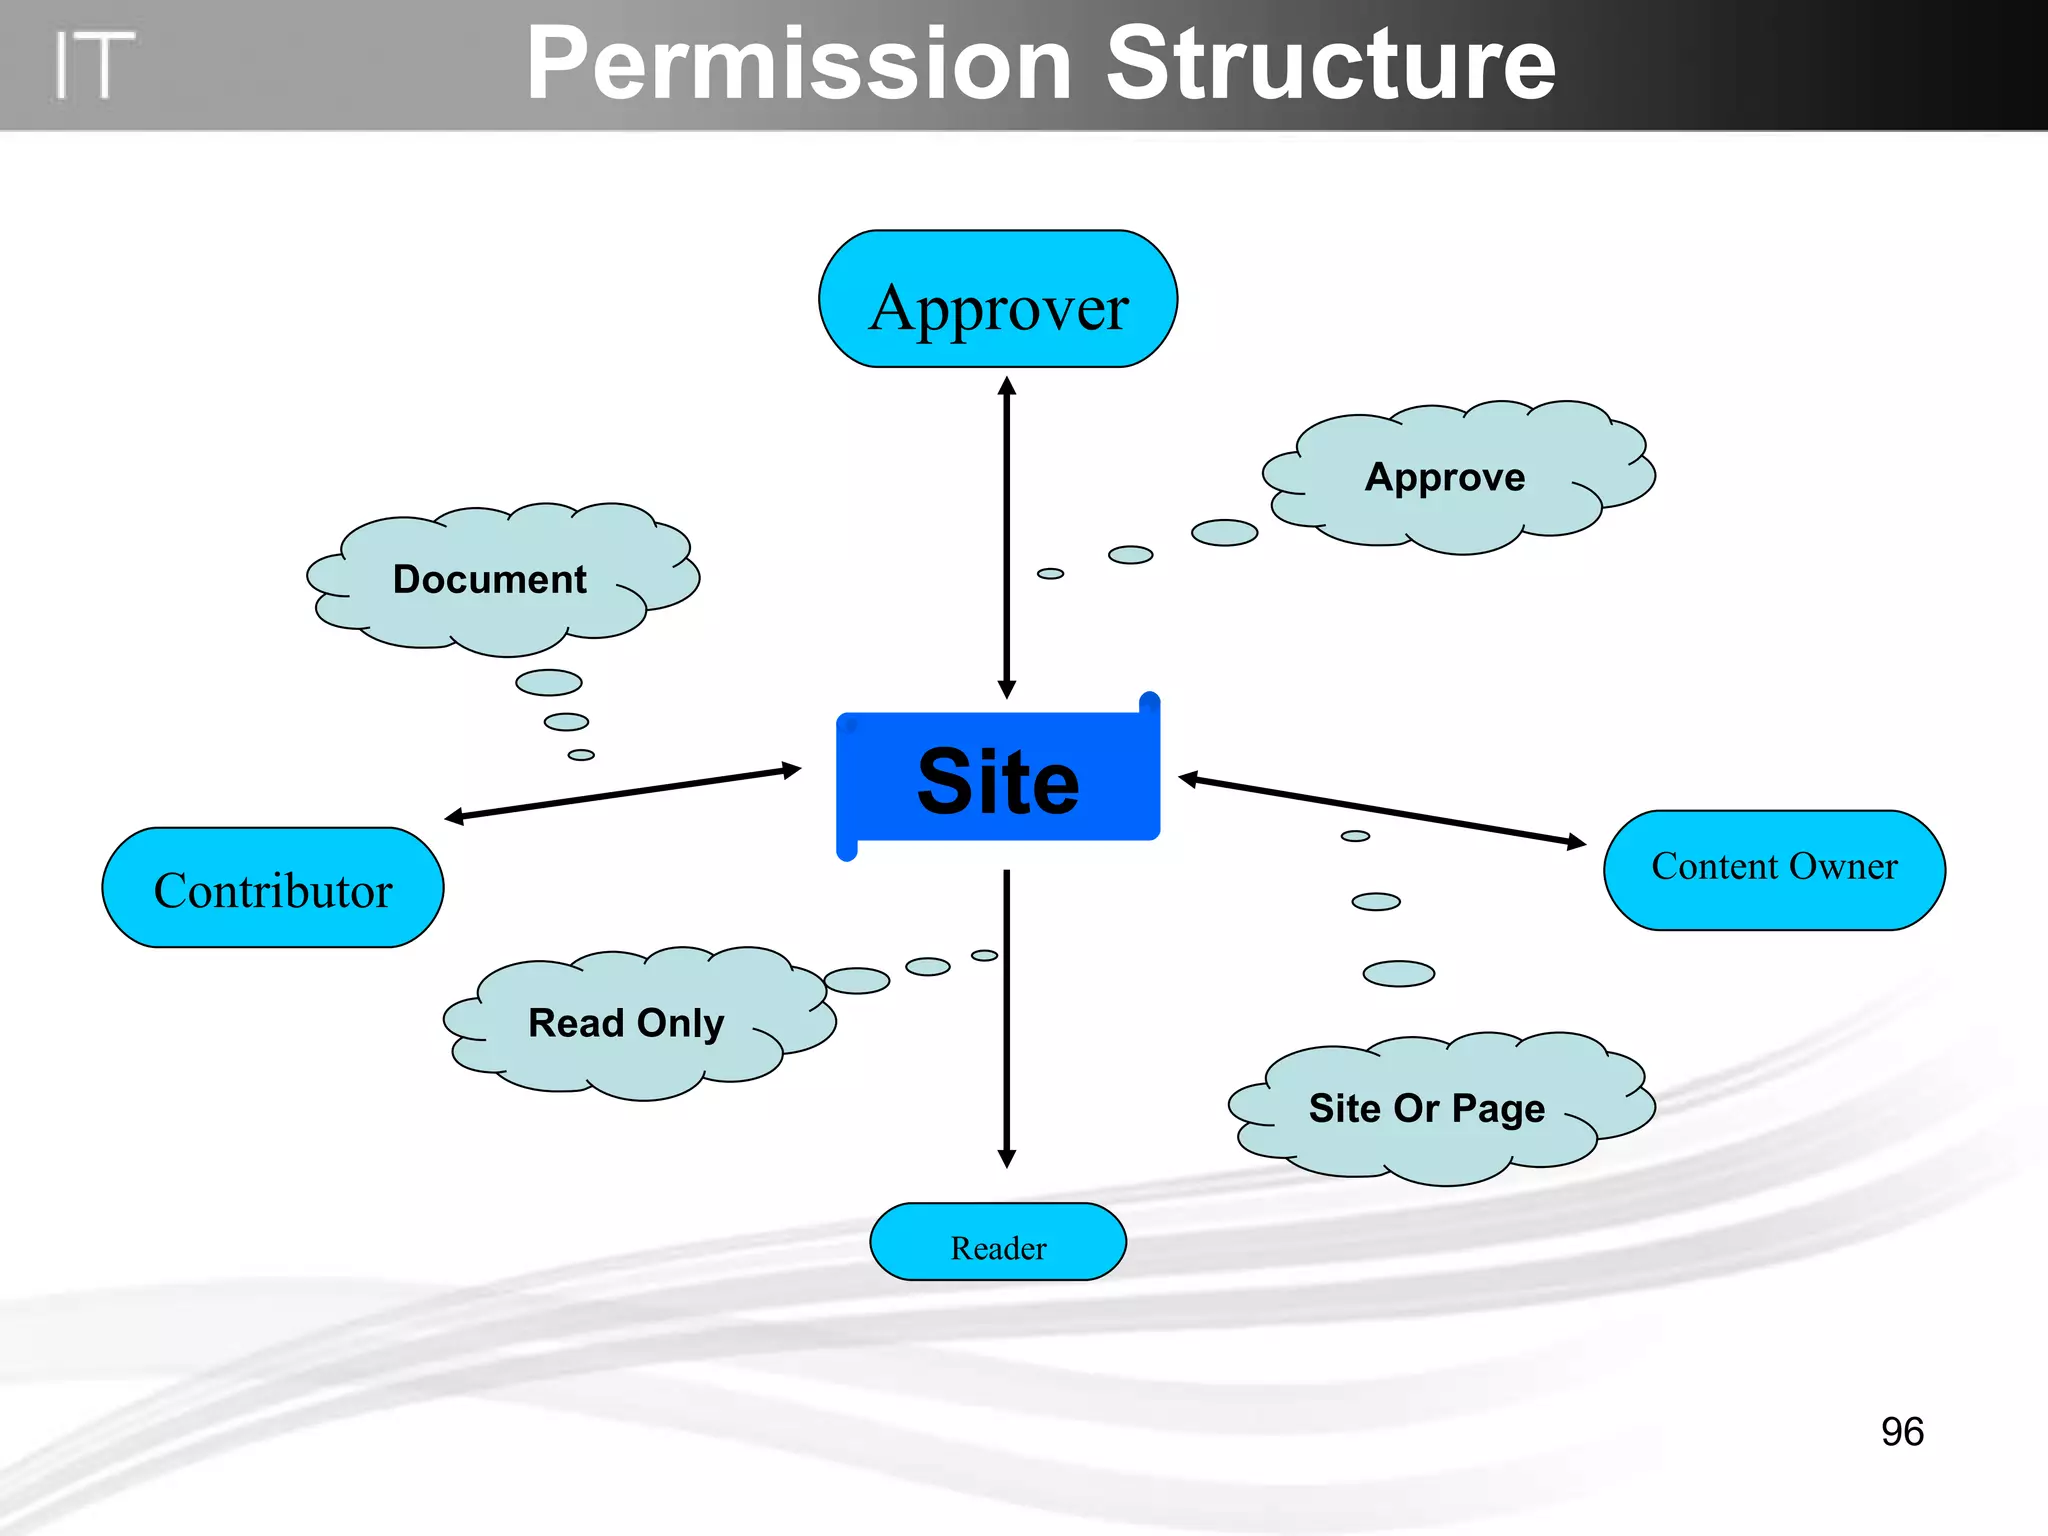
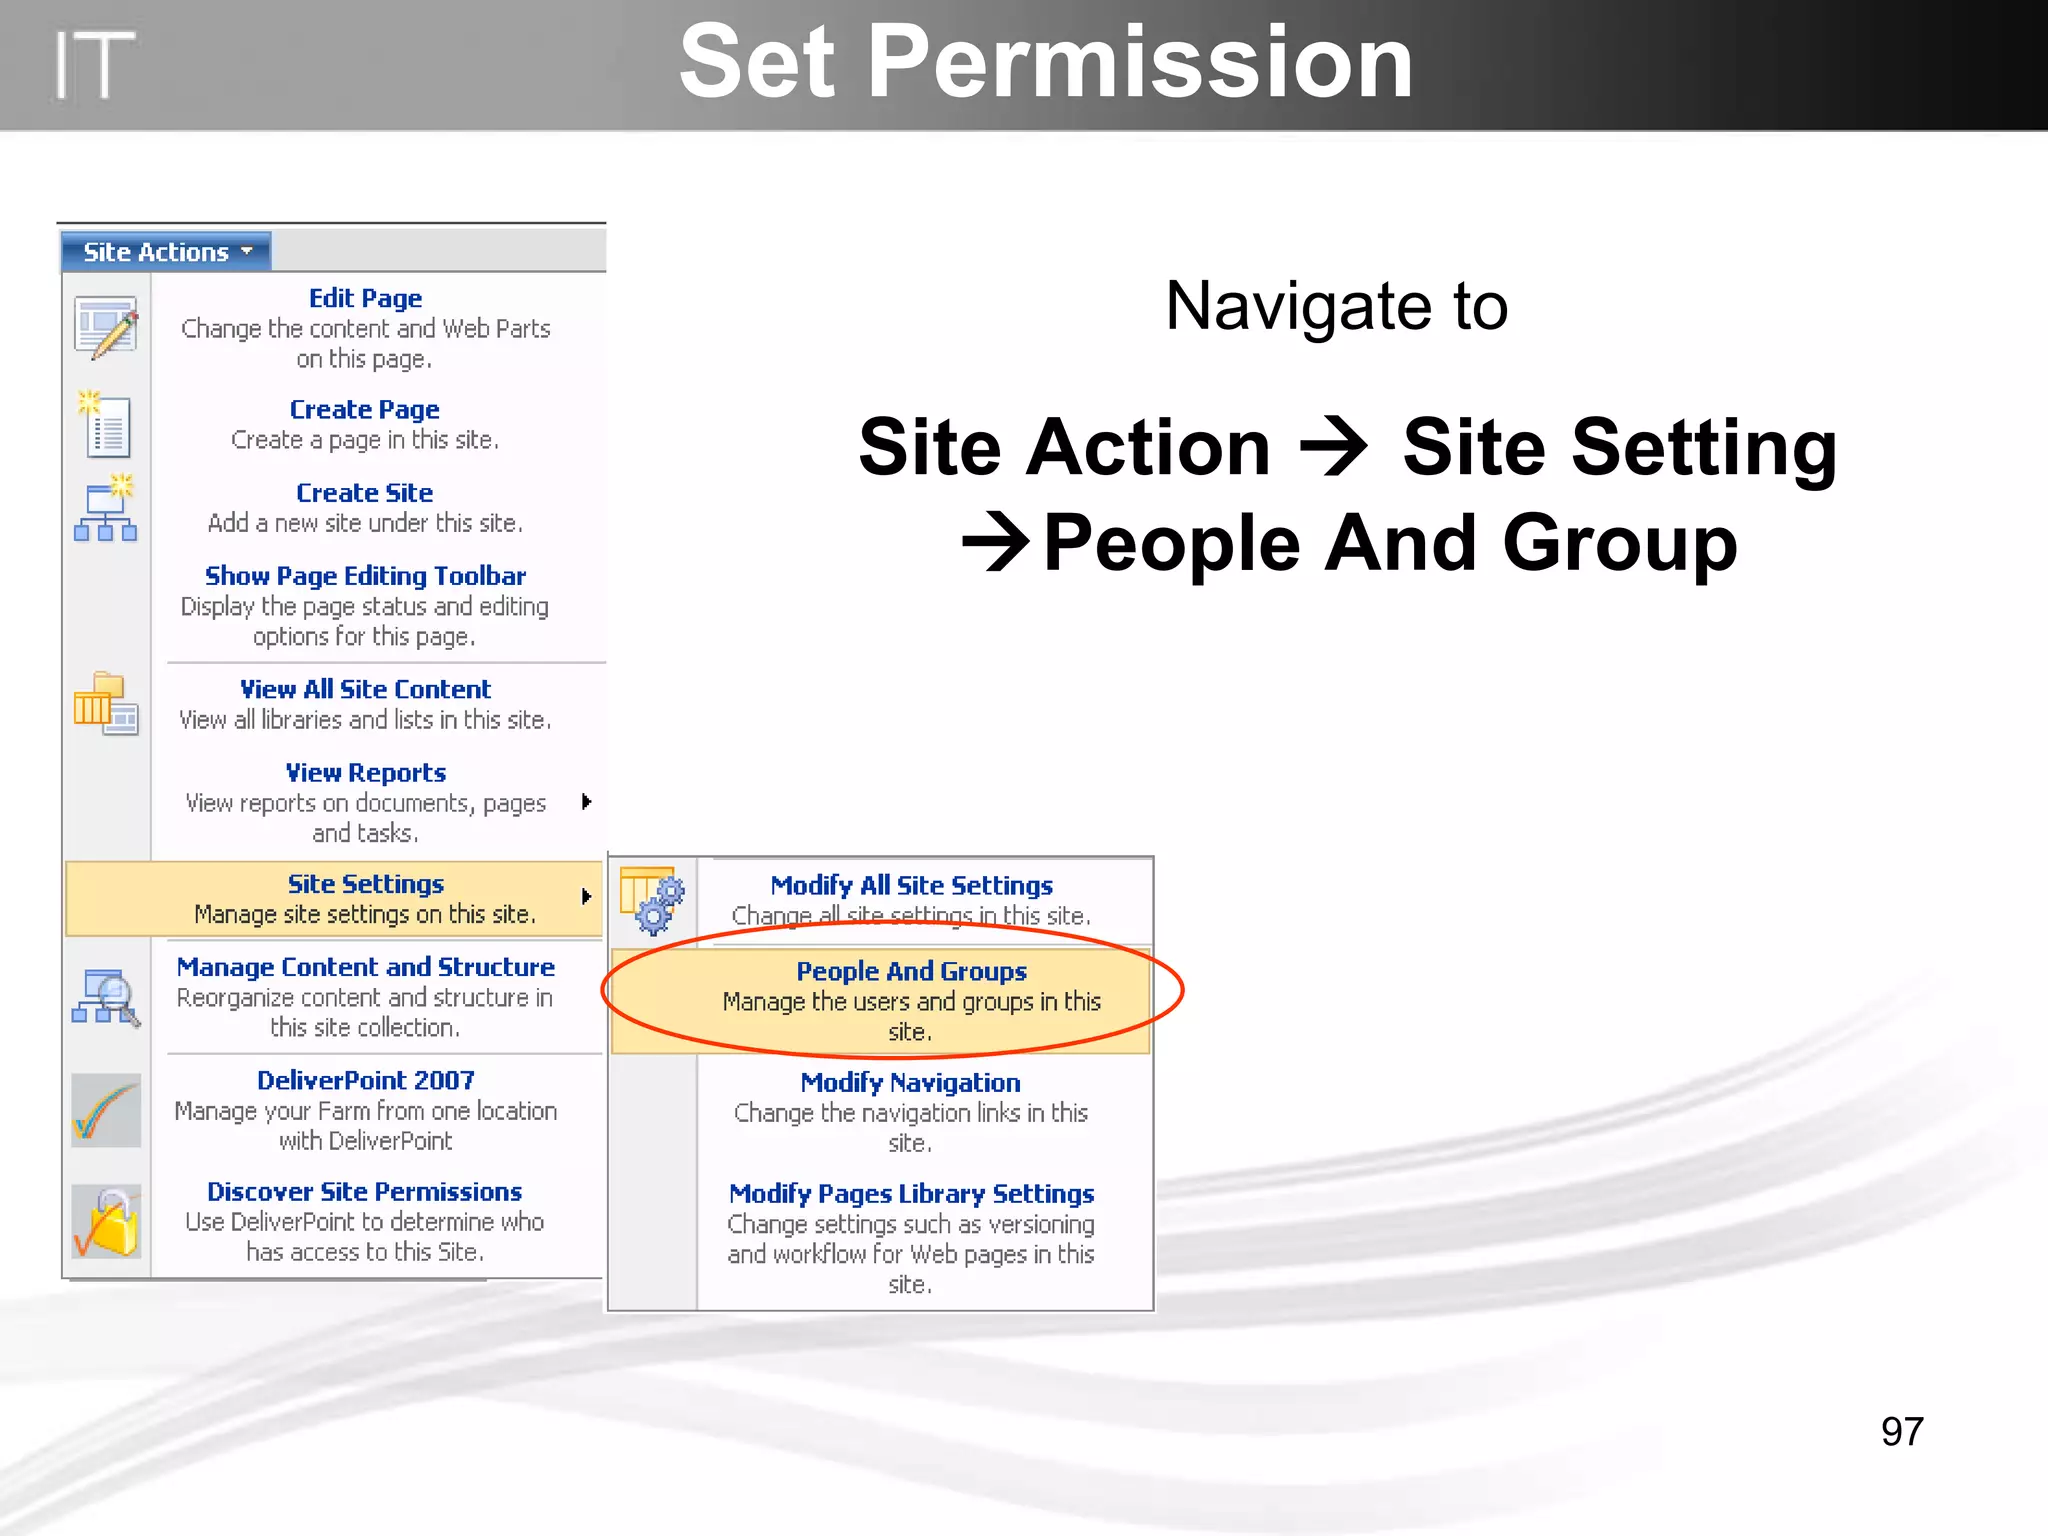
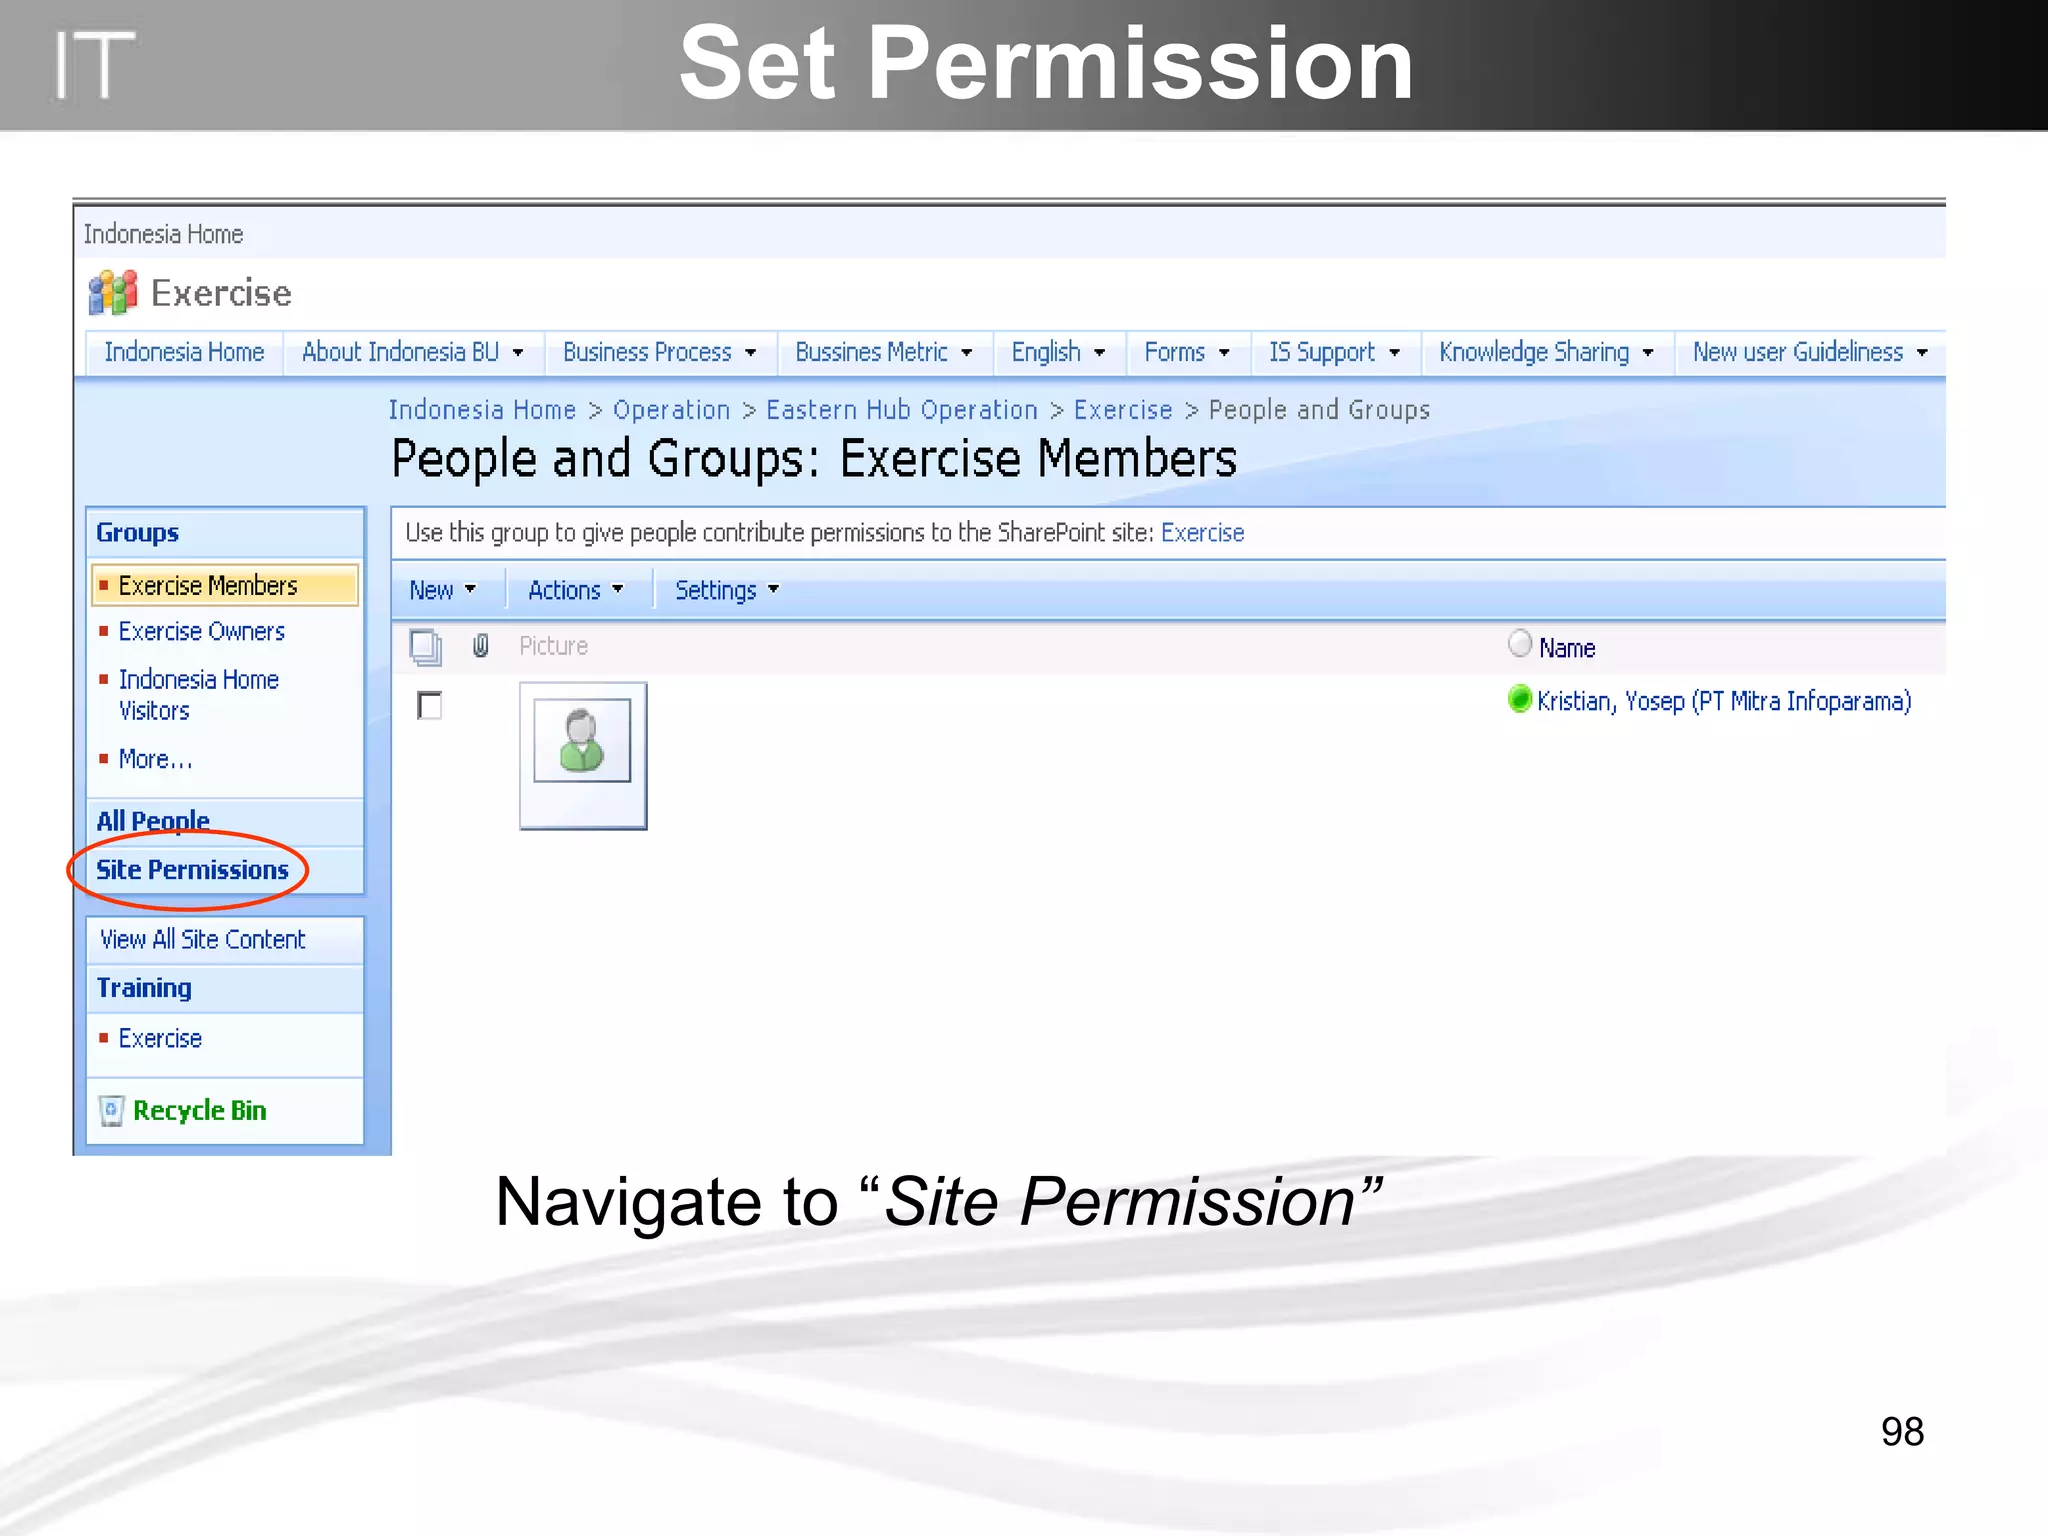
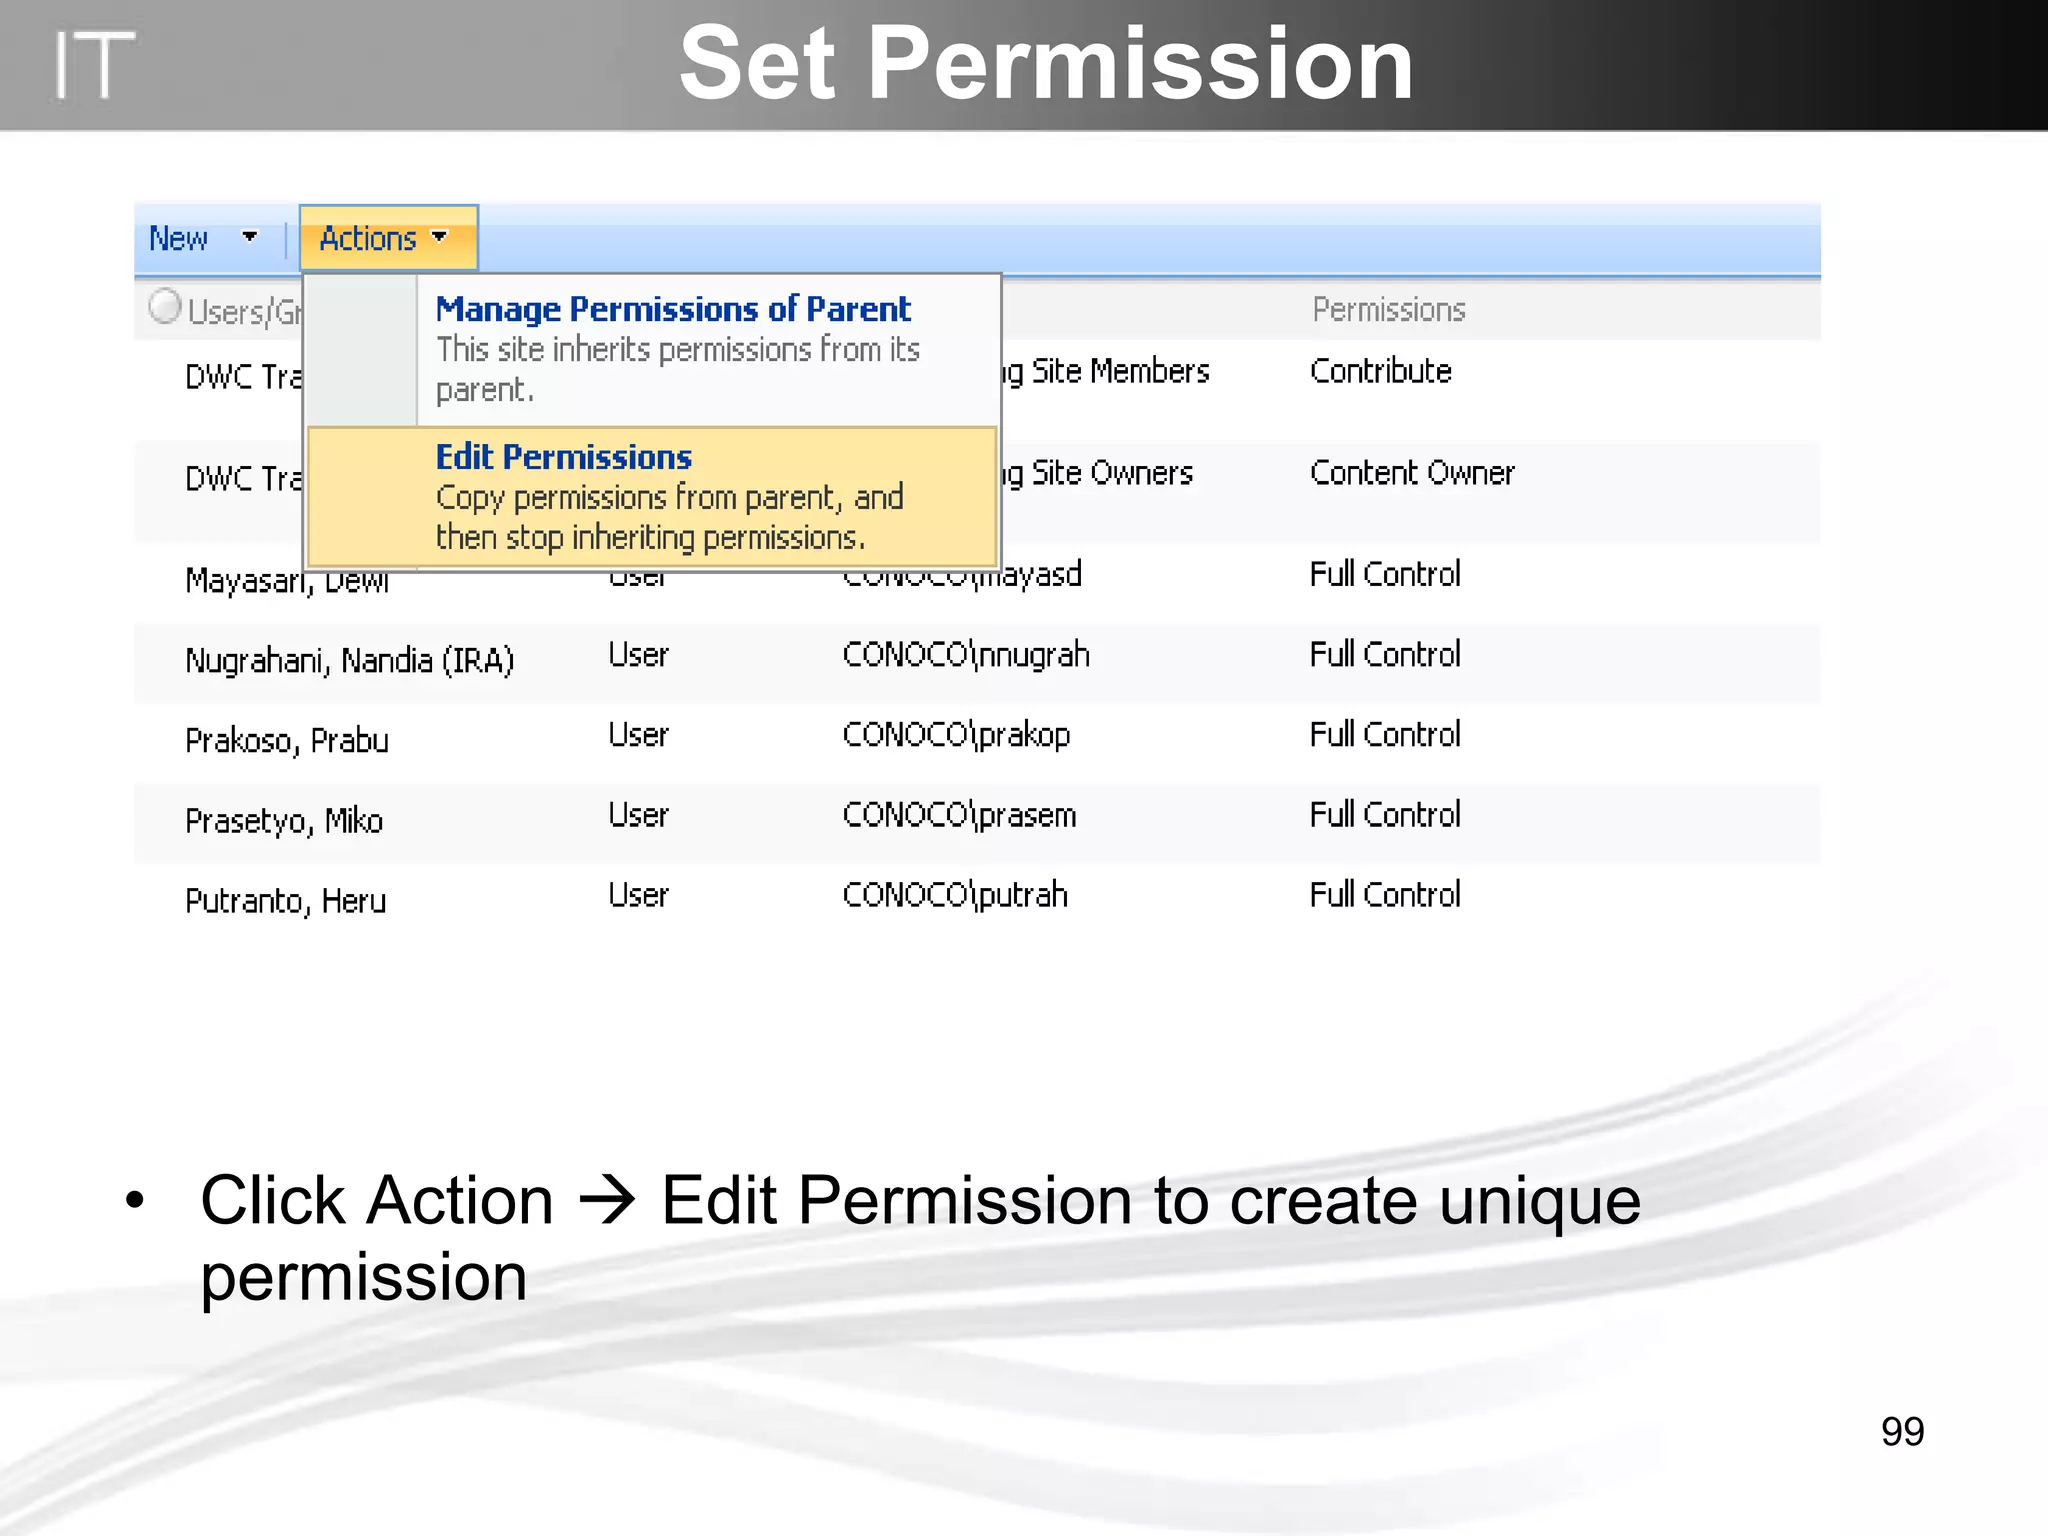
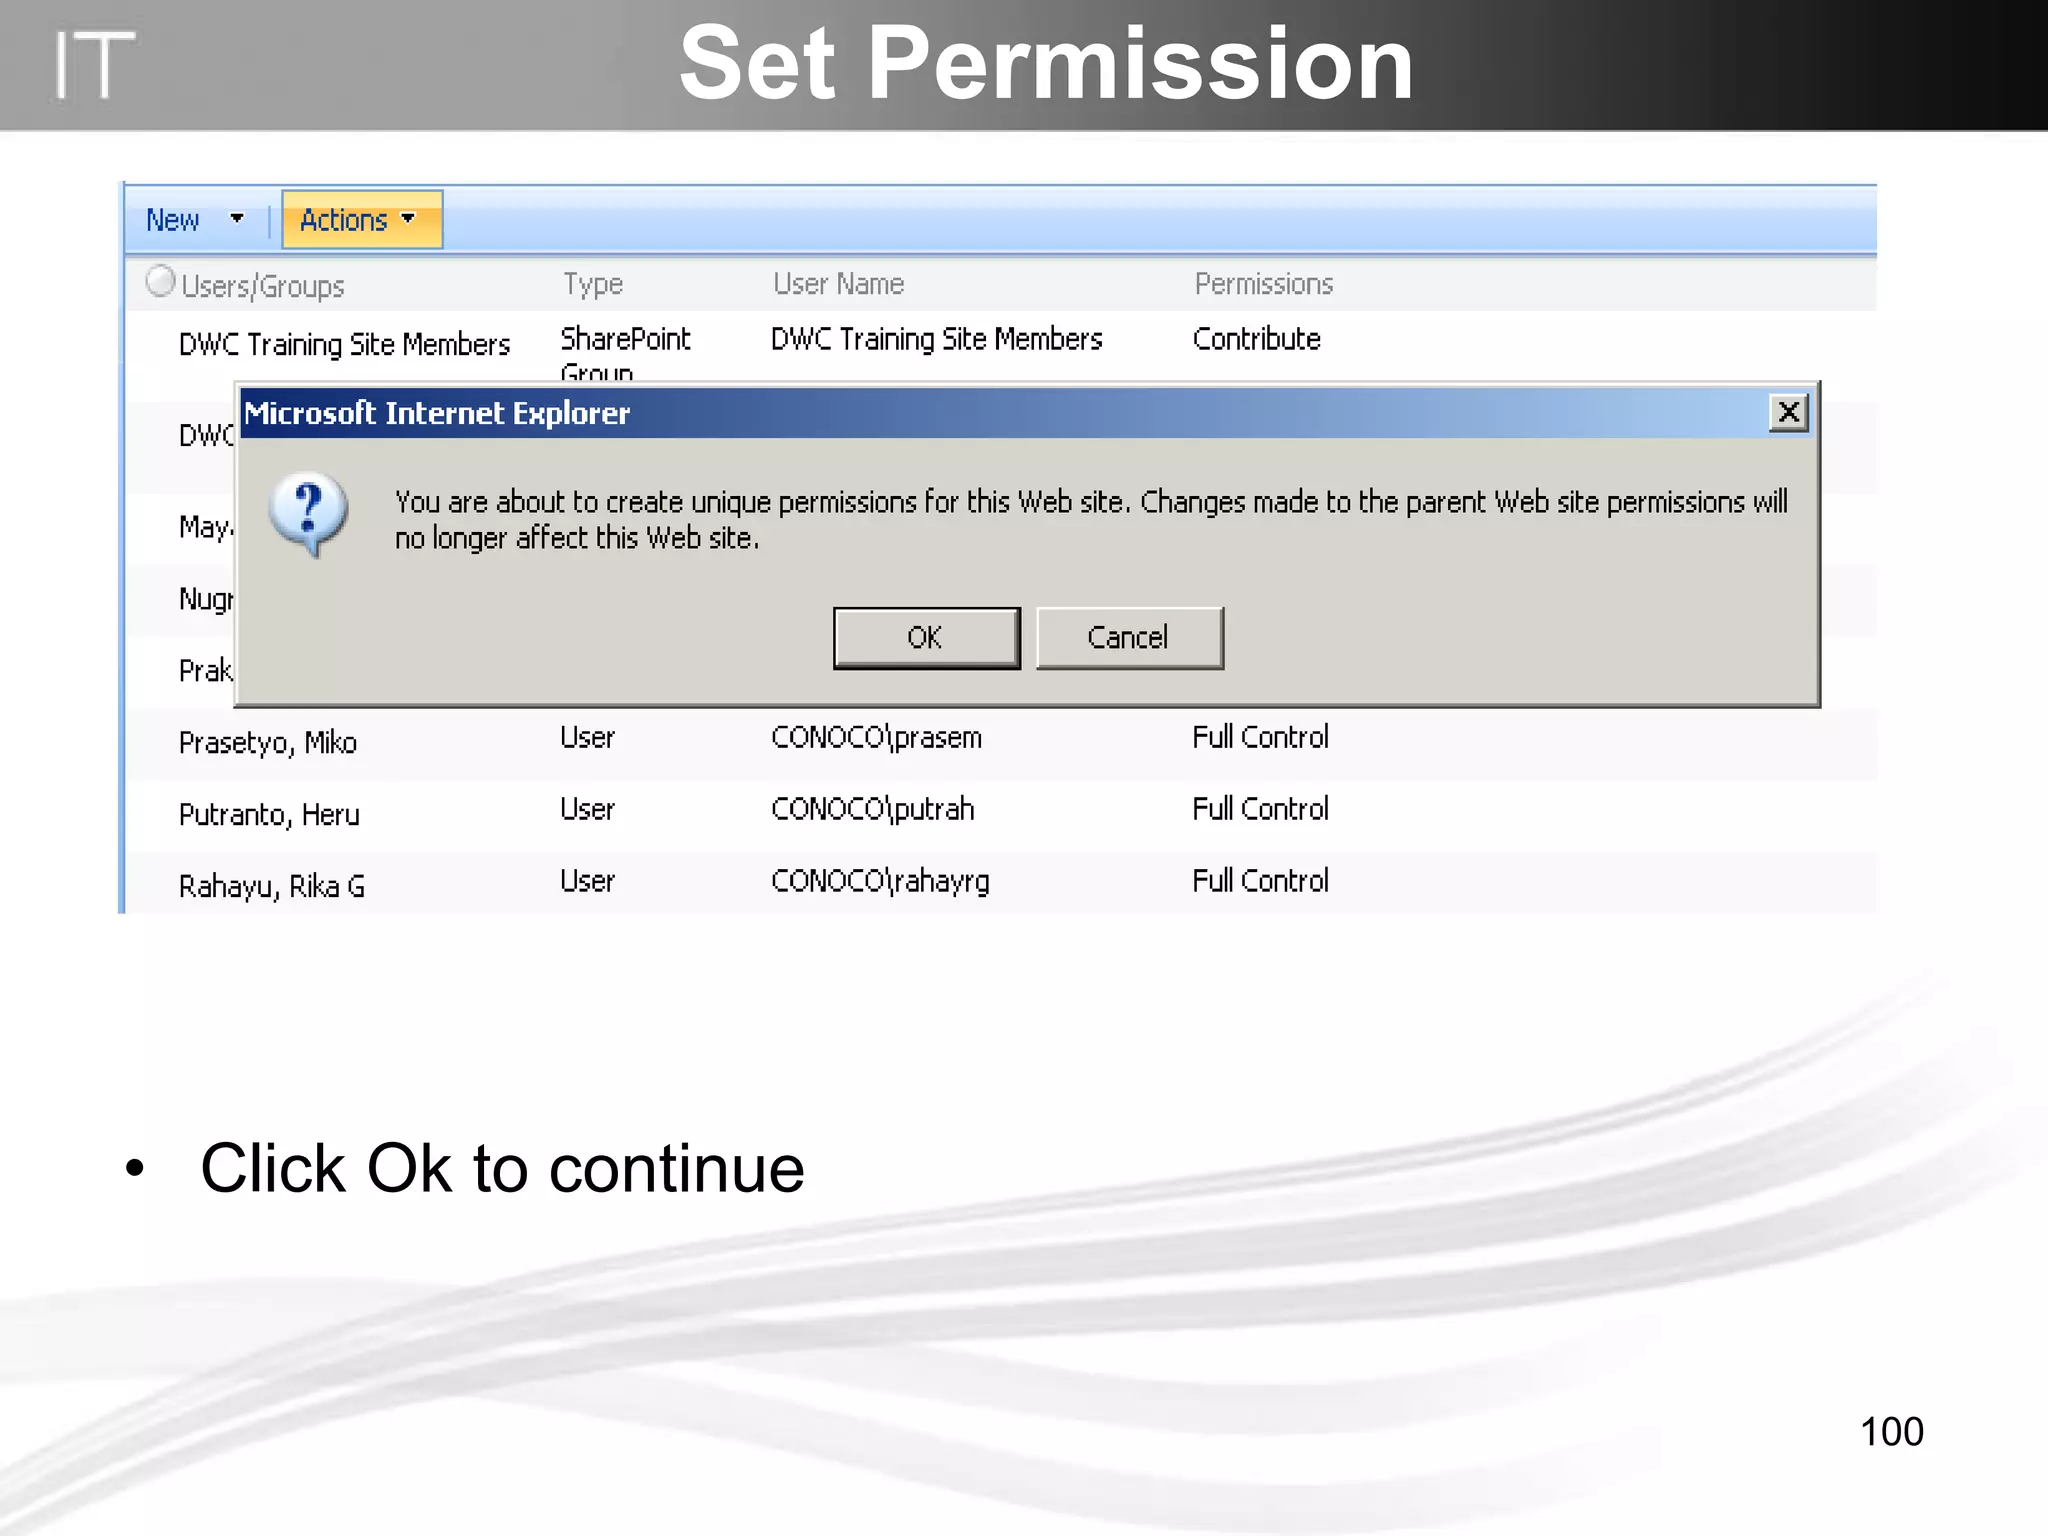
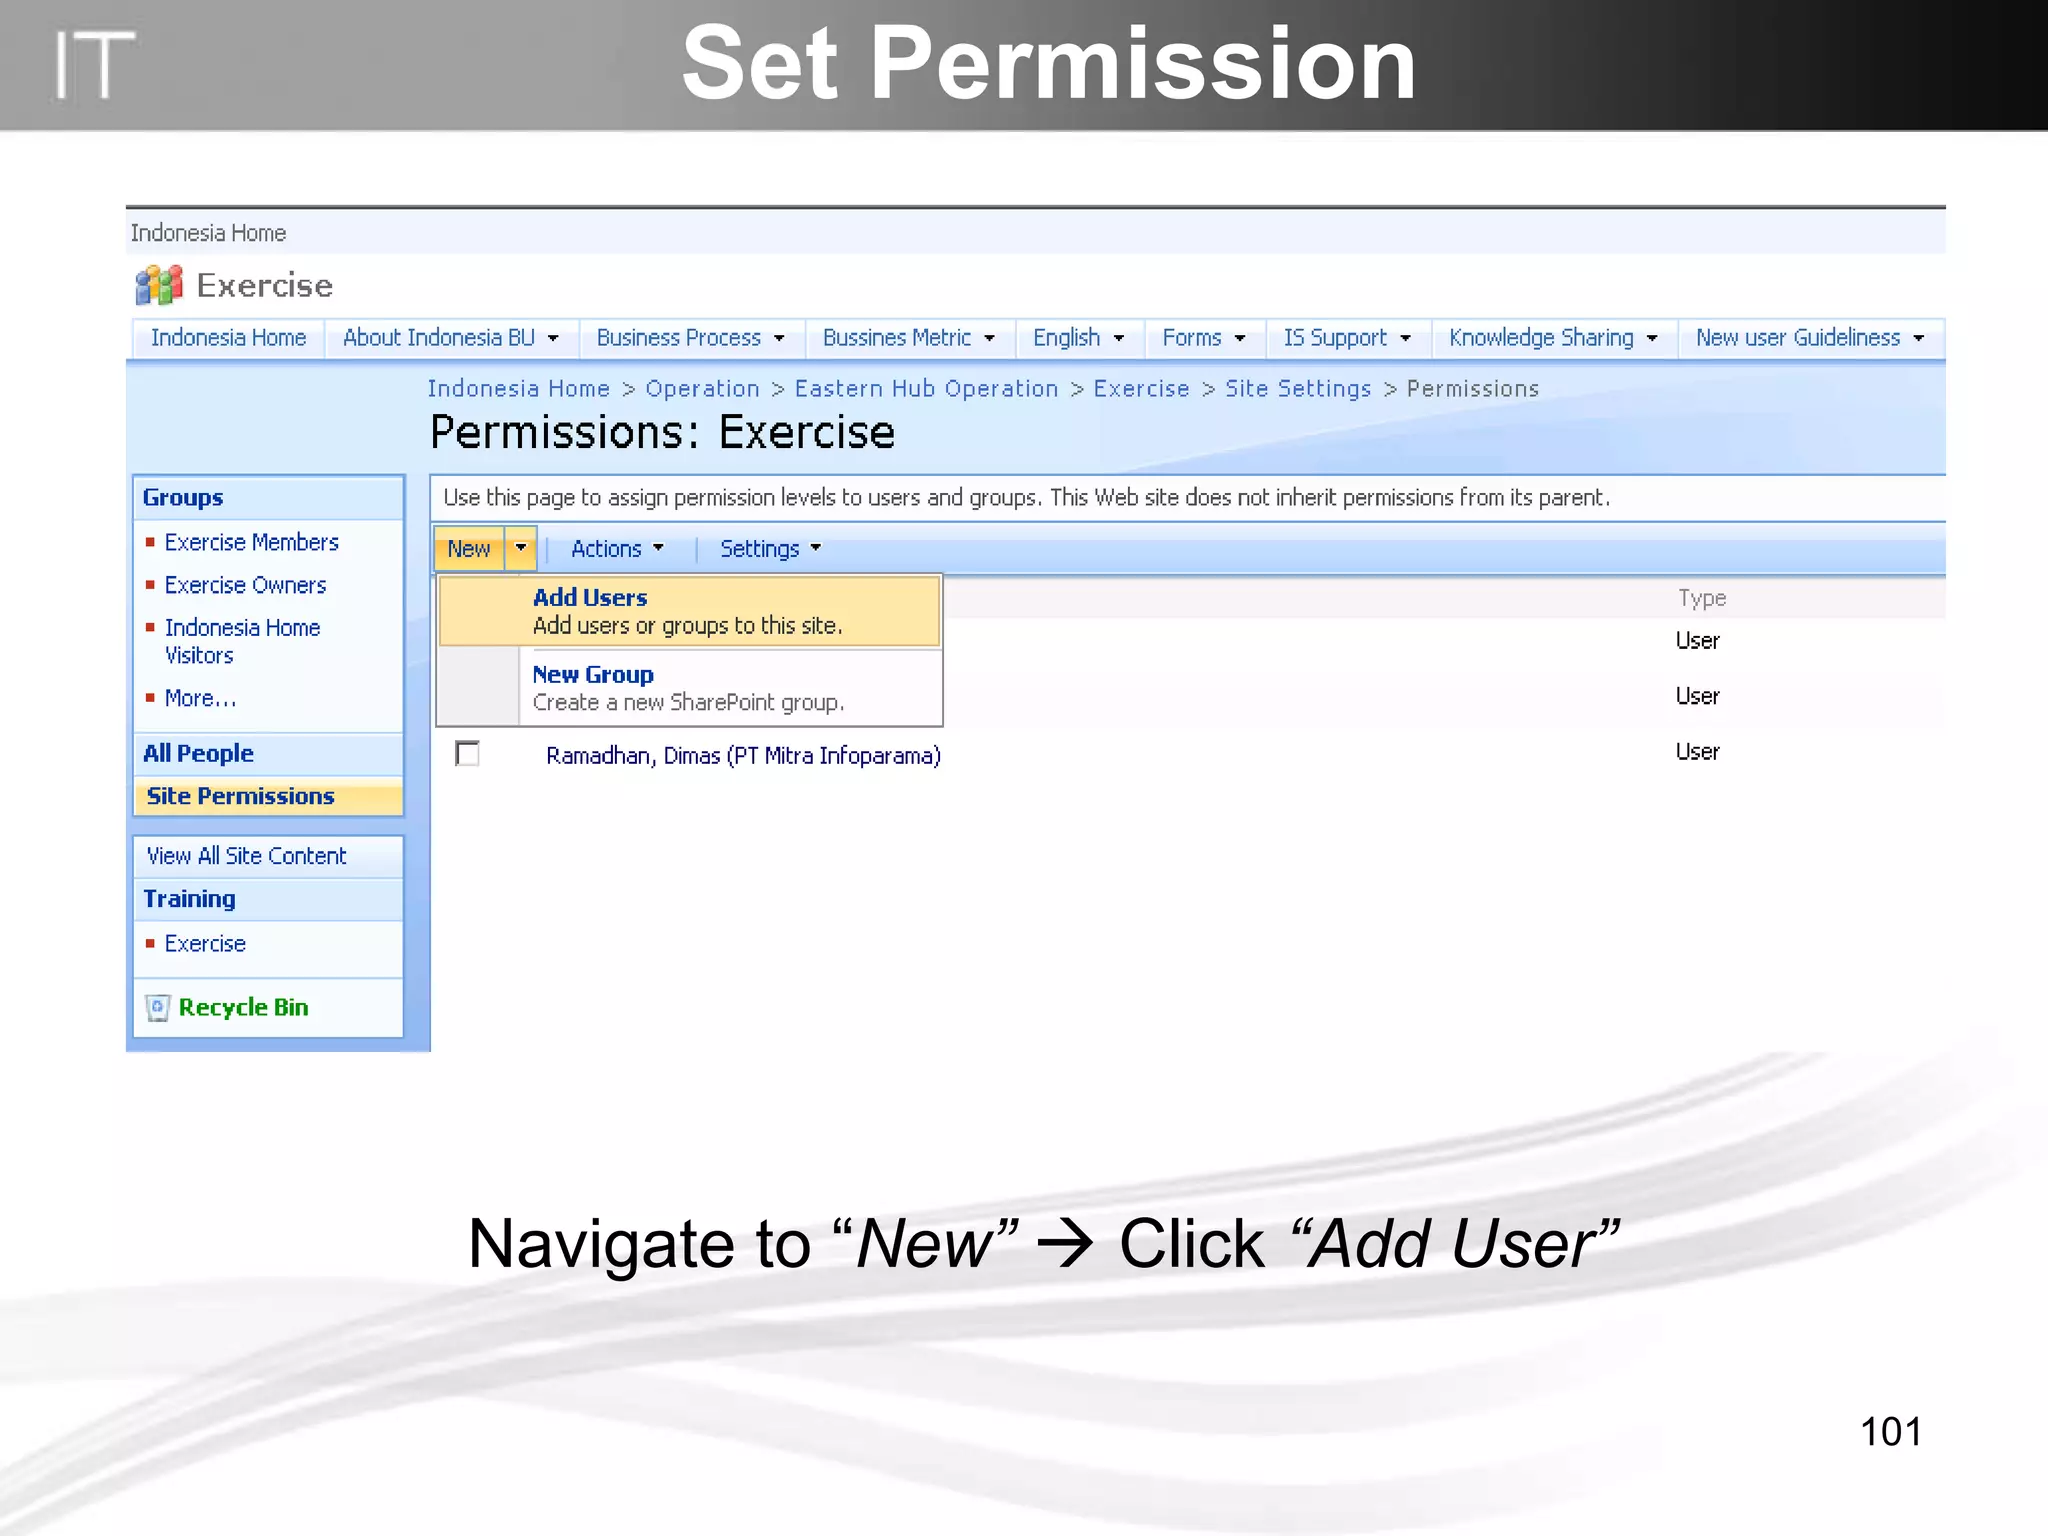
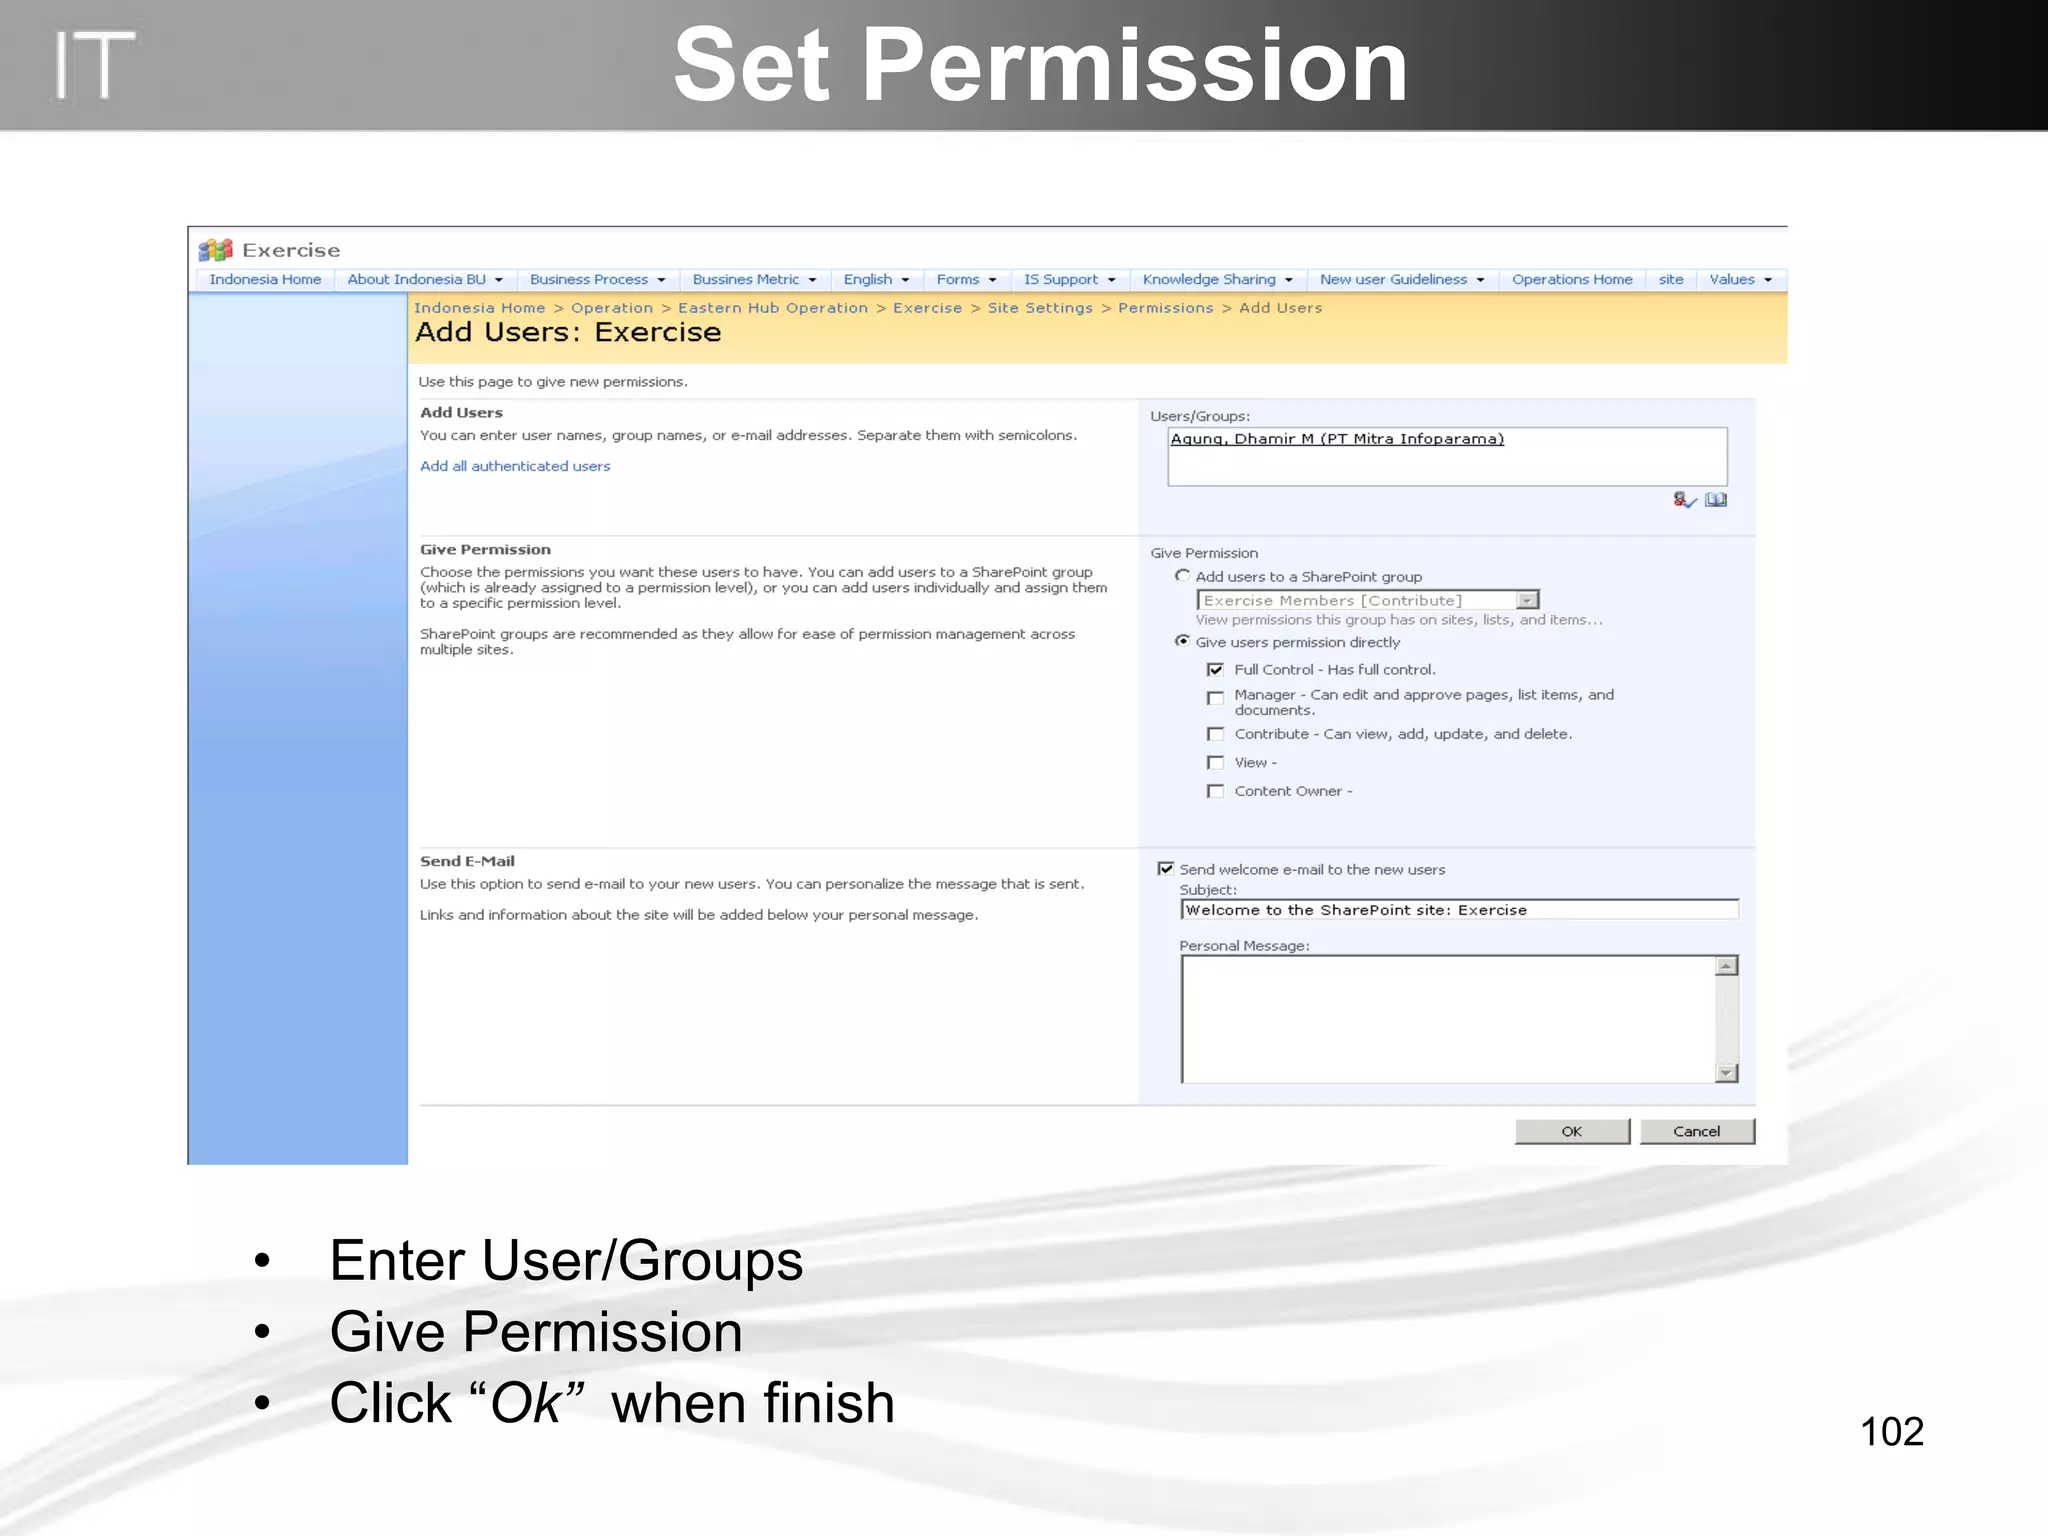
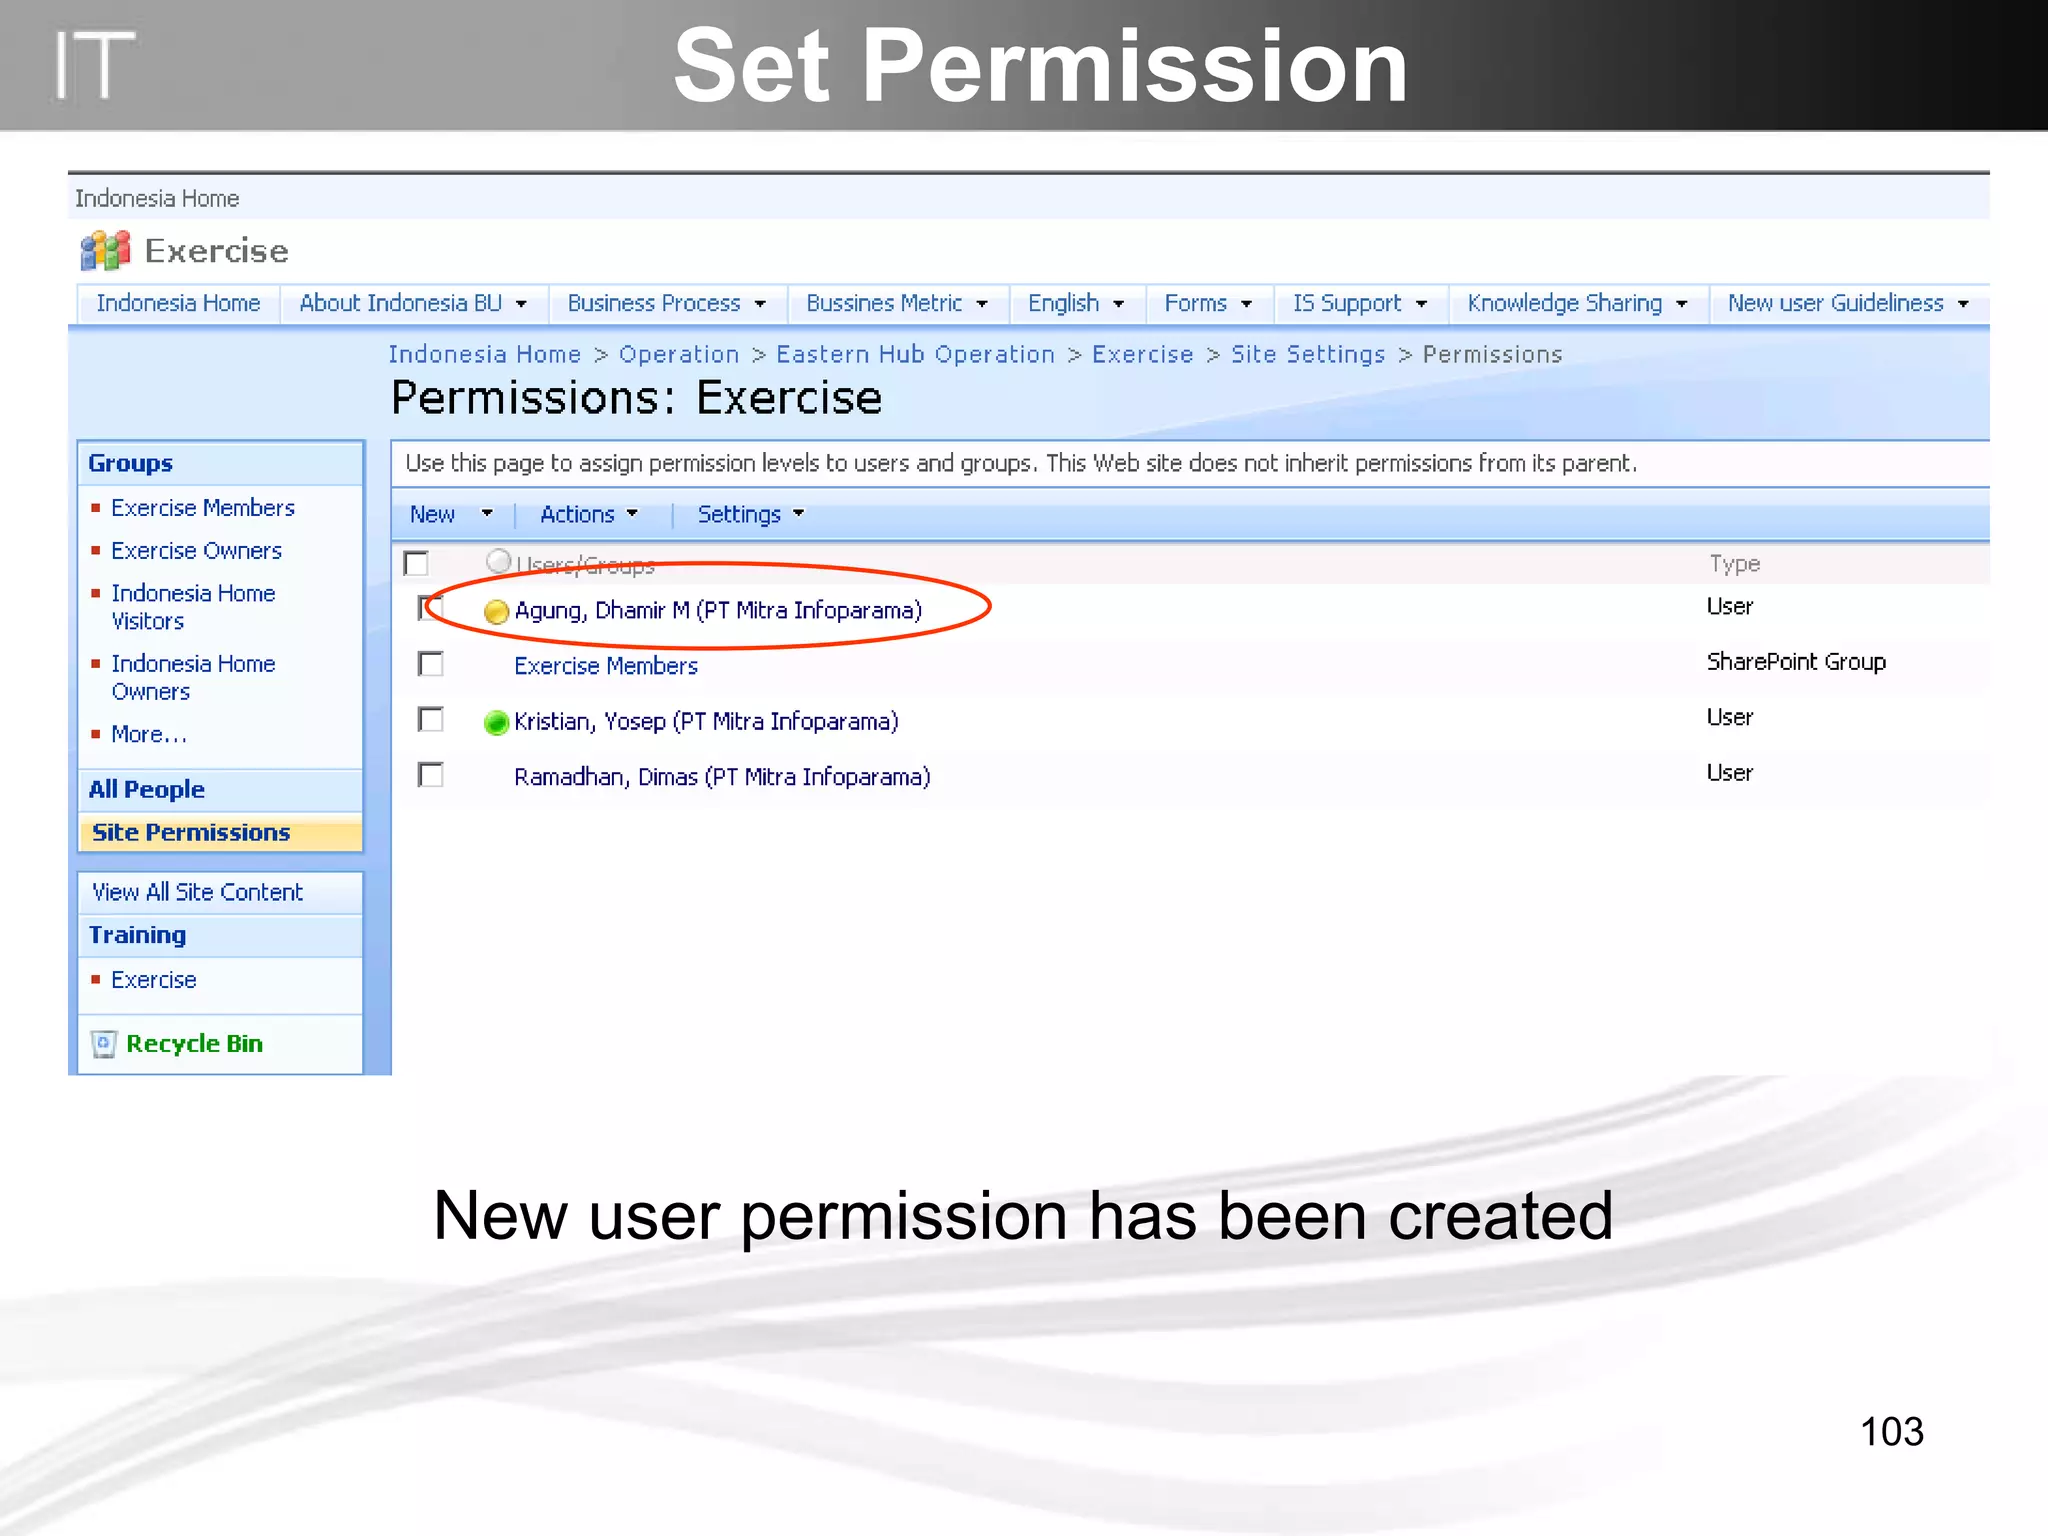
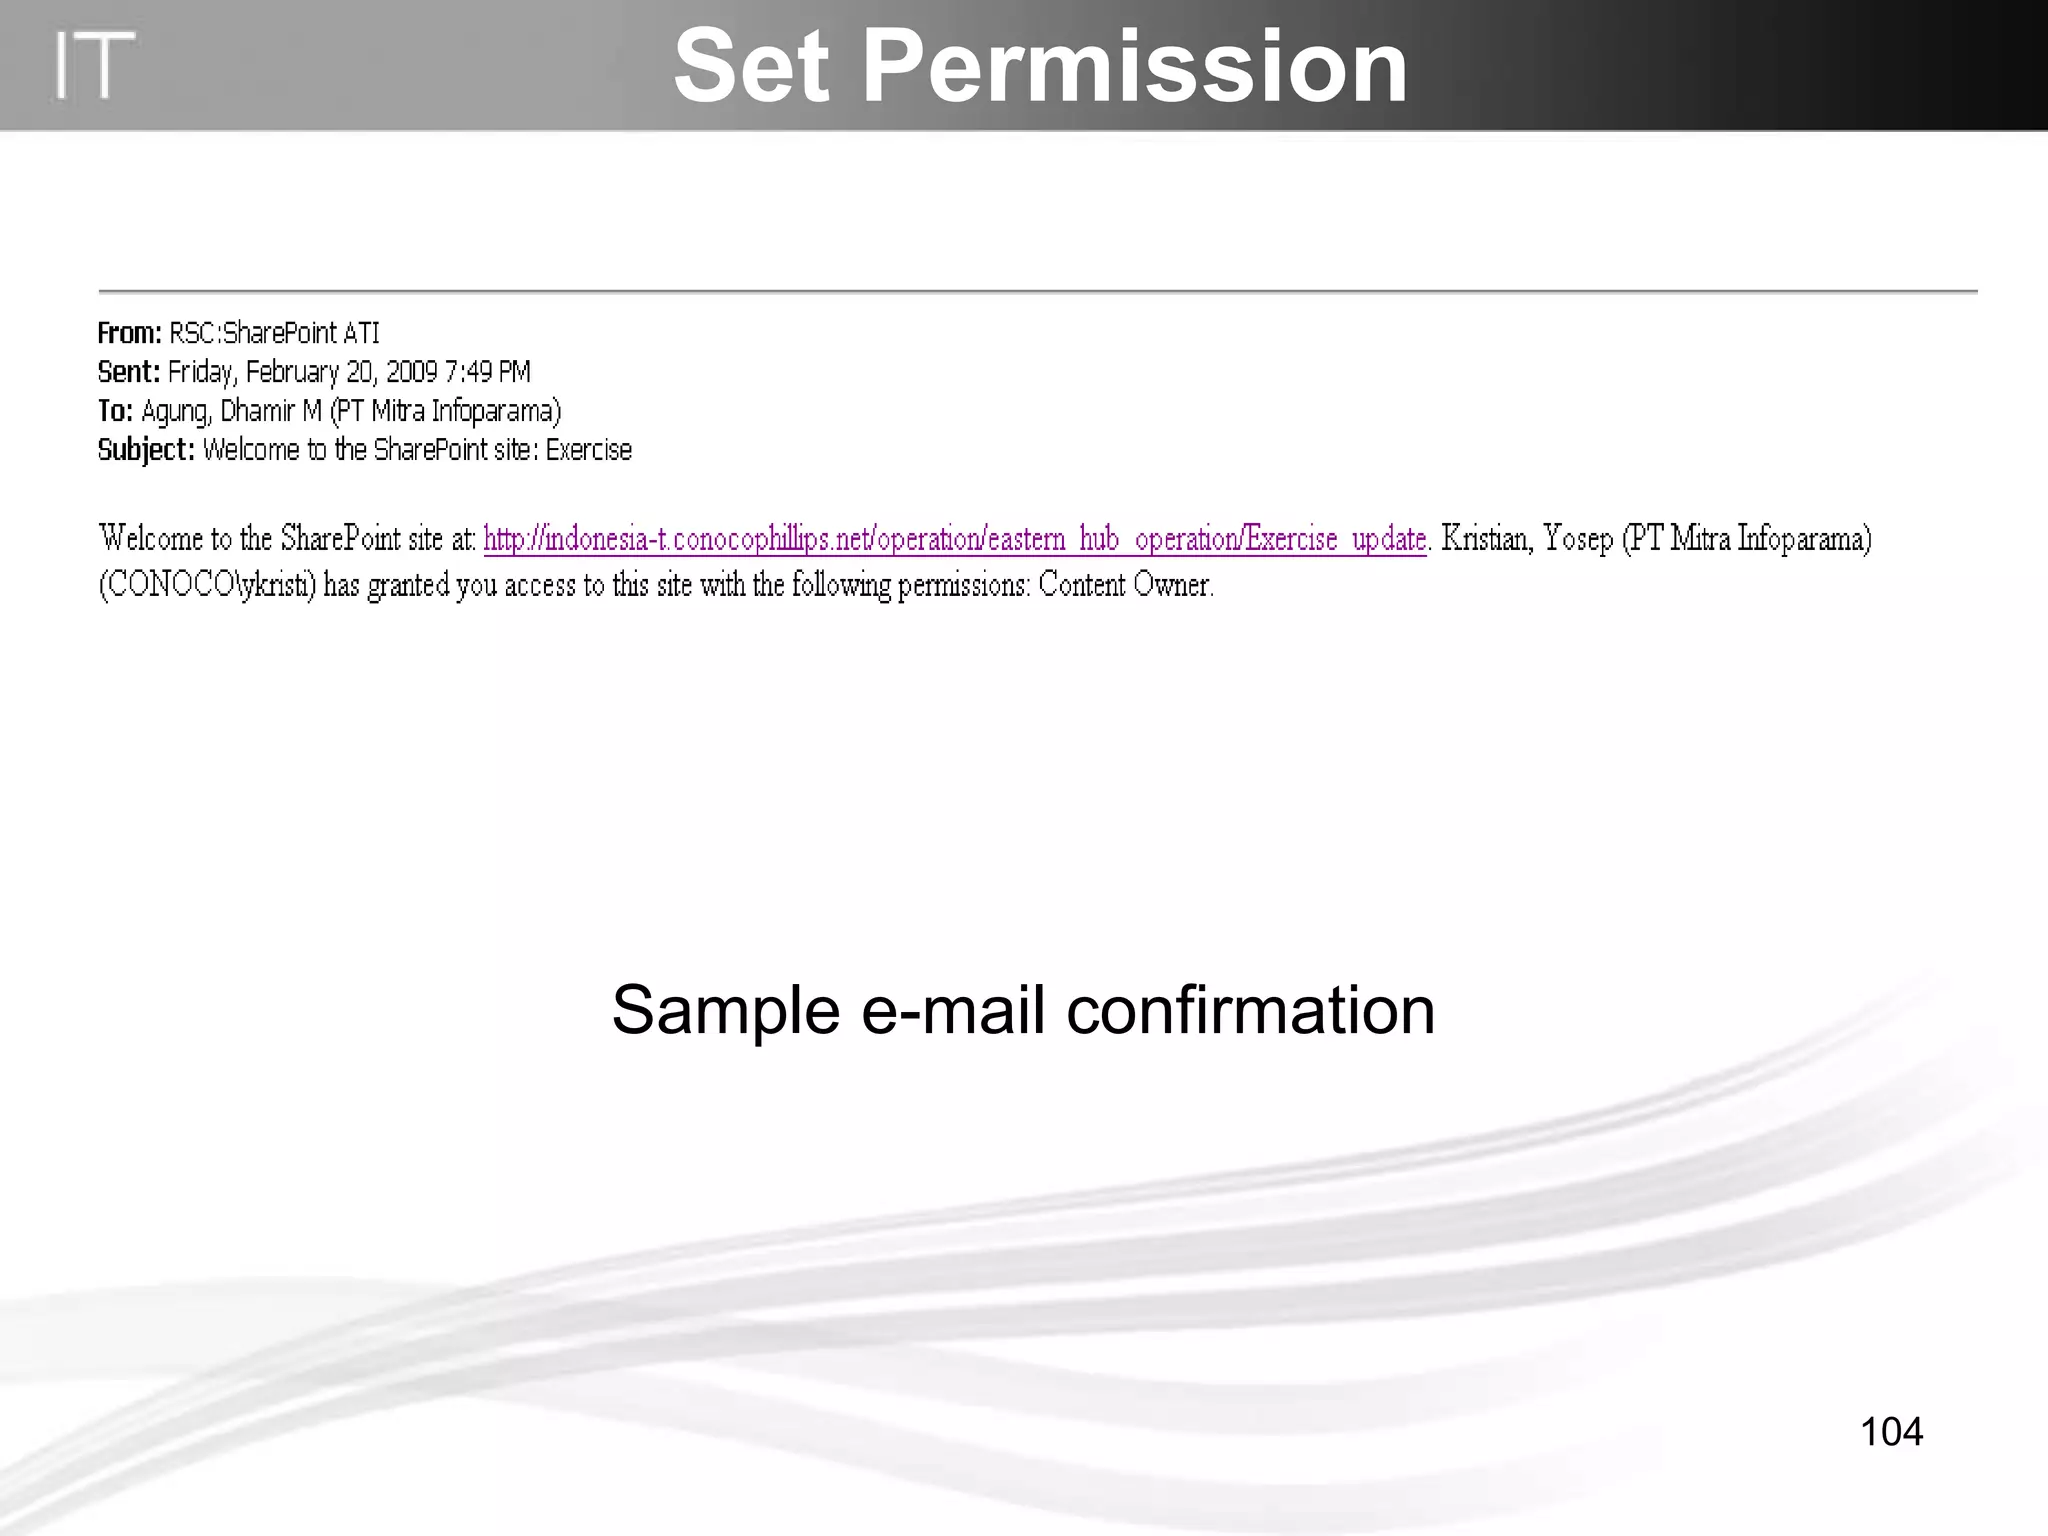
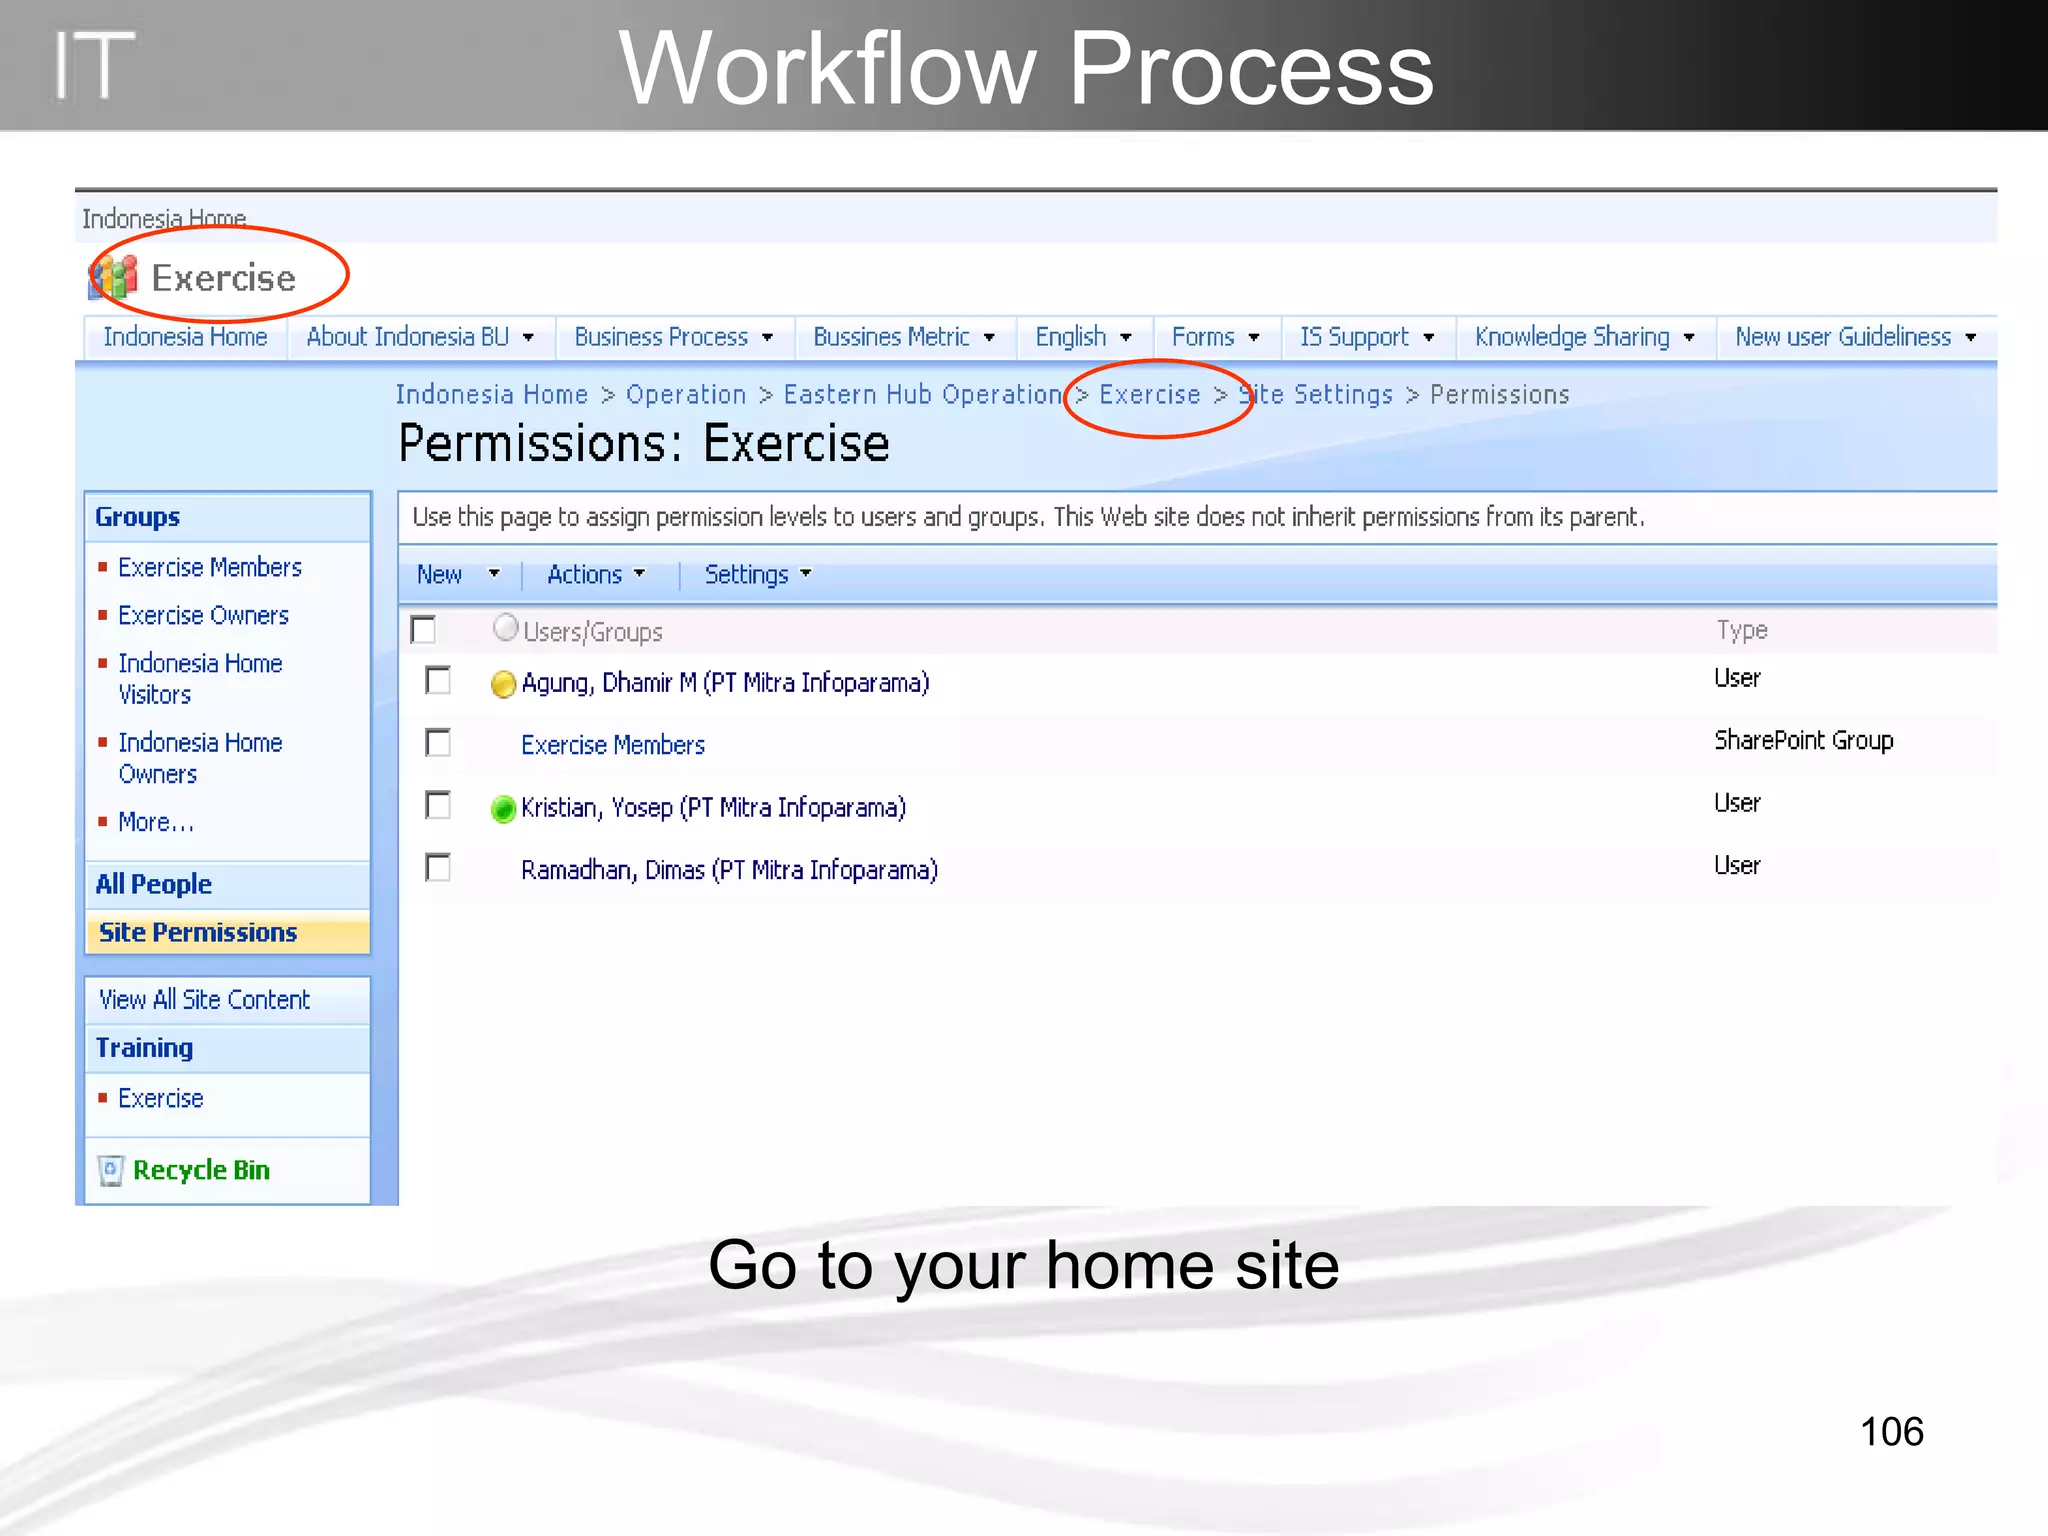
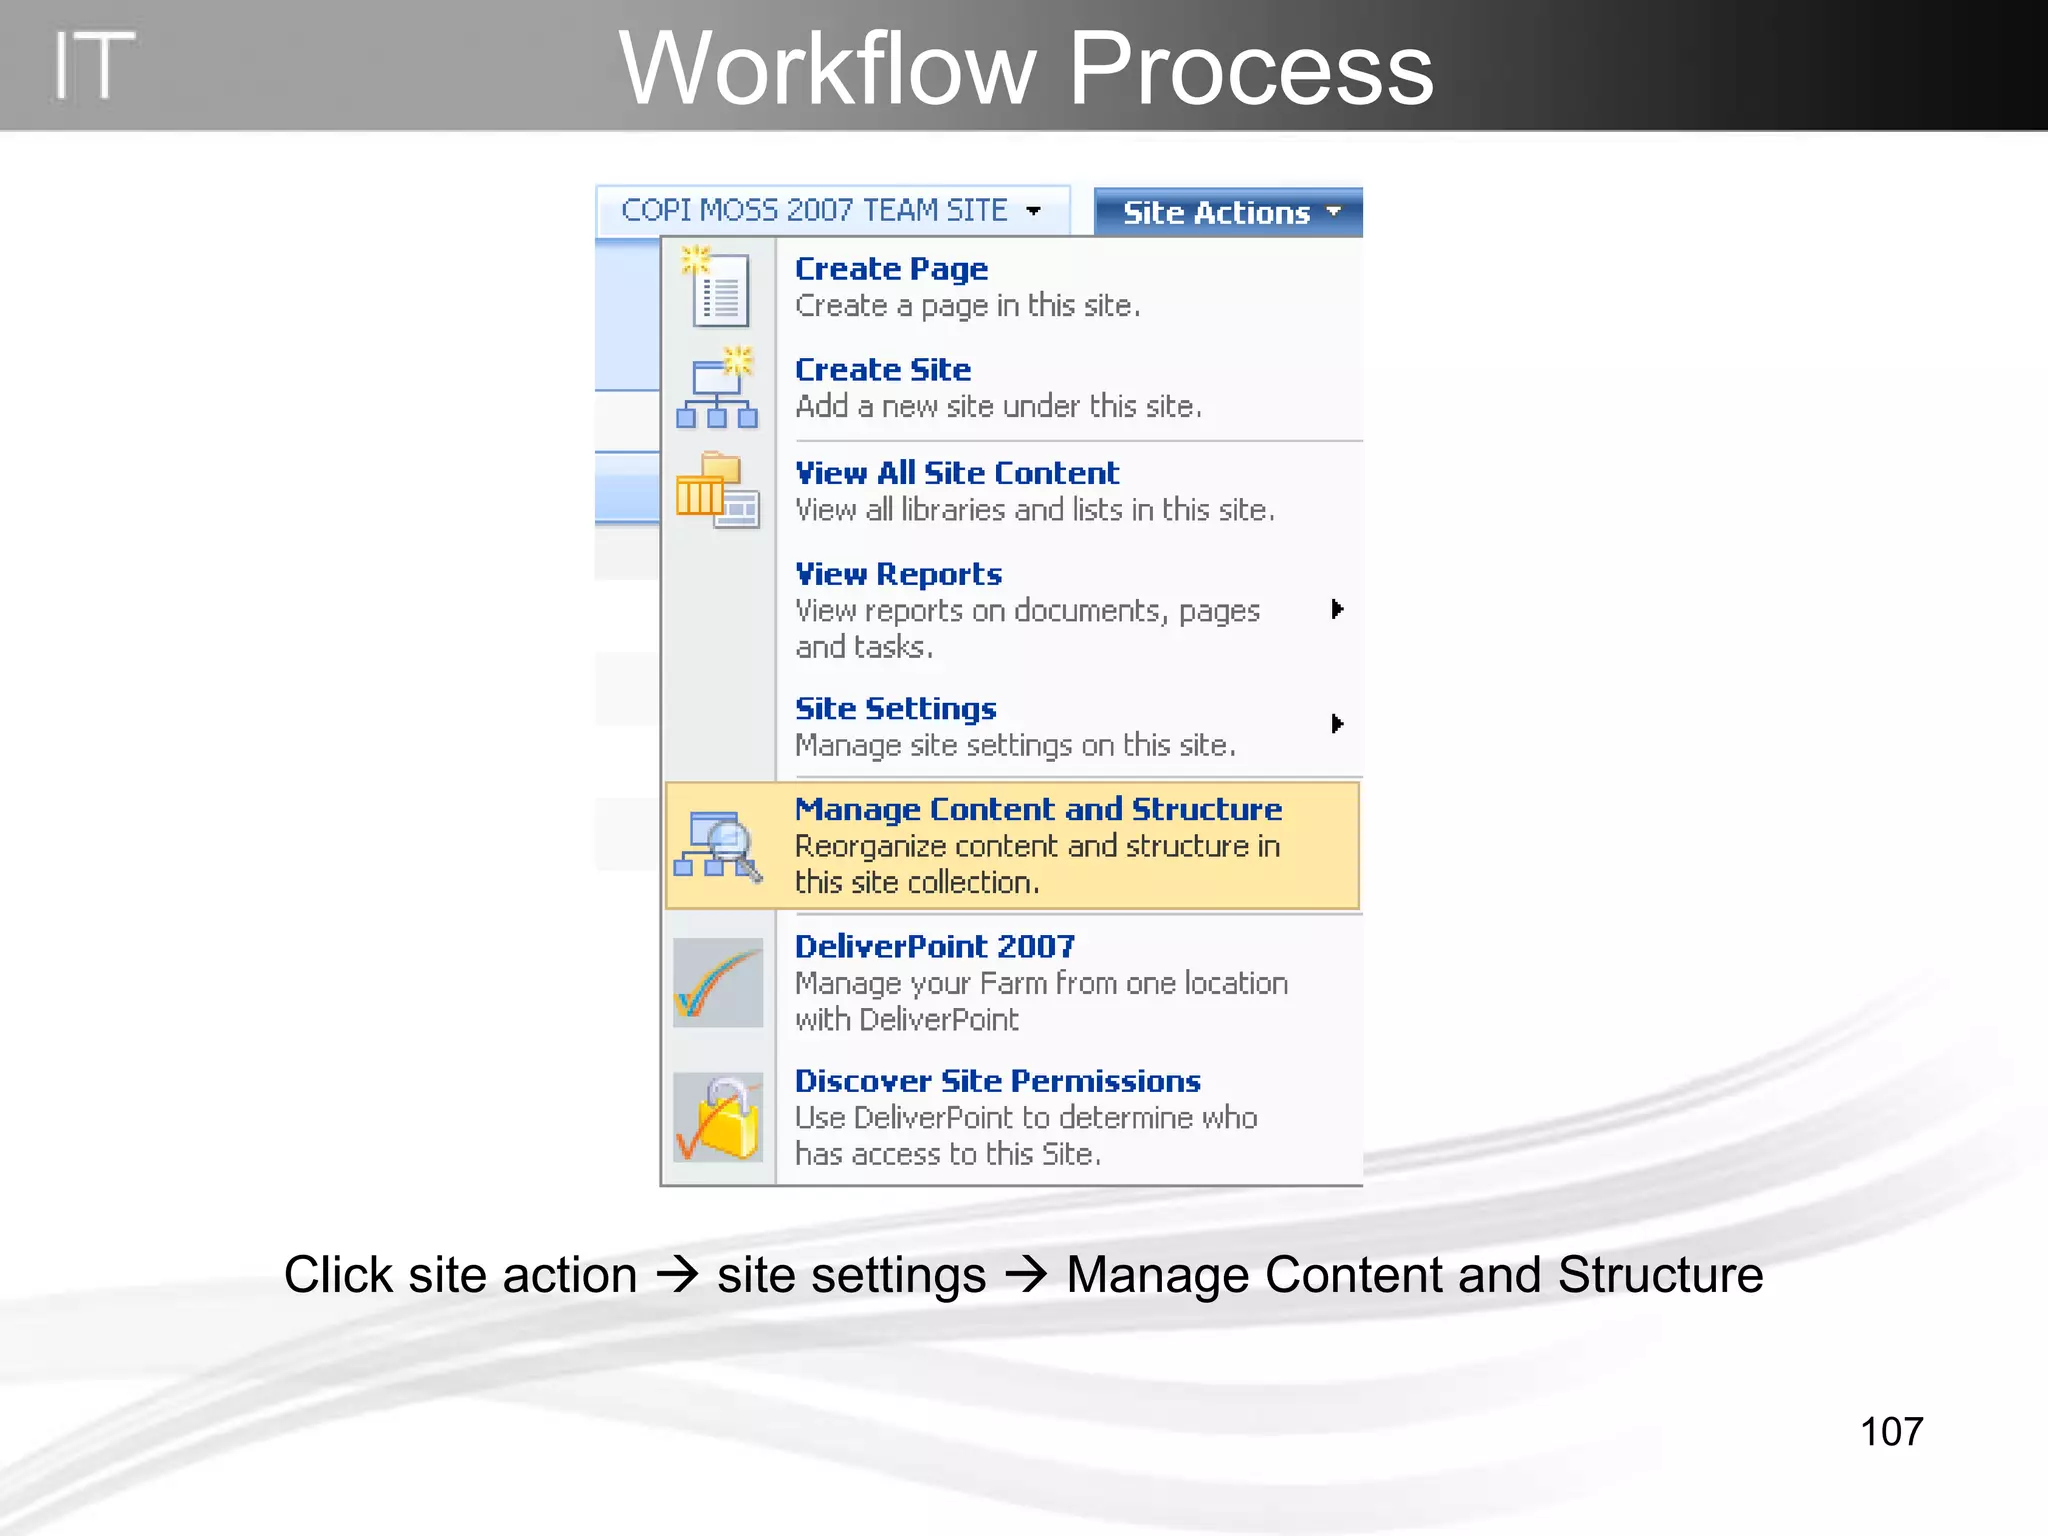
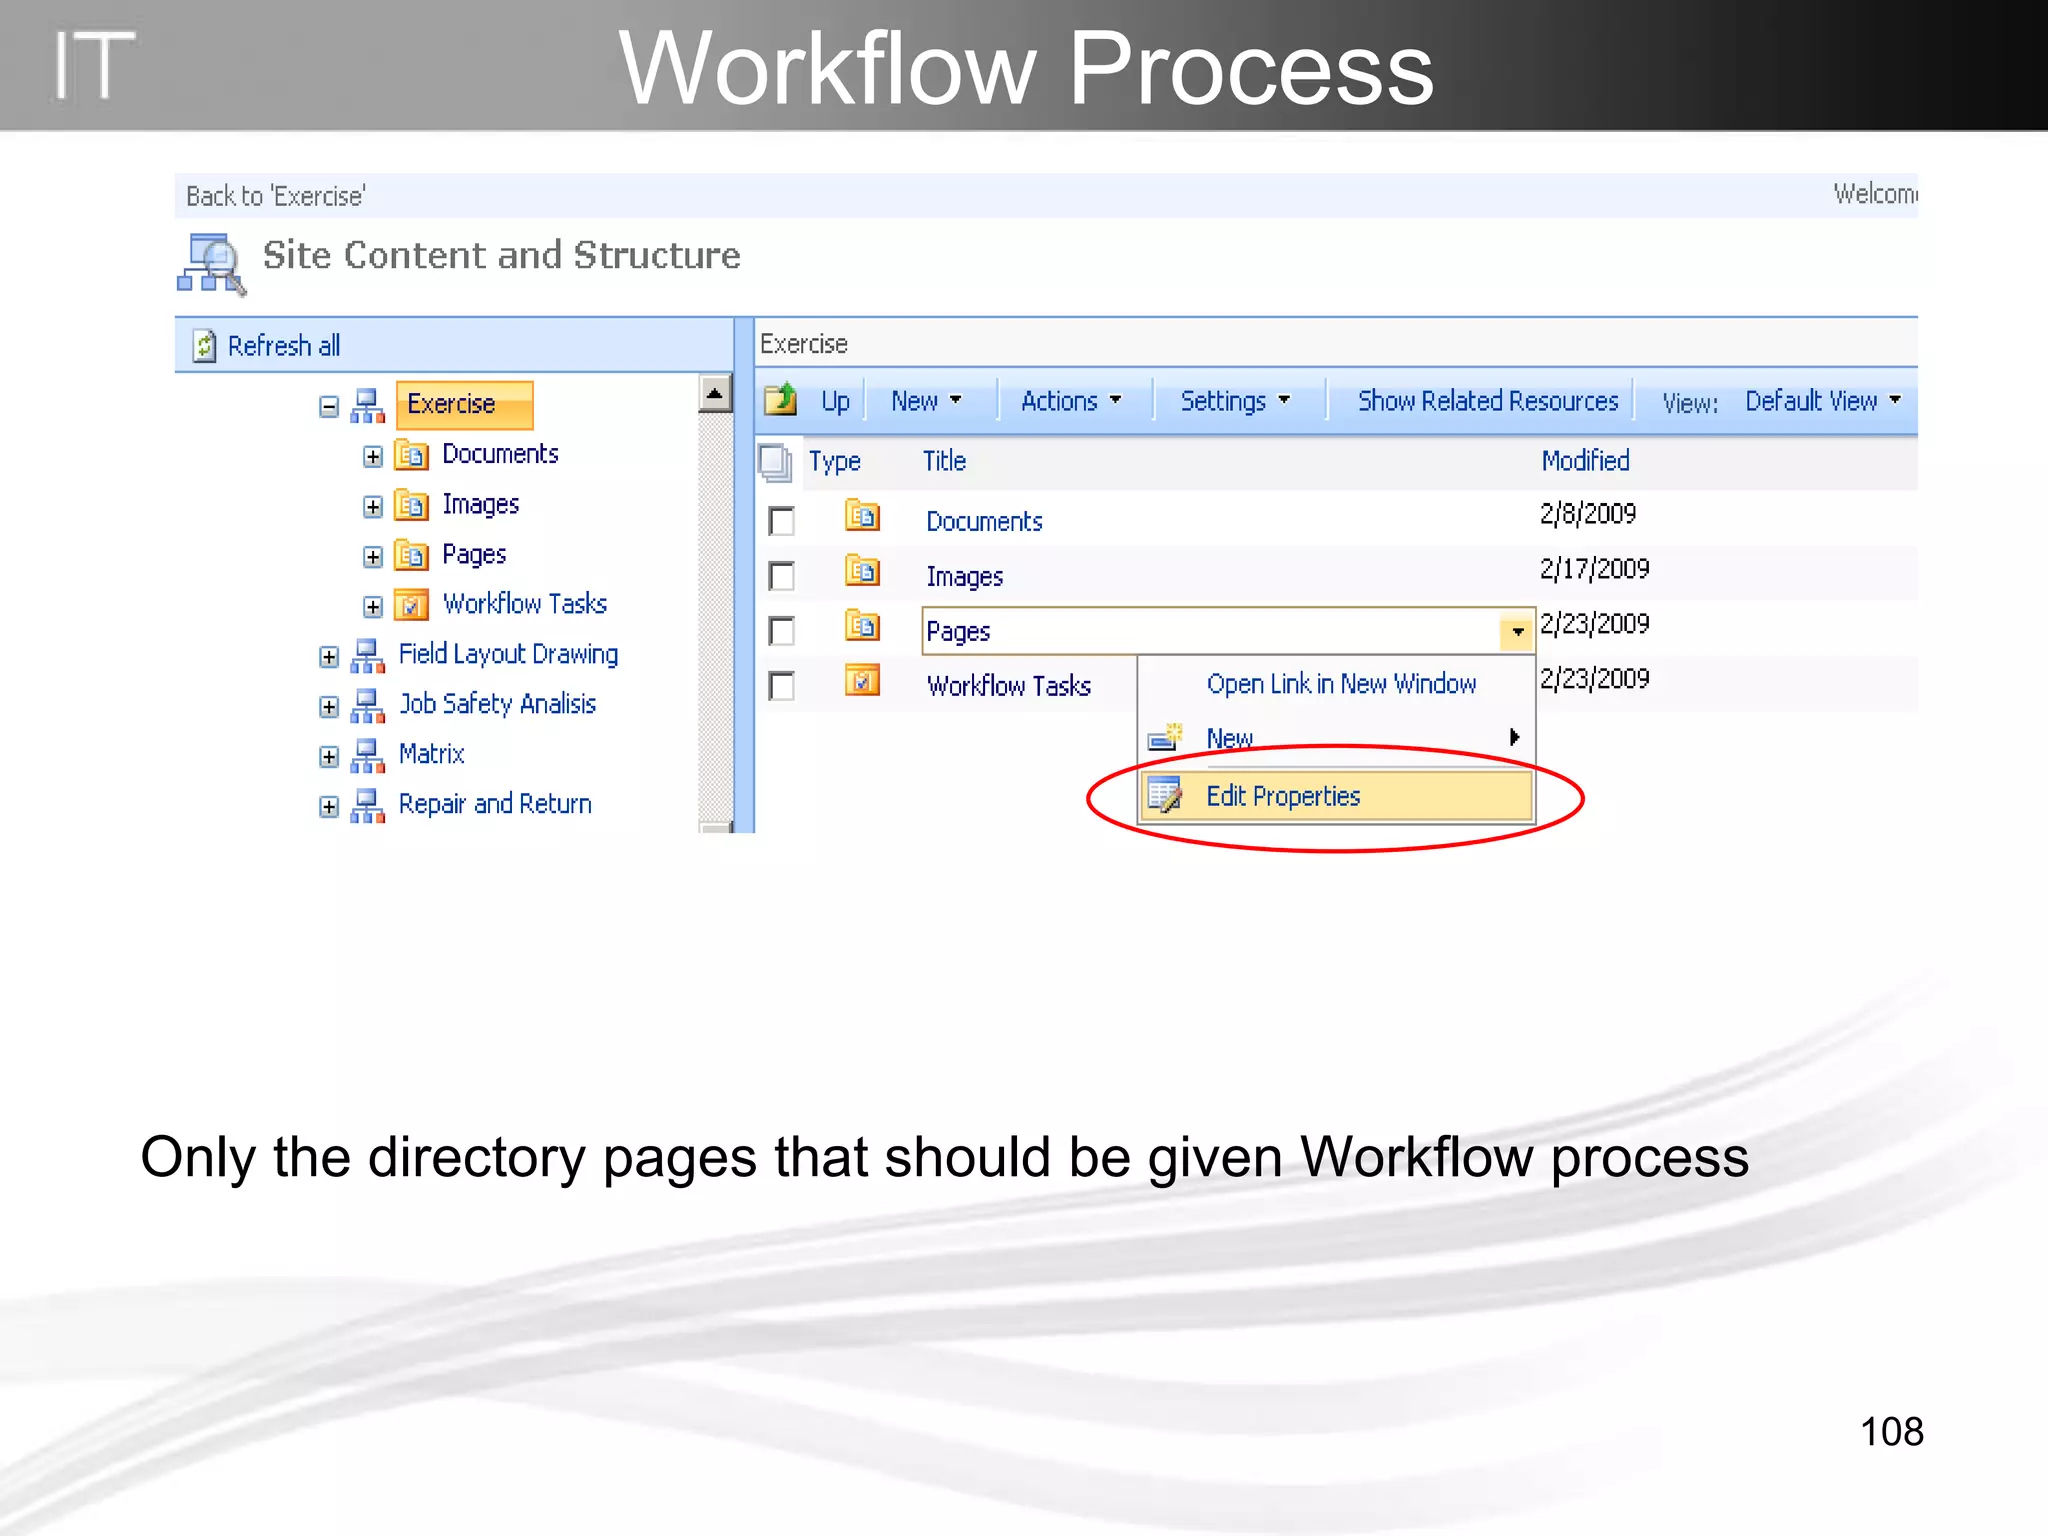
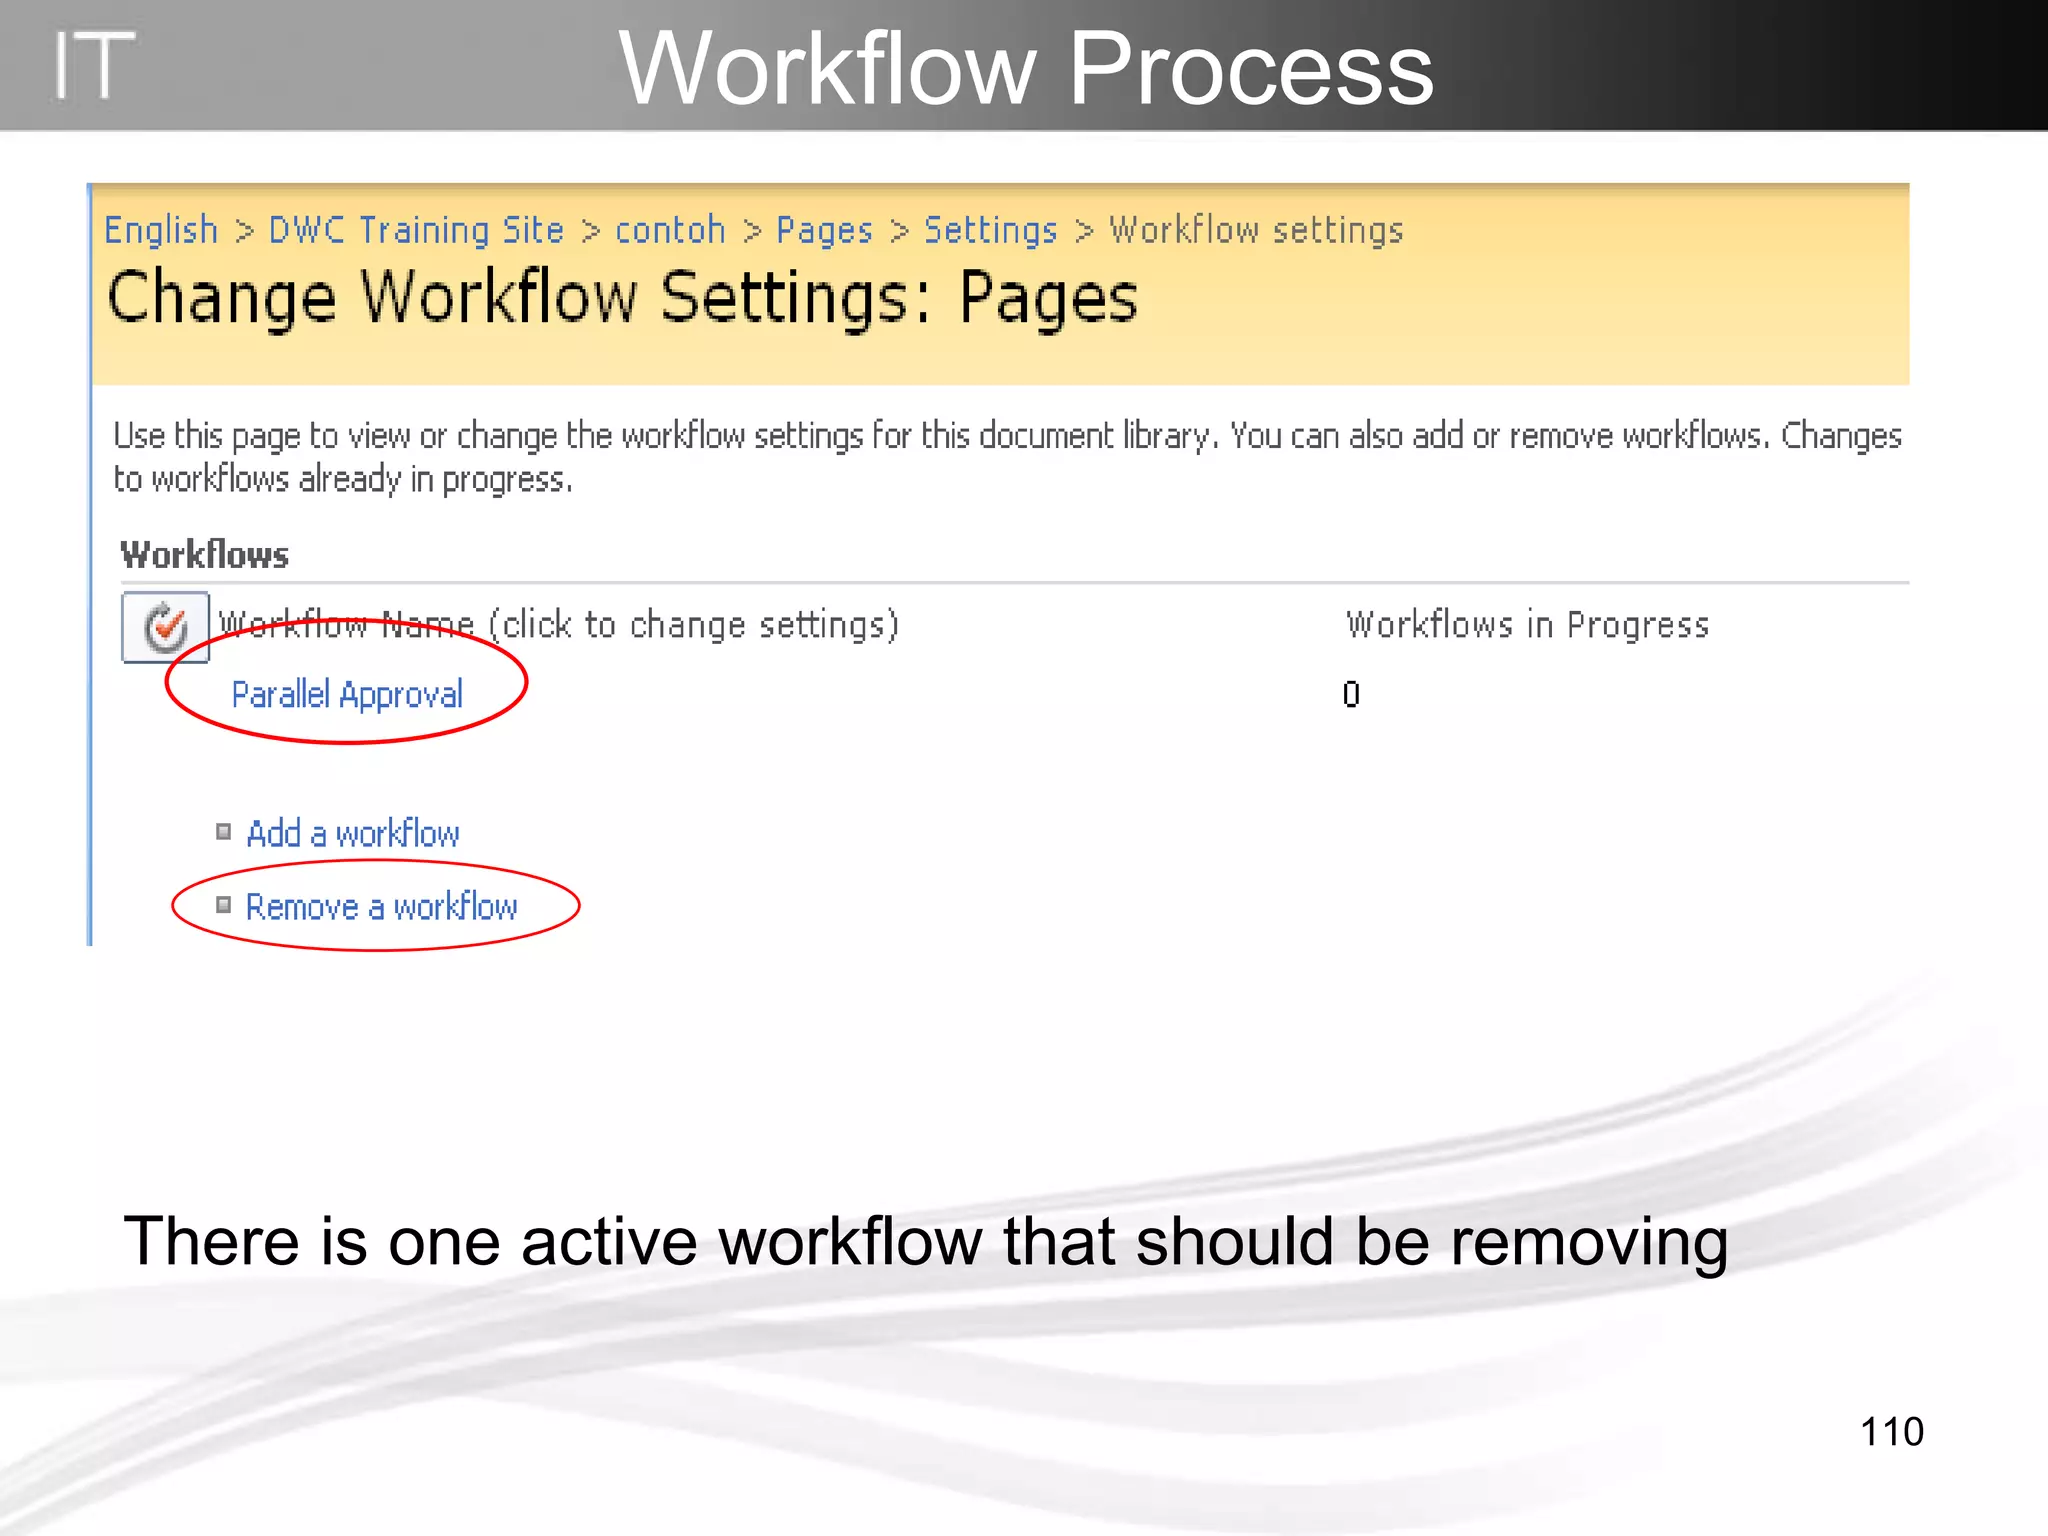
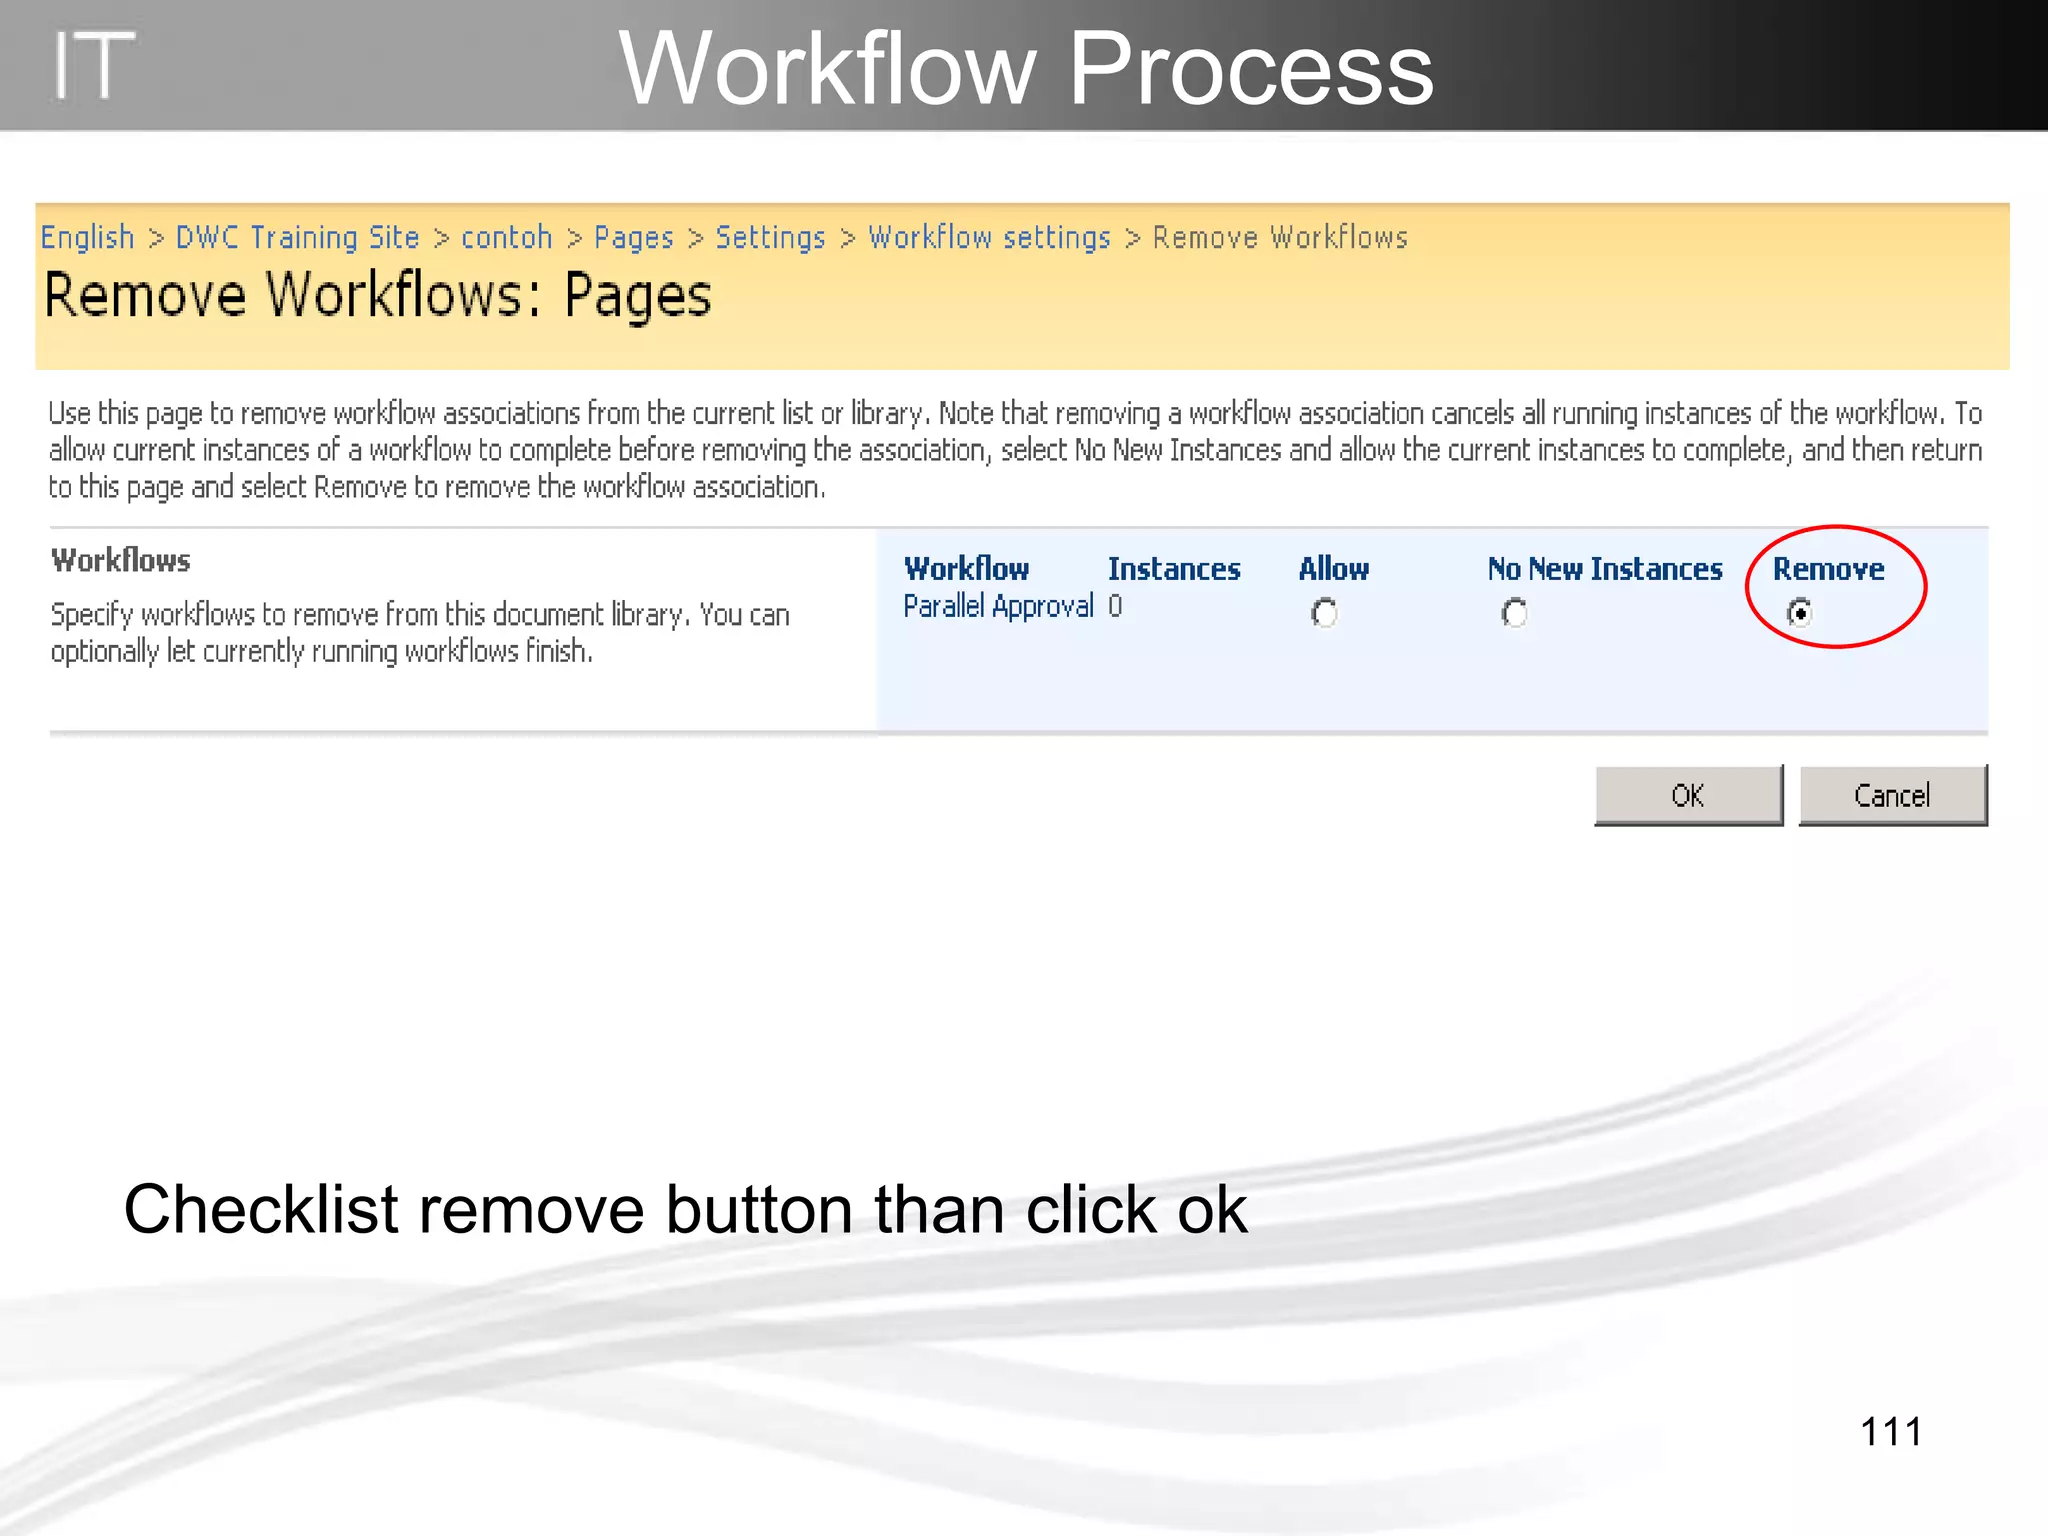
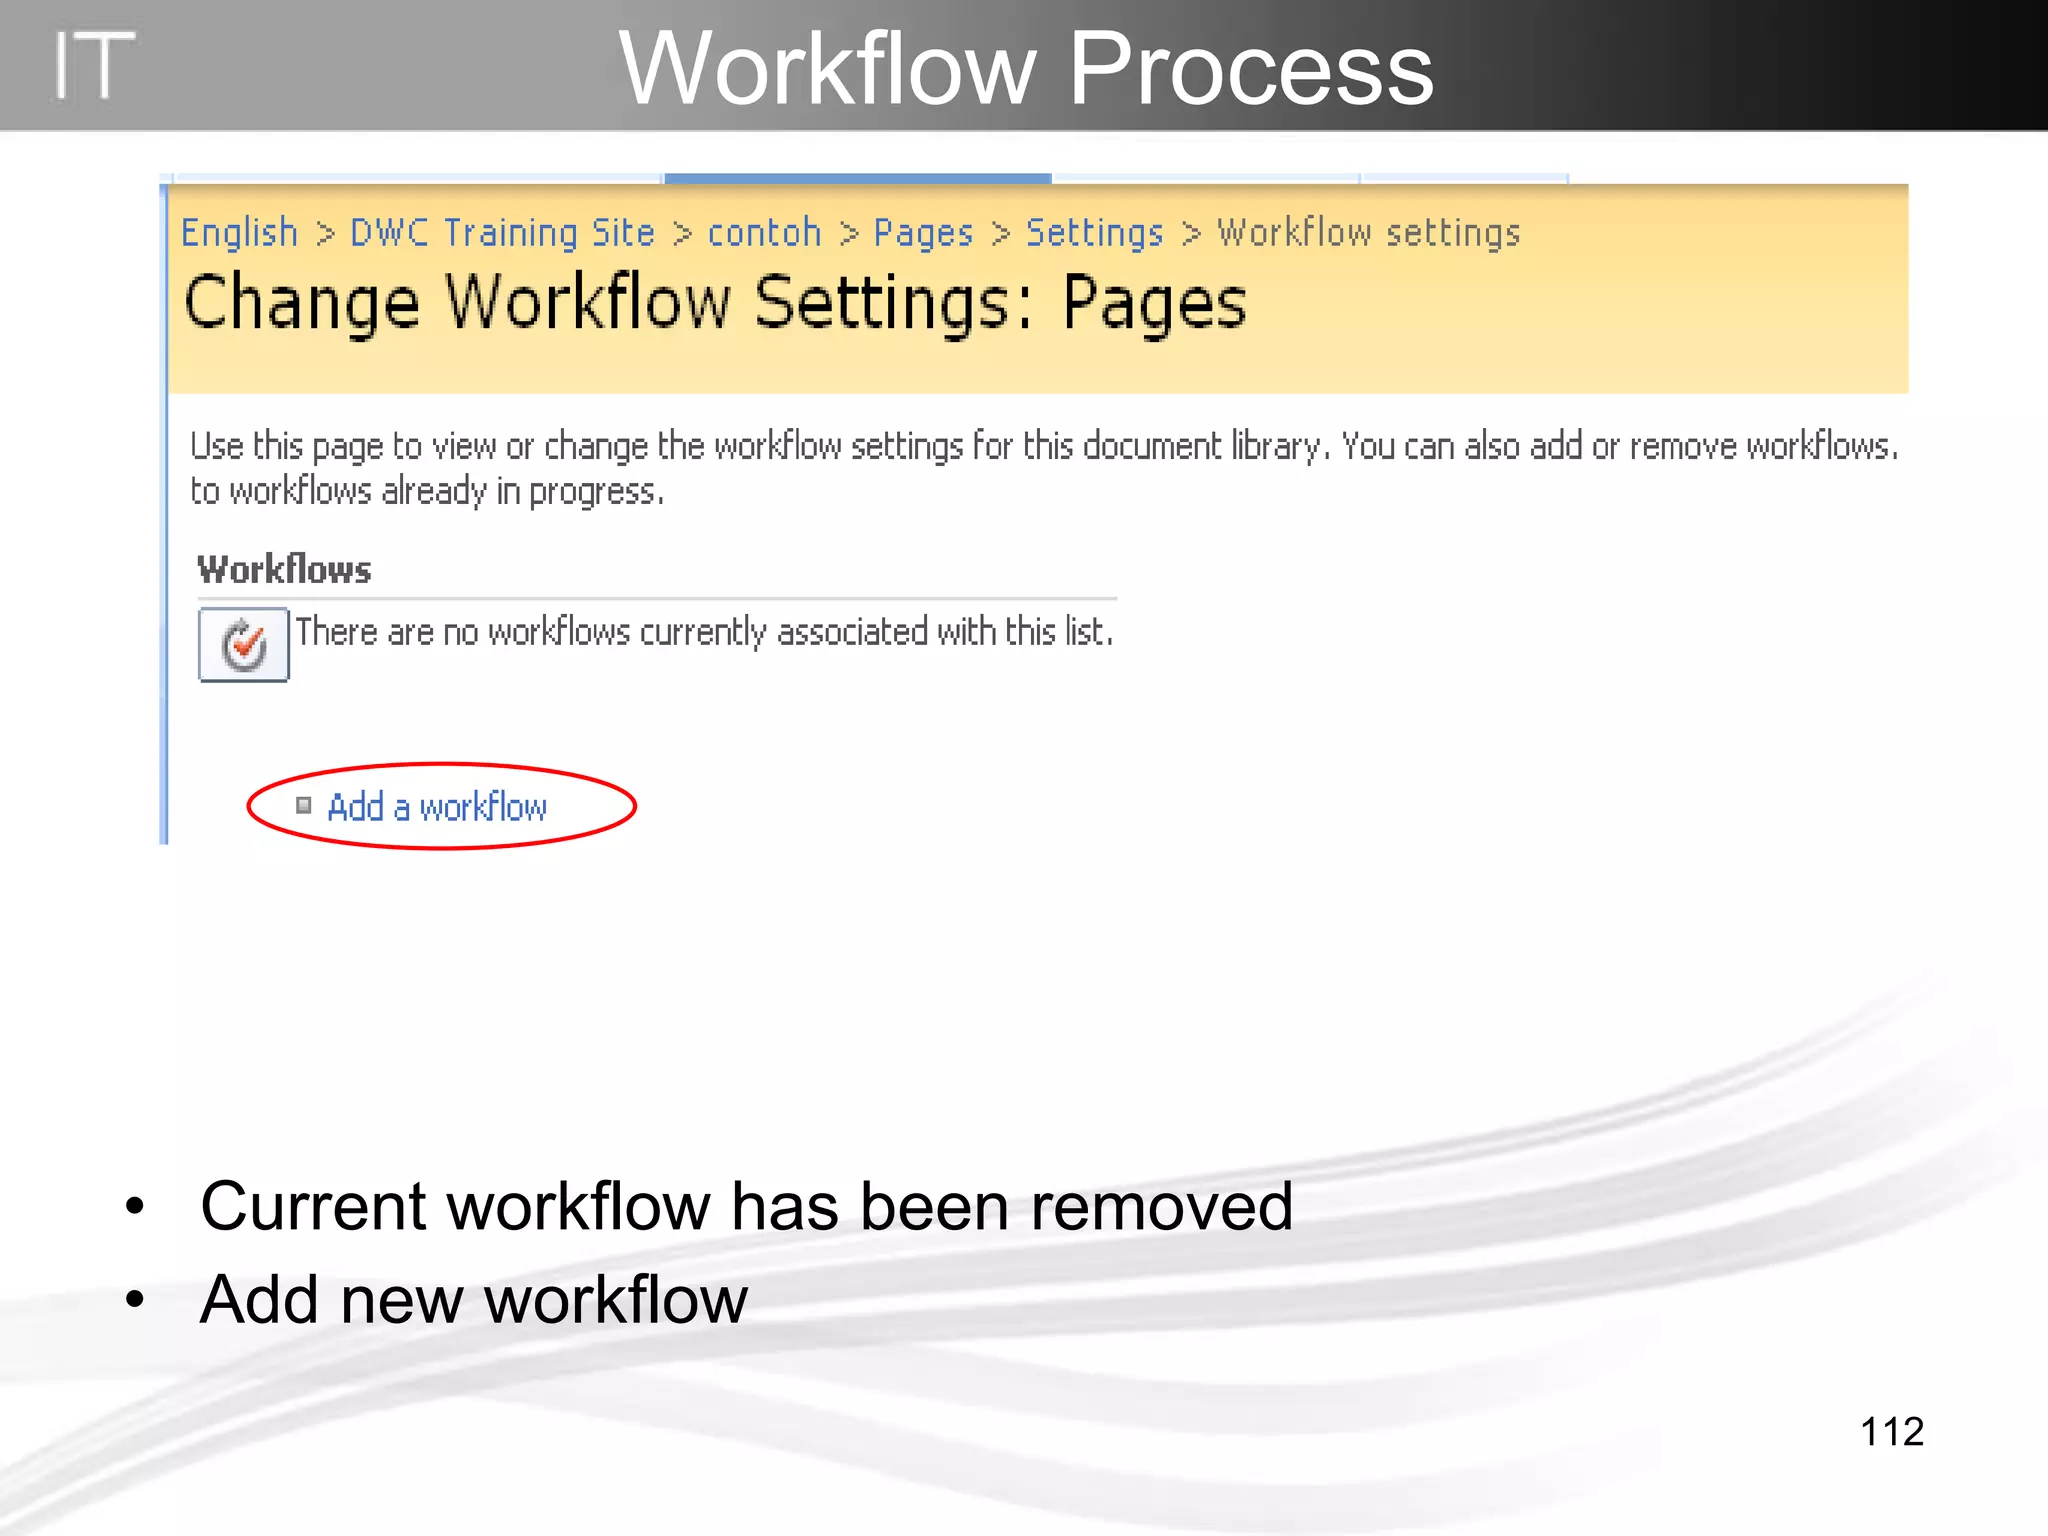
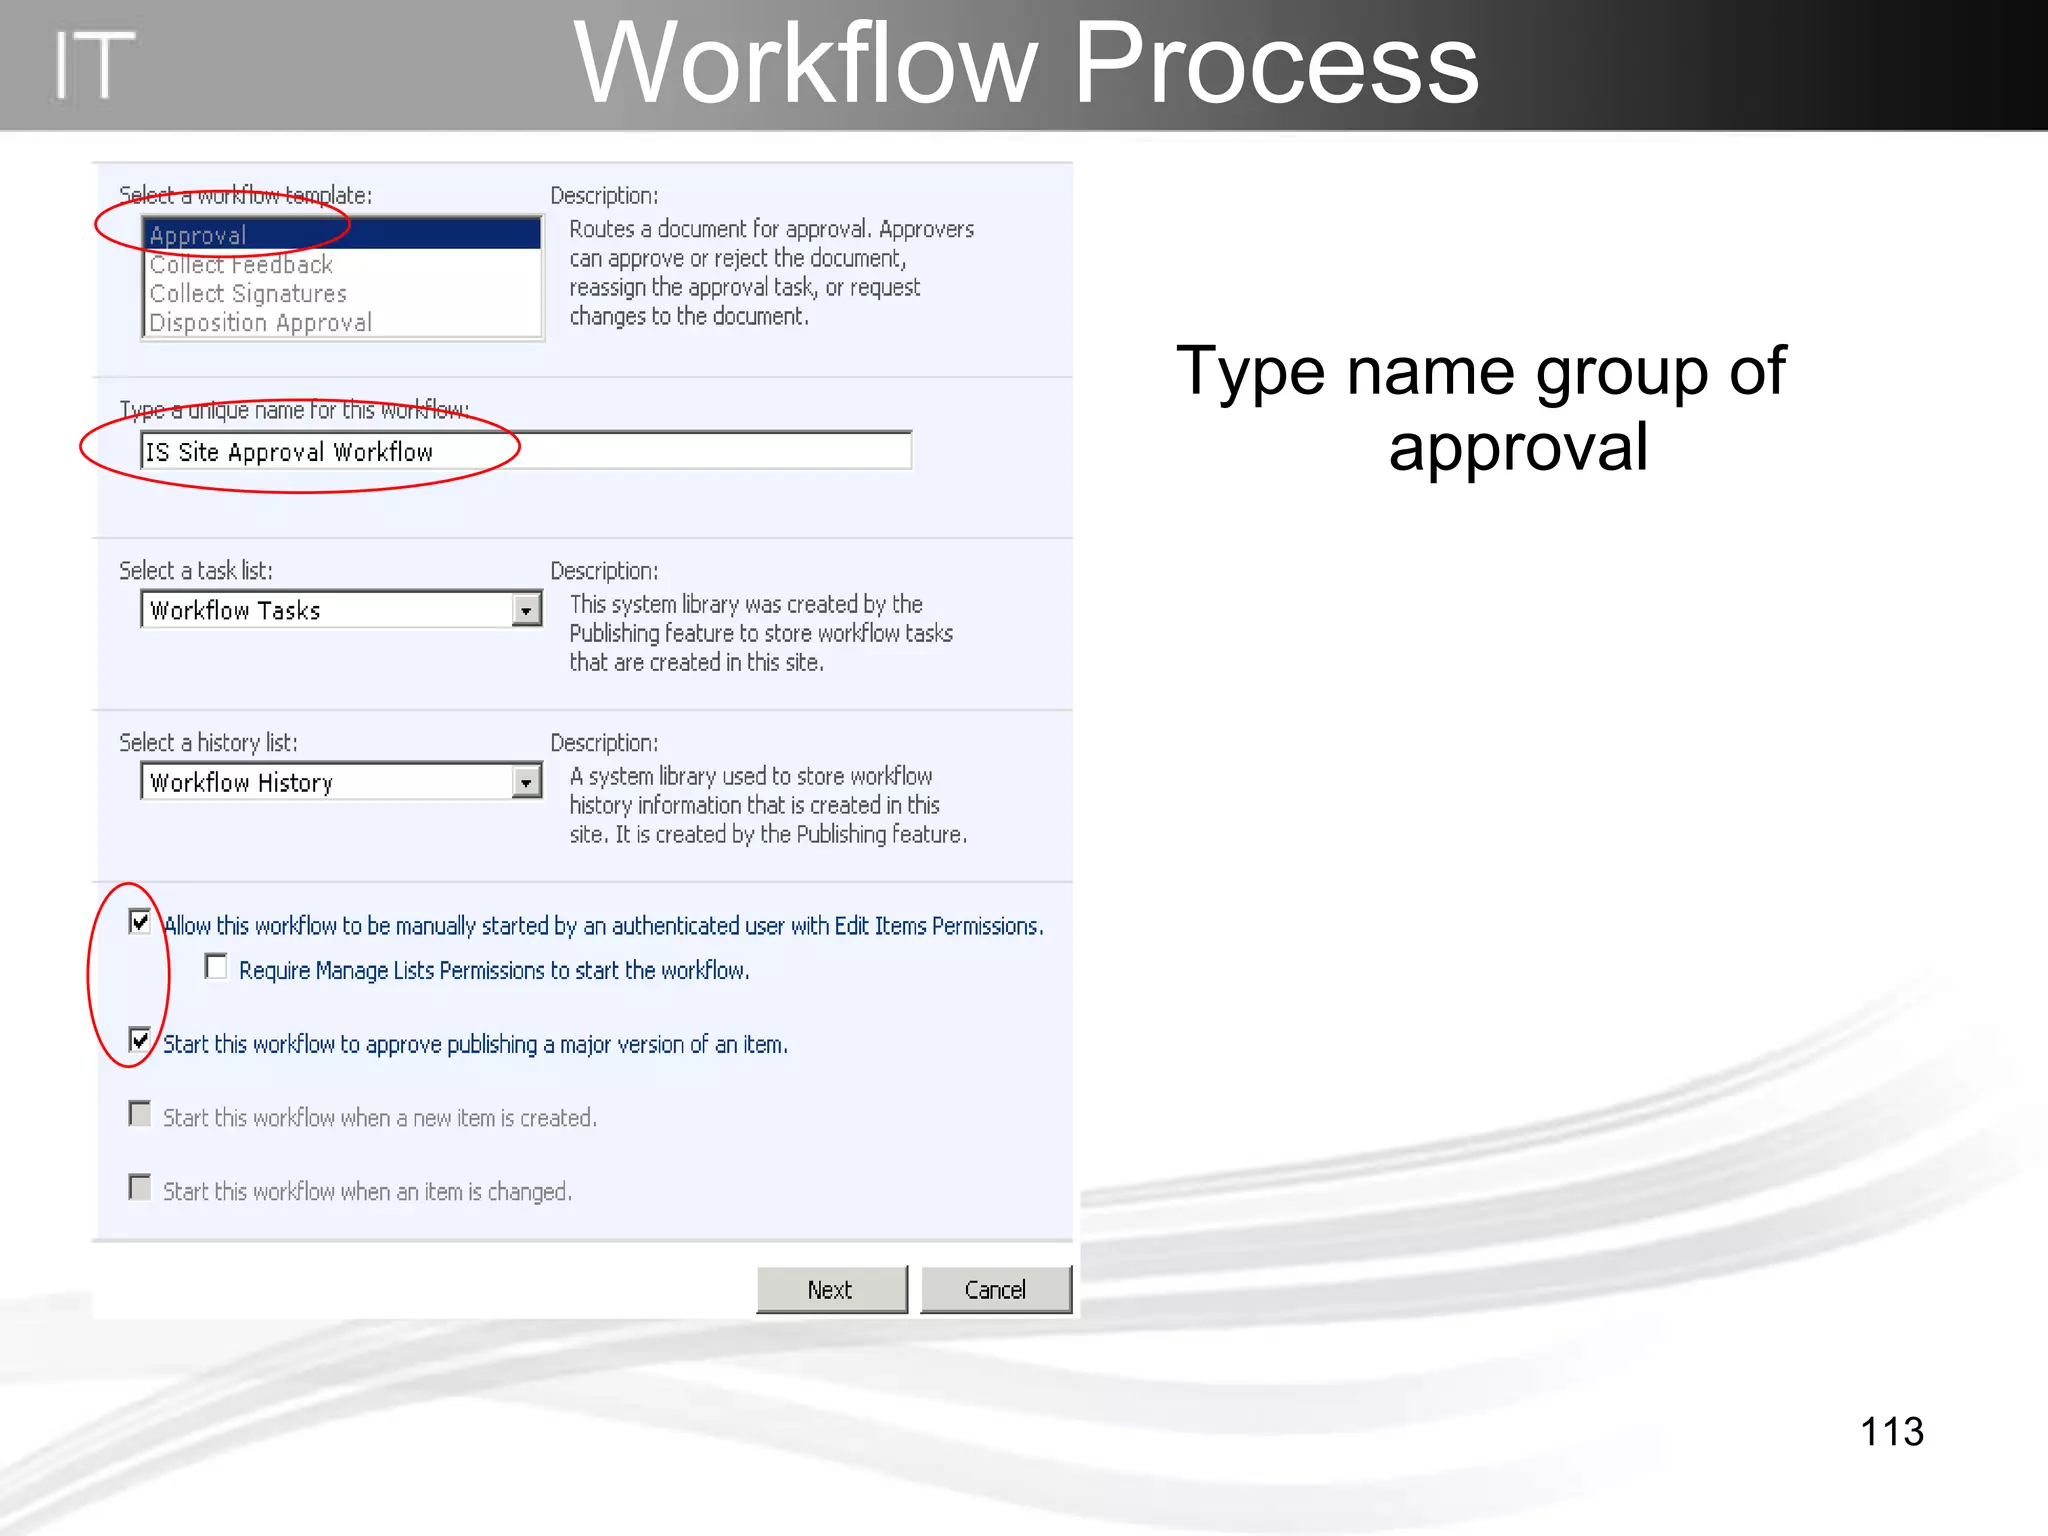
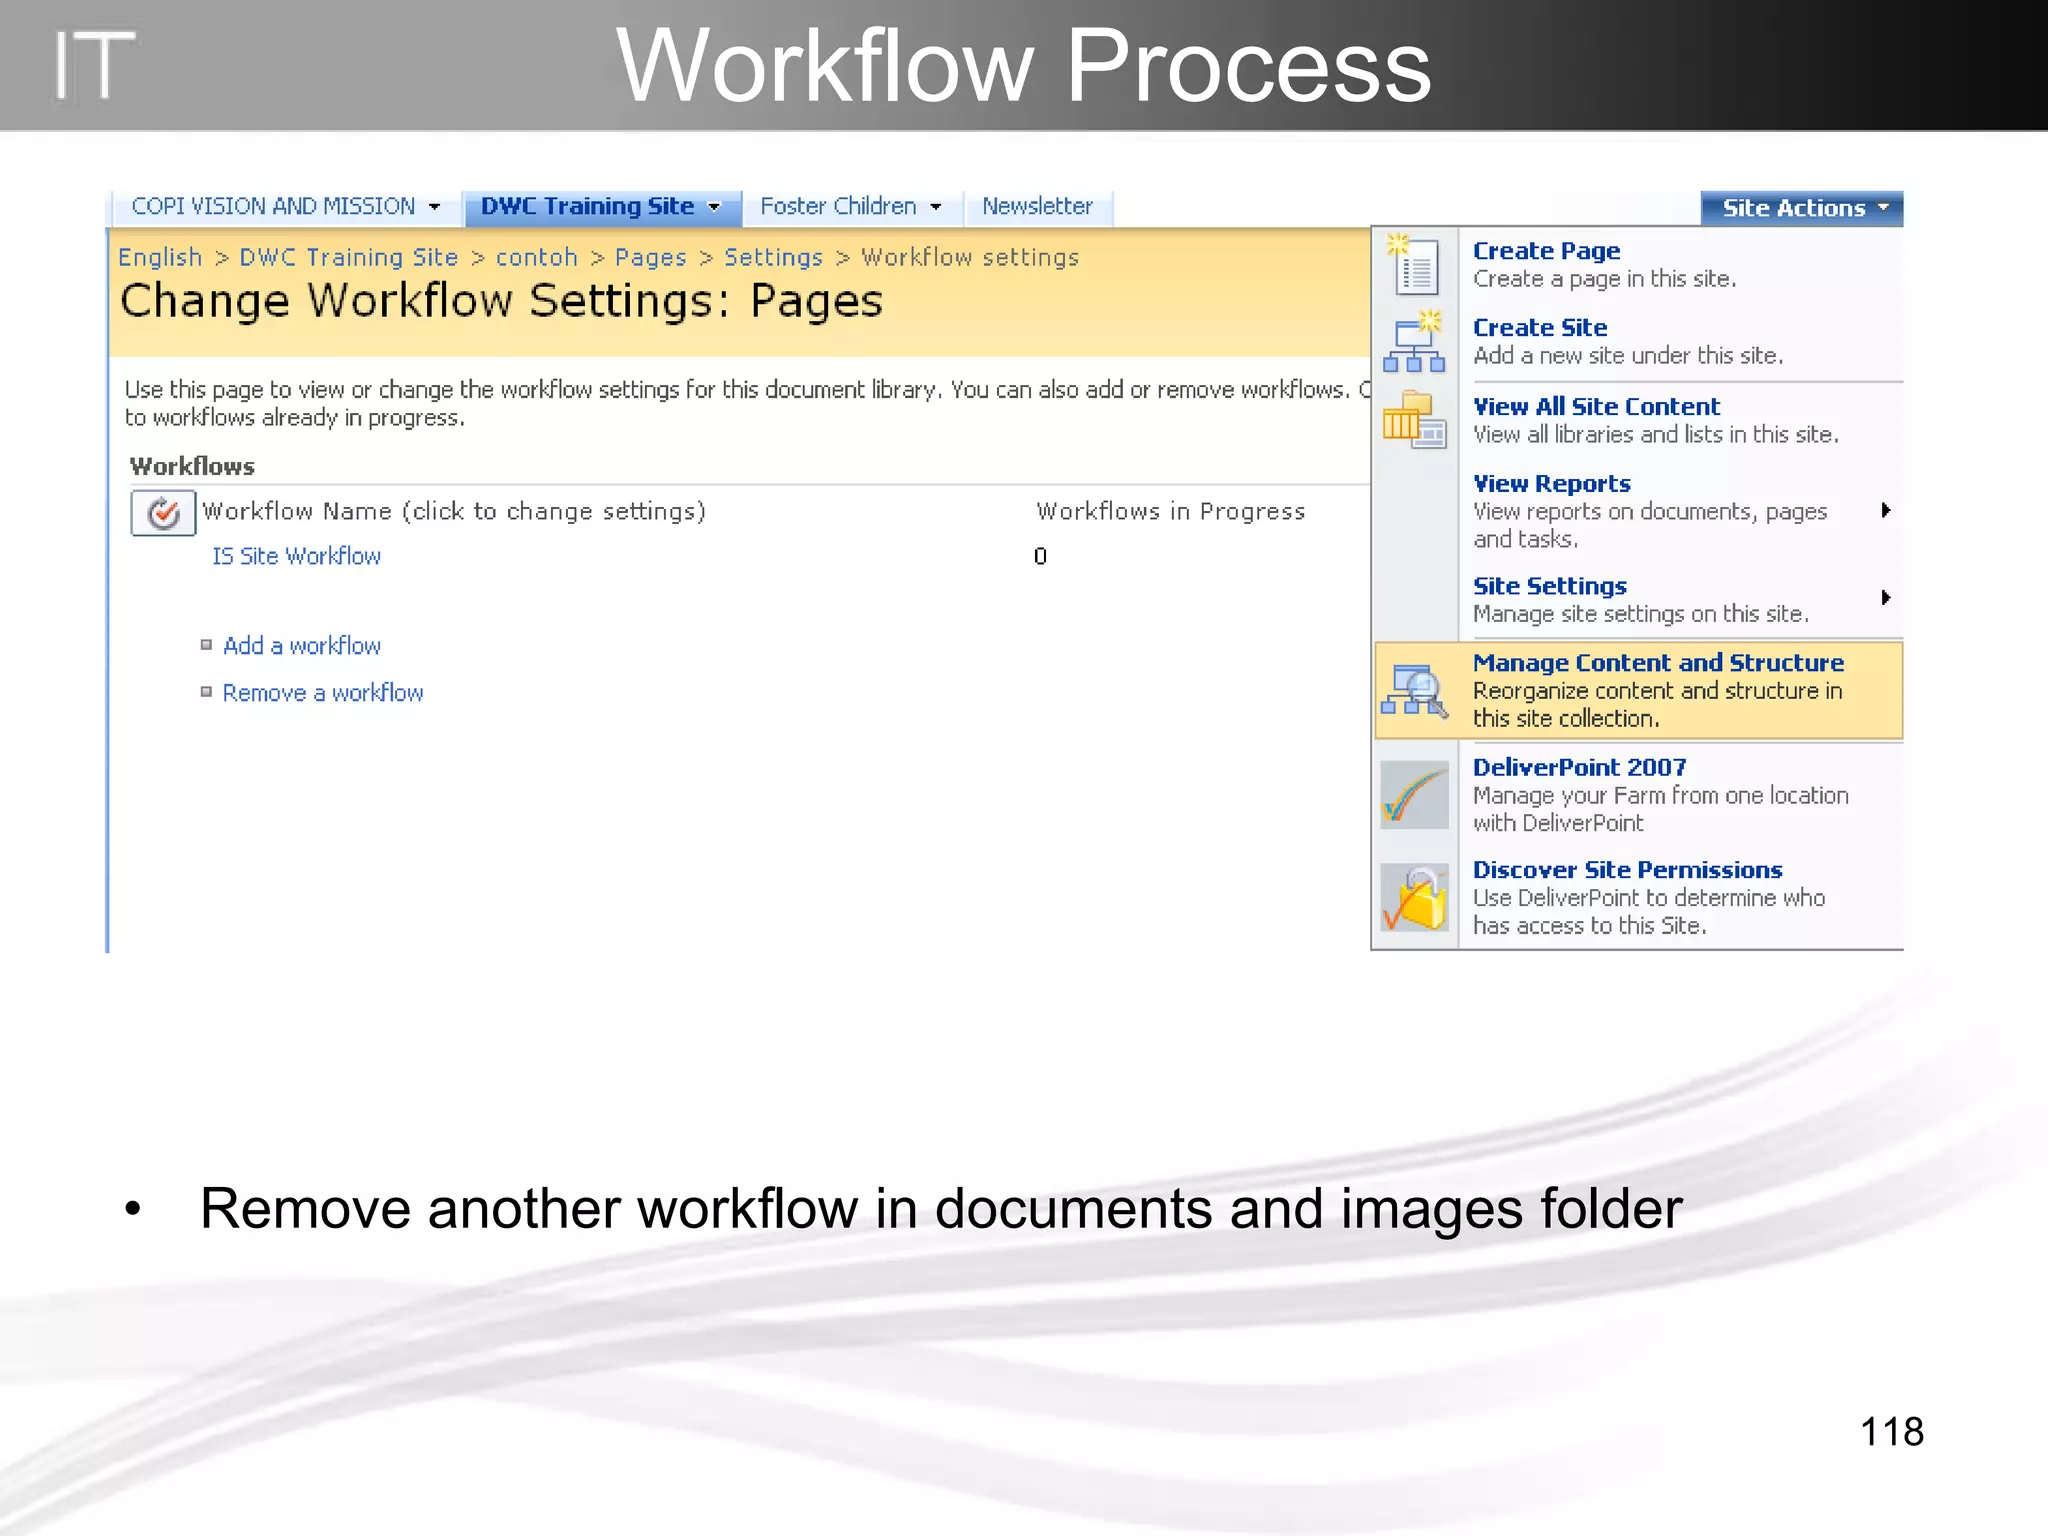
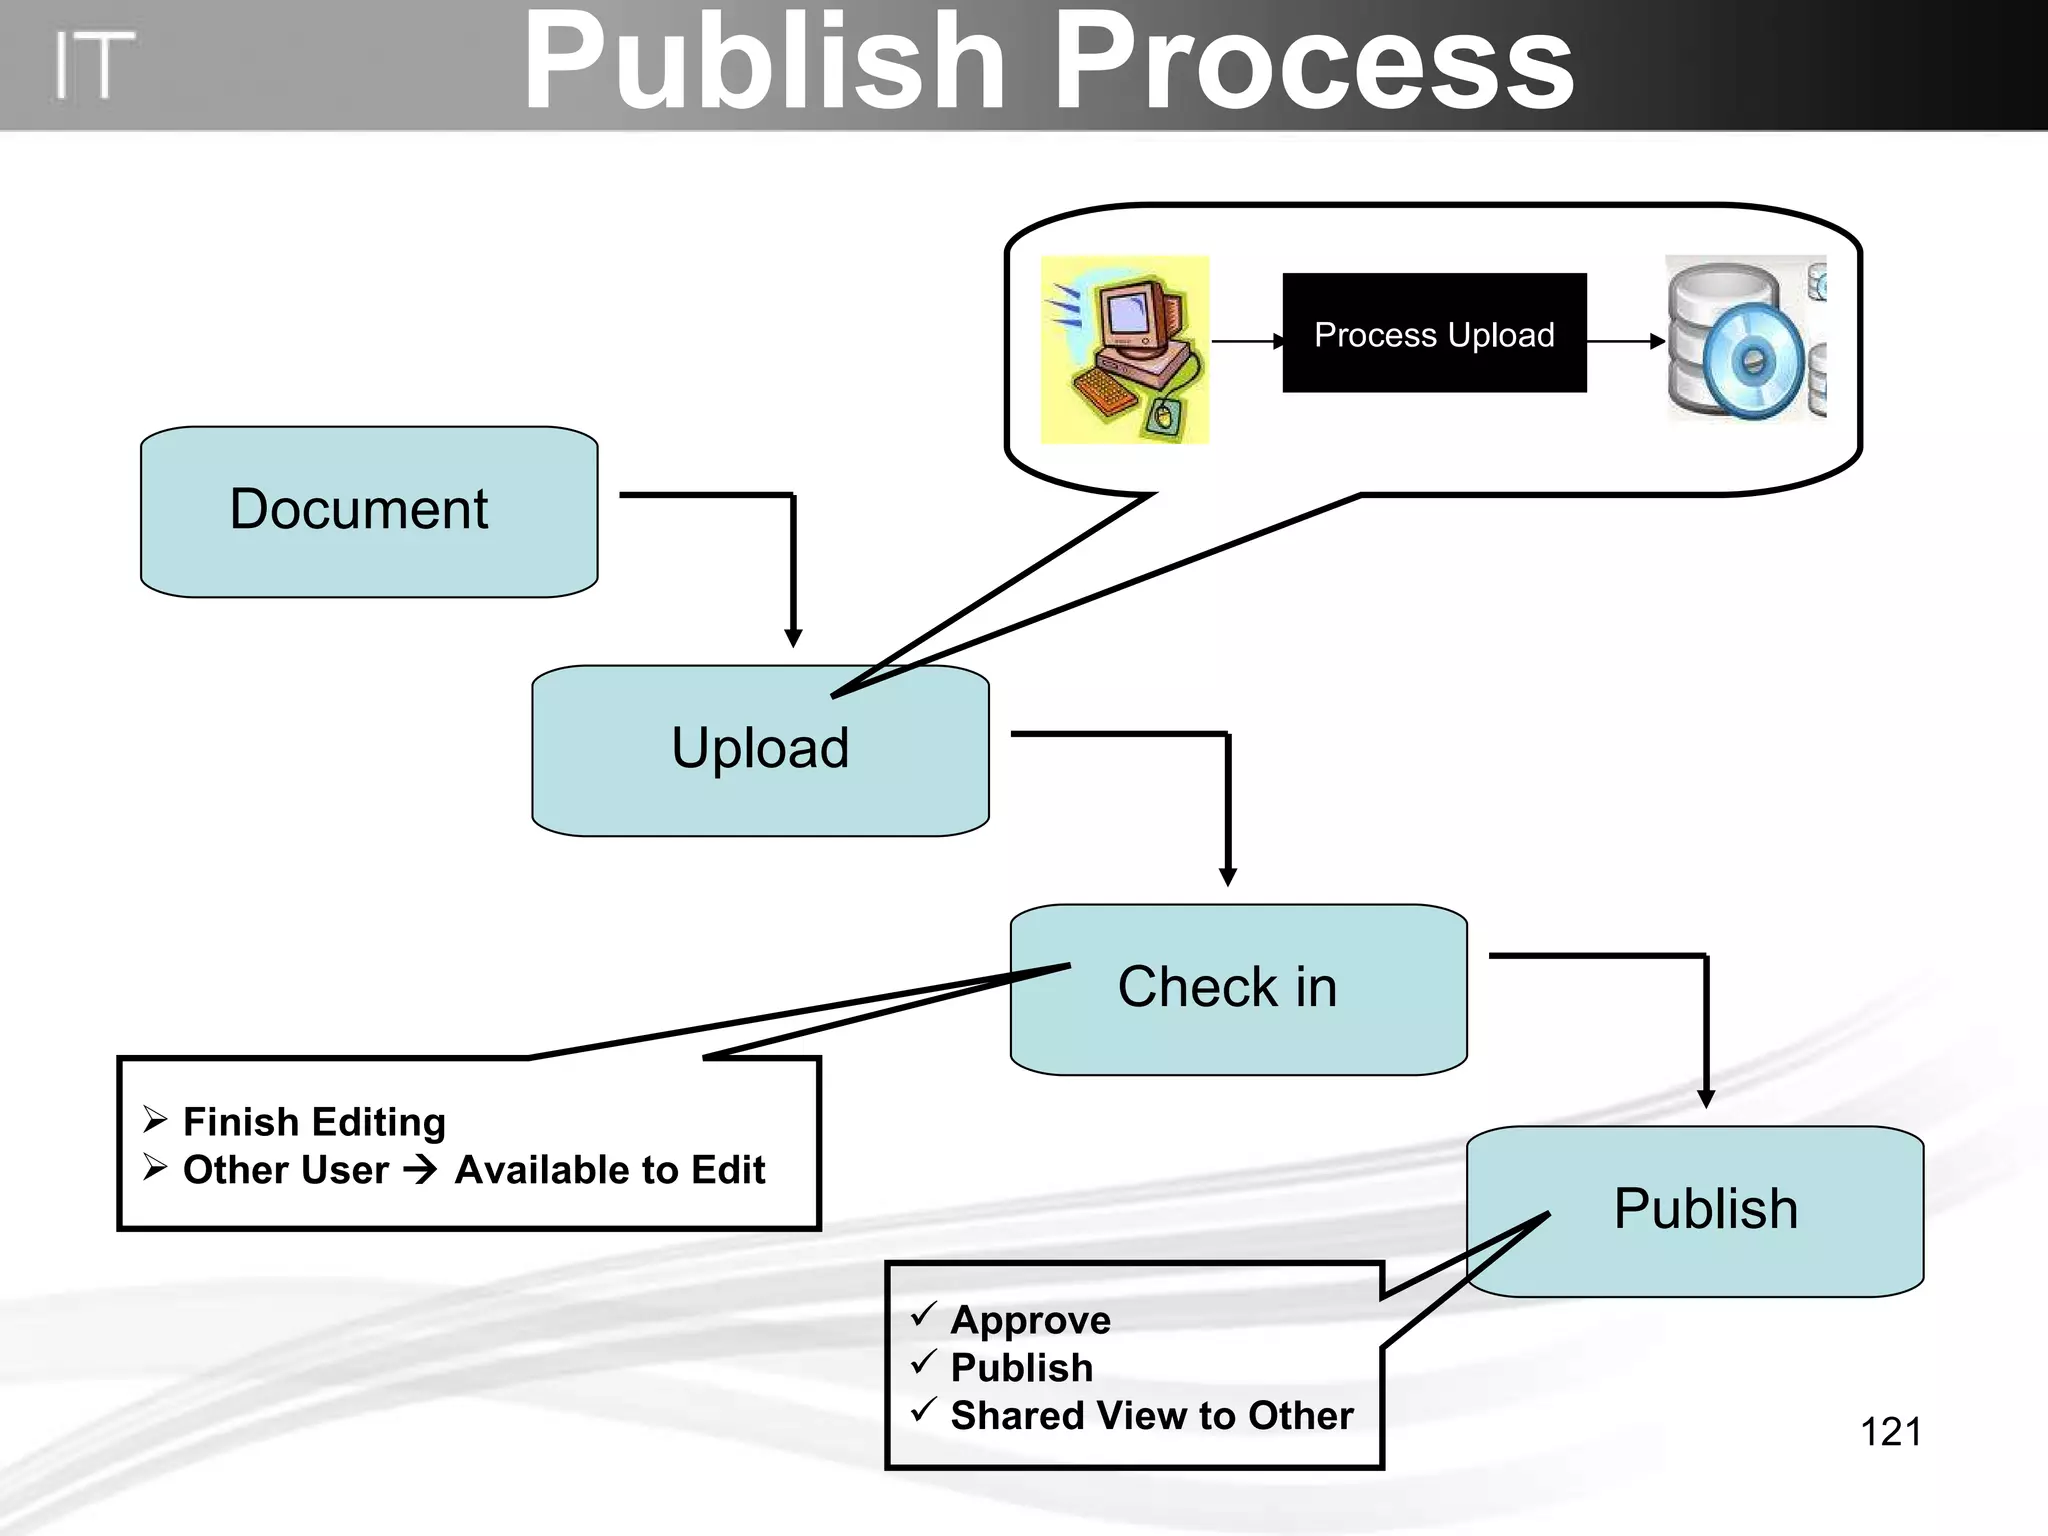
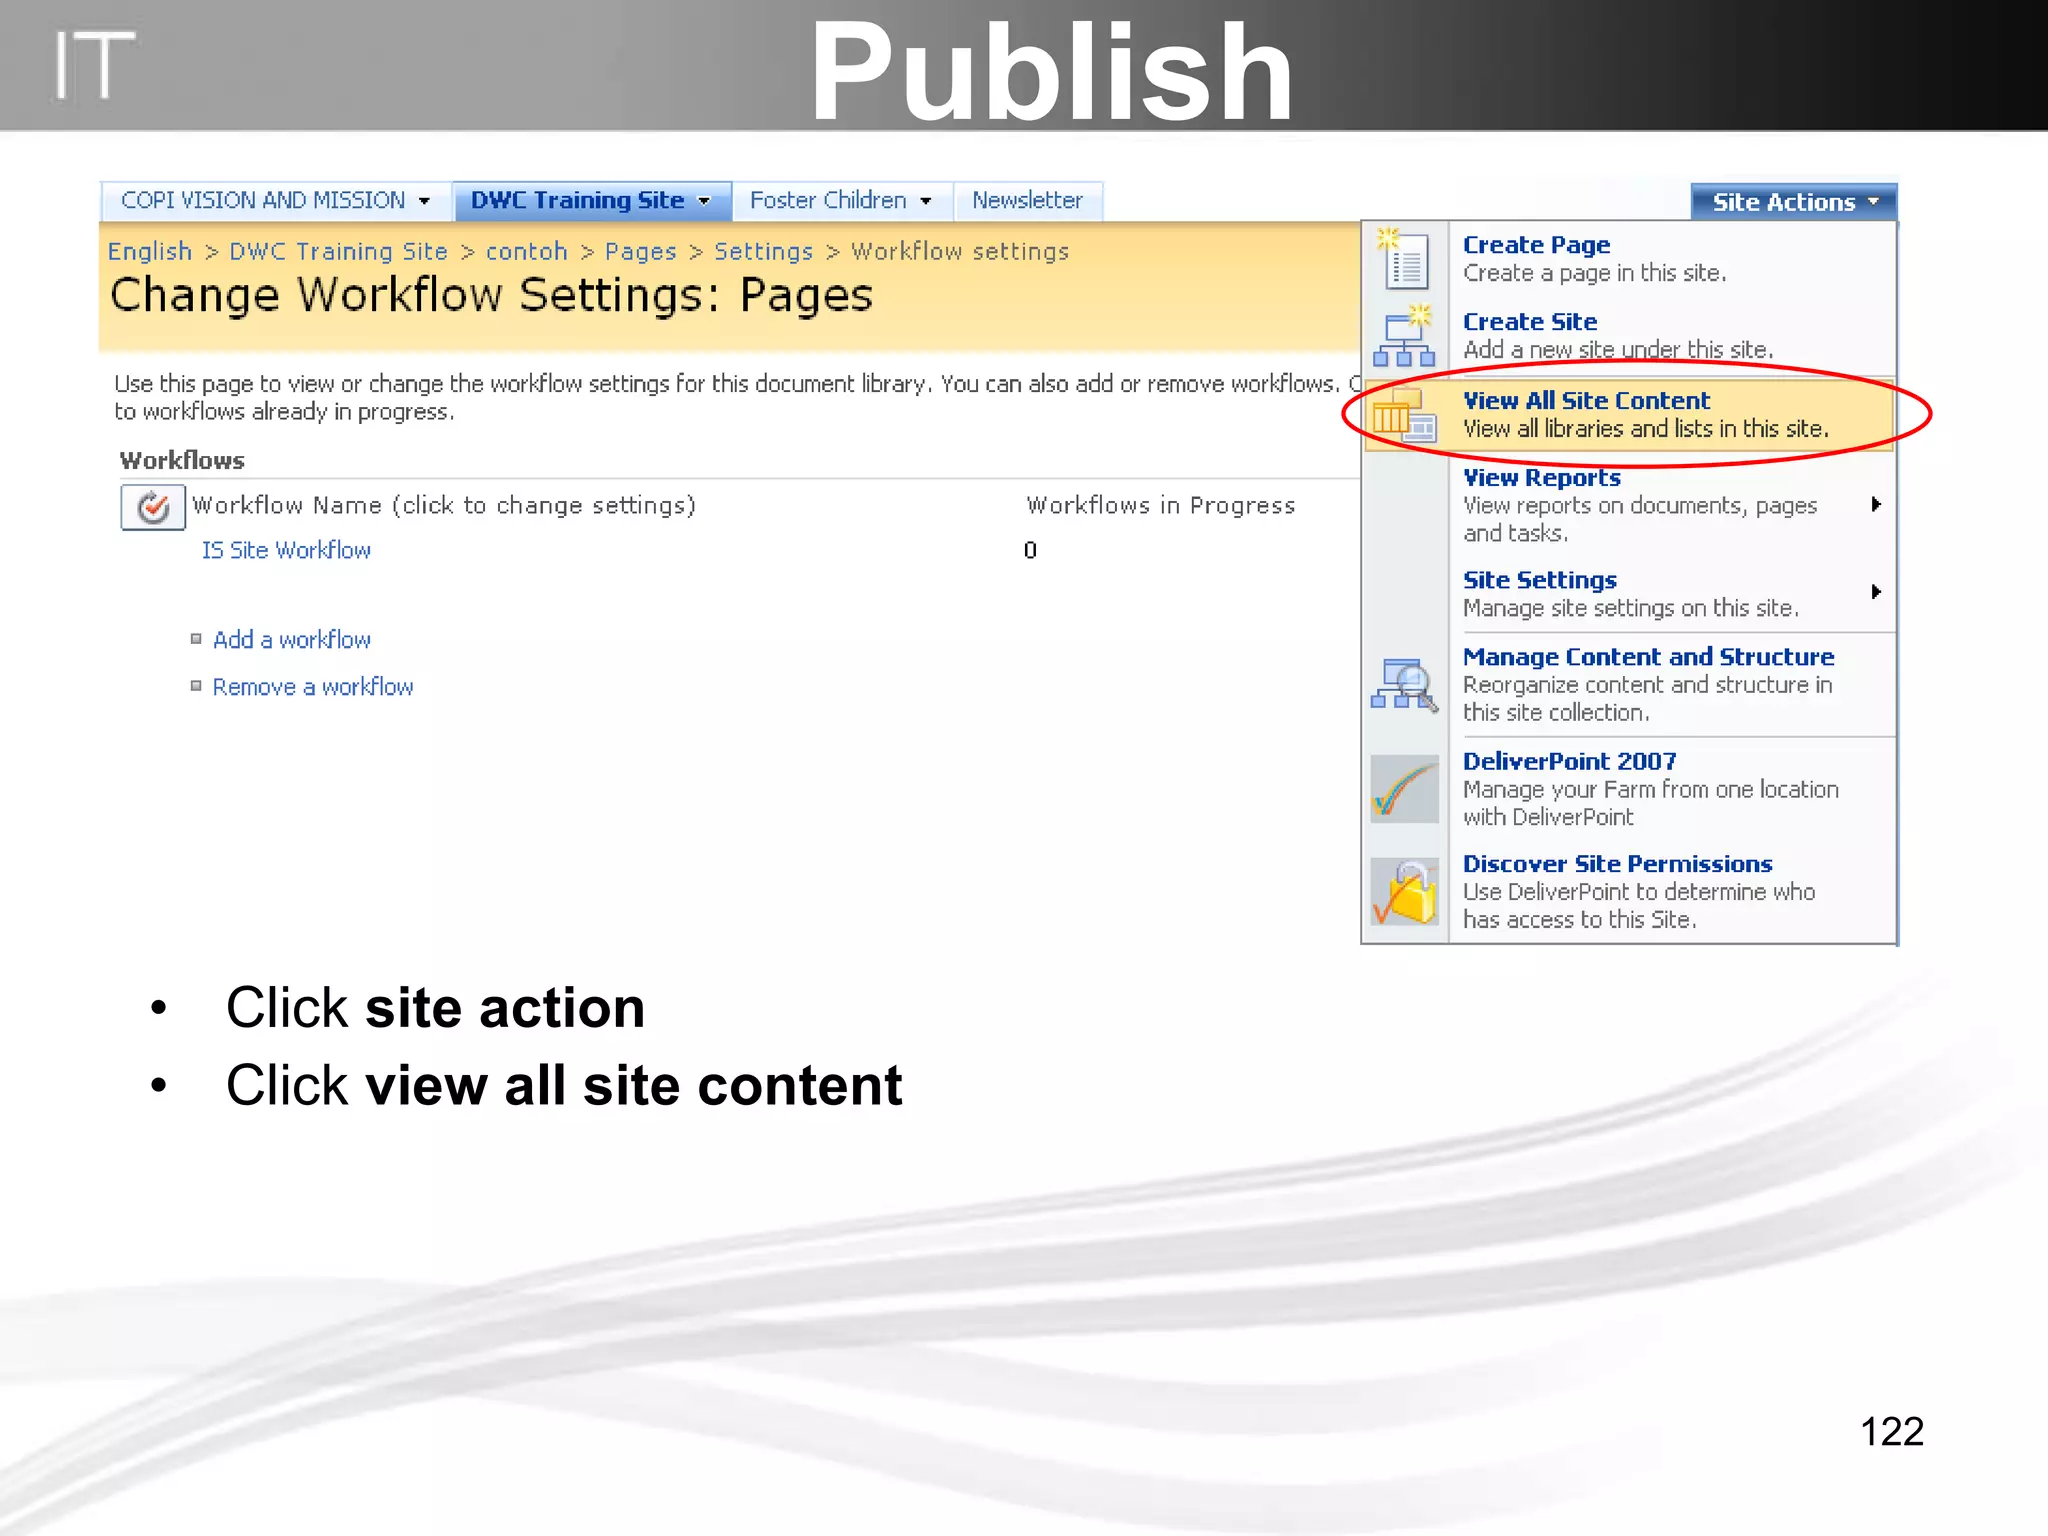
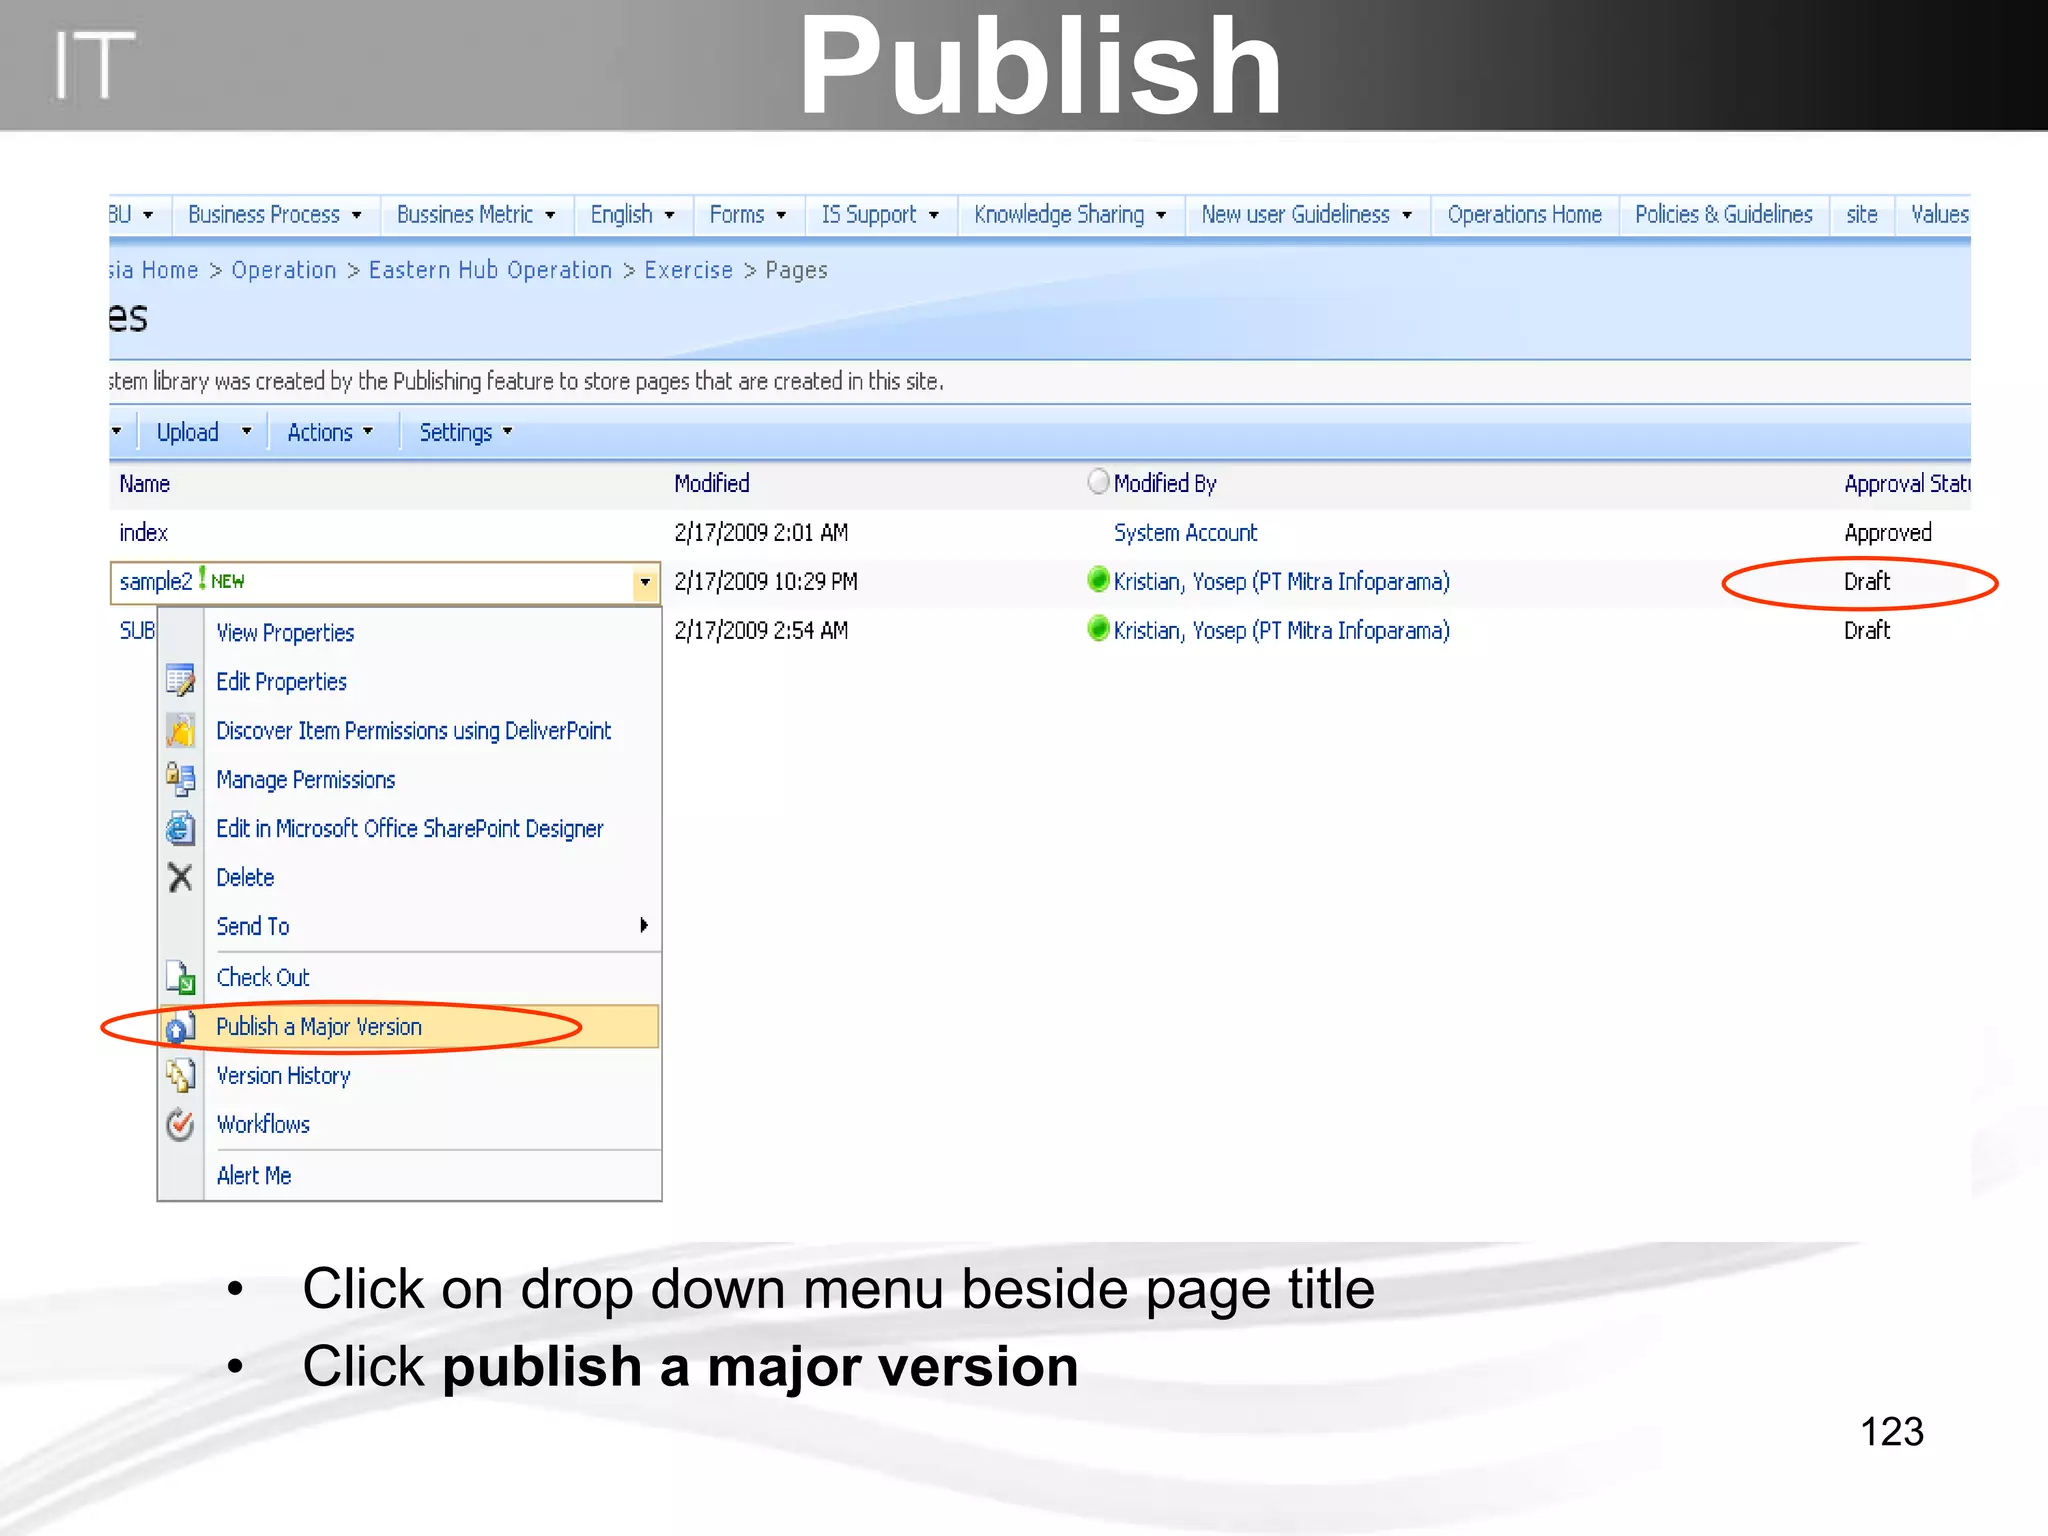
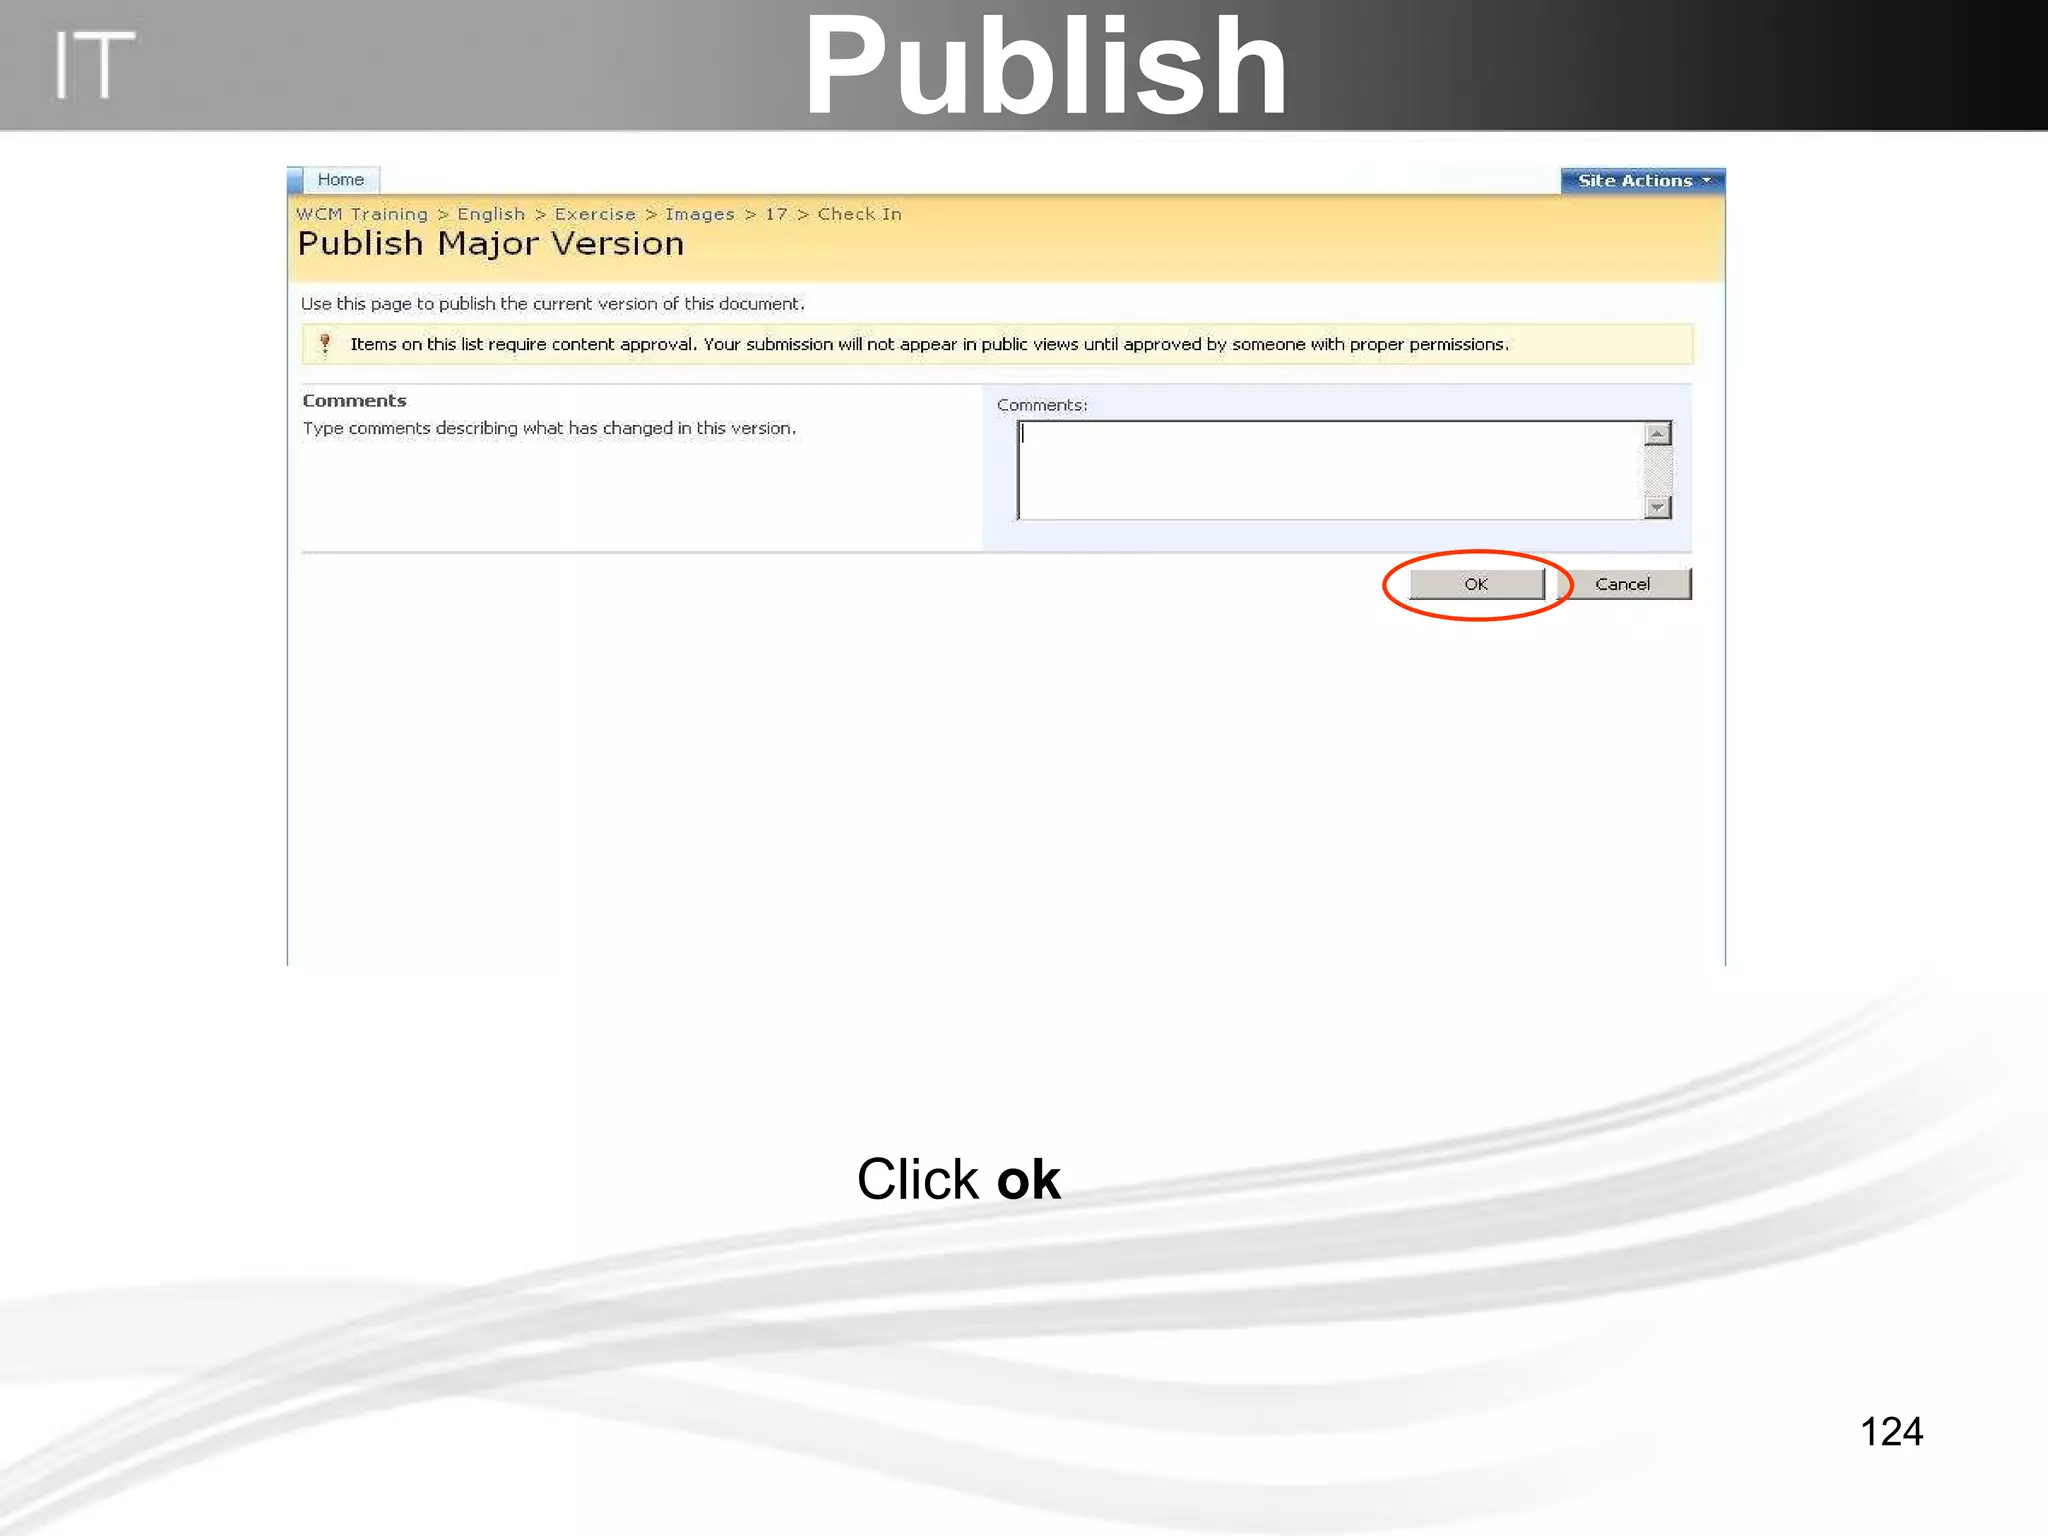
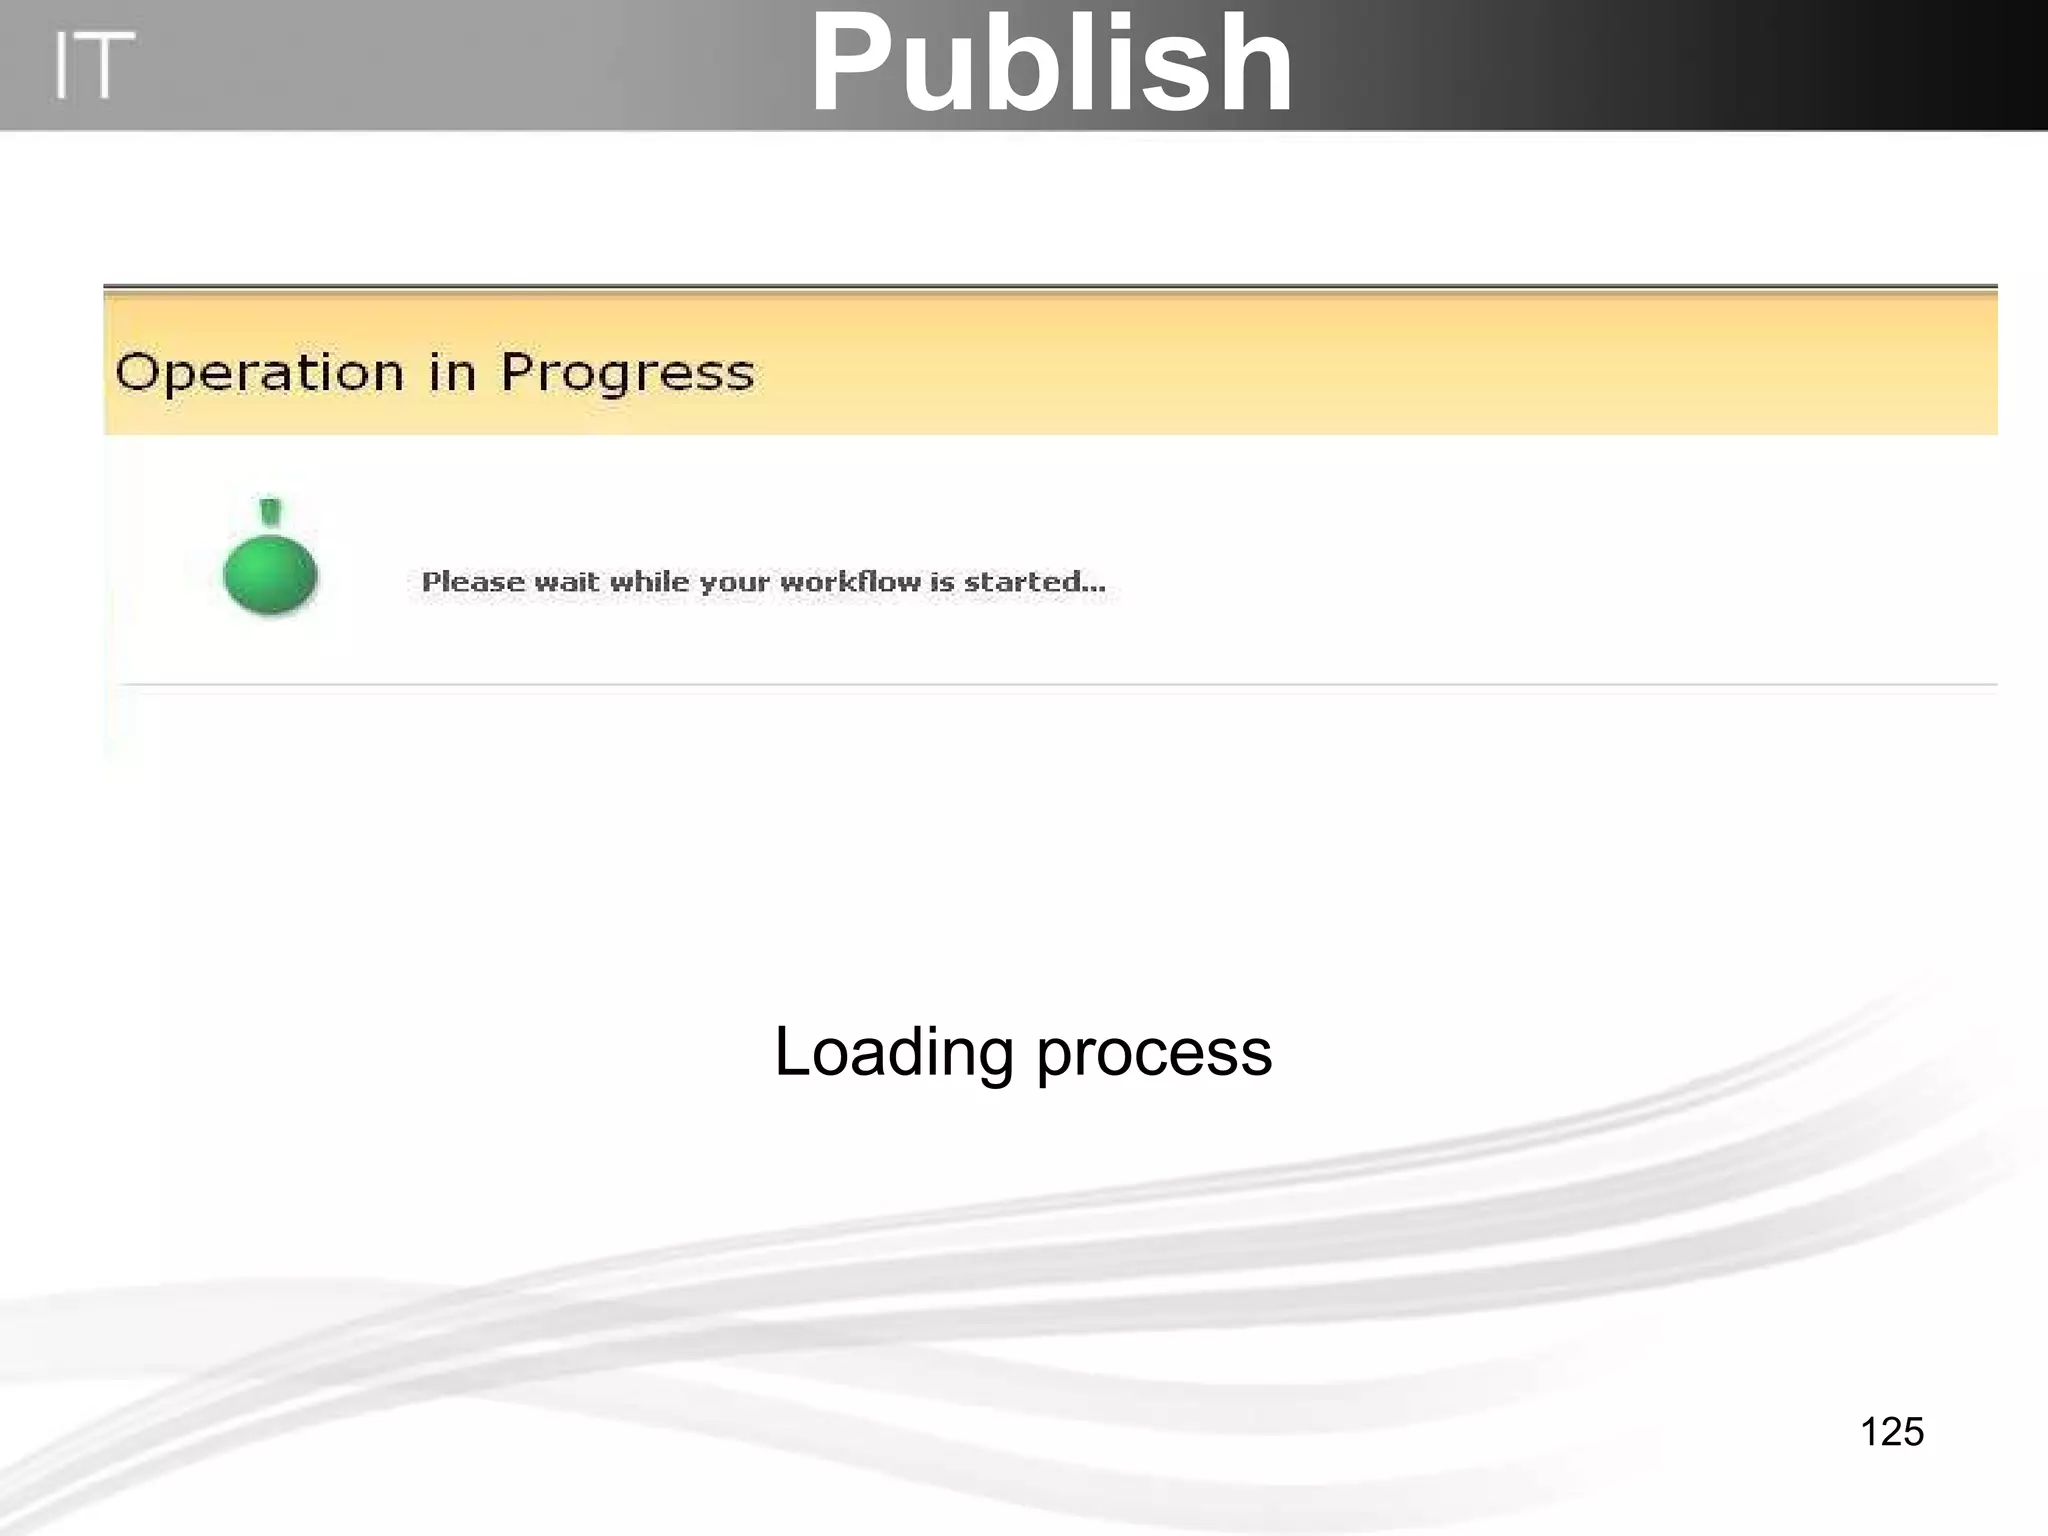
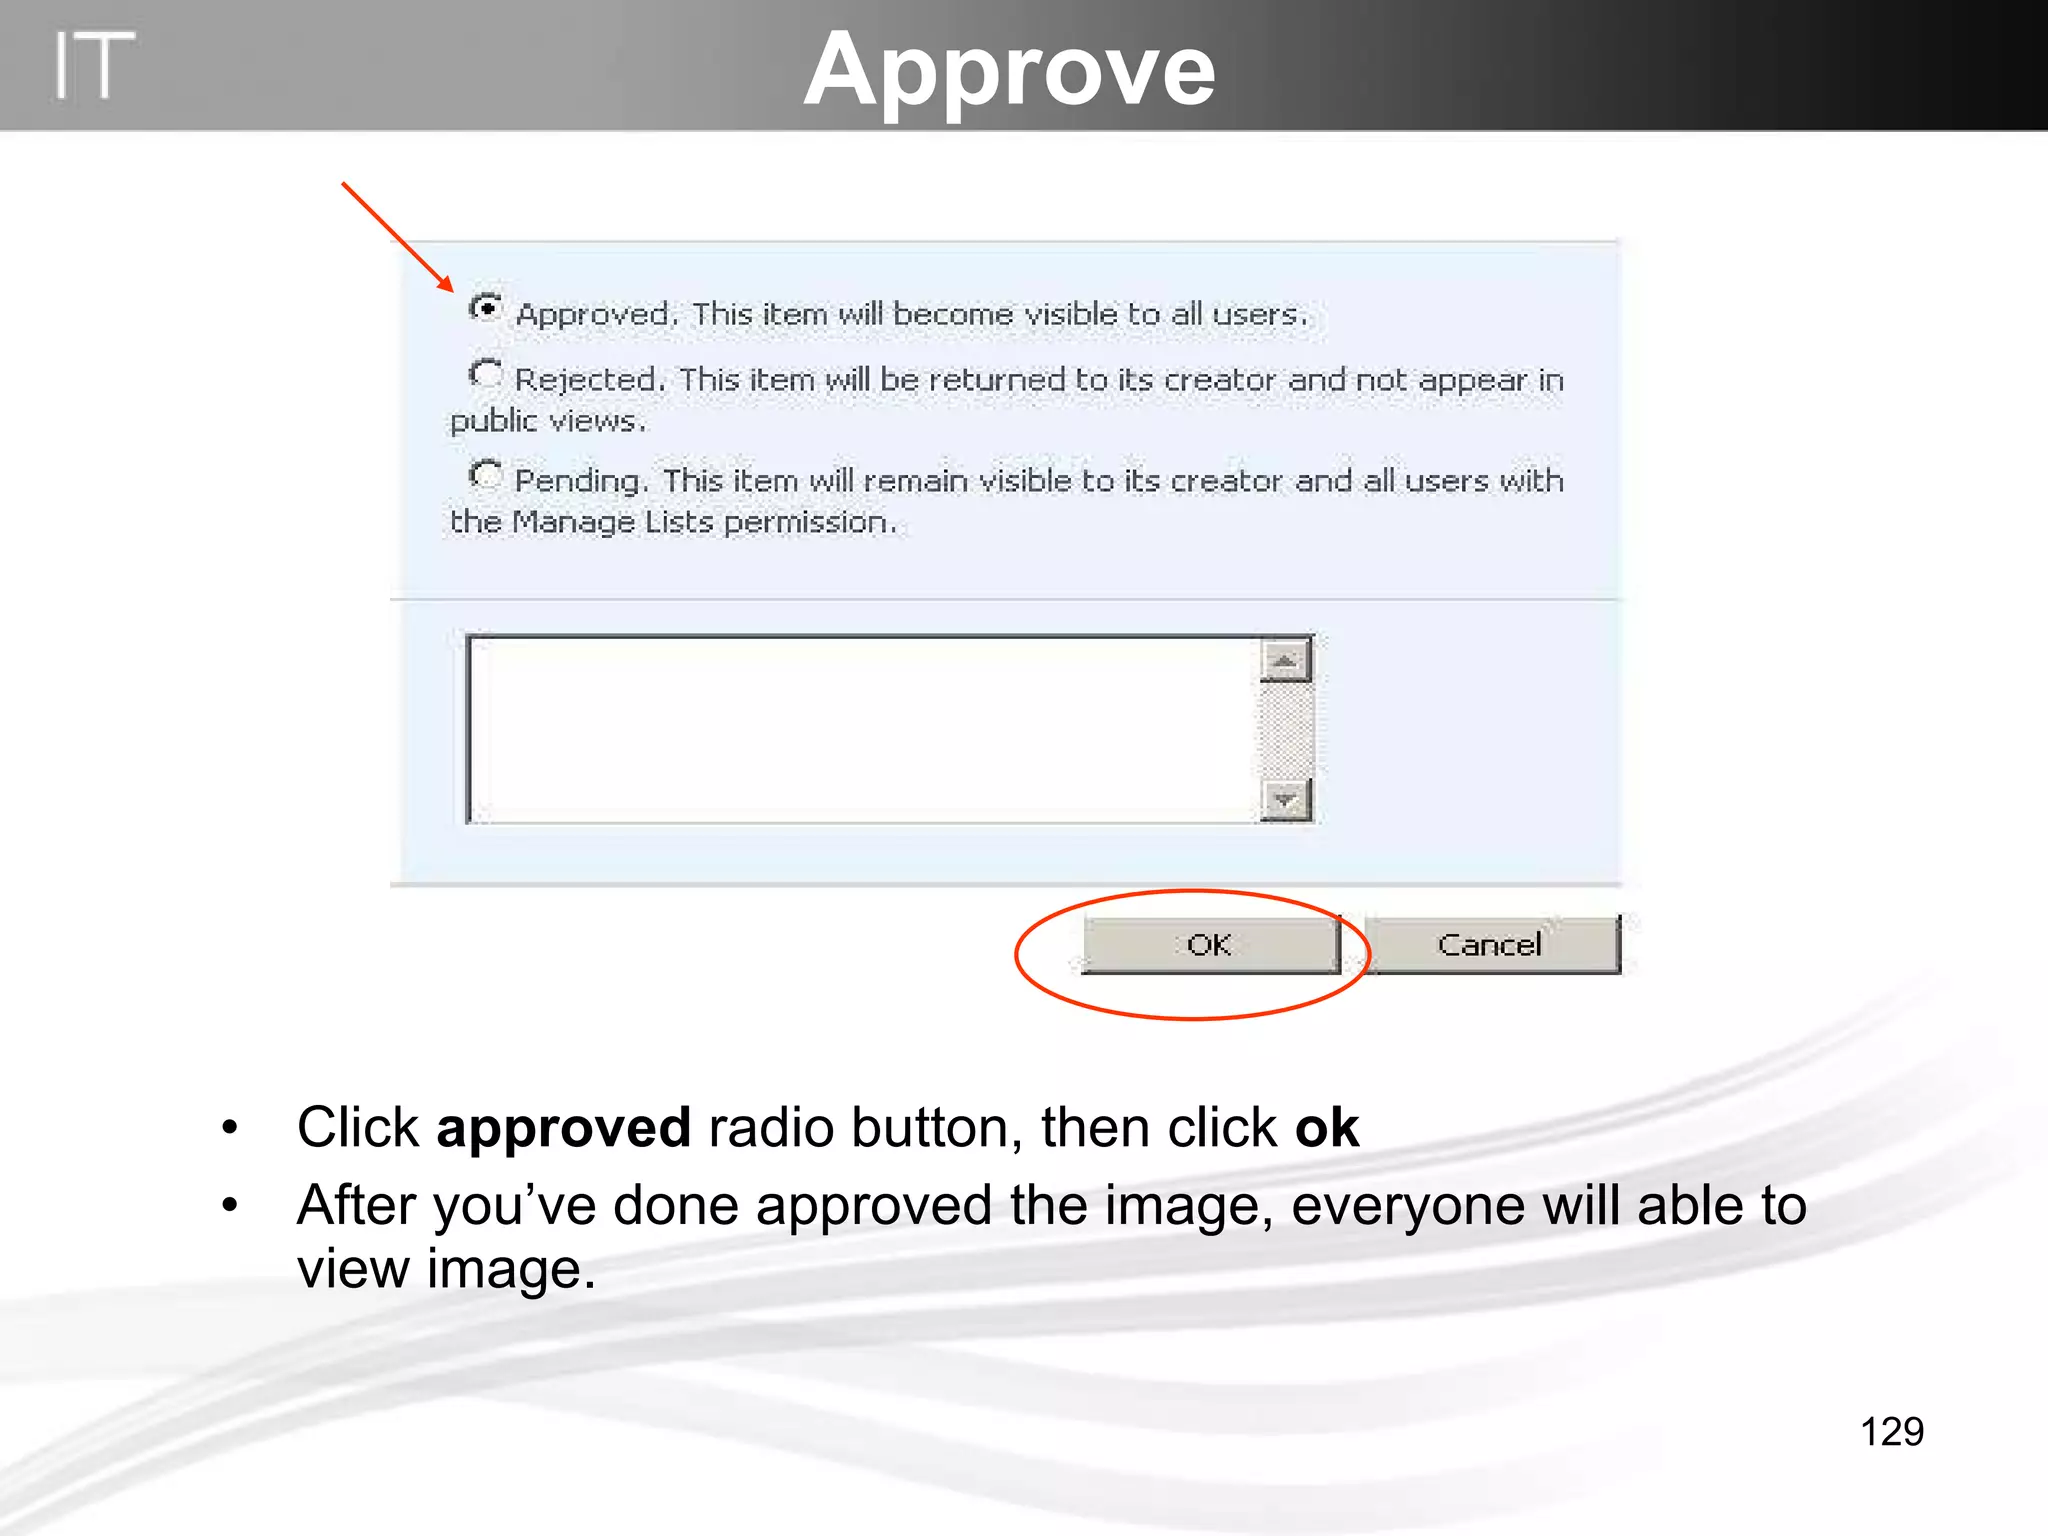
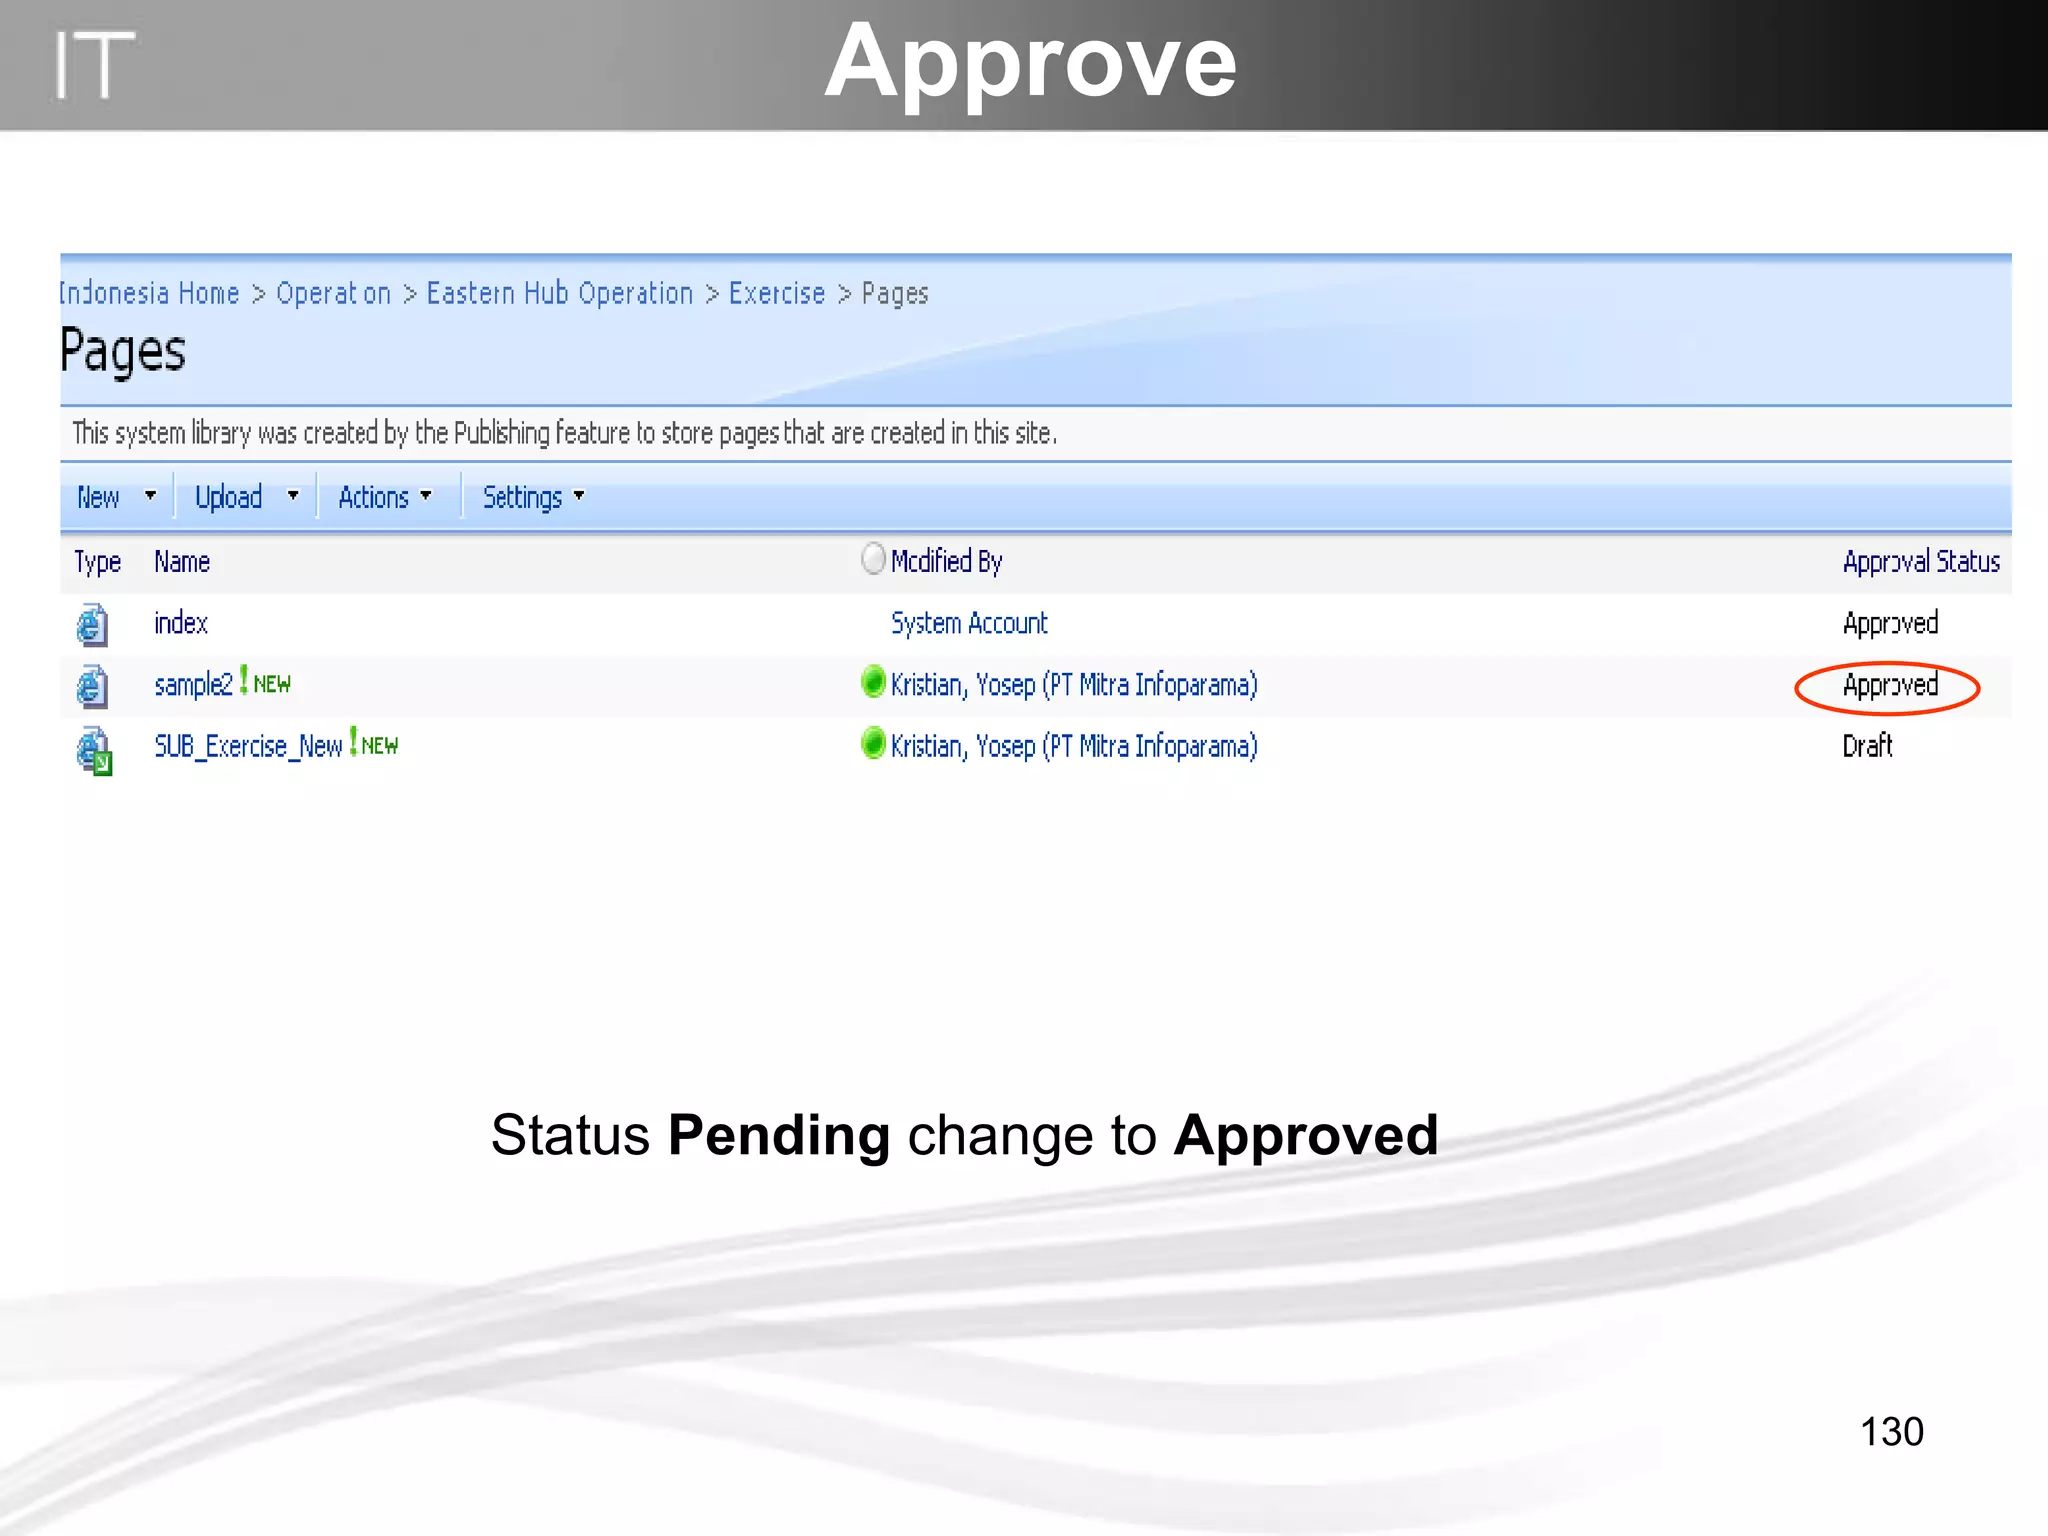
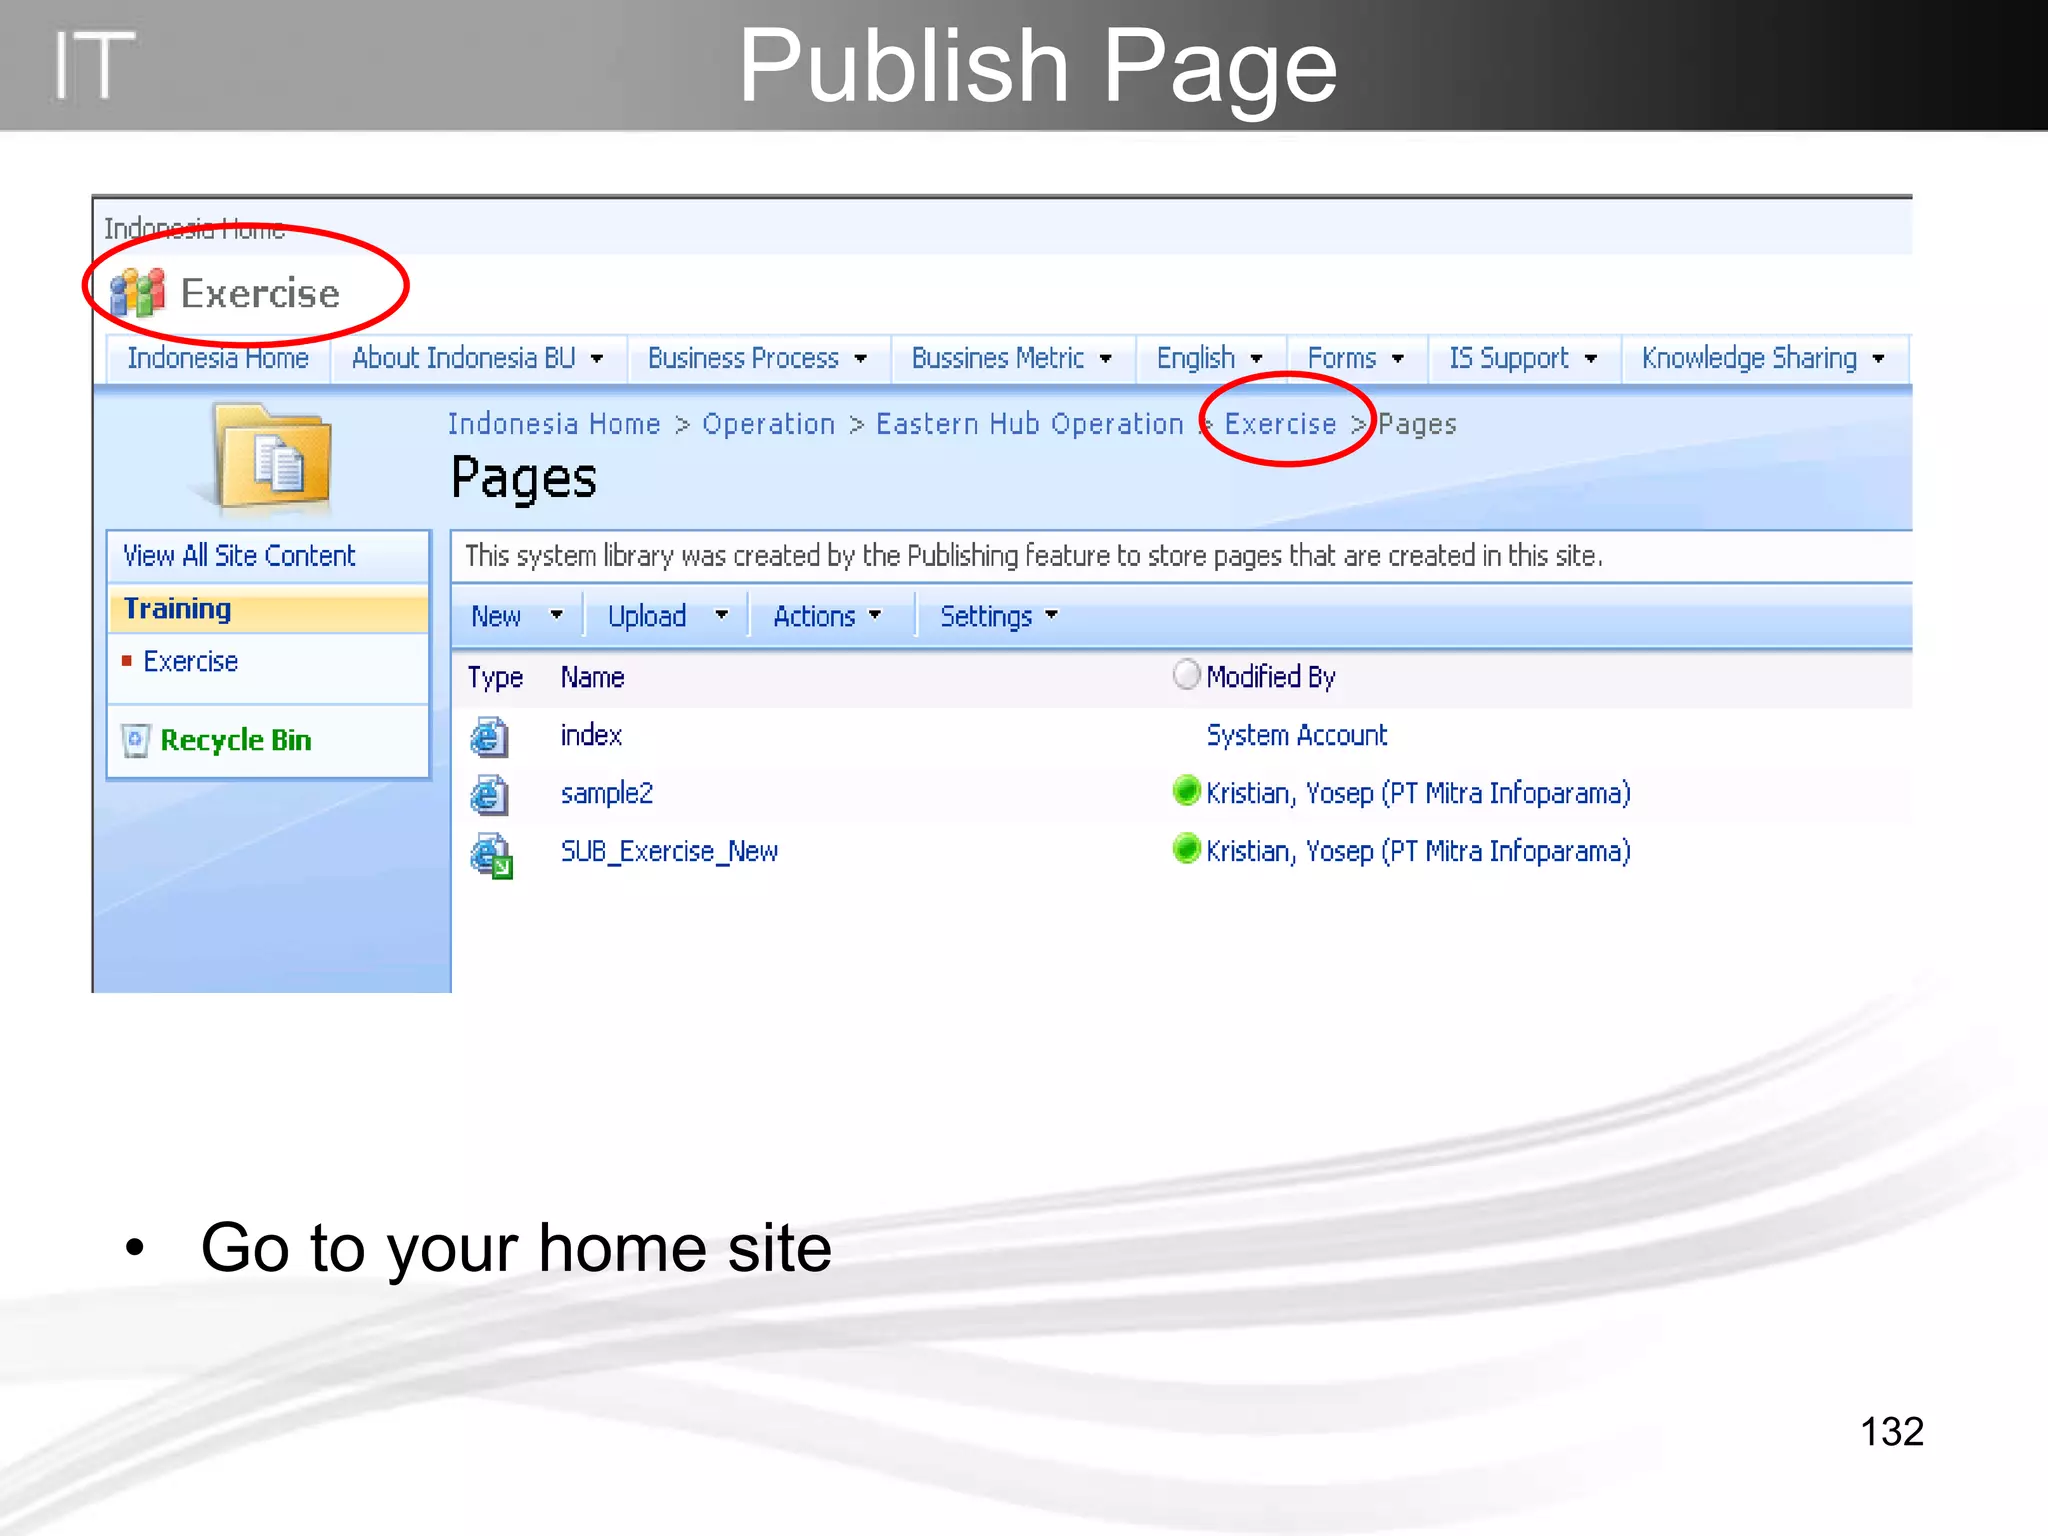
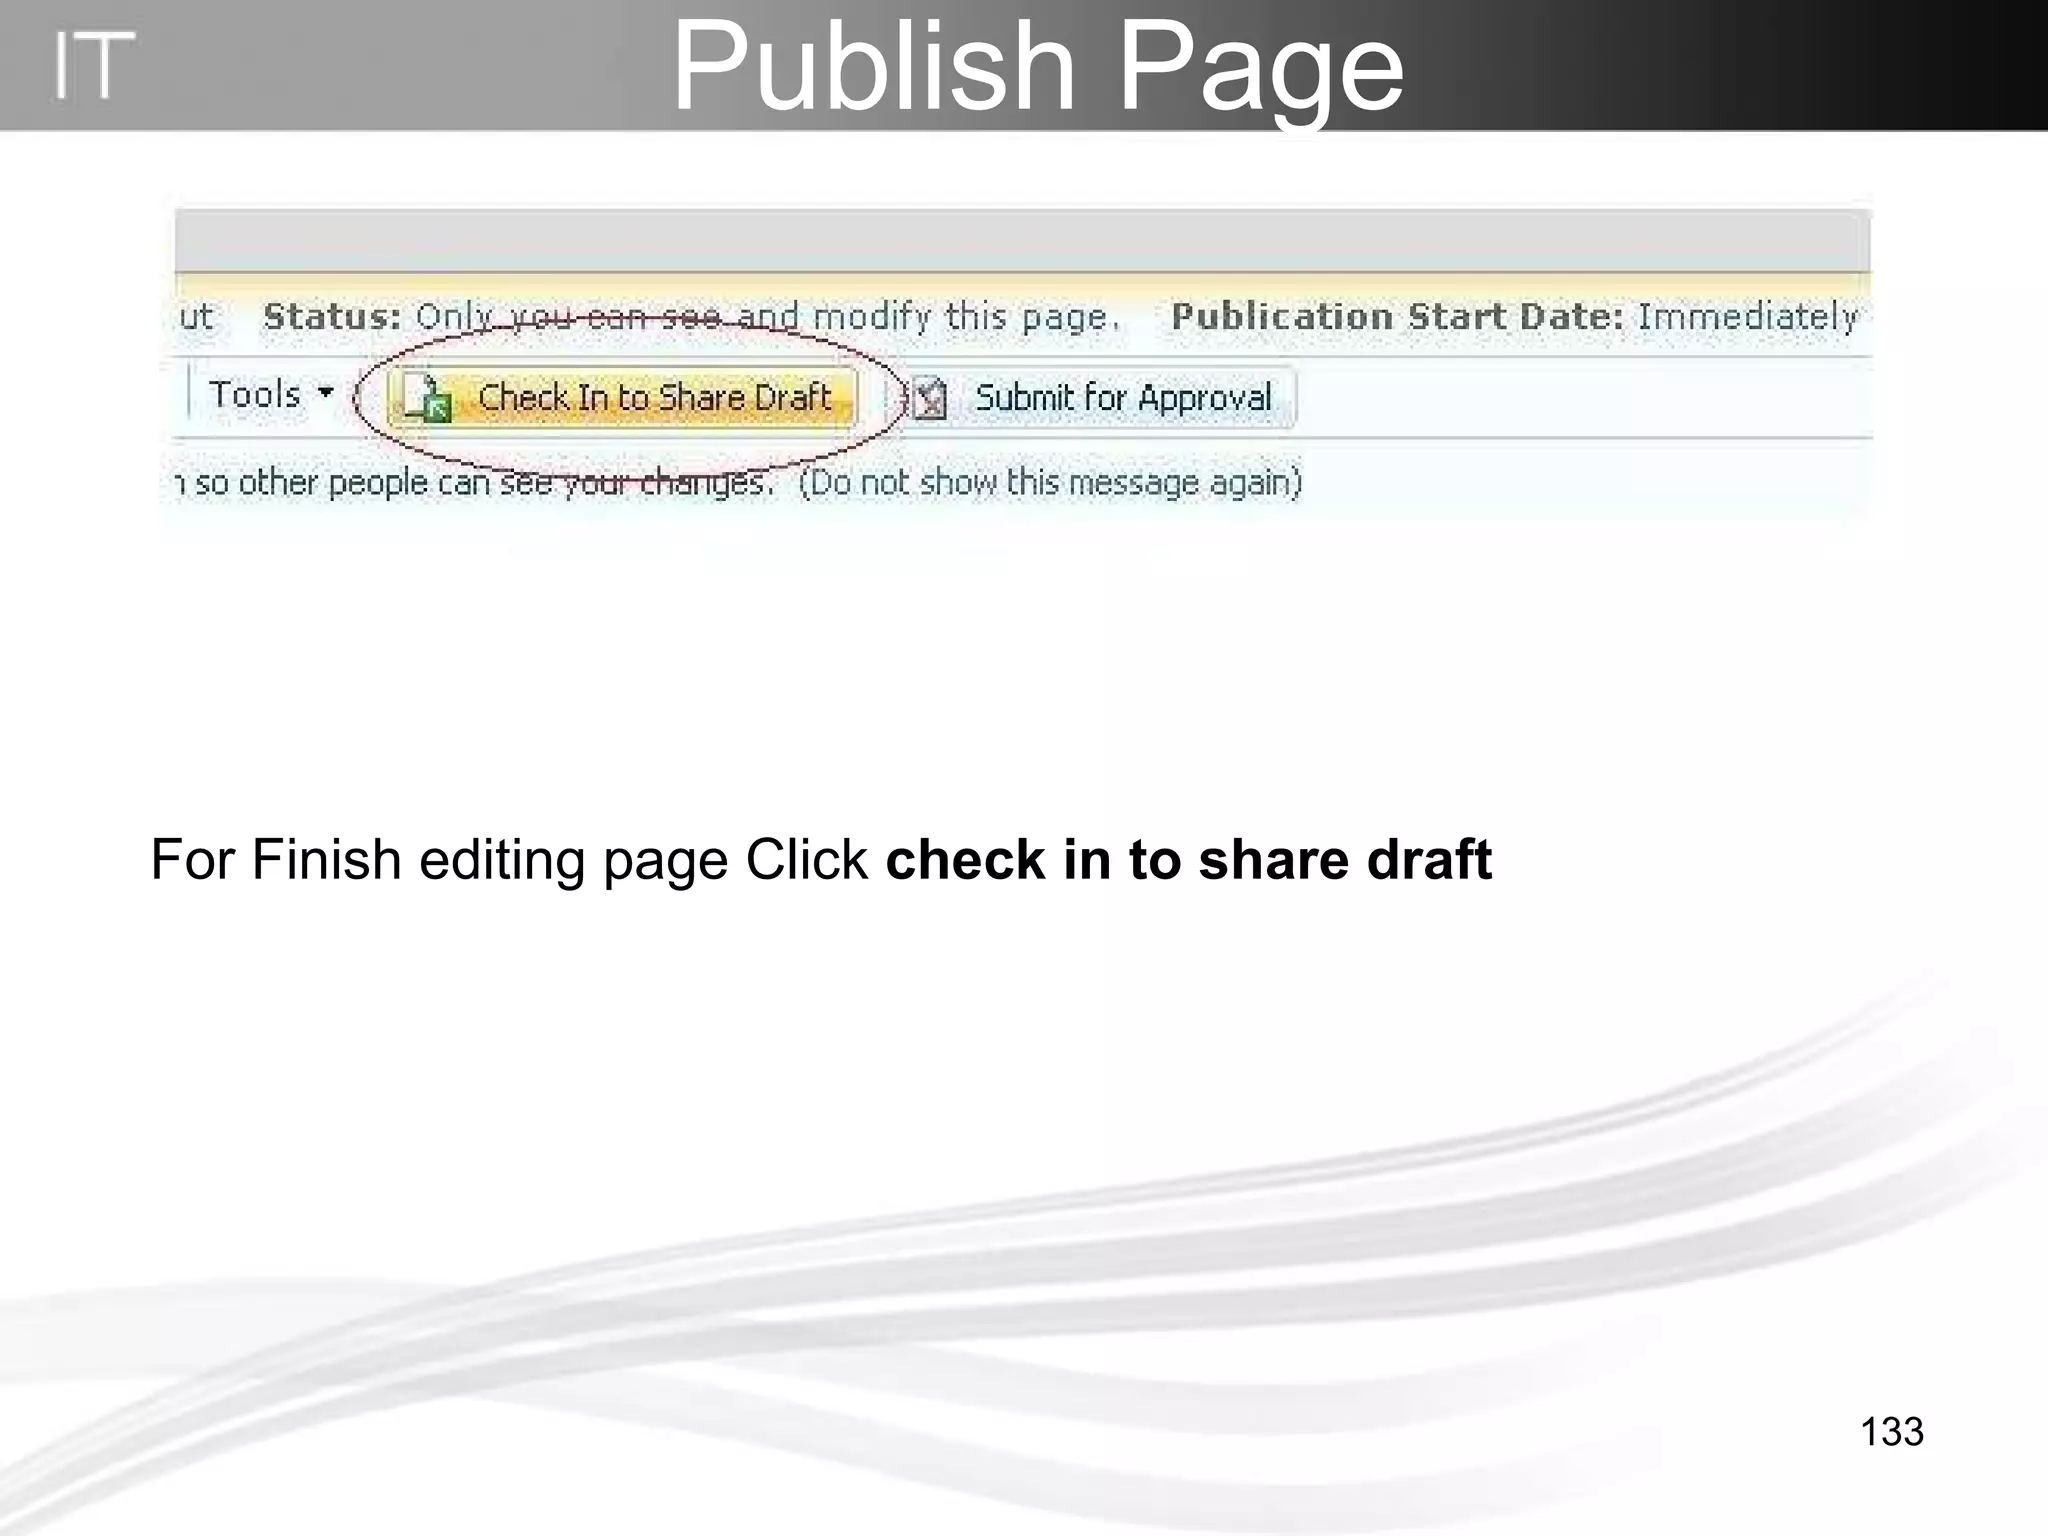
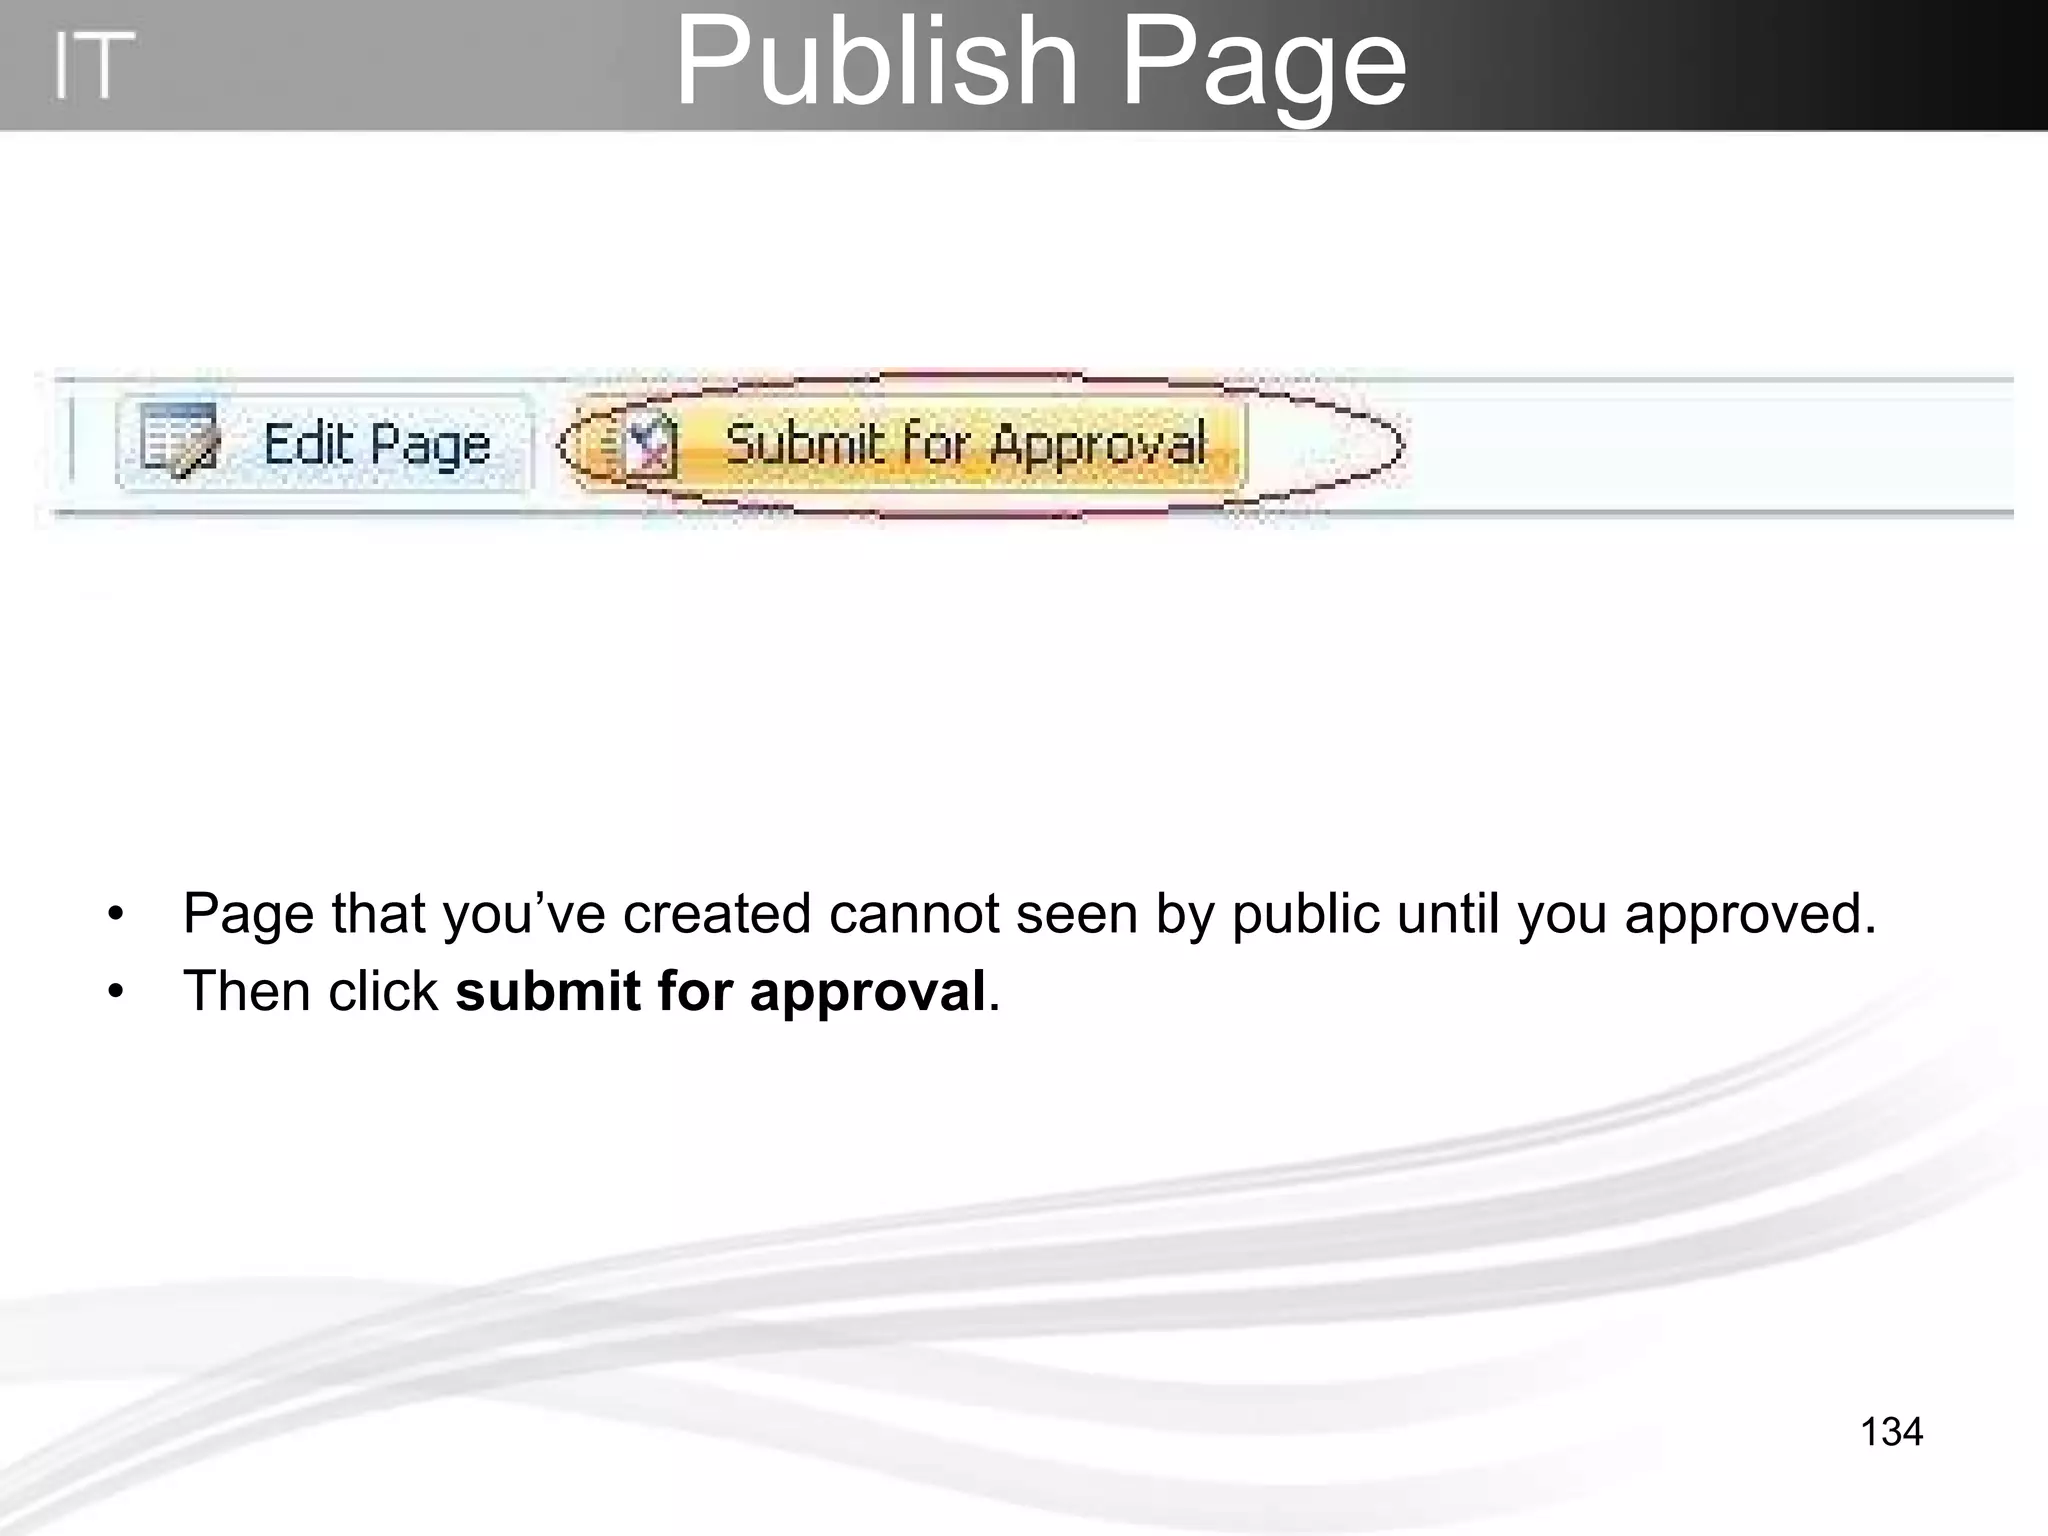
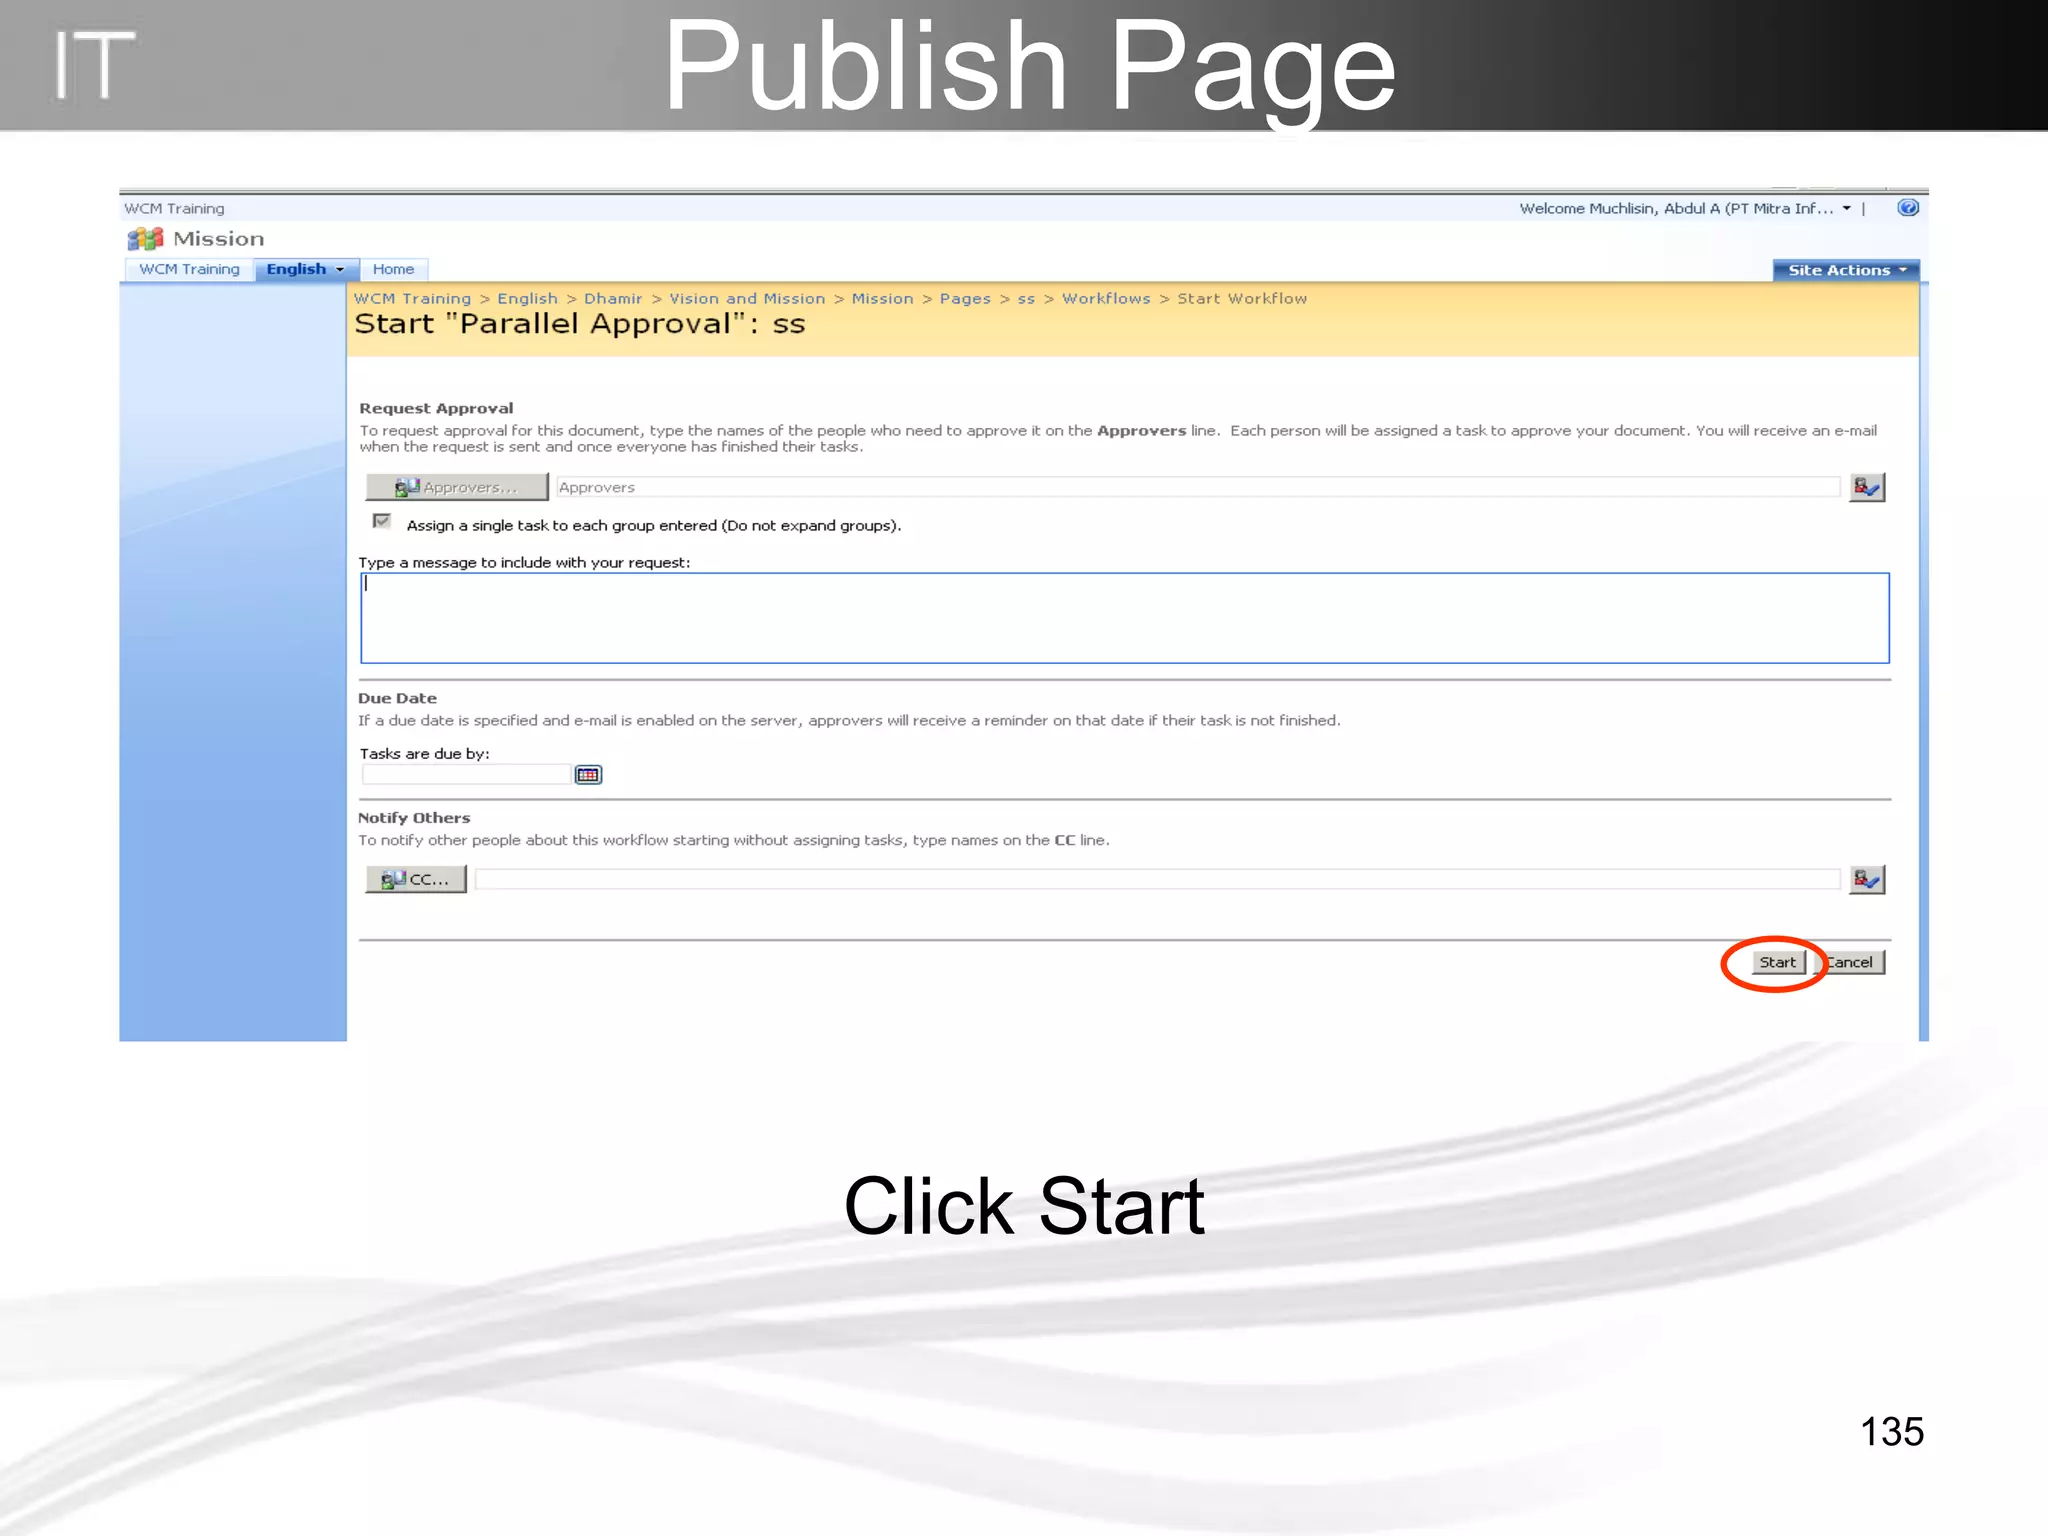
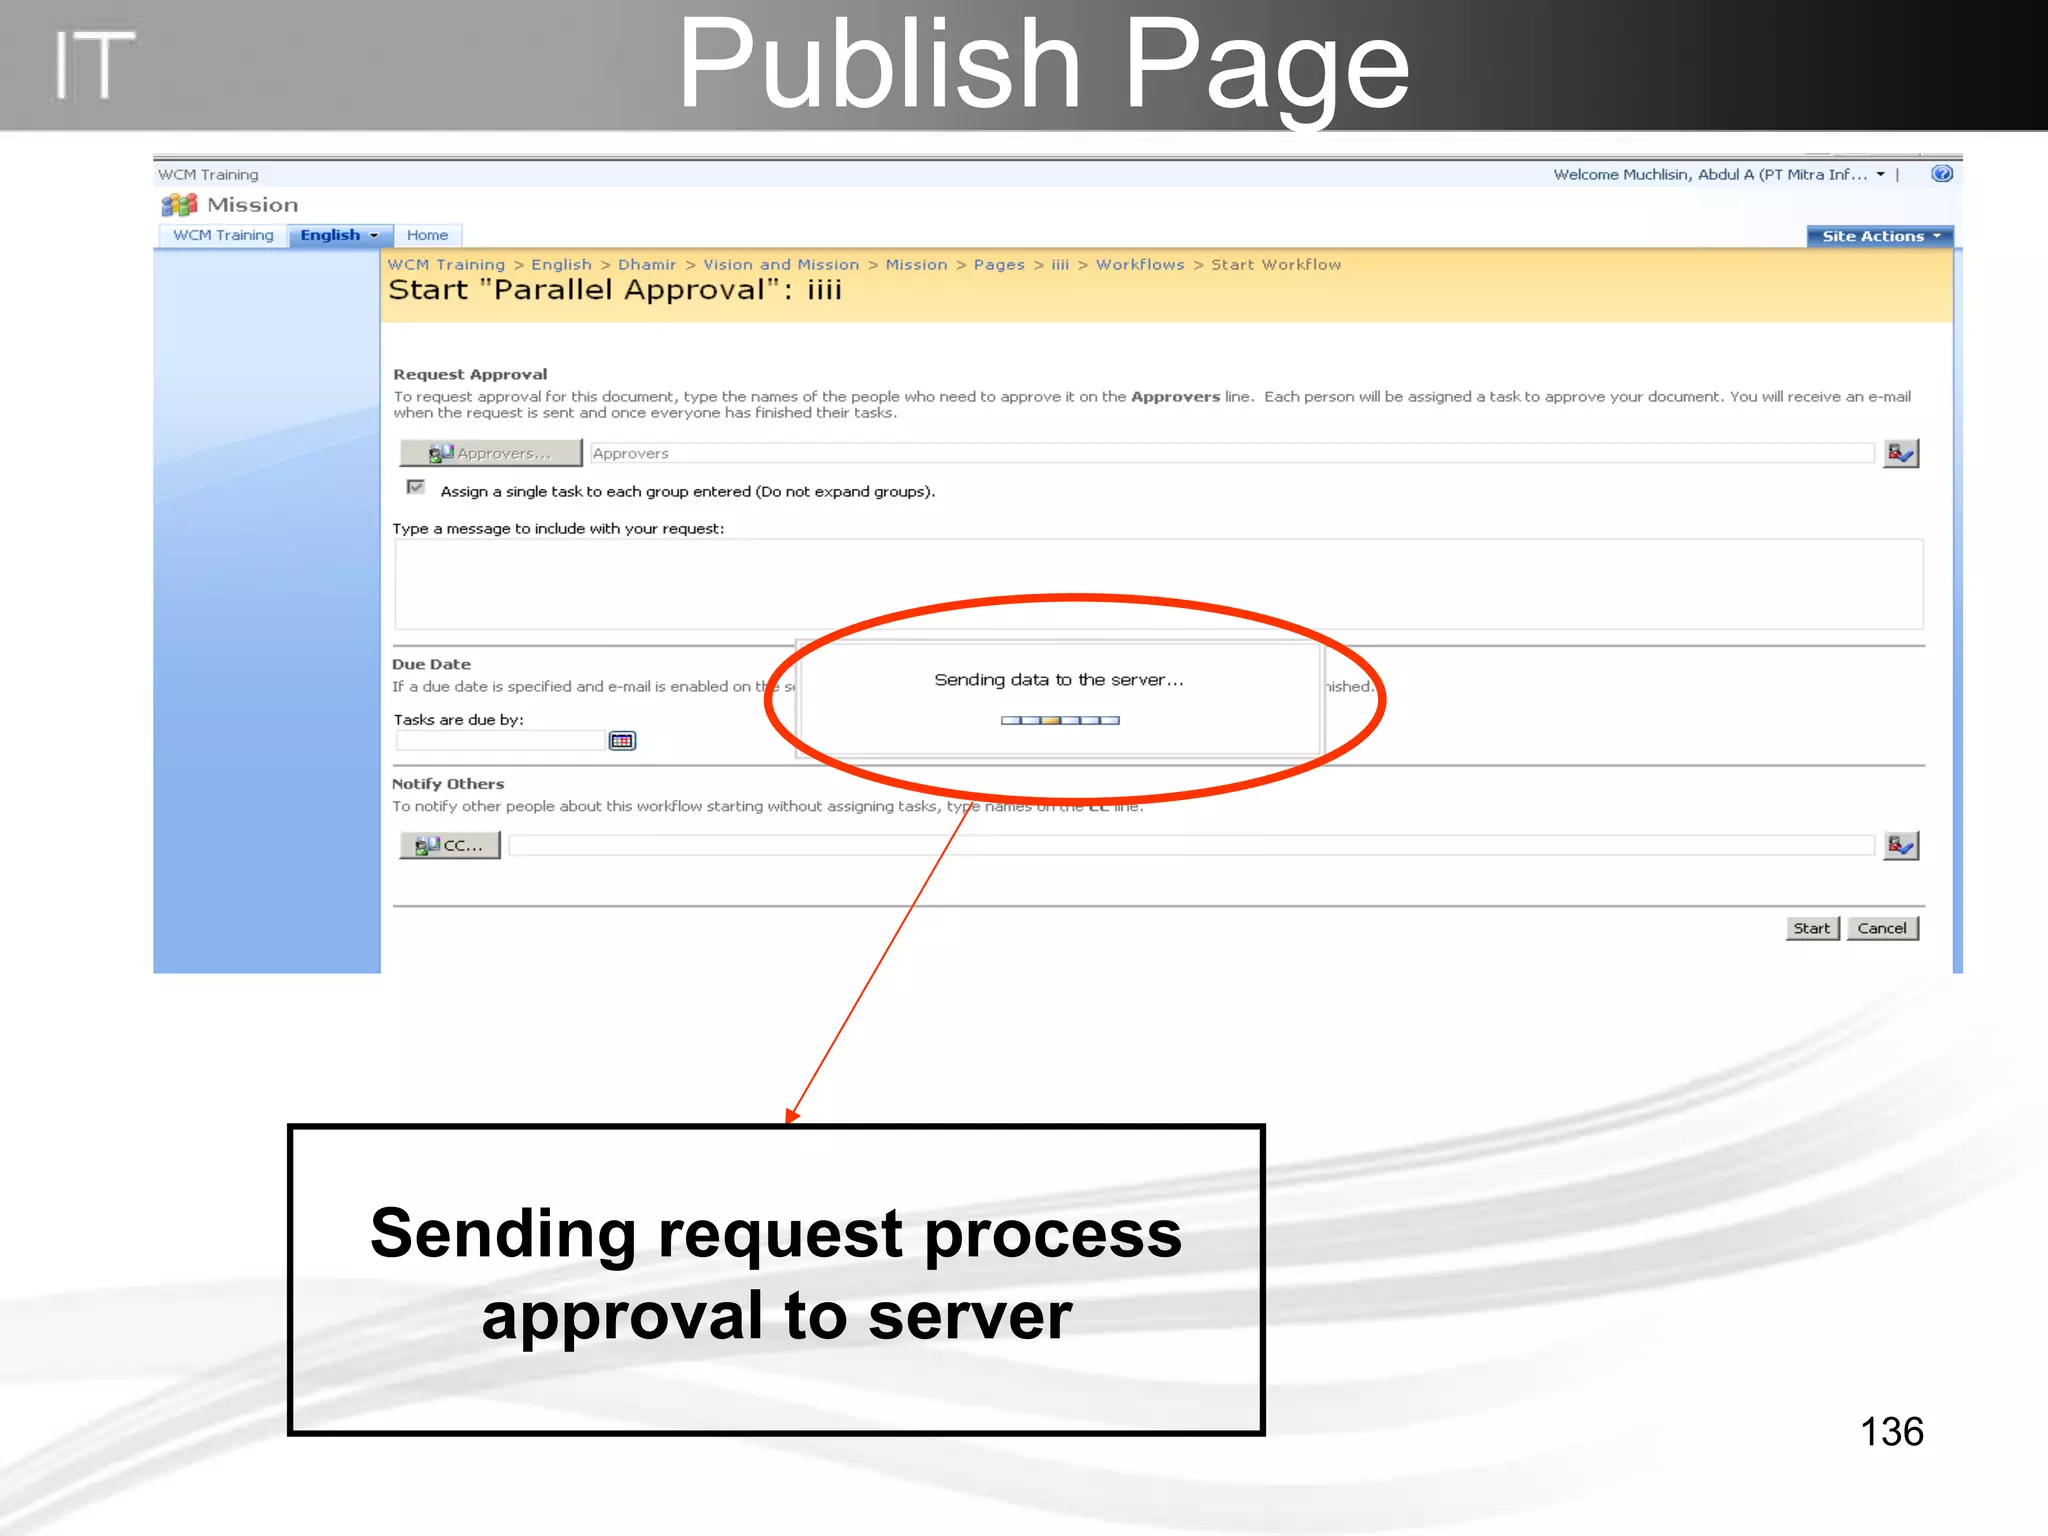
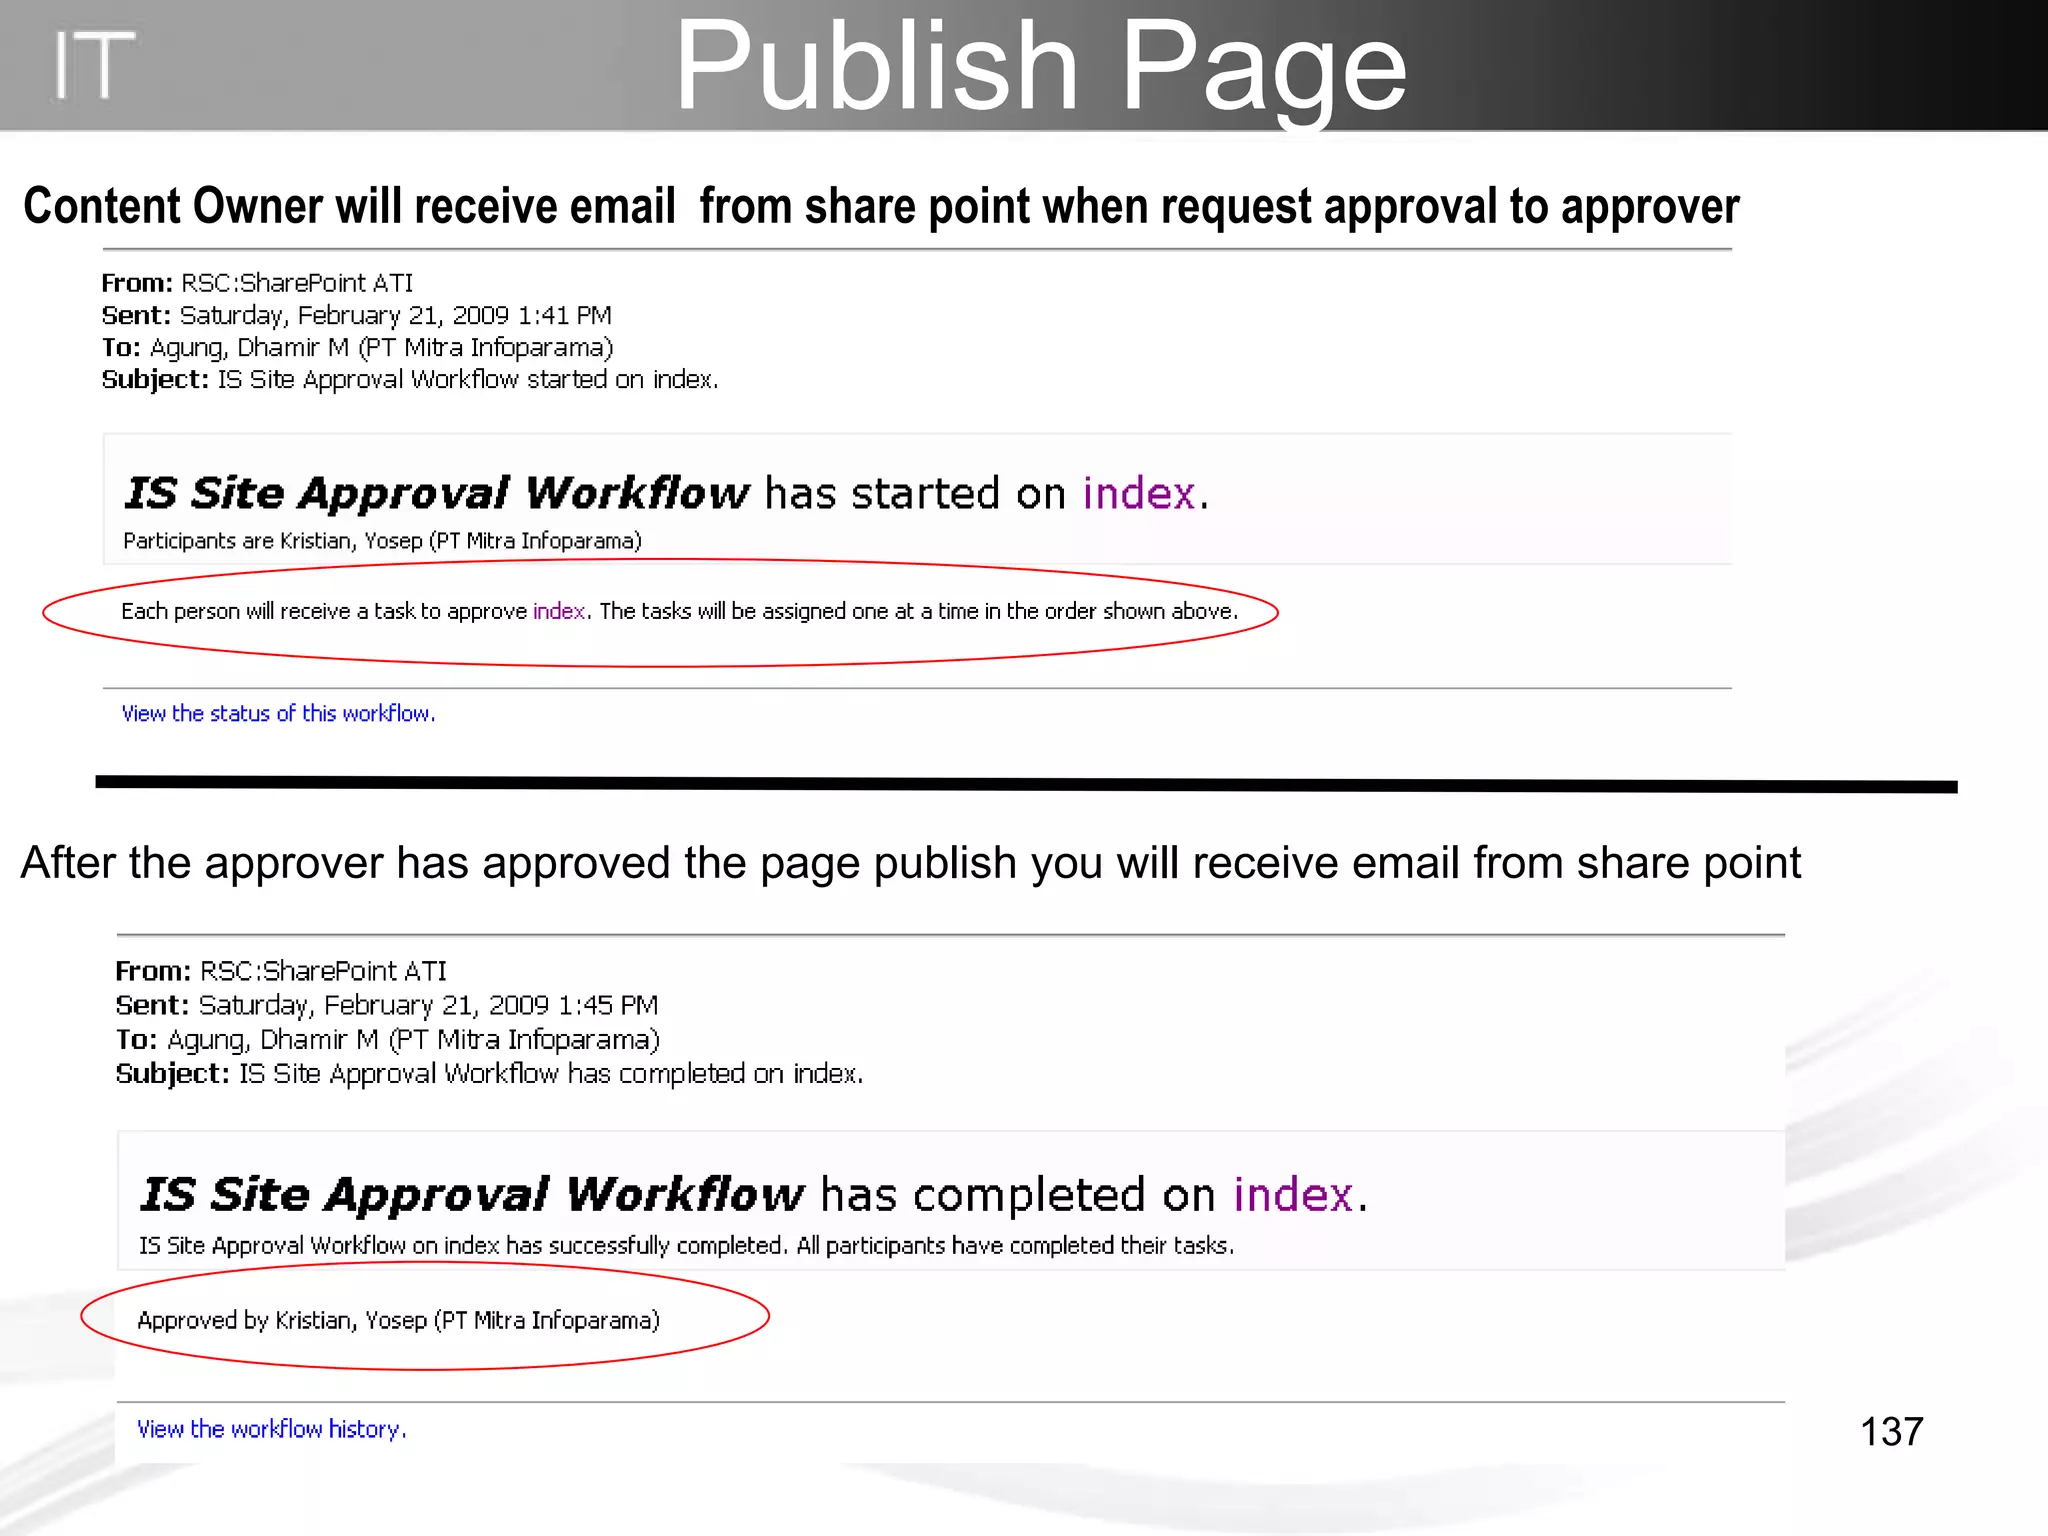
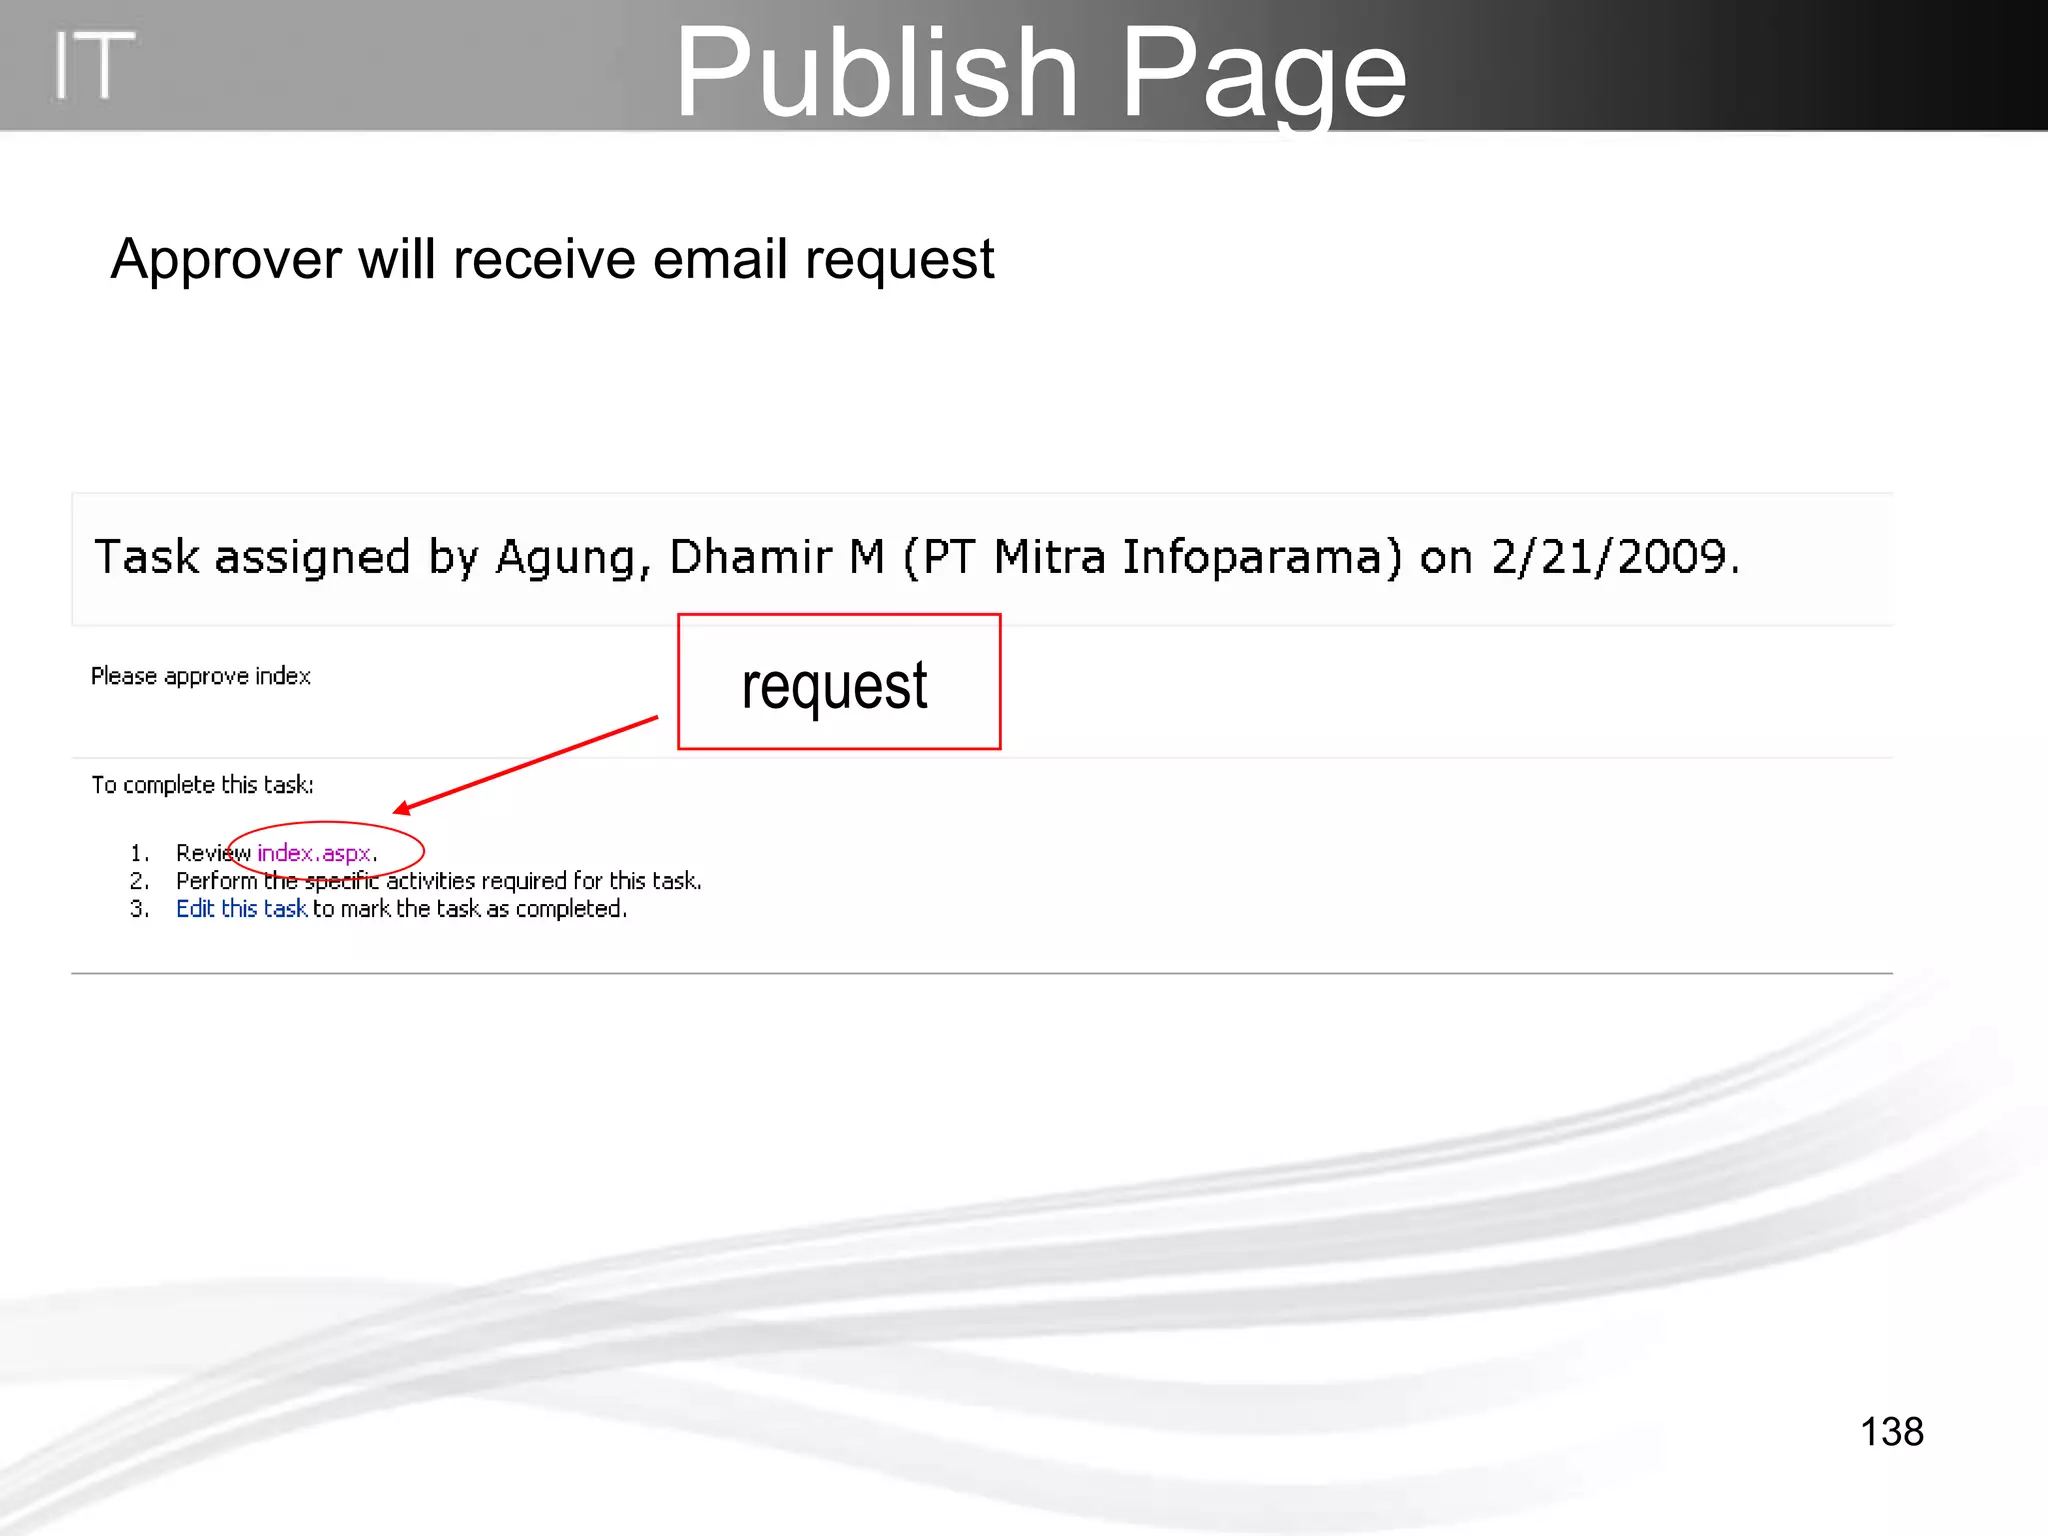
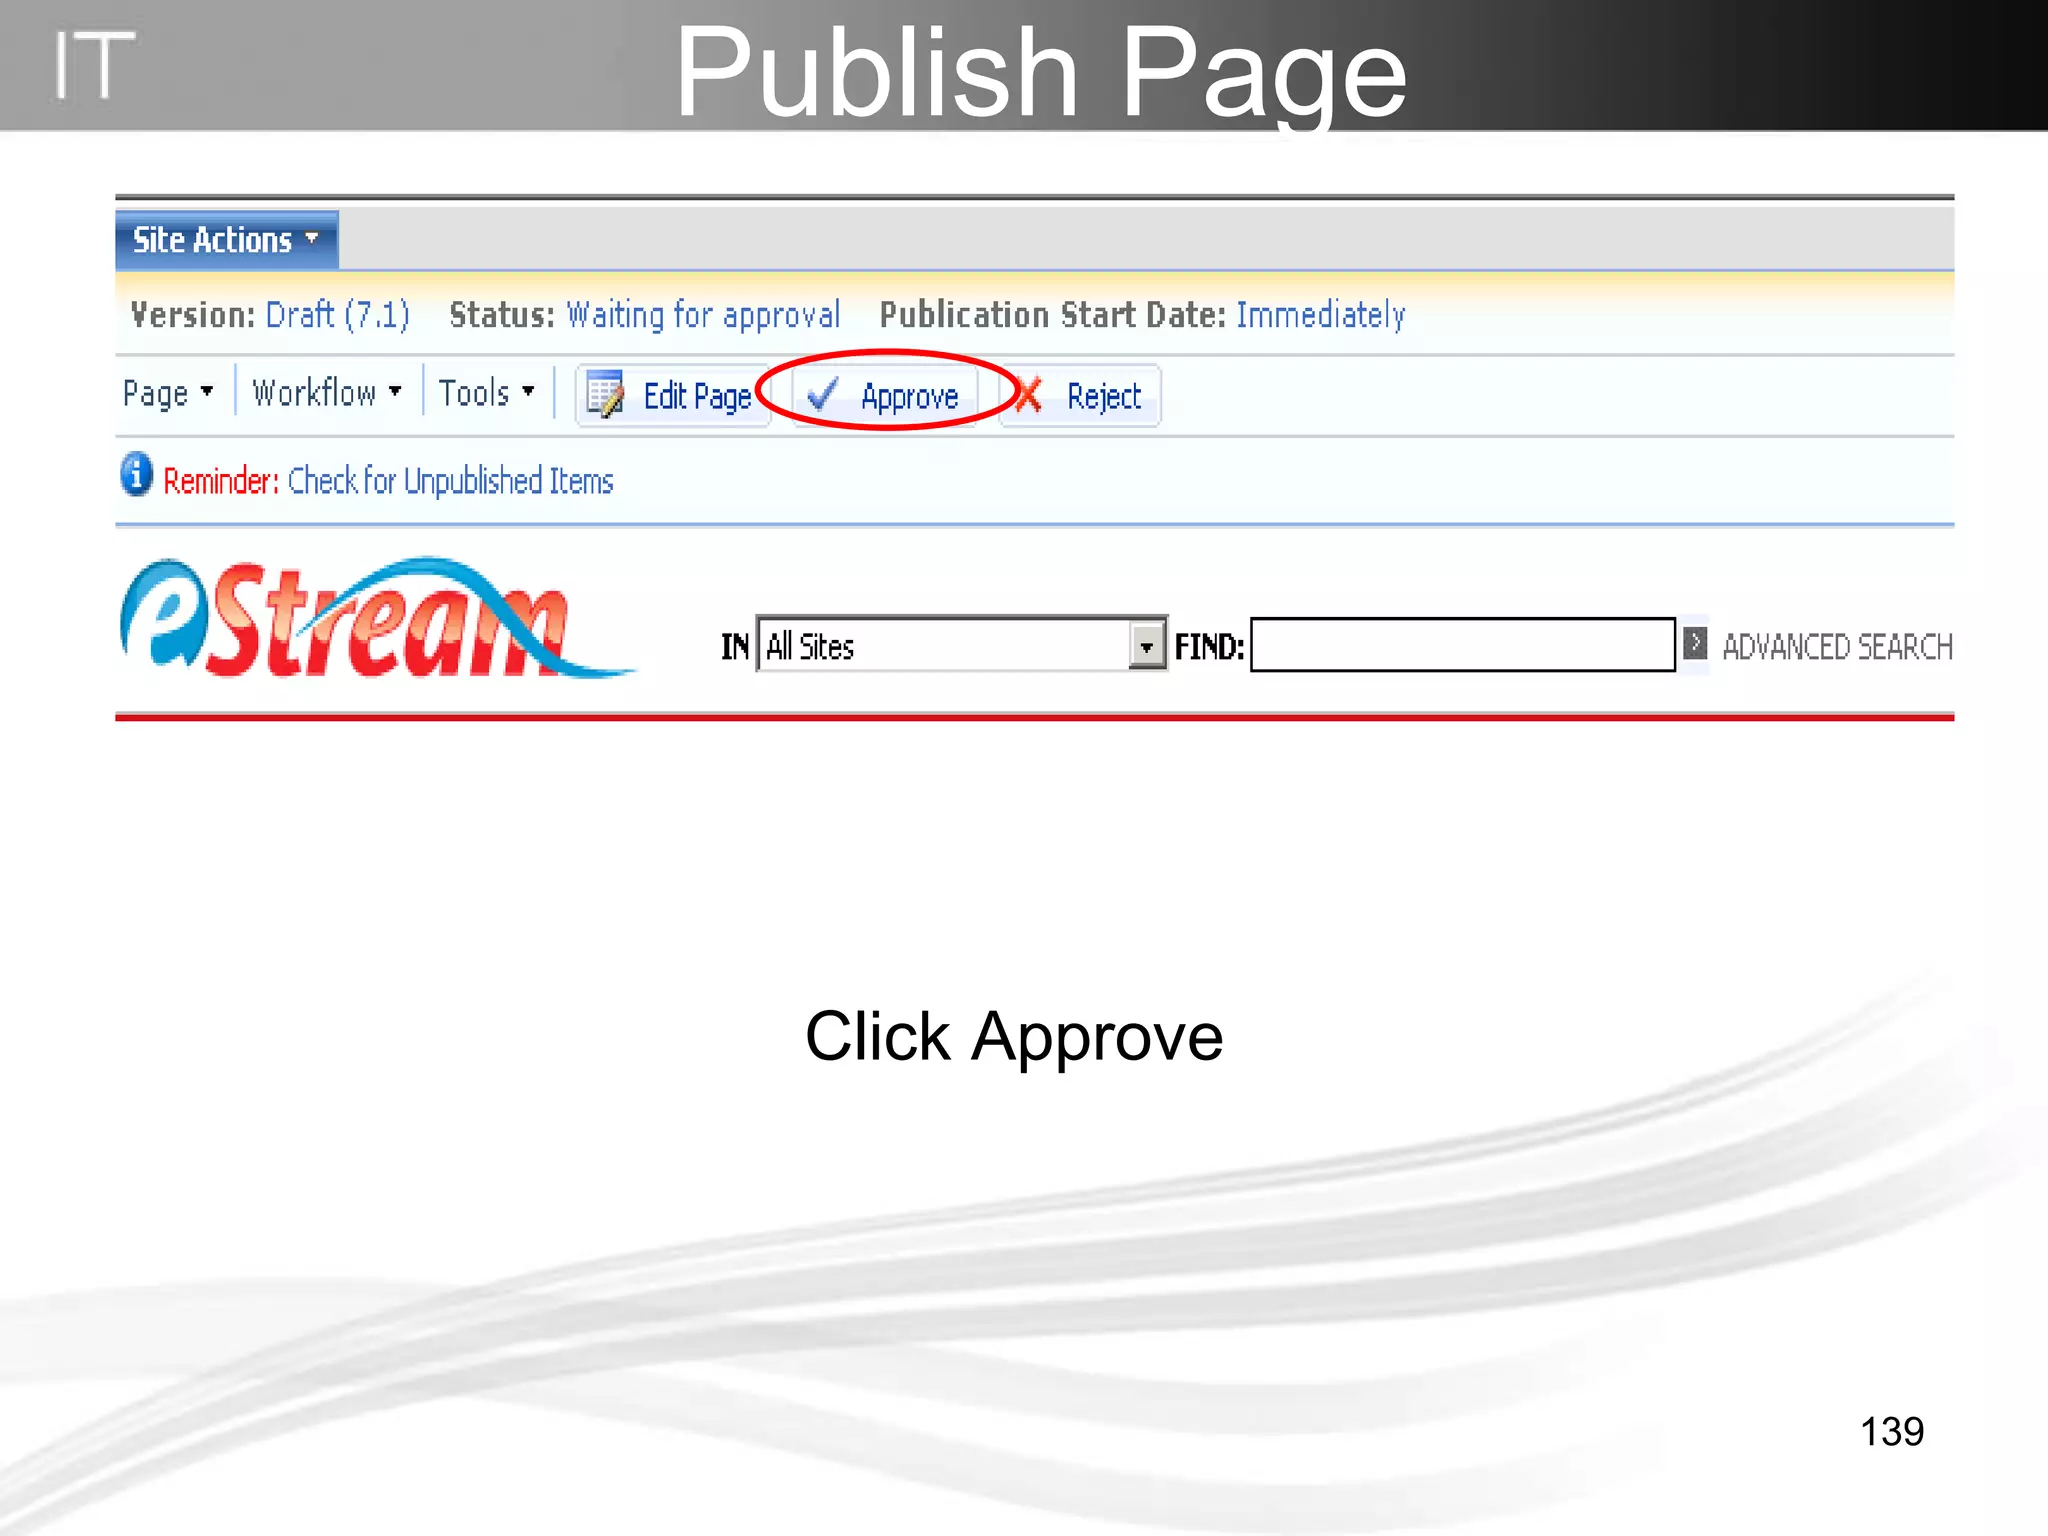
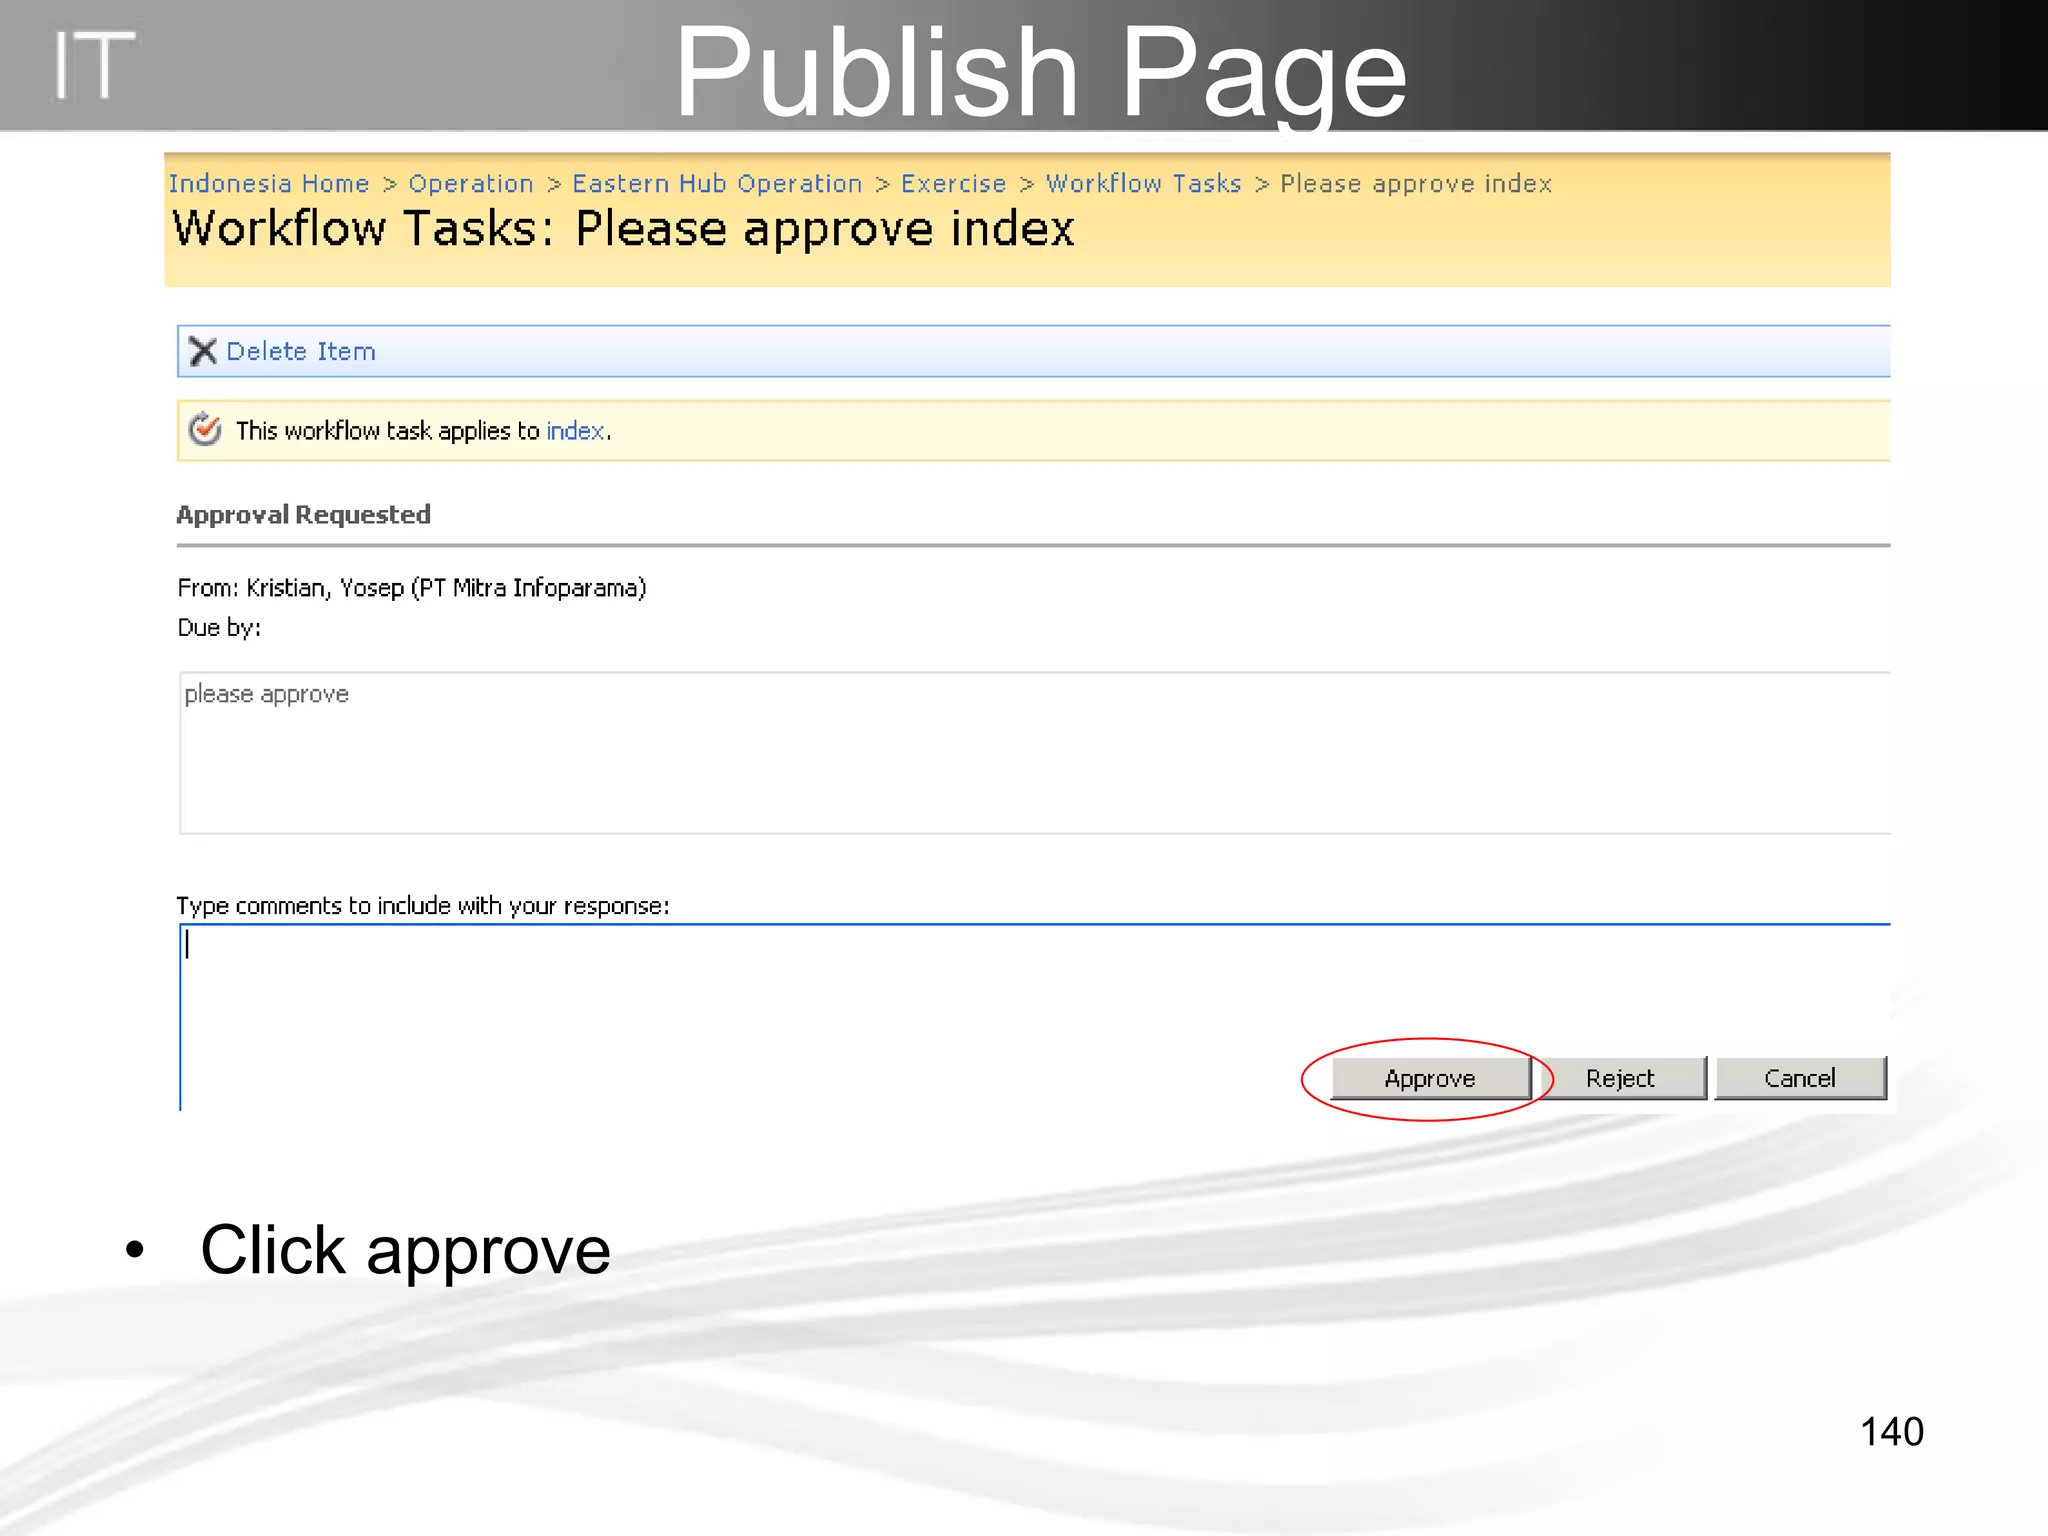
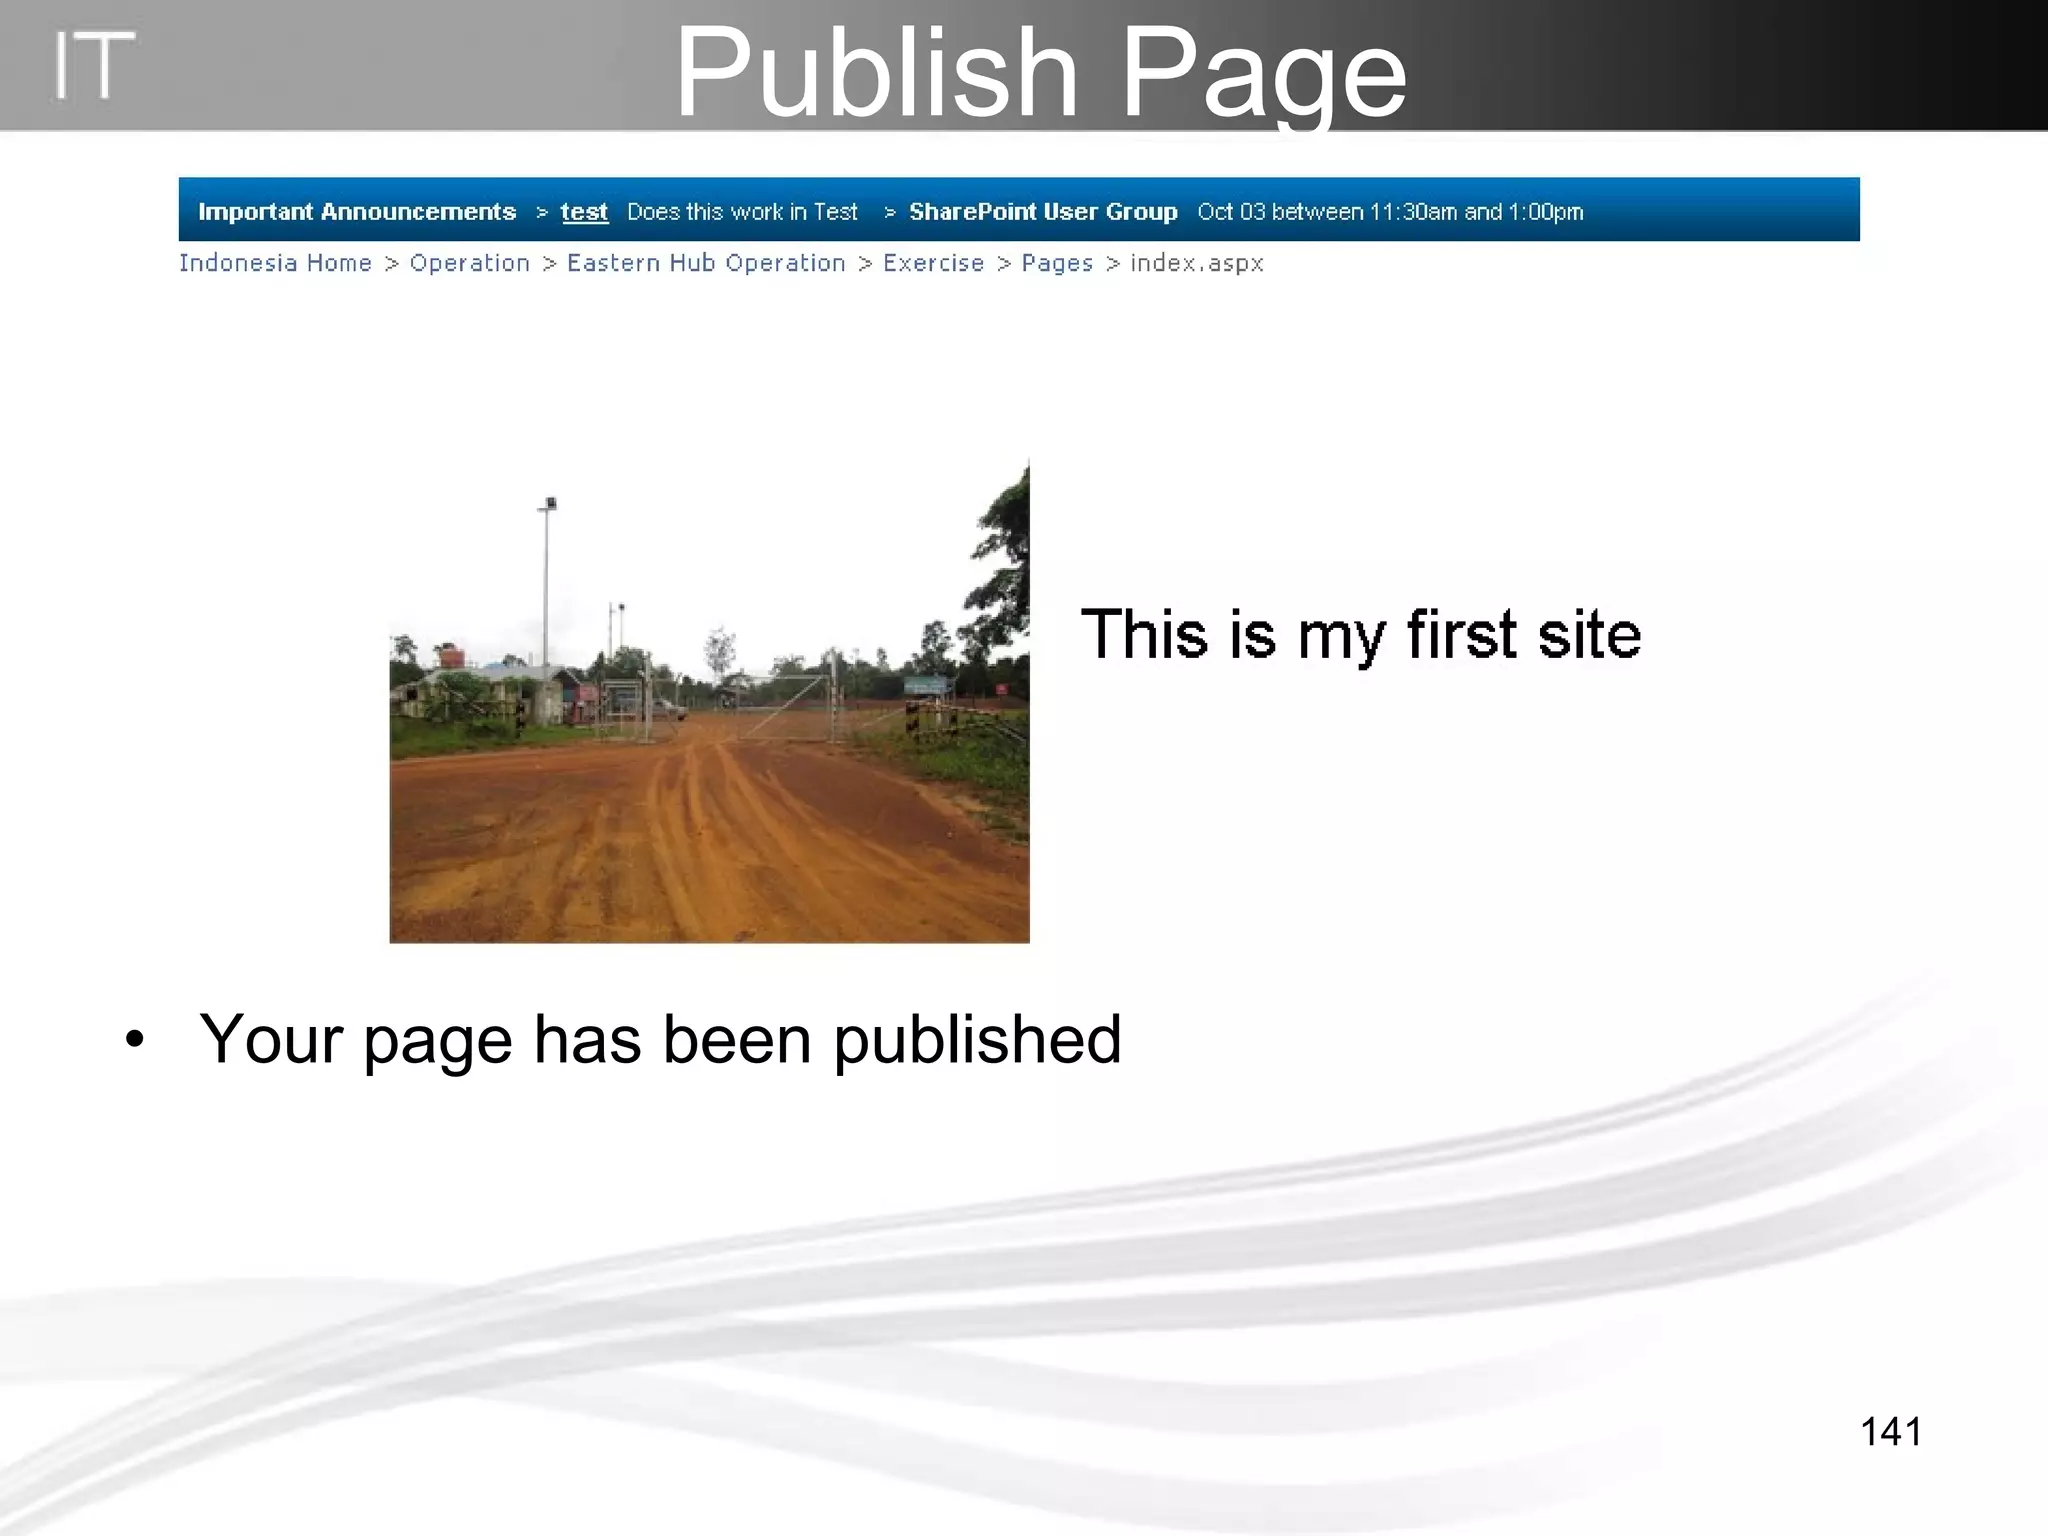
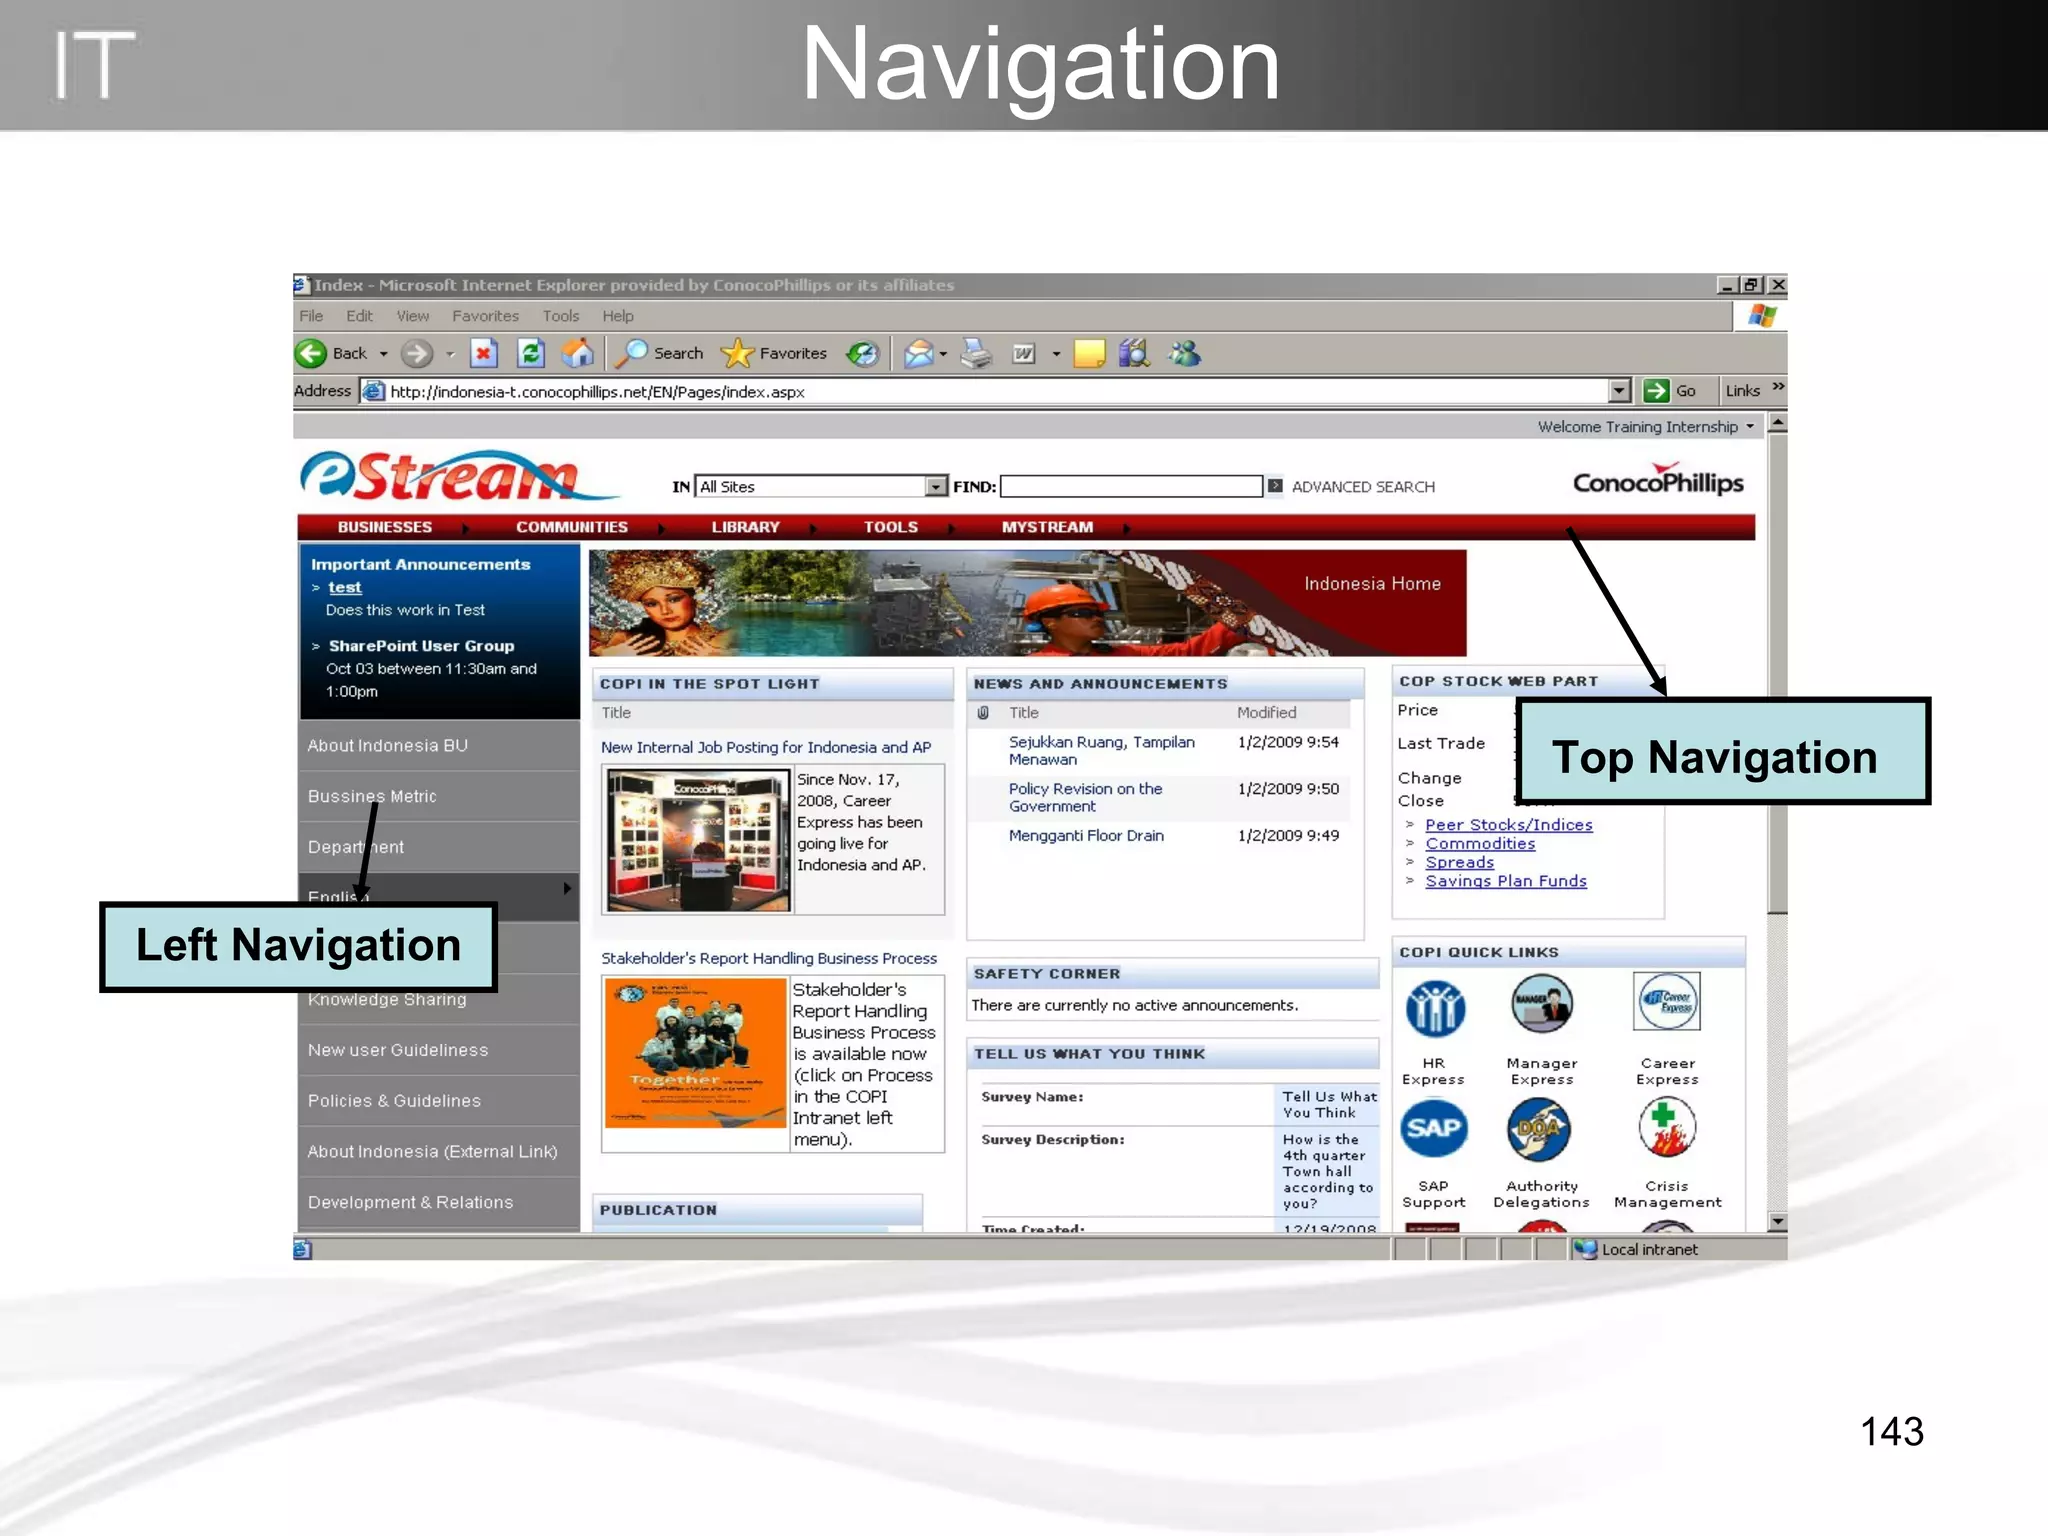
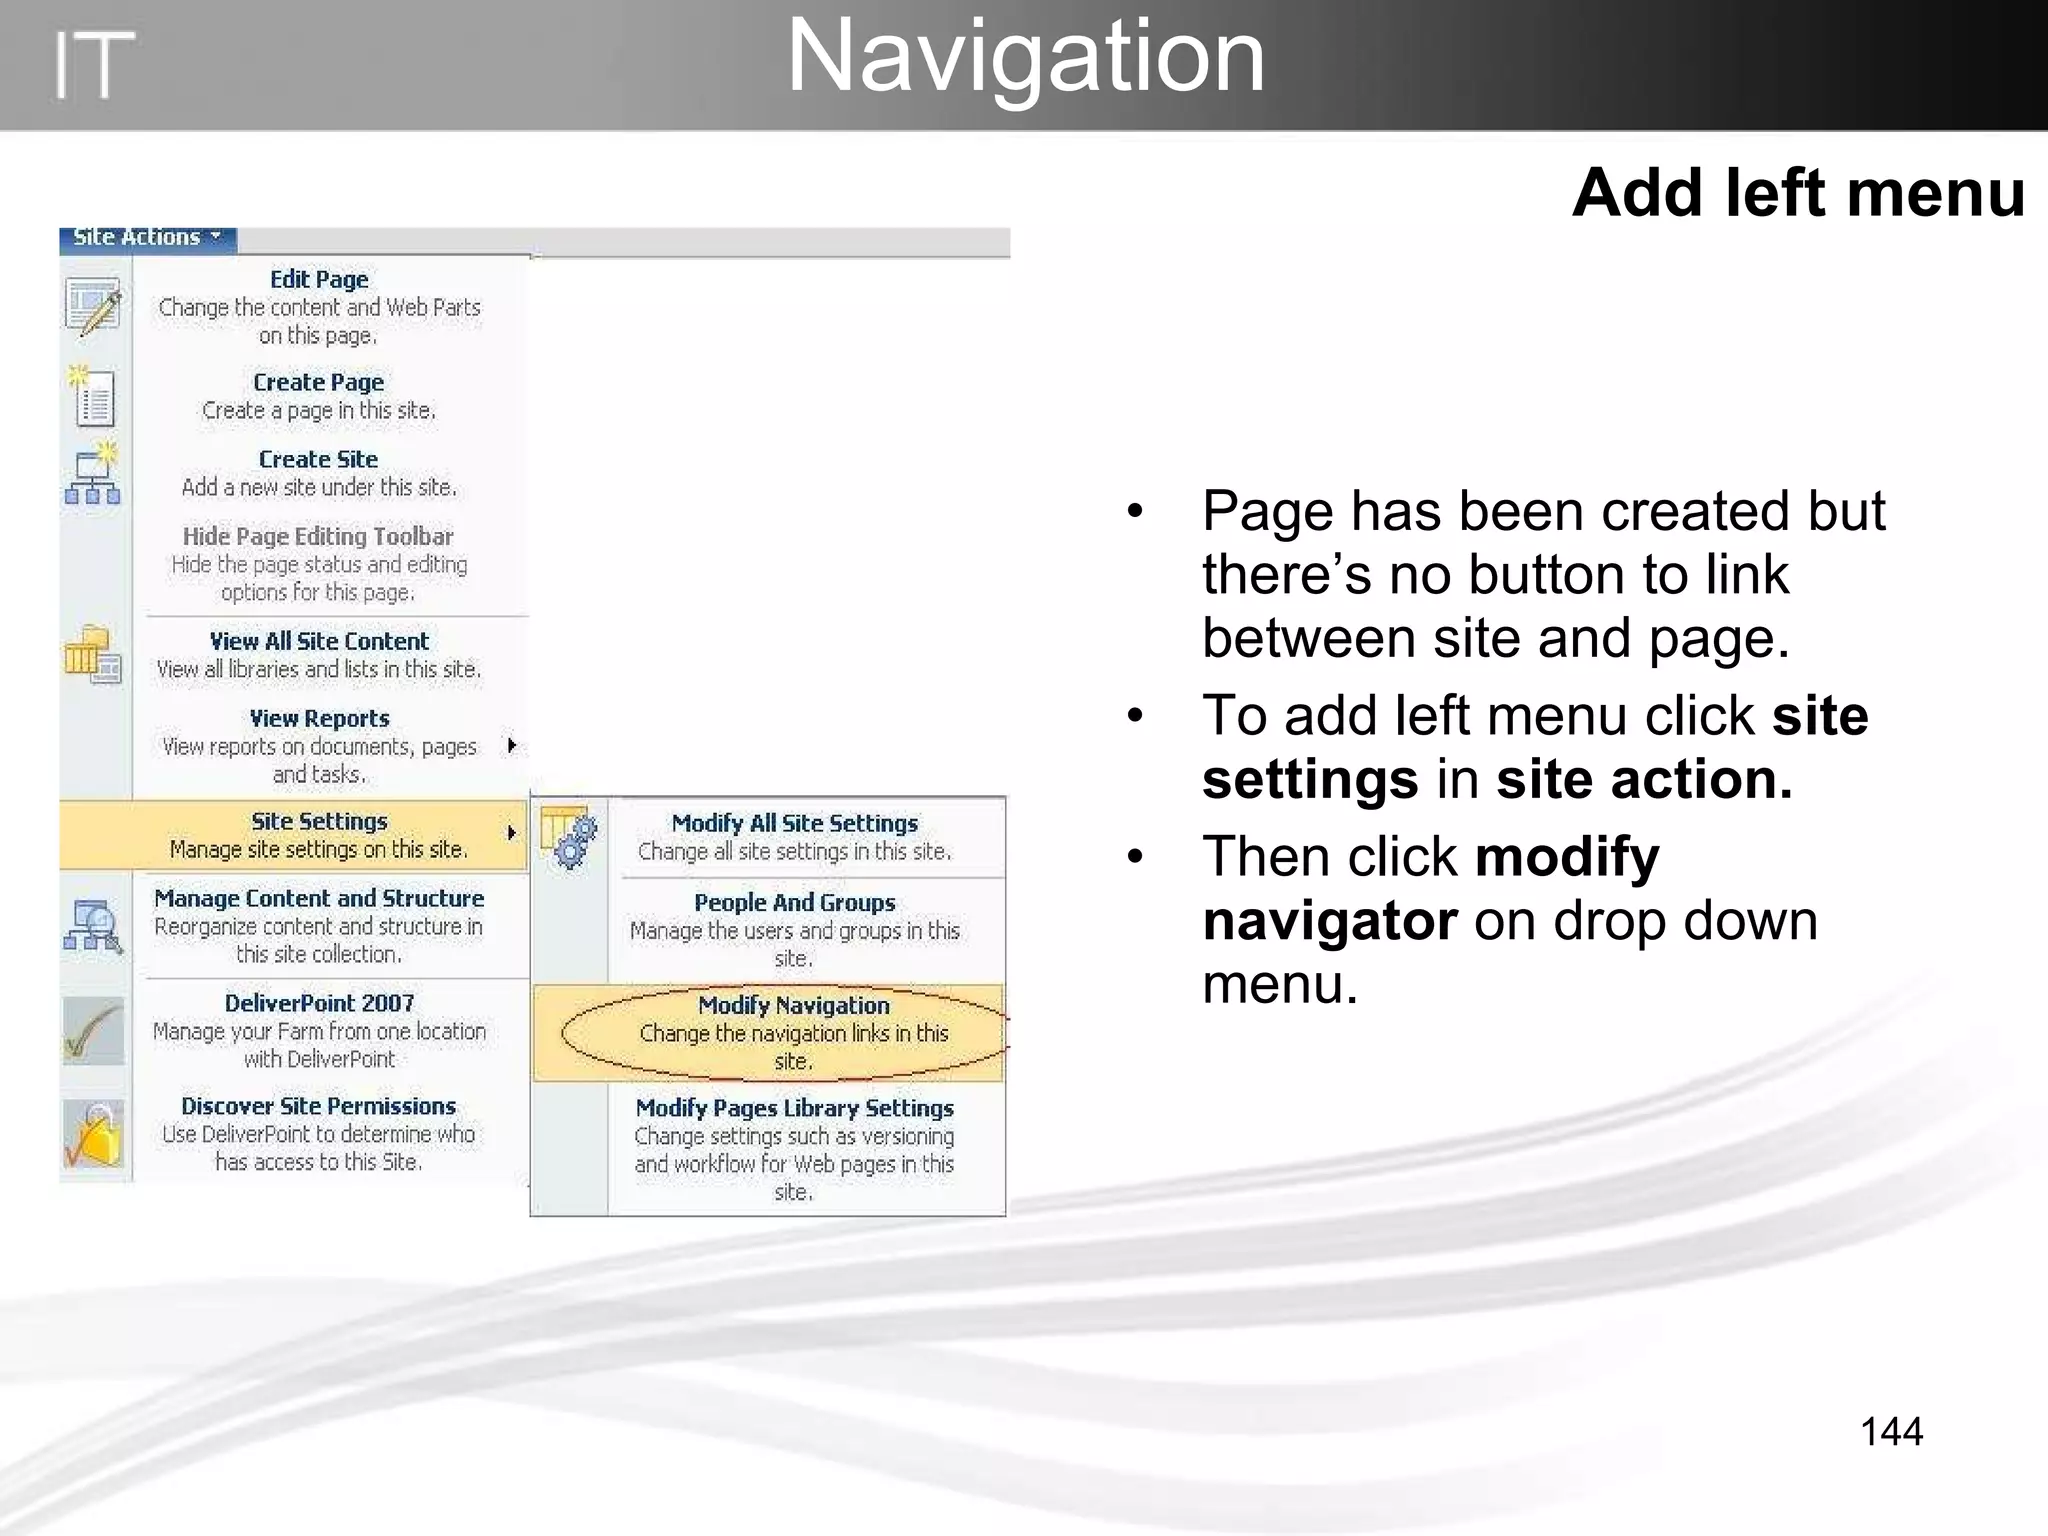
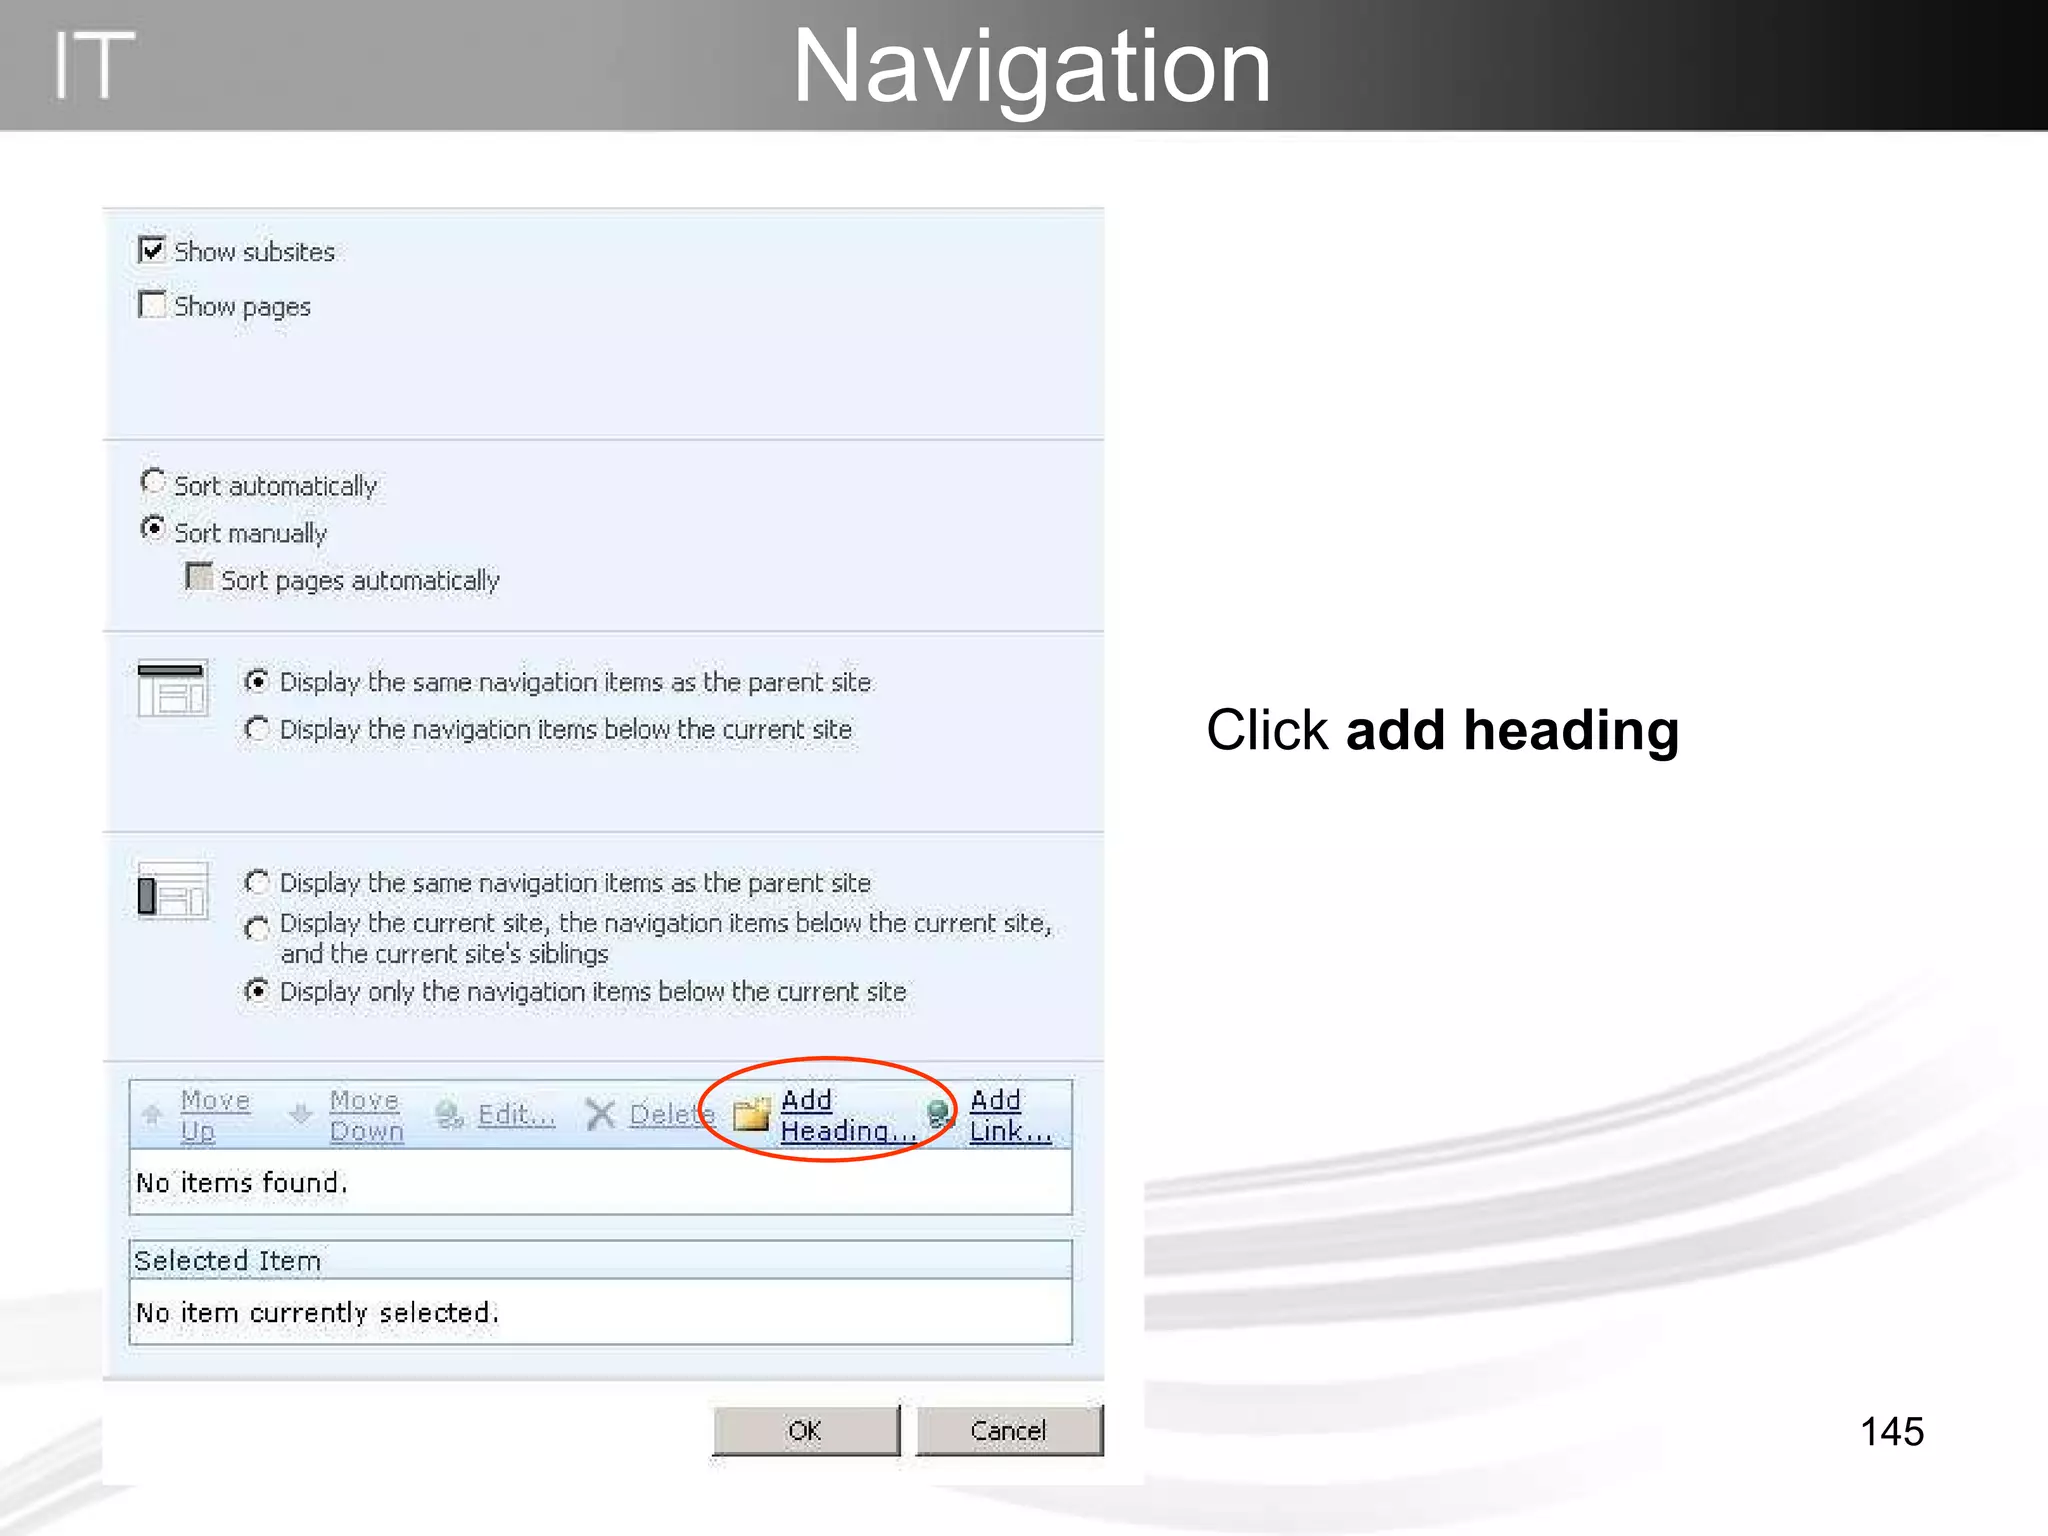
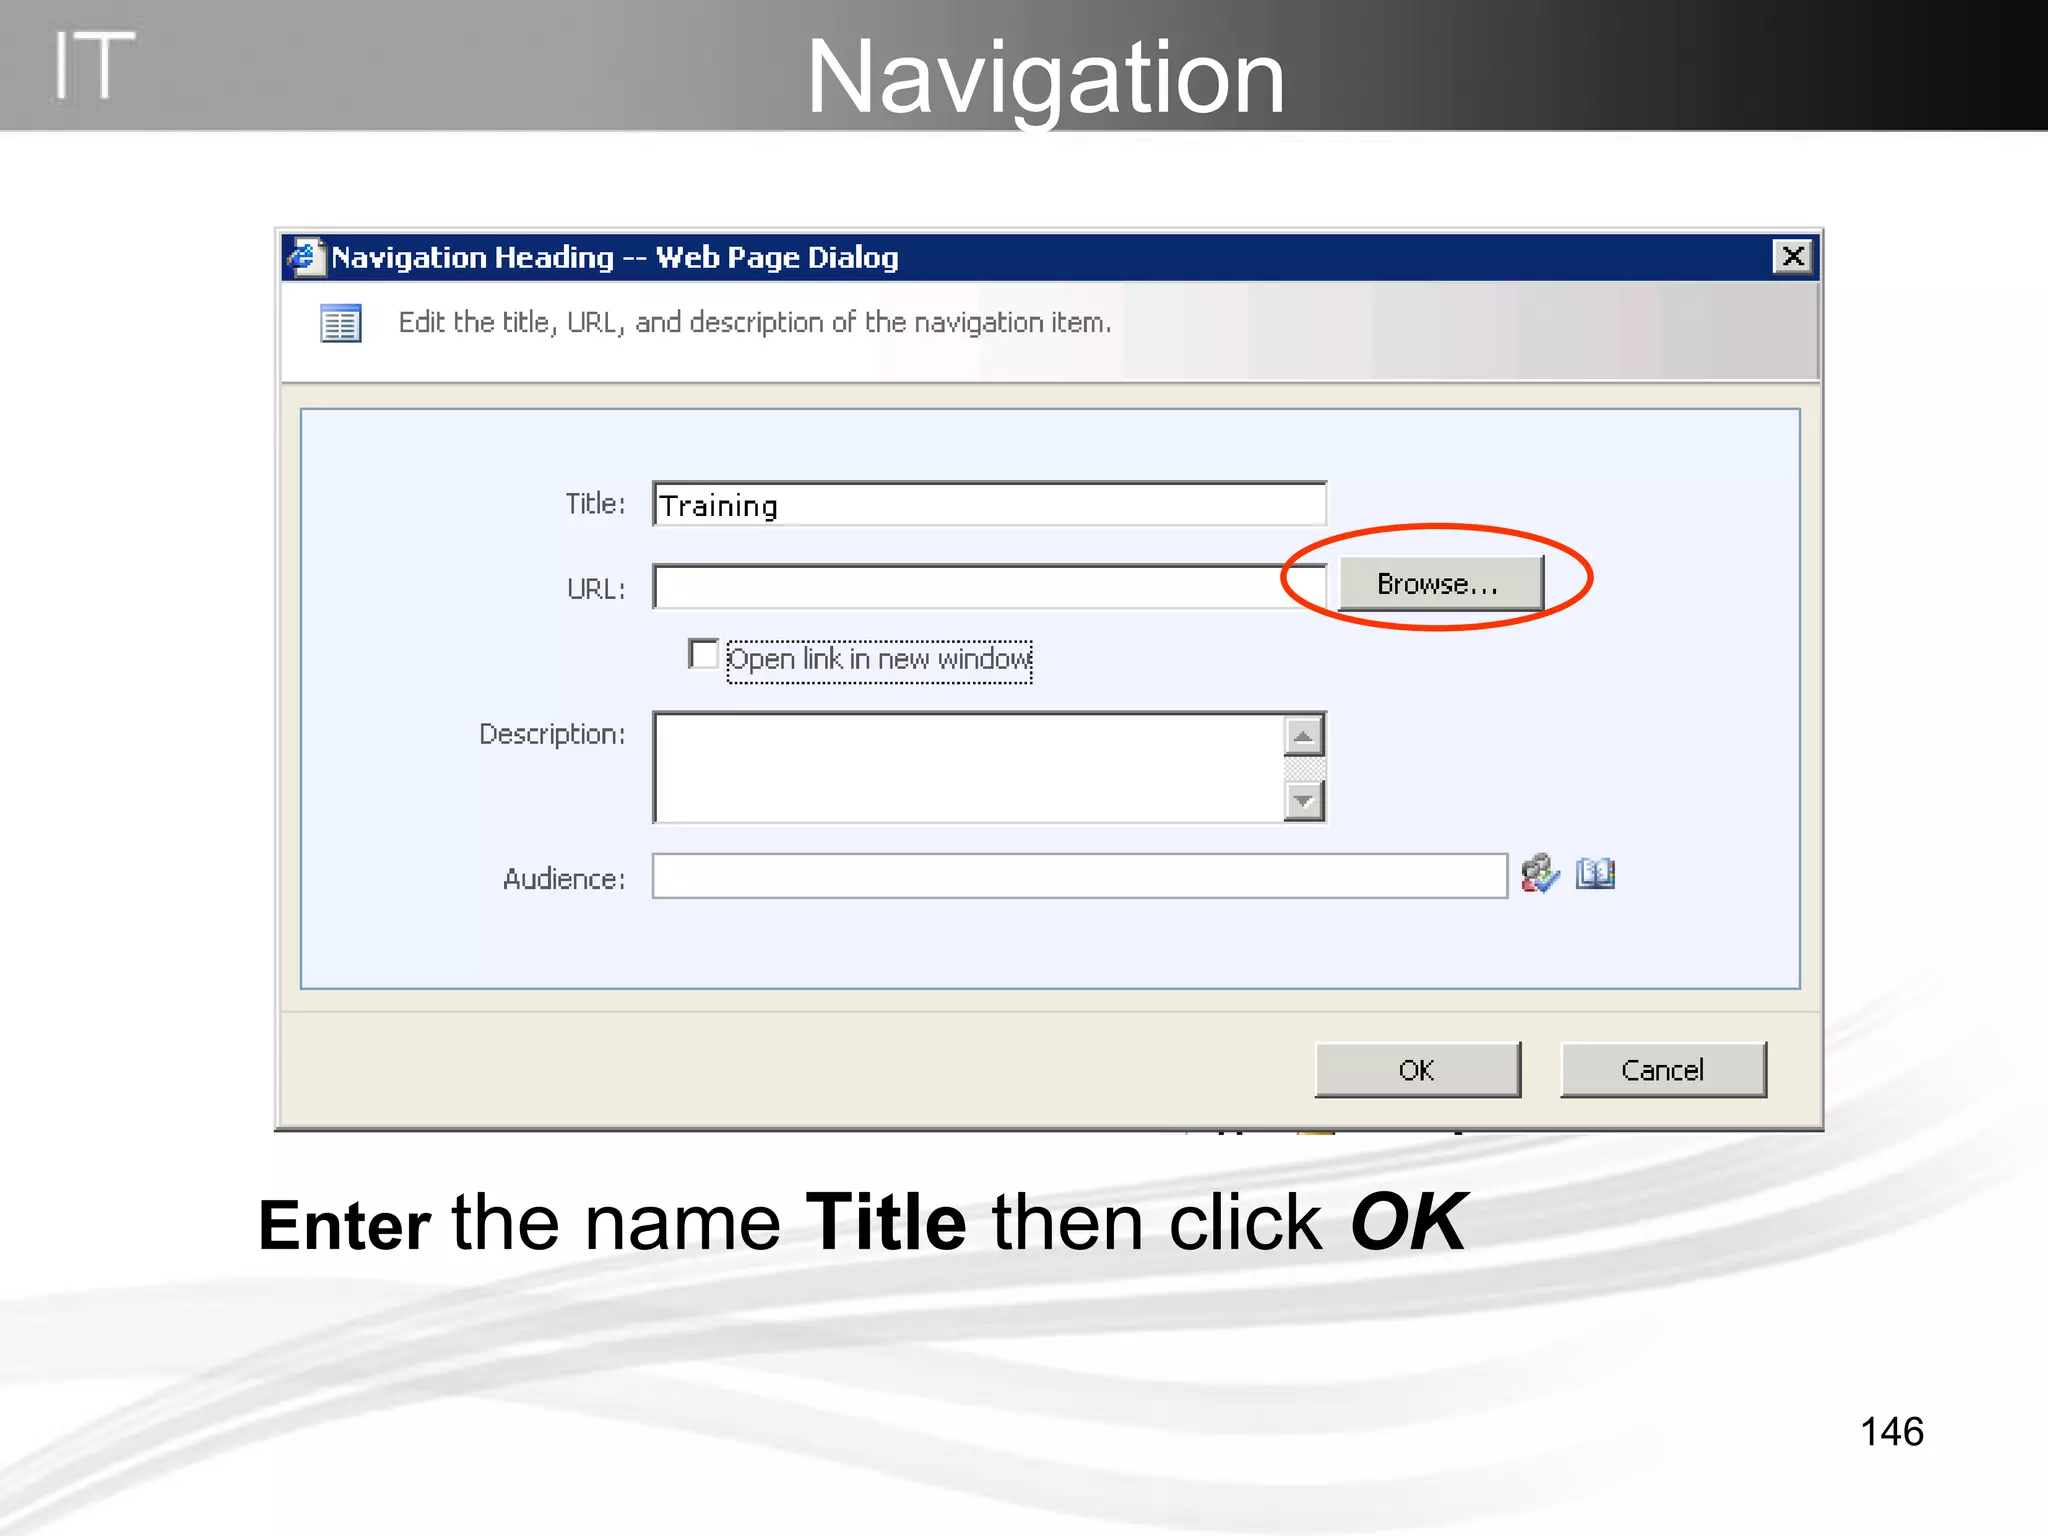
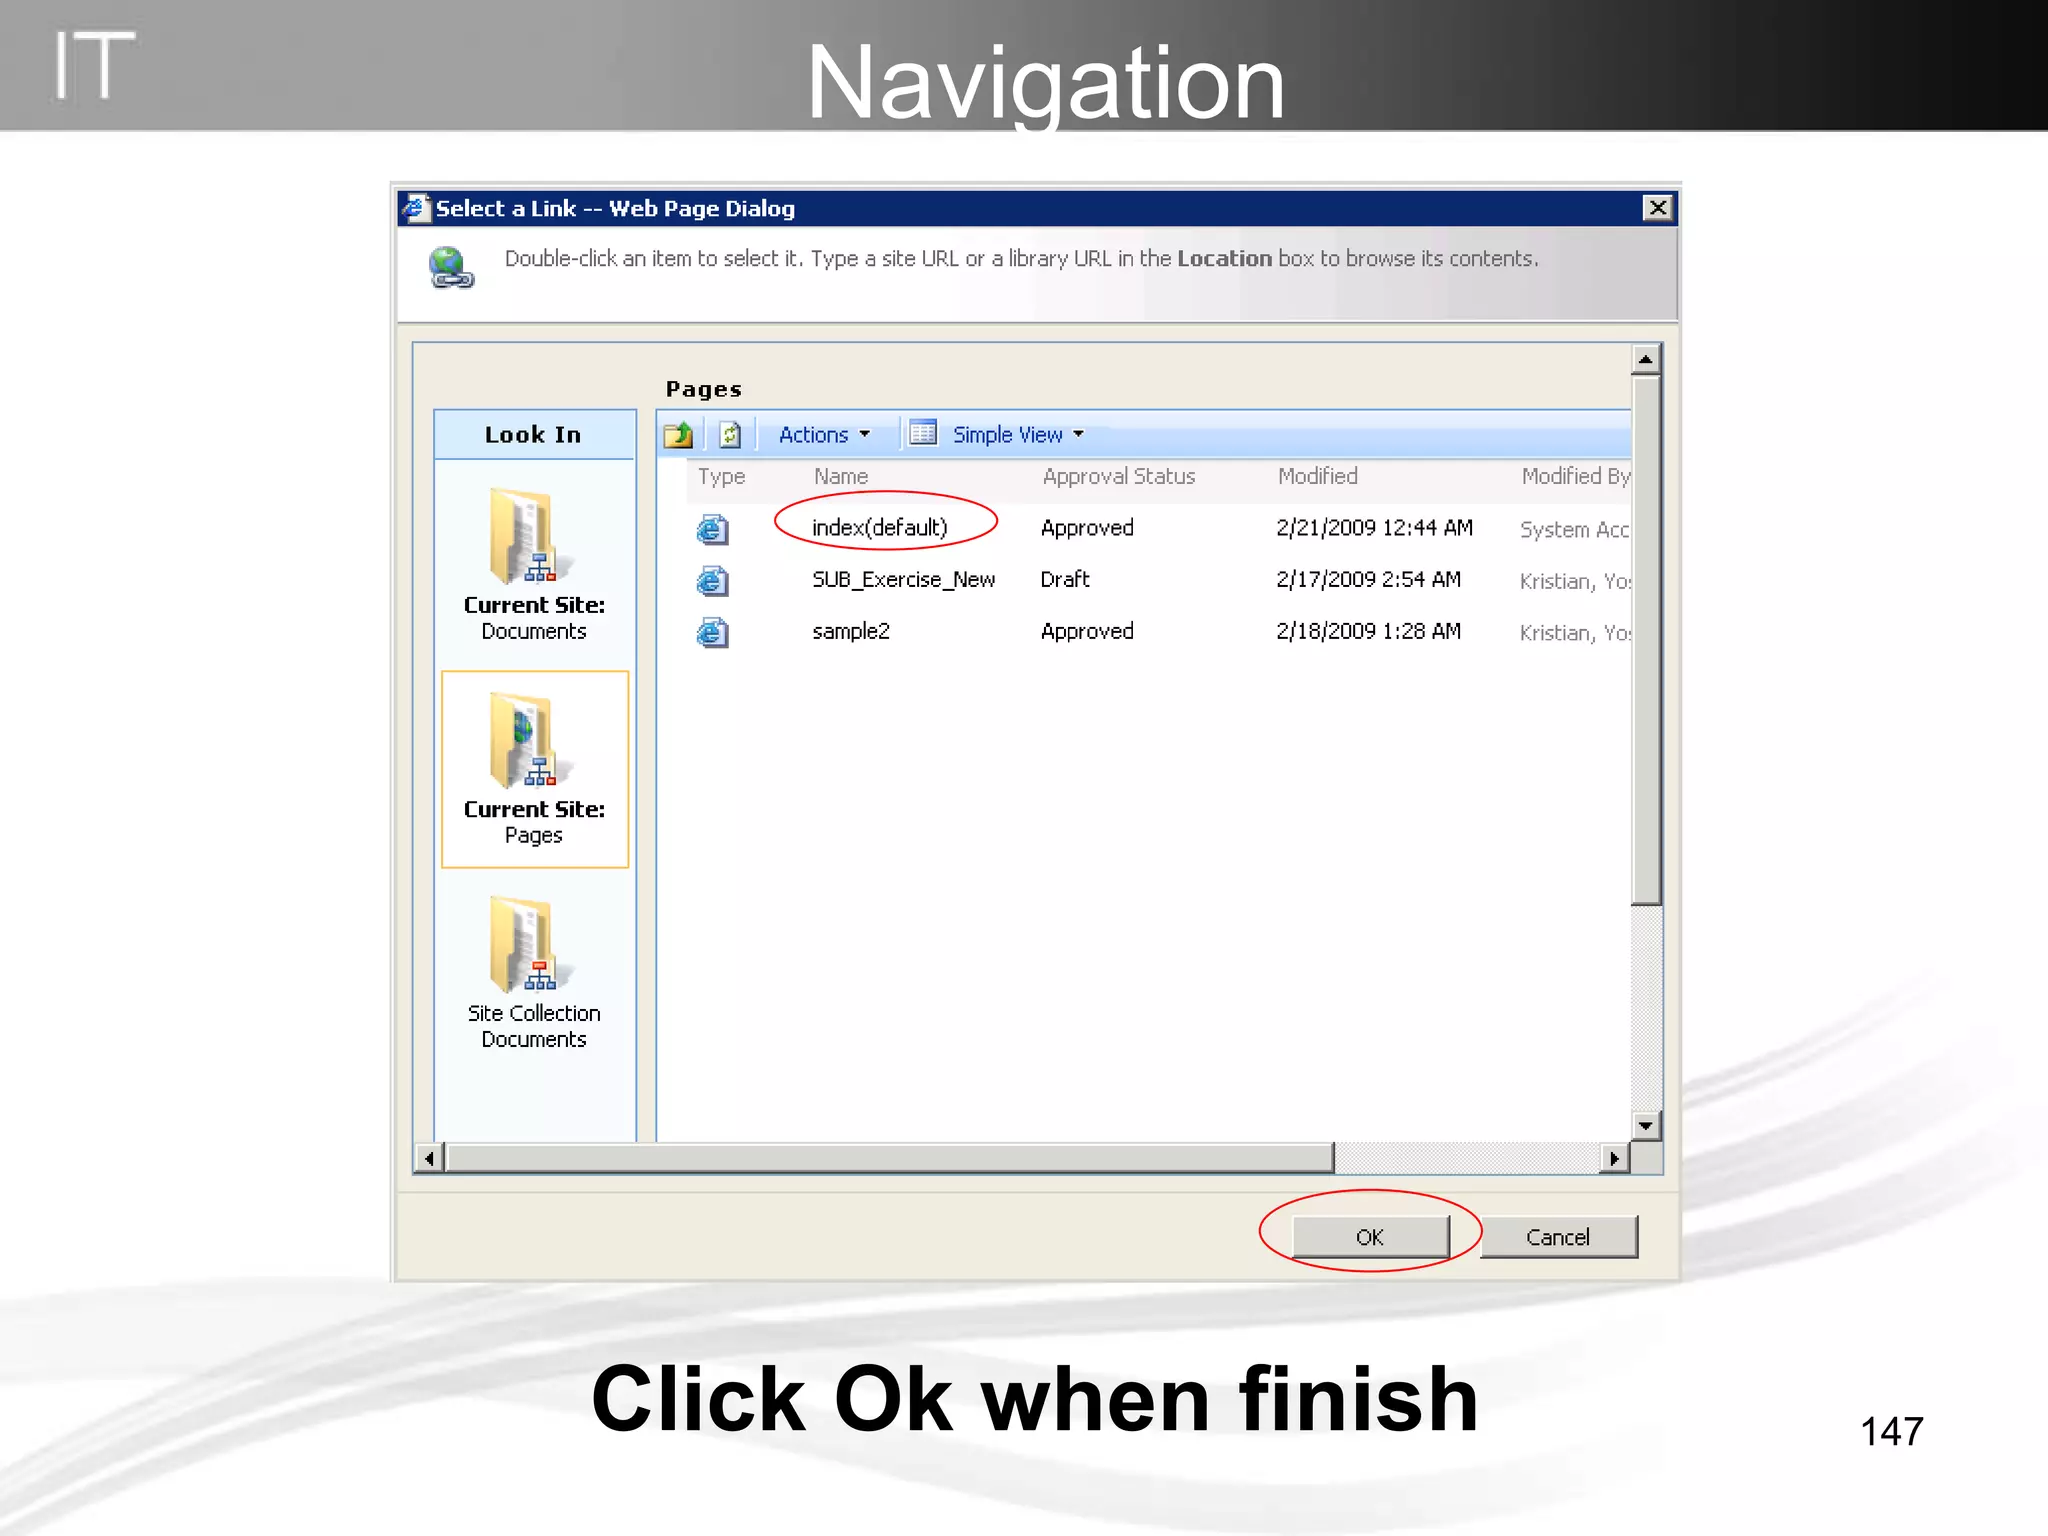
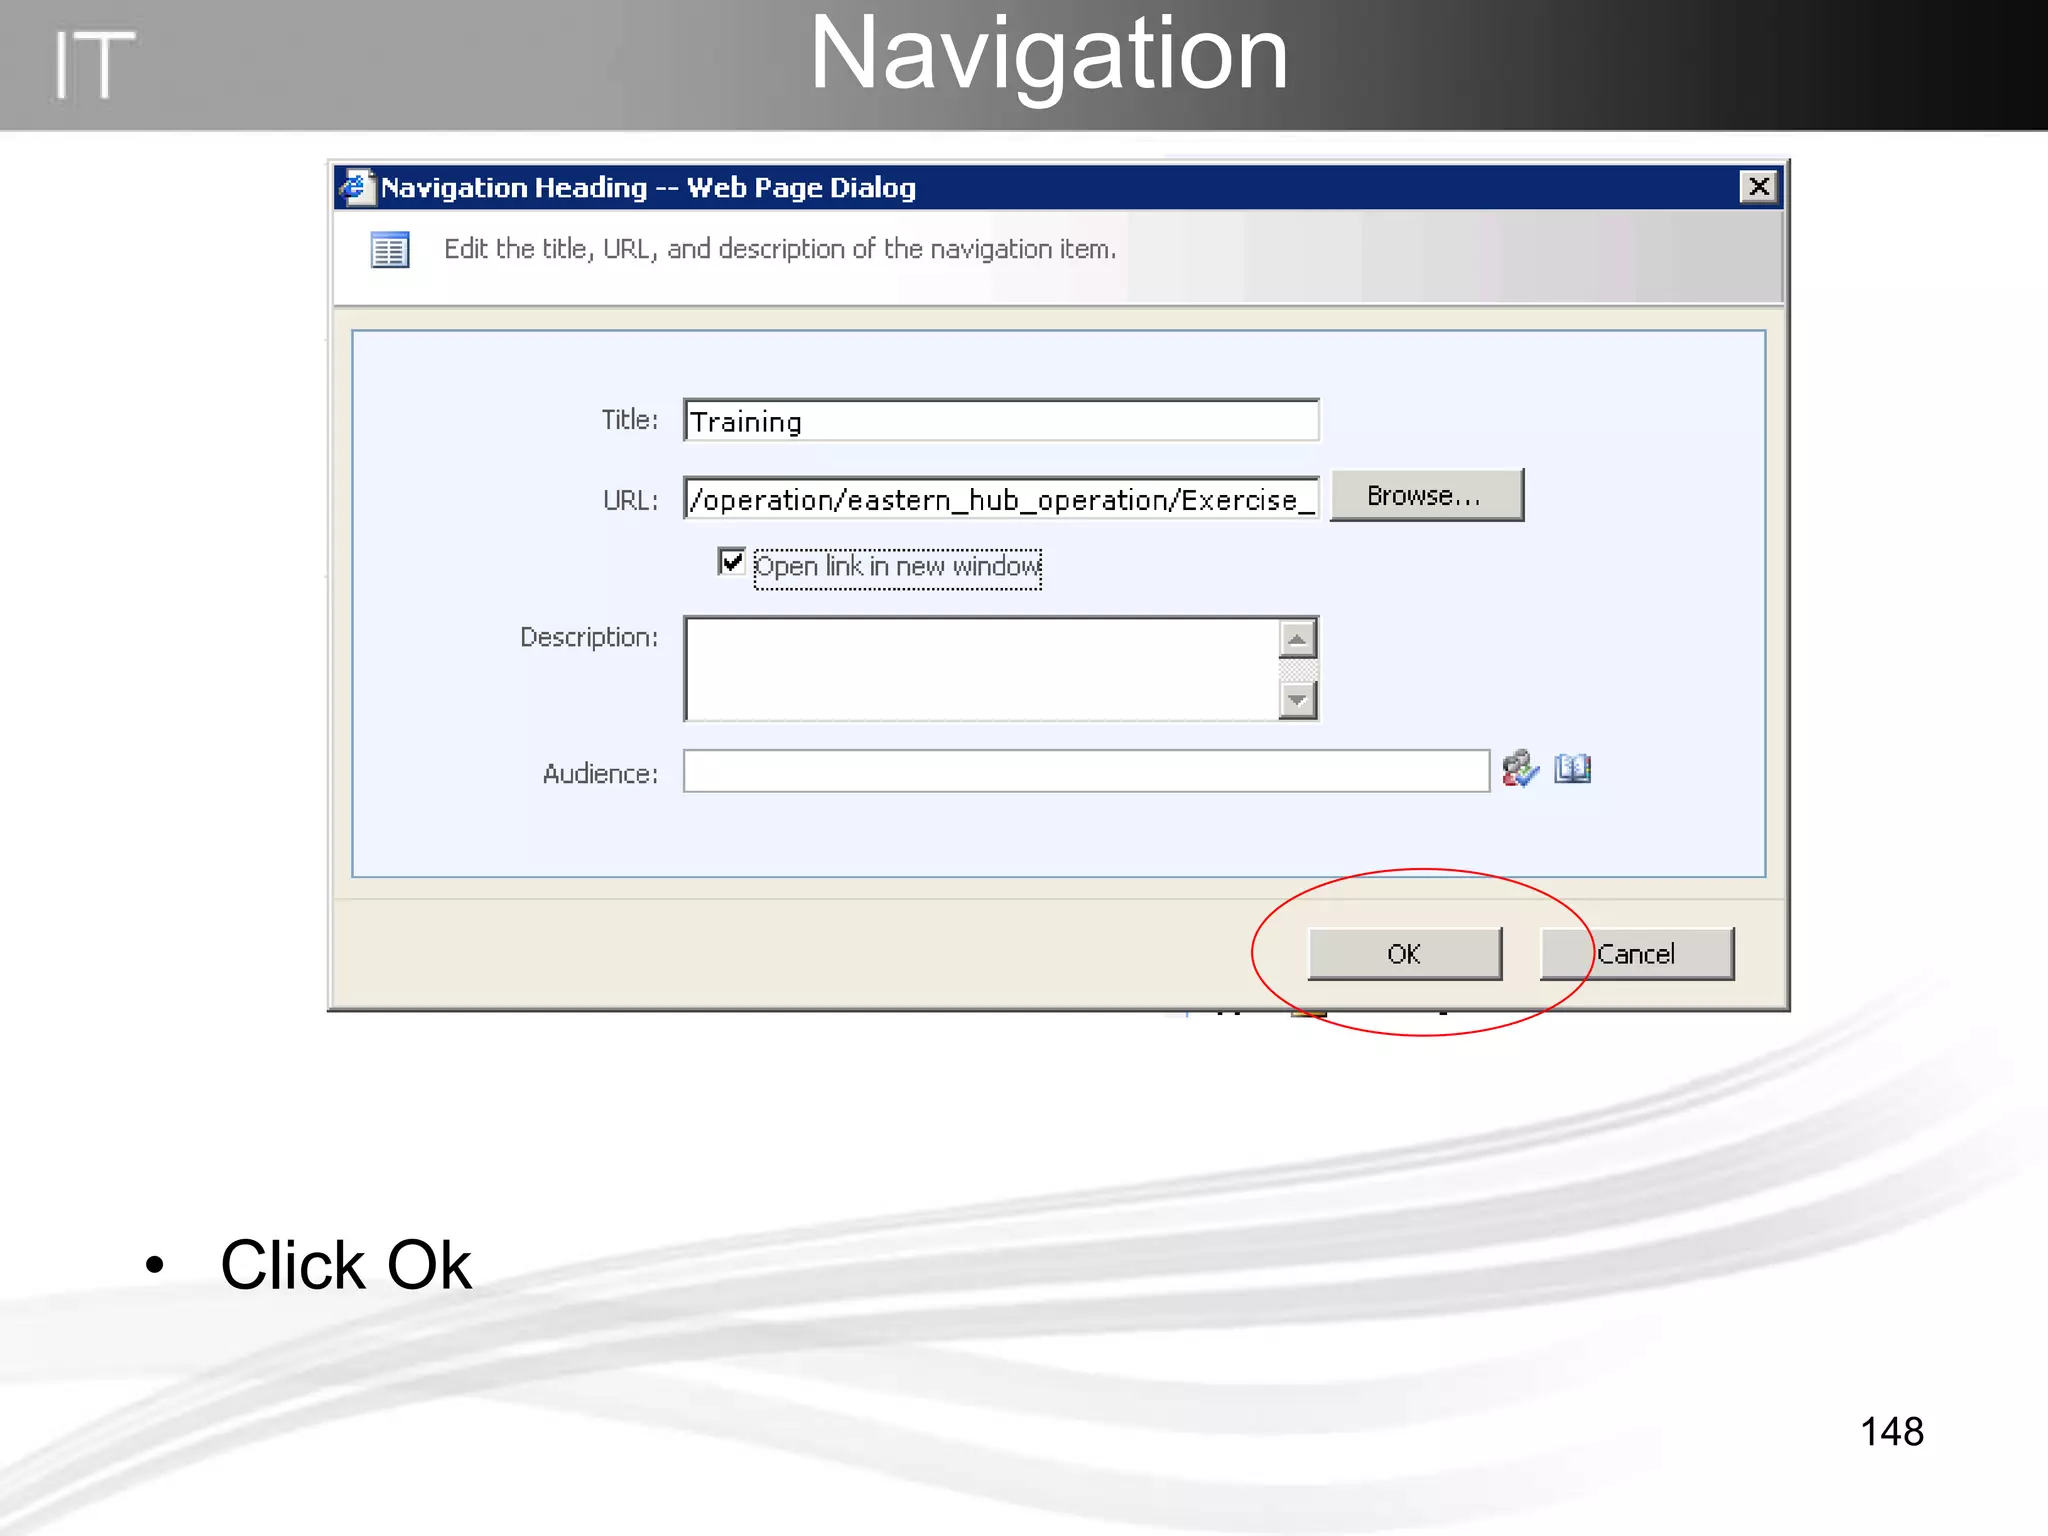
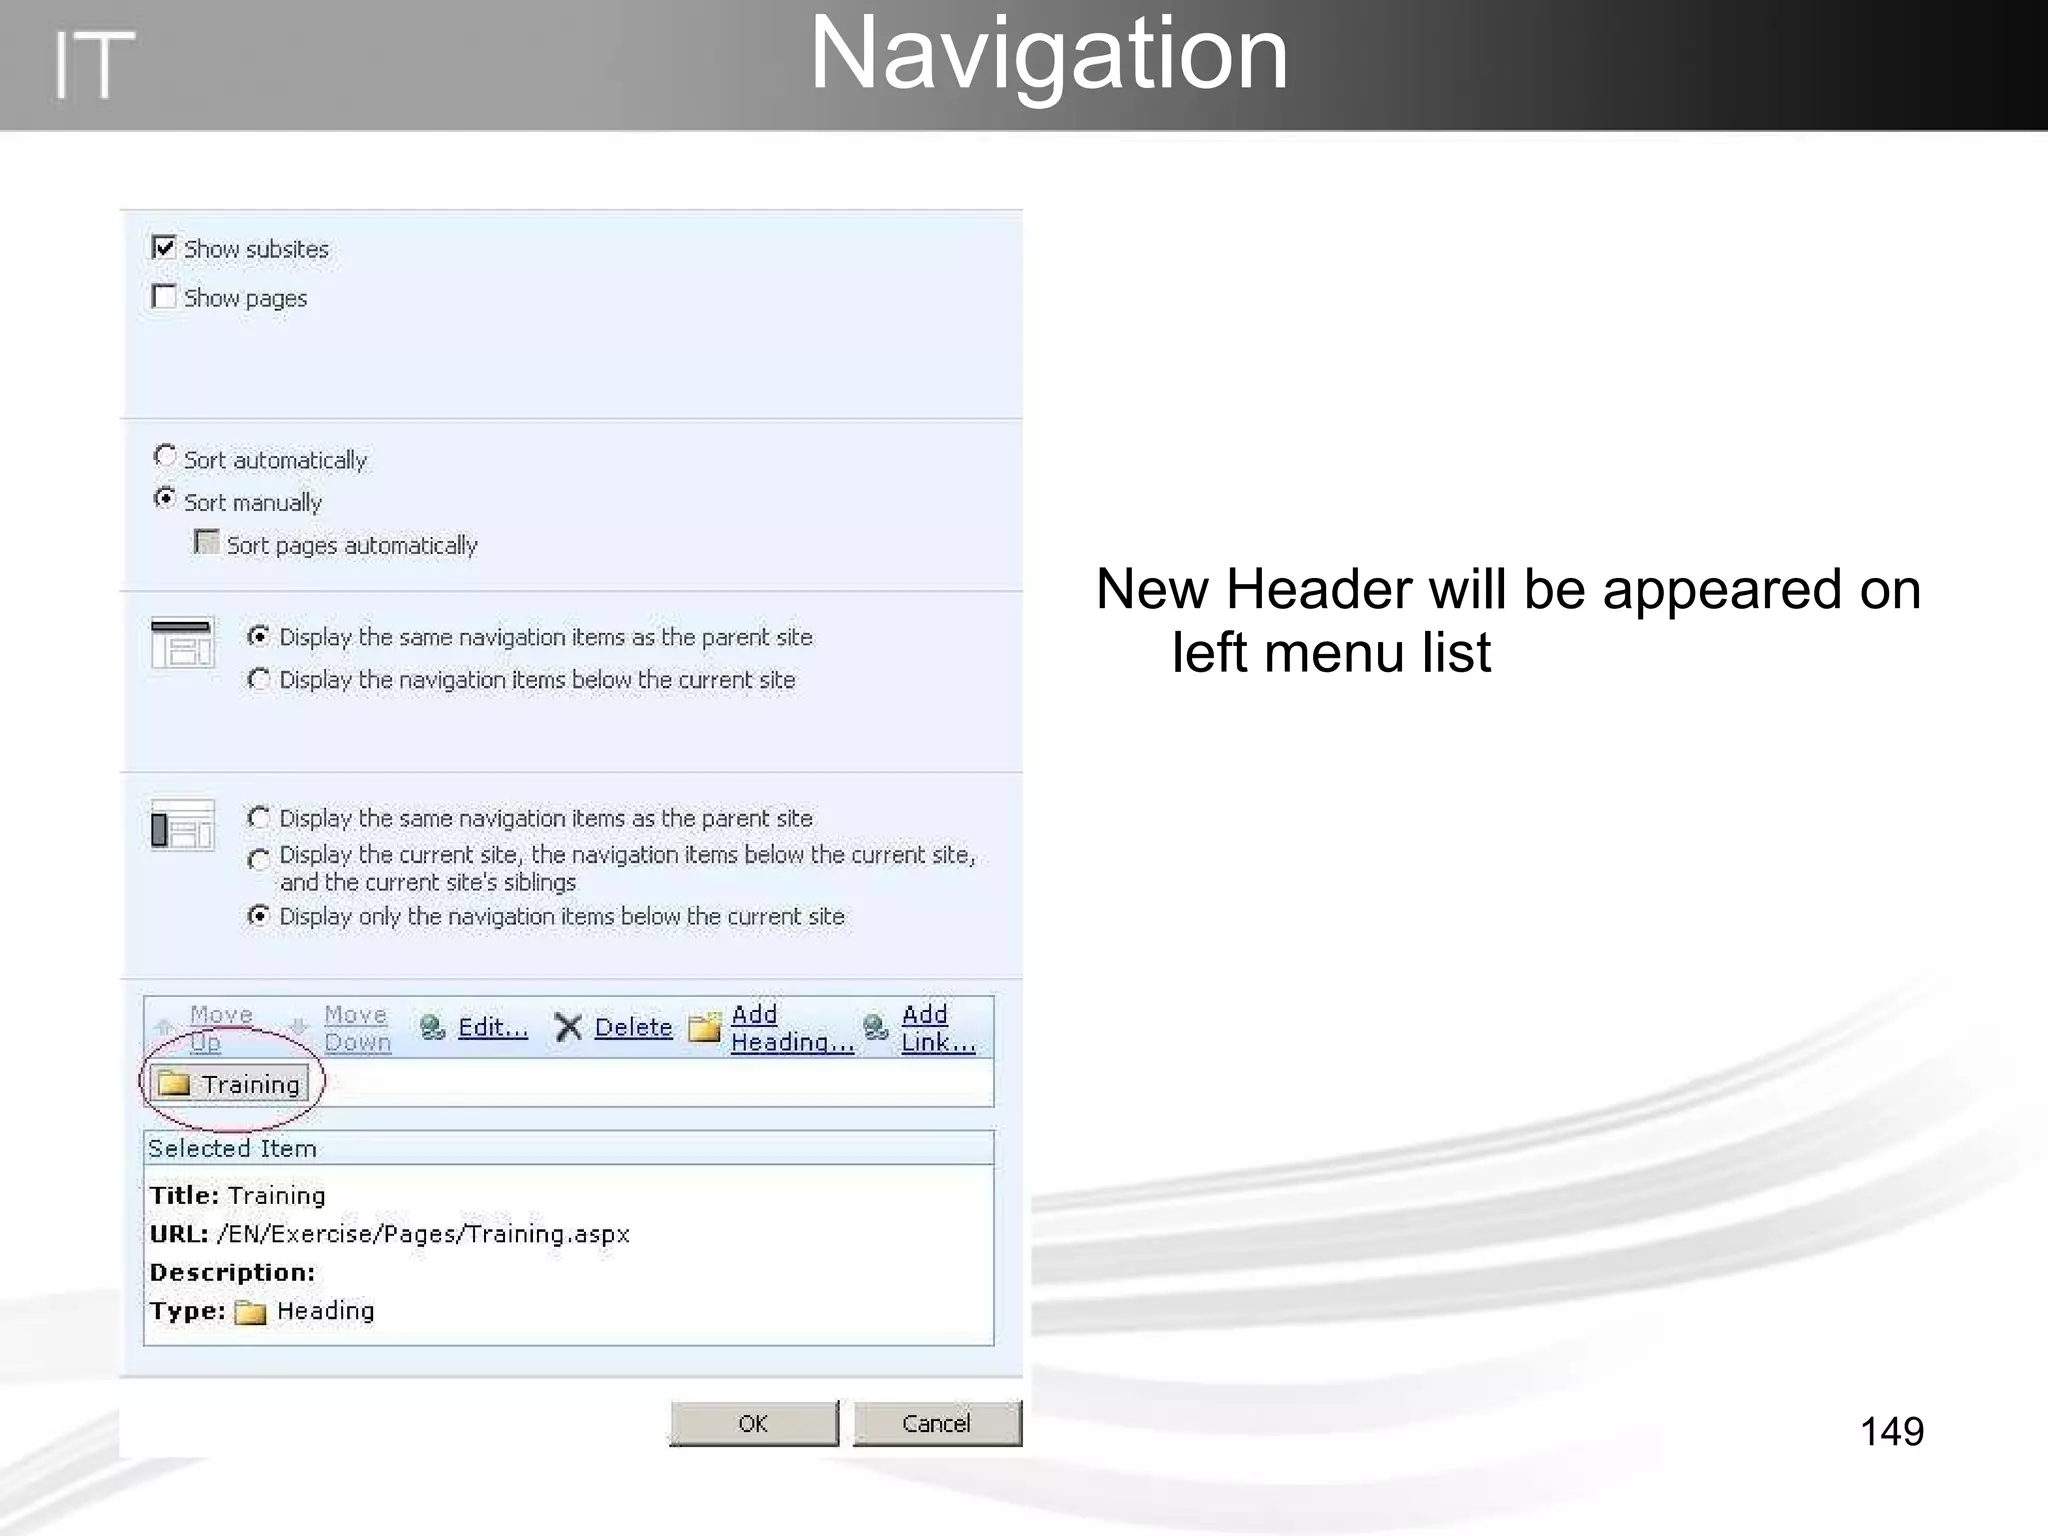
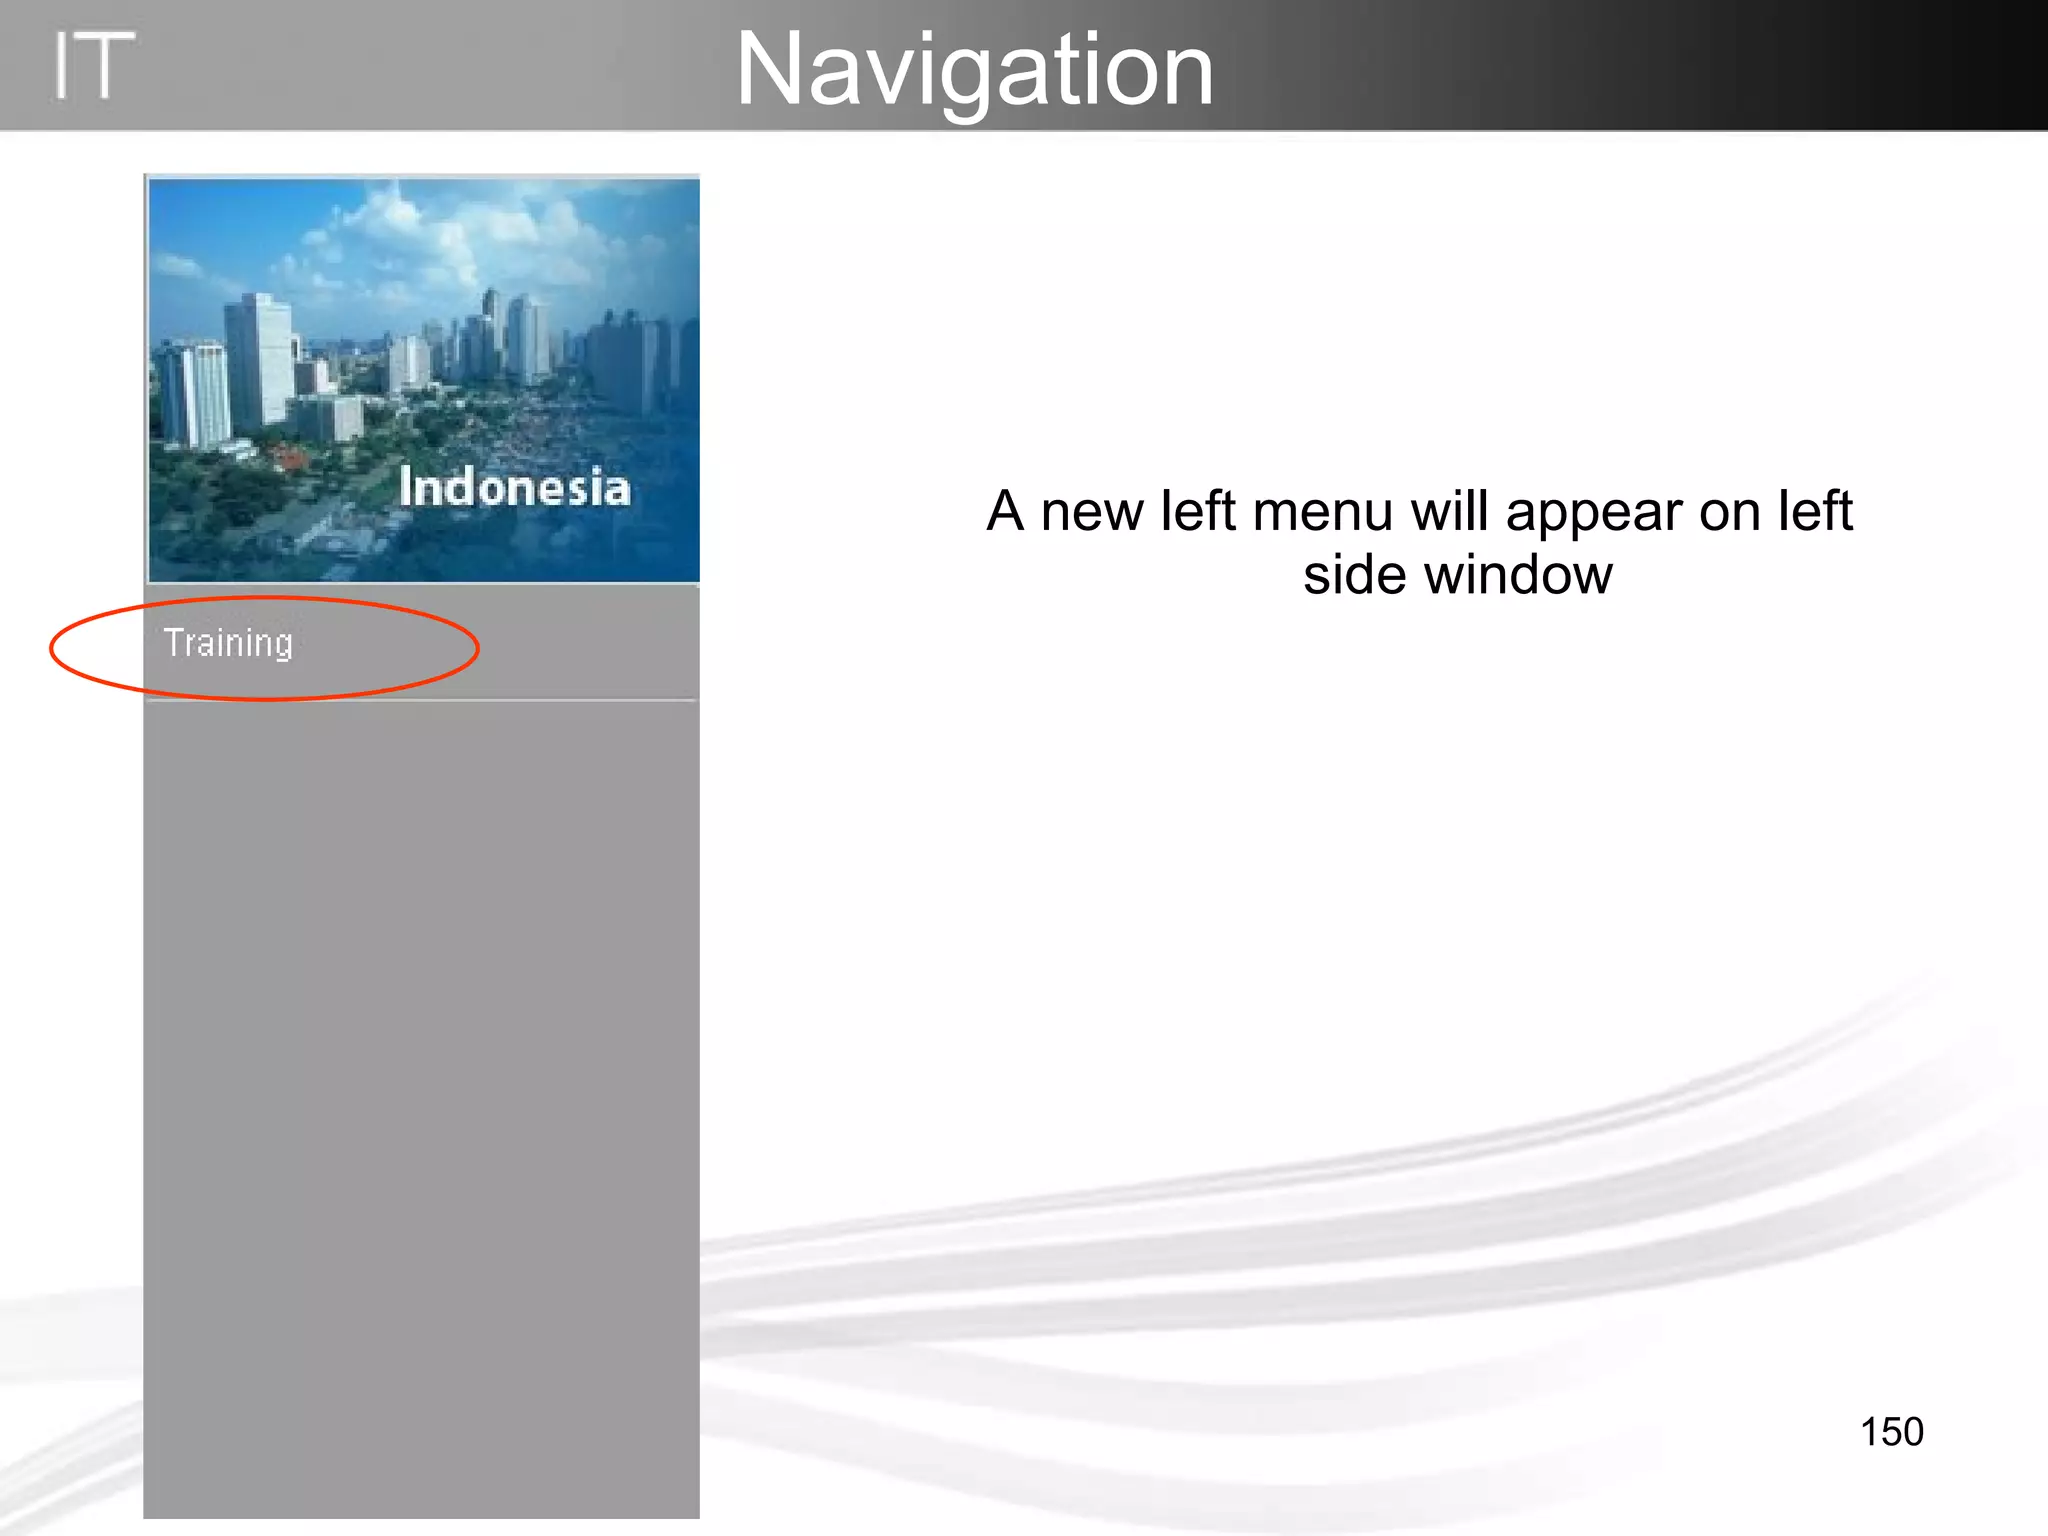
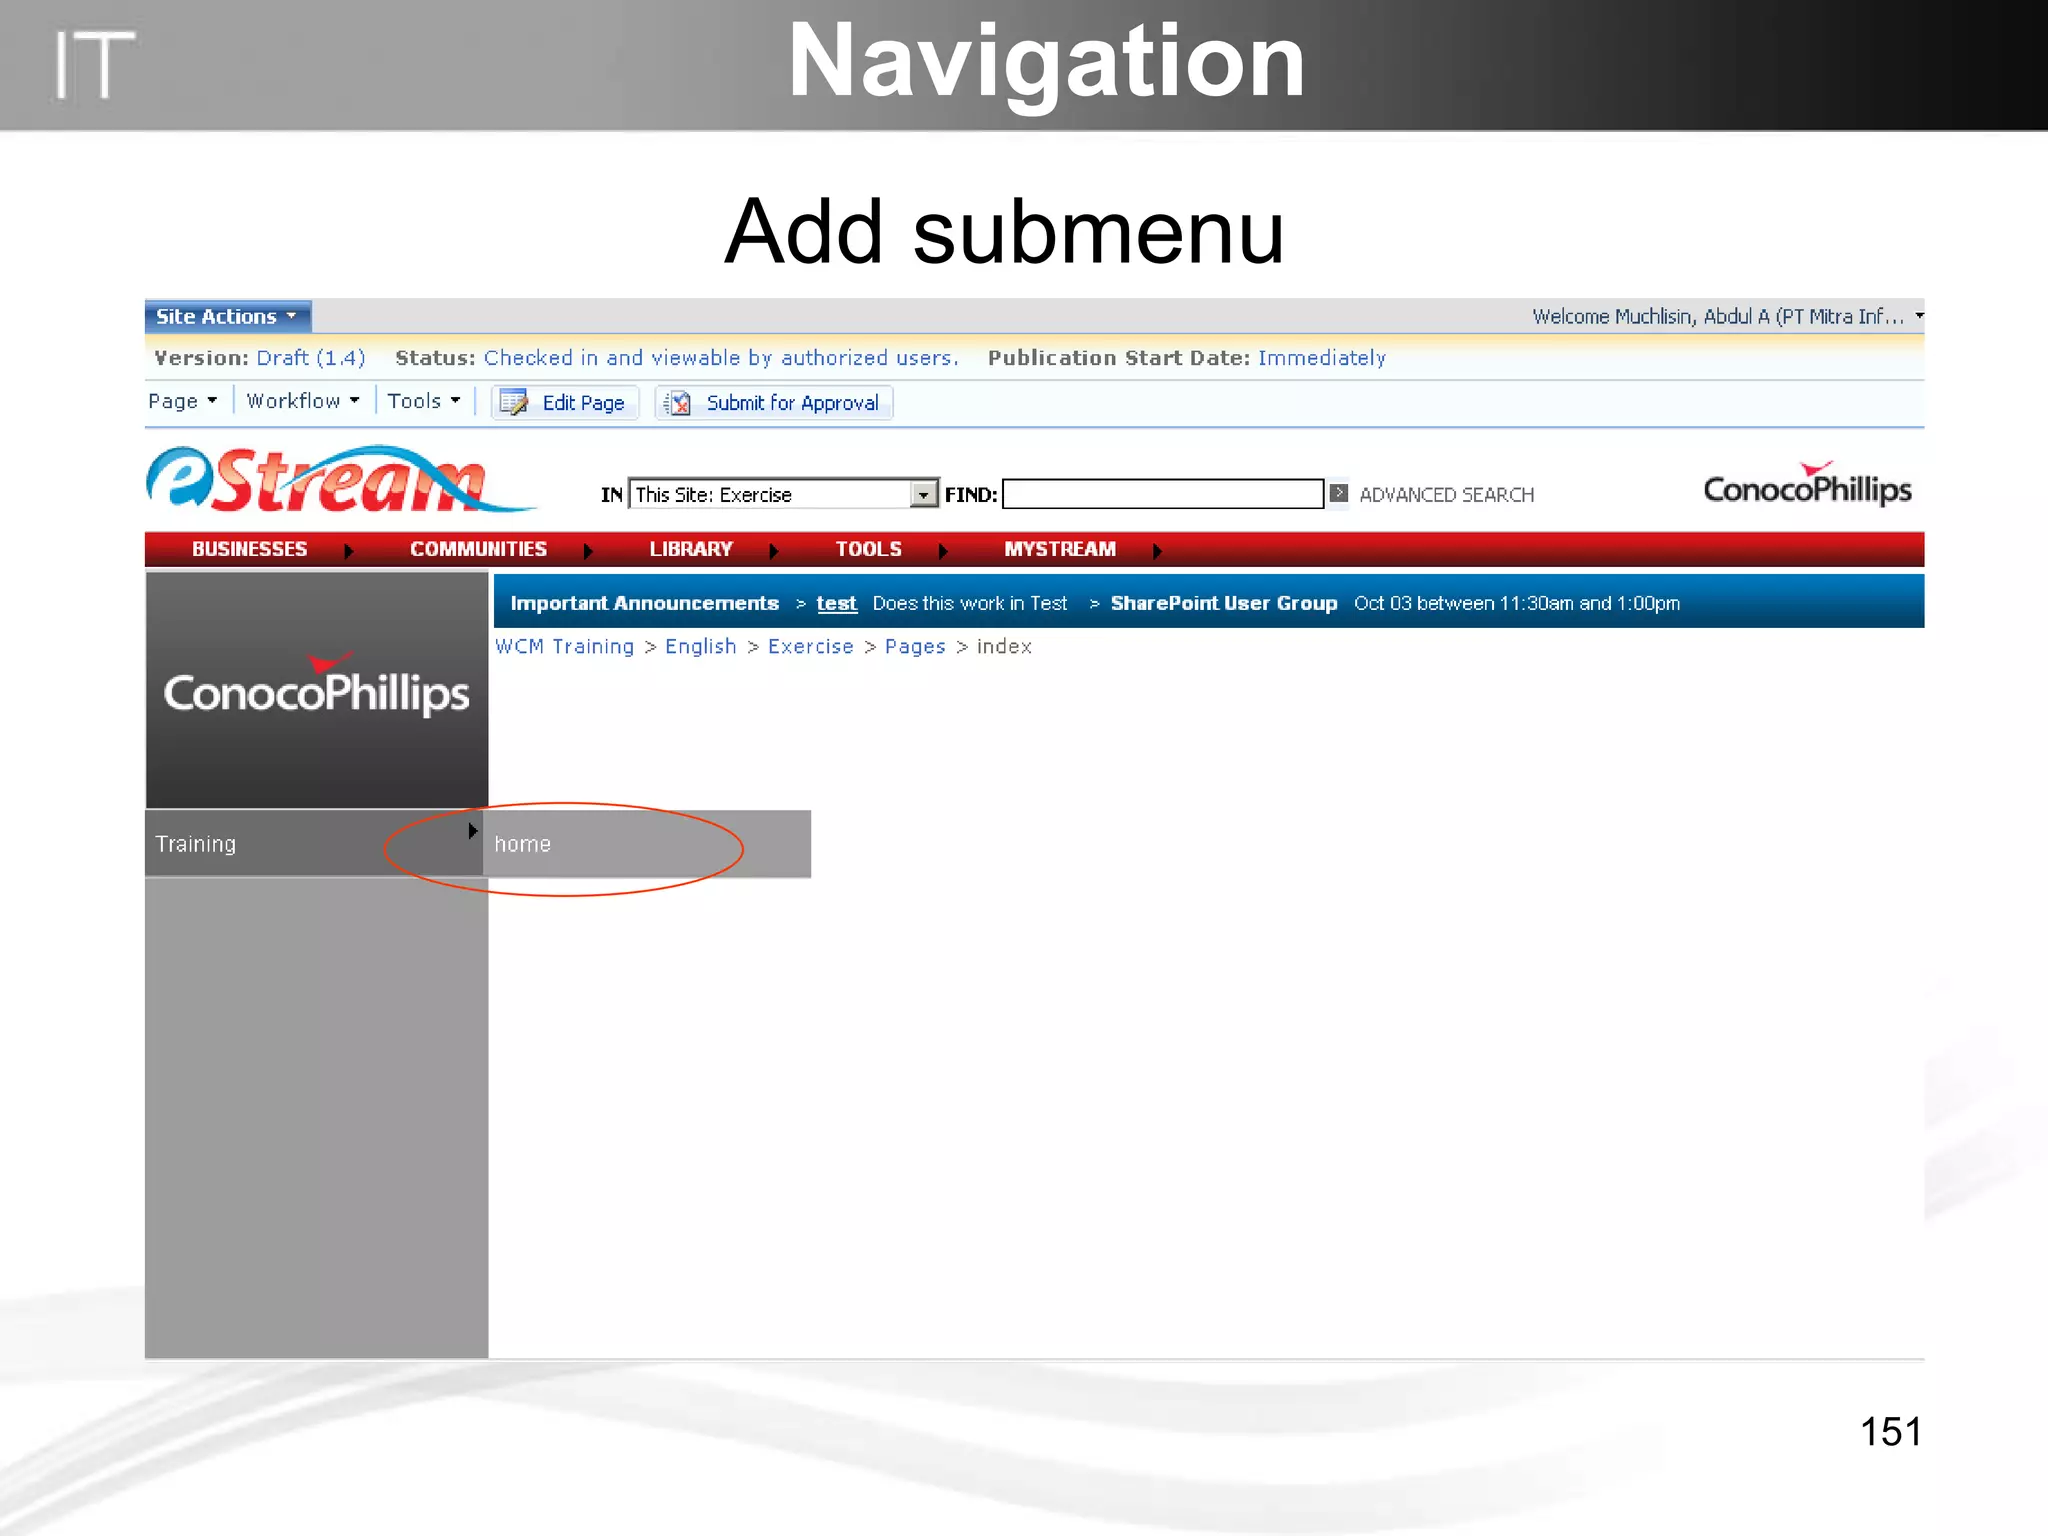
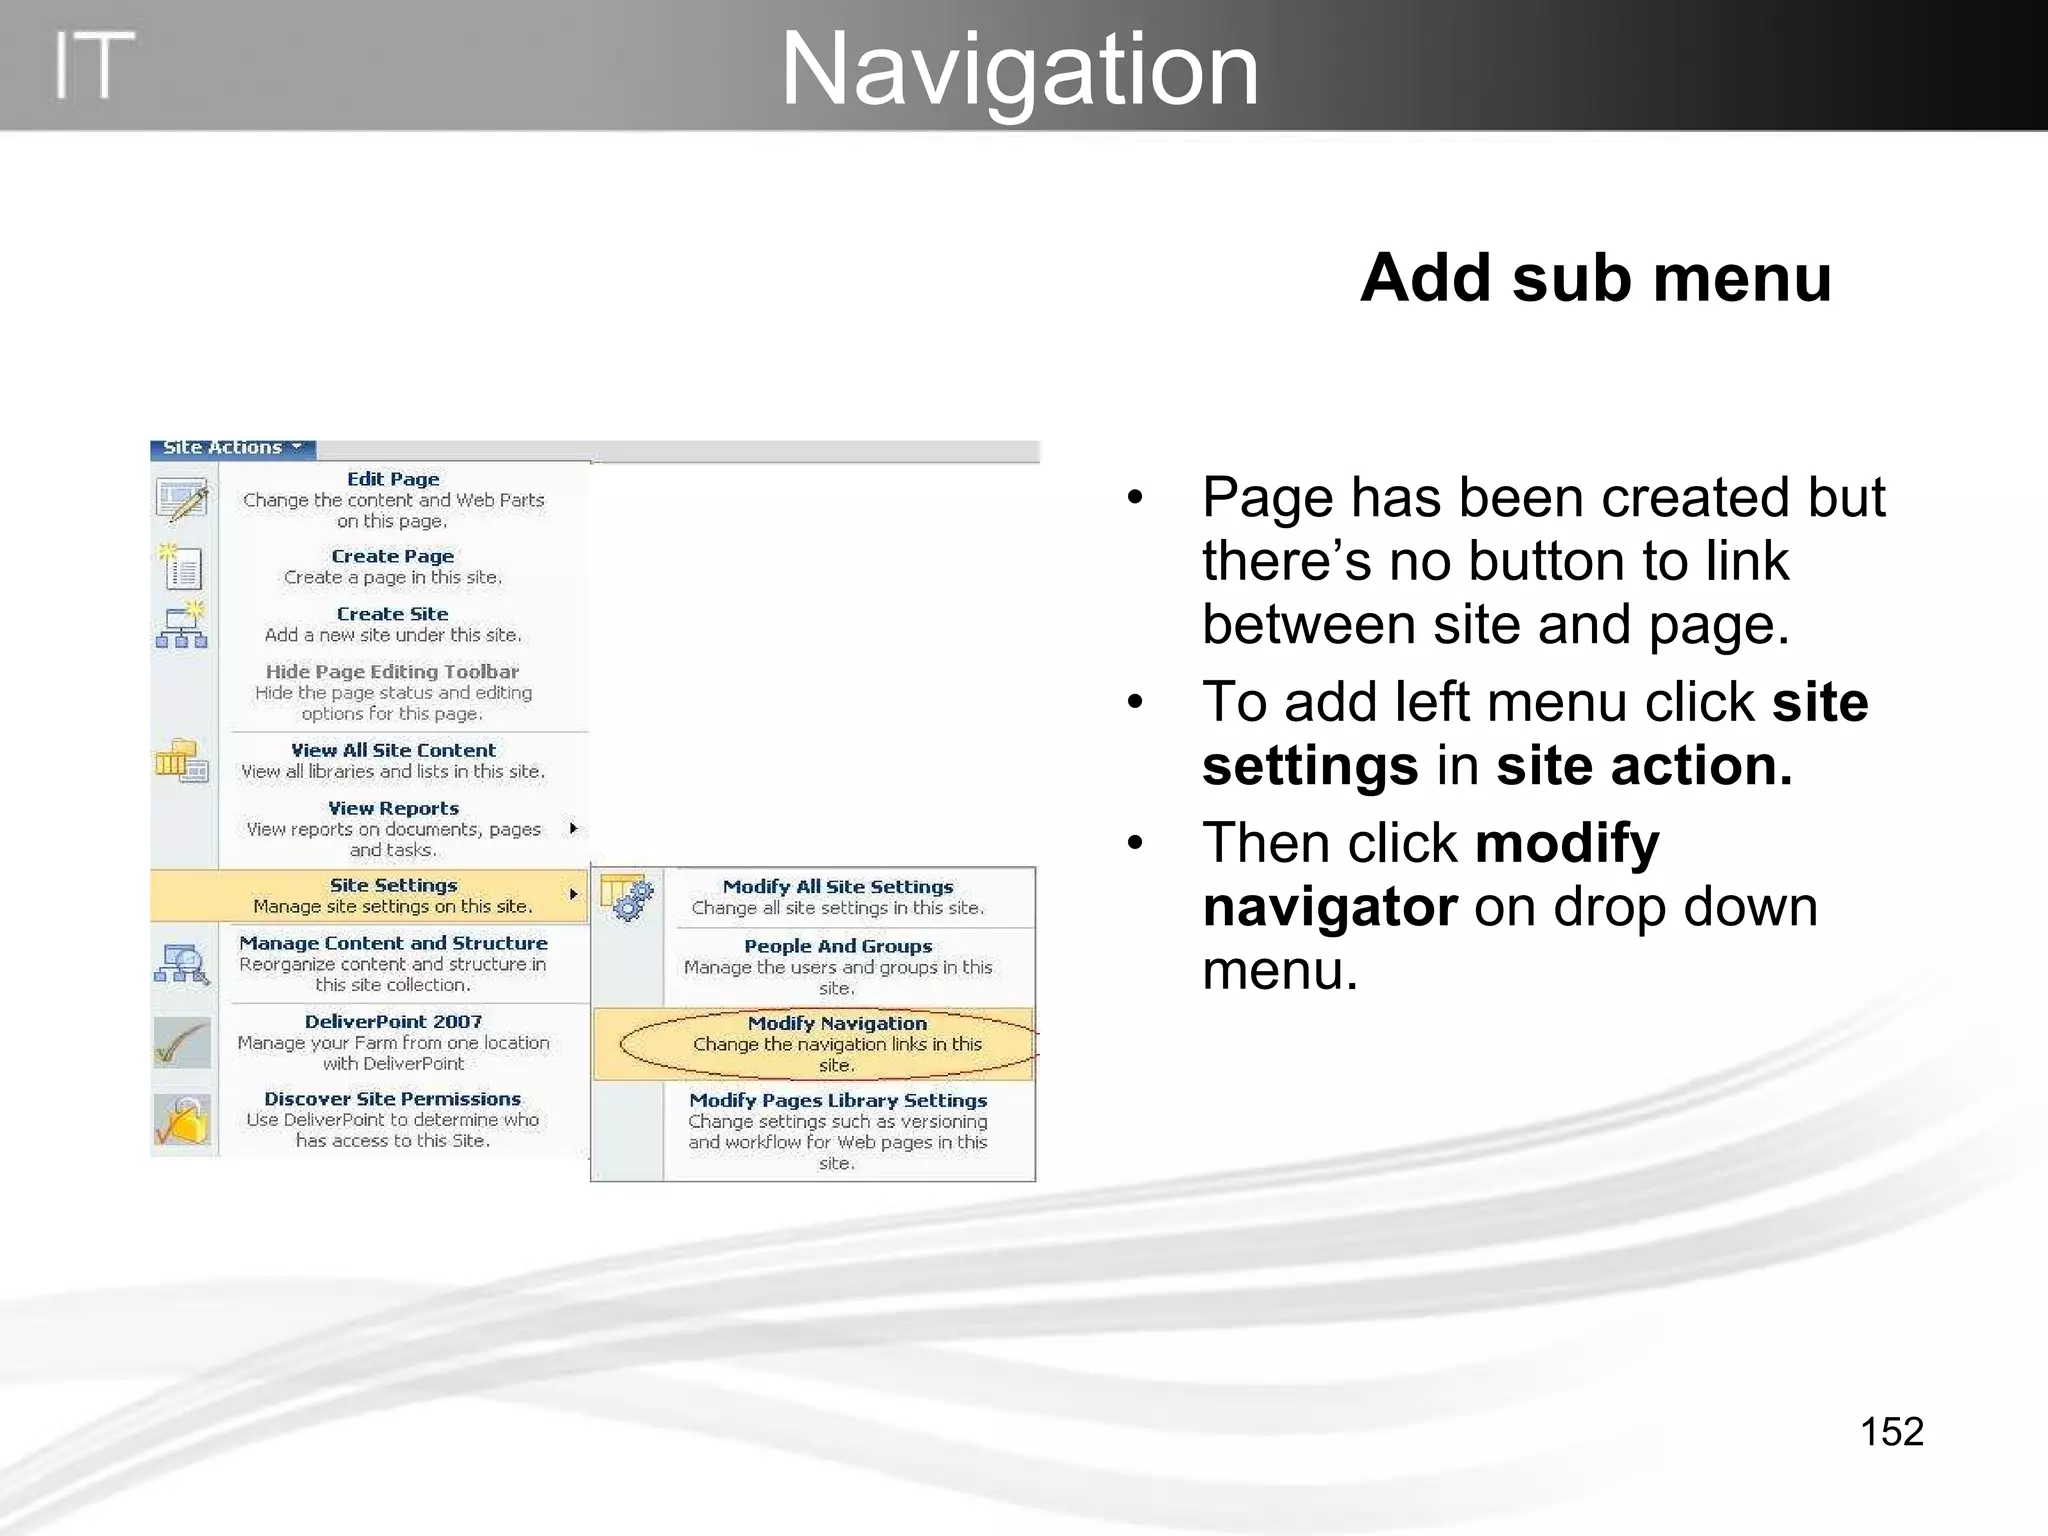
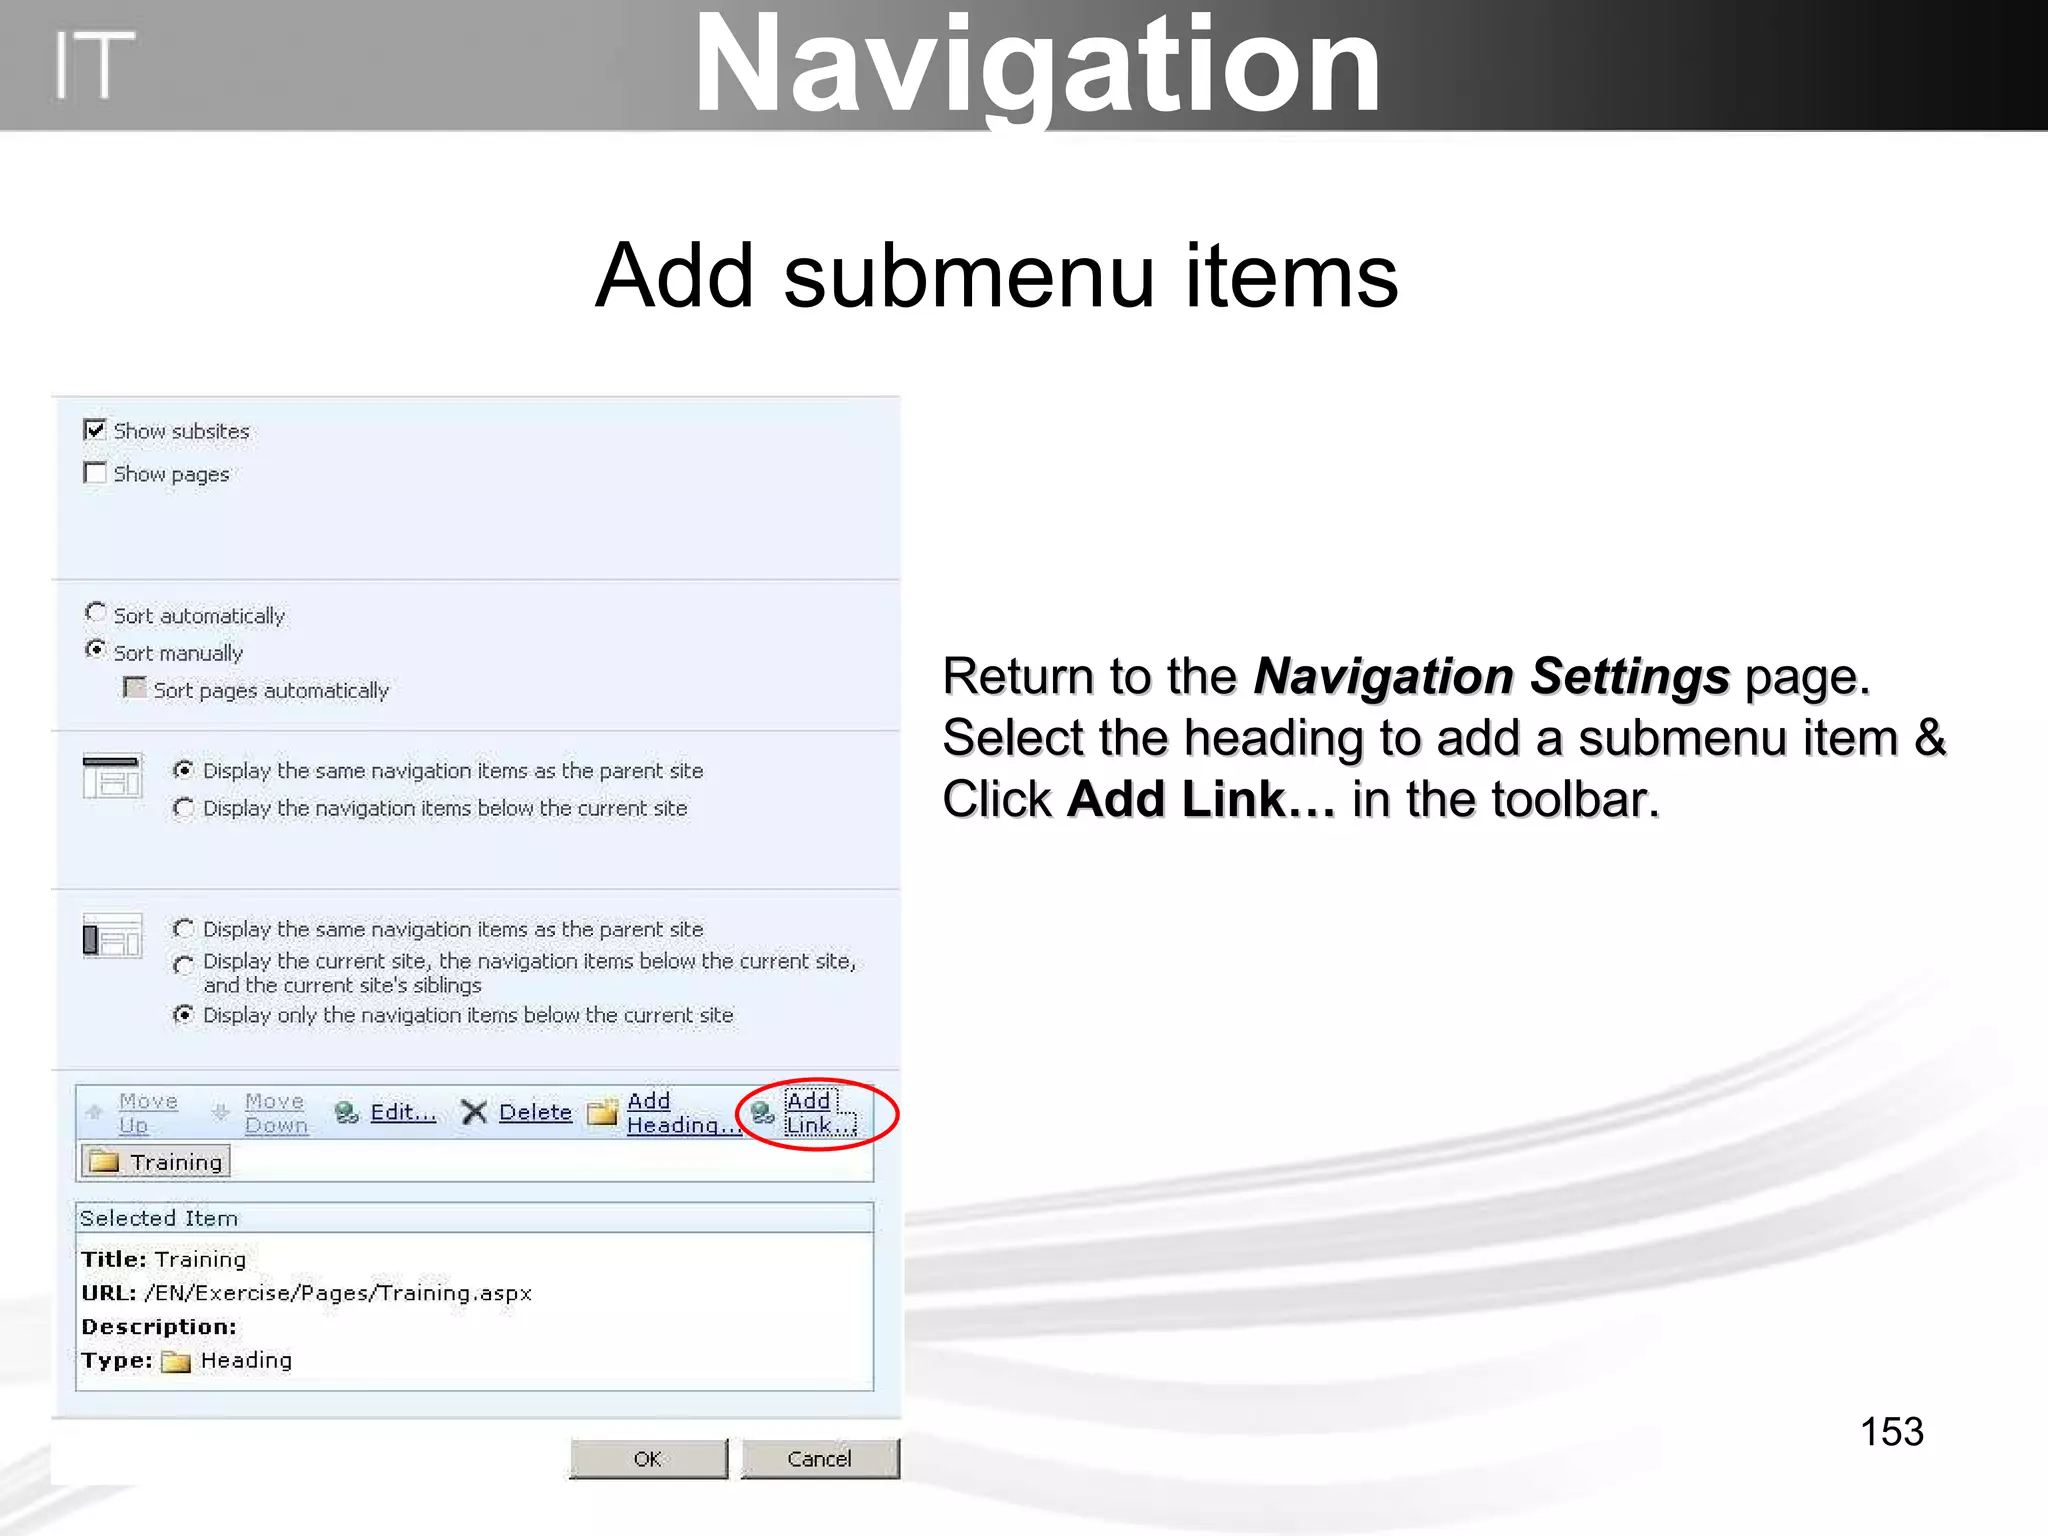
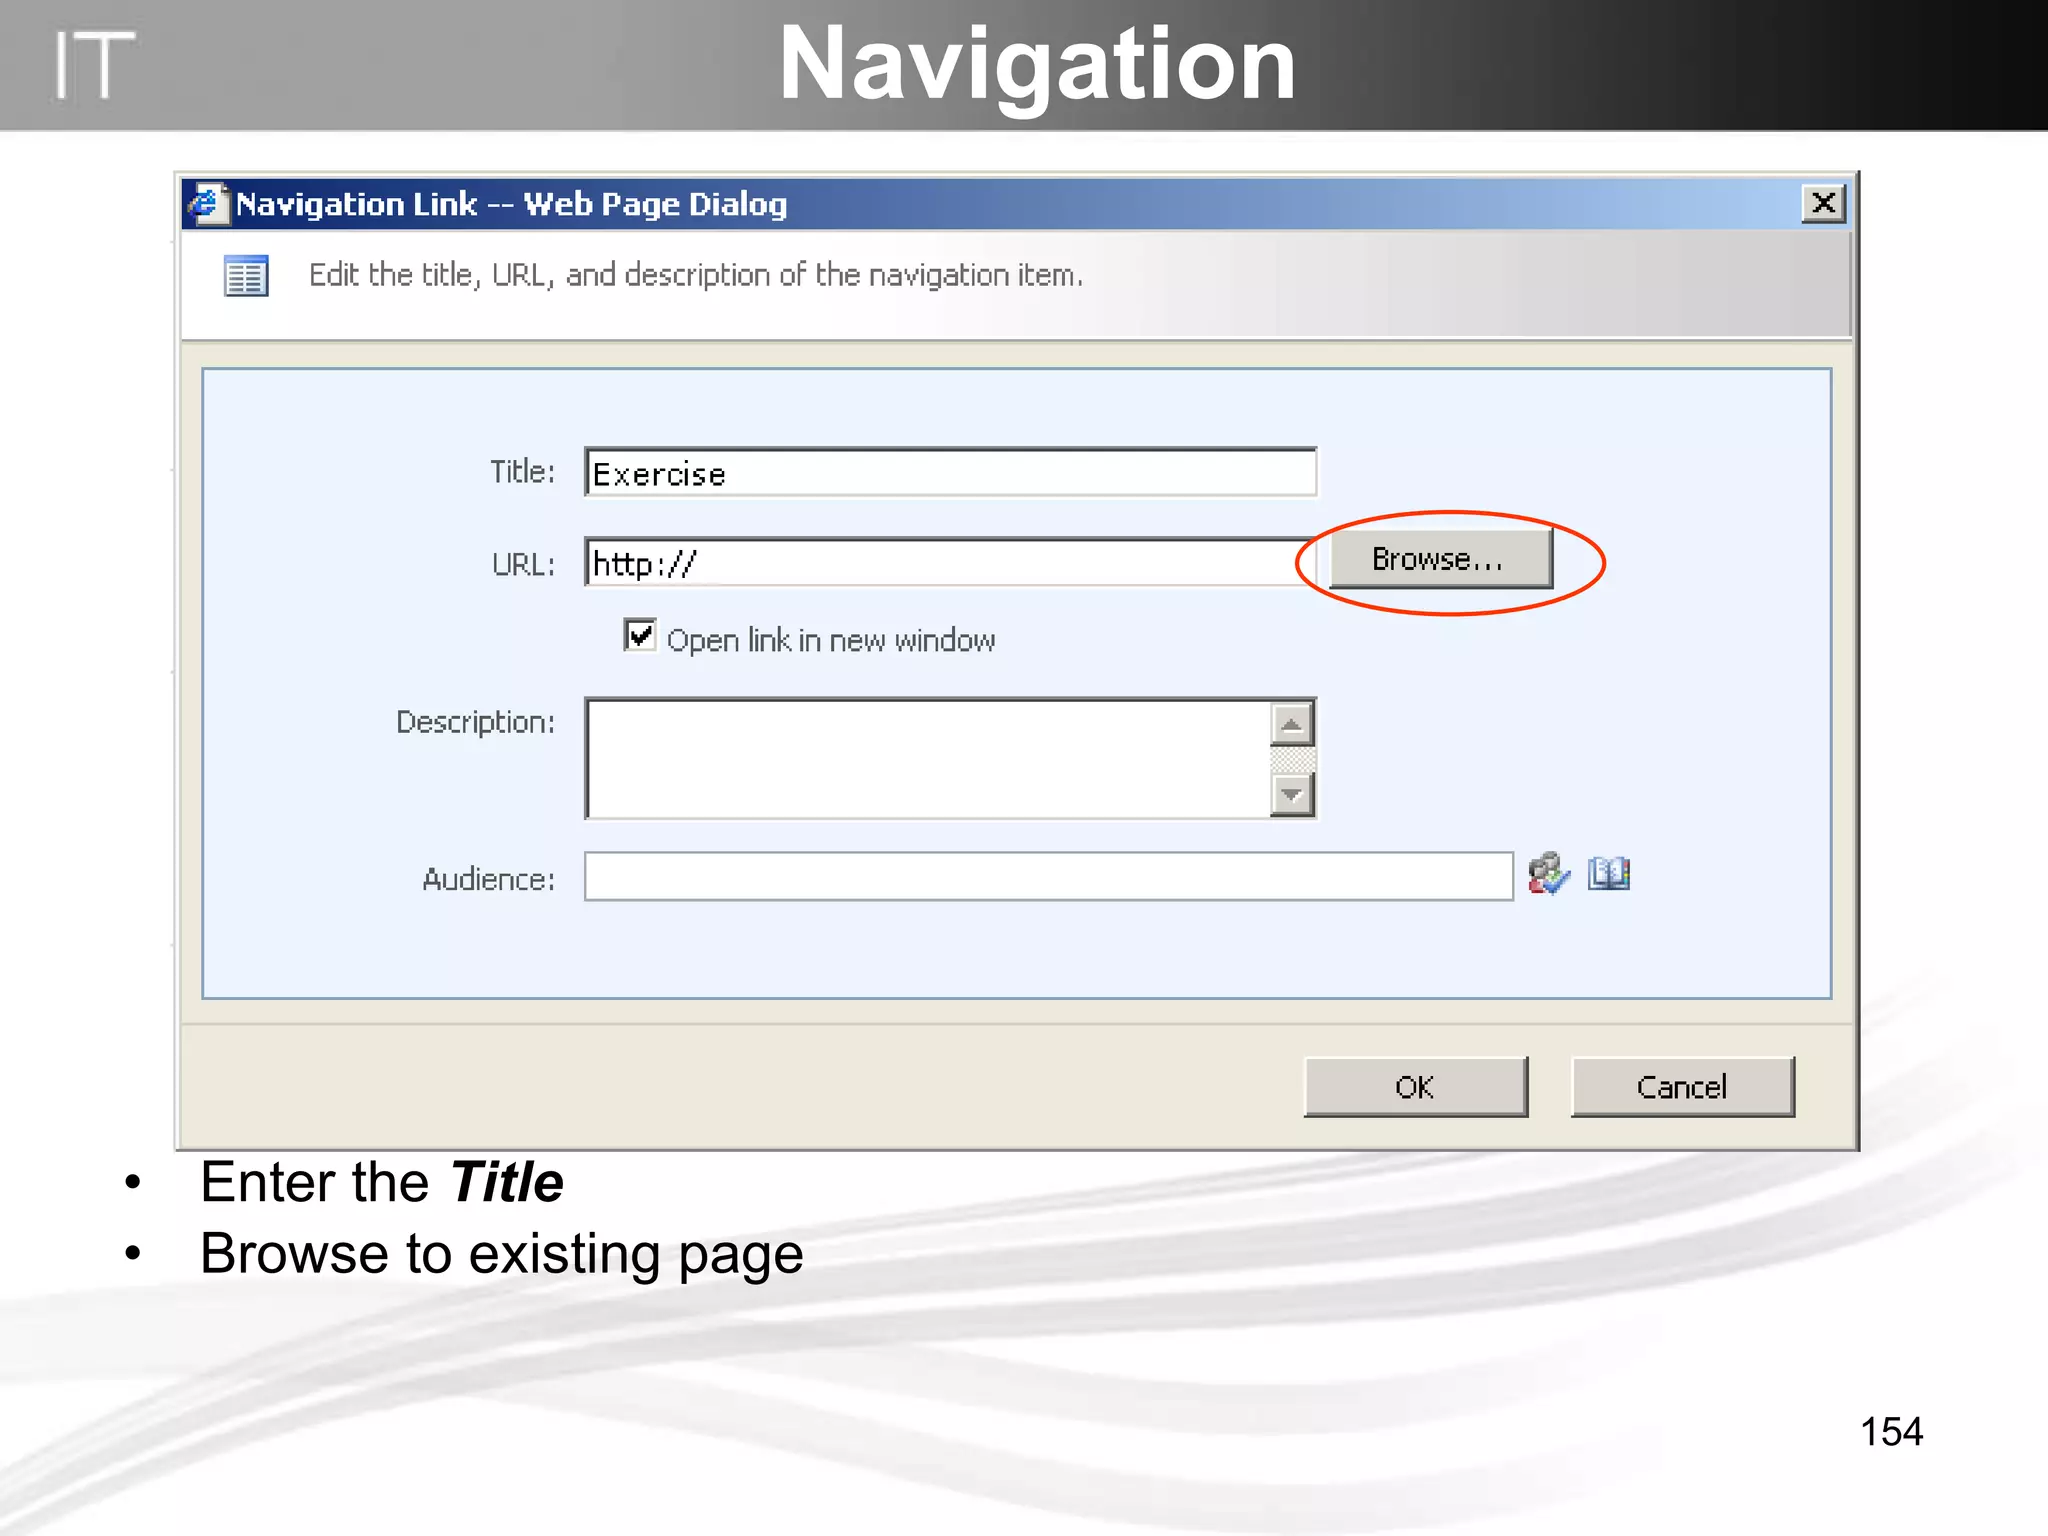
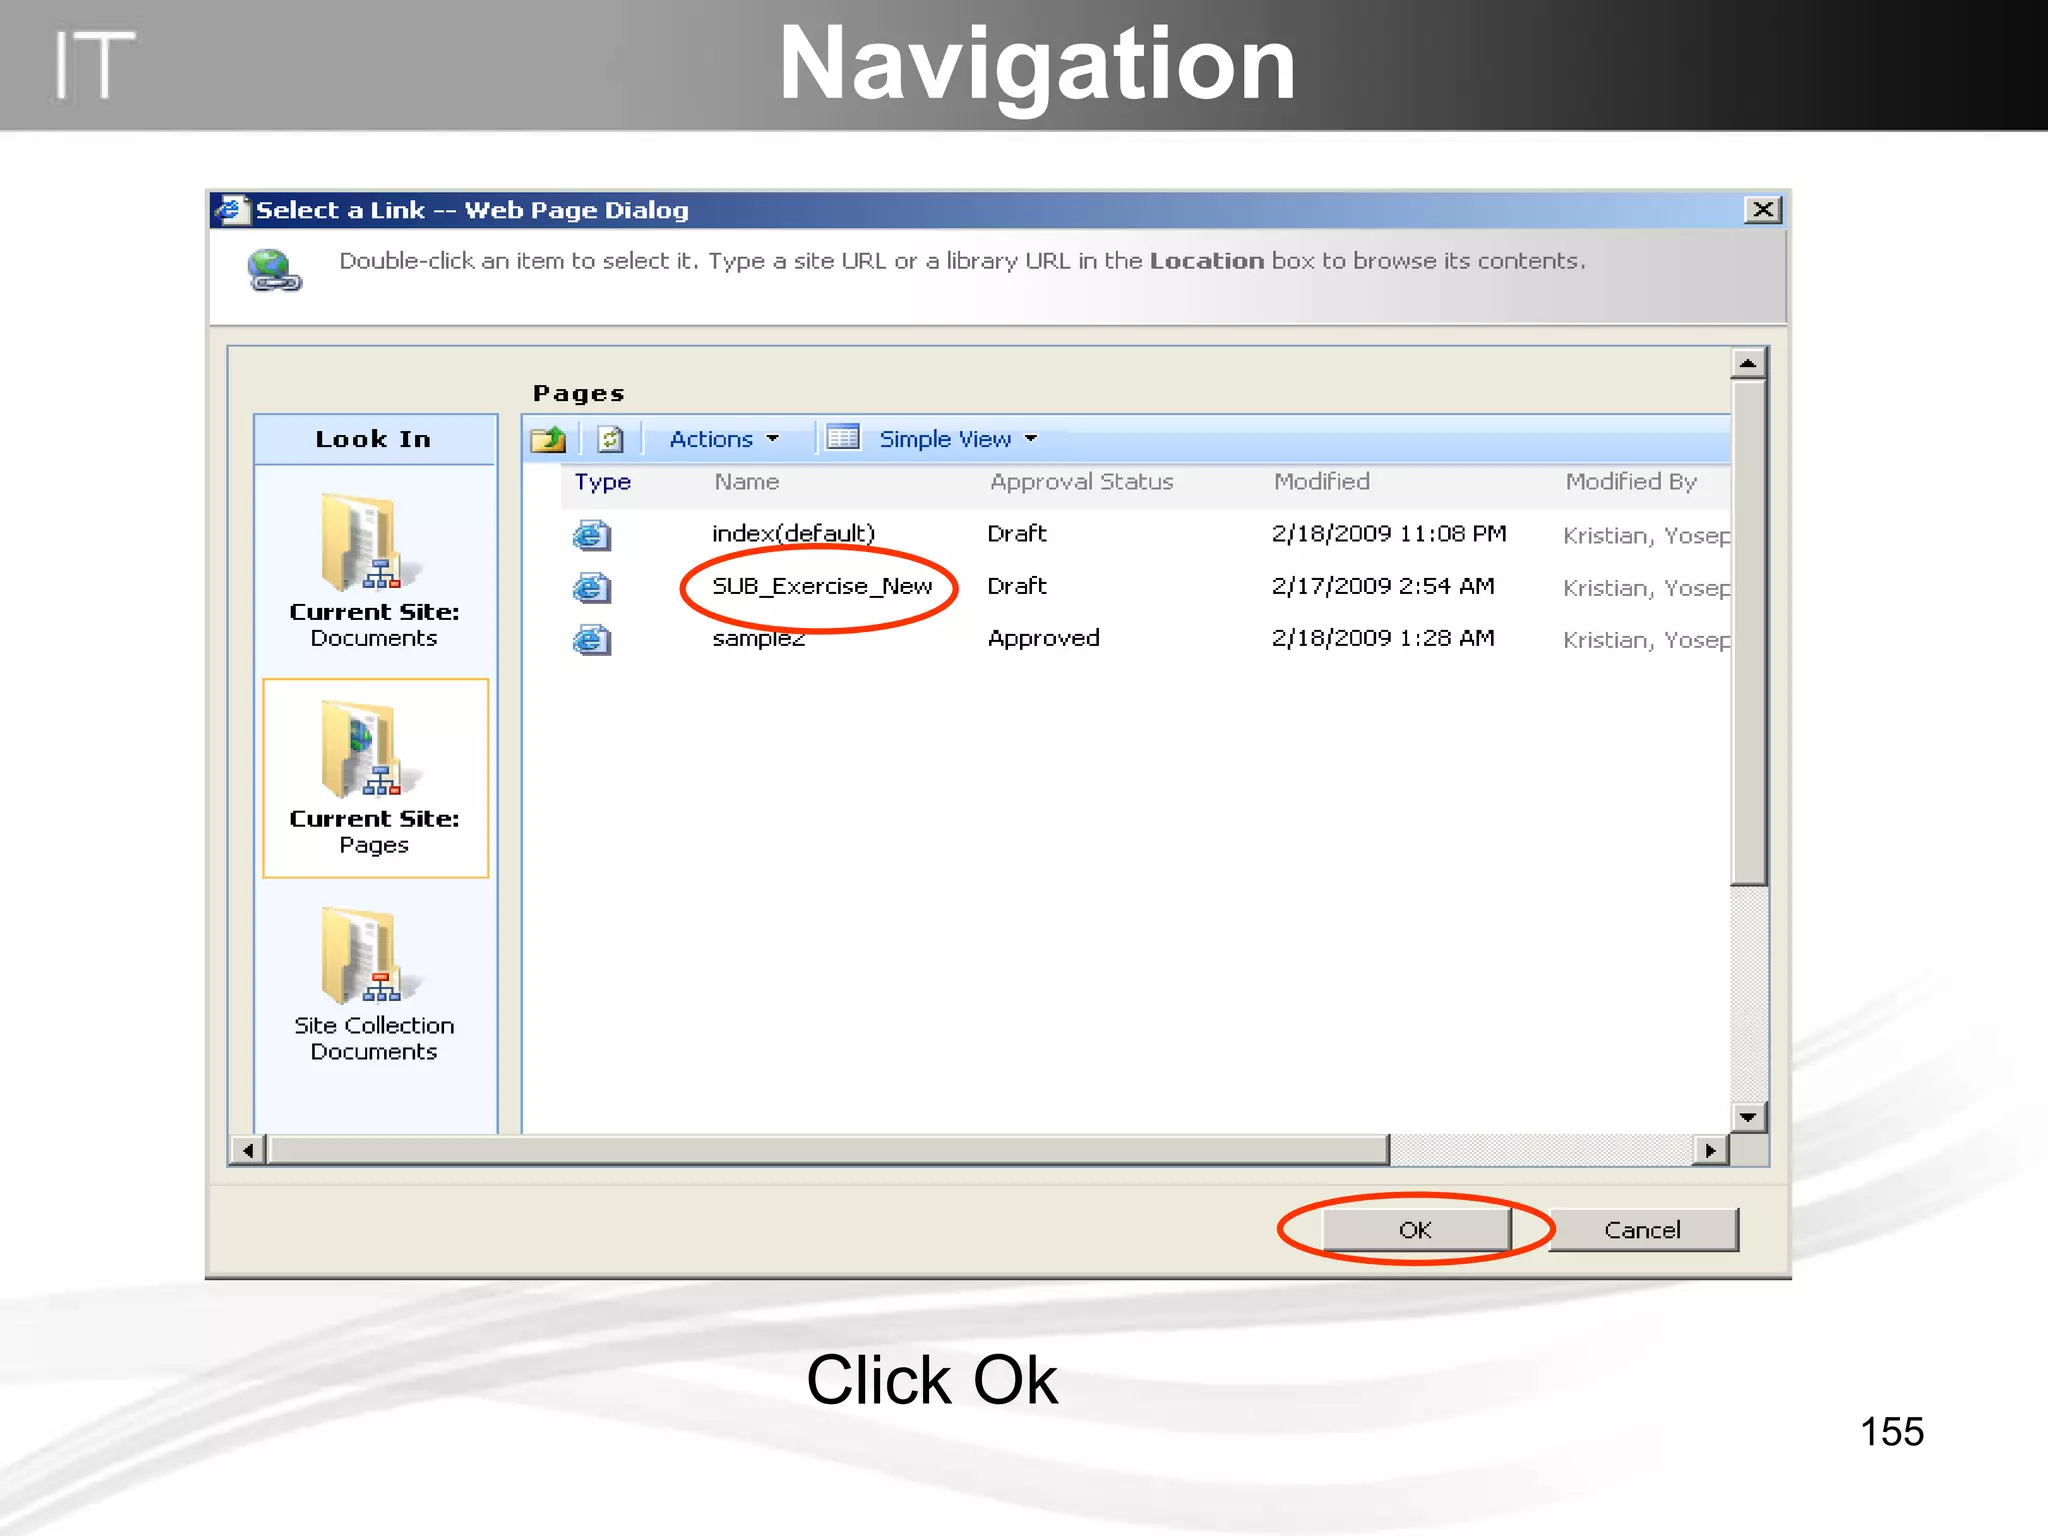
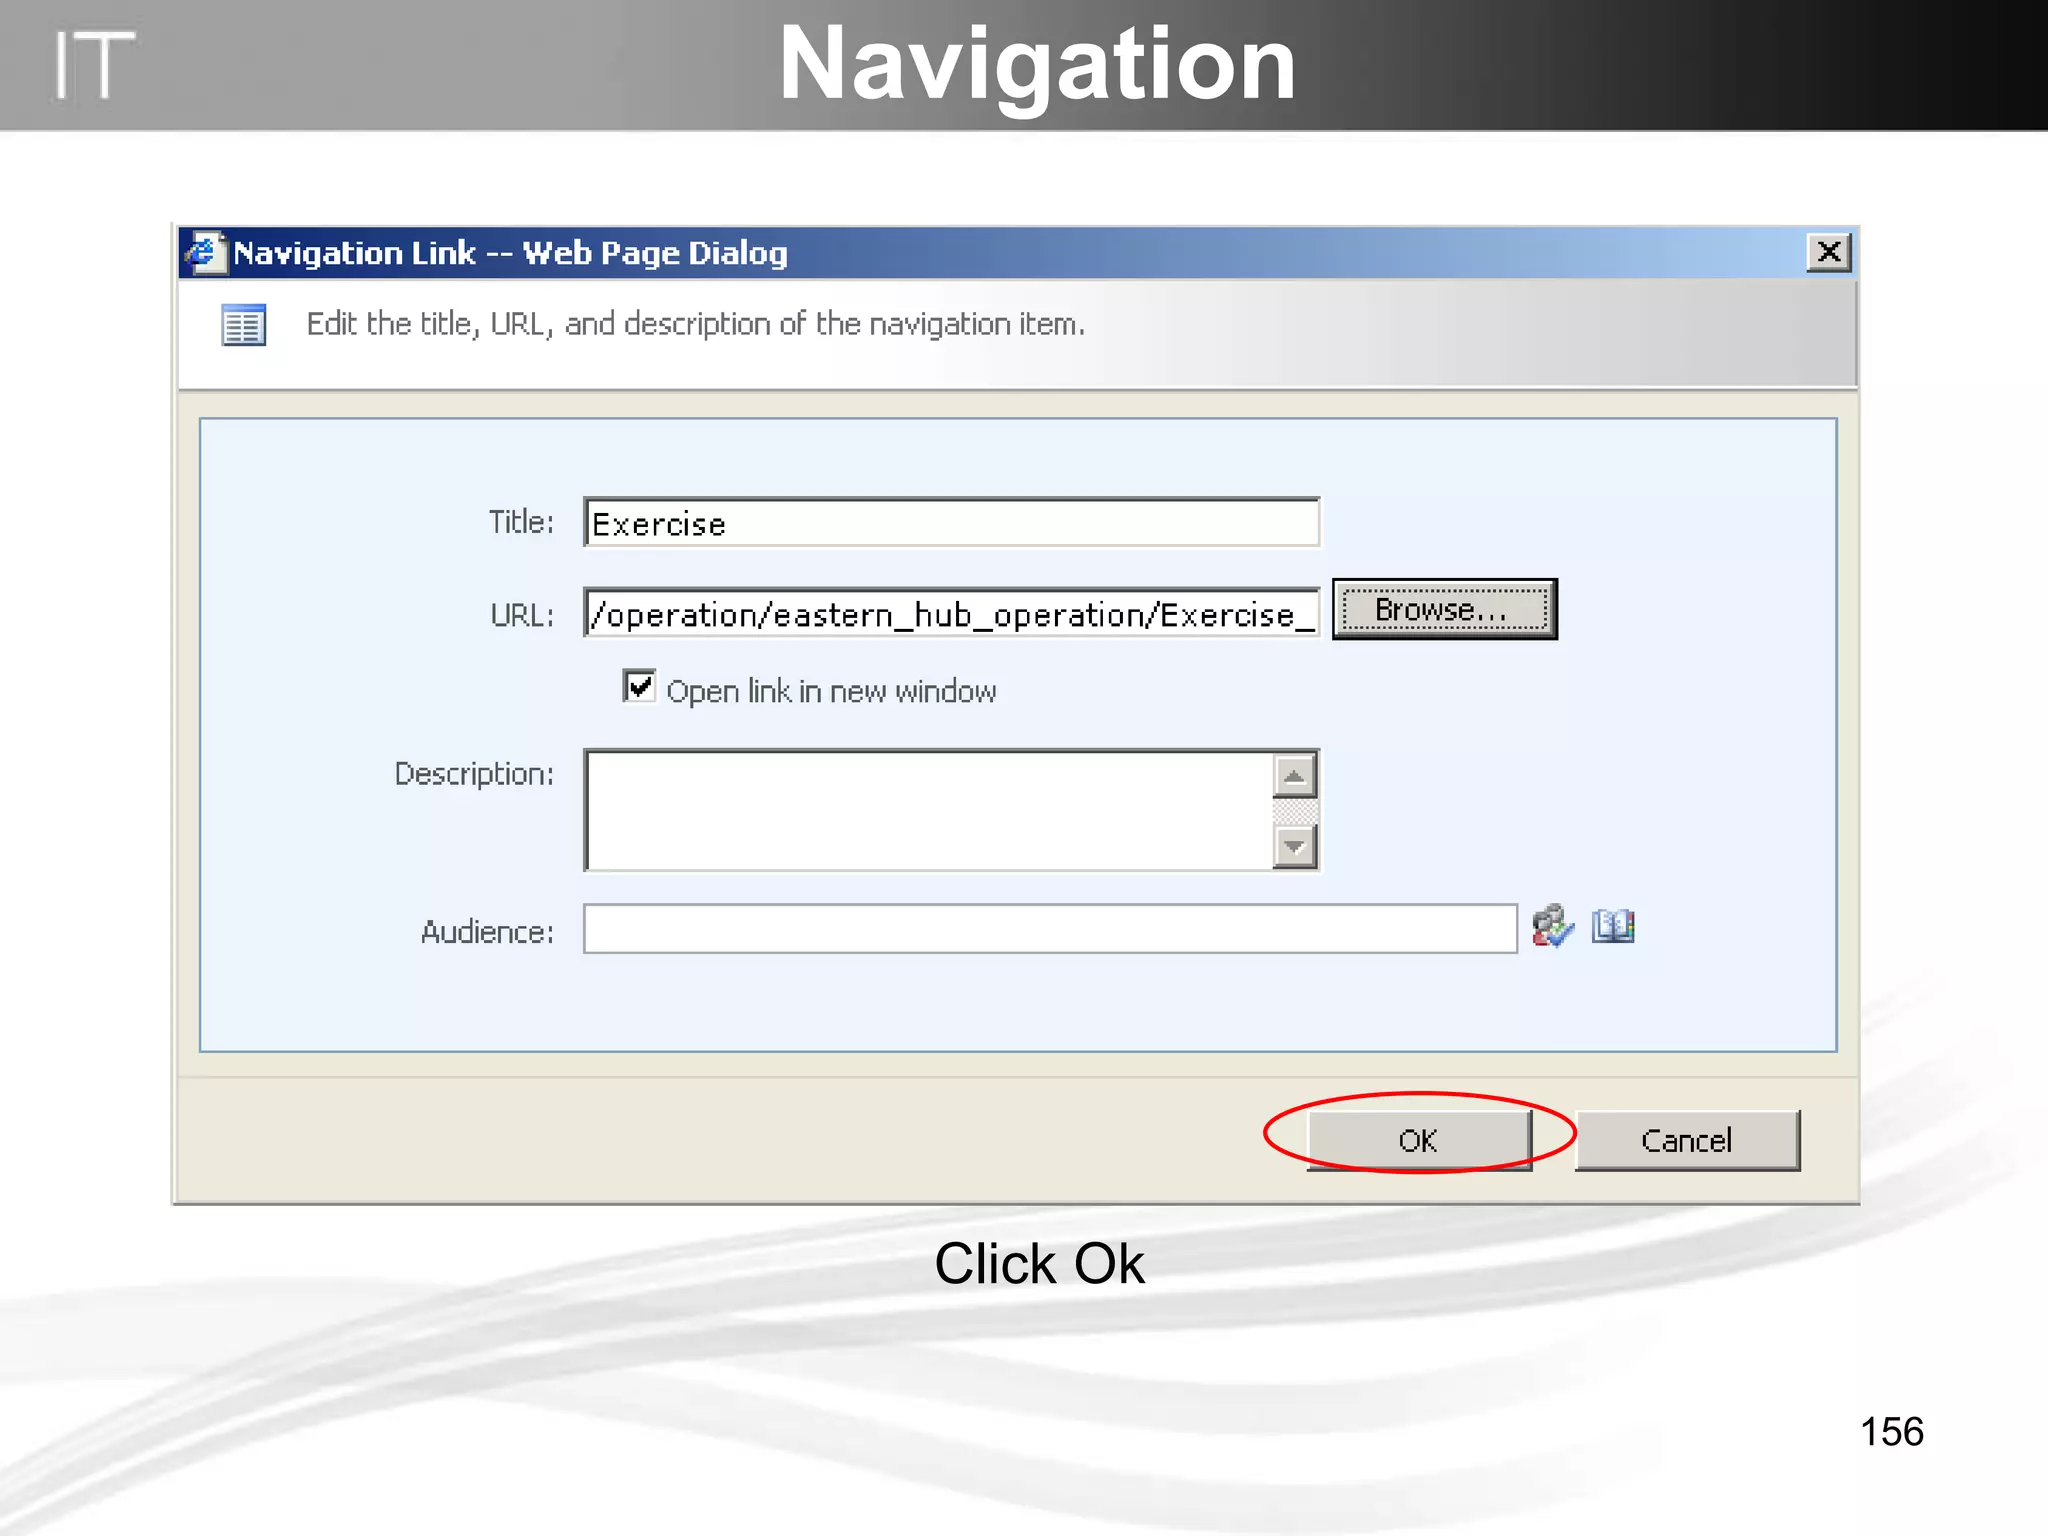
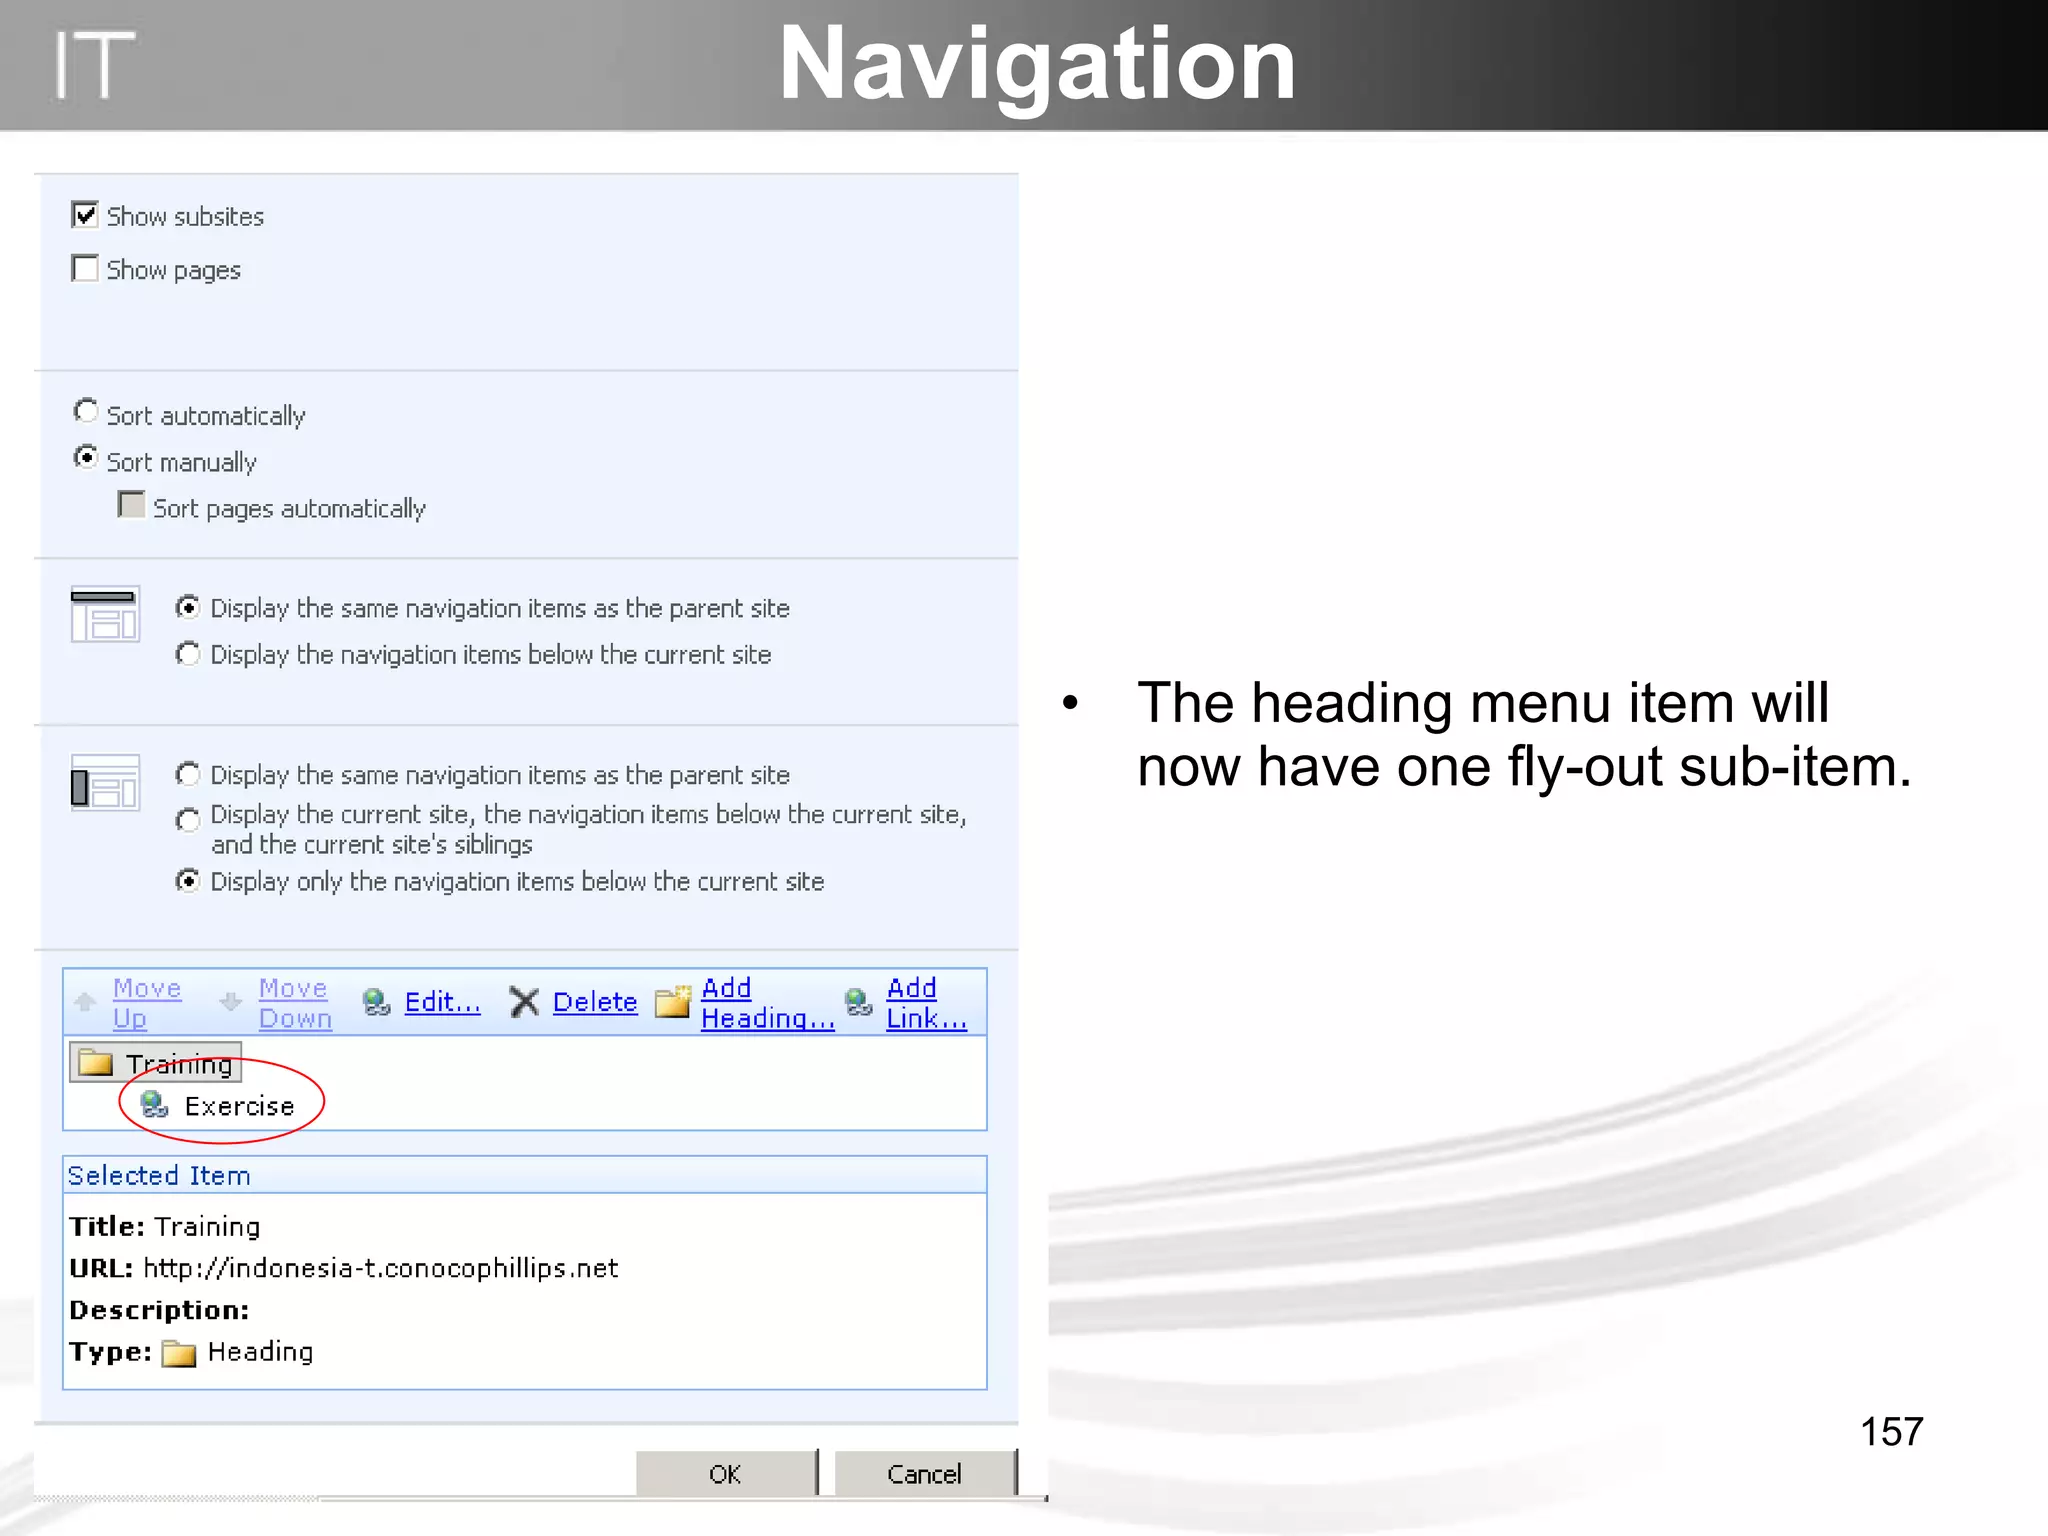
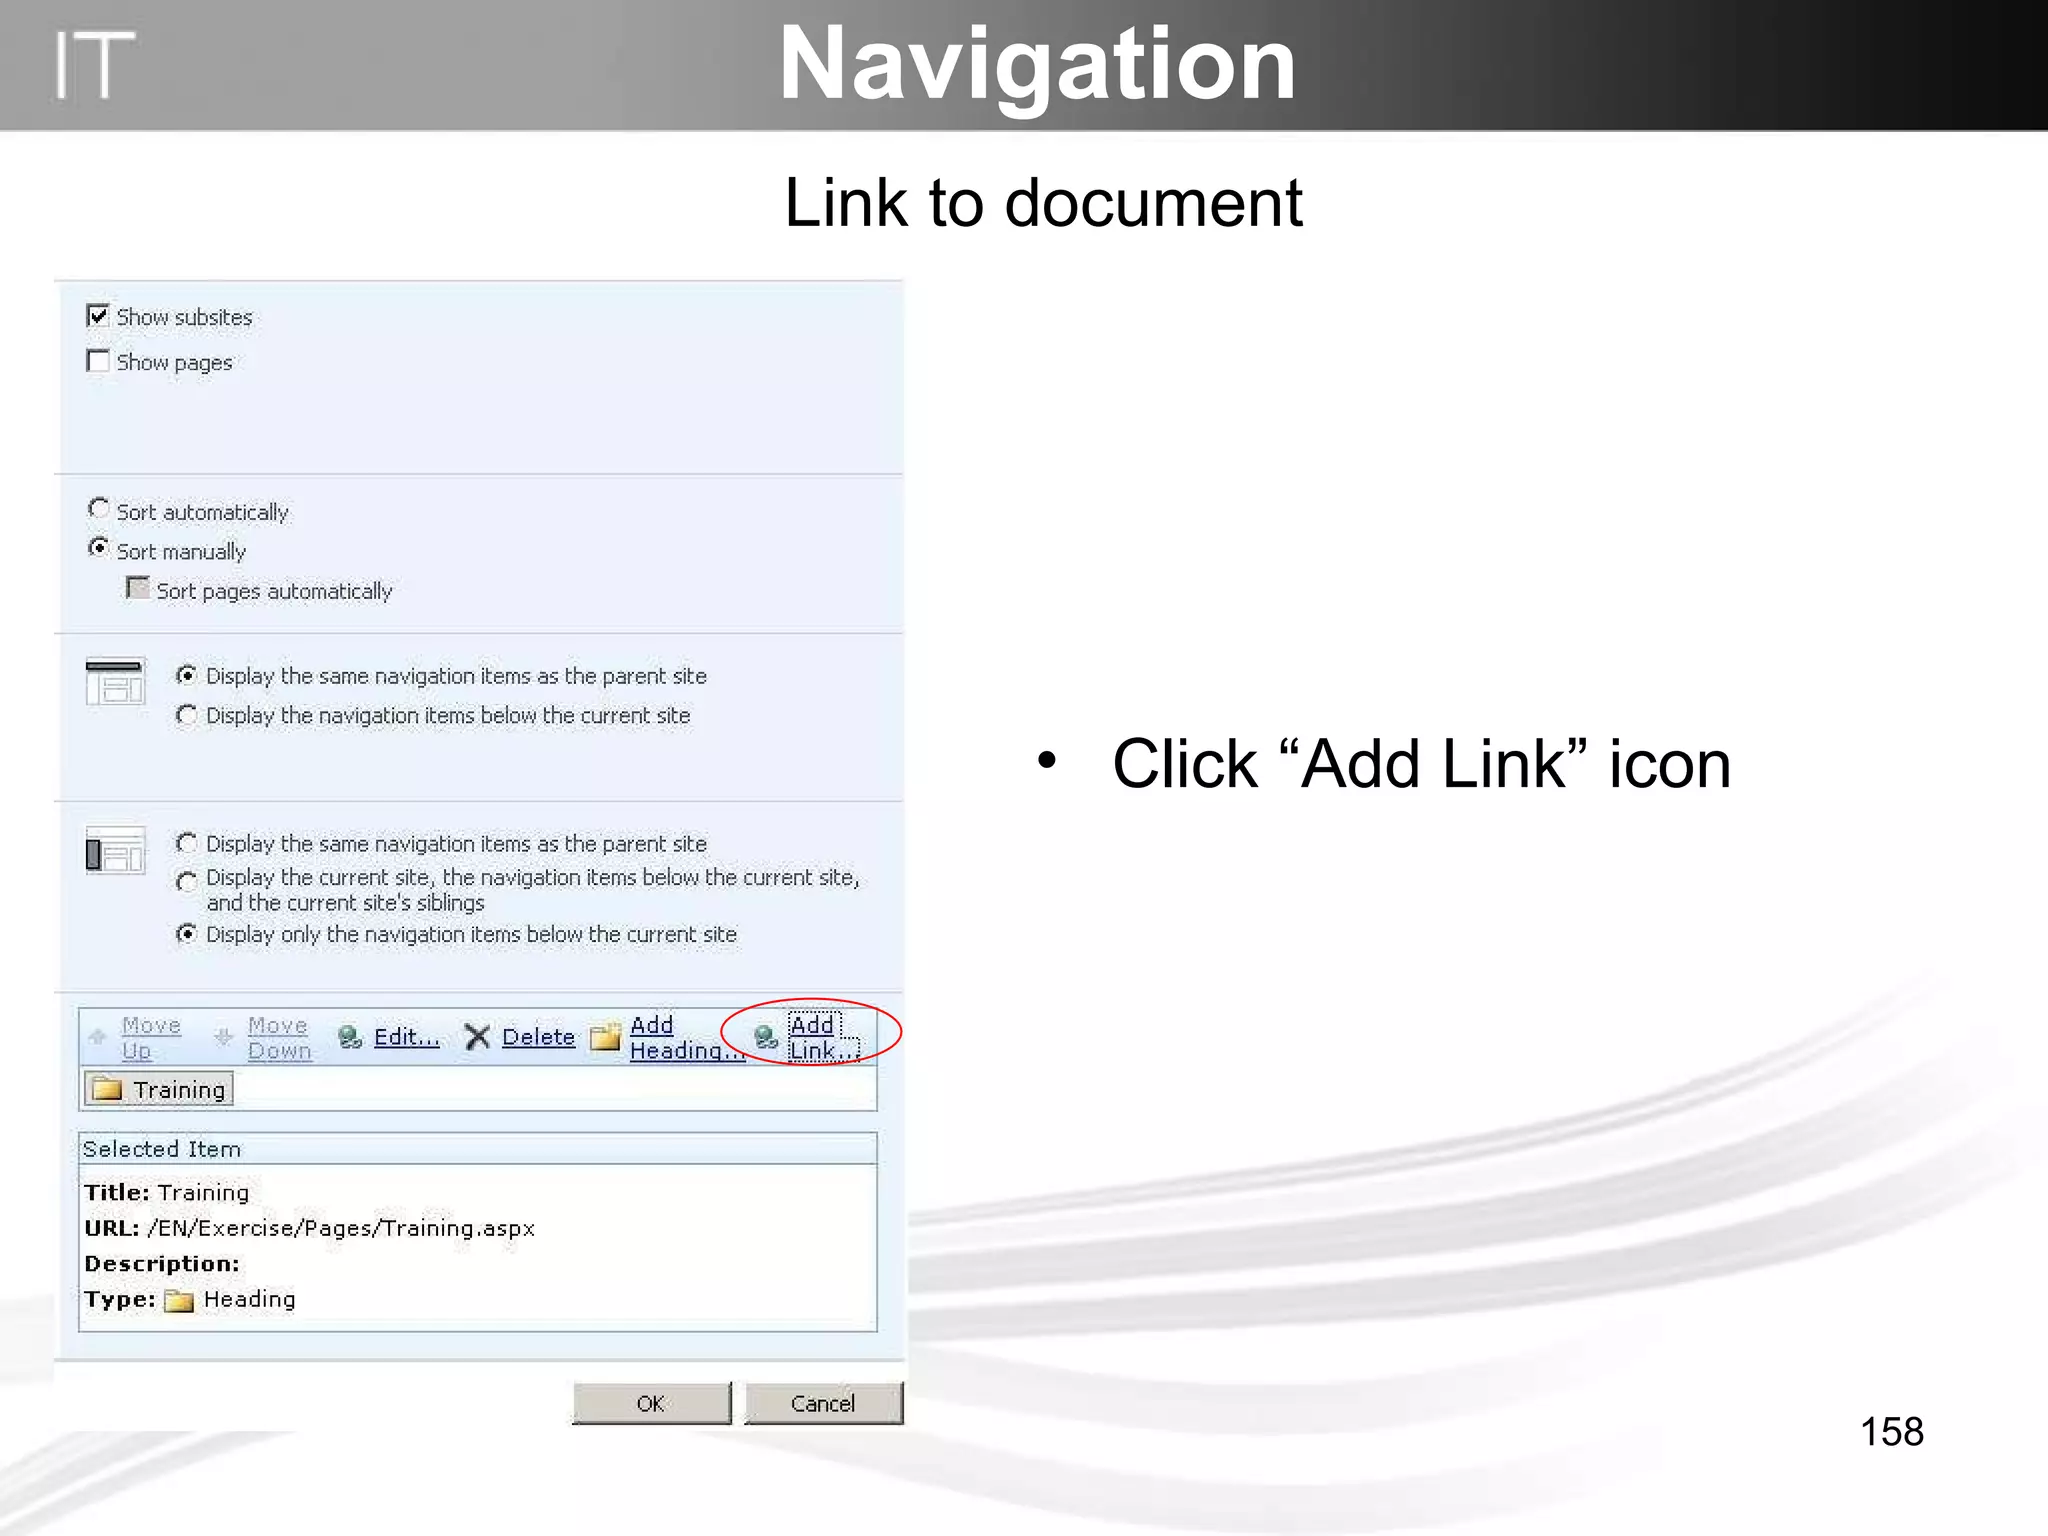
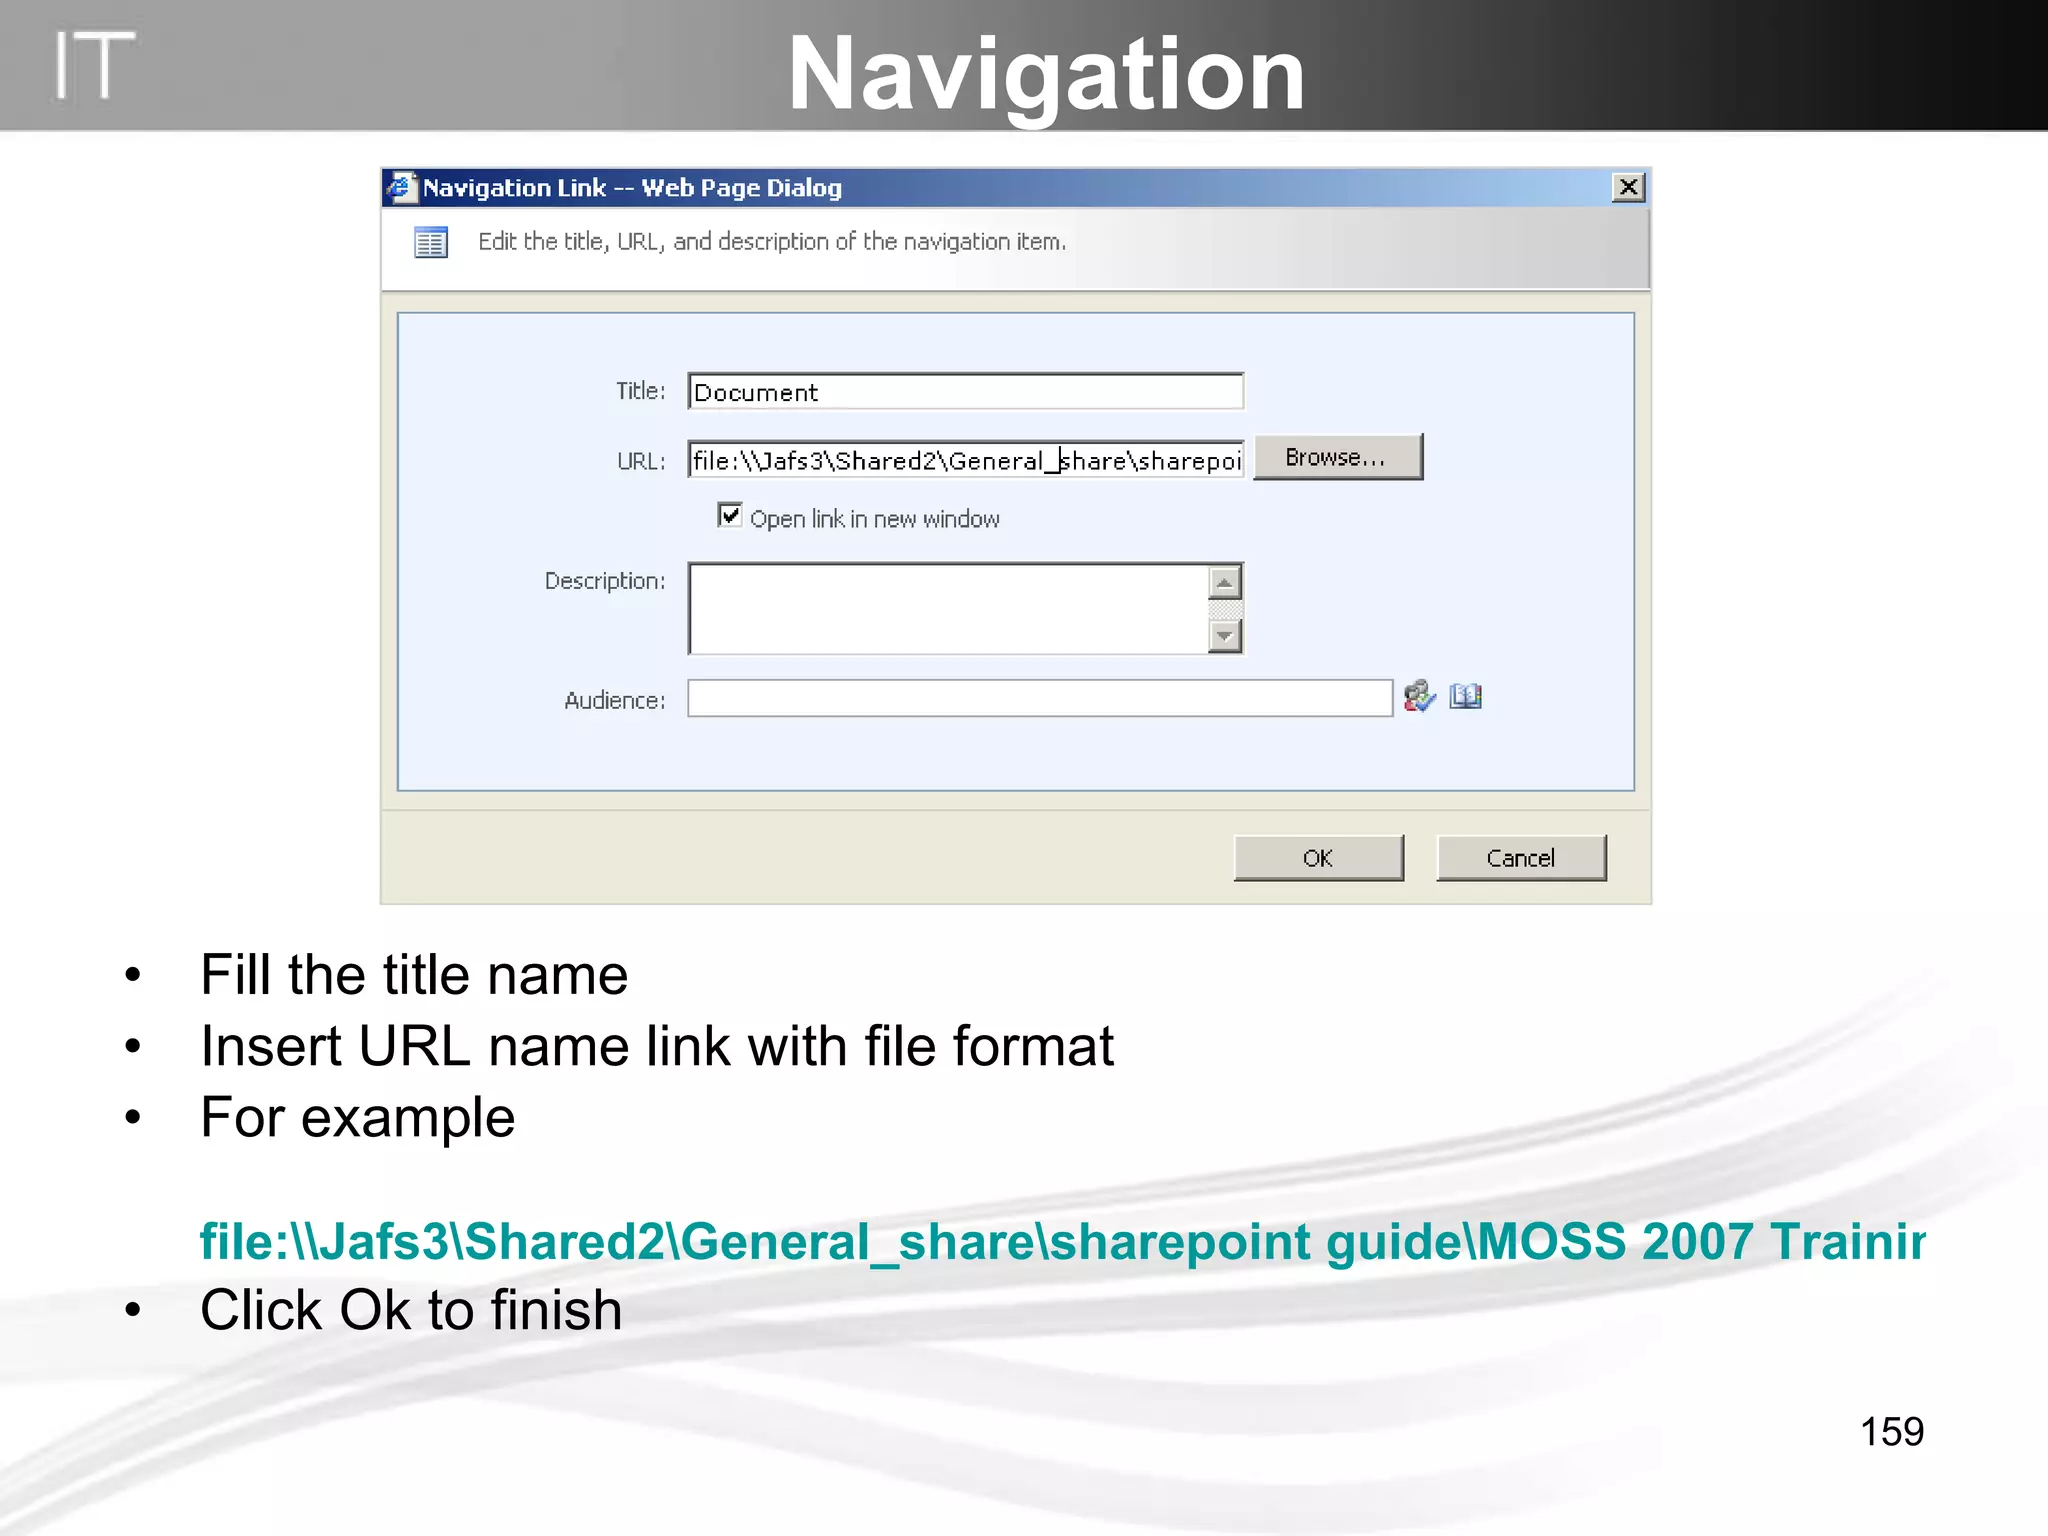
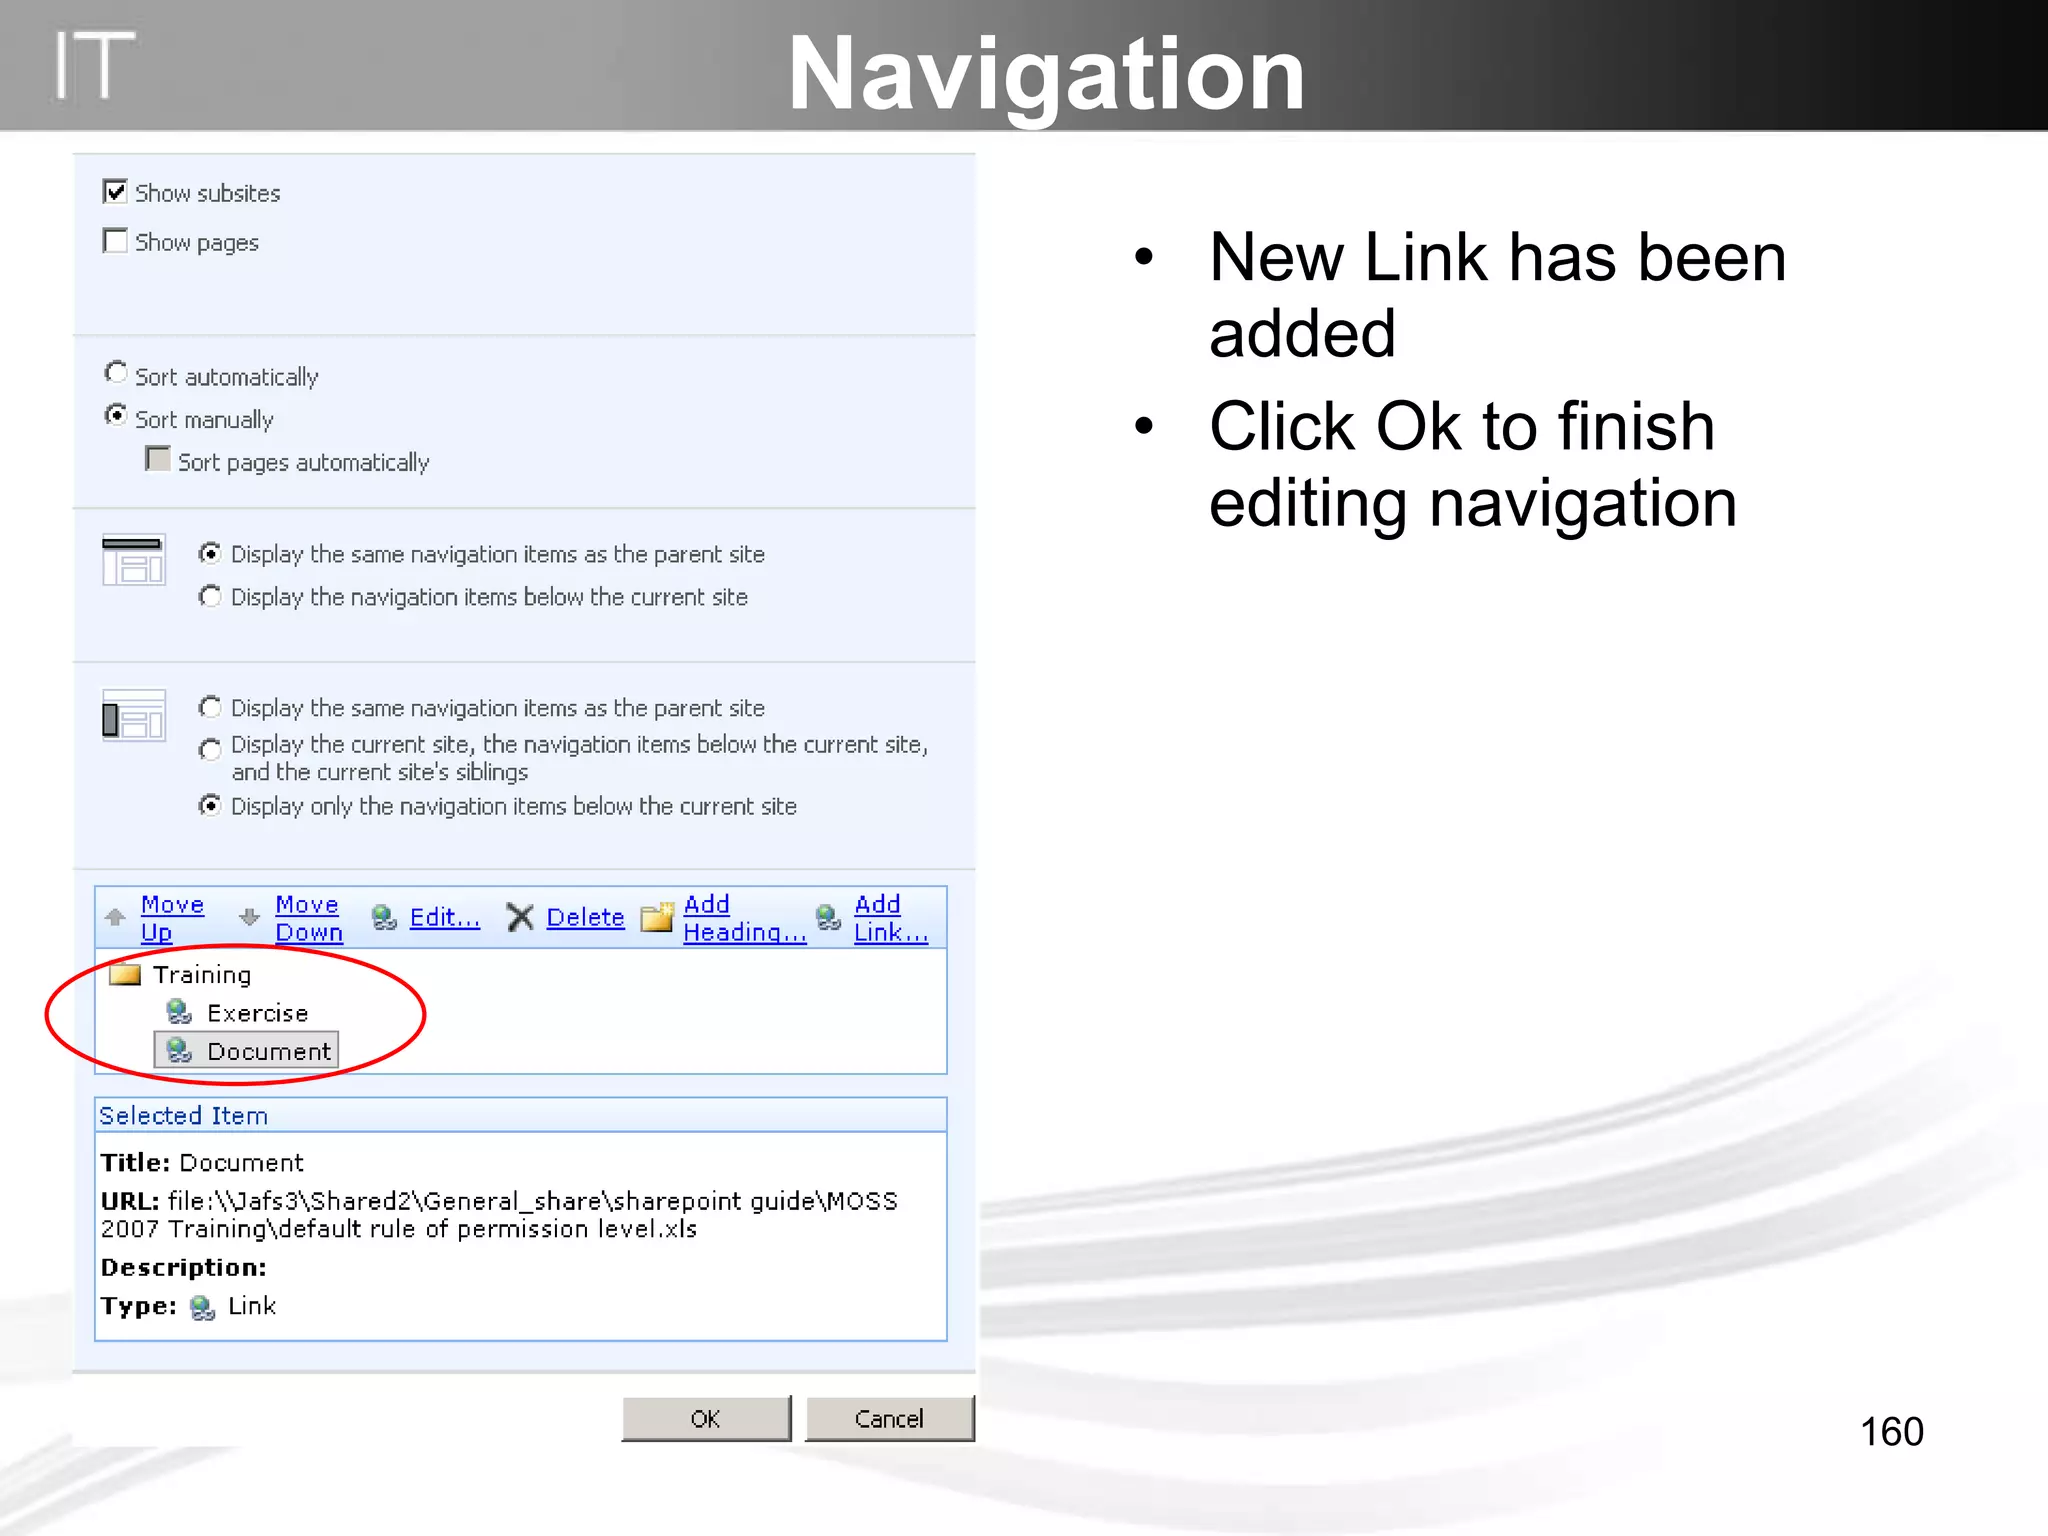
Training Moss 2007 COPI MOSS TEAM
Agenda Content      Duration Safety Briefing   (  1-2 Minutes   ) Ground Rules (  2-3 Minutes   ) Training Site/Page ( 10-15 Minutes ) Content ( 10-15 Minutes ) Permissions + Workflow  ( 20-25 Minutes ) Navigation (  10-15 Minutes ) Questions  ( 10-15 Minutes ) Total duration (95-120 Minutes)
Ground Rules Vibrate Active Listen Respect Opinions Questions No Side Talking
S  i  t  e
S i t e Site Document Page Images Sub site A web consist with many groups of page that connected with links. Site Content Left menu
Sample site Left Menu Sub Site Image Page
Site Setting Menu Site Actions Menu  With editing permissions Edit Page Create or View Site Content View Reports Access Site Settings Manage Site Content and Structure
Create site
Navigate to an existing site. Click on  Site Actions  (on the top left)     Create Site.   Create site
Enter the  Title .  In the  Web Site Address  section add a  URL name  for the site. Create site
Create site Click the Create button.
“ site_name/index.aspx” The new site is ready to be set up. Create site
Rename Site
Rename Site Click on  Site Actions  (on the top left)   Manage Content and Structure.
Rename Site Navigate your pointer to your site name until scroll down menu appear. Click general setting
Navigate to Title, description, and icon Rename Site
Rename Site Edit title or your URL name and click “ OK ” when finish
Rename Site Your site name has been rename
Create page
On the  "Site Actions"  menu, click  "Create Page" .  Create page
Type a new title for the page. Type the file name for the page, In the  "URL Name"  box. Click Create. Create page
When you finish created page, it will appear like this in URL “page_name.aspx” Create page
Rename Page
Rename Page Click on  Site Actions  (on the top left)   Manage Content and Structure.
Rename Page Navigate to your site and open page folder
Rename Page Navigate to your page and click edit page setting
Rename Page Scroll down your mouse and click Ok when finish configure
Rename Page Your page name has been rename
Upload File
MOSS 2007 Rules MOSS 2007 is suggested as information site not repository files Pages files can be stored in MOSS 2007 Images (less than 1 MB) can be stored in MOSS 2007,suggestion format JPG  Please remove unused content Other files can be saved in Storage Documents Livelink S Drive Sharepoint 2003  Another repository site Recommendation from global, more information please email to GRP:COPI MOSS-2007 TEAM
Upload File Management Files Purpose Site Link Only MOSS 2007 Document Storage  Upload Images Pages Documents Repository Files Documents Upload
Upload File Using Manage Content & Structure
Navigate your pointer to image folder in left explore window Upload Images
Navigate your pointer to the right window and click  New    Item   Click  view all site content Upload Images
Browse to  S:\GENERAL_SHARE\sharepoint guide\MOSS 2007 Training Click Ok when finish Upload Images
Click  check in  to enable you review uploaded image appear on page or site. Upload Images Must Filled  in
Upload Images Upload Success
Upload Document
Upload File Document can be saved in Storage Documents Livelink Sharepoint 2003 S Drive  Jakarta – JAFS3 Grissik – GRSFS1 Belanak – BELFS1 Belida – BLDFS1 Hangtuah – HTFS1  Another repository site
For information about Livelink please contact  [email_address]  ext 1950 [email_address]  ext 1951 Upload File Using Livelink
Upload File Open new windows (internet Explorer) Go to your department sharepoint 2003 site Click Document and List  Using sharepoint 2003
Click  Upload Document Upload File
Upload File Browse File to  jafs3 Server S:\GENERAL_SHARE\sharepoint guide\MOSS 2007 Training Click Open
Click  Save and Close Upload File
File has been uploaded Upload File
Edit Page With Edit Content
Edit page with edit content Back to your home page
On the  Site Actions  menu, click  Edit Page.  Notice that the page has switched to Design mode. The page's Web Part zones and titles are visible.  Edit page with edit content
Click  Add new content  Edit page with edit content
Click the icon image to display the picture in your site Edit page with edit content Formatting toolbar Image
Click  Browse Edit page with edit content
Select image then click  ok Edit page with edit content
Click  ok Edit page with edit content
Uploaded image will appear on page content Edit page with edit content
Edit page with edit content click the table icon to divide your page into multiple columns Table
Edit page with edit content Insert size of rows or columns than click “ OK ”
Edit page with edit content Table has been created Put your picture into table and you can write something in another column
Edit page with edit content Your first page has been modified
Edit page with  content editor web part
Web Part  in the Web Part zone can help you to manage your page content structure.  Edit page with content editor web part
Menu  content editor Web Part Edit page with content editor web part
Display the web part when you have selected one of the menu Edit page with content editor web part
Edit page with content editor web part Click  edit Click  modify shared web part
Edit page with content editor web part Source editor  can help you to design your page with HTML source
Edit page with content editor web part Open  S:\GENERAL_SHARE\sharepoint guide\MOSS 2007 Training Right-Click on right-click on the file  sample1.html  click  open with      Notepad Copy-paste text into Text Entry then click  Save
Edit page with content editor web part An example using web editor with html source
Edit page with content editor web part You can edit your source editor using rich text editor
Edit page with content editor web part Exercise : place the image on the rich text editor   Clue : Rich text editor = Page content Click  OK  when finish editing
Create Link
Create Link Insert picture or write something to create quick link Bold the word or click the image and then click Hyperlink icon
Bold the word or clik the image and then click Hyperlink icon Create Link
Create Link For the selected URL you can use the document link in sharepoint 2003 Click OK to finish editing
Quick Link has been created Create Link
For s: drive link using format:  File:\\ server_name\Shared_folder\Working  _folder\ files.xxx Sample : file:\\Jafs3\Shared2\General_share\sample.txt Create Link
Edit Page Using Page Viewer
Edit Page Using Page Viewer Click Add Web Part
Edit Page Using Page Viewer Checklist Page Viewer Web Page Click Add
Edit Page Using Page Viewer Click  edit click  modify shared web part
Edit Page Using Page Viewer Copy and Paste your save HTML file (the URL) Click OK  Exercise :  Browse your page file Copy page URL
Edit Page Using Page Viewer Manage your page viewer properties. Click Ok when Finish
Edit Page Using Page Viewer Final Result
How to create the Announcement
Create Announcement Click  site action Click  view all site content
Create Announcement Click  create
Create announcement Click  announcement  to create and add new list announcement.
Create announcement Type announcement list name Click  create
Create announcement Click  settings  then click  create view  to insert table
Click Standard view Create Announcement
Create view Type  view name  title Click  ok  to create view table.
Add new announcement To create a new announcement. Click new item
Enter the  Title  and  Body  of the new announcement item.  The title will show up as a bulleted item and the body should contain supplemental information. Create announcement list
Publish announcement Click page on top left menu Click add web parts and browse
Publish announcement Browse new announcement Click  add
Publish announcement A new announcement will be appeared in web part box
Site Permission Setting
Permission Structure Contributor Reader Approver Content Owner Site Approve Site Or Page Document Read Only
Set Permission Navigate to   Site Action    Site Setting   People And Group
Set Permission Navigate to “ Site Permission”
Click Action    Edit Permission to create unique permission Set Permission
Click Ok to continue Set Permission
Set Permission Navigate to “ New”     Click  “Add User”
Set Permission Enter User/Groups Give Permission Click “ Ok”   when finish
Set Permission New user permission has been created
Set Permission Sample e-mail confirmation
Workflow Process
Go to your home site Workflow Process
Workflow Process   Click site action    site settings    Manage Content and Structure
Only the directory pages that should be given Workflow process Workflow Process
Workflow Process   Choice Workflow Settings
There is one active workflow that should be removing Workflow Process
Checklist remove button than click ok Workflow Process
Current workflow has been removed Add new workflow Workflow Process
Workflow Process   Type name group of approval
Workflow Process   Select one participants    Browse name of approver
Workflow Process   Select name approver
Click Ok when finish Workflow Process
Workflow Setting New workflow has been removed
Remove another workflow in documents and images folder Workflow Process
repeat step by step removing Workflow Workflow Process
Publish
Publish Process Process Upload Finish Editing Other User    Available to Edit Approve Publish Shared View to Other Document Upload Publish Check in
Click  site action Click  view all site content Publish
Click on drop down menu beside page title Click  publish a major version Publish
Click  ok Publish
Publish Loading process
Publish Status  Draft  change to P ending
Approve
Approve Click on drop down menu beside image title Click  approve/reject
Click  approved  radio button, then click  ok After you’ve done approved the image, everyone will able to view image. Approve
Approve Status  Pending  change to  Approved
Publish Page
Go to your home site Publish Page
Publish Page For Finish editing page Click  check in to share draft
Publish Page Page that you’ve created cannot seen by public until you approved. Then click  submit for approval .
Publish Page Click Start
Publish Page Sending request process approval to server
Publish Page After the approver has approved the page publish you will receive email from share point Content Owner will receive email  from share point when request approval to approver
Approver will receive email request Publish Page request
Click Approve  Publish Page
Click approve Publish Page
Your page has been published Publish Page
How to Create a Navigation
Navigation   Top Navigation Left Navigation
Page has been created but there’s no button to link between site and page. To add left menu click  site settings  in  site action. Then click  modify navigator  on drop down menu. Navigation   Add left menu
Click  add heading Navigation
Navigation   Enter  the name  Title  then click  OK
Click Ok when finish Navigation
Click Ok Navigation
New Header will be appeared on left menu list Navigation
A new left menu will appear on left side window Navigation
Navigation Add submenu
Page has been created but there’s no button to link between site and page. To add left menu click  site settings  in  site action. Then click  modify navigator  on drop down menu. Navigation   Add sub menu
Navigation Return to the  Navigation Settings  page. Select the heading to add a submenu item & Click  Add Link…  in the toolbar.  Add submenu items
Enter the  Title   Browse to existing page  Navigation
Click Ok Navigation
Click Ok Navigation
The heading menu item will now have one fly-out sub-item.  Navigation
Link to document Navigation Click “Add Link” icon
Fill the title name Insert URL name link with file format For example  file:\\Jafs3\Shared2\General_share\sharepoint guide\MOSS 2007 Training\default rule of permission level.xls Click Ok to finish Navigation
New Link has been added Click Ok to finish editing navigation Navigation
Navigation DONE
COPI MOSS 2007 Thanks for your Attention Service Desk Asia Pasific Technical Problem Support mail to RSC:MOSS 2007 Local Content consultant : GRP:COPI MOSS 2007 BY COPI MOSS 2007 TEAM

Training Moss 2007 Information Site

Editor's Notes

  • #31 Livelink untuk final document (record) S drive untuk working document Sharepoint 2003 untuk colaboration document
  • #32 Recomendasi ini disarankan per april 2009 atas recomndasi global