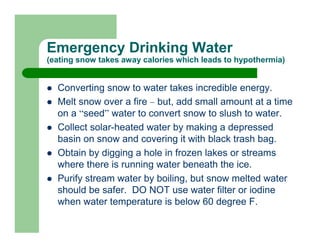
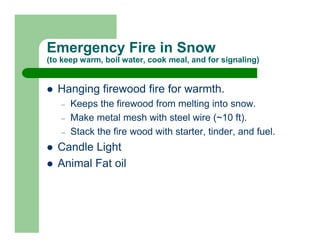
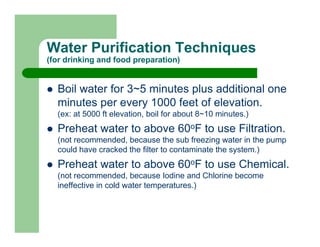
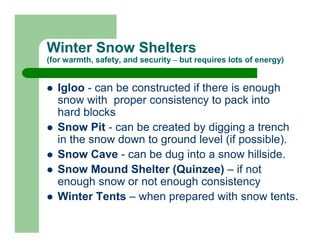
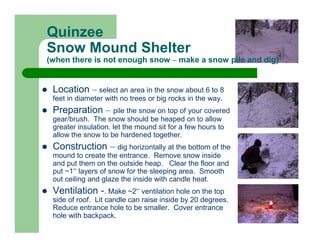
Winter Survival Techniques


            ALERT Cadet
            Alpha 3rd California

            2005 : 1/23 ~ 1/25
Winter Survival Tools

 Multi-Purpose Knife (Swiss army or Leatherman)
 Avalanche Shovel and/or Snow Pick
 Steel Wire (10 ft – setting fire on suspended firewood)
 Duct Tape (binding any broken things)
 Rice (quick energy - 3 cups of rice per person per day)
 Small Cooking Pot with Lid (boiling waters)
 Wood Powered Camp Stove (no liquid fuels)
 Lighter and Matches (bring plenty of extra)
Winter Survival Needs

 Hazards of Winter Weathers
 Getting about in the snow
 Snow Shelters
 Warmth (Clothing, Fire)
 Water (Circulation)
 Food (Energy)
Hazards of Cold Weather Exposure
(frostbite, snow blindness, and hypothermia)


  Stretch muscles in every directions (winkle face, exercise hands)
  Watch each other for patches of waxy, reddening or blackened
  skin, especially faces, ears, and hands.
  Do not get clothing wet whether through sweat or water.
  Dry them as soon as possible.
  Knock snow off before entering shelter, or leave outer clothing at
  the entrance to avoid melting snow which wet gear and clothing.
  Avoid tight clothing which reduces circulation.
  Never go out without adequate clothing – however briefly.
  Never touch metal with bare hands. Avoid spilling gasoline on
  bare flesh. Lower melting point causes more damage than water.
Emergency Snowshoes
(to get to safety without exhaustion in knee deep snows)


  Cut two stocky branches about 3 feet long
   –   Fir tree with plenty of small green branches
  Tie one branch to each foot at the front end of
  the branch.
  Thread the string through something on the
  front of your boot. Leave enough room for
  swivel during walk.
Emergency Drinking Water
(eating snow takes away calories which leads to hypothermia)


  Converting snow to water takes incredible energy.
  Melt snow over a fire – but, add small amount at a time
  on a “seed” water to convert snow to slush to water.
  Collect solar-heated water by making a depressed
  basin on snow and covering it with black trash bag.
  Obtain by digging a hole in frozen lakes or streams
  where there is running water beneath the ice.
  Purify stream water by boiling, but snow melted water
  should be safer. DO NOT use water filter or iodine
  when water temperature is below 60 degree F.
Emergency Fire in Snow
(to keep warm, boil water, cook meal, and for signaling)


  Hanging firewood fire for warmth.
   –   Keeps the firewood from melting into snow.
   –   Make metal mesh with steel wire (~10 ft).
   –   Stack the fire wood with starter, tinder, and fuel.
  Candle Light
  Animal Fat oil
Water Purification Techniques
(for drinking and food preparation)


  Boil water for 3~5 minutes plus additional one
  minutes per every 1000 feet of elevation.
  (ex: at 5000 ft elevation, boil for about 8~10 minutes.)
  Preheat water to above 60oF to use Filtration.
  (not recommended, because the sub freezing water in the pump
  could have cracked the filter to contaminate the system.)
  Preheat water to above 60oF to use Chemical.
  (not recommended, because Iodine and Chlorine become
  ineffective in cold water temperatures.)
Winter Snow Shelters
(for warmth, safety, and security – but requires lots of energy)


  Igloo - can be constructed if there is enough
  snow with proper consistency to pack into
  hard blocks
  Snow Pit - can be created by digging a trench
  in the snow down to ground level (if possible).
  Snow Cave - can be dug into a snow hillside.
  Snow Mound Shelter (Quinzee) – if not
  enough snow or not enough consistency
  Winter Tents – when prepared with snow tents.
Cautions for Snow Shelters

 Keep Dry:     While shoveling and digging, you will get warm and wet from sweat. So take
 some layers off while you're digging. Only dry clothes will keep you warm when cold.
 Keep Warm: The thicker the walls of your shelter are, the more insulation you'll have.
 While waiting for the snow to harden, remain active in order to stay warm, prepare a meal,
 collect some boughs, get a fire going. Don't just sit around!
 Keep Exit Open: You want to block the entrance of your shelter after you enter in order to
 keep the shelter warm but don't seal the doorway, leave some cracks and spaces to allow air to
 circulate. Bring your digging tool inside the shelter with you in case you have to dig your way
 out in the morning.
 Keep Light: If you leave the shelter at night, be sure to leave a light on to guide you back.
 Don't light up a gas stove, trioxide or any other chemicals. This can give you a lethal dose of
 carbon monoxide even with ventilation holes. Candles are the maximum I would use.
 Keep Boots: If it's freezing cold, wrap your boots and water bottle in a plastic bag and take
 them into your sleeping bag (if you have one).
 Brush-off Snows:           Brush off all particles of snow stuck to your clothes before entering
 the shelter or they will melt and get you wet.
Igloo
(for longer term stay with sufficient hard-packed snow)


  Location – Flat area away from trees and big
  rocks. Orient for cross wind entrance hole.
  Construction – Cut snow blocks to construct
  spiral wall small enough for you to lie down and
  put your gears. Bedding area should be raised
  and insulated. dig general purpose area for
  gears and stove shelves. Make 3 ft deep
  entrance hole with snow block covers.
  Roof – cover block seams with power snow.
  Smooth out internal ceiling to avoid dripping.
  Ventilation -. Make ~2” ventilation hole on the
  top of the roof for cooking and heating inside.
Snow Cave Shelter
(when there is packed snow bank or drift for burrowing)


 Location – hard packed snow bank on the lee-
 ward side of a steep ridge or river bank. Snow drift
 should be at least 9 ft deep. Avoid newly fallen,
 powdery, or loose snow. Probe it with sticks.
 Construction – burrow a small entrance tunnel
 then dig a chamber right angles up the entrance.
 Sleeping and sitting platform should be above the
 entrance. Smooth out the ceiling to avoid water
 dripping and make draining channels around the
 sleeping area. Insulate sleeping area. Make a shelf
 and aluminum heat reflector for candle.
 Ventilation -. Make ~2” ventilation hole on the
 top side of roof. Lit candle can raise inside by 20
 degrees. Cover entrance hole with backpack.
Snow Pit Trench Shelter
(for open area with sufficient snows depth)


   Location – Flat area away from trees and big
   rocks. Orient the trench down wind on the short
   side of the trench.
   Construction – dig 3 ft deep, small enough for
   you to lie down and put your gears. Bedding area
   should be raised and insulate with soft branches
   and leaves. Make 1.5 ft x1.5 ft trench entrance
   with snow block as a door.
   Roof - support with poles, ski, or sticks and cover
   with tarp. Cover ~3” with dry snow or 1.5” wet
   snow blocks.
   Ventilation -. Make 5”x5” ventilation hole on
   the opposite side of door if wants to cook inside.
Quinzee
Snow Mound Shelter
(when there is not enough snow – make a snow pile and dig)


 Location – select an area in the snow about 6 to 8
 feet in diameter with no trees or big rocks in the way.
 Preparation – pile the snow on top of your covered
 gear/brush. The snow should be heaped on to allow
 greater insulation. let the mound sit for a few hours to
 allow the snow to be hardened together.
 Construction – dig horizontally at the bottom of the
 mound to create the entrance. Remove snow inside
 and put them on the outside heap. Clear the floor and
 put ~1” layers of snow for the sleeping area. Smooth
 out ceiling and glaze the inside with candle heat.
 Ventilation -. Make ~2” ventilation hole on the top
 side of roof. Lit candle can raise inside by 20 degrees.
 Reduce entrance hole to be smaller. Cover entrance
 hole with backpack.
Emergency Signaling
(Most air searches are done from 200 to 500 feet.)


  Needs to be visible from 200~500 feet.
  Signal in sets of three (calls or signs)
  to indicate emergency help request.
  Post flags and make markings to get
  rescuers attention and lead them to
  your shelter entrance. (It will be
  difficult to hear and watch for the
  rescuers when you are inside your
  shelter)
Semaphore Flag Signaling
       E
             The flags are held, arms extended, in various positions
             representing each of the letters of the alphabet. The
             pattern resembles a clock face divided into eight
             positions: up, down, out, high, low, for each of the left
             and right hands (LH and RH) six letters require the hand
             to be brought across the body so that both flags are on
             the same side.

              •first circle: A, B, C, D, E, F, G;
              •second circle: H, I, K, L, M, N (omitting J);
              •third circle: O, P, Q, R, S;
              •fourth circle: T, U, Y and 'annul';
              •fifth circle: 'numeric', J (or 'alphabetic'), V;
              •sixth circle: W, X;
              •seventh circle: Z

winter survival techniques

  • 1.
    Winter Survival Techniques ALERT Cadet Alpha 3rd California 2005 : 1/23 ~ 1/25
  • 2.
    Winter Survival Tools Multi-Purpose Knife (Swiss army or Leatherman) Avalanche Shovel and/or Snow Pick Steel Wire (10 ft – setting fire on suspended firewood) Duct Tape (binding any broken things) Rice (quick energy - 3 cups of rice per person per day) Small Cooking Pot with Lid (boiling waters) Wood Powered Camp Stove (no liquid fuels) Lighter and Matches (bring plenty of extra)
  • 3.
    Winter Survival Needs Hazards of Winter Weathers Getting about in the snow Snow Shelters Warmth (Clothing, Fire) Water (Circulation) Food (Energy)
  • 4.
    Hazards of ColdWeather Exposure (frostbite, snow blindness, and hypothermia) Stretch muscles in every directions (winkle face, exercise hands) Watch each other for patches of waxy, reddening or blackened skin, especially faces, ears, and hands. Do not get clothing wet whether through sweat or water. Dry them as soon as possible. Knock snow off before entering shelter, or leave outer clothing at the entrance to avoid melting snow which wet gear and clothing. Avoid tight clothing which reduces circulation. Never go out without adequate clothing – however briefly. Never touch metal with bare hands. Avoid spilling gasoline on bare flesh. Lower melting point causes more damage than water.
  • 5.
    Emergency Snowshoes (to getto safety without exhaustion in knee deep snows) Cut two stocky branches about 3 feet long – Fir tree with plenty of small green branches Tie one branch to each foot at the front end of the branch. Thread the string through something on the front of your boot. Leave enough room for swivel during walk.
  • 6.
    Emergency Drinking Water (eatingsnow takes away calories which leads to hypothermia) Converting snow to water takes incredible energy. Melt snow over a fire – but, add small amount at a time on a “seed” water to convert snow to slush to water. Collect solar-heated water by making a depressed basin on snow and covering it with black trash bag. Obtain by digging a hole in frozen lakes or streams where there is running water beneath the ice. Purify stream water by boiling, but snow melted water should be safer. DO NOT use water filter or iodine when water temperature is below 60 degree F.
  • 7.
    Emergency Fire inSnow (to keep warm, boil water, cook meal, and for signaling) Hanging firewood fire for warmth. – Keeps the firewood from melting into snow. – Make metal mesh with steel wire (~10 ft). – Stack the fire wood with starter, tinder, and fuel. Candle Light Animal Fat oil
  • 8.
    Water Purification Techniques (fordrinking and food preparation) Boil water for 3~5 minutes plus additional one minutes per every 1000 feet of elevation. (ex: at 5000 ft elevation, boil for about 8~10 minutes.) Preheat water to above 60oF to use Filtration. (not recommended, because the sub freezing water in the pump could have cracked the filter to contaminate the system.) Preheat water to above 60oF to use Chemical. (not recommended, because Iodine and Chlorine become ineffective in cold water temperatures.)
  • 9.
    Winter Snow Shelters (forwarmth, safety, and security – but requires lots of energy) Igloo - can be constructed if there is enough snow with proper consistency to pack into hard blocks Snow Pit - can be created by digging a trench in the snow down to ground level (if possible). Snow Cave - can be dug into a snow hillside. Snow Mound Shelter (Quinzee) – if not enough snow or not enough consistency Winter Tents – when prepared with snow tents.
  • 10.
    Cautions for SnowShelters Keep Dry: While shoveling and digging, you will get warm and wet from sweat. So take some layers off while you're digging. Only dry clothes will keep you warm when cold. Keep Warm: The thicker the walls of your shelter are, the more insulation you'll have. While waiting for the snow to harden, remain active in order to stay warm, prepare a meal, collect some boughs, get a fire going. Don't just sit around! Keep Exit Open: You want to block the entrance of your shelter after you enter in order to keep the shelter warm but don't seal the doorway, leave some cracks and spaces to allow air to circulate. Bring your digging tool inside the shelter with you in case you have to dig your way out in the morning. Keep Light: If you leave the shelter at night, be sure to leave a light on to guide you back. Don't light up a gas stove, trioxide or any other chemicals. This can give you a lethal dose of carbon monoxide even with ventilation holes. Candles are the maximum I would use. Keep Boots: If it's freezing cold, wrap your boots and water bottle in a plastic bag and take them into your sleeping bag (if you have one). Brush-off Snows: Brush off all particles of snow stuck to your clothes before entering the shelter or they will melt and get you wet.
  • 11.
    Igloo (for longer termstay with sufficient hard-packed snow) Location – Flat area away from trees and big rocks. Orient for cross wind entrance hole. Construction – Cut snow blocks to construct spiral wall small enough for you to lie down and put your gears. Bedding area should be raised and insulated. dig general purpose area for gears and stove shelves. Make 3 ft deep entrance hole with snow block covers. Roof – cover block seams with power snow. Smooth out internal ceiling to avoid dripping. Ventilation -. Make ~2” ventilation hole on the top of the roof for cooking and heating inside.
  • 12.
    Snow Cave Shelter (whenthere is packed snow bank or drift for burrowing) Location – hard packed snow bank on the lee- ward side of a steep ridge or river bank. Snow drift should be at least 9 ft deep. Avoid newly fallen, powdery, or loose snow. Probe it with sticks. Construction – burrow a small entrance tunnel then dig a chamber right angles up the entrance. Sleeping and sitting platform should be above the entrance. Smooth out the ceiling to avoid water dripping and make draining channels around the sleeping area. Insulate sleeping area. Make a shelf and aluminum heat reflector for candle. Ventilation -. Make ~2” ventilation hole on the top side of roof. Lit candle can raise inside by 20 degrees. Cover entrance hole with backpack.
  • 13.
    Snow Pit TrenchShelter (for open area with sufficient snows depth) Location – Flat area away from trees and big rocks. Orient the trench down wind on the short side of the trench. Construction – dig 3 ft deep, small enough for you to lie down and put your gears. Bedding area should be raised and insulate with soft branches and leaves. Make 1.5 ft x1.5 ft trench entrance with snow block as a door. Roof - support with poles, ski, or sticks and cover with tarp. Cover ~3” with dry snow or 1.5” wet snow blocks. Ventilation -. Make 5”x5” ventilation hole on the opposite side of door if wants to cook inside.
  • 14.
    Quinzee Snow Mound Shelter (whenthere is not enough snow – make a snow pile and dig) Location – select an area in the snow about 6 to 8 feet in diameter with no trees or big rocks in the way. Preparation – pile the snow on top of your covered gear/brush. The snow should be heaped on to allow greater insulation. let the mound sit for a few hours to allow the snow to be hardened together. Construction – dig horizontally at the bottom of the mound to create the entrance. Remove snow inside and put them on the outside heap. Clear the floor and put ~1” layers of snow for the sleeping area. Smooth out ceiling and glaze the inside with candle heat. Ventilation -. Make ~2” ventilation hole on the top side of roof. Lit candle can raise inside by 20 degrees. Reduce entrance hole to be smaller. Cover entrance hole with backpack.
  • 15.
    Emergency Signaling (Most airsearches are done from 200 to 500 feet.) Needs to be visible from 200~500 feet. Signal in sets of three (calls or signs) to indicate emergency help request. Post flags and make markings to get rescuers attention and lead them to your shelter entrance. (It will be difficult to hear and watch for the rescuers when you are inside your shelter)
  • 16.
    Semaphore Flag Signaling E The flags are held, arms extended, in various positions representing each of the letters of the alphabet. The pattern resembles a clock face divided into eight positions: up, down, out, high, low, for each of the left and right hands (LH and RH) six letters require the hand to be brought across the body so that both flags are on the same side. •first circle: A, B, C, D, E, F, G; •second circle: H, I, K, L, M, N (omitting J); •third circle: O, P, Q, R, S; •fourth circle: T, U, Y and 'annul'; •fifth circle: 'numeric', J (or 'alphabetic'), V; •sixth circle: W, X; •seventh circle: Z