SlideShare a Scribd company logo
1 of 29
Download to read offline
Attribution-NonCommercial-ShareAlike 3.0 United States (CC BY-NC-SA 3.0 US)
Facilitating an Earth Oven Course
Teachers manual
A How-to Manual - Including Oven Use and Sourdough basics
By Simha Bode
Introduction
Facilitating a hands-on earth oven course is a beautiful way to connect people and create
community. I hope this manual will help you with all of the logistics of running your own
successful oven course. The first section of this book is about the cultural context of ovens and
the role that teaching an oven workshop has in creating community. The second section is the
pre-course logistics of setting up an oven course. The third section is a detailed technical guide
to teaching an oven course using a specific oven design as a guide. The fourth section has
details on building specifics. The fifth section covers the use of an earth oven, building oven
tools and the basics of sourdough.
The trade skill of natural building has gained a lot of popularity over the past few decades.
There are many reasons for this growing trend: accessibility and purity of the medium and
materials, esthetics and artistic potentials, work-party dynamics and embodied-energy footprints
among others. Some of the opportunities and resources to learn these skills are through
workshops, do-it-yourself guides, volunteering and work-trades. Once you have gained the skill
you can apprentice as a co-teacher under a teacher you respect. Just as you learned the skill of
the trade by doing it with someone guiding you, you can learn to teach.
Learning a skill is one thing, but learning to teach that skill is another. You can be a very skilled
trades person and not know how to transmit that skill to others effectively. As someone who has
been building earth ovens for a decade and just recently started to teach, I realized there is a
lack of resources for teachers. I believe this dynamic of accumulating best practices for teachers
is just beginning to find its way into the various fields. That is where this book comes in. I
wanted to create a guide that would help someone who has built several ovens to teach their
own oven workshops.
The context of ovens in todays culture
In the name of progress, our society is pushing towards a more industrialized culture. This
contemporary worldview of progress has created many paradoxes. For example, never before
have we had this level of global connectivity, yet our local communities are fragmented and
struggling. Another example is our great success in creating time saving technologies, which
have led to a fast paced life of stress. There are many paradoxes in our culture today and the
root cause of this confusion is the loss of real community. Real community is the face to face
sharing of our lives through spending time, listening, helping, creating, dreaming, consoling and
celebrating with each other.
“I think we risk becoming the best informed society that has ever died of ignorance.”
― Reuben Blades
There are many people and organizations around the world working locally to create community.
Here are a few examples of the organizations tackling this issue on a global level: Transition
towns, Ecovillages, Permaculture guilds, World Cafes, Time banks and Natural building schools.
These organizations get people involved and invested in their local community through
gathering and connecting people in a common goal and vision of life. The core theme in
creating community is building and improving our relations.
Why are ovens important in this movement to heal our relations and create community? Since
time immemorial three central pillars of community stand out: fire, food and building. Wood fired
ovens have all three of these community pillars! Traditionally in Europe, ovens were in the town-
square or church. Residents would bring their dough to be baked by the village baker. Ovens
metaphorically represented the heart of the community. These central meeting points could also
act as a community hub where discussion on pressing local topics or announcements could be
made. The old world trades of artisan bread and oven building connect people around the
common necessity of sustenance. Now more than ever people are yearning for this connectivity
and community. A new culture is emerging and just as before, community and food are central
to its expression. Earth ovens and natural building courses have an important role to play in
establishing this emerging culture.
The role of facilitating
The word teach has different psychological connotations for everyone, many of which are rooted
in our experiences at school. This may just be semantics, but I prefer to use the word facilitate.
Facilitate means to make easy or render less difficult, stemming from the Latin word facilis
“easy”. An assumption of teaching is that students are empty vessels that the teacher must fill.
This assumption disconnects the teacher from the mutual exchange which makes learning
wholesome and unifying. When we facilitate we can be open and ready to learn something
ourselves, acknowledging that we all have different skills and knowledge to share with each
other. This interpersonal dynamic of facilitating brings personal experiences and inspirations into
the open. Another concept that embodies the word facilitate is what I would call collaborative
leadership. I would describe some of the roles of a collaborative leader as: being a good
listener, directing the flow of dialogue, using questions for engagement and feedback, actively
initiating, proactive in personal connections and openness, empowerment through recognition,
and finally connecting and translating first hand experience into stories and illustrations. These
roles of a collaborative leader are also foundational dynamics of community. As Kiko Denzer
pointed out to me in our dialogue on teaching:
“What we build together is not ovens, or buildings, but stories. Stories provide us, over
time, with the building blocks of culture. Ultimately, what I'm hoping people learn from
oven workshops is to think of themselves not as consumers, but as participants in the
work of culture”.
To heal the presently fragmented culture, we need to weave our stories together to create our
common story. Facilitating is one of the most potent opportunities to do this. Essentially this is
an opportunity to empower ourselves and others by instilling self-confidence and giving the
experience of community through team work and dialogue.
“True teachers are those who use themselves as bridges over which they invite their
students to cross; then, having facilitated their crossing, joyfully collapse, encouraging
them to create their own.”
― Nikos Kazantzakis
Building an earth oven is a great introductory project to community building for many reasons. It
is a fairly quick project with a satisfying outcome. Participants leave the course with a feeling of
personal achievement and community bonding. Working earthen materials with our feet and
hands links us to our most common connection, the Earth. It is a gateway into larger natural
building projects which also build community.
I first started to facilitate earth oven courses as a co-facilitator. This role of apprenticing as a
facilitator allowed me to experience facilitating without having the entire burden of fulfilling all the
logistics of the course while being in the spot light. Being freed of the full responsibility allowed
me to step-back and observe and then step forward and engage. This process helped me to
take on the role as facilitator incrementally and with intention. If you are new to facilitating, I
highly recommend starting out as a co-facilitator.
It is ideal to be familiar with building and baking with the oven model you choose to facilitate in a
course. The more experiences and stories you have with this oven model the deeper and richer
your course will be. One of the most valuable yields from having experience with your ovens
comes from the mistakes you made. It is these mistakes that give you the ability to lessen the
learning curve for your students. These experiences can increase your students ability to
succeed as well as instilling fortitude and persistence. In this new culture, we need the ability to
see failure as a stepping stone to progress.
Facilitating best practices
Be professional and fun - Adopt an equanimous relationship with all participants of the course;
be organized and punctual while having a good time.
Take interest in the participants - Learn their names and help them get acquainted with each
other’s names, by playing a name game for example. Find out their experience and interests
associated with oven building; some may want to be bakers and others oven builders.
Be a good listener while staying on track - It is easy for questions to sidetrack the course. If a
question is too much of a tangent, let them know when you will be covering that topic later in the
course.
Be a good facilitator - Encourage them to be professional by not playing favorites with other
participants, engage shy people by giving them tasks, give participants tasks that meet their
abilities (elders, youth, handicapped), mix up groups and pairings, rotate tasks, be sure to
gather everyone for demos.
Be clear in your orientation - Give overviews of the next steps, use repetition to help
participants stay on track, open the space for questions after each new step and demonstration,
continually clarify things which may be confusing.
Have a confident presence - Be honest with your own experience level. If you are unsure
about something tell the truth and get back to them with answers. Be relaxed about participants
skill level and use positive reinforcement.
Example Outline of a weekend course
Below is an example course outline which you can use to create your own and give it to
participants as a handout.
Day 1 Morning
• Welcome and orientation
• Check-in - Introductions, oven experience and student course goals
• Introduction to the course and context
• Facilities and site orientation
• Overview of the order of the days
• Oven design - Brief overview of oven components
• Drainage - rubel trench
• Foundation overview
• Hearth
• Oven dome - Scale and Ratio
• Roof
• Siting/Foundations
• Mix demo - use mix to build the retaining ring of cob for the hearth bricks
• Build the Hearth
• Lunch
Day 1 Afternoon
• Identifying building materials and developing a mix
• Building the sand form, arch and thermal mass layer of dome
• Tool and site cleaning/organizing
Day 1 Evening
• Oven slideshow and discussion
Day 2 Morning
• Personal check-in and clarification
• Overview of day - logistics
• Demo - insulation mix (slip mixing)
• Mixing and building the insulation layer
• Lunch
Day 2 Afternoon
• Demo - Earthen plaster mixing and application
• Application of earthen plaster
• lecture/demo - applying a lime finish plaster (demo if possible)
• Discussion of firing and baking in your oven
• Presentation of course certificate
An illustrated technical guide
Since I started building ovens in 2006 I have always referred to Kiko Denzer’s book Build Your
Own Earth Oven (which I refer to in this manual as BYOEO) for guidance. It is a beautifully
illustrated and detailed manual for beginners to jump in and build their own oven. Kiko covers
many oven design variations and options. For this manual I am using my process of facilitating
the construction of a 36” hearth oven as an example. Though I get into the detail of building this
specific oven you can use your own design instead. You will find tips and best practices for
teaching that can be applied to any design. I choose to use this particular model for my courses
because it is an efficient and versatile home size oven.
If you want to facilitate an oven course and have yet to build one, get Kiko’s book, build and
bake in a few ovens and then come back to this manual. Double click the images in this ebook
to view them full size.
This technical guide is broken into four main sections:
1. Pre-course
• making an agreement with the course host
• advising the host on building the foundation and roof
• a list of the materials and tools that will be needed for the course

2. Course
• facilitating instructions of the step by step build
• comprehensive learning
• wrapping up the course

3. Technical details
• Calculating the size of a rubble trench
• Building a door form
• Arch details
4. Oven use
• details of firing and baking in earth ovens
• guide on building the tools including the door
• information on sourdough
Pre-course
Host agreement
First you will need to find a host for the workshop. This can take time, so start early! Connect
with regional natural building groups, local permaculture guilds, group venue hosts, neighbors
and friends. It is important to be clear with what your services include and the responsibility of
the host. Create a project proposal with all the details and use this as a contract. Be very clear
to the host that the material expenses and building of the foundation and roof are his/her
responsibility. If possible make a site visit while consulting, but if you can’t, stay in close contact
to ensure that the requirements are met for the pre-course set-up. Below, I cover some of the
important factor you will want to communicate to the host.
Siting the oven
These are factors to consider when you or the host is choosing the location and orientation of
the oven:
• Municipal zoning
• Door facing away from prevailing winds
• Good drainage (high and dry)
• Near access to fire wood and water
• Near kitchen (best if oven door is visible from the kitchen)
• Safe distance from flammables
• Enough work room in front of oven
• Good roof clearance
The foundation
Emphasize the importance of drainage to the host. When siting the oven take into consideration
spring runoff and indicator species such as sedge to avoid wet zones.
The rubble trench needs to be slightly larger than the foundation so it drains properly. For more
details on drainage and the equations to determine the size of the rubble trench see Technical
details at the end.
There are several options for a foundation; I will cover the two recommended for long term
ovens, dry-stone and cement block. It is important to survey the needs of your host to see that
they fit within the confines of what is possible for the course.
Dry stone foundation
• Start larger than the calculated top surface of foundation, the stones step in as you build up
• The corner stones should weave long face pointing every other side
• Save flat stones for the top
• Use odd shaped large stones on the ground level
Block foundation
• Use surface bond on both inside and outside faces of the walls or standard mortar technique
• Corner blocks weave long face pointing every other side - no standing seams
• Use rebar in corners and fill with concrete. Leaving a couple inches of rebar sticking above the
blocks allows for attaching a roof
• For a stronger base fill all blocks with concrete
• Walls are vertical - bottom of the foundation is the same size as the top
Once the rubble trench and foundation are complete fill the base with rubble (its recommended
to use mixed sizes or mix with sand). It is a good practice to line drystone foundations with
landscape cloth before filling and tamping, to block the small holes.
Material and quantities
You will need to ensure that all the materials for the workshop are correct and onsite prior to
starting your workshop. For more information on materials see page 30 of BYOEO.
Material quantities for an oven with a 36” hearth:
• Clay - 8 five gallon buckets
• Sand - 1 cubic yard
• Bricks - 50-54 including the arch
• Perlite - 1/2 cubic yard
• Fiber - 1 bucket
Clay - It is always better to have more then enough. Inspect the clay before it is delivered so
you don’t end up with silt. Clay can be obtained from sand pits, farm land, pottery studios and
friends/neighbors land. It is best to soak your clay a few days before the course begins.
Sand - It should be a gritty angular sand, as used in concrete. Smooth beach sand is less
desirable for the cob mix, but works well for making a sand form. Once the sand is onsite be
sure it is covered with a tarp to protect it from rain.
Insulation - It is recommended to use perlite for the insulation beneath the hearth and in the
dome insulative layer. Vermiculite can be used for the dome insulation but is not recommended
for the sub-hearth insulation. I have successfully used pumice beneath the hearth and wood
shavings for the insulative layer.

Bricks - Refractory fire brick is the best choice, though red brick can work. Research the type
and size of bricks that are available in the area and design your oven accordingly.
Water - Make sure it is easily available at the build site.
Fiber - This is used to make the earth plaster. You can use finely chopped straw, horse manure,
cellulose or similar fibers.
Oven Roof
This is a component many people want to skip; you must emphasis to the host that it is an
essential element and their responsibility. It’s not critical that the roof be built before the oven
workshop. If it’s not built a temporary shelter like a pop-up tent or tarp with ropes will be needed
to protect the oven in case of rain. Having enough overhang to protect the oven, and enough
clearance (from the oven door) are the most important design constraints. I am covering two
simple designs, but many more can be found by a simple google search. If you’re building an
oven with a chimney be sure to take this into account when designing the roof.
The easiest roof choice for a dry stone foundation is a shed roof, shown in the image on the left.
A gable roof could be build in the same way.
On a cement block foundation you can build the roof into the corners of the foundation reducing
the materials needed, shown in the image on the right. Be sure to leave a couple inches of rebar
sticking out of the corners to anchor the roof to the foundation, .
Tools for the course
Create your own tools and material check list to have prior to the course to ensure you bring
everything you need.
Basic tools list:
(1) wheelbarrow
(5) tarps (10x10ft)
(10) 5 gallon buckets
(4) trowels
(1) 4’ level
(1) 9” level
(2) tape measures
(1) string
(2) runners for screeding
(1) rubber mallet
(1) wire brush
(1) corded electric drill
(1) plaster mixer attachment
(3) shovels
(1) grinder with diamond blade
(6) dust masks
(2) safety glasses
(3) extension cords
(1) projector for slideshow (optional)
It is good to have your door form built ahead of the course. Be sure to bring this to the building
site (or the materials and tools to build it) and two thin wooden wedges. For the details on
building a door form see Technical details at the end.
The Course
Welcome to the course
Give the handouts for the course including a list of participants names and contacts. It’s good to
start with a simple go-around introduction. Ask people to state their name, where they are from,
what their interest is with ovens and what their goals are for the course. After the go-around give
participants an orientation of the site and facilities and ask if anyone has any special needs.
Once people have settled in, give a brief overview of the course.
Learning names is important! It shows that you value each individual and helps build a positive
group dynamic. Here’s a simple name game. Find something to toss (a ball of cob works good)
and form a circle, including yourself. Have each person says their own name as they passes the
ball either right or left. Go around the circle twice. Now have the participants lightly toss the ball
to someone else in the circle, saying that person’s name aloud. Keep going around until
everyone has had their name called a few times. Finish the game by passing the ball around the
circle again, but this time having everyone say the person’s name who is receiving the ball.
• Day 1 Morning
The course step-by-step
Set-up the site by organizing your tools and a place for taking breaks with water and
refreshments.
It’s good to have a large paper and markers (or a prepared schematic drawing of the oven) to
illustrate the different components, key features and ratios of the oven. The most critical ratio to
emphasize is the door being 63% of the inside of the dome apex. This is a good time to be
detailed about the rubble trench and foundation as you are standing in front of a built foundation
ready for the hearth and dome. It’s good practice to facilitate by asking questions, such as
“What is the purpose of the foundation?”. For information on foundations see page 39-40 of
BYOEO.
Identifying clay
Now you are ready to get into it! This is a hands-on learning experience so at every opportunity
get the participants to experience what you are facilitating first hand. Have everyone grab and
play with a piece of wet clay. Ask them what clay is and how to identify it. Acknowledge their
answers and reinforce the right ones then bring in your own answers. If you have a sample of
silt, it’s a good way for students to compare it with the clay.
Two tests I like to demonstrate are: the Ribbon Test, where you squish out a ribbon of clay
between your index and thumb (can’t be too wet) and the Squeak Test, where you hold a very
wet sample up to your ear and pinch and release it between thumb and index finger, getting a
good sound as well as feeling its stickiness. See Page 24-28 of BYOEO for information on clay
and more test you can demonstrate.
The hearth
It’s good to be technical in your build and to describe the optimum design and technique; yet it is
also good to emphasize the forgiving nature of cob. Encourage them by keeping it as simple as
you can.
I start this phase with a cob mix demo to use for the sub-hearth retaining ring. Always have one
bucket dedicated for a washing station for hands and feet to minimize water usage. Mixing
works well in pairs, so demonstrate with another person. Lay out a tarp and measure your first
mix (with nearly-pure clay; it’s 3 parts sand to 1 part clay). For more details on mixing see page
52-54 of BYOEO. Stomp it flat, and then roll it with the tarp. Stomp and repeat until you get what
we call “the baby seal” (when the mix is well incorporated and you roll it, it sticks together in the
form of a baby seal).
The sub hearth insulation should be a minimum of 3 inches, the more the better. This is a good
time to describe the difference between thermal mass and insulation, see page 92 - 93 of
BYOEO.
Be sure that the rubble in the foundation has been thoroughly tamped. If there are a lot of gaps
for the insulation to fall into, lay a burlap or landscape cloth and/or tamp some sand into the
rubble. Build the retaining ring larger than the hearth giving a minimum depth of 3” for the
insulation. Fill the ring with perlite and pack it firmly into all the corners of the ring. Cover the
perlite with a thin layer of sand to level the hearth bricks. Embed and level the two screeding
runners into the sand and walk them through the process.
Start laying the hearth by finding the middle of the door and lay the 5 or 6 hearth entrance brick
(where the door will go) with a 1 1/2 inch over hang from the edge of the foundation. Explain
that the purpose of the overhang is for easy removal of ash and coals. Measure from the inside
edge of the middle brick into the middle of the hearth 18” to find the center of the hearth. use a
string and two sticks or pencils to make a compass 18” long. Have one student hold one stick at
the middle point and another rotate around this access with the other stick lightly drawing the
outline of the 36” hearth in the sand. Lay the first bricks of the hearth demonstrating how to
“kiss” the bricks into place. Have the participants try their hand at it. Typically we reach midday
around finishing the hearth and take lunch.
• Day 1 Afternoon
The Sand Form
Participants might feel a little sleepy after eating lunch so you can do some stretching to get the
blood flowing. Demonstrate how to build the sand form. I emphasize using the outer hand as a
mold (for the outer surface) while pressing it into place with the inner hand. Sometimes
participants struggle with the balance of finesse and firmness that building the sand form takes.
Be patient and encouraging. Explain that the first 8” - 9” of the sand form goes straight up
vertically, to maximize the usable surface of the hearth. Once all the participants have tried their
hand at it interrupt them to give the arch demonstration. Get two participants to volunteer to
work on the arch while the others finish the sand form.
Once the sand form is finished show them how to cover it in wet news paper, explaining that this
provides a parting layer so you know where to stop when digging it out. Start on the top of the
dome and work toward the bottom. See page 36, 50-51 of BYOEO.
The Arch
Prepare the arch bricks (14-15 bricks) by soaking them for a minute. This will keep the dry
bricks from “stealing” moisture from the earthen mortar which could make it crack. Set the door
form and wedges into place and secure it with a stone or weight at the front and then pack some
sand on the back side. Demonstrate how to lay the first arch bricks of the hearth. Two
volunteers can work on the arch while others finish building the sand form. You can jump back
and forth between the two groups as they need help. For more details on building the arch see
Technical details at the end.
Thermal mass layer
This is your “heat battery”, which soaks up the heat from the fire and radiates it back into the
oven. If you made cob test bricks in your pre-course setup, this is a good way for the
participants to see the difference in mixes. If not, you can describe the process of trying different
percentages, see page 27 of BYOEO.
Find a flat and smooth place for stomping close to the oven. Using pre-soaked clay or a wet mix
makes mixing the clay and sand much easier. If the mix is too wet, make little mounds (after
stomping it thoroughly) across the surface of a tarp. It will likely get a bit dry and crusty on the
outer layer of the mounds. When you are ready to use it collect the mounds in the middle of the
tarp and stomp them out.
Give a demonstration on how to apply the cob mix for the thermal layer. See page 52-55 of
BYOEO. This can be difficult for some participants especially the ones with small hands. One
common issue is making the wall too thin. It’s essential to maintain at least 4” which is about the
width of a medium sized hand. Extra cob can always be shaved off. Another common issue is
keeping the 90° angle to the sand form. Most everyone has the tendency to make the top
(working) surface of thermal wall horizontal. if necessary give another demonstration showing
how to maintain the 90°, see illustration.
Typically we finish the first day after the thermal layer has been completed around 5pm. If you
haven’t finished, you can use your finger tips to dimple the working surface. These dimples will
give a more secure connection when you start up the next morning. Whether you finish or not,
the oven should be securely covered with a tarp to protect it from possible rain. Clean up the
work site and call it a day. Good work team!
• Day 1 evening
Slideshow
After dinner it’s nice to offer a slide show of different ovens (if feasible). This is an opportunity for
participants to see various types of foundations, roofs and oven designs and also enables you
to answer questions.
The morning of the second day you can do a check-in with the participants to see how they are
feeling and if there is anything from the previous day that needs clarification. Once the check-in
is complete, give a brief overview of the day. There will be less building on the second day, so it
gives you time for speaking more in-depth about oven components and design considerations.
• Day 2 Morning
Insulative layer
The optimum material choice for this is perlite but you can use vermiculite or wood shavings
(not sawdust, it should be like cork screws). You will need to have some participants prepare
slip for this mix. If they are using a drill with plaster attachment to mix be sure they hold the
bucket down by putting a foot on the top edge of the bucket. This will likely splash so be
prepared (watch for shoe laces). Show them to test if the slip has enough clay by dipping an
arm into the mixture. It should look as though you have a mud latex glove on (complete
coverage). Take out any remaining chunks once you reach the desired consistency.
Give a demonstration showing how to mix the insulation and slip together and how to test its
consistency. Be sure everyone handling the insulation is wearing a dust mask.
Once you have your first batch mixed give a demonstration on applying it on top of the thermal
layer. Break the participants into two groups, one group to mix and the other to apply. I
encourage participants to self-regulate by switch roles on their own (so everyone gets a chance
to try each job). If they are too caught-up in what they are doing, you might need to remind them
to change roles.
• Day 2 Afternoon
Plastering
Now that the insulation layer is complete, it needs to be protected by a earthen plaster. The
earthen plaster is the same cob mix but a little wetter and mixed with some type of fiber. For
fiber you can use horse manure, finely chopped straw, cellulose insulation or other such fibers.
Give a demonstration on applying the plaster. Usually this is one of the hardest skills for
participants to get.
here, I emphasize:
• Always using a clean wet trowel
• To use pressure with the second hand on the bottom of the blade of the trowel
• A wide stance for better leverage
• To gradually glide off of the mix as it run out
Like anything, it just takes doing it, so let them experiment. If required, give another
demonstration and explain what you’re doing. Once the plaster is finished you’re done with the
build section of this course.
Lime Finish
Lime is an extra layer of protection which is more water resistant than the earthen plaster,
though the oven will still need a roof. If the host wants a lime plaster finish, this will have to
happen once the oven is completely dry (about 1 month). You will need to score the surface of
the plaster layer to give it a texture to grip onto, this is easier to do when the earthen plaster is
still fresh. If you’re doing another oven course in the area you can come back and do the lime
finish at the end of that course. Lime is caustic so be sure to use rubber gloves, dust masks and
goggles. The lime finish is 3 parts sand to 1 part hydraulic lime. This is easiest to mix with a hoe
in a wheelbarrow. Dampen the dry plaster surface of the oven and apply the lime finish the
same way you did the earthen plaster.
Finishing up the course
A weekend oven course is not long enough to get into all the details of baking. Begin with the
basics of preparing and firing the oven, as well as an overview of the oven tools. If time allows
you can venture into baking instructions. After you’ve answered questions it’s time to celebrate a
successful workshop! It’s good to have printed certificates for the completion of the course for
each participant. Sign and date the certificates and hand them out, congratulating each
participant on their accomplishment.
Technical details
Determining the size of the rubble trench
This section explains how to figure out the trench size using the hearth diameter of the oven you
are building. First determine the outside diameter of the oven, with this equation:
hearth diameter + width of wall doubled = outside diameter of the oven
For example: 36” (Hearth) + 10” (4” Thermal, 4” Insulation, 2” Plaster) x 2 (both sides) = 56”
Outside diameter
Now determine the top surface of the foundation by adding the amount of surface you want
around the finished oven (doubled) to the outside diameter. In this example model I am saying I
want 4” all around.
4” x 2 + 56” = 64” The top surface of the hearth for this oven is 64” square.
The rubble trench should be a minimum of 2” bigger (on all sides) than the bottom of the oven’s
foundation.
A block foundation is vertical, meaning the bottom of the foundation will be the same size as the
top - 2” x 2 (all sides) + 64” = 68”. This oven’s trench for a block foundation is 68” square.
A dry stone foundation steps in as you build up, meaning the top surface of the foundation is
smaller than the bottom. I am estimating I will loose 7” on each side of a foundation that is 36”
high. 7” x 2 (all sides) + 64” = 78” square. The oven’s trench for this drystone foundation is 78”
square. The trench in any case should be a minimum of 16” - 18” deep.
Drainage
Slants the floor of the trench slightly leading to a drain pipe which empties to daylight (exiting
the earth). To maintain good drainage over many years, line the trench with landscape cloth
before it is filled with rubble (1 1/2” - 2” gravel). Compact the rubble by tamping it. By cutting the
landscape cloth extra large the excess can be flipped on top of the rubble filled trench and
secured under the first foundation stones. The sod can be saved to placed over the cloth
showing around the oven and on the ditch.
Building your door form
The door form supports the bricks as you build your arch. Depending on the size of your bricks
this could be a little different. The diagram below is using the standard size refractory fire brick
which measures 9” × 4.5” × 3”. By adding the brick height and mortar you can calculate where
the arch will begin.
After you get the first board cut into the shape of the door form, trace it and make a second one.
Secure some scrap wood (sandwiched) between the two door form boards to give it an even
depth. Put a few screws or a piece of wood on one side of the form to act as a handle to easily
remove the form from the finished arch.
Building the Arch
After the setting of the six bricks which make up the sides of the door, place the corner of the
first arching brick against the corner of the arch on the door form. Use a piece of cardboard or
paper as a template for the corner wedges. Cut four of these wedges and mortar them into
place. The image below shows the corner wedges outlined in white.
Once the participants reach the middle of the arch make a cardboard template from both the
front and back of the arch (due to mortar thickness, they may be different). Leave no space for
mortar on the key stones, make the templates as exact as possible. Trace the templates onto
two bricks and cut the two key stone bricks. Once these are in place put a piece of card board at
the bottom of the hole in-between the keystones and fill the hole with cob.
Oven use
Firing and baking in earth ovens
Getting to know your oven will take time and patience. Once you have made several small
drying fires and your oven is cured you are ready for your first bake!
Fire safety: It is important to have tools with long enough handles so you don’t need to reach
inside the oven.
The oven tools you need:
• peel
• rake
• mop
• poker
• metal container for coals
• water bucket
• door
You should also always have a 5 gallon bucket of water and a water source near by. Wear close
toed shoes and have leather gloves on hand. Each oven is unique as to the amount of time it
takes to get up to temperature and how long it will hold the heat. See oven tools section below.
Some variables:
• oven size
• amount of thermal mass
• efficiency of insulation
• quality of wood.
The more thermal mass your oven has the longer it will take it to get up to temp. (using more
fuel) and the longer it will hold heat with the variable of insulation efficiency. Firing time will also
vary depending on what you’re going to bake.
From my experience the basic baking thermometers are of no use in these ovens. See Oven
Preparation below for a basic low-tech way to check the temperature.
Starting your oven
To start the fire you should have:
• paper or birch bark
• some small kindling
• medium size wood
Build a small lincoln-log style fire just inside door way. This allows the fire to get sufficient air
when starting to create the draft. Once the draft is established you can use your rake to push
the fire to the middle of the of the hearth.
In this style oven the door is both the intake and exhaust. This means there is a stratification of
air: the cool air is being drawn in the bottom half of the door and the hot exhaust of the fire is
exiting the top half of the door. This is important to be aware of because the air exiting the top of
the door can burn you quickly: whether you’re leaning in to look or putting a log on the fire.
Managing the Fire
Once the oven is up to temperature, it will be too hot for baking. It takes between 1-3 hours to
fire a smaller home-sized oven (as it was built in this class). Have a long stick (poker) handy for
arranging the wood and always dip your tools in a 5 gallon bucket of water after using, to make
sure there are no embers on them. The air is being drawn in along the hearth so the fire needs
to be as open as possible to receive this air intake: create a “tunnel” so the air can pass along
the bottom of the fire. A lincoln-log approach works well; keeping the sides and back of the oven
clear so the air can reach all points of the fuel. It’s a “dance” that takes practice; having your
bread ready at the same time the oven is ready is the goal.
Oven Preparation
Once the oven is up to temperature, let the wood burn down to coals and spread them evenly
across the hearth. Wait about 20-30 minutes for the floor temperature to even out. Now you will
need your tools. Removing the coals can be the most dangerous part of the firing, so be sure
you have plenty of water on hand and all combustibles are at a distance. Use a large metal
container to rake the coals into (using a scoop is ideal) and then dowse the coals with water. Be
aware of steam it can burn! If your tools are wooden keep them wet. Once the majority of coals
are out, you will use a wet mop (or drape a towel over your rake as I do) and mop out the
majority of coals and ash. Don’t worry about getting it completely clean because you don’t want
to lose too much heat and you’ll be mopping it again later.
Now that the oven is empty, close it up. If you’re using a plug door, sufficiently wet a towel,
double it and drape it across the back (inside) of the door. Push the door into the opening.
Typically you should wet the towel again in 5-10 minutes (or it will burn through). After 30-40
minutes the heat should have evened out and you’re ready to check the oven temperature. Take
a small handful of white flour, open the door carefully and place the flour in a pile near the
middle of the oven hearth and close the door. Count 20 seconds and look at the pile. If it’s only
browned, your oven is ready to bake. If the top of the pile is burned (black) the air temp is too
hot. Mop the oven out again, close the door and wait 20-40 minutes and test again. If the edges
of flour touching the hearth are burned then the hearth is still too hot. Mop the oven out
thoroughly again, close the door and wait 10-20 minutes and test again. Repeat until the flour
only browns in 20 seconds. You are ready to now bake!
The Bake
Now your perfectly proofed loaves are ready to bake. You can bake in bread pans (they have
their advantages), though there is nothing like a hearth kissed loaf. Typically sourdough loaves
are either proofed (left to rise) in baskets or cradled in the folds of linen or cotton canvases. In
both cases flour the surface of the basket and the canvas before putting your loaves in. When
using linen, flour both sides heavily on the first use (using white flour; the bran of whole wheat is
too large) pushing it into the fibers. After this initial “priming” of the canvas with white flower, only
a light dusting will be needed in subsequent bakes: whole grain works best. Use a sifter to apply
the flour in a thin even coat.
Have a table or shelf set up to the side of the oven door (your dominant side). If using canvas
you’ll need to transport the loaves to the oven on the surface they were proofed on. Use a board
or table top that fits through your doorway without tilting. Baskets and pans can simply be
carried out. Now you need a peel, a razor blade and some flour.
Flour the peel, and transfer the loaf from its proofing place onto the peel (with bread pans you
just slide them in). If using canvas, place the peel next to the loaf on top of the canvas. Place
your hand on the other side of the loaf under the canvas, lift the canvas and roll the loaf onto the
peel. I put 2-3 loaves on a peel to save time and heat by loading the oven faster. Leave some
room in between the loaves or they will combine into one. With time and practice you will
loading your oven quickly You are finished loading the oven, which should be a quick and
smooth operation (it takes practice and failure).
You want it to be quick so you have an even bake, the first loaf has already baked the amount of
time it took to load the oven. Depending on your oven the bread could be done in 20 minutes.
Check your loaves by peeking if they are risen and look baked. Pull one out and tap on the
bottom: if it sounds hollow it is done. In the case of a second or third bake, leave the oven
empty 20 minutes for the thermal mass to reheat the air temperature in-between bakes. As the
oven temperature drops you can use it to bake different things like, pies and cookies, then leave
a stew in for a couple hours or throw some root vegetables in directly, be creative! After you are
all done with food, you can load your oven with your next load of wood to get it kiln dried for a
really great burn next time.
Baking Pizza
Baking pizza is totally different, as I assume you know from seeing it done. In baking pizza you
keep the fire in the oven and you don’t use a door. This is to have a very high air temperature to
cook the toppings. Fire your oven 1-2 hours, get a good coal base, spread the coals across the
floor, wait 20 min and push the coals to one side or the back of the oven (I like the side its easier
to see as it bakes). You should have some small hardwood pieces to keep feeding to the coals
to maintain a flame. Mop the hearth out and put you pizza in, you will need to rotate the pizza
quite soon. Keep a close eye on the side of the pizza facing the fire. Pull it out with your peel
when that side is golden, rotate and put back; typically a pizza only takes a few minutes.
Basic Sourdough Science
Most bacteria found in sourdough are lactobacilli, cousins of the bacteria that turn milk into
yogurt and cheese. These lactobacilli out number the yeasts in sourdough by as many as 100 to
1. Lactobacilli make acetic and lactic acids by converting sugars; this is what gives sourdough
its tang. These acids also deteriorate gluten, which is one reason sourdough bread is more
digestible. The lactobacilli also create aromatic compounds that infuse bread with flavors and
smells. The pH of a well fermented sourdough is around 3.8. Most microorganisms drop out of
competition at this point, but the wild yeasts in sourdough can tolerate the acids and still convert
sugars into carbon dioxide and ethanol making the bread rise.
Our digestive system works because of the good bacteria living therein, without them there
would be no digestion. Our entire existence directly depends on these friendly bacteria, which
help us convert the foods we eat into usable, absorbable nutrients. Everything we eat is broken
down into its individual make-up of amino acids (proteins), vitamins, carbohydrates (simple and
complex), fats, and more. Sourdough and other foods, using probiotic fermentation, are using
nature’s design for predigesting foods that our bodies need help to break down.
This is using living organisms to process your food, so you must get to know them... have
patience, pay attention, be observant, experiment and have fun!
It is alive!
Yes, sourdough is a living being, breathing, eating and transforming. This requires you to bring
awareness to another aspect of food preparation; using a living organism. This is a disclaimer.
Sourdough requires a relationship with this living culture: feeding, observing, messing up and
trying variations (keeping notes helps).
Just realize the culture is alive and everything from air temperature to humidity, handling and
time, affect the culture and the outcome of the bread. If you are the type of person that can’t
take failure, don’t even attempt to use sourdough... this isn’t to say with some experience you
won’t be able to get consistent results. Most likely it will take composting some of your attempts
and each time you will learn something; this is where observation and note taking can be very
helpful.
Not only will you be rewarded with great tasting breads and pancakes, it is also a very healthy
way to eat grains. Grains are actually very difficult for us to digest when they are uncultured.
Many of the allergies people experience with wheat consumption is actually the inability to
digest the grain. For some people sourdough has been found to be a ‘cure’ for this reaction.
Spelt is a grain that is very low in gluten, which is a good option for a more digestible bread;
sprouting your grains increases the digestibility even more. A well sprouted grain will use up the
majority of its gluten in the sprouting process.
Basic sourdough culture
Also known as a “mother” or “starter”. This wild yeast exists everywhere! It is only a matter of
attracting them. You attract them by creating their ideal environment through fermenting sugars.
Preferably you are using fresh spring or well water. If you have no other option than chlorinated
tap water you can let the water sit out in a large bowl for 24 hours before use; this way the
chlorine will evaporate. Add 1/2 cup flour in a bowl and mix 1 cup of water by adding slowly
(prevents lumping). Cover the bowl with a cloth or paper towel. Each day add a table spoon of
flour and stir. The stirring oxygenates the mixture giving the bacterias and yeast the air they
need. Add fresh water as needed to keep the mixture a thick liquid. Within 3-5 days you should
start to smell the fermentation happening. I recommended using whole grain flour because it
has all the various components of the grain, though you can use white. It should now be bubbly.
If it’s not, keep waiting, feeding and stirring. Once you have the bubbles, you got it! You can
store your starter in the fridge as this slows the bacterias metabolism down. You only need to
refresh it every 2 weeks (and it can go longer), Without refrigeration, depending on the air
temperature you will need to refresh daily or every couple of days. Freezing it is also possible;
to use, thaw and refresh.
When using the starter to make bread, replace the culture used with fresh water and flour.
ALWAYS KEEP SOME CULTURE SET ASIDE or you will have to start from the beginning
again! When you’re not using your starter, refresh it every 2-3 weeks. Compost half of it and
replace with fresh water and flour.
Sourdough has so many variables, which makes it very hard to write a recipes. There are many
sites online that can help you get started, see resources below. There is also a nice recipe on
page 76 - 83 of BYOEO
Oven Tool
In this section I give a brief overview of the essential tools for baking in your oven. Many people
skip this step (of making or buying tools) and end up using baking pans. By using baking pans
you are lowering the efficiency of the oven, as the bottom surface of the pan will only touch the
hearth in a few places. Baking directly on the hearth is ideal for both taste and efficiency
(especially for pizza). To bake directly on the hearth you will need some tools. These tools can
be purchased but they are simple to make yourself.
Resources
Kiko Denzer - BYOEO - http://www.handprintpress.com/bookstore/build-your-own-earth-oven/
Facilitating workshops - Seeds of Change PDF - https://we.riseup.net/assets/25682/
FacilitatingWorkshops.pdf
Simha Bode - Google photo album of ovens - https://plus.google.com/photos/
113657341843007171761/albums/6132073247849742129?authkey=CJyKo6yviMOKjAE
Simha Bode - Earth Oven Material makeup— Lime cycle and more - https://drive.google.com/
file/d/0B5t_blchjdPtVmVhclNtTjcxWVk/view?usp=sharing
By a student of Kiko - Instructables earth oven guide - http://www.instructables.com/id/Build-a-
Wood-Fired-Earth-Oven/
Mark Krawczyk - Earth Oven Construction Simplified - https://www.dropbox.com/home/YM
%20Oven%202014/Oven%20Docs?preview=Oven+Procedures.gen.rtf
Canadian Museum of History - The Bread Ovens of Quebec - http://www.historymuseum.ca/
cmc/exhibitions/tresors/barbeau/mbp0501e.shtml
Alan Scott and Daniel Wing - The Bread Builders - http://books.google.ch/books?
id=VA6y1EMnkpYC&lpg=PA132&ots=W7XY_CPQKe&dq=quebecois-ovens%20doors%20wood
%20fired&pg=PP1#v=onepage&q&f=false
The Fresh Loaf - Earth oven and Baking forum - http://www.thefreshloaf.com/forum
The sourdough school - http://www.sourdough.co.uk/sourdough-blogs/
Discovering Sourdough - http://www.northwestsourdough.com/discover/
Bode Earth Ovens on Facebook - https://www.facebook.com/BodeEarthOvens?ref=hl
Simha Bode - geomergent@gmail.com

More Related Content

Similar to Teachers manual to facilitating an earth oven course 1

Worldview_Weekends_2014_v3
Worldview_Weekends_2014_v3Worldview_Weekends_2014_v3
Worldview_Weekends_2014_v3Andrew McPeak
 
Reflective portfolio
Reflective portfolioReflective portfolio
Reflective portfoliojobbo1
 
[Chapters] USC Education (Re)Open Community Listening Circle Toolkit
[Chapters] USC Education (Re)Open Community Listening Circle Toolkit[Chapters] USC Education (Re)Open Community Listening Circle Toolkit
[Chapters] USC Education (Re)Open Community Listening Circle ToolkitDanielleShingleton
 
Donohue harney-transcript-1
Donohue harney-transcript-1Donohue harney-transcript-1
Donohue harney-transcript-1John O. Harney
 
Global Learning and Collaboration - Key ideas and themes
Global Learning and Collaboration - Key ideas and themesGlobal Learning and Collaboration - Key ideas and themes
Global Learning and Collaboration - Key ideas and themesJulie Lindsay
 
Module 2 and 3 final alba eunice ariel
Module 2 and 3 final alba eunice arielModule 2 and 3 final alba eunice ariel
Module 2 and 3 final alba eunice arielAlbaIrisAdamesMesa
 
A relational approach to intergenerational learning
A relational approach to intergenerational learningA relational approach to intergenerational learning
A relational approach to intergenerational learningaliceproject
 
Developing a District Incubator for PD - NFUSSD 2014
Developing a District Incubator for PD - NFUSSD 2014Developing a District Incubator for PD - NFUSSD 2014
Developing a District Incubator for PD - NFUSSD 2014North Kansas City Schools
 
Integrating global issues in the creative English language classroom.
Integrating global issues in the creative English language classroom.Integrating global issues in the creative English language classroom.
Integrating global issues in the creative English language classroom.Little Daisy
 
Let's Cook Together!
Let's Cook Together!Let's Cook Together!
Let's Cook Together!aliceproject
 
Purposeful education in hyperactive times
Purposeful education in hyperactive timesPurposeful education in hyperactive times
Purposeful education in hyperactive timesPhuti Ragophala
 
500 Word Essay Handwritten. How Many Pa. Online assignment writing service.
500 Word Essay Handwritten. How Many Pa. Online assignment writing service.500 Word Essay Handwritten. How Many Pa. Online assignment writing service.
500 Word Essay Handwritten. How Many Pa. Online assignment writing service.Robynn Dixon
 
EDL 318 Curriculum Project
EDL 318 Curriculum ProjectEDL 318 Curriculum Project
EDL 318 Curriculum ProjectCody Dye
 
Leonardo Corporate Learning Award Dossier Review 2013
Leonardo Corporate Learning Award Dossier Review 2013Leonardo Corporate Learning Award Dossier Review 2013
Leonardo Corporate Learning Award Dossier Review 2013Peter Palme 高 彼特
 
Levers For Change
Levers For ChangeLevers For Change
Levers For Changeanne1pia
 

Similar to Teachers manual to facilitating an earth oven course 1 (20)

Worldview_Weekends_2014_v3
Worldview_Weekends_2014_v3Worldview_Weekends_2014_v3
Worldview_Weekends_2014_v3
 
Reflective portfolio
Reflective portfolioReflective portfolio
Reflective portfolio
 
AOH Kenya 2013 Harvest
AOH Kenya 2013 Harvest AOH Kenya 2013 Harvest
AOH Kenya 2013 Harvest
 
[Chapters] USC Education (Re)Open Community Listening Circle Toolkit
[Chapters] USC Education (Re)Open Community Listening Circle Toolkit[Chapters] USC Education (Re)Open Community Listening Circle Toolkit
[Chapters] USC Education (Re)Open Community Listening Circle Toolkit
 
Donohue harney-transcript-1
Donohue harney-transcript-1Donohue harney-transcript-1
Donohue harney-transcript-1
 
Global Learning and Collaboration - Key ideas and themes
Global Learning and Collaboration - Key ideas and themesGlobal Learning and Collaboration - Key ideas and themes
Global Learning and Collaboration - Key ideas and themes
 
Module 2 and 3 final alba eunice ariel
Module 2 and 3 final alba eunice arielModule 2 and 3 final alba eunice ariel
Module 2 and 3 final alba eunice ariel
 
479936.pptx.ppt
479936.pptx.ppt479936.pptx.ppt
479936.pptx.ppt
 
School for all part B.pdf
School for all part B.pdfSchool for all part B.pdf
School for all part B.pdf
 
A relational approach to intergenerational learning
A relational approach to intergenerational learningA relational approach to intergenerational learning
A relational approach to intergenerational learning
 
Developing a District Incubator for PD - NFUSSD 2014
Developing a District Incubator for PD - NFUSSD 2014Developing a District Incubator for PD - NFUSSD 2014
Developing a District Incubator for PD - NFUSSD 2014
 
Integrating global issues in the creative English language classroom.
Integrating global issues in the creative English language classroom.Integrating global issues in the creative English language classroom.
Integrating global issues in the creative English language classroom.
 
Future Ready?
Future Ready?Future Ready?
Future Ready?
 
Let's Cook Together!
Let's Cook Together!Let's Cook Together!
Let's Cook Together!
 
Purposeful education in hyperactive times
Purposeful education in hyperactive timesPurposeful education in hyperactive times
Purposeful education in hyperactive times
 
500 Word Essay Handwritten. How Many Pa. Online assignment writing service.
500 Word Essay Handwritten. How Many Pa. Online assignment writing service.500 Word Essay Handwritten. How Many Pa. Online assignment writing service.
500 Word Essay Handwritten. How Many Pa. Online assignment writing service.
 
EDL 318 Curriculum Project
EDL 318 Curriculum ProjectEDL 318 Curriculum Project
EDL 318 Curriculum Project
 
Leonardo Corporate Learning Award Dossier Review 2013
Leonardo Corporate Learning Award Dossier Review 2013Leonardo Corporate Learning Award Dossier Review 2013
Leonardo Corporate Learning Award Dossier Review 2013
 
Shirley Reushle Plenary APLEC2014
Shirley Reushle Plenary APLEC2014Shirley Reushle Plenary APLEC2014
Shirley Reushle Plenary APLEC2014
 
Levers For Change
Levers For ChangeLevers For Change
Levers For Change
 

More from Simha Bode

Is syllabus edited by simha
Is syllabus edited by simhaIs syllabus edited by simha
Is syllabus edited by simhaSimha Bode
 
Simha’s curriculum for i.s. leadership training
Simha’s curriculum for i.s. leadership trainingSimha’s curriculum for i.s. leadership training
Simha’s curriculum for i.s. leadership trainingSimha Bode
 
I.S. permaculture handout
I.S. permaculture handoutI.S. permaculture handout
I.S. permaculture handoutSimha Bode
 
Gaia schedule LIPD
Gaia schedule LIPDGaia schedule LIPD
Gaia schedule LIPDSimha Bode
 
OP5 timeline of un/learnings and outcomes
OP5 timeline of un/learnings and outcomesOP5 timeline of un/learnings and outcomes
OP5 timeline of un/learnings and outcomesSimha Bode
 
Orientation integrative ecosocial design
Orientation integrative ecosocial designOrientation integrative ecosocial design
Orientation integrative ecosocial designSimha Bode
 
Passive solar heating and cooling
Passive solar heating and coolingPassive solar heating and cooling
Passive solar heating and coolingSimha Bode
 
Op4 outline : review
Op4 outline : reviewOp4 outline : review
Op4 outline : reviewSimha Bode
 
Living culture of bread
Living culture of bread Living culture of bread
Living culture of bread Simha Bode
 
Generation now communication
Generation now   communicationGeneration now   communication
Generation now communicationSimha Bode
 
Community booklet
Community bookletCommunity booklet
Community bookletSimha Bode
 

More from Simha Bode (13)

Is syllabus edited by simha
Is syllabus edited by simhaIs syllabus edited by simha
Is syllabus edited by simha
 
Simha’s curriculum for i.s. leadership training
Simha’s curriculum for i.s. leadership trainingSimha’s curriculum for i.s. leadership training
Simha’s curriculum for i.s. leadership training
 
I.S. permaculture handout
I.S. permaculture handoutI.S. permaculture handout
I.S. permaculture handout
 
Oven tools
Oven toolsOven tools
Oven tools
 
Gaia schedule LIPD
Gaia schedule LIPDGaia schedule LIPD
Gaia schedule LIPD
 
OP5 outline
OP5 outlineOP5 outline
OP5 outline
 
OP5 timeline of un/learnings and outcomes
OP5 timeline of un/learnings and outcomesOP5 timeline of un/learnings and outcomes
OP5 timeline of un/learnings and outcomes
 
Orientation integrative ecosocial design
Orientation integrative ecosocial designOrientation integrative ecosocial design
Orientation integrative ecosocial design
 
Passive solar heating and cooling
Passive solar heating and coolingPassive solar heating and cooling
Passive solar heating and cooling
 
Op4 outline : review
Op4 outline : reviewOp4 outline : review
Op4 outline : review
 
Living culture of bread
Living culture of bread Living culture of bread
Living culture of bread
 
Generation now communication
Generation now   communicationGeneration now   communication
Generation now communication
 
Community booklet
Community bookletCommunity booklet
Community booklet
 

Recently uploaded

SOCIAL AND HISTORICAL CONTEXT - LFTVD.pptx
SOCIAL AND HISTORICAL CONTEXT - LFTVD.pptxSOCIAL AND HISTORICAL CONTEXT - LFTVD.pptx
SOCIAL AND HISTORICAL CONTEXT - LFTVD.pptxiammrhaywood
 
APM Welcome, APM North West Network Conference, Synergies Across Sectors
APM Welcome, APM North West Network Conference, Synergies Across SectorsAPM Welcome, APM North West Network Conference, Synergies Across Sectors
APM Welcome, APM North West Network Conference, Synergies Across SectorsAssociation for Project Management
 
Arihant handbook biology for class 11 .pdf
Arihant handbook biology for class 11 .pdfArihant handbook biology for class 11 .pdf
Arihant handbook biology for class 11 .pdfchloefrazer622
 
mini mental status format.docx
mini    mental       status     format.docxmini    mental       status     format.docx
mini mental status format.docxPoojaSen20
 
Russian Call Girls in Andheri Airport Mumbai WhatsApp 9167673311 💞 Full Nigh...
Russian Call Girls in Andheri Airport Mumbai WhatsApp  9167673311 💞 Full Nigh...Russian Call Girls in Andheri Airport Mumbai WhatsApp  9167673311 💞 Full Nigh...
Russian Call Girls in Andheri Airport Mumbai WhatsApp 9167673311 💞 Full Nigh...Pooja Nehwal
 
Mastering the Unannounced Regulatory Inspection
Mastering the Unannounced Regulatory InspectionMastering the Unannounced Regulatory Inspection
Mastering the Unannounced Regulatory InspectionSafetyChain Software
 
1029-Danh muc Sach Giao Khoa khoi 6.pdf
1029-Danh muc Sach Giao Khoa khoi  6.pdf1029-Danh muc Sach Giao Khoa khoi  6.pdf
1029-Danh muc Sach Giao Khoa khoi 6.pdfQucHHunhnh
 
Organic Name Reactions for the students and aspirants of Chemistry12th.pptx
Organic Name Reactions  for the students and aspirants of Chemistry12th.pptxOrganic Name Reactions  for the students and aspirants of Chemistry12th.pptx
Organic Name Reactions for the students and aspirants of Chemistry12th.pptxVS Mahajan Coaching Centre
 
Grant Readiness 101 TechSoup and Remy Consulting
Grant Readiness 101 TechSoup and Remy ConsultingGrant Readiness 101 TechSoup and Remy Consulting
Grant Readiness 101 TechSoup and Remy ConsultingTechSoup
 
1029 - Danh muc Sach Giao Khoa 10 . pdf
1029 -  Danh muc Sach Giao Khoa 10 . pdf1029 -  Danh muc Sach Giao Khoa 10 . pdf
1029 - Danh muc Sach Giao Khoa 10 . pdfQucHHunhnh
 
Disha NEET Physics Guide for classes 11 and 12.pdf
Disha NEET Physics Guide for classes 11 and 12.pdfDisha NEET Physics Guide for classes 11 and 12.pdf
Disha NEET Physics Guide for classes 11 and 12.pdfchloefrazer622
 
The byproduct of sericulture in different industries.pptx
The byproduct of sericulture in different industries.pptxThe byproduct of sericulture in different industries.pptx
The byproduct of sericulture in different industries.pptxShobhayan Kirtania
 
microwave assisted reaction. General introduction
microwave assisted reaction. General introductionmicrowave assisted reaction. General introduction
microwave assisted reaction. General introductionMaksud Ahmed
 
BASLIQ CURRENT LOOKBOOK LOOKBOOK(1) (1).pdf
BASLIQ CURRENT LOOKBOOK  LOOKBOOK(1) (1).pdfBASLIQ CURRENT LOOKBOOK  LOOKBOOK(1) (1).pdf
BASLIQ CURRENT LOOKBOOK LOOKBOOK(1) (1).pdfSoniaTolstoy
 
Accessible design: Minimum effort, maximum impact
Accessible design: Minimum effort, maximum impactAccessible design: Minimum effort, maximum impact
Accessible design: Minimum effort, maximum impactdawncurless
 
BAG TECHNIQUE Bag technique-a tool making use of public health bag through wh...
BAG TECHNIQUE Bag technique-a tool making use of public health bag through wh...BAG TECHNIQUE Bag technique-a tool making use of public health bag through wh...
BAG TECHNIQUE Bag technique-a tool making use of public health bag through wh...Sapna Thakur
 
Software Engineering Methodologies (overview)
Software Engineering Methodologies (overview)Software Engineering Methodologies (overview)
Software Engineering Methodologies (overview)eniolaolutunde
 
Presentation by Andreas Schleicher Tackling the School Absenteeism Crisis 30 ...
Presentation by Andreas Schleicher Tackling the School Absenteeism Crisis 30 ...Presentation by Andreas Schleicher Tackling the School Absenteeism Crisis 30 ...
Presentation by Andreas Schleicher Tackling the School Absenteeism Crisis 30 ...EduSkills OECD
 

Recently uploaded (20)

INDIA QUIZ 2024 RLAC DELHI UNIVERSITY.pptx
INDIA QUIZ 2024 RLAC DELHI UNIVERSITY.pptxINDIA QUIZ 2024 RLAC DELHI UNIVERSITY.pptx
INDIA QUIZ 2024 RLAC DELHI UNIVERSITY.pptx
 
SOCIAL AND HISTORICAL CONTEXT - LFTVD.pptx
SOCIAL AND HISTORICAL CONTEXT - LFTVD.pptxSOCIAL AND HISTORICAL CONTEXT - LFTVD.pptx
SOCIAL AND HISTORICAL CONTEXT - LFTVD.pptx
 
APM Welcome, APM North West Network Conference, Synergies Across Sectors
APM Welcome, APM North West Network Conference, Synergies Across SectorsAPM Welcome, APM North West Network Conference, Synergies Across Sectors
APM Welcome, APM North West Network Conference, Synergies Across Sectors
 
Arihant handbook biology for class 11 .pdf
Arihant handbook biology for class 11 .pdfArihant handbook biology for class 11 .pdf
Arihant handbook biology for class 11 .pdf
 
mini mental status format.docx
mini    mental       status     format.docxmini    mental       status     format.docx
mini mental status format.docx
 
Russian Call Girls in Andheri Airport Mumbai WhatsApp 9167673311 💞 Full Nigh...
Russian Call Girls in Andheri Airport Mumbai WhatsApp  9167673311 💞 Full Nigh...Russian Call Girls in Andheri Airport Mumbai WhatsApp  9167673311 💞 Full Nigh...
Russian Call Girls in Andheri Airport Mumbai WhatsApp 9167673311 💞 Full Nigh...
 
Mastering the Unannounced Regulatory Inspection
Mastering the Unannounced Regulatory InspectionMastering the Unannounced Regulatory Inspection
Mastering the Unannounced Regulatory Inspection
 
1029-Danh muc Sach Giao Khoa khoi 6.pdf
1029-Danh muc Sach Giao Khoa khoi  6.pdf1029-Danh muc Sach Giao Khoa khoi  6.pdf
1029-Danh muc Sach Giao Khoa khoi 6.pdf
 
Organic Name Reactions for the students and aspirants of Chemistry12th.pptx
Organic Name Reactions  for the students and aspirants of Chemistry12th.pptxOrganic Name Reactions  for the students and aspirants of Chemistry12th.pptx
Organic Name Reactions for the students and aspirants of Chemistry12th.pptx
 
Grant Readiness 101 TechSoup and Remy Consulting
Grant Readiness 101 TechSoup and Remy ConsultingGrant Readiness 101 TechSoup and Remy Consulting
Grant Readiness 101 TechSoup and Remy Consulting
 
1029 - Danh muc Sach Giao Khoa 10 . pdf
1029 -  Danh muc Sach Giao Khoa 10 . pdf1029 -  Danh muc Sach Giao Khoa 10 . pdf
1029 - Danh muc Sach Giao Khoa 10 . pdf
 
Disha NEET Physics Guide for classes 11 and 12.pdf
Disha NEET Physics Guide for classes 11 and 12.pdfDisha NEET Physics Guide for classes 11 and 12.pdf
Disha NEET Physics Guide for classes 11 and 12.pdf
 
The byproduct of sericulture in different industries.pptx
The byproduct of sericulture in different industries.pptxThe byproduct of sericulture in different industries.pptx
The byproduct of sericulture in different industries.pptx
 
microwave assisted reaction. General introduction
microwave assisted reaction. General introductionmicrowave assisted reaction. General introduction
microwave assisted reaction. General introduction
 
BASLIQ CURRENT LOOKBOOK LOOKBOOK(1) (1).pdf
BASLIQ CURRENT LOOKBOOK  LOOKBOOK(1) (1).pdfBASLIQ CURRENT LOOKBOOK  LOOKBOOK(1) (1).pdf
BASLIQ CURRENT LOOKBOOK LOOKBOOK(1) (1).pdf
 
Accessible design: Minimum effort, maximum impact
Accessible design: Minimum effort, maximum impactAccessible design: Minimum effort, maximum impact
Accessible design: Minimum effort, maximum impact
 
Advance Mobile Application Development class 07
Advance Mobile Application Development class 07Advance Mobile Application Development class 07
Advance Mobile Application Development class 07
 
BAG TECHNIQUE Bag technique-a tool making use of public health bag through wh...
BAG TECHNIQUE Bag technique-a tool making use of public health bag through wh...BAG TECHNIQUE Bag technique-a tool making use of public health bag through wh...
BAG TECHNIQUE Bag technique-a tool making use of public health bag through wh...
 
Software Engineering Methodologies (overview)
Software Engineering Methodologies (overview)Software Engineering Methodologies (overview)
Software Engineering Methodologies (overview)
 
Presentation by Andreas Schleicher Tackling the School Absenteeism Crisis 30 ...
Presentation by Andreas Schleicher Tackling the School Absenteeism Crisis 30 ...Presentation by Andreas Schleicher Tackling the School Absenteeism Crisis 30 ...
Presentation by Andreas Schleicher Tackling the School Absenteeism Crisis 30 ...
 

Teachers manual to facilitating an earth oven course 1

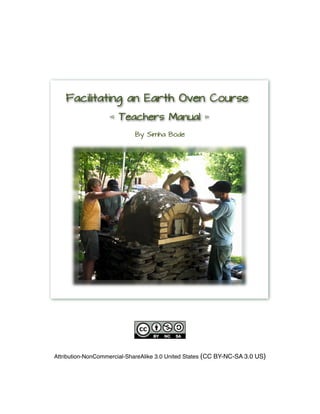
  • 2. Facilitating an Earth Oven Course Teachers manual A How-to Manual - Including Oven Use and Sourdough basics By Simha Bode Introduction Facilitating a hands-on earth oven course is a beautiful way to connect people and create community. I hope this manual will help you with all of the logistics of running your own successful oven course. The first section of this book is about the cultural context of ovens and the role that teaching an oven workshop has in creating community. The second section is the pre-course logistics of setting up an oven course. The third section is a detailed technical guide to teaching an oven course using a specific oven design as a guide. The fourth section has details on building specifics. The fifth section covers the use of an earth oven, building oven tools and the basics of sourdough. The trade skill of natural building has gained a lot of popularity over the past few decades. There are many reasons for this growing trend: accessibility and purity of the medium and materials, esthetics and artistic potentials, work-party dynamics and embodied-energy footprints among others. Some of the opportunities and resources to learn these skills are through workshops, do-it-yourself guides, volunteering and work-trades. Once you have gained the skill you can apprentice as a co-teacher under a teacher you respect. Just as you learned the skill of the trade by doing it with someone guiding you, you can learn to teach. Learning a skill is one thing, but learning to teach that skill is another. You can be a very skilled trades person and not know how to transmit that skill to others effectively. As someone who has been building earth ovens for a decade and just recently started to teach, I realized there is a lack of resources for teachers. I believe this dynamic of accumulating best practices for teachers is just beginning to find its way into the various fields. That is where this book comes in. I wanted to create a guide that would help someone who has built several ovens to teach their own oven workshops. The context of ovens in todays culture In the name of progress, our society is pushing towards a more industrialized culture. This contemporary worldview of progress has created many paradoxes. For example, never before have we had this level of global connectivity, yet our local communities are fragmented and struggling. Another example is our great success in creating time saving technologies, which have led to a fast paced life of stress. There are many paradoxes in our culture today and the root cause of this confusion is the loss of real community. Real community is the face to face
  • 3. sharing of our lives through spending time, listening, helping, creating, dreaming, consoling and celebrating with each other. “I think we risk becoming the best informed society that has ever died of ignorance.” ― Reuben Blades There are many people and organizations around the world working locally to create community. Here are a few examples of the organizations tackling this issue on a global level: Transition towns, Ecovillages, Permaculture guilds, World Cafes, Time banks and Natural building schools. These organizations get people involved and invested in their local community through gathering and connecting people in a common goal and vision of life. The core theme in creating community is building and improving our relations. Why are ovens important in this movement to heal our relations and create community? Since time immemorial three central pillars of community stand out: fire, food and building. Wood fired ovens have all three of these community pillars! Traditionally in Europe, ovens were in the town- square or church. Residents would bring their dough to be baked by the village baker. Ovens metaphorically represented the heart of the community. These central meeting points could also act as a community hub where discussion on pressing local topics or announcements could be made. The old world trades of artisan bread and oven building connect people around the common necessity of sustenance. Now more than ever people are yearning for this connectivity and community. A new culture is emerging and just as before, community and food are central to its expression. Earth ovens and natural building courses have an important role to play in establishing this emerging culture. The role of facilitating The word teach has different psychological connotations for everyone, many of which are rooted in our experiences at school. This may just be semantics, but I prefer to use the word facilitate. Facilitate means to make easy or render less difficult, stemming from the Latin word facilis “easy”. An assumption of teaching is that students are empty vessels that the teacher must fill. This assumption disconnects the teacher from the mutual exchange which makes learning wholesome and unifying. When we facilitate we can be open and ready to learn something ourselves, acknowledging that we all have different skills and knowledge to share with each other. This interpersonal dynamic of facilitating brings personal experiences and inspirations into the open. Another concept that embodies the word facilitate is what I would call collaborative leadership. I would describe some of the roles of a collaborative leader as: being a good listener, directing the flow of dialogue, using questions for engagement and feedback, actively initiating, proactive in personal connections and openness, empowerment through recognition, and finally connecting and translating first hand experience into stories and illustrations. These roles of a collaborative leader are also foundational dynamics of community. As Kiko Denzer pointed out to me in our dialogue on teaching: “What we build together is not ovens, or buildings, but stories. Stories provide us, over time, with the building blocks of culture. Ultimately, what I'm hoping people learn from oven workshops is to think of themselves not as consumers, but as participants in the work of culture”.
  • 4. To heal the presently fragmented culture, we need to weave our stories together to create our common story. Facilitating is one of the most potent opportunities to do this. Essentially this is an opportunity to empower ourselves and others by instilling self-confidence and giving the experience of community through team work and dialogue. “True teachers are those who use themselves as bridges over which they invite their students to cross; then, having facilitated their crossing, joyfully collapse, encouraging them to create their own.” ― Nikos Kazantzakis Building an earth oven is a great introductory project to community building for many reasons. It is a fairly quick project with a satisfying outcome. Participants leave the course with a feeling of personal achievement and community bonding. Working earthen materials with our feet and hands links us to our most common connection, the Earth. It is a gateway into larger natural building projects which also build community. I first started to facilitate earth oven courses as a co-facilitator. This role of apprenticing as a facilitator allowed me to experience facilitating without having the entire burden of fulfilling all the logistics of the course while being in the spot light. Being freed of the full responsibility allowed me to step-back and observe and then step forward and engage. This process helped me to take on the role as facilitator incrementally and with intention. If you are new to facilitating, I highly recommend starting out as a co-facilitator. It is ideal to be familiar with building and baking with the oven model you choose to facilitate in a course. The more experiences and stories you have with this oven model the deeper and richer your course will be. One of the most valuable yields from having experience with your ovens comes from the mistakes you made. It is these mistakes that give you the ability to lessen the learning curve for your students. These experiences can increase your students ability to succeed as well as instilling fortitude and persistence. In this new culture, we need the ability to see failure as a stepping stone to progress. Facilitating best practices Be professional and fun - Adopt an equanimous relationship with all participants of the course; be organized and punctual while having a good time. Take interest in the participants - Learn their names and help them get acquainted with each other’s names, by playing a name game for example. Find out their experience and interests associated with oven building; some may want to be bakers and others oven builders. Be a good listener while staying on track - It is easy for questions to sidetrack the course. If a question is too much of a tangent, let them know when you will be covering that topic later in the course. Be a good facilitator - Encourage them to be professional by not playing favorites with other participants, engage shy people by giving them tasks, give participants tasks that meet their abilities (elders, youth, handicapped), mix up groups and pairings, rotate tasks, be sure to gather everyone for demos.
  • 5. Be clear in your orientation - Give overviews of the next steps, use repetition to help participants stay on track, open the space for questions after each new step and demonstration, continually clarify things which may be confusing. Have a confident presence - Be honest with your own experience level. If you are unsure about something tell the truth and get back to them with answers. Be relaxed about participants skill level and use positive reinforcement. Example Outline of a weekend course Below is an example course outline which you can use to create your own and give it to participants as a handout. Day 1 Morning • Welcome and orientation • Check-in - Introductions, oven experience and student course goals • Introduction to the course and context • Facilities and site orientation • Overview of the order of the days • Oven design - Brief overview of oven components • Drainage - rubel trench • Foundation overview • Hearth • Oven dome - Scale and Ratio • Roof • Siting/Foundations • Mix demo - use mix to build the retaining ring of cob for the hearth bricks • Build the Hearth • Lunch Day 1 Afternoon • Identifying building materials and developing a mix • Building the sand form, arch and thermal mass layer of dome • Tool and site cleaning/organizing Day 1 Evening • Oven slideshow and discussion Day 2 Morning • Personal check-in and clarification • Overview of day - logistics • Demo - insulation mix (slip mixing) • Mixing and building the insulation layer • Lunch
  • 6. Day 2 Afternoon • Demo - Earthen plaster mixing and application • Application of earthen plaster • lecture/demo - applying a lime finish plaster (demo if possible) • Discussion of firing and baking in your oven • Presentation of course certificate An illustrated technical guide Since I started building ovens in 2006 I have always referred to Kiko Denzer’s book Build Your Own Earth Oven (which I refer to in this manual as BYOEO) for guidance. It is a beautifully illustrated and detailed manual for beginners to jump in and build their own oven. Kiko covers many oven design variations and options. For this manual I am using my process of facilitating the construction of a 36” hearth oven as an example. Though I get into the detail of building this specific oven you can use your own design instead. You will find tips and best practices for teaching that can be applied to any design. I choose to use this particular model for my courses because it is an efficient and versatile home size oven. If you want to facilitate an oven course and have yet to build one, get Kiko’s book, build and bake in a few ovens and then come back to this manual. Double click the images in this ebook to view them full size. This technical guide is broken into four main sections: 1. Pre-course • making an agreement with the course host • advising the host on building the foundation and roof • a list of the materials and tools that will be needed for the course
 2. Course • facilitating instructions of the step by step build • comprehensive learning • wrapping up the course
 3. Technical details • Calculating the size of a rubble trench • Building a door form • Arch details 4. Oven use • details of firing and baking in earth ovens • guide on building the tools including the door • information on sourdough
  • 7. Pre-course Host agreement First you will need to find a host for the workshop. This can take time, so start early! Connect with regional natural building groups, local permaculture guilds, group venue hosts, neighbors and friends. It is important to be clear with what your services include and the responsibility of the host. Create a project proposal with all the details and use this as a contract. Be very clear to the host that the material expenses and building of the foundation and roof are his/her responsibility. If possible make a site visit while consulting, but if you can’t, stay in close contact to ensure that the requirements are met for the pre-course set-up. Below, I cover some of the important factor you will want to communicate to the host. Siting the oven These are factors to consider when you or the host is choosing the location and orientation of the oven: • Municipal zoning • Door facing away from prevailing winds • Good drainage (high and dry) • Near access to fire wood and water • Near kitchen (best if oven door is visible from the kitchen) • Safe distance from flammables • Enough work room in front of oven • Good roof clearance The foundation Emphasize the importance of drainage to the host. When siting the oven take into consideration spring runoff and indicator species such as sedge to avoid wet zones.
  • 8. The rubble trench needs to be slightly larger than the foundation so it drains properly. For more details on drainage and the equations to determine the size of the rubble trench see Technical details at the end. There are several options for a foundation; I will cover the two recommended for long term ovens, dry-stone and cement block. It is important to survey the needs of your host to see that they fit within the confines of what is possible for the course. Dry stone foundation • Start larger than the calculated top surface of foundation, the stones step in as you build up • The corner stones should weave long face pointing every other side • Save flat stones for the top • Use odd shaped large stones on the ground level Block foundation • Use surface bond on both inside and outside faces of the walls or standard mortar technique • Corner blocks weave long face pointing every other side - no standing seams • Use rebar in corners and fill with concrete. Leaving a couple inches of rebar sticking above the blocks allows for attaching a roof • For a stronger base fill all blocks with concrete • Walls are vertical - bottom of the foundation is the same size as the top Once the rubble trench and foundation are complete fill the base with rubble (its recommended to use mixed sizes or mix with sand). It is a good practice to line drystone foundations with landscape cloth before filling and tamping, to block the small holes. Material and quantities You will need to ensure that all the materials for the workshop are correct and onsite prior to starting your workshop. For more information on materials see page 30 of BYOEO.
  • 9. Material quantities for an oven with a 36” hearth: • Clay - 8 five gallon buckets • Sand - 1 cubic yard • Bricks - 50-54 including the arch • Perlite - 1/2 cubic yard • Fiber - 1 bucket Clay - It is always better to have more then enough. Inspect the clay before it is delivered so you don’t end up with silt. Clay can be obtained from sand pits, farm land, pottery studios and friends/neighbors land. It is best to soak your clay a few days before the course begins. Sand - It should be a gritty angular sand, as used in concrete. Smooth beach sand is less desirable for the cob mix, but works well for making a sand form. Once the sand is onsite be sure it is covered with a tarp to protect it from rain. Insulation - It is recommended to use perlite for the insulation beneath the hearth and in the dome insulative layer. Vermiculite can be used for the dome insulation but is not recommended for the sub-hearth insulation. I have successfully used pumice beneath the hearth and wood shavings for the insulative layer.
 Bricks - Refractory fire brick is the best choice, though red brick can work. Research the type and size of bricks that are available in the area and design your oven accordingly. Water - Make sure it is easily available at the build site. Fiber - This is used to make the earth plaster. You can use finely chopped straw, horse manure, cellulose or similar fibers. Oven Roof This is a component many people want to skip; you must emphasis to the host that it is an essential element and their responsibility. It’s not critical that the roof be built before the oven workshop. If it’s not built a temporary shelter like a pop-up tent or tarp with ropes will be needed to protect the oven in case of rain. Having enough overhang to protect the oven, and enough clearance (from the oven door) are the most important design constraints. I am covering two simple designs, but many more can be found by a simple google search. If you’re building an oven with a chimney be sure to take this into account when designing the roof. The easiest roof choice for a dry stone foundation is a shed roof, shown in the image on the left. A gable roof could be build in the same way.
  • 10. On a cement block foundation you can build the roof into the corners of the foundation reducing the materials needed, shown in the image on the right. Be sure to leave a couple inches of rebar sticking out of the corners to anchor the roof to the foundation, . Tools for the course Create your own tools and material check list to have prior to the course to ensure you bring everything you need. Basic tools list: (1) wheelbarrow (5) tarps (10x10ft) (10) 5 gallon buckets (4) trowels (1) 4’ level (1) 9” level (2) tape measures (1) string (2) runners for screeding (1) rubber mallet (1) wire brush (1) corded electric drill (1) plaster mixer attachment (3) shovels (1) grinder with diamond blade (6) dust masks (2) safety glasses (3) extension cords (1) projector for slideshow (optional) It is good to have your door form built ahead of the course. Be sure to bring this to the building site (or the materials and tools to build it) and two thin wooden wedges. For the details on building a door form see Technical details at the end.
  • 11. The Course Welcome to the course Give the handouts for the course including a list of participants names and contacts. It’s good to start with a simple go-around introduction. Ask people to state their name, where they are from, what their interest is with ovens and what their goals are for the course. After the go-around give participants an orientation of the site and facilities and ask if anyone has any special needs. Once people have settled in, give a brief overview of the course. Learning names is important! It shows that you value each individual and helps build a positive group dynamic. Here’s a simple name game. Find something to toss (a ball of cob works good) and form a circle, including yourself. Have each person says their own name as they passes the ball either right or left. Go around the circle twice. Now have the participants lightly toss the ball to someone else in the circle, saying that person’s name aloud. Keep going around until everyone has had their name called a few times. Finish the game by passing the ball around the circle again, but this time having everyone say the person’s name who is receiving the ball. • Day 1 Morning The course step-by-step Set-up the site by organizing your tools and a place for taking breaks with water and refreshments. It’s good to have a large paper and markers (or a prepared schematic drawing of the oven) to illustrate the different components, key features and ratios of the oven. The most critical ratio to emphasize is the door being 63% of the inside of the dome apex. This is a good time to be detailed about the rubble trench and foundation as you are standing in front of a built foundation ready for the hearth and dome. It’s good practice to facilitate by asking questions, such as “What is the purpose of the foundation?”. For information on foundations see page 39-40 of BYOEO.
  • 12. Identifying clay Now you are ready to get into it! This is a hands-on learning experience so at every opportunity get the participants to experience what you are facilitating first hand. Have everyone grab and play with a piece of wet clay. Ask them what clay is and how to identify it. Acknowledge their answers and reinforce the right ones then bring in your own answers. If you have a sample of silt, it’s a good way for students to compare it with the clay. Two tests I like to demonstrate are: the Ribbon Test, where you squish out a ribbon of clay between your index and thumb (can’t be too wet) and the Squeak Test, where you hold a very wet sample up to your ear and pinch and release it between thumb and index finger, getting a good sound as well as feeling its stickiness. See Page 24-28 of BYOEO for information on clay and more test you can demonstrate.
  • 13. The hearth It’s good to be technical in your build and to describe the optimum design and technique; yet it is also good to emphasize the forgiving nature of cob. Encourage them by keeping it as simple as you can. I start this phase with a cob mix demo to use for the sub-hearth retaining ring. Always have one bucket dedicated for a washing station for hands and feet to minimize water usage. Mixing works well in pairs, so demonstrate with another person. Lay out a tarp and measure your first mix (with nearly-pure clay; it’s 3 parts sand to 1 part clay). For more details on mixing see page 52-54 of BYOEO. Stomp it flat, and then roll it with the tarp. Stomp and repeat until you get what we call “the baby seal” (when the mix is well incorporated and you roll it, it sticks together in the form of a baby seal). The sub hearth insulation should be a minimum of 3 inches, the more the better. This is a good time to describe the difference between thermal mass and insulation, see page 92 - 93 of BYOEO. Be sure that the rubble in the foundation has been thoroughly tamped. If there are a lot of gaps for the insulation to fall into, lay a burlap or landscape cloth and/or tamp some sand into the rubble. Build the retaining ring larger than the hearth giving a minimum depth of 3” for the insulation. Fill the ring with perlite and pack it firmly into all the corners of the ring. Cover the perlite with a thin layer of sand to level the hearth bricks. Embed and level the two screeding runners into the sand and walk them through the process. Start laying the hearth by finding the middle of the door and lay the 5 or 6 hearth entrance brick (where the door will go) with a 1 1/2 inch over hang from the edge of the foundation. Explain that the purpose of the overhang is for easy removal of ash and coals. Measure from the inside edge of the middle brick into the middle of the hearth 18” to find the center of the hearth. use a string and two sticks or pencils to make a compass 18” long. Have one student hold one stick at the middle point and another rotate around this access with the other stick lightly drawing the outline of the 36” hearth in the sand. Lay the first bricks of the hearth demonstrating how to “kiss” the bricks into place. Have the participants try their hand at it. Typically we reach midday around finishing the hearth and take lunch. • Day 1 Afternoon The Sand Form Participants might feel a little sleepy after eating lunch so you can do some stretching to get the blood flowing. Demonstrate how to build the sand form. I emphasize using the outer hand as a mold (for the outer surface) while pressing it into place with the inner hand. Sometimes participants struggle with the balance of finesse and firmness that building the sand form takes. Be patient and encouraging. Explain that the first 8” - 9” of the sand form goes straight up vertically, to maximize the usable surface of the hearth. Once all the participants have tried their hand at it interrupt them to give the arch demonstration. Get two participants to volunteer to work on the arch while the others finish the sand form.
  • 14. Once the sand form is finished show them how to cover it in wet news paper, explaining that this provides a parting layer so you know where to stop when digging it out. Start on the top of the dome and work toward the bottom. See page 36, 50-51 of BYOEO. The Arch Prepare the arch bricks (14-15 bricks) by soaking them for a minute. This will keep the dry bricks from “stealing” moisture from the earthen mortar which could make it crack. Set the door form and wedges into place and secure it with a stone or weight at the front and then pack some sand on the back side. Demonstrate how to lay the first arch bricks of the hearth. Two volunteers can work on the arch while others finish building the sand form. You can jump back and forth between the two groups as they need help. For more details on building the arch see Technical details at the end. Thermal mass layer This is your “heat battery”, which soaks up the heat from the fire and radiates it back into the oven. If you made cob test bricks in your pre-course setup, this is a good way for the participants to see the difference in mixes. If not, you can describe the process of trying different percentages, see page 27 of BYOEO. Find a flat and smooth place for stomping close to the oven. Using pre-soaked clay or a wet mix makes mixing the clay and sand much easier. If the mix is too wet, make little mounds (after stomping it thoroughly) across the surface of a tarp. It will likely get a bit dry and crusty on the outer layer of the mounds. When you are ready to use it collect the mounds in the middle of the tarp and stomp them out. Give a demonstration on how to apply the cob mix for the thermal layer. See page 52-55 of BYOEO. This can be difficult for some participants especially the ones with small hands. One common issue is making the wall too thin. It’s essential to maintain at least 4” which is about the width of a medium sized hand. Extra cob can always be shaved off. Another common issue is keeping the 90° angle to the sand form. Most everyone has the tendency to make the top
  • 15. (working) surface of thermal wall horizontal. if necessary give another demonstration showing how to maintain the 90°, see illustration. Typically we finish the first day after the thermal layer has been completed around 5pm. If you haven’t finished, you can use your finger tips to dimple the working surface. These dimples will give a more secure connection when you start up the next morning. Whether you finish or not, the oven should be securely covered with a tarp to protect it from possible rain. Clean up the work site and call it a day. Good work team! • Day 1 evening Slideshow After dinner it’s nice to offer a slide show of different ovens (if feasible). This is an opportunity for participants to see various types of foundations, roofs and oven designs and also enables you to answer questions. The morning of the second day you can do a check-in with the participants to see how they are feeling and if there is anything from the previous day that needs clarification. Once the check-in is complete, give a brief overview of the day. There will be less building on the second day, so it gives you time for speaking more in-depth about oven components and design considerations. • Day 2 Morning Insulative layer The optimum material choice for this is perlite but you can use vermiculite or wood shavings (not sawdust, it should be like cork screws). You will need to have some participants prepare slip for this mix. If they are using a drill with plaster attachment to mix be sure they hold the bucket down by putting a foot on the top edge of the bucket. This will likely splash so be prepared (watch for shoe laces). Show them to test if the slip has enough clay by dipping an
  • 16. arm into the mixture. It should look as though you have a mud latex glove on (complete coverage). Take out any remaining chunks once you reach the desired consistency. Give a demonstration showing how to mix the insulation and slip together and how to test its consistency. Be sure everyone handling the insulation is wearing a dust mask. Once you have your first batch mixed give a demonstration on applying it on top of the thermal layer. Break the participants into two groups, one group to mix and the other to apply. I encourage participants to self-regulate by switch roles on their own (so everyone gets a chance to try each job). If they are too caught-up in what they are doing, you might need to remind them to change roles. • Day 2 Afternoon Plastering Now that the insulation layer is complete, it needs to be protected by a earthen plaster. The earthen plaster is the same cob mix but a little wetter and mixed with some type of fiber. For fiber you can use horse manure, finely chopped straw, cellulose insulation or other such fibers. Give a demonstration on applying the plaster. Usually this is one of the hardest skills for participants to get. here, I emphasize: • Always using a clean wet trowel • To use pressure with the second hand on the bottom of the blade of the trowel • A wide stance for better leverage • To gradually glide off of the mix as it run out Like anything, it just takes doing it, so let them experiment. If required, give another demonstration and explain what you’re doing. Once the plaster is finished you’re done with the build section of this course. Lime Finish Lime is an extra layer of protection which is more water resistant than the earthen plaster, though the oven will still need a roof. If the host wants a lime plaster finish, this will have to happen once the oven is completely dry (about 1 month). You will need to score the surface of the plaster layer to give it a texture to grip onto, this is easier to do when the earthen plaster is still fresh. If you’re doing another oven course in the area you can come back and do the lime finish at the end of that course. Lime is caustic so be sure to use rubber gloves, dust masks and goggles. The lime finish is 3 parts sand to 1 part hydraulic lime. This is easiest to mix with a hoe in a wheelbarrow. Dampen the dry plaster surface of the oven and apply the lime finish the same way you did the earthen plaster. Finishing up the course
  • 17. A weekend oven course is not long enough to get into all the details of baking. Begin with the basics of preparing and firing the oven, as well as an overview of the oven tools. If time allows you can venture into baking instructions. After you’ve answered questions it’s time to celebrate a successful workshop! It’s good to have printed certificates for the completion of the course for each participant. Sign and date the certificates and hand them out, congratulating each participant on their accomplishment. Technical details Determining the size of the rubble trench This section explains how to figure out the trench size using the hearth diameter of the oven you are building. First determine the outside diameter of the oven, with this equation: hearth diameter + width of wall doubled = outside diameter of the oven For example: 36” (Hearth) + 10” (4” Thermal, 4” Insulation, 2” Plaster) x 2 (both sides) = 56” Outside diameter Now determine the top surface of the foundation by adding the amount of surface you want around the finished oven (doubled) to the outside diameter. In this example model I am saying I want 4” all around. 4” x 2 + 56” = 64” The top surface of the hearth for this oven is 64” square. The rubble trench should be a minimum of 2” bigger (on all sides) than the bottom of the oven’s foundation. A block foundation is vertical, meaning the bottom of the foundation will be the same size as the top - 2” x 2 (all sides) + 64” = 68”. This oven’s trench for a block foundation is 68” square. A dry stone foundation steps in as you build up, meaning the top surface of the foundation is smaller than the bottom. I am estimating I will loose 7” on each side of a foundation that is 36” high. 7” x 2 (all sides) + 64” = 78” square. The oven’s trench for this drystone foundation is 78” square. The trench in any case should be a minimum of 16” - 18” deep. Drainage Slants the floor of the trench slightly leading to a drain pipe which empties to daylight (exiting the earth). To maintain good drainage over many years, line the trench with landscape cloth before it is filled with rubble (1 1/2” - 2” gravel). Compact the rubble by tamping it. By cutting the landscape cloth extra large the excess can be flipped on top of the rubble filled trench and secured under the first foundation stones. The sod can be saved to placed over the cloth showing around the oven and on the ditch. Building your door form
  • 18. The door form supports the bricks as you build your arch. Depending on the size of your bricks this could be a little different. The diagram below is using the standard size refractory fire brick which measures 9” × 4.5” × 3”. By adding the brick height and mortar you can calculate where the arch will begin. After you get the first board cut into the shape of the door form, trace it and make a second one. Secure some scrap wood (sandwiched) between the two door form boards to give it an even depth. Put a few screws or a piece of wood on one side of the form to act as a handle to easily remove the form from the finished arch. Building the Arch After the setting of the six bricks which make up the sides of the door, place the corner of the first arching brick against the corner of the arch on the door form. Use a piece of cardboard or paper as a template for the corner wedges. Cut four of these wedges and mortar them into place. The image below shows the corner wedges outlined in white.
  • 19. Once the participants reach the middle of the arch make a cardboard template from both the front and back of the arch (due to mortar thickness, they may be different). Leave no space for mortar on the key stones, make the templates as exact as possible. Trace the templates onto two bricks and cut the two key stone bricks. Once these are in place put a piece of card board at the bottom of the hole in-between the keystones and fill the hole with cob. Oven use Firing and baking in earth ovens Getting to know your oven will take time and patience. Once you have made several small drying fires and your oven is cured you are ready for your first bake! Fire safety: It is important to have tools with long enough handles so you don’t need to reach inside the oven. The oven tools you need: • peel • rake • mop • poker • metal container for coals • water bucket • door You should also always have a 5 gallon bucket of water and a water source near by. Wear close toed shoes and have leather gloves on hand. Each oven is unique as to the amount of time it takes to get up to temperature and how long it will hold the heat. See oven tools section below. Some variables:
  • 20. • oven size • amount of thermal mass • efficiency of insulation • quality of wood. The more thermal mass your oven has the longer it will take it to get up to temp. (using more fuel) and the longer it will hold heat with the variable of insulation efficiency. Firing time will also vary depending on what you’re going to bake. From my experience the basic baking thermometers are of no use in these ovens. See Oven Preparation below for a basic low-tech way to check the temperature. Starting your oven To start the fire you should have: • paper or birch bark • some small kindling • medium size wood Build a small lincoln-log style fire just inside door way. This allows the fire to get sufficient air when starting to create the draft. Once the draft is established you can use your rake to push the fire to the middle of the of the hearth. In this style oven the door is both the intake and exhaust. This means there is a stratification of air: the cool air is being drawn in the bottom half of the door and the hot exhaust of the fire is exiting the top half of the door. This is important to be aware of because the air exiting the top of the door can burn you quickly: whether you’re leaning in to look or putting a log on the fire. Managing the Fire Once the oven is up to temperature, it will be too hot for baking. It takes between 1-3 hours to fire a smaller home-sized oven (as it was built in this class). Have a long stick (poker) handy for arranging the wood and always dip your tools in a 5 gallon bucket of water after using, to make sure there are no embers on them. The air is being drawn in along the hearth so the fire needs to be as open as possible to receive this air intake: create a “tunnel” so the air can pass along the bottom of the fire. A lincoln-log approach works well; keeping the sides and back of the oven clear so the air can reach all points of the fuel. It’s a “dance” that takes practice; having your bread ready at the same time the oven is ready is the goal. Oven Preparation Once the oven is up to temperature, let the wood burn down to coals and spread them evenly across the hearth. Wait about 20-30 minutes for the floor temperature to even out. Now you will need your tools. Removing the coals can be the most dangerous part of the firing, so be sure you have plenty of water on hand and all combustibles are at a distance. Use a large metal container to rake the coals into (using a scoop is ideal) and then dowse the coals with water. Be
  • 21. aware of steam it can burn! If your tools are wooden keep them wet. Once the majority of coals are out, you will use a wet mop (or drape a towel over your rake as I do) and mop out the majority of coals and ash. Don’t worry about getting it completely clean because you don’t want to lose too much heat and you’ll be mopping it again later. Now that the oven is empty, close it up. If you’re using a plug door, sufficiently wet a towel, double it and drape it across the back (inside) of the door. Push the door into the opening. Typically you should wet the towel again in 5-10 minutes (or it will burn through). After 30-40 minutes the heat should have evened out and you’re ready to check the oven temperature. Take a small handful of white flour, open the door carefully and place the flour in a pile near the middle of the oven hearth and close the door. Count 20 seconds and look at the pile. If it’s only browned, your oven is ready to bake. If the top of the pile is burned (black) the air temp is too hot. Mop the oven out again, close the door and wait 20-40 minutes and test again. If the edges of flour touching the hearth are burned then the hearth is still too hot. Mop the oven out thoroughly again, close the door and wait 10-20 minutes and test again. Repeat until the flour only browns in 20 seconds. You are ready to now bake! The Bake Now your perfectly proofed loaves are ready to bake. You can bake in bread pans (they have their advantages), though there is nothing like a hearth kissed loaf. Typically sourdough loaves are either proofed (left to rise) in baskets or cradled in the folds of linen or cotton canvases. In both cases flour the surface of the basket and the canvas before putting your loaves in. When using linen, flour both sides heavily on the first use (using white flour; the bran of whole wheat is too large) pushing it into the fibers. After this initial “priming” of the canvas with white flower, only a light dusting will be needed in subsequent bakes: whole grain works best. Use a sifter to apply the flour in a thin even coat. Have a table or shelf set up to the side of the oven door (your dominant side). If using canvas you’ll need to transport the loaves to the oven on the surface they were proofed on. Use a board or table top that fits through your doorway without tilting. Baskets and pans can simply be carried out. Now you need a peel, a razor blade and some flour. Flour the peel, and transfer the loaf from its proofing place onto the peel (with bread pans you just slide them in). If using canvas, place the peel next to the loaf on top of the canvas. Place your hand on the other side of the loaf under the canvas, lift the canvas and roll the loaf onto the peel. I put 2-3 loaves on a peel to save time and heat by loading the oven faster. Leave some room in between the loaves or they will combine into one. With time and practice you will loading your oven quickly You are finished loading the oven, which should be a quick and smooth operation (it takes practice and failure). You want it to be quick so you have an even bake, the first loaf has already baked the amount of time it took to load the oven. Depending on your oven the bread could be done in 20 minutes. Check your loaves by peeking if they are risen and look baked. Pull one out and tap on the bottom: if it sounds hollow it is done. In the case of a second or third bake, leave the oven empty 20 minutes for the thermal mass to reheat the air temperature in-between bakes. As the oven temperature drops you can use it to bake different things like, pies and cookies, then leave a stew in for a couple hours or throw some root vegetables in directly, be creative! After you are
  • 22. all done with food, you can load your oven with your next load of wood to get it kiln dried for a really great burn next time. Baking Pizza Baking pizza is totally different, as I assume you know from seeing it done. In baking pizza you keep the fire in the oven and you don’t use a door. This is to have a very high air temperature to cook the toppings. Fire your oven 1-2 hours, get a good coal base, spread the coals across the floor, wait 20 min and push the coals to one side or the back of the oven (I like the side its easier to see as it bakes). You should have some small hardwood pieces to keep feeding to the coals to maintain a flame. Mop the hearth out and put you pizza in, you will need to rotate the pizza quite soon. Keep a close eye on the side of the pizza facing the fire. Pull it out with your peel when that side is golden, rotate and put back; typically a pizza only takes a few minutes. Basic Sourdough Science Most bacteria found in sourdough are lactobacilli, cousins of the bacteria that turn milk into yogurt and cheese. These lactobacilli out number the yeasts in sourdough by as many as 100 to 1. Lactobacilli make acetic and lactic acids by converting sugars; this is what gives sourdough its tang. These acids also deteriorate gluten, which is one reason sourdough bread is more digestible. The lactobacilli also create aromatic compounds that infuse bread with flavors and smells. The pH of a well fermented sourdough is around 3.8. Most microorganisms drop out of competition at this point, but the wild yeasts in sourdough can tolerate the acids and still convert sugars into carbon dioxide and ethanol making the bread rise. Our digestive system works because of the good bacteria living therein, without them there would be no digestion. Our entire existence directly depends on these friendly bacteria, which help us convert the foods we eat into usable, absorbable nutrients. Everything we eat is broken down into its individual make-up of amino acids (proteins), vitamins, carbohydrates (simple and complex), fats, and more. Sourdough and other foods, using probiotic fermentation, are using nature’s design for predigesting foods that our bodies need help to break down. This is using living organisms to process your food, so you must get to know them... have patience, pay attention, be observant, experiment and have fun! It is alive! Yes, sourdough is a living being, breathing, eating and transforming. This requires you to bring awareness to another aspect of food preparation; using a living organism. This is a disclaimer. Sourdough requires a relationship with this living culture: feeding, observing, messing up and trying variations (keeping notes helps). Just realize the culture is alive and everything from air temperature to humidity, handling and time, affect the culture and the outcome of the bread. If you are the type of person that can’t take failure, don’t even attempt to use sourdough... this isn’t to say with some experience you won’t be able to get consistent results. Most likely it will take composting some of your attempts and each time you will learn something; this is where observation and note taking can be very helpful.
  • 23. Not only will you be rewarded with great tasting breads and pancakes, it is also a very healthy way to eat grains. Grains are actually very difficult for us to digest when they are uncultured. Many of the allergies people experience with wheat consumption is actually the inability to digest the grain. For some people sourdough has been found to be a ‘cure’ for this reaction. Spelt is a grain that is very low in gluten, which is a good option for a more digestible bread; sprouting your grains increases the digestibility even more. A well sprouted grain will use up the majority of its gluten in the sprouting process. Basic sourdough culture Also known as a “mother” or “starter”. This wild yeast exists everywhere! It is only a matter of attracting them. You attract them by creating their ideal environment through fermenting sugars. Preferably you are using fresh spring or well water. If you have no other option than chlorinated tap water you can let the water sit out in a large bowl for 24 hours before use; this way the chlorine will evaporate. Add 1/2 cup flour in a bowl and mix 1 cup of water by adding slowly (prevents lumping). Cover the bowl with a cloth or paper towel. Each day add a table spoon of flour and stir. The stirring oxygenates the mixture giving the bacterias and yeast the air they need. Add fresh water as needed to keep the mixture a thick liquid. Within 3-5 days you should start to smell the fermentation happening. I recommended using whole grain flour because it has all the various components of the grain, though you can use white. It should now be bubbly. If it’s not, keep waiting, feeding and stirring. Once you have the bubbles, you got it! You can store your starter in the fridge as this slows the bacterias metabolism down. You only need to refresh it every 2 weeks (and it can go longer), Without refrigeration, depending on the air temperature you will need to refresh daily or every couple of days. Freezing it is also possible; to use, thaw and refresh. When using the starter to make bread, replace the culture used with fresh water and flour. ALWAYS KEEP SOME CULTURE SET ASIDE or you will have to start from the beginning again! When you’re not using your starter, refresh it every 2-3 weeks. Compost half of it and replace with fresh water and flour. Sourdough has so many variables, which makes it very hard to write a recipes. There are many sites online that can help you get started, see resources below. There is also a nice recipe on page 76 - 83 of BYOEO Oven Tool In this section I give a brief overview of the essential tools for baking in your oven. Many people skip this step (of making or buying tools) and end up using baking pans. By using baking pans you are lowering the efficiency of the oven, as the bottom surface of the pan will only touch the hearth in a few places. Baking directly on the hearth is ideal for both taste and efficiency (especially for pizza). To bake directly on the hearth you will need some tools. These tools can be purchased but they are simple to make yourself.
  • 24.
  • 25.
  • 26.
  • 27. Resources Kiko Denzer - BYOEO - http://www.handprintpress.com/bookstore/build-your-own-earth-oven/ Facilitating workshops - Seeds of Change PDF - https://we.riseup.net/assets/25682/ FacilitatingWorkshops.pdf Simha Bode - Google photo album of ovens - https://plus.google.com/photos/ 113657341843007171761/albums/6132073247849742129?authkey=CJyKo6yviMOKjAE Simha Bode - Earth Oven Material makeup— Lime cycle and more - https://drive.google.com/ file/d/0B5t_blchjdPtVmVhclNtTjcxWVk/view?usp=sharing By a student of Kiko - Instructables earth oven guide - http://www.instructables.com/id/Build-a- Wood-Fired-Earth-Oven/ Mark Krawczyk - Earth Oven Construction Simplified - https://www.dropbox.com/home/YM %20Oven%202014/Oven%20Docs?preview=Oven+Procedures.gen.rtf Canadian Museum of History - The Bread Ovens of Quebec - http://www.historymuseum.ca/ cmc/exhibitions/tresors/barbeau/mbp0501e.shtml
  • 28. Alan Scott and Daniel Wing - The Bread Builders - http://books.google.ch/books? id=VA6y1EMnkpYC&lpg=PA132&ots=W7XY_CPQKe&dq=quebecois-ovens%20doors%20wood %20fired&pg=PP1#v=onepage&q&f=false The Fresh Loaf - Earth oven and Baking forum - http://www.thefreshloaf.com/forum The sourdough school - http://www.sourdough.co.uk/sourdough-blogs/ Discovering Sourdough - http://www.northwestsourdough.com/discover/
  • 29. Bode Earth Ovens on Facebook - https://www.facebook.com/BodeEarthOvens?ref=hl Simha Bode - geomergent@gmail.com