Download to read offline


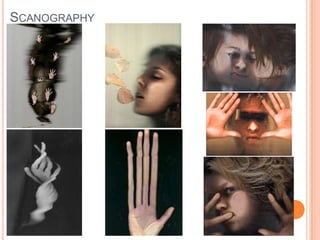


The document discusses two experimental photography techniques - high speed photography and scanography. For high speed photography, the key aspects are using a very fast shutter speed (e.g. 1/1000th of a second), a tripod to avoid blur from camera shake, a high aperture for more light, and flash lighting in a dark room. The author produced a test image capturing paper in mid-air. For scanography, scanners can distort images by pressing objects on the glass or moving the scanner, elongating and warping objects. The author created a self-portrait using this technique but notes it may not suit their final images.


