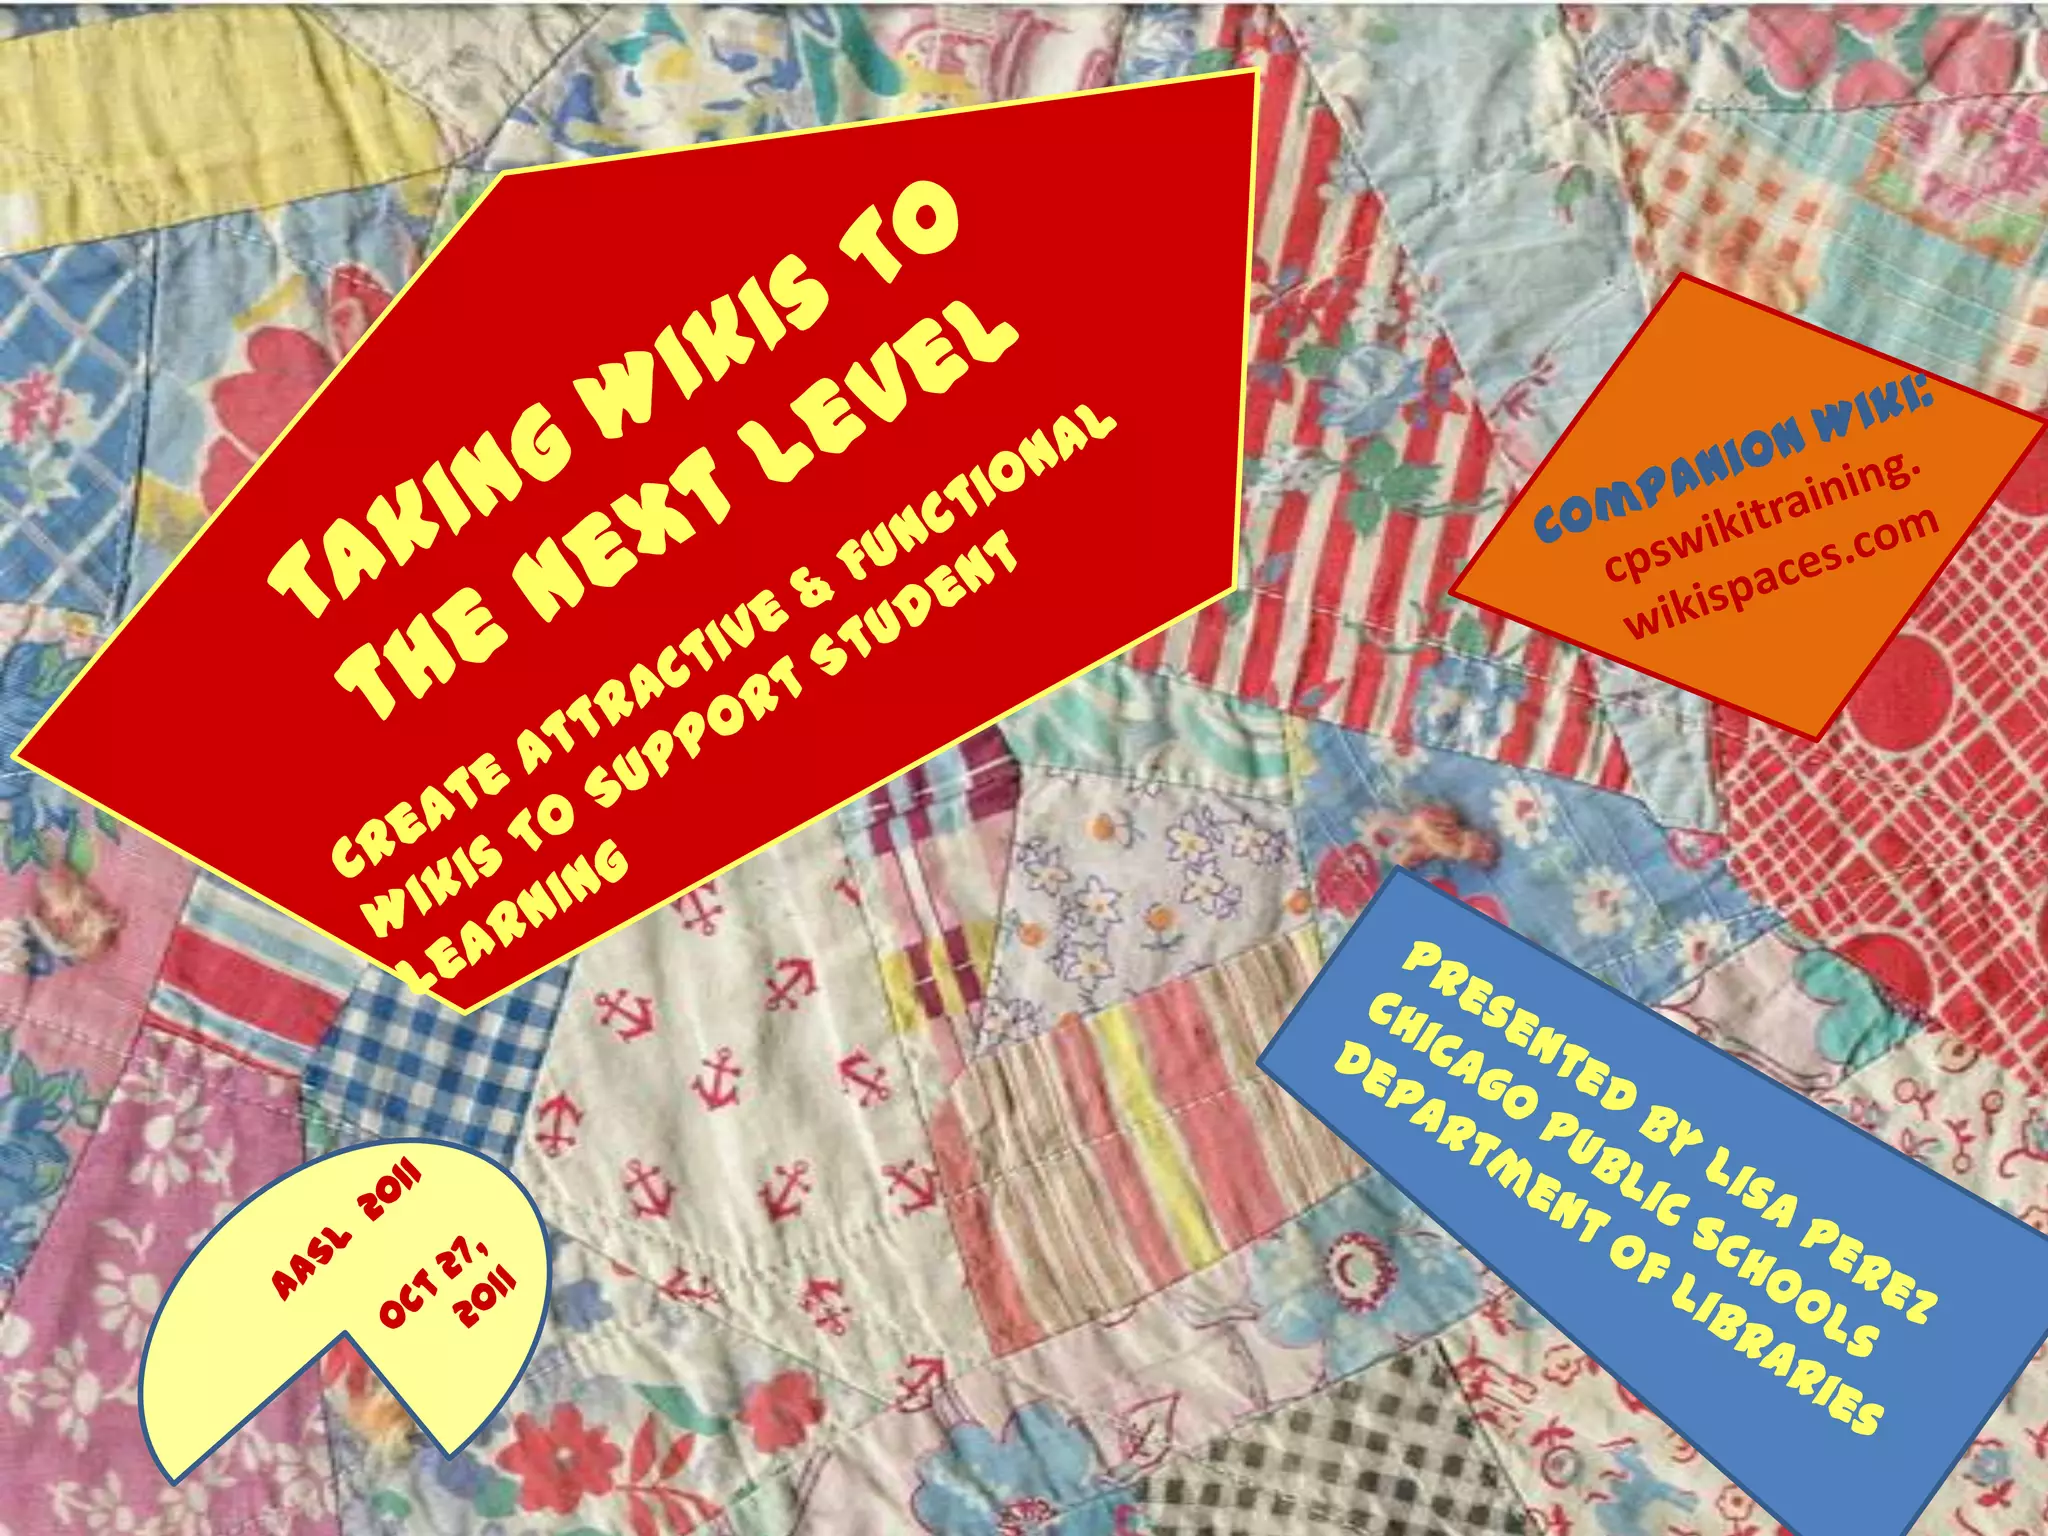
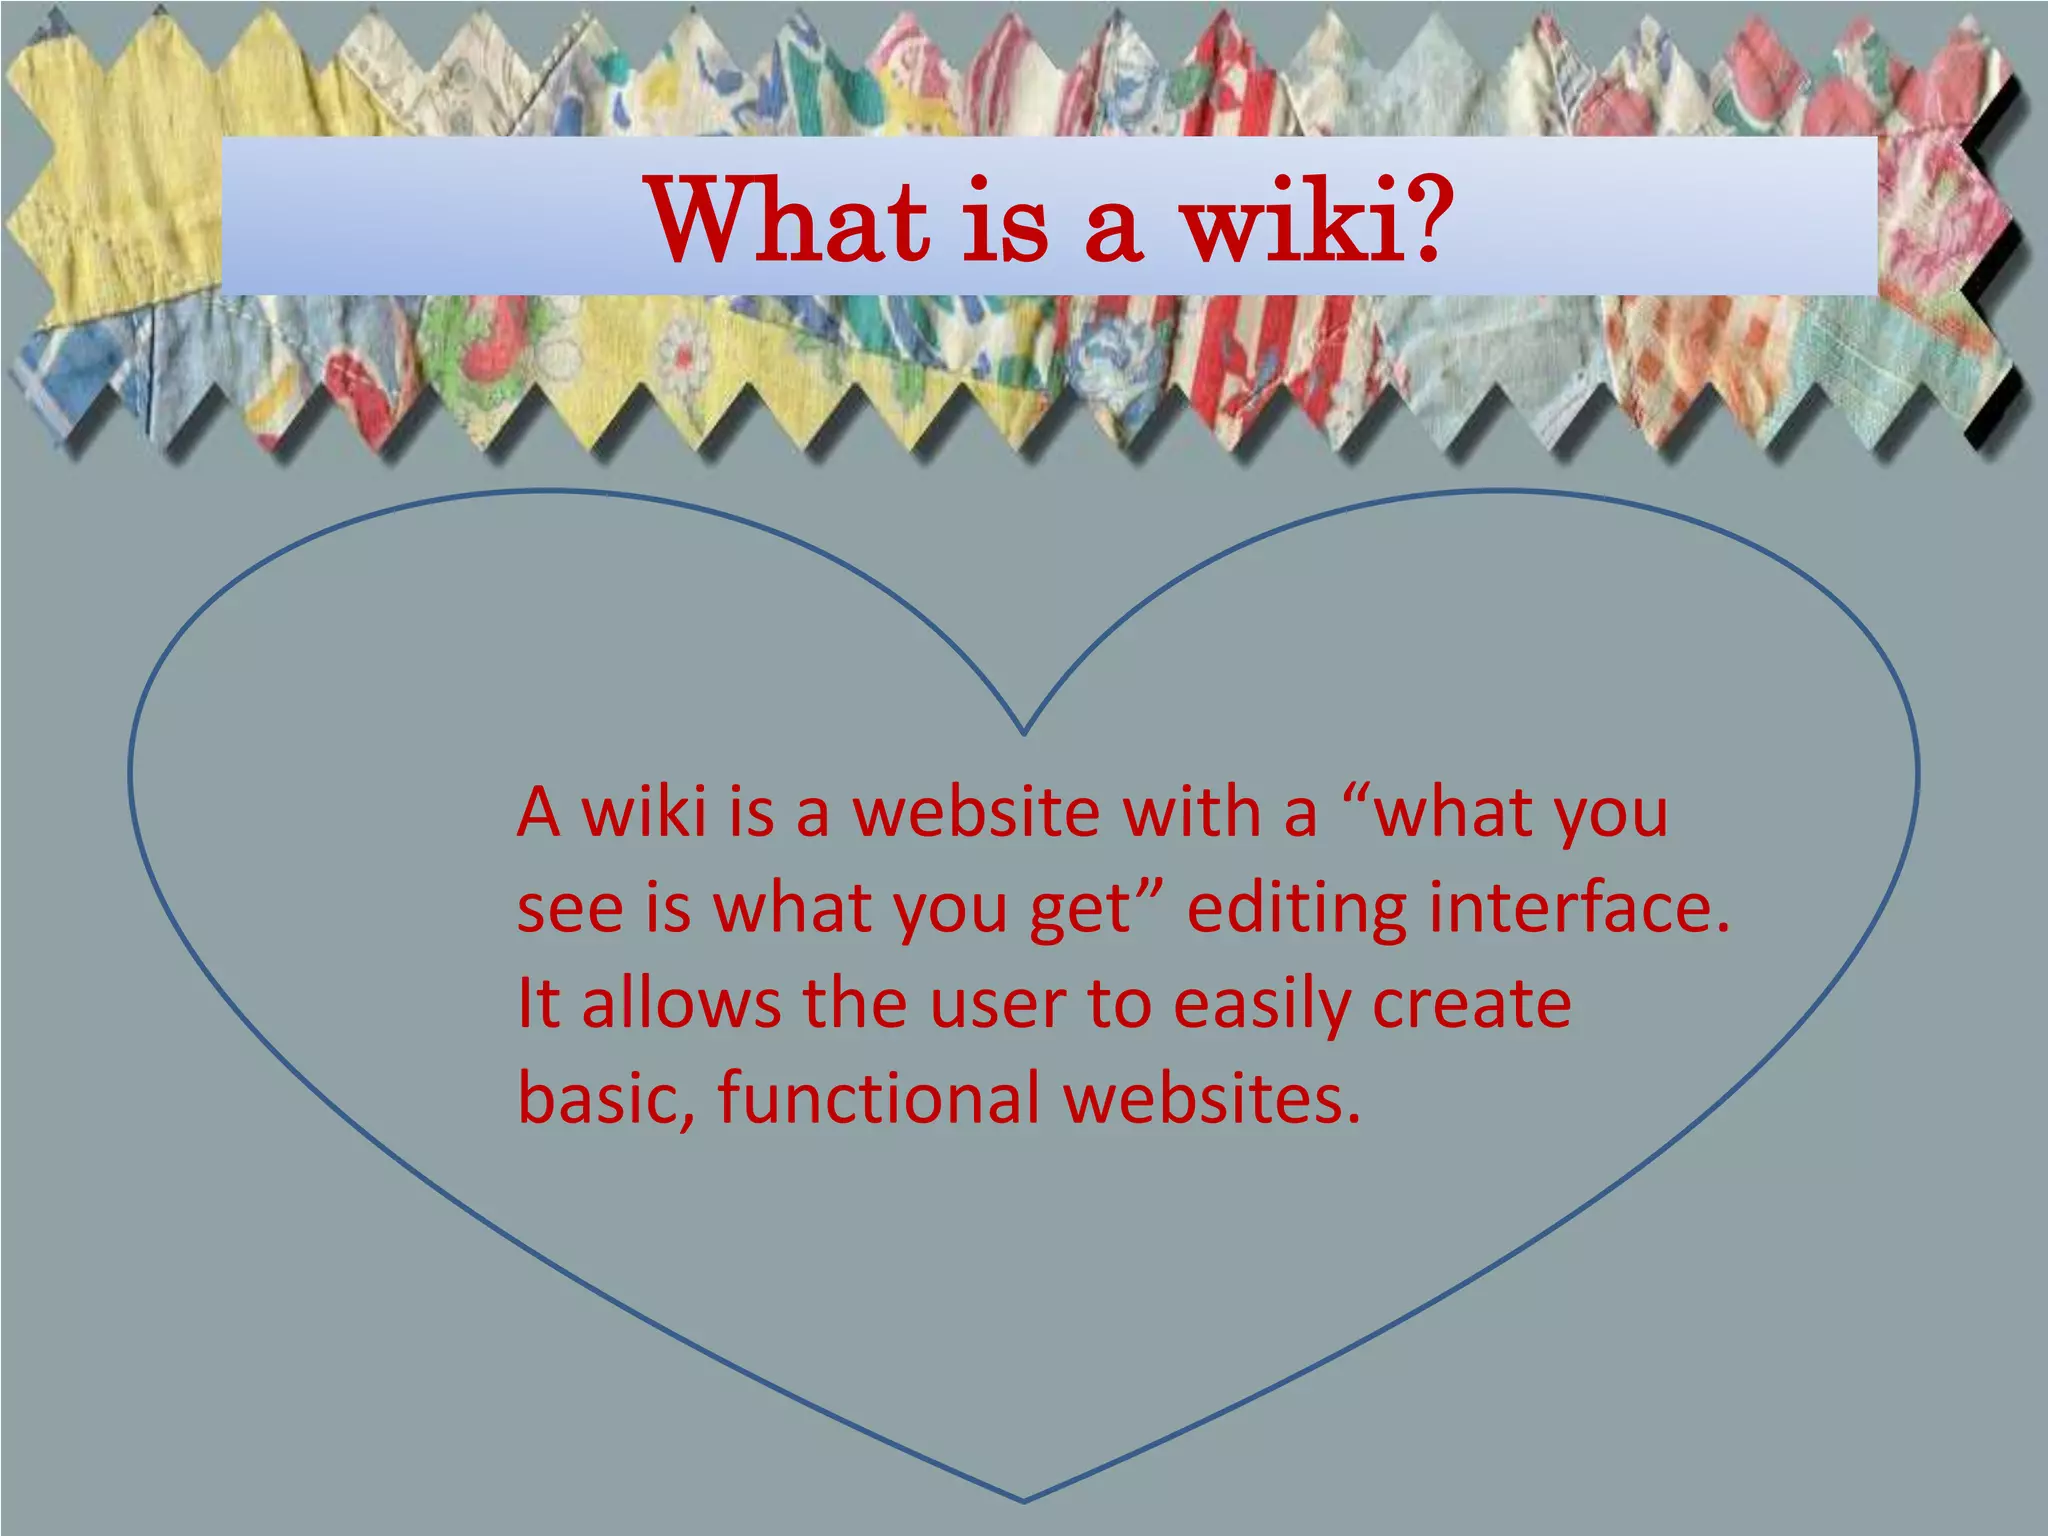
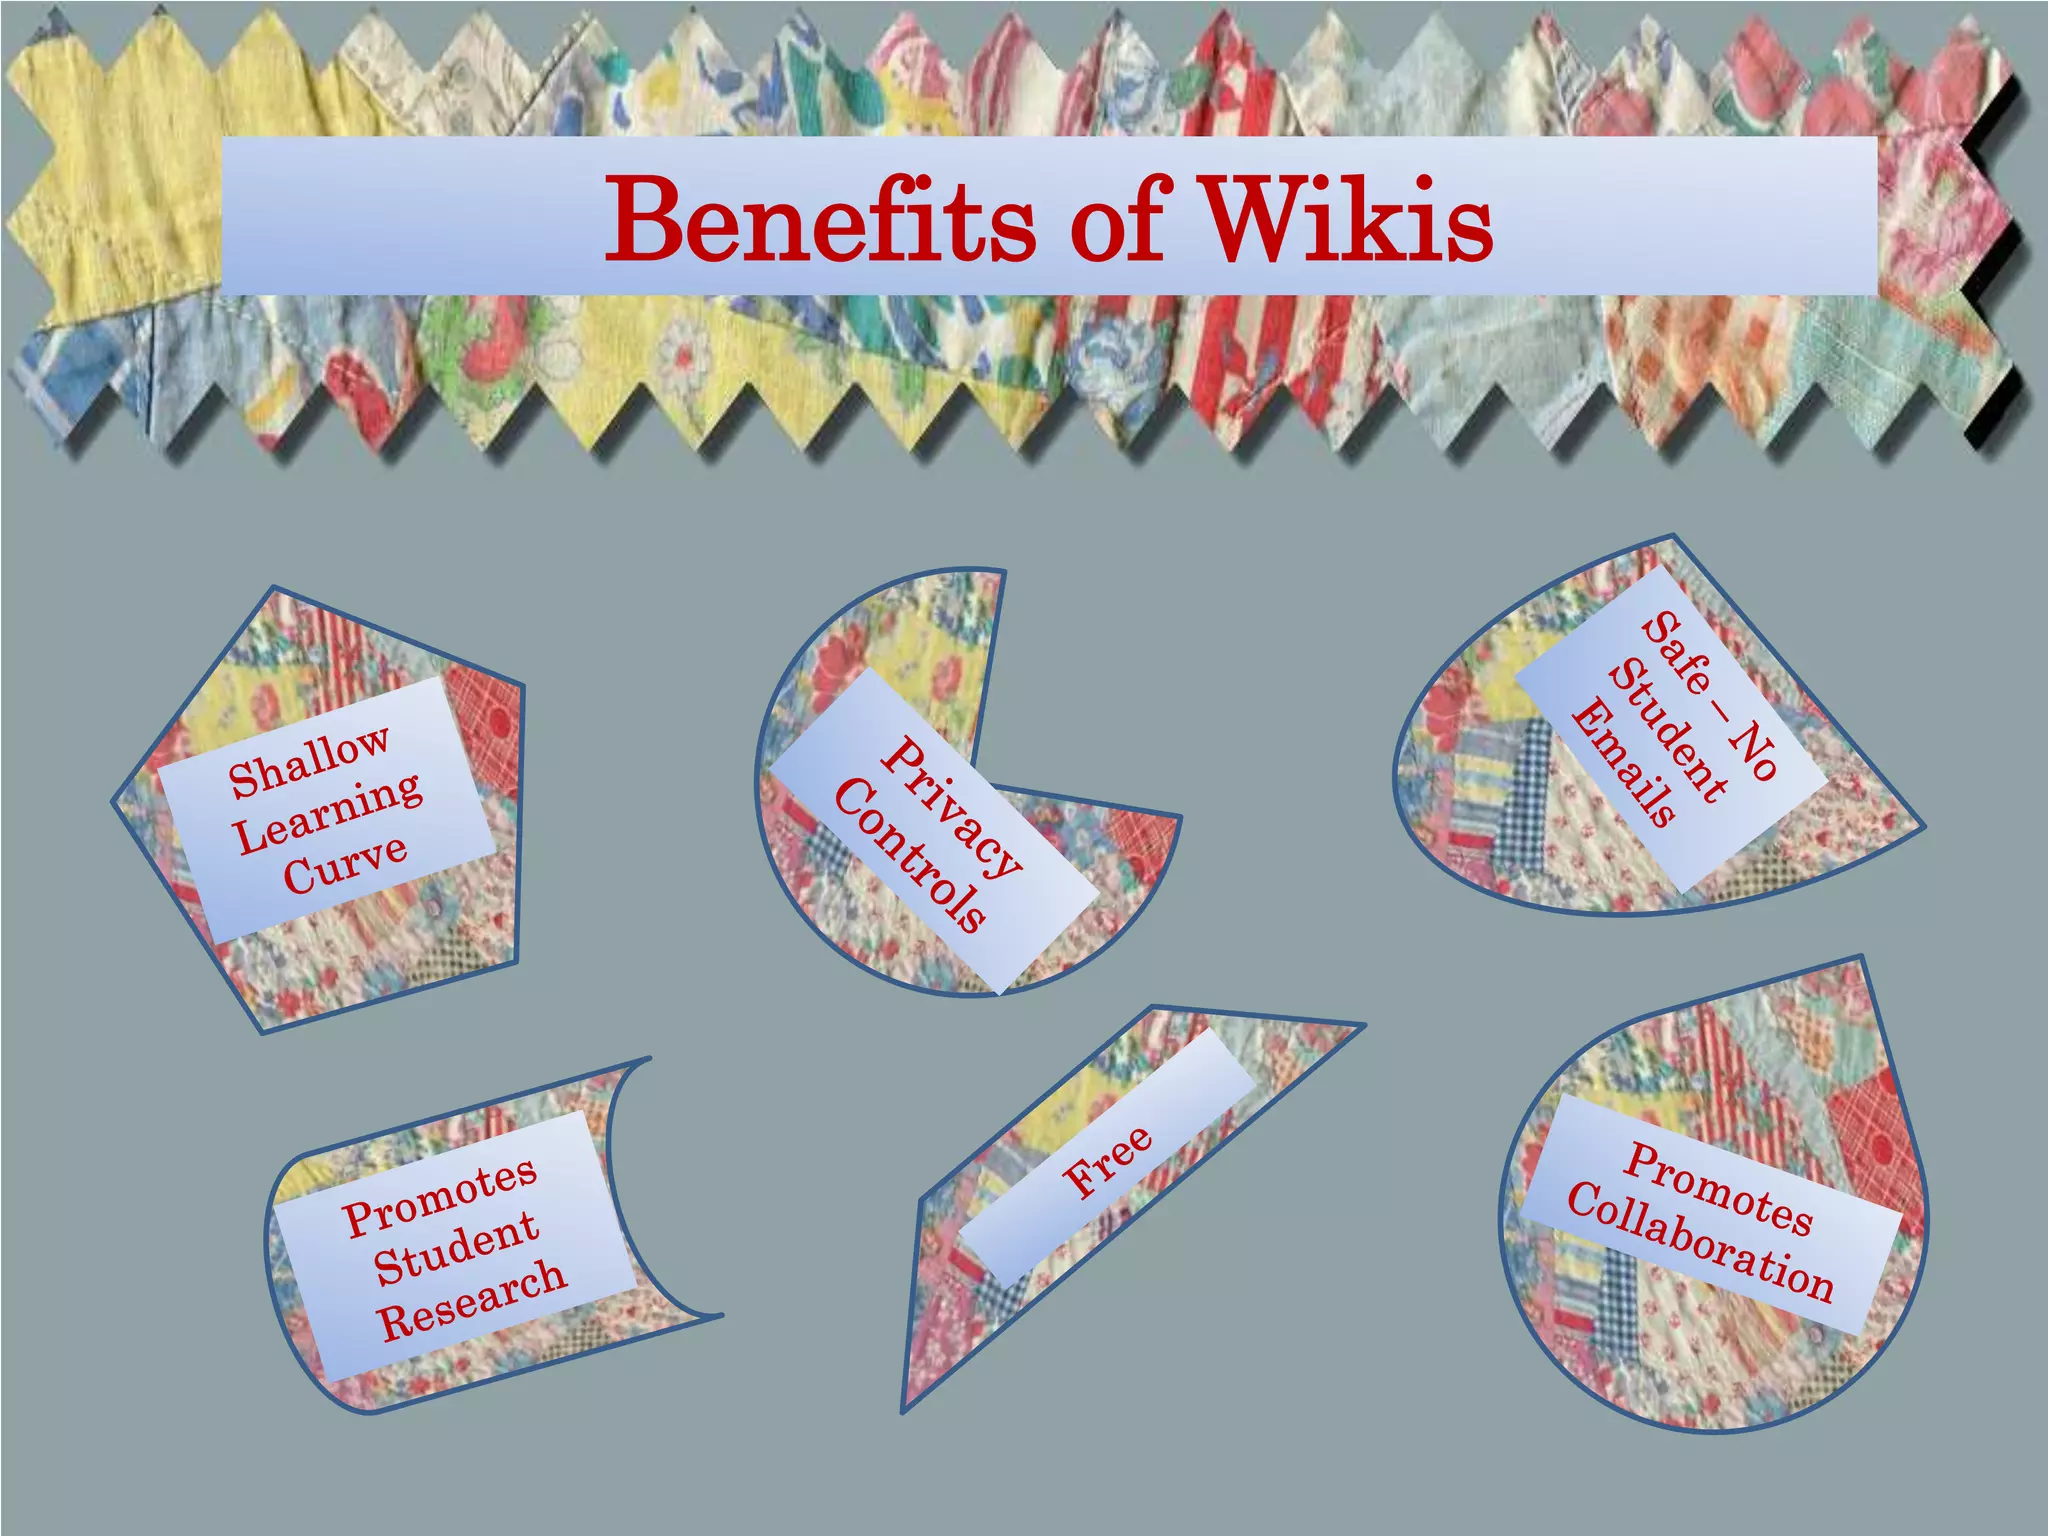
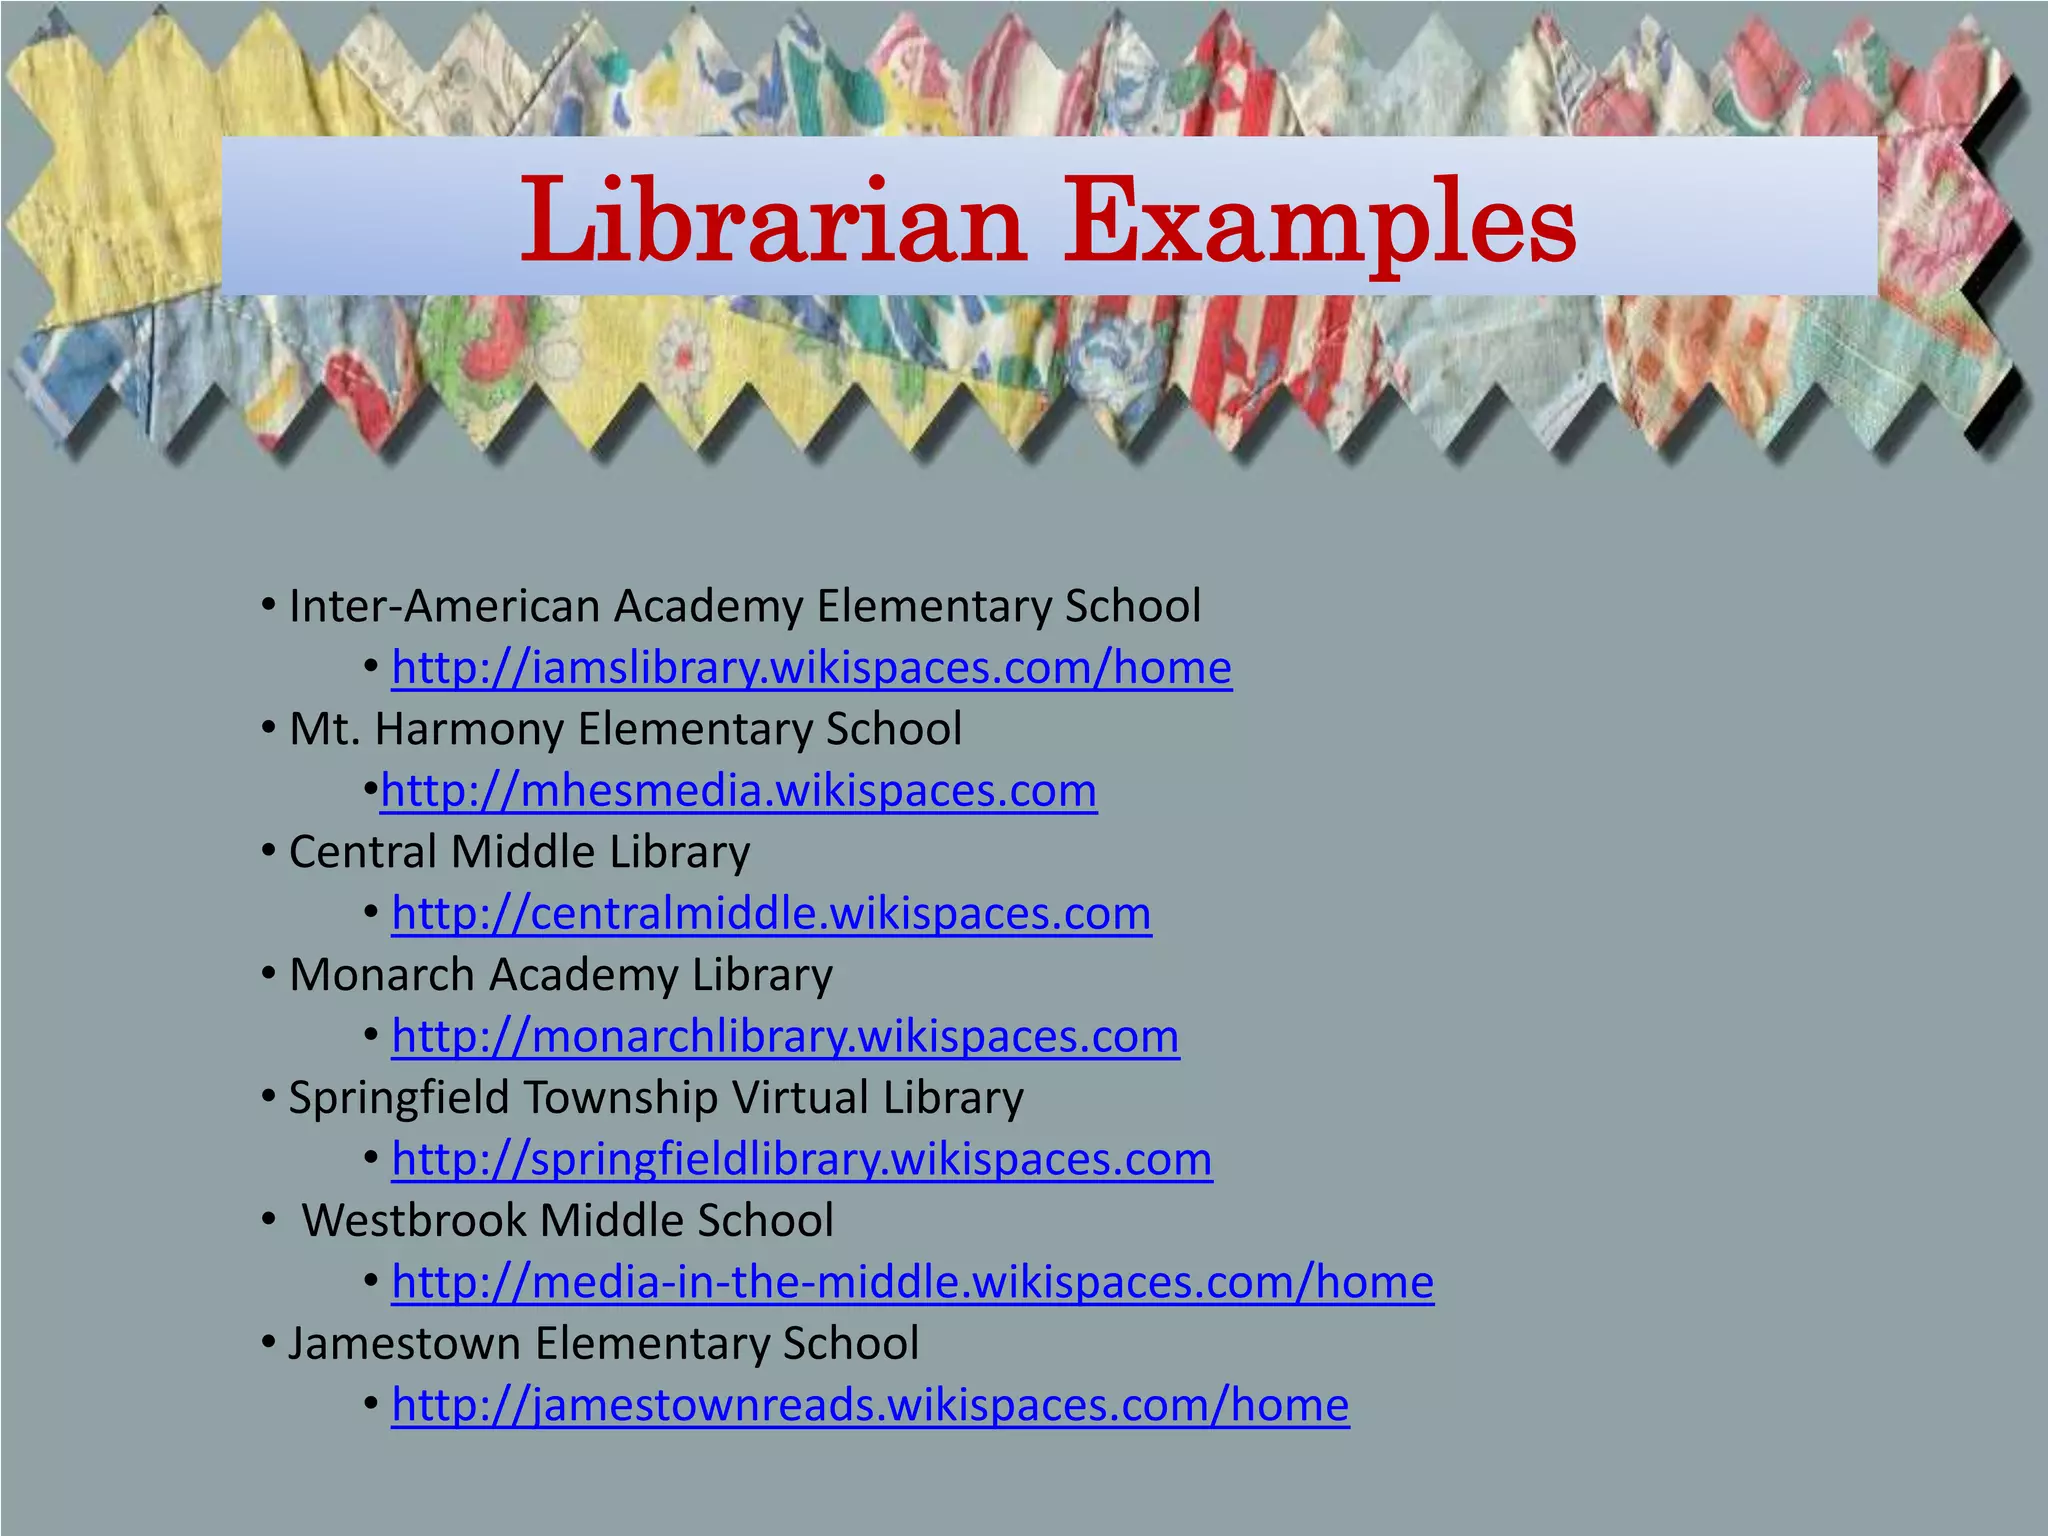
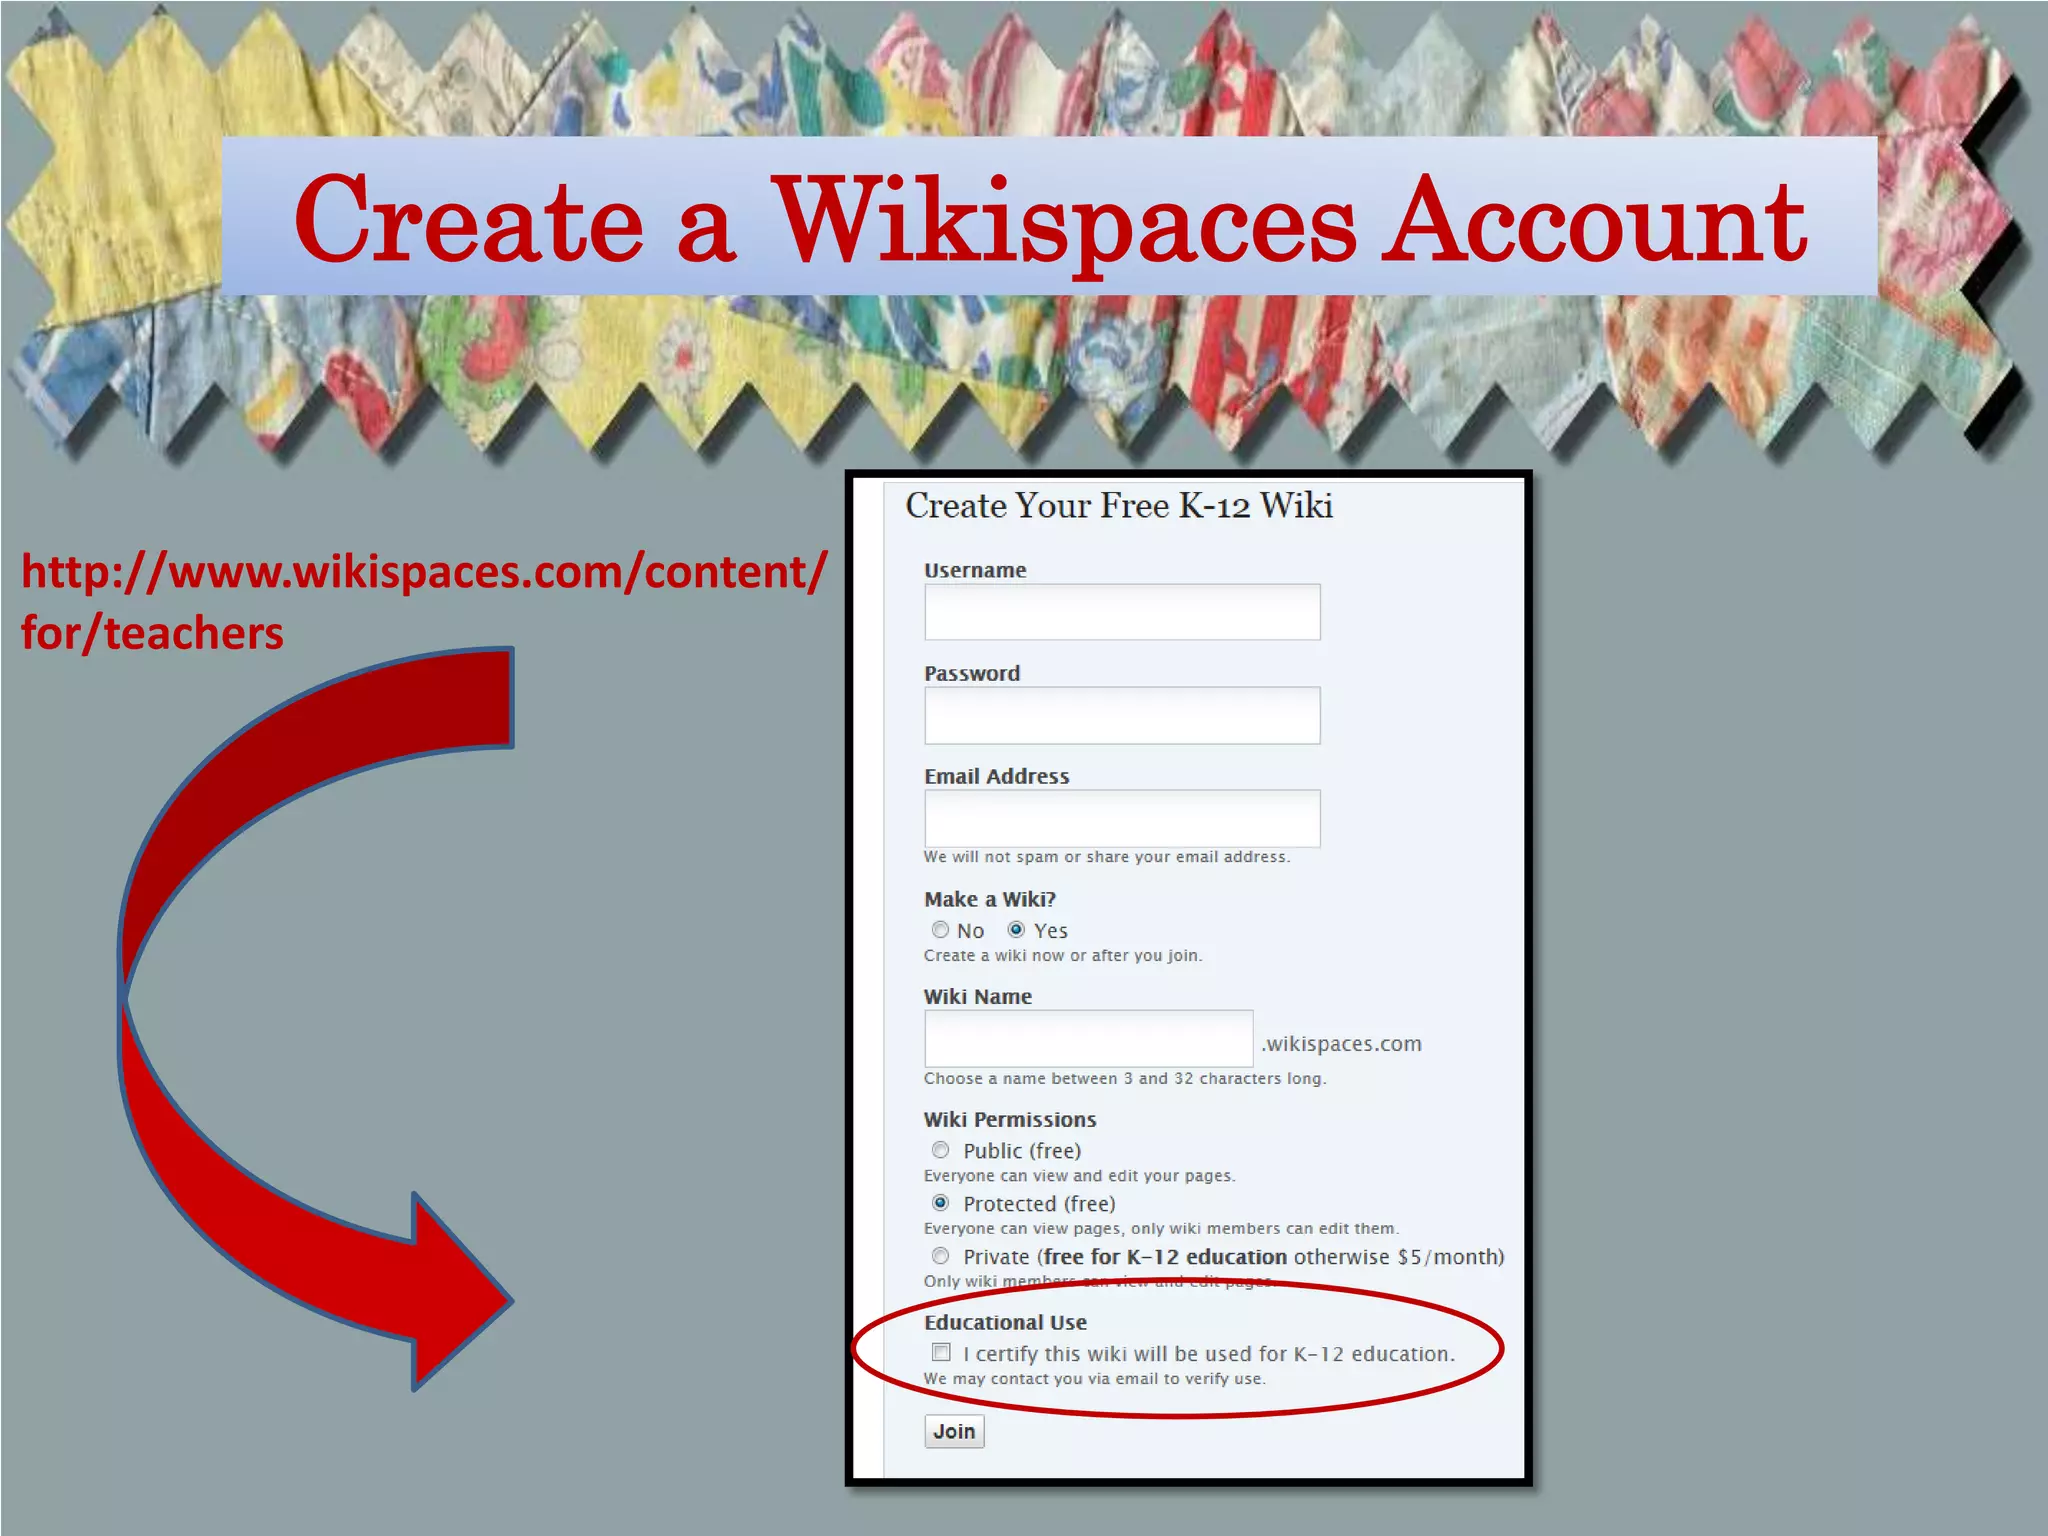
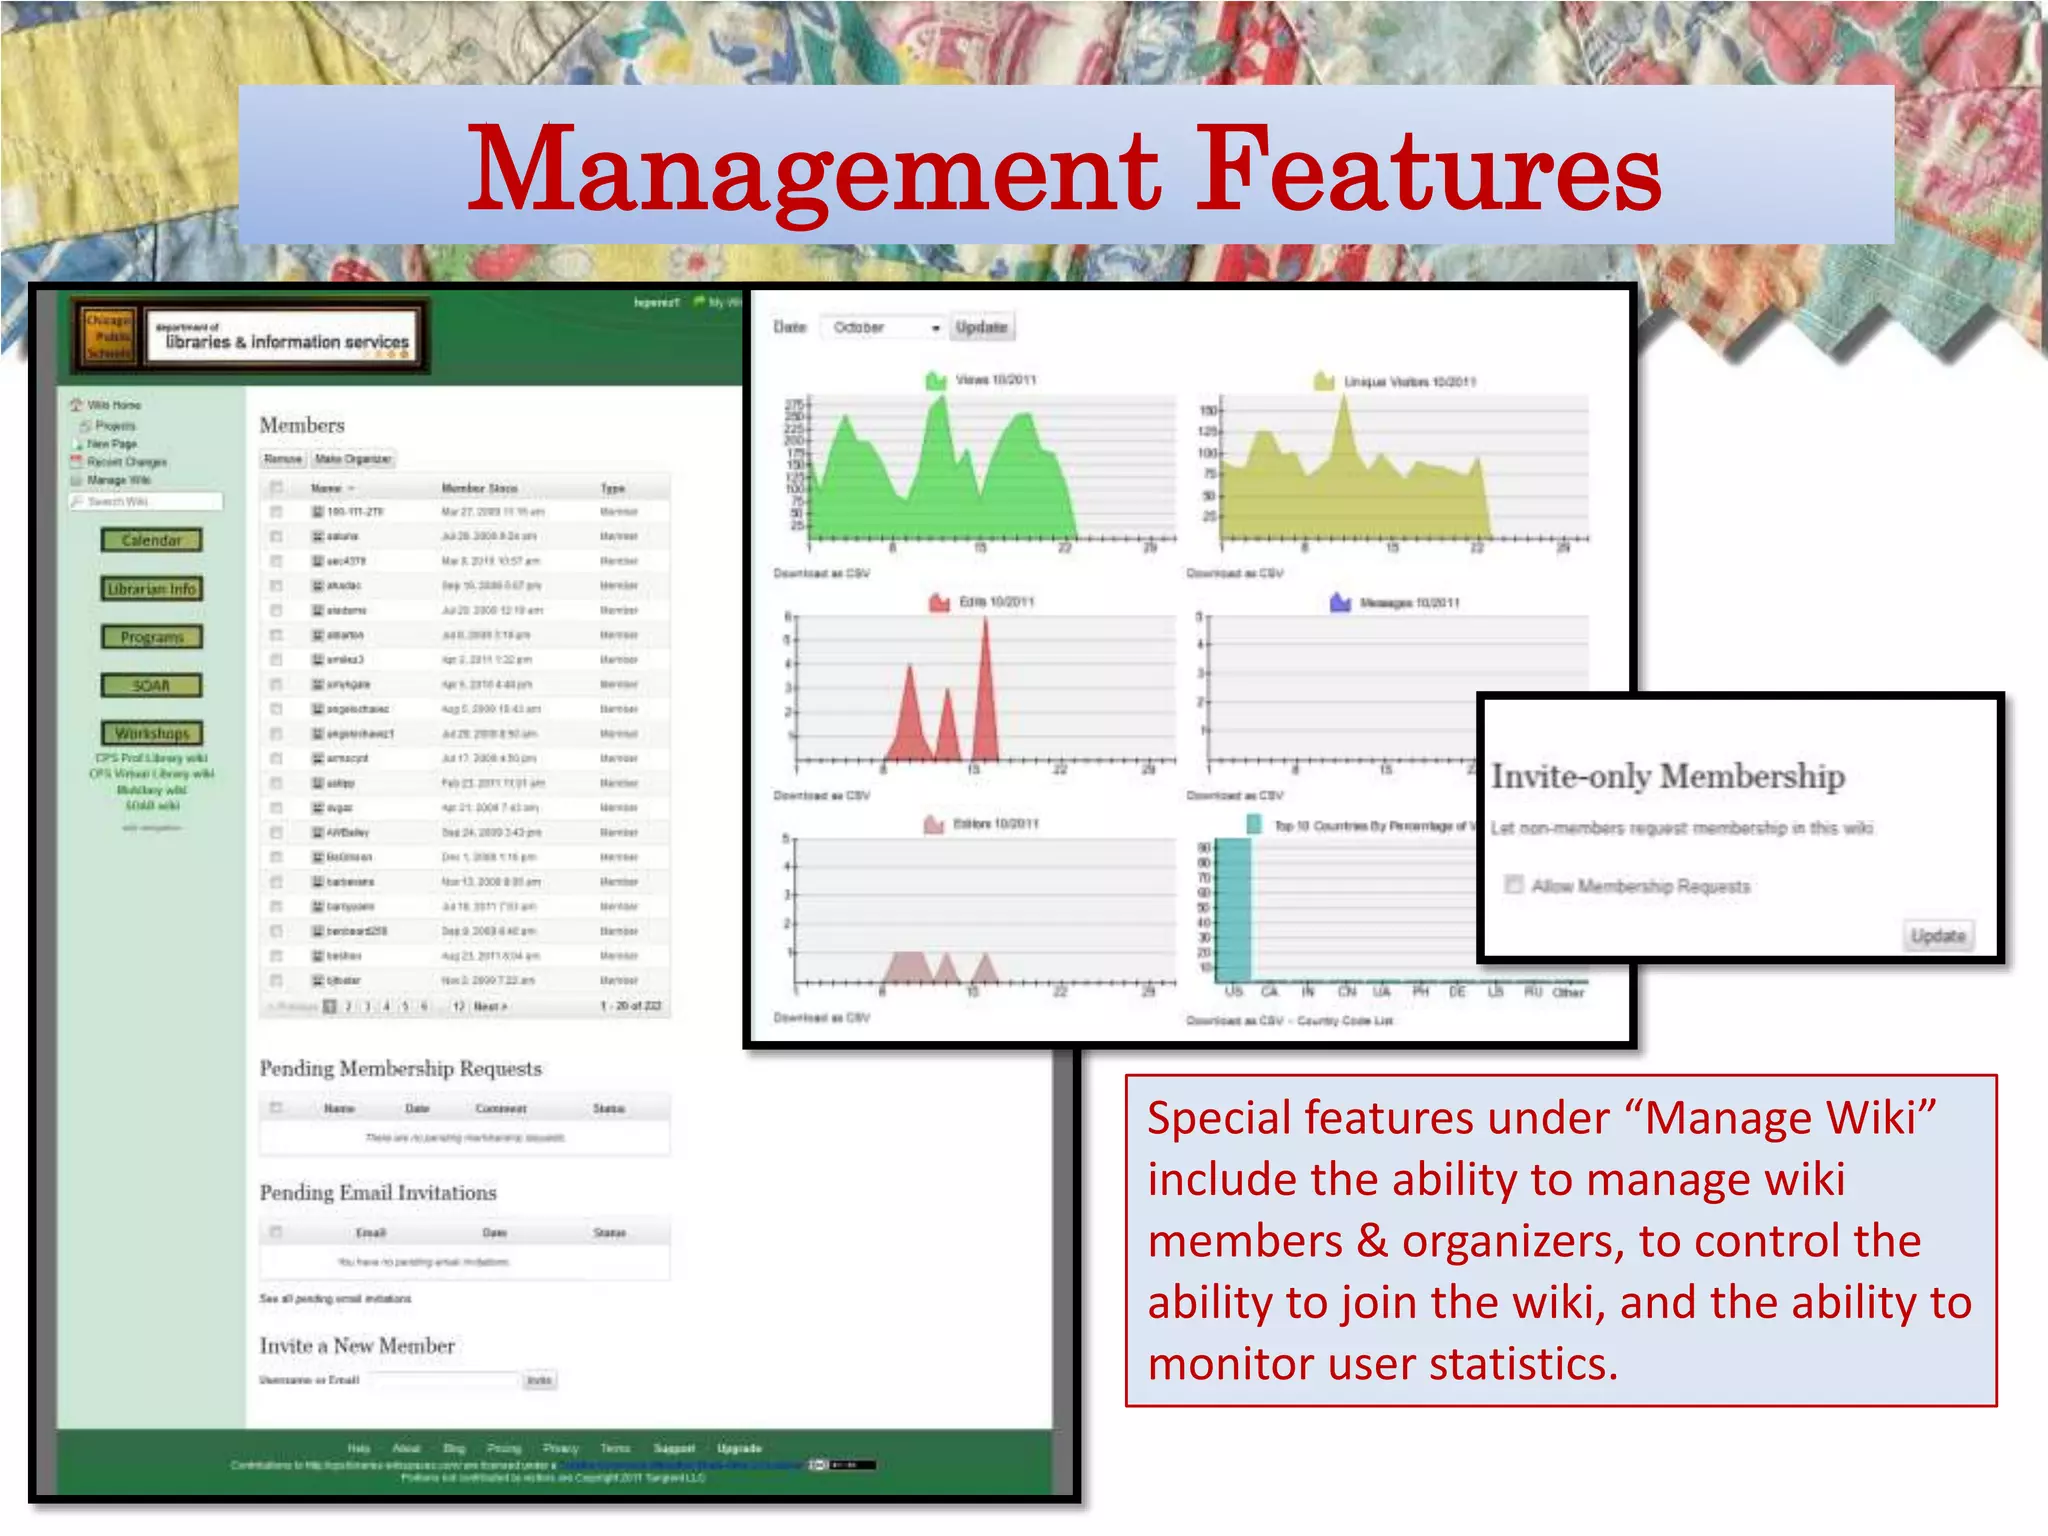
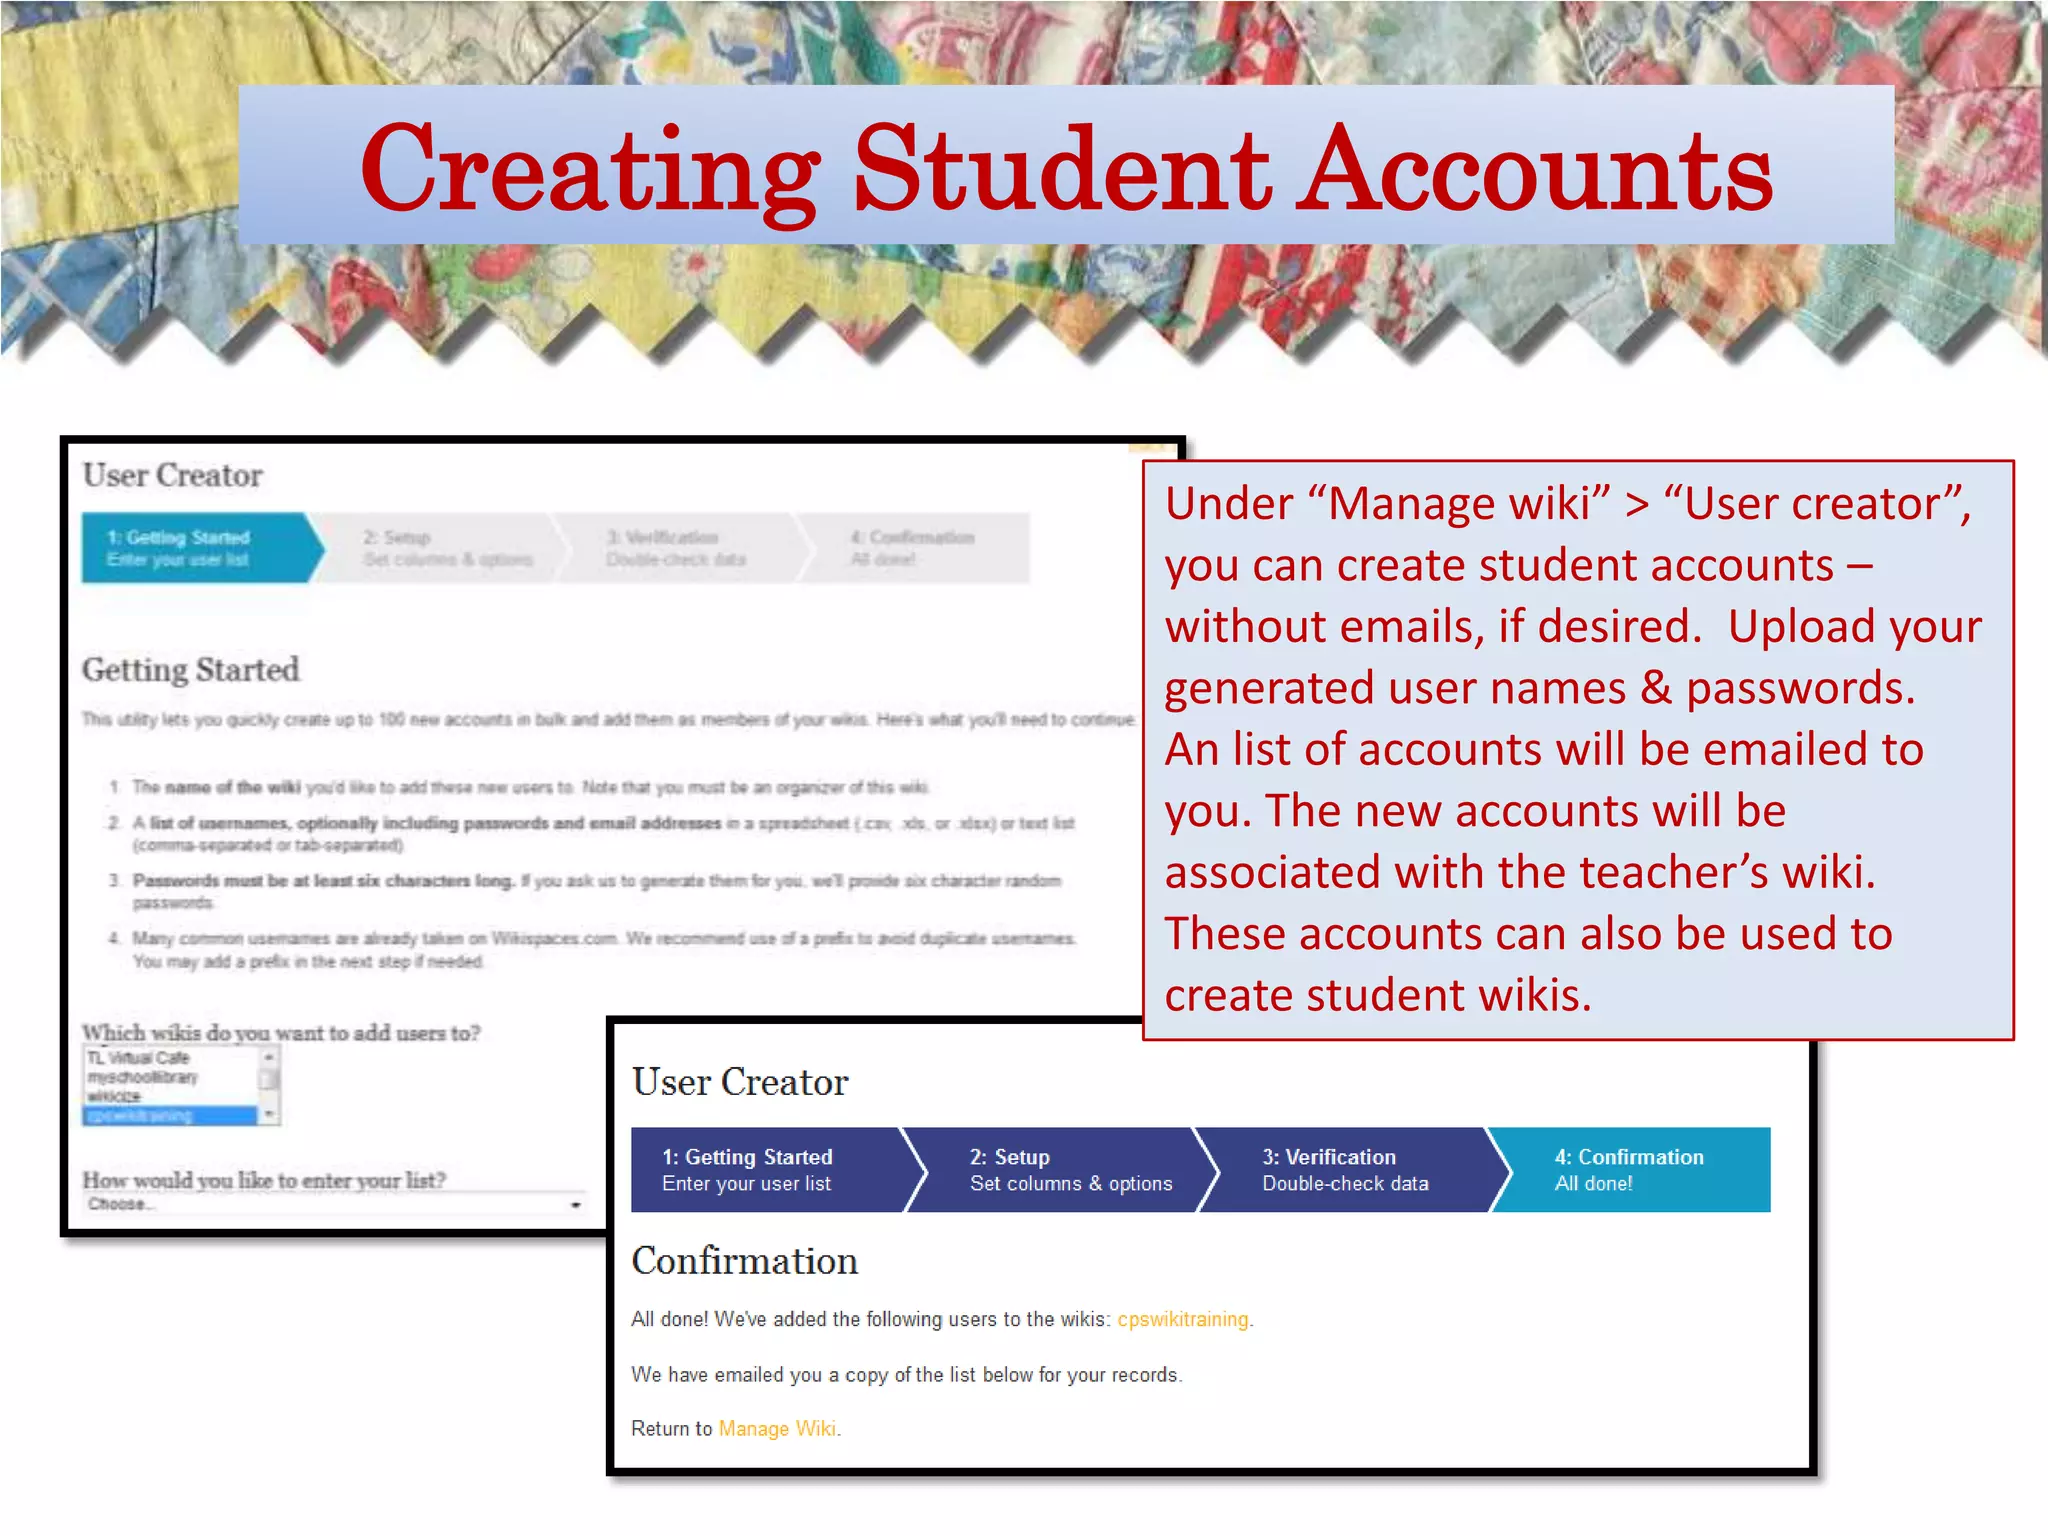
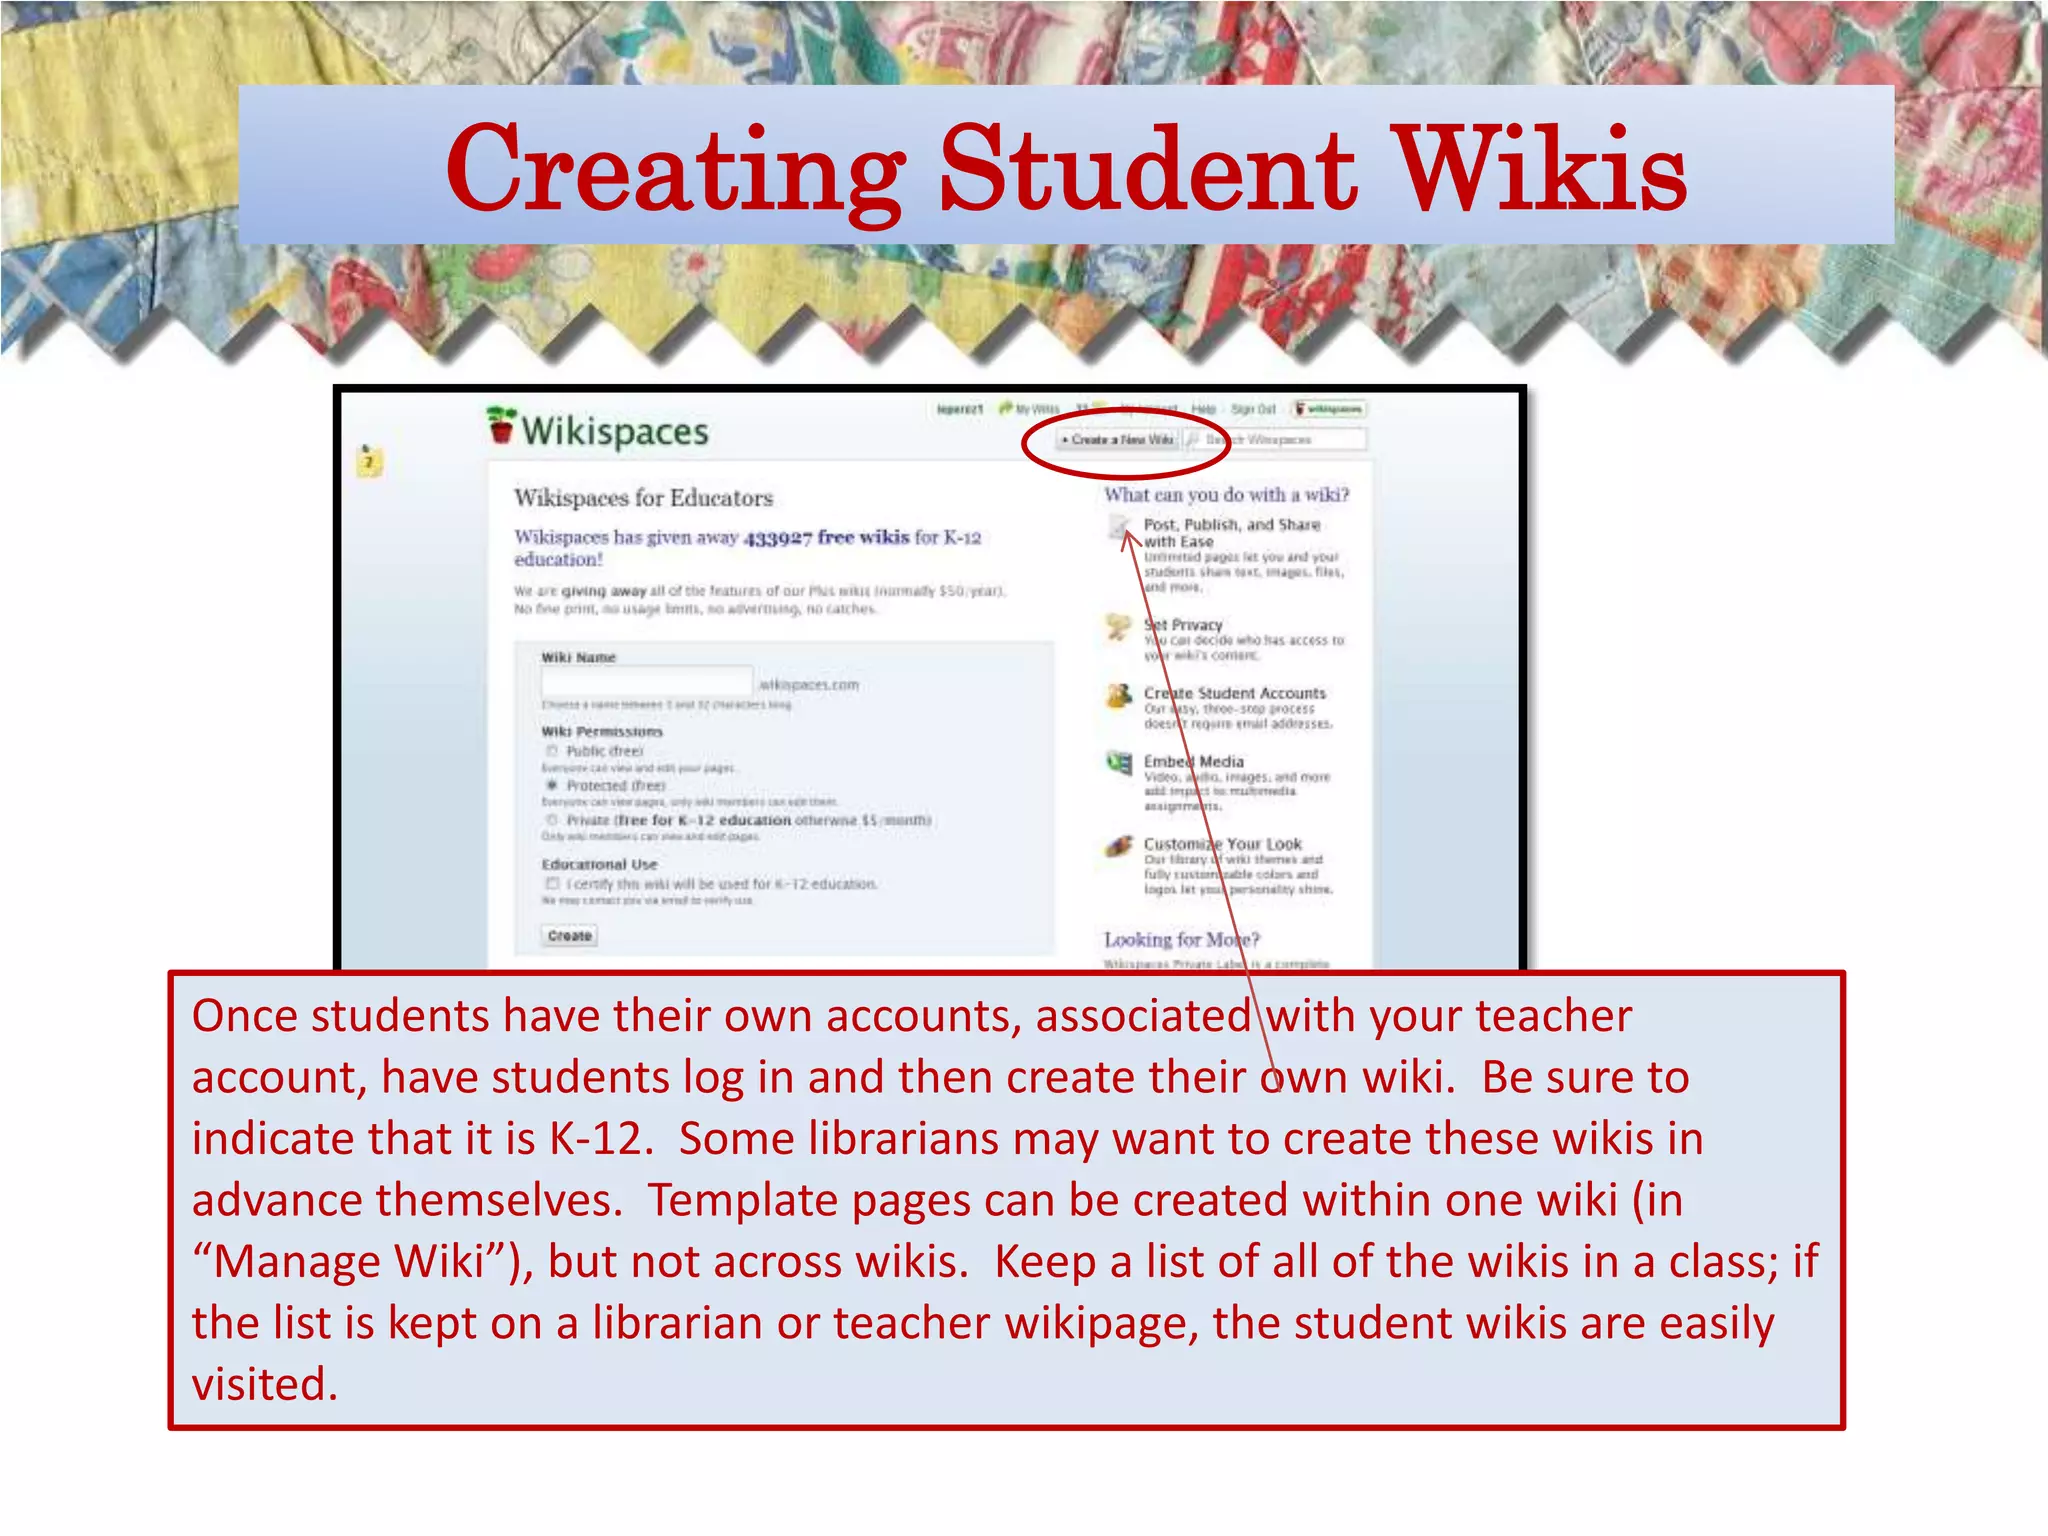
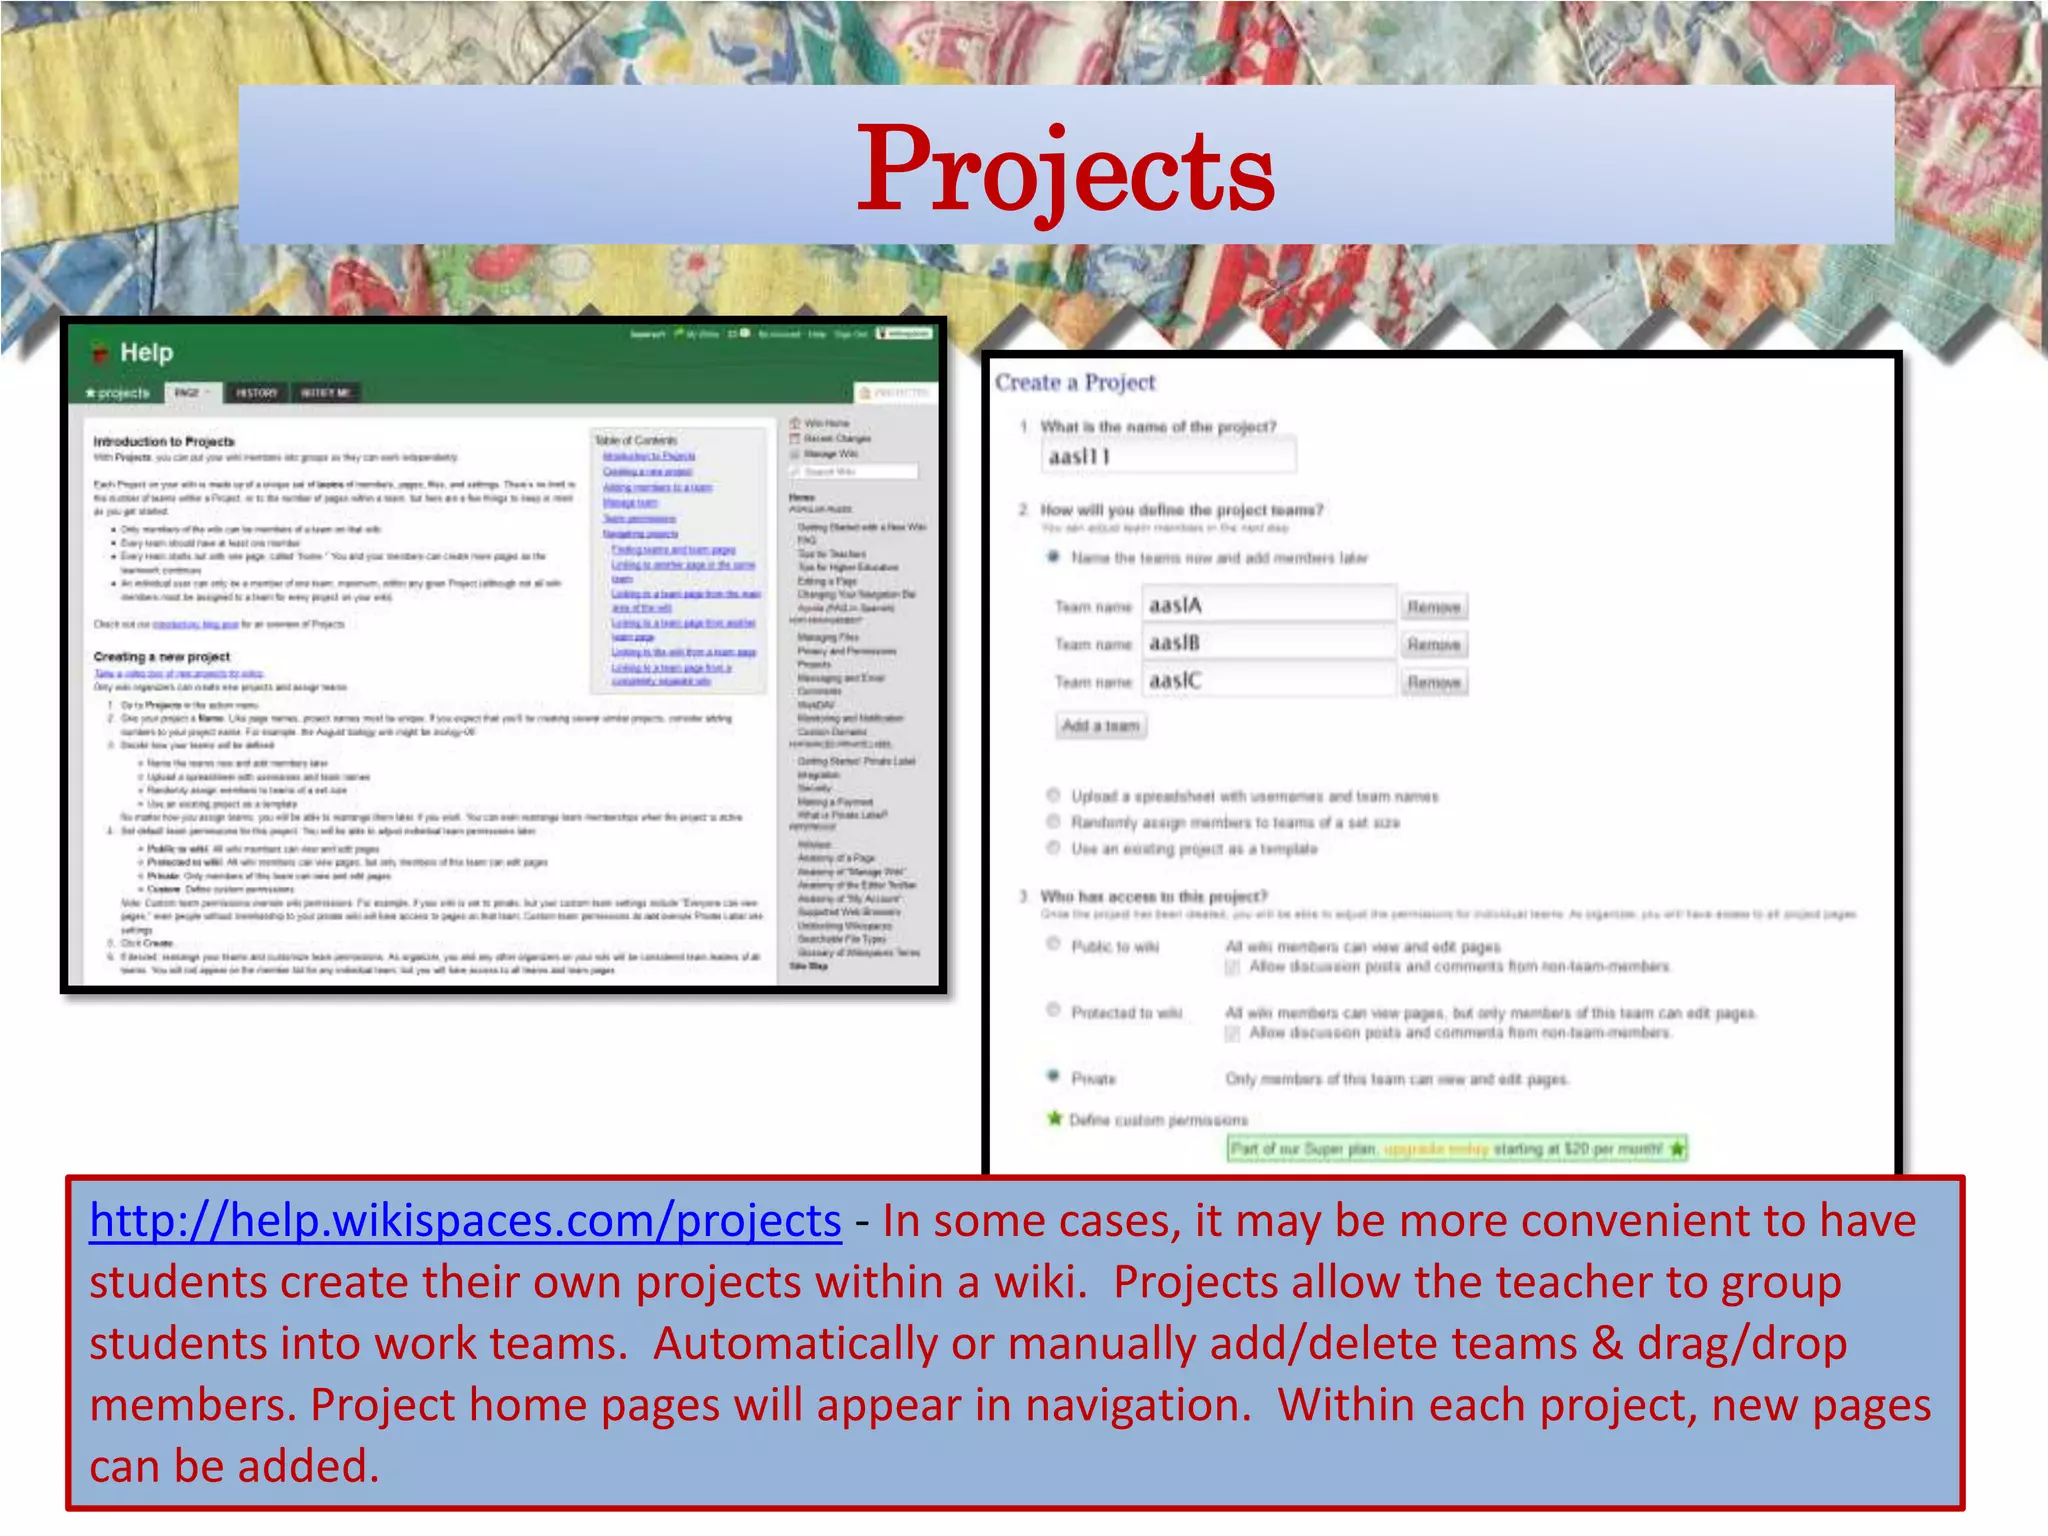
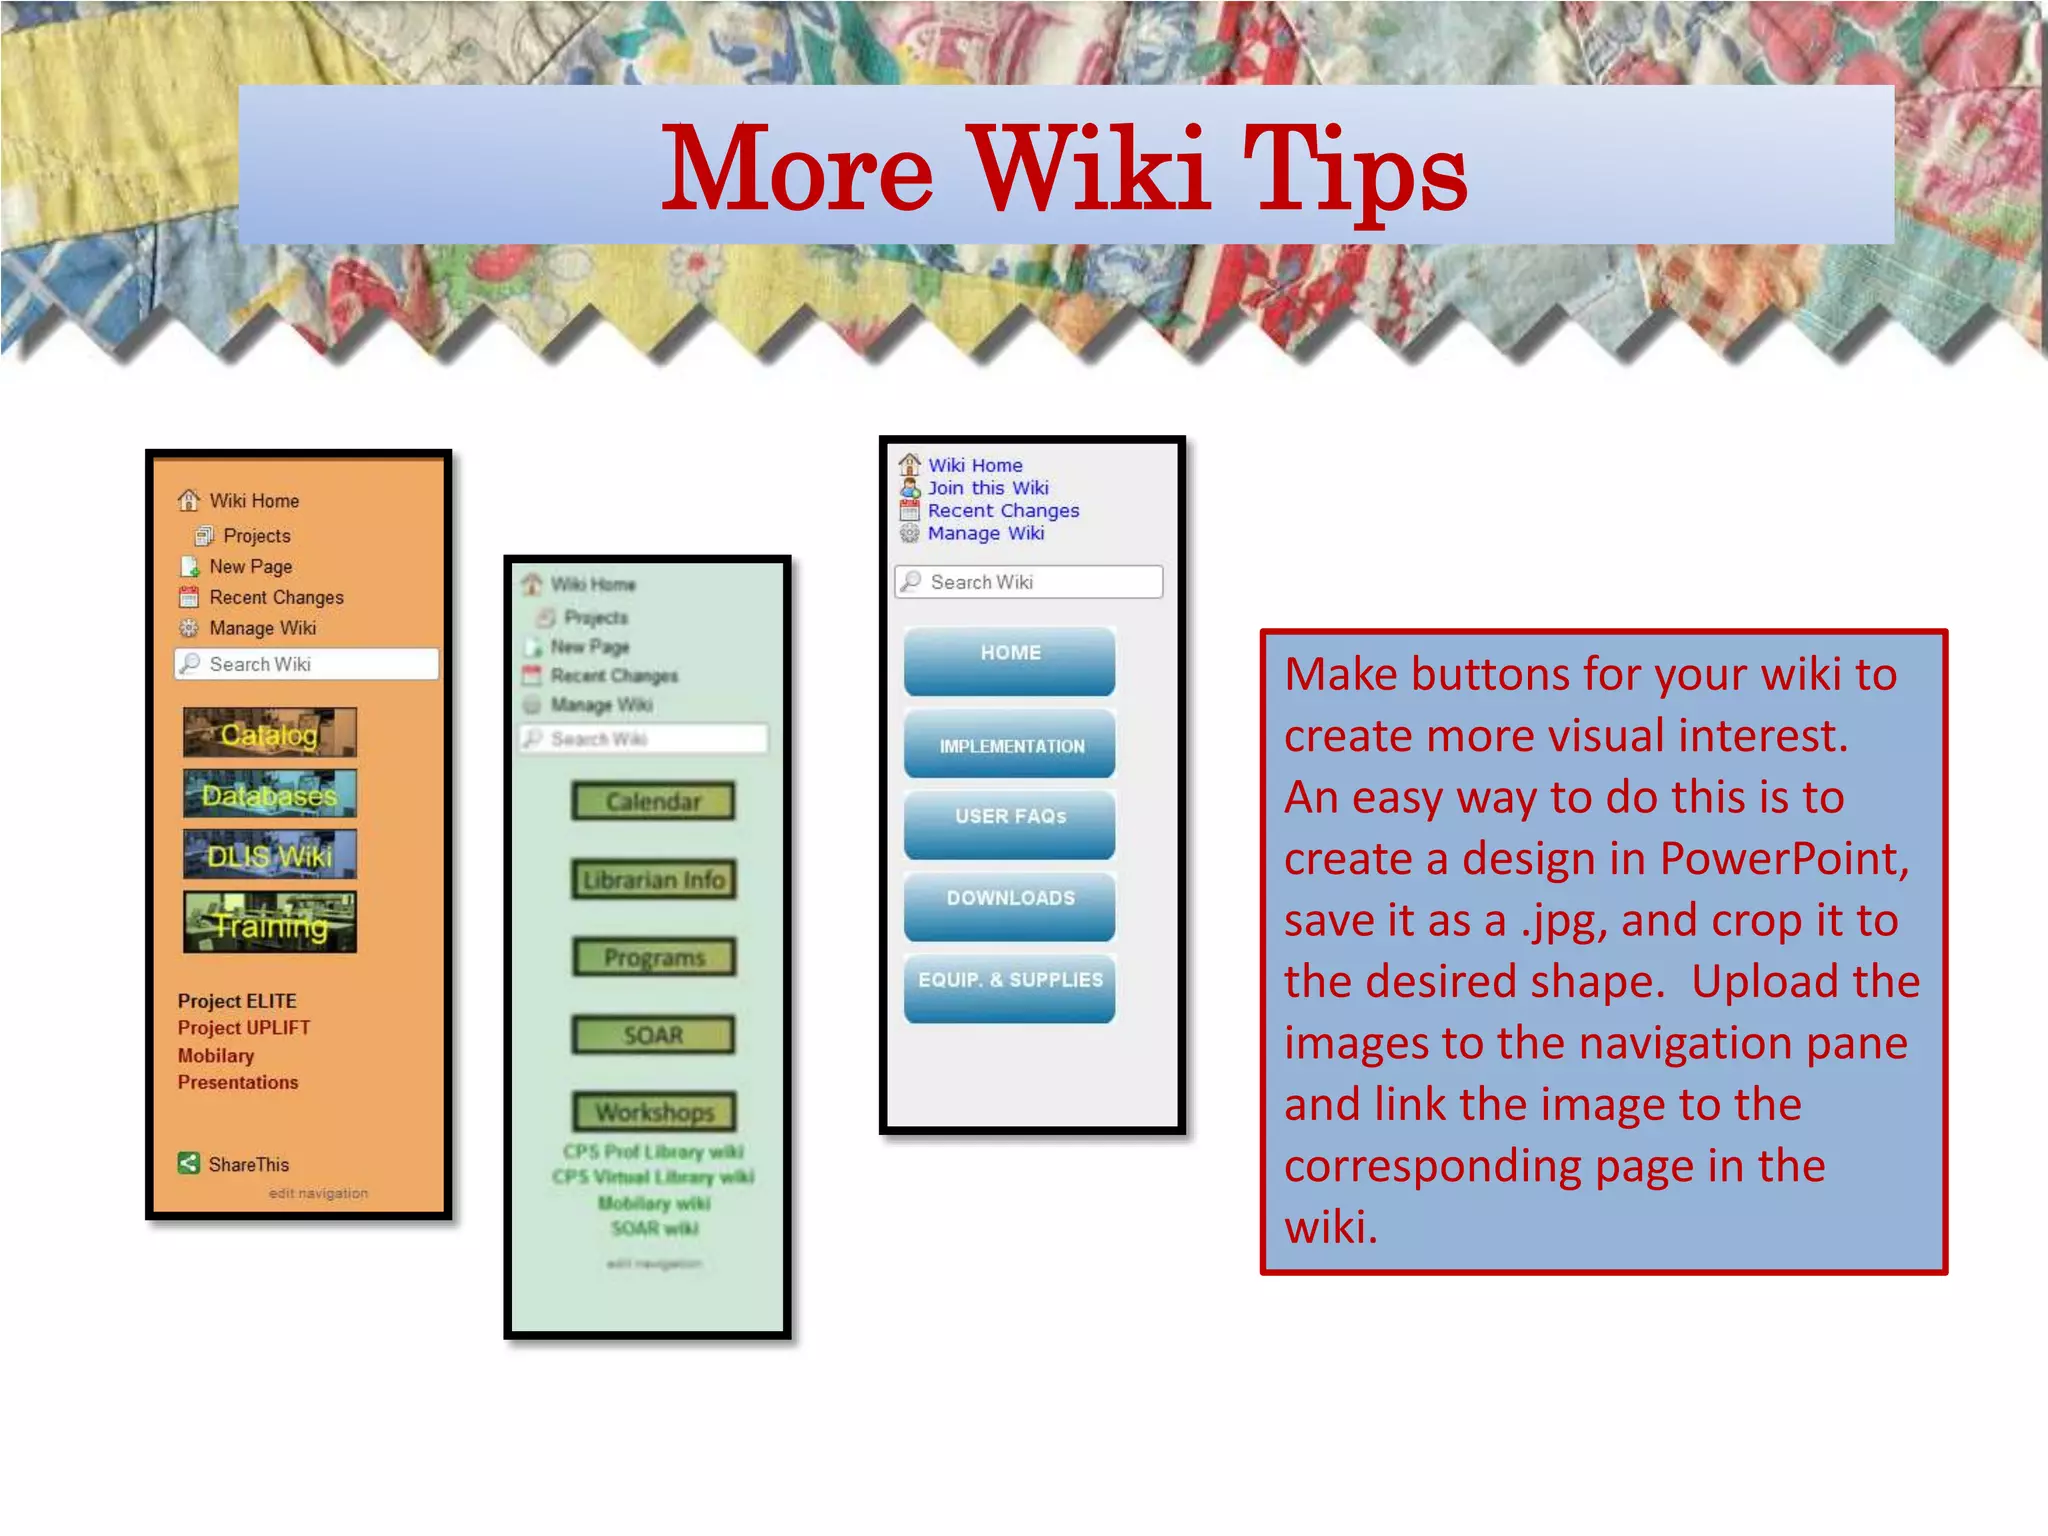
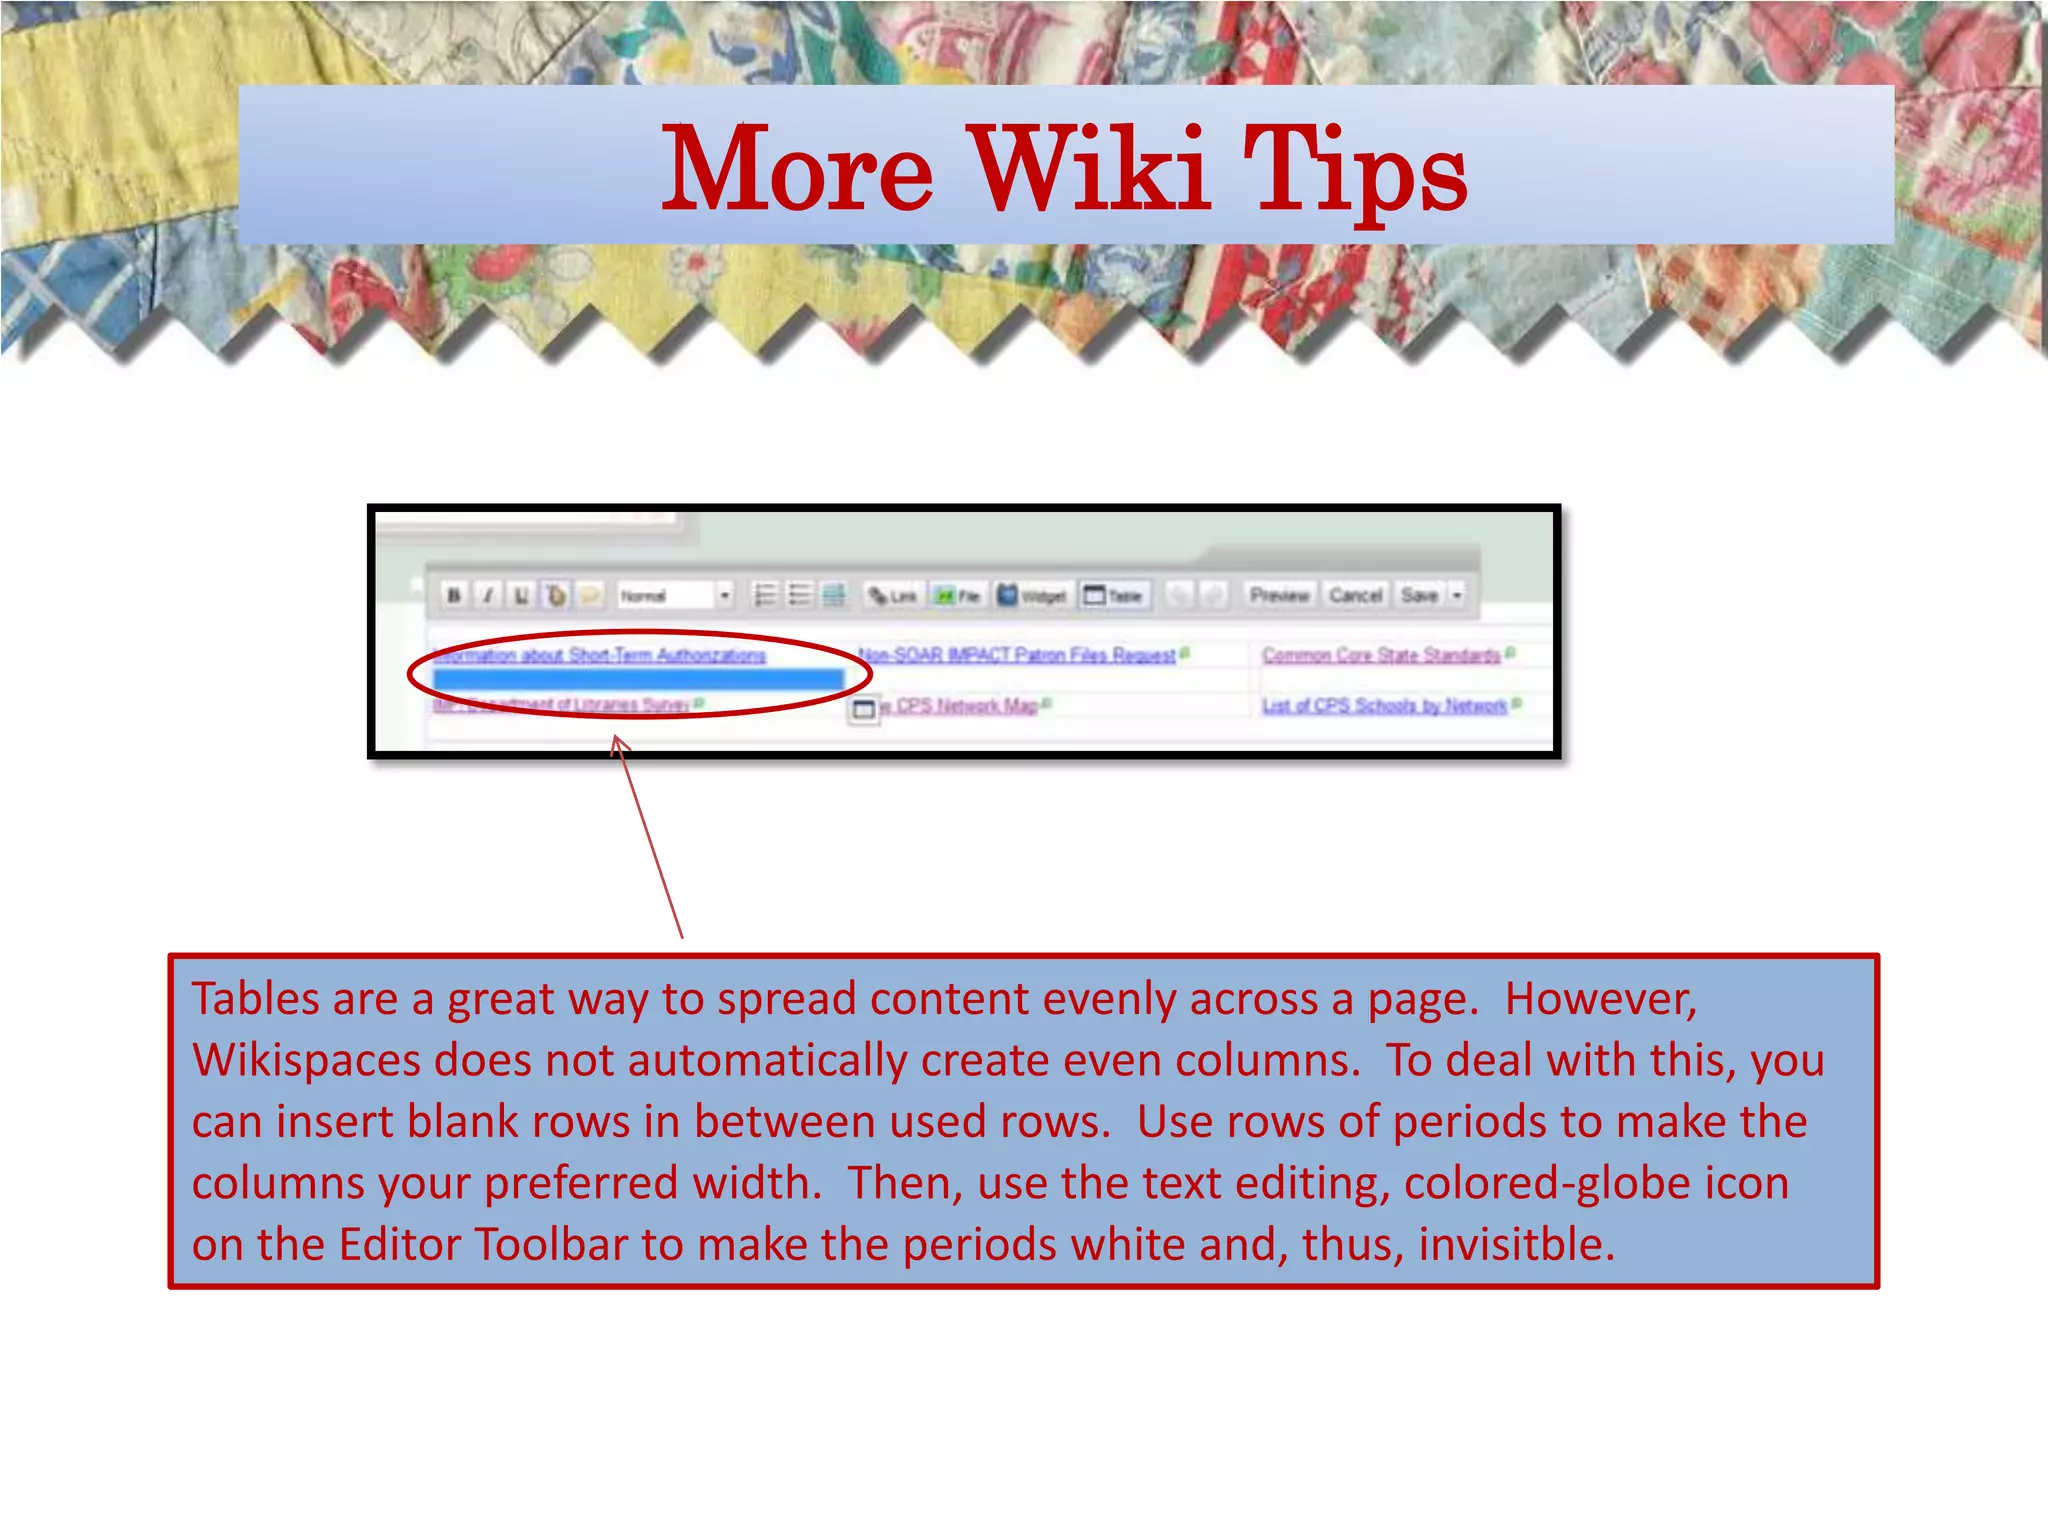
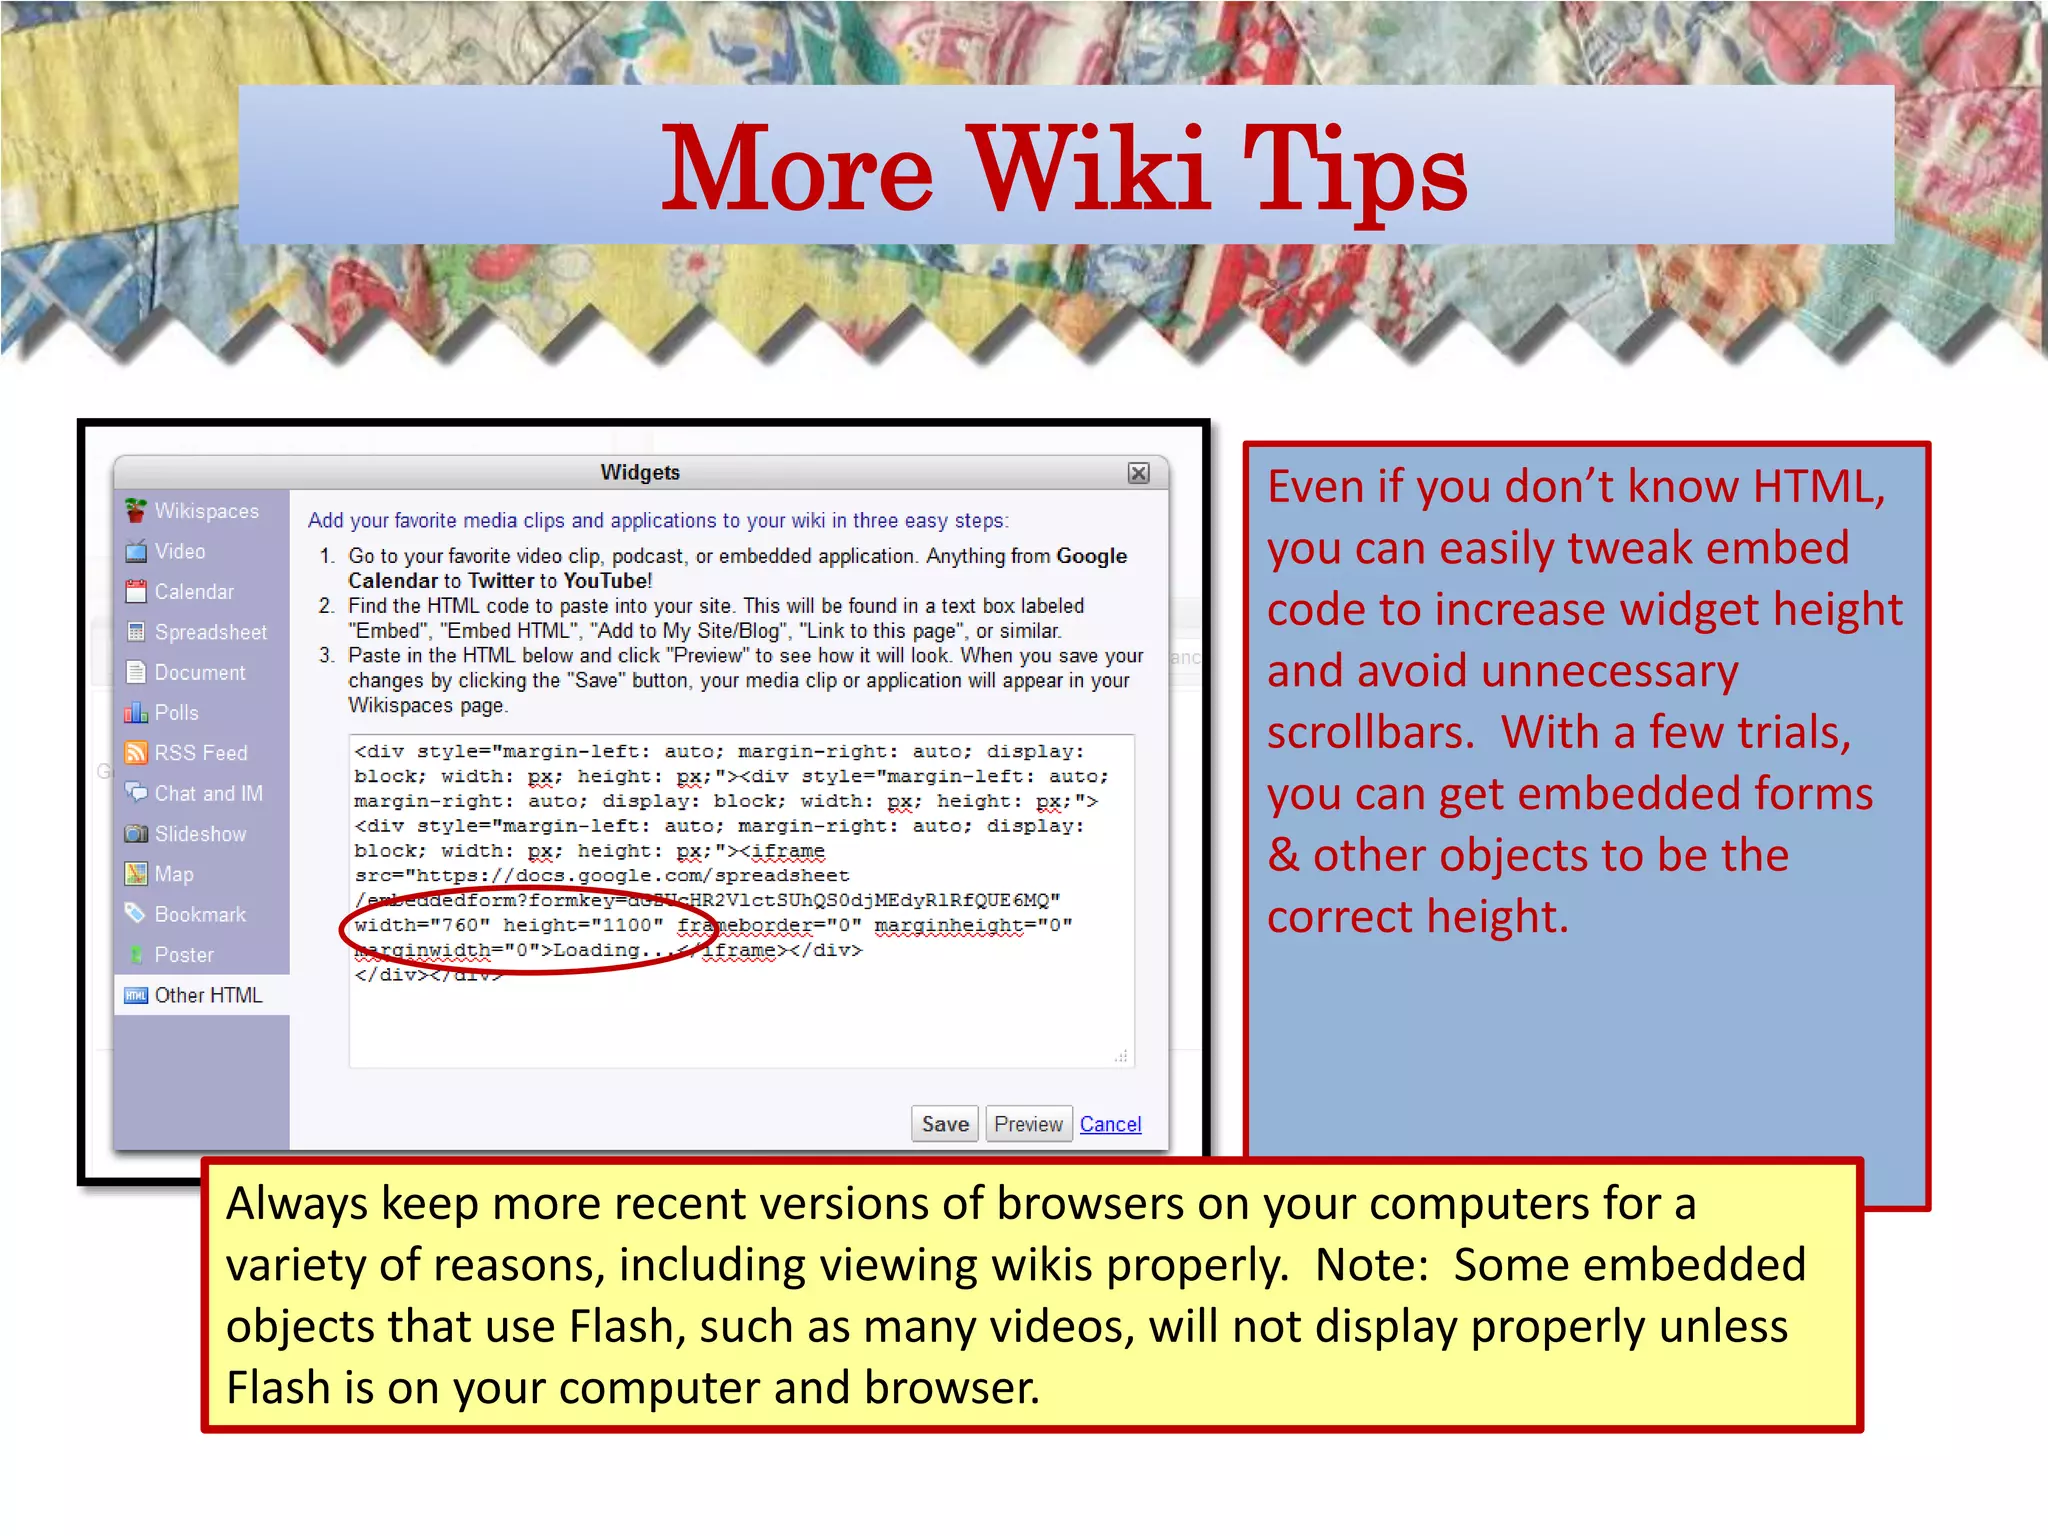
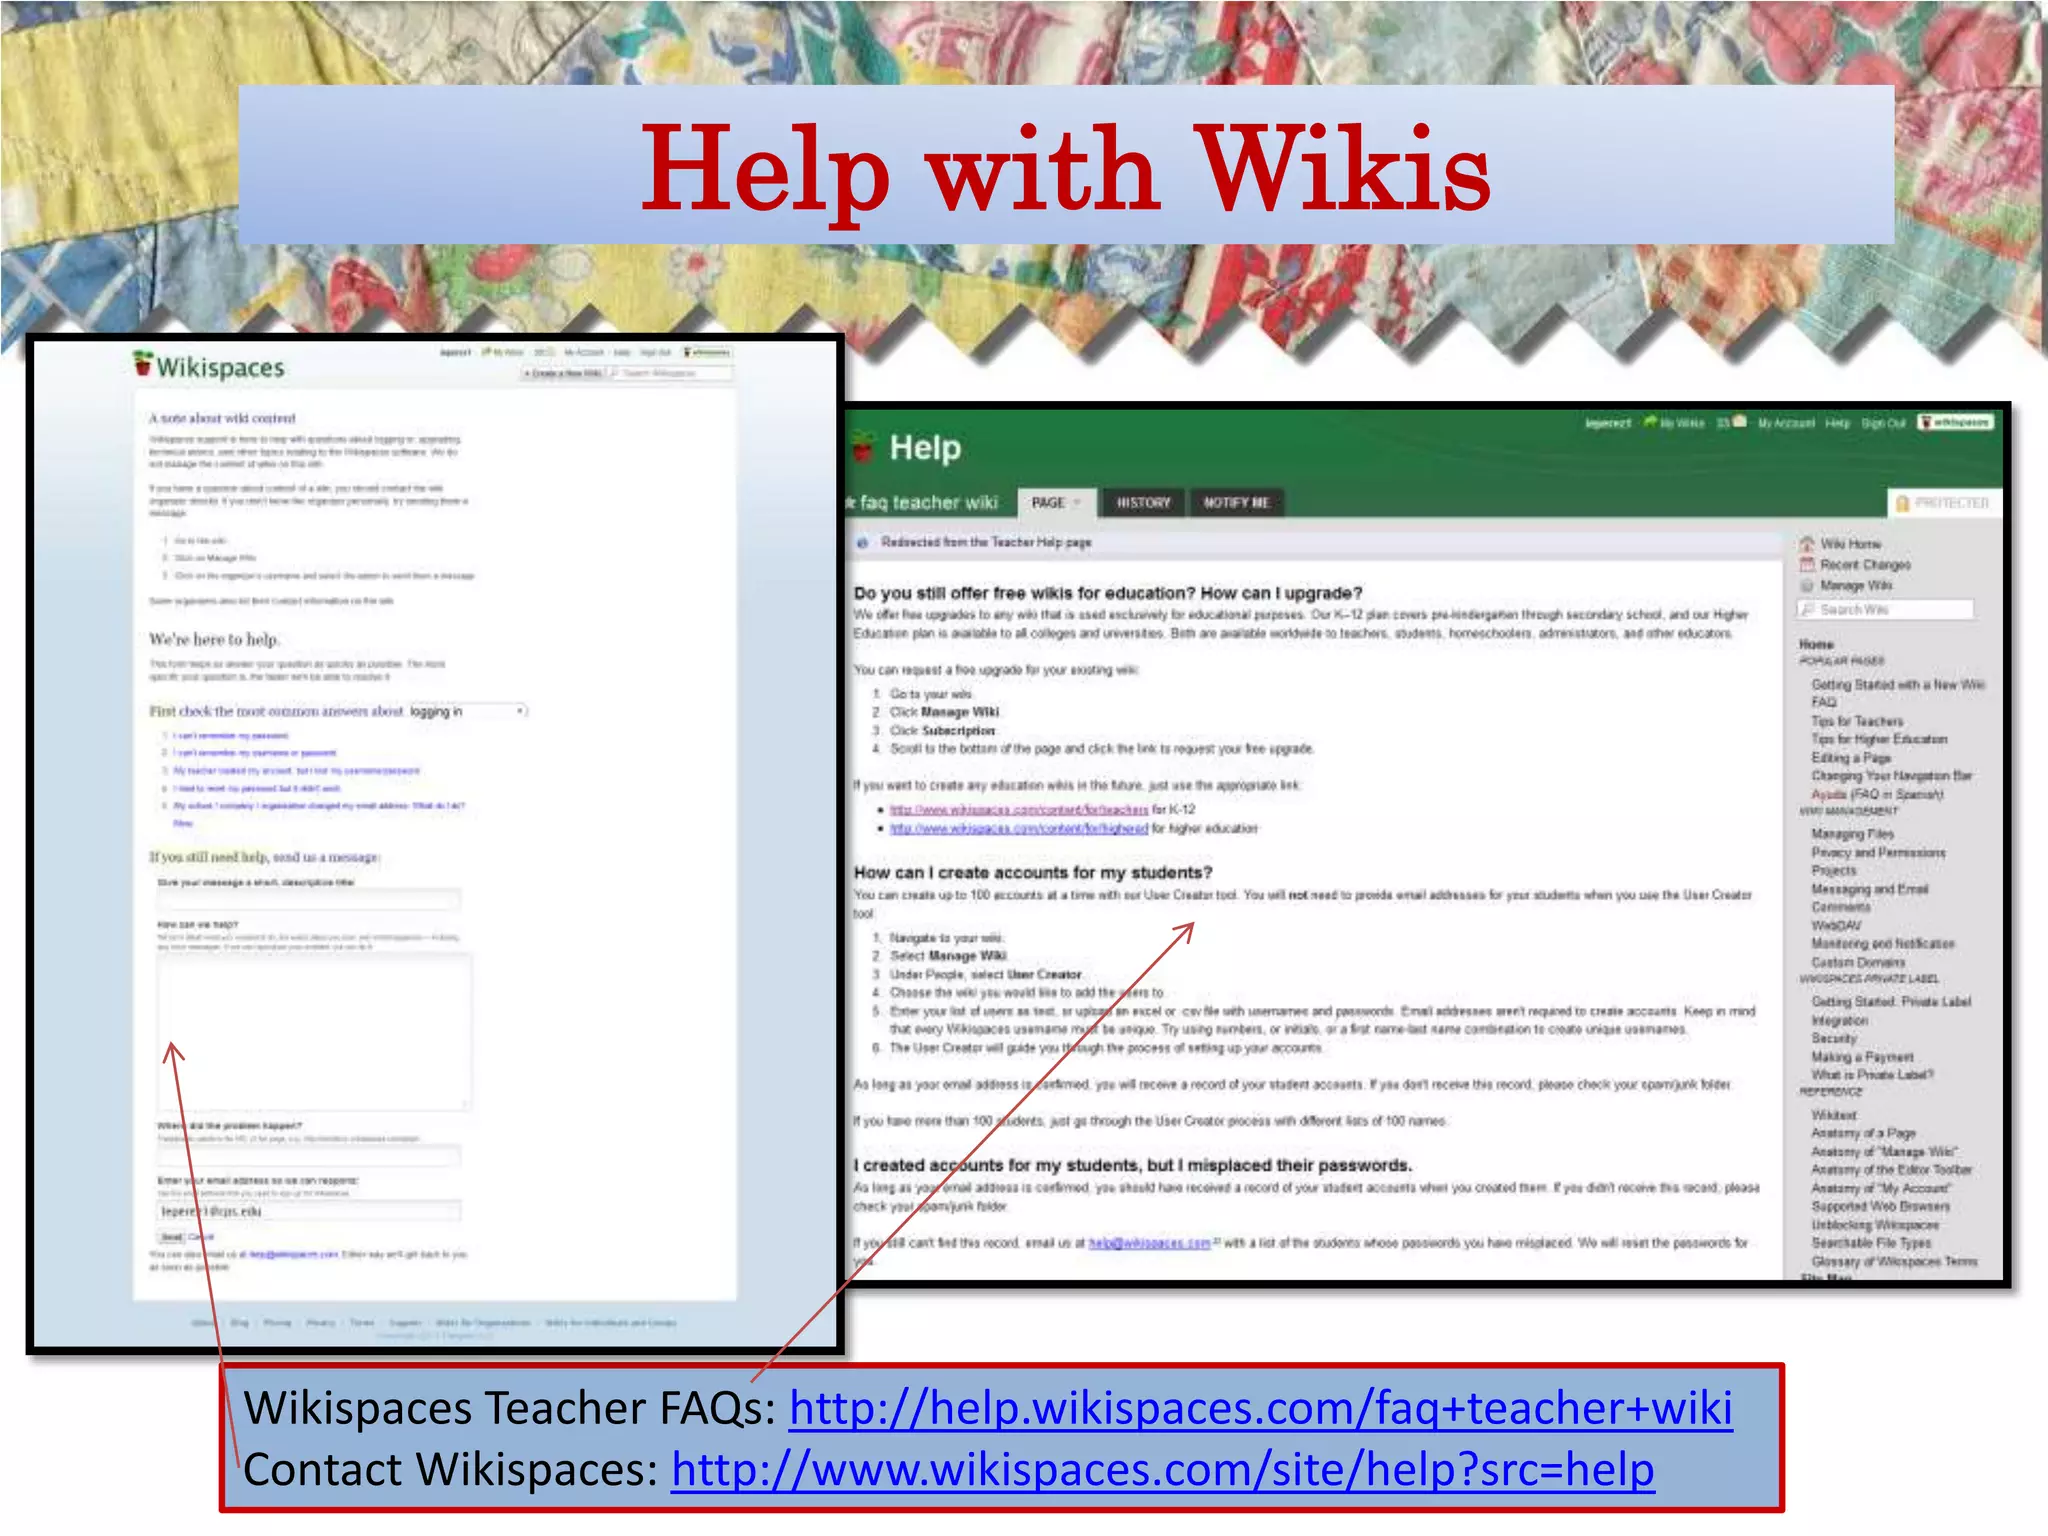
Why Wikis?
What is a wiki?


A wiki is a website with a “what you
see is what you get” editing interface.
It allows the user to easily create
basic, functional websites.
Benefits of Wikis
Librarian Examples


• Inter-American Academy Elementary School
      • http://iamslibrary.wikispaces.com/home
• Mt. Harmony Elementary School
      •http://mhesmedia.wikispaces.com
• Central Middle Library
      • http://centralmiddle.wikispaces.com
• Monarch Academy Library
      • http://monarchlibrary.wikispaces.com
• Springfield Township Virtual Library
      • http://springfieldlibrary.wikispaces.com
• Westbrook Middle School
      • http://media-in-the-middle.wikispaces.com/home
• Jamestown Elementary School
      • http://jamestownreads.wikispaces.com/home
Student Examples


• Jane Adams Research
     • http://nickim-janeaddams37.wikispaces.com/Questions
• Athens, Greece
     • http://8taylorrodney.wikispaces.com/home
• Monet
     • http://monet2.wikispaces.com/Images
• Population of Japan
     • http://japanpopulation.wikispaces.com/home
• World War I
     • http://asiamericans.wikispaces.com/home
• Explorer Louis Joliet
     • http://holmes19.wikispaces.com/home
• American Revolution
     • http://american-revolution3000.wikispaces.com/home
Getting Started
Polldaddy Poll
Create a Wikispaces Account

http://www.wikispaces.com/content/
for/teachers
Your Brand-New Wiki


Step 1: Customize it to make it your own.
Go to “Look and Feel”
Browse for a logo on your computer. The logo
must already be sized correctly. It will appear
on the upper portion of your new wiki. Hint:
Create your own custom banner in PowerPoint.
Save as a .jpeg, then use as your logo.
Select “Themes and Colors” to further
personalize your wiki.
Choose a layout & colors that you like. Select
“Preview and Customize” to more highly
customize your wiki.
The editor toolbar allows you to boldface, italicize,
or underscore text; resize text; add bulleted or
numbered lists; add horizontal rules; and perform
other functions.
More Text & Toolbar Options
                                       Note “undo”, “redo”, “preview”, &
                                       “cancel” options.


                                            Select heading
                                            sizes.


    Further edit text by selecting fonts, size,
    text color, background colors, and
    strikethrough options.
Internal & External Links


Add internal & external links to your wikis by clicking on the
“Link” button on the Editor Toolbar.
Uploading Files

                                             Documents
                                             MS Word (.doc, .docx)
                                             MS Excel (.xls, .xlsx)
                                             MS PowerPoint (.ppt, .pptx)
                                             Portable Document Format (.pdf)
                                             Text, HTML, and XML documents (.txt,
                                             .html, .xhtml, .xml)
                                             OpenDocument Formats (.odt, .ods, .odp,
                                             .odg, .odf)
                                             Rich Text Format (.rtf)

                                             Other
                                             Outlook mail folders (.pst)
                                             Java class files (.class)
                                             Image metadata (.png, .gif, .jpeg, .tiff,
                                             .bmp)
                                             Audio metadata (.mp3, .wav, .midi, .aiff,
                                             .au)


Add downloadable files to your wikis by clicking on the
“File” button on the Editor Toolbar.
Uploading Images


Use the image editor toolbar to align, resize, caption, or add
a link to an image.
Looking at Widgets
Embedding Widgets


                                                                   3. Click “save” on the widget box,
1. Copy the code from various                                      “save” on the editor toolbar to
embeddable objects, such as                                        view your embedded object.
forms, video, polls, calendars,
VoiceThreads, Glogs, etc.

                                  2. On the Editor Toolbar, select
                                  “Widget”, “Other HTML”, then past
                                  the code in the box. Hint: You can
                                  easily alter the height and widget
                                  of the object, if needed.
Adding Tables
Google Form Survey
Adding Pages


Click on the top left to add a new page. Name the page and add tags, if you
choose. Go to Manage wiki > Pages to lock/unlock, tag, or delete pages
Discussion, History, Notifications


Use the discussion tab to allow other members to comment on the page. This
is a great way to support formative teacher & peer assessment, as well as foster
collaboration. Use the history tab to monitor contributors to the page and roll
back to previous versions, if necessary. Set up notifications to receive emails
when the page is changed.
Editing Navigation


1. Traditional navigation lists every page.
   With many pages, that becomes
   cumbersome. You can select “edit
   navigation” to create a more
   manageable navigation list
2. Delete the “Include navigation” widget
   to create your own custom navigation.
3. To create your navigation, build lists of
   section titles and links to specific wiki
   pages.
Navigation Trees

Create navigation trees to
manage tiers of related
pages and to keep the top
level navigation simple.

For example, this page is a
top-level page called
“training” which leads to
various other pages.

Librarians may create top-
level pages that lead to
various teacher pages,
electronic pathfinders, or
online centers.

Wiki:
cpsproflib.wikispaces.com
Management Features


          Special features under “Manage Wiki”
          include the ability to manage wiki
          members & organizers, to control the
          ability to join the wiki, and the ability to
          monitor user statistics.
Creating Student Accounts

              Under “Manage wiki” > “User creator”,
              you can create student accounts –
              without emails, if desired. Upload your
              generated user names & passwords.
              An list of accounts will be emailed to
              you. The new accounts will be
              associated with the teacher’s wiki.
              These accounts can also be used to
              create student wikis.
Tips for Using with Students

• You can create up to 100 student accounts at once in bulk; repeat, if necessary
• No student emails are needed
• Create a list of student user names in advance; create user names unique to your school
• Create unique passwords for each student or let Wikispaces generate the passwords
• Save the account information for future reference; account information will also be
emailed to you
• Students (or the librarian, in advance) must create wikis associated with the account to
permit students to have their own wikis.
• Make librarians and collaborating teachers members of each student wiki
• Turn off private messaging in account preferences
• For librarians, wikis are a great tool to use as a container for student research. Use wikis to
hold student research information; related artifacts, such as images; to maintain a running
bibliography; to foster collaboration; and to house formative & summative assessments.
• Advise students to avoid using last names or personal, identifying information in their
wikis, unless you have signed parental permission. Keep wikis private, if desired.
• Collaborating teachers often like it if the librarian creates a page dedicated to the project
with one list linking to each student wiki to assist in the grading process
Creating Student Wikis


Once students have their own accounts, associated with your teacher
account, have students log in and then create their own wiki. Be sure to
indicate that it is K-12. Some librarians may want to create these wikis in
advance themselves. Template pages can be created within one wiki (in
“Manage Wiki”), but not across wikis. Keep a list of all of the wikis in a class; if
the list is kept on a librarian or teacher wikipage, the student wikis are easily
visited.
Projects


http://help.wikispaces.com/projects - In some cases, it may be more convenient to have
students create their own projects within a wiki. Projects allow the teacher to group
students into work teams. Automatically or manually add/delete teams & drag/drop
members. Project home pages will appear in navigation. Within each project, new pages
can be added.
More Wiki Tips


          Make buttons for your wiki to
          create more visual interest.
          An easy way to do this is to
          create a design in PowerPoint,
          save it as a .jpg, and crop it to
          the desired shape. Upload the
          images to the navigation pane
          and link the image to the
          corresponding page in the
          wiki.
More Wiki Tips


Tables are a great way to spread content evenly across a page. However,
Wikispaces does not automatically create even columns. To deal with this, you
can insert blank rows in between used rows. Use rows of periods to make the
columns your preferred width. Then, use the text editing, colored-globe icon
on the Editor Toolbar to make the periods white and, thus, invisitble.
More Wiki Tips

                                                  Even if you don’t know HTML,
                                                  you can easily tweak embed
                                                  code to increase widget height
                                                  and avoid unnecessary
                                                  scrollbars. With a few trials,
                                                  you can get embedded forms
                                                  & other objects to be the
                                                  correct height.


Always keep more recent versions of browsers on your computers for a
variety of reasons, including viewing wikis properly. Note: Some embedded
objects that use Flash, such as many videos, will not display properly unless
Flash is on your computer and browser.
Help with Wikis


Wikispaces Teacher FAQs: http://help.wikispaces.com/faq+teacher+wiki
Contact Wikispaces: http://www.wikispaces.com/site/help?src=help
Last Words


• Start with your own Library wiki before trying wikis with your students
• Go slow and let your wiki grow organically
• The only way you can “damage” your wiki is to delete it. Otherwise, you can
always recover your work. (Drafts are saved or you can revert to previous pages
in the History tab.)
• Teach students to create their own wikis; that is the best use of the technology
• You have full permission to use any of my materials on any of my wikis for your
own training. Just cite the source.

                       Have a “Wiki” Good Time!!
Survey Monkey
  Exit Survey
Contact


          leperez1@cps.edu

          Twitter: @leperez1

          Facebook: Lisa Perez

Taking Wikis to the Next Level - AASL 2011

  • 2.
  • 3.
    What is awiki? A wiki is a website with a “what you see is what you get” editing interface. It allows the user to easily create basic, functional websites.
  • 4.
  • 5.
    Librarian Examples • Inter-AmericanAcademy Elementary School • http://iamslibrary.wikispaces.com/home • Mt. Harmony Elementary School •http://mhesmedia.wikispaces.com • Central Middle Library • http://centralmiddle.wikispaces.com • Monarch Academy Library • http://monarchlibrary.wikispaces.com • Springfield Township Virtual Library • http://springfieldlibrary.wikispaces.com • Westbrook Middle School • http://media-in-the-middle.wikispaces.com/home • Jamestown Elementary School • http://jamestownreads.wikispaces.com/home
  • 6.
    Student Examples • JaneAdams Research • http://nickim-janeaddams37.wikispaces.com/Questions • Athens, Greece • http://8taylorrodney.wikispaces.com/home • Monet • http://monet2.wikispaces.com/Images • Population of Japan • http://japanpopulation.wikispaces.com/home • World War I • http://asiamericans.wikispaces.com/home • Explorer Louis Joliet • http://holmes19.wikispaces.com/home • American Revolution • http://american-revolution3000.wikispaces.com/home
  • 7.
  • 8.
  • 9.
    Create a WikispacesAccount http://www.wikispaces.com/content/ for/teachers
  • 10.
    Your Brand-New Wiki Step1: Customize it to make it your own.
  • 11.
    Go to “Lookand Feel”
  • 12.
    Browse for alogo on your computer. The logo must already be sized correctly. It will appear on the upper portion of your new wiki. Hint: Create your own custom banner in PowerPoint. Save as a .jpeg, then use as your logo.
  • 13.
    Select “Themes andColors” to further personalize your wiki.
  • 14.
    Choose a layout& colors that you like. Select “Preview and Customize” to more highly customize your wiki.
  • 15.
    The editor toolbarallows you to boldface, italicize, or underscore text; resize text; add bulleted or numbered lists; add horizontal rules; and perform other functions.
  • 16.
    More Text &Toolbar Options Note “undo”, “redo”, “preview”, & “cancel” options. Select heading sizes. Further edit text by selecting fonts, size, text color, background colors, and strikethrough options.
  • 17.
    Internal & ExternalLinks Add internal & external links to your wikis by clicking on the “Link” button on the Editor Toolbar.
  • 18.
    Uploading Files Documents MS Word (.doc, .docx) MS Excel (.xls, .xlsx) MS PowerPoint (.ppt, .pptx) Portable Document Format (.pdf) Text, HTML, and XML documents (.txt, .html, .xhtml, .xml) OpenDocument Formats (.odt, .ods, .odp, .odg, .odf) Rich Text Format (.rtf) Other Outlook mail folders (.pst) Java class files (.class) Image metadata (.png, .gif, .jpeg, .tiff, .bmp) Audio metadata (.mp3, .wav, .midi, .aiff, .au) Add downloadable files to your wikis by clicking on the “File” button on the Editor Toolbar.
  • 19.
    Uploading Images Use theimage editor toolbar to align, resize, caption, or add a link to an image.
  • 20.
  • 21.
    Embedding Widgets 3. Click “save” on the widget box, 1. Copy the code from various “save” on the editor toolbar to embeddable objects, such as view your embedded object. forms, video, polls, calendars, VoiceThreads, Glogs, etc. 2. On the Editor Toolbar, select “Widget”, “Other HTML”, then past the code in the box. Hint: You can easily alter the height and widget of the object, if needed.
  • 22.
  • 23.
  • 24.
    Adding Pages Click onthe top left to add a new page. Name the page and add tags, if you choose. Go to Manage wiki > Pages to lock/unlock, tag, or delete pages
  • 25.
    Discussion, History, Notifications Usethe discussion tab to allow other members to comment on the page. This is a great way to support formative teacher & peer assessment, as well as foster collaboration. Use the history tab to monitor contributors to the page and roll back to previous versions, if necessary. Set up notifications to receive emails when the page is changed.
  • 26.
    Editing Navigation 1. Traditionalnavigation lists every page. With many pages, that becomes cumbersome. You can select “edit navigation” to create a more manageable navigation list 2. Delete the “Include navigation” widget to create your own custom navigation. 3. To create your navigation, build lists of section titles and links to specific wiki pages.
  • 27.
    Navigation Trees Create navigationtrees to manage tiers of related pages and to keep the top level navigation simple. For example, this page is a top-level page called “training” which leads to various other pages. Librarians may create top- level pages that lead to various teacher pages, electronic pathfinders, or online centers. Wiki: cpsproflib.wikispaces.com
  • 28.
    Management Features Special features under “Manage Wiki” include the ability to manage wiki members & organizers, to control the ability to join the wiki, and the ability to monitor user statistics.
  • 29.
    Creating Student Accounts Under “Manage wiki” > “User creator”, you can create student accounts – without emails, if desired. Upload your generated user names & passwords. An list of accounts will be emailed to you. The new accounts will be associated with the teacher’s wiki. These accounts can also be used to create student wikis.
  • 30.
    Tips for Usingwith Students • You can create up to 100 student accounts at once in bulk; repeat, if necessary • No student emails are needed • Create a list of student user names in advance; create user names unique to your school • Create unique passwords for each student or let Wikispaces generate the passwords • Save the account information for future reference; account information will also be emailed to you • Students (or the librarian, in advance) must create wikis associated with the account to permit students to have their own wikis. • Make librarians and collaborating teachers members of each student wiki • Turn off private messaging in account preferences • For librarians, wikis are a great tool to use as a container for student research. Use wikis to hold student research information; related artifacts, such as images; to maintain a running bibliography; to foster collaboration; and to house formative & summative assessments. • Advise students to avoid using last names or personal, identifying information in their wikis, unless you have signed parental permission. Keep wikis private, if desired. • Collaborating teachers often like it if the librarian creates a page dedicated to the project with one list linking to each student wiki to assist in the grading process
  • 31.
    Creating Student Wikis Oncestudents have their own accounts, associated with your teacher account, have students log in and then create their own wiki. Be sure to indicate that it is K-12. Some librarians may want to create these wikis in advance themselves. Template pages can be created within one wiki (in “Manage Wiki”), but not across wikis. Keep a list of all of the wikis in a class; if the list is kept on a librarian or teacher wikipage, the student wikis are easily visited.
  • 32.
    Projects http://help.wikispaces.com/projects - Insome cases, it may be more convenient to have students create their own projects within a wiki. Projects allow the teacher to group students into work teams. Automatically or manually add/delete teams & drag/drop members. Project home pages will appear in navigation. Within each project, new pages can be added.
  • 33.
    More Wiki Tips Make buttons for your wiki to create more visual interest. An easy way to do this is to create a design in PowerPoint, save it as a .jpg, and crop it to the desired shape. Upload the images to the navigation pane and link the image to the corresponding page in the wiki.
  • 34.
    More Wiki Tips Tablesare a great way to spread content evenly across a page. However, Wikispaces does not automatically create even columns. To deal with this, you can insert blank rows in between used rows. Use rows of periods to make the columns your preferred width. Then, use the text editing, colored-globe icon on the Editor Toolbar to make the periods white and, thus, invisitble.
  • 35.
    More Wiki Tips Even if you don’t know HTML, you can easily tweak embed code to increase widget height and avoid unnecessary scrollbars. With a few trials, you can get embedded forms & other objects to be the correct height. Always keep more recent versions of browsers on your computers for a variety of reasons, including viewing wikis properly. Note: Some embedded objects that use Flash, such as many videos, will not display properly unless Flash is on your computer and browser.
  • 36.
    Help with Wikis WikispacesTeacher FAQs: http://help.wikispaces.com/faq+teacher+wiki Contact Wikispaces: http://www.wikispaces.com/site/help?src=help
  • 37.
    Last Words • Startwith your own Library wiki before trying wikis with your students • Go slow and let your wiki grow organically • The only way you can “damage” your wiki is to delete it. Otherwise, you can always recover your work. (Drafts are saved or you can revert to previous pages in the History tab.) • Teach students to create their own wikis; that is the best use of the technology • You have full permission to use any of my materials on any of my wikis for your own training. Just cite the source. Have a “Wiki” Good Time!!
  • 38.
    Survey Monkey Exit Survey
  • 39.
    Contact leperez1@cps.edu Twitter: @leperez1 Facebook: Lisa Perez