Download to read offline


![INFO
Press guide key and then press INFO key, this key not only has the same Function
as Display key in Information when playingMultimedia, But also can provide the operation
the image files. Use this key to change the display time as elapsed/remening time.
REPEAT
Press [REPEAT] on remote in main menu, the symbol of "Repeat Folder","Folder","Shuffle"
"Random”,”Single”,”Repeat One “will show one after another for repeat sequences.
While playing image/video the repeat options are displayed on the screen and can
be changed by pressing this key
.
FR (FAST REVERSE)
FR key is used for backward the playing track / item by the speed of (X2, X4, X8, X16,X32)
FF (FAST FORWARD)
FF key is used for forward the playing track / item by the speed of (X2, X4, X8, X16,X32)
NEXT
NEXT key is used to select next track/item for play in multimedia source.
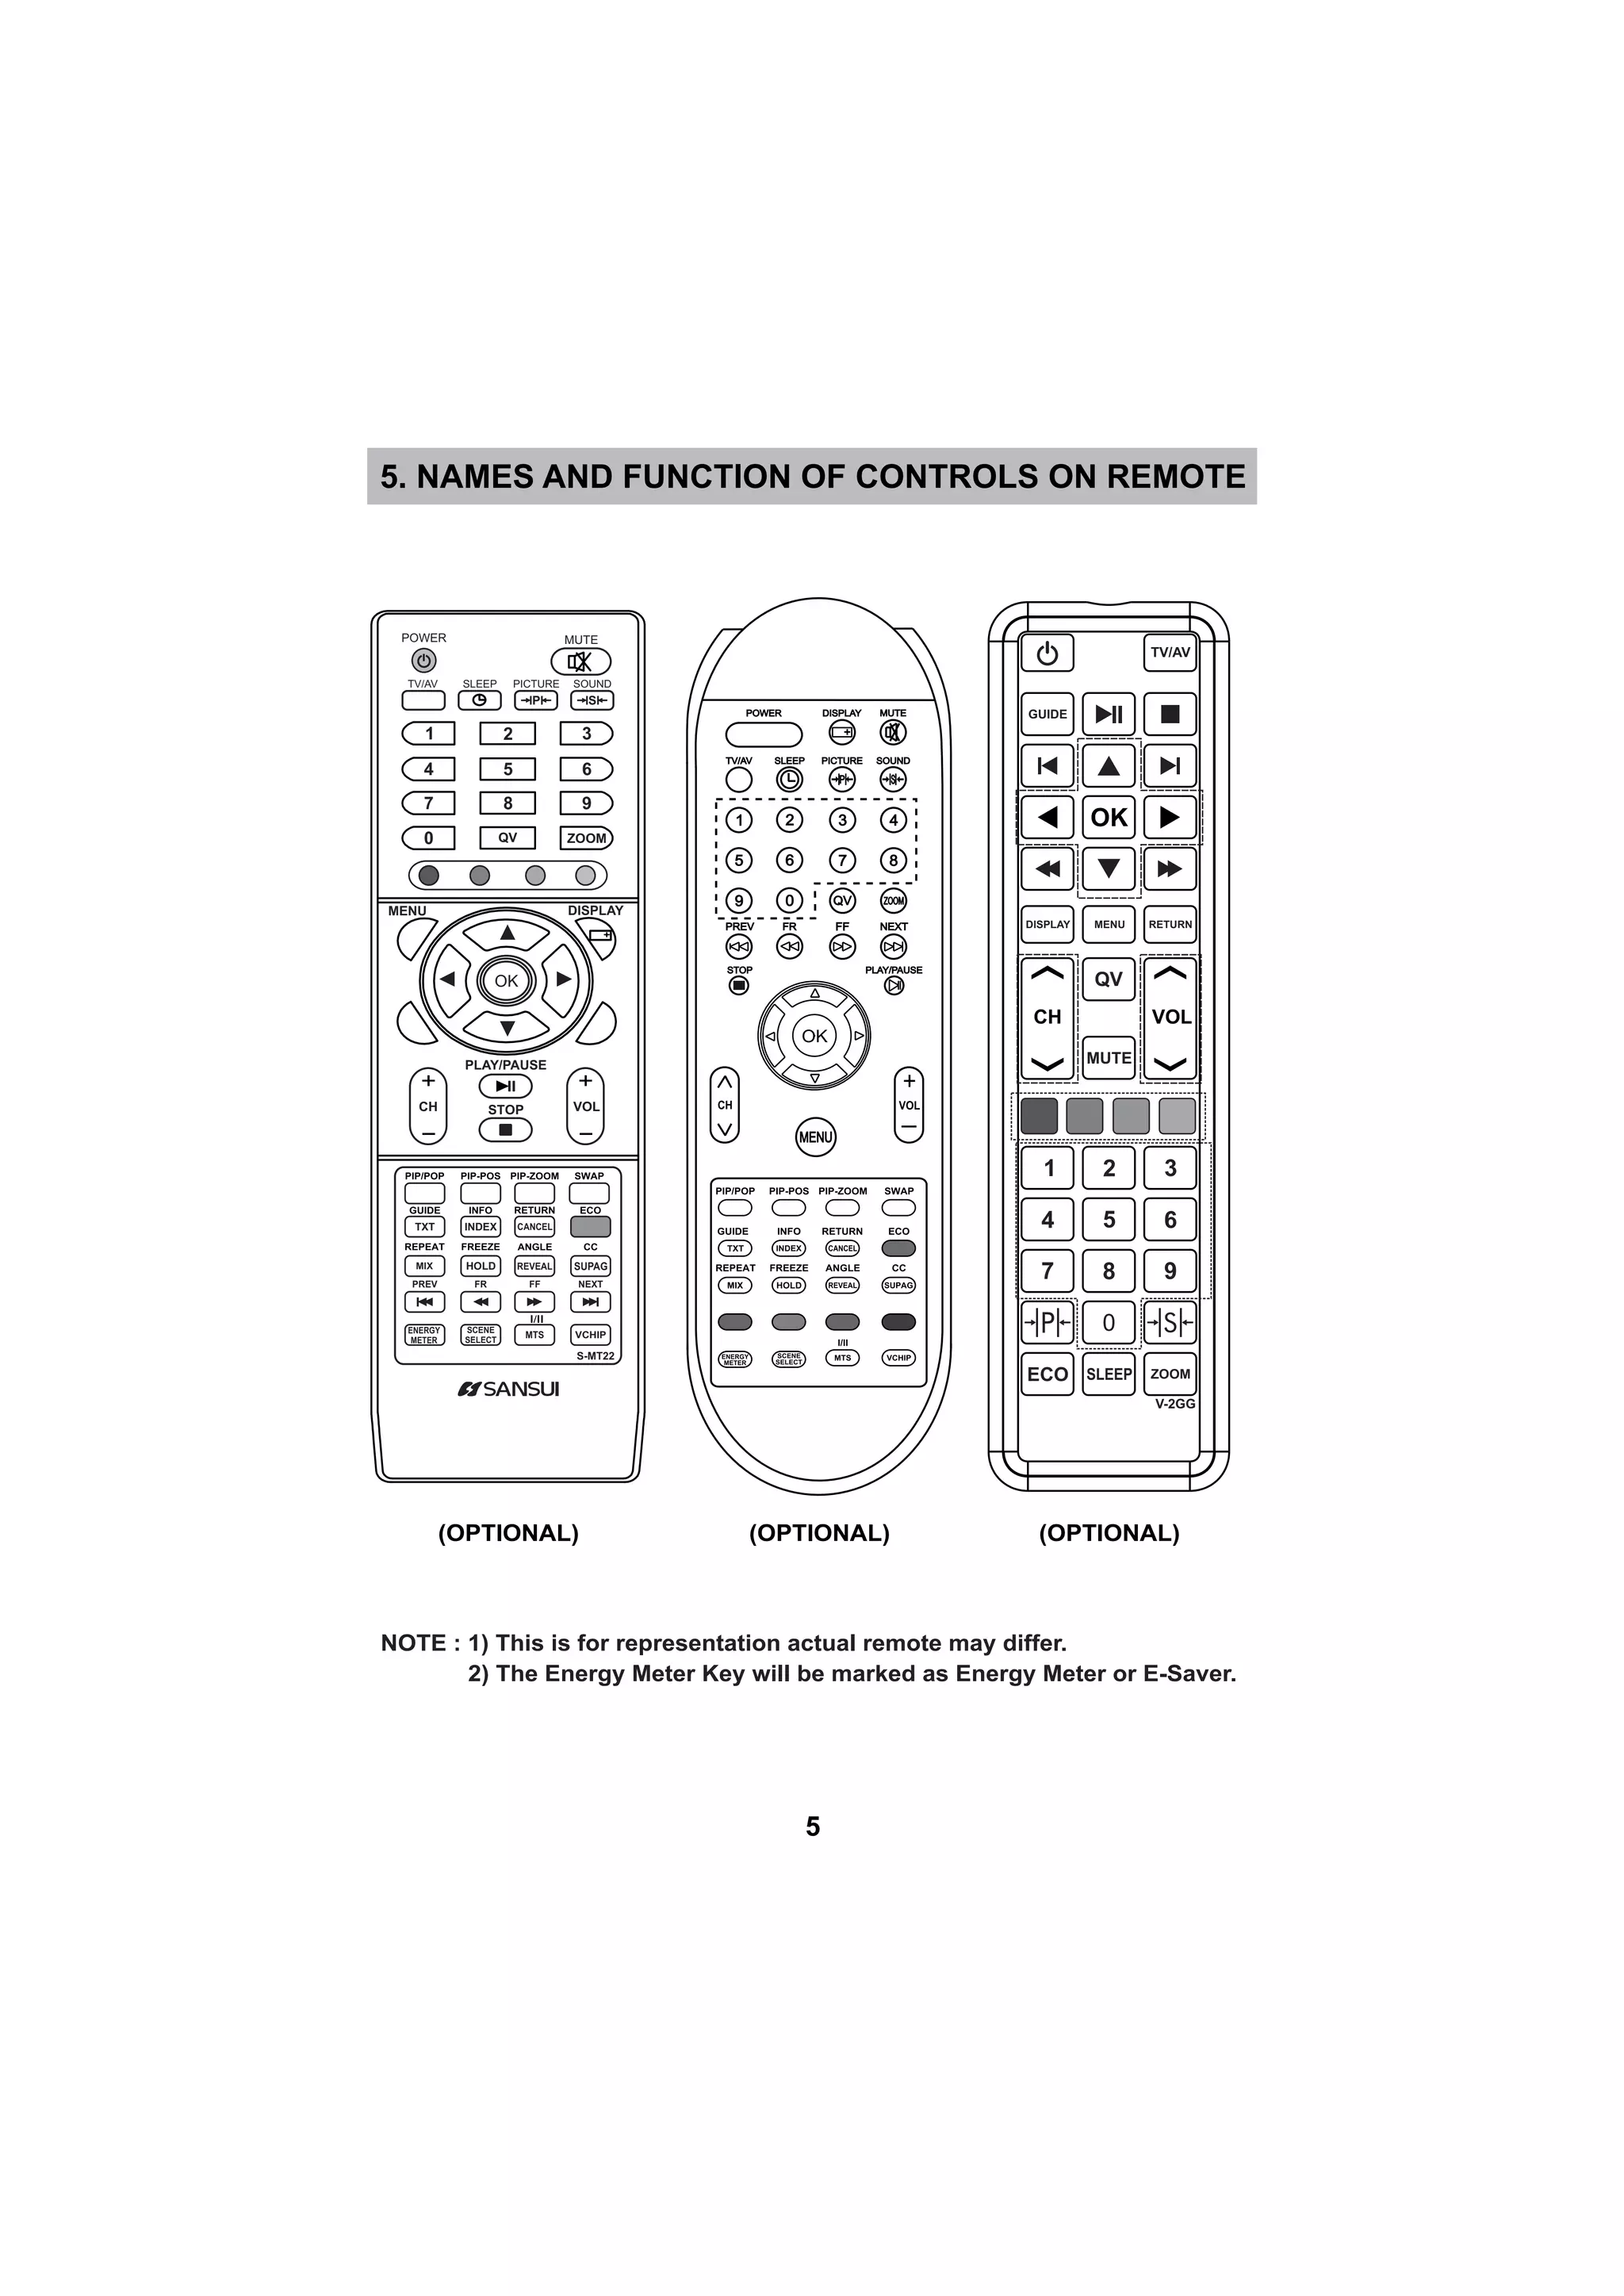
PIP/POP PIP-POS
PIP-ZOOM SWAP
PREV FR
PIP/POP
This key/feature is Not Applicable.
PIP-POS
This key/feature is Not Applicable.
PIP-ZOOM
This key/feature is Not Applicable.
SWAP
This key/feature is Not Applicable.
FF NEXT
GUIDE INFO
RETURN ECO
REPEAT FREEZE
TXT INDEX
CANCEL
MIX HOLD
NOTE: Teletext is not available in india.
I/II is not available in india.
STOP PLAY / PAUSE
PREV (PREVIOUS)
PREV key is used to select the previous track/item in multimedia source and in Easy Connect
feature in HDMI source.
STOP
Press this keys to stop the playback and press OK to resume the playback. To Easy connect
in HDMI to resume.source, select the last viewed file and then press Play
To view images as thumbnail this keys can be used.
PLAY/PAUSE
Press this keys to play or pause track/item in multimedia source & in Easy Connect feature.
To freeze image press this key on images.
GUIDE
When playing image file press [GUIDE] key.
The task bar will show for guiding the Multimedia
RETURN
Use this key to return to main multimedia menu while playing a track/item.
ECO
with display is off and onlyecovision symbol on the screen, in audio only mode
audio is on. Press any key to exit audio only mode.
This key provides the different power savings modes. The current mode this displayed
TV/AV, (0-9) key, CH+/- on the remote key. Not effective in multimedia.
This key is used to Freeze the moving picture. To exit again press Freeze Menu,
FREEZE
7
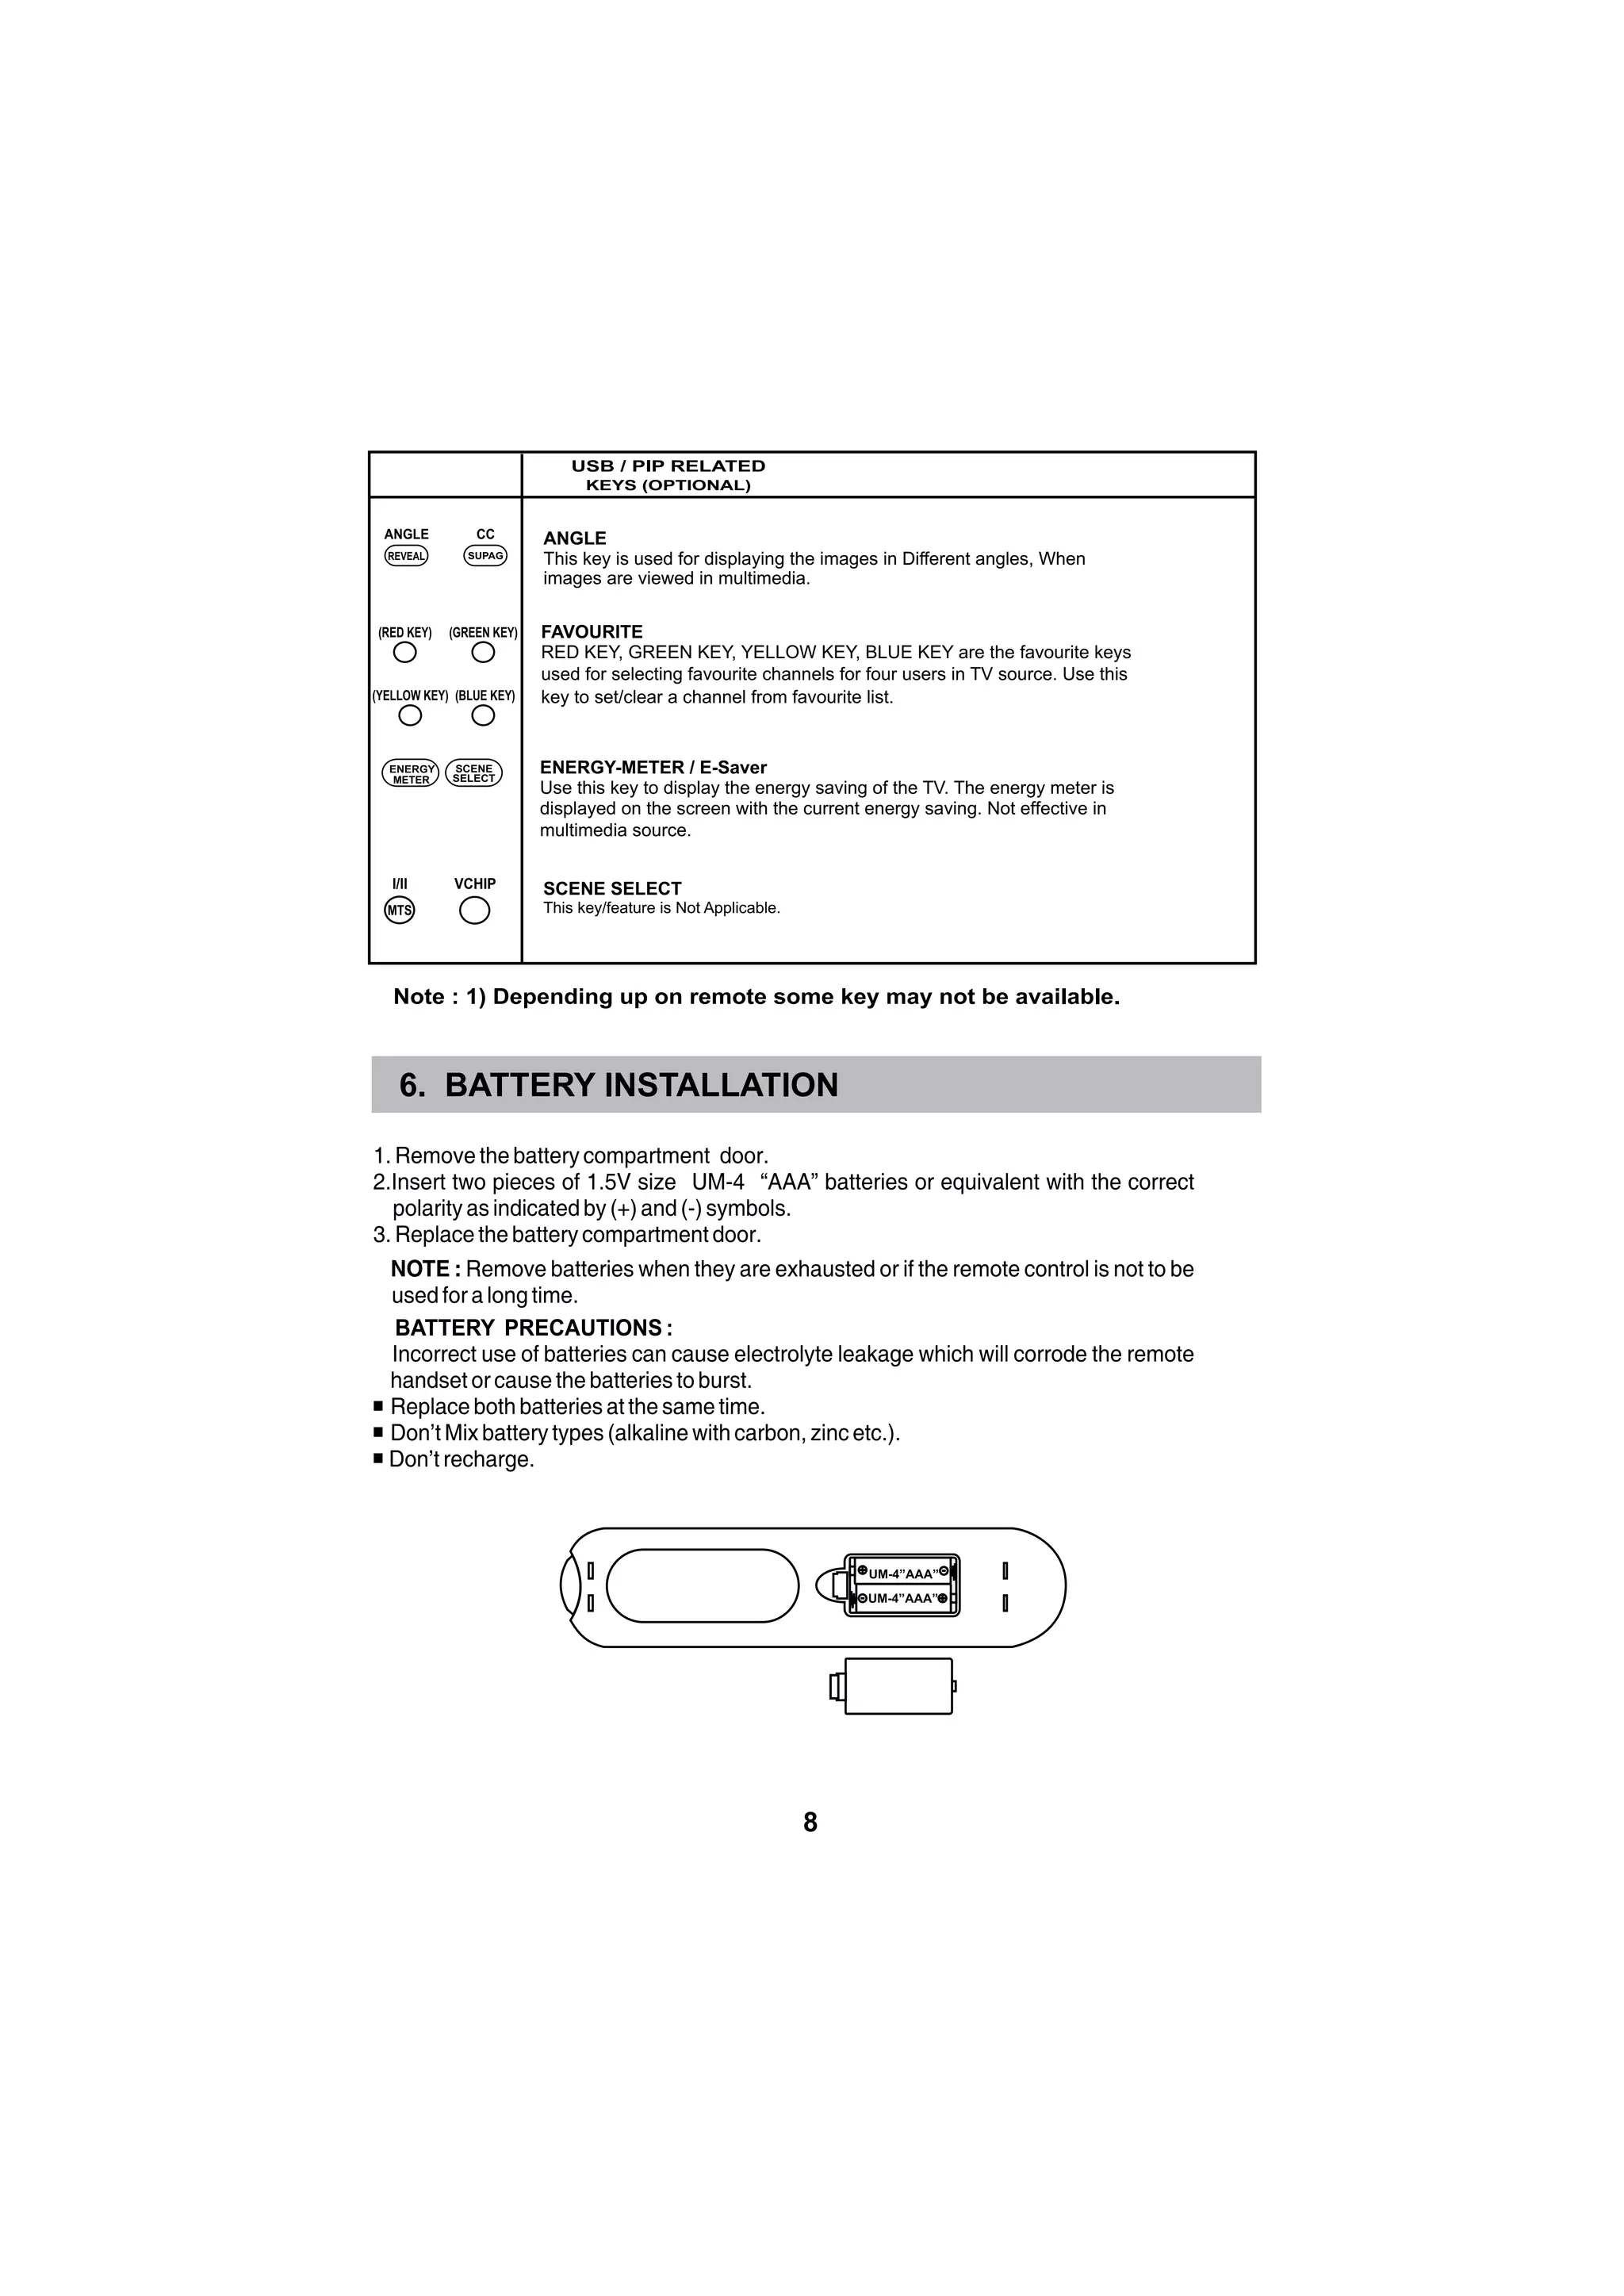
USB / PIP RELATED
KEYS (OPTIONAL)](https://image.slidesharecdn.com/sjx40fb-9xaf-150729061436-lva1-app6892/75/Sjx40-fb-9xaf-9-2048.jpg)


This document is an instruction manual for a Sansui LCD/LED television. It begins with welcoming the customer to Sansui and discussing their goal of providing high quality products. It then provides instructions on setting up and using the television, including connecting antennas and devices, descriptions of the control buttons on the television and remote, and explanations of the menu system and settings. The document provides technical specifications for the television and instructions for troubleshooting issues. It concludes by providing guidelines for proper disposal of the product.


