This document is a user manual for Samsung LED TV models T24D390EX, T27D390EX, T24D391EX, T24D590EX and T27D590EX. It provides instructions on safety, proper ventilation, connecting power and cables, initial setup, making connections to external devices, changing input sources and basic TV features. It also includes troubleshooting information and specifications.
![Figures and illustrations in this User Manual are provided for reference only and may differ from actual product appearances. Product
design and specifications may be changed without notice.
Digital TV notice
1. Functionalities related to Digital TV (DVB) are only available in countries/areas where DVB-T (MPEG2 and MPEG4
AVC) digital terrestrial signals are broadcasted or where you are able to access to a compatible DVB-C (MPEG2 and
MPEG4 AAC) cable-TV service. Please check with your local dealer the possibility to receive DVB-T or DVB-C signal.
2. DVB-T is the DVB European consortium standard for the broadcast transmission of digital terrestrial television and
DVB-C is that for the broadcast transmission of digital TV over cable. However, some differentiated features like
EPG (Electric Programme Guide), VOD (Video On Demand) and so on, are not included in this specification. So, they
cannot be workable at this moment.
3. Although this TV set meets the latest DVB-T and DVB-C standards, as of [August, 2008], the compatibility with
future DVB-T digital terrestrial and DVB-C digital cable broadcasts cannot be guaranteed.
4. Depending on the countries/areas where this TV set is used some cable-TV providers may charge an additional fee
for such a service and you may be required to agree to terms and conditions of their business.
5. Some Digital TV functions might be unavailable in some countries or regions and DVB-C might not work correctly
with some cable service providers.
6. For more information, please contact your local Samsung customer care centre.
✎✎The reception quality of TV may be affected due to differences in broadcasting method between the
countries. Please check the TV performance in the local SAMSUNG Authorized Dealer, or the Samsung Call
Centre whether it can be improved by reconfiguring TV setting or not.
Still image warning
Avoid displaying still images (like jpeg picture files) or still image element (like TV programme logo, panorama or
4:3 image format, stock or news bar at screen bottom etc.) on the screen. Constant displaying of still picture can
cause ghosting of LED screen, which will affect image quality. To reduce risk of this effect, please follow below
recommendations:
•• Avoid displaying the same TV channel for long periods.
•• Always try do display any image on full screen, use TV set picture format menu for best possible match.
•• Reduce brightness and contrast values to minimum required to achieve desired picture quality, exceeded values
may speed up the burnout process.
•• Frequently use all TV features designed to reduce image retention and screen burnout, refer to e-Manual for details.
English - 2](https://image.slidesharecdn.com/samsung1-141106013404-conversion-gate01/85/Samsung-1-2-320.jpg)


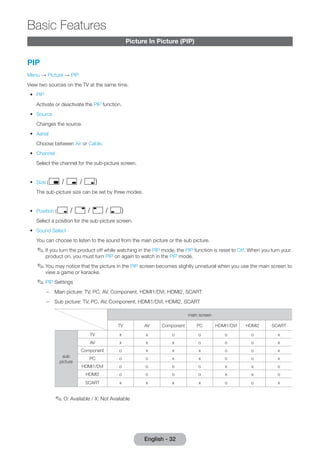
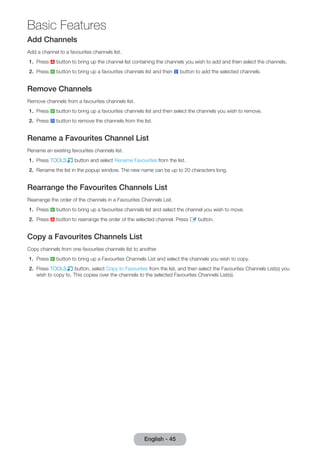
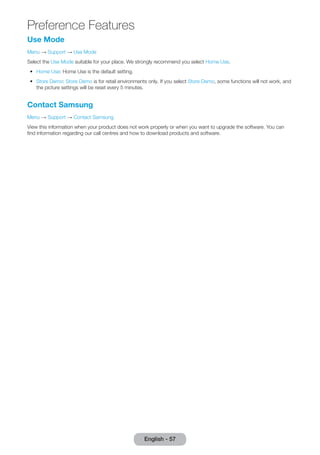
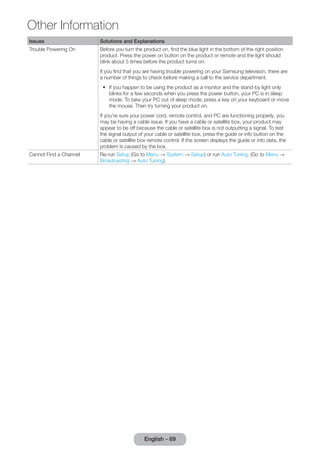
![Accessories and Cables
✎✎Please make sure the following items are included with your product. If any items are missing, contact your dealer.
✎✎The items’ colours and shapes may vary depending on the model.
✎✎Make sure that there are no accessories hidden behind or under packing materials after you open the box.
[[[CAUTION] INSERT SECURELY LEST SHOULD BE DETACHED IN SET
•• Remote Control & Batteries (AAA x 2)
•• Warranty Card / Safety Guide / Quick Setup Guide
(Depending on the model)
•• Power Cord
•• S/W Driver CD
HDMI Cable Adapter
TD390 TD391 TD590
Stand Base
TD390/TD391 TD590
Stand Base
Input Cables (Sold Separately)
You will need one or more of these cables to connect your product to your antenna or cable outlet and your peripheral
devices (Blu-ray players, DVD players, etc.)
Component Composite (AV) Coaxial (RF)
HDMI-DVI Stereo Cable
For the best cable connections to this product, use cables no thicker than the cable illustrated below:
•• Maximum thickness - 0.55 inches (14mm)
Getting Started
English - 12](https://image.slidesharecdn.com/samsung1-141106013404-conversion-gate01/85/Samsung-1-12-320.jpg)
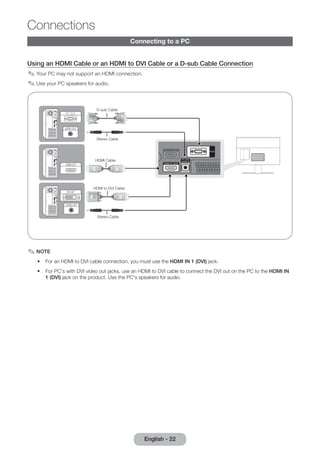
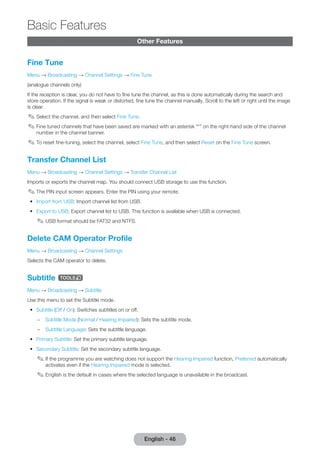
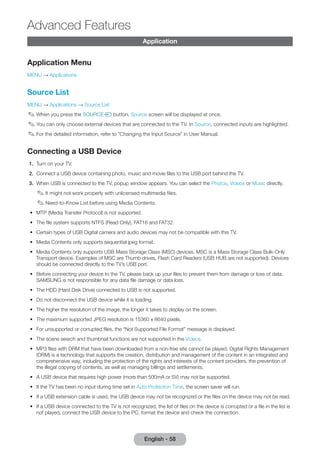
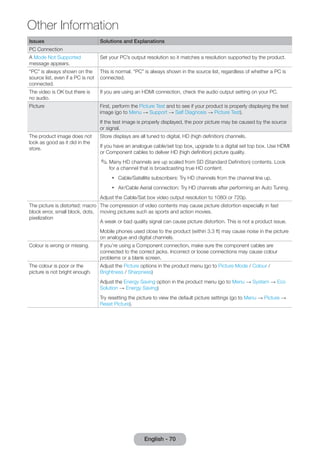
![English - 20 Connections
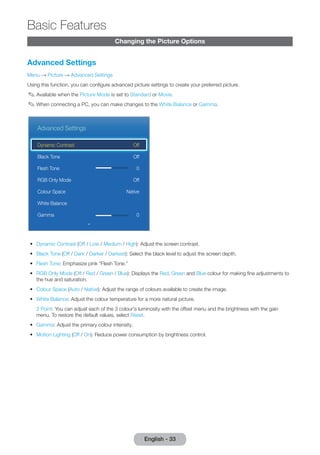
Using a Component Cable (up to 1080p HD signals) or an Audio/Video Cable (480i
analogue signals only)
Use with DVD players, Blu-ray players, cable boxes, STB satellite receivers, VCRs.
R W
R B G
Y R W
R W R B G
R W R B G
R W Y
Device AUDIO OUT COMPONENT OUT
Device
PR PB
R-AUDIO-L
AUDIO OUT
R-AUDIO-L
VIDEO OUT
PG
Audio Cable
(Not Supplied)
Component Cable
(Not Supplied)
Red
Red
Blue
White
Green
Video Cable Audio Cable
✎✎For better picture quality, we recommend the Component connection over the A/V connection.
✎✎When you connect a Video cable to COMPONENT / AV IN, the colour of the COMPONENT / AV IN [VIDEO] jack
(green) will not match the video cable (yellow).
Using a Scart Cable
Available devices: DVD, VCR
EXT
✎✎In Ext. mode, DTV Out supports MPEG SD Video and Audio only.](https://image.slidesharecdn.com/samsung1-141106013404-conversion-gate01/85/Samsung-1-20-320.jpg)


![5G Explained! A High Level Overview [Introduction]](https://cdn.slidesharecdn.com/ss_thumbnails/5gexplainedahighleveloverview-260119165306-cc137a3e-thumbnail.jpg?width=640&height=640&fit=bounds)


