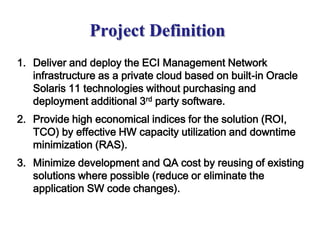
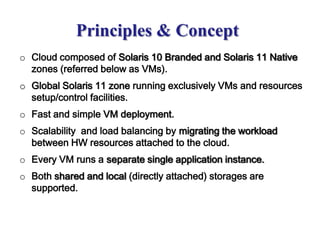
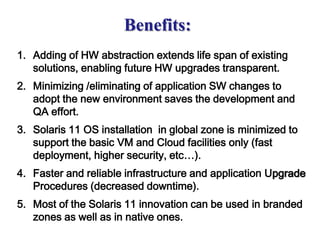
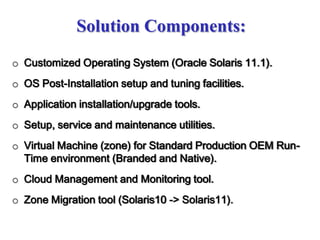
Overview
Mark Markman
2013
Oracle Solaris 11 platform for
ECI Telecom private cloud
infrastructure
Project Definition
1. Deliver and deploy the ECI Management Network
infrastructure as a private cloud based on built-in Oracle
Solaris 11 technologies without purchasing and
deployment additional 3rd party software.
2. Provide high economical indices for the solution (ROI,
TCO) by effective HW capacity utilization and downtime
minimization (RAS).
3. Minimize development and QA cost by reusing of existing
solutions where possible (reduce or eliminate the
application SW code changes).
Principles & Concept
o Cloud composed of Solaris 10 Branded and Solaris 11 Native
zones (referred below as VMs).
o Global Solaris 11 zone running exclusively VMs and resources
setup/control facilities.
o Fast and simple VM deployment.
o Scalability and load balancing by migrating the workload
between HW resources attached to the cloud.
o Every VM runs a separate single application instance.
o Both shared and local (directly attached) storages are
supported.
Benefits:
1. Adding of HW abstraction extends life span of existing
solutions, enabling future HW upgrades transparent.
2. Minimizing /eliminating of application SW changes to
adopt the new environment saves the development and
QA effort.
3. Solaris 11 OS installation in global zone is minimized to
support the basic VM and Cloud facilities only (fast
deployment, higher security, etc…).
4. Faster and reliable infrastructure and application Upgrade
Procedures (decreased downtime).
5. Most of the Solaris 11 innovation can be used in branded
zones as well as in native ones.
Solaris 11 technologies used:
o Zones
o ZFS
o AI Distro Constructor
o Network Virtualization (“Crossbow”)
o Boot Environments
o COMSTAR
o IPS
o zonestat, DTrace, etc…
All these technologies work together – the whole
is greater then the sum of its parts!
Solution Components:
o Customized Operating System (Oracle Solaris 11.1).
o OS Post-Installation setup and tuning facilities.
o Application installation/upgrade tools.
o Setup, service and maintenance utilities.
o Virtual Machine (zone) for Standard Production OEM Run-
Time environment (Branded and Native).
o Cloud Management and Monitoring tool.
o Zone Migration tool (Solaris10 -> Solaris11).
Solaris 10 Branded Zone
o VM (Solaris 10 Branded Zone) created from zone image file.
o Zone image is compressed snapshot datastream file.
o Zone creation general steps:
1. Creating prototype datasets from the image file
2. Cloning prototype datasets into zone dataset
3. Setup standard (empty) zone configuration within cloned dataset
4. Attaching new zone
5. Performing post-install configuration
New branded zone creation time (on x86 system):
first zone on ZFS pool ~ 40 sec
second zone (prototype dataset already exists) ~ 8 sec (!)
Zone Administration tool
Developed to manage all zone (VM) tasks needed:
o Create zone of a specific type:
 Branded zone from prototype image file
 Native Solaris 11 zone from scratch
 Native Solaris 11 zone from prototype image file
 By cloning the existing zone
o Move zone between ZFS pools on the same server.
o Transfer zone to another physical server.
o Attach Migrated zone from Solaris 10.
o Setup and tune zone parameters .
o Zone start / stop / destroy / display status
Network Virtualization Scheme
VNIC
VNIC
VNIC
VNIC
VNIC
VNIC
global zone
VNIC
NIC1 NIC2
zone1 zone2 zone3
IPv6 IPv6 IPv6
IPv6
VM Deployment Workflow
(shared storage iSCSI case)
1. create ZFS volume
2. create iSCSI target 1. Discover iSCSI target
2. Assign vdev for iSCSI target
3. Configure ZFS pool on vdev
4. Create datasets for zone deployment
5. Copy (receive) zone image to dataset
6. Configure new zone
7. Attach new zone
8. Post-install setup/tuning
9. Boot the new zone
Storage
Server
Example (share storage is Solaris11 box):
pkg install group/feature/storage-server
svcadm enable stmf
svccfg export -a stmf
zfs create -V 10g rpool/iscsi_vol
stmfadm create-lu /dev/zvol/rdsk/rpool/iscsi_vol
stmfadm list-lu
stmfadm add-view 600144F0563C8C0000005149E7320001
svcadm enable -r svc:/network/iscsi/target:default
itadm create-target
Discover iSCSI target:
iscsiadm add static-config
iqn.1986-03.com.sun.iqn…,147.234.158.145
iscsiadm add discovery-address 147.234.158.145:3260
iscsiadm modify discovery --static enable
devfsadm -i iscsi
Create ZFS pool/datasets:
zpool create iscsi-pool c0t600144F0563C8C0000005149E7320001d0
zfs create zone_datasets
Copy zone image to dataset:
gzcat prototype | zfs recv -u -d iscsi_pool
Create zone:
zfs clone -p proto_clone iscsi_pool/zone_ds
… create zone cfg file…
zonecfg -z zone_name -f zone_cfg_file
zoneadm -z zone_name attach
zoneadm -z zone_name boot
VM Transfer
(shared storage iSCSI case)
1. Shutdown zone
2. Export iSCSI ZFS pool
3. Disconnect iSCSI target
4. Transfer zone metadata to
server B
1. Discover the iSCSI target
2. Assign vdev for iSCSI target
3. Import the ZFS pool
4. Mount datasets
5. Tune received zone metadata
6. Attach transferred zone
7. Boot the transferred zone
Storage
Server BServer A
VM Transfer
(shared storage iSCSI case)
Storage
Server BServer A
Additional Features & Tools:
1. Migration Tool
Transforms Solaris 10 sparse-root zone into
branded zone for Solaris 11
2. Zone Monitor
Performance monitoring tool, based on Solaris 11
zonestat utility
3. Cloud Manager
Tool for the whole cloud management and
monitoring
1. Migration Tool
Transforms Solaris 10 sparse-root zone into
branded zone for Solaris 11
2. Zone Monitor
Performance monitoring tool, based on Solaris 11
zonestat utility
3. Cloud Manager
Tool for the whole cloud management and
monitoring
Zone Monitor Example:
Implementation: current status
Management Systems R&D private cloud:
• Number of phys. servers: 30 (x86, SPARC)
• Number of VMs: ~400 (350 branded + 50 native)
• Central storage: 22TB (Sun ZFS Appliance 7120)
• Storage access: iSCSI (via 1GbE and 10GbE)
• User access: PC-X emulators
• New VM deployment time: 8sec. (average)
• VM migration time: 5sec.
Use of Solaris 11 cloud features made HW utilization and TCO
parameters much higher.
Questions…

Oracle Solaris 11 platform for ECI Telecom private cloud infrastructure

  • 1.
    Overview Mark Markman 2013 Oracle Solaris11 platform for ECI Telecom private cloud infrastructure
  • 2.
    Project Definition 1. Deliverand deploy the ECI Management Network infrastructure as a private cloud based on built-in Oracle Solaris 11 technologies without purchasing and deployment additional 3rd party software. 2. Provide high economical indices for the solution (ROI, TCO) by effective HW capacity utilization and downtime minimization (RAS). 3. Minimize development and QA cost by reusing of existing solutions where possible (reduce or eliminate the application SW code changes).
  • 3.
    Principles & Concept oCloud composed of Solaris 10 Branded and Solaris 11 Native zones (referred below as VMs). o Global Solaris 11 zone running exclusively VMs and resources setup/control facilities. o Fast and simple VM deployment. o Scalability and load balancing by migrating the workload between HW resources attached to the cloud. o Every VM runs a separate single application instance. o Both shared and local (directly attached) storages are supported.
  • 4.
    Benefits: 1. Adding ofHW abstraction extends life span of existing solutions, enabling future HW upgrades transparent. 2. Minimizing /eliminating of application SW changes to adopt the new environment saves the development and QA effort. 3. Solaris 11 OS installation in global zone is minimized to support the basic VM and Cloud facilities only (fast deployment, higher security, etc…). 4. Faster and reliable infrastructure and application Upgrade Procedures (decreased downtime). 5. Most of the Solaris 11 innovation can be used in branded zones as well as in native ones.
  • 5.
    Solaris 11 technologiesused: o Zones o ZFS o AI Distro Constructor o Network Virtualization (“Crossbow”) o Boot Environments o COMSTAR o IPS o zonestat, DTrace, etc… All these technologies work together – the whole is greater then the sum of its parts!
  • 6.
    Solution Components: o CustomizedOperating System (Oracle Solaris 11.1). o OS Post-Installation setup and tuning facilities. o Application installation/upgrade tools. o Setup, service and maintenance utilities. o Virtual Machine (zone) for Standard Production OEM Run- Time environment (Branded and Native). o Cloud Management and Monitoring tool. o Zone Migration tool (Solaris10 -> Solaris11).
  • 7.
    Solaris 10 BrandedZone o VM (Solaris 10 Branded Zone) created from zone image file. o Zone image is compressed snapshot datastream file. o Zone creation general steps: 1. Creating prototype datasets from the image file 2. Cloning prototype datasets into zone dataset 3. Setup standard (empty) zone configuration within cloned dataset 4. Attaching new zone 5. Performing post-install configuration New branded zone creation time (on x86 system): first zone on ZFS pool ~ 40 sec second zone (prototype dataset already exists) ~ 8 sec (!)
  • 8.
    Zone Administration tool Developedto manage all zone (VM) tasks needed: o Create zone of a specific type:  Branded zone from prototype image file  Native Solaris 11 zone from scratch  Native Solaris 11 zone from prototype image file  By cloning the existing zone o Move zone between ZFS pools on the same server. o Transfer zone to another physical server. o Attach Migrated zone from Solaris 10. o Setup and tune zone parameters . o Zone start / stop / destroy / display status
  • 9.
    Network Virtualization Scheme VNIC VNIC VNIC VNIC VNIC VNIC globalzone VNIC NIC1 NIC2 zone1 zone2 zone3 IPv6 IPv6 IPv6 IPv6
  • 10.
    VM Deployment Workflow (sharedstorage iSCSI case) 1. create ZFS volume 2. create iSCSI target 1. Discover iSCSI target 2. Assign vdev for iSCSI target 3. Configure ZFS pool on vdev 4. Create datasets for zone deployment 5. Copy (receive) zone image to dataset 6. Configure new zone 7. Attach new zone 8. Post-install setup/tuning 9. Boot the new zone Storage Server Example (share storage is Solaris11 box): pkg install group/feature/storage-server svcadm enable stmf svccfg export -a stmf zfs create -V 10g rpool/iscsi_vol stmfadm create-lu /dev/zvol/rdsk/rpool/iscsi_vol stmfadm list-lu stmfadm add-view 600144F0563C8C0000005149E7320001 svcadm enable -r svc:/network/iscsi/target:default itadm create-target Discover iSCSI target: iscsiadm add static-config iqn.1986-03.com.sun.iqn…,147.234.158.145 iscsiadm add discovery-address 147.234.158.145:3260 iscsiadm modify discovery --static enable devfsadm -i iscsi Create ZFS pool/datasets: zpool create iscsi-pool c0t600144F0563C8C0000005149E7320001d0 zfs create zone_datasets Copy zone image to dataset: gzcat prototype | zfs recv -u -d iscsi_pool Create zone: zfs clone -p proto_clone iscsi_pool/zone_ds … create zone cfg file… zonecfg -z zone_name -f zone_cfg_file zoneadm -z zone_name attach zoneadm -z zone_name boot
  • 11.
    VM Transfer (shared storageiSCSI case) 1. Shutdown zone 2. Export iSCSI ZFS pool 3. Disconnect iSCSI target 4. Transfer zone metadata to server B 1. Discover the iSCSI target 2. Assign vdev for iSCSI target 3. Import the ZFS pool 4. Mount datasets 5. Tune received zone metadata 6. Attach transferred zone 7. Boot the transferred zone Storage Server BServer A
  • 12.
    VM Transfer (shared storageiSCSI case) Storage Server BServer A
  • 13.
    Additional Features &Tools: 1. Migration Tool Transforms Solaris 10 sparse-root zone into branded zone for Solaris 11 2. Zone Monitor Performance monitoring tool, based on Solaris 11 zonestat utility 3. Cloud Manager Tool for the whole cloud management and monitoring 1. Migration Tool Transforms Solaris 10 sparse-root zone into branded zone for Solaris 11 2. Zone Monitor Performance monitoring tool, based on Solaris 11 zonestat utility 3. Cloud Manager Tool for the whole cloud management and monitoring
  • 14.
  • 15.
    Implementation: current status ManagementSystems R&D private cloud: • Number of phys. servers: 30 (x86, SPARC) • Number of VMs: ~400 (350 branded + 50 native) • Central storage: 22TB (Sun ZFS Appliance 7120) • Storage access: iSCSI (via 1GbE and 10GbE) • User access: PC-X emulators • New VM deployment time: 8sec. (average) • VM migration time: 5sec. Use of Solaris 11 cloud features made HW utilization and TCO parameters much higher.
  • 16.