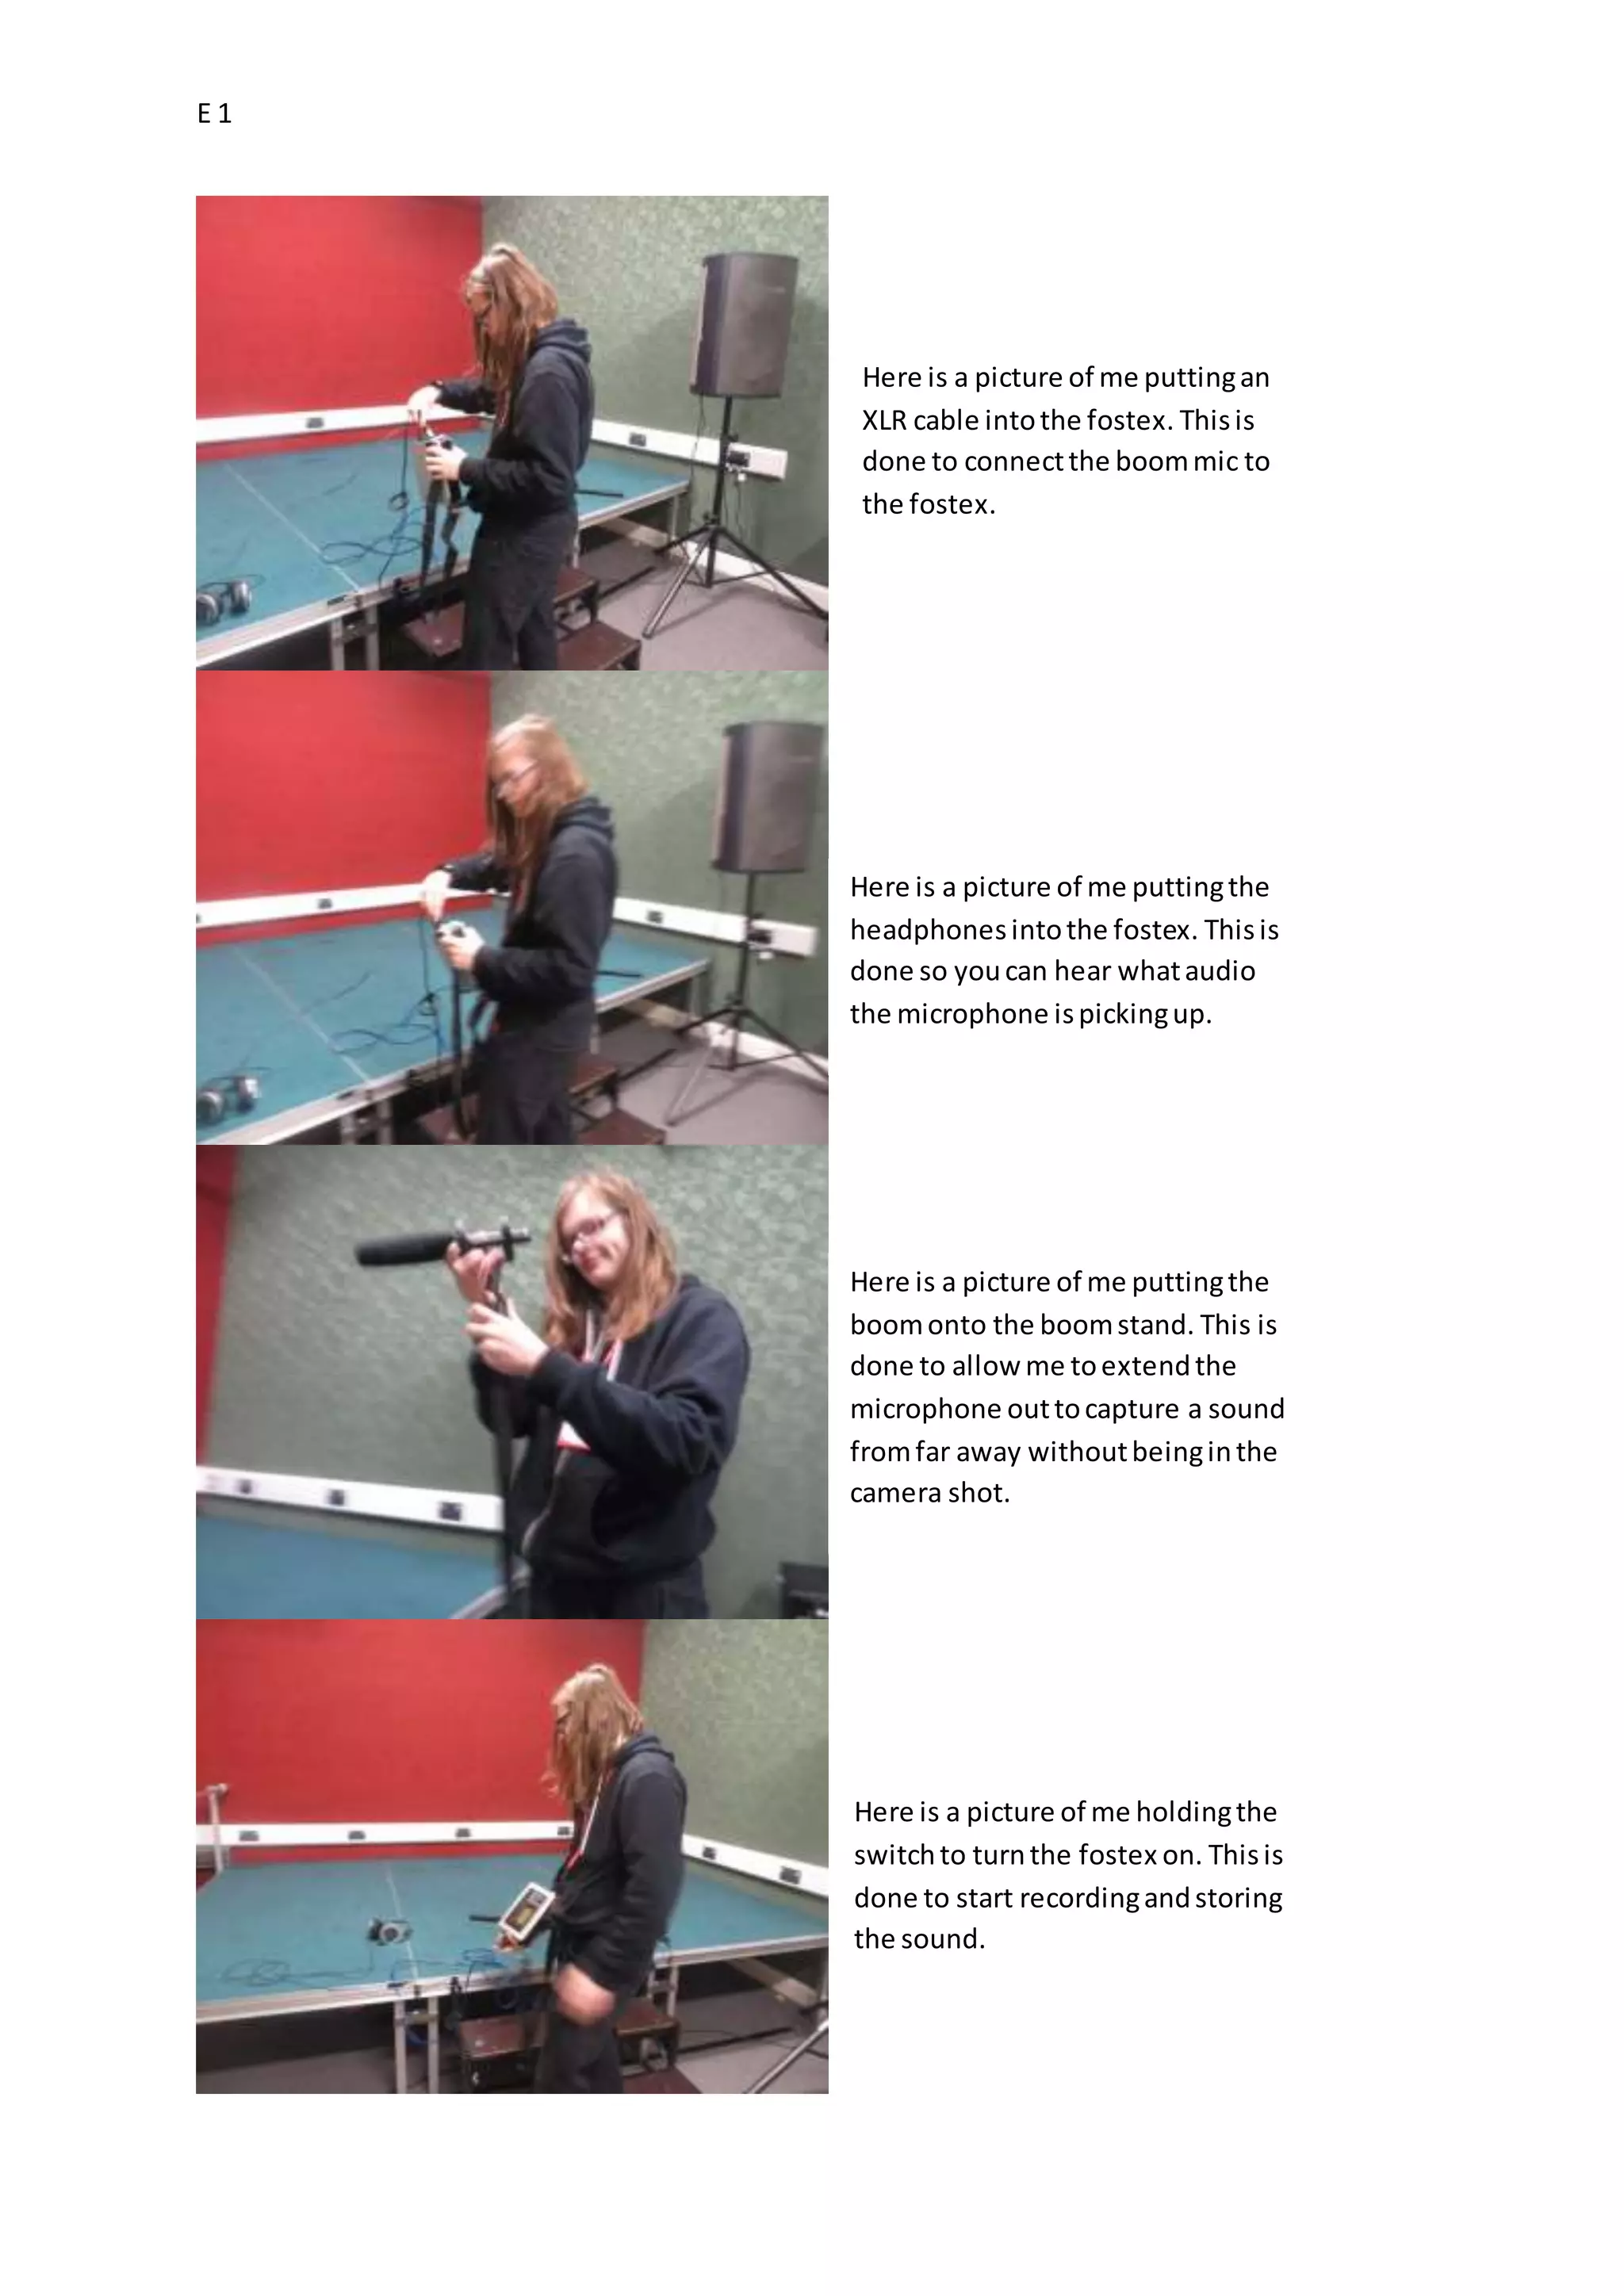
E 1 
Setting up equipment 
Here is a picture of me putting an SD 
card into a camera. This is done to 
allow the data recorded on the 
camera to be stored. I also inserted 
the battery so the camera had 
power. 
Here is a picture of me putting a 
camera onto a tripod. This is done to 
keep the camera stabilized. 
Here is the camera fully set up on 
the tripod.
E 1 
Here is a picture of me putting an 
XLR cable into the fostex. This is 
done to connect the boom mic to 
the fostex. 
Here is a picture of me putting the 
headphones into the fostex. This is 
done so you can hear what audio 
the microphone is picking up. 
Here is a picture of me putting the 
boom onto the boom stand. This is 
done to allow me to extend the 
microphone out to capture a sound 
from far away without being in the 
camera shot. 
Here is a picture of me holding the 
switch to turn the fostex on. This is 
done to start recording and storing 
the sound.
E 1 
Here is a picture of me setting up a 
tripod for lights. This is done to keep 
the lights stabilized and adjust the 
height of them. 
Here is a picture of me screwing the 
light head onto the stand. This is 
done to secure the light head so it 
won’t fall off. 
Here is a picture of me putting the 
reflectors onto the light head. This is 
done to expand the effective area of 
the lights. 
I also inserted the lights into the 
light head so they shone and 
plugged the light head into the wall 
to supply it power.

Setting up equipment

  • 1.
    E 1 Settingup equipment Here is a picture of me putting an SD card into a camera. This is done to allow the data recorded on the camera to be stored. I also inserted the battery so the camera had power. Here is a picture of me putting a camera onto a tripod. This is done to keep the camera stabilized. Here is the camera fully set up on the tripod.
  • 2.
    E 1 Hereis a picture of me putting an XLR cable into the fostex. This is done to connect the boom mic to the fostex. Here is a picture of me putting the headphones into the fostex. This is done so you can hear what audio the microphone is picking up. Here is a picture of me putting the boom onto the boom stand. This is done to allow me to extend the microphone out to capture a sound from far away without being in the camera shot. Here is a picture of me holding the switch to turn the fostex on. This is done to start recording and storing the sound.
  • 3.
    E 1 Hereis a picture of me setting up a tripod for lights. This is done to keep the lights stabilized and adjust the height of them. Here is a picture of me screwing the light head onto the stand. This is done to secure the light head so it won’t fall off. Here is a picture of me putting the reflectors onto the light head. This is done to expand the effective area of the lights. I also inserted the lights into the light head so they shone and plugged the light head into the wall to supply it power.