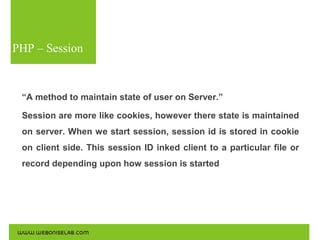
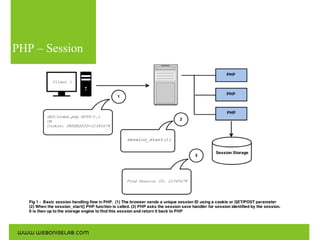
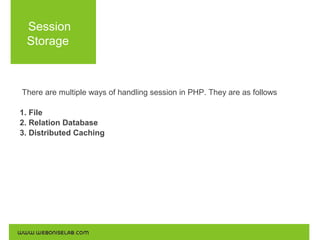
Webonise Lab
PHP – Session Handling Using
Memcached
PHP – Session

“A method to maintain state of user on Server.”
Session are more like cookies, however there state is maintained
on server. When we start session, session id is stored in cookie
on client side. This session ID inked client to a particular file or
record depending upon how session is started
PHP – Session
Session
Storage

There are multiple ways of handling session in PHP. They are as follows
1. File
2. Relation Database
3. Distributed Caching
FILES

The “Files” session handler in PHP is default session save handler.
It stores session data as files on disk, in a specified directory (or sometimes in
a tree of directories). Usually, this save handler is capable of easily handling
tens of thousands of sessions.

The biggest disadvantage of the files save handler is that it imposes a major
scalability bottleneck when trying to scale an application to run on more than
one server.
Relation
Database

Relation Database is another way to handle session and save it. In this type,
the session and it related data is stored in DB table.
To achieve this, we have to crate a table which will store the session id, host
name and the data.
When ever, client requests for session data, a query will get executed and user
and data will be fetched from database
This way of session handling solves the scalability problem but involved some
major drawback too
Relation
Database

1. Performance
2. Memory
3. Server Failure Handling issue
Memcached

What is Memcached?
–

Memcached (pronounced as ‘mem-cache-D’) is an

open-source

distributed memory based storage system, designed mostly as a fast
caching solution.
–

It is invented by Brad Fitzpatrick
Memcached
Use the following commands for the installations:

Memcached is mainly developed as caching mechanism for distributed sever.
The memcached has proved itself as one of the best caching mechanism in
recent years.
Worlds most highly traffic websites use memcache as there performance
booster. Eg. Facebook
Memcached
Use the following commands for the installations:

The advantages of Memcached are as follows
1. Performance
2. Scalability
3. Easy Installation
Session +
Memcache
Use the following commands for the installations:

Lets see how this equation works for PHP
Session Storage in memcached solves the locality problem, and is usually faster
than most DB session storage implementations.
Memcached is distributed in the sense that data may be spread on multiple
nodes – this makes memcached scalable when it
growing number of concurrent sessions.

comes to handling a
Installation
Installation of memcached is very easy. Follow the following steps to
install memcache in server
STEP #1
sudo apt-get update
sudo apt-get install memcached
Above will install memcached in your linux machine.
Installation
STEP #2 – Installing PHP memcache etension
sudo apt-get install memcahe
OR
sudo apt-get install php5-memcache

Above commands will install memcache extension for PHP. It is available on
PECL
Configurations
Don't open champagne yet. We have to make some configuration in PHP to
have party.
Following are the steps to make configuration
STEP #1
Open your php.ini file and change session save handler. It is by default as
“files”. Change as below
session.save_handler = memcache
STEP #2
Change the session save path
session.save_path = “tcp://hostIP:11211”
Configurations
To handle session using memcache on web cluster (multiserver architecture),
All we need to add another server as comma separated in session save path

session.save_path = “tcp://hostIP:11211, tcp://AnotherHostIP:11211”
In above it is important that both the server should have Memcached installed
and it should allow your server IP to store memcache. To do so we have to
make changes in /etc/memcached.conf file.
Here you will see the “-l 127.0.0.1” as default which mean, only local can save
the memcache. Here you need to add the server IP which you want to allow
FLOW
DONE!
At last we are Done with installation and configuration of PHP. Now its
time to test it

Let's have demo of all the efforts
Thank You!

Session Handling Using Memcache

  • 1.
    Webonise Lab PHP –Session Handling Using Memcached
  • 2.
    PHP – Session “Amethod to maintain state of user on Server.” Session are more like cookies, however there state is maintained on server. When we start session, session id is stored in cookie on client side. This session ID inked client to a particular file or record depending upon how session is started
  • 3.
  • 4.
    Session Storage There are multipleways of handling session in PHP. They are as follows 1. File 2. Relation Database 3. Distributed Caching
  • 5.
    FILES The “Files” sessionhandler in PHP is default session save handler. It stores session data as files on disk, in a specified directory (or sometimes in a tree of directories). Usually, this save handler is capable of easily handling tens of thousands of sessions. The biggest disadvantage of the files save handler is that it imposes a major scalability bottleneck when trying to scale an application to run on more than one server.
  • 6.
    Relation Database Relation Database isanother way to handle session and save it. In this type, the session and it related data is stored in DB table. To achieve this, we have to crate a table which will store the session id, host name and the data. When ever, client requests for session data, a query will get executed and user and data will be fetched from database This way of session handling solves the scalability problem but involved some major drawback too
  • 7.
    Relation Database 1. Performance 2. Memory 3.Server Failure Handling issue
  • 8.
    Memcached What is Memcached? – Memcached(pronounced as ‘mem-cache-D’) is an open-source distributed memory based storage system, designed mostly as a fast caching solution. – It is invented by Brad Fitzpatrick
  • 9.
    Memcached Use the followingcommands for the installations: Memcached is mainly developed as caching mechanism for distributed sever. The memcached has proved itself as one of the best caching mechanism in recent years. Worlds most highly traffic websites use memcache as there performance booster. Eg. Facebook
  • 10.
    Memcached Use the followingcommands for the installations: The advantages of Memcached are as follows 1. Performance 2. Scalability 3. Easy Installation
  • 11.
    Session + Memcache Use thefollowing commands for the installations: Lets see how this equation works for PHP Session Storage in memcached solves the locality problem, and is usually faster than most DB session storage implementations. Memcached is distributed in the sense that data may be spread on multiple nodes – this makes memcached scalable when it growing number of concurrent sessions. comes to handling a
  • 12.
    Installation Installation of memcachedis very easy. Follow the following steps to install memcache in server STEP #1 sudo apt-get update sudo apt-get install memcached Above will install memcached in your linux machine.
  • 13.
    Installation STEP #2 –Installing PHP memcache etension sudo apt-get install memcahe OR sudo apt-get install php5-memcache Above commands will install memcache extension for PHP. It is available on PECL
  • 14.
    Configurations Don't open champagneyet. We have to make some configuration in PHP to have party. Following are the steps to make configuration STEP #1 Open your php.ini file and change session save handler. It is by default as “files”. Change as below session.save_handler = memcache STEP #2 Change the session save path session.save_path = “tcp://hostIP:11211”
  • 15.
    Configurations To handle sessionusing memcache on web cluster (multiserver architecture), All we need to add another server as comma separated in session save path session.save_path = “tcp://hostIP:11211, tcp://AnotherHostIP:11211” In above it is important that both the server should have Memcached installed and it should allow your server IP to store memcache. To do so we have to make changes in /etc/memcached.conf file. Here you will see the “-l 127.0.0.1” as default which mean, only local can save the memcache. Here you need to add the server IP which you want to allow
  • 16.
  • 17.
    DONE! At last weare Done with installation and configuration of PHP. Now its time to test it Let's have demo of all the efforts
  • 18.