Downloaded 78 times


![Preface
These installation instructions assume
You have a CD-ROM drive on your computer and the Official Red Hat Linux or OpenNA Linux
CD-ROM. Installations were tested on the Official Red Hat Linux version 7.3 and OpenNA Linux.
You should familiarize yourself with the hardware on which the operating system will be installed.
After examining the hardware, the rest of this document guides you, step-by-step, through the
installation process.
Obtaining the example configuration files
In a true server environment and especially when Graphical User Interface is not installed, we will
often use text files, scripts, shell, etc. Throughout this book we will see shell commands, script
files, configuration files and many other actions to execute on the terminal of the server. You can
enter them manually or use the compressed archive file that I made which contains all
configuration examples and paste them directly to your terminal. This seems to be useful in many
cases to save time.
The example configuration files in this book are available electronically via HTTP from this URL:
http://www.openna.com/products/books/securing-optimizing-linux/3rdedition/index.htm
•
In either case, extract the files into your Linux server from the archive by typing:
[root@deep /]# cd /var/tmp
[root@deep tmp]# tar xzpf floppy-3.0.tgz
If you cannot get the examples from the Internet, please contact the author at this email address:
gmourani@openna.com
Problem with Securing & Optimizing Linux
When you encounter a problem in "Securing & Optimizing Linux" we want to hear about it. Your
reports are an important part in making the book more reliable, because even with the utmost
care we cannot guarantee that every part of the book will work on every platform under every
circumstance.
We cannot promise to fix every error right away. If the problem is obvious, critical, or affects a lot
of users, chances are that someone will look into it. It could also happen that we tell you to
update to a newer version to see if the problem persists there. Or we might decide that the
problem cannot be fixed until some major rewriting has been done. If you need help immediately,
consider obtaining a commercial support contract or try our Q&A archive from the mailing list for
an answer.
Below are some important links:
OpenNA web site: http://www.openna.com/
Mailing list: http://www.openna.com/support/mailing/
Support: http://www.openna.com/support/
RPM Download: http://www.openna.com/download/
Acknowledgments
I would like to thank all the OpenNA staff for their hard works and patience. A special gratitude
and many thanks to Colin Henry who made tremendous efforts to make this book grammatically
and orthographically sound in a professional manner. Adrian Pascalau for its time and help in the
open source community and all Linux users around the world who have participated by providing
good comments, ideas, recommendations and suggestions.
15](https://image.slidesharecdn.com/securingoptimizinglinuxthehackingsolutionv-131209075405-phpapp02/85/Securing-Optimizing-Linux-the-Hacking-Solution-v-3-0-15-320.jpg)


![Introduction 0
CHAPTER 1
Libraries
Programs can be linked not only to object files (*.o) but also to libraries that are collections of
object files. There are two forms of linking to libraries: static, where the code goes in the
executable file, and dynamic, where the code is collected when the program starts to run.
Patches
It was common for executable files to be given corrections without recompiling them. Now this
practice has died out; in modern days, people change a small portion of the source code, putting
a change into a file called a “patch”. Where different versions of a program are required, small
changes to code can be released this way, saving the trouble of having two large distributions.
Errors in Compilation and Linking
Errors in compilation and linking are often due to typos, omissions, or misuse of the language.
You have to check that the right “includes file” is used for the functions you are calling.
Unreferenced symbols are the sign of an incomplete link step. Also check if the necessary
development libraries (GLIBC) or tools (GCC, DEV86, MAKE, etc) are installed on your system.
Debugging
Debugging is a large topic. It usually helps to have statements in the code that inform you of what
is happening. To avoid drowning in output you might sometimes get them to print out only the first
3 passes in a loop. Checking that variables have passed correctly between modules often helps.
Get familiar with your debugging tools.
Build & install software on your system
You will see in this book that we use many different compile commands to build and install
programs on the server. These commands are UNIX compatible and are used on all variants of
*NIX machines to compile and install software.
The procedures to compile and install software tarballs on your server are as follows:
1. First of all, you must download the tarball from your trusted software archive site. Usually
from the main site of the software you hope to install.
2. After downloading the tarball, change to the /var/tmp directory (note that other paths
are possible, at personal discretion) and untar the archive by typing the commands (as
root) as in the following example:
[root@deep /]# tar xzpf foo.tar.gz
The above command will extract all files from the example foo.tar.gz compressed archive and
will create a new directory with the name of the software from the path where you executed the
command.
The “x” option tells tar to extract all files from the archive.
The “z” option tells tar that the archive is compressed with gzip utility.
The “p” option maintains the original permissions the files had when the archive was created.
The “f” option tells tar that the very next argument is the file name.
23](https://image.slidesharecdn.com/securingoptimizinglinuxthehackingsolutionv-131209075405-phpapp02/85/Securing-Optimizing-Linux-the-Hacking-Solution-v-3-0-23-320.jpg)


![Since this, is a relatively rare occurrence, you will save time if you try to use the standard diskette
images first, and then review the Errata only if you experience any problems completing the
installation. Below, we will show you two methods to create the installation Boot Disk, the first
method is to use an existing Microsoft Windows computer and the second using an existing Linux
computer.
Making a Diskette under MS-DOS:
Before you make the boot disk, insert the Official Red Hat Linux CD-ROM Disk 1 in your
computer that runs the Windows operating system. When the program asks for the filename,
enter boot.img for the boot disk. To make the floppies under MS-DOS, you need to use these
commands (assuming your CD-ROM is drive D: and contain the Official Red Hat Linux CD-ROM).
•
Open the Command Prompt under Windows: Start | Programs | Command Prompt
C:> d:
D:> cd dosutils
D:dosutils> rawrite
Enter disk image source file name: ..imagesboot.img
Enter target diskette drive: a:
Please insert a formatted diskette into drive A: and press -ENTER- :
D:dosutils>exit
The rawrite.exe program asks for the filename of the disk image: Enter boot.img and insert
a blank floppy into drive A. It will then ask for a disk to write to: Enter a:, and when complete,
label the disk “Red Hat boot disk”, for example.
Making a Diskette under a Linux-Like OS:
To make a diskette under Linux or any other variant of Linux-Like operating system, you must
have permission to write to the device representing the floppy drive (known as /dev/fd0H1440
under Linux).
This permission is granted when you log in to the system as the super-user “root”. Once you
have logged as “root”, insert a blank formatted diskette into the diskette drive of your computer
without issuing a mount command on it. Now it’s time to mount the Red Hat Linux CD-ROM on
Linux and change to the directory containing the desired image file to create the boot disk.
•
Insert a blank formatted diskette into the diskette drive
Insert the Red Hat Linux CD Part 1 into the CD-ROM drive
[root@deep /]# mount /dev/cdrom /mnt/cdrom
[root@deep /]# cd /mnt/cdrom/images/
[root@deep images]# dd if=boot.img of=/dev/fd0H1440 bs=1440k
1+0 records in
1+0 records out
[root@deep images]# cd /
[root@deep /]# umount /mnt/cdrom
Don’t forget to label the diskette “Red Hat boot disk”, for example.
32](https://image.slidesharecdn.com/securingoptimizinglinuxthehackingsolutionv-131209075405-phpapp02/85/Securing-Optimizing-Linux-the-Hacking-Solution-v-3-0-32-320.jpg)

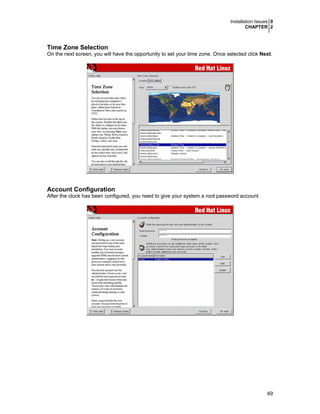
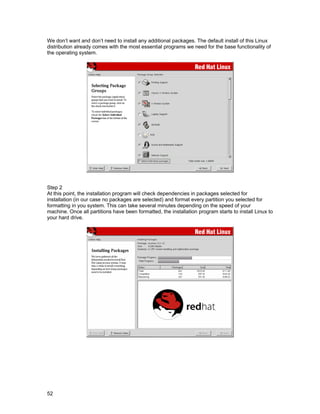
![Installation Issues 0
CHAPTER 2
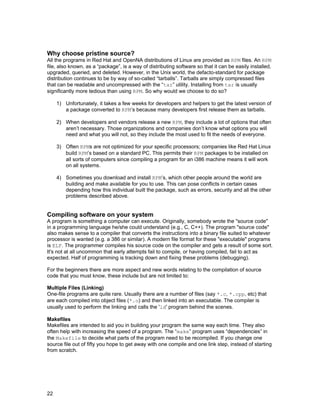
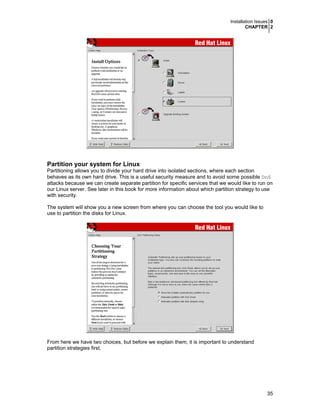
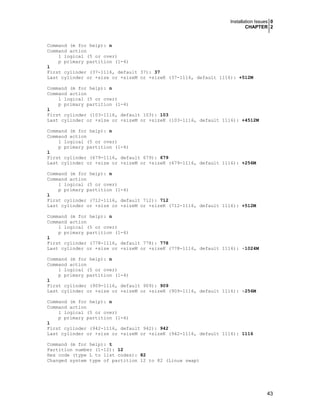
Disk Partition (Manual Partitioning)
Now that we know exactly what partitions we need to create for our new Linux server, it is time to
choose the partitioning software we will use to make these partitions. With Red Hat Linux two
programs exist to assist you with this step:
•
•
Manually partition with Disk druid
Manually partition with fdisk [experts only]
Disk Druid is new software used by default in Red Hat Linux to partition your disk drive, this
program is easy to use, and allows you to use a graphical interface to create your partitions
tables.
fdisk was the first partitioning program available on Linux. It is more powerful then Disk
Druid and allows you to create your partition table in exactly the way you want it (if you want to
put your swap partition near the beginning of your drive, then you will need to use fdisk).
Unfortunately, it is also a little more complicated than Disk Druid and many Linux users prefer
to use Disk Druid for this reason.
Personally, I prefer to create the partitions with the fdisk program and I recommend you use
and be familiar with it, because if, in the future you want to add or change some file systems you
will need to use fdisk.
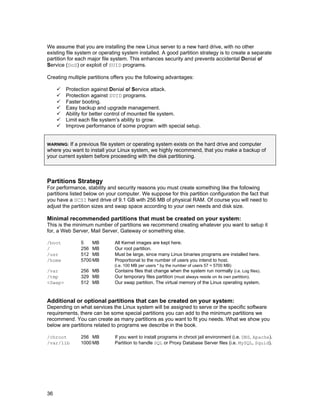
Partitioning with Disk Druid
This section applies only if you chose to use Disk Druid to partition your system. Disk Druid
is a program that partitions your hard drive for you. Choose “New” to add a new partition, “Edit”
to edit a partition, “Delete” to delete a partition and “Reset” to reset the partitions to the original
state. When you add a new partition, a new window appears on your screen and gives you
parameters to choose.
Mount Point: for where you want to mount your new partition in the filesystem.
Filesystem Type: Ext3 for Linux filesystem and Swap for Linux Swap Partition
Size (MB): for the size of your new partition in megabytes.
39](https://image.slidesharecdn.com/securingoptimizinglinuxthehackingsolutionv-131209075405-phpapp02/85/Securing-Optimizing-Linux-the-Hacking-Solution-v-3-0-39-320.jpg)


![Installation Issues 0
CHAPTER 2
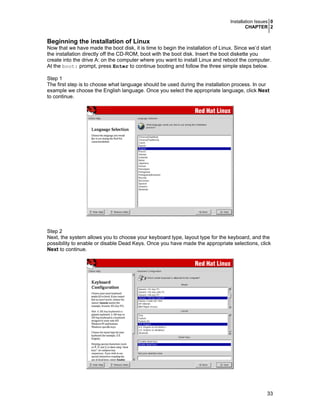
Boot Disk Creation
From this section of the installation, we have the possibility to create a boot disk for our newly
installed operating system. If you do not want to create a boot disk, you should check the “Skip
boot disk creation” checkbox before you click Next. Creating a boot disk must be made if you
decide to not install GRUB or LILO on the MBR (the Master Boot Record) or if you are not installing
GRUB or LILO at all.
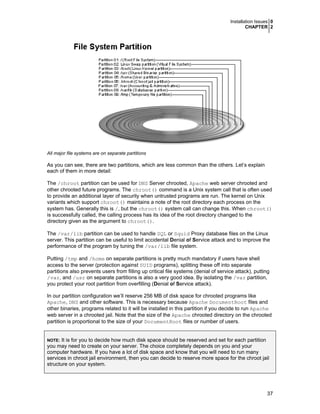
How to use RPM Commands
This section contains an overview of using RPM for installing, uninstalling, upgrading, querying,
listing, and checking RPM packages on your Linux system. You must be familiar with these RPM
commands now because we’ll use them often in this book and especially later in this chapter for
software that must be uninstalled after installation of the server.
Install a RPM package:
Note that RPM packages have a file of names like foo-1.0-2.i386.rpm, which include the
package name (foo), version (1.0), release (2), and architecture (i386).
•
To install a RPM package, use the command:
[root@deep /]# rpm -ivh foo-1.0-2.i386.rpm
foo
##################################################
Uninstall a RPM package:
Notice that we used the package name “foo”, not the name of the original package file “foo1.0-2.i386.rpm”.
•
To uninstall a RPM package, use the command:
[root@deep /]# rpm -e foo
53](https://image.slidesharecdn.com/securingoptimizinglinuxthehackingsolutionv-131209075405-phpapp02/85/Securing-Optimizing-Linux-the-Hacking-Solution-v-3-0-53-320.jpg)
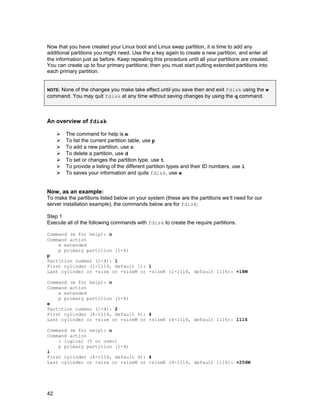
![Upgrade a RPM package:
With this command, RPM automatically uninstalls the old version of foo package and installs the
new one. Always use “rpm -Uvh” command to install packages, since it works fine even when
there are no previous versions of the package installed. This is the recommended method of
installing package on the system.
•
To upgrade a RPM package, use the command:
[root@deep /]# rpm -Uvh foo-1.0-2.i386.rpm
foo
##################################################
Force the installation of a RPM package:
With this command, RPM will force the installation of the specified package even if some conflict
or other kind of problem exists. This command should be used with care and only if you know
what you do. In most case, RPM can correctly guest problem and refuse to install. To bypass RPM
warning, you can use the RPM command below.
•
To force the installation of a RPM package, use the command:
[root@deep /]# rpm -Uvh --force foo-1.0-2.i386.rpm
foo
##################################################
Avoid RPM package dependency:
With this command, RPM will not take care of package dependency and will install the RPM
software on your system. Package dependency is an important concept in the RPM world.
Dependency is when some other packages depend of the RPM package you are trying to install.
By default, RPM check if all other RPM packages required for the RPM you try to install are present
before installing the RPM. If some required packages are not present, RPM will inform you. This is
made to avoid problem and be sure that the software you want to install will perfectly work. In
some special case, we don’t need to take care of dependency and can use the option below to
inform it to skip the dependency check when installing the software.
•
To avoid RPM package dependency, use the command:
[root@deep /]# rpm -Uvh --nodeps foo-1.0-2.i386.rpm
foo
##################################################
Query a RPM package:
This command will print the package name, version, and release number of installed package
foo. Use this command to verify that a package is or is not installed on your system.
•
To query a RPM package, use the command:
[root@deep /]# rpm -q foo
foo-2.3-8
54](https://image.slidesharecdn.com/securingoptimizinglinuxthehackingsolutionv-131209075405-phpapp02/85/Securing-Optimizing-Linux-the-Hacking-Solution-v-3-0-54-320.jpg)
![Installation Issues 0
CHAPTER 2
Display RPM package information:
This command displays package information; includes name, version, and description of the
installed program. Use this command to get information about the installed package.
•
To display RPM package information, use the command:
[root@deep /]# rpm -qi foo
Name
: foo
Relocations: none
Version
: 2.3
Vendor: OpenNA.com, Inc.
Release
: 8
Build Date: Thu 24 Aug 2000 11:16:53 AM EDT
Install date: Mon 12 Feb 2001 01:17:24 AM EST
Build Host: openna.com
Group
: Applications/Archiving
Source RPM: foo-2.3-8.src.rpm
Size
: 271467
License: distributable
Packager
: OpenNA.com, Inc. <http://www.openna.com/>
Summary
: Here will appears summary of the package.
Description : Here will appears the description of the package.
Display RPM package information before installing the program:
This command displays package information; includes name, version, and description of the
program without the need to install the program first. Use this command to get information about
a package before you install it on your system.
•
To display package information before installing the program, use the command:
[root@deep /]# rpm -qpi foo-2.3-8.i386.rpm
Name
: foo
Relocations: none
Version
: 2.3
Vendor: OpenNA.com, Inc.
Release
: 8
Build Date: Thu 24 Aug 2000 11:16:53 AM EDT
Install date: Mon 12 Feb 2001 01:17:24 AM EST
Build Host: openna.com
Group
: Applications/Archiving
Source RPM: foo-2.3-8.src.rpm
Size
: 271467
License: distributable
Packager
: OpenNA.com, Inc. <http://www.openna.com/>
Summary
: Here will appears summary of the package.
Description : Here will appears the description of the package.
List files in a installed RPM package:
This command will list all files in a installed RPM package. It works only when the package is
already installed on your system.
•
To list files in a installed RPM package, use the command:
[root@deep /]# rpm -ql foo
/usr/bin/foo
/usr/bin/foo1
/usr/sbin/foo2
List files in RPM package that is not already installed:
This command will list all files in a RPM package that is not already installed on your system. It is
useful when you want to know which components are included in the package before installing it.
•
To list files in RPM package that is not already installed, use the command:
[root@deep /]# rpm -qpl foo
/usr/lib/foo
/usr/bin/foo1
/usr/sbin/foo2
55](https://image.slidesharecdn.com/securingoptimizinglinuxthehackingsolutionv-131209075405-phpapp02/85/Securing-Optimizing-Linux-the-Hacking-Solution-v-3-0-55-320.jpg)
![Know which files is part of which RPM package:
This command will show you from which RPM package the file comes from. It works only when the
package is already installed on your system and it is very useful when you see some files into
Linux that you do not know about it and want to get more information about its RPM provenance.
•
To know which files is part of which RPM package, use the command:
[root@deep /]# rpm -qf /etc/passwd
setup-2.3.4-1
Check RPM signature package:
This command checks the PGP signature of specified package to ensure its integrity and origin.
Always use this command first before installing new RPM package on your system. GnuPG or PGP
software must be already installed on your system before you can use this command. See the
chapter related to GnuPG installation and configuration for more information.
•
To check a RPM signature package, use the command:
[root@deep /]# rpm --checksig foo
Examine the md5sum of RPM package:
The RPM md5sum is useful to verify that a package has not been corrupted or tampered with. You
can use it to be sure that the download of your new RPM package was not corrupted during
network transfer.
•
To examine only the md5sum of the package, use the command:
[root@deep /]# rpm --checksig --nogpg foo
Starting and stopping daemon services
The init program of Linux (also known as process control initialization) is in charge of starting
all the normal and authorized processes that need to run at boot time on your system. These may
include the APACHE daemons, NETWORK daemons, and anything else that must be running
when your machine boots.
Each of these processes has a script file under the /etc/init.d directory written to accept an
argument, which can be start, stop, restart, etc. As you can imagine, those script are made
to simplify the administration of the server and the way we can start or stop services under Linux.
Of course, we can use the native way to start all required services under our server, but it is much
simple to have some kind of script files that should provide us some easy method to automate
and control the procedures. This is why init program and all initialization script files available
under the /etc/init.d directory exist.
Below are some examples showing you how to execute those scripts by hand.
For example:
•
To start the httpd web server daemon manually under Linux, you’ll type:
[root@deep /]# /etc/init.d/httpd start
Starting httpd:
[OK]
•
To stop the httpd web server daemon manually under Linux, you’ll type:
[root@deep /]# /etc/init.d/httpd stop
Shutting down http:
[OK]
56](https://image.slidesharecdn.com/securingoptimizinglinuxthehackingsolutionv-131209075405-phpapp02/85/Securing-Optimizing-Linux-the-Hacking-Solution-v-3-0-56-320.jpg)
![Installation Issues 0
CHAPTER 2
•
To restart the httpd web server daemon manually under Linux, you’ll type:
[root@deep /]# /etc/init.d/httpd restart
Shutting down http:
[OK]
Starting httpd:
[OK]
Check inside your /etc/init.d directory for services available and use the commands start |
stop | restart to work around. You will see along this book that we often use initialization
script file to administration and control the way we start, restart, stop, etc services under Linux.
Software that must be uninstalled after installation of the server
Red Hat Linux installs other programs on your system by default and doesn’t give you the choice
to uninstall them during the install setup. For this reason, you must uninstall the following
software after the complete installation of our Linux server.
Below is the list of programs and a short description of their purpose. We must uninstall them for
increased security and to make more space on our server. For more information and an
explanation of their capabilities and uses, please see your Red Hat manual or query the package
by making an “rpm -qi foo” command before uninstalling them.
The anacron package:
The anacron package is similar to the cron package but differ in the way that it does not
assume that the system is running continuously and it is a good command scheduler for system
which doesn’t run 24 hours a day. In server environment, the system should absolutely run 24/24
hours; therefore we simply don’t need to have this kind of package installed on a server.
•
To remove the anacron package from your system, use the following commands:
[root@deep /]# /etc/init.d/anacron stop
[root@deep /]# rpm -e anacron
[root@deep /]# rm -rf /var/spool/anacron/
The apmd package:
The apmd package or Advanced Power Management Daemon utilities is used on notebook
computer. It can watch your notebook's battery and warn all users when the battery is low. As you
can imagine, there is no need to have it installed on a server machine.
•
To remove the apmd package from your system, use the following commands:
[root@deep /]# /etc/init.d/apmd stop
[root@deep /]# rpm -e apmd
The at package:
The at package is a utility that will do time-oriented job control by scheduling a command to run
later. Unfortunately, it has had a rich history of problems and we can achieve the same
functionality with the more secure vixie-cron package. For this reason I recommend you to
uninstall it.
•
To remove the at package from your system, use the following commands:
[root@deep /]# /etc/init.d/atd stop
[root@deep /]# rpm -e at
57](https://image.slidesharecdn.com/securingoptimizinglinuxthehackingsolutionv-131209075405-phpapp02/85/Securing-Optimizing-Linux-the-Hacking-Solution-v-3-0-57-320.jpg)
![The gpm package:
The gpm package provides mouse support to text-based Linux applications. It’s the software that
allows you to cut-and-paste operations using the mouse on your terminal. If most of your entire
administration of the server is made via remote connection, you can remove this package to save
some processes and memories. We can continue to use cut-and-paste operation via remote
connection to the server without problem. The gpm package is only useful if you stay at the
console terminal of your server to make administration tasks.
•
To remove the gpm package from your system, use the following commands:
[root@deep /]# /etc/init.d/gpm stop
[root@deep /]# rpm -e gpm
The dhcpcd package:
The dhcpcd package contains the protocol, which allows systems to get their own network
configuration information from a DHCP server. If you are going to use DHCP on your network, it is
recommended to install the DHCP client included in the pump package, which provides a faster
and simpler DHCP client. For more information about DHCP, see its related chapter in this book.
•
To remove the dhcpcd package from your system, use the following command:
[root@deep /]# rpm -e dhcpcd
The eject package:
The eject package contains an eject program that allows the user to eject removable media
(typically CD-ROMs, floppy disks, Iomega Jaz or Zip disks) using software. This is an unneeded
program to have installed in a server environment. You should keep it installed only if you’re
intended to run a tape backup on your system.
•
To remove the eject package from your system, use the following command:
[root@deep /]# rpm -e eject
The hotplug package:
The hotplug package is a helper application for loading modules for USB devices. On a server
environment, USB devices are not used at all and are required only on Linux workstation.
•
To remove the hotplug package from your system, use the following command:
[root@deep /]# rpm -e hotplug
The lokkit package:
The lokkit package is a Firewall configuration application for an average end user and it is not
designed to configure arbitrary firewalls since it is solely designed to handle typical dialup user
and cable modem set-ups. It is not the answer to a complex firewall configuration, and it is not the
equal of an expert firewall designer. Therefore remove it from your server and read the chapter
related to GIPTables in this book for more information about secure firewall configuration.
•
To remove the lokkit package from your system, use the following command:
[root@deep /]# rpm -e lokkit
58](https://image.slidesharecdn.com/securingoptimizinglinuxthehackingsolutionv-131209075405-phpapp02/85/Securing-Optimizing-Linux-the-Hacking-Solution-v-3-0-58-320.jpg)
![Installation Issues 0
CHAPTER 2
The ipchains package:
The ipchains package is the old tool used with Linux kernel 2.2 for managing Linux kernel
packet filtering capabilities and to set up firewalling on the network. A new and more powerful tool
called “IPTables” exists and this is the one that we will use later in the book to set up our
firewall on Linux.
•
To remove the ipchains package from your system, use the following command:
[root@deep /]# rpm -e ipchains
The ksymoops package:
The ksymoops package is a small tool used to report kernel oops and error message decoder.
This package is useful for developers that work on the Linux kernel and want to debug or for
users that want to report bugs with the kernel. The same result can be achieved with the dmesg
command of Linux. Therefore, you can remove this package from your secure server.
•
To remove the ksymoops package from your system, use the following command:
[root@deep /]# rpm -e ksymoops
The kudzu package:
The kudzu package is a hardware-probing tool that runs at system boot time to determine what
hardware has been added or removed from the system. Again, in server environment, we don’t
upgrade, add or remove hardware every time. Therefore, we can safety remove this small
package from our server.
•
To remove the kudzu package from your system, use the following command:
[root@deep /]# rpm -e kudzu
The mailcap package:
Metamail is a program that uses the mailcap file to determine how it should display non-text or
multimedia material. We don’t need to have it installed at all. Remove it.
•
To remove the mailcap package from your system, use the following command:
[root@deep /]# rpm -e mailcap
The pciutils package:
The pciutils package contains various utilities for inspecting and setting devices connected to
the PCI bus. Keep it installed if you want, but I recommend removing it form the server.
•
To remove the pciutils package from your system, use the following command:
[root@deep /]# rpm -e pciutils
The raidtools package:
The raidtools package includes the tools you need to set up and maintain a software RAID
device on a Linux system. You should keep this package only if you have configured your server
to run with RAID support. Otherwise, remove it.
•
To remove the raidtools package from your system, use the following command:
[root@deep /]# rpm -e raidtools
59](https://image.slidesharecdn.com/securingoptimizinglinuxthehackingsolutionv-131209075405-phpapp02/85/Securing-Optimizing-Linux-the-Hacking-Solution-v-3-0-59-320.jpg)
![The redhat-logos package:
The redhat-logos package contains files of the Red Hat "Shadow Man" logo and the RPM logo.
•
To remove the redhat-logos package from your system, use the following command:
[root@deep /]# rpm -e redhat-logos
The redhat-release package:
The redhat-release package contains the Red Hat Linux release files. Please note that if you
remove this package, the boot process of the system will generate error messages because it will
look for a file called “redhat-release” which will not be available anymore. To solve this
problem, we recreate the required file under the appropriated directory and add as content of this
file the word “Red Hat Linux”. Of course you can change it for whatever you want.
•
To remove the redhat-release package from your system, use the command:
[root@deep /]# rpm -e redhat-release
[root@deep /]# echo Red Hat Linux > /etc/redhat-release
The setserial package:
The setserial package is a basic system utility for displaying or setting serial port information.
•
To remove the setserial package from your system, use the command:
[root@deep /]# rpm -e setserial
The hdparm package:
The program hdparm is needed by IDE hard disks but not SCSI hard disks. If you have an IDE
disk on your system you must keep this program (hdparm), but if you don’t have an IDE hard
disk you can remove it safely from your system. hdparm is a small Linux tool used to optimize
your IDE hard drive. SCSI hard drives don’t need to be optimized since they are capable to run at
their full speed (80 Mps to 160 Mps) without modification.
•
To remove the hdparm package from your system, use the following command:
[root@deep /]# rpm -e hdparm
The mkinitrd package:
The program mkinitrd is needed by SCSI or RAID hard disk but not IDE hard disks. If you
have a SCSI or RAID disk on your system you must keep this program (mkinitrd), but if you
don’t have a SCSI or RAID hard disk you can safely remove it from your system.
•
To remove the mkinitrd package from your system, use the following command:
[root@deep /]# rpm -e --nodeps mkinitrd
The xconfig packages:
Use the programs kbdconfig, mouseconfig, timeconfig, netconfig, authconfig,
ntsysv, and setuptool in order to set your keyboard language and type, your mouse type,
your default time zone, your Ethernet devices, your NIS and shadow passwords, your numerous
symbolic links in /etc/rc.d directory, and text mode menu utility which allow you to access all
of these features.
60](https://image.slidesharecdn.com/securingoptimizinglinuxthehackingsolutionv-131209075405-phpapp02/85/Securing-Optimizing-Linux-the-Hacking-Solution-v-3-0-60-320.jpg)
![Installation Issues 0
CHAPTER 2
After those configurations have been set during the installation stage of your Linux server it’s rare
that you would need to change them again. So, you can uninstall them, and if in the future you
need to change your keyboard, mouse, default time, etc again via test mode menu, all you have
to do is to install the program with the RPM from your original CD-ROM.
•
To remove all the above programs from your system, use the following command:
[root@deep /]# rpm -e kbdconfig mouseconfig timeconfig netconfig
authconfig ntsysv setuptool
The newt package:
The newt package provides a development library for text mode user interfaces. It’s mainly used
by all the above config packages. Since all the config packages are removed from the server, we
can safety remove newt from our system. If you have decided to keep the above config
packages (kbdconfig, mouseconfig, etc), then you should keep newt, otherwise you should
remove it.
•
To remove the newt package from your system, use the following command:
[root@deep /]# rpm -e newt
The lilo package:
The lilo package provides a boot loader for Linux. Remember that during our Linux installation,
we have chosen to go with GRUB instead of LILO as our boot loader for Linux. Therefore, you can
safety remove this package from your system since it’s really not used now.
•
To remove the lilo package from your system, use the following command:
[root@deep /]# rpm -e lilo
[root@deep /]# rm -f /etc/lilo.conf.anaconda
The reiserfs-utils package:
The reiserfs-utils package contains a number of utilities for creating, checking, modifying,
and correcting any inconsistencies in ReiserFS file-systems. ReiserFS is another file-system
like Ext3 for Linux. In our configuration of Linux we use Ext3 as our file-system therefore we
don’t need to keep this package installed. Keep this utility package only if you intended to run
ReiserFS instead of Ext3 file-system on your Linux server.
•
To remove the reiserfs-utils package from your system, use the command:
[root@deep /]# rpm -e reiserfs-utils
The quota package:
The program quota is a system administration tools for monitoring and limiting user/group disk
usage, per file system. This program must be installed only on servers where the need for
monitoring and restricting amount of disk space in user’s directories is require.
•
To remove the quota package from your system, use the following command:
[root@deep /]# rpm -e quota
61](https://image.slidesharecdn.com/securingoptimizinglinuxthehackingsolutionv-131209075405-phpapp02/85/Securing-Optimizing-Linux-the-Hacking-Solution-v-3-0-61-320.jpg)
![The indexhtml package:
The indexhtml package contains the HTML page and graphics for a welcome page shown by
your browser under graphical interface installation. These HTML pages are information about Red
Hat software. You really don’t need this package under server installation and especially when
GUI is not available. Therefore, you can safety remove this package from your system.
•
To remove the indexhtml package from your system, use the following command:
[root@deep /]# rpm -e indexhtml
The usbutils package:
The usbutils package provides Linux USB utilities for inspecting devices connected to a USB
bus on your system. In server environment, we really don’t use any USB devices and can safety
remove this package from our server installation. USB will usually be used only in Linux
workstation installation where you want to plug printer, camera and any other media of this type.
•
To remove the usbutils package from your system, use the following command:
[root@deep /]# rpm -e usbutils
The hwdata package:
The hwdata package contains various hardware identification and configuration data mainly
used with USB and XFree86. Remember that XFree86 is related to graphical interface and since
we don’t use any GUI into our Linux server, we can remove this package from our system.
•
To remove the hwdata package from your system, use the following command:
[root@deep /]# rpm -e hwdata
The parted package:
The parted package contains various utilities to create, destroy, resize, move and copy hard
disk partitions. It is useful when you need to play with your hard disk structure. In most case, we
partition and set hard disk organization at the installation of the operating system and don’t need
to play or change something once everything are installed and running properly. It’s rare to have
to use this package utility on a production server and this is the reason why I recommend you to
uninstall it. If you prefer to keep it installed for future possible usage, you are free to do it.
•
To remove the parted package from your system, use the following command:
[root@deep /]# rpm -e parted
The hesiod package:
The hesiod package is another one that we can uninstall from our Linux server configuration
setup. It’s a system which uses existing DNS functionality to provide access to databases of
information that change infrequently. In most cases, we don’t need it and you should keep it
install only if you think that you will need it for some special configuration of your server.
•
To remove the hesiod package from your system, use the following command:
[root@deep /]# rpm -e hesiod
62](https://image.slidesharecdn.com/securingoptimizinglinuxthehackingsolutionv-131209075405-phpapp02/85/Securing-Optimizing-Linux-the-Hacking-Solution-v-3-0-62-320.jpg)
![Installation Issues 0
CHAPTER 2
The mt-st package:
The mt-st package provides tools for controlling and managing tape drives on your system. You
should keep it installed only if you have and want to run a tape backup media on your system.
•
To remove the mt-st package from your system, use the following command:
[root@deep /]# rpm -e mt-st
The man-pages package:
The man-pages package provides a large collection of additional manual pages (man pages)
from the Linux Documentation Project (LDP). By default many manual pages are installed with
the operating system and the man-pages package provides additional documentation for those
who want to read them on the system. In server environment, I really don’t see the need to have
additional manual pages installed since these manual pages can be read online from the Internet
or even on another computer running as a development or workstation.
•
To remove the man-pages package from your system, use the following command:
[root@deep /]# rpm -e man-pages
The sendmail package:
Even if you don’t want to run your system as a full mail server, mailer software is always needed
for potential messages sent to the root user by different software services installed on your
machine.
Sendmail is a Mail Transport Agent (MTA) program that sends mail from one machine to another
and it’s the default mail server program installed on Red Hat Linux. Unfortunately, this software
has a long history of security problem and for this reason I highly recommend you to not use it on
your Linux server. You must uninstall Sendmail and see the part in this book that is related to
Mail Transfer Agent configuration and installation for some good alternative like Exim or Qmail.
•
To remove the sendmail package from your system, use the following commands:
[root@deep /]# /etc/init.d/sendmail stop
[root@deep /]# rpm -e sendmail
The procmail package:
Procmail is a mail-processing program, which can be used by Sendmail for all local mail
delivery and filtering. This program is required only if you decide to install and use Sendmail on
your server and only if Sendmail is installed. Since we’ve decided to not go with Sendmail as
our MTA for security reason, we can uninstall procmail from our Linux server.
•
To remove the procmail package from your system, use the following command:
[root@deep /]# rpm -e procmail
The openldap package:
The OpenLDAP software is a set of protocols for accessing directory services like phone book
style information and other kinds of information over the Internet. This useful program is not
suitable for everyone and depends of what you want to do with your system. If you want to give it
a try, see later in this book under the chapter related to databases for more information.
•
To remove the OpenLDAP package from your system, use the following command:
[root@deep /]# rpm -e --nodeps openldap
63](https://image.slidesharecdn.com/securingoptimizinglinuxthehackingsolutionv-131209075405-phpapp02/85/Securing-Optimizing-Linux-the-Hacking-Solution-v-3-0-63-320.jpg)
![The cyrus-sasl packages:
The Cyrus SASL implementation is the Simple Authentication and Security Layer, a method for
adding authentication support to connection-based protocols. It is used in conjunction with
Cyrus, which is an electronic messaging program like Sendmail. Since Cyrus SASL is made to
be used with Sendmail that we have removed previously for security reason, we can safety
remove it.
•
To remove the Cyrus SASL package from your system, use the following command:
[root@deep /]# rpm -e --nodeps cyrus-sasl cyrus-sasl-md5 cyrus-sasl-plain
The openssl package:
OpenSSL is an SSL encryption mechanism which ensures and provides safe and secure
transactions of data over networks. This piece of software is one of the most important tools for a
Linux server and it is highly recommended that it is installed. Unfortunately, the one that comes
with Red Hat Linux is not up to date and not optimized for our specific server. For this reason, we
will uninstall it now and see later in this book, under the chapters related to security software, how
to install, secure, optimize and use it.
•
To remove the OpenSSL package from your system, use the following command:
[root@deep /]# rpm -e --nodeps openssl
[root@deep /]# rm -rf /usr/share/ssl/
The ash package:
The ash package is a smaller version of the bourne shell (sh). Since we already use sh, we can
uninstall this package from our system. If you use this program in your regular administration
task, then keep it installed on your server. In most case, we can remove it.
•
To remove the ash package from your system, use the following command:
[root@deep /]# rpm -e ash
The tcsh package:
The tcsh package is an enhanced version of csh, another C shell. We already have bash as our
default shell program on Linux, and I don’t find any reason to keep another variant installed if we
don’t have any program or services that need it to run.
Most services under Linux can easily run with our default bash shell program and if you don’t
have any program that required tcsh to run, then I recommend you to uninstall it. If in the future,
you see that you need to have tcsh installed on your server for some specific program to run,
then all you have to do is to install it from your CD-ROM. In most cases, there is no program that
needs tsch to run, therefore you can remove it.
•
To remove the tcsh package from your system, use the following command:
[root@deep /]# rpm -e tcsh
64](https://image.slidesharecdn.com/securingoptimizinglinuxthehackingsolutionv-131209075405-phpapp02/85/Securing-Optimizing-Linux-the-Hacking-Solution-v-3-0-64-320.jpg)
![Installation Issues 0
CHAPTER 2
The specspo package:
The specspo package contains the portable object catalogues used to internationalize Red Hat
packages. I don’t think that this kind of package is really required on a production server.
•
To remove the specspo package from your system, use the following command:
[root@deep /]# rpm -e specspo
The krb5-libs package:
The krb5-libs package contains the shared libraries needed by Kerberos 5. Because we’re
not using Kerberos, we’ll need to uninstall this package. Kerberos is not secure as you can
think and can be cracked easily with some good knowledge of this program. Anyway it is yours to
decide if you really need it.
•
To remove the krb5-libs package from your system, use the following command:
[root@deep /]# rpm -e krb5-libs
[root@deep /]# rm -rf /usr/kerberos/
The MAKEDEV package:
The MAKEDEV package contains the MAKEDEV program, which makes it easier to create and
maintain the files in the /dev directory. Program provided by this package is used for creating
device files in the /dev directory of your server. In general, we use it under development server
when we build new package for our Linux system. On production servers, it’s rare to use it.
Therefore we can remove it from our system without any problem.
•
To remove the MAKEDEV package from your system, use the following command:
[root@deep /]# rpm -e MAKEDEV
Remove unnecessary documentation files
By default the majority of each RPM’s packages installed under Linux come with documentation
files related to the software. This documentation contains original files from the program tar
archive like README, FAQ, BUG, INSTALL, NEWS, PROJECTS and more.
Many of them can be easily retrieved from the website where the program has been downloaded
and it makes no sense for them to be kept on your system. I know that hard drives costs have
come down considerably recently, but why keep this kind of documentation on a secure server if
it unlikely they will not be read more than once. Anyway, have a look inside those files and decide
for yourself if you want to remove them or not.
•
To remove all documentation files from your system, use the following commands:
[root@deep /]# cd /usr/share/doc/
[root@deep doc]# rm -rf *
65](https://image.slidesharecdn.com/securingoptimizinglinuxthehackingsolutionv-131209075405-phpapp02/85/Securing-Optimizing-Linux-the-Hacking-Solution-v-3-0-65-320.jpg)
![Remove unnecessary/empty files and directories
There are some files and directories we can remove manually from the file system of Linux to
make a clean install. These files and directories are not needed but still exist after our secure
installation of Linux and can be removed safely. Some are bugs from the Red Hat installation
script and others are created by default even if you don’t use them.
•
To remove all unnecessary files and directories from your system, use the commands:
[root@deep
[root@deep
[root@deep
[root@deep
[root@deep
[root@deep
[root@deep
[root@deep
[root@deep
[root@deep
[root@deep
[root@deep
[root@deep
[root@deep
[root@deep
[root@deep
[root@deep
[root@deep
[root@deep
[root@deep
[root@deep
[root@deep
[root@deep
[root@deep
[root@deep
[root@deep
[root@deep
[root@deep
[root@deep
/]#
/]#
/]#
/]#
/]#
/]#
/]#
/]#
/]#
/]#
/]#
/]#
/]#
/]#
/]#
/]#
/]#
/]#
/]#
/]#
/]#
/]#
/]#
/]#
/]#
/]#
/]#
/]#
/]#
rm
rm
rm
rm
rm
rm
rm
rm
rm
rm
rm
rm
rm
rm
rm
rm
rm
rm
rm
rm
rm
rm
rm
rm
rm
rm
rm
rm
rm
-f
-f
-f
-f
-f
-f
-f
-f
-f
-f
-f
-rf
-rf
-rf
-rf
-rf
-rf
-rf
-rf
-rf
-rf
-rf
-rf
-rf
-rf
-rf
-rf
-f
-f
/etc/exports
/etc/printcap
/etc/ldap.conf
/etc/krb.conf
/etc/yp.conf
/etc/hosts.allow
/etc/hosts.deny
/etc/csh.login
/etc/csh.cshrc
/etc/fstab.REVOKE
/etc/pam_smb.conf
/etc/xinetd.d/
/etc/opt/
/etc/X11/
opt/
/var/opt/
/var/nis/
/var/yp/
/var/lib/games/
/var/spool/lpd/
/usr/lib/python1.5/
/usr/lib/games/
/usr/X11R6/
/usr/etc/
/usr/games/
/usr/local/
/usr/dict/
/usr/bin/X11
/usr/lib/X11
If in the future you want to install a program which needs some of the files/directories we
have removed, then the program will automatically recreate the missing files or directories. Good!
NOTE:
Software that must be installed after installation of the server
There are certain programs required to be able to compile programs on your server, for this
reason you must install the following RPM packages. This part of the installation is very important
and requires that you install all the packages described below.
These are on your Red Hat Part 1 and Part 2 CD-ROMs under RedHat/RPMS directory and
represent the necessary base software needed by Linux to compile and install programs. Please
note that if you don’t want to compile software in your server or if you only use RPM’s packages to
update programs or if you use a dedicated server to develop, compile or create your own RPM’s
packages which will be installed later along your network on the servers, then you DON’T need to
install the packages described here.
66](https://image.slidesharecdn.com/securingoptimizinglinuxthehackingsolutionv-131209075405-phpapp02/85/Securing-Optimizing-Linux-the-Hacking-Solution-v-3-0-66-320.jpg)
![Installation Issues 0
CHAPTER 2
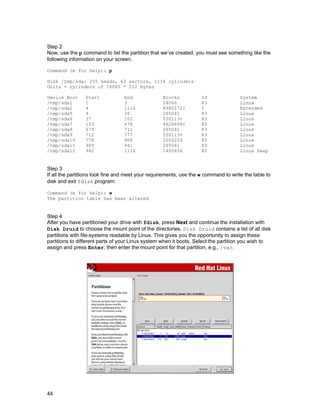
Step 1
First, we mount the CD-ROM drive and move to the RPMS subdirectory of the CD-ROM.
•
To mount the CD-ROM drive and move to RPM directory, use the following commands:
[root@deep /]# mount /dev/cdrom /mnt/cdrom/
had: ATAPI 32X CD-ROM drive, 128kB Cache
mount: block device dev/cdrom is write-protected, mounting read-only
[root@deep /]# cd /mnt/cdrom/RedHat/RPMS/
These are the packages that we need to be able to compile and install programs on the Linux
system. Remember, this is the minimum number of packages that permits you to compile most of
the tarballs available for Linux. Other compiler packages exist on the Linux CD-ROM, so verify
with the README file that came with the tarballs program you want to install if you receive error
messages during compilation of the specific software.
The compiler packages:
Compiler packages contain programs and languages used to build software on the system.
Remember to uninstall the entire following compiler packages after successful installation of all
software required on your Linux server.
binutils-2.11.93.0.2-11.i386.rpm
bison-1.35-1.i386.rpm
byacc-1.9-19.i386.rpm
cdecl-2.5-22.i386.rpm
cpp-2.96-110.i386.rpm
cproto-4.6-9.i386.rpm
ctags-5.2.2-2.i386.rpm
dev86-0.15.5-1.i386.rpm
flex-2.5.4a-23.i386.rpm
gcc-2.96-110.i386.rpm
gcc-c++-2.96-110.i386.rpm
glibc-kernheaders-2.4-7.14.i386.rpm
m4-1.4.1-7.i386.rpm
make-3.79.1-8.i386.rpm
patch-2.5.4-12.i386.rpm
perl-5.6.1-34.99.6.i386.rpm
The development packages:
Development packages contain header and other files required during compilation of software. In
general, development packages are needed when we want to add some specific functionality to
the program that we want to compile. For example if I want to add PAM support to IMAP, I’ll need
pam-devel, which contains the required header files for IMAP to compile successfully.
As for compiler packages, all development packages must be uninstalled after successful
compilation of all the software that you need on your Linux server. Remember to uninstall them
since they are not needed for proper functionality of the server, but just to compile the programs.
aspell-devel-0.33.7.1-9.i386.rpm
db3-devel-3.3.11-6.i386.rpm
freetype-devel-2.0.9-2.i386.rpm
gdbm-devel-1.8.0-14.i386.rpm
gd-devel-1.8.4-4.i386.rpm
glibc-devel-2.2.5-34.i386.rpm
libjpeg-devel-6b-19.i386.rpm
libpng-devel-1.0.12-2.i386.rpm
libstdc++-devel-2.96-110.i386.rpm
ncurses-devel-5.2-26.i386.rpm
pam-devel-0.75-32.i386.rpm
pspell-devel-0.12.2-8.i386.rpm
zlib-devel-1.1.3-25.7.i386.rpm
67](https://image.slidesharecdn.com/securingoptimizinglinuxthehackingsolutionv-131209075405-phpapp02/85/Securing-Optimizing-Linux-the-Hacking-Solution-v-3-0-67-320.jpg)
![Dependencies packages:
Dependencies packages are other RPM packages needed by the RPM packages that we want to
install. This happens because some RPM’s are directly linked with others and depend on each
one to function properly. The following packages are required by the above RPM packages and
we will install them to satisfy dependencies. After proper compilation and installation of all needed
software on the Linux server, we can uninstall them safety (if not needed by special program that
we will install).
aspell-0.33.7.1-9.i386.rpm
freetype-2.0.9-2.i386.rpm
gd-1.8.4-4.i386.rpm
libjpeg-6b-19.i386.rpm
libpng-1.0.12-2.i386.rpm
libtool-libs-1.4.2-7.i386.rpm
pspell-0.12.2-8.i386.rpm
Step 2
It is better to install the software described above together if you don’t want to receive
dependencies error messages during the install. Some of the RPMs reside on CD-ROM Part 1
and other on CD-ROM Part2 of Red Hat. For easy installation, I recommend you to copy all of the
required packages (compilers and development) to your hard drive and install them from there.
•
These procedures can be accomplished with the following commands:
[root@deep /]# cd /var/tmp/
[root@deep tmp]# rpm -Uvh *.rpm
Preparing...
1:binutils
2:bison
3:byacc
4:cdecl
5:cpp
6:cproto
7:ctags
8:db3-devel
9:dev86
10:flex
11:freetype
12:freetype-devel
13:gdbm-devel
14:glibc-kernheaders
15:glibc-devel
16:gcc
17:libjpeg
18:libjpeg-devel
19:libpng
20:gd
21:gd-devel
22:libstdc++-devel
23:gcc-c++
24:libtool-libs
25:m4
26:make
27:pam-devel
28:patch
29:perl
30:ncurses-devel
31:pspell
32:aspell
33:pspell-devel
34:aspell-devel
35:zlib-devel
36:libpng-devel
68
###########################################
###########################################
###########################################
###########################################
###########################################
###########################################
###########################################
###########################################
###########################################
###########################################
###########################################
###########################################
###########################################
###########################################
###########################################
###########################################
###########################################
###########################################
###########################################
###########################################
###########################################
###########################################
###########################################
###########################################
###########################################
###########################################
###########################################
###########################################
###########################################
###########################################
###########################################
###########################################
###########################################
###########################################
###########################################
###########################################
###########################################
[100%]
[ 2%]
[ 5%]
[ 8%]
[ 11%]
[ 13%]
[ 16%]
[ 19%]
[ 22%]
[ 25%]
[ 27%]
[ 30%]
[ 33%]
[ 36%]
[ 38%]
[ 41%]
[ 44%]
[ 47%]
[ 50%]
[ 52%]
[ 55%]
[ 58%]
[ 61%]
[ 63%]
[ 66%]
[ 69%]
[ 72%]
[ 75%]
[ 77%]
[ 80%]
[ 83%]
[ 86%]
[ 88%]
[ 91%]
[ 94%]
[ 97%]
[100%]](https://image.slidesharecdn.com/securingoptimizinglinuxthehackingsolutionv-131209075405-phpapp02/85/Securing-Optimizing-Linux-the-Hacking-Solution-v-3-0-68-320.jpg)


![General Security 0
CHAPTER 3
Linux General Security
Abstract
A secure Linux server depends on how the administrator makes it. Once we have eliminated the
potential security risk by removing unneeded services, we can start to secure our existing
services and software on our server. Within a few hours of installing and configuring your system,
you can prevent many attacks before they occur. In this chapter we will discuss some of the more
general, basic techniques used to secure your system. The following is a list of features that can
be used to help prevent attacks from external and internal sources.
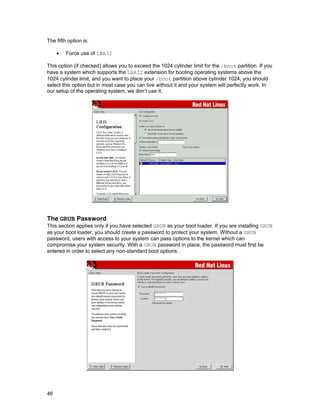
BIOS
It is recommended to disallow booting from floppy drives and set passwords on BIOS features.
You can check your BIOS manual or look at it thoroughly the next time you boot up your system
to find out how to do this. Disabling the ability to boot from floppy drives and being able to set a
password to access the BIOS features will improve the security of your system.
This will block unauthorized people from trying to boot your Linux system with a special boot disk
and will protect you from people trying to change BIOS features like allowing boot from floppy
drive or booting the server without prompt password. It is important to note that there is a
possibility to bypass this security measure if someone has a physical access to your server since
they can open the computer and unplug the BIOS battery. This will reset all features to their initial
values.
Unplug your server from the network
It is not wise to apply security changes in your newly installed Linux server if you are online. So it
is preferable to deactivate all network interfaces in the system before applying security changes.
•
To stop specific network devices manually on your system, use the command:
[root@deep /]# ifdown eth0
•
To start specific network devices manually on your system, use the command:
[root@deep /]# ifup eth0
•
To shut down all network interfaces, use the following command:
[root@deep /]# /etc/init.d/network stop
Shutting down interface eth0
[OK]
Disabling Ipv4 packet forwarding
[OK]
•
To start all network interfaces, use the following command:
[root@deep /]# /etc/init.d/network start
Setting network parameters
[OK]
Bringing up interface lo
[OK]
Bringing up interface eth0
[OK]
75](https://image.slidesharecdn.com/securingoptimizinglinuxthehackingsolutionv-131209075405-phpapp02/85/Securing-Optimizing-Linux-the-Hacking-Solution-v-3-0-75-320.jpg)

![General Security 0
CHAPTER 3
The single-user login mode of Linux
This part applies for those who use LILO as their boot loader. Linux has a special command
(linux single) also known as ‘single-user mode’, which can be entered at the boot prompt
during startup of the system. The single-user mode is generally used for system maintenance.
You can boot Linux in single-user mode by typing at the LILO boot prompt the command:
LILO:
linux single
This will place the system in Run level 1 where you'll be logged in as the super-user 'root', and
where you won't even have to type in a password!
Step 1
Requiring no password to boot into root under single-user mode is a bad idea! You can fix this by
editing the inittab file (vi /etc/inittab) and change the following line:
id:3:initdefault:
To read:
id:3:initdefault:
~~:S:wait:/sbin/sulogin
The addition of the above line will require entering the root password before continuing to boot
into single-user mode by making init (8) run the program sulogin (8) before dropping
the machine into a root shell for maintenance.
Step 2
Now, we have to restart the process control initialization of the server for the changes to take
effect.
•
This can be done with the following command:
[root@deep /]# /sbin/init q
Disabling Ctrl-Alt-Delete keyboard shutdown command
Commenting out the line (with a “#”) listed below in your /etc/inittab file will disable the
possibility of using the Control-Alt-Delete command to shutdown your computer. This is
pretty important if you don't have the best physical security to the machine.
Step 1
• To do this, edit the inittab file (vi /etc/inittab) and change/comment the line:
ca::ctrlaltdel:/sbin/shutdown -t3 -r now
To read:
#ca::ctrlaltdel:/sbin/shutdown -t3 -r now
79](https://image.slidesharecdn.com/securingoptimizinglinuxthehackingsolutionv-131209075405-phpapp02/85/Securing-Optimizing-Linux-the-Hacking-Solution-v-3-0-79-320.jpg)
![Step 2
Now, we have to restart the process control initialization of the server for the changes to take
effect.
•
This can be done with the following command:
[root@deep /]# /sbin/init q
Limiting the default number of started ttys on the server
Default installed Linux system comes with six virtual consoles in standard run levels. This means
that six mingetty processes will always by available at every time on the server. These virtual
consoles allow you to login with six different virtual consoles on the system.
Step 1
On secure server, we can limit the number to two virtual consoles and save some resources
which may be used for other work by the server when required.
•
To do this, edit the inittab file (vi /etc/inittab) and remove/comment the lines:
1:2345:respawn:/sbin/mingetty
2:2345:respawn:/sbin/mingetty
3:2345:respawn:/sbin/mingetty
4:2345:respawn:/sbin/mingetty
5:2345:respawn:/sbin/mingetty
6:2345:respawn:/sbin/mingetty
tty1
tty2
tty3
tty4
tty5
tty6
To read:
1:2345:respawn:/sbin/mingetty tty1
2:2345:respawn:/sbin/mingetty tty2
#3:2345:respawn:/sbin/mingetty tty3
#4:2345:respawn:/sbin/mingetty tty4
#5:2345:respawn:/sbin/mingetty tty5
#6:2345:respawn:/sbin/mingetty tty6
Step 2
Now, we have to restart the process control initialization of the server for the changes to take
effect.
•
This can be done with the following command:
[root@deep /]# /sbin/init q
The LILO and /etc/lilo.conf file
This part applies for those who use LILO as their boot loader. LILO is a boot loader that can be
used to manage the boot process, boot Linux kernel images from floppy disks, hard disks or can
even act as a "boot manager" for other operating systems.
LILO is very important in the Linux system and for this reason, we must protect it the best we
can. The most important configuration file of LILO is the lilo.conf file. It is with this file that we
can configure and improve the security of our LILO program and Linux system. Following are
three important options that will improve the security of our valuable LILO program.
80](https://image.slidesharecdn.com/securingoptimizinglinuxthehackingsolutionv-131209075405-phpapp02/85/Securing-Optimizing-Linux-the-Hacking-Solution-v-3-0-80-320.jpg)
![General Security 0
CHAPTER 3
• Adding: timeout=00
This option controls how long (in seconds) LILO waits for user input before booting to the default
selection. One of the requirements of C2 security is that this interval be set to 0 unless the system
dual boots something else.
• Adding: restricted
This option asks for a password only, if parameters are specified on the command line (e.g.
linux single). The option “restricted” can only be used together with the “password”
option. Make sure you use this one on each additional image you may have.
• Adding: password=<password>
This option asks the user for a password when trying to load the image. Actually the effect of
using the password parameter in /etc/lilo.conf will protect the Linux image from booting.
This means, it doesn't matter if you load Linux in single mode or if you just do a normal boot. It
will always ask you for the password.
Now this can have a very bad effect, namely you are not able to reboot Linux remotely any more
since it won't come up until you type in the root password at the console. It is for this reason that
adding “restricted” with “password” is very important since the option "restricted" relaxes
the password protection and a password is required only if parameters are specified at the LILO
prompt, (e.g. single).
Passwords are always case-sensitive, also make sure the /etc/lilo.conf file is no longer
world readable, or any user will be able to read the password. Here is an example of our
protected LILO with the lilo.conf file.
Step 1
• Edit the lilo.conf file (vi /etc/lilo.conf) and add or change the three options
above as show:
boot=/dev/sda
map=/boot/map
install=/boot/boot.b
prompt
remove this line if you don’t want to pass options at the LILO prompt.
timeout=00
change this line to 00 to disable the LILO prompt.
linear
message=/boot/message
remove this line if you don’t want the welcome screen.
default=linux
add this line to relaxes the password protection.
restricted
password=<password>
add this line and put your password.
image=/boot/vmlinuz-2.4.2-2
label=linux
initrd=/boot/initrd-2.4.2-2.img
read-only
root=/dev/sda6
Step 2
Because the configuration file /etc/lilo.conf now contains unencrypted passwords, it should
only be readable for the super-user “root”.
•
To make the /etc/lilo.conf file readable only by the super-user “root”, use the
following command:
[root@deep /]# chmod 600 /etc/lilo.conf (will be no longer world readable).
81](https://image.slidesharecdn.com/securingoptimizinglinuxthehackingsolutionv-131209075405-phpapp02/85/Securing-Optimizing-Linux-the-Hacking-Solution-v-3-0-81-320.jpg)
![Step 3
Now we must update our configuration file /etc/lilo.conf for the change to take effect.
•
To update the /etc/lilo.conf file, use the following command:
[root@deep /]# /sbin/lilo -v
LILO version 21.4-4, copyright © 1992-1998 Wernerr Almesberger
‘lba32’ extentions copyright © 1999,2000 John Coffman
Reading boot sector from /dev/sda
had : ATAPI 32X CD-ROM drive, 128kB Cache
Merging with /boot/boot.b
Mapping message file /boot/message
Boot image : /boot/vmlinuz-2.2.16-22
Mapping RAM disk /boot/initrd-2.2.16-22.img
Added linux *
/boot/boot.0800 exists – no backup copy made.
Writing boot sector.
Step 4
One more security measure you can take to secure the lilo.conf file is to set it immutable,
using the chattr command.
•
To set the file immutable simply, use the following command:
[root@deep /]# chattr +i /etc/lilo.conf
And this will prevent any changes (accidental or otherwise) to the lilo.conf file. If you wish to
modify the lilo.conf file you will need to unset the immutable flag:
•
To unset the immutable flag, use the following command:
[root@deep /]# chattr -i /etc/lilo.conf
When you use the password option, then LILO will always ask you for the password,
regardless if you pass options at the LILO prompt (e.g. single) or not EXCEPT when you set
the "restricted" option in /etc/lilo.conf.
WARNING:
The option "restricted" relaxes the password protection and a password is required only if
parameters are specified at the LILO prompt, (e.g. single).
If you didn't had this option set "restricted", Linux will always ask you for the password and
you will not be able to remotely reboot your system, therefore don’t forget to add the option
"restricted” with the option "password" into the /etc/lilo.conf file.
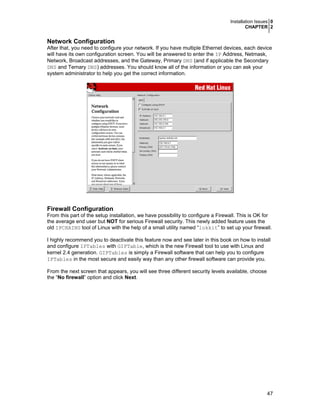
The GRUB and /boot/grub/grub.conf file
This part applies for those who use GRUB as their boot loader. GRUB is another boot loader like
LILO but with many more useful feature and power. One of its main advantages compared to
LILO is the fact that it provides a small shell interface to manage the operating system. Also, it
doesn’t need to be updated each time you recompile a new kernel on your server.
82](https://image.slidesharecdn.com/securingoptimizinglinuxthehackingsolutionv-131209075405-phpapp02/85/Securing-Optimizing-Linux-the-Hacking-Solution-v-3-0-82-320.jpg)
![General Security 0
CHAPTER 3
GRUB is very important since it is the first software program that runs when the computer starts
and we have to secure it as much as possible to avoid any possible problem. In its default
installation it’s already well protected and below I explain how its configuration file is made. In
regard to LILO, GRUB is really easy to use and configure. Below is a default GRUB configuration
file and security I recommend you to apply. The text in bold are the parts of the configuration file
that must be customized and adjusted to satisfy our needs.
•
Edit the grub.conf file (vi /boot/grub/grub.conf) and set your needs. Below is
what we recommend you:
default=0
timeout=0
splashimage=(hd0,0)/grub/splash.xpm.gz
password --md5 $1$oKr0ÝmFo$tPYwkkvQbtqo1erwHj5wb/
title Red Hat Linux (2.4.18-3)
root (hd0,0)
kernel /vmlinuz-2.4.18-3 ro root=/dev/sda5
initrd /initrd-2.4.18-3.img
This tells the grub.conf file to set itself up for this particular configuration with:
default=0
The option “default” is used to define the default entry of the configuration file. The number “0”
mean that the following parameters are the default entry for the configuration of GRUB. In a server
configuration where Linux is the only operating system to boot, the default entry of “0” will be the
only one to use and we don’t need to define any additional entry.
timeout=0
This option “timeout” is used to define the timeout, in sec seconds to wait, before automatically
booting the default entry. As for LILO, one of the requirements of C2 security is that this interval
be set to 0 unless the system dual boots something else. One of the disadvantages to set this
option to “0” is that you will no longer be able to have access at boot time to the shell interface of
the software but this is not really a problem since all we need from the GRUB software is to boot
our operating system.
splashimage=(hd0,0)/grub/splash.xpm.gz
This option “splashimage” is an option added by Red Hat to boot the system with a graphical
image. The value is the path of the compressed image to use when booting GRUB. It’s to you to
keep this parameter on your system or to remove it. If you want to remove it, just delete the
above line with the compressed image from your server.
password --md5 $1$bgGCL/$4yF3t0py.IjU0LU.q7YfB1
This option “password” is used to inform GRUB to ask for a password and disallows any
interactive control, until you press the key <p> and enter a correct password. The option --md5
tells GRUB that a password in MD5 format is required as a value. If it is omitted, GRUB assumes
the specified password is in clear text.
When we have installed the operating system, we have already configured GRUB with a
password protection. This password is what you see here. If you want to change it, you have to
use the “grub-md5-crypt” command to generate a new encrypt password it in MD5 format.
•
This can be done with the following command:
[root@dev /]# grub-md5-crypt
Password:
$1$bgGCL/$4yF3t0py.IjU0LU.q7YfB1
83](https://image.slidesharecdn.com/securingoptimizinglinuxthehackingsolutionv-131209075405-phpapp02/85/Securing-Optimizing-Linux-the-Hacking-Solution-v-3-0-83-320.jpg)
![Once the above command has been issued, you have to cut and paste the encrypted password
to your configuration file.
title Red Hat Linux (2.4.18-3)
This option “title” is used to define a name to the contents of the rest of the line. It is directly
related to the default boot entry. What you enter here is what you will see during boot time. This
option is useful when we have more than one OS to start on our computer and allow us to give
the name that we want to distinguish them. You are free to enter whatever name you like.
root (hd0,0)
This option “root” is one of the most important parameter with GRUB and without it nothing will
work. It is used to define the current root device to use for booting the operating system. Its
definition and configuration is a little bit special as you can see. Here is an explanation of its
meaning. The “hd0” parameter represents using the entire disk and the “hd0,0” represents using
the partition of the disk (or the boot sector of the partition when installing GRUB). Don’t be
confused here because “hd” is valid for IDE and SCSI drives. There is no difference; you always
use “hd” even on SCSI drive.
kernel /vmlinuz-2.4.18-3 ro root=/dev/sda5
This option “kernel” is used to load the primary boot image (our kernel). The parameter to this
option is simply the path where GRUB should find the kernel image from which we want it to boot.
The additional lines are to inform it that kernel image is located on the sda5 partition on our
server and that we want to load it as read only for security reason.
initrd /initrd-2.4.18-3.img
This option “initrd” is optional and will appear into your GRUB configuration file only if you run a
SCSI computer. For IDE computer, this option is not required and should not be defined inside
the configuration file of GRUB. The parameter simply informs GRUB software where our initial ram
disk image is located on the server. GRUB reads this initial ram disk and loads it during startup.
The /etc/services file
The port numbers on which certain "standard" services are offered are defined in the RFC 1700
"Assigned Numbers". The /etc/services file enables server and client programs to convert
service names to these numbers (ports). The list is kept on each host and it is stored in the file
/etc/services. Only the "root" user is allowed to make modifications to this file. It is rare to
edit the /etc/services file since it already contains the more common service names / port
numbers. To improve security, we can set the immutable flag on this file to prevent unauthorized
deletion or modification.
•
To immunize the /etc/services file, use the following command:
[root@deep /]# chattr +i /etc/services
84](https://image.slidesharecdn.com/securingoptimizinglinuxthehackingsolutionv-131209075405-phpapp02/85/Securing-Optimizing-Linux-the-Hacking-Solution-v-3-0-84-320.jpg)
![General Security 0
CHAPTER 3
The /etc/securetty file
The /etc/securetty file allows you to specify which TTY and VC (virtual console) devices the
“root” user is allowed to login on. The /etc/securetty file is read by the login program
(usually /bin/login). Its format is a list of the tty and vc devices names allowed, and for all
others that are commented out or do not appear in this file, root login is disallowed.
Disable any tty and vc devices that you do not need by commenting them out (# at the
beginning of the line) or by removing them.
•
Edit the securetty file (vi /etc/securetty) and comment out or remove the lines:
tty1
#tty2
#tty3
#tty4
#tty5
#tty6
#tty7
#tty8
#tty9
#tty10
#tty11
vc/1
#vc/2
#vc/3
#vc/4
#vc/5
#vc/6
#vc/7
#vc/8
#vc/9
#vc/10
#vc/11
Which means root is allowed to login on only tty1 and vc/1. This is my recommendation,
allowing “root” to log in on only one tty or vc device and use the su or sudo command to
switch to “root” if you need more devices to log in as “root”.
Special accounts
It is important to DISABLE ALL default vendor accounts that you don’t use on your system
(some accounts exist by default even if you have not installed the related services on your
server). This should be checked after each upgrade or new software installation. Linux provides
these accounts for various system activities, which you may not need if the services are not
installed on your server. If you do not need the accounts, remove them. The more accounts you
have, the easier it is to access your system.
We assume that you are using the shadow password suite on your Linux system. If you are not,
you should consider doing so, as it helps to tighten up security somewhat. This is already set if
you’ve followed our Linux installation procedure and selected, under the “Authentication
Configuration”, the option to “Enable Shadow Passwords” (see the chapter related to the
“Installation of your Linux Server” for more information).
•
To delete user on your system, use the following command:
[root@deep /]# userdel username
•
To delete group on your system, use the following command:
[root@deep /]# groupdel username
85](https://image.slidesharecdn.com/securingoptimizinglinuxthehackingsolutionv-131209075405-phpapp02/85/Securing-Optimizing-Linux-the-Hacking-Solution-v-3-0-85-320.jpg)
![Step 1
First we will remove all default vendor accounts into the /etc/passwd file that are unnecessary
for the operation of the secure server configuration that we use in this book.
•
Type the following commands to delete all default users accounts listed below.
[root@deep
[root@deep
[root@deep
[root@deep
[root@deep
[root@deep
[root@deep
[root@deep
[root@deep
[root@deep
[root@deep
/]#
/]#
/]#
/]#
/]#
/]#
/]#
/]#
/]#
/]#
/]#
userdel
userdel
userdel
userdel
userdel
userdel
userdel
userdel
userdel
userdel
userdel
adm
lp
shutdown
halt
news
mailnull
operator
games
gopher
ftp
vcsa
By default, the userdel command will not delete a user’s home directory. If you want
the home directories of accounts to be deleted too, then add the -r option to the userdel
command. Finally, the -r option must be used only when you have added a new user to the
server and want to remove them. It doesn’t need to be used for the removal of the above default
user’s accounts since they do not have a home directory.
WARNING:
Once the above list of users has been deleted from your Linux system, the /etc/passwd file will
look like this:
root:x:0:0:root:/root:/bin/bash
bin:x:1:1:bin:/bin:/sbin/nologin
daemon:x:2:2:daemon:/sbin:/sbin/nologin
sync:x:5:0:sync:/sbin:/bin/sync
mail:x:8:12:mail:/var/spool/mail:/sbin/nologin
uucp:x:10:14:uucp:/var/spool/mail:/sbin/nologin
nobody:x:99:99:Nobody:/:/sbin/nologin
rpm:x:37:37::/var/lib/rpm:/bin/bash
Step 2
After that we have removed all the unnecessary default vendor accounts into the /etc/passwd
file from our system, we will remove all default vendor accounts into the /etc/group file.
•
Type the following commands to delete all default users groups accounts listed below.
[root@deep
[root@deep
[root@deep
[root@deep
[root@deep
86
/]#
/]#
/]#
/]#
/]#
groupdel
groupdel
groupdel
groupdel
groupdel
adm
lp
news
games
dip](https://image.slidesharecdn.com/securingoptimizinglinuxthehackingsolutionv-131209075405-phpapp02/85/Securing-Optimizing-Linux-the-Hacking-Solution-v-3-0-86-320.jpg)
![General Security 0
CHAPTER 3
Once the above list of group users has been deleted from your Linux system the /etc/group
file will look like this:
root:x:0:root
bin:x:1:root,bin,daemon
daemon:x:2:root,bin,daemon
sys:x:3:root,bin
tty:x:5:
disk:x:6:root
mem:x:8:
kmem:x:9:
wheel:x:10:root
mail:x:12:mail
uucp:x:14:uucp
man:x:15:
lock:x:54:
nobody:x:99:
users:x:100:
slocate:x:21:
floppy:x:19:
utmp:x:22:
rpm:x:37:
Step 3
Now, you can add all the necessary and allowed users into the system. Below I show you how
you should add new user into your Linux server. Adding a new user into your server mean that
you have to create the username and assign him/her a password.
•
To add a new user on your system, use the following command:
[root@deep /]# useradd username
For example:
[root@deep /]# useradd admin
•
To add or change password for user on your system, use the following command:
[root@deep /]# passwd username
For example:
[root@deep /]# passwd admin
The output should look something like this:
Changing password for user admin
New UNIX password:
Retype new UNIX password:
passwd: all authentication tokens updated successfully
Step 4
The immutable bit can be used to prevent accidentally deleting or overwriting a file that must be
protected. It also prevents someone from creating a symbolic link to this file, which has been the
source of attacks involving the deletion of /etc/passwd, /etc/shadow, /etc/group or
/etc/gshadow files.
•
To set the immutable bit on the passwords and groups files, use the following commands:
[root@deep /]# chattr +i /etc/passwd
[root@deep /]# chattr +i /etc/shadow
[root@deep /]# chattr +i /etc/group
87](https://image.slidesharecdn.com/securingoptimizinglinuxthehackingsolutionv-131209075405-phpapp02/85/Securing-Optimizing-Linux-the-Hacking-Solution-v-3-0-87-320.jpg)
![[root@deep /]# chattr +i /etc/gshadow
In the future, if you intend to add or delete users, passwords, user groups, or group
files, you must unset the immutable bit on all those files or you will not be able to make and
update your changes. Also if you intend to install an RPM program that will automatically add a
new user to the different immunized passwd and group files, then you will receive an error
message during the install if you have not unset the immutable bit from those files.
WARNING:
•
To unset the immutable bit on the passwords and groups files, use the commands:
[root@deep
[root@deep
[root@deep
[root@deep
/]#
/]#
/]#
/]#
chattr
chattr
chattr
chattr
-i
-i
-i
-i
/etc/passwd
/etc/shadow
/etc/group
/etc/gshadow
Control mounting a file system
You can have more control on mounting file systems like /var/lib, /home or /tmp partitions
with some nifty options like noexec, nodev, and nosuid. This can be setup in the /etc/fstab
file. The fstab file contains descriptive information about the various file system mount options;
each line addresses one file system.
Information related to security options in the fstab text file are:
defaults
noquota
nosuid
nodev
noexec
quota
ro
rw
suid
Allow everything (quota, read-write, and suid) on this partition.
Do not set users quotas on this partition.
Do not set SUID/SGID access on this partition.
Do not set character or special devices access on this partition.
Do not set execution of any binaries on this partition.
Allow users quotas on this partition.
Allow read-only on this partition.
Allow read-write on this partition.
Allow SUID/SGID access on this partition.
For more information on options that you can set in this file (fstab) see the man pages
about mount (8).
NOTE:
Step 1
• Edit the fstab file (vi /etc/fstab) and change it depending of your needs.
For example change:
LABEL=/home
LABEL=/tmp
LABEL=/var/lib
/home
/tmp
/var/lib
ext3
ext3
ext3
defaults 1 2
defaults 1 2
defaults 1 2
/home
/tmp
/var/lib
ext3
ext3
ext3
defaults,nosuid 1 2
defaults,nosuid,noexec 1 2
defaults,nodev 1 2
To read:
LABEL=/home
LABEL=/tmp
LABEL=/var/lib
88](https://image.slidesharecdn.com/securingoptimizinglinuxthehackingsolutionv-131209075405-phpapp02/85/Securing-Optimizing-Linux-the-Hacking-Solution-v-3-0-88-320.jpg)
![General Security 0
CHAPTER 3
Meaning, <nosuid>, do not allow set-user-identifier or set-group-identifier bits to take effect,
<nodev>, do not interpret character or block special devices on this file system partition, and
<noexec>, do not allow execution of any binaries on the mounted file system.
Step 2
Once you have made the necessary adjustments to the /etc/fstab file, it is time to inform the
Linux system about the modifications.
•
This can be accomplished with the following commands:
[root@deep /]# mount /var/lib -oremount
[root@deep /]# mount /home -oremount
[root@deep /]# mount /tmp -oremount
Each file system that has been modified must be remounted with the command show above. In
our example we have modified the /var/lib, /home, and /tmp file system and it is for this
reason that we remount these files systems with the above commands.
•
You can verify if the modifications have been correctly applied to the Linux system with
the following command:
[root@deep /]# cat /proc/mounts
rootfs
/
rootfs
/dev/root
/
ext3
/proc
/proc
proc
/dev/sda1
/boot
ext3
/dev/sda8
/chroot
ext3
none
/dev/pts
devpts
/dev/sda7
/home
ext3
none
/dev/shm
tmpfs
/dev/sda11
/tmp
ext3
/dev/sda6
/usr
ext3
/dev/sda9
/var
ext3
/dev/sda10
/var/lib
ext3
rw 0 0
rw 0 0
rw 0 0
rw 0 0
rw 0 0
rw 0 0
rw,nosuid 0 0
rw 0 0
rw,nosuid,noexec 0 0
rw 0 0
rw 0 0
rw,nodev 0 0
This command will show you all the files systems on your Linux server with parameters applied to
them.
Mounting the /usr directory of Linux as read-only
It is allowable to mount your /usr partition read-only since this is, by definition, static data. Of
course, anyone with root access can remount it as writable, but a generic attack script may not
know this. On many Linux variants this directory resides in its own partition and the default
parameter is to mount it as read-write. We can change this parameter to make it read-only for
better security. Please be sure that your /usr directory is on its own partition or the following
hack will not work for you.
89](https://image.slidesharecdn.com/securingoptimizinglinuxthehackingsolutionv-131209075405-phpapp02/85/Securing-Optimizing-Linux-the-Hacking-Solution-v-3-0-89-320.jpg)
![Step 1
Mounting the /usr partition as read-only eliminates possible problems that someone may try to
change or modify vital files inside it. To mount the /usr file system of Linux as read-only, follow
the simple steps below.
•
Edit the fstab file (vi /etc/fstab) and change the line:
LABEL=/usr
/usr
ext3
defaults
1 2
/usr
ext3
defaults,ro 1 2
To read:
LABEL=/usr
We add the “ro” option to this line to specify to mount this partition as read-only.
Step 2
Make the Linux system aware about the modification you have made to the /etc/fstab file.
•
This can be accomplished with the following command:
[root@deep /]# mount /usr -oremount
•
Then test your results with the following command:
[root@deep /]# cat /proc/mounts
rootfs
/
rootfs
/dev/root
/
ext3
/proc
/proc
proc
/dev/sda1
/boot
ext3
/dev/sda8
/chroot
ext3
none
/dev/pts
devpts
/dev/sda7
/home
ext3
none
/dev/shm
tmpfs
/dev/sda11
/tmp
ext3
/dev/sda6
/usr
ext3
/dev/sda9
/var
ext3
/dev/sda10
/var/lib
ext3
rw 0 0
rw 0 0
rw 0 0
rw 0 0
rw 0 0
rw 0 0
rw,nosuid 0 0
rw 0 0
rw,nosuid,noexec 0 0
ro 0 0
rw 0 0
rw,nodev 0 0
If you see something like: /dev/sda6 /usr ext3 ro 0 0, congratulations!
WARNING: If in the future you want to install some RPM package or program from source code, it is
important to reset the modification you have made to the /usr directory to its initial state (readwrite) or you will not be able to install new software because the /usr partition is set as readonly. All you have to do if you want to put the /usr partition to its original state is to edit the
/etc/fstab file again and remove the “ro” option then remount the /usr file system with the
“mount -oremount” command again.
90](https://image.slidesharecdn.com/securingoptimizinglinuxthehackingsolutionv-131209075405-phpapp02/85/Securing-Optimizing-Linux-the-Hacking-Solution-v-3-0-90-320.jpg)
![General Security 0
CHAPTER 3
Tighten scripts under /etc/init.d
Fix the permissions of the script files that are responsible for starting and stopping all your normal
processes that need to run at boot time.
•
To fix the permissions of those files, use the following command:
[root@deep /]# chmod 0700 /etc/init.d/*
Which means just the super-user “root” is allowed to Read, Write, and Execute scripts files on
this directory. I don’t think regular users need to know what’s inside those script files.
If you install a new program or update a program that use the init system V script
located under /etc/init.d/ directory, don’t forget to change or verify the permission of this
script file again.
WARNING:
Tighten scripts under /etc/cron.daily/
As for the above hack, we can tighten the security of all script files that are responsible for
executing scheduled job on our server. Those files have a default permission mode of (0755rwxr-xr-x), which is too high for what they should accomplish.
•
To fix the permissions of those files, use the following command:
[root@deep /]# chmod 0550 /etc/cron.daily/*
The same is true for other cron directories under the /etc directory of your system. If files exist
under the other cron directories, then use the above command to change their default permission
mode for better security.
If you install a new program or update a program that provides and install a cron file on
your server, don’t forget to change or verify the permission of this script file again.
WARNING:
Bits from root-owned programs
A regular user will be able to run a program as root if it is set to SUID root. All programs and files
on your computer with the ’s’ bits appearing on its mode, have the SUID (-rwsr-xr-x) or SGID
(-r-xr-sr-x) bit enabled. Because these programs grant special privileges to the user who is
executing them, it is important to remove the 's' bits from root-owned programs that won't
absolutely require such privilege.
This can be accomplished by executing the command chmod a-s with the name(s) of the
SUID/SGID files as its arguments.
Such programs include, but aren't limited to:
Programs you never use.
Programs that you don't want any non-root users to run.
Programs you use occasionally, and don't mind having to su (1) to root to run.
91](https://image.slidesharecdn.com/securingoptimizinglinuxthehackingsolutionv-131209075405-phpapp02/85/Securing-Optimizing-Linux-the-Hacking-Solution-v-3-0-91-320.jpg)
![Step 1
We've placed an asterisk (*) next to each program we personally might disable and consider
being not absolutely required for the duty work of the server. Remember that your system needs
some suid root programs to work properly, so be careful.
•
To find all files with the ‘s’ bits from root-owned programs, use the command:
[root@deep]# find / -type f ( -perm -04000 -o -perm -02000 ) -exec ls -l {} ;
*-rwsr-xr-x
*-rwsr-xr-x
-rwxr-sr-x
-r-s--x--x
*-r-xr-sr-x
*-rws--x--x
*-rws--x--x
*-rws--x--x
*-rwxr-sr-x
-rwsr-xr-x
*-rwsr-xr-x
*-rwsr-xr-x
-rwxr-sr-x
-rws--x--x
*-rwsr-xr-x
*-rwsr-xr-x
*-rwsr-xr-x
*-rwsr-xr-x
-rwsr-xr-x
-r-sr-xr-x
-r-sr-xr-x
*-rwxr-sr-x
1
1
1
1
1
1
1
1
1
1
1
1
1
1
1
1
1
1
1
1
1
1
root
root
root
root
root
root
root
root
root
root
root
root
root
root
root
root
root
root
root
root
root
root
root
root
slocate
root
tty
root
root
root
tty
root
root
root
utmp
root
root
root
root
root
root
root
root
root
34296
36100
25020
15104
6920
12072
11496
4764
8584
21080
32673
13994
6604
22388
17461
35192
60104
30664
19116
120264
16992
14657
Mar
Mar
Jun
Mar
Mar
Apr
Apr
Apr
Apr
Apr
Apr
Apr
Jun
Apr
Apr
Apr
Apr
Apr
Apr
Apr
Apr
Apr
27
27
25
13
14
1
1
1
1
15
18
18
24
15
19
18
1
1
8
9
9
19
20:40
20:40
2001
20:44
15:24
18:26
18:26
18:26
18:26
00:49
17:40
17:40
2001
18:15
12:35
17:40
18:26
18:26
12:02
23:24
23:24
12:35
/usr/bin/chage
/usr/bin/gpasswd
/usr/bin/slocate
/usr/bin/passwd
/usr/bin/wall
/usr/bin/chfn
/usr/bin/chsh
/usr/bin/newgrp
/usr/bin/write
/usr/bin/crontab
/usr/sbin/ping6
/usr/sbin/traceroute6
/usr/sbin/utempter
/usr/sbin/userhelper
/usr/sbin/usernetctl
/bin/ping
/bin/mount
/bin/umount
/bin/su
/sbin/pwdb_chkpwd
/sbin/unix_chkpwd
/sbin/netreport
Step 2
• To disable the suid bits on selected programs above, use the following commands:
[root@deep
[root@deep
[root@deep
[root@deep
[root@deep
[root@deep
[root@deep
[root@deep
[root@deep
[root@deep
[root@deep
[root@deep
[root@deep
[root@deep
92
/]#
/]#
/]#
/]#
/]#
/]#
/]#
/]#
/]#
/]#
/]#
/]#
/]#
/]#
chmod
chmod
chmod
chmod
chmod
chmod
chmod
chmod
chmod
chmod
chmod
chmod
chmod
chmod
a-s
a-s
a-s
a-s
a-s
a-s
a-s
a-s
a-s
a-s
a-s
a-s
a-s
a-s
/usr/bin/chage
/usr/bin/gpasswd
/usr/bin/wall
/usr/bin/chfn
/usr/bin/chsh
/usr/bin/newgrp
/usr/bin/write
/usr/sbin/ping6
/usr/sbin/traceroute6
/usr/sbin/usernetctl
/bin/ping
/bin/mount
/bin/umount
/sbin/netreport](https://image.slidesharecdn.com/securingoptimizinglinuxthehackingsolutionv-131209075405-phpapp02/85/Securing-Optimizing-Linux-the-Hacking-Solution-v-3-0-92-320.jpg)
![General Security 0
CHAPTER 3
Don’t let internal machines tell the server what their MAC address is
To avoid the risk that a user could easily change a computers IP address and appear as
someone else to the firewall, you can force the ARP cache entries of Linux using the arp
command utility. A special option can be used with the arp utility to avoid letting INTERNAL
machines tell the server what their MAC (Media Access Control) address is and the IP address
associated with it.
Step1
ARP is a small utility, which manipulates the kernel’s ARP (Address Resolution Protocol) cache.
Through all possible options associated with this utility, the primary one is clearing an address
mapping entry and manually setting up one. In the hope to more secure our server from the
INTERNAL, we will manually set MAC address (sometimes called Hardware addresses) of all
known computers in our network statically by using static ARP entries.
•
For each IP address of INTERNAL computers in your network, use the following
command to know the MAC address associate with the IP address:
[root@deep /]# ifconfig
eth0
Link encap:Ethernet HWaddr 00:50:DA:C6:D3:FF
inet addr:207.35.78.3 Bcast:207.35.78.32 Mask:255.255.255.224
UP BROADCAST RUNNING MULTICAST MTU:1500 Metric:1
RX packets:1887318 errors:0 dropped:0 overruns:1 frame:0
TX packets:2709329 errors:0 dropped:0 overruns:0 carrier:1
collisions:18685 txqueuelen:100
Interrupt:10 Base address:0xb000
eth1
Link encap:Ethernet HWaddr 00:50:DA:C6:D3:09
inet addr:192.168.1.11 Bcast:192.168.1.255 Mask:255.255.255.0
UP BROADCAST RUNNING MULTICAST MTU:1500 Metric:1
RX packets:182937 errors:0 dropped:0 overruns:0 frame:0
TX packets:179612 errors:0 dropped:0 overruns:0 carrier:0
collisions:7434 txqueuelen:100
Interrupt:11 Base address:0xa800
lo
Link encap:Local Loopback
inet addr:127.0.0.1 Mask:255.0.0.0
UP LOOPBACK RUNNING MTU:3924 Metric:1
RX packets:7465 errors:0 dropped:0 overruns:0 frame:0
TX packets:7465 errors:0 dropped:0 overruns:0 carrier:0
collisions:0 txqueuelen:0
The MAC (Media Access Control) address will be the letters and numbers that come after
“HWaddr” (the Hardware Address). In the above example our MAC address are:
00:50:DA:C6:D3:FF for the interface eth0 and 00:50:DA:C6:D3:09 for the interface eth1.
Step 2
Once we know the MAC (Media Access Control) address associated with IP address, we can add
them manually to the ARP entries of the Linux server.
•
To add manually MAC address to ARP entries, use the following commands:
[root@deep /]# arp -s 207.35.78.3 00:50:DA:C6:D3:FF
[root@deep /]# arp -s 192.168.1.11 00:50:DA:C6:D3:09
93](https://image.slidesharecdn.com/securingoptimizinglinuxthehackingsolutionv-131209075405-phpapp02/85/Securing-Optimizing-Linux-the-Hacking-Solution-v-3-0-93-320.jpg)
![The “-s” option means to manually create an ARP address mapping entry for host hostname with
hardware address set to hw_addr class. You can add you ARP commands to the
/etc/rc.local file if you want to keep your configuration if the system reboots.
Step 3
• To verify if the modifications have been added to the system, use the following command:
[root@deep /]# arp
Address
Hwtype
207.35.78.3 ether
192.168.1.11 ether
Hwaddress
00:20:78:13:86:92
00:E0:18:90:1B:56
Flags Mask
CM
CM
Iface
eth1
eth1
If you receive error message like: SIOCSARP: Invalid argument, it is because the MAC
(Media Access Control) address you want to add is the one of your server. You must add only MAC
address of INTERNAL computers in your private network. This hack doesn’t apply to external
node on the Internet.
WARNING:
You can now be reassured that someone will not change the system's IP address of an
INTERNAL system and get through. If they do change the IP address, the server simply won't
talk to them. With the new iptables tool of Linux, which replace the old ipchains utility for
packet filter administration and firewall setup, MAC addresses can be filtered and configured in the
firewall rules too.
Unusual or hidden files
It is important to look everywhere on the system for unusual or hidden files (files that start with a
period and are normally not shown by the “ls” command), as these can be used to hide tools and
information (password cracking programs, password files from other systems, etc.). A common
technique on UNIX systems is to put a hidden directory or file in a user's account with an unusual
name, something like '...' or '.. ' (dot dot space) or '..^G' (dot dot control-G). The find
program can be used to look for hidden files.
•
To look for hidden files, use the following commands:
[root@deep /]# find / -name ".. " -print -xdev
[root@deep /]# find / -name ".*" -print -xdev | cat –v
/etc/skel/.bash_logout
/etc/skel/.bash_profile
/etc/skel/.bashrc
/etc/.pwd.lock
/root/.bash_logout
/root/.Xresources
/root/.bash_profile
/root/.bashrc
/root/.cshrc
/root/.tcshrc
/root/.bash_history
/usr/lib/perl5/5.6.1/i386-linux/.packlist
/home/admin/.bash_logout
/home/admin/.bash_profile
/home/admin/.bashrc
/.autofsck
94](https://image.slidesharecdn.com/securingoptimizinglinuxthehackingsolutionv-131209075405-phpapp02/85/Securing-Optimizing-Linux-the-Hacking-Solution-v-3-0-94-320.jpg)
![General Security 0
CHAPTER 3
Finding Group and World Writable files and directories
Group and world writable files and directories, particularly system files (partitions), can be a
security hole if a cracker gains access to your system and modifies them. Additionally, worldwritable directories are dangerous, since they allow a cracker to add or delete files as he or she
wishes in these directories. In the normal course of operation, several files will be writable,
including some from the /dev, /var/mail directories, and all symbolic links on your system.
•
To locate all group & world-writable files on your system, use the command:
[root@deep /]# find / -type f ( -perm -2 -o -perm -20 ) -exec ls -lg {} ;
-rw-rw-r-1 root
utmp
107904 Jun 17 12:04 /var/log/wtmp
-rw-rw-r-1 root
utmp
4608 Jun 17 12:04 /var/run/utmp
•
To locate all group & world-writable directories on your system, use the command:
[root@deep /]# find / -type d ( -perm -2 -o -perm -20 ) -exec ls -ldg {} ;
drwxrwxr-x
12 root
man
4096 Jun 17 06:50 /var/cache/man/X11R6
drwxrwxr-x
2 root
man
4096 Mar 25 09:17 /var/cache/man/X11R6/cat1
drwxrwxr-x
2 root
man
4096 Mar 25 09:17 /var/cache/man/X11R6/cat2
drwxrwxr-x
2 root
man
4096 Mar 25 09:17 /var/cache/man/X11R6/cat3
drwxrwxr-x
2 root
man
4096 Mar 25 09:17 /var/cache/man/X11R6/cat4
drwxrwxr-x
2 root
man
4096 Mar 25 09:17 /var/cache/man/X11R6/cat5
drwxrwxr-x
2 root
man
4096 Mar 25 09:17 /var/cache/man/X11R6/cat6
drwxrwxr-x
2 root
man
4096 Mar 25 09:17 /var/cache/man/X11R6/cat7
drwxrwxr-x
2 root
man
4096 Mar 25 09:17 /var/cache/man/X11R6/cat8
drwxrwxr-x
2 root
man
4096 Mar 25 09:17 /var/cache/man/X11R6/cat9
drwxrwxr-x
2 root
man
4096 Mar 25 09:17 /var/cache/man/X11R6/catn
drwxrwxr-x
2 root
man
4096 Mar 25 09:17 /var/cache/man/cat1
drwxrwxr-x
2 root
man
4096 Mar 25 09:17 /var/cache/man/cat2
drwxrwxr-x
2 root
man
4096 Mar 25 09:17 /var/cache/man/cat3
drwxrwxr-x
2 root
man
4096 Mar 25 09:17 /var/cache/man/cat4
drwxrwxr-x
2 root
man
4096 Mar 25 09:17 /var/cache/man/cat5
drwxrwxr-x
2 root
man
4096 Mar 25 09:17 /var/cache/man/cat6
drwxrwxr-x
2 root
man
4096 Mar 25 09:17 /var/cache/man/cat7
drwxrwxr-x
2 root
man
4096 Mar 25 09:17 /var/cache/man/cat8
drwxrwxr-x
2 root
man
4096 Mar 25 09:17 /var/cache/man/cat9
drwxrwxr-x
2 root
man
4096 Mar 25 09:17 /var/cache/man/catn
drwxrwxr-x
12 root
man
4096 Jun 17 06:50 /var/cache/man/local
drwxrwxr-x
2 root
man
4096 Mar 25 09:17 /var/cache/man/local/cat1
drwxrwxr-x
2 root
man
4096 Mar 25 09:17 /var/cache/man/local/cat2
drwxrwxr-x
2 root
man
4096 Mar 25 09:17 /var/cache/man/local/cat3
drwxrwxr-x
2 root
man
4096 Mar 25 09:17 /var/cache/man/local/cat4
drwxrwxr-x
2 root
man
4096 Mar 25 09:17 /var/cache/man/local/cat5
drwxrwxr-x
2 root
man
4096 Mar 25 09:17 /var/cache/man/local/cat6
drwxrwxr-x
2 root
man
4096 Mar 25 09:17 /var/cache/man/local/cat7
drwxrwxr-x
2 root
man
4096 Mar 25 09:17 /var/cache/man/local/cat8
drwxrwxr-x
2 root
man
4096 Mar 25 09:17 /var/cache/man/local/cat9
drwxrwxr-x
2 root
man
4096 Mar 25 09:17 /var/cache/man/local/catn
drwxrwxr-x
3 root
lock
4096 Jun 17 06:49 /var/lock
drwxrwxr-x
2 root
root
4096 Apr 19 12:35 /var/run/netreport
drwxrwxr-x
2 root
12
4096 Jun 17 12:30 /var/spool/mail
drwxrwxrwt
2 root
root
4096 Jun 17 11:29 /var/tmp
drwxrwxrwt
2 root
root
4096 Jun 17 06:52 /tmp
A file and directory integrity checker like “Tripwire” software can be used regularly to
scan, manage and find modified group or world writable files and directories easily. See later in
this book for more information about Tripwire.
WARNING:
95](https://image.slidesharecdn.com/securingoptimizinglinuxthehackingsolutionv-131209075405-phpapp02/85/Securing-Optimizing-Linux-the-Hacking-Solution-v-3-0-95-320.jpg)
![Unowned files
Don’t permit any unowned file on your server. Unowned files may also be an indication that an
intruder has accessed your system. If you find unowned file or directory on your system, verify its
integrity, and if all looks fine, give it an owner name. Some time you may uninstall a program and
get an unowned file or directory related to this software; in this case you can remove the file or
directory safely.
•
To locate files on your system that do not have an owner, use the following command:
[root@deep /]# find / -nouser -o -nogroup
WARNING:
It is important to note that files reported under /dev/ directory don’t count.
Finding .rhosts files
Finding all existing .rhosts files that could exist on your server should be a part of your regular
system administration duties, as these files should not be permitted on your system. Remember
that a cracker only needs one insecure account to potentially gain access to your entire network.
Step 1
If you are doing a new install of Linux (like we did) you should not have any .rhosts files on
your system. If the result returns nothing, then you are safe and your system contain no .rhosts
files in the /home directory at this time.
•
You can locate all existing .rhosts files on your system with the following command:
[root@deep /]# find /home -name .rhosts
Step 2
You can also use a cron job to periodically check for, report the contents of, and delete
$HOME/.rhosts files. Also, users should be made aware that you regularly perform this type of
audit, as directed by your security policy.
•
Create the rhosts.cron file (touch /etc/cron.daily/rhosts.cron) and add the
following lines inside the script file.
#!/bin/sh
/usr/bin/find /home -name .rhosts | (cat <<EOF
This is an automated report of possible existent ..rhosts files on
the server deep.openna.com, generated by the find utility command.
New detected ..rhosts. files under the ./home/. directory include:
EOF
cat
) | /bin/mail -s "Content of .rhosts file audit report" root
•
Now make this script executable, verify the owner, and change the group to “root”.
[root@deep /]# chmod 550 /etc/cron.daily/rhosts.cron
[root@deep /]# chown 0.0 /etc/cron.daily/rhosts.cron
Each day mail will be sent to “root” with a subject:” Content of .rhosts file audit report” containing
potential new .rhosts files.
96](https://image.slidesharecdn.com/securingoptimizinglinuxthehackingsolutionv-131209075405-phpapp02/85/Securing-Optimizing-Linux-the-Hacking-Solution-v-3-0-96-320.jpg)
![General Security 0
CHAPTER 3
Physical hard copies of all-important logs
One of the most important security considerations is the integrity of the different log files under
the /var/log directory on your server. If despite each of the security functions put in place on
our server, a cracker can gain access to it; our last defence is the log file system, so it is very
important to consider a method of being sure of the integrity of our log files.
If you have a printer installed on your server, or on a machine on your network, a good idea
would be to have actual physical hard copies of all-important logs. This can be easily
accomplished by using a continuous feed printer and having the syslog program sending all
logs you think are important out to /dev/lp0 (the printer device). Cracker can change the files,
programs, etc on your server, but can do nothing when you have a printer that prints a real paper
copy of all of your important logs.
As an example:
For logging of all telnet, mail, boot messages and ssh connections from your server to the
printer attached to THIS server, you would want to add the following line to the
/etc/syslog.conf file:
Step 1
• Edit the syslog.conf file (vi /etc/syslog.conf) and add at the end of this file the
following line:
authpriv.*;mail.*;local7.*;auth.*;daemon.info /dev/lp0
Step 2
• Now restart your syslog daemon for the change to take effect:
[root@deep /]# /etc/init.d/syslog restart
Shutting down kernel logger:
[OK]
Shutting down system logger:
[OK]
Starting system logger:
[OK]
Starting kernel logger:
[OK]
As an example:
For logging of all telnet, mail, boot messages and ssh connections from your server to the
printer attached to a REMOTE server in your local network, then you would want to add the
following line to /etc/syslog.conf file on the REMOTE server.
Step 1
• Edit the syslog.conf file (vi /etc/syslog.conf) on the REMOTE server (for
example: printer.openna.com) and add at the end of this file the following line:
authpriv.*;mail.*;local7.*;auth.*;daemon.info /dev/lp0
If you don’t have a printer in your network, you can also copy all the log files to another machine;
simply omit the above first step of adding /dev/lp0 to your syslog.conf file on remote and go
directly to the “-r” option second step on remote. Using the feature of copying all the log files to
another machine will give you the possibility to control all syslog messages on one host and will
tear down administration needs.
97](https://image.slidesharecdn.com/securingoptimizinglinuxthehackingsolutionv-131209075405-phpapp02/85/Securing-Optimizing-Linux-the-Hacking-Solution-v-3-0-97-320.jpg)
![Step 2
Since the default configuration of the syslog daemon is to not receive any messages from the
network, we must enable on the REMOTE server the facility to receive messages from the
network. To enable the facility to receive messages from the network on the REMOTE server,
add the following option “-r” to your syslog daemon script file (only on the REMOTE host):
•
Edit the syslog daemon (vi +24 /etc/rc.d/init.d/syslog) and change:
daemon syslogd -m 0
To read:
daemon syslogd -r -m 0
Step 3
• Restart your syslog daemon on the remote host for the change to take effect:
[root@mail /]# /etc/init.d/syslog restart
Shutting down kernel logger:
[OK]
Shutting down system logger:
[OK]
Starting system logger:
[OK]
Starting kernel logger:
[OK]
Step 4
• Edit the syslog.conf file (vi /etc/syslog.conf) on the LOCAL server, and add at
the end of this file the following line:
authpriv.*;mail.*;local7.*;auth.*;daemon.info @printer
Where (printer) represent the hostname of the REMOTE server. Now if anyone ever hacks
your machine and attempts to erase vital system logs, you still have a hard copy of everything. It
should then be fairly simple to trace where they came from and deal with it accordingly.
Step 5
• Restart your syslog daemon on the LOCAL server for the change to take effect:
[root@deep /]# /etc/init.d/syslog restart
Shutting down kernel logger:
[OK]
Shutting down system logger:
[OK]
Starting system logger:
[OK]
Starting kernel logger:
[OK]
Never use your Gateway Server as a host to control all syslog messages; this is a
very bad idea. More options and strategies exist with the sysklogd program, see the man pages
about sysklogd (8), syslog(2), and syslog.conf(5) for more information.
WARNING:
98](https://image.slidesharecdn.com/securingoptimizinglinuxthehackingsolutionv-131209075405-phpapp02/85/Securing-Optimizing-Linux-the-Hacking-Solution-v-3-0-98-320.jpg)
![General Security 0
CHAPTER 3
Getting some more security by removing manual pages
Here we have to think a little bit about manual pages installed on all Linux system. Manual pages
also known as man-pages are compressed files located under the /usr/share/man directory
on your system. These documentation files are very useful to get quick information on how
service, program, commands, and configuration files of specific software work. These files are
readable by the man program and depend of other installed software on Linux to work and display
the information.
On production servers where specific task are assigned and where we only run services to the
internal or external, does we really need to have these manual pages and related software
installed? Do we will connect to these production servers to read these manual pages? Does this
is really important to have them duplicated on all of our different servers? Personally, I don’t think
because we can have all of these useful documentation files available on our Linux workstation or
development server each time we need to consult them.
If you have made attention to what we have done previously to secure our server, you will
remember that most of all group and world-writable directories on our system comes from the
/var/cache directory which is owned by the man program associated with manual pages. By
removing manual pages and related software from our server, we can get some more security
and save some not negligible space which could help when we scan our server with integrity tool
like Tripwire. This also allow us to remove other software directly related to man program and
limit the number of installed component on our production server without scarifying in the
functionally of the server. If this is what you want to do, here are the steps to follow.
Step 1
First of all, we should remove the man software from our system. The man software is the
program we use to read manual pages. By removing this software we eliminate most of all group
and world-writable directories from our system.
•
To remove the man software, use the following command:
[root@deep /]# rpm -e man
Step 2
Once the above software has been removed, we can continue with groff. Groff is a document
formatting system that takes standard text and formatting commands as input and produces
formatted output. This software is used by man to format man-pages.
•
To remove the groff software, use the following command:
[root@deep /]# rpm -e groff
Step 3
Because we don’t use manual pages anymore on our production servers, we can remove all
man-pages that are already installed and available under the /usr/share/man directory.
•
To remove all preinstalled man-pages from your server, use the following commands:
[root@deep /]# cd /usr/share/man/
[root@deep man]# rm -f man*/*.gz
99](https://image.slidesharecdn.com/securingoptimizinglinuxthehackingsolutionv-131209075405-phpapp02/85/Securing-Optimizing-Linux-the-Hacking-Solution-v-3-0-99-320.jpg)
![Step 4
Finally, it is important to note that any future installation and upgrade of RPM packages on the
system should be made with the “--excludedocs” option. This RPM option allow us to install or
upgrade the RPM package without the need to install the documentation part that may comes with
the software. For example, if I want to install or upgrade the bind package, I will use the
following RPM command.
•
To install or upgrade RPM without documentation, use the following command:
[root@deep /]# rpm –Uvh --exculdedocs bind-version.i386.rpm
System is compromised!
If you believe that your system has been compromised, contact CERT ® Coordination Center or
your representative in FIRST (Forum of Incident Response and Security Teams).
Internet Email:
cert@cert.org
CERT Hotline:
(+1) 412-268-7090
Facsimile:
(+1) 412-268-6989
CERT/CC personnel answer 8:00 a.m. – 8:00 p.m. EST (GMT –5)/EDT (GMT –4)) on working
days; they are on call for emergencies during other hours and on weekends and holidays.
100](https://image.slidesharecdn.com/securingoptimizinglinuxthehackingsolutionv-131209075405-phpapp02/85/Securing-Optimizing-Linux-the-Hacking-Solution-v-3-0-100-320.jpg)


![Pluggable Authentication Modules 0
CHAPTER 4
Disabling console program access
In a safe environment, where we are sure that console is secured because passwords for BIOS
and GRUB or LILO are set and all physical power and reset switches on the system are disabled,
it may be advantageous to entirely disable all console-equivalent access to programs like
poweroff, reboot, and halt for regular users on your server.
•
To do this, run the following command:
[root@deep /]# rm -f /etc/security/console.apps/<servicename>
Where <servicename> is the name of the program to which you wish to disable consoleequivalent access.
•
To disable console program access, use the following commands:
[root@deep /]# rm -f /etc/security/console.apps/halt
[root@deep /]# rm -f /etc/security/console.apps/poweroff
[root@deep /]# rm -f /etc/security/console.apps/reboot
This will disable console-equivalent access to programs halt, poweroff, and reboot.
Disabling all console access
The Linux-PAM library installed by default on your system allows the system administrator to
choose how applications authenticate users, such as for console access, program and file
access.
Step 1
In order to disable all these accesses for the users, you must comment out all lines that refer to
pam_console.so in the /etc/pam.d directory. This step is a continuation of the hack
“Disabling console program access”. The following script will do the trick automatically for you.
•
As ‘root’ creates the disabling.sh script file (touch disabling.sh) and add the
following lines inside:
# !/bin/sh
cd /etc/pam.d
for i in * ; do
sed '/[^#].*pam_console.so/s/^/#/' < $i > foo && mv foo $i
done
Step 2
Now, we have to make the script executable and run it.
•
This can be done with the following commands:
[root@deep /]# chmod 700 disabling.sh
[root@deep /]# ./disabling.sh
This will comment out all lines that refer to pam_console.so for all files located under
/etc/pam.d directory. Once the script has been executed, you can remove it from your system.
105](https://image.slidesharecdn.com/securingoptimizinglinuxthehackingsolutionv-131209075405-phpapp02/85/Securing-Optimizing-Linux-the-Hacking-Solution-v-3-0-105-320.jpg)

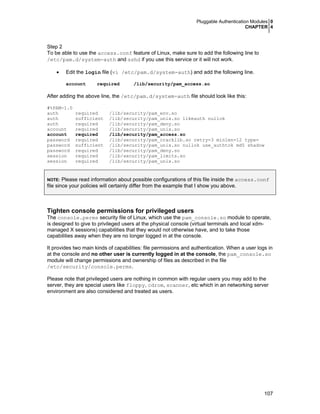
![Step 1
The default console.perms configuration file of Linux is secure enough for regular use of the
system where an Xwindow interface is considered to be installed but in a highly secure
environment where the Graphical User Interface (GUI) is not installed or where some special
devices like sound, jaz, etc have no reason to exist, we can tighten the console.perms
security file of Linux to be more secure by eliminating non-existent or unneeded privileged users
to have capabilities that they would not otherwise have.
•
Edit the console.perms file (vi /etc/security/console.perms), and change the
default lines inside this file:
# file classes -- these are regular expressions
<console>=tty[0-9][0-9]* vc/[0-9][0-9]* :[0-9].[0-9] :[0-9]
<xconsole>=:[0-9].[0-9] :[0-9]
# device classes -- these are shell-style globs
<floppy>=/dev/fd[0-1]*
/dev/floppy/* /mnt/floppy*
<sound>=/dev/dsp* /dev/audio* /dev/midi*
/dev/mixer* /dev/sequencer
/dev/sound/* /dev/beep
<cdrom>=/dev/cdrom* /dev/cdroms/* /dev/cdwriter* /mnt/cdrom*
<pilot>=/dev/pilot
<jaz>=/mnt/jaz*
<zip>=/mnt/pocketzip* /mnt/zip*
<ls120>=/dev/ls120 /mnt/ls120*
<scanner>=/dev/scanner /dev/usb/scanner*
<rio500>=/dev/usb/rio500
<camera>=/mnt/camera* /dev/usb/dc2xx* /dev/usb/mdc800*
<memstick>=/mnt/memstick*
<flash>=/mnt/flash*
<diskonkey>=/mnt/diskonkey*
<rem_ide>=/mnt/microdrive*
<fb>=/dev/fb /dev/fb[0-9]*
/dev/fb/*
<kbd>=/dev/kbd
<joystick>=/dev/js[0-9]*
<v4l>=/dev/video* /dev/radio* /dev/winradio* /dev/vtx* /dev/vbi*
/dev/video/*
<gpm>=/dev/gpmctl
<dri>=/dev/nvidia* /dev/3dfx*
<mainboard>=/dev/apm_bios
# permission definitions
<console> 0660 <floppy>
<console> 0600 <sound>
<console> 0600 <cdrom>
<console> 0600 <pilot>
<console> 0600 <jaz>
<console> 0600 <zip>
<console> 0600 <ls120>
<console> 0600 <scanner>
<console> 0600 <camera>
<console> 0600 <memstick>
<console> 0600 <flash>
<console> 0600 <diskonkey>
<console> 0600 <rem_ide>
<console> 0600 <fb>
<console> 0600 <kbd>
<console> 0600 <joystick>
108
0660
0600
0660
0660
0660
0660
0660
0600
0600
0600
0600
0660
0660
0600
0600
0600
root.floppy
root
root.disk
root.uucp
root.disk
root.disk
root.disk
root
root
root
root
root.disk
root.disk
root
root
root](https://image.slidesharecdn.com/securingoptimizinglinuxthehackingsolutionv-131209075405-phpapp02/85/Securing-Optimizing-Linux-the-Hacking-Solution-v-3-0-108-320.jpg)
![Pluggable Authentication Modules 0
CHAPTER 4
<console>
<console>
<console>
<console>
0600
0700
0600
0600
<v4l>
<gpm>
<mainboard>
<rio500>
0600
0700
0600
0600
root
root
root
root
<xconsole> 0600 /dev/console 0600 root.root
<xconsole> 0600 <dri>
0600 root
To read :
# file classes -- these are regular expressions
<console>=tty[0-9][0-9]* vc/[0-9][0-9]* :[0-9].[0-9] :[0-9]
# device classes -- these are shell-style globs
<floppy>=/dev/fd[0-1]*
/dev/floppy/* /mnt/floppy*
<cdrom>=/dev/cdrom* /dev/cdroms/* /dev/cdwriter* /mnt/cdrom*
<pilot>=/dev/pilot
<fb>=/dev/fb /dev/fb[0-9]*
/dev/fb/*
<kbd>=/dev/kbd
<gpm>=/dev/gpmctl
<mainboard>=/dev/apm_bios
# permission definitions
<console> 0660 <floppy>
<console> 0600 <cdrom>
<console> 0600 <pilot>
<console> 0600 <fb>
<console> 0600 <kbd>
<console> 0700 <gpm>
<console> 0600 <mainboard>
0660
0660
0660
0600
0600
0700
0600
root.floppy
root.disk
root.uucp
root
root
root
root
Here we removed every privileged user related to the Graphical User Interface and others related
to sound, zip drive, jaz drive, scanner, joystick and video media at the physical console
on the server.
Putting limits on resource
The limits.conf file located under the /etc/security directory can be used to control and
limit resources for the users on your system. It is important to set resource limits on all your users
so they can't perform Denial of Service attacks (number of processes, amount of memory, etc) on
the server. These limits will have to be set up for the user when he or she logs in.
Step 1
For example, limits for all users on your system might look like this:
•
Edit the limits.conf file (vi /etc/security/limits.conf) and change the lines:
#*
#*
#@student
soft
hard
hard
core
rss
nproc
0
10000
20
hard
hard
hard
core
rss
nproc
0
5000
35
To read:
*
*
*
109](https://image.slidesharecdn.com/securingoptimizinglinuxthehackingsolutionv-131209075405-phpapp02/85/Securing-Optimizing-Linux-the-Hacking-Solution-v-3-0-109-320.jpg)
![This says to prohibit the creation of core files “core 0”, restrict the number of processes to 35
“nproc 35”, and restrict memory usage to 5M “rss 5000” for everyone except the super user
“root”. All of the above only concerns users who have entered through the login prompt on your
system. With this kind of quota, you have more control on the processes, core files, and memory
usage that users may have on your system. The asterisk “*” mean: all users that logs in on the
server.
Putting an asterisk “*” to cover all users can pose problem with daemon users account like “www”
for a web server, “mysql” for a SQL database server, etc. If we put an asterisk, then, these users
will be affected by the restriction and limitation of processes or memory usage.
To solve the problem, we can choose an existing group name in our system and add every
regular user to this group. In this manner, the restrictions and limitations will apply to all users
who are members of this group name only. A special group account named “users” can be used
for this purpose. This is the recommended method on putting limit on user resources.
•
Edit the limits.conf file (vi /etc/security/limits.conf) and change the lines:
#*
#*
#@student
soft
hard
hard
core
rss
nproc
0
10000
20
hard
hard
hard
core
rss
nproc
0
5000
35
To read:
@users
@users
@users
If you decide to use a group name like “@users” to control and limit resources for the users on
your system, then it is important to not forget to change the GUI (Group User ID) of these users
to be “100”. “100” is the numeric value of the user’s ID “users”.
•
The command to create a new user with group name which is set by default to users is:
[root@deep /]# useradd -g100 admin
The “-g100” option represents the number of the user’s initial login group and in our case “100”
is the group account name “users”. The “admin” parameter is the user name we want to add to
the group name “users”.
Use the same command above for all users on your system you want to be member of
the “users” group account. It is also preferable to set this parameter first before adding users to
the system.
WARNING:
110](https://image.slidesharecdn.com/securingoptimizinglinuxthehackingsolutionv-131209075405-phpapp02/85/Securing-Optimizing-Linux-the-Hacking-Solution-v-3-0-110-320.jpg)

![Blocking; su to root, by one and sundry
The su (Substitute User) command allows you to become other existing users on the system. For
example you can temporarily become ‘root’ and execute commands as the super-user ‘root’.
Step 1
If you don’t want anyone to su to root or want to restrict the su command to certain users then
uncomment the following line of your su configuration file in the /etc/pam.d directory. We
highly recommend that you limit the persons allowed to su to the root account.
•
Edit the su file (vi /etc/pam.d/su) and uncomment the following line in the file:
auth
required
/lib/security/pam_wheel.so use_uid
After this line has been uncommented, the /etc/pam.d/su file should look like this:
#%PAM-1.0
auth
auth
auth
account
password
session
session
sufficient
required
required
required
required
required
optional
/lib/security/pam_rootok.so
/lib/security/pam_wheel.so use_uid
/lib/security/pam_stack.so service=system-auth
/lib/security/pam_stack.so service=system-auth
/lib/security/pam_stack.so service=system-auth
/lib/security/pam_stack.so service=system-auth
/lib/security/pam_xauth.so
Which means only those who are members of the “wheel” group can su to root; it also includes
logging. Note that the “wheel” group is a special account on your system that can be used for
this purpose. You cannot use any group name you want to make this hack. This hack combined
with specifying which TTY and VC devices super-user root is allowed to login on will improve
your security a lot on the system.
Step 2
Now that we have defined the “wheel” group in our /etc/pam.d/su file configuration, it is time
to add some users who will be allowed to su to super-user “root” account.
•
If you want to make, for example, the user “admin” a member of the “wheel” group, and
thus be able to su to root, use the following command:
[root@deep /]# usermod -G10 admin
Which means “G” is a list of supplementary groups, where the user is also a member of. “10” is
the numeric value of the user’s ID “wheel”, and “admin” is the user we want to add to the
“wheel” group. Use the same command above for all users on your system you want to be able
to su to super-user “root” account.
For Linux users, who use the Xwindow interface, it is important to note that if you can't su
in a GNOME terminal, it’s because you’ve used the wrong terminal. (So don't think that this advice
doesn't work simply because of a GNOME terminal problem!)
NOTE:
112](https://image.slidesharecdn.com/securingoptimizinglinuxthehackingsolutionv-131209075405-phpapp02/85/Securing-Optimizing-Linux-the-Hacking-Solution-v-3-0-112-320.jpg)
![Pluggable Authentication Modules 0
CHAPTER 4
Facultative:
A special line exists in the su file /etc/pam.d/su which allows you to implicitly trust users in the
“wheel” group (for security reasons, I don’t recommend using this option). This mean that all
users who are members of the “wheel” group can su to root without the need to enter the
super-user “root” password.
•
To allow users who are members of the “wheel” group to su to root account without the
need to enter the “root” password, edit the su file (vi /etc/pam.d/su) and
uncomment the following line in the file:
auth
sufficient
/lib/security/pam_wheel.so trust use_uid
After this line has been uncommented, the /etc/pam.d/su file should look like this:
#%PAM-1.0
auth
auth
auth
account
password
session
session
sufficient
sufficient
required
required
required
required
optional
/lib/security/pam_rootok.so
/lib/security/pam_wheel.so trust use_uid
/lib/security/pam_stack.so service=system-auth
/lib/security/pam_stack.so service=system-auth
/lib/security/pam_stack.so service=system-auth
/lib/security/pam_stack.so service=system-auth
/lib/security/pam_xauth.so
Using sudo instead of su for logging as super-user
There is a security tool called “sudo” that we discuss into this book. This security software allow
us to archive the same result as using the su command to get root privilege on the server but in
a more secure and informative way. With sudo installed in our server, we can get information
about who is connected as super-user root as well as many other useful features. Please see
the chapter related to this security program into this book for more information about sudo.
If you want to use sudo to allow and control which is allowed to logging as super-user root on
your server, then you no longer need to use the su command of Linux to archive this task and we
can remove the SUID bit on this command to completely disable su and use sudo.
This let us remove one more SUID bit on our secure server and have a more complete and
powerful security software to control access to super-user root. This is the method I highly
recommend you to use instead of the su command of Linux.
Step 1
To archive this result, we have to remove the SUID bit of the su command and install the sudo
security software as explained further down in this book. This also implies that we don’t need to
modify the above su configuration file on our system. To recap, all we need to do is to remove
the SUID bit on the su command, and install sudo in our server.
•
To remove the SUID bit on the su binary, use the following command:
[root@deep /]# chmod a-s /bin/su
113](https://image.slidesharecdn.com/securingoptimizinglinuxthehackingsolutionv-131209075405-phpapp02/85/Securing-Optimizing-Linux-the-Hacking-Solution-v-3-0-113-320.jpg)


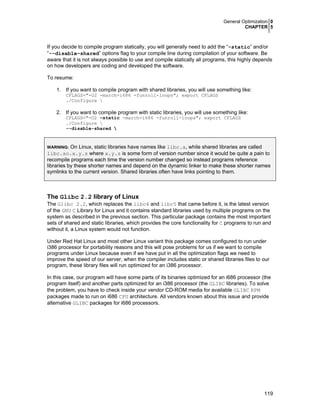
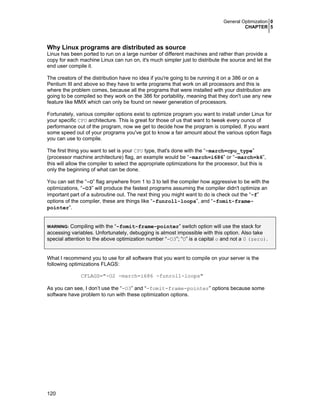
![General Optimization 0
CHAPTER 5
Some misunderstanding in the compiler flags options
At lot of discussions exist in the Linux community about the “-O” option and its level numbers.
Some Linux users try to convince that level number up to “-O3” like “-O9” will produce faster
program. The “-O9” flag doesn't do anything over “-O3”, if you don't believe me make a small file,
call it testO3.c and see:
Step 1
• Create the testO3.c file with the following command:
[root@deep tmp]# touch testO3.c
Step 2
• Run the GCC compiler with “-O3” flag through the testO3.c file with the command:
[root@deep tmp]# gcc -O3 -S -fverbose-asm testO3.c
Step 3
Look at testO3.s that it made, then run again with “-O9” and compare the output.
•
Create the testO9.c file with the following command:
[root@deep tmp]# touch testO9.c
Step 4
• Run the GCC compiler again with “-O9” flag through the testO9.c file with command:
[root@deep tmp]# gcc -O9 -S -fverbose-asm testO9.c
Step 5
Now if you compare the output you will see no difference between the both files.
•
To compare the output, use the following command:
[root@deep tmp]# diff testO3.s testO9.s > difference
The “-O3” flag level number is the best and highest optimization flag you can use
during optimization of programs under Linux.
WARNING:
121](https://image.slidesharecdn.com/securingoptimizinglinuxthehackingsolutionv-131209075405-phpapp02/85/Securing-Optimizing-Linux-the-Hacking-Solution-v-3-0-121-320.jpg)
![General Optimization 0
CHAPTER 5
The gcc specs file
The /usr/lib/gcc-lib/i386-redhat-linux/2.96/specs file of Red Hat Linux is a set of
defines that the gcc compiler uses internally to set various aspects of the compile environment.
All customizations that you put in this file will apply for the entire variable environment on your
system, so putting optimization flags in this file is a good choice.
To squeeze the maximum performance from your x86 programs, you can use full optimization
when compiling with the “-O3” flag. Many programs contain “-O2” in the Makefile. The “-O3”
level number is the highest level of optimization. It will increase the size of what it produces, but it
runs faster in most case. You can also use the “-march=cpu_type” switch to optimize the
program for the CPU listed to the best of GCC’s ability. However, the resulting code will only be run
able on the indicated CPU or higher.
Below are the optimization flags that we recommend you to put in your /usr/lib/gcclib/i386-redhat-linux/2.96/specs file depending on your CPU architecture. The
optimization options apply only when we compile and install a new program in our server. These
optimizations don’t play any role in our Linux base system; it just tells our compiler to optimize the
new programs that we will install with the optimization flags we have specified in the
/usr/lib/gcc-lib/i386-redhat-linux/2.96/specs file. Adding options listed below
depending of your CPU architecture to the gcc 2.96 specs file will save you having to change
every CFLAGS in future Makefiles.
Step 1
The first thing to do is to verify the compiler version installed on your Linux server.
•
To verify the compiler version installed on your system, use the command:
[root@deep /]# gcc -v
Reading specs from /usr/lib/gcc-lib/i386-redhat-linux/2.96/specs
gcc version 2.96 20000731 (Red Hat Linux 7.3 2.96-110)
Step 2
For CPU i686 or PentiumPro, Pentium II, Pentium III, and Athlon
Edit the /usr/lib/gcc-lib/i386-redhat-linux/2.96/specs file, scroll down a ways...
You'll see a section like the following:
*cpp_cpu_default:
-D__tune_i386__
*cpp_cpu:
-Acpu(i386) -Amachine(i386) %{!ansi:-Di386} -D__i386 -D__i386__
%{march=i386:%{!mcpu*:-D__tune_i386__ }}%{march=i486:-D__i486 -D__i486__
%{!mcpu*:-D__tune_i486__ }}%{march=pentium|march=i586:-D__pentium -D__pentium__
%{!mcpu*:-D__tune_pentium__ }}%{march=pentiumpro|march=i686:-D__pentiumpro D__pentiumpro__
%{!mcpu*:-D__tune_pentiumpro__ }}%{march=k6:-D__k6 -D__k6__
%{!mcpu*:-D__tune_k6__ }}%{march=athlon:-D__athlon -D__athlon__ %{!mcpu*:D__tune_athlon__ }}%{m386|mcpu=i386:-D__tune_i386__ }%{m486|mcpu=i486:D__tune_i486__ }%{mpentium|mcpu=pentium|mcpu=i586:-D__tune_pentium__
}%{mpentiumpro|mcpu=pentiumpro|mcpu=i686:-D__tune_pentiumpro__ }%{mcpu=k6:D__tune_k6__ }%{mcpu=athlon:-D__tune_athlon__
}%{!march*:%{!mcpu*:%{!m386:%{!m486:%{!mpentium*:%(cpp_cpu_default)}}}}}
*cc1_cpu:
%{!mcpu*: %{m386:-mcpu=i386} %{m486:-mcpu=i486} %{mpentium:-mcpu=pentium}
%{mpentiumpro:-mcpu=pentiumpro}}
122](https://image.slidesharecdn.com/securingoptimizinglinuxthehackingsolutionv-131209075405-phpapp02/85/Securing-Optimizing-Linux-the-Hacking-Solution-v-3-0-122-320.jpg)
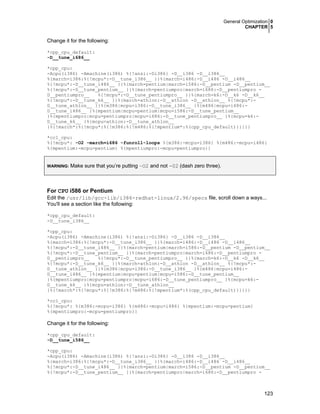
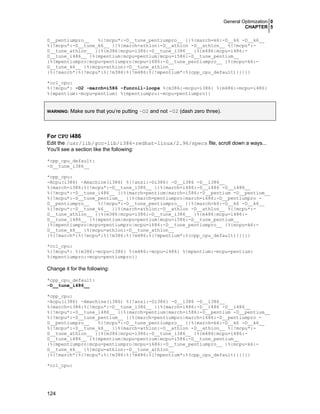
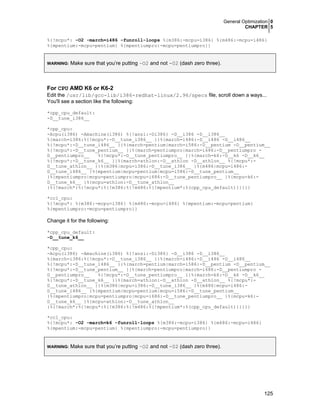
![General Optimization 0
CHAPTER 5
Step3
Once our optimization flags have been applied to the gcc 2.96 specs file, it time to verify if the
modification work.
•
To verify if the optimization work, use the following commands:
[root@deep tmp]# touch cpu.c
[root@deep tmp]# gcc cpu.c -S -fverbose-asm
[root@deep tmp]# less cpu.s
What you'll get is a file that contains depending of options you have chose, something like:
.file
"ccnVPjeW.i"
.version
"01.01"
# GNU C version 2.96 20000731 (Red Hat Linux 7.3 2.96-110) (i386-redhat-linux)
compiled by GNU C version 2.96 20000731 (Red Hat Linux 7.3 2.96-110).
# options passed: -O2 -march=i686 -funroll-loops -fverbose-asm
# options enabled: -fdefer-pop -foptimize-sibling-calls -fcse-follow-jumps
# -fcse-skip-blocks -fexpensive-optimizations -fthread-jumps
# -fstrength-reduce -funroll-loops -fpeephole -fforce-mem -ffunction-cse
# -finline -fkeep-static-consts -fcaller-saves -fpcc-struct-return -fgcse
# -frerun-cse-after-loop -frerun-loop-opt -fdelete-null-pointer-checks
# -fschedule-insns2 -fsched-interblock -fsched-spec -fbranch-count-reg
# -fnew-exceptions -fcommon -fverbose-asm -fgnu-linker -fregmove
# -foptimize-register-move -fargument-alias -fstrict-aliasing
# -fmerge-constants -fident -fpeephole2 -fmath-errno -m80387 -mhard-float
# -mno-soft-float -mieee-fp -mfp-ret-in-387 -march=i686
gcc2_compiled.:
.ident "GCC: (GNU) 2.96 20000731 (Red Hat Linux 7.3 2.96-110)"
In our example we are optimized the specs file for a i686 CPU processor. It is important
to note that most of the “-f” options are automatically included when you use “-O2” and don't
need to be specified again. The changes that were shown were made so that a command like
"gcc" would really be the command "gcc -march=i686" without having to change every single
Makefile which can really be a pain.
WARNING:
Below is the explanation of the different optimization options we use:
•
•
The “-funroll-loops” optimization flag
The “-funroll-loops” optimization option will perform the optimization of loop
unrolling and will do it only for loops whose number of iterations can be determined at
compile time or run time.
•
126
The “-march=cpu_type” optimization flag
The “-march=cpu_type” optimization option will set the default CPU to use for the
machine type when scheduling instructions.
The “-fomit-frame-pointer” optimization flag
The “-fomit-frame-pointer” optimization option, one of the most interesting, will
allow the program to not keep the frame pointer in a register for functions that don't need
one. This avoids the instructions to save, set up and restores frame pointers; it also
makes an extra register available in many functions and makes debugging impossible on
most machines.](https://image.slidesharecdn.com/securingoptimizinglinuxthehackingsolutionv-131209075405-phpapp02/85/Securing-Optimizing-Linux-the-Hacking-Solution-v-3-0-126-320.jpg)
![General Optimization 0
CHAPTER 5
All future optimizations that we will describe in this book refer by default to a Pentium
PRO/II/III and higher i686 CPU family. So you must adjust the compilation flags for your specific
CPU processor type in the /usr/lib/gcc-lib/i386-redhat-linux/2.96/specs file and
during your compilation time.
WARNING:
Striping all binaries and libraries files
When compiler builds program it add many comments and other stuffs inside the resulting binary
and library code which are used to debug application on the system or to make the code more
readable by developers. To get the latest bit of optimization, we can remove all comments and
other unneeded stuffs since there are only used for debugging purpose. This will make the
software runs a little bit faster because it will have fewer codes to read when executing.
I don’t know if it’s a good idea to talk about this hack because it’s really dangerous to apply and
can make your system unstable or completely unworkable if you don’t take care of what you do.
The process of eliminating all unneeded comments and other unneeded stuffs from your binaries
and libraries files is made by the use of the strip command of Linux. This command should be
used with care and in the good manner or you will certainly have a bad surprise.
Bellow, I will explain you how to apply it on your system and on which files or where you should
use it. It is very important to know that it’s NOT all binaries and especially libraries files that need
to be striped by this method but ONLY some of them. If you apply this hack on your entire
system, then something will inevitably break, you have been warned.
Finally, you should use this hack on servers where you DON’T compile software. If you compile
software on the server where you want to apply this hack, then nothing will work and you will not
be able to compile any software on it. Use this hack on server which doesn’t have any compiler
packages installed to make compilation.
Step 1
The first step in our procedure will be to be sure that the strip command is available on our
server; this command comes from the “binutils” RPM package. Therefore, if it is not installed,
install it from your CD-ROM.
Step 2
Once the strip program is installed on our server, it’s time to strip the required files. With the
commands below, we strip all binaries program available under the /bin, /sbin, /usr/bin and
/usr/sbin directories of your server.
•
To strip all binaries program, use the following commands:
[root@deep
[root@deep
[root@deep
[root@deep
/]#
/]#
/]#
/]#
strip
strip
strip
strip
/bin/*
/sbin/*
/usr/bin/*
/usr/sbin/*
When issuing the above commands, you will receive some error messages like “File
format not recognized” on your terminal. This is normal because some of the binaries files
are symbolic link pointing to other binaries on your system and the strip command generate the
warning because it cannot strip symbolic links.
NOTE:
127](https://image.slidesharecdn.com/securingoptimizinglinuxthehackingsolutionv-131209075405-phpapp02/85/Securing-Optimizing-Linux-the-Hacking-Solution-v-3-0-127-320.jpg)
![General Optimization 0
CHAPTER 5
Step 3
Now, it’s time to strip the libraries files. This is where the action can become dangerous if you
don’t take care or abuse the strip command. With the commands below, we strip all libraries
files available under the /lib and /usr/lib directory of the system.
•
To strip all libraries files, use the following command:
[root@deep /]# strip -R .comment /usr/lib/*.so.*
[root@deep /]# strip -R .comment /lib/*.so.*
Make attention to the above command, you can see here that I use the “-R” option with the
strip command. This option allows us to select a specific name to strip from the target libraries
files. With the “.comment” name, we inform the command to remove any lines inside the libraries
codes where this name appears. You can see that I don’t use the strip command without any
option as I do for the above step related to binaries program. This is very important and you
should never use the strip command without the above option to strip libraries files on your
system.
NOTE:
Tuning IDE Hard Disk Performance
Accessing a hard disk can be 50 to 100 times slower than reading data from RAM. File caches
using RAM can alleviate this. However, low memory conditions will reduce the amount of memory
available for the file-system cache slowing things down. File systems can also become heavily
fragmented, slowing down disk accesses. Heavy use of symbolic links on Unix systems can slow
down disk accesses too.
Default Linux installs are also notorious for setting hard disk default settings which are tuned for
compatibility and not for speed. Use the command hdparm to tune your Linux hard disk settings.
The hdparm is a tool, which can be used to tune and improve the performance of your IDE hard
disk. By default, any IDE drives you have in your Linux system are not optimized. Even if you
have an ULTRA DMA system you will not be able to take full advantage of its speed if you are not
using the hdparm tool to enable its features. This is because there is many different hard drive
makes and models and Linux cannot know every feature of each one.
Performance increases have been reported on massive disk I/O operations by setting the IDE
drivers to use DMA, 32-bit transfers and multiple sector modes. The kernel seems to use more
conservative settings unless told otherwise. The magic command to change the setting of your
drive is hdparm.
Before going into the optimization of your hard drive, it is important to verify that the hdparm
package is installed in your system. If you have followed every step during the installation of
Linux on your computer, then this package is not installed.
To verify if hdparm package is installed on your system, use the command:
[root@deep /]# rpm -q hdparm
package hdparm is not installed
If the hdparm package seems not to be installed, you’ll need to mount your CD-ROM drive
containing the Linux CD-ROM Part 1 and install it.
128](https://image.slidesharecdn.com/securingoptimizinglinuxthehackingsolutionv-131209075405-phpapp02/85/Securing-Optimizing-Linux-the-Hacking-Solution-v-3-0-128-320.jpg)
![General Optimization 0
CHAPTER 5
•
To mount the CD-ROM drive, use the following commands:
[root@deep /]# mount /dev/cdrom /mnt/cdrom/
had: ATAPI 32X CD-ROM drive, 128kB Cache
mount: block device dev/cdrom is write-protected, mounting read-only
•
To install the hdparm package on your Linux system, use the following command:
[root@deep /]# cd /mnt/cdrom/RedHat/RPMS/
[root@deep RPMS]# rpm -Uvh hdparm-version.i386.rpm
hdparm
##################################################
•
To unmount your CD-ROM drive, use the following command:
[root@deep RPMS]# cd /; umount /mnt/cdrom/
Once hdparm package is installed on the system, it is time to go into the optimization of your
hard drive. It is important to note that depending on your model and make, there will be some
parameters that will apply and other that don’t. It is to your responsibility to know and understand
your disk drive before applying any optimization parameters as described below.
Finally, and especially for UltraDMA systems, it is vital to verify under your BIOS settings if the
parameters related to DMA support on your computer are enabled or you will inevitably break your
hard disk. You have been warned.
Step 1
The first parameter applies to the majority of all modern drives and models in the market and
enables 32-bit I/O over PCI buses. This option is one of the most important and will usually
double the speed of your drive.
•
To enable 32-bit I/O over the PCI buses, use the following command:
[root@deep /]#
/sbin/hdparm -c3 /dev/hda (or hdb, hdc etc).
This will usually, depending on your IDE Disk Drive model, cut the timing buffered disk reads time
by two. The hdparm (8) manpage says that you may need to use “-c3” for many chipsets since it
works with nearly all 32-bit IDE chipsets. All (E)IDE drives still have only a 16-bit connection
over the ribbon cable from the interface card.
Step 2
The second parameter applies only on standard DMA disk and will activate the simple DMA feature
of the disk. This feature is for old disk drives with DMA capabilities.
•
To enable DMA, use the following command:
[root@deep /]#
/sbin/hdparm -d1 /dev/hda (or hdb, hdc etc).
This may depend on support for your motherboard chipset being compiled into your kernel. Also,
this command will enable DMA support for your hard drive only for interfaces which support DMA, it
will cut the timing buffered disk reads time and will improve the performance by two.
129](https://image.slidesharecdn.com/securingoptimizinglinuxthehackingsolutionv-131209075405-phpapp02/85/Securing-Optimizing-Linux-the-Hacking-Solution-v-3-0-129-320.jpg)
![General Optimization 0
CHAPTER 5
Step 3
Multiword DMA mode 2, also known as ATA2 disk drive is the successor of the simple DMA drive. If
you have this kind of hard drive, then you must enable the parameter in your Linux system.
•
To enable multiword DMA mode 2 transfers, use the following command:
[root@deep /]#
/sbin/hdparm -d1 -X34 /dev/hda (or hdb, hdc etc).
This sets the IDE transfer mode for newer (E)IDE/ATA2 drives. (Check your hardware manual
to see if you have it).
Step 4
As for DMA mode 2, the UltraDMA mode 2 is an improvement of the DMA technology. If you have
this kind of drive in your system, then choose this mode.
•
To enable UltraDMA mode 2 transfers, use the following command:
[root@deep /]#
/sbin/hdparm -d1 -X66 /dev/hda (or hdb, hdc etc)
See your manual page about hdparm for more information. USE THIS OPTION WITH EXTREME
CAUTION!
Step 5
The UltraDMA mode 4 is one of the latest entries and one of the most popular at this time; it is
also known and referred as ATA/66. I guess that most of you have this kind of drive installed and
if it is the case then it is the one that you must choose for sure.
•
To enable UltraDMA mode4 transfers, use the following command:
[root@deep /]#
/sbin/hdparm -d1 -X12 -X68 /dev/hda (or hdb, hdc etc)
This will enable UltraDMA ATA/66 mode on your drive. See your manual page about hdparm
for more information. USE THIS OPTION WITH EXTREME CAUTION!
Step 6
Multiple sector mode (aka IDE Block Mode), is a feature of most modern IDE hard drives,
permitting the transfer of multiple sectors per I/O interrupt, rather than the usual one sector per
interrupt. When this feature is enabled, it typically reduces operating system overhead for disk I/O
by 30-50%. On many systems it also provides increased data throughput of anywhere from 5% to
50%.
•
To set multiple sector mode I/O, use the following command:
[root@deep /]#
/sbin/hdparm -mXX /dev/hda (or hdb, hdc etc)
Where “XX” represent the maximum setting supported by your drive. The “-i” flag can be used to
find the maximum setting supported by an installed drive: look for MaxMultSect in the output.
130](https://image.slidesharecdn.com/securingoptimizinglinuxthehackingsolutionv-131209075405-phpapp02/85/Securing-Optimizing-Linux-the-Hacking-Solution-v-3-0-130-320.jpg)
![General Optimization 0
CHAPTER 5
•
To find the maximum setting of your drive, use the following command:
[root@deep /]#
/sbin/hdparm -i /dev/hda (or hdb, hdc etc)
/dev/hda:
Model=QUANTUM FIREBALLP LM15, FwRev=A35.0700, SerialNo=883012661990
Config={ HardSect NotMFM HdSw>15uSec Fixed DTR>10Mbs }
RawCHS=16383/16/63, TrkSize=32256, SectSize=21298, ECCbytes=4
BuffType=3(DualPortCache), BuffSize=1900kB, MaxMultSect=16, MultSect=16
DblWordIO=no, OldPIO=2, DMA=yes, OldDMA=2
CurCHS=16383/16/63, CurSects=-66060037, LBA=yes, LBAsects=29336832
tDMA={min:120,rec:120}, DMA modes: mword0 mword1 mword2
IORDY=on/off, tPIO={min:120,w/IORDY:120}, PIO modes: mode3 mode4
UDMA modes: mode0 mode1 mode2 mode3 *mode4
Step 7
The get/set sector count is used to improve performance in sequential reads of large files! The
default setting is 8 sectors (4KB) and we will double and change it for 16. USE THIS OPTION
WITH EXTREME CAUTION!
•
To improve the get/set sector count for file system read-ahead, use the command:
[root@deep /]#
/sbin/hdparm -a16 /dev/hda (or hdb, hdc etc)
Step 8
The get/set interrupt-unmask flag will greatly improve Linux's responsiveness and eliminates
"serial port overrun" errors. USE THIS OPTION WITH EXTREME CAUTION!
•
To improve and get/set interrupt-unmask flag for the drive, use the command:
[root@deep /]#
/sbin/hdparm -u1 /dev/hda (or hdb, hdc etc)
Step 9
The IDE drive's write-caching feature will improve the performance of the hard disk. USE THIS
OPTION WITH EXTREME CAUTION!
•
To enable the IDE drive's write-caching feature, use the following command:
[root@deep /]#
/sbin/hdparm -W1 /dev/hda (or hdb, hdc etc)
Step 10
These options will allow the drive to retain your settings over a soft reset (as done during the error
recovery sequence). It is important to note that not all drives support this feature.
•
To enables the drive to retain your settings, use the command:
[root@deep /]#
/sbin/hdparm -K1 -k1 /dev/hda (or hdb, hdc etc)
131](https://image.slidesharecdn.com/securingoptimizinglinuxthehackingsolutionv-131209075405-phpapp02/85/Securing-Optimizing-Linux-the-Hacking-Solution-v-3-0-131-320.jpg)
![General Optimization 0
CHAPTER 5
Step 11
Once every tuning related to your specific drive have been set, you can test the results and see if
you want to keep them or not.
•
You can test the results of your changes by running hdparm in performance test mode:
[root@deep /]#
/sbin/hdparm -vtT /dev/hda (or hdb, hdc etc).
/dev/hda:
multcount
= 16 (on)
I/O support
= 3 (32-bit w/sync)
unmaskirq
= 1 (on)
using_dma
= 1 (on)
keepsettings
= 1 (on)
nowerr
= 0 (off)
readonly
= 0 (off)
readahead
= 16 (on)
geometry
= 1826/255/63, sectors = 29336832, start = 0
Timing buffer-cache reads: 128 MB in 0.85 seconds = 150.59 MB/sec
Timing buffered disk reads: 64 MB in 2.54 seconds = 25.20 MB/sec
Once you have a set of hdparm options, you can put the commands in your /etc/rc.local file
to run it every time you reboot the machine. When running from /etc/rc.local, you can add
the “-q” option for reducing screen clutter. In my case, I will put the following configuration in the
end of my rc.local file:
/sbin/hdparm -q -c3 -d1 -X12 -X68 -m16 -a16 -u1 -W1 -k1 -K1 /dev/had
132](https://image.slidesharecdn.com/securingoptimizinglinuxthehackingsolutionv-131209075405-phpapp02/85/Securing-Optimizing-Linux-the-Hacking-Solution-v-3-0-132-320.jpg)


![Kernel Security & Optimization 0
CHAPTER 6
A solution was found and this was the Modularized Kernel approach. A technique that allows
small pieces of compiled code to be inserted in or removed from the running kernel. In this way
the Kernel will only load and run drivers and features that your computer have and will forget
about the others. This practice is what all Linux vendors use to provide Linux kernels. They build
and link every driver and feature as a module (which keeps the binary kernel smaller) that can be
recognized and loaded if, and only if, they are needed by the kernel or the system.
Kernel developers provide the ability to build a Modularized kernel, through an option that asks
you during kernel configuration if you want to build the available drivers/features as a module.
This option appears at the beginning of the Kernel configuration in the following form "Enable
loadable module support (CONFIG_MODULES) [Y/n/?]". If you answer "Yes" here,
then the compiled Kernel will be a Modularized Kernel and all future questions appearing during
kernel configuration will give you the choice to compile the drivers/features into the Kernel code
as a module by answering "m" for module, "y" for yes includes the code, or "n" do not include the
code. Alternatively, if you answer "No" to the question "Enable loadable module support
(CONFIG_MODULES) [Y/n/?]", then the corresponding Kernel will be a Monolithic kernel and
all future questions appearing during kernel configuration will let you answer either "y" (yes,
include the driver/feature) or "n" (no, do not include the drivers/feature). This allows you to build a
Kernel where every driver/feature is compiled into it.
To recap, Modularized Kernels allow small pieces of compiled code, which reside under the
/lib/modules/2.4.x-x/ kernel directory to be inserted into or removed from the running
kernel and a Monolithic Kernel contains the drivers/features into its compiled code.
Some people will say that a loadable module is as good as hard-linked code. But what sort of
speed difference is seen when using loadable modules instead of hard-linked code? Well, here’s
an extract of the kernel mailing list archive:
The immediate response from some was "almost nothing," but further consideration has shown
this not to be true. There are, in fact, a number of costs associated with loadable modules. The
biggest, perhaps, relates to how loadable modules are placed in kernel memory. The code for a
module needs to live in a contiguous address space. The kernel sets up that address space with
a function called vmalloc, which allocates memory with virtual addresses. In other words, a
loadable module is in an address space that is visible to the kernel, but which is separate from
where the core kernel code goes. This difference is important. The core kernel address space is a
direct map of physical memory; it can be handled very efficiently in the processor's page table.
Indeed, on some processors, a single page table entry covers the entire kernel. Space obtained
from vmalloc, instead, uses one page table entry per memory page. A greater number of page
table entries mean more lookups, and more translation buffer misses.
One estimate is that the slowdown can be as much as 5%. Given this problem, why not load
modules into the regular kernel memory space? Module code requires a contiguous address
space. Since the standard kernel space is a direct map of physical memory, contiguous address
spaces must also be contiguous in physical memory. Once the system has been running for a
while, finding even two physically contiguous pages can be a challenge; finding enough to load a
large module can be almost impossible. Modules also seem to have endemic problems with race
conditions - it is possible, for example, for the kernel to attempt to access a newly-loaded module
before it is fully initialized. Modules can also, in some situations, be removed while still in use.
Such occurrences are obviously quite rare, but they can be catastrophic when they happen. The
race conditions can be fixed with enough work, but that may require changing some fundamental
kernel interfaces. In general, dealing with loadable modules is not an easy task; as one kernel
hacker told us in a private message: "Doing live surgery on the kernel is never going to be pretty."
136](https://image.slidesharecdn.com/securingoptimizinglinuxthehackingsolutionv-131209075405-phpapp02/85/Securing-Optimizing-Linux-the-Hacking-Solution-v-3-0-136-320.jpg)
![Kernel Security & Optimization 0
CHAPTER 6
Pristine source
If you don’t use the RPM package to install the kernel, it will be difficult for you to locate all the files
installed onto the system if you want to update your kernel in the future. To solve this problem, it’s
a good idea to make a list of files on the system before you install the kernel, and then one
afterwards, and then compare them using the diff utility to find out what files were placed
where.
•
Simply run the following command before installing the kernel:
[root@deep root]# find /* > Kernel1
•
And the following one after you install the kernel:
[root@deep root]# find /* > Kernel2
•
Then use this command to get a list of what changed:
[root@deep root]# diff Kernel1 Kernel2 > Kernel-Installed
With this procedure, if any upgrade appears, all you have to do is to read the generated list of
what files were added or changed by the program and remove them manually from your system
before installing the new kernel. In our example above, we use the /root directory of the system
to store all the generated file lists.
Making an emergency boot floppy
The first step before going into the configuration and compilation of our new kernel is to create an
emergency boot floppy in case something goes wrong during the build of your new Linux Kernel.
Here we create the boot floppy for a modularized kernel since the kernel that is presently installed
on our system should be a modularized kernel. We’ll see later that a method for creating the boot
disk for mololithic kernel exists and is different from what we use here. To create the emergency
boot floppy for a modularized kernel, follow these steps.
Step1
We have to find the present modularized kernel version used on our system. We need this
information to be able to create our emergency boot floppy disk.
•
To know which kernel version is running on your system, use the command:
[root@dev /]# uname -a
Linux dev 2.4.18-3 #1 Thu Apr 18 07:37:53 EDT 2002 i686 unknown
From the above command, we know now that our kernel version is 2.4.18-3. Therefore we will
use this information in the next step to create the boot disk.
Step2
Once we know which kernel version we are currently running, we can use the command below to
create the boot disk.
•
Put a floppy in your system and execute the following command as root:
[root@deep /]# mkbootdisk --device /dev/fd0H1440 2.4.18-3
Insert a disk in /dev/fd0. Any information on the disk will be lost.
Press <Enter> to continue or ^C to abort:
138](https://image.slidesharecdn.com/securingoptimizinglinuxthehackingsolutionv-131209075405-phpapp02/85/Securing-Optimizing-Linux-the-Hacking-Solution-v-3-0-138-320.jpg)
![Kernel Security & Optimization 0
CHAPTER 6
In this example, the current kernel on our system is version 2.4.18-3 and this is why we
use “2.4.18-3” here. If you kernel version is different from what we use here, you just have to
change the example version number for the one that you have according to the result returned by
the “uname -a” command.
NOTE:
Following these guidelines, you will now have a boot floppy with a known working kernel in case
of problems with the upgrade. I recommend rebooting the system with the floppy to make sure
that the floppy works correctly before continuing.
Preparing the Kernel for the installation
We have to copy the new kernel tar archive to the appropriate location on our server /usr/src
and then we remove the old kernel from our system before installing a new one. Removing the
old kernel will not freeze your computer until you try to reboot it before installing the new one
because the Linux kernel resides in memory.
Step 1
We must copy the archive file of the kernel to the /usr/src directory and move to this directory.
•
To copy the tar archive of the Linux kernel to the /usr/src directory, use the command:
[root@deep /]# cp linux-version.tar.gz /usr/src/
•
To move to the /usr/src directory, use the following command:
[root@deep /]# cd /usr/src/
Step 2
Depending on how the Linux Kernel has been previously installed on your system, there are two
ways to uninstall it, these are shown below.
If you already have installed a Linux kernel with a tar archive before
These steps are required ONLY if you have previously installed a Linux kernel from a tar archive.
If it is a fresh, first install of the kernel, then uninstall the kernel-headers-version.
i386.rpm, kernel-version.i386.rpm packages that are on your system.
•
Move to the /usr/src directory if you are not already in it with the following command:
[root@deep /]# cd /usr/src/
•
Remove the Linux symbolic link with the following command:
[root@deep src]# rm -f linux
•
Remove the Linux kernel headers directory with the following command:
[root@deep src]# rm -rf linux-2.4.x/
•
Remove the Linux kernel with the following command:
[root@deep src]# rm -f /boot/vmlinuz-2.4.x
•
Remove the Linux System.map file with the following command:
[root@deep src]# rm -f /boot/System.map-2.4.x
•
Remove the Linux kernel modules directory (if available) with the following command:
[root@deep src]# rm -rf /lib/modules/2.4.x/
139](https://image.slidesharecdn.com/securingoptimizinglinuxthehackingsolutionv-131209075405-phpapp02/85/Securing-Optimizing-Linux-the-Hacking-Solution-v-3-0-139-320.jpg)
![Kernel Security & Optimization 0
CHAPTER 6
Removing the old kernel modules is only required if you have installed a modularized
kernel version before. If the modules directory doesn’t exist under the /lib/modules directory,
it’s because your old kernel version is not a modularized kernel.
NOTE:
If the original kernel’s RPM packages are installed on your system
If the original kernel RPM packages are installed on your system, instead of the Linux kernel tar
archive, which they would be if you have just finished installing your new Linux system, or have
previously used an RPM package to upgrade your system, then use the following command to
uninstall the Linux kernel:
•
Verify which kernel RPM packages are installed on your server with the command:
[root@deep src]# rpm -qa | grep kernel
kernel-2.4.18-3
•
Also, verify if Kernel header package is installed on your server with the command:
[root@deep src]# rpm -q glibc-kernheaders
glibc-kernheaders-2.4-7.14
The above command shows us that kernel and glibc-kernheaders are the only kernel RPM
packages installed on our system. We uninstall them as show below.
•
To uninstall the linux kernel RPM, use the following command:
[root@deep src]# rpm -e --nodeps kernel glibc-kernheaders
If you receive an error message like: cannot remove /lib/modules/2.4.x directory,
directory not empty, then remove the directory manually with command like: rm –rf
/lib/modules/2.4.x/ form your system. This directory is related to the old kernel and it is not
required for the new kernel we want to install.
NOTE:
Step 3
Once we have uninstalled the old kernel and our new kernel tar archive has been copied to the
/usr/src directory, we must uncompress it and remove the tar archive (linux-version.
tar.gz) from the system to conserve disk space.
•
To uncompress the kernel, use the following command:
[root@deep src]# tar xzpf linux-version.tar.gz
•
To remove the kernel tar archive from the system, use the following command:
[root@deep src]# rm -f linux-version.tar.gz
If kernel compilation is something new for you, then it is recommended to keep the
kernel tar archive (linux-version.tar.gz) until the end of the installation. This way, if you
make a mistake during compilation, you have the source available to try again.
WARNING:
140](https://image.slidesharecdn.com/securingoptimizinglinuxthehackingsolutionv-131209075405-phpapp02/85/Securing-Optimizing-Linux-the-Hacking-Solution-v-3-0-140-320.jpg)
![Kernel Security & Optimization 0
CHAPTER 6
Applying the Grsecurity kernel patch
Grsecurity is a single patch file for the newest stable versions of Linux kernel that is an
attempt to greatly improve the security of a Linux system. It mainly accomplishes this by
physically patching the Linux kernel to make processes more restricted.
Many other projects like Grsecurity exist on the Internet. There are some well know like the
RSBAC (www.rsbac.org), LIDS (www.lids.org), SELinux (www.nsa.gov/selinux/), and OpenWall
(www.openwall.com/linux/), projects, all of which fulfills only one part of a complete security
system.
What makes Grsecurity so different and better than these other projects is mainly because
Grsecurity provides greatly needed additional security to Linux systems. In other words, it
covers all features of the other projects and adds additional security features that the other
projects do NOT cover. The types of added Grsecurity security are categorized as:
1.
2.
3.
4.
5.
6.
7.
8.
Complete Buffer Overflow Exploitation Protection.
File system Race Protection.
System Auditing.
Change-root Protections.
Portscan and OS Fingerprinting Protection.
Restricted Users.
Configurability Options.
Access Control.
Grsecurity patch may change from version to version, and some may contain various other
security features. It is important to use the Grsecurity patch that corresponds to the Linux
Kernel version that you compile on your server. If you compile kernel version 2.4.18, you have to
download Grsecurity patch for kernel version 2.4.18, etc.
When applying the Grsecurity patch to the Kernel, a new “Grsecurity”
configuration section will be added at the end of your Linux Kernel configuration allowing you to
configure and enable the security features that you want.
WARNING:
Obtaining and Installing Grsecurity
To obtain the Grsecurity patch suitable for your Linux Kernel, simply follow the "download" link
on the Grsecurity home page, and download the file listed there. Grsecurity patch is
available directly via http://www.grsecurity.org/. Remember that Grsecurity is specific to one
kernel version, and as of this writing that version is 2.4.18.
•
To apply the Grsecurity patch to the Linux kernel, use the commands:
[root@deep
[root@deep
[root@deep
[root@deep
[root@deep
/]# cp grsecurity-1.9.4-2.4.18.patch /usr/src/
/]# cd /usr/src/linux/
linux]# patch -p1 < ../grsecurity-1.9.4-2.4.18.patch
linux]# cd ../
src]# rm -f grsecurity-1.9.4-2.4.18.patch
The step of patching your new kernel with Grsecurity patch is completed. Now follow the rest
of this Kernel installation guide to build the Linux kernel and reboot your system. Configuration
relating to Grsecurity will appears at the end of your Kernel configuration.
141](https://image.slidesharecdn.com/securingoptimizinglinuxthehackingsolutionv-131209075405-phpapp02/85/Securing-Optimizing-Linux-the-Hacking-Solution-v-3-0-141-320.jpg)

![Kernel Security & Optimization 0
CHAPTER 6
•
Edit the Makefile file (vi +20 /usr/src/linux/Makefile) and change the line:
HOSTCFLAGS = -Wall -Wstrict-prototypes -O2 -fomit-frame-pointer
To read:
HOSTCFLAGS = -Wall -Wstrict-prototypes -O2 -march=i686 -funroll-loops fomit-frame- pointer
•
Edit the Makefile file (vi +91 /usr/src/linux/Makefile) and change the line:
CFLAGS := $(CPPFLAGS) -Wall -Wstrict-prototypes -O2 -fomit-frame-pointer
-fno-strict-aliasing
To read:
CFLAGS := $(CPPFLAGS) -Wall -Wstrict-prototypes -O2 -march=i686 -funrollloops -fomit-frame-pointer -fno-strict-aliasing
In the last example, we optimize the code for an i686 CPU architecture, if you have a
different processor, you'll have to adjust the “-march=i686" options for your specific processor.
WARNING:
Never compile the Kernel with optimization code number superior to “-O2”, this do nothing more
and should produce an unstable kernel in some cases. Therefore use “-O2” at the maximum
optimization number but never something superior to it.
Cleaning up the Kernel
It is important to make sure that your /usr/include/asm, and /usr/include/linux
subdirectories are just symlinks to the kernel sources.
Step 1
The asm and linux subdirectories are soft links to the real include kernel source header
directories needed for our Linux architecture, for example /usr/src/linux/include/asmi386 for asm.
•
To symlink the asm, and linux subdirectories to the kernel sources, type the following
commands on your terminal:
[root@deep
[root@deep
[root@deep
[root@deep
src]# cd /usr/include/
include]# rm -f asm linux
include]# ln -s /usr/src/linux/include/asm-i386 asm
include]# ln -s /usr/src/linux/include/linux linux
This is a very important part of the configuration: we remove the asm, and linux directories
under /usr/include then create new links that point to the same name directories under the
new kernel source version directory. The /usr/include directory contains important header
files needed by your kernel and programs to be able to compile on your system.
143](https://image.slidesharecdn.com/securingoptimizinglinuxthehackingsolutionv-131209075405-phpapp02/85/Securing-Optimizing-Linux-the-Hacking-Solution-v-3-0-143-320.jpg)
![Kernel Security & Optimization 0
CHAPTER 6
If the previously installed kernel in your system was made by RPM packages, then the
asm and linux soft links will not exist since the uninstall of kernel-headers RPM package
removes them automatically for you. Don’t forget to create them.
WARNING:
Step 2
Make sure you have no stale .o files or dependencies lying around.
•
To be sure that we have no stale .o files or dependencies lying around, type the
following commands on your terminal:
[root@deep include]# cd /usr/src/linux/
[root@deep linux]# make mrproper
These two steps simply clean up anything that might have accidentally been left in the
source tree by the development team.
WARNING:
You should now have the source correctly installed. You can configure the kernel in one of three
ways. The first method is to use the make config command. It provides you with a text-based
interface for answering all the configuration options. You are prompted for all the options you
need to set up your kernel.
The second method is to use the make menuconfig command, which provides all the kernel
options in an easy-to-use menu. The third is to use the make xconfig command (only available
if the graphical interface of Linux is installed on the system), which provides a full graphical
interface to all the kernel options.
Step 3
For configuration in this guide, we will use the make config command because we have not
installed the XFree86 Window Interface on our Linux server or the necessary packages to use the
make menuconfig command.
•
Type the following commands on your terminal to load the kernel configuration:
[root@deep /]# cd /usr/src/linux/ (if you are not already in this directory).
[root@deep linux]# make config
rm -f include/asm
( cd include ; ln -sf asm-i386 asm)
/bin/sh scripts/Configure arch/i386/config.in
#
# Using defaults found in arch/i386/defconfig
#
144](https://image.slidesharecdn.com/securingoptimizinglinuxthehackingsolutionv-131209075405-phpapp02/85/Securing-Optimizing-Linux-the-Hacking-Solution-v-3-0-144-320.jpg)
![Kernel Security & Optimization 0
CHAPTER 6
Configuring the Kernel
As soon as you enter make config at the prompt as described in the previous step, a list of
kernel configurable options will be displayed for you to choose to configure the kernel, you must
indicate what features and devices drivers you want to include on your system and select how to
include support for specific devices. Typically, for each configuration option, you have to respond
with one of the following choices:
[y] To compile into the kernel and always be loaded.
[m] To use a module for that feature and load that segment of code on demand.
[n] To skip and excludes the support for that specific device from the kernel.
It is important to note that an [n] or [y] means the default choice. If a device does not
have a modular device driver or you have not compiled the Kernel as a Modularized Kernel, you
will not see the [m] option. Some time an [?] option will appear in the choices. This mean that
you can get more information about the feature when you type the ? + ENTER key. Choosing the
[?] help option opens another terminal describing the option.
WARNING:
A new Linux kernel is very specific to our computer hardware since we have to choose the right
drivers as well as features that we need to include and compile into the Kernel code. This implies
a good understanding and knowledge of your computer hardware. It is simply inconceivable to
build a Linux system if you don't know what hardware your computer has, especially if you spend
money to buy a computer and then take time to configure it. Therefore we assume that you know
all of your hardware and be aware that during the kernel configuration, you will be asked to
answer some important questions related to your specific computer hardware.
Be prepared to answer the following questions:
1.
2.
3.
4.
5.
6.
7.
8.
9.
10.
11.
What type of processor do you have on your computer (i.e. Pentium III, AMD)?
How many processor do you have on your computer (i.e. 1, 2, 3)?
What kind of hard drive do you have on your computer (i.e. IDE, SCSI) ?
How many hard drives do you have on your computer? (i.e. want to make RAID)?
How much memories (RAM) do you have on your computer (i.e. 512 MB RAM)?
Do you have a network card? If so, who made it and what model is it?
Do you have a SCSI adapter? If so, who made it and what model is it?
Do you have a RAID system? If so, who made it and what model is it?
What type of mouse do you have (eg, PS/2, Microsoft, Logitech)?
If you have a serial mouse, what COM port is it connected to (eg, COM1)?
What is the make and model of your video card?
All of the above questions are very important and if you don't know the answers for all of them,
then it is recommended to get the information before going into Linux kernel configuration,
compilation and installation. If you have all of the information, then you can read the rest of this
guide.
145](https://image.slidesharecdn.com/securingoptimizinglinuxthehackingsolutionv-131209075405-phpapp02/85/Securing-Optimizing-Linux-the-Hacking-Solution-v-3-0-145-320.jpg)
![Kernel Security & Optimization 0
CHAPTER 6
Monolithic kernel configuration
As we know now, they are two possible different configurations for the kernel. The first is called a
monolithic kernel the second is called a modularized kernel. Below we begin by
showing you the configuration of a monolithic kernel which is to compile the required code
and drivers directly into the kernel by answering the different kernel questions only by yes or no.
Don’t forget to only compile code that you need and use.
A new kernel is very specific to your computer hardware, in the monolithic kernel
configuration part below; we have the following hardware for our example. Of course you must
change them to fit whatever components you have in your system.
1 Pentium II 400 MHz (i686) processor
1 SCSI Motherboard
1 SCSI Hard Disk
1 SCSI Controler Adaptec AIC 7xxx
1 CD-ROM ATAPI IDE
1 Floppy Disk
2 Ethernet Cards Intel EtherExpressPro 10/100
1 Mouse PS/2
If you don’t want some of the options listed in the monolithic kernel configuration that I
enable by default, answer n (for no) instead of y (for yes) to the related questions. If you want
some other options that I disable, then answer y instead of n. Finally, the procedure of building a
new kernel is quite long, therefore I recommend you to take your time. Some coffees and
cigarettes will surely be welcome during these steps.
# Using defaults found in arch/i386/defconfig
#
*
* Code maturity level options
* Prompt for development and/or incomplete code/drivers (CONFIG_EXPERIMENTAL)
[N/y/?] Press Enter
This option relates to features or drivers that are currently considered to be in the alpha-test
phase and for a production system, it is highly recommended to answer by N to this question. Just
hit [Enter] to approve the default choice, which is NO (Do not prompt for development and/or
incomplete code/drivers).
*
* Loadable module support
* Enable loadable module support (CONFIG_MODULES) [Y/n/?] n
This option is very important since it asks us if we want to enable loadable module support into
the Kernel. Remember that our goal in this part of the guide is to build a Monolithic Linux Kernel
where all drivers and features are directly integrated and compiled into the Kernel code, therefore
our answer to this question must be No (Do not enable loadable module support). This means
that we have to enter n as the answer to this question to change the default value, which is Y for
Yes.
146](https://image.slidesharecdn.com/securingoptimizinglinuxthehackingsolutionv-131209075405-phpapp02/85/Securing-Optimizing-Linux-the-Hacking-Solution-v-3-0-146-320.jpg)
![Kernel Security & Optimization 0
CHAPTER 6
*
* Processor type and features
* Processor family (386, 486, 586/K5/5x86/6x86/6x86MX, Pentium-Classic,
Pentium-MMX, Pentium-Pro/Celeron/Pentium-II, Pentium-III/Celeron(Coppermine),
Pentium-4, K6/K6-II/K6-III, Athlon/Duron/K7, Crusoe, Winchip-C6, Winchip-2,
Winchip-2A/Winchip-3, CyrixIII/C3) [Pentium-III/Celeron(Coppermine)] Pentium-4
This option asks you what type of processor you have on your computer and the default choice is
in brackets [Pentium-III/Celeron(Coppermine)]. Therefore, if you processor is not a
Pentium-III/Celerom(Coppermine) model, you have to enter your processor model here. The
available choices are listed in the question. In the above example, I changed the default value
[Pentium-III/Celeron(Coppermine)] and chose a Pentium-4 model.
Toshiba Laptop support (CONFIG_TOSHIBA) [N/y/?] Press Enter
This option asks you if you want to add a driver support for Toshiba Laptop. If you intend to run
this kernel on a Toshiba portable, then you have to answer Yes to this question and change the
default value which is No. In our example, we keep the default value of No by pressing the
[Enter] key.
Dell Inspiron 8000 support (CONFIG_I8K) [N/y/?] Press Enter
As for the previous option, this one asks you if you want to add a driver support for Dell Inspiron
8000 Laptop. If you intend to run this kernel on a Dell Inspiron 8000, then you have to answer
Yes to this question and change the default value which is No. In our example, we keep the
default value of No by pressing the [Enter] key again.
/dev/cpu/microcode - Intel IA32 CPU microcode support (CONFIG_MICROCODE)
[N/y/?] Press Enter
This option allows you to update the microcode on Intel processors in the IA32 family, e.g.
Pentium Pro, Pentium II, Pentium III, Pentium 4, Xeon etc. If you say Y here and change the
default value of N, then you'll need to say Y also to "/dev file system support" in the 'File
systems' section below. In most situations, this option is simply not needed and you can safety
keep the default setting of N by pressing the [Enter] key.
/dev/cpu/*/msr - Model-specific register support (CONFIG_X86_MSR) [N/y/?] y
This option allows you to enable a device that gives privileged processes access to the x86
Model-Specific Registers (MSRs). On multi-processor the MSR accesses are directed to a
specific CPU. It is a good idea to answer Y to this option to enable it, even if you only have one
processor on your system. Therefore answer Y to this question.
/dev/cpu/*/cpuid - CPU information support (CONFIG_X86_CPUID) [N/y/?] y
This option allows you to enable a device that gives processes access to the x86 CPUID
instructions to be executed on a specific processor. As for the previous option, it is a good idea to
change the default value of N to Y.
High Memory Support (off, 4GB, 64GB) [off] Press Enter
This option allows you to be able to use up to 64 Gigabytes of physical memory on x86 systems.
Usually, and it’s true for most of us, we have a system that will never run with more than 1
Gigabyte total physical RAM and if this is you case, then answer "off" here (default choice and
suitable for most users). In other part if you have a system that has between 1 and 4 Gigabytes
physical RAM, then answer "4GB" here. If more than 4 Gigabytes is used then answer "64GB"
here. In our example, we will configure the kernel to use a maximum of 1 Gigabyte total physical
RAM by pressing the [Enter] key to accept the default choice "off".
147](https://image.slidesharecdn.com/securingoptimizinglinuxthehackingsolutionv-131209075405-phpapp02/85/Securing-Optimizing-Linux-the-Hacking-Solution-v-3-0-147-320.jpg)
![Kernel Security & Optimization 0
CHAPTER 6
Math emulation (CONFIG_MATH_EMULATION) [N/y/?] Press Enter
This option allows Linux to emulate a math coprocessor (a feature used for floating point
operations). In general, only old 486SX and 386 processors do not have a a math coprocessor
built in. All modern Pentium I, II, III, IV and later, AMD, Cyrix, etc have a math coprocessor built in
and do not require this option to be turned on. If you have a very old 486SX or 386 processor in
your computer, then you will have to change the default value of N here to become Y, but in
general, everyone will keep the default value of N here since they have a math coprocessor built
in their processor chip.
MTRR (Memory Type Range Register) support (CONFIG_MTRR) [N/y/?] Press Enter
This option on Intel family processors (Pentium Pro, Pentium II and later) allows the Memory
Type Range Registers (MTRRs) to be used to control processor access to memory ranges. This
is most useful if you have XFree86 graphical interface installed on your computer or have more
than 1 processor on your system. Changing the default value of N here to become Y on a Linux
system where a graphical interface or multiple processors are present will increase the
performance of the system. If you don't use a graphical interface, or do not have more than one
processor installed on you system, you must keep the default value of N by pressing the
[Enter] key. Finally, it is important to note that this option is valid only if you have Intel family
processors (Pentium Pro, Pentium II and later) installed on your computer. It doesn't work with
AMD or Cyrix processors.
Symmetric multi-processing support (CONFIG_SMP) [Y/n/?] n
This option enables support for systems with more than one CPU. If you have a system with only
one CPU, like most personal computers, say N. If you have a system with more than one CPU,
say Y. In our example, we only have one processor installed on our computer and will change the
default value of Y to become N.
Local APIC support on uniprocessors (CONFIG_X86_UP_APIC) [N/y/?] (NEW) Press
Enter
This option appears only if you have answered N to the previous option and will let you enable
support for local APIC on system with single processor. Local APIC (Advanced Programmable
Interrupt Controller) is an integrated interrupt controller in the CPU that supports CPU-generated
self-interrupts (timer, performance counters), and the NMI watchdog, which detects hard lockups
on the server. On systems with single processor, you may have to answer Y here, but on systems
with multiple processors, you don't have to answer this question since the kernel will
automatically enable it. Usually we keep the default choice of N here since the feature is available
only on modern Pentium processors like the IV family. Pentium I, II, and III don’t support this
option, as well as AMD and Cyrix processors.
*
* General setup
* Networking support (CONFIG_NET) [Y/n/?] Press Enter
This option is very important and must be set to Y all the time, which is the default value. It allows
your Linux system to support and use networking. We use the default value of Y by pressing the
[Enter] key.
PCI support (CONFIG_PCI) [Y/n/?] Press Enter
This option allows us to enable or disable PCI support on Linux. In most cases, we have to say Y
here. PCI's are the white slots on your motherboard where you can add network cards, video
cards, etc. Since most of us use a PC and have this kind of slot available, it is important to say Y
here by pressing the [Enter] key to use the default choice.
148](https://image.slidesharecdn.com/securingoptimizinglinuxthehackingsolutionv-131209075405-phpapp02/85/Securing-Optimizing-Linux-the-Hacking-Solution-v-3-0-148-320.jpg)
![Kernel Security & Optimization 0
CHAPTER 6
PCI access mode (BIOS, Direct, Any) [Any] Press Enter
On PCI systems, the BIOS can be used to detect the PCI devices and determine their
configuration. However, some old PCI motherboards have BIOS bugs and may crash if this is
done. Also, some embedded PCI-based systems don't have any BIOS at all. Linux can also try to
detect the PCI hardware directly without using the BIOS. With this option, you can specify how
Linux should detect the PCI devices. If you choose "BIOS", the BIOS will be used, if you choose
"Direct", the BIOS won't be used, and if you choose "Any", the kernel will try the direct access
method and falls back to the BIOS if that doesn't work. If unsure, go with the default, which is
"Any" by pressing the [Enter] key.
PCI device name database (CONFIG_PCI_NAMES) [Y/n/?] n
This option lets you enable a feature that allows the Kernel to contain a database of all known
PCI device names via different files under the /proc filesystem and make the information
comprehensible to the user or disable this feature and get device ID numbers instead of names.
Disabling this feature will save you about 80KB of kernel image size and will make the kernel
smaller in size, which is a good thing for increased performance. If you disable this feature, the
kernel will still run as usual, but will show you device ID numbers instead of names. Therefore, we
will change the default value of Y (get PCI device by names) to become N (get PCI device by ID
numbers) and will save 80KB of Kernel image size.
EISA support (CONFIG_EISA) [N/y/?] Press Enter
This option allows you to enable support for the Extended Industry Standard Architecture (EISA)
bus. EISA is now obsolete by the PCI bus and you may enable this option only if you use some
older ISA card on your system. Since most of us don't have these types of card, we can safety
keep the default value of N here by pressing the [Enter] key.
MCA support (CONFIG_MCA) [N/y/?] Press Enter
This option allows us to enable MCA support with the kernel. MCA (MicroChannel Architecture) is
found in some IBM PS/2 machines and laptops. It is a bus system similar to PCI or ISA. It is rare
that we have this kind of bus on our system and we can safety keep the default value of N (do not
support MCA on this kernel) by pressing the [Enter] key again.
Support for hot-pluggable devices (CONFIG_HOTPLUG) [Y/n/?] n
This option is often required only on laptop computer where you have a PCMCIA or PC-cards that
you can plug or unplug at any time. If the kernel that you compile is made to run on a standard
computer (not laptop, portable), then you have to say N here by changing the default option of Y
to become N.
System V IPC (CONFIG_SYSVIPC) [Y/n/?] Press Enter
This option allows us to enable IPC on Linux. IPC (Inter Process Communication) is a suite of
library functions and system calls which let processes (running programs) synchronize and
exchange information. It is generally considered to be a good thing, and some programs won't
run unless you say Y here. Therefore, we keep the default setting of Y by pressing the [Enter]
key.
BSD Process Accounting (CONFIG_BSD_PROCESS_ACCT) [N/y/?] Press Enter
This option allows us to enable a user level programs, which will be able to instruct the kernel (via
a special system call) to write process accounting information to a file. It is not vital or even really
necessary to enable this kind of option to get a working Linux kernel. Therefore, we keep the
default value of N here by pressing the [Enter] key.
149](https://image.slidesharecdn.com/securingoptimizinglinuxthehackingsolutionv-131209075405-phpapp02/85/Securing-Optimizing-Linux-the-Hacking-Solution-v-3-0-149-320.jpg)
![Kernel Security & Optimization 0
CHAPTER 6
Sysctl support (CONFIG_SYSCTL) [Y/n/?] Press Enter
This option is very important and especially with Linux kernel 2.4.x generation. It is the feature
that allows us to dynamically change certain kernel parameters and variables on the fly through
the /proc filesystem with the use of the /etc/sysctl.conf file. We keep the default value of
Y by pressing the [Enter] key.
Kernel core (/proc/kcore) format (ELF, A.OUT) [ELF] Press Enter
This option allows a file under the /proc filesystem, which is called "kcore" to contain the
Kernel core image in two different formats, which are ELF or A.OUT. For newer Linux systems,
ELF (Executable and Linkable Format) is highly recommended and is the default option that we
choose by pressing the [Enter] key. A.OUT (Assembler.OUTput) was the old format method
used, but is now really obsolete.
Kernel support for a.out binaries (CONFIG_BINFMT_AOUT) [Y/n/?] n
This option is very important and allows us to provide support for A.OUT. A.OUT
(Assembler.OUTput) is a set of formats for libraries and executables used in the earliest versions
of UNIX and, as we said before, it is now really obsolete and was replaced with the ELF format.
To be sure none of our programs will use this older executable format, we will change the default
value of Y to become N.
Kernel support for ELF binaries (CONFIG_BINFMT_ELF) [Y/n/?] Press Enter
Here, it is important to answer Y to this question since this binary format is the one used now on
modern Linux systems. ELF (Executable and Linkable Format) is a format for libraries and
executables used across different architectures and operating systems. Many new executables
are distributed solely in ELF format and you definitely want to say Y to this option by pressing the
[Enter] key.
Kernel support for MISC binaries (CONFIG_BINFMT_MISC) [Y/n/?] Press Enter
This option enables wrapper-driven binary formats into the kernel. This feature is required by
programs that need an interpreter to run, like Java, Python or Emacs-Lisp. Since we're sure to
use one of these types of programs, it is safe to accept the default value of Y by pressing the
[Enter] key.
Power Management support (CONFIG_PM) [Y/n/?] n
This option allows Power Management Support for your computer. With this feature parts of your
computer are shut off or put into a power conserving "sleep" mode if they are not being used. In
general it is good to enable this option on portable computer (Laptop) only. Note that, even if you
say N here, Linux, on the x86 architecture, will issue the hlt instruction if nothing is to be done,
thereby sending the processor to sleep and saving power. Therefore our choice will be N here.
*
* Memory Technology Devices (MTD)
* Memory Technology Device (MTD) support (CONFIG_MTD) [N/y/?] Press Enter
This option enables MTD (Memory Technology Devices) on your computer. MTD are flash, RAM
and similar chips, often used for solid-state file systems on embedded devices. If you have some
of these devices in your system, then answer Y to the question. In most cases, the default choice
of N is recommended.
*
* Parallel port support
* Parallel port support (CONFIG_PARPORT) [N/y/?] Press Enter
If you want to use devices connected to your machine's parallel port like a printer, zip drive, etc,
then you need to say Y here otherwise the default value N is recommended.
150](https://image.slidesharecdn.com/securingoptimizinglinuxthehackingsolutionv-131209075405-phpapp02/85/Securing-Optimizing-Linux-the-Hacking-Solution-v-3-0-150-320.jpg)
![Kernel Security & Optimization 0
CHAPTER 6
*
* Plug and Play configuration
* Plug and Play support (CONFIG_PNP) [Y/n/?] n
Plug and Play (PnP) is a standard for peripherals which allows those peripherals to be configured
by software. If you answer to this question by Y, then Linux will be able to configure your Plug and
Play devices. Under Linux, we really don't need to enable PNP support and our choice will be N
here.
*
* Block devices
* Normal PC floppy disk support (CONFIG_BLK_DEV_FD) [Y/n/?] Press Enter
This option allows us to use the floppy disk drive(s) in our PC under Linux. Since everyone has
and usually needs a floppy disk in their computer, the answer to this question will be Y. If you run
a Linux server in highly secure environment, you could answer to this question by N since we
never use floppy disk on this type of system.
XT hard disk support (CONFIG_BLK_DEV_XD) [N/y/?] Press Enter
This option allows us to enable the very old 8 bit hard disk controllers used in the IBM XT
computer and since it's pretty unlikely that you have one of these then you must answer to this
question by N. Therefore we simply press [Enter] because the default answer to this question
is N.
Compaq SMART2 support (CONFIG_BLK_CPQ_DA) [N/y/?] Press Enter
This option allows us to enable support for the Compaq Smart Array controllers. If you use these
kinds of boards in your system, then you should say Y here, otherwise the default value of N is
recommended.
Compaq Smart Array 5xxx support (CONFIG_BLK_CPQ_CISS_DA) [N/y/?] Press Enter
This option allows us to enable support for the Compaq Smart Array 5xxx controllers. If you use
these kinds of boards in your system, then you should say Y here, otherwise the default value of
N is recommended.
Mylex DAC960/DAC1100 PCI RAID Controller support (CONFIG_BLK_DEV_DAC960)
[N/y/?] Press Enter
This option enables support for the Mylex DAC960, AcceleRAID, and eXtremeRAID PCI RAID
controllers. If you use these kinds of boards in your system, then you should say Y here,
otherwise the default value of N is recommended.
Loopback device support (CONFIG_BLK_DEV_LOOP) [N/y/?] Press Enter
This option is a little different from other kernel options and if you enable it, you will be able to use
a regular file as a block device that let you have access to some special advanced features and
possibilities under Linux. The default value for this option will be ok for most of us and only
advanced users or user that know why they need these features will enable the "Loopback
device support" option. For SCSI systems with a modularized kernel, it is important to say Y
here since SCSI drivers will use this device.
Network block device support (CONFIG_BLK_DEV_NBD) [N/y/?] Press Enter
This option enables another advanced feature under Linux, the possibility for your system to be a
client for network block devices. The default value for this option would be ok for most of us and
only advanced users or user that know why they need this feature will enable it.
151](https://image.slidesharecdn.com/securingoptimizinglinuxthehackingsolutionv-131209075405-phpapp02/85/Securing-Optimizing-Linux-the-Hacking-Solution-v-3-0-151-320.jpg)
![Kernel Security & Optimization 0
CHAPTER 6
RAM disk support (CONFIG_BLK_DEV_RAM) [N/y/?] Press Enter
This option will allow you to use a portion of your RAM memory as a block device, so that you can
make file systems on it, read and write to it and do all the other things that you can do with normal
block devices (such as hard drives). It is usually used to load and store a copy of a minimal root
file system off of a floppy into RAM during the initial install of Linux. Again, most normal users
won't need the RAM disk functionality and will answer N to this question. For SCSI systems with a
modularized kernel, it is important to say Y here since SCSI drivers will use this feature.
*
* Multi-device support (RAID and LVM)
* Multiple devices driver support (RAID and LVM) (CONFIG_MD) [N/y/?] Press
Enter
This option is required only for RAID and logical volume management (LVM). If you use them,
then change the default value of N to become Y.
*
* Networking options
* Packet socket (CONFIG_PACKET) [Y/n/?] Press Enter
This option allows you to enable applications, which communicate directly with network devices
without an intermediate network protocol implemented in the kernel like the tcpdump program. It
is a good idea to enable this feature for most of us.
Packet socket: mmapped IO (CONFIG_PACKET_MMAP) [N/y/?] y
This option allows packet protocol driver to use an IO (Input/Output) mechanism that results in
faster communication. Say Y here.
Kernel/User netlink socket (CONFIG_NETLINK) [N/y/?] y
This option allows us to enable two-way communication between the kernel and user processes.
Say Y here.
Routing messages (CONFIG_RTNETLINK) [N/y/?] (NEW) y
If we have said Y to the previous option, we must say Y here too or the previous option will not
work. Therefore our choice is Y.
Netlink device emulation (CONFIG_NETLINK_DEV) [N/y/?] (NEW) y
This option is a backward compatibility option, and we have to choose Y for now.
Network packet filtering (replaces ipchains) (CONFIG_NETFILTER) [N/y/?] y
This option enables support for a packet filter firewall on your system (Netfilter). It is very
important to answer to this question by Y if you want to support firewall and IPTables on your
computer. If you answer N to this question, then the firewalling features will not be available, even
if your have the IPTables software installed on your system.
Network packet filtering debugging (CONFIG_NETFILTER_DEBUG) [N/y/?] (NEW) y
This option turns on support for debugging the netfilter code. It is a good idea to enable it.
Socket Filtering (CONFIG_FILTER) [N/y/?] Press Enter
This option allows us to enable Linux Socket Filter, a feature needed by PPP packet filtering in
general. Therefore you only need to say Y here if you want to use PPP packet filtering on your
system. Since we use a network card to get a connection to the Internet and not PPP (modem
link), we keep the default value of N here.
152](https://image.slidesharecdn.com/securingoptimizinglinuxthehackingsolutionv-131209075405-phpapp02/85/Securing-Optimizing-Linux-the-Hacking-Solution-v-3-0-152-320.jpg)
![Kernel Security & Optimization 0
CHAPTER 6
Unix domain sockets (CONFIG_UNIX) [Y/n/?] Press Enter
This option is very important and must always be set to Y. It allows us to include support for Unix
domain sockets; sockets are the standard Unix mechanism for establishing and accessing
network connections. It is vital to say Y to this option.
TCP/IP networking (CONFIG_INET) [Y/n/?] Press Enter
Another very important and vital option under Linux. This option allows us to enable support for
TCP/IP networking on the computer. TCP/IP are the protocols used on the Internet and on most
local Ethernets. It is highly recommended to say Y here even if you are not connected to the
Internet.
IP: multicasting (CONFIG_IP_MULTICAST) [Y/n/?] n
This option allows us to enable a code that addresses several networked computers at once. You
need it if you intend to participate in the MBONE, a high bandwidth network on top of the Internet
which carries audio and video broadcasts. For most people, it's safe to say N here.
IP: advanced router (CONFIG_IP_ADVANCED_ROUTER) [N/y/?] n
This option allows us to configure our Linux system to run mostly as a router. The answer to this
question won't directly affect the kernel: answering N will just cause the configuration to skip all
the questions about advanced routing. In many cases, we can safety keep the default value of N
here. Only users that want to run their Linux system primarily as a router will answer to this
question by Y to be presented a list of advanced routing features to enable or reject. If you want
to configure your Linux server as a Gateway server, you need to answer Y to this question and all
questions related to this option.
IP: kernel level autoconfiguration (CONFIG_IP_PNP) [N/y/?] Press Enter
This option must be set to Y only for diskless machines requiring network access to boot. For
most people, it's safe to say N here.
IP: tunneling (CONFIG_NET_IPIP) [N/y/?] Press Enter
This option will enable Tunneling on our system. Tunneling is a means of encapsulating data of
one protocol type within another protocol and sending it over a channel that understands the
encapsulating protocol. This is an advanced feature and only advanced users who know why they
need it must answer Y to this question.
IP: GRE tunnels over IP (CONFIG_NET_IPGRE) [N/y/?] Press Enter
This option will enable another kind of Tunneling feature on our system. This method is known as
GRE (Generic Routing Encapsulation). This is an advanced feature and only advanced users that
know why they need it must answer Y to this question.
IP: TCP Explicit Congestion Notification support (CONFIG_INET_ECN) [N/y/?]
Press Enter
This option enables Explicit Congestion Notification on your system. ECN allows routers to notify
clients about network congestion, resulting in fewer dropped packets and increased network
performance. This is a very good feature but, unfortunately, there are many broken firewalls on
the Internet, which refuse connections from ECN-enabled machines, and it may be a while before
these firewalls are fixed. Until then, to access a site behind such a firewall you will have to disable
this option by saying N here.
153](https://image.slidesharecdn.com/securingoptimizinglinuxthehackingsolutionv-131209075405-phpapp02/85/Securing-Optimizing-Linux-the-Hacking-Solution-v-3-0-153-320.jpg)
![Kernel Security & Optimization 0
CHAPTER 6
IP: TCP syncookie support (disabled per default) (CONFIG_SYN_COOKIES) [N/y/?] y
This option is very important and every one must answer to this question by Y because normal
TCP/IP networking is open to an attack known as "SYN flooding". This denial-of-service attack
prevents legitimate remote users from being able to connect to your computer during an ongoing
attack and requires very little work from the attacker, who can operate from anywhere on the
Internet. SYN cookies provide protection against this type of attack. Therefore don't forget to
answer Y to this question.
*
* IP: Netfilter Configuration
All questions under the "IP: Netfilter Configuration" section of the Kernel configuration
are related to packet filter firewall support and features. We recommend you enable everything.
Below, we show you the answer for each question without any explanation on the features. If you
need to get more information about the features that you don't understand, you can simply type ?
[Enter] at the prompt to get help.
*
Connection tracking (required for masq/NAT) (CONFIG_IP_NF_CONNTRACK) [N/y/?]
(NEW) y
FTP protocol support (CONFIG_IP_NF_FTP) [N/y/?] (NEW) y
IRC protocol support (CONFIG_IP_NF_IRC) [N/y/?] (NEW) y
IP tables support (required for filtering/masq/NAT) (CONFIG_IP_NF_IPTABLES)
[N/y/?] (NEW) y
limit match support (CONFIG_IP_NF_MATCH_LIMIT) [N/y/?] (NEW) y
MAC address match support (CONFIG_IP_NF_MATCH_MAC) [N/y/?] (NEW) y
netfilter MARK match support (CONFIG_IP_NF_MATCH_MARK) [N/y/?] (NEW) y
Multiple port match support (CONFIG_IP_NF_MATCH_MULTIPORT) [N/y/?] (NEW) y
TOS match support (CONFIG_IP_NF_MATCH_TOS) [N/y/?] (NEW) y
LENGTH match support (CONFIG_IP_NF_MATCH_LENGTH) [N/y/?] (NEW) y
TTL match support (CONFIG_IP_NF_MATCH_TTL) [N/y/?] (NEW) y
tcpmss match support (CONFIG_IP_NF_MATCH_TCPMSS) [N/y/?] (NEW) y
Connection state match support (CONFIG_IP_NF_MATCH_STATE) [N/y/?] (NEW) y
Packet filtering (CONFIG_IP_NF_FILTER) [N/y/?] (NEW) y
REJECT target support (CONFIG_IP_NF_TARGET_REJECT) [N/y/?] (NEW) y
Full NAT (CONFIG_IP_NF_NAT) [N/y/?] (NEW) y
Packet mangling (CONFIG_IP_NF_MANGLE) [N/y/?] (NEW) y
TOS target support (CONFIG_IP_NF_TARGET_TOS) [N/y/?] (NEW) y
MARK target support (CONFIG_IP_NF_TARGET_MARK) [N/y/?] (NEW) y
LOG target support (CONFIG_IP_NF_TARGET_LOG) [N/y/?] (NEW) y
TCPMSS target support (CONFIG_IP_NF_TARGET_TCPMSS) [N/y/?] (NEW) y
If you want to enable IPTables support into the kernel, the iptables program must
be installed first or you will receive error messages during kernel compilation. This is because
when IPTables support is enabled, the kernel will associate some part of the iptables
program with it configuration. Therefore don’t forget to install IPTables before configuring kernel
with IPTables support. Finally the same warning is true for quota support into the kernel.
WARNING:
*
*
* The IPX protocol (CONFIG_IPX) [N/y/?] Press Enter
This option allows us to enable Novell networking protocol support on Linux. You need it if you
want to access Novell NetWare file or print servers using Linux or if you want to configure your
Linux system to run as a Novell NetWare file or print server. In most cases, this is not required
and we can answer N to this question.
154](https://image.slidesharecdn.com/securingoptimizinglinuxthehackingsolutionv-131209075405-phpapp02/85/Securing-Optimizing-Linux-the-Hacking-Solution-v-3-0-154-320.jpg)
![Kernel Security & Optimization 0
CHAPTER 6
Appletalk protocol support (CONFIG_ATALK) [N/y/?] Press Enter
This option allows us to enable AppleTalk protocol support on Linux. You need it if you want to
access Apple computers using Linux. In most cases, this is not required and we can answer N to
this question.
DECnet Support (CONFIG_DECNET) [N/y/?] Press Enter
This option allows us to enable DECnet networking protocol support on Linux. The DECnet
networking protocol was used in many products made by Digital (now Compaq). In most cases,
this is not required and we can answer N to this question.
802.1d Ethernet Bridging (CONFIG_BRIDGE) [N/y/?] Press Enter
This option will allow your Linux system to act as an Ethernet bridge, which means that the
different Ethernet segments it is connected to will appear as one Ethernet to the participants.
Several such bridges can work together to create even larger networks of Ethernets using the
IEEE 802.1 spanning tree algorithm. In most cases, this is not required and we can answer N to
this question.
*
* QoS and/or fair queueing
* QoS and/or fair queueing (CONFIG_NET_SCHED) [N/y/?] Press Enter
This option allows us to enable QoS (Quality of Service) support on Linux. When the kernel has
several packets to send out over a network device, it has to decide which ones to send first,
which ones to delay, and which ones to drop. This is the job of the packet scheduler, and several
different algorithms for how to do this "fairly" have been proposed. If we answer N to this
question, the standard packet scheduler, which is a FIFO (first come, first served) will be used by
default. The standard packet scheduler is enough for most of us and if you are running a router
system or are an advanced user who wants to experiment in some new way with TCP/IP
networking, then you can say Y to this question and be able to choose from among several
alternative algorithms which can then be attached to different network devices. In most cases, we
say N to this question.
*
* Telephony Support
* Linux telephony support (CONFIG_PHONE) [N/y/?] Press Enter
This option allows us to use a regular phone for voice-over-IP applications. This also means that
you have to have a telephony card attached to your computer and you know what to do. Most
people will simply answer N to this question.
*
* ATA/IDE/MFM/RLL support
* ATA/IDE/MFM/RLL support (CONFIG_IDE) [Y/n/?] Press Enter
This option allows the kernel to manage low cost mass storage units such as ATA/(E)IDE and
ATAPI units. The most common cases are IDE hard drives and ATAPI CD-ROM drives and
since we all have one of these devices attached to our computer we can safety say Y to this
question. The only time that you can answer to this question by N is when you know that your
system is pure SCSI.
*
* IDE, ATA and ATAPI Block devices
* Enhanced IDE/MFM/RLL disk/cdrom/tape/floppy support (CONFIG_BLK_DEV_IDE)
[Y/n/?] Press Enter
This option allows us to enable the new enhanced driver with IDE/MFM/RLL
disk/cdrom/tape/floppy drives. If you have one or more IDE drives, it is required to answer Y to
this question.
155](https://image.slidesharecdn.com/securingoptimizinglinuxthehackingsolutionv-131209075405-phpapp02/85/Securing-Optimizing-Linux-the-Hacking-Solution-v-3-0-155-320.jpg)
![Kernel Security & Optimization 0
CHAPTER 6
Use old disk-only driver on primary interface (CONFIG_BLK_DEV_HD_IDE) [N/y/?]
Press Enter
This option allows us to enable the old hard disk driver to control IDE/MFM/RLL
disk/cdrom/tape/floppy drives. It is highly recommended not to enable it, since we've already used
the new enhanced driver option with IDE/MFM/RLL disk/cdrom/tape/floppy drives above. This
option may be useful for older systems.
Include IDE/ATA-2 DISK support (CONFIG_BLK_DEV_IDEDISK) [Y/n/?] Press Enter
This option allows us to enable another enhanced support for MFM/RLL/IDE hard disks. The only
time that you can answer N to this question is when you know that your system is pure SCSI.
Therefore, we'll enable support for this option by saying Y to the question.
Use multi-mode by default (CONFIG_IDEDISK_MULTI_MODE) [Y/n/?] n
This option allows us to fix possible error messages that can appear on IDE systems. This error
message may look like:
hda: set_multmode: status=0x51 { DriveReady SeekComplete Error }
hda: set_multmode: error=0x04 { DriveStatusError }
If you get this kind of error message on your system, then you have to say Y to this option. We
suppose that you have a good IDE disk drive and that this error will never appear for you, in this
case, we will change the default value of Y to become N.
Include IDE/ATAPI CDROM support (CONFIG_BLK_DEV_IDECD) [Y/n/?] n
This option allows us to instruct Linux to identify more than one CD-ROM drive along with other
IDE devices, as "hdb" or "hdc", or something similar at boot time. If you have only one CD-ROM
drive installed on your system, you can say N to this question even if it uses the ATAPI protocol
and save some KB into the kernel. You have to say Y to this option only if you handle more than
one CD-ROM drive in your computer. Since most people will usually have only one CD-ROM
installed into their computer, we will change the default value of Y to become N. If you have one
CD-ROM and another one CD-ROM for burning disk, then you have answer Y to this question.
Include IDE/ATAPI TAPE support (CONFIG_BLK_DEV_IDETAPE) [N/y/?] Press Enter
This option allows us to enable an IDE tape drive using the ATAPI protocol. If you have an IDE
tape drive installed on your system, you must answer Y to this question. Most people will say N
here.
Include IDE/ATAPI FLOPPY support (CONFIG_BLK_DEV_IDEFLOPPY) [N/y/?] Press Enter
This option allows us to enable an IDE floppy drive which uses the ATAPI protocol. If you have
this kind of floppy drive installed on your system, you must answer this question Y. Most people
will say N here.
SCSI emulation support (CONFIG_BLK_DEV_IDESCSI) [N/y/?] Press Enter
This option provides SCSI host adapter emulation for IDE ATAPI devices, and will allow us to
use a SCSI device driver instead of a native ATAPI driver. If you intend to install and use a CDRW drive on your computer, then you have to say Y here. Again, most people will say N here.
156](https://image.slidesharecdn.com/securingoptimizinglinuxthehackingsolutionv-131209075405-phpapp02/85/Securing-Optimizing-Linux-the-Hacking-Solution-v-3-0-156-320.jpg)
![Kernel Security & Optimization 0
CHAPTER 6
*
* IDE chipset support/bugfixes
* CMD640 chipset bugfix/support (CONFIG_BLK_DEV_CMD640) [Y/n/?] n
This option allows us to include code which tries to automatically detect and correct the CMD640
problems under Linux. The CMD-Technologies CMD640 IDE chip is used on many common 486
and Pentium motherboards, usually in combination with a "Neptune" or "SiS" chipset.
Unfortunately, it has a number of rather nasty design flaws that can cause severe data corruption
under many common conditions. To know if you need to enable this option for your system to
correct this bug, edit the /proc/cpuinfo file and see if the parameter "f00f_bug" is set to no
or yes. If the "f00f_bug" value is set to no, then you don't need to enable this option and can
say N to the question, otherwise you have to say Y here.
RZ1000 chipset bugfix/support (CONFIG_BLK_DEV_RZ1000) [Y/n/?] n
This option allows us to include code which tries to automatically detect and correct the RZ1000
problems under Linux. The PC-Technologies RZ1000 IDE chip is used on many common 486
and Pentium motherboards, usually along with the "Neptune" chipset. As for the CMD640 bug
above, it also has a number of rather nasty design flaws that can cause severe data corruption
under many common conditions. To know if you need to enable this option for your system to
correct this bug, edit the /proc/cpuinfo file and see if the parameter "coma_bug" is set to no
or yes. If the "coma_bug" value is set to no, then you don't need to enable this option and can
say N to the question, otherwise you have to say Y here.
Generic PCI IDE chipset support (CONFIG_BLK_DEV_IDEPCI) [Y/n/?] Press Enter
This option helps the IDE driver to automatically detect and configure all PCI-based IDE
interfaces in your system. If you have PCI systems which use IDE drive(s), then say Y to this
question. Most of us have PCI systems which use IDE and have answer Y this question.
Sharing PCI IDE interrupts support (CONFIG_IDEPCI_SHARE_IRQ) [Y/n/?] Press
Enter
This option allows us to enable support for sharing a single IRQ with other cards under ATA/IDE
chipsets. In general, everyone has answer Y this question.
Generic PCI bus-master DMA support (CONFIG_BLK_DEV_IDEDMA_PCI) [Y/n/?] Press
Enter
This option allows us to reduce CPU overhead with IDE drive(s) on PCI system capable of busmaster DMA operation. If you have a modern IDE ATA/33/66/100 hard drive, then it is
recommended to answer this question Y.
Boot off-board chipsets first support (CONFIG_BLK_DEV_OFFBOARD) [N/y/?] Press
Enter
This option allows us to reverse the device scan order to improve the usability of some boot
managers such as lilo when booting from a drive on an off-board controller. In many cases, this
option is really not required and you can accept the default value of N here.
Use PCI DMA by default when available (CONFIG_IDEDMA_PCI_AUTO) [Y/n/?] Press
Enter
A very important option to enable on all modern IDE disk drives. This option allows us to use the
DMA feature of our disk drive under Linux to improve performance. Most people running a capable
DMA drive will answer to this question by Y.
157](https://image.slidesharecdn.com/securingoptimizinglinuxthehackingsolutionv-131209075405-phpapp02/85/Securing-Optimizing-Linux-the-Hacking-Solution-v-3-0-157-320.jpg)
![Kernel Security & Optimization 0
CHAPTER 6
All of the following Kernel options are related to the special onboard chipsets that you may have
on your motherboard. Therefore, specific drivers are provided for each of them and you have to
choose from the list the one that matches you chipset. If you have an Intel onboard chipset, then
you can safety choose the default answer of N to all of the questions, since the kernel supports it
naturally.
Other chipset models must be selected from the list. In many cases, if your chipset is not listed,
this means that it is automatically supported by the Kernel. Note that two options have their
default answer set to Y (Intel PIIXn chipsets support (CONFIG_BLK_DEV_PIIX)
[Y/n/?] and PIIXn Tuning support (CONFIG_PIIX_TUNING) [Y/n/?]). If you have a
Pentium II or later processor, you must keep the default value of these two option to Y.
AEC62XX chipset support (CONFIG_BLK_DEV_AEC62XX) [N/y/?] Press Enter
ALI M15x3 chipset support (CONFIG_BLK_DEV_ALI15X3) [N/y/?] Press Enter
CMD64X chipset support (CONFIG_BLK_DEV_CMD64X) [N/y/?] Press Enter
CY82C693 chipset support (CONFIG_BLK_DEV_CY82C693) [N/y/?] Press Enter
Cyrix CS5530 MediaGX chipset support (CONFIG_BLK_DEV_CS5530) [N/y/?] Press
Enter
HPT34X chipset support (CONFIG_BLK_DEV_HPT34X) [N/y/?] Press Enter
HPT366 chipset support (CONFIG_BLK_DEV_HPT366) [N/y/?] Press Enter
Intel PIIXn chipsets support (CONFIG_BLK_DEV_PIIX) [Y/n/?] Press Enter
PIIXn Tuning support (CONFIG_PIIX_TUNING) [Y/n/?] Press Enter
NS87415 chipset support (EXPERIMENTAL) (CONFIG_BLK_DEV_NS87415) [N/y/?] Press
Enter
PROMISE PDC202{46|62|65|67|68} support (CONFIG_BLK_DEV_PDC202XX) [N/y/?] Press
Enter
ServerWorks OSB4/CSB5 chipsets support (CONFIG_BLK_DEV_SVWKS) [N/y/?] Press
Enter
SiS5513 chipset support (CONFIG_BLK_DEV_SIS5513) [N/y/?] Press Enter
SLC90E66 chipset support (CONFIG_BLK_DEV_SLC90E66) [N/y/?] Press Enter
Tekram TRM290 chipset support (EXPERIMENTAL) (CONFIG_BLK_DEV_TRM290) [N/y/?]
Press Enter
VIA82CXXX chipset support (CONFIG_BLK_DEV_VIA82CXXX) [N/y/?] Press Enter
Other IDE chipset support (CONFIG_IDE_CHIPSETS) [N/y/?] Press Enter
IGNORE word93 Validation BITS (CONFIG_IDEDMA_IVB) [N/y/?] Press Enter
*
* SCSI support
* SCSI support (CONFIG_SCSI) [Y/n/?] Press Enter
This option allows us to enable SCSI hard disks, SCSI tape drives, SCSI CD-ROM's or any other
SCSI devices under Linux. If you have a SCSI like system, you need to answer Y to this question.
If you don't have any SCSI devices on your system, you can safety answer N to the question. For
users that have a SCSI system, it is very important for you to know the name of your SCSI host
adapter (the card inside your computer that "speaks" the SCSI protocol, also called SCSI
controller), because you will be asked for it if you enable this option. Once again, if you don't have
a SCSI system, simply answer N to this question and skip this section of the Linux Kernel
configuration.
*
* SCSI support type (disk, tape, CD-ROM)
* SCSI disk support (CONFIG_BLK_DEV_SD) [Y/n/?] Press Enter
This option allows us to enable support for a SCSI hard disk under Linux. If you have enabled the
SCSI support feature above because you have a SCSI hard drive on your system, then it's here
that you have to specify it by answering Y to the question.
158](https://image.slidesharecdn.com/securingoptimizinglinuxthehackingsolutionv-131209075405-phpapp02/85/Securing-Optimizing-Linux-the-Hacking-Solution-v-3-0-158-320.jpg)
![Kernel Security & Optimization 0
CHAPTER 6
Maximum number of SCSI disks that can be loaded as modules
(CONFIG_SD_EXTRA_DEVS) [40] Press Enter
This option allows us to control the amount of additional space allocated in tables for drivers that
are loaded as modules after the kernel is booted. In the event that the SCSI core itself was
loaded as a module, this value is the number of additional disks that can be loaded after the first
host driver is loaded. Since we're compiling a Monolithic Kernel where no modules are available,
this option doesn't concern us and we can safety press the [Enter] key to accept the default
value.
SCSI tape support (CONFIG_CHR_DEV_ST) [N/y/?] Press Enter
This option allows us to enable support for a SCSI tape drive under Linux. If you have enabled
the SCSI support feature above because you have a SCSI tape drive on your system, then it's
here that you have to specify it by answering Y to the question. For most SCSI users, the answer
is N (no, we don't have a SCSI tape drive on this computer).
SCSI OnStream SC-x0 tape support (CONFIG_CHR_DEV_OSST) [N/y/?] Press Enter
This option allows us to enable support for the OnStream SC-x0 SCSI tape drives under Linux. If
you have this kind of SCSI tape drive installed on your computer, then you have to answer to this
question by Y. Most SCSI users will simply say N to this question.
SCSI CD-ROM support (CONFIG_BLK_DEV_SR) [N/y/?] Press Enter
This option allows us to enable support for a SCSI CD-ROM under Linux. If you have enabled the
SCSI support feature above because you have a SCSI CD-ROM on your system, then it's here
that you have to specify it by answering Y to the question. For most SCSI users, the answer is N
(no, we don't have a SCSI CD-ROM on this computer).
SCSI generic support (CONFIG_CHR_DEV_SG) [N/y/?] Press Enter
This option allows us to enable support to use SCSI scanners, synthesizers or CD-writers or just
about anything having "SCSI" in its name other than hard disks, CD-ROMs or tapes. If you have
one of these SCSI items installed on your computer, then you have to say Y here as well as for
the "SCSI disk support" option above to enable the driver.
For users having IDE CD-writers, you have to say Y to this question too,
even if your CD-writers are not SCSI CD-writers. Most SCSI users will simply say N to his
question.
VERY IMPORTANT NOTE:
*
* Some SCSI devices (e.g. CD jukebox) support multiple LUNs
* Enable extra checks in new queueing code (CONFIG_SCSI_DEBUG_QUEUES) [Y/n/?]
Press Enter
This option turns on a lot of additional consistency checking for the new queuing code on SCSI
devices. It is a good idea to enable it by saying Y to the question.
Probe all LUNs on each SCSI device (CONFIG_SCSI_MULTI_LUN) [Y/n/?] n
This option force the SCSI driver to probe for multiple LUN's (Logical Unit Number) on your
system and will certainly affect the performance of the system. Most SCSI users will simply
disable this option by saying N to this question to improve performance. If you enable this option,
then we assume that you know what you're doing.
159](https://image.slidesharecdn.com/securingoptimizinglinuxthehackingsolutionv-131209075405-phpapp02/85/Securing-Optimizing-Linux-the-Hacking-Solution-v-3-0-159-320.jpg)
![Kernel Security & Optimization 0
CHAPTER 6
Verbose SCSI error reporting (kernel size +=12K) (CONFIG_SCSI_CONSTANTS)
[Y/n/?] n
This option allows any error messages regarding your SCSI hardware to be more
understandable, this enlarges your kernel by about 12 KB. If performance is important to you, we
highly recommend you to disable this option by answering the question N.
SCSI logging facility (CONFIG_SCSI_LOGGING) [N/y/?] Press Enter
This option allows us to turns on a logging facility that can be used to debug a number of SCSI
related problems. Again, if performance is important to you, we highly recommend you to disable
this option by keeping the default value of N here.
*
* SCSI low-level drivers
Below you will be presented a list of available SCSI controllers to choose from, simply select the
SCSI controller that is installed on your system and disable all the others. As an example, we will
pretend that we have an Adaptec AIC7080 controller and will enable it further down. We chose
an Adaptec AIC7080 model for our example; don't forget to change our choice if you have
another kind of SCSI controller installed on your system.
*
3ware Hardware ATA-RAID support (CONFIG_BLK_DEV_3W_XXXX_RAID) [N/y/?] Press
Enter
7000FASST SCSI support (CONFIG_SCSI_7000FASST) [N/y/?] Press Enter
ACARD SCSI support (CONFIG_SCSI_ACARD) [N/y/?] Press Enter
Adaptec AHA152X/2825 support (CONFIG_SCSI_AHA152X) [N/y/?] Press Enter
Adaptec AHA1542 support (CONFIG_SCSI_AHA1542) [N/y/?] Press Enter
Adaptec AHA1740 support (CONFIG_SCSI_AHA1740) [N/y/?] Press Enter
Adaptec AIC7xxx support (CONFIG_SCSI_AIC7XXX) [N/y/?] y
Maximum number of TCQ commands per device (CONFIG_AIC7XXX_CMDS_PER_DEVICE)
[253] (NEW) Press Enter
Initial bus reset delay in milli-seconds (CONFIG_AIC7XXX_RESET_DELAY_MS)
[15000] (NEW) Press Enter
Build Adapter Firmware with Kernel Build (CONFIG_AIC7XXX_BUILD_FIRMWARE)
[N/y/?] (NEW) Press Enter
Adaptec I2O RAID support (CONFIG_SCSI_DPT_I2O) [N/y/?] Press Enter
AdvanSys SCSI support (CONFIG_SCSI_ADVANSYS) [N/y/?] Press Enter
Always IN2000 SCSI support (CONFIG_SCSI_IN2000) [N/y/?] Press Enter
AM53/79C974 PCI SCSI support (CONFIG_SCSI_AM53C974) [N/y/?] Press Enter
AMI MegaRAID support (CONFIG_SCSI_MEGARAID) [N/y/?] Press Enter
BusLogic SCSI support (CONFIG_SCSI_BUSLOGIC) [N/y/?] Press Enter
Compaq Fibre Channel 64-bit/66Mhz HBA support (CONFIG_SCSI_CPQFCTS) [N/y/?]
Press Enter
DMX3191D SCSI support (CONFIG_SCSI_DMX3191D) [N/y/?] Press Enter
DTC3180/3280 SCSI support (CONFIG_SCSI_DTC3280) [N/y/?] Press Enter
EATA ISA/EISA/PCI (DPT and generic EATA/DMA-compliant boards) support
(CONFIG_SCSI_EATA) [N/y/?] Press Enter
EATA-DMA [Obsolete] (DPT, NEC, AT&T, SNI, AST, Olivetti, Alphatronix) support
(CONFIG_SCSI_EATA_DMA) [N/y/?] Press Enter
EATA-PIO (old DPT PM2001, PM2012A) support (CONFIG_SCSI_EATA_PIO) [N/y/?] Press
Enter
Future Domain 16xx SCSI/AHA-2920A support (CONFIG_SCSI_FUTURE_DOMAIN) [N/y/?]
Press Enter
Intel/ICP (former GDT SCSI Disk Array) RAID Controller support
(CONFIG_SCSI_GDTH) [N/y/?] Press Enter
Generic NCR5380/53c400 SCSI support (CONFIG_SCSI_GENERIC_NCR5380) [N/y/?] Press
Enter
IBM ServeRAID support (CONFIG_SCSI_IPS) [N/y/?] Press Enter
Initio 9100U(W) support (CONFIG_SCSI_INITIO) [N/y/?] Press Enter
Initio INI-A100U2W support (CONFIG_SCSI_INIA100) [N/y/?] Press Enter
160](https://image.slidesharecdn.com/securingoptimizinglinuxthehackingsolutionv-131209075405-phpapp02/85/Securing-Optimizing-Linux-the-Hacking-Solution-v-3-0-160-320.jpg)
![Kernel Security & Optimization 0
CHAPTER 6
NCR53c406a SCSI support (CONFIG_SCSI_NCR53C406A) [N/y/?] Press Enter
NCR53c7,8xx SCSI support (CONFIG_SCSI_NCR53C7xx) [N/y/?] Press Enter
SYM53C8XX Version 2 SCSI support (CONFIG_SCSI_SYM53C8XX_2) [N/y/?] Press Enter
NCR53C8XX SCSI support (CONFIG_SCSI_NCR53C8XX) [N/y/?] Press Enter
SYM53C8XX SCSI support (CONFIG_SCSI_SYM53C8XX) [Y/n/?] n
PAS16 SCSI support (CONFIG_SCSI_PAS16) [N/y/?] Press Enter
PCI2000 support (CONFIG_SCSI_PCI2000) [N/y/?] Press Enter
PCI2220i support (CONFIG_SCSI_PCI2220I) [N/y/?] Press Enter
PSI240i support (CONFIG_SCSI_PSI240I) [N/y/?] Press Enter
Qlogic FAS SCSI support (CONFIG_SCSI_QLOGIC_FAS) [N/y/?] Press Enter
Qlogic ISP SCSI support (CONFIG_SCSI_QLOGIC_ISP) [N/y/?] Press Enter
Qlogic ISP FC SCSI support (CONFIG_SCSI_QLOGIC_FC) [N/y/?] Press Enter
Qlogic QLA 1280 SCSI support (CONFIG_SCSI_QLOGIC_1280) [N/y/?] Press Enter
Seagate ST-02 and Future Domain TMC-8xx SCSI support (CONFIG_SCSI_SEAGATE)
[N/y/?] Press Enter
Simple 53c710 SCSI support (Compaq, NCR machines) (CONFIG_SCSI_SIM710) [N/y/?]
Press Enter
Symbios 53c416 SCSI support (CONFIG_SCSI_SYM53C416) [N/y/?] Press Enter
Tekram DC390(T) and Am53/79C974 SCSI support (CONFIG_SCSI_DC390T) [N/y/?] Press
Enter
Trantor T128/T128F/T228 SCSI support (CONFIG_SCSI_T128) [N/y/?] Press Enter
UltraStor 14F/34F support (CONFIG_SCSI_U14_34F) [N/y/?] Press Enter
UltraStor SCSI support (CONFIG_SCSI_ULTRASTOR) [N/y/?] Press Enter
*
* Fusion MPT device support
* Fusion MPT (base + ScsiHost) drivers (CONFIG_FUSION) [N/y/?] Press Enter
*
* I2O device support
* I2O support (CONFIG_I2O) [N/y/?] Press Enter
This option allows us to enable support for Intelligent Input/Output (I2O) architecture. In order for
this to work, you need to have an I2O interface adapter card in your computer. If you have this
kind of I2O interface adapter card installed on your system, then you can say Y to the question
and you will get a choice of interface adapter drivers and OSM's. Most users simply say N here.
*
* Network device support
* Network device support (CONFIG_NETDEVICES) [Y/n/?] Press Enter
This option is one of the most important and allows us to enable support and feature for network
cards under Linux. Therefore, we have to answer Y to this question.
*
* ARCnet devices
* ARCnet support (CONFIG_ARCNET) [N/y/?] Press Enter
This option allows us to enable ARCnet chipset support under Linux. If you have a network card
of this type installed on your system, then say Y here, otherwise and for most users, you have to
keep the default value of N here.
Dummy net driver support (CONFIG_DUMMY) [Y/n/?] n
This option is only useful for PPP dial up modem users on Linux. If you don't use your system to
make PPP connections, then you can safety answer N to this question. Only users who have a
modem and want to use it to establish a connection via PPP or SLIP need to say Y here. Since,
in our example, we use a network card to make a network connection, we will answer the
question N.
161](https://image.slidesharecdn.com/securingoptimizinglinuxthehackingsolutionv-131209075405-phpapp02/85/Securing-Optimizing-Linux-the-Hacking-Solution-v-3-0-161-320.jpg)
![Kernel Security & Optimization 0
CHAPTER 6
Bonding driver support (CONFIG_BONDING) [N/y/?] Press Enter
This option allows us to 'bond' multiple Ethernet Channels together. This is called 'Etherchannel'
by Cisco, 'Trunking' by Sun, and 'Bonding' in Linux. It is a technique to merge Ethernet segments
together for doubling the speed of a connection. In most cases, we can safety choose the default
choice of N here. You must have two Ethernet cards installed on your system and on the remote
computer where you want to use this technique to be able to use it. Also, this is an advanced
feature and only experienced Linux users may need it. Therefore, we will answer to the question
by N.
EQL (serial line load balancing) support (CONFIG_EQUALIZER) [N/y/?] Press Enter
This option allows us to enable the same feature as the previous option, but this time for two
modems and two telephone lines. Therefore, we will simply say N to this question.
Universal TUN/TAP device driver support (CONFIG_TUN) [N/y/?] Press Enter
This option allows us to enable TUN/TAP support under Linux. TUN/TAP provides packet
reception and transmission for user space programs. It can be viewed as a simple Point-to-Point
or Ethernet device, which instead of receiving packets from a physical media, receives them from
user space program and instead of sending packets via physical media, writes them to the user
space program. It is rare that we need this feature, if you need it then simply say Y here. Most
users will say N here.
*
* Ethernet (10 or 100Mbit)
* Ethernet (10 or 100Mbit) (CONFIG_NET_ETHERNET) [Y/n/?] Press Enter
This option is very important and allows us to enable support for Ethernet Network Interface
Cards (NIC's) under Linux. Now, everyone has a NIC in their computer and if you want to be able
to use your network card, then you have to say Y here. Note that the answer to this question
won't directly affect the kernel: saying N will just cause the configuration to skip all the questions
about Ethernet network cards. We must say Y here to be able to select the network card that we
have in our computer from the list of supported network cards.
It is very important to know the name of the network card(s) installed in your system because you
will be asked for it. As an example we will pretend that we have an "EtherExpressPro/100"
network card in our computer and we will enable support for it. This is an example and don't
forget to change our default choice if you have another kind of network card installed in your
system. In general, we say Y for the network card that we have and N for all other network cards.
Sun Happy Meal 10/100baseT support (CONFIG_HAPPYMEAL) [N/y/?] Press Enter
Sun GEM support (CONFIG_SUNGEM) [N/y/?] Press Enter
3COM cards (CONFIG_NET_VENDOR_3COM) [N/y/?] Press Enter
AMD LANCE and PCnet (AT1500 and NE2100) support (CONFIG_LANCE) [N/y/?] Press
Enter
Western Digital/SMC cards (CONFIG_NET_VENDOR_SMC) [N/y/?] Press Enter
Racal-Interlan (Micom) NI cards (CONFIG_NET_VENDOR_RACAL) [N/y/?] Press Enter
DEPCA, DE10x, DE200, DE201, DE202, DE422 support (CONFIG_DEPCA) [N/y/?] Press
Enter
HP 10/100VG PCLAN (ISA, EISA, PCI) support (CONFIG_HP100) [N/y/?] Press Enter
Other ISA cards (CONFIG_NET_ISA) [N/y/?] Press Enter
EISA, VLB, PCI and on board controllers (CONFIG_NET_PCI) [Y/n/?] Press Enter
AMD PCnet32 PCI support (CONFIG_PCNET32) [N/y/?] Press Enter
Apricot Xen-II on board Ethernet (CONFIG_APRICOT) [N/y/?] Press Enter
CS89x0 support (CONFIG_CS89x0) [N/y/?] Press Enter
DECchip Tulip (dc21x4x) PCI support (CONFIG_TULIP) [N/y/?] Press Enter
Generic DECchip & DIGITAL EtherWORKS PCI/EISA (CONFIG_DE4X5) [N/y/?] Press
Enter
Digi Intl. RightSwitch SE-X support (CONFIG_DGRS) [N/y/?] Press Enter
Davicom DM910x/DM980x support (CONFIG_DM9102) [N/y/?] Press Enter
162](https://image.slidesharecdn.com/securingoptimizinglinuxthehackingsolutionv-131209075405-phpapp02/85/Securing-Optimizing-Linux-the-Hacking-Solution-v-3-0-162-320.jpg)
![Kernel Security & Optimization 0
CHAPTER 6
EtherExpressPro/100 support (CONFIG_EEPRO100) [Y/n/?] Press Enter
Myson MTD-8xx PCI Ethernet support (CONFIG_FEALNX) [N/y/?] Press Enter
National Semiconductor DP8381x series PCI Ethernet support (CONFIG_NATSEMI)
[N/y/?] Press Enter
PCI NE2000 and clones support (see help) (CONFIG_NE2K_PCI) [N/y/?] Press Enter
RealTek RTL-8139 PCI Fast Ethernet Adapter support (CONFIG_8139TOO) [N/y/?]
Press Enter
SiS 900/7016 PCI Fast Ethernet Adapter support (CONFIG_SIS900) [N/y/?] Press
Enter
SMC EtherPower II (CONFIG_EPIC100) [N/y/?] Press Enter
Sundance Alta support (CONFIG_SUNDANCE) [N/y/?] Press Enter
TI ThunderLAN support (CONFIG_TLAN) [N/y/?] Press Enter
VIA Rhine support (CONFIG_VIA_RHINE) [N/y/?] Press Enter
Winbond W89c840 Ethernet support (CONFIG_WINBOND_840) [N/y/?] Press Enter
Pocket and portable adapters (CONFIG_NET_POCKET) [N/y/?] Press Enter
*
* Ethernet (1000 Mbit)
* Alteon AceNIC/3Com 3C985/NetGear GA620 Gigabit support (CONFIG_ACENIC)
[N/y/?] Press Enter
D-Link DL2000-based Gigabit Ethernet support (CONFIG_DL2K) [N/y/?] Press Enter
National Semiconduct DP83820 support (CONFIG_NS83820) [N/y/?] Press Enter
Packet Engines Hamachi GNIC-II support (CONFIG_HAMACHI) [N/y/?] Press Enter
SysKonnect SK-98xx support (CONFIG_SK98LIN) [N/y/?] Press Enter
FDDI driver support (CONFIG_FDDI) [N/y/?] Press Enter
This option allows us to enable FDDI card support under Linux. FDDI (Fiber Distributed Data
Interface) is a high speed local area network design to runs over copper or fiber. If you are
connected to such a network and want a driver for the FDDI card in your computer, say Y here.
Most users will simply say N here.
PPP (point-to-point protocol) support (CONFIG_PPP) [N/y/?] Press Enter
This option allows us to enable PPP support under Linux. PPP (Point to Point Protocol) is the
protocol used by modern modems to establish a remote connection with your ISP. If you have a
modem card installed on your system to make a remote connection with your ISP, then you need
to answer Y to this question. If you don't use PPP to connect on the Internet, then you can safety
say N here. In our example, we assume that you use another method, like a network interface, to
connect to the Internet and say N here.
SLIP (serial line) support (CONFIG_SLIP) [N/y/?] Press Enter
This option allows us to enable SLIP or CSLIP support under Linux. These protocols are really
old now and have been replaced by the PPP protocol (see the above option). If for any reason
you still use them, then say Y here. Most users will answer this question N.
*
* Wireless LAN (non-hamradio)
* Wireless LAN (non-hamradio) (CONFIG_NET_RADIO) [N/y/?] Press Enter
This option allows us to enable support for wireless LANs and everything having to do with radio,
but not with amateur radio or FM broadcasting. If you need such support on your system, then
say Y here, also if you need Wireless Extensions with wireless PCMCIA (PC-) cards on Linux, you
need to say Y here too. Most users will simply say N here.
*
* Token Ring devices
* Token Ring driver support (CONFIG_TR) [N/y/?] Press Enter
This option allows us to enable support for Token Ring under Linux. Token Ring is IBM's way of
communication on a local network; the rest of the world uses Ethernet. If you need Token Ring
support on your computer, then say Y here. Most people will select the default choice of N here.
163](https://image.slidesharecdn.com/securingoptimizinglinuxthehackingsolutionv-131209075405-phpapp02/85/Securing-Optimizing-Linux-the-Hacking-Solution-v-3-0-163-320.jpg)
![Kernel Security & Optimization 0
CHAPTER 6
Fibre Channel driver support (CONFIG_NET_FC) [N/y/?] Press Enter
This option allows us to enable Fibre Channel support under Linux. Fibre Channel is a high speed
serial protocol mainly used to connect large storage devices to the computer. If you have a Fibre
channel adapter card in your computer, then you can say Y here. Most users will simply say N
here.
*
* Wan interfaces
* Wan interfaces support (CONFIG_WAN) [N/y/?] Press Enter
This option allows us to enable support for Wan interfaces under Linux. Wide Area Networks
(WANs), such as X.25, frame relay and leased lines, are used to interconnect Local Area
Networks (LANs) over vast distances. If you have these kinds of cards installed on your system,
then you can answer Y to the question. Most users will say N here.
*
* Amateur Radio support
* Amateur Radio support (CONFIG_HAMRADIO) [N/y/?] Press Enter
This option allows us to enable Amateur Radio support under Linux. If you want to connect your
Linux box to an amateur radio, answer Y here. Note that the answer to this question won't directly
affect the kernel: saying N will just cause the configuration to skip all the questions about amateur
radio. Most people will say N here.
*
* IrDA (infrared) support
* IrDA subsystem support (CONFIG_IRDA) [N/y/?] Press Enter
This option allows us to enable support for the IrDA (TM) protocols under Linux. IrDA (Infrared
Data Associations) is a support for wireless infrared communication. Laptops or computers that
use infrared and PDA's users will say Y here. Most users will say N here.
*
* ISDN subsystem
* ISDN support (CONFIG_ISDN) [N/y/?] Press Enter
This option allows us to enable ISDN support under Linux. ISDN (Integrated Services Digital
Networks) is a special type of fully digital telephone service; it's mostly used to connect to your
Internet service provider (with SLIP or PPP). If you have this type of card installed on your
computer (popular in Europe), then you have to say Y here otherwise, you will certainly keep the
default value of N here.
*
* Old CD-ROM drivers (not SCSI, not IDE)
* Support non-SCSI/IDE/ATAPI CDROM drives (CONFIG_CD_NO_IDESCSI) [N/y/?] Press
Enter
If you have a CD-ROM drive that is neither SCSI nor IDE/ATAPI, say Y here, otherwise N. Note
that the answer to this question doesn't directly affect the kernel: saying N will just cause the
configuration to skip all the questions about these CD-ROM drives. Most users will say N here.
*
* Input core support
* Input core support (CONFIG_INPUT) [N/y/?] Press Enter
This option allows us to enable any of the USB HID (Human Interface Device) options in the USB
support section which require Input core support. If you intended to use USB on Linux, say Y here
otherwise, you can safety say N here. It is rare that we have to use USB on server systems.
164](https://image.slidesharecdn.com/securingoptimizinglinuxthehackingsolutionv-131209075405-phpapp02/85/Securing-Optimizing-Linux-the-Hacking-Solution-v-3-0-164-320.jpg)
![Kernel Security & Optimization 0
CHAPTER 6
*
* Character devices
* Virtual terminal (CONFIG_VT) [Y/n/?] Press Enter
This option is very important and allows us to enable support for terminal devices with display and
keyboard devices. On Linux, you need at least one virtual terminal device in order to make use of
your keyboard and monitor. Therefore, we have to say Y here.
Support for console on virtual terminal (CONFIG_VT_CONSOLE) [Y/n/?] Press Enter
This option allows us to enable support for consoles on virtual terminals. Most users will simply
keep the default value of Y here.
Standard/generic (8250/16550 and compatible UARTs) serial support
(CONFIG_SERIAL) [Y/n/?] n
This option allows us to use serial mice, modems and similar devices that connect to the standard
serial ports under Linux. If you use your Linux system as a workstation with graphical interface
installed, then you must answer Y to the question. If you use your Linux system for dedicated
Ethernet WWW/FTP servers, then you can say N here. In our example, we assume that your
Linux system is dedicated and configured to run as a server only and answer N to the question.
Non-standard serial port support (CONFIG_SERIAL_NONSTANDARD) [N/y/?] Press
Enter
This option allows us to enable support for any non-standard serial boards under Linux. These
are usually used for systems that need many serial ports, because they serve many terminals or
dial-in connections. If this is not true in your case, then you can safety say N here. Most people
will simply say N here.
Unix98 PTY support (CONFIG_UNIX98_PTYS) [Y/n/?] Press Enter
This option is important in modern Linux system and allows us to enable pseudo terminal (PTY)
support under Linux. Everyone must say Y here. Information about pseudo terminal (PTY) can be
found in the Kernel documentation.
Maximum number of Unix98 PTYs in use (0-2048) (CONFIG_UNIX98_PTY_COUNT) [256]
128
This option allows us to set the maximum number of Unix98 PTY's that can be used at any one
time. It is important to note that each additional set of 256 PTY's occupy approximately 8 KB of
kernel memory on 32-bit architectures and for security as well as performance reasons, we must
keep the number as low as possible. Therefore, we will change the default value of 256 to 128.
*
* I2C support
* I2C support (CONFIG_I2C) [N/y/?] Press Enter
This option allows us to enable I2C and SMBus support under Linux. IC2 is a slow serial bus
protocol used in many micro controller applications and developed by Philips. If you need this
feature, then say Y to the question otherwise say N here. Most people will say N here.
Bus Mouse Support (CONFIG_BUSMOUSE) [N/y/?] Press Enter
This option allows us to enable bus mouse support under Linux. All modern computer now use a
serial mouse. If you still continue to use a bus mouse on your system, then you have to say Y
here. Laptop users also need to say Y here. Most users will simply say N here.
165](https://image.slidesharecdn.com/securingoptimizinglinuxthehackingsolutionv-131209075405-phpapp02/85/Securing-Optimizing-Linux-the-Hacking-Solution-v-3-0-165-320.jpg)
![Kernel Security & Optimization 0
CHAPTER 6
Mouse Support (not serial and bus mice) (CONFIG_MOUSE) [Y/n/?] Press Enter
This option allows us to enable support for no serial or bus mice support under Linux. This is for
machines with a mouse, which is neither a serial, nor a bus mouse. Examples are PS/2 mice. If
you have a PS/2 mouse, then say Y here, otherwise say N here. Laptop and workstation users
also need to say Y here. If you use your Linux system for dedicated Ethernet WWW/FTP servers,
then you can say N here and save some space in your Kernel code.
PS/2 mouse (aka "auxiliary device") support (CONFIG_PSMOUSE) [Y/n/?] Press
Enter
This option enables support for a PS/2 mouse on your system. The PS/2 mouse connects to a
special mouse port that looks much like the keyboard port (small circular connector with 6 pins). If
you have this kind of mouse (most modern computers and laptops have and use it), then say Y
here otherwise say N.
C&T 82C710 mouse port support (as on TI Travelmate) (CONFIG_82C710_MOUSE)
[N/y/?] Press Enter
This option allows us to enable support for a certain kind of PS/2 mouse used on the TI
Travelmate. If you have this kind of mouse installed on your system, then say Y here. Most users
will say N to this question.
PC110 digitizer pad support (CONFIG_PC110_PAD) [N/y/?] Press Enter
This drives the digitizer pad on the IBM PC110 palmtop. It can turn the digitizer pad into PS/2
mouse emulation with tap gestures or into an absolute pad. Most users will answer this question
N.
QIC-02 tape support (CONFIG_QIC02_TAPE) [N/y/?] Press Enter
This option allows us to enable QIC-02 tape support under Linux. QIC-02 is a non-SCSI tape
drive and if you use it, then says Y to the question. Most users will say N here.
*
* Watchdog Cards
* Watchdog Timer Support (CONFIG_WATCHDOG) [N/y/?] Press Enter
This option enables Watchdog Timer support under Linux. For details about watchdog, please
read Documentation/watchdog.txt in the kernel source. Most users will say N here.
Intel i8x0 Random Number Generator support (CONFIG_INTEL_RNG) [N/y/?] Press
Enter
This option allows us to enable support for a driver that provides kernel-side support for the
Random Number Generator hardware found on Intel i8xx-based motherboards. If you have this
generator hardware installed on your computer, then you can say Y to the question. Most people
will say N here.
/dev/nvram support (CONFIG_NVRAM) [N/y/?] Press Enter
This option allows us to get read and write access to the 50 bytes of non-volatile memory in the
real time clock (RTC). This memory is conventionally called "CMOS RAM" on PCs and may be
used to view settings there, or to change them (with some utility). Most users will say N to this
question.
Enhanced Real Time Clock Support (CONFIG_RTC) [N/y/?] Press Enter
This option allows us to get access to the real time clock (or hardware clock) built into the
computer. If you run Linux on a multiprocessor machine and said Y to "Symmetric Multi
Processing" above, you should say Y here to read and set the RTC in an SMP compatible
fashion.
166](https://image.slidesharecdn.com/securingoptimizinglinuxthehackingsolutionv-131209075405-phpapp02/85/Securing-Optimizing-Linux-the-Hacking-Solution-v-3-0-166-320.jpg)
![Kernel Security & Optimization 0
CHAPTER 6
Double Talk PC internal speech card support (CONFIG_DTLK) [N/y/?] Press Enter
This option allows us to enable support for the DoubleTalk PC under Linux. If you have a speech
card installed on your computer, then answer to this question by Y. Most users will say N here.
Siemens R3964 line discipline (CONFIG_R3964) [N/y/?] Press Enter
This option allows synchronous communication with devices using the Siemens R3964 packet
protocol. Unless you are dealing with special hardware like PLC's, you are unlikely to need this.
Most users will simply say N here.
Applicom intelligent fieldbus card support (CONFIG_APPLICOM) [N/y/?] Press
Enter
This option provides the kernel-side support for the intelligent fieldbus cards made by Applicom
International. Unless you are dealing with such a card, you are unlikely to need this. Most users
will simply say N here.
*
* Ftape, the floppy tape device driver
* Ftape (QIC-80/Travan) support (CONFIG_FTAPE) [N/y/?] Press Enter
This option allows us to enable support for some well know tape drives under Linux. If you enable
this option, then you'll be asked to select your make and model from the available list. If you don't
use tape drive on your computer, then you can say N to this option.
/dev/agpgart (AGP Support) (CONFIG_AGP) [Y/n/?] n
This option is only pertinent if you use XFree86 on your computer and want to use the GLX or
DRI features for better performance. Enable this option only if you use graphical interface on your
computer. If you system is a server, then you really don't need this option. In our example, we are
configuring the kernel for a server purpose, therefore, we will say N here.
Direct Rendering Manager (XFree86 4.1.0 and higher DRI support) (CONFIG_DRM)
[Y/n/?] n
This option is directly related to the use of XFree86 and graphical interface on your computer. It
allows us to enable Kernel-level support for the Direct Rendering Infrastructure (DRI) for better
performance of the system. If your computer doesn't have a graphical interface installed, and is
configured as a server, then you don't need to enable this option. If you say Y here because you
have and use a graphical interface, then you need to select the module that's right for your
graphics card from the available list. In our example, we are configuring the kernel for a server
purpose, therefore, we will say N here.
ACP Modem (Mwave) support (CONFIG_MWAVE) [N/y/?] Press Enter
This option allows us to enable ACP modem (Mwave) support under Linux. ACP is a WinModem
composed of a kernel driver and a user level application. Together these components support
direct attachment to public switched telephone networks (PSTNs) and support selected countries.
Most user will simply say N here.
*
* Multimedia devices
* Video For Linux (CONFIG_VIDEO_DEV) [N/y/?] Press Enter
This option allows us to enable support for audio/video capture and overlay devices and FM radio
cards under Linux. If you use graphical interface on your system, you need to say Y here. If your
system is configured as a server and you don't have graphical interface installed on it, then you
can safety say N here. In our example, we are configuring the kernel for a server purpose,
therefore, we will say N here.
167](https://image.slidesharecdn.com/securingoptimizinglinuxthehackingsolutionv-131209075405-phpapp02/85/Securing-Optimizing-Linux-the-Hacking-Solution-v-3-0-167-320.jpg)
![Kernel Security & Optimization 0
CHAPTER 6
*
* File systems
* Quota support (CONFIG_QUOTA) [N/y/?] y
This option is important to allow us to set per user/group limits for disk usage (also called disk
quotas) under Linux. It is sometimes required on server environments where such a purpose is
required. If you use Linux as a workstation with graphical interface, it is not useful to enable it.
Only enable this option on server environment when required.
Kernel automounter support (CONFIG_AUTOFS_FS) [N/y/?] Press Enter
This option allows us to automatically mount remote file systems on demand. A newer version of
the automounter with more features is now available; therefore we really don't need to enable this
option. Say N here.
Kernel automounter version 4 support (also supports v3) (CONFIG_AUTOFS4_FS)
[Y/n/?] n
This option allows us to enable support for the new automounter tool. If you are not a part of a
fairly large, distributed network or don't have a laptop which needs to dynamically reconfigure to
the local network, you probably do not need an automounter, and can say N here.
Ext3 journalling file system support (EXPERIMENTAL) (CONFIG_EXT3_FS) [N/y/?] y
This option is very important and allows us to enable support for the new EXT3 journaling file
system support under Linux. EXT3 is the journaling version of the Second extended file system
(often called ext3), the de facto standard Linux file system (method to organize files on a storage
device) for hard disks. Most users will say Y here to be able to get advantage of the new EXT3
journaling file system.
JBD (ext3) debugging support (CONFIG_JBD_DEBUG) [N/y/?] y
This option allows us to enable debugging output while the system is running EXT3 under Linux,
in order to help track down any problems you are having. It is a good idea to enable it, therefore
answer Y to the question.
DOS FAT fs support (CONFIG_FAT_FS) [N/y/?] Press Enter
If you want to use one of the FAT-based file systems (the MS-DOS, VFAT (Windows 95) and
UMSDOS (used to run Linux on top of an ordinary DOS partition) file systems, then you must say Y
here. In many case, we really don't need this kind of feature and can safety say N here.
Recommended choice is N and especially for a linux server system.
Compressed ROM file system support (CONFIG_CRAMFS) [N/y/?] Press Enter
This option allows us to enable CramFs support under Linux. CramFs (Compressed ROM File
System) is designed to be a simple, small, and compressed file system for ROM based embedded
systems. Most users will simply say N here.
Virtual memory file system support (former shm fs) (CONFIG_TMPFS) [Y/n/?] Press
Enter
This option allows us to enable support for Tmpfs under Linux. Tmpfs is a file system which
keeps all files in virtual memory. It is a good idea to enable it on your computer.
Simple RAM-based file system support (CONFIG_RAMFS) [N/y/?] Press Enter
This option allows us to enable support for Ramfs under Linux. Ramfs is a file system which
keeps all files in RAM. It allows read and write access. Most users will say N here.
ISO 9660 CDROM file system support (CONFIG_ISO9660_FS) [Y/n/?] Press Enter
This option is important and allows Linux to access and read your CD-ROM. Since everyone has
and uses a CD-ROM, it is vital to say Y to this question.
168](https://image.slidesharecdn.com/securingoptimizinglinuxthehackingsolutionv-131209075405-phpapp02/85/Securing-Optimizing-Linux-the-Hacking-Solution-v-3-0-168-320.jpg)
![Kernel Security & Optimization 0
CHAPTER 6
Microsoft Joliet CDROM extensions (CONFIG_JOLIET) [N/y/?] Press Enter
This option allows us to be able to read Joliet CD-ROM's under Linux. Joliet is a Microsoft
extension for the ISO 9660 CD-ROM file system, which allows for long filenames in unicode
format. If you think that you'll need to access some files written in this format under Linux with
your CD-ROM, then you need to say Y here. For workstations, you may need to say Y here but
for Linux servers, you have to say N here.
Transparent decompression extension (CONFIG_ZISOFS) [N/y/?] Press Enter
This is a Linux-specific extension to RockRidge which lets you store data in compressed form on
a CD-ROM and have it transparently decompressed when the CD-ROM is accessed. Again, for
workstations you may need it but for servers, you don't need it. Say N.
Minix fs support (CONFIG_MINIX_FS) [N/y/?] Press Enter
This option allows us to enable Minix fs support with Linux. The minix file system (method to
organize files on a hard disk partition or a floppy disk) was the original file system for Linux, but
has been superseded by the second extended file system (ext2fs). Simply say N here.
FreeVxFS file system support (VERITAS VxFS(TM) compatible) (CONFIG_VXFS_FS)
[N/y/?] Press Enter
FreeVxFS is a file system driver that support the VERITAS VxFS(TM) file system format.
VERITAS VxFS(TM) is the standard file system of SCO UnixWare (and possibly others) and
optionally available for Sunsoft Solaris, HP-UX and many other operating systems. If you want to
support such file system on your computer, then say Y here otherwise say N.
NTFS file system support (read only) (CONFIG_NTFS_FS) [N/y/?] Press Enter
NTFS is the file system of Microsoft Windows NT. Say Y if you want to get read access to files on
NTFS partitions of your hard drives otherwise say N here. Most users will say N.
OS/2 HPFS file system support (CONFIG_HPFS_FS) [N/y/?] Press Enter
OS/2 is IBM's operating system for PC's, the same as Warp, and HPFS is the file system used for
organizing files on OS/2 hard disk partitions. Say Y if you want to be able to read files from and
write files to an OS/2 HPFS partition on your hard drive. Most users will say N here.
/proc file system support (CONFIG_PROC_FS) [Y/n/?] Press Enter
This is a virtual file system providing information about the status of the system. Several
programs depend on this, so everyone should say Y here.
/dev/pts file system for Unix98 PTYs (CONFIG_DEVPTS_FS) [Y/n/?] Press Enter
This option allows us to get a virtual file system which can be mounted on /dev/pts with
"mount -t devpts". This, together with the pseudo terminal master multiplexer /dev/ptmx, is
used for pseudo terminal support as described in The Open Group's Unix98 standard. Again,
everyone should say Y here.
ROM file system support (CONFIG_ROMFS_FS) [N/y/?] Press Enter
This is a very small read-only file system mainly intended for initial ram disks of installation disks,
but it could be used for other read-only media as well. Most people will simply say N to this
question. If you want to run SCSI system on modularized kernel, you should say Y here.
Second extended fs support (CONFIG_EXT2_FS) [Y/n/?] Press Enter
This is the de facto standard Linux file system (method to organize files on a storage device) for
hard disks and you must say Y to this question.
169](https://image.slidesharecdn.com/securingoptimizinglinuxthehackingsolutionv-131209075405-phpapp02/85/Securing-Optimizing-Linux-the-Hacking-Solution-v-3-0-169-320.jpg)
![Kernel Security & Optimization 0
CHAPTER 6
System V/Xenix/V7/Coherent file system support (CONFIG_SYSV_FS) [N/y/?] Press
Enter
SCO, Xenix and Coherent are commercial Unix systems for Intel machines, and Version 7 was
used on the DEC PDP-11. Saying Y here would allow you to read from their floppies and hard
disk partitions. Most people will say N to this question.
UDF file system support (read only) (CONFIG_UDF_FS) [N/y/?] Press Enter
This is the new file system used on some CD-ROMs and DVD's. Say Y if you intend to mount
DVD discs or CD-RW's written in packet mode, or if written to by other UDF utilities, such as
DirectCD. Only enable this option if you have some such need.
UFS file system support (read only) (CONFIG_UFS_FS) [N/y/?] Press Enter
BSD and derivative versions of Unix (such as SunOS, FreeBSD, NetBSD, OpenBSD and
NeXTstep) use a file system called UFS. Some System V Unixes can create and mount hard disk
partitions and diskettes using this file system as well. Saying Y here will allow you to read from
these partitions. Most users will say N here.
*
* Network File Systems
* Coda file system support (advanced network fs) (CONFIG_CODA_FS) [N/y/?] Press
Enter
Coda is an advanced network file system, similar to NFS in that it enables you to mount file
systems of a remote server and access them with regular Unix commands as if they were sitting
on your hard disk. Enable this option only if you need it otherwise disable it.
NFS file system support (CONFIG_NFS_FS) [Y/n/?] n
If you are connected to some other (usually local) Unix computer (using SLIP, PLIP, PPP or
Ethernet) and want to mount files residing on that computer (the NFS server) using the Network
File Sharing protocol, say Y here.
NFS server support (CONFIG_NFSD) [Y/n/?] n
If you want your Linux box to act as an NFS *server*, so that other computers on your local
network which support NFS can access certain directories on your box transparently, you have
two options: you can use the self-contained user space program nfsd, in which case you should
say N here, or you can say Y and use the kernel based NFS server. The advantage of the kernel
based solution is that it is faster. Finally, if you don't want to support NFS server at all, simply say
N here.
SMB file system support (to mount Windows shares etc.) (CONFIG_SMB_FS) [N/y/?]
Press Enter
SMB (Server Message Block) is the protocol Windows for Workgroups (WfW), Windows 95/98,
Windows NT, 2000, XP and OS/2 Lan Manager use to share files and printers over local
networks. Saying Y here allows you to mount their file systems (often called "shares" in this
context) and access them just like any other Unix directory. Enable this option only if you need it.
In most cases the answer to this question will be N even if you install Samba on your system.
NCP file system support (to mount NetWare volumes) (CONFIG_NCP_FS) [N/y/?]
Press Enter
NCP (NetWare Core Protocol) is a protocol that runs over IPX and is used by Novell NetWare
clients to talk to file servers. It is to IPX what NFS is to TCP/IP, if that helps. Saying Y here allows
you to mount NetWare file server volumes and to access them just like any other Unix directory.
Enable this option only if you need it. In most cases the answer to this question will be N. You do
not have to say Y here if you want your Linux box to act as a file *server* for Novell NetWare
clients.
170](https://image.slidesharecdn.com/securingoptimizinglinuxthehackingsolutionv-131209075405-phpapp02/85/Securing-Optimizing-Linux-the-Hacking-Solution-v-3-0-170-320.jpg)
![Kernel Security & Optimization 0
CHAPTER 6
*
* Partition Types
* Advanced partition selection (CONFIG_PARTITION_ADVANCED) [N/y/?] Press Enter
This option allows us to enable the use of hard disks under Linux which were partitioned under an
operating system running on a different architecture than the Linux system. Note that the answer
to this question won't directly affect the kernel: saying N will just cause the configuration to skip all
the questions about foreign partitioning schemes.
*
* Console drivers
* VGA text console (CONFIG_VGA_CONSOLE) [Y/n/?] Press Enter
This option allows us to use Linux in text mode through a display that complies with the generic
VGA standard. Virtually everyone wants that. Everyone should say Y here.
Video mode selection support (CONFIG_VIDEO_SELECT) [N/y/?] Press Enter
This option allows us to enable support for text mode selection on kernel startup. In general we
don't need to enable this option. Say N here and read the file Documentation/svga.txt for
more information about the Video mode selection support if you are curious.
*
* Sound
* Sound card support (CONFIG_SOUND) [Y/n/?] n
This option allows us to enable sound support under Linux. If you have a sound card in your
computer, then say Y here and select from the available list of sound card the one that you have.
If you run Linux as a workstation, you may need to say Y here, if you run Linux as a server, you
really don't need to enable this option and can safety say N here.
*
* USB support
* Support for USB (CONFIG_USB) [Y/n/?] n
This option allows us to enable USB support under Linux. If your computer has a USB port and
you want to use USB devices, then you have to say Y here. For servers you really don't need to
say Y here and can safety say N.
*
* Kernel hacking
* Kernel debugging (CONFIG_DEBUG_KERNEL) [N/y/?] Press Enter
You have to say Y here only if you are developing drivers or trying to debug and identify kernel
problems. Most users will simply say N here.
*
* Grsecurity
*
Grsecurity (CONFIG_GRKERNSEC) [N/y/?] y
This option allows us to enable Grsecurity support under Linux. If you say Y to this option, you
will be able to configure many Grsecurity features that will enhance the security of your Linux
system in many ways. This option is available ONLY if you have patched your Linux kernel with
the Grsecurity patch as discussed previously in this chapter. For best security of your Linux
server say Y here.
Security level (Low, Medium, High, Customized) [Customized] Press Enter
This Grsecurity option allows us to choose between three predefined Grsecurity
configurations or to customize the Grsecurity configuration as we want. For better control of
what the patch does and what we may or may not need, we chose to have full control about what
should or shouldn’t be enable with Grsecurity by pressing the [Enter] key to accept the
default choice of [Customized], which let us see all available security features and chose only
the one we need for our server and kernel security setup.
171](https://image.slidesharecdn.com/securingoptimizinglinuxthehackingsolutionv-131209075405-phpapp02/85/Securing-Optimizing-Linux-the-Hacking-Solution-v-3-0-171-320.jpg)
![Kernel Security & Optimization 0
CHAPTER 6
*
* Buffer Overflow Protection
*
Openwall non-executable stack (CONFIG_GRKERNSEC_STACK) [N/y/?] y
This Grsecurity option allows us to enable the non-executable stack protection on the system.
If you say Y here, your system will not allow execution of code on the stack, making buffer
overflow exploitation more difficult. It’s a good idea to say Y here.
Gcc trampoline support (CONFIG_GRKERNSEC_STACK_GCC) [N/y/?] Press Enter
This Grsecurity option allows us to support trampoline code along with the above stack
protection. Trampolining is an action to use the ability of the stack to contain executable code,
which can improve program efficiency in a few cases. Since few programs and some version of
GCC use and need 'trampolining', it is preferable to NOT enable this option to avoid break of some
program on the system. Say N here by pressing the [Enter] key.
Read-only kernel memory (CONFIG_GRKERNSEC_KMEM) [N/y/?] y
This Grsecurity option allows us to enable the read-only kernel memory protection on the
system. If you say Y here, root will not be able to modify the contents of kernel memory. It’s a
good idea to say Y here. If you are building a Monolithic Kernel, then the ability of an attacker to
insert foreign code into a running kernel is completely removed. Yes, another good idea to build a
Monolithic Kernel instead of a Modularized Kernel. Say Y here.
*
* Access Control Lists
*
Grsecurity ACL system (CONFIG_GRKERNSEC_ACL) [N/y/?] y
This Grsecurity option allows us to enable the Access Control List system (ACL) for
Grsecurity. It’s a good idea to say Y here. ACL allows us to better control what program, files,
etc on the system are allowed to do. We use it to apply a security policy that will work for the
entire system. You can install and run Grsecurity without ACL but it is recommended for
optimum security to enable this feature and use it. Once properly implemented, it will become
impossible for a cracker to access and damage your Linux server. Personally, with Grsecurity
ACL, I don’t know how someone could break into a Linux system. Say Y here.
ACL Debugging Messages (CONFIG_GR_DEBUG) [N/y/?] y
This Grsecurity option allows the Grsecurity ACL system to print debugging messages as
an aid to finding problems in your ACL sets. It’s really a good idea to say Y here since it can
become very difficult to debug problems with ACL if this option is not enable. Say Y here.
Extra ACL Debugging Messages (CONFIG_GR_SUPERDEBUG) [N/y/?] Press Enter
This Grsecurity option allows us to enable additional debugging messages that can help in
finding problems in ACL sets or to gain a better understanding of the internal workings of the ACL
system. In many cases, it is not necessary to enable this additional debugging messages feature
for ACL and we will say N here.
Denied capability logging (CONFIG_GRKERNSEC_ACL_CAPLOG) [N/y/?] y
This Grsecurity option allows us to enable the denied capability logging support protection with
ACL. If you say Y here, logs will be produced when a root-owned process does not have a
needed capability raised in his set. This can help to debug the ACL of Grsecurity again. It’s a
good idea to say Y here.
172](https://image.slidesharecdn.com/securingoptimizinglinuxthehackingsolutionv-131209075405-phpapp02/85/Securing-Optimizing-Linux-the-Hacking-Solution-v-3-0-172-320.jpg)
![Kernel Security & Optimization 0
CHAPTER 6
Path to gradm (CONFIG_GRADM_PATH) [/sbin/gradm] Press Enter
This Grsecurity option allows us to specify the path of the gradm binary installed on the
system. gradm is the binary program used to manage Grsecurity ACL on the server. You have
to download and install it to be able to use ACL on your server. Please read the next chapter in
this book to get information about gradm and how to setup Grsecurity ACL on your system.
The default path for gradm as shown above is correct and we press the [Enter] key to accept
the default value for the path.
Maximum tries before password lockout (CONFIG_GR_MAXTRIES) [3] 2
Once the gradm program is installed on your server to control and manage Grsecurity ACL,
you will have to create a password for gradm to work. This option allows us to specify the number
of times a user can attempt to authorize them selves with the Grsecurity ACL system. Here we
change the default value of 3 to become 2, meaning that users are allowed to authorize
themselves with the Grsecurity ACL system twice.
Time to wait after max password tries, in seconds (CONFIG_GR_TIMEOUT) [30]
Press Enter
This option specifies the time the user must wait after attempting to authorize to the ACL system
with the maximum number of invalid passwords. Just press [Enter] to accept the default entry.
*
* Filesystem Protections
*
Proc restrictions (CONFIG_GRKERNSEC_PROC) [N/y/?] y
This Grsecurity option allows us to enable the proc restrictions protection on the system. If you
say Y here, the permissions of the /proc file system will be altered to enhance system security
and privacy. It’s a very good idea to say Y here.
Restrict to user only (CONFIG_GRKERNSEC_PROC_USER) [N/y/?] y
This Grsecurity option allows us to enable restrict to user only protection on the system. If you
say Y here, non-root users will only be able to view their own processes, restricts them from
viewing network-related information, viewing kernel symbol and module information. It’s a very
good idea to say Y here.
Additional restrictions (CONFIG_GRKERNSEC_PROC_ADD) [N/y/?] y
This Grsecurity option allows us to enable additional restrictions protection on the system. If
you say Y here, additional restrictions will be placed on the /proc file system that keep normal
users from viewing cpu and device information. Again, it’s a good idea to say Y here.
Linking restrictions (CONFIG_GRKERNSEC_LINK) [N/y/?] y
This Grsecurity option allows us to enable the linking restrictions protection on the system. If
you say Y here, /tmp race exploits will be prevented, since users will no longer be able to follow
symlinks owned by other users in world-writeable +t directories, unless the owner of the symlink
is the owner of the directory. Users will also not be able to hard link to files they do not own. It’s
really a good idea to say Y here.
FIFO restrictions (CONFIG_GRKERNSEC_FIFO) [N/y/?] y
This Grsecurity option allows us to enable FIFO restrictions protection on the system. If you
say Y here, users will not be able to write to FIFOs they don't own in world-writeable +t
directories, unless the owner of the FIFO is the same owner of the directory it's held in. It’s a
good idea to say Y here.
173](https://image.slidesharecdn.com/securingoptimizinglinuxthehackingsolutionv-131209075405-phpapp02/85/Securing-Optimizing-Linux-the-Hacking-Solution-v-3-0-173-320.jpg)
![Kernel Security & Optimization 0
CHAPTER 6
Secure file descriptors (CONFIG_GRKERNSEC_FD) [N/y/?] y
This Grsecurity option allows us to enable secure file descriptors protection on the system. If
you say Y here, binaries will be protected from data spoofing attacks. It’s a very good idea to say
Y here.
Chroot jail restrictions (CONFIG_GRKERNSEC_CHROOT) [N/y/?] y
This Grsecurity option allows us to enable chroot jail restrictions protection on the system. If
you say Y here, you will be able to choose several options that will make breaking out of a
chrooted jail much more difficult. It’s a very good idea to say Y here.
Restricted signals (CONFIG_GRKERNSEC_CHROOT_SIG) [N/y/?] y
This Grsecurity option allows us to enable the restricted signals protection on the system. If
you say Y here, processes inside a chroot will not be able to send signals outside of the chroot.
It’s a good idea to say Y here.
Deny mounts (CONFIG_GRKERNSEC_CHROOT_MOUNT) [N/y/?] y
This Grsecurity option allows us to enable deny mounts protection on the system. If you say Y
here, processes inside a chroot will not be able to mount or remount file systems. It’s a good idea
to say Y here.
Deny double-chroots (CONFIG_GRKERNSEC_CHROOT_DOUBLE) [N/y/?] y
This Grsecurity option allows us to enable the deny double-chroot protection on the system. If
you say Y here, processes inside a chroot will not be able to chroot again. This is a widely used
method of breaking out of a chroot jail and should not be allowed. It’s a good idea to say Y here.
Enforce chdir("/") on all chroots (CONFIG_GRKERNSEC_CHROOT_CHDIR) [N/y/?] y
This Grsecurity option allows us to enable the enforce chdir("/") on all chroots protection
on the system. If you say Y here, the current working directory of all newly-chrooted applications
will be set to the root directory of the chroot. It’s a good idea to say Y here.
Deny (f)chmod +s (CONFIG_GRKERNSEC_CHROOT_CHMOD) [N/y/?] y
This Grsecurity option allows us to enable the deny (f)chmod +s protection on the system.
If you say Y here, processes inside a chroot will not be able to chmod or fchmod files to make
them have suid or sgid bits. It’s a really good idea to say Y here.
Deny mknod (CONFIG_GRKERNSEC_CHROOT_MKNOD) [N/y/?] y
This Grsecurity option allows us to enable the deny mknod protection on the system. If you
say Y here, processes inside a chroot will not be allowed to mknod (create device on the system).
It’s a good idea to say Y here, unless you run into software incompatibilities.
Deny ptraces (CONFIG_GRKERNSEC_CHROOT_PTRACE) [N/y/?] y
This Grsecurity option allows us to enable the deny ptraces protection on the system. If you
say Y here, processes inside a chroot will not be able to ptrace other processes. It’s a good idea
to say Y here.
Restrict priority changes (CONFIG_GRKERNSEC_CHROOT_NICE) [N/y/?] y
This Grsecurity option allows us to enable the restrict priority changes protection on the
system. If you say Y here, processes inside a chroot will not be able to raise the priority of
processes in the chroot, or alter the priority of processes outside the chroot. It’s a good idea to
say Y here.
174](https://image.slidesharecdn.com/securingoptimizinglinuxthehackingsolutionv-131209075405-phpapp02/85/Securing-Optimizing-Linux-the-Hacking-Solution-v-3-0-174-320.jpg)
![Kernel Security & Optimization 0
CHAPTER 6
Capability restrictions within chroot (CONFIG_GRKERNSEC_CHROOT_CAPS) [N/y/?]
Press Enter
This Grsecurity option allows us to enable the capability restrictions within chroot protection on
the system. If you say Y here, the capabilities on all root processes within a chroot jail will be
lowered to stop module insertion, raw i/o, system and net admin tasks, rebooting the system,
modifying immutable files, and changing the system time. This option can break some
applications on the server and we disable it by answering to the question by N.
Secure keymap loading (CONFIG_GRKERNSEC_KBMAP) [N/y/?] y
This Grsecurity option allows us to enable the secure keymap loading protection on the
system. If you say Y here, KDSKBENT and KDSKBSENT ioctl calls being called by unprivileged
users will be denied. This means that unprivileged users with access to the console will NOT be
able to modify keyboard bindings. It’s a good idea to say Y here.
*
* Kernel Auditing
*
Single group for auditing (CONFIG_GRKERNSEC_AUDIT_GROUP) [N/y/?] Press Enter
This Grsecurity option allows us to enable single group for auditing protection on the system. If
you say Y here, the exec, chdir, (un)mount, and ipc logging features of Grsecurity will
only operate on a group you specify. By default Grsecurity produces a large amount of logs
from the entire system on a production server; we don’t really need the entire auditing feature
provided by Grsecurity even on specified group. Therefore we simply say N to this question
and enable later in this Grsecurity kernel configuration the auditing log that we really need for
production servers.
Exec logging (CONFIG_GRKERNSEC_EXECLOG) [N/y/?] Press Enter
This Grsecurity option allows us to enable the exec logging protection on the system. If you
say Y here, execution of any program on the server will be logged to syslog. This option when
enabled will produce a LOT of logs, especially on an active system. Therefore, we don’t
recommend you to enable this security option. If you are those people that like to spend all their
time reading log files, you could enable this option but be aware that it will take you a day to read
all the logs generated by this option on a production server. Be reasonable, and say N here.
Log execs within chroot (CONFIG_GRKERNSEC_CHROOT_EXECLOG) [N/y/?] y
This Grsecurity option allows us to enable the log execs within chroot protection on the
system. If you say Y here, all executions of any program inside a chroot jail environment will be
logged to syslog. Contrary to the previous option that logs execution of any program on the
system, this option ONLY logs the execution of program inside a chroot jail. In general, services
running in chroot jail environment are limited, meaning that your log file will not become too BIG
to read; therefore we can say Y here to enable this security option on the server.
Chdir logging (CONFIG_GRKERNSEC_AUDIT_CHDIR) [N/y/?] Press Enter
This Grsecurity option allows us to enable the chdir logging protection on the system. If you
say Y here, all chdir() calls will be logged. Chdir() calls is when you navigate via your console
on your server by using the ‘cd’ command. Imagine how many times you use the ‘cd’ command
on your server when you performing some administration tasks. I recommend you to NOT enable
this option if you want to avoid some BIG log files to read again. Say N here.
(Un)Mount logging (CONFIG_GRKERNSEC_AUDIT_MOUNT) [N/y/?] Press Enter
This Grsecurity option allows us to enable the (Un)Mount logging protection on the system. If
you say Y here, all mounts and unmounts calls will be logged to syslog. This means that each
time you mount or unmount drive on your server; the action will be logged to syslog. You can
enable this security option if you like, but personally, I prefer to disable it. Say N here.
175](https://image.slidesharecdn.com/securingoptimizinglinuxthehackingsolutionv-131209075405-phpapp02/85/Securing-Optimizing-Linux-the-Hacking-Solution-v-3-0-175-320.jpg)
![Kernel Security & Optimization 0
CHAPTER 6
IPC logging (CONFIG_GRKERNSEC_AUDIT_IPC) [N/y/?] y
This Grsecurity option allows us to enable the IPC logging protection on the system. If you say
Y here, creation and removal of message queues, semaphores, and shared memory will be
logged. It’s a good idea to say Y here.
Ptrace logging (CONFIG_GRKERNSEC_AUDIT_PTRACE) [N/y/?] Press Enter
This Grsecurity option allows us to enable the ptrace logging protection on the system. If you
say Y here, all successful ptraces will be logged. Ptraces are special operations performed
when programs like strace or gdb are run. In general we never install programs like strace
and gdb on a production server. These programs are only required on development server to
debug software. If you don’t have these kinds of programs installed on your server, you can
safety say N here, otherwise say Y to this security option.
Signal logging (CONFIG_GRKERNSEC_SIGNAL) [N/y/?] y
This Grsecurity option allows us to enable the signal logging protection on the system. If you
say Y here, certain important signals will be logged, such as SIGSEGV that will inform you of
when an error in a program occurred, which in some cases could mean a possible exploit
attempt. It’s a good idea to say Y here.
Fork failure logging (CONFIG_GRKERNSEC_FORKFAIL) [N/y/?] y
This Grsecurity option allows us to enable the fork failure logging protection on the system. If
you say Y here, all failed fork() attempts will be logged. This could suggest a fork bomb, or
someone attempting to overstep their process limit. It’s a good idea to say Y here.
Set*id logging (CONFIG_GRKERNSEC_SUID) [N/y/?] Press Enter
This Grsecurity option allows us to enable the set*id logging protection on the system. If you
say Y here, all set*id() calls will be logged. Enabling this security option could produce a lot of
logs on an active system that run some services that use set*id() calls to operate. Mailman,
Exim, Sendmail are known to software that uses many set*id() calls. Also, we already have
other security programs doing the same job like sXid, therefore we don’t really need to enable
this option. It is your’s to decide if you really need it or not. Personally, I disable this option by
saying N here and use sXid to achieve the same result.
Log set*ids to root (CONFIG_GRKERNSEC_SUID_ROOT) [N/y/?] y
This Grsecurity option allows us to enable the log set*ids to root protection on the system. If
you say Y here, only set*id() calls where a user is changing to the GID or UID of the root user
will be logged. Such information could be useful when detecting a possible intrusion attempt. This
option will produce smaller logs than logging all calls; therefore it’s a good idea to say Y here.
Time change logging (CONFIG_GRKERNSEC_TIME) [N/y/?] y
This Grsecurity option allows us to enable the time change logging protection on the system. If
you say Y here, any changes of the system clock will be logged. It’s a good idea to say Y here.
*
* Executable Protections
*
Exec process limiting (CONFIG_GRKERNSEC_EXECVE) [N/y/?] y
This Grsecurity option allows us to enable the exec process limiting protection on the system.
If you say Y here, users with a resource limit on processes will have the value checked during
execve() calls (execution of program). It’s really a good idea to say Y here.
176](https://image.slidesharecdn.com/securingoptimizinglinuxthehackingsolutionv-131209075405-phpapp02/85/Securing-Optimizing-Linux-the-Hacking-Solution-v-3-0-176-320.jpg)
![Kernel Security & Optimization 0
CHAPTER 6
Dmesg(8) restriction (CONFIG_GRKERNSEC_DMESG) [N/y/?] y
This Grsecurity option allows us to enable the dmesg restriction protection on the system. If
you say Y here, non-root users will not be able to use dmesg(8) to view up to the last 4kb of
messages in the kernel's log buffer. Again, it’s really a good idea to say Y here.
Randomized PIDs (CONFIG_GRKERNSEC_RANDPID) [N/y/?] y
This Grsecurity option allows us to enable the randomized PIDs protection on the system. If
you say Y here, all PIDs created on the system will be pseudo-randomly generated. This is
extremely effective to disallow an attacker from guessing pids of daemons, etc. It’s a good idea to
say Y here.
Altered default IPC permissions (CONFIG_GRKERNSEC_IPC) [N/y/?] Press Enter
This Grsecurity option allows us to enable the altered default IPC permissions protection on
the system. If you say Y here, the default permissions for IPC objects will be set based on the file
system umask of the user creating the object. This is a good security feature but unfortunately, it
is known to break software like Apache. Therefore we say N here.
Limit uid/gid changes to root (CONFIG_GRKERNSEC_TTYROOT) [N/y/?] y
This Grsecurity option allows us to enable the limit UID/GID changes to root protection on the
system. If you say Y here, you will be able choose from three options that will allow you to restrict
access to the root account by console type. Therefore we say Y here.
Deny physical consoles (tty) (CONFIG_GRKERNSEC_TTYROOT_PHYS) [N/y/?] Press
Enter
This Grsecurity option allows us to enable the deny physical consoles (tty) protection on the
system. If you say Y here, access to root from physical consoles will be denied. This is only
recommended for rare cases where you will never need to be physically at the machine. For most
of us, this is not the case and we have to say N here.
Deny serial consoles (ttyS) (CONFIG_GRKERNSEC_TTYROOT_SERIAL) [N/y/?] y
This Grsecurity option allows us to enable deny serial consoles (ttyS) protection on the
system. If you say Y here, access to root from serial consoles will be denied. Most people can say
Y here, since most don't use serial devices for their console access.
Deny pseudo consoles (pty) (CONFIG_GRKERNSEC_TTYROOT_PSEUDO) [N/y/?] Press
Enter
This Grsecurity option allows us to enable the deny pseudo consoles (pty) protection on the
system. If you say Y here, access to root from pseudo consoles will be denied. Pseudo consoles
include consoles from telnet, ssh, or any other kind of interactive shell initiated from the
network. In general, most of us use at least SSH to make a remote connection. Therefore we
have to say N here, if we want to continue to use SSH for secure remote connection.
Fork-bomb protection (CONFIG_GRKERNSEC_FORKBOMB) [N/y/?] y
This Grsecurity option allows us to enable fork-bomb protection on the system. If you say Y
here, you will be able to configure a group to add to users on your system that you want to be
unable to fork-bomb the system. It’s a good idea to say Y here and chose in the next security
option the GID to run this protection with.
GID for restricted users (CONFIG_GRKERNSEC_FORKBOMB_GID) [1006] Press Enter
This Grsecurity option allows us to enable the GID for restricted users’ protection on the
system. Here we have to enter a GID number as the value, the default value is 1006 and we can
keep it by pressing the [Enter] key. It is important to note that this GID should be added to any
user for which the feature should be activated. See the next chapter of this book for more
information about the procedures to follow. At this time you only need to accept the default value.
177](https://image.slidesharecdn.com/securingoptimizinglinuxthehackingsolutionv-131209075405-phpapp02/85/Securing-Optimizing-Linux-the-Hacking-Solution-v-3-0-177-320.jpg)
![Kernel Security & Optimization 0
CHAPTER 6
Forks allowed per second (CONFIG_GRKERNSEC_FORKBOMB_SEC) [40] Press Enter
This Grsecurity option allows us to enable the forks allowed per second protection on the
system. This option is a continuation of the above forks options, here we have to enter the
maximum number of forks allowed per second, and the default setting should be fine for most
users.
Maximum processes allowed (CONFIG_GRKERNSEC_FORKBOMB_MAX) [20] 35
This Grsecurity option allows us to enable the maximum processes allowed on the system.
Here we have to enter the maximum number of processes users in the fork-bomb protected
group can run. We change the default value of 20 to become 35. 35 is the number you have set
into the /etc/security/limit.conf file. Please see what is set into your limit.conf file
and report it here. In general, 35 is a good value to go with.
Trusted path execution (CONFIG_GRKERNSEC_TPE) [N/y/?] y
This Grsecurity option allows us to enable trusted path execution protection on the system. If
you say Y here, you will be able to choose a GID to add to the supplementary groups of users
you want to mark as "untrusted." These users will not be able to execute any files that are not in
root-owned directories writeable only by root. It’s a good idea to say Y here.
Glibc protection (CONFIG_GRKERNSEC_TPE_GLIBC) [N/y/?] y
This Grsecurity option allows us to enable the glibc protection on the system. If you say Y
here, all non-root users executing any files while glibc specific environment variables such as
LD_PRELOAD are set, will have their environment cleared of these variables, since they could be
used to evade the trusted path execution protection. It also protects against evasion through
executing the dynamic linker to run a rogue binary. It is highly recommended you say Y here.
Partially restrict non-root users (CONFIG_GRKERNSEC_TPE_ALL) [N/y/?] y
This Grsecurity option allows us to enable the partially restrict non-root users protection on the
system. If you say Y here, All non-root users other than the ones in the group specified in the
main TPE option will only be allowed to execute files in directories they own that are not group or
world-writeable, or in directories owned by root and writeable only by root. It’s a good idea to say
Y here.
GID for untrusted users: (CONFIG_GRKERNSEC_TPE_GID) [1005] Press Enter
This Grsecurity option allows us to enable the GID for untrusted user’s protection on the
system. Here we have to enter a GID number as the value, the default value is 1005 and we can
keep it by pressing the [Enter] key. It is important to note that this GID should be added to any
user for which the feature should be activated. See the next chapter of this book for more
information about the procedures to follow. At this time you only need to accept the default value.
Restricted ptrace (CONFIG_GRKERNSEC_PTRACE) [N/y/?] y
This Grsecurity option allows us to enable the restricted ptrace protection on the system. If
you say Y here, no one but root will be able to ptrace processes. Tracing syscalls inside the
kernel will also be disabled. It’s a good idea to say Y here.
Allow ptrace for group (CONFIG_GRKERNSEC_PTRACE_GROUP) [N/y/?] Press Enter
This Grsecurity option allows us to enable the allow ptrace for group protection on the system.
If you say Y here, you will be able to choose a GID of users will be able to ptrace. Remember
that ptraces are special operations performed when programs like strace or gdb are run for
debugging purpose. Since these kind of program should in general be run on development server
and by a root user only, we can safety say N here.
178](https://image.slidesharecdn.com/securingoptimizinglinuxthehackingsolutionv-131209075405-phpapp02/85/Securing-Optimizing-Linux-the-Hacking-Solution-v-3-0-178-320.jpg)
![Kernel Security & Optimization 0
CHAPTER 6
*
* Network Protections
*
Randomized IP IDs (CONFIG_GRKERNSEC_RANDID) [N/y/?] y
This Grsecurity option allows us to enable the allow randomized IP IDs protection on the
system. If you say Y here, the entire ID field on all outgoing packets will be randomized. This
hinders OS fingerprinters and keeps your machine from being used as a bounce for an
untraceable portscan. It’s a good idea to say Y here.
Randomized TCP source ports (CONFIG_GRKERNSEC_RANDSRC) [N/y/?] y
This Grsecurity option allows us to enable the randomized TCP source ports protection on the
system. If you say Y here, situations where a source port is generated on the fly for the TCP
protocol (ie. with connect() ) will be altered so that the source port is generated at random,
instead of a simple incrementing algorithm. It’s a good idea to say Y here.
Randomized RPC XIDs (CONFIG_GRKERNSEC_RANDRPC) [N/y/?] y
This Grsecurity option allows us to enable the randomized RPC XIDs protection on the
system. If you say Y here, the method of determining XIDs for RPC requests will be randomized,
instead of using linux's default behavior of simply incrementing the XID. This allows us to have a
more secure RPC connection on the system. It’s a good idea to say Y here.
Altered Ping IDs (CONFIG_GRKERNSEC_RANDPING) [N/y/?] y
This Grsecurity option allows us to enable the altered Ping IDs protection on the system. If you
say Y here, the way Linux handles echo replies will be changed so that the reply uses an ID equal
to the ID of the echo request. This will help in confusing OS detection. It’s a good idea to say Y
here.
Randomized TTL (CONFIG_GRKERNSEC_RANDTTL) [N/y/?] y
This Grsecurity option allows us to enable the randomized TTL protection on the system. If
you say Y here, your TTL (time to live) for packets will be set at random, with a base of the
sysctl ttl default, to further confuse OS detection. It’s a good idea to say Y here.
Socket restrictions (CONFIG_GRKERNSEC_SOCKET) [N/y/?] y
This Grsecurity option allows us to enable the socket restrictions protection on the system. If
you say Y here, you will be able to choose from three options related to socket protection on the
server. From these three available security options, you’ll have to choose the one that best fits
your requirements. Therefore, it’s a good idea to say Y here since we have to choose one of the
three available security options for our needs.
Deny any sockets to group (CONFIG_GRKERNSEC_SOCKET_ALL) [N/y/?] y
This Grsecurity option allows us to enable the socket restrictions protection on the system. If
you say Y here, you will be able to choose a GID of whose users will be unable to connect to
other hosts from your machine or run server applications from your machine. This is the security
option that we’ll choose. Say Y here.
GID to deny all sockets for: (CONFIG_GRKERNSEC_SOCKET_ALL_GID) [1004] Press
Enter
This Grsecurity option allows us to enable the GID to deny all sockets protection on the
system. Here we have to enter a GID number as the value, the default value is 1004 and we can
keep it by pressing the [Enter] key. It is important to note that this GID should be added to any
user for which the feature should be activated. See the next chapter of this book for more
information about the procedures to follow. At this time you only need to accept the default value.
179](https://image.slidesharecdn.com/securingoptimizinglinuxthehackingsolutionv-131209075405-phpapp02/85/Securing-Optimizing-Linux-the-Hacking-Solution-v-3-0-179-320.jpg)
![Kernel Security & Optimization 0
CHAPTER 6
Deny client sockets to group (CONFIG_GRKERNSEC_SOCKET_CLIENT) [N/y/?] Press
Enter
This Grsecurity option allows us to enable the deny client sockets to group protection on the
system. If you say Y here, you will be able to choose a GID of whose users will be unable to
connect to other hosts from your machine, but will be able to run servers. We have already
chosen the above option that enables socket protection on both ways (users cannot connect to
other hosts or run server applications from our machine), therefore we don’t need to say Y here.
Say N here.
Deny server sockets to group (CONFIG_GRKERNSEC_SOCKET_SERVER) [N/y/?] Press
Enter
This Grsecurity option allows us to enable the deny server sockets to group protection on the
system. If you say Y here, you will be able to choose a GID of whose users will be unable to run
server applications from your machine. As for the above option, we already have chosen the first
option that enable socket protection on both way (users cannot connect to other hosts or run
server applications from our machine), therefore we don’t need to say Y here. Say N here.
*
* Sysctl support
*
Sysctl support (CONFIG_GRKERNSEC_SYSCTL) [N/y/?] Press Enter
This Grsecurity option allows us to enable Grsecurity sysctl support protection on the
system. If you say Y here, you will be able to change the options that Grsecurity runs with at
bootup, without having to recompile your kernel. You can echo values to files in
/proc/sys/kernel/grsecurity to enable (1) or disable (0) various features. Enabling this
option will reduce the effectiveness of the added security of the Grsecurity patch, therefore we
say N here.
*
* Miscellaneous Features
*
Seconds in between log messages(minimum) (CONFIG_GRKERNSEC_FLOODTIME) [30]
Press Enter
This Grsecurity option allows us to enable the seconds in between log messages protection
on the system. This option allows you to enforce the number of seconds between Grsecurity
log messages. The default should be suitable for most people. Just press the [Enter] key here
to accept the default value.
BSD-style coredumps (CONFIG_GRKERNSEC_COREDUMP) [N/y/?] y
This Grsecurity option allows us to enable the BSD-style coredumps protection on the
system. If you say Y here, Linux will use a style similar to BSD for coredumps, core.processname.
Not a security feature, just a useful one. Say Y here.
*** End of Linux kernel configuration.
*** Check the top-level Makefile for additional configuration.
*** Next, you must run 'make dep'.
180](https://image.slidesharecdn.com/securingoptimizinglinuxthehackingsolutionv-131209075405-phpapp02/85/Securing-Optimizing-Linux-the-Hacking-Solution-v-3-0-180-320.jpg)
![Kernel Security & Optimization 0
CHAPTER 6
Modularized kernel configuration
Building kernel with modules (Modularized kernel) has some advantages. It allows easy
portability between different Linux systems, since you can choose and build different parts of the
kernel as a module and load that segment of code on demand. Below we show you the
configuration of Modularized kernel, which is to compile some needed codes and drivers as
a module into the kernel by answering the different questions using y, n or m. As for the previous
Monolithic kernel configuration, don’t forget to only compile code that you need and use.
A new kernel is very specific to your computer hardware, in the Modularized kernel
configuration part below; we assume the following hardware for our example. Of course you must
change them to fit your system components.
1 Pentium-III 667 MHz (i686) processor
1 Motherboard Asus P3V4X Pro 133Mhz EIDE
1 Hard Disk Ultra ATA/100 EIDE
1 Chipset Apollo Pro133A
1 CD-ROM ATAPI IDE
1 Floppy Disk
2 Ethernet Cards 3COM 3c597 PCI 10/100
1 Mouse PS/2
If you don’t want some options listed in the Modularized kernel configuration that I enable by
default, answer n (for no) instead of y (for yes) or m (for modularized if possible) to the related
questions. If you want some other options that I disable, then answer y or m instead of n.
rm -f include/asm
( cd include ; ln -sf asm-i386 asm)
/bin/sh scripts/Configure arch/i386/config.in
#
# Using defaults found in arch/i386/defconfig
#
*
* Code maturity level options
*
Prompt for development and/or incomplete code/drivers (CONFIG_EXPERIMENTAL) [N/y/?] Press
Enter
*
* Loadable module support
*
Enable loadable module support (CONFIG_MODULES) [Y/n/?] Press Enter
Set version information on all module symbols (CONFIG_MODVERSIONS) [Y/n/?] n
Kernel module loader (CONFIG_KMOD) [Y/n/?] Press Enter
*
* Processor type and features
*
Processor family (386, 486, 586/K5/5x86/6x86/6x86MX, Pentium-Classic, Pentium-MMX,
Pentium-Pro/Celeron/Pentium-II, Pentium-III/Celeron(Coppermine), Pentium-4, K6/K6-II/K6III, Athlon/Duron/K7, Elan, Crusoe, Winchip-C6, Winchip-2, Winchip-2A/Winchip-3,
CyrixIII/C3) [Pentium-III/Celeron(Coppermine)] Press Enter
Toshiba Laptop support (CONFIG_TOSHIBA) [N/y/m/?] Press Enter
Dell laptop support (CONFIG_I8K) [N/y/m/?] Press Enter
/dev/cpu/microcode - Intel IA32 CPU microcode support (CONFIG_MICROCODE) [N/y/m/?] m
/dev/cpu/*/msr - Model-specific register support (CONFIG_X86_MSR) [N/y/m/?] m
/dev/cpu/*/cpuid - CPU information support (CONFIG_X86_CPUID) [N/y/m/?] m
High Memory Support (off, 4GB, 64GB) [off] Press Enter
Math emulation (CONFIG_MATH_EMULATION) [N/y/?] Press Enter
MTRR (Memory Type Range Register) support (CONFIG_MTRR) [N/y/?] Press Enter
Symmetric multi-processing support (CONFIG_SMP) [Y/n/?] n
Local APIC support on uniprocessors (CONFIG_X86_UP_APIC) [N/y/?] (NEW) y
IO-APIC support on uniprocessors (CONFIG_X86_UP_IOAPIC) [N/y/?] (NEW) y
*
* General setup
181](https://image.slidesharecdn.com/securingoptimizinglinuxthehackingsolutionv-131209075405-phpapp02/85/Securing-Optimizing-Linux-the-Hacking-Solution-v-3-0-181-320.jpg)
![Kernel Security & Optimization 0
CHAPTER 6
*
Networking support (CONFIG_NET) [Y/n/?] Press Enter
PCI support (CONFIG_PCI) [Y/n/?] Press Enter
PCI access mode (BIOS, Direct, Any) [Any] Press Enter
PCI device name database (CONFIG_PCI_NAMES) [Y/n/?] n
EISA support (CONFIG_EISA) [N/y/?] Press Enter
MCA support (CONFIG_MCA) [N/y/?] Press Enter
Support for hot-pluggable devices (CONFIG_HOTPLUG) [Y/n/?] n
System V IPC (CONFIG_SYSVIPC) [Y/n/?] Press Enter
BSD Process Accounting (CONFIG_BSD_PROCESS_ACCT) [N/y/?] Press Enter
Sysctl support (CONFIG_SYSCTL) [Y/n/?] Press Enter
Kernel core (/proc/kcore) format (ELF, A.OUT) [ELF] Press Enter
Kernel support for a.out binaries (CONFIG_BINFMT_AOUT) [Y/m/n/?] m
Kernel support for ELF binaries (CONFIG_BINFMT_ELF) [Y/m/n/?] Press Enter
Kernel support for MISC binaries (CONFIG_BINFMT_MISC) [Y/m/n/?] m
Power Management support (CONFIG_PM) [Y/n/?] n
*
* Memory Technology Devices (MTD)
*
Memory Technology Device (MTD) support (CONFIG_MTD) [N/y/m/?] Press Enter
*
* Parallel port support
*
Parallel port support (CONFIG_PARPORT) [N/y/m/?] Press Enter
*
* Plug and Play configuration
*
Plug and Play support (CONFIG_PNP) [Y/m/n/?] n
*
* Block devices
*
Normal PC floppy disk support (CONFIG_BLK_DEV_FD) [Y/m/n/?] Press Enter
XT hard disk support (CONFIG_BLK_DEV_XD) [N/y/m/?] Press Enter
Compaq SMART2 support (CONFIG_BLK_CPQ_DA) [N/y/m/?] Press Enter
Compaq Smart Array 5xxx support (CONFIG_BLK_CPQ_CISS_DA) [N/y/m/?] Press Enter
Mylex DAC960/DAC1100 PCI RAID Controller support (CONFIG_BLK_DEV_DAC960) [N/y/m/?] Press
Enter
Loopback device support (CONFIG_BLK_DEV_LOOP) [N/y/m/?] Press Enter
Network block device support (CONFIG_BLK_DEV_NBD) [N/y/m/?] Press Enter
RAM disk support (CONFIG_BLK_DEV_RAM) [N/y/m/?] Press Enter
*
* Multi-device support (RAID and LVM)
*
Multiple devices driver support (RAID and LVM) (CONFIG_MD) [N/y/?] Press Enter
*
* Networking options
*
Packet socket (CONFIG_PACKET) [Y/m/n/?] Press Enter
Packet socket: mmapped IO (CONFIG_PACKET_MMAP) [N/y/?] y
Netlink device emulation (CONFIG_NETLINK_DEV) [N/y/m/?] (NEW) m
Network packet filtering (replaces ipchains) (CONFIG_NETFILTER) [N/y/?] y
Network packet filtering debugging (CONFIG_NETFILTER_DEBUG) [N/y/?] (NEW) y
Socket Filtering (CONFIG_FILTER) [N/y/?] Press Enter
Unix domain sockets (CONFIG_UNIX) [Y/m/n/?] Press Enter
TCP/IP networking (CONFIG_INET) [Y/n/?] Press Enter
IP: multicasting (CONFIG_IP_MULTICAST) [Y/n/?] n
IP: advanced router (CONFIG_IP_ADVANCED_ROUTER) [N/y/?] Press Enter
IP: kernel level autoconfiguration (CONFIG_IP_PNP) [N/y/?] Press Enter
IP: tunneling (CONFIG_NET_IPIP) [N/y/m/?] Press Enter
IP: GRE tunnels over IP (CONFIG_NET_IPGRE) [N/y/m/?] Press Enter
IP: TCP Explicit Congestion Notification support (CONFIG_INET_ECN) [N/y/?] Press Enter
IP: TCP syncookie support (disabled default) (CONFIG_SYN_COOKIES) [N/y/?] y
*
*
IP: Netfilter Configuration
*
Connection tracking (required for masq/NAT) (CONFIG_IP_NF_CONNTRACK) [N/y/m/?] (NEW) m
FTP protocol support (CONFIG_IP_NF_FTP) [N/m/?] (NEW) m
IRC protocol support (CONFIG_IP_NF_IRC) [N/m/?] (NEW) m
IP tables support (required for filtering/masq/NAT) (CONFIG_IP_NF_IPTABLES) [N/y/m/?]
(NEW) m
limit match support (CONFIG_IP_NF_MATCH_LIMIT) [N/m/?] (NEW) m
182](https://image.slidesharecdn.com/securingoptimizinglinuxthehackingsolutionv-131209075405-phpapp02/85/Securing-Optimizing-Linux-the-Hacking-Solution-v-3-0-182-320.jpg)
![Kernel Security & Optimization 0
CHAPTER 6
MAC address match support (CONFIG_IP_NF_MATCH_MAC) [N/m/?] (NEW) m
netfilter MARK match support (CONFIG_IP_NF_MATCH_MARK) [N/m/?] (NEW) m
Multiple port match support (CONFIG_IP_NF_MATCH_MULTIPORT) [N/m/?] (NEW) m
TOS match support (CONFIG_IP_NF_MATCH_TOS) [N/m/?] (NEW) m
AH/ESP match support (CONFIG_IP_NF_MATCH_AH_ESP) [N/m/?] (NEW) m
LENGTH match support (CONFIG_IP_NF_MATCH_LENGTH) [N/m/?] (NEW) m
TTL match support (CONFIG_IP_NF_MATCH_TTL) [N/m/?] (NEW) m
tcpmss match support (CONFIG_IP_NF_MATCH_TCPMSS) [N/m/?] (NEW) m
Connection state match support (CONFIG_IP_NF_MATCH_STATE) [N/m/?] (NEW) m
Packet filtering (CONFIG_IP_NF_FILTER) [N/m/?] (NEW) m
REJECT target support (CONFIG_IP_NF_TARGET_REJECT) [N/m/?] (NEW) m
Full NAT (CONFIG_IP_NF_NAT) [N/m/?] (NEW) m
MASQUERADE target support (CONFIG_IP_NF_TARGET_MASQUERADE) [N/m/?] (NEW) m
REDIRECT target support (CONFIG_IP_NF_TARGET_REDIRECT) [N/m/?] (NEW) m
Packet mangling (CONFIG_IP_NF_MANGLE) [N/m/?] (NEW) m
TOS target support (CONFIG_IP_NF_TARGET_TOS) [N/m/?] (NEW) m
MARK target support (CONFIG_IP_NF_TARGET_MARK) [N/m/?] (NEW) m
LOG target support (CONFIG_IP_NF_TARGET_LOG) [N/m/?] (NEW) m
TCPMSS target support (CONFIG_IP_NF_TARGET_TCPMSS) [N/m/?] (NEW) m
ipchains (2.2-style) support (CONFIG_IP_NF_COMPAT_IPCHAINS) [N/y/m/?] (NEW) Press Enter
ipfwadm (2.0-style) support (CONFIG_IP_NF_COMPAT_IPFWADM) [N/y/m/?] (NEW) Press Enter
*
*
*
The IPX protocol (CONFIG_IPX) [N/y/m/?] Press Enter
Appletalk protocol support (CONFIG_ATALK) [N/y/m/?] Press Enter
DECnet Support (CONFIG_DECNET) [N/y/m/?] Press Enter
802.1d Ethernet Bridging (CONFIG_BRIDGE) [N/y/m/?] Press Enter
*
* QoS and/or fair queueing
*
QoS and/or fair queueing (CONFIG_NET_SCHED) [N/y/?] Press Enter
*
* Telephony Support
*
Linux telephony support (CONFIG_PHONE) [N/y/m/?] Press Enter
*
* ATA/IDE/MFM/RLL support
*
ATA/IDE/MFM/RLL support (CONFIG_IDE) [Y/m/n/?] Press Enter
*
* IDE, ATA and ATAPI Block devices
*
Enhanced IDE/MFM/RLL disk/cdrom/tape/floppy support (CONFIG_BLK_DEV_IDE) [Y/m/n/?] Press
Enter
*
* Please see Documentation/ide.txt for help/info on IDE drives
*
Use old disk-only driver on primary interface (CONFIG_BLK_DEV_HD_IDE) [N/y/?] Press
Enter
Include IDE/ATA-2 DISK support (CONFIG_BLK_DEV_IDEDISK) [Y/m/n/?] Press Enter
Use multi-mode by default (CONFIG_IDEDISK_MULTI_MODE) [Y/n/?] n
Include IDE/ATAPI CDROM support (CONFIG_BLK_DEV_IDECD) [Y/m/n/?] Press Enter
Include IDE/ATAPI TAPE support (CONFIG_BLK_DEV_IDETAPE) [N/y/m/?] Press Enter
Include IDE/ATAPI FLOPPY support (CONFIG_BLK_DEV_IDEFLOPPY) [N/y/m/?] Press Enter
SCSI emulation support (CONFIG_BLK_DEV_IDESCSI) [N/y/m/?] Press Enter
*
* IDE chipset support/bugfixes
*
CMD640 chipset bugfix/support (CONFIG_BLK_DEV_CMD640) [Y/n/?] n
RZ1000 chipset bugfix/support (CONFIG_BLK_DEV_RZ1000) [Y/n/?] n
Generic PCI IDE chipset support (CONFIG_BLK_DEV_IDEPCI) [Y/n/?] Press Enter
Sharing PCI IDE interrupts support (CONFIG_IDEPCI_SHARE_IRQ) [Y/n/?] Press Enter
Generic PCI bus-master DMA support (CONFIG_BLK_DEV_IDEDMA_PCI) [Y/n/?] Press Enter
Boot off-board chipsets first support (CONFIG_BLK_DEV_OFFBOARD) [N/y/?] Press Enter
Use PCI DMA by default when available (CONFIG_IDEDMA_PCI_AUTO) [Y/n/?] Press Enter
AEC62XX chipset support (CONFIG_BLK_DEV_AEC62XX) [N/y/?] Press Enter
ALI M15x3 chipset support (CONFIG_BLK_DEV_ALI15X3) [N/y/?] Press Enter
AMD Viper support (CONFIG_BLK_DEV_AMD74XX) [N/y/?] Press Enter
CMD64X chipset support (CONFIG_BLK_DEV_CMD64X) [N/y/?] Press Enter
CY82C693 chipset support (CONFIG_BLK_DEV_CY82C693) [N/y/?] Press Enter
183](https://image.slidesharecdn.com/securingoptimizinglinuxthehackingsolutionv-131209075405-phpapp02/85/Securing-Optimizing-Linux-the-Hacking-Solution-v-3-0-183-320.jpg)
![Kernel Security & Optimization 0
CHAPTER 6
Cyrix CS5530 MediaGX chipset support (CONFIG_BLK_DEV_CS5530) [N/y/?] Press Enter
HPT34X chipset support (CONFIG_BLK_DEV_HPT34X) [N/y/?] Press Enter
HPT366 chipset support (CONFIG_BLK_DEV_HPT366) [N/y/?] Press Enter
Intel PIIXn chipsets support (CONFIG_BLK_DEV_PIIX) [Y/n/?] Press Enter
PIIXn Tuning support (CONFIG_PIIX_TUNING) [Y/n/?] Press Enter
NS87415 chipset support (EXPERIMENTAL) (CONFIG_BLK_DEV_NS87415) [N/y/?] Press Enter
PROMISE PDC202{46|62|65|67|68} support (CONFIG_BLK_DEV_PDC202XX) [N/y/?] Press Enter
ServerWorks OSB4/CSB5 chipsets support (CONFIG_BLK_DEV_SVWKS) [N/y/?] Press Enter
SiS5513 chipset support (CONFIG_BLK_DEV_SIS5513) [N/y/?] Press Enter
SLC90E66 chipset support (CONFIG_BLK_DEV_SLC90E66) [N/y/?] Press Enter
Tekram TRM290 chipset support (EXPERIMENTAL) (CONFIG_BLK_DEV_TRM290) [N/y/?] Press
Enter
VIA82CXXX chipset support (CONFIG_BLK_DEV_VIA82CXXX) [N/y/?] y
Other IDE chipset support (CONFIG_IDE_CHIPSETS) [N/y/?] Press Enter
IGNORE word93 Validation BITS (CONFIG_IDEDMA_IVB) [N/y/?] Press Enter
*
* SCSI support
*
SCSI support (CONFIG_SCSI) [Y/m/n/?] n
*
* Fusion MPT device support
*
*
* I2O device support
*
I2O support (CONFIG_I2O) [N/y/m/?] Press Enter
*
* Network device support
*
Network device support (CONFIG_NETDEVICES) [Y/n/?] Press Enter
*
* ARCnet devices
*
ARCnet support (CONFIG_ARCNET) [N/y/m/?] Press Enter
Dummy net driver support (CONFIG_DUMMY) [M/n/y/?] Press Enter
Bonding driver support (CONFIG_BONDING) [N/y/m/?] Press Enter
EQL (serial line load balancing) support (CONFIG_EQUALIZER) [N/y/m/?] Press Enter
Universal TUN/TAP device driver support (CONFIG_TUN) [N/y/m/?] Press Enter
*
* Ethernet (10 or 100Mbit)
*
Ethernet (10 or 100Mbit) (CONFIG_NET_ETHERNET) [Y/n/?] Press Enter
Sun Happy Meal 10/100baseT support (CONFIG_HAPPYMEAL) [N/y/m/?] Press Enter
Sun GEM support (CONFIG_SUNGEM) [N/y/m/?] Press Enter
3COM cards (CONFIG_NET_VENDOR_3COM) [N/y/?] y
3c501 "EtherLink" support (CONFIG_EL1) [N/y/m/?] (NEW) Press Enter
3c503 "EtherLink II" support (CONFIG_EL2) [N/y/m/?] (NEW) Press Enter
3c505 "EtherLink Plus" support (CONFIG_ELPLUS) [N/y/m/?] (NEW) Press Enter
3c509/3c529 (MCA)/3c579 "EtherLink III" support (CONFIG_EL3) [N/y/m/?] (NEW) Press
Enter
3c515 ISA "Fast EtherLink" (CONFIG_3C515) [N/y/m/?] (NEW) Press Enter
3c590/3c900 series (592/595/597) "Vortex/Boomerang" support (CONFIG_VORTEX) [N/y/m/?]
(NEW) y
AMD LANCE and PCnet (AT1500 and NE2100) support (CONFIG_LANCE) [N/y/m/?] Press Enter
Western Digital/SMC cards (CONFIG_NET_VENDOR_SMC) [N/y/?] Press Enter
Racal-Interlan (Micom) NI cards (CONFIG_NET_VENDOR_RACAL) [N/y/?] Press Enter
DEPCA, DE10x, DE200, DE201, DE202, DE422 support (CONFIG_DEPCA) [N/y/m/?] Press Enter
HP 10/100VG PCLAN (ISA, EISA, PCI) support (CONFIG_HP100) [N/y/m/?] Press Enter
Other ISA cards (CONFIG_NET_ISA) [N/y/?] Press Enter
EISA, VLB, PCI and on board controllers (CONFIG_NET_PCI) [Y/n/?] n
Pocket and portable adapters (CONFIG_NET_POCKET) [N/y/?] Press Enter
*
* Ethernet (1000 Mbit)
*
Alteon AceNIC/3Com 3C985/NetGear GA620 Gigabit support (CONFIG_ACENIC) [N/y/m/?] Press
Enter
D-Link DL2000-based Gigabit Ethernet support (CONFIG_DL2K) [N/y/m/?] Press Enter
National Semiconduct DP83820 support (CONFIG_NS83820) [N/y/m/?] Press Enter
Packet Engines Hamachi GNIC-II support (CONFIG_HAMACHI) [N/y/m/?] Press Enter
SysKonnect SK-98xx support (CONFIG_SK98LIN) [N/y/m/?] Press Enter
FDDI driver support (CONFIG_FDDI) [N/y/?] Press Enter
184](https://image.slidesharecdn.com/securingoptimizinglinuxthehackingsolutionv-131209075405-phpapp02/85/Securing-Optimizing-Linux-the-Hacking-Solution-v-3-0-184-320.jpg)
![Kernel Security & Optimization 0
CHAPTER 6
PPP (point-to-point protocol) support (CONFIG_PPP) [N/y/m/?] Press Enter
SLIP (serial line) support (CONFIG_SLIP) [N/y/m/?] Press Enter
*
* Wireless LAN (non-hamradio)
*
Wireless LAN (non-hamradio) (CONFIG_NET_RADIO) [N/y/?] Press Enter
*
* Token Ring devices
*
Token Ring driver support (CONFIG_TR) [N/y/?] Press Enter
Fibre Channel driver support (CONFIG_NET_FC) [N/y/?] Press Enter
*
* Wan interfaces
*
Wan interfaces support (CONFIG_WAN) [N/y/?] Press Enter
*
* Amateur Radio support
*
Amateur Radio support (CONFIG_HAMRADIO) [N/y/?] Press Enter
*
* IrDA (infrared) support
*
IrDA subsystem support (CONFIG_IRDA) [N/y/m/?] Press Enter
*
* ISDN subsystem
*
ISDN support (CONFIG_ISDN) [N/y/m/?] Press Enter
*
* Old CD-ROM drivers (not SCSI, not IDE)
*
Support non-SCSI/IDE/ATAPI CDROM drives (CONFIG_CD_NO_IDESCSI) [N/y/?] Press Enter
*
* Input core support
*
Input core support (CONFIG_INPUT) [N/y/m/?] Press Enter
*
* Character devices
*
Virtual terminal (CONFIG_VT) [Y/n/?] Press Enter
Support for console on virtual terminal (CONFIG_VT_CONSOLE) [Y/n/?] Press Enter
Standard/generic (8250/16550 and compatible UARTs) serial support (CONFIG_SERIAL)
[Y/m/n/?] Press Enter
Support for console on serial port (CONFIG_SERIAL_CONSOLE) [N/y/?] Press Enter
Extended dumb serial driver options (CONFIG_SERIAL_EXTENDED) [N/y/?] Press Enter
Non-standard serial port support (CONFIG_SERIAL_NONSTANDARD) [N/y/?] Press Enter
Unix98 PTY support (CONFIG_UNIX98_PTYS) [Y/n/?] Press Enter
Maximum number of Unix98 PTYs in use (0-2048) (CONFIG_UNIX98_PTY_COUNT) [256] 128
*
* I2C support
*
I2C support (CONFIG_I2C) [N/y/m/?] Press Enter
*
* Mice
*
Bus Mouse Support (CONFIG_BUSMOUSE) [N/y/m/?] Press Enter
Mouse Support (not serial and bus mice) (CONFIG_MOUSE) [Y/m/n/?] n
*
* Joysticks
*
*
* Input core support is needed for gameports
*
*
* Input core support is needed for joysticks
*
QIC-02 tape support (CONFIG_QIC02_TAPE) [N/y/m/?] Press Enter
*
* Watchdog Cards
*
Watchdog Timer Support (CONFIG_WATCHDOG) [N/y/?] Press Enter
Intel i8x0 Random Number Generator support (CONFIG_INTEL_RNG) [N/y/m/?] Press Enter
185](https://image.slidesharecdn.com/securingoptimizinglinuxthehackingsolutionv-131209075405-phpapp02/85/Securing-Optimizing-Linux-the-Hacking-Solution-v-3-0-185-320.jpg)
![Kernel Security & Optimization 0
CHAPTER 6
/dev/nvram support (CONFIG_NVRAM) [N/y/m/?] Press Enter
Enhanced Real Time Clock Support (CONFIG_RTC) [N/y/m/?] Press Enter
Double Talk PC internal speech card support (CONFIG_DTLK) [N/y/m/?] Press Enter
Siemens R3964 line discipline (CONFIG_R3964) [N/y/m/?] Press Enter
Applicom intelligent fieldbus card support (CONFIG_APPLICOM) [N/y/m/?] Press Enter
*
* Ftape, the floppy tape device driver
*
Ftape (QIC-80/Travan) support (CONFIG_FTAPE) [N/y/m/?] Press Enter
/dev/agpgart (AGP Support) (CONFIG_AGP) [Y/m/n/?] n
Direct Rendering Manager (XFree86 DRI support) (CONFIG_DRM) [Y/n/?] n
ACP Modem (Mwave) support (CONFIG_MWAVE) [N/y/m/?] Press Enter
*
* Multimedia devices
*
Video For Linux (CONFIG_VIDEO_DEV) [N/y/m/?] Press Enter
*
* File systems
*
Quota support (CONFIG_QUOTA) [N/y/?] y
Kernel automounter support (CONFIG_AUTOFS_FS) [N/y/m/?] Press Enter
Kernel automounter version 4 support (also supports v3) (CONFIG_AUTOFS4_FS) [Y/m/n/?] n
Reiserfs support (CONFIG_REISERFS_FS) [N/y/m/?] Press Enter
Ext3 journalling file system support (EXPERIMENTAL) (CONFIG_EXT3_FS) [N/y/m/?] y
JBD (ext3) debugging support (CONFIG_JBD_DEBUG) [N/y/?] y
DOS FAT fs support (CONFIG_FAT_FS) [N/y/m/?] m
MSDOS fs support (CONFIG_MSDOS_FS) [N/y/m/?] m
VFAT (Windows-95) fs support (CONFIG_VFAT_FS) [N/y/m/?] m
Compressed ROM file system support (CONFIG_CRAMFS) [N/y/m/?] Press Enter
Virtual memory file system support (former shm fs) (CONFIG_TMPFS) [Y/n/?] Press Enter
Simple RAM-based file system support (CONFIG_RAMFS) [N/y/m/?] Press Enter
ISO 9660 CDROM file system support (CONFIG_ISO9660_FS) [Y/m/n/?] m
Microsoft Joliet CDROM extensions (CONFIG_JOLIET) [N/y/?] y
Transparent decompression extension (CONFIG_ZISOFS) [N/y/?] Press Enter
Minix fs support (CONFIG_MINIX_FS) [N/y/m/?] Press Enter
FreeVxFS file system support (VERITAS VxFS(TM) compatible) (CONFIG_VXFS_FS) [N/y/m/?]
Press Enter
NTFS file system support (read only) (CONFIG_NTFS_FS) [N/y/m/?] Press Enter
OS/2 HPFS file system support (CONFIG_HPFS_FS) [N/y/m/?] Press Enter
/proc file system support (CONFIG_PROC_FS) [Y/n/?] Press Enter
/dev/pts file system for Unix98 PTYs (CONFIG_DEVPTS_FS) [Y/n/?] Press Enter
ROM file system support (CONFIG_ROMFS_FS) [N/y/m/?] Press Enter
Second extended fs support (CONFIG_EXT2_FS) [Y/m/n/?] Press Enter
System V/Xenix/V7/Coherent file system support (CONFIG_SYSV_FS) [N/y/m/?] Press Enter
UDF file system support (read only) (CONFIG_UDF_FS) [N/y/m/?] Press Enter
UFS file system support (read only) (CONFIG_UFS_FS) [N/y/m/?] Press Enter
*
* Network File Systems
*
Coda file system support (advanced network fs) (CONFIG_CODA_FS) [N/y/m/?] Press Enter
NFS file system support (CONFIG_NFS_FS) [Y/m/n/?] n
NFS server support (CONFIG_NFSD) [Y/m/n/?] n
SMB file system support (to mount Windows shares etc.) (CONFIG_SMB_FS) [N/y/m/?] Press
Enter
NCP file system support (to mount NetWare volumes) (CONFIG_NCP_FS) [N/y/m/?] Press Enter
*
* Partition Types
*
Advanced partition selection (CONFIG_PARTITION_ADVANCED) [N/y/?] Press Enter
*
* Native Language Support
*
Default NLS Option (CONFIG_NLS_DEFAULT) [iso8859-1] (NEW) Press Enter
Codepage 437 (United States, Canada) (CONFIG_NLS_CODEPAGE_437) [N/y/m/?] (NEW) Press
Enter
Codepage 737 (Greek) (CONFIG_NLS_CODEPAGE_737) [N/y/m/?] (NEW) Press Enter
Codepage 775 (Baltic Rim) (CONFIG_NLS_CODEPAGE_775) [N/y/m/?] (NEW) Press Enter
Codepage 850 (Europe) (CONFIG_NLS_CODEPAGE_850) [N/y/m/?] (NEW) Press Enter
Codepage 852 (Central/Eastern Europe) (CONFIG_NLS_CODEPAGE_852) [N/y/m/?] (NEW) Press
Enter
Codepage 855 (Cyrillic) (CONFIG_NLS_CODEPAGE_855) [N/y/m/?] (NEW) Press Enter
186](https://image.slidesharecdn.com/securingoptimizinglinuxthehackingsolutionv-131209075405-phpapp02/85/Securing-Optimizing-Linux-the-Hacking-Solution-v-3-0-186-320.jpg)
![Kernel Security & Optimization 0
CHAPTER 6
Codepage 857 (Turkish) (CONFIG_NLS_CODEPAGE_857) [N/y/m/?] (NEW) Press Enter
Codepage 860 (Portuguese) (CONFIG_NLS_CODEPAGE_860) [N/y/m/?] (NEW) Press Enter
Codepage 861 (Icelandic) (CONFIG_NLS_CODEPAGE_861) [N/y/m/?] (NEW) Press Enter
Codepage 862 (Hebrew) (CONFIG_NLS_CODEPAGE_862) [N/y/m/?] (NEW) Press Enter
Codepage 863 (Canadian French) (CONFIG_NLS_CODEPAGE_863) [N/y/m/?] (NEW) Press Enter
Codepage 864 (Arabic) (CONFIG_NLS_CODEPAGE_864) [N/y/m/?] (NEW) Press Enter
Codepage 865 (Norwegian, Danish) (CONFIG_NLS_CODEPAGE_865) [N/y/m/?] (NEW) Press Enter
Codepage 866 (Cyrillic/Russian) (CONFIG_NLS_CODEPAGE_866) [N/y/m/?] (NEW) Press Enter
Codepage 869 (Greek) (CONFIG_NLS_CODEPAGE_869) [N/y/m/?] (NEW) Press Enter
Simplified Chinese charset (CP936, GB2312) (CONFIG_NLS_CODEPAGE_936) [N/y/m/?] (NEW)
Press Enter
Traditional Chinese charset (Big5) (CONFIG_NLS_CODEPAGE_950) [N/y/m/?] (NEW) Press Enter
Japanese charsets (Shift-JIS, EUC-JP) (CONFIG_NLS_CODEPAGE_932) [N/y/m/?] (NEW) Press
Enter
Korean charset (CP949, EUC-KR) (CONFIG_NLS_CODEPAGE_949) [N/y/m/?] (NEW) Press Enter
Thai charset (CP874, TIS-620) (CONFIG_NLS_CODEPAGE_874) [N/y/m/?] (NEW) Press Enter
Hebrew charsets (ISO-8859-8, CP1255) (CONFIG_NLS_ISO8859_8) [N/y/m/?] (NEW) Press Enter
Windows CP1250 (Slavic/Central European Languages) (CONFIG_NLS_CODEPAGE_1250) [N/y/m/?]
(NEW) Press Enter
Windows CP1251 (Bulgarian, Belarusian) (CONFIG_NLS_CODEPAGE_1251) [N/y/m/?] (NEW) Press
Enter
NLS ISO 8859-1 (Latin 1; Western European Languages) (CONFIG_NLS_ISO8859_1) [N/y/m/?]
(NEW) Press Enter
NLS ISO 8859-2 (Latin 2; Slavic/Central European Languages) (CONFIG_NLS_ISO8859_2)
[N/y/m/?] (NEW) Press Enter
NLS ISO 8859-3 (Latin 3; Esperanto, Galician, Maltese, Turkish) (CONFIG_NLS_ISO8859_3)
[N/y/m/?] (NEW) Press Enter
NLS ISO 8859-4 (Latin 4; old Baltic charset) (CONFIG_NLS_ISO8859_4) [N/y/m/?] (NEW)
Press Enter
NLS ISO 8859-5 (Cyrillic) (CONFIG_NLS_ISO8859_5) [N/y/m/?] (NEW) Press Enter
NLS ISO 8859-6 (Arabic) (CONFIG_NLS_ISO8859_6) [N/y/m/?] (NEW) Press Enter
NLS ISO 8859-7 (Modern Greek) (CONFIG_NLS_ISO8859_7) [N/y/m/?] (NEW) Press Enter
NLS ISO 8859-9 (Latin 5; Turkish) (CONFIG_NLS_ISO8859_9) [N/y/m/?] (NEW) Press Enter
NLS ISO 8859-13 (Latin 7; Baltic) (CONFIG_NLS_ISO8859_13) [N/y/m/?] (NEW) Press Enter
NLS ISO 8859-14 (Latin 8; Celtic) (CONFIG_NLS_ISO8859_14) [N/y/m/?] (NEW) Press Enter
NLS ISO 8859-15 (Latin 9; Western European Languages with Euro) (CONFIG_NLS_ISO8859_15)
[N/y/m/?] (NEW) Press Enter
NLS KOI8-R (Russian) (CONFIG_NLS_KOI8_R) [N/y/m/?] (NEW) Press Enter
NLS KOI8-U/RU (Ukrainian, Belarusian) (CONFIG_NLS_KOI8_U) [N/y/m/?] (NEW) Press Enter
NLS UTF8 (CONFIG_NLS_UTF8) [N/y/m/?] (NEW) Press Enter
*
* Console drivers
*
VGA text console (CONFIG_VGA_CONSOLE) [Y/n/?] Press Enter
Video mode selection support (CONFIG_VIDEO_SELECT) [N/y/?] Press Enter
*
* Sound
*
Sound card support (CONFIG_SOUND) [Y/m/n/?] n
*
* USB support
*
Support for USB (CONFIG_USB) [Y/m/n/?] n
*
* USB Controllers
*
*
* USB Device Class drivers
*
*
*
SCSI support is needed for USB Storage
*
*
* USB Human Interface Devices (HID)
*
*
*
Input core support is needed for USB HID
*
*
* USB Imaging devices
*
187](https://image.slidesharecdn.com/securingoptimizinglinuxthehackingsolutionv-131209075405-phpapp02/85/Securing-Optimizing-Linux-the-Hacking-Solution-v-3-0-187-320.jpg)
![Kernel Security & Optimization 0
CHAPTER 6
*
* USB Multimedia devices
*
*
*
Video4Linux support is needed for USB Multimedia device support
*
*
* USB Network adaptors
*
*
* USB port drivers
*
*
* USB Serial Converter support
*
*
* USB Miscellaneous drivers
*
*
* Kernel hacking
*
Kernel debugging (CONFIG_DEBUG_KERNEL) [N/y/?] Press Enter
*
* Grsecurity
*
Grsecurity (CONFIG_GRKERNSEC) [N/y/?] y
Security level (Low, Medium, High, Customized) [Customized] Press Enter
*
* Buffer Overflow Protection
*
Openwall non-executable stack (CONFIG_GRKERNSEC_STACK) [N/y/?] y
Gcc trampoline support (CONFIG_GRKERNSEC_STACK_GCC) [N/y/?] Press Enter
Read-only kernel memory (CONFIG_GRKERNSEC_KMEM) [N/y/?] y
*
* Access Control Lists
*
Grsecurity ACL system (CONFIG_GRKERNSEC_ACL) [N/y/?] y
ACL Debugging Messages (CONFIG_GR_DEBUG) [N/y/?] y
Extra ACL Debugging Messages (CONFIG_GR_SUPERDEBUG) [N/y/?] Press Enter
Denied capability logging (CONFIG_GRKERNSEC_ACL_CAPLOG) [N/y/?] y
Path to gradm (CONFIG_GRADM_PATH) [/sbin/gradm] Press Enter
Maximum tries before password lockout (CONFIG_GR_MAXTRIES) [3] 2
Time to wait after max password tries, in seconds (CONFIG_GR_TIMEOUT) [30] Press Enter
*
* Filesystem Protections
*
Proc restrictions (CONFIG_GRKERNSEC_PROC) [N/y/?] y
Restrict to user only (CONFIG_GRKERNSEC_PROC_USER) [N/y/?] y
Additional restrictions (CONFIG_GRKERNSEC_PROC_ADD) [N/y/?] y
Linking restrictions (CONFIG_GRKERNSEC_LINK) [N/y/?] y
FIFO restrictions (CONFIG_GRKERNSEC_FIFO) [N/y/?] y
Secure file descriptors (CONFIG_GRKERNSEC_FD) [N/y/?] y
Chroot jail restrictions (CONFIG_GRKERNSEC_CHROOT) [N/y/?] y
Restricted signals (CONFIG_GRKERNSEC_CHROOT_SIG) [N/y/?] y
Deny mounts (CONFIG_GRKERNSEC_CHROOT_MOUNT) [N/y/?] y
Deny double-chroots (CONFIG_GRKERNSEC_CHROOT_DOUBLE) [N/y/?] y
Enforce chdir("/") on all chroots (CONFIG_GRKERNSEC_CHROOT_CHDIR) [N/y/?] y
Deny (f)chmod +s (CONFIG_GRKERNSEC_CHROOT_CHMOD) [N/y/?] y
Deny mknod (CONFIG_GRKERNSEC_CHROOT_MKNOD) [N/y/?] y
Deny ptraces (CONFIG_GRKERNSEC_CHROOT_PTRACE) [N/y/?] y
Restrict priority changes (CONFIG_GRKERNSEC_CHROOT_NICE) [N/y/?] y
Capability restrictions within chroot (CONFIG_GRKERNSEC_CHROOT_CAPS) [N/y/?] Press Enter
Secure keymap loading (CONFIG_GRKERNSEC_KBMAP) [N/y/?] y
*
* Kernel Auditing
*
Single group for auditing (CONFIG_GRKERNSEC_AUDIT_GROUP) [N/y/?] Press Enter
Exec logging (CONFIG_GRKERNSEC_EXECLOG) [N/y/?] Press Enter
Log execs within chroot (CONFIG_GRKERNSEC_CHROOT_EXECLOG) [N/y/?] y
Chdir logging (CONFIG_GRKERNSEC_AUDIT_CHDIR) [N/y/?] Press Enter
188](https://image.slidesharecdn.com/securingoptimizinglinuxthehackingsolutionv-131209075405-phpapp02/85/Securing-Optimizing-Linux-the-Hacking-Solution-v-3-0-188-320.jpg)
![Kernel Security & Optimization 0
CHAPTER 6
(Un)Mount logging (CONFIG_GRKERNSEC_AUDIT_MOUNT) [N/y/?] Press Enter
IPC logging (CONFIG_GRKERNSEC_AUDIT_IPC) [N/y/?] y
Ptrace logging (CONFIG_GRKERNSEC_AUDIT_PTRACE) [N/y/?] Press Enter
Signal logging (CONFIG_GRKERNSEC_SIGNAL) [N/y/?] y
Fork failure logging (CONFIG_GRKERNSEC_FORKFAIL) [N/y/?] y
Set*id logging (CONFIG_GRKERNSEC_SUID) [N/y/?] Press Enter
Log set*ids to root (CONFIG_GRKERNSEC_SUID_ROOT) [N/y/?] y
Time change logging (CONFIG_GRKERNSEC_TIME) [N/y/?] y
*
* Executable Protections
*
Exec process limiting (CONFIG_GRKERNSEC_EXECVE) [N/y/?] y
Dmesg(8) restriction (CONFIG_GRKERNSEC_DMESG) [N/y/?] y
Randomized PIDs (CONFIG_GRKERNSEC_RANDPID) [N/y/?] y
Altered default IPC permissions (CONFIG_GRKERNSEC_IPC) [N/y/?] Press Enter
Limit uid/gid changes to root (CONFIG_GRKERNSEC_TTYROOT) [N/y/?] y
Deny physical consoles (tty) (CONFIG_GRKERNSEC_TTYROOT_PHYS) [N/y/?] Press Enter
Deny serial consoles (ttyS) (CONFIG_GRKERNSEC_TTYROOT_SERIAL) [N/y/?] y
Deny pseudo consoles (pty) (CONFIG_GRKERNSEC_TTYROOT_PSEUDO) [N/y/?] Press Enter
Fork-bomb protection (CONFIG_GRKERNSEC_FORKBOMB) [N/y/?] y
GID for restricted users (CONFIG_GRKERNSEC_FORKBOMB_GID) [1006] Press Enter
Forks allowed per second (CONFIG_GRKERNSEC_FORKBOMB_SEC) [40] Press Enter
Maximum processes allowed (CONFIG_GRKERNSEC_FORKBOMB_MAX) [20] 35
Trusted path execution (CONFIG_GRKERNSEC_TPE) [N/y/?] y
Glibc protection (CONFIG_GRKERNSEC_TPE_GLIBC) [N/y/?] y
Partially restrict non-root users (CONFIG_GRKERNSEC_TPE_ALL) [N/y/?] y
GID for untrusted users: (CONFIG_GRKERNSEC_TPE_GID) [1005] Press Enter
Restricted ptrace (CONFIG_GRKERNSEC_PTRACE) [N/y/?] y
Allow ptrace for group (CONFIG_GRKERNSEC_PTRACE_GROUP) [N/y/?] Press Enter
*
* Network Protections
*
Randomized IP IDs (CONFIG_GRKERNSEC_RANDID) [N/y/?] y
Randomized TCP source ports (CONFIG_GRKERNSEC_RANDSRC) [N/y/?] y
Randomized RPC XIDs (CONFIG_GRKERNSEC_RANDRPC) [N/y/?] y
Altered Ping IDs (CONFIG_GRKERNSEC_RANDPING) [N/y/?] y
Randomized TTL (CONFIG_GRKERNSEC_RANDTTL) [N/y/?] y
Socket restrictions (CONFIG_GRKERNSEC_SOCKET) [N/y/?] y
Deny any sockets to group (CONFIG_GRKERNSEC_SOCKET_ALL) [N/y/?] y
GID to deny all sockets for: (CONFIG_GRKERNSEC_SOCKET_ALL_GID) [1004] Press Enter
Deny client sockets to group (CONFIG_GRKERNSEC_SOCKET_CLIENT) [N/y/?] Press Enter
Deny server sockets to group (CONFIG_GRKERNSEC_SOCKET_SERVER) [N/y/?] Press Enter
*
* Sysctl support
*
Sysctl support (CONFIG_GRKERNSEC_SYSCTL) [N/y/?] Press Enter
*
* Miscellaneous Features
*
Seconds in between log messages(minimum) (CONFIG_GRKERNSEC_FLOODTIME) [30] Press Enter
BSD-style coredumps (CONFIG_GRKERNSEC_COREDUMP) [N/y/?] y
*** End of Linux kernel configuration.
*** Check the top-level Makefile for additional configuration.
*** Next, you must run 'make dep'.
189](https://image.slidesharecdn.com/securingoptimizinglinuxthehackingsolutionv-131209075405-phpapp02/85/Securing-Optimizing-Linux-the-Hacking-Solution-v-3-0-189-320.jpg)
![Kernel Security & Optimization 0
CHAPTER 6
Compiling the Kernel
This section applies to both Monolithic and Modularized kernels. Once the kernel configuration
has been completed, return to the /usr/src/linux directory (if you are not already in it) and
compile the new kernel. You do so by using the following command:
•
To compile the Kernel, use the following command:
[root@deep linux]# make dep; make clean; make bzImage
This line contains three commands in one. The first one, make dep, actually takes your
configuration and builds the corresponding dependency tree. This process determines what gets
compiled and what doesn’t. The next step, make clean, erases all previous traces of a
compilation so as to avoid any mistakes in which the wrong version of a feature gets tied into the
kernel. Finally, make bzImage does the full compilation of the kernel.
After the process is complete, the kernel is compressed and ready to be installed on your system.
Before we can install the new kernel, we must know if we need to compile the corresponding
modules. This is required ONLY if you said yes to “Enable loadable module support
(CONFIG_MODULES)” and have compiled some options in the kernel configuration above as a
module (See Modularized kernel configuration). In this case, you must execute the following
commands:
•
To compile the corresponding modules for your kernel, use the following commands:
[root@deep linux]# make modules
[root@deep linux]# make modules_install
The make modules and make modules_install commands are required ONLY if
you say yes to “Enable loadable module support (CONFIG_MODULES)” in your kernel
configurations (See Modularized kernel configuration) because you want to build a
modularized kernel.
WARNING:
Installing the Kernel
This section applies to both the Monolithic and Modularized kernel. Ok, the kernel has been
configured, compiled and is now ready to be installed your system. Below are the steps required
to install all the necessary kernel components in your system.
Step 1
Copy the file /usr/src/linux/arch/i386/boot/bzImage from the kernel source tree to the
/boot directory, and give it an appropriate new name.
•
To copy the bzImage file to the /boot directory, use the following commands:
[root@deep /]# cd /usr/src/linux/ (if you are not already in it)
[root@deep linux]# cp arch/i386/boot/bzImage /boot/vmlinuz-2.4.18
190](https://image.slidesharecdn.com/securingoptimizinglinuxthehackingsolutionv-131209075405-phpapp02/85/Securing-Optimizing-Linux-the-Hacking-Solution-v-3-0-190-320.jpg)
![Kernel Security & Optimization 0
CHAPTER 6
Step 2
A new System.map file is generated when you compile a kernel, and is a list of all the addresses
in that kernel and their corresponding symbols. Every time that you create a new kernel, such a
file System.map is created and saved in /usr/src/linux. It's a text file, which is read by a
few programs to do address <-> symbol translation, and which you need if you ever get an Oops.
Certain commands, like klog, ps, and lsof, use the System.map file to get the name of kernel
symbols. Without it some commands like lsof will complain that they can't find a System.map
file to match the currently booted kernel.
Copy the file /usr/src/linux/System.map from the kernel source tree to the /boot
directory, and give it an appropriate new name.
•
To copy the System.map file to the /boot directory, use the following commands:
[root@deep /]# cd /usr/src/linux/ (if you are not already in it)
[root@deep linux]# cp System.map /boot/System.map-2.4.18
Step 3
Move into the /boot directory and rebuild the links vmlinuz and System.map.
•
To rebuild the vmlinuz and System.map files, use the following commands:
[root@deep linux]# cd /boot/
[root@deep /boot]# ln -fs vmlinuz-2.4.18 vmlinuz
[root@deep /boot]# ln -fs System.map-2.4.18 System.map
We must rebuild the links of vmlinuz and System.map to point them to the new installed kernel
version. Without the new links LILO or GRUB program will look, by default, for the old version of
your Linux kernel.
Step 4
Remove obsolete and unnecessary files under the /boot directory to increase disk space:
•
To remove obsolete and unnecessary files under the /boot directory, use commands:
[root@deep /]# cd /boot/ (if you are not already in it)
[root@deep /boot]# rm -f module-info
[root@deep /boot]# rm -f initrd-2.4.x.img
The module-info is a link, which points to the old modules directory of your original kernel.
Since we have installed a brand new kernel, we don’t need to keep this broken link.
The initrd-2.4.x.img is a file that contains an initial RAM disk image that serves as a
system before the disk is available. This file is only available and is installed by the Linux initial
setup installation if your system has a SCSI adapter present and only if your system has a SCSI
adapter. If we use and have a SCSI system, the required driver now will have been incorporated
into our new Linux kernel since we have build it by answering Y to the question related to our
SCSI model during the configuration of the kernel, so we can safely remove this file (initrd2.4.x.img).
191](https://image.slidesharecdn.com/securingoptimizinglinuxthehackingsolutionv-131209075405-phpapp02/85/Securing-Optimizing-Linux-the-Hacking-Solution-v-3-0-191-320.jpg)
![Kernel Security & Optimization 0
CHAPTER 6
Step 5
Create a new Linux kernel directory that will handle all the header files related to Linux kernel for
future compilation of other programs on your system.
Recall, we had created two symlinks under the /usr/include directory that pointed to the Linux
kernel header files to be able to compile it without receiving errors and also be able to compile
future programs. The /usr/include directory is where all the header files for your Linux system
are kept for reference and dependencies when you compile and install new programs.
The asm, and linux links are used when programs need to know some functions which are
compile-time specific to the kernel installed on your system. Programs call other headers as well
in the /usr/include directory when they must know specific information, dependencies, etc of
your system.
•
To create a new Linux kernel directory to handle all header files, use the commands:
[root@deep
[root@deep
[root@deep
[root@deep
[root@deep
[root@deep
[root@deep
[root@deep
/]# mkdir -p /usr/src/linux-2.4.18/include
/]# cd /usr/src/linux/
linux]# cp -r include/asm-i386 ../linux-2.4.18/include/
linux]# cp -r include/linux ../linux-2.4.18/include/
linux]# cd ../
src]# rm -rf /usr/src/linux
src]# cd /usr/src/ (to be sure that we are into the src directory)
src]# ln -s /usr/src/linux-2.4.18 linux
First we create a new directory named “linux-2.4.18” based on the version of the kernel we
have installed for easy interpretation, then we copy directories asm-i386, and linux from
/usr/src/linux/include to our new location /usr/src/linux-2.4.18/include. After
we remove the entire source directory where we compiled the new kernel, we create a new
symbolic link named “linux” under /usr/src that points to our new /usr/src/linux2.4.18 directory. With these steps, future compiled programs will know where to look for
headers related to the kernel on your server.
This step will allow us to gain space on our hard drive and will reduce the security risks.
The Linux kernel source directory handles a lot files and is about 94M in size when
uncompressed. With the procedure described above, our Linux kernel directory began
approximately 4M in size so we save 90MB for the same functionalities.
NOTE:
Verifying or upgrading your boot loader
Once the new kernel image has been installed on your server, we have to inform our boot loader
about it. This is done inside the configuration file of your boot loader software. Below I show you
how to do it depending if you use GRUB or LILO as your boot loader.
LILO:
This step applies only if you use LILO as your boot loader on the system. If you use GRUB as
your boot loader instead of LILO (highly recommended), then you can skip this section and go
directly to the next one.
192](https://image.slidesharecdn.com/securingoptimizinglinuxthehackingsolutionv-131209075405-phpapp02/85/Securing-Optimizing-Linux-the-Hacking-Solution-v-3-0-192-320.jpg)
![Kernel Security & Optimization 0
CHAPTER 6
Step 1
You need to edit the lilo.conf file to make your new kernel one of the boot time options:
•
Edit the lilo.conf file (vi /etc/lilo.conf) and make the appropriate change on
the line that reads “image=/boot/vmlinuz-x.x.x”.
[root@deep /]# vi /etc/lilo.conf
boot=/dev/sda
map=/boot/map
install=/boot/boot.b
timeout=00
default=linux
restricted
password=somepasswd
image=/boot/vmlinuz
label=linux
read-only
root=/dev/sda6
Step 2
Once the necessary modifications have been made in the /etc/lilo.conf file as shown
above, we update our lilo.conf file for the change to take effect.
•
This can be done with the following command:
[root@deep /]# /sbin/lilo
Added linux *
GRUB:
This step applies only if you use GRUB as your boot loader on the system. In most case, GRUB
does not need to be updated when you install a new kernel on your computer but here we have to
verify inside our grub.conf file if all default setting are still available and configured because
when we uninstall Red Hat kernel RPM package, the software automatically remove some needed
parameters from the GRUB configuration file.
Step 1
Edit your GRUB configuration file and be sure that everything is correct and look like the following.
Your setting should differ from the example below.
•
Edit the grub.conf file (vi /etc/grub.conf) and check your setting.
[root@deep /]# vi /etc/grub.conf
default 0
timeout 00
title Red Hat Linux
kernel (hd0,0)/vmlinuz ro root=/dev/sda5
193](https://image.slidesharecdn.com/securingoptimizinglinuxthehackingsolutionv-131209075405-phpapp02/85/Securing-Optimizing-Linux-the-Hacking-Solution-v-3-0-193-320.jpg)

![Kernel Security & Optimization 0
CHAPTER 6
Rebooting your system to load the new kernel
Whether you have installed a new Monolithic Kernel where codes and drivers are compiled into
the kernel and are always loaded or a Modularized Kernel where some segment of codes are
compiled into the kernel as a module and loaded on demand, it is time to Reboot your system
and test your results.
•
To reboot your Linux system, use the following command:
[root@deep /]# reboot
When the system is rebooted and you are logged in, verify the new version of your kernel with the
following command:
•
To verify the version of your new kernel, use the following command:
[root@deep /]# uname -a
Linux dev 2.4.18-grsec-1.9.4 #1 Wed Jun 19 15:14:55 EDT 2002 i686 unknown
Congratulations!
Delete programs, edit files pertaining to modules
This section applies only if you chose to install a Monolithic Kernel on your system. By default
when you install Linux for the first time (like we did), the kernel is built as a Modularized Kernel.
This means that each device or function we need exists as a module and is controlled by the
Kernel Daemon program named kmod. kmod automatically loads some modules and functions
into memory as they are needed, and unloads them when they’re no longer being used.
kmod and other module management programs included in the modutils RPM package use the
modules.conf file located in the /etc directory to know for example which Ethernet card you
have, if your Ethernet card requires special configuration and so on. If we don’t use any modules
in our newly compiled kernel because we have compiled the kernel as a Monolithic Kernel and
ONLY in this case, we can remove the modules.conf file and completely uninstall the
modutils RPM package.
•
To remove the modules.conf file, use the following command:
[root@deep /]# rm -f /etc/modules.conf
•
To uninstall the modutils package, use the following command:
[root@deep /]# rpm -e --nodeps modutils
Once again, the above is required only if you said no to “Enable loadable module
support (CONFIG_MODULES)” in your kernel configuration because you have decided to build
a Monolithic Kernel.
WARNING:
195](https://image.slidesharecdn.com/securingoptimizinglinuxthehackingsolutionv-131209075405-phpapp02/85/Securing-Optimizing-Linux-the-Hacking-Solution-v-3-0-195-320.jpg)
![Kernel Security & Optimization 0
CHAPTER 6
Making a new rescue floppy for Modularized Kernel
This section applies only if you chose to install a Modularized Kernel on your system.
Immediately after you successfully start your system and log in as root, you should create a new
emergency boot floppy disk. The procedure to achieve it is the same as shown at the beginning
of this chapter related to Linux Kernel.
Please go back to the beginning of this chapter and follow the procedures to recreate a new
emergency boot floppy disk suitable for the new install Linux kernel on your system. Don’t forget
to test the boot disk to be sure that it works.
The mkbootdisk program runs only on Modularized Kernel. So you can’t use it on a Monolithic
Kernel; instead create an emergency boot floppy disk for Monolithic kernel as shown below.
Making a emergency boot floppy disk for Monolithic Kernel
This section applies only if you chose to install a Monolithic Kernel in your system. Because it is
possible to create a rescue floppy only on modularized kernel, we must find another way to boot
our Linux system for a monolithic kernel if the Linux kernel on the hard disk is damaged.
This is possible with a Linux emergency boot floppy disk. You should create it immediately after
you successfully start your system and log in as root. To create the emergency boot floppy, follow
these steps:
Step 1
Insert a floppy disk and format it with the following command:
[root@deep /]# fdformat /dev/fd0H1440
Double-sided, 80 tracks, 18 sec/track. Total capacity 1440 kB.
Formatting ... done
Verifying ... done
Step 2
Copy the actual file “vmlinuz” from the /boot directory to the floppy disk:
[root@deep /]# cp /boot/vmlinuz /dev/fd0H1440
cp: overwrite `/dev/fd0H1440'? y
NOTE:
The vmlinuz file is a symbolic link that points to the real Linux kernel.
Step 3
Determine the kernel’s root device with the following command:
[root@deep /]# rdev
/dev/sda6 /
The kernel’s root device is the disk partition where the root file system is located. In this
example, the root device is /dev/sda6; the device name should be different on your system.
NOTE:
196](https://image.slidesharecdn.com/securingoptimizinglinuxthehackingsolutionv-131209075405-phpapp02/85/Securing-Optimizing-Linux-the-Hacking-Solution-v-3-0-196-320.jpg)
![Kernel Security & Optimization 0
CHAPTER 6
Step 4
Set the kernel’s root device with the following command:
[root@deep /]# rdev /dev/fd0H1440 /dev/sda6
To set the kernel’s root device, use the device reported by the “rdev” command utility in
the previous step.
NOTE:
Step 5
Mark the root device as read-only with the following command:
[root@deep /]# rdev -R /dev/fd0H1440 1
This causes Linux to initially mount the root file system as read-only. By setting the root
device as read-only, you avoid several warnings and error messages.
NOTE:
Step 6
Now put the boot floppy in the drive A: and reboot your system with the following command to be
sure that your new boot disk is working:
[root@something /]# reboot
Following these guidelines, you will now have a boot floppy with a known working kernel in case
of problems with the upgrade. I recommend rebooting the system with the floppy to make sure
that the floppy works correctly.
Step 7
Because the mkbootdisk and dosfstools program are required only when you have a
Modularized kernel installed in your Linux system, we can remove the unneeded mkbootdisk
and dosfstools packages from the system when we have a Monolithic kernel installed on our
server.
•
To uninstall the mkbootdisk and dosfstools utility, use the following command:
[root@deep /]# rpm –e mkbootdisk dosfstools
197](https://image.slidesharecdn.com/securingoptimizinglinuxthehackingsolutionv-131209075405-phpapp02/85/Securing-Optimizing-Linux-the-Hacking-Solution-v-3-0-197-320.jpg)


![Process file system management 0
CHAPTER 7
What is sysctl?
sysctl is an interface that allows you to make changes to a running Linux system. It serves two
functions: to read and to modify system settings.
•
To view all readable variables, use the following command:
[root@deep /]# sysctl -a
•
To read a particular variable, for example, fs.file-max, use the following command:
[root@deep /]# sysctl fs.file-max
fs.file-max = 8192
•
To set a particular variable for fs.file-max, use the following command:
[root@deep /]# sysctl -w fs.file-max=5536
fs.file-max = 16384
Settings of sysctl variables are usually strings, numbers, or booleans (a boolean being 1 for
yes or a 0 for no). If you set and change variable manually with the sysctl command as show
above, your changes will not resists on the next reboot of the system. For this reason, we will use
and show you further down in this chapter how to make your changes permanent even on
possible reboot of the server by using the /etc/sysctl.conf file.
/proc/sys/vm: The virtual memory subsystem of Linux
All parameters described in this chapter reside under the /proc/sys/vm directory of the server
and can be used to tune the operation of the virtual memory (VM) subsystem of the Linux kernel.
Be very careful when attempting this. You can optimize your system, but you can also cause it to
crash. Since every system is different, you'll probably want some control over this piece of the
system.
Finally, these are advanced setting and if you don’t understand them, then don’t try to play in this
area or try to use all the examples below in your system. Remember that all systems are different
and require different settings and customizations. The majority of the following hacks will work
fine on a server with >= at 512MB of RAM or a minimum of 256MB of RAM. Below this amount of
memory, nothing is guaranteed and the default setting will just be fine for you.
Next I’ll show you parameters that can be optimized. All suggestions I make in this section are
valid for all kinds of servers. The only difference depends on the amount of RAM your machine
has and this is where the settings will change.
The above figure shows a snapshot of /proc/sys/vm directory on an OpenNA Linux & Red Hat
Linux system running kernel version 2.4. Please note that this picture may look different on your
system.
202](https://image.slidesharecdn.com/securingoptimizinglinuxthehackingsolutionv-131209075405-phpapp02/85/Securing-Optimizing-Linux-the-Hacking-Solution-v-3-0-202-320.jpg)

![Process file system management 0
CHAPTER 7
The default kernel setup for the bdflush parameters is:
"40 64 64 256 500 3000 60 0 0"
The default setup for the bdflush parameters under OpenNA Linux is:
"60 64 64 256 500 3000 80 0 0"
The default setup for the bdflush parameters under Red Hat Linux is:
"30 64 64 256 500 3000 60 0 0"
Step 1
To change the values of bdflush, type the following command on your terminal:
•
Edit the sysctl.conf file (vi /etc/sysctl.conf) and add the following line:
# Improve file system performance
vm.bdflush = 60 64 64 256 500 3000 80 0 0
Step 2
You must restart your network for the change to take effect. The command to restart the network
is the following:
•
To restart all network devices manually on your system, use the following command:
[root@deep /]# /etc/init.d/network restart
Setting network parameters
[OK]
Bringing up interface lo
[OK]
Bringing up interface eth0
[OK]
Bringing up interface eth1
[OK]
There is another way to update the entry without restarting the network by using the
following command in your terminal screen:
NOTE:
[root@deep /]# sysctl -w vm.bdflush="60 64 64 256 500 3000 80 0 0"
The kswapd parameter:
The kswapd file is related to the kernel swapout daemon. This file /proc/sys/vm/kswapd
frees memory on the system when it gets fragmented or full. Its task is to keep the memory
management system operating efficiently. Since every system is different, you'll probably want
some control over this piece of the system.
There are three parameters to tune in this file and two of them (tries_base and
swap_cluster) have the largest influence on system performance. The kswapd file can be
used to tune the operation of the virtual memory (VM) subsystem of the Linux kernel.
Parameter 1 (tries_base):
The kswapd parameter 1 specifies the maximum number of pages kswapd tries to free in one
round. Usually this number will be divided by 4 or 8, so it isn't as big as it looks. Increase this
number to cause swap to be released faster, and increase overall swap throughput. The default
value is 512 pages. We keep the default value here.
204](https://image.slidesharecdn.com/securingoptimizinglinuxthehackingsolutionv-131209075405-phpapp02/85/Securing-Optimizing-Linux-the-Hacking-Solution-v-3-0-204-320.jpg)
![Process file system management 0
CHAPTER 7
Parameter 2 (tries_min):
The kswapd parameter 2 specifies the minimum number of pages kswapd tries to free a least
each time it is called. Basically it's just there to make sure that kswapd frees some pages even
when it's being called with minimum priority. The default value is 32 pages. We keep the default
value here.
Parameter 3 (swap_cluster):
The kswapd parameter 3 specifies the number of pages kswapd writes in one iteration. You
want this large to increase performance so that kswapd does its I/O in large chunks and the disk
doesn't have to seek often, but you don't want it to be too large since that would flood the request
queue. The default value is 8 pages. We improve the default value here.
The default kernel setup for the kswapd parameters is:
"512 32 8"
The default setup for the kswapd parameters under OpenNA Linux is:
"512 32 32"
The default setup for the kswapd parameters under Red Hat Linux is:
"512 32 8"
Step 1
To change the values of kswapd, type the following command on your terminal:
•
Edit the sysctl.conf file (vi /etc/sysctl.conf) and add the following lines:
# Increase swap bandwidth system performance
vm.kswapd = 512 32 32
Step 2
You must restart your network for the change to take effect. The command to restart the network
is the following:
•
To restart all network devices manually on your system, use the following command:
[root@deep /]# /etc/init.d/network restart
Setting network parameters
[OK]
Bringing up interface lo
[OK]
Bringing up interface eth0
[OK]
Bringing up interface eth1
[OK]
There is another way to update the entry without restarting the network by using the
following command into your terminal screen:
NOTE:
[root@deep /]# sysctl -w vm.kswapd=”512 32 32”
205](https://image.slidesharecdn.com/securingoptimizinglinuxthehackingsolutionv-131209075405-phpapp02/85/Securing-Optimizing-Linux-the-Hacking-Solution-v-3-0-205-320.jpg)
![Process file system management 0
CHAPTER 7
The overcommit_memory parameter:
The overcommit_memory parameter is simply a flag that enables memory overcommitment.
Memory overcommitment is a procedure to check that a process has enough memory to allocate
a new virtual mapping. When this flag is 0, the kernel checks before each malloc() to see if
there's enough memory left. If the flag is 1, the system pretends there's always enough memory
and don't make the check on the system. This feature can be very useful ONLY on big servers
with a lot of pysical memories available (>= 2GB) because there are a lot of programs that
malloc() huge amounts of memory "just-in-case" and don't use much of it.
The default kernel setup for the overcommit_memory parameter is:
"0"
The default setup for the overcommit_memory parameter under OpenNA Linux is:
"0"
The default setup for the overcommit_memory parameter under Red Hat Linux is:
"0"
Step 1
To change the value of overcommit_memory, type the following command on your terminal:
•
Edit the sysctl.conf file (vi /etc/sysctl.conf) and add the following lines:
# Enables/Disables memory overcommitment
vm.overcommit_memory = 0
Step 2
You must restart your network for the change to take effect. The command to restart the network
is the following:
•
To restart all network devices manually on your system, use the following command:
[root@deep /]# /etc/init.d/network restart
Setting network parameters
[OK]
Bringing up interface lo
[OK]
Bringing up interface eth0
[OK]
Bringing up interface eth1
[OK]
Only change the default value of 0 to become 1 on systems with more than 2GB of
RAM. Recall that on small systems the value must be set to 0 (overcommit_memory=0).
WARNING:
There is another way to update the entry without restarting the network by using the following
command into your terminal screen:
[root@deep /]# sysctl -w overcommit_memory=0
206](https://image.slidesharecdn.com/securingoptimizinglinuxthehackingsolutionv-131209075405-phpapp02/85/Securing-Optimizing-Linux-the-Hacking-Solution-v-3-0-206-320.jpg)
![Process file system management 0
CHAPTER 7
The page-cluster parameter:
The Linux virtual memory subsystem avoids excessive disk seeks by reading multiple pages on a
page fault. The number of pages it reads is highly dependent on the amount of memory in your
machine. The number of pages the kernel reads in at once is equal to 2 ^ page-cluster. Values
above 2 ^ 5 don't make much sense for swap because we only cluster swap data in 32-page
groups. The page-cluster parameter is used to tune the operation of the virtual memory (VM)
subsystem of the Linux kernel.
The default kernel setup for the kswapd parameter is:
"3"
The default setup for the kswapd parameter under OpenNA Linux is:
"5"
The default setup for the kswapd parameter under Red Hat Linux is:
"4"
Step 1
To change the value of page-cluster, type the following command on your terminal:
•
Edit the sysctl.conf file (vi /etc/sysctl.conf) and add the following lines:
# Increase number of pages kernel reads in at once
vm.page-cluster = 5
Step 2
You must restart your network for the change to take effect. The command to restart the network
is the following:
•
To restart all network devices manually on your system, use the following command:
[root@deep /]# /etc/init.d/network restart
Setting network parameters
[OK]
Bringing up interface lo
[OK]
Bringing up interface eth0
[OK]
Bringing up interface eth1
[OK]
There is another way to update the entry without restarting the network by using the
following command into your terminal screen:
NOTE:
[root@deep /]# sysctl -w vm.page-cluster=5
207](https://image.slidesharecdn.com/securingoptimizinglinuxthehackingsolutionv-131209075405-phpapp02/85/Securing-Optimizing-Linux-the-Hacking-Solution-v-3-0-207-320.jpg)
![Process file system management 0
CHAPTER 7
The pagetable_cache parameter:
The kernel keeps a number of page tables in a per-processor cache (this helps a lot on SMP
systems). The cache size for each processor will be between the low and the high value. On SMP
systems it is used so that the system can do fast pagetable allocations without having to acquire
the kernel memory lock.
For large systems, the settings are probably OK. For normal systems they won't hurt a bit. For
small systems (<16MB RAM) and on a low-memory, single CPU system it might be
advantageous to set both values to 0 so you don't waste the memory.
The default kernel setup for the kswapd parameters is:
"25 50"
The default setup for the kswapd parameters under OpenNA Linux is:
"25 50"
The default setup for the kswapd parameters under Red Hat Linux is:
"25 50"
Step 1
To change the values of pagetable_cache, type the following command on your terminal:
•
Edit the sysctl.conf file (vi /etc/sysctl.conf) and add the following lines:
# Improve number of page tables keeps in a per-processor cache
vm.pagetable_cache = 25 50
Step 2
You must restart your network for the change to take effect. The command to restart the network
is the following:
•
To restart all network devices manually on your system, use the following command:
[root@deep /]# /etc/init.d/network restart
Setting network parameters
[OK]
Bringing up interface lo
[OK]
Bringing up interface eth0
[OK]
Bringing up interface eth1
[OK]
Only change these values on systems with multiple processors (SMP) or on small
systems (single processor) with less than 16MB of RAM. Recall that on small systems the both
values must be set to 0 (vm.pagetable_cache = 0 0).
WARNING:
There is another way to update the entry without restarting the network by using the following
command into your terminal screen:
[root@deep /]# sysctl -w vm.pagetable_cache=”25 50”
208](https://image.slidesharecdn.com/securingoptimizinglinuxthehackingsolutionv-131209075405-phpapp02/85/Securing-Optimizing-Linux-the-Hacking-Solution-v-3-0-208-320.jpg)
![Process file system management 0
CHAPTER 7
/proc/sys/fs: The file system data of Linux
All parameters described later in this chapter reside under the /proc/sys/fs directory of the
server and can be used to tune and monitor miscellaneous things in the operation of the Linux
kernel. Be very careful when attempting this. You can optimize your system, but you can also
cause it to crash. Since every system is different, you'll probably want some control over these
pieces of the system.
Finally, these are advanced settings and if you don’t understand them, then don’t play in this area
or try to use all the examples below in your system. Remember that all systems are different and
required different setting and customization.
Below I show you only parameters that can be optimized for the system. All suggestions I
enumerate in this section are valid for every kind of servers. The only difference depends on the
amount of MB of RAM your machines have and this is where settings will change.
The above figure shows a snapshot of /proc/sys/fs directory on a OpenNA Linux & Red Hat
Linux system running kernel version 2.4. Please note that this picture may look different on your
system.
The file-max & file-nr parameters:
The file-max and file-nr files work together on Linux, we use the file-max parameter to
sets the maximum number of file-handles that the Linux kernel will allocate and the file-nr file
to get information about the number of allocated file handles, the number of used file handles and
the maximum number of file handles presently on the system. A large-scale production server
may easily require many thousands of file-handles, depending on the kind and number of
services running concurrently on the server. On busy servers where many services are running
concurrently, we generally tune this file (file-max) to improve the number of open files available
on the system.
It is important to note that you need to increase the limit of open files available on your server
ONLY when you get lots of error messages about running out of file handles. If you don’t receive
this kind of error message, you really DON’T need to increase the default value.
•
To know the number of allocated file handles, the number of used file handles and the
maximum number of file handles on your system, use the following command:
[root@deep /]# cat /proc/sys/fs/file-nr
405
137
8192
209](https://image.slidesharecdn.com/securingoptimizinglinuxthehackingsolutionv-131209075405-phpapp02/85/Securing-Optimizing-Linux-the-Hacking-Solution-v-3-0-209-320.jpg)
![Process file system management 0
CHAPTER 7
The first value (405) in our result is the number of allocated file handles, the second value (137) is
the number of used file handles, and the last value (8192) is the maximum number of file handles.
When the allocated file handles (405) come close to the maximum (8192), but the number of
actually used ones (137) is far less, you've encountered a peak in your usage of file handles and
you don't need to increase the maximum. The default kernel setup is suitable for most of us.
The default kernel setup for the file-max parameter is:
"8192"
The default setup for the file-max parameter under OpenNA Linux is:
"8192"
The default setup for the file-max parameter under Red Hat Linux is:
"8192"
Step 1
To adjust the value of file-max, type the following command on your terminal:
•
Edit the sysctl.conf file (vi /etc/sysctl.conf) and add the following lines:
# Increase limit of file-handles
fs.file-max = 8192
Step 2
You must restart your network for the change to take effect. The command to restart the network
is the following:
•
To restart all network devices manually on your system, use the following command:
[root@deep /]# /etc/init.d/network restart
Setting network parameters
[OK]
Bringing up interface lo
[OK]
Bringing up interface eth0
[OK]
Bringing up interface eth1
[OK]
There is another way to update the entry without restarting the network by using the
following command into your terminal screen:
NOTE:
[root@deep /]# sysctl -w fs.file-max=8192
210](https://image.slidesharecdn.com/securingoptimizinglinuxthehackingsolutionv-131209075405-phpapp02/85/Securing-Optimizing-Linux-the-Hacking-Solution-v-3-0-210-320.jpg)
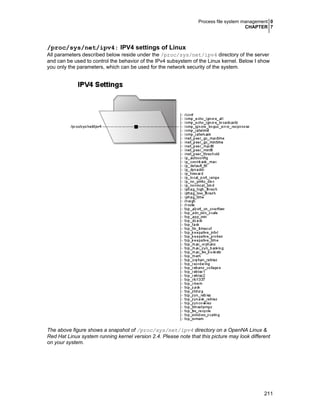
![Process file system management 0
CHAPTER 7
Prevent your system responding to ping request:
Preventing your system for responding to ping requests can make a big improvement in your
network security since no one can ping your server and receive an answer. The TCP/IP
protocol suite has a number of weaknesses that allows an attacker to leverage techniques in the
form of covert channels to surreptitiously pass data in otherwise benign packets.
Step 1
Preventing your server from responding to ping requests can help to minimize this problem. Not
responding to pings would at least keep most "crackers" out because they would never know it's
there. ICMP blocking can hurt the performance of long-duration TCP connections, and this is due
to the fact that MTU discovery relies on ICMP packets to work.
•
Edit the sysctl.conf file (vi /etc/sysctl.conf) and add the following lines:
# Enable/Disable ignoring ping request
net.ipv4.icmp_echo_ignore_all = 1
When this key is on (1), the computer will ignore all ICMP packets. It is not recommended to turn
on this key, except in special situations when you receive an ICMP packet based attack. In the
above parameter, we enable this option.
Step 2
Once the configuration has been set, you must restart your network for the change to take effect.
The command to restart the network is the following:
•
To restart all network devices manually on your system, use the following command:
[root@deep /]# /etc/init.d/network restart
Setting network parameters
[OK]
Bringing up interface lo
[OK]
Bringing up interface eth0
[OK]
Bringing up interface eth1
[OK]
There is another way to update the entry without restarting the network by using the
following command into your terminal screen:
NOTE:
[root@deep /]# sysctl -w net.ipv4.icmp_echo_ignore_all=1
212](https://image.slidesharecdn.com/securingoptimizinglinuxthehackingsolutionv-131209075405-phpapp02/85/Securing-Optimizing-Linux-the-Hacking-Solution-v-3-0-212-320.jpg)
![Process file system management 0
CHAPTER 7
Refuse responding to broadcasts request:
As for the ping request, it’s also important to disable broadcast requests. When a packet is
sent to an IP broadcast address (i.e. 192.168.1.255) from a machine on the local network,
that packet is delivered to all machines on that network. Then all the machines on a network
respond to this ICMP echo request and the result can be severe network congestion or outages
(Denial-of-Service attacks). See the RFC 2644 for more information.
Step 1
To disable broadcast requests, type the following command on your terminal.
•
Edit the sysctl.conf file (vi /etc/sysctl.conf) and add the following lines:
# Enable/Disable ignoring broadcasts request
net.ipv4.icmp_echo_ignore_broadcasts = 1
When this key is on (1), the server will never answer to "ping" if its destination address is
multicast or broadcast. It is good to turn on (1) this key to avoid your server becoming an
involuntary partner of a DoS attack. In the above parameter, we enable this option.
Step 2
Once the configuration has been set, you must restart your network for the change to take effect.
The command to restart the network is the following:
•
To restart all networks devices manually on your system, use the following command:
[root@deep /]# /etc/init.d/network restart
Setting network parameters
[OK]
Bringing up interface lo
[OK]
Bringing up interface eth0
[OK]
Bringing up interface eth1
[OK]
There is another way to update the entry without restarting the network by using the
following command into your terminal screen:
NOTE:
[root@deep /]# sysctl -w net.ipv4.icmp_echo_ignore_broadcasts=1
213](https://image.slidesharecdn.com/securingoptimizinglinuxthehackingsolutionv-131209075405-phpapp02/85/Securing-Optimizing-Linux-the-Hacking-Solution-v-3-0-213-320.jpg)
![Process file system management 0
CHAPTER 7
Routing Protocols:
Routing and routing protocols can create several problems. IP source routing, where an IP packet
contains details of the path to its intended destination, is dangerous because according to RFC
1122 the destination host must respond along the same path. If an attacker was able to send a
source routed packet into your network, then he would be able to intercept the replies and fool
your host into thinking it is communicating with a trusted host.
Step 1
I strongly recommend that you disable IP source routing on all network interfaces on the system
to protect your server from this hole. If IP source routing is set to off (0), the server will not accept
source-routed frames. Remember that Source-routed frames have an embedded, explicit
description of the route between source and destination. Normally, IP packet routing is based
solely on destination's address.
•
Edit the sysctl.conf file (vi /etc/sysctl.conf) and add the following lines:
# Enable/Disable IP source routing
net.ipv4.conf.all.accept_source_route = 0
net.ipv4.conf.default.accept_source_route = 0
Source-routed packets are a powerful concept but were never used, and can bring security
problems because they allow a non-blind, REMOTE spoof. It is a very good idea to turn off (0)
these keys. In the above parameters, we disable these options.
Step 2
Once configurations have been set, you must restart your network for the change to take effect.
The command to restart the network is the following:
•
To restart all network devices manually on your system, use the following command:
[root@deep /]# /etc/init.d/network restart
Setting network parameters
[OK]
Bringing up interface lo
[OK]
Bringing up interface eth0
[OK]
Bringing up interface eth1
[OK]
There is another way to update the entry without restarting the network by using the
following command into your terminal screen:
NOTE:
[root@deep /]# sysctl -w net.ipv4.conf.all.accept_source_route=1
[root@deep /]# sysctl -w net.ipv4.conf.default.accept_source_route=1
214](https://image.slidesharecdn.com/securingoptimizinglinuxthehackingsolutionv-131209075405-phpapp02/85/Securing-Optimizing-Linux-the-Hacking-Solution-v-3-0-214-320.jpg)
![Process file system management 0
CHAPTER 7
Enable TCP SYN Cookie Protection:
A "SYN Attack" is a Denial of Service (DoS) attack that consumes all the resources on your
machine, forcing you to reboot. Denials of Service attacks (attacks which incapacitate a server
due to high traffic volume or ones those tie-up system resources enough that the server cannot
respond to a legitimate connection request from a remote system) are easily achievable from
internal resources or external connections via extranets and Internet. Enabling TCP SYN Cookie
Protection will help to eliminate the problem. Below is a simple explanation of the concept.
Every TCP/IP connection begins with a 3-way handshake:
1. Client sends a packet (packet 1) to server with SYN bit on, and waits;
2. Server sends a confirmation packet (packet 2) to client, and waits;
3. Client sends a third packet (packet 3) that consolidates the connection.
Once the 3-way handshake is done, the server keeps data of packet 1 in a queue to compare it
with packet 3 and establish the connection. This queue is limited in size and a quite high timeout.
The SYN-flood attack exploits this fact and sends a lot of type-1 packets with random IP source
addresses; the phase 3 answers never arrive; and once the queue is full, the server cannot
receive more connections, be they legitimate or forged.
The SYN cookie "trick" is to embed a code in the header of phase 2 packets, so server DOES
NOT NEED TO KEEP any information about the client. If the phase 3 packet arrives someday,
the server will calculate the port and client initial sequence number based solely on that packet and will be able to establish the connection.
Step 1
Since this embedded codification reduces randomness of the server initial sequence number, and
thus can increase the "chance" of IP spoof family attacks, SYN cookies are used only in
emergency situations, that is, when the half-open connections queue is full.
•
Edit the sysctl.conf file (vi /etc/sysctl.conf) and add the following lines:
# Enable/Disable TCP SYN Cookie Protection
net.ipv4.tcp_syncookies = 1
If this key is on (1), the kernel will send "SYN cookies" ONLY and ONLY when the half-open
connections queue becomes full. This will mitigate the effects of SYN-flood DoS attacks. In the
above parameter, we enable this option.
Step 2
Once the configuration has been set, you must restart your network for the change to take effect.
The command to restart the network is the following:
•
To restart all network devices manually on your system, use the following command:
[root@deep /]# /etc/init.d/network restart
Setting network parameters
[OK]
Bringing up interface lo
[OK]
Bringing up interface eth0
[OK]
There is another way to update the entry without restarting the network by using the
following command into your terminal screen:
WARNING:
[root@deep /]# sysctl -w net.ipv4.tcp_syncookies=1
215](https://image.slidesharecdn.com/securingoptimizinglinuxthehackingsolutionv-131209075405-phpapp02/85/Securing-Optimizing-Linux-the-Hacking-Solution-v-3-0-215-320.jpg)
![Process file system management 0
CHAPTER 7
Disable ICMP Redirect Acceptance:
When hosts use a non-optimal or defunct route to a particular destination, an ICMP redirect
packet is used by routers to inform the hosts what the correct route should be. If an attacker is
able to forge ICMP redirect packets, he or she can alter the routing tables on the host and
possibly subvert the security of the host by causing traffic to flow via a path you didn't intend.
Step 1
A legitimate ICMP REDIRECT packet is a message from a router that says "router X is better
than me to reach network Y". Therefore, in complex networks, it will be highly recommended to
keep these keys activated. On simple networks, it’s strongly recommended to disable ICMP
Redirect Acceptance into all available interfaces on the server to protect it from this hole.
•
Edit the sysctl.conf file (vi /etc/sysctl.conf) and add the following lines:
# Enable/Disable ICMP Redirect Acceptance
net.ipv4.conf.all.accept_redirects = 0
net.ipv4.conf.default.accept_redirects = 0
When these keys are off (0), the kernel does not honor ICMP_REDIRECT packets, thus avoiding
a whole family of attacks based on forging of this type of packet. In the above parameters, we
disable these options.
Step 2
Once the configurations have been set, you must restart your network for the change to take
effect. The command to restart the network is the following:
•
To restart all networks devices manually on your system, use the following command:
[root@deep /]# /etc/init.d/network restart
Setting network parameters
[OK]
Bringing up interface lo
[OK]
Bringing up interface eth0
[OK]
Bringing up interface eth1
[OK]
There is another way to update the entry without restarting the network by using the
following command into your terminal screen:
NOTE:
[root@deep /]# sysctl -w net.ipv4.conf.all.accept_redirects=0
[root@deep /]# sysctl -w net.ipv4.conf.default.accept_redirects=0
216](https://image.slidesharecdn.com/securingoptimizinglinuxthehackingsolutionv-131209075405-phpapp02/85/Securing-Optimizing-Linux-the-Hacking-Solution-v-3-0-216-320.jpg)
![Process file system management 0
CHAPTER 7
Enable bad error message Protection:
This option will alert you about all bad error messages on your network.
Step 1
• Edit the sysctl.conf file (vi /etc/sysctl.conf) and add the following line:
# Enable/Disable bad error message Protection
net.ipv4.icmp_ignore_bogus_error_responses = 1
Step 2
Once configuration has been set, you must restart your network for the change to take effect. The
command to restart the network is the following:
•
To restart all network devices manually on your system, use the following command:
[root@deep /]# /etc/init.d/network restart
Setting network parameters
[OK]
Bringing up interface lo
[OK]
Bringing up interface eth0
[OK]
Bringing up interface eth1
[OK]
There is another way to update the entry without restarting the network by using the
following command into your terminal screen:
NOTE:
[root@deep /]# sysctl -w net.ipv4.icmp_ignore_bogus_error_responses=1
Enable IP spoofing protection:
The spoofing protection prevents your network from being the source of spoofed (i.e. forged)
communications that are often used in DoS Attacks.
Step 1
• Edit the sysctl.conf file (vi /etc/sysctl.conf) and add the following lines:
# Enable/Disable IP spoofing protection
net.ipv4.conf.all.rp_filter = 2
net.ipv4.conf.default.rp_filter = 2
These keys control IP Spoof detection and can have the following values:
0=absolutely no checking (the default)
1=simple checking (only obvious spoofs)
2=strong checking (positive source verification)
The recommended standard is level 2, which can bring "problems in complex (non loop free)
networks". In the above parameters, we enable the “strong checking” option.
217](https://image.slidesharecdn.com/securingoptimizinglinuxthehackingsolutionv-131209075405-phpapp02/85/Securing-Optimizing-Linux-the-Hacking-Solution-v-3-0-217-320.jpg)
![Process file system management 0
CHAPTER 7
Step 2
Once the configurations have been made, you must restart your network for the change to take
effect. The command to restart the network is the following:
•
To restart all network devices manually on your system, use the following command:
[root@deep /]# /etc/init.d/network restart
Setting network parameters
[OK]
Bringing up interface lo
[OK]
Bringing up interface eth0
[OK]
This parameter will prevent spoofing attacks against your internal networks but your
external addresses can still be spoofed.
NOTE:
There is another way to update the entry without restarting the network by using the following
command into your terminal screen:
[root@deep /]# sysctl -w net.ipv4.conf.all.rp_filter=2
[root@deep /]# sysctl -w net.ipv4.conf.default.rp_filter=2
Enable Log Spoofed, Source Routed and Redirect Packets:
This change will log all Spoofed Packets, Source Routed Packets, and Redirect Packets to your
log files.
Step 1
• Edit the sysctl.conf file (vi /etc/sysctl.conf) and add the following lines:
# Enable/Disable Log Spoofed, Source Routed, Redirect Packets
net.ipv4.conf.all.log_martians = 1
net.ipv4.conf.default.log_martians = 1
When this key is on (1), the kernel will log any "impossible" packets, where the IP source address
spoofing is obvious. Example: packet with source address equal to 127.0.0.1 coming from an
Ethernet interface. In the above parameter, we enable this option.
Step 2
You must restart your network for the change to take effect. The command to restart the network
is the following:
•
To restart all network devices manually on your system, use the following command:
[root@deep /]# /etc/init.d/network restart
Setting network parameters
[OK]
Bringing up interface lo
[OK]
Bringing up interface eth0
[OK]
There is another way to update the entry without restarting the network by using the
following command into your terminal screen:
NOTE:
[root@deep /]# sysctl -w net.ipv4.conf.all.log_martians=1
[root@deep /]# sysctl -w net.ipv4.conf.default.log_martians=1
218](https://image.slidesharecdn.com/securingoptimizinglinuxthehackingsolutionv-131209075405-phpapp02/85/Securing-Optimizing-Linux-the-Hacking-Solution-v-3-0-218-320.jpg)
![Process file system management 0
CHAPTER 7
Other possible optimization of the system
All information described next relates to tuning we can make on the system. Be very careful when
attempting this. You can optimize your system, but you can also cause it to crash.
The shared memory limit parameters:
Shared memory is used for inter-process communication, and to store resources that are shared
between multiple processes such as cached data and code. If insufficient shared memory is
allocated any attempt to access resources that use shared memory such as database
connections or executable code will perform poorly.
Under UNIX world, shared memory is referred to as "System V IPC". Almost all modern operating
systems provide these features, but not all of them have them turned on or sufficiently sized by
default, especially systems with BSD heritage. With Linux the default shared memory limit (both
SHMMAX and SHMALL) is 32 MB in 2.4 kernels, but fortunately can be changed into the /proc file
system.
On system with small MB of RAM (>= 128MB), the default setting of 32MB for shared memory on
the system is enough and should not be changed. On system with lot of RAM, we can readjust
the default setting to better fit our machine and server performance.
Below, I show you an example, to allow 128MB of shared memory on the system. The new value
you enter for the shared memory should be four time less than what your total MB of RAM is. For
example if you have 512MB of RAM installed on your computer, then you can set the default
shared memory to 128MB as we do here. If you have less than what I use in this example, you
have to adjust the value to fit your needs.
Step 1
To change the default values of shared memory, type the following commands on your terminal:
•
Edit the sysctl.conf file (vi /etc/sysctl.conf) and add the following lines:
# Improve shared memory size
kernel.shmall = 134217728
kernel.shmmax = 134217728
Step 2
You must restart your network for the change to take effect. The command to restart the network
is the following:
•
To restart all network devices manually on your system, use the following command:
[root@deep /]# /etc/init.d/network restart
Setting network parameters
[OK]
Bringing up interface lo
[OK]
Bringing up interface eth0
[OK]
Bringing up interface eth1
[OK]
There is another way to update the entry without restarting the network by using the
following commands into your terminal screen:
NOTE:
[root@deep /]# sysctl -w kernel.shmall="134217728"
[root@deep /]# sysctl -w kernel.shmmax="134217728"
219](https://image.slidesharecdn.com/securingoptimizinglinuxthehackingsolutionv-131209075405-phpapp02/85/Securing-Optimizing-Linux-the-Hacking-Solution-v-3-0-219-320.jpg)
![Process file system management 0
CHAPTER 7
Tuning the default and maximum window size parameters:
The following hack allow us to raise network limits on Linux by requesting that the kernel provide
a larger send buffer for the server's connections to its clients. This is possible by tuning the
"default send window" and "maximum send window" parameters.
Default parameter under Linux is 64kb, this is correct for regular use of the OS but if you run your
system as a server, it is recommended to change the default parameter to a sufficiently-high
value like 2000kb. 64kb is equal to 65536 (64 * 1024 = 65536), to set the values to 2000kb, we
should enter new values of 2048000 (2000 * 1024 = 2048000).
Step 1
To change the default values of default and maximum window size, type the following
commands on your terminal:
•
Edit the sysctl.conf file (vi /etc/sysctl.conf) and add the following lines:
# Improve default and maximum window size
net.core.wmem_max = 2048000
net.core.wmem_default = 2048000
Step 2
You must restart your network for the change to take effect. The command to restart the network
is the following:
•
To restart all network devices manually on your system, use the following command:
[root@deep /]# /etc/init.d/network restart
Setting network parameters
[OK]
Bringing up interface lo
[OK]
Bringing up interface eth0
[OK]
Bringing up interface eth1
[OK]
There is another way to update the entry without restarting the network by using the
following commands into your terminal screen:
NOTE:
[root@deep /]# sysctl -w net.core.wmem_max="2048000"
[root@deep /]# sysctl -w net.core.wmem_default="2048000"
The ulimit parameter:
The ulimit command provides control over the resources available to the shell and to
processes started by it, on systems that allow such control. We can use it to change the default
resource set by the system to users or super user “root” but actually, we use it for changing
resources for the super user “root” only because resources for normal users are controlled and
managed through the /etc/security/limit.conf file.
It is not all default resources available through the ulimit parameter that need to be changed
but only those which can improve the performance of the server in a high load environment. Most
default values for the super user “root” are acceptable and should be kept unchanged. Linux itself
has a “Maximum Processes” per user limit. This feature allows us to control the number of
processes an existing user or the “root” super user on the server may be authorized to have. To
increase performance on highly loaded servers, we can safely set the limit of processes for the
super-user “root” to be unlimited. This is what we will do in the following steps.
220](https://image.slidesharecdn.com/securingoptimizinglinuxthehackingsolutionv-131209075405-phpapp02/85/Securing-Optimizing-Linux-the-Hacking-Solution-v-3-0-220-320.jpg)
![Process file system management 0
CHAPTER 7
One question remains, how can we change the default resources for a specific user on the
system? Each new user has a hidden file called “.bashrc” available in their home directory. It is
into this file that we can change the default value of resources for the specific user. In the
example below, we do it for the super user “root” but the procedure is the same for any users on
the system. Just edit their corresponding “.bashrc” file and make the change.
Step 1
• Edit the .bashrc file for super user “root” (vi /root/.bashrc) and add the line:
ulimit -u unlimited
NOTE:
You must exit and re-login from your terminal for the change to take effect.
Step 2
To verify that you are ready to go, make sure that when you type as root the command ulimit
-a on your terminal, it shows "unlimited" next to max user processes.
[root@deep /]# ulimit -a
core file size
(blocks, -c)
data seg size
(kbytes, -d)
file size
(blocks, -f)
max locked memory
(kbytes, -l)
max memory size
(kbytes, -m)
open files
(-n)
pipe size
(512 bytes, -p)
stack size
(kbytes, -s)
cpu time
(seconds, -t)
max user processes
(-u)
virtual memory
(kbytes, -v)
0
unlimited
unlimited
unlimited
unlimited
1024
8
8192
unlimited
unlimited
unlimited
You may also do ulimit -u unlimited at the command prompt instead of adding it to
the /root/.bashrc file but the value will not survive to a reboot.
NOTE:
The atime attribute:
Linux records information about when files were created and last modified as well as when it was
last accessed. There is a cost associated with recording the last access time. The ext2 file
system of Linux has an attribute that allows the super-user to mark individual files such that their
last access time is not recorded. This may lead to significant performance improvements on often
accessed, frequently changing files such as the contents of News Server, Web Server, Proxy
Server, Database Server among other directories.
•
To set the attribute to a file, use:
[root@deep /]# chattr +A filename
For a specific file
For a whole directory tree, do something like:
[root@deep /root]# chattr -R +A /var/spool
[root@deep /root]# chattr -R +A /home/httpd/html
[root@deep /root]# chattr -R +A /var/lib/mysql
For a News and Mail Server directory
For a Web Server directory
For a SQL Database directory
221](https://image.slidesharecdn.com/securingoptimizinglinuxthehackingsolutionv-131209075405-phpapp02/85/Securing-Optimizing-Linux-the-Hacking-Solution-v-3-0-221-320.jpg)
![Process file system management 0
CHAPTER 7
The noatime attribute:
Linux has a special mount option for file systems called noatime that can be added to each line
that addresses one file system in the /etc/fstab file. If a file system has been mounted with
this option, reading accesses to the file system will no longer result in an update to the atime
information associated with the file like we have explained previously. The importance of the
noatime setting is that it eliminates the need by the system to make writes to the file system for
files, which are simply being read. Since writes can be somewhat expensive, this can result in
measurable performance gains. Note that the write time information to a file will continue to be
updated anytime the file is written to. In our example below, we will set the noatime option to our
/chroot file system.
Step 1
• Edit the fstab file (vi /etc/fstab) and add in the line that refers to the /chroot file
system, the noatime option after the defaults option as show below:
LABEL=/chroot
/chroot
ext3
defaults,noatime
1 2
Step 2
Once you have made the necessary adjustments to the /etc/fstab file, it is time to inform the
system about the modification.
•
This can be accomplished with the following commands:
[root@deep /]# mount /chroot -oremount
Each file system that has been modified must be remounted with the command shown above. In
our example we have modified the /chroot file system and it is for this reason that we remount
this file system with the above command.
Step 3
• You can verify if the modifications have been correctly applied to the Linux system with
the following command:
[root@deep /]# cat /proc/mounts
/dev/root
/
ext3
/proc
/proc
proc
/dev/sda1
/boot
ext3
/dev/sda10
/cache
ext3
/dev/sda9
/chroot
ext3
/dev/sda8
/home
ext3
/dev/sda13
/tmp
ext3
/dev/sda7
/usr
ext3
/dev/sda11
/var
ext3
/dev/sda12
/var/lib
ext3
none
/dev/pts
devpts
rw 0 0
rw 0 0
rw 0 0
rw,nodev 0 0
rw,noatime 0 0
rw,nosuid 0 0
rw,noexec,nosuid 0 0
rw 0 0
rw 0 0
rw 0 0
rw 0 0
This command will show you all file systems on your server with parameters applied to them. If
you see something like:
/dev/sda9
Congratulations!
222
/chroot
ext3
rw,noatime 0 0](https://image.slidesharecdn.com/securingoptimizinglinuxthehackingsolutionv-131209075405-phpapp02/85/Securing-Optimizing-Linux-the-Hacking-Solution-v-3-0-222-320.jpg)


![TCP/IP Network Management 0
CHAPTER 8
Linux TCP/IP
Abstract
This chapter has been inserted here because it is preferable not to be connected to the network if
the parts "Installation-Related Reference" and "Security and Optimization-Related Reference" of
the book have not been completed. It is not wise to apply new security configurations to your
system if you are online. Also, don’t forget that the firewall, which represents 50% of networking
security, is still not configured on the Linux server. Finally it is very important and I say VERY
IMPORTANT that you check all configuration files related to Linux networking to be sure that
everything is configured correctly. Please follow all recommendations and steps in this chapter
before continuing reading this book. This will allow us to be sure that if something goes wrong in
the other chapters, it will be not related to your networking configurations.
•
To stop specific network device manually on your system, use the following command:
[root@deep /]# ifdown eth0
•
To start specific network device manually on your system, use the following command:
[root@deep /]# ifup eth0
•
To stop all network devices manually on your system, use the following command:
[root@deep /]# /etc/init.d/network stop
Shutting down interface eth0
[OK]
Disabling IPv4 packet forwarding
[OK]
•
To start all network devices manually on your system, use the following command:
[root@deep /]# /etc/init.d/network start
Enabling IPv4 packet forwarding
[OK]
Bringing up interface lo
[OK]
Bringing up interface eth0
[OK]
Until now, we have not played with the networking capabilities of Linux. Linux is one of the best
operating systems in the world for networking features. Most Internet sites around the world
already know this, and have used it for some time. Understanding your network hardware and all
the files related to it is very important if you want to have a full control of what happens on your
server. Good knowledge of primary networking commands is vital. Network management covers
a wide variety of topics. In general, it includes gathering statistical data and monitoring the status
of parts of your network, and taking action as necessary to deal with failures and other changes.
The most primitive technique for network monitoring is periodic "pinging" of critical hosts. More
sophisticated network monitoring requires the ability to get specific status and statistical
information from a range of devices on the network. These should include various sorts of
datagram counts, as well as counts of errors of different kinds. For these reasons, in this chapter
we will try to answer fundamental questions about networking devices, files related to network
functionality, and essential networking commands.
227](https://image.slidesharecdn.com/securingoptimizinglinuxthehackingsolutionv-131209075405-phpapp02/85/Securing-Optimizing-Linux-the-Hacking-Solution-v-3-0-227-320.jpg)


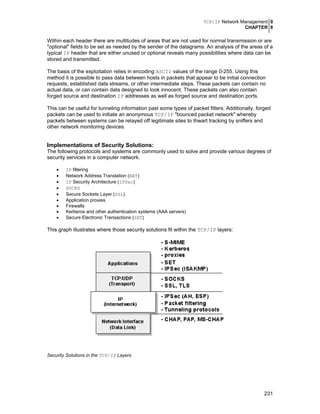

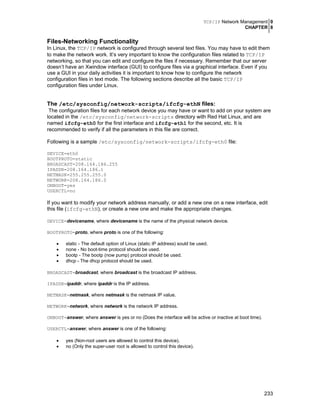
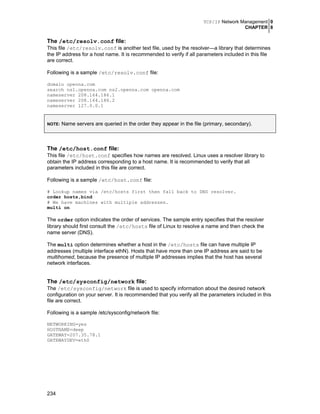
![TCP/IP Network Management 0
CHAPTER 8
The following values may be used:
NETWORKING=answer, where answer is yes or no (Configure networking or not configure networking).
HOSTNAME=hostname, where hostname is the hostname of your server.
GATEWAY=gwip, where gwip is the IP address of the remote network gateway (if available).
GATEWAYDEV=gwdev, where gwdev is the device name (eth#) you use to access the remote gateway.
The /etc/sysctl.conf file:
With the new version of Red Hat Linux, all kernel parameters available under the /proc/sys/
subdirectory of Linux can be configured at runtime. You can use the new /etc/sysctl.conf
file to modify and set kernel parameters at runtime. The sysctl.conf file is read and loaded
each time the system reboots or when you restart your network. All settings are now stored in the
/etc/sysctl.conf file. All modifications to /proc/sys should be made through
/etc/sysctl.conf, because they are better for control, and are executed before rc.local or
any other "users" scripts.
Below, we’ll focus only on the kernel option for IPv4 forwarding support. See later in this chapter
the TCP/IP security parameters related to the sysctl.conf file.
To enable IPv4 forwarding on your Linux system, use the following command:
Step 1
• Edit the sysctl.conf file (vi /etc/sysctl.conf) and add the following line:
# Enable packet forwarding (required only for Gateway, VPN, Proxy, PPP)
net.ipv4.ip_forward = 1
Step 2
You must restart your network for the change to take effect. The command to restart the network
is the following:
•
To restart all network devices manually on your system, use the following command:
[root@deep /]# /etc/init.d/network restart
Setting network parameters
[OK]
Bringing up interface lo
[OK]
Bringing up interface eth0
[OK]
Bringing up interface eth1
[OK]
You must enable packet forwarding only on a machine that serves as a Gateway
Server, VPN Server, Proxy Server or with PPP connection. Forwarding allows packets that are
destined for another network interface (if you have another one) to pass through the network.
WARNING:
There is another way to update the entry without restarting the network by using the following
command into your terminal screen:
[root@deep /]# sysctl -w net.ipv4.ip_forward=1
235](https://image.slidesharecdn.com/securingoptimizinglinuxthehackingsolutionv-131209075405-phpapp02/85/Securing-Optimizing-Linux-the-Hacking-Solution-v-3-0-235-320.jpg)
![TCP/IP Network Management 0
CHAPTER 8
The /etc/hosts file:
As your machine gets started, it will need to know the mapping of some hostnames to IP
addresses before DNS can be referenced. This mapping is kept in the /etc/hosts file. In the
absence of a name server, any network program on your system consults this file to determine
the IP address that corresponds to a host name.
Following is a sample /etc/hosts file:
IP Address
127.0.0.1
208.164.186.1
208.164.186.2
208.164.186.3
Hostname
localhost.localdomain
deep.openna.com
mail.openna.com
web.openna.com
Alias
localhost
deep
mail
web
The leftmost column is the IP address to be resolved. The next column is that host’s name. Any
subsequent columns are the aliases for that host. In the second line, for example, the IP address
208.164.186.1 if for the host deep.openna.com. Another name for deep.openna.com is
deep.
Some people have reporting that a badly formed line in the /etc/hosts file may result
to a "Segmentation fault (core dumped)" with the syslogd daemon, therefore I recommend you
to double check your entry under this file and be sure that its respond to the example as shown
above. The “Alias” part of the line is important if you want to be able to use the FQDN (Fully
Qualified Domain Name) of the system reported by the hostname -f command.
WARNING:
After you are finished adding and configuring your networking files, don’t forget to restart your
network for the changes to take effect.
•
To restart your network, use the following command:
[root@deep /]# /etc/init.d/network restart
Setting network parameters
[OK]
Bringing up interface lo
[OK]
Bringing up interface eth0
[OK]
Bringing up interface eth1
[OK]
Time out problems for telnet or ftp connection are often caused by the server trying
to resolve the client IP address to a DNS name. Either DNS isn’t configured properly on your
server or the client machines aren’t known to the DNS server. If you intend to run telnet or ftp
services on your server, and aren’t using DNS, don’t forget to add the client machine name and
IP in your /etc/hosts file on the server or you can expect to wait several minutes for the DNS
lookup to time out, before you get a login prompt.
WARNING:
236](https://image.slidesharecdn.com/securingoptimizinglinuxthehackingsolutionv-131209075405-phpapp02/85/Securing-Optimizing-Linux-the-Hacking-Solution-v-3-0-236-320.jpg)
![TCP/IP Network Management 0
CHAPTER 8
Testing TCP/IP Networking
Once we have applied TCP/IP security and optimization parameters to our server and checked
or configured all files related to network functionality, we can run some tests to verify that
everything works as expected. It is important to note that at this stage every test must be
successful and not have any errors. It is to your responsibility to know and understand networking
architecture and basic TCP/IP protocols before testing any parts of your networking configuration
and topology.
Step 1
To begin, we can use the ifconfig utility to display all the network interfaces on the server.
•
To display all the interfaces you have on your server, use the command:
[root@deep /]# ifconfig
The output should look something like this:
eth0 Link encap:Ethernet HWaddr 00:E0:18:90:1B:56
inet addr:208.164.186.2 Bcast:208.164.186.255 Mask:255.255.255.0
UP BROADCAST RUNNING MULTICAST MTU:1500 Metric:1
RX packets:1295 errors:0 dropped:0 overruns:0 frame:0
TX packets:1163 errors:0 dropped:0 overruns:0 carrier:0
collisions:0 txqueuelen:100
Interrupt:11 Base address:0xa800
lo
Link encap:Local Loopback
inet addr:127.0.0.1 Mask:255.0.0.0
UP LOOPBACK RUNNING MTU:3924 Metric:1
RX packets:139 errors:0 dropped:0 overruns:0 frame:0
TX packets:139 errors:0 dropped:0 overruns:0 carrier:0
collisions:0 txqueuelen:0
NOTE:
If the ifconfig tool is invoked without any parameters, it displays all interfaces you
configured. An option of “-a” shows the inactive one as well.
Step 2
If all network interfaces on the server look as you expect, then it is time to verify that you can
reach your hosts. Choose a host from your internal network, for instance 192.168.1.1
•
To verify that you can reach your internal hosts, use the command:
[root@deep /]# ping 192.168.1.1
The output should look something like this:
PING 192.168.1.1 (192.168.1.1) from 192.168.1.1 : 56 data bytes
64 bytes from 192.168.1.1: icmp_seq=0 ttl=128 time=1.0 ms
64 bytes from 192.168.1.1: icmp_seq=1 ttl=128 time=1.0 ms
64 bytes from 192.168.1.1: icmp_seq=2 ttl=128 time=1.0 ms
64 bytes from 192.168.1.1: icmp_seq=3 ttl=128 time=1.0 ms
--- 192.168.1.1 ping statistics --4 packets transmitted, 4 packets received, 0% packet loss
round-trip min/avg/max = 1.0/1.0/1.0 ms
237](https://image.slidesharecdn.com/securingoptimizinglinuxthehackingsolutionv-131209075405-phpapp02/85/Securing-Optimizing-Linux-the-Hacking-Solution-v-3-0-237-320.jpg)
![TCP/IP Network Management 0
CHAPTER 8
Do not try to ping a host in which you have applied the previous TCP/IP security
settings to prevent your system to respond to ping request. Instead try to ping another host
without this feature enable. Also if you don’t receive an answer from the internal host you try to
ping, verify if your hubs, routers, network cards, and network topology are correct.
WARNING:
If you are able to ping your internal host, congratulations! Now we must ping an external
network, for instance 216.148.218.195
•
To verify that you can reach the external network, use the command:
[root@deep /]# ping 216.148.218.195
The output should look something like this:
PING 216.148.218.195 (216.148.218.195) from 216.148.218.195 :56 data byte
64 bytes from 216.148.218.195: icmp_seq=0 ttl=128 time=1.0 ms
64 bytes from 216.148.218.195: icmp_seq=1 ttl=128 time=1.0 ms
64 bytes from 216.148.218.195: icmp_seq=2 ttl=128 time=1.0 ms
64 bytes from 216.148.218.195: icmp_seq=3 ttl=128 time=1.0 ms
--- 216.148.218.195 ping statistics --4 packets transmitted, 4 packets received, 0% packet loss
round-trip min/avg/max = 1.0/1.0/1.0 ms
Step 3
You should now display the routing information with the command route to see if the hosts have
the correct routing entries.
•
To display the routing information, use the command:
[root@deep /]# route -n
The output should look something like this:
Kernel IP routing table
Destination Gateway
Genmask
Flags Metric Ref
208.164.186.2 0.0.0.0
255.255.255.255UH
0
0
208.164.186.0 208.164.186.2 255.255.255.0 UG
0
0
208.164.186.0 0.0.0.0
255.255.255.0 U
0
0
127.0.0.0
0.0.0.0
255.0.0.0
U
0
0
238
Use
0
0
0
0
Iface
eth0
eth0
eth0
lo](https://image.slidesharecdn.com/securingoptimizinglinuxthehackingsolutionv-131209075405-phpapp02/85/Securing-Optimizing-Linux-the-Hacking-Solution-v-3-0-238-320.jpg)
![Step 4
Another useful option is “netstat -vat”, which shows all active and listen TCP connections.
•
To shows all active and listen TCP connections, use the command:
[root@deep /]# netstat -vat
The output may look something similar to this example depending if the related services are
running. Be aware that your results will almost certainly vary from the ones shown below:
Active Internet connections (servers and established)
Proto Recv-Q Send-Q Local Address
Foreign Address
State
tcp
0
0 deep.openna.co:domain
*:*
LISTEN
tcp
0
0 localhost:domain
*:*
LISTEN
tcp
0
0 deep.openna.com:ssh
gate.openna.com:1682ESTABLISHED
tcp
0
0 *:webcache
*:*
LISTEN
tcp
0
0 deep.openar:netbios-ssn *:*
LISTEN
tcp
0
0 localhost:netbios-ssn
*:*
LISTEN
tcp
0
0 localhost:1032
localhost:1033
ESTABLISHED
tcp
0
0 localhost:1033
localhost:1032
ESTABLISHED
tcp
0
0 localhost:1030
localhost:1031
ESTABLISHED
tcp
0
0 localhost:1031
localhost:1030
ESTABLISHED
tcp
0
0 localhost:1028
localhost:1029
ESTABLISHED
tcp
0
0 localhost:1029
localhost:1028
ESTABLISHED
tcp
0
0 localhost:1026
localhost:1027
ESTABLISHED
tcp
0
0 localhost:1027
localhost:1026
ESTABLISHED
tcp
0
0 localhost:1024
localhost:1025
ESTABLISHED
tcp
0
0 localhost:1025
localhost:1024
ESTABLISHED
tcp
0
0 deep.openna.com:www
*:*
LISTEN
tcp
0
0 deep.openna.com:https
*:*
LISTEN
tcp
0
0 *:389
*:*
LISTEN
tcp
0
0 *:ssh
*:*
LISTEN
Step 5
Sometimes machines on your network will discard your IP packets and finding the offending
Gateway responsilbe can be difficult. Fortunately the tracepath utility attempts to trace the
route an IP packet would follow to some Internet host. Choose an Internet host, for instance
64.81.28.146
•
To print the route packets take to network host, use the command:
[root@deep /]# tracepath 64.81.28.146
The output should look something like this:
1?: [LOCALHOST]
pmtu 1500
1?: 207.35.78.1
2?: 10.70.1.1
3?: 206.47.228.178
4?: 206.108.97.149
5?: 206.108.103.214
6?: 206.108.103.228
7?: 208.51.134.9
8?: 208.48.234.189
9?: 206.132.41.78
asymm 10
10?: 204.246.213.226 asymm 13
11?: 206.253.192.217 asymm 13
12?: 206.253.195.218 asymm 14
13: 64.81.28.146
asymm 15 139ms reached
Resume: pmtu 1500 hops 13 back 15](https://image.slidesharecdn.com/securingoptimizinglinuxthehackingsolutionv-131209075405-phpapp02/85/Securing-Optimizing-Linux-the-Hacking-Solution-v-3-0-239-320.jpg)
![TCP/IP Network Management 0
CHAPTER 8
Step 6
Finally, we will use the hostname command of Linux to show if our systems host name is
correct.
•
To display and print the current host name of your server, use the command:
[root@deep /]# hostname
deep
The hostname command without any options will print the current host name of our system, in
this example “deep”.
Now, it’s important to verify if the Fully Qualified Domain Name (FQDN) of our server is reported
correctly.
•
To display and print the FQDN of your server, use the command:
[root@deep /]# hostname -f
deep.openna.com
The last checkup
If you can answer, “Yes” to each of the questions below, then your network is working and you
can continue .
Parameters inside ifcfg-ethN files are corrects
The /etc/resolv.conf file contain your primary and secondary Domain Name Server
All parameters included in the /etc/host.conf file are corrects
All parameters included in the /etc/sysconfig/network file are corrects
The /etc/hosts file contain the mapping of your hostnames to IP addresses
All network interfaces on the server have the right parameter
You can reach the internal and external hosts
Your hosts have the correct routing entry
The status of the interfaces has been checked and looks fine
You are able to print the route packets take to network host
240](https://image.slidesharecdn.com/securingoptimizinglinuxthehackingsolutionv-131209075405-phpapp02/85/Securing-Optimizing-Linux-the-Hacking-Solution-v-3-0-240-320.jpg)


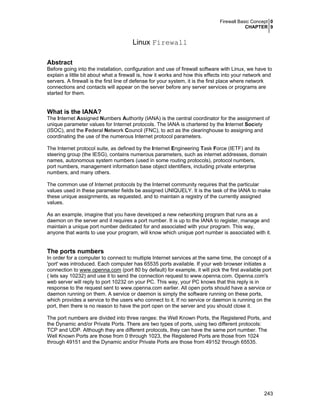
![Firewall Basic Concept 0
CHAPTER 9
The Well Known Ports are assigned by the IANA and on most systems can only be used by
system (or root) processes or by programs executed by privileged users (our daemons running in
the background). Ports are used by the TCP protocol [RFC793] to name the ends of logical
connections, which carry long-term conversations. For the purpose of providing services to
unknown callers, a service contact port is defined. The contact port is sometimes called the "wellknown port". Wherever possible, the same port assignments are also used by UDP protocol
[RFC768]. For many years Well Known Ports were in the range 0-255. Recently, the range for
the Well Known Ports has been expanded from 0 to 1023 to respond to the exponential growth of
the Internet.
The Registered Ports are also listed by the IANA and, on most systems, can be used by ordinary
user processes or programs executed by ordinary users. The IANA registers the use of these
ports as a convenience to the community. Again, wherever possible, these same port
assignments are used with UDP [RFC768]. The Registered Ports are in the range 1024-49151.
Finally, the Dynamic and/or Private Ports are those ranging from 49152 through to 65535.
Ports Numbers Graphical Representation
1
3
2
[1] The Well Known Ports represent 2% of all available ports [0-1023].
[2] The Registered Ports represent 73% of all available ports [1024-49151].
[3] The Dynamic and/or Private Ports represent 25% of all available ports [49152-65535].
244](https://image.slidesharecdn.com/securingoptimizinglinuxthehackingsolutionv-131209075405-phpapp02/85/Securing-Optimizing-Linux-the-Hacking-Solution-v-3-0-244-320.jpg)


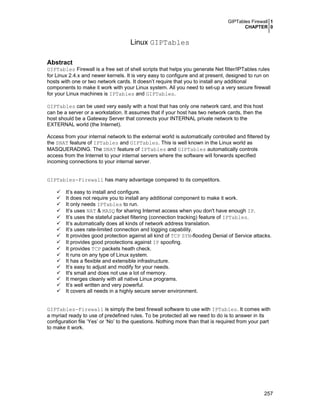
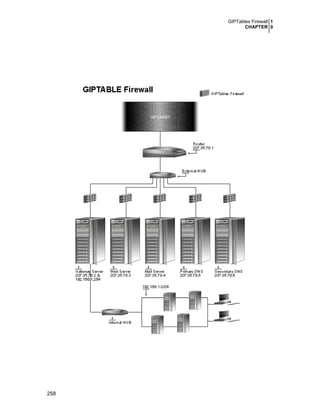
![GIPTables Firewall 1
CHAPTER 0
Pristine source
As we don’t use the RPM package to install the program, it would be difficult for us to locate all the
files installed on the system if in the future we want to upgrade. To solve this problem, it is a good
idea to make a list of files on the system before you install GIPTables, and then one afterwards,
we can then compare them using the diff utility to find out what files were installed and where
they were placed.
•
Simply run the following command before installing the software:
[root@deep root]# find /* > GIPTables1
•
And the following one after you install the software:
[root@deep root]# find /* > GIPTables2
•
Then use the following command to get a list of what changed:
[root@deep root]# diff GIPTables1 GIPTables2 > GIPTables-Installed
With this procedure, if any future upgrade appears, all you have to do is to read the generated list
of what files were added or changed by the program and remove them manually from your
system before installing the new software. In the above example, we use the /root directory of
the system to store the generated list of files.
Compiling - Optimizing & Installing GIPTables
To install the GIPTables software on your system, just download the latest version of the
software from http://www.giptables.org/ site, and then as user ‘root’ expand the archive under
your /var/tmp directory.
•
To accomplish this use the following commands:
[root@deep /]# cp giptables-version.tar.gz /var/tmp/
[root@deep /]# cd /var/tmp/
[root@deep tmp]# tar xzpf giptables-version.tar.gz
Next, move into the newly created GIPTables source directory and perform the following steps
to install the software for your system.
•
To move into the newly created GIPTables source directory use the command:
[root@deep tmp]# cd giptables-1.1/
•
To install GIPTables enter the following command:
[root@deep giptables-1.1]# ./install.sh
The “install.sh” script file will simply install any GIPTables components on your system to
the right location.
Once the installation of GIPTables has been completed, we can free up some disk space by
deleting both the program tar archive and the related source directory since they are no longer
needed.
•
To delete GIPTables and its related source directory, use the commands:
[root@deep /]# cd /var/tmp/
[root@deep tmp]# rm -rf giptables-version/
[root@deep tmp]# rm -f giptables-version.tar.gz
262](https://image.slidesharecdn.com/securingoptimizinglinuxthehackingsolutionv-131209075405-phpapp02/85/Securing-Optimizing-Linux-the-Hacking-Solution-v-3-0-262-320.jpg)
![GIPTables Firewall 1
CHAPTER 0
Step1
First of all, choose one of the default configuration files that can be found in the
/lib/giptables/conf directory. Find one that mostly meets your needs, make a backup copy
of it and open it with any kind of text editor to configure it. In our example, we will configure our
GIPTables firewall software for a Gateway/Proxy Server with two network interfaces since it is
the most complicated configuration we are likely to encounter.
•
These procedures can be accomplished with the following commands:
[root@deep /]# cd /lib/giptables/conf/
[root@deep conf]# cp giptables.conf.gateway giptables.conf.mybox
[root@deep conf]# ln -sf /lib/giptables/conf/giptables.conf.mybox
/etc/giptables.conf
In the above steps, we make a copy of our original “giptables.conf.gateway” file and create
a symbolic link pointing to the copy.
NOTE: It is a good idea not to directly modify an example configuration file, because if it gets
damage, then you have to install the entire package again in order to get it back.
Step2
Now our giptables.conf file that is a symbolic link pointing to the original configuration file for
a Gateway set-up exists. It is time to edit it and provide or change some minimal values to make it
work for our system.
In the GIPTables configuration file below, we’ll ONLY explain how to configure and set
parameters that are the same for all types of GIPTables firewall configuration. Parts that differ
are associated with different available GIPTables modules that must be loaded by the firewall
configuration file to enable different services. All available modules with GIPTables firewall are
explained later in this document.
•
Edit the giptables.conf file (vi /etc/giptables.conf) and configure it to fit in
with your system and networking setup. Text in bold is what you should change to make
the firewall work with your server:
The Debug Definition:
The first configurable option that is the same for all types of GIPTables firewall configuration is
“DEBUG” and by default it is set to “off”. This option is useful only for debugging purposes.
# ---------------------------------------------------------------------------# DEBUG
#
DEBUG="off"
If you set this option to "on", the firewall will display all IPTables rules relating to the
GIPTables configuration file that you use to the screen, nothing will go to the kernel. The
displayed set of rules will be commented so that you will not end up with lots of rules on the
screen that you do not understand. This way you can see only what the firewall is generating, and
also you will be able to better understand which rule is for what.
264](https://image.slidesharecdn.com/securingoptimizinglinuxthehackingsolutionv-131209075405-phpapp02/85/Securing-Optimizing-Linux-the-Hacking-Solution-v-3-0-264-320.jpg)
![GIPTables Firewall 1
CHAPTER 0
When this option is set to "off" (the default setting), the firewall will send all generated rules to
the kernel, nothing will be displayed on your screen and the firewall will run on your system.
Therefore is you want to run GIPTables on your system, you must be sure that this option is set
to ‘off’.
NOTE: When the “DEBUG” option is set to “on”, it is possible to redirect the output of the firewall
rules to a file, and use this file as learning example of how to set up IPTables rules for different
kind of services. This is possible with the following command:
[root@deep tmp]# /etc/init.d/giptables start > output-result.txt
The Monolithic Kernel Definition:
The second configurable option that is the same for all types of GIPTables configuration is the
“MONOLITIC_KERNEL” option and it is set to “no” by default. This option exists because the Linux
kernel can be compiled so that it contains all the required IPTables driver code directly in it.
This way we have a MONOLITHIC KERNEL and we would need to answer by “yes” to the option.
# ---------------------------------------------------------------------------# Some definitions for easy maintenance
# Edit these to suit your system
#
MONOLITIC_KERNEL="no"
If you set this option to ‘yes’, then GIPTables will be informed that all native IPTables
modules are directly compiled into the kernel. It is important to say ‘yes’ here only if you have a
Monolithic Linux Kernel installed on your computer otherwise say ‘no’. Then the firewall will look
for and load all the IPTables modules that are required, depending on your configuration file.
NOTE: If you compile your kernel as Monolithic, you should know what IPTables modules you
need to compile directly into the kernel, since the firewall will not try to load them. If you missed
some modules, you will inevitably get errors, or the firewall might not work as expected. The best
solution for a Monolithic Kernel set-up is to compile all native iptables modules into the kernel.
Also, don’t forget to set MONOLITIC_KERNEL="yes" in the firewall configuration file.
The External Network Interface Definition:
The next configurable option that is the same for all type of GIPTables firewall configuration is
one of the most important settings in the configuration file.
# Interface 0: This is our external network interface
# It is directly connected to Internet
INTERFACE0="eth0"
INTERFACE0_IPADDR="x.x.x.x"
ANY_IPADDR="0/0"
265](https://image.slidesharecdn.com/securingoptimizinglinuxthehackingsolutionv-131209075405-phpapp02/85/Securing-Optimizing-Linux-the-Hacking-Solution-v-3-0-265-320.jpg)

![GIPTables Firewall 1
CHAPTER 0
# Refuse incoming packets claiming to be from the IP addresses of our
interfaces
REFUSE_SPOOFING_IPADDR[0]=$INTERFACE0_IPADDR
INTERFACE0_IN_REFUSE_SPOOFING[0]="yes"
INTERFACE1_IN_REFUSE_SPOOFING[0]="no"
NETWORK1_IN_REFUSE_SPOOFING[0]="yes"
REFUSE_SPOOFING_IPADDR[1]=$INTERFACE1_IPADDR
INTERFACE0_IN_REFUSE_SPOOFING[1]="no"
INTERFACE1_IN_REFUSE_SPOOFING[1]="yes"
NETWORK1_IN_REFUSE_SPOOFING[1]="no"
B) We log and drop all incoming packets claiming to be from the broadcast source address
range. We accept broadcast source packets only in one situation: when we have a DHCP
Server, and this, because a DHCP Client will request its IP address by sending out and
DHCP discovery packet that has source IP address "0.0.0.0" and destination IP
address "255.255.255.255". In this situation, the Gateway Server is also a DHCP
Server, so we will accept by default those broadcast source packets only on the internal
interface.
# Refuse incoming packets claiming to be from broadcast-src address range
REFUSE_SPOOFING_IPADDR[2]="0.0.0.0/8"
INTERFACE0_IN_REFUSE_SPOOFING[2]="yes"
INTERFACE1_IN_REFUSE_SPOOFING[2]="no"
NETWORK1_IN_REFUSE_SPOOFING[2]="yes"
C) We log and drop all incoming packets claiming to be from the reserved loopback IP
address range. This is so obvious. We should never have incoming packets with source
IP address from the loopback address range. We can refuse them safely on all our
interfaces.
# Refuse incoming packets claiming to be from reserved loopback address range
REFUSE_SPOOFING_IPADDR[3]="127.0.0.0/8"
INTERFACE0_IN_REFUSE_SPOOFING[3]="yes"
INTERFACE1_IN_REFUSE_SPOOFING[3]="yes"
NETWORK1_IN_REFUSE_SPOOFING[3]="yes"
E) We log and drop all incoming packets claiming to be from the well-known private
networks: A, B, C. We can safely refuse all packets claiming to be from those private
networks on all of our interfaces, and internal network.
# Refuse incoming packets claiming to be from class A private network
REFUSE_SPOOFING_IPADDR[4]="10.0.0.0/8"
INTERFACE0_IN_REFUSE_SPOOFING[4]="yes"
INTERFACE1_IN_REFUSE_SPOOFING[4]="yes"
NETWORK1_IN_REFUSE_SPOOFING[4]="yes"
273](https://image.slidesharecdn.com/securingoptimizinglinuxthehackingsolutionv-131209075405-phpapp02/85/Securing-Optimizing-Linux-the-Hacking-Solution-v-3-0-273-320.jpg)
![GIPTables Firewall 1
CHAPTER 0
# Refuse incoming packets claiming to be from class B private network
REFUSE_SPOOFING_IPADDR[5]="172.16.0.0/12"
INTERFACE0_IN_REFUSE_SPOOFING[5]="yes"
INTERFACE1_IN_REFUSE_SPOOFING[5]="yes"
NETWORK1_IN_REFUSE_SPOOFING[5]="yes"
# Refuse incoming packets claiming to be from class C private network
REFUSE_SPOOFING_IPADDR[6]="192.168.0.0/16"
INTERFACE0_IN_REFUSE_SPOOFING[6]="yes"
INTERFACE1_IN_REFUSE_SPOOFING[6]="no"
NETWORK1_IN_REFUSE_SPOOFING[6]="yes"
WARNING: There is only one exception in which case we do not refuse incoming packets on our
internal interface claiming to be from our internal private network. This appears only for a
Gateway Server when your internal network is from class C. You should not refuse incoming
packets on internal interface from your internal network.
F) We log and drop all incoming packets claiming to be from class D, E, and unallocated IP
addresses. These are classes that are not currently used or that are unallocated. There is
no reason for an incoming packet to have a source IP address from one of those classes.
# Refuse incoming packets claiming to be from class D, E, and unallocated
REFUSE_SPOOFING_IPADDR[7]="224.0.0.0/3"
INTERFACE0_IN_REFUSE_SPOOFING[7]="yes"
INTERFACE1_IN_REFUSE_SPOOFING[7]="yes"
NETWORK1_IN_REFUSE_SPOOFING[7]="yes"
The above Spoofing and bad address protection assume that you have two network interfaces
installed on your system. This configuration is suitable for a Gateway Server. If you only have one
network interface on your server, then you can ignore, comment out or remove those options that
refer to internal interface and network (Interface1 and Network1).
If REFUSE_SPOOFING="no" then the entire spoofing protection section is ignored.
The above configuration closes our discussion about parameters that are the same for all types of
GIPTables firewall configurations. Once you have configured all of the customized values in this
part of the GIPTables configuration file, suitable for your type of system, you are ready to start
the software.
/etc/rc.d/rc.giptables.blocked: The GIPTables Blocked File
Sometimes you’ll know an address that you would like to block from having any access at all to
your server. Instead of entering the entire iptables line per IP address for those jerks on the
internet, you can write them into the rc.giptables.blocked file, that will take the IP
addresses, strip out any comments and run the resulting list through an iptables routine.
The net effect is the /etc/giptables.conf file increases no more than needed, especially
when one might have a large number of IP addresses to deny.
274](https://image.slidesharecdn.com/securingoptimizinglinuxthehackingsolutionv-131209075405-phpapp02/85/Securing-Optimizing-Linux-the-Hacking-Solution-v-3-0-274-320.jpg)
![GIPTables Firewall 1
CHAPTER 0
•
To start GIPTables on your system, use the following command:
[root@deep /]# /etc/init.d/giptables start
The GIPTables Firewall Module Files
Once you have chosen the right GIPTables configuration file suitable for the type of server that
you want to protect and all the parameters, which are the same for all type of GIPTables firewall
have been configured, GIPTables should have enough information to run properly on your
system. Really, your work is done and your firewall is well protected against attacks.
Everyone has a different set-up for his firewall design and sometimes we need to implement a
new service and then open and control the port associated with this service on our server.
GIPTables allows us to add, modify, delete, and customize any existing or expected services in
a simple manner through its modules feature.
With GIPTables, each service like DNS, FTP, HTTPD, etc have their own modules. Those
modules are loaded only when defined in the giptables.conf file, so that if there are no
options related to FTP for example, the FTP module will not be loaded. You can specify on which
interface or network the module will work, and what kind of requests (incoming or outgoing) can
go thought that interface or network.
All GIPTables modules are located under the /lib/giptables/modules directory and it’s in
these module files that we handle all rules relating to the specific service. When we configure,
customize and enable service parameters in the giptables.conf file, the parameter in
question get its information about IPTables rules that must be used through the modules files
available under the /lib/giptables/modules directory. If the parameter of the specific
service that you want to enable is not defined into the GIPTables configuration file, then this
service will not load its IPTables rules from its modules file and will not run with your
GIPTables Firewall software.
If you look in the /lib/giptables/modules directory, you’ll find the following modules for the
services that can be enabled with GIPTables Firewall.
giptables-ANY
giptables-AUTH
giptables-DHCP
giptables-DNS
giptables-FINGER
giptables-FTP
giptables-HTTP
giptables-HTTPS
giptables-ICMP
giptables-IMAP
giptables-IMAPS
giptables-LDAP
giptables-LDAPS
giptables-MYSQL
giptables-NETBIOS
giptables-NNTP
giptables-NNTPS
giptables-NTP
giptables-ORACLE
giptables-POP3
giptables-POP3S
giptables-POSTGRES
276
The ANY module, which refer to ANY services
The AUTH module, which refer to AUTH services
The DHCP module, which refer to DHCP services
The DNS module, which refer to DNS services
The FINGER module, which refer to FINGER services
The FTP module, which refer to FTP services
The HTTP module, which refer to HTTP services
The HTTPS module, which refer to HTTPS services
The ICMP module, which refer to ICMP services
The IMAP module, which refer to IMAP services
The IMAPS module, which refer to IMAPS services
The LDAP module, which refer to LDAP services
The LDAPS module, which refer to LDAPS services
The MYSQL module, which refer to MYSQL services
The NetBIOS module, which refer to NetBIOS services
The NNTP module, which refer to NNTP services
The NNTPS module, which refer to NNTPS services
The NTP module, which refer to NTP services
The ORACLE module, which refer to ORACLE services
The POP3 module, which refer to POP3 services
The POP3S module, which refer to POP3S services
The POSTGRES module, which refer to POSTGRES services](https://image.slidesharecdn.com/securingoptimizinglinuxthehackingsolutionv-131209075405-phpapp02/85/Securing-Optimizing-Linux-the-Hacking-Solution-v-3-0-276-320.jpg)
![GIPTables Firewall 1
CHAPTER 0
Enabling outgoing client requests
In the example below, we define and enable MySQL outgoing client requests for a Gateway
Server. The difference about parameters with other type of servers is that we need to define
additional network interface (INTERFACE1) and network (NETWORK1) for a Gateway Server setup. All text in bold should be configured to define and enable the MySQL service.
# ---------------------------------------------------------------------------# MYSQL outgoing client request
#
# Interface 0 MYSQL outgoing client request
INTERFACE0_MYSQL_CLIENT="yes"
INTERFACE0_MYSQL_OUT_SRC_IPADDR[0]=$INTERFACE0_IPADDR
INTERFACE0_MYSQL_OUT_DST_IPADDR[0]=$ANY_IPADDR
In the above example, we first enable MySQL outgoing client request on the external interface
(INTERFACE0_MYSQL_CLIENT="yes").
Next, we instruct the system that the parameters apply to interface 0 (INTERFACE0) for the
MySQL service (MYSQL) for outgoing requests (OUT) with the source IP address (SRC_IPADDR)
coming from our external interface IP address ($INTERFACE0_IPADDR). Which means, packets
having our external interface IP address, as a source IP address will be able to go out and/or start
a new connection.
Finally, we inform the system that the parameters also apply to interface 0 (INTERFACE0) for the
MySQL service (MYSQL) for outgoing requests (OUT) with the destination IP address
(DST_IPADDR) going to anywhere ($ANY_IPADDR). And this means, packets having our external
interface, as the destination IP address will be able to go out and/or start a new connection.
Using the connection tracking capability of IPTables, the related MySQL incoming packets are
automatically allowed back in by the firewall. In this case, our machine can be a MySQL client that
is allowed to access any MySQL server on the Internet.
If we want to restrict access to only one external MySQL server, the parameters should be
configured like in the example below:
# Interface 0 MYSQL outgoing client request
INTERFACE0_MYSQL_CLIENT="yes"
INTERFACE0_MYSQL_OUT_SRC_IPADDR[0]=$INTERFACE0_IPADDR
INTERFACE0_MYSQL_OUT_DST_IPADDR[0]="x.x.x.x"
In this case, "x.x.x.x" is the IP address of the external MySQL server that we want to access.
For a second MySQL server, another set of parameters should be added, like in the example
below:
278](https://image.slidesharecdn.com/securingoptimizinglinuxthehackingsolutionv-131209075405-phpapp02/85/Securing-Optimizing-Linux-the-Hacking-Solution-v-3-0-278-320.jpg)
![GIPTables Firewall 1
CHAPTER 0
# Interface 0 MYSQL outgoing client request
INTERFACE0_MYSQL_CLIENT="yes"
INTERFACE0_MYSQL_OUT_SRC_IPADDR[0]=$INTERFACE0_IPADDR
INTERFACE0_MYSQL_OUT_DST_IPADDR[0]="x.x.x.x"
INTERFACE0_MYSQL_OUT_SRC_IPADDR[1]=$INTERFACE0_IPADDR
INTERFACE0_MYSQL_OUT_DST_IPADDR[1]="y.y.y.y"
"x.x.x.x" is the IP address of the first external MySQL server that we want to access and
"y.y.y.y" is the IP address of the second external MySQL server that we want to access. Please
note that the index of parameters has been increased, so that the first set of parameters have the
index 0, and the second set of parameters have the index 1.
NOTE: This rule is the same for all GIPTables Firewall parameters that have an index. If you
would like to add a second set of parameters, just copy/paste them, make the required changes
and do not forget to increase the index.
On a Gateway Server or machines with two networks interfaces, we need to define the following
additional parameters for the firewall to recognize the other network interface and the private
network behind it.
# Interface 1 MYSQL outgoing client request
INTERFACE1_MYSQL_CLIENT="yes"
INTERFACE1_MYSQL_OUT_SRC_IPADDR[0]=$INTERFACE1_IPADDR
INTERFACE1_MYSQL_OUT_DST_IPADDR[0]=$NETWORK1
In the above example, we enable MySQL outgoing client request on the internal interface
(INTERFACE1_MYSQL_CLIENT="yes").
We instruct the system that the parameters apply to internal interface 1 (INTERFACE1) for the
MySQL service (MYSQL) to outgoing requests (OUT) with source IP address (SRC_IPADDR)
coming from our internal interface IP address ($INTERFACE1_IPADDR). Therefore, any packets
having our internal interface IP address, as source IP address will be able to go out and/or start a
new connection.
Next, we inform the system that the parameters also apply to internal interface 1 (INTERFACE1)
for the MySQL service (MYSQL) for outgoing requests (OUT) with a destination IP address
(DST_IPADDR) going from our internal subnet IP address range ($NETWORK1). Therefore, any
packets from our internal subnet will be able to go out and/or start new connections.
Using the connection tracking capability of IPTables, the related MySQL incoming packets are
automatically allowed back in by the firewall. In this case, our machine can be a MySQL client that
is allowed to access any MySQL server from our internal subnet.
# Network 1 MYSQL forwarded outgoing client request
NETWORK1_MYSQL_CLIENT="yes"
NETWORK1_MYSQL_OUT_SRC_IPADDR[0]=$NETWORK1
NETWORK1_MYSQL_OUT_DST_IPADDR[0]=$ANY_IPADDR
279](https://image.slidesharecdn.com/securingoptimizinglinuxthehackingsolutionv-131209075405-phpapp02/85/Securing-Optimizing-Linux-the-Hacking-Solution-v-3-0-279-320.jpg)
![GIPTables Firewall 1
CHAPTER 0
Here, we enable MySQL outgoing client requests on our internal subnet
(NETWORK1_MYSQL_CLIENT="yes").
We instruct the system that the parameters apply to our internal subnet (NETWORK1) for the
MySQL service (MYSQL) for outgoing requests (OUT) with the source IP address (SRC_IPADDR)
coming from our internal subnet IP address range ($NETWORK1).
In the second line, we inform the system that the parameters also apply to our internal subnet
(NETWORK1) for the MySQL service (MYSQL) to outgoing requests (OUT) with destination IP
address (DST_IPADDR) going to anywhere ($ANY_IPADDR).
Using the connection tracking capability of IPTables, the related MySQL incoming packets are
automatically allowed back in by the firewall. In this case, our machines from our internal subnet
are the MySQL clients and are allowed to access any MySQL server on the Internet.
NOTE: The requests are automatically SNATed (MASQUERADEd) by the GIPTables Firewall, so
that the MySQL server from the Internet thinks that talks with our Gateway server.
In general, you should only replace MYSQL with the name of the service that you want to define
for the parameters to work for other type of services. In our example, we use MYSQL; it is to you
to change it for the service of your choice.
Enabling incoming client requests
As we can see, all of the above parameters apply only to outgoing client requests for the MySQL
service on a Gateway Server. Now for incoming server requests, we should add the related lines
to the configuration file to allow them in. In the example below, we define and enable MySQL
incoming client requests for a Gateway Server. The difference with parameters for other types of
servers is that here we need to define an additional network interface (INTERFACE1) and a
network (NETWORK1) for a Gateway Server set-up.
# ---------------------------------------------------------------------------# MYSQL incoming client request
#
# Interface 0 MYSQL incoming client request
INTERFACE0_MYSQL_SERVER="yes"
INTERFACE0_MYSQL_IN_SRC_IPADDR[0]=$ANY_IPADDR
INTERFACE0_MYSQL_IN_DST_IPADDR[0]=$INTERFACE0_IPADDR
In the above example, we first enable incoming client request for MySQL on the external interface
(INTERFACE0_MYSQL_SERVER="yes").
Next, we instruct the system that the parameters apply to external interface 0 (INTERFACE0) for
the MySQL service (MYSQL) for incoming requests (IN) with the source IP address (SRC_IPADDR)
coming from anywhere ($ANY_IPADDR). This mean that we permit the firewall to receive packets
coming from anywhere on our external interface to start a new connection.
280](https://image.slidesharecdn.com/securingoptimizinglinuxthehackingsolutionv-131209075405-phpapp02/85/Securing-Optimizing-Linux-the-Hacking-Solution-v-3-0-280-320.jpg)
![GIPTables Firewall 1
CHAPTER 0
Finally, we inform the system that parameters also apply to external interface 0 (INTERFACE0)
for MySQL service (MYSQL) on incoming requests (IN) with destination IP address (DST_IPADDR)
coming from our external IP address ($INTERFACE0_IPADDR). In other terms, incoming packets
having our external interface, as destination IP address will be able to come in and/or start a new
connection.
Using the connection tracking capability of IPTables, the related MySQL outgoing packets are
automatically allowed back out by the firewall. In this case, our machine is a MySQL server that is
allowed to receive requests from any MySQL client from the Internet.
If we want to allow access to only one external client machine on the MySQL server, the
parameters should be configured like in the example below:
# Interface 0 MYSQL incoming client request
INTERFACE0_MYSQL_SERVER="yes"
INTERFACE0_MYSQL_IN_SRC_IPADDR[0]="x.x.x.x"
INTERFACE0_MYSQL_IN_DST_IPADDR[0]=$INTERFACE0_IPADDR
In this case, "x.x.x.x" is the IP address of the external client machine that is allowed to access
our MySQL server. For a second external client machine allowed, another set of parameters
should be added, like in the example below:
# Interface 0 MYSQL incoming client request
INTERFACE0_MYSQL_SERVER="yes"
INTERFACE0_MYSQL_IN_SRC_IPADDR[0]="x.x.x.x"
INTERFACE0_MYSQL_IN_DST_IPADDR[0]=$INTERFACE0_IPADDR
INTERFACE0_MYSQL_IN_SRC_IPADDR[1]="y.y.y.y"
INTERFACE0_MYSQL_IN_DST_IPADDR[1]=$INTERFACE0_IPADDR
"x.x.x.x" is the IP address of the first external client machine that is allowed to access our
MySQL server and "y.y.y.y" is the IP address of the second external client machine that is
allowed to access our MySQL server. Please note that the index of parameters has been
increased, so that the first set of parameters have the index 0, and the second set of parameters
have the index 1.
NOTE: This rule is the same for all GIPTables Firewall parameters that have an index. If you
would like to add a second set of parameters, just copy/paste them, make the required changes
and do not forget to increase the index.
Don’t forget that we need to add all of the lines below for a Gateway Server set-up for the firewall
to recognize the second network interface and our internal subnet. The definitions and
explanations are the same as for outgoing client requests explained earlier.
# Interface 1 MYSQL incoming client request
INTERFACE1_MYSQL_SERVER="yes"
INTERFACE1_MYSQL_IN_SRC_IPADDR[0]=$NETWORK1
INTERFACE1_MYSQL_IN_DST_IPADDR[0]=$INTERFACE1_IPADDR
281](https://image.slidesharecdn.com/securingoptimizinglinuxthehackingsolutionv-131209075405-phpapp02/85/Securing-Optimizing-Linux-the-Hacking-Solution-v-3-0-281-320.jpg)
![GIPTables Firewall 1
CHAPTER 0
In the above example, we enable MySQL incoming client request on the internal interface
(INTERFACE1_MYSQL_SERVER="yes").
Next, we instruct the firewall that on the internal interface (INTERFACE1), all MySQL (MYSQL)
incoming packets (IN) with source IP address (SRC_IPADDR) from our internal subnet IP address
range ($NETWORK1) and with destination IP address (DST_IPADDR) coming from our internal
interface IP address ($INTERFACE1_IPADDR) will be allowed to come in and/or start a new
connection.
In other terms, any incoming MySQL packets with source IP address from our internal subnet IP
address range and with our internal interface IP address as destination IP address will be allowed
to come in and/or start a new connection.
Using the connection tracking capability of IPTables, the related MySQL outgoing packets are
automatically allowed back out by the firewall. In this case, our machine is a MySQL server that is
allowed to receive requests from any MySQL client from our internal subnet.
There might be a situation when we would like to access the MySQL server from our internal
subnet using the external interface IP address ($INTERFACE0_IPADDR) as destination IP
address (DST_IPADDR). This is the case when we connect to the MySQL server using its host
name instead of the IP address. Our DNS server might resolve the MySQL server's IP address as
the external interface IP address. In this case, the parameters should be configured like in the
example below:
# Interface 1 MYSQL incoming client request
INTERFACE1_MYSQL_SERVER="yes"
INTERFACE1_MYSQL_IN_SRC_IPADDR[0]=$NETWORK1
INTERFACE1_MYSQL_IN_DST_IPADDR[0]=$INTERFACE1_IPADDR
INTERFACE1_MYSQL_IN_SRC_IPADDR[1]=$NETWORK1
INTERFACE1_MYSQL_IN_DST_IPADDR[1]=$INTERFACE0_IPADDR
As you can see, we have copy/paste the first set of parameters, then changes the destination IP
address (DST_IPADDR) to our external interface IP address ($INTERFACE0_IPADDR) and also
increase the index number.
# Network 1 MYSQL forwarded incoming server request
NETWORK1_MYSQL_SERVER="yes"
NETWORK1_MYSQL_IN_CLI_IPADDR[0]=$ANY_IPADDR
NETWORK1_MYSQL_IN_SRV_IPADDR[0]="192.168.1.1"
In the above example, we enable MySQL incoming client request on our internal subnet
(NETWORK1_MYSQL_SERVER="yes").
Next, we instruct the firewall that in our internal subnet (NETWORK1), all MySQL (MYSQL) incoming
packets (IN) with source IP address (SRC_IPADDR) of any IP address ($ANY_IPADDR) and with
destination IP address (DST_IPADDR) "192.168.1.1" will be allowed to come in and/or start a
new connection.
282](https://image.slidesharecdn.com/securingoptimizinglinuxthehackingsolutionv-131209075405-phpapp02/85/Securing-Optimizing-Linux-the-Hacking-Solution-v-3-0-282-320.jpg)
![GIPTables Firewall 1
CHAPTER 0
In other terms, any incoming MySQL packets with any IP address as source IP address and with
192.168.1.1 as destination IP address will be allowed to come in and/or start a new
connection.
Using the connection tracking capability of IPTables, the related MySQL outgoing packets are
automatically allowed back out by the firewall. In this case, our machine from our internal subnet
that has the IP address 192.168.1.1 is the MySQL server and it is allowed to receive requests
from any MySQL client from the Internet.
NOTE: The MySQL client from the Internet thinks that it talks to our Gateway server, so the actual
destination IP address of the packet is our external interface IP address
($INTERFACE1_IPADDR), but the packet is automatically DNATed to 192.168.1.1.
Pay special attention to the above parameters. We noted that IP address “192.168.1.1” is used
as the value for the incoming client requests with the forwarding feature. This is important, if your
internal workstation IP address is different, you will have to adjust the setting to fit your own IP
address for each of the forwarding definitions.
Step3
Now that our parameters for MySQL service have been correctly entered in the GIPTables
configuration file, we need to restart our GIPTables firewall for the changes to take effect.
•
To restart GIPTables on your system, use the following command:
[root@deep /]# /etc/init.d/giptables restart
Well, now we have a better idea about what these cryptic definitions do and how to change them
to fit our needs depending of the type of firewall that we need for our server. Human error is
inevitable and if we entered all the additional parameters into GIPTables by hand, we could in
inadvertently make some errors. To avoid this risk, GIPTables provides through it’s
“giptables.conf.README” file all the possible definitions for available services that can be
used with it.
Therefore, if you need to add some additional services, which do not exist by default in the
giptables.conf file, you can refer to this file to get the parameters to make your service run
with GIPTables Firewall. All you’ll need to do is to cut and paste the required lines into your
GIPTables configuration file and set up each parameter by answering “yes” or “no” to the
questions.
Running the type of GIPTables firewall that you need
All servers should be configured to block the unused ports, even if they are not a firewall
server. This is required for increased security. Imagine that someone gains access to your main
firewall server: if your other servers are not configured to block unused ports, this can result a
serious network security risk. The same is true for local connections; unauthorized employees
can gain access to your other servers from inside the network.
As you should know now, before running GIPTables in your system, you must create a symbolic
link under the /etc directory that points to the GIPTables configuration file suitable for your
system. Once this configuration file exists under your /etc directory, all you have to do is to edit
it and set-up your networking configuration to make it work for you. This is true with all of server
types except for a Gateway Server which differs as explained below.
283](https://image.slidesharecdn.com/securingoptimizinglinuxthehackingsolutionv-131209075405-phpapp02/85/Securing-Optimizing-Linux-the-Hacking-Solution-v-3-0-283-320.jpg)
![GIPTables Firewall 1
CHAPTER 0
Step1
The IP masquerading code will only work if IP forwarding is enabled on your system. This feature
is by default disabled and you can enable it with the following command:
•
To enable IPv4 forwarding on your Linux system, use the following command:
Edit the sysctl.conf file (vi /etc/sysctl.conf) and add the following lines:
# Enable packet forwarding (required only for Gateway, VPN, Proxy, PPP)
net.ipv4.ip_forward = 1
You must restart your network for the change to take effect. The command to restart the network
is:
•
To restart all network devices manually on your system, use the following command:
[root@deep /]# /etc/init.d/network restart
Setting network parameters
[OK]
Bringing up interface lo
[OK]
Bringing up interface eth0
[OK]
Bringing up interface eth1
[OK]
Step 2
Create the symbolic link to the giptables.conf file that points to the right GIPTables
configuration file suitable for our setup of a Gateway Server.
•
This can be accomplished with the following command:
[root@deep /]# ln -s /lib/giptables/conf/giptables.conf.gateway
/etc/giptables.conf
Step3
Once the symbolic link is created, we will edit it to suit our requirements. The text in bold are the
parts of the configuration that must be modified to satisfy your needs.
This is the configuration script file for a Gateway/Proxy Server, it will:
1
2
3
4
5
6
7
8
9
10
11
12
13
14
15
16
17
18
19
20
21
Log and limit the amount of incoming dropped packets.
Implement the Syn-flood protection.
Make sure that all NEW incoming tcp connections are SYN packets.
Protect from Spoofing and bad addresses.
Allow DNS client requests on internal & external interfaces.
Allow FTP client requests on internal & external interfaces.
Allow SSH client requests on internal & external interfaces.
Allow SSH server requests on the external interface.
Allow SMTP client requests on internal & external interfaces.
Allow POP3 client requests on the internal interface.
Allow POP3S client requests on the internal interface.
Allow HTTP client requests on internal & external interfaces.
Allow HTTPS client requests on internal & external interfaces.
Allow SQUID client requests on internal & external interfaces.
Allow SQUID server requests on the external interface.
Allow NETBIOS client requests on the internal interface.
Allow NETBIOS server requests on the internal interface.
Allow TRACEROUTE client requests on internal & external interfaces.
Allow TRACEROUTE server requests on internal & external interfaces.
Allow ICMP client requests on internal & external interfaces.
Allow DHCP client requests on the internal interface.
285](https://image.slidesharecdn.com/securingoptimizinglinuxthehackingsolutionv-131209075405-phpapp02/85/Securing-Optimizing-Linux-the-Hacking-Solution-v-3-0-285-320.jpg)
![GIPTables Firewall 1
CHAPTER 0
If you don’t want some of the services listed in the firewall rules files for the Gateway/Proxy
Server, disable them by saying “no” to the questions. If you want some other services that are not
enabled, simply say, “yes” to the questions. If the service does not exist, add it to your
configuration based on the available examples from the giptables.conf.README file.
•
To edit the giptales.conf file, use the following command:
[root@deep /]# vi /etc/giptables.conf
#
#
#
#
#
#
#
#
#
#
#
#
#
#
#
#
#
#
#
#
#
---------------------------------------------------------------------------GIPTables Firewall v1.1 http://www.giptables.org
Copyright (C) 2002 Adrian Pascalau <apascalau@openna.com>
GATEWAY main configuration file
---------------------------------------------------------------------------This file is part of GIPTables Firewall
GIPTables Firewall is free software; you can redistribute it and/or modify
it under the terms of the GNU General Public License as published by
the Free Software Foundation; either version 2 of the License, or
(at your option) any later version.
This program is distributed in the hope that it will be useful,
but WITHOUT ANY WARRANTY; without even the implied warranty of
MERCHANTABILITY or FITNESS FOR A PARTICULAR PURPOSE. See the
GNU General Public License for more details.
You should have received a copy of the GNU General Public License
along with this program; if not, write to the Free Software
Foundation, Inc., 59 Temple Place, Suite 330, Boston, MA 02111-1307
USA
# ---------------------------------------------------------------------------# DEBUG
#
DEBUG="off"
# ---------------------------------------------------------------------------# Some definitions for easy maintenance
# Edit these to suit your system
#
MONOLITIC_KERNEL="no"
# Interface 0: This is our external network interface
# It is directly connected to Internet
INTERFACE0="eth0"
INTERFACE0_IPADDR="x.x.x.x"
ANY_IPADDR="0/0"
# Interface 1: This is our internal network interface
# It is directly connected to our internal Network 1
INTERFACE1="eth1"
INTERFACE1_IPADDR="192.168.1.254"
NETWORK1="192.168.1.0/24"
# Do you need Network Address Translation for your internal network?
NETWORK1_NAT="yes"
286](https://image.slidesharecdn.com/securingoptimizinglinuxthehackingsolutionv-131209075405-phpapp02/85/Securing-Optimizing-Linux-the-Hacking-Solution-v-3-0-286-320.jpg)
![GIPTables Firewall 1
CHAPTER 0
# ---------------------------------------------------------------------------# Spoofing and bad addresses
#
REFUSE_SPOOFING="yes"
# Refuse incoming packets claiming to be from the ip addresses of our
interfaces
REFUSE_SPOOFING_IPADDR[0]=$INTERFACE0_IPADDR
INTERFACE0_IN_REFUSE_SPOOFING[0]="yes"
INTERFACE1_IN_REFUSE_SPOOFING[0]="no"
NETWORK1_IN_REFUSE_SPOOFING[0]="yes"
REFUSE_SPOOFING_IPADDR[1]=$INTERFACE1_IPADDR
INTERFACE0_IN_REFUSE_SPOOFING[1]="no"
INTERFACE1_IN_REFUSE_SPOOFING[1]="yes"
NETWORK1_IN_REFUSE_SPOOFING[1]="no"
# Refuse incoming packets claiming to be from broadcast-src address range
REFUSE_SPOOFING_IPADDR[2]="0.0.0.0/8"
# If you provide DHCP services on one of your interfaces, do not forget to
# set the following option related to that interface to "no"
INTERFACE0_IN_REFUSE_SPOOFING[2]="yes"
INTERFACE1_IN_REFUSE_SPOOFING[2]="no"
NETWORK1_IN_REFUSE_SPOOFING[2]="yes"
# Refuse incoming packets claiming to be from reserved loopback address range
REFUSE_SPOOFING_IPADDR[3]="127.0.0.0/8"
INTERFACE0_IN_REFUSE_SPOOFING[3]="yes"
INTERFACE1_IN_REFUSE_SPOOFING[3]="yes"
NETWORK1_IN_REFUSE_SPOOFING[3]="yes"
# Refuse incoming packets claiming to be from class A private network
REFUSE_SPOOFING_IPADDR[4]="10.0.0.0/8"
INTERFACE0_IN_REFUSE_SPOOFING[4]="yes"
INTERFACE1_IN_REFUSE_SPOOFING[4]="yes"
NETWORK1_IN_REFUSE_SPOOFING[4]="yes"
# Refuse incoming packets claiming to be from class B private network
REFUSE_SPOOFING_IPADDR[5]="172.16.0.0/12"
INTERFACE0_IN_REFUSE_SPOOFING[5]="yes"
INTERFACE1_IN_REFUSE_SPOOFING[5]="yes"
NETWORK1_IN_REFUSE_SPOOFING[5]="yes"
# Refuse incoming packets claiming to be from class C private network
REFUSE_SPOOFING_IPADDR[6]="192.168.0.0/16"
INTERFACE0_IN_REFUSE_SPOOFING[6]="yes"
INTERFACE1_IN_REFUSE_SPOOFING[6]="no"
NETWORK1_IN_REFUSE_SPOOFING[6]="yes"
289](https://image.slidesharecdn.com/securingoptimizinglinuxthehackingsolutionv-131209075405-phpapp02/85/Securing-Optimizing-Linux-the-Hacking-Solution-v-3-0-289-320.jpg)
![GIPTables Firewall 1
CHAPTER 0
# Refuse incoming packets claiming to be from class D, E, and unallocated
REFUSE_SPOOFING_IPADDR[7]="224.0.0.0/3"
INTERFACE0_IN_REFUSE_SPOOFING[7]="yes"
INTERFACE1_IN_REFUSE_SPOOFING[7]="yes"
NETWORK1_IN_REFUSE_SPOOFING[7]="yes"
# ****************************************************************************
#
*
#
A N Y
*
#
*
# ****************************************************************************
ACCEPT_ANY="no"
# ****************************************************************************
#
*
#
D N S
*
#
*
# ****************************************************************************
ACCEPT_DNS="yes"
# ---------------------------------------------------------------------------# DNS outgoing client request
#
# Interface 0 DNS outgoing client request
INTERFACE0_DNS_CLIENT="yes"
INTERFACE0_DNS_OUT_SRC_IPADDR[0]=$INTERFACE0_IPADDR
INTERFACE0_DNS_OUT_DST_IPADDR[0]=$ISP_PRIMARY_DNS_SERVER
INTERFACE0_DNS_OUT_UDP_REQUEST[0]="yes"
INTERFACE0_DNS_OUT_TCP_REQUEST[0]="yes"
INTERFACE0_DNS_OUT_SPORT53_REQUEST[0]="no"
INTERFACE0_DNS_OUT_SRC_IPADDR[1]=$INTERFACE0_IPADDR
INTERFACE0_DNS_OUT_DST_IPADDR[1]=$ISP_SECONDARY_DNS_SERVER
INTERFACE0_DNS_OUT_UDP_REQUEST[1]="yes"
INTERFACE0_DNS_OUT_TCP_REQUEST[1]="yes"
INTERFACE0_DNS_OUT_SPORT53_REQUEST[1]="no"
# Network 1 DNS forwarded outgoing client request
NETWORK1_DNS_CLIENT="yes"
NETWORK1_DNS_OUT_SRC_IPADDR[0]=$NETWORK1
NETWORK1_DNS_OUT_DST_IPADDR[0]=$ISP_PRIMARY_DNS_SERVER
NETWORK1_DNS_OUT_UDP_REQUEST[0]="yes"
NETWORK1_DNS_OUT_TCP_REQUEST[0]="yes"
NETWORK1_DNS_OUT_SPORT53_REQUEST[0]="no"
# ****************************************************************************
#
*
#
F T P
*
#
*
# ****************************************************************************
ACCEPT_FTP="yes"
290](https://image.slidesharecdn.com/securingoptimizinglinuxthehackingsolutionv-131209075405-phpapp02/85/Securing-Optimizing-Linux-the-Hacking-Solution-v-3-0-290-320.jpg)
![GIPTables Firewall 1
CHAPTER 0
# ---------------------------------------------------------------------------# FTP outgoing client request
#
# Interface 0 FTP outgoing client request
INTERFACE0_FTP_CLIENT="yes"
INTERFACE0_FTP_OUT_SRC_IPADDR[0]=$INTERFACE0_IPADDR
INTERFACE0_FTP_OUT_DST_IPADDR[0]=$ANY_IPADDR
INTERFACE0_FTP_OUT_PASIVE[0]="yes"
INTERFACE0_FTP_OUT_ACTIVE[0]="no"
# Network 1 FTP forwarded outgoing client request
NETWORK1_FTP_CLIENT="yes"
NETWORK1_FTP_OUT_SRC_IPADDR[0]=$NETWORK1
NETWORK1_FTP_OUT_DST_IPADDR[0]=$ANY_IPADDR
NETWORK1_FTP_OUT_PASIVE[0]="yes"
NETWORK1_FTP_OUT_ACTIVE[0]="yes"
# ****************************************************************************
#
*
#
S S H
*
#
*
# ****************************************************************************
ACCEPT_SSH="yes"
# ---------------------------------------------------------------------------# SSH outgoing client request
#
# Interface 0 SSH outgoing client request
INTERFACE0_SSH_CLIENT="yes"
INTERFACE0_SSH_OUT_SRC_IPADDR[0]=$INTERFACE0_IPADDR
INTERFACE0_SSH_OUT_DST_IPADDR[0]=$ANY_IPADDR
# Network 1 SSH forwarded outgoing client request
NETWORK1_SSH_CLIENT="yes"
NETWORK1_SSH_OUT_SRC_IPADDR[0]=$NETWORK1
NETWORK1_SSH_OUT_DST_IPADDR[0]=$ANY_IPADDR
# ---------------------------------------------------------------------------# SSH incoming client request
#
# Interface 0 SSH incoming client request
INTERFACE0_SSH_SERVER="yes"
INTERFACE0_SSH_IN_SRC_IPADDR[0]=$ANY_IPADDR
INTERFACE0_SSH_IN_DST_IPADDR[0]=$INTERFACE0_IPADDR
291](https://image.slidesharecdn.com/securingoptimizinglinuxthehackingsolutionv-131209075405-phpapp02/85/Securing-Optimizing-Linux-the-Hacking-Solution-v-3-0-291-320.jpg)
![GIPTables Firewall 1
CHAPTER 0
# Interface 1 SSH incoming client request
INTERFACE1_SSH_SERVER="yes"
INTERFACE1_SSH_IN_SRC_IPADDR[0]=$NETWORK1
INTERFACE1_SSH_IN_DST_IPADDR[0]=$INTERFACE0_IPADDR
# ****************************************************************************
#
*
#
T E L N E T
*
#
*
# ****************************************************************************
ACCEPT_TELNET="no"
# ---------------------------------------------------------------------------# TELNET outgoing client request
#
# Interface 0 TELNET outgoing client request
INTERFACE0_TELNET_CLIENT="yes"
INTERFACE0_TELNET_OUT_SRC_IPADDR[0]=$INTERFACE0_IPADDR
INTERFACE0_TELNET_OUT_DST_IPADDR[0]=$ANY_IPADDR
# Network 1 TELNET forwarded outgoing client request
NETWORK1_TELNET_CLIENT="yes"
NETWORK1_TELNET_OUT_SRC_IPADDR[0]=$NETWORK1
NETWORK1_TELNET_OUT_DST_IPADDR[0]=$ANY_IPADDR
# ---------------------------------------------------------------------------# TELNET incoming client request
#
# Interface 1 TELNET incoming client request
INTERFACE1_TELNET_SERVER="no"
INTERFACE1_TELNET_IN_SRC_IPADDR[0]=$NETWORK1
INTERFACE1_TELNET_IN_DST_IPADDR[0]=$INTERFACE0_IPADDR
# ****************************************************************************
#
*
#
T E L N E T S
*
#
*
# ****************************************************************************
ACCEPT_TELNETS="no"
# ****************************************************************************
#
*
#
S M T P
*
#
*
# ****************************************************************************
ACCEPT_SMTP="yes"
292](https://image.slidesharecdn.com/securingoptimizinglinuxthehackingsolutionv-131209075405-phpapp02/85/Securing-Optimizing-Linux-the-Hacking-Solution-v-3-0-292-320.jpg)
![GIPTables Firewall 1
CHAPTER 0
# ---------------------------------------------------------------------------# SMTP outgoing client request
#
# Interface 0 SMTP outgoing client request
INTERFACE0_SMTP_CLIENT="yes"
INTERFACE0_SMTP_OUT_SRC_IPADDR[0]=$INTERFACE0_IPADDR
INTERFACE0_SMTP_OUT_DST_IPADDR[0]=$ANY_IPADDR
# Network 1 SMTP forwarded outgoing client request
NETWORK1_SMTP_CLIENT="yes"
NETWORK1_SMTP_OUT_SRC_IPADDR[0]=$NETWORK1
NETWORK1_SMTP_OUT_DST_IPADDR[0]=$ANY_IPADDR
# ****************************************************************************
#
*
#
S M T P S
*
#
*
# ****************************************************************************
ACCEPT_SMTPS="no"
# ---------------------------------------------------------------------------# SMTPS outgoing client request
#
# Interface 0 SMTPS outgoing client request
INTERFACE0_SMTPS_CLIENT="yes"
INTERFACE0_SMTPS_OUT_SRC_IPADDR[0]=$INTERFACE0_IPADDR
INTERFACE0_SMTPS_OUT_DST_IPADDR[0]=$ANY_IPADDR
# Network 1 SMTPS forwarded outgoing client request
NETWORK1_SMTPS_CLIENT="yes"
NETWORK1_SMTPS_OUT_SRC_IPADDR[0]=$NETWORK1
NETWORK1_SMTPS_OUT_DST_IPADDR[0]=$ANY_IPADDR
# ****************************************************************************
#
*
#
P O P 3
*
#
*
# ****************************************************************************
ACCEPT_POP3="yes"
# ---------------------------------------------------------------------------# POP3 outgoing client request
#
# Network 1 POP3 forwarded outgoing client request
NETWORK1_POP3_CLIENT="yes"
NETWORK1_POP3_OUT_SRC_IPADDR[0]=$NETWORK1
NETWORK1_POP3_OUT_DST_IPADDR[0]=$ANY_IPADDR
293](https://image.slidesharecdn.com/securingoptimizinglinuxthehackingsolutionv-131209075405-phpapp02/85/Securing-Optimizing-Linux-the-Hacking-Solution-v-3-0-293-320.jpg)
![GIPTables Firewall 1
CHAPTER 0
# ****************************************************************************
#
*
#
P O P 3 S
*
#
*
# ****************************************************************************
ACCEPT_POP3S="yes"
# ---------------------------------------------------------------------------# POP3S outging client request
#
# Network 1 POP3S forwarded outging client request
NETWORK1_POP3S_CLIENT="yes"
NETWORK1_POP3S_OUT_SRC_IPADDR[0]=$NETWORK1
NETWORK1_POP3S_OUT_DST_IPADDR[0]=$ANY_IPADDR
# ****************************************************************************
#
*
#
I M A P
*
#
*
# ****************************************************************************
ACCEPT_IMAP="no"
# ---------------------------------------------------------------------------# IMAP outgoing client request
#
# Network 1 IMAP forwarded outgoing client request
NETWORK1_IMAP_CLIENT="yes"
NETWORK1_IMAP_OUT_SRC_IPADDR[0]=$NETWORK1
NETWORK1_IMAP_OUT_DST_IPADDR[0]=$ANY_IPADDR
# ****************************************************************************
#
*
#
I M A P S
*
#
*
# ****************************************************************************
ACCEPT_IMAPS="no"
# ---------------------------------------------------------------------------# IMAPS outgoing client request
#
# Network 1 IMAPS forwarded outgoing client request
NETWORK1_IMAPS_CLIENT="yes"
NETWORK1_IMAPS_OUT_SRC_IPADDR[0]=$NETWORK1
NETWORK1_IMAPS_OUT_DST_IPADDR[0]=$ANY_IPADDR
# ****************************************************************************
#
*
#
H T T P
*
#
*
# ****************************************************************************
294](https://image.slidesharecdn.com/securingoptimizinglinuxthehackingsolutionv-131209075405-phpapp02/85/Securing-Optimizing-Linux-the-Hacking-Solution-v-3-0-294-320.jpg)
![GIPTables Firewall 1
CHAPTER 0
ACCEPT_HTTP="yes"
# ---------------------------------------------------------------------------# HTTP outgoing client request
#
# Interface 0 HTTP outgoing client request
INTERFACE0_HTTP_CLIENT="yes"
INTERFACE0_HTTP_OUT_SRC_IPADDR[0]=$INTERFACE0_IPADDR
INTERFACE0_HTTP_OUT_DST_IPADDR[0]=$ANY_IPADDR
# Network 1 HTTP forwarded outgoing client request
NETWORK1_HTTP_CLIENT="yes"
NETWORK1_HTTP_OUT_SRC_IPADDR[0]=$NETWORK1
NETWORK1_HTTP_OUT_DST_IPADDR[0]=$ANY_IPADDR
# ****************************************************************************
#
*
#
H T T P S
*
#
*
# ****************************************************************************
ACCEPT_HTTPS="yes"
# ---------------------------------------------------------------------------# HTTPS outgoing client request
#
# Interface 0 HTTPS outgoing client request
INTERFACE0_HTTPS_CLIENT="yes"
INTERFACE0_HTTPS_OUT_SRC_IPADDR[0]=$INTERFACE0_IPADDR
INTERFACE0_HTTPS_OUT_DST_IPADDR[0]=$ANY_IPADDR
# Network 1 HTTPS forwarded outgoing client request
NETWORK1_HTTPS_CLIENT="yes"
NETWORK1_HTTPS_OUT_SRC_IPADDR[0]=$NETWORK1
NETWORK1_HTTPS_OUT_DST_IPADDR[0]=$ANY_IPADDR
# ****************************************************************************
#
*
#
S Q U I D
*
#
*
# ****************************************************************************
ACCEPT_SQUID="yes" # Squid in Proxy-Caching Mode
# ---------------------------------------------------------------------------# SQUID outgoing client request
#
# Interface 0 SQUID outgoing client request
INTERFACE0_SQUID_CLIENT="yes"
295](https://image.slidesharecdn.com/securingoptimizinglinuxthehackingsolutionv-131209075405-phpapp02/85/Securing-Optimizing-Linux-the-Hacking-Solution-v-3-0-295-320.jpg)
![GIPTables Firewall 1
CHAPTER 0
INTERFACE0_SQUID_OUT_SRC_IPADDR[0]=$INTERFACE0_IPADDR
INTERFACE0_SQUID_OUT_DST_IPADDR[0]=$ANY_IPADDR
# Interface 1 SQUID outgoing client request
INTERFACE1_SQUID_CLIENT="yes"
INTERFACE1_SQUID_OUT_SRC_IPADDR[0]=$INTERFACE1_IPADDR
INTERFACE1_SQUID_OUT_DST_IPADDR[0]=$NETWORK1
# Network 1 SQUID forwarded outgoing client request
NETWORK1_SQUID_CLIENT="yes"
NETWORK1_SQUID_OUT_SRC_IPADDR[0]=$NETWORK1
NETWORK1_SQUID_OUT_DST_IPADDR[0]=$ANY_IPADDR
# ---------------------------------------------------------------------------# SQUID incoming client request
#
# Interface 0 SQUID incoming client request
INTERFACE0_SQUID_SERVER="yes"
INTERFACE0_SQUID_IN_SRC_IPADDR[0]=$ANY_IPADDR
INTERFACE0_SQUID_IN_DST_IPADDR[0]=$INTERFACE0_IPADDR
# Interface 1 SQUID incoming client request
INTERFACE1_SQUID_SERVER="yes"
INTERFACE1_SQUID_IN_SRC_IPADDR[0]=$NETWORK1
INTERFACE1_SQUID_IN_DST_IPADDR[0]=$INTERFACE1_IPADDR
# ****************************************************************************
#
*
#
W E B C A C H E
*
#
*
# ****************************************************************************
ACCEPT_WEBCACHE="no" # Squid in HTTPD-Accelerator Mode
# ****************************************************************************
#
*
#
N N T P
*
#
*
# ****************************************************************************
ACCEPT_NNTP="no"
# ---------------------------------------------------------------------------# NNTP outgoing client request
#
# Network 1 NNTP forwarded outgoing client request
NETWORK1_NNTP_CLIENT="yes"
NETWORK1_NNTP_OUT_SRC_IPADDR[0]=$NETWORK1
NETWORK1_NNTP_OUT_DST_IPADDR[0]=$ANY_IPADDR
296](https://image.slidesharecdn.com/securingoptimizinglinuxthehackingsolutionv-131209075405-phpapp02/85/Securing-Optimizing-Linux-the-Hacking-Solution-v-3-0-296-320.jpg)

![GIPTables Firewall 1
CHAPTER 0
INTERFACE0_AUTH_CLIENT="yes"
INTERFACE0_AUTH_OUT_SRC_IPADDR[0]=$INTERFACE0_IPADDR
INTERFACE0_AUTH_OUT_DST_IPADDR[0]=$ANY_IPADDR
# Network 1 AUTH forwarded outgoing client request
NETWORK1_AUTH_CLIENT="yes"
NETWORK1_AUTH_OUT_SRC_IPADDR[0]=$NETWORK1
NETWORK1_AUTH_OUT_DST_IPADDR[0]=$ANY_IPADDR
# ****************************************************************************
#
*
#
W H O I S
*
#
*
# ****************************************************************************
ACCEPT_WHOIS="no"
# ---------------------------------------------------------------------------# WHOIS outgoing client request
#
# Interface 0 WHOIS outgoing client request
INTERFACE0_WHOIS_CLIENT="yes"
INTERFACE0_WHOIS_OUT_SRC_IPADDR[0]=$INTERFACE0_IPADDR
INTERFACE0_WHOIS_OUT_DST_IPADDR[0]=$ANY_IPADDR
# Network 1 WHOIS forwarded outgoing client request
NETWORK1_WHOIS_CLIENT="yes"
NETWORK1_WHOIS_OUT_SRC_IPADDR[0]=$NETWORK1
NETWORK1_WHOIS_OUT_DST_IPADDR[0]=$ANY_IPADDR
# ****************************************************************************
#
*
#
F I N G E R
*
#
*
# ****************************************************************************
ACCEPT_FINGER="no"
# ---------------------------------------------------------------------------# FINGER outgoing client request
#
# Interface 0 FINGER outgoing client request
INTERFACE0_FINGER_CLIENT="yes"
INTERFACE0_FINGER_OUT_SRC_IPADDR[0]=$INTERFACE0_IPADDR
INTERFACE0_FINGER_OUT_DST_IPADDR[0]=$ANY_IPADDR
# Network 1 FINGER forwarded outgoing client request
NETWORK1_FINGER_CLIENT="yes"
NETWORK1_FINGER_OUT_SRC_IPADDR[0]=$NETWORK1
NETWORK1_FINGER_OUT_DST_IPADDR[0]=$ANY_IPADDR
298](https://image.slidesharecdn.com/securingoptimizinglinuxthehackingsolutionv-131209075405-phpapp02/85/Securing-Optimizing-Linux-the-Hacking-Solution-v-3-0-298-320.jpg)
![GIPTables Firewall 1
CHAPTER 0
# ****************************************************************************
#
*
#
N T P
*
#
*
# ****************************************************************************
ACCEPT_NTP="no"
# ---------------------------------------------------------------------------# NTP outgoing client request
#
# Interface 0 NTP outgoing client request
INTERFACE0_NTP_CLIENT="yes"
INTERFACE0_NTP_OUT_SRC_IPADDR[0]=$INTERFACE0_IPADDR
INTERFACE0_NTP_OUT_DST_IPADDR[0]=$ANY_IPADDR
# Network 1 NTP forwarded outgoing client request
NETWORK1_NTP_CLIENT="no"
NETWORK1_NTP_OUT_SRC_IPADDR[0]=$NETWORK1
NETWORK1_NTP_OUT_DST_IPADDR[0]=$ANY_IPADDR
# ****************************************************************************
#
*
#
N E T B I O S
*
#
*
# ****************************************************************************
ACCEPT_NETBIOS="yes"
# ---------------------------------------------------------------------------# NETBIOS outgoing client request
#
# Interface 1 NETBIOS outgoing client request
INTERFACE1_NETBIOS_CLIENT="yes"
INTERFACE1_NETBIOS_OUT_SRC_IPADDR[0]=$INTERFACE1_IPADDR
INTERFACE1_NETBIOS_OUT_DST_IPADDR[0]=$NETWORK1
# ---------------------------------------------------------------------------# NETBIOS incoming client request
#
# Interface 1 NETBIOS incoming client request
INTERFACE1_NETBIOS_SERVER="yes"
INTERFACE1_NETBIOS_IN_SRC_IPADDR[0]=$NETWORK1
INTERFACE1_NETBIOS_IN_DST_IPADDR[0]=$INTERFACE1_IPADDR
# ****************************************************************************
#
*
#
S Y S L O G
*
#
*
# ****************************************************************************
299](https://image.slidesharecdn.com/securingoptimizinglinuxthehackingsolutionv-131209075405-phpapp02/85/Securing-Optimizing-Linux-the-Hacking-Solution-v-3-0-299-320.jpg)
![GIPTables Firewall 1
CHAPTER 0
ACCEPT_SYSLOG="no"
# ---------------------------------------------------------------------------# SYSLOG outgoing client request
#
# Interface 1 SYSLOG outgoing client request
INTERFACE1_SYSLOG_CLIENT="yes"
INTERFACE1_SYSLOG_OUT_SRC_IPADDR[0]=$INTERFACE1_IPADDR
INTERFACE1_SYSLOG_OUT_DST_IPADDR[0]=$SYSLOG_SERVER
# ****************************************************************************
#
*
#
T R A C E R O U T E
*
#
*
# ****************************************************************************
ACCEPT_TRACEROUTE="yes"
# ---------------------------------------------------------------------------# TRACEROUTE outgoing client request
#
# Interface 0 TRACEROUTE outgoing client request
INTERFACE0_TRACEROUTE_CLIENT="yes"
INTERFACE0_TRACEROUTE_OUT_SRC_IPADDR[0]=$INTERFACE0_IPADDR
INTERFACE0_TRACEROUTE_OUT_DST_IPADDR[0]=$ANY_IPADDR
# Network 1 TRACEROUTE forwarded outgoing client request
NETWORK1_TRACEROUTE_CLIENT="yes"
NETWORK1_TRACEROUTE_OUT_SRC_IPADDR[0]=$NETWORK1
NETWORK1_TRACEROUTE_OUT_DST_IPADDR[0]=$ANY_IPADDR
# ---------------------------------------------------------------------------# TRACEROUTE incoming client request
#
# Interface 1 TRACEROUTE incoming client request
INTERFACE1_TRACEROUTE_SERVER="no"
INTERFACE1_TRACEROUTE_IN_SRC_IPADDR[0]=$NETWORK1
INTERFACE1_TRACEROUTE_IN_DST_IPADDR[0]=$INTERFACE0_IPADDR
# ****************************************************************************
#
*
#
I C M P
*
#
*
# ****************************************************************************
ACCEPT_ICMP="yes"
# ---------------------------------------------------------------------------# ICMP outgoing client request
#
# Interface 0 ICMP outgoing client request
300](https://image.slidesharecdn.com/securingoptimizinglinuxthehackingsolutionv-131209075405-phpapp02/85/Securing-Optimizing-Linux-the-Hacking-Solution-v-3-0-300-320.jpg)
![GIPTables Firewall 1
CHAPTER 0
INTERFACE0_ICMP_CLIENT="yes"
INTERFACE0_ICMP_OUT_SRC_IPADDR[0]=$INTERFACE0_IPADDR
INTERFACE0_ICMP_OUT_DST_IPADDR[0]=$ANY_IPADDR
# Network 1 ICMP forwarded outgoing client request
NETWORK1_ICMP_CLIENT="yes"
NETWORK1_ICMP_OUT_SRC_IPADDR[0]=$NETWORK1
NETWORK1_ICMP_OUT_DST_IPADDR[0]=$ANY_IPADDR
# ---------------------------------------------------------------------------# ICMP incoming client request
#
# Interface 1 ICMP incoming client request
INTERFACE1_ICMP_SERVER="no"
INTERFACE1_ICMP_IN_SRC_IPADDR[0]=$NETWORK1
INTERFACE1_ICMP_IN_DST_IPADDR[0]=$INTERFACE0_IPADDR
INTERFACE1_ICMP_IN_SRC_IPADDR[1]=$NETWORK1
INTERFACE1_ICMP_IN_DST_IPADDR[1]=$INTERFACE1_IPADDR
# ****************************************************************************
#
*
#
D H C P
*
#
*
# ****************************************************************************
ACCEPT_DHCP="yes"
# ---------------------------------------------------------------------------# DHCP incoming client request
#
# Interface 1 DHCP incoming client request
INTERFACE1_DHCP_SERVER="yes"
#
#
#
#
If above option is "yes", do not forget to configure the following
lines in the "Spoofing and bad addresses" section
REFUSE_SPOOFING_IPADDR[2]="0.0.0.0/8"
INTERFACE1_IN_REFUSE_SPOOFING[2]="no"
INTERFACE1_DHCP_IN_SRC_IPADDR[0]=$NETWORK1
INTERFACE1_DHCP_IN_DST_IPADDR[0]=$INTERFACE1_IPADDR
# ****************************************************************************
#
*
#
E N D
*
#
*
# ****************************************************************************
DROP_EVERYTHING_FROM_HERE="yes"
# ---------------------------------------------------------------------------# LOG & DROP everything from here... just in case.
#
301](https://image.slidesharecdn.com/securingoptimizinglinuxthehackingsolutionv-131209075405-phpapp02/85/Securing-Optimizing-Linux-the-Hacking-Solution-v-3-0-301-320.jpg)
![GIPTables Firewall 1
CHAPTER 0
INTERFACE0_IN_DROP_EVERYTHING_FROM_HERE="yes"
INTERFACE1_IN_DROP_EVERYTHING_FROM_HERE="yes"
NETWORK1_IN_DROP_EVERYTHING_FROM_HERE="yes"
# ---------------------------------------------------------------------------# End of file
Step 4
Once the configuration file has been configured, it is time to start the firewall on your system.
•
To start the firewall on your system, use the following command:
[root@deep /]# /etc/init.d/giptables start
Starting Firewalling Services:
[OK]
GIPTables-Firewall Administrative Tools
The commands listed below are some that we use often, but many more exist. Check the manual
page and documentation for more information.
IPTables
The iptables tool is used for the firewall packet filter administration of the system. We can use
it to set up a firewall rules file, as we are doing in this book. Once firewall rules have been created
we can play with its many commands to maintain, and inspect the rules in the kernel.
•
To list all rules in the selected chain, use the command:
[root@deep /]# iptables –L
Chain INPUT (policy DROP)
target
prot opt source
ACCEPT
all -- anywhere
destination
anywhere
Chain FORWARD (policy DROP)
target
prot opt source
destination
Chain OUTPUT (policy DROP)
target
prot opt source
ACCEPT
all -- anywhere
destination
anywhere
This command will list all rules in the selected chain. If no chain is selected, all chains are listed.
•
302
To list all INPUT rules in the selected chain, use the command:
[root@deep /]# iptables -L INPUT
Chain INPUT (policy DROP)
target
prot opt source
ACCEPT
all -- anywhere
ACCEPT
all -- 192.168.1.0/24
DROP
all -- 204.254.45.9
DROP
all -- 187.231.11.5
DROP
all -- 207.35.78.5
destination
anywhere
anywhere
anywhere
anywhere
anywhere](https://image.slidesharecdn.com/securingoptimizinglinuxthehackingsolutionv-131209075405-phpapp02/85/Securing-Optimizing-Linux-the-Hacking-Solution-v-3-0-302-320.jpg)
![GIPTables Firewall 1
CHAPTER 0
•
To list all OUTPUT rules in the selected chain, use the command:
[root@deep /]# iptables -L OUTPUT
Chain OUTPUT (policy DROP)
target
prot opt source
ACCEPT
all -- anywhere
ACCEPT
all -- anywhere
ACCEPT
udp -- 207.35.78.5
spt:domain dpt:domain
ACCEPT
tcp -- 207.35.78.5
spts:1024:65535 dpt:domain
•
destination
anywhere
192.168.1.0/24
207.35.78.3
udp
207.35.78.3
tcp
To list all FORWARD rules in the selected chain, use the command:
[root@deep /]# iptables -L FORWARD
Chain FORWARD (policy DROP)
target
prot opt source
DROP
tcp -- anywhere
DROP
tcp -- anywhere
DROP
all -- !192.168.0.0/24
ACCEPT
all -- 192.168.0.0/24
ACCEPT
all -- !192.168.0.0/24
destination
anywhere
anywhere
anywhere
anywhere
anywhere
tcp
tcp
state NEW
state
This of course works only if you have configured Masquerading on your server (for Gateway
servers in general).
•
To list all rules in numeric OUTPUT in the selected chain, use the command:
[root@deep /]# iptables –nL
Chain INPUT (policy DROP)
target
prot opt source
ACCEPT
all -- 0.0.0.0/0
ACCEPT
all -- 192.168.1.0/24
DROP
all -- 204.254.45.9
destination
0.0.0.0/0
0.0.0.0/0
0.0.0.0/0
Chain FORWARD (policy DROP)
target
prot opt source
destination
Chain OUTPUT (policy DROP)
target
prot opt source
ACCEPT
all -- 0.0.0.0/0
ACCEPT
all -- 0.0.0.0/0
ACCEPT
udp -- 207.35.78.5
destination
0.0.0.0/0
192.168.1.0/24
207.35.78.5
All the IP addresses and port numbers will be printed in numeric format.
303](https://image.slidesharecdn.com/securingoptimizinglinuxthehackingsolutionv-131209075405-phpapp02/85/Securing-Optimizing-Linux-the-Hacking-Solution-v-3-0-303-320.jpg)


![Squid 1
CHAPTER 1
These installation instructions assume
Commands are Unix-compatible.
The source path is /var/tmp (note that other paths are possible, as personal discretion).
Installations were tested on OpenNA Linux & Red Hat Linux 7.3.
All steps in the installation will happen using the super-user account “root”.
Whether kernel recompilation may be required: No
Latest Squid version number is 2.4.STABLE6
Packages
The following are based on information listed by Squid as of 2002/03/20. Please regularly check
at www.squid-cache.org for the latest status. We chose to install the required component from
source file because it provides the facility to fine tune the installation.
Source code is available from:
Squid Homepage: http://www.squid-cache.org/
Squid FTP Site: 206.168.0.9
You must be sure to download: squid-2.4.STABLE7-src.tar.gz
Though the procedures given in this chapter are likely to work on all Linux platforms, we have
only tested it on OpenNA Linux and Red Hat Linux.
Pristine source
If you don’t use the RPM package to install this program, it will be difficult for you to locate all files
installed into the system if the package is updated in the future. To solve this problem, it is a good
idea to make a list of files on the system before you install Squid, and one afterwards, and then
compares them using the diff utility of Linux to find out what files are placed where.
•
Simply run the following command before installing the software:
[root@deep root]# find /* > Squid1
•
•
And the following one after you install the software:
[root@deep root]# find /* > Squid2
Then use the following command to get a list of what changed:
[root@deep root]# diff Squid1 Squid2 > Squid-Installed
By doing this, if in the future any upgrade appears, all you have to do is to read the generated list
of what files were added or changed by the program and remove them manually from your
system before installing the new software. We use the /root directory of the system to store all
generated list files.
308](https://image.slidesharecdn.com/securingoptimizinglinuxthehackingsolutionv-131209075405-phpapp02/85/Securing-Optimizing-Linux-the-Hacking-Solution-v-3-0-308-320.jpg)
![Squid 1
CHAPTER 1
Compiling - Optimizing & Installing Squid
Below are the steps that you must make to configure, compile and optimize the Squid server
software before installing it on your system. First off, we install the program as user 'root' so as to
avoid any authorization problems.
Step 1
Once you get the program from the main software site you must copy it to the /var/tmp
directory and change to this location before expanding the archive.
•
This can be done with the following commands:
[root@deep /]# cp squid-version-src.tar.gz /var/tmp/
[root@deep /]# cd /var/tmp/
[root@deep tmp]# tar xzpf squid-version-src.tar.gz
Step 2
To avoid security risks, we must create a new user account called “squid” to be the owner of the
Squid database cache files and daemon.
•
To create this special Squid user on OpenNA Linux, use the following command:
[root@deep tmp]# groupadd -g 23 squid > /dev/null 2>&1 || :
[root@deep tmp]# useradd -c "Squid Server" -d /var/spool/squid -g 23 -s
/bin/false -u 23 squid > /dev/null 2>&1 || :
•
To create this special Squid user on Red Hat Linux, use the following command:
[root@deep tmp]# useradd -c "Squid Server" -u 23 -s /bin/false -r -d
/var/spool/squid squid 2>/dev/null || :
The above command will create a null account, with no password, no valid shell, no files ownednothing but a UID and a GID for the program. Remember that Squid daemon does not need to
have a shell account on the server.
Step 3
After that, move into the newly created Squid source directory and perform the following steps to
configure and optimize the software for your system.
•
To move into the newly created Squid source directory use the command:
[root@deep tmp]# cd squid-2.4.STABLE7/
Step 4
There are some source files to modify before going into the configuration and compilation of the
program; the changes allow us to fix some problems and to configure the program for our PATH
environment variable under Linux.
•
Edit the acl.c file (vi +651 src/acl.c) and change the line:
*Top = splay_insert(xstrdup(t), *Top, aclDomainCompare);
To read:
*Top = splay_insert(xstrdup(t), *Top, aclHostDomainCompare);
309](https://image.slidesharecdn.com/securingoptimizinglinuxthehackingsolutionv-131209075405-phpapp02/85/Securing-Optimizing-Linux-the-Hacking-Solution-v-3-0-309-320.jpg)

![Squid 1
CHAPTER 1
Step 6
Now, we must make a list of all existing files on the system before installing the software, and one
afterwards, then compare them using the diff utility tool of Linux to find out what files are placed
where and finally install the Squid Proxy Server:
[root@deep squid-2.4.STABLE7]# make all
[root@deep squid-2.4.STABLE7]# cd auth_modules
[root@deep auth_modules]# cd NCSA
[root@deep NCSA]# make
[root@deep NCSA]# cd ../PAM
[root@deep PAM]# make
[root@deep PAM]# cd ../SMB
[root@deep SMB]# make SAMBAPREFIX=/usr
[root@deep SMB]# cd ../getpwnam
[root@deep getpwnam]# make
[root@deep getpwnam]# cd
[root@deep root]# find /* > Squid1
[root@deep root]# cd /var/tmp/squid-2.4.STABLE7/
[root@deep squid-2.4.STABLE7]# make install
[root@deep squid-2.4.STABLE7]# cd auth_modules
[root@deep auth_modules]# install -m 4511 PAM/pam_auth /usr/lib/squid/
[root@deep auth_modules]# install -m 0511 NCSA/ncsa_auth /usr/lib/squid/
[root@deep auth_modules]# install -m 0511 SMB/smb_auth /usr/lib/squid/
[root@deep auth_modules]# install –m 0511 getpwnam/getpwnam_auth
/usr/lib/squid/
[root@deep auth_modules]# mkdir -p /var/spool/squid
[root@deep auth_modules]# mkdir -p /var/log/squid
[root@deep auth_modules]# chown -R squid.squid /var/spool/squid/
[root@deep auth_modules]# chown -R squid.squid /var/log/squid/
[root@deep auth_modules]# chmod 0750 /var/spool/squid/
[root@deep auth_modules]# chmod 0750 /var/log/squid/
[root@deep auth_modules]# rm -rf /var/logs/
[root@deep auth_modules]# rm -f /usr/sbin/RunCache
[root@deep auth_modules]# rm -f /usr/sbin/RunAccel
[root@deep auth_modules]# strip /usr/sbin/squid
[root@deep auth_modules]# strip /usr/sbin/client
[root@deep auth_modules]# strip /usr/lib/squid/*
[root@deep auth_modules]# /sbin/ldconfig
[root@deep auth_modules]# cd
[root@deep root]# find /* > Squid2
[root@deep root]# diff Squid1 Squid2 > Squid-Installed
The make all command will compile all source files into executable binaries that can be
installed, and make install will install the binaries and any supporting files into the appropriate
locations. Pay special attention to the authenticator module directory of Squid, we move into this
directory (auth_modules) and compile all authenticator modules that may be needed with
Squid.
Squid authenticator module is required when you want to authorize and authenticate users
before allowing them an access to the Internet or the network. Different authenticator modules
using different techniques are available with Squid. In our compilation, we compile Squid
authenticator modules for PAM, NCSA, SMB, and getpwnam. You don’t need to compile all of them
but only the one that you want to use or nothing if you are not intending to provide user
authentication for Proxy access.
The mkdir command will create two new directories named “squid” under /var/spool and
/var/log directory.
312](https://image.slidesharecdn.com/securingoptimizinglinuxthehackingsolutionv-131209075405-phpapp02/85/Securing-Optimizing-Linux-the-Hacking-Solution-v-3-0-312-320.jpg)
![Squid 1
CHAPTER 1
The rm command will remove the /var/logs directory since it has been created to handle the
log files for Squid that we have relocated during compile time into the /var/log/squid
directory.
The chown command will change the owner of the /var/spool/squid and /var/log/squid
directories to be owned by the user squid, and the chmod command will make the mode of both
squid directories (0750/drwxr-x---) for security reasons. This means that only squid owner
and group will be able to access these directories and others will not.
Note that we remove the small scripts named “RunCache” and “RunAccel” which take care of
starting Squid in either caching mode or accelerator mode, since we use a better script named
“squid” located under /etc/init.d directory that takes advantage of Linux system V.
Finally, the strip command will reduce the size of the specified binaries for optimum
performance.
Step 7
Once we’ve configured, optimized, compiled, and installed the Squid Proxy Server software, we
can free up some disk space by deleting the program tar archive and the related source directory
since they are no longer needed.
•
This is done by using the following commands:
[root@deep /]# cd /var/tmp/
[root@deep tmp]# rm -rf squid-version/
[root@deep tmp]# rm -f squid-version-src.tar.gz
The rm command as used above will remove all the source files we have used to compile and
install Squid. It will also remove the Squid compressed archive from the /var/tmp directory.
Configuring Squid
After Squid has been built and installed successfully on your system, your next step is to
configure and customize all the required parameters in the different Squid configuration files.
Parameters entered into the Squid configuration file (squid.conf) will decide how the Squid
software will run on the server and in which mode (either httpd-accelerator mode or in proxycaching mode). This shows us that the installation of Squid under Linux does not care and that
only the configuration of the squid.conf file will decide whether Squid will run in httpdaccelerator or proxy-caching mode.
/etc/squid/squid.conf: (The Squid Configuration File)
/etc/sysconfig/squid: (The Squid System Configuration File)
/etc/logrotate.d/squid: (The Squid Log Rotation File)
/etc/init.d/squid: (The Squid Initialization File)
313](https://image.slidesharecdn.com/securingoptimizinglinuxthehackingsolutionv-131209075405-phpapp02/85/Securing-Optimizing-Linux-the-Hacking-Solution-v-3-0-313-320.jpg)

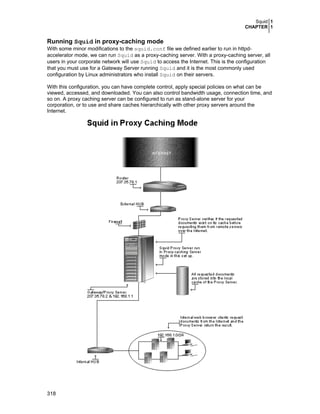
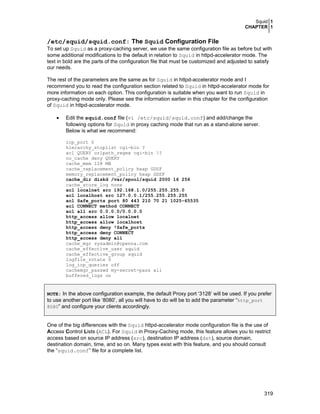

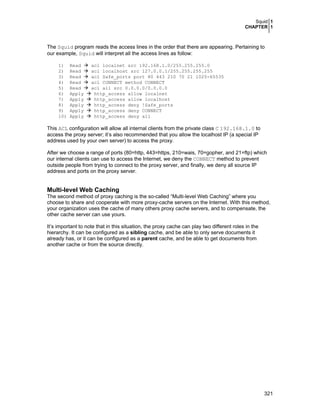
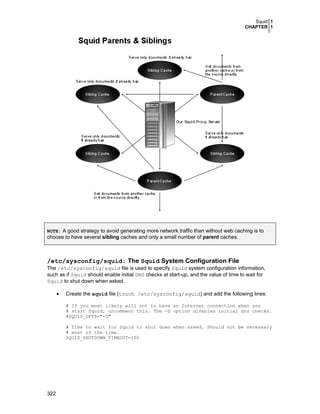
![Squid 1
CHAPTER 1
#
via the HTTP, FTP, and gopher protocols) on a system closer to the
#
requesting site than to the source. Web browsers can then use the
#
local Squid cache as a proxy HTTP server, reducing access time as
#
well as bandwidth consumption.
#
# processname: squid
# pidfile: /var/run/squid.pid
# config: /etc/squid/squid.conf
PATH=/usr/bin:/sbin:/bin:/usr/sbin
export PATH
# Source function library.
. /etc/rc.d/init.d/functions
# Source networking configuration.
. /etc/sysconfig/network
# Check that networking is up.
[ ${NETWORKING} = "no" ] && exit 0
# Check if the squid.conf file is present.
[ -f /etc/squid/squid.conf ] || exit 0
# Source Squid configureation.
if [ -f /etc/sysconfig/squid ]; then
. /etc/sysconfig/squid
else
SQUID_OPTS="-D"
SQUID_SHUTDOWN_TIMEOUT=100
fi
# Determine the name of the squid binary.
[ -f /usr/sbin/squid ] && SQUID=squid
[ -z "$SQUID" ] && exit 0
prog="$SQUID"
# Determine which one is the cache_swap directory
CACHE_SWAP=`sed -e 's/#.*//g' /etc/squid/squid.conf |
grep cache_dir | awk '{ print $3 }'`
[ -z "$CACHE_SWAP" ] && CACHE_SWAP=/var/spool/squid
RETVAL=0
start() {
for adir in $CACHE_SWAP; do
if [ ! -d $adir/00 ]; then
echo -n "init_cache_dir $adir... "
$SQUID -z -F 2>/dev/null
fi
done
echo -n $"Starting $prog: "
$SQUID $SQUID_OPTS 2> /dev/null &
# Trap and prevent certain signals from being sent to the Squid process.
trap '' 1 2 3 18
RETVAL=$?
[ $RETVAL -eq 0 ] && touch /var/lock/subsys/$SQUID
[ $RETVAL -eq 0 ] && echo_success
[ $RETVAL -ne 0 ] && echo_failure
echo
return $RETVAL
324](https://image.slidesharecdn.com/securingoptimizinglinuxthehackingsolutionv-131209075405-phpapp02/85/Securing-Optimizing-Linux-the-Hacking-Solution-v-3-0-324-320.jpg)
![Squid 1
CHAPTER 1
}
stop() {
echo -n $"Stopping $prog: "
$SQUID -k check >/dev/null 2>&1
RETVAL=$?
if [ $RETVAL -eq 0 ] ; then
$SQUID -k shutdown &
rm -f /var/lock/subsys/$SQUID
timeout=0
while : ; do
[ -f /var/run/squid.pid ] || break
if [ $timeout -ge $SQUID_SHUTDOWN_TIMEOUT ]; then
echo
return 1
fi
sleep 2 && echo -n "."
timeout=$((timeout+2))
done
echo_success
echo
else
echo_failure
echo
fi
return $RETVAL
}
reload() {
$SQUID $SQUID_OPTS -k reconfigure
}
restart() {
stop
start
}
condrestart() {
[ -e /var/lock/subsys/squid ] && restart || :
}
# See how we were called.
case "$1" in
start)
start
;;
stop)
stop
;;
reload)
reload
;;
restart)
restart
;;
condrestart)
condrestart
;;
*)
echo $"Usage: $0 {start|stop|reload|restart|condrestart}"
exit 1
esac
exit $?
325](https://image.slidesharecdn.com/securingoptimizinglinuxthehackingsolutionv-131209075405-phpapp02/85/Securing-Optimizing-Linux-the-Hacking-Solution-v-3-0-325-320.jpg)
![Squid 1
CHAPTER 1
Step 2
Once the /etc/init.d/squid script file has been created, it is important to make it
executable, change its default permissions, create the necessary links and start it. Making this file
executable will allow the system to run it, changing its default permission is to allow only the root
user to change this file for security reason, and creation of the symbolic links will let the process
control initialization of Linux which is in charge of starting all the normal and authorized processes
that need to run at boot time on your system to start the program automatically for you at each
system reboot.
•
To make this script executable and to change its default permissions, use the commands:
[root@deep /]# chmod 700 /etc/init.d/squid
[root@deep /]# chown 0.0 /etc/init.d/squid
•
To create the symbolic rc.d links for Squid, use the following commands:
[root@deep /]# chkconfig --add squid
[root@deep /]# chkconfig --level 345 squid on
•
To start Squid software manually, use the following command:
[root@deep /]# /etc/init.d/squid start
Starting squid:
[OK]
Running Squid with Users Authentication Support
Squid is a complete Proxy software solution that provides many useful features for the
administrator and it is up to us to use and configure them. In this section, we’ll discuss the Proxy
Authentication mechanism that provides a way to authenticate internal users who can use it to
access the Internet. This allows us to add an additional layer of security on which users need to
have rights (the authorization) to access the Internet via the Gateway server in the enterprise.
The Squid source code comes with a few authentication processes. These include:
LDAP: Uses the Lightweight Directory Access Protocol.
NCSA: Uses an NCSA-style username and password file.
MSNT: Uses a Windows NT authentication domain.
PAM: Uses the Linux Pluggable Authentication Modules scheme.
SMB: Uses a SMB server like Windows NT or Samba.
getpwam: Uses the old-fashioned Unix password file.
In order to authenticate users, you need to compile and install one of the above supplied
authentication modules. In our compilation of Squid, we have already included the most
interesting authentication modules, which were NCSA, PAM, SMB, and getpwam.
One problem with all of these authentication modules is the fact that the supplied username and
password are essentially sent in clear text between the browser and the proxy. Therefore,
administrators should not set-up the same username and password that users would use for
account login on the server (if they are allowed) or for email accounts.
326](https://image.slidesharecdn.com/securingoptimizinglinuxthehackingsolutionv-131209075405-phpapp02/85/Securing-Optimizing-Linux-the-Hacking-Solution-v-3-0-326-320.jpg)
![Squid 1
CHAPTER 1
Step 4
One of the last steps is to create accounts for all users who will be allowed to access the Internet
with Squid after proper authentication with a username and password. Remember, we have to
create null account, with no valid shell for our users.
•
To create null user account, use the following command:
[root@deep /]# useradd -s /bin/false gmourani
The above command will create a null account, with no password, no valid shell, no files ownednothing but a UID and a GID.
•
To set a password for this new user, use the following command:
[root@deep /]# passwd gmourani
Changing password for user gmourani
New UNIX password:
Retype new UNIX password:
passwd: all authentication tokens updated successfully
NOTE: It is NOT important to create a home directory for the users (i.e. /home/gmourani).
Squid with Users Authentication Support can run even if home directories are not created for the
users. All we need for authentication is a username and password. Therefore, a home directory is
futile and since we do not give shell access, there is really no reason for users to have a home
directory on the system.
Step 5
Finally, open your favorite browser and enter the username and password to access the Internet
with Squid as your Proxy Caching Gateway Server.
329](https://image.slidesharecdn.com/securingoptimizinglinuxthehackingsolutionv-131209075405-phpapp02/85/Securing-Optimizing-Linux-the-Hacking-Solution-v-3-0-329-320.jpg)
![Squid 1
CHAPTER 1
Securing Squid
This section deals specifically with actions we can take to improve and tighten security under
Squid. As with the other chapters, the interesting points here are that we refer to the features
available within the base installed program and not any additional software.
More control on mounting the cache directory of Squid
If you have created the cache directory of Squid in a separate partition your system (i.e.
/var/spool), like we have done during the initial set-up of Linux, then you can use the noexec,
nodev, and nosuid features of Linux to improve and consolidate the cache security.
These features can be set up in the /etc/fstab file to inform the system to not allow execution
of any binaries (noexec), to not interpret character or block special devices (nodev), and to not
allow set-user-identifier or set-group-identifier bits to take effect (nosuid) on the mounted file
system (/var/spool in our example).
Applying this procedure on the partition where the Squid Cache resides will help to eliminate the
possibility of DEV, SUID/SGID, and execution of any binaries that may be in the Squid cache.
Step 1
• Edit the fstab file (vi /etc/fstab) and add in the line that refer to /var/spool file
system the following options after the defaults option as show below:
LABEL=/var/spool /var/spool
ext3
defaults,noexec,nodev,nosuid
1 2
Step 2
Once you have made the necessary adjustments to the /etc/fstab file, it is time to inform the
system about the modification.
•
This can be accomplished with the following commands:
[root@deep /]# mount /var/spool -oremount
Each file system that has been modified must be remounted with the command as shown
previously. In our example we have modified the /var/spool file system and it is for this reason
that we remount this file system with the above command.
NOTE: If /var/spool is not a file system but just a directory, then the above command obviously
will not work. The ‘-oremount’ option of the Linux ‘mount’ command is used to remount a file
system, which resides on its own partition on your computer.
330](https://image.slidesharecdn.com/securingoptimizinglinuxthehackingsolutionv-131209075405-phpapp02/85/Securing-Optimizing-Linux-the-Hacking-Solution-v-3-0-330-320.jpg)
![Squid 1
CHAPTER 1
Step 3
• You can verify if the modifications have been correctly applied to the Linux system with
the following command:
[root@deep /]# cat /proc/mounts
/dev/root / ext2
rw 0 0
/proc /proc
proc
rw 0 0
/dev/sda1
/boot
ext3
/dev/sda9
/chroot
ext3
/dev/sda8
/home
ext3
/dev/sda13
/tmp
ext3
/dev/sda7
/usr
ext3
/dev/sda11
/var
ext3
/dev/sda12
/var/spool ext3
none /dev/pts
devpts rw 0 0
rw 0 0
rw 0 0
rw 0 0
rw 0 0
rw 0 0
rw 0 0
rw,noexec,nodev,nosuid 0 0
This command will show you all file system in your Linux server with parameters applied to them.
If you see something like the following, congratulations!
/var/spool /var/spool ext3
rw,noexec,nodev,nosuid 0 0
Immunize the Squid configuration file
As we already know, the immutable bit can be used to prevent deletion, overwriting, or creation of
a symbolic link to a file. Once your squid.conf file has been configured, it’s a good idea to
immunize it with the following command:
[root@deep /]# chattr +i /etc/squid/squid.conf
Banning all Destination addresses except one
In the university libraries, we can often see computers available to students that want to, for their
studies, search for a specific author. Administrators have the task of configuring the computer to
allow only searches on one site where the database of all books and authors are stored.
Therefore, they don’t want to give students access to other sites on the Internet but just to the
database site.
With Squid as the Proxy Server, this can be accomplished easily by adding the right ACL to its
existing configuration file. In the next example, we introduce new ACL rules to our Squid
example configuration file to do just this.
•
Edit the squid.conf file (vi /etc/squid/squid.conf) and add/change the
following options. Text in bold are what we have added/changed to our default Squid
example configuration file. Below is what we recommend you enter:
icp_port 0
hierarchy_stoplist cgi-bin ?
acl QUERY urlpath_regex cgi-bin ?
no_cache deny QUERY
cache_mem 128 MB
cache_replacement_policy heap GDSF
memory_replacement_policy heap GDSF
cache_dir diskd /var/spool/squid 2000 16 256
cache_store_log none
acl localhost src 127.0.0.1/255.255.255.255
acl Safe_ports port 80 443 1025-65535
acl CONNECT method CONNECT
acl DATABASE dst 207.78.0.1
331](https://image.slidesharecdn.com/securingoptimizinglinuxthehackingsolutionv-131209075405-phpapp02/85/Securing-Optimizing-Linux-the-Hacking-Solution-v-3-0-331-320.jpg)
![Squid 1
CHAPTER 1
http_access deny all
cache_mgr sysadmin@openna.com
cache_effective_user squid
cache_effective_group squid
logfile_rotate 0
log_icp_queries off
cachemgr_passwd my-secret-pass all
buffered_logs on
This new ACL configuration allows all internal clients from the private class C 192.168.1.0 to
access the Internet between 08:30 and 17:30. In this way, we limit the time when our staff can
connect to the Internet to the working hours of the company only.
NOTE: Don’t forget to restart your Squid Proxy Server for the changes to take effect. The order in
which each line appears in the Squid configuration file is important and you have to respect
them. You can’t just add ‘acl’ or ‘http_access’ parameters, wherever you want. Because the
program reads and interprets each access line in the order that they appear.
Optimizing Squid
This section deals specifically with the actions we can take to improve and tighten the
performance of Squid. Note that we refer to the features available within the base installed
program only.
The atime and noatime attributes
The atime and noatime attributes of Linux can be used to get a measurable performance gain
in the Squid cache directory (/var/spool/squid). See the chapter related to the kernel in this
book for more information on this issue.
Physical memory
The most important resource for Squid is physical memory. Your processor does not need to be
ultra-fast. Your disk system will be the major bottleneck, so fast disks are also important for highvolume caches. Therefore, our recommendation is to use a SCSI disk with at least 512 MB of
physical memory.
Squid Administrative Tools
Now you’ve configured Squid, tightened its security and optimized it for maximum performance,
we can start to play with its utilities.
Stopping Squid process immediately
There are some interesting command line options, especially when we want to stop Squid on the
server. Unlike other services that run as daemons on the system, Squid cannot be stopped
directly and we have to wait for existing connections to terminate before Squid shutdowns.
Sometimes this is not appropriate and we have to stop Squid immediately. This is possible with
the following command:
•
To stop Squid process immediately, use the following command:
[root@deep /]# /usr/sbin/squid -k kill
This command sends a KILL signal, which causes the Squid process to exit immediately, without
closing any connections or log files.
333](https://image.slidesharecdn.com/securingoptimizinglinuxthehackingsolutionv-131209075405-phpapp02/85/Securing-Optimizing-Linux-the-Hacking-Solution-v-3-0-333-320.jpg)
![Squid 1
CHAPTER 1
Step 2
Once the correct ACL have been added to your squid.conf file to allow purge requests on the
Proxy Server, we have to use the client program that comes with Squid to purge an object.
•
This procedure can be accomplished with the following commands:
[root@deep /]# client -m PURGE http://www.mydomain.com/
Where <www.mydomain.com> is the object that you want to purge. If the purge was successful,
you will see a “200 OK” response. If the object was not found in the cache, you will see a "404
Not Found" response.
NOTE: The PURGE feature of Squid works only when Users Authentication Support is disabled in
the Squid configuration file. The client program of Squid is not capable of using User
Authentication because it doesn’t have the option to specify a username or password through its
command line.
The cachemgr.cgi program utility of Squid
The cachemgr.cgi utility program, which is available by default when you compile and install
Squid on your system, is designed to run through a web interface, and outputs various statistics
about Squid configuration and performance.
Personally, I don’t recommend you use it. The cachemgr.cgi is a buggy utility, which provides
incomprehensible and cryptic results. Connection to its web interface is not always guaranteed
even if you have the proper configuration. I think that more development and a complete revision
of its functionality is required. Especially when we want to make a remote connection to its web
interface. If you really want to use it, then here are the correct steps you must follow.
This program, by default, is located under the /usr/lib/squid directory, and you have to put it
in your “cgi-bin” directory (eg, /home/httpd/cgi-bin) to be able to use it. Follow the simple
steps below to use this program.
Step 1
The first step will be to move the “cachemgr.cgi” CGI file from the /usr/lib/squid directory
to your /home/httpd/cgi-bin directory.
•
This procedure can be accomplished with the following command:
[root@deep /]# mv /usr/lib/squid/cachemgr.cgi /home/httpd/cgi-bin/
Step 2
Once you’ve put the “cachemgr.cgi” program into your /cgi-bin directory, it is time to
change its default mode permission and owner.
•
These procedures can be accomplished with the following commands:
[root@deep /]# cd /home/httpd/cgi-bin/
[root@deep cgi-bin]# chown 0.0 cachemgr.cgi
[root@deep cgi-bin]# chmod 0511 cachemgr.cgi
335](https://image.slidesharecdn.com/securingoptimizinglinuxthehackingsolutionv-131209075405-phpapp02/85/Securing-Optimizing-Linux-the-Hacking-Solution-v-3-0-335-320.jpg)


![SquidGuard 1
CHAPTER 2
Pristine source
If you don’t use the RPM package to install this program, it will be difficult for you to locate all the
files installed onto the system if you want to update the package in the future. To solve this
problem, it’s a good idea to make a list of files on the system before you install SquidGuard, and
then one afterwards, and then compare them using the diff utility to find out what files were
placed where.
•
Simply run the following command before installing the software:
[root@deep root]# find /* > SquidGuard1
•
•
And the following one after you install the software:
[root@deep root]# find /* > SquidGuard2
Then use this command to get a list of what changed:
[root@deep root]# diff SquidGuard1 SquidGuard2 > SquidGuard-Installed
With this procedure, if any upgrade appears, all you have to do is to read the generated list of
what files were added or changed by the program and remove them manually from your system
before installing the new software. In our example above, we use the /root directory of the
system to store all the generated file lists.
Compiling - Optimizing & Installing SquidGuard
Below are the steps that you must take to configure, compile and optimize the SquidGuard
software before installing it onto your system.
Step 1
Once you get the program from the main software site you must copy it to the /var/tmp
directory and change to this location before expanding the archive.
•
These procedures can be accomplished with the following commands:
[root@deep /]# cp squidGuard-version.tar.gz /var/tmp/
[root@deep /]# cd /var/tmp/
[root@deep tmp]# tar xzpf squidGuard-version.tar.gz
Step 2
After that, move into the newly created SquidGuard source directory and perform the following
steps to configure and optimize the software for your system.
•
To move into the newly created SquidGuard source directory use the command:
[root@deep tmp]# cd squidGuard-1.2.0/
•
To configure and optimize SquidGuard use the following compilation lines:
CFLAGS="-O2 -march=i686 -funroll-loops"
./configure
--prefix=/usr
--sysconfdir=/etc
--localstatedir=/var
--with-sg-config=/etc/squid/squidGuard.conf
--with-sg-logdir=/var/log/squid/squidGuard
--with-sg-dbhome=/var/spool/squid/squidGuard
--with-db-inc=/usr/include
--with-db-lib=/usr/lib
340](https://image.slidesharecdn.com/securingoptimizinglinuxthehackingsolutionv-131209075405-phpapp02/85/Securing-Optimizing-Linux-the-Hacking-Solution-v-3-0-340-320.jpg)
![SquidGuard 1
CHAPTER 2
This tells SquidGuard to set itself up for this particular configuration setup with:
-
-
The location of where the squidGuard configuration file must be installed.
The location of where the squidGuard log file must be installed.
The location of where the squidGuard database directory must be installed.
The location of the Berkley DB includes files that SquidGuard need.
The location of the Berkley DB library that SquidGuard need.
Step 3
Now, we must make a list of all files on the system before installing the software, and one
afterwards, then compare them using the diff utility to find out what files are placed where and
finally we install the SquidGuard software:
[root@deep squidGuard-1.2.0]# make
[root@deep squidGuard-1.2.0]# cd
[root@deep root]# find /* > SquidGuard1
[root@deep root]# cd /var/tmp/squidGuard-1.2.0/
[root@deep squidGuard-1.2.0]# make install
[root@deep squidGuard-1.2.0]# cd samples/
[root@deep samples]# install –m 511 squidGuard.cgi /home/httpd/cgi-bin/
[root@deep samples]# cd dest/
[root@deep dest]# mkdir -p /var/spool/squid/squidGuard
[root@deep dest]# chown -R squid.squid /var/spool/squid/squidGuard/
[root@deep dest]# chmod 0750 /var/spool/squid/squidGuard/
[root@deep dest]# chown -R squid.squid /var/log/squid/squidGuard/
[root@deep dest]# chmod 0750 /var/log/squid/squidGuard/
[root@deep dest]# cp blacklists.tar.gz /var/spool/squid/squidGuard/
[root@deep dest]# cd /var/spool/squid/squidGuard/
[root@deep squidGuard]# mkdir -p aggressive
[root@deep squidGuard]# mkdir -p gambling
[root@deep squidGuard]# mkdir -p hacking
[root@deep squidGuard]# mkdir -p porn
[root@deep squidGuard]# chown -R squid.squid aggressive/
[root@deep squidGuard]# chown -R squid.squid gambling/
[root@deep squidGuard]# chown -R squid.squid hacking/
[root@deep squidGuard]# chown -R squid.squid porn/
[root@deep squidGuard]# tar xzpf blacklists.tar.gz
[root@deep squidGuard]# cd blacklists
[root@deep blacklists]# install -m 644 aggressive/domains
../aggressive/
[root@deep blacklists]# install -m 644 aggressive/urls ../aggressive/
[root@deep blacklists]# install -m 644 gambling/domains ../gambling/
[root@deep blacklists]# install -m 644 gambling/urls ../gambling/
[root@deep blacklists]# install -m 644 hacking/domains ../hacking/
[root@deep blacklists]# install -m 644 hacking/urls ../hacking/
[root@deep blacklists]# install -m 644 porn/domains ../porn/
[root@deep blacklists]# install -m 644 porn/urls ../porn/
[root@deep blacklists]# install -m 644 porn/expressions ../porn/
[root@deep blacklists]# cd ..
[root@deep squidGuard]# chown -R squid.squid *
[root@deep squidGuard]# strip /usr/bin/squidGuard
[root@deep squidGuard]# /sbin/ldconfig
[root@deep squidGuard]# rm -rf blacklists blacklists.tar.gz
[root@deep squidGuard]# cd
[root@deep root]# find /* > SquidGuard2
[root@deep root]# diff SquidGuard1 SquidGuard2 > SquidGuard-Installed
341](https://image.slidesharecdn.com/securingoptimizinglinuxthehackingsolutionv-131209075405-phpapp02/85/Securing-Optimizing-Linux-the-Hacking-Solution-v-3-0-341-320.jpg)
![SquidGuard 1
CHAPTER 2
The make command will compile all source files into executable binaries that can be installed,
and make install will install the binaries and any supporting files into the appropriate locations.
The “install -m 0511” command will install the CGI program called squidGuard.cgi
(squidGuard.cgi is a small script, which is used to explain to the user that the URL is blocked
and by which rule set) into your cgi-bin directory.
The “mkdir -p” command will create the SquidGuard directory and subdirectories to store
database filter files to run with squidGuard, the “chown and chmod” commands will set the
appropriate mode and ownership permissions to the squidGuard directory and it’s
subdirectories. The “tar” command will untar the blacklists.tar.gz compressed archive
containing all the filter files and the “install -m 644” commands will install the entire filter files
to their appropriate directories.
Finally, the strip command will reduce the size of the specified binaries for optimum
performance and the “rm -rf” commands will remove the blacklists directory and archive
file that we no longer need on our system.
Step 4
Once the configuration, optimization, compilation, and installation of the SquidGuard software
have been accomplished, we can free up some disk space by deleting the program tar archive
and the related source directory since they are no longer needed.
•
To delete SquidGuard and its related source directory, use the following commands:
[root@deep /]# cd /var/tmp/
[root@deep tmp]# rm -rf squidGuard-version/
[root@deep tmp]# rm -f squidGuard-version.tar.gz
The rm command as used above will remove all the source files we have used to compile and
install SquidGuard. It will also remove the SquidGuard compressed archive from the
/var/tmp directory.
Configuring SquidGuard
After SquidGuard has been built and installed successfully on your system, your next step is to
configure and customize the squidGuard.conf file to suit your needs.
The parameters entered into the squidGuard configuration file (squidGuard.conf) will decide
how the ACL should be applied and on which users, hosts, IP addresses, times, dates,
destination, source, etc.
/etc/squid/squidGuard.conf (The SquidGuard Configuration File)
/home/httpd/cgi-bin/squidGuard.cgi (The squidGuard.cgi File)
/etc/squid/squidGuard.conf: The SquidGuard Configuration File
The /etc/squid/squidGuard.conf file is the main and only configuration file for
squidGuard. It is not difficult to configure or understand but we have to understand the rules
order if we want to have a working SquidGuard configuration file.
The SquidGuard configuration file (squidGuard.conf) has a structure that must be followed
during its configuration. Next we show you the recommended structure for the configuration file
and the order in which declarations are supposed to appear. There are six different possible
declarations where five are optional and one required.
342](https://image.slidesharecdn.com/securingoptimizinglinuxthehackingsolutionv-131209075405-phpapp02/85/Securing-Optimizing-Linux-the-Hacking-Solution-v-3-0-342-320.jpg)
![SquidGuard 1
CHAPTER 2
NOTE: If you receive an error message here, it is likely because you have forgot to configure the
squidguard.cgi program to fit your domain name information. Please edit the
“/home/httpd/cgi-bin/suidguard.cgi” program and make the appropriate changes.
Optimizing SquidGuard
This section deals specifically with the actions we can take to improve and tighten the
performance of SquidGuard. Note that we refer to the features available within the base
installed program only.
Creating a prebuilt database
Ok, your SquidGuard program is running and you’re happy to see that it works, but wait a
minute; it is possible to make SquidGuard runs faster simply by converting its filter files (where
blacklisted domains and urls reside) into a db filter file.
The default filter files used with SquidGuard are in plain text format, and SquidGuard needs to
parse all the lines inside the filter file to decide if domains/url’s can be allowed or not. There is a
better method that gives the same result and also runs faster by converting all of its filter files into
a db file.
Step1
The first step to accomplish this conversion will be to use the “-C” command of SquidGuard.
This command simply converts the text file into a db file.
•
To convert your filter text files into a db file,use the following commands:
[root@deep
[root@deep
[root@deep
[root@deep
[root@deep
[root@deep
[root@deep
[root@deep
[root@deep
/]#
/]#
/]#
/]#
/]#
/]#
/]#
/]#
/]#
cd /var/spool/squid/squidGuard/
squidGuard -C aggressive/domains
squidGuard -C aggressive/urls
squidGuard -C gambling/domains
squidGuard -C gambling/urls
squidGuard -C hacking/domains
squidGuard -C hacking/urls
squidGuard -C porn/domains
squidGuard -C porn/urls
The above commands, will convert a domainlist or urllist from plain text file to a prebuilt database.
351](https://image.slidesharecdn.com/securingoptimizinglinuxthehackingsolutionv-131209075405-phpapp02/85/Securing-Optimizing-Linux-the-Hacking-Solution-v-3-0-351-320.jpg)


![FreeS/WAN VPN 1
CHAPTER 3
These installation instructions assume
Commands are Unix-compatible.
The source path is /usr/src (note that other paths are possible, at personal discretion).
Installations were tested on OpenNA Linux and Red Hat Linux 7.3.
All steps in the installation will happen using the super-user account “root”.
Whether kernel recompilation may be required: Yes
Latest FreeS/WAN version number is 1.95
The procedures given in this chapter are likely to work on all Linux platforms, but we have only
tested it on OpenNA Linux and Red Hat Linux.
Packages
The following is based on information listed by FreeS/WAN as of 2001/02/04. Please check
http://www.freeswan.org/ regularly for the latest status. We chose to install from source because it
provides the facility to fine tune the installation.
Source code is available from:
FreeS/WAN Homepage Site: http://www.freeswan.org/
FreeS/WAN FTP Site: 194.109.6.26
You must be sure to download: freeswan-1.95.tar.gz
Prerequisites
Linux FreeS/WAN requires that the software below is already installed on your system to be able
to run and work successfully. If this is not the case, you must install it from your Linux CD-ROM or
source archive file. Please make sure you have this program installed on your machine before
you proceed with this chapter.
gmp is required to compile and make FreeS/WAN works in your system.
NOTE:
Not installing the GMP library will make pluto fail to compile on your server.
Pristine source
If you don’t use the RPM package to install this program, it will be difficult for you to locate all the
files installed onto the system if you want to update the package in the future. To solve this
problem, it’s a good idea to make a list of files on the system before you install FreeS/WAN, and
then one afterwards, and then compares them using the diff utility to find out what files were
placed where.
•
Simply run the following command before installing the software:
[root@deep root]# find /* > Freeswan1
•
And the following one after you install the software:
[root@deep root]# find /* > Freeswan2
•
Then use this command to get a list of what changed:
[root@deep root]# diff Freeswan1 Freeswan2 > Freeswan-Installed
359](https://image.slidesharecdn.com/securingoptimizinglinuxthehackingsolutionv-131209075405-phpapp02/85/Securing-Optimizing-Linux-the-Hacking-Solution-v-3-0-359-320.jpg)
![FreeS/WAN VPN 1
CHAPTER 3
Compiling - Optimizing & Installing FreeS/WAN
Below are the required steps that you must make to compile and optimize the FreeS/WAN
software before installing it into your Linux system.
Step 1
The installation of IPSEC FreeS/WAN software requires some modification of your original
kernel since some parts of FreeS/WAN must be included and incorporated in your kernel before
you can use it. For this reason the first step in installing FreeS/WAN is to go to the Linux Kernel
section in this book and follow the instructions on how to install the Linux Kernel on your system
(even if you have already done this before) and come back to this section after you have
executed the “make dep; make clean” commands, but before the “make bzImage”
command in the Linux Kernel chapter.
Step 2
Once your kernel is configured and you download the FreeS/WAN program from the main
software site you must copy it to the /usr/src directory and change to this location before
expanding the archive. Putting FreeS/WAN under /usr/src/linux will confuse the links,
therefore, expand the software under /usr/src and never under /usr/src/linux directory.
•
These procedures can be accomplished with the following commands:
[root@deep /]# cp freeswan-version.tar.gz /usr/src/
[root@deep /]# cd /usr/src/
[root@deep src]# tar xzpf freeswan-version.tar.gz
Step 3
After that, move into the newly created FreeS/WAN directory then configure, compile and
optimize it.
•
To move into the top-level directory of FreeS/WAN distribution use the command:
[root@deep src]# cd freeswan-1.95/
Step 4
You must modify the Makefile.inc under the FreeS/WAN source directory to specify
installation paths and optimization parameters. We must modify this file to be compliant with
Linux file system structure, add optimization parameters for our specific processor architecture
and install FreeS/WAN files under our PATH environment variable.
•
Edit the Makefile.inc file (vi Makefile.inc) and change all of the targeted lines in
the order shown below:
PUBDIR=$(DESTDIR)/usr/local/sbin
To read:
INC_USRLOCAL=/usr
REALPRIVDIR=/usr/local/lib/ipsec
To read:
INC_MANDIR=/share/man
360](https://image.slidesharecdn.com/securingoptimizinglinuxthehackingsolutionv-131209075405-phpapp02/85/Securing-Optimizing-Linux-the-Hacking-Solution-v-3-0-360-320.jpg)
![FreeS/WAN VPN 1
CHAPTER 3
MANTREE=$(DESTDIR)/usr/local/man
To read:
USERCOMPILE=-O2
CONFDIR=$(DESTDIR)/etc
To read:
KLIPSCOMPILE=-O2
All of the above changes, will relocate all files related to the FreeS/WAN software to the
destination target directories we have chosen. We also add optimization parameters related to
the type of processor that we use in our system for better performance.
Step 5
Once the modifications have been made to the source file of FreeS/WAN as described in step 4,
we need to patch the pre-configured Linux Kernel to include FreeS/WAN support.
•
This procedure can be accomplished with the following command:
[root@deep freeswan-1.95]# make ogo
echo "===============" >>out.kpatch
echo "`date` `cd /usr/src/linux ; pwd`" >>out.kpatch
make _patches2.3 >>out.kpatch
…………
The make ogo command is what we use to patch the kernel. It will automatically start the kernel
configuration part for the second time and will let you answer all kernel configuration questions
before compilation and integration of its component into the kernel.
During the second kernel configuration, be sure that your kernel has been built with FreeS/WAN
support enabled. A new section related to Frees/WAN support named “IPSec options
(FreeS/WAN)” should appear in your kernel configuration after you have patched the kernel with
the FreeS/WAN program as described above. You need ensure that you have answered Y to the
following questions under the new kernel section: IPSec options (FreeS/WAN).
IP Security Protocol (FreeS/WAN IPSEC) (CONFIG_IPSEC) [Y/n/?]
*
* IPSec options (FreeS/WAN)
*
IPSEC: IP-in-IP encapsulation (tunnel mode) (CONFIG_IPSEC_IPIP) [Y/n/?]
IPSEC: Authentication Header (CONFIG_IPSEC_AH) [Y/n/?]
HMAC-MD5 authentication algorithm (CONFIG_IPSEC_AUTH_HMAC_MD5) [Y/n/?]
HMAC-SHA1 authentication algorithm (CONFIG_IPSEC_AUTH_HMAC_SHA1) [Y/n/?]
IPSEC: Encapsulating Security Payload (CONFIG_IPSEC_ESP) [Y/n/?]
3DES encryption algorithm (CONFIG_IPSEC_ENC_3DES) [Y/n/?]
IPSEC: IP Compression (CONFIG_IPSEC_IPCOMP) [Y/n/?]
IPSEC Debugging Option (CONFIG_IPSEC_DEBUG) [Y/n/?]
361](https://image.slidesharecdn.com/securingoptimizinglinuxthehackingsolutionv-131209075405-phpapp02/85/Securing-Optimizing-Linux-the-Hacking-Solution-v-3-0-361-320.jpg)
![FreeS/WAN VPN 1
CHAPTER 3
All the customization you made to your kernel the first time you ran the make config,
make dep, and make clean commands will be preserved, so you don’t need to reconfigure every
part of your kernel; Just the new section added by FreeS/WAN named “IPSec options
(FreeS/WAN)” is required, as shown above.
NOTE:
Some networking options will get turned on automatically, even if you previously turned them off;
This is because IPSEC needs them. Whichever configuration program you are using, you should
pay careful attention to a few issues: in particular, do NOT disable any of the following under the
“Networking Options” of your kernel configuration:
Kernel/User netlink socket (CONFIG_NETLINK) [Y/n/?]
Netlink device emulation (CONFIG_NETLINK_DEV) [Y/n/?]
Step 6
Once the make ogo command is completed, your FreeS/WAN software and Linux kernel with
FreeS/WAN support is ready to be installed on your server. We must make a list of files on the
system before you install the software and the kernel, and one afterwards, then compare them
using the diff utility to find out what files are placed where and finally install FreeS/WAN and
the new kernel with FreeS/WAN support in your server:
[root@deep
[root@deep
[root@deep
[root@deep
[root@deep
[root@deep
[root@deep
freeswan-1.95]# cd
root]# find /* > Freeswan1
root]# cd /usr/src/freeswan-1.95/
freeswan-1.95]# make install
freeswan-1.95]# cd
root]# find /* > Freeswan2
root]# diff Freeswan1 Freeswan2 > Freeswan-Installed
The make install command will install all FreeS/WAN and kernel components together to the
appropriated location on your server.
Step 7
At this stage of your installation of FreeS/WAN, you must follow the rest of the instructions in the
Linux Kernel chapter of this book as normal to install the kernel. At this point, after you have
copied and installed your new kernel image, system.map, or modules (if necessary), and set the
lilo.conf file to load the new kernel, you must edit and customize the configuration files
related to FreeS/WAN “ipsec.conf” and “ipsec.secrets” before rebooting your system.
Step 8
Once the compilation, optimization and installation of the software have been finished, we can
free up some disk space by deleting the program tar archive and the related source directory
since they are no longer needed.
•
To delete FreeS/WAN and its related source directory, use the following commands:
[root@deep /]# cd /usr/src/
[root@deep src]# rm -rf freeswan-version/
[root@deep src]# rm -f freeswan-version.tar.gz
362](https://image.slidesharecdn.com/securingoptimizinglinuxthehackingsolutionv-131209075405-phpapp02/85/Securing-Optimizing-Linux-the-Hacking-Solution-v-3-0-362-320.jpg)

![FreeS/WAN VPN 1
CHAPTER 3
/etc/ipsec.secrets: The FreeS/WAN File to store Secret Keys
The file ipsec.secrets stores the secrets used by the pluto daemon to authenticate
communication between both gateways. Two different kinds of secrets can be configured in this
file, preshared secrets and RSA private keys. You must check the permissions of this file to be
sure that the super-user “root” owns the file, and its permissions are set to block all access by
others.
Step 1
An example secret is supplied in the ipsec.secrets file by default. You should change it by
creating your own. With automatic keying you may have a shared secret up to 256 bits, which is
then used during the key exchanges to make sure a man in the middle attack does not occur.
•
To create a new shared secret, use the following commands:
[root@deep /]# ipsec ranbits 256
> temp
New, random keys are created with the ranbits(8) utility in the file named “temp”. The ranbits
utility may pause for a few seconds if not enough entropy is available immediately. Don’t forget to
delete the temporary file as soon as you are done with it.
Step 2
Now that our new shared secret key has been created in the “temp” file, we must put it in the
/etc/ipsec.secrets file. When editing the ipsec.secrets file, you should see something
like the following appearing in your text editor. Each line has the IP addresses of the two
gateways plus the secret. It should look something like this:
# This file holds shared secrets which are currently the only inter-Pluto
# authentication mechanism. See ipsec_pluto(8) manpage. Each secret is
# (oversimplifying slightly) for one pair of negotiating hosts.
# The shared secrets are arbitrary character strings and should be both
# long and hard to guess.
# Note that all secrets must now be enclosed in quotes, even if they have
# no white space inside them.
10.0.0.1 11.0.0.1
"jxVS1kVUTTulkVRRTnTujSm444jRuU1mlkklku2nkW3nnVu
V2WjjRRnulmlkmU1Run5VSnnRT"
•
Edit the ipsec.secrets file (vi /etc/ipsec.secrets) and change the default
secrets keys:
10.0.0.1 11.0.0.1 " jxVS1kVUTTulkVRRTnTujSm444jRuU1mlkklku2nkW3nnVu
V2WjjRRnulmlkmU1Run5VSnnRT "
To read:
208.164.186.1 208.164.186.2
"0x9748cc31_2e99194f_d230589b_cd846b57_dc070b01_74b66f34_19c40a1a_804906ed"
Where “208.164.186.1" and “208.164.186.2" are the IP addresses of the two gateways and
"0x9748cc31_2e99194f_d230589b_cd846b57_dc070b01_74b66f34_19c40a1a_804906
ed" (note that the quotes are required) is the shared secret we have generated above with the
command “ipsec ranbits 256 > temp” in the “temp” file.
366](https://image.slidesharecdn.com/securingoptimizinglinuxthehackingsolutionv-131209075405-phpapp02/85/Securing-Optimizing-Linux-the-Hacking-Solution-v-3-0-366-320.jpg)
![FreeS/WAN VPN 1
CHAPTER 3
Step 3
The files ipsec.conf, and ipsec.secrets must be copied to the second gateway machine so
as to be identical on both ends. The only exception to this is the ipsec.conf file, which must
have in it a section labeled by the line config setup with the correct interface settings for the
second gateway, if they differ from the first. The ipsec.secrets file, contrary to the RSA
private key, should have the same-shared secrets on the two gateways.
The file /etc/ipsec.secrets should have permissions rw------- (600) and be
owned by the super-user “root”. The file /etc/ipsec.conf is installed with permissions rw-r-r— (644) and must be owned also by “root”.
WARNING:
Configuring RSA private keys secrets
Recall that currently with FreeSWAN software there are two kinds of secrets: preshared secrets
and RSA private keys. The preshared secrets are what we have configured in our ipsec.conf
and ipsec.secrets example, above. Some people may prefer to use RSA private keys for
authentication by the Pluto daemon of the other hosts. If you are in this situation, you will have
to make some minor modifications to your ipsec.conf and ipsec.secrets files as described
in the following steps:
You need to create a separate RSA key for *each* gateway. Each one gets its private key in its
own ipsec.secrets file, and the public keys go in leftrsasigkey and rightrsasigkey
parameters in the conn description of ipsec.conf file, which goes to both.
Step 1
Create a separate RSA key for *each* gateway:
•
On the first gateway (e.i. deep), use the following commands:
[root@deep /]# cd /
[root@deep /]# ipsec rsasigkey --verbose 1024 > deep-keys
computing primes and modulus...
getting 64 random bytes from /dev/random
looking for a prime starting there
found it after 30 tries
getting 64 random bytes from /dev/random
looking for a prime starting there
found it after 230 tries
swapping primes so p is the larger
computing (p-1)*(q-1)...
computing d...
computing exp1, exp1, coeff...
output...
•
On the second gateway (e.i. mail), use the following commands:
[root@mail /]# cd /
[root@mail /]# ipsec rsasigkey --verbose 1024 > mail-keys
computing primes and modulus...
getting 64 random bytes from /dev/random
looking for a prime starting there
found it after 30 tries
getting 64 random bytes from /dev/random
looking for a prime starting there
found it after 230 tries
swapping primes so p is the larger
computing (p-1)*(q-1)...
367](https://image.slidesharecdn.com/securingoptimizinglinuxthehackingsolutionv-131209075405-phpapp02/85/Securing-Optimizing-Linux-the-Hacking-Solution-v-3-0-367-320.jpg)
![FreeS/WAN VPN 1
CHAPTER 3
RSA keys for gateway deep (deep-keys):
[root@deep /]# cd /
[root@deep /]# vi deep-keys
# 1024 bits, Fri Feb 4 05:05:19 2000
# for signatures only, UNSAFE FOR ENCRYPTION
#pubkey=0x010395daee1be05f3038ae529ef2668afd79f5ff1b16203c9ceaef801cea9cb74
bcfb51a6ecc08890d3eb4b5470c0fc35465c8ba2ce9d1145ff07b5427e04cf4a38ef98a7f29edcb
4d7689f2da7a69199e4318b4c8d0ea25d33e4f084186a2a54f4b4cec12cca1a5deac3b19d561c16
a76bab772888f1fd71aa08f08502a141b611f
Modulus:
0x95daee1be05f3038ae529ef2668afd79f5ff1b16203c9ceaef801cea9cb74bcfb51a6ecc08890
d3eb4b5470c0fc35465c8ba2ce9d1145ff07b5427e04cf4a38ef98a7f29edcb4d7689f2da7a6919
9e4318b4c8d0ea25d33e4f084186a2a54f4b4cec12cca1a5deac3b19d561c16a76bab772888f1fd
71aa08f08502a141b611f
PublicExponent: 0x03
# everything after this point is secret
PrivateExponent:
0x63e74967eaea2025c98c69f6ef0753a6a3ff6764157dbdf1f50013471324dd352366f48805b0b
37f232384b2b52ce2ee85d173468b62eaa052381a9588a317b3a1324d01a531a41fa7add6c5efbd
d88f4718feed2bc0246be924e81bb90f03e49ceedf7af0dd48f06f265b519600bd082c6e6bd27ea
a71cc0288df1ecc3b062b
Prime1:
0xc5b471a88b025dd09d4bd7b61840f20d182d9b75bb7c11eb4bd78312209e3aee7ebfe632304db
6df5e211d21af7fee79c5d45546bea3ccc7b744254f6f0b847f
Prime2:
0xc20a99feeafe79767122409b693be75f15e1aef76d098ab12579624aec708e85e2c5dd62080c3
a64363f2f45b0e96cb4aef8918ca333a326d3f6dc2c72b75361
Exponent1:
0x83cda11b0756e935be328fcebad5f6b36573bcf927a80bf2328facb6c0697c9eff2a9976cade7
9ea3ec0be1674fff4512e8d8e2f29c2888524d818df9f5d02ff
Exponent2:
0x815c66a9f1fefba44b6c2b124627ef94b9411f4f9e065c7618fb96dc9da05f03ec83e8ec055d7
c42ced4ca2e75f0f3231f5061086ccd176f37f9e81da1cf8ceb
Coefficient:
0x10d954c9e2b8d11f4db1b233ef37ff0a3cecfffad89ba5d515449b007803f577e3bd7f0183ced
dfd805466d62f767f3f5a5731a73875d30186520f1753a7e325
RSA keys for gateway mail (mail-keys):
[root@mail /]# cd /
[root@mail /]# vi mail-keys
# 1024 bits, Fri Feb 4 04:46:59 2000
# for signatures only, UNSAFE FOR ENCRYPTION
#pubkey=0x01037631b81f00d5e6f888c542d44dbb784cd3646f084ed96f942d341c7c4686c
bd405b805dc728f8697475f11e8b1dd797550153a3f0d4ff0f2b274b70a2ebc88f073748d1c1c88
21dc6be6a2f0064f3be7f8e4549f8ab9af64944f829b014788dd202cf7d2e320cab666f5e7a197e
64efe0bfee94e92ce4dad82d5230c57b89edf
Modulus:
0x7631b81f00d5e6f888c542d44dbb784cd3646f084ed96f942d341c7c4686cbd405b805dc728f8
697475f11e8b1dd797550153a3f0d4ff0f2b274b70a2ebc88f073748d1c1c8821dc6be6a2f0064f
3be7f8e4549f8ab9af64944f829b014788dd202cf7d2e320cab666f5e7a197e64efe0bfee94e92c
e4dad82d5230c57b89edf
PublicExponent: 0x03
# everything after this point is secret
PrivateExponent:
0x4ecbd014ab3944a5b08381e2de7cfadde242f4b03490f50d737812fd8459dd3803d003e84c5fa
f0f84ea0bf07693a64e35637c2a08dff5f721a324b1747db09f62c871d5e11711251b845ae76753
d4ef967c494b0def4f5d0762f65da603bc04c41b4c6cab4c413a72c633b608267ae2889c162a3d5
bc07ee083b1c6e038400b
369](https://image.slidesharecdn.com/securingoptimizinglinuxthehackingsolutionv-131209075405-phpapp02/85/Securing-Optimizing-Linux-the-Hacking-Solution-v-3-0-369-320.jpg)
![FreeS/WAN VPN 1
CHAPTER 3
Prime1:
0xc7f7cc8feaaac65039c39333b878bffd8f95b0dc22995c553402a5b287f341012253e9f25b839
83c936f6ca512926bebee3d5403bf9f4557206c6bbfd9aac899
Prime2:
0x975015cb603ac1d488dc876132d8bc83079435d2d3395c03d5386b5c004eadd4d7b01b3d86aad
0a2275d2d6b791a2abe50d7740b7725679811a32ca22db97637
Exponent1:
0x854fddb5471c84357bd7b777d0507ffe5fb92092c1bb92e37801c3cc5aa22b5616e29bf6e7ad1
028624a486e0c619d47f428e2ad2a6a2e3a159d9d2a911c85bb
Exponent2:
0x64e00e87957c81385b3daf9621e5d302050d7937377b92ad38d04792aadf1e8de52012290471e
06c1a3e1e47a61171d435e4f807a4c39a6561177316c9264ecf
Coefficient:
0x6f087591becddc210c2ee0480e30beeb25615a3615203cd3cef65e5a1d476fd9602ca0ef10d9b
858edb22db42c975fb71883a470b43433a7be57df7ace4a0a3f
Extract and copy the public RSA key files of deep and mail to your ipsec.conf files as shown
below. You can locate the line related to the public key by a sentence beginning with the
commented-out: “#pubkey=” line.
# sample connection
conn deep-mail
left=208.164.186.1
leftsubnet=192.168.1.0/24
leftnexthop=205.151.222.250
right=208.164.186.2
rightsubnet=192.168.1.0/24
rightnexthop=205.151.222.251
keyingtries=0
auth=ah
authby=rsasig
leftrsasigkey=0x010395daee1be05f3038ae529ef2668afd79f5ff1b16203c9ceaef801ce
a9cb74bcfb51a6ecc08890d3eb4b5470c0fc35465c8ba2ce9d1145ff07b5427e04cf4a38ef9
8a7f29edcb4d7689f2da7a69199e4318b4c8d0ea25d33e4f084186a2a54f4b4cec12cca1a5d
eac3b19d561c16a76bab772888f1fd71aa08f08502a141b611f
rightrsasigkey=0x01037631b81f00d5e6f888c542d44dbb784cd3646f084ed96f942d341c
7c4686cbd405b805dc728f8697475f11e8b1dd797550153a3f0d4ff0f2b274b70a2ebc88f07
3748d1c1c8821dc6be6a2f0064f3be7f8e4549f8ab9af64944f829b014788dd202cf7d2e320
cab666f5e7a197e64efe0bfee94e92ce4dad82d5230c57b89edf
auto=start
Don’t forget that, in this example, the “leftrsasigkey=” parameter contains the public
key of deep and the “rightrsasigkey=” parameter contains the public key of mail.
NOTE:
Step 3
Modify your /etc/ipsec.secrets files to use RSA private keys in *each* gateway:
Edit your original ipsec.secrets file (vi /etc/ipsec.secrets) and add the RSA private
key for authentication on both gateways:
The ipsec.secrets file for gateway deep:
[root@deep /]# vi /etc/ipsec.secrets
208.164.186.1 208.164.186.2
"0x9748cc31_2e99194f_d230589b_cd846b57_dc070b01_74b66f34_19c40a1a_804906ed"
370](https://image.slidesharecdn.com/securingoptimizinglinuxthehackingsolutionv-131209075405-phpapp02/85/Securing-Optimizing-Linux-the-Hacking-Solution-v-3-0-370-320.jpg)
![FreeS/WAN VPN 1
CHAPTER 3
You must change your original ipsec.secrets file as shown above to look like the following on
both gateways. It is important to note that the private keys are not the same on both gateways,
deep and mail. The private key for deep comes from the RSA key file “deep-keys”, while the
private key for mail comes from the RSA key file “mail-keys”:
208.164.186.1 208.164.186.2: RSA {
Modulus:
0x95daee1be05f3038ae529ef2668afd79f5ff1b16203c9ceaef801cea9cb74bcfb51a6ecc08890
d3eb4b5470c0fc35465c8ba2ce9d1145ff07b5427e04cf4a38ef98a7f29edcb4d7689f2da7a6919
9e4318b4c8d0ea25d33e4f084186a2a54f4b4cec12cca1a5deac3b19d561c16a76bab772888f1fd
71aa08f08502a141b611f
PublicExponent: 0x03
# everything after this point is secret
PrivateExponent:
0x63e74967eaea2025c98c69f6ef0753a6a3ff6764157dbdf1f50013471324dd352366f48805b0b
37f232384b2b52ce2ee85d173468b62eaa052381a9588a317b3a1324d01a531a41fa7add6c5efbd
d88f4718feed2bc0246be924e81bb90f03e49ceedf7af0dd48f06f265b519600bd082c6e6bd27ea
a71cc0288df1ecc3b062b
Prime1:
0xc5b471a88b025dd09d4bd7b61840f20d182d9b75bb7c11eb4bd78312209e3aee7ebfe632304db
6df5e211d21af7fee79c5d45546bea3ccc7b744254f6f0b847f
Prime2:
0xc20a99feeafe79767122409b693be75f15e1aef76d098ab12579624aec708e85e2c5dd62080c3
a64363f2f45b0e96cb4aef8918ca333a326d3f6dc2c72b75361
Exponent1:
0x83cda11b0756e935be328fcebad5f6b36573bcf927a80bf2328facb6c0697c9eff2a9976cade7
9ea3ec0be1674fff4512e8d8e2f29c2888524d818df9f5d02ff
Exponent2:
0x815c66a9f1fefba44b6c2b124627ef94b9411f4f9e065c7618fb96dc9da05f03ec83e8ec055d7
c42ced4ca2e75f0f3231f5061086ccd176f37f9e81da1cf8ceb
Coefficient:
0x10d954c9e2b8d11f4db1b233ef37ff0a3cecfffad89ba5d515449b007803f577e3bd7f0183ced
dfd805466d62f767f3f5a5731a73875d30186520f1753a7e325
}
The ipsec.secrets file for gateway mail:
[root@mail /]# vi /etc/ipsec.secrets
208.164.186.1 208.164.186.2: RSA {
Modulus:
0x95daee1be05f3038ae529ef2668afd79f5ff1b16203c9ceaef801cea9cb74bcfb51a6ecc08890
d3eb4b5470c0fc35465c8ba2ce9d1145ff07b5427e04cf4a38ef98a7f29edcb4d7689f2da7a6919
9e4318b4c8d0ea25d33e4f084186a2a54f4b4cec12cca1a5deac3b19d561c16a76bab772888f1fd
71aa08f08502a141b611f
PublicExponent: 0x03
# everything after this point is secret
PrivateExponent:
0x63e74967eaea2025c98c69f6ef0753a6a3ff6764157dbdf1f50013471324dd352366f48805b0b
37f232384b2b52ce2ee85d173468b62eaa052381a9588a317b3a1324d01a531a41fa7add6c5efbd
d88f4718feed2bc0246be924e81bb90f03e49ceedf7af0dd48f06f265b519600bd082c6e6bd27ea
a71cc0288df1ecc3b062b
Prime1:
0xc5b471a88b025dd09d4bd7b61840f20d182d9b75bb7c11eb4bd78312209e3aee7ebfe632304db
6df5e211d21af7fee79c5d45546bea3ccc7b744254f6f0b847f
Prime2:
0xc20a99feeafe79767122409b693be75f15e1aef76d098ab12579624aec708e85e2c5dd62080c3
a64363f2f45b0e96cb4aef8918ca333a326d3f6dc2c72b75361
Exponent1:
0x83cda11b0756e935be328fcebad5f6b36573bcf927a80bf2328facb6c0697c9eff2a9976cade7
9ea3ec0be1674fff4512e8d8e2f29c2888524d818df9f5d02ff
371](https://image.slidesharecdn.com/securingoptimizinglinuxthehackingsolutionv-131209075405-phpapp02/85/Securing-Optimizing-Linux-the-Hacking-Solution-v-3-0-371-320.jpg)
![FreeS/WAN VPN 1
CHAPTER 3
Exponent2:
0x815c66a9f1fefba44b6c2b124627ef94b9411f4f9e065c7618fb96dc9da05f03ec83e8ec055d7
c42ced4ca2e75f0f3231f5061086ccd176f37f9e81da1cf8ceb
Coefficient:
0x10d954c9e2b8d11f4db1b233ef37ff0a3cecfffad89ba5d515449b007803f577e3bd7f0183ced
dfd805466d62f767f3f5a5731a73875d30186520f1753a7e325
}
Authentication by RSA Signatures requires that each host have its own private key. The key part
of an entry may start with a token indicating the kind of key. “RSA” signifies RSA private key and
“PSK” (which is the default) signifies PreShared Key. Since “PSK” is the default, we must specify
“RSA”, so that we’ll be able to use RSA private keys in this file (ipsec.secrets). The super-user
“root” should own the file ipsec.secrets, and its permissions should be set to block all access
by others.
Requiring network setup for IPSec
There are some considerations you must ensure are correct before running FreeS/WAN
software. These considerations are important if you don’t want to receive error messages during
start up of your VPN. The following are the steps to follow:
Step1
You will need to enable TCP/IP forwarding on the both gateway servers. In Linux, this is
accomplished by adding the following line:
•
To enable IPv4 forwarding on your Linux system, edit the /etc/sysctl.conf file (vi
/etc/sysctl.conf) and add the following line:
# Enable/Disable packet forwarding
net.ipv4.ip_forward = 1
You must restart your network for the change to take effect. The command to restart the network
is the following:
•
To restart all network devices manually on your system, use the following command:
[root@deep /]# /etc/init.d/network restart
Setting network parameters
[OK]
Bringing up interface lo
[OK]
Bringing up interface eth0
[OK]
Bringing up interface eth1
[OK]
Step 2
Recall that automatically keyed connections use keys automatically generated by the Pluto key
negotiation daemon. The pluto daemon will start up, try to connect to the Pluto daemon at the
other end of the tunnel, and establish a connection. For this reason, an IPSEC gateway should
have packet filters rules (in the firewall script file) permitting the following protocols to traverse the
gateway when talking to other IPSEC gateway:
UDP port 500 for IKE implemented by the Pluto daemon
Protocol 50 for ESP encryption and/or authentication
Protocol 51 for AH packet-level authentication
See the GIPTables chapter in this book and the GIPTables manual for the correct rules to add
to your firewall on both gateway machines to allow IPSEC packets to traverse the remote network
gateway to your network gateway and vice versa.
372](https://image.slidesharecdn.com/securingoptimizinglinuxthehackingsolutionv-131209075405-phpapp02/85/Securing-Optimizing-Linux-the-Hacking-Solution-v-3-0-372-320.jpg)
![FreeS/WAN VPN 1
CHAPTER 3
Step 3
The rp_filter subsystem (related to IP spoofing protection) must be turned off on both
gateways for IPSEC to work properly. This is accomplished by checking if the value 0 (off) is set
in the /proc/sys/net/ipv4/conf/ipsec0/rp_filter and
/proc/sys/net/ipv4/conf/eth0/rp_filter files respectively:
•
To check if the value 0 (off) is set in the rp_filter files, use the commands:
[root@deep /]# cat /proc/sys/net/ipv4/conf/ipsec0/rp_filter
0
[root@deep /]# cat /proc/sys/net/ipv4/conf/eth0/rp_filter
0
The subdirectory “ipsec0” in our example will be created only after the reboot of your
system. So you may check the value of the “rp_filter” file in the “ipsec0” directory after your
system has been restarted.
NOTE:
•
To set the value 0 (off) in the both rp_filter files manually, use the commands:
[root@deep /]# echo 0 > /proc/sys/net/ipv4/conf/ipsec0/rp_filter
[root@deep /]# echo 0 > /proc/sys/net/ipv4/conf/eth0/rp_filter
Also you can put lines like the following in your firewall script files
/etc/rc.d/init.d/iptables on both gateways to automatically set these values to 0 (off)
and avoid making them manually:
# Disable IP spoofing protection to allow IPSEC to work properly
echo 0 > /proc/sys/net/ipv4/conf/ipsec0/rp_filter
echo 0 > /proc/sys/net/ipv4/conf/eth0/rp_filter
In the example of the firewall script file above, we assume that eth0 is the interface you
use for your connection. Of course if you use eth1 you must change eth0 to eth1, and so on.
NOTE:
If you forget this step you will receive error messages on your terminal such as the following
during the start up of FreeSWAN IPSEC:
ipsec_setup: WARNING: ipsec0 has route filtering turned on, KLIPS may not work
ipsec_setup: (/proc/sys/net/ipv4/conf/ipsec0/rp_filter = `1', should be 0)
ipsec_setup: WARNING: eth0 has route filtering turned on, KLIPS may not work
ipsec_setup: (/proc/sys/net/ipv4/conf/eth0/rp_filter = `1', should be 0)
373](https://image.slidesharecdn.com/securingoptimizinglinuxthehackingsolutionv-131209075405-phpapp02/85/Securing-Optimizing-Linux-the-Hacking-Solution-v-3-0-373-320.jpg)
![FreeS/WAN VPN 1
CHAPTER 3
Testing the FreeS/WAN installation
•
Reboot the both gateways to get FreeS/WAN started.
•
Examine the /var/log/messages file for any signs of trouble. If all goes well you
should see something like this in the /var/log/messages file:
Feb 2 05:22:35 deep ipsec_setup: Starting FreeS/WAN IPSEC
snap2000jan31b...
Feb 2 05:22:35 deep ipsec_setup: KLIPS debug `none'
Feb 2 05:22:35 deep ipsec_setup: KLIPS ipsec0 on eth0
192.168.1.1/255.255.255.0 broadcast 192.168.1.255
Feb 2 05:22:36 deep ipsec_setup: Disabling core dumps:
Feb 2 05:22:36 deep ipsec_setup: Starting Pluto (debug `none'):
Feb 2 05:22:37 deep ipsec_setup: Loading Pluto database `deep-mail':
Feb 2 05:22:37 deep ipsec_setup: Enabling Pluto negotiation:
Feb 2 05:22:37 deep ipsec_setup: Routing for Pluto conns `deep-mail':
Feb 2 05:22:37 deep ipsec_setup: Initiating Pluto tunnel `deep-mail':
Feb 2 05:22:39 deep ipsec_setup: 102 "deep-mail" #1: STATE_MAIN_I1:
initiate
Feb 2 05:22:39 deep ipsec_setup: 104 "deep-mail" #1: STATE_MAIN_I2: from
STATE_MAIN_I1; sent MI2, expecting MR2
Feb 2 05:22:39 deep ipsec_setup: 106 "deep-mail" #1: STATE_MAIN_I3: from
STATE_MAIN_I2; sent MI3, expecting MR3
Feb 2 05:22:39 deep ipsec_setup: 004 "deep-mail" #1: STATE_MAIN_I4: SA
established
Feb 2 05:22:39 deep ipsec_setup: 110 "deep-mail" #2: STATE_QUICK_I1:
initiate
Feb 2 05:22:39 deep ipsec_setup: 004 "deep-mail" #2: STATE_QUICK_I2: SA
established
Feb 2 05:22:39 deep ipsec_setup: ...FreeS/WAN IPSEC started
•
Examine the /var/log/secure file for any signs of trouble. If all goes well you should
see something like the following:
Feb 21 14:45:42 deep Pluto[432]: Starting Pluto (FreeS/WAN Version 1.3)
Feb 21 14:45:43 deep Pluto[432]: added connection description "deep-mail"
Feb 21 14:45:43 deep Pluto[432]: listening for IKE messages
Feb 21 14:45:43 deep Pluto[432]: adding interface ipsec0/eth0 192.168.1.1
Feb 21 14:45:43 deep Pluto[432]: loading secrets from
"/etc/ipsec.secrets"
Feb 21 14:45:43 deep Pluto[432]: "deep-mail" #1: initiating Main Mode
Feb 21 14:45:44 deep Pluto[432]: "deep-mail" #1: ISAKMP SA established
Feb 21 14:45:44 deep Pluto[432]: "deep-mail" #2: initiating Quick Mode
POLICY_RSASIG+POLICY_ENCRYPT+POLICY_AUTHENTICATE+POLICY_TUNNEL+POLICY_PFS
Feb 21 14:45:46 deep Pluto[432]: "deep-mail" #2: sent QI2, IPsec SA
established
Feb 21 14:45:47 deep Pluto[432]: "deep-mail" #3: responding to Main Mode
Feb 21 14:45:49 deep Pluto[432]: "deep-mail" #3: sent MR3, ISAKMP SA
established
Feb 21 14:45:49 deep Pluto[432]: "deep-mail" #4: responding to Quick Mode
Feb 21 14:45:50 deep Pluto[432]: "deep-mail" #4: IPsec SA established
374](https://image.slidesharecdn.com/securingoptimizinglinuxthehackingsolutionv-131209075405-phpapp02/85/Securing-Optimizing-Linux-the-Hacking-Solution-v-3-0-374-320.jpg)
![FreeS/WAN VPN 1
CHAPTER 3
•
On both gateways, the following entries should now exist in the /proc/net/ directory:
[root@deep /]# ls -l /proc/net/ipsec_*
-r--r--r-1 root
root 0 Feb 2 05:30 /proc/net/ipsec_eroute
-r--r--r-1 root
root 0 Feb 2 05:30 /proc/net/ipsec_klipsdebug
-r--r--r-1 root
root 0 Feb 2 05:30 /proc/net/ipsec_spi
-r--r--r-1 root
root 0 Feb 2 05:30 /proc/net/ipsec_spigrp
-r--r--r-1 root
root 0 Feb 2 05:30 /proc/net/ipsec_spinew
-r--r--r-1 root
root 0 Feb 2 05:30 /proc/net/ipsec_tncfg
-r--r--r-1 root
root 0 Feb 2 05:30 /proc/net/ipsec_version
•
The IPSEC interfaces should be attached on top of the specified physical interfaces.
Confirm that with:
[root@deep /]#
ipsec0 -> eth0
ipsec1 -> NULL
ipsec2 -> NULL
ipsec3 -> NULL
•
cat /proc/net/ipsec_tncfg
mtu=16260 -> 1500
mtu=0 -> 0
mtu=0 -> 0
mtu=0 -> 0
Now execute the following command to show minimal debugging information and see if
the output looks something like this:
[root@deep /]# ipsec look
deep.openna.com Fri Feb 4 17:25:17 EST 2000
============-============
192.168.1.1/32
-> 192.168.1.2/32
=> tun0x106@192.168.1.2
esp0x4450894d@192.168.1.2 ah0x4450894c@192.168.1.2
------------=-----------ah0x3350f551@192.168.1.1 AH_HMAC_MD5: dir=in ooowin=32 seq=115
bit=0xffffffff alen=128 aklen=16
life(c,s,h)=bytes(16140,0,0)add(51656,0,0)use(54068,0,0)packets(115,0,0)
idle=499
ah0x4450894c@192.168.1.2 AH_HMAC_MD5: dir=out ooowin=32 seq=2828 alen=128
aklen=16
life(c,s,h)=bytes(449488,0,0)add(51656,0,0)use(51656,0,0)packets(2828,0,0
) idle=6
esp0x3350f552@192.168.1.1 ESP_3DES: dir=in ooowin=32 seq=115
bit=0xffffffff eklen=24
life(c,s,h)=bytes(13380,0,0)add(51656,0,0)use(54068,0,0)packets(115,0,0)
idle=499
esp0x4450894d@192.168.1.2 ESP_3DES: dir=out ooowin=32 seq=2828 eklen=24
life(c,s,h)=bytes(381616,0,0)add(51656,0,0)use(51656,0,0)packets(2828,0,0
) idle=6
tun0x105@192.168.1.1 IPIP: dir=in 192.168.1.2 -> 192.168.1.1
life(c,s,h)=add(51656,0,0)
tun0x106@192.168.1.2 IPIP: dir=out 192.168.1.1 -> 192.168.1.2
life(c,s,h)=bytes(327581,0,0)add(51656,0,0)use(51656,0,0)packets(2828,0,0
) idle=6
192.168.1.0
0.0.0.0 255.255.255.0
U
0 0 0 eth0
192.168.1.0
0.0.0.0 255.255.255.0
U
0 0 0 ipsec0
192.168.1.1
0.0.0.0 255.255.255.255 UH 0 0 0 eth0
192.168.1.2
192.168.1.2 255.255.255.255 UGH 0 0 0 ipsec0
Destination
Gateway Genmask Flags
MSS Window irtt Iface
375](https://image.slidesharecdn.com/securingoptimizinglinuxthehackingsolutionv-131209075405-phpapp02/85/Securing-Optimizing-Linux-the-Hacking-Solution-v-3-0-375-320.jpg)
![FreeS/WAN VPN 1
CHAPTER 3
•
Try pinging 192.168.1.2 from the 192.168.1.1 client. If this works then you have set
it up correctly. If it does not work check your network to make sure 208.164.186.1 can
reach 208.164.186.2, and that TCP-IP forwarding is enabled, and make sure that no
firewall rules are blocking the packets, or trying to masquerade them before the rules
allowing IPSec related traffic. For this test to work, it is important to use pings that go
from one subnet to the other.
208.164.186.1 ---- 205.151.222.250 ---- 205.151.222.251 ---- 208.164.186.2
|
|
192.168.1.0/24
192.168.1.0/24
|
|
192.168.1.1
192.168.1.2
A last note about testing the installation of FreeSWAN IPSEC, if you encounter a problem that
you are unable to resolve, you can use the following command to view a collection of debugging
information (contents of files, selections from logs, etc.) related to the IPSEC
encryption/authentication system that you should send to the Linux-IPSEC Mailing List (linuxipsec@clinet.fi) to help you.
•
Use the following command to make an output of a collection of debugging information:
[root@deep /]# ipsec barf > result
This command is primarily provided as a convenience for remote debugging; A single command
which packages up (and labels) all information that might be relevant to diagnosing a problem in
IPSEC.
Further documentation
For more details, there are several manual pages about FreeS/WAN that you could read:
$ man ipsec (8)
$ man ipsec atoaddr, addrtoa (3)
$ man ipsec atoasr (3)
$ man ipsec atobytes, bytestoa (3)
$ man ipsec atodata, datatoa (3)
$ man ipsec atosa, satoa (3)
$ man ipsec atosubnet, subnettoa (3)
$ man ipsec atoul, ultoa (3)
$ man ipsec auto (8)
$ man ipsec barf (8)
$ man ipsec bitstomask (3)
$ man ipsec eroute (8)
$ man ipsec goodmask (3)
$ man ipsec hostof (3)
$ man ipsec klipsdebug (8)
$ man ipsec look (8)
$ man ipsec manual (8)
$ man ipsec masktobits (3)
$ man ipsec optionsfrom (3)
$ man ipsec pluto (8)
$ man ipsec ranbits (8)
$ man ipsec rangetoa (3)
$ man ipsec rsasigkey (8)
$ man ipsec setup (8)
$ man ipsec spi (8)
$ man ipsec spigrp (8)
$ man ipsec subnetof (3)
$ man ipsec tncfg (8)
$ man ipsec whack (8)
$ man ipsec.conf (5)
$ man ipsec.secrets (5)
376
- invoke IPSEC utilities.
- convert Internet addresses to and from ASCII.
- convert ASCII to Internet address, subnet, or range.
- convert binary data bytes from and to ASCII formats.
- convert binary data from and to ASCII formats.
- convert IPSEC Security Association IDs to and from ASCII.
- convert subnet/mask ASCII form to and from addresses.
- convert unsigned-long numbers to and from ASCII.
- control automatically-keyed IPSEC connections.
- spew out collected IPSEC debugging information.
- convert bit count to Internet subnet mask.
- manipulate IPSEC extended routing tables.
- is this Internet subnet mask a valid one?
- given Internet address and subnet mask, return host part.
- set Klips (kernel IPSEC support) debug features and level.
- show minimal debugging information.
- take manually-keyed IPSEC connections up and down.
- convert Internet subnet mask to bit count.
- read additional ``command-line'' options from file.
- IPsec IKE keying daemon.
- generate random bits in ASCII form.
- convert Internet address range to ASCII.
- generate RSA signature key.
- control IPSEC subsystem.
- manage IPSEC Security Associations.
- group/ungroup IPSEC Security Associations.
- given Internet address and subnet mask, return subnet number.
- associate IPSEC virtual interface with real interface.
- control interface for IPSEC keying daemon.
- IPSEC configuration and connections.
- secrets for IKE/IPsec authentication.](https://image.slidesharecdn.com/securingoptimizinglinuxthehackingsolutionv-131209075405-phpapp02/85/Securing-Optimizing-Linux-the-Hacking-Solution-v-3-0-376-320.jpg)


![GnuPG 1
CHAPTER 4
Prerequisites
GnuPG requires that the listed software below be already installed on your system to be able to
compile successfully. If this is not the case, you must install it from your Linux CD-ROM or source
archive files. Please make sure you have this program installed on your machine before you
proceed with this chapter.
gettext is required to run GnuPG on your system.
python-1.5 is required to run GnuPG on your system.
expat is required to run GnuPG on your system.
gmp is required to run GnuPG on your system.
Pristine source
If you don’t use the RPM package to install this program, it will be difficult for you to locate all the
files installed on the system if you want to update the package in the future. To solve this
problem, it’s a good idea to make a list of files on the system before you install GnuPG, and then
one afterwards, and then compare them using the diff utility to find out what files were placed
where.
•
•
Simply run the following command before installing the software:
[root@deep root]# find /* > GnuPG1
And the following one after you install the software:
[root@deep root]# find /* > GnuPG2
•
Then use the following command to get a list of what changed:
[root@deep root]# diff GnuPG1 GnuPG2 > GnuPG-Installed
With this procedure, if any upgrade appears, all you have to do is to read the generated list of
what files were added or changed by the program and remove them manually from your system
before installing the new software. In our example above, we use the /root directory of the
system to store all the generated file lists.
Compiling - Optimizing & Installing GnuPG
Below are the required steps that you must make to configure, compile and optimize the GnuPG
software before installing it into your Linux system. First off, we install the program as user 'root'
so as to avoid authorization problems.
Step 1
Once you get the program from the main software site you must copy it to the /var/tmp
directory and change to this location before expanding the archive.
•
This can be done with the following commands:
[root@deep /]# cp gnupg-version.tar.gz /var/tmp/
[root@deep /]# cd /var/tmp/
[root@deep tmp]# tar xzpf gnupg-version.tar.gz
382](https://image.slidesharecdn.com/securingoptimizinglinuxthehackingsolutionv-131209075405-phpapp02/85/Securing-Optimizing-Linux-the-Hacking-Solution-v-3-0-382-320.jpg)
![GnuPG 1
CHAPTER 4
Step 2
In order to check that the version of GnuPG, which you are going to install, is an original and
unmodified one, use the commands described below and check the supplied signature. Since we
don’t have GnuPG already installed in the system, we have to verify the MD5 checksum of the
program.
•
To verify the MD5 checksum of GnuPG, use the following command:
[root@deep /]# md5sum gnupg-version.tar.gz
This should yield an output similar to this:
d8b36d4dfd213a1a1027b1877acbc897
gnupg-1.0.7.tar.gz
Now check that this checksum is exactly the same as the one published on the GnuPG website at
the following URL: http://www.gnupg.org/download.html
Step 3
Next, move into the newly created GnuPG source directory and perform the following steps to
configure and optimize the software for your system.
•
To move into the newly created GnuPG directory use the following command:
[root@deep tmp]# cd gnupg-1.0.7/
•
To configure and optimize GnuPG use the following compilation lines:
CFLAGS="-O2 -march=i686 -funroll-loops"; export CFLAGS
./configure
--prefix=/usr
--mandir=/usr/share/man
--infodir=/usr/share/info
--enable-shared
--disable-nls
Pay special attention to the compile CFLAGS line above. We optimize GnuPG for an
i686 CPU architecture with the parameter “-march=i686”. Please don’t forget to adjust the
CFLAGS line to reflect your own system.
WARNING:
Step 4
Now, we must make a list of all files on the system before installing the software, and one
afterwards, then compare them using the diff utility to find out what files are placed where and
finally we install the GnuPG software:
[root@deep
[root@deep
[root@deep
[root@deep
[root@deep
[root@deep
[root@deep
[root@deep
[root@deep
[root@deep
[root@deep
gnupg-1.0.7]# make
gnupg-1.0.7]# make check
gnupg-1.0.7]# cd
root]# find /* > GnuPG1
root]# cd /var/tmp/gnupg-1.0.7/
gnupg-1.0.7]# make install
gnupg-1.0.7]# strip /usr/bin/gpg
gnupg-1.0.7]# strip /usr/bin/gpgv
gnupg-1.0.7]# cd
root]# find /* > GnuPG2
root]# diff GnuPG1 GnuPG2 > GnuPG-Installed
383](https://image.slidesharecdn.com/securingoptimizinglinuxthehackingsolutionv-131209075405-phpapp02/85/Securing-Optimizing-Linux-the-Hacking-Solution-v-3-0-383-320.jpg)
![GnuPG 1
CHAPTER 4
The above commands will configure the software to ensure your system has the necessary
libraries to successfully compile the package, compile all source files into executable binaries,
and then install the binaries and any supporting files into the appropriate locations.
Step 5
Once the configuration, optimization, compilation, and installation of the GnuPG software have
been accomplished, we can free up some disk space by deleting the program tar archive and the
related source directory since they are no longer needed.
•
To delete GnuPG and its related source directory, use the following commands:
[root@deep /]# cd /var/tmp/
[root@deep tmp]# rm -rf gnupg-version/
[root@deep tmp]# rm -f gnupg-version.tar.gz
The rm command as used above will remove all the source files we have used to compile and
install GnuPG. It will also remove the GnuPG compressed archive from the /var/tmp/ directory.
Using GnuPG under Linux terminal
Here we show you how to use GnuPG using a terminal to manage GPG keys. The commands
listed below are ones that we use often, but many more exist. Check the manual page gpg (1)
for more information.
Creating a key-pair:
First of all, we must create a new key-pair (public and private) if this is a first use of the GnuPG
software to be able to use its encryption features.
Step 1
The “--gen-key” option of GnuPG is used to generate a new (public and private) key, we have to
use it every time we need to create a new GnuPG key on the system. When we issue this
command for the first time, GnuPG will create the required directory and options file for us.
•
To create a new key-pair, use the following command:
[root@deep /]# gpg --gen-key
gpg (GnuPG) 1.0.7; Copyright (C) 2000 Free Software Foundation, Inc.
This program comes with ABSOLUTELY NO WARRANTY.
This is free software, and you are welcome to redistribute it
under certain conditions. See the file COPYING for details.
gpg: /root/.gnupg: directory created
gpg: /root/.gnupg/options: new options file created
gpg: you have to start GnuPG again, so it can read the new options file
384](https://image.slidesharecdn.com/securingoptimizinglinuxthehackingsolutionv-131209075405-phpapp02/85/Securing-Optimizing-Linux-the-Hacking-Solution-v-3-0-384-320.jpg)
![GnuPG 1
CHAPTER 4
Step 2
Once the command has been executed, we have to run it again for a second time to create our
public and private keys, because on first utilization, it just creates the required directory and
options file for us. Therefore, it will now create the keys.
•
We start GnuPG again with the same command:
[root@deep /]# gpg --gen-key
gpg (GnuPG) 1.0.7; Copyright (C) 2002 Free Software Foundation, Inc.
This program comes with ABSOLUTELY NO WARRANTY.
This is free software, and you are welcome to redistribute it
under certain conditions. See the file COPYING for details.
gpg: keyring `/root/.gnupg/secring.gpg' created
gpg: keyring `/root/.gnupg/pubring.gpg' created
Please select what kind of key you want:
(1) DSA and ElGamal (default)
(2) DSA (sign only)
(4) ElGamal (sign and encrypt)
(5) RSA (sign only)
Your selection? 1
DSA keypair will have 1024 bits.
About to generate a new ELG-E keypair.
minimum keysize is 768 bits
default keysize is 1024 bits
highest suggested keysize is 2048 bits
What keysize do you want? (1024) Press Enter
Requested keysize is 1024 bits
Please specify how long the key should be valid.
0 = key does not expire
<n> = key expires in n days
<n>w = key expires in n weeks
<n>m = key expires in n months
<n>y = key expires in n years
Key is valid for? (0) Press Enter
Key does not expire at all
Is this correct (y/n)? y
You need a User-ID to identify your key; the software constructs the user
id from Real Name, Comment and Email Address in this form:
"Heinrich Heine (Der Dichter) <heinrichh@duesseldorf.de>"
Real name: Gerhard Mourani
Email address: gmourani@openna.com
Comment: Press Enter
You selected this USER-ID:
"Gerhard Mourani <gmourani@openna.com>"
Change (N)ame, (C)omment, (E)mail or (O)kay/(Q)uit? o
You need a Passphrase to protect your secret key.
Enter passphrase: mypassphrase
Repeat passphrase: mypassphrase
We need to generate a lot of random bytes. It is a good idea to perform
some other action (type on the keyboard, move the mouse, utilize the
disks) during the prime generation; this gives the random number
generator a better chance to gain enough entropy.
++++++++++++++++++++.+++++.+++++.+++++++++++++++.+++++++++++++++..+++++++
++++++++...+++++++++++++++.+++++.++++++++++++++++++++++++++++++++++++++++
..+++++
385](https://image.slidesharecdn.com/securingoptimizinglinuxthehackingsolutionv-131209075405-phpapp02/85/Securing-Optimizing-Linux-the-Hacking-Solution-v-3-0-385-320.jpg)
![GnuPG 1
CHAPTER 4
<+++++..>+++++.................<..+++++..................................
..........+++++^^^^
public and secret key created and signed.
A new key-pair is created (secret and public key) in the “root” home directory ~/root
under the .gnupg subdirectory because we issued this GnuPG command as user “root”. If you
run the above command under other user into the system, then the generated keys will be
located under its home directory on the server.
NOTE:
Exporting GPG key/s for a user:
Once your own key-pair is created, you can expand your horizons by exporting and distributing
your public key over the world (NEVER export you private key). This can be done by publishing it
on your homepage, through an available key server on the Internet, or any other available
method. GnuPG has some useful options to help you publish your public key.
Step 1
First off, we have to extract our public key in ASCII text to be able to distribute it. ASCII text is a
good format to use because it allows people to get it easily. In this way, anyone can just cut and
past your public key and use it when they want to securely communicate with you.
•
To extract your public key in ASCII armored output, use the following command:
[root@deep /]# gpg --export –ao UID
As an example:
[root@deep /]# gpg --export –ao Gerhard Mourani
Where “--export” is for extracting Public-key from your pubring encrypted file, “a” is to create
ASCII armored output that you can mail, publish or put it on a web page, “o” to put the result in a
file and UID represents the user key you want to export, which is in our example the user
“Gerhard Mourani” key that we have create previously.
Step 2
Once your public key has been extracted, the resulting output will be a file called “Gerhard”
under the directory where you are issuing the above command, representing the First name of
the user key to extract. In our example, the file is called “Gerhard” because it is the name of the
key we want to export in ASCII text format. Note that the file name will be different for your public
ASCII text format key.
•
Edit your public key in ASCII armored output format, and distribute it:
[root@deep /]# vi Gerhard
-----BEGIN PGP PUBLIC KEY BLOCK----Version: GnuPG v1.0.7 (GNU/Linux)
Comment: For info see http://www.gnupg.org
mQGiBDzGNQcRBAC+1NrjFMCEtyjcv5lhtFNMLHEQ0VdHObv0CMUdCkiDslJ9QT9v
MtVG1d4r3+0RJan23Z+8fc11E7Q0wRjRO13efRGEbxaIushhRc/p11LsEubWMWC7
E1UCsMmniScEdoZLSq9/myjj7IJqAavgL0a7/VkVHjrX1j/pTTK1wUUsRwCgy0jp
0JzY1+dIK4ElfGxAQ7oHop8D/03MkyVhUZh9asLW4tyGlmMN8exqfRoMdeSv0jnz
ftAAZ71sn8jDdviccvaJvj2eTdZ7J43BIhxALJZ8KMQdEDWQnW62FfV9uGWcB5HL
c869XOD0so9LOJGsgF1XpnMKQhTRXXEIuN0THpGDSLdQtXelBzIusQuSmNBrx7A0
6/5xA/0W3H2NYzvMWnTuENpHUQR8KtIARcmis4bGIH/fEiPQyR7YWIAs9sPOE5Yr
3cQuUpZ3nwGcZ5CGOKm0qRBkhMI49SO25gsoaRVVatNZ1v1o07AaNDimmvE0hhO3
+/LTv9cJYMdm4ijp+XOhssO4zctgdg0bHISsTWqB1AJcSsdAirQpR2VyaGFyZCBN
386](https://image.slidesharecdn.com/securingoptimizinglinuxthehackingsolutionv-131209075405-phpapp02/85/Securing-Optimizing-Linux-the-Hacking-Solution-v-3-0-386-320.jpg)
![GnuPG 1
CHAPTER 4
b3VyYW5pIDxzeXNhZG1pbkBkZXYub3Blbm5hLmNvbT6IVwQTEQIAFwUCPMY1BwUL
BwoDBAMVAwIDFgIBAheAAAoJEOTyFOEuU3j3OB8AoJcMlZkGYlHBt013kjg6U7Xt
e7muAJ9LBfIlSHtmR3aZAn/4yekA8jwkrbkBDQQ8xjULEAQAvA7lwVx/AUga4j3d
yo4upmHClk4+rYW9bQQXdMGj9EO2gdrxXzbQ2AlQj0UXgDN8HzXHdcZ4TyGghNVm
zq9k2+Ud4Gx0+q34tJI+ljDM7eGhBZbSMGs7kB75/DKIvqONV2JCYJMutrRQPBF1
8ZRf/FgJEtOcjOHu5UfpMresWXsAAwYEAKj2b7LmSfPpm9X/eTEoHAFbR5WPXkRP
eNUEgN2nk2rzyA+7IL4Sg9OPz31qhKOCh/NhFHKcg5VCS4bG35p78eb9KHr8CO01
+h1lUmqCf+s9UvHLUGJahnfp3lnFul9qBqK9MXvWd2bXfovHzAObC1kWAXuYmfnw
8RxdVSgFD4VyiEYEGBECAAYFAjzGNQsACgkQ5PIU4S5TePeMrwCgslkWPnwc3aTY
xQnMq9ml/PdIhS0An1P917iFxhfP2mneemt4N6ELcF4E
=7bvq
-----END PGP PUBLIC KEY BLOCK-----
Never export or distribute your private key to the world. I know, this seem to be a stupid
warning, but I’ve been informed that some people do it.
WARNING:
Importing GPG key/s from a user:
When you receive someone's public key (or some trusted third partly keys) you have to add them
to your key database in order to be able to use his/her keys for future encryption, verification and
authentication. This is often the case, when we install software that has a GPG key available for
verification. Therefore, here is what you should do before installing software that has a GPG key to
your disposal for authenticity.
Step 1
First off, we have to retrieve the GPG public key of the company, organization, etc that we want to
import into our keyring database. In our example, we will retrieve the GPG key that OpenNA uses
to sign RPM packages and other software.
This GPG public key is available from: http://www.openna.com/about/openna.asc. Cut and past it
into a file called “openna.asc” on your server machine where GnuPG is installed.
Step 2
Now, we have to import the OpenNA GPG public key into our database. This procedure should be
done for any GPG public keys that you want to use to verify authenticity of software you want to
install on your server. Most organizations have GPG public keys for you to download.
•
To import Public Keys to your keyring database, use the following command:
[root@deep /]# gpg --import filename
As an example:
[root@deep /]# gpg --import openna.asc
gpg: key 3487965A: public key imported
gpg: /root/.gnupg/trustdb.gpg: trustdb created
gpg: Total number processed: 1
gpg:
imported: 1
The above command will append the new key “filename” into the keyring database and will
update all already existing keys. It is important to note that GnuPG does not import keys that are
not self-signed (asc).
387](https://image.slidesharecdn.com/securingoptimizinglinuxthehackingsolutionv-131209075405-phpapp02/85/Securing-Optimizing-Linux-the-Hacking-Solution-v-3-0-387-320.jpg)
![GnuPG 1
CHAPTER 4
Signing GPG key/s from a user:
When you import keys into your public keyring database and are sure that the trusted third party
is really the person they claim, you can start signing his/her keys. Signing a key certifies that you
know the owner of the keys and this leads to the situation where the signature acknowledges that
the user ID mentioned in the key is actually the owner of that key.
•
To sign the key for company OpenNA that we have added into our keyring database
above, use the following command:
[root@deep /]# gpg --sign-key UID
As an example:
[root@deep /]# gpg --sign-key OpenNA
pub 1024D/3487965A created: 2001-07-02 expires: never
sub 1024g/0146F594 created: 2001-07-02 expires: never
(1). OpenNA Inc. <noc@openna.com>
pub
trust: -/q
1024D/3487965A created: 2001-07-02 expires: never
trust: -/q
Fingerprint: 7A3D 6871 2DF1 9210 8ABE AF36 D460 86D5 3487
965A
OpenNA Inc. <noc@openna.com>
Are you really sure that you want to sign this key
with your key: "Gerhard Mourani <gmourani@openna.com>"
Really sign? y
You need a passphrase to unlock the secret key for
user: "Gerhard Mourani <gmourani@openna.com>"
1024-bit DSA key, ID 2E5378F7, created 2002-04-24
Enter passphrase:
You should only sign a key as being authentic when you are ABSOLUTELY SURE that
the key is really authentic! You should never sign a key based on any kind of assumption.
WARNING:
Checking GPG signature:
We have shown above how to sign a key, now we will explain how people can verify if the
signature is really the good one. Once you have extracted your public key and exported it,
everyone who knows or gets your public key should be able to check whether encrypted data
from you is also really signed by you.
•
To check the signature of encrypted data, use the following command:
[root@deep /]# gpg --verify Data
The “--verify” option will check the signature where Data is the encrypted data/file you want
to verify.
388](https://image.slidesharecdn.com/securingoptimizinglinuxthehackingsolutionv-131209075405-phpapp02/85/Securing-Optimizing-Linux-the-Hacking-Solution-v-3-0-388-320.jpg)
![GnuPG 1
CHAPTER 4
Encrypting and decrypting GPG files:
After installing, importing, signing and configuring everything in the way that we want, we can
start encrypting and decrypting our files, software, etc.
•
To encrypt and sign data for the user OpenNA that we have added on our keyring
database above, use the following command:
[root@deep /]# gpg -sear OpenNA file
As an example:
[root@deep /]# gpg -sear OpenNA Message-to-OpenNA.txt
You need a passphrase to unlock the secret key for
user: "Gerhard Mourani <gmourani@openna.com>"
1024-bit DSA key, ID 2E5378F7, created 2002-04-24
Enter passphrase:
Of the arguments passed, the “s” is for signing (To avoid the risk that somebody else claims to be
you, it is very useful to sign everything you encrypt), “e” for encrypting, “a” to create ASCII
armored output (“.asc” ready for sending by mail), “r” to encrypt the UID name and “file” is the
message you want to encrypt.
•
To decrypt data, use the following command:
[root@deep /]# gpg -d file
For example:
[root@deep /]# gpg -d Message-from-GerhardMourani.asc
You need a passphrase to unlock the secret key for
user: "Gerhard Mourani (Open Network Architecture) <gmourani@openna.com>"
1024-bit DSA key, ID 2E5378F7, created 2002-04-24
Enter passphrase:
Where “d” is for decrypting and “file” is the message you want to decrypt. It is important that
the public key of the sender of the message we want to decrypt be in our public keyring database
or of course nothing will work.
Further documentation
For more details, there are some manual pages about GnuPG that you could read:
$ man gpg (1)
$ man gpgv (1)
- GPG encryption and signing tool.
- GPGV signature verification tool.
389](https://image.slidesharecdn.com/securingoptimizinglinuxthehackingsolutionv-131209075405-phpapp02/85/Securing-Optimizing-Linux-the-Hacking-Solution-v-3-0-389-320.jpg)


![OpenSSL 1
CHAPTER 5
These installation instructions assume
Commands are Unix-compatible.
The source path is /var/tmp (note that other paths are possible, at personal discretion).
Installations were tested on OpenNA Linux & Red Hat Linux 7.3.
All steps in the installation will happen using the super-user account “root”.
Whether kernel recompilation may be required: No
Latest OpenSSL version number is 0.9.6d
The procedures given in this chapter are likely to work on all Linux platforms, but we have only
tested it on OpenNA Linux and Red Hat Linux.
Packages
The following is based on information listed by OpenSSL as of 2002/05/09. Please check
http://www.openssl.org/ regularly for the latest status. We chose to install from source because it
provides the facility to fine tune the installation.
Source code is available from:
OpenSSL Homepage: http://www.openssl.org/
OpenSSL FTP Site: 129.132.7.170
You must be sure to download: openssl-0.9.6d.tar.gz
Pristine source
If you don’t use the RPM package to install this program, it will be difficult for you to locate all the
files installed onto the system if you want to update the package in the future. To solve this
problem, it’s a good idea to make a list of files on the system before you install OpenSSL, and
then one afterwards, and then compare them using the diff utility to find out what files were
placed where.
•
Simply run the following command before installing the software:
[root@deep root]# find /* > OpenSSL1
•
And the following one after you install the software:
[root@deep root]# find /* > OpenSSL2
•
Then use the following command to get a list of what changed:
[root@deep root]# diff OpenSSL1 OpenSSL2 > OpenSSL-Installed
With this procedure, if any upgrade appears, all you have to do is to read the generated list of
what files were added or changed by the program and remove them manually from your system
before installing the new software. In our example above, we use the /root directory of the
system to store all the generated file lists.
395](https://image.slidesharecdn.com/securingoptimizinglinuxthehackingsolutionv-131209075405-phpapp02/85/Securing-Optimizing-Linux-the-Hacking-Solution-v-3-0-395-320.jpg)
![OpenSSL 1
CHAPTER 5
Compiling - Optimizing & Installing OpenSSL
Below are the steps that you must make to configure, compile and optimize the OpenSSL
software before installing it into your Linux system. First off, we install the program as user 'root'
so as to avoid authorization problems.
Step 1
Once you get the program from the main software site you must copy it to the /var/tmp
directory and change to this location before expanding the archive.
•
This can be done with the following commands:
[root@deep /]# cp openssl-version.tar.gz /var/tmp/
[root@deep /]# cd /var/tmp/
[root@deep tmp]# tar xzpf openssl-version.tar.gz
Step 2
Next, move into the newly created OpenSSL source directory and perform the following steps to
configure and optimize the software for your system.
•
To move into the newly created OpenSSL directory use the following command:
[root@deep tmp]# cd openssl-0.9.6d/
Step 3
With OpenSSL, the optimization FLAGS should be changed in the “Configure” file of the
program. It is in this file that we define the GCC optimizations we want to use related to the type of
processor running in our system. OpenSSL is cryptography software and there are some
optimization hacks that we can make that can significantly increase the performance of the
program, therefore take the time to modify the “Configure” file of the software. This will be a
benefit for you.
a) Edit the Configure file (vi +337 Configure) and change the following lines:
"linux-elf",
"gcc:-DL_ENDIAN -DTERMIO -O3 -fomit-frame-pointer -m486 -Wall::D_REENTRANT:-ldl:BN_LLONG ${x86_gcc_des}
${x86_gcc_opts}:${x86_elf_asm}:dlfcn:linux-shared:fPIC:.so.$(SHLIB_MAJOR).$(SHLIB_MINOR)",
To read:
"linux-elf",
"gcc:-DL_ENDIAN -DTERMIO -O3 -march=i686 -funroll-loops -fomitframe-pointer -Wall::-D_REENTRANT:-ldl:BN_LLONG ${x86_gcc_des}
${x86_gcc_opts}:${x86_elf_asm}:dlfcn:linux-shared:fPIC:.so.$(SHLIB_MAJOR).$(SHLIB_MINOR)",
b) Edit the Configure file (vi +338 Configure) and change the following lines:
"debug-linux-elf","gcc:-DBN_DEBUG -DREF_CHECK -DCONF_DEBUG -DBN_CTX_DEBUG DCRYPTO_MDEBUG -DL_ENDIAN -DTERMIO -g -m486 -Wall::-D_REENTRANT:-lefence ldl:BN_LLONG ${x86_gcc_des} ${x86_gcc_opts}:${x86_elf_asm}:dlfcn",
To read:
"debug-linux-elf","gcc:-DBN_DEBUG -DREF_CHECK -DCONF_DEBUG -DBN_CTX_DEBUG DCRYPTO_MDEBUG -DL_ENDIAN -DTERMIO -O3 -march=i686 -funroll-loops -fomit-framepointer -Wall::-D_REENTRANT:-lefence -ldl:BN_LLONG ${x86_gcc_des}
${x86_gcc_opts}:${x86_elf_asm}:dlfcn",
396](https://image.slidesharecdn.com/securingoptimizinglinuxthehackingsolutionv-131209075405-phpapp02/85/Securing-Optimizing-Linux-the-Hacking-Solution-v-3-0-396-320.jpg)
![OpenSSL 1
CHAPTER 5
c) Edit the Configure file (vi +339 Configure) and change the following lines:
"debug-linux-elf-noefence","gcc:-DBN_DEBUG -DREF_CHECK -DCONF_DEBUG -DBN_CTX_DEBUG
-DCRYPTO_MDEBUG -DL_ENDIAN -DTERMIO -g -m486 -Wall::-D_REENTRANT:-ldl:BN_LLONG
${x86_gcc_des} ${x86_gcc_opts}:${x86_elf_asm}:dlfcn",
To read:
"debug-linux-elf-noefence","gcc:-DBN_DEBUG -DREF_CHECK -DCONF_DEBUG -DBN_CTX_DEBUG
-DCRYPTO_MDEBUG -DL_ENDIAN -DTERMIO -O3 -march=i686 -funroll-loops -fomit-framepointer -Wall::-D_REENTRANT:-ldl:BN_LLONG ${x86_gcc_des}
${x86_gcc_opts}:${x86_elf_asm}:dlfcn",
Step 4
By default, OpenSSL source files assume that our “perl” binary program is located under
/usr/local/bin/perl. We must change this to reflect our environment variable.
•
To point all OpenSSL script files to our “perl” binary, use the following command:
[root@deep openssl-0.9.6d]# perl util/perlpath.pl /usr/bin/perl
Step 5
At this stage, it is time to configure and compile OpenSSL for our system.
•
To configure and optimize OpenSSL use the following compilation lines:
./Configure linux-elf no-asm shared
--prefix=/usr
--openssldir=/usr/share/ssl
Step 6
Now, we must make a list of all files on the system before installing the software, and one
afterwards, then compare them using the diff utility to find out what files are placed where and
finally we install the OpenSSL software:
[root@deep
[root@deep
[root@deep
[root@deep
[root@deep
[root@deep
[root@deep
[root@deep
[root@deep
[root@deep
[root@deep
[root@deep
[root@deep
[root@deep
[root@deep
[root@deep
[root@deep
[root@deep
[root@deep
[root@deep
[root@deep
[root@deep
[root@deep
[root@deep
openssl-0.9.6d]# LD_LIBRARY_PATH=`pwd` make all build-shared
openssl-0.9.6d]# LD_LIBRARY_PATH=`pwd` make test apps tests
openssl-0.9.6d]# cd
root]# find /* > OpenSSL1
root]# cd /var/tmp/openssl-0.9.6d/
openssl-0.9.6d]# make install build-shared
openssl-0.9.6d]# cd /usr/lib/
lib]# mv libcrypto.so.0.9.6 ../../lib/
lib]# mv libssl.so.0.9.6 ../../lib/
lib]# ln -sf ../../lib/libcrypto.so.0.9.6 libcrypto.so
lib]# ln -sf ../../lib/libcrypto.so.0.9.6 libcrypto.so.0
lib]# ln -sf ../../lib/libssl.so.0.9.6 libssl.so
lib]# ln -sf ../../lib/libssl.so.0.9.6 libssl.so.0
lib]# mv /usr/share/ssl/man/man1/* /usr/share/man/man1/
lib]# mv /usr/share/ssl/man/man3/* /usr/share/man/man3/
lib]# mv /usr/share/ssl/man/man5/* /usr/share/man/man5/
lib]# mv /usr/share/ssl/man/man7/* /usr/share/man/man7/
lib]# rm -rf /usr/share/ssl/man/
lib]# rm -rf /usr/share/ssl/lib/
lib]# strip /usr/bin/openssl
lib]# mkdir -p /usr/share/ssl/crl
lib]# cd
root]# find /* > OpenSSL2
root]# diff OpenSSL1 OpenSSL2 > OpenSSL-Installed
397](https://image.slidesharecdn.com/securingoptimizinglinuxthehackingsolutionv-131209075405-phpapp02/85/Securing-Optimizing-Linux-the-Hacking-Solution-v-3-0-397-320.jpg)
![OpenSSL 1
CHAPTER 5
The above commands will configure the software to ensure your system has the necessary
libraries to successfully compile the package, compile all source files into executable binaries,
and then test the OpenSSL libraries to finally install the binaries and any supporting files into the
appropriate locations.
Step 7
Once the configuration, optimization, compilation, and installation of the OpenSSL software has
completed, we can free up some disk space by deleting the program tar archive and the related
source directory since they are no longer needed.
•
To delete OpenSSL and its related source directory, use the following commands:
[root@deep /]# cd /var/tmp/
[root@deep tmp]# rm -rf openssl-version/
[root@deep tmp]# rm -f openssl-version.tar.gz
Configuring OpenSSL
After OpenSSL has been built and installed successfully on your system, your next step is to
configure and customize the openssl.cnf and sign files to suit your needs.
/usr/shared/ssl/openssl.cnf (The OpenSSL Configuration File)
/usr/shared/ssl/misc/sign (A CA script file to sign certificates)
/usr/shared/ssl/openssl.cnf: The OpenSSL Configuration File
This is the general configuration file for OpenSSL, where you can configure the expiration date of
your keys, the name of your organization, address and so on.
The most important parameters you may need to change will be in the [ CA_default ] and
especially the [ req_distinguished_name ] sections of the file. We must change the
default one to fit our requirements and operating system. The text in bold is the parts of the
configuration file that must be customized and adjusted to satisfy our needs.
•
Edit the openssl.cnf file (vi /usr/share/ssl/openssl.cnf) and set your needs.
#
# OpenSSL example configuration file.
# This is mostly being used for generation of certificate requests.
#
# This definition stops the following lines choking if HOME isn't
# defined.
HOME
= .
RANDFILE
= $ENV::HOME/.rnd
# Extra OBJECT IDENTIFIER info:
#oid_file
= $ENV::HOME/.oid
oid_section
= new_oids
#
#
#
#
#
#
To use this configuration file with the "-extfile" option of the
"openssl x509" utility, name here the section containing the
X.509v3 extensions to use:
extensions
=
(Alternatively, use a configuration file that has only
X.509v3 extensions in its main [= default] section.)
398](https://image.slidesharecdn.com/securingoptimizinglinuxthehackingsolutionv-131209075405-phpapp02/85/Securing-Optimizing-Linux-the-Hacking-Solution-v-3-0-398-320.jpg)
![OpenSSL 1
CHAPTER 5
[ new_oids ]
#
#
#
#
#
We can add new OIDs in here for use by 'ca' and 'req'.
Add a simple OID like this:
testoid1=1.2.3.4
Or use config file substitution like this:
testoid2=${testoid1}.5.6
####################################################################
[ ca ]
default_ca
= CA_default
# The default ca section
####################################################################
[ CA_default ]
dir
certs
crl_dir
database
new_certs_dir
=
=
=
=
=
/usr/share/ssl
$dir/certs
$dir/crl
$dir/ca.db.index
$dir/ca.db.certs
#
#
#
#
#
Where everything is kept
Where the issued certs are kept
Where the issued crl are kept
database index file.
default place for new certs.
certificate
serial
crl
private_key
RANDFILE
=
=
=
=
=
$dir/certs/ca.crt
$dir/ca.db.serial
$dir/crl.pem
$dir/private/ca.key
$dir/ca.db.rand
#
#
#
#
#
The CA certificate
The current serial number
The current CRL
The private key
private random number file
x509_extensions = usr_cert
# The extentions to add to the cert
# Extensions to add to a CRL. Note: Netscape communicator chokes on V2 CRLs
# so this is commented out by default to leave a V1 CRL.
# crl_extensions
= crl_ext
default_days
=
default_crl_days=
default_md
=
preserve
=
365
30
md5
no
#
#
#
#
how long to certify for
how long before next CRL
which md to use.
keep passed DN ordering
# A few difference way of specifying how similar the request should look
# For type CA, the listed attributes must be the same, and the optional
# and supplied fields are just that :-)
policy
= policy_match
# For the CA policy
[ policy_match ]
countryName
stateOrProvinceName
organizationName
organizationalUnitName
commonName
emailAddress
=
=
=
=
=
=
match
match
match
optional
supplied
optional
# For the 'anything' policy
# At this point in time, you must list all acceptable 'object'
# types.
[ policy_anything ]
countryName
= optional
stateOrProvinceName
= optional
localityName
= optional
organizationName
= optional
organizationalUnitName = optional
commonName
= supplied
emailAddress
= optional
399](https://image.slidesharecdn.com/securingoptimizinglinuxthehackingsolutionv-131209075405-phpapp02/85/Securing-Optimizing-Linux-the-Hacking-Solution-v-3-0-399-320.jpg)
![OpenSSL 1
CHAPTER 5
####################################################################
[ req ]
default_bits
= 1024
default_keyfile
= privkey.pem
distinguished_name
= req_distinguished_name
attributes
= req_attributes
x509_extensions = v3_ca # The extentions to add to the self signed cert
# Passwords for private keys if not present they will be prompted for
# input_password = secret
# output_password = secret
# This sets a mask for permitted string types. There are several options.
# default: PrintableString, T61String, BMPString.
# pkix
: PrintableString, BMPString.
# utf8only: only UTF8Strings.
# nombstr : PrintableString, T61String (no BMPStrings or UTF8Strings).
# MASK:XXXX a literal mask value.
# WARNING: current versions of Netscape crash on BMPStrings or UTF8Strings
# so use this option with caution!
string_mask = nombstr
# req_extensions = v3_req # The extensions to add to a certificate request
[ req_distinguished_name ]
countryName
countryName_default
countryName_min
countryName_max
=
=
=
=
stateOrProvinceName
stateOrProvinceName_default
= State or Province Name (full name)
= Quebec
localityName
localityName_default
= Locality Name (eg, city)
= Montreal
0.organizationName
0.organizationName_default
= Organization Name (eg, company)
= OpenNA, Inc.
Country Name (2 letter code)
CA
2
2
# we can do this but it is not needed normally :-)
#1.organizationName
= Second Organization Name (eg, company)
#1.organizationName_default
= World Wide Web Pty Ltd
organizationalUnitName
organizationalUnitName_default
= Organizational Unit Name (eg, section)
= Open Network Architecture
commonName
commonName_default
commonName_max
= Common Name (eg, YOUR name)
= www.openna.com
= 64
emailAddress
emailAddress_default
emailAddress_max
= Email Address
= noc@openna.com
= 40
# SET-ex3
= SET extension number 3
[ req_attributes ]
challengePassword
challengePassword_min
challengePassword_max
= A challenge password
= 8
= 20
unstructuredName
= An optional company name
400](https://image.slidesharecdn.com/securingoptimizinglinuxthehackingsolutionv-131209075405-phpapp02/85/Securing-Optimizing-Linux-the-Hacking-Solution-v-3-0-400-320.jpg)
![OpenSSL 1
CHAPTER 5
[ usr_cert ]
# These extensions are added when 'ca' signs a request.
# This goes against PKIX guidelines but some CAs do it and some software
# requires this to avoid interpreting an end user certificate as a CA.
basicConstraints=CA:FALSE
# Here are some examples of the usage of nsCertType. If it is omitted
# the certificate can be used for anything *except* object signing.
# This is OK for an SSL server.
# nsCertType
= server
# For an object signing certificate this would be used.
# nsCertType = objsign
# For normal client use this is typical
# nsCertType = client, email
# and for everything including object signing:
# nsCertType = client, email, objsign
# This is typical in keyUsage for a client certificate.
# keyUsage = nonRepudiation, digitalSignature, keyEncipherment
# This will be displayed in Netscape's comment listbox.
nsComment
= "OpenSSL Generated Certificate"
# PKIX recommendations harmless if included in all certificates.
subjectKeyIdentifier=hash
authorityKeyIdentifier=keyid,issuer:always
# This stuff is for subjectAltName and issuerAltname.
# Import the email address.
# subjectAltName=email:copy
# Copy subject details
# issuerAltName=issuer:copy
#nsCaRevocationUrl
#nsBaseUrl
#nsRevocationUrl
#nsRenewalUrl
#nsCaPolicyUrl
#nsSslServerName
= http://www.domain.dom/ca-crl.pem
[ v3_req ]
# Extensions to add to a certificate request
basicConstraints = CA:FALSE
keyUsage = nonRepudiation, digitalSignature, keyEncipherment
[ v3_ca ]
# Extensions for a typical CA
# PKIX recommendation.
401](https://image.slidesharecdn.com/securingoptimizinglinuxthehackingsolutionv-131209075405-phpapp02/85/Securing-Optimizing-Linux-the-Hacking-Solution-v-3-0-401-320.jpg)
![OpenSSL 1
CHAPTER 5
subjectKeyIdentifier=hash
authorityKeyIdentifier=keyid:always,issuer:always
# This is what PKIX recommends but some broken software chokes on critical
# extensions.
#basicConstraints = critical,CA:true
# So we do this instead.
basicConstraints = CA:true
#
#
#
#
Key usage: this is typical for a CA certificate. However since it will
prevent it being used as an test self-signed certificate it is best
left out by default.
keyUsage = cRLSign, keyCertSign
# Some might want this also
# nsCertType = sslCA, emailCA
#
#
#
#
Include email address in subject alt name: another PKIX recommendation
subjectAltName=email:copy
Copy issuer details
issuerAltName=issuer:copy
#
#
#
#
#
DER hex encoding of an extension: beware experts only!
obj=DER:02:03
Where 'obj' is a standard or added object
You can even override a supported extension:
basicConstraints= critical, DER:30:03:01:01:FF
[ crl_ext ]
# CRL extensions.
# Only issuerAltName and authorityKeyIdentifier make any sense in a CRL.
# issuerAltName=issuer:copy
authorityKeyIdentifier=keyid:always,issuer:always
You don’t need to change all of the default options set in the file openssl.cnf; The
configurations you usually change will be into the [ CA_default ] and [
req_distinguished_name ] sections of the file.
WARNING:
/usr/share/ssl/misc/sign: The CA Script File to Sign Certificates
OpenSSL CA command has some strange requirements and the default OpenSSL config doesn't
allow one to easily use OpenSSL CA directly. It is for this reason that we don’t use the files CA.pl
or CA.sh to sign certificates.
Step 1
To solve the problem, we’ll create and customize the sign script file below to replace them. Text
in bold are the parts of the script that must be customized and adjusted to satisfy our needs.
•
Create the sign script file (touch /usr/share/ssl/misc/sign) and add the
following lines:
#!/bin/sh
##
402](https://image.slidesharecdn.com/securingoptimizinglinuxthehackingsolutionv-131209075405-phpapp02/85/Securing-Optimizing-Linux-the-Hacking-Solution-v-3-0-402-320.jpg)
![OpenSSL 1
CHAPTER 5
##
##
##
sign.sh -- Sign a SSL Certificate Request (CSR)
Copyright (c) 1998-1999 Ralf S. Engelschall, All Rights Reserved.
#
argument line handling
CSR=$1
if [ $# -ne 1 ]; then
echo "Usage: sign.sign <whatever>.csr"; exit 1
fi
if [ ! -f $CSR ]; then
echo "CSR not found: $CSR"; exit 1
fi
case $CSR in
*.csr ) CERT="`echo $CSR | sed -e 's/.csr/.crt/'`" ;;
* ) CERT="$CSR.crt" ;;
esac
#
make sure environment exists
if [ ! -d ca.db.certs ]; then
mkdir ca.db.certs
fi
if [ ! -f ca.db.serial ]; then
echo '01' >ca.db.serial
fi
if [ ! -f ca.db.index ]; then
cp /dev/null ca.db.index
fi
#
create an own SSLeay config
cat >ca.config <<EOT
[ ca ]
default_ca
= CA_own
[ CA_own ]
dir
= /usr/share/ssl
certs
= /usr/share/ssl/certs
new_certs_dir = /usr/share/ssl/ca.db.certs
database
= /usr/share/ssl/ca.db.index
serial
= /usr/share/ssl/ca.db.serial
RANDFILE
= /usr/share/ssl/ca.db.rand
certificate = /usr/share/ssl/certs/ca.crt
private_key = /usr/share/ssl/private/ca.key
default_days = 365
default_crl_days
= 30
default_md
= md5
preserve
= no
policy
= policy_anything
[ policy_anything ]
countryName = optional
stateOrProvinceName
= optional
localityName = optional
organizationName
= optional
organizationalUnitName
= optional
commonName
= supplied
emailAddress = optional
EOT
# sign the certificate
echo "CA signing: $CSR -> $CERT:"
openssl ca -config ca.config -out $CERT -infiles $CSR
echo "CA verifying: $CERT <-> CA cert"
openssl verify -CAfile /usr/share/ssl/certs/ca.crt $CERT
#
cleanup after SSLeay
403](https://image.slidesharecdn.com/securingoptimizinglinuxthehackingsolutionv-131209075405-phpapp02/85/Securing-Optimizing-Linux-the-Hacking-Solution-v-3-0-403-320.jpg)
![OpenSSL 1
CHAPTER 5
rm -f ca.config
rm -f ca.db.serial.old
rm -f ca.db.index.old
# die gracefully
exit 0
Step 2
Once the script file has been created, it is important to make it executable and change its default
permissions. Making this file executable will allow the system to run it, changing its default
permission is to allow only the root user to change this file for security reason.
•
To make this script executable and to change its default permissions, use the commands:
[root@deep /]# chmod 700 /usr/share/ssl/misc/sign
[root@deep /]# chown 0.0 /usr/share/ssl/misc/sign
OpenSSL Administrative Tools
Once your configuration options have been set in the openssl.cnf file, we can play with the
OpenSSL utility. As an example, we’ll show you how to create certificates for the Apache web
server and your own CA (Certifying Authority) to sign your “Certificate Signing Request” yourself.
All commands listed below are to be made in the /usr/share/ssl directory.
The Apache Key & CSR Generation:
The utility “openssl” that you use to generate RSA Private Keys (Key) and Certificate Signing
Requests (CSR) comes with OpenSSL and is usually installed under the directory /usr/bin on
our Linux distribution. Below are the steps to create certificates for Apache.
Step 1
First you have to know the Fully Qualified Domain Name (FQDN) of the website/server for which
you want to request a certificate. When you want to access your website/server through
https://www.mydomain.com/ then the FQDN of your website is www.mydomain.com.
Step 2
Second, select five large and relatively random files from your hard drive (compressed log files
are a good start) and put them under your /usr/share/ssl directory. These will act as your
random seed enhancers. We refer to them as random1: random2:...: random5 below.
•
To select five random files and put them under /usr/share/ssl, use the commands:
[root@deep
[root@deep
[root@deep
[root@deep
[root@deep
404
/]#
/]#
/]#
/]#
/]#
cp
cp
cp
cp
cp
/var/log/boot.log /usr/share/ssl/random1
/var/log/cron /usr/share/ssl/random2
/var/log/dmesg /usr/share/ssl/random3
/var/log/messages /usr/share/ssl/random4
/var/log/secure /usr/share/ssl/random5](https://image.slidesharecdn.com/securingoptimizinglinuxthehackingsolutionv-131209075405-phpapp02/85/Securing-Optimizing-Linux-the-Hacking-Solution-v-3-0-404-320.jpg)
![OpenSSL 1
CHAPTER 5
Step 3
Third, create the RSA private key protected with a pass-phrase for your web server. The
command below will generate 1024 bit RSA Private Key and store it in
www.mydomain.com.key.
It will ask you for a pass-phrase: use something secure and remember it. Your certificate will be
useless without the key. If you don't want to protect your key with a pass-phrase (only if you
absolutely trust that server machine, and you make sure the permissions are carefully set so only
you can read that key) you can leave out the -des3 option below.
•
To generate the Key, use the following command:
[root@deep /]# cd /usr/share/ssl/
[root@deep ssl]# openssl genrsa -des3 –rand
random1:random2:random3:random4:random5 -out www.mydomain.com.key 1024
123600 semi-random bytes loaded
Generating RSA private key, 1024 bit long modulus
......................+++++
.....+++++
e is 65537 (0x10001)
Enter PEM pass phrase:
Verifying password - Enter PEM pass phrase:
Please backup your www.mydomain.com.key file and remember the pass-phrase you
had to enter at a secure location. A good choice is to backup this information onto a diskette or
other removable media.
WARNING:
Step 4
Finally, generate a Certificate Signing Request (CSR) with the server RSA private key. The
command below will prompt you for the X.509 attributes of your certificate. Remember to give
the name “www.mydomain.com” when prompted for ‘Common Name'. Do not enter your personal
name here. We are requesting a certificate for a web server, so the ‘Common Name’ has to match
the FQDN of your website (a requirement of the browsers).
•
To generate the CSR, use the following command:
[root@deep ssl]# openssl req -new -key www.mydomain.com.key -out
www.mydomain.com.csr
Using configuration from /usr/share/ssl/openssl.cnf
Enter PEM pass phrase:
You are about to be asked to enter information that will be incorporated
into your certificate request.
What you are about to enter is what is called a Distinguished Name or a
DN.
There are quite a few fields but you can leave some blank
For some fields there will be a default value,
If you enter '.', the field will be left blank.
----Country Name (2 letter code) [CA]:
State or Province Name (full name) [Quebec]:
Locality Name (eg, city) [Montreal]:
Organization Name (eg, company) [OpenNA, Inc.]:
Organizational Unit Name (eg, section) [Open Network Architecture]:
Common Name (eg, YOUR name) [www.openna.com]:
Email Address [noc@openna.com]:
Please enter the following 'extra' attributes
405](https://image.slidesharecdn.com/securingoptimizinglinuxthehackingsolutionv-131209075405-phpapp02/85/Securing-Optimizing-Linux-the-Hacking-Solution-v-3-0-405-320.jpg)
![OpenSSL 1
CHAPTER 5
to be sent with your certificate request
A challenge password []:.
An optional company name []:.
Make sure you enter the FQDN (Fully Qualified Domain Name) of the server when
OpenSSL prompts you for the “Common Name” (i.e. when you generate a CSR for a website which
will be later accessed via https://www.mydomain.com/, enter “www.mydomain.com” here).
WARNING:
After the generation of your Certificate Signing Request (CSR), you must send this certificate to a
commercial Certifying Authority (CA) like Thawte or Verisign for signing. You usually have to post
the CSR into a web form, pay for the signing, await the signed certificate and store it into a
“www.mydomain.com.crt” file. The result is then a real certificate, which can be used with
Apache.
The CA Key & CRT Generation:
If you don’t want to pay a commercial Certifying Authority (CA) to sign you certificates, you can
use your own CA and now have to sign the CSR yourself by this CA. This solution is economical,
and allows an organization to host their own CA server and generate as many certificates as they
need for internal use without paying a cent to a commercial CA.
Unfortunately using your own CA to generate certificates causes problems in electronic
commerce, because customers need to have some trust in your organization by the use of a
recognized commercial CA. See below on how to sign a CSR with your CA yourself.
Step 1
As for the Apache web server above, the first step is to create the RSA private key protected with
a pass-phrase for your CA. The command below will generate 1024 bit RSA Private Key and
stores it in the file “ca.key”. It will ask you for a pass-phrase: use something secure and
remember it. Your certificate will be useless without the key.
•
To create the RSA private key for your (CA), use the following command:
[root@deep /]# cd /usr/share/ssl/
[root@deep ssl]# openssl genrsa -des3 -out ca.key 1024
Generating RSA private key, 1024 bit long modulus
...........................+++++
............................................+++++
e is 65537 (0x10001)
Enter PEM pass phrase:
Verifying password - Enter PEM pass phrase:
Please backup your “ca.key” file and remember the pass-phrase you had to enter at a
secure location. A good choice is to backup this information onto a diskette or other removable
media.
WARNING:
406](https://image.slidesharecdn.com/securingoptimizinglinuxthehackingsolutionv-131209075405-phpapp02/85/Securing-Optimizing-Linux-the-Hacking-Solution-v-3-0-406-320.jpg)
![OpenSSL 1
CHAPTER 5
Step 2
Now, we must create a self-signed (CA) certificate (x509 structure) with the RSA key of the CA.
The req command creates a self-signed certificate when the -x509 switch is used.
•
To create a self-signed (CA) certificate, use the following command:
[root@deep ssl]# openssl req -new -x509 -days 365 -key ca.key -out ca.crt
Using configuration from /usr/share/ssl/openssl.cnf
Enter PEM pass phrase:
You are about to be asked to enter information that will be incorporated
into your certificate request.
What you are about to enter is what is called a Distinguished Name or a
DN.
There are quite a few fields but you can leave some blank
For some fields there will be a default value,
If you enter '.', the field will be left blank.
----Country Name (2 letter code) [CA]:
State or Province Name (full name) [Quebec]:
Locality Name (eg, city) [Montreal]:
Organization Name (eg, company) [OpenNA, Inc.]:
Organizational Unit Name (eg, section) [Open Network]:Sales Dept
Common Name (eg, YOUR name) [www.openna.com]:
Email Address [noc@openna.com]:sales@openna.com
Step 3
Once the self-signed (CA) certificate has been created, we must place all certificates and CA files
into their appropriate directories.
•
To place the files into their appropriate directories, use the following commands:
[root@deep ssl]# mv www.mydomain.com.key private/
[root@deep ssl]# mv ca.key private/
[root@deep ssl]# mv ca.crt certs/
Step 4
Finally, you can use this CA to sign all the servers CSR's in order to create real SSL Certificates
for use inside the web server (assuming you already have a www.mydomain.com.csr at hand).
We must also prepare the script “sign” for signing.
•
To sign server CSR's in order to create real SSL Certificates, use the following command:
[root@deep ssl]# /usr/share/ssl/misc/sign www.mydomain.com.csr
CA signing: www.mydomain.com.csr -> www.mydomain.com.crt:
Using configuration from ca.config
Enter PEM pass phrase:
Check that the request matches the signature
Signature ok
The Subjects Distinguished Name is as follows
countryName
:PRINTABLE:'CA'
stateOrProvinceName
:PRINTABLE:'Quebec'
localityName
:PRINTABLE:'Montreal'
organizationName
:PRINTABLE:'OpenNA, Inc.'
organizationalUnitName
:PRINTABLE:'Open Network Architecture'
commonName
:PRINTABLE:'www.openna.com'
emailAddress
:IA5STRING:'noc@openna.com'
Certificate is to be certified until Oct 18 14:59:29 2001 GMT (365 days)
Sign the certificate? [y/n]:y
407](https://image.slidesharecdn.com/securingoptimizinglinuxthehackingsolutionv-131209075405-phpapp02/85/Securing-Optimizing-Linux-the-Hacking-Solution-v-3-0-407-320.jpg)
![OpenSSL 1
CHAPTER 5
1 out of 1 certificate requests certified, commit? [y/n]y
Write out database with 1 new entries
Data Base Updated
CA verifying: www.mydomain.com.crt <-> CA cert
www.mydomain.com.crt: OK
This signs the CSR and results in a “www.mydomain.com.crt” file. Move this file to its
appropriate directory as follows.
•
To move the CRT file to its appropriate directory, use the following command:
[root@deep ssl]# mv www.mydomain.com.crt certs/
Now you have two files: “www.mydomain.com.key” and “www.mydomain.com.crt”. These
can now, for example, be used as follows, inside the virtual host section of your Apache server's
httpd.conf file:
SSLCertificateFile
SSLCertificateKeyFile
/usr/share/ssl/certs/www.mydomain.com.crt
/usr/share/ssl/private/www.mydomain.com.key
In this example, www.mydomain.com.crt is our web server Certificate Signing Request Public
Key, and www.mydomain.com.key is our web server RSA Private Key.
The www.mydomain.com.csr file is no longer needed; we can remove it from the system.
•
To remove this file from the system, use the following command:
[root@deep ssl]# rm -f www.mydomain.com.csr
If you receive an error message during the signing of the certificate, it’s probably
because you’ve entered the wrong FQDN (Fully Qualified Domain Name) for the server when
OpenSSL prompted you for the “Common Name”; the “Common Name” must be something like
“www.mydomain.com” and not “mydomain.com”. Also, since you generate both the certificate
and the CA certificate, it’s important that at least ONE piece of information differs between both
files, or you may encounter problems during the signature of the certificate request.
WARNING:
408](https://image.slidesharecdn.com/securingoptimizinglinuxthehackingsolutionv-131209075405-phpapp02/85/Securing-Optimizing-Linux-the-Hacking-Solution-v-3-0-408-320.jpg)
![OpenSSL 1
CHAPTER 5
Securing OpenSSL
This small section deals specifically with actions we can take to improve and tighten security
under OpenSSL. It’s important to note that we refer to the features available within the base
installed program and not to any additional software.
Changing the default mode of OpenSSL keys:
Make your keys “Read and Write” only by the super-user “root”. This is important because no
one needs to touch these files.
•
To make your keys “read and Write” only by “root”, use the following commands:
[root@deep
[root@deep
[root@deep
[root@deep
[root@deep
/]#
/]#
/]#
/]#
/]#
chmod
chmod
chmod
chmod
chmod
750
400
400
400
400
/usr/share/ssl/private/
/usr/share/ssl/certs/ca.crt
/usr/share/ssl/certs/www.mydomain.com.crt
/usr/share/ssl/private/ca.key
/usr/share/ssl/private/www.mydomain.com.key
Some possible uses of OpenSSL software
OpenSSL can be used to:
1.
2.
3.
4.
5.
6.
7.
8.
9.
Creation of your own Certifying Authority Server.
Creation of RSA, DH and DSA key parameters.
Creation of X.509 certificates, CSRs and CRLs.
Calculation of Message Digest.
Encryption and Descryptiion with Ciphers.
SSL/TLS Client and Server Tests.
Handling of S/MIME signed or encrypted mail.
Provide data confidentiality, integrity, authentication, and electronic signature in
transmission for the users.
Secure electronic commerce transactions.
409](https://image.slidesharecdn.com/securingoptimizinglinuxthehackingsolutionv-131209075405-phpapp02/85/Securing-Optimizing-Linux-the-Hacking-Solution-v-3-0-409-320.jpg)


![OpenSSH 1
CHAPTER 6
Prerequisites
OpenSSH requires that the listed software below be already installed on your system to be able to
compile successfully. If this is not the case, you must install it from your Linux CD-ROM or source
archive files. Please make sure you have this program installed on your machine before you
proceed with this chapter.
OpenSSL is required to run OpenSSH on your system.
NOTE: For more information on OpenSSL software, see its related chapter in this book. Even if
you don’t need to use OpenSSL software to create or hold encrypted key files, it’s important to
note that OpenSSH requires its libraries files to be able to work.
Pristine source
As we don’t use the RPM package to install this program, it will be difficult for you to locate all the
files installed onto the system if you want to update the package in the future. To solve this
problem, it’s a good idea to make a list of files on the system before you install OpenSSH, and
then one afterwards, and then compare them using the diff utility to find out what files were
placed where.
•
Simply run the following command before installing the software:
[root@deep root]# find /* > OpenSSH1
•
And the following one after you install the software:
[root@deep root]# find /* > OpenSSH2
•
Then use the following command to get a list of what changed:
[root@deep root]# diff OpenSSH1 OpenSSH2 > OpenSSH-Installed
With this procedure, if any upgrade appears, all you have to do is to read the generated list of
what files were added or changed by the program and remove them manually from your system
before installing the new software. In our example above, we use the /root directory of the
system to store all the generated file lists.
Compiling - Optimizing & Installing OpenSSH
Below are the steps that you must make to configure, compile and optimize the OpenSSH server
software before installing it on your system. First off, we install the program as user 'root' so as
to avoid any authorization problems.
Step 1
Once you get the program from the main software site you must copy it to the /var/tmp
directory and change to this location before expanding the archive.
•
414
This can be done with the following commands:
[root@deep /]# cp openssh-version.tar.gz /var/tmp/
[root@deep /]# cd /var/tmp/
[root@deep tmp]# tar xzpf openssh-version.tar.gz](https://image.slidesharecdn.com/securingoptimizinglinuxthehackingsolutionv-131209075405-phpapp02/85/Securing-Optimizing-Linux-the-Hacking-Solution-v-3-0-414-320.jpg)
![OpenSSH 1
CHAPTER 6
Step 2
In order to check that the version of OpenSSH, which you are, going to install, is an original and
unmodified one, please check the supplied signature with the GPG key of OpenSSH available on
the OpenSSH website.
To get a GPG key copy of OpenSSH, please point your browser to the following URL:
ftp://ftp.openbsd.org/pub/OpenBSD/OpenSSH/portable/openssh-3.4p1.tar.gz.sig. For more
information about how to use this key for verification, see the GnuPG chapter in this book.
Step 3
OpenSSH needs a UID and GID to properly run on the system but this UID/GID cannot run as
super-user root; for this reason we must create a special user with no shell privileges on the
system for running sshd daemon. This is required by the privilege separation feature of OpenSSH
by which operations that require root privilege are performed by a separate privileged monitor
process.
•
To create this special OpenSSH user on OpenNA Linux, use the following command:
[root@deep tmp]# groupadd -g 39 sshd > /dev/null 2>&1 || :
[root@deep tmp]# useradd -c "SSH Server" -d /var/empty -g 39 -s
/bin/false -u 39 sshd > /dev/null 2>&1 || :
•
To create this special OpenSSH user on Red Hat Linux, use the following command:
[root@deep tmp]# groupadd -g 39 sshd > /dev/null 2>&1 || :
[root@deep tmp]# useradd -u 39 -g 39 -s /bin/false -M -r -d /var/empty
sshd > /dev/null 2>&1 || :
The above command will create a null account, with no password, no valid shell, no files ownednothing but a UID and a GID for the program. Remember that OpenSSH daemon does not need
to have a shell account on the server.
Step 4
Now, edit the shells file (vi /etc/shells) and add a non-existent shell name
“/bin/false”, which is the one we used in the useradd command above.
[root@deep tmp]# vi /etc/shells
/bin/bash2
/bin/bash
/bin/sh
/bin/false This is our added no-existent shell
Patching OpenSSH to run in chroot jail mode for some users:
There is an external patch available for OpenSSH that allow us to compile OpenSSH with chroot
jail support. If you are interested in compiling OpenSSH to run in chroot jail environment for some
of your users, then I recommend you to follow these steps. If you don’t want to compile OpenSSH
with chroot jail support, you can simply skip these steps and go directly to next section where we
will compile the software for our system.
For OpenSSH to run and work in chroot jail mode, you have to be sure that you have recompiled
your Linux kernel without the Grsecurity option that allows us to enable chroot jail restrictions
protection on the system. You should be sure that “Chroot jail restrictions
(CONFIG_GRKERNSEC_CHROOT) [N/y/?]” is NOT enable or nothing will work.
415](https://image.slidesharecdn.com/securingoptimizinglinuxthehackingsolutionv-131209075405-phpapp02/85/Securing-Optimizing-Linux-the-Hacking-Solution-v-3-0-415-320.jpg)
![OpenSSH 1
CHAPTER 6
Step 1
First of, we have to retrieve the OpenSSH chroot patch available on the Internet. This patch can
be downloaded from the following location: http://chrootssh.sourceforge.net/
Step 2
Once you have a copy of this patch, you should move it under the /var/tmp directory and patch
your OpenSSH source files.
•
This can be done with the following commands:
[root@deep /]# mv osshChroot-3.4.diff /var/tmp/
[root@deep /]# cd /var/tmp/
[root@deep tmp]# patch -p0 < osshChroot-3.4.diff
It’s important to note that the version number of the OpenSSH chroot patch that you have to
download from the Internet must match the version number of the OpenSSH software you
intended to install. For example, if the version number of OpenSSH is 3.4p1, you should
download the newer OpenSSH chroot patch that matches this number.
NOTE:
Step 3
After that, move into the newly created OpenSSH source directory and perform the following steps
to configure and optimize the software for your system.
•
To move into the newly created OpenSSH directory use the following command:
[root@deep tmp]# cd openssh-3.4p1/
•
To configure and optimize OpenSSH use the following compilation lines:
CFLAGS="-O2 -march=i686 -funroll-loops"; export CFLAGS
./configure
--prefix=/usr
--sysconfdir=/etc/ssh
--libexecdir=/usr/libexec/openssh
--mandir=/usr/share/man
--with-pam
--with-ipaddr-display
--with-ipv4-default
--with-md5-passwords
--with-zlib
This tells OpenSSH to set itself up for this particular configuration setup with:
- Enable PAM support.
- Use the IP address instead of hostname.
- Use IPv4 by connections.
- Enable use of MD5 passwords.
- Use zlib for transport compression.
Pay special attention to the compile CFLAGS line above. We optimize OpenSSH for an i686
CPU architecture with the parameter “-march=i686”. Please don’t forget to adjust this CFLAGS
line to reflect your own system and architecture.
NOTE:
416](https://image.slidesharecdn.com/securingoptimizinglinuxthehackingsolutionv-131209075405-phpapp02/85/Securing-Optimizing-Linux-the-Hacking-Solution-v-3-0-416-320.jpg)
![OpenSSH 1
CHAPTER 6
Step 4
Now, we must make a list of all existing files on the system before installing the software and one
afterwards then compare them using the diff utility to find out what files are placed where and
finally install the OpenSSH Server:
[root@deep
[root@deep
[root@deep
[root@deep
[root@deep
[root@deep
[root@deep
[root@deep
[root@deep
[root@deep
openssh-3.4p1]# make
openssh-3.4p1]# cd
root]# find /* > OpenSSH1
root]# cd /var/tmp/openssh-3.4p1/
openssh-3.4p1]# make install
openssh-3.4p1]# mkdir /var/empty
openssh-3.4p1]# chown root.sys /var/empty
openssh-3.4p1]# cd
root]# find /* > OpenSSH2
root]# diff OpenSSH1 OpenSSH2 > OpenSSH-Installed
The above commands will configure the software to ensure your system has the necessary
libraries to successfully compile the package, compile all source files into executable binaries,
and then install the binaries and any supporting files into the appropriate locations.
Step 5
Once the configuration, optimization, compilation, and installation of the OpenSSH software has
been accomplished, we can free up some disk space by deleting the program tar archive and the
related source directory since they are no longer needed.
•
To delete OpenSSH and its related source directory, use the following commands:
[root@deep /]# cd /var/tmp/
[root@deep tmp]# rm -rf openssh-version/
[root@deep tmp]# rm -f openssh-version.tar.gz
The rm command as used above will remove all the source files we have used to compile and
install OpenSSH. It will also remove the OpenSSH compressed archive from the /var/tmp
directory.
Configuring OpenSSH
After OpenSSH has been built and installed successfully in your system, your next step is to
configure and customize its configuration files to fit your needs.
/etc/ssh/sshd_config: (The OpenSSH Server Configuration File)
/etc/ssh/ssh_config: (The OpenSSH Client Configuration File)
/etc/pam.d/sshd: (The OpenSSH PAM Support Configuration File)
/etc/init.d/sshd: (The OpenSSH Initialization File)
/etc/ssh/sshd_config: The OpenSSH Server Configuration File
The sshd_config file is the system-wide server configuration file for OpenSSH which allows you
to set options that modify the operation of the sshd daemon. This file contains keyword-value
pairs, one per line, with keywords being case insensitive.
Here are the most important keywords to configure your sshd server for maximum security; a
complete listing and/or special requirements are available in the manual page for sshd (8). We
must change the default one to fit our requirements and operating system. The text in bold are
the parts of the configuration file that must be customized and adjusted to satisfy our needs.
417](https://image.slidesharecdn.com/securingoptimizinglinuxthehackingsolutionv-131209075405-phpapp02/85/Securing-Optimizing-Linux-the-Hacking-Solution-v-3-0-417-320.jpg)


![OpenSSH 1
CHAPTER 6
IdentityFile ~/.ssh/identity
IdentityFile ~/.ssh/id_dsa
IdentityFile ~/.ssh/id_rsa
These options specify alternate multiple authentication identity files to read.
Port 22
This option “Port” specifies on which port number ssh connects to on the remote host. The
default port is 22.
Protocol 2,1
This option “Protocol” specifies the protocol versions ssh should support in order of
preference. In our configuration the default is “2,1”. This means that ssh tries version 2 and falls
back to version 1 if version 2 is not available. Depending of the ssh client version you use to
connect, you may need to invert this order but you can connect with ssh client version 1 even if
the order is “2,1”.
Cipher blowfish
This option “Cipher” specifies what cipher should be used for encrypting sessions. The
blowfish use 64-bit blocks and keys of up to 448 bits.
EscapeChar ~
This option “EscapeChar” specifies the session escape character for suspension.
/etc/pam.d/sshd: The OpenSSH PAM Support Configuration File
For increased security of OpenSSH, we have compiled it to use the PAM mechanism for password
authentication.
Step 1
To be able to use this feature, we must create the /etc/pam.d/sshd file and add the following
parameters inside it.
•
Create the sshd file (touch /etc/pam.d/sshd) and add the following lines:
#%PAM-1.0
auth
auth
account
account
account
password
session
session
required
required
required
required
required
required
required
required
/lib/security/pam_stack.so service=system-auth
/lib/security/pam_nologin.so
/lib/security/pam_stack.so service=system-auth
/lib/security/pam_access.so
/lib/security/pam_time.so
/lib/security/pam_stack.so service=system-auth
/lib/security/pam_stack.so service=system-auth
/lib/security/pam_limits.so
Step2
Now, set the permissions of the sshd file to be (0640/-rw-r-----) and owned by the superuser ‘root’ for security reasons.
•
To change the permissions and ownership of the sshd file, use the commands:
[root@deep /]# chmod 640 /etc/pam.d/sshd
[root@deep /]# chown 0.0 /etc/pam.d/sshd
423](https://image.slidesharecdn.com/securingoptimizinglinuxthehackingsolutionv-131209075405-phpapp02/85/Securing-Optimizing-Linux-the-Hacking-Solution-v-3-0-423-320.jpg)
![OpenSSH 1
CHAPTER 6
/etc/init.d/sshd: The OpenSSH Initialization File
The /etc/init.d/sshd script file is responsible to automatically starting and stopping the
OpenSSH server on your Linux system. Loading the sshd daemon as a standalone daemon will
eliminate load time and will even reduce swapping since non-library code will be shared.
Please note that the following script is suitable for Linux operating systems that use SystemV. If
you Linux system use some other methods like BSD, you’ll have to adjust the script bellow to
make it work for you.
Step 1
Create the sshd script file (touch /etc/init.d/sshd) and add the following lines:
#!/bin/bash
#
#
#
#
#
#
#
#
#
#
#
#
This shell script takes care of starting and stopping OpenSSH.
chkconfig: 2345 55 25
description: OpenSSH is a program thas allows to establish a secure remote
connection to a server.
processname: sshd
config: /etc/ssh/ssh_host_key
config: /etc/ssh/ssh_host_key.pub
config: /etc/ssh/ssh_random_seed
config: /etc/ssh/sshd_config
pidfile: /var/run/sshd.pid
# Source function library.
. /etc/init.d/functions
# Source networking configuration.
. /etc/sysconfig/network
# Source OpenSSH configureation.
if [ -f /etc/sysconfig/sshd ] ; then
. /etc/sysconfig/sshd
fi
RETVAL=0
# Some functions to make the below more readable.
KEYGEN=/usr/bin/ssh-keygen
RSA1_KEY=/etc/ssh/ssh_host_key
RSA_KEY=/etc/ssh/ssh_host_rsa_key
DSA_KEY=/etc/ssh/ssh_host_dsa_key
PID_FILE=/var/run/sshd.pid
my_success() {
local msg
if [ $# -gt 1 ]; then
msg="$2"
else
msg="done"
fi
case "`type -type success`" in
function)
success "$1"
;;
*)
echo -n "${msg}"
;;
esac
424](https://image.slidesharecdn.com/securingoptimizinglinuxthehackingsolutionv-131209075405-phpapp02/85/Securing-Optimizing-Linux-the-Hacking-Solution-v-3-0-424-320.jpg)
![OpenSSH 1
CHAPTER 6
}
my_failure() {
local msg
if [ $# -gt 1 ]; then
msg="$2"
else
msg="FAILED"
fi
case "`type -type failure`" in
function)
failure "$1"
;;
*)
echo -n "${msg}"
;;
esac
}
do_rsa1_keygen() {
if ! test -f $RSA1_KEY ; then
echo -n "Generating SSH1 RSA host key: "
if $KEYGEN -q -t rsa1 -f $RSA1_KEY -C '' -N '' >&/dev/null;
then
my_success "RSA1 key generation"
echo
else
my_failure "RSA1 key generation"
echo
exit 1
fi
fi
}
do_rsa_keygen() {
if ! test -f $RSA_KEY ; then
echo -n "Generating SSH2 RSA host key: "
if $KEYGEN -q -t rsa -f $RSA_KEY -C '' -N '' >&/dev/null; then
my_success "RSA key generation"
echo
else
my_failure "RSA key generation"
echo
exit 1
fi
fi
}
do_dsa_keygen() {
if ! test -f $DSA_KEY ; then
echo -n "Generating SSH2 DSA host key: "
if $KEYGEN -q -t dsa -f $DSA_KEY -C '' -N '' >&/dev/null; then
my_success "DSA key generation"
echo
else
my_failure "DSA key generation"
echo
exit 1
fi
fi
}
do_restart_sanity_check() {
sshd -t
RETVAL=$?
if [ ! "$RETVAL" = 0 ]; then
my_failure "Configuration file or keys"
echo
425](https://image.slidesharecdn.com/securingoptimizinglinuxthehackingsolutionv-131209075405-phpapp02/85/Securing-Optimizing-Linux-the-Hacking-Solution-v-3-0-425-320.jpg)
![OpenSSH 1
CHAPTER 6
exit $RETVAL
fi
}
case "$1" in
start)
# Create keys if necessary
do_rsa1_keygen;
do_rsa_keygen;
do_dsa_keygen;
echo -n "Starting SSHD: "
if [ ! -f $PID_FILE ] ; then
sshd $OPTIONS
RETVAL=$?
if [ "$RETVAL" = "0" ] ; then
my_success "sshd startup" "sshd"
touch /var/lock/subsys/sshd
else
my_failure "sshd startup" ""
fi
fi
echo
;;
stop)
echo -n "Shutting down SSHD: "
if [ -f $PID_FILE ] ; then
killproc sshd
RETVAL=$?
[ $RETVAL -eq 0 ] && rm -f /var/lock/subsys/sshd
fi
echo
;;
restart)
do_restart_sanity_check
$0 stop
$0 start
RETVAL=$?
;;
condrestart)
if [ -f /var/lock/subsys/sshd ] ; then
do_restart_sanity_check
$0 stop
$0 start
RETVAL=$?
fi
;;
status)
status sshd
RETVAL=$?
;;
*)
echo "Usage: sshd {start|stop|restart|status|condrestart}"
exit 1
;;
esac
exit $RETVAL
426](https://image.slidesharecdn.com/securingoptimizinglinuxthehackingsolutionv-131209075405-phpapp02/85/Securing-Optimizing-Linux-the-Hacking-Solution-v-3-0-426-320.jpg)
![OpenSSH 1
CHAPTER 6
Step 2
Once the /etc/init.d/sshd script file has been created, it is important to make it executable,
change its default permissions, create the necessary links and start it. Making this file executable
will allow the system to run it, changing its default permission is to allow only the root user to
change this file for security reason, and creation of the symbolic links will let the process control
initialization of Linux to start the program automatically for you at each system boot.
•
To make this script executable and to change its default permissions, use the commands:
[root@deep /]# chmod 700 /etc/init.d/sshd
[root@deep /]# chown 0.0 /etc/init.d/sshd
•
To create the symbolic rc.d links for OpenSSH, use the following commands:
[root@deep /]# chkconfig --add sshd
[root@deep /]# chkconfig --level 2345 sshd on
•
To start OpenSSH software manually, use the following command:
[root@deep /]# /etc/init.d/sshd start
Starting SSHD:
[OK]
Running OpenSSH in a chroot jail
This section applies only if you want to run OpenSSH in chroot jail environment for some of your
users. This kind of setup is useful for web hosting companies that want to provide shell access
via remote secure connection with OpenSSH but don’t want to allow full access to the server and
just limit users to their own web directory. By default, OpenSSH does not support the chroot jail
mode and we have to compile it with an external patch to enable the chroot mode extensions.
The patch is available from the following site: http://chrootssh.sourceforge.net/
Remember that you have to download the version number equal to the OpenSSH version number
you use in order for chroot jail support to work. At the beginning of this chapter, we have already
patched the software with the chroot jail mode extensions patch, therefore, we only need to
create the required skeleton environment and copy the necessary tools into this chroot jail
directory to enable chroot jail support. Below are the steps to follow if you want to run OpenSSH
with chroot jail support for the specified users.
The main benefit of a chroot jail is that the jail will limit the portion of the file system the daemon
can see to the root directory of the jail. Additionally, since the jail only needs to support OpenSSH,
the programs available in the jail can be extremely limited. More importantly, there is no need for
setuid-root programs, which can be used to gain root access and break out of the jail.
427](https://image.slidesharecdn.com/securingoptimizinglinuxthehackingsolutionv-131209075405-phpapp02/85/Securing-Optimizing-Linux-the-Hacking-Solution-v-3-0-427-320.jpg)
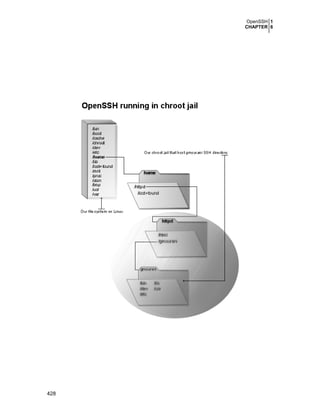
![OpenSSH 1
CHAPTER 6
Necessary steps to run OpenSSH in a chroot jail:
What you're essentially doing is creating a skeleton root file system with enough components
(binaries, libraries, etc.) to allow Unix to do a chroot when the user logs in.
Step 1
With OpenSSH, it’s important to give to your strictly SSH users a real shell account on the Linux
system because we want to allow remote shell access, even if limited to running just a few
commands on the server.
First, create the new users for this purpose; these users will be the users allowed to connect to
your OpenSSH server running in chroot jail mode. These have to be separate from regular user
accounts with unlimited access because of how the "chroot" environment works. Chroot makes it
appear from the user's perspective as if the level of the file system you've placed them in is the
top level of the file system.
Here we create a new SSH user called “gmourani” as an example and set it’s the home directory
under the /home/httpd/gmourani directory since it is the place where it’s the users web
directory and web pages will be located.
•
Use the following command to create a new SSH user. This step must be done for each
additional new user you allow to access your OpenSSH server on OpenNA Linux.
[root@deep /]# useradd -m -d /home/httpd/gmourani gmourani
[root@deep /]# passwd gmourani
Changing password for user gmourani
New UNIX password:
Retype new UNIX password:
passwd: all authentication tokens updated successfully
•
Use the following command to create a new SSH user. This step must be done for each
additional new user you allow to access your OpenSSH server on Red Hat Linux.
[root@deep /]# useradd -g users -d /home/httpd/gmourani gmourani
[root@deep /]# passwd gmourani
Changing password for user gmourani
New UNIX password:
Retype new UNIX password:
passwd: all authentication tokens updated successfully
The useradd command will add the new SSH user called “gmourani” to our Linux server and
will set it’s the home directory under the /home/httpd/gmourani directory on the system since
it is a useful location for remote clients to maintain their web accounts. The passwd command
will set the password for this user “gmourani”.
429](https://image.slidesharecdn.com/securingoptimizinglinuxthehackingsolutionv-131209075405-phpapp02/85/Securing-Optimizing-Linux-the-Hacking-Solution-v-3-0-429-320.jpg)
![OpenSSH 1
CHAPTER 6
Step 2
Once the new SSH users have been created, we must edit the /etc/passwd file and make the
appropriated changes to the accounts to allow OpenSSH to chroot when the users login on the
system. In general, the sshd daemon will chroot when it encounters the magic token '/./' in a
users home directory. Therefore this is what we will add to the passwd file for the SSH user in
question.
•
Edit the passwd file (vi /etc/passwd) and change the following line:
gmourani:x:501:100::/home/httpd/gmourani:/bin/bash
To read:
gmourani:x:501:100::/home/httpd/gmourani/./:/bin/bash
Don’t forget to make the same modification for each additional SSH user for whom you want
to chroot.
NOTE:
Step 3
Now, we have to create all the necessary chrooted environment subdirectories where we will
copy tools we want to allow this SSH user to use on the system.
•
Use the following command to create all the necessary chroot subdirectories.
[root@deep
[root@deep
[root@deep
[root@deep
[root@deep
[root@deep
[root@deep
•
/]#
/]#
/]#
/]#
/]#
/]#
/]#
mkdir
mkdir
mkdir
mkdir
mkdir
mkdir
mkdir
/home/httpd/gmourani/bin
/home/httpd/gmourani/dev
/home/httpd/gmourani/etc
/home/httpd/gmourani/lib
/home/httpd/gmourani/usr
/home/httpd/gmourani/usr/bin
/home/httpd/gmourani/usr/lib
For Red Hat Linux 7.3 users, you should create the following additional directory:
[root@deep /]# mkdir /home/httpd/gmourani/lib/i686
Step 4
Next, we must change the permissions on all the chroot glue subdirectories to mode (0111/d-x--x--x) for security reasons.
•
Use the following command to change the permissions of all the subdirectories.
[root@deep /]# chmod -R 0111 /home/httpd/gmourani/*
430](https://image.slidesharecdn.com/securingoptimizinglinuxthehackingsolutionv-131209075405-phpapp02/85/Securing-Optimizing-Linux-the-Hacking-Solution-v-3-0-430-320.jpg)
![OpenSSH 1
CHAPTER 6
Step 5
Once all permissions of the supporting glues have been changed, it is time to copy the required
binary programs to the related subdirectories in the chroot area for OpenSSH to work.
These programs are necessary to allow the SSH users to list, create directory, copy, remove, and
edit files on the SSH chroot jail directory. If there are features you don’t want the user to be able to
use, then don’t copy them to the chroot area.
•
Use the following commands to copy the require binaries programs into the chroot area.
[root@deep
[root@deep
[root@deep
[root@deep
[root@deep
[root@deep
[root@deep
[root@deep
[root@deep
[root@deep
/]#
/]#
/]#
/]#
/]#
/]#
/]#
/]#
/]#
/]#
cp /bin/bash /home/httpd/gmourani/bin/
cp /bin/cp /home/httpd/gmourani/bin/
cp /bin/ls /home/httpd/gmourani/bin/
cp /bin/mkdir /home/httpd/gmourani/bin/
cp /bin/grep /home/httpd/gmourani/bin/
cp /bin/rm /home/httpd/gmourani/bin/
cp /bin/vi /home/httpd/gmourani/bin/
cp /usr/bin/dircolors /home/httpd/gmourani/usr/bin/
chmod 0111 /home/httpd/gmourani/bin/*
chmod 0111 /home/httpd/gmourani/usr/bin/*
The above chmod commands will change default permissions of those programs under the
/bin directories of the chroot jail area to be (0111 ---x--x—x) because we don’t want users to
be able to modify or read binaries in the chroot area but just to execute them if necessary.
NOTE:
Step 6
The binaries we have copied into the chroot area have been compiled with shared libraries by
default and for this reason it is important to find the shared libraries dependencies associated with
them and copy them into the /lib subdirectory in the chroot jail area that we created earlier.
To find the shared library dependencies of binaries, you have to use the ldd command of Linux.
You must copy all the libraries below to the /home/httpd/gmourani/lib directory of the
chroot area. These libraries are part of libc, and needed by various programs.
•
Use the following commands to copy the require libraries into the chroot area.
[root@deep
[root@deep
[root@deep
[root@deep
[root@deep
[root@deep
[root@deep
•
/]#
/]#
/]#
/]#
/]#
/]#
/]#
cp /lib/libtermcap.so.2 /home/httpd/gmourani/lib/
cp /lib/libdl.so.2 /home/httpd/gmourani/lib/
cp /lib/libc.so.6 /home/httpd/gmourani/lib/
cp /lib/libgcc_s.so.1 /home/httpd/gmourani/lib/
cp /lib/ld-linux.so.2 /home/httpd/gmourani/lib/
cp /usr/lib/libncurses.so.5 /home/httpd/gmourani/usr/lib/
strip -R .comment /home/httpd/gmourani/lib/*
For Red Hat Linux 7.3 users, you should copy the following additional library:
[root@deep /]# cp /lib/i686/libc.so.6 /home/httpd/gmourani/lib/i686/
431](https://image.slidesharecdn.com/securingoptimizinglinuxthehackingsolutionv-131209075405-phpapp02/85/Securing-Optimizing-Linux-the-Hacking-Solution-v-3-0-431-320.jpg)
![OpenSSH 1
CHAPTER 6
Depending on what has been compiled, the required shared libraries may be different
than the ones illustrated above. Please use the ldd command on each binary under /bin
subdirectories of the chroot jail to find out the ones you need and copy them to the /lib
subdirectory of the chroot area.
WARNING:
The “strip -R .comment” command will remove all the named section “.comment” from the
libraries files under the /lib subdirectory and will make them smaller in size and can help in the
performance of them.
Step 7
One of the last step to do, is to make a copy of the “DIR_COLORS” and “passwd” files located
under the /etc directory to our chroot jail for SSH to be able to find it.
•
Use the following commands to copy the file into the chroot area.
[root@deep /]# cp /etc/DIR_COLORS /home/httpd/gmourani/etc/
[root@deep /]# cp /etc/passwd /home/httpd/gmourani/etc/
Step 8
Finally, we have to create the /home/httpd/gmourani/dev/null device file and set its mode
appropriately.
•
Use the following commands to create the null device into the chroot area.
[root@deep /]# mknod /home/httpd/gmourani/dev/null c 1 3
[root@deep /]# chmod 666 /home/httpd/gmourani/dev/null
Creating OpenSSH private & public keys
This section deals with actions that need to be performed to create new private/public keys for
our users to establish a secure connection on the server. There are cryptosystems where
encryption and decryption are done using separate keys, and it is not possible to derive the
decryption key from the encryption key. The idea is that each user creates a public/private key
pair for authentication purposes. The server knows the public key, and only the user knows the
private key.
The file $HOME/.ssh/authorized_keys lists the public keys that are permitted for logging in.
When the user logs in, the ssh program tells the server which key pair it would like to use for
authentication. The server checks if this key is permitted, and if so, sends the user (actually the
ssh program running on behalf of the user) a challenge, a random number, encrypted by the
user's public key. The challenge can only be decrypted using the proper private key. The user's
client then decrypts the challenge using the private key, proving that he/she knows the private
key but without disclosing it to the server.
Step 1
Below, are the steps to follow to create a new SSH private & public key for one user. This
example assumes that secure encrypted connections will be made between Linux servers.
•
To create your (RSA) private & public keys for SSH2 of LOCAL, use the commands:
[root@deep /]# su gmourani
[gmourani@deep /]$ ssh-keygen -t rsa
Generating public/private rsa key pair.
432](https://image.slidesharecdn.com/securingoptimizinglinuxthehackingsolutionv-131209075405-phpapp02/85/Securing-Optimizing-Linux-the-Hacking-Solution-v-3-0-432-320.jpg)
![OpenSSH 1
CHAPTER 6
Enter file in which to save the key (/home/gmourani/.ssh/id_rsa):
Created directory '/home/gmourani/.ssh'.
Enter passphrase (empty for no passphrase):
Enter same passphrase again:
Your identification has been saved in /home/gmourani/.ssh/id_rsa.
Your public key has been saved in /home/gmourani/.ssh/id_rsa.pub.
The key fingerprint is:
ba:0c:08:6d:9d:51:4f:b3:32:68:9b:0d:83:ce:be:bd gmourani@deep
The above example assumes that you want to generate (RSA) private & public keys for
SSH protocol 2 (highly recommended). If you want to generate (RSA) private & public keys for SSH
protocol 1, then you must use the ‘-t rsa1’ option to the key generation command as follows:
WARNING:
[root@deep /]# su gmourani
[gmourani@deep /]$ ssh-keygen -t rsa1
Using the ‘-t rsa1’ option will generate SSH1 instead of SSH2 private & public keys. The SSH1
private key will be named ”identity” and the public key will be “identity.pub”. The '-t'
option is used to specify the type of the key to create. The possible values are "rsa1" for protocol
version 1 and "rsa" or "dsa" for protocol version 2.
If you have multiple accounts you might want to create a separate key on each of them. You may
want to have separate keys for:
•
•
•
Your server (1)
Your server (2)
Your server (3)
This allows you to limit access between these servers, e.g. not allowing the first server (1)
account to access your second server (2) account or the third server (3). This enhances the
overall security in the case any of your authentication keys are compromised for any reason.
Step 2
Copy your local public key id_rsa.pub for SSH2 or identity.pub for SSH1 from the
/home/gmourani/.ssh directory remotely under the name, say, “authorized_keys”. One
way to copy the file is to use the ftp command or you might need to send your public key in
electronic mail to the administrator of the other system. Just include the contents of the
~/.ssh/id_rsa.pub or ~/.ssh/identity.pub file in the message.
To resume the required steps:
1) The user creates his/her RSA keys pair by running ssh-keygen. This stores the private
key in id_rsa (SSH2) or in identity (SSH1) and the public key in id_rsa.pub (SSH2)
or in identity.pub (SSH1) into the user's home directory on the LOCAL machine.
2) The user should then copy the id_rsa.pub key (SSH2) or identity.pub key (SSH1)
to $HOME/.ssh/authorized_keys into his/her home directory on the REMOTE
machine.
433](https://image.slidesharecdn.com/securingoptimizinglinuxthehackingsolutionv-131209075405-phpapp02/85/Securing-Optimizing-Linux-the-Hacking-Solution-v-3-0-433-320.jpg)
![OpenSSH 1
CHAPTER 6
------------------|
|
Server 1
|
|
|
------------------User:
gmourani
Pass-phrase:
qwerty1
Private key:
id_rsa
Public key:
id_rsa.pub --------------authorized_keys
----------------------|
|
|
|
|
------------------|
|
Server 2
|
|
|
------------------User:
gmourani
Pass-phrase:
qwerty2
Private key:
id_rsa
authorized_keys
Public key:
id_rsa.pub
|
|
|
|
|
Public key of user gmourani on the first server (1) is sending to the second server (2) under the
$HOME directory of user gmourani and become ‘authorized_keys’; the same action is made
on the second server (2). The public key of user gmourani on server (2) is sending to server (1)
under the $HOME directory of user gmourani and become ‘authorized_keys’.
OpenSSH's public key is a one-line string. Adding public keys from commercial SSH tools
which stretch the public key over several lines, will not be recognized by OpenSSH.
NOTE:
OpenSSH Users Tools
The commands listed below are some that we use regularly, but many more exist, and you
should check the manual pages and documentation of OpenSSH for more details.
ssh
The ssh (Secure Shell) command provides secure encrypted communications between two
untrusted hosts over an insecure network. It is a program for securely logging into a remote
machine and executing commands from there. It is a suitable replacement for insecure programs
like telnet, rlogin, rcp, rdist, and rsh.
•
To login to a remote machine, use the following command:
[root@deep /]# ssh -l <login_name> <hostname>
For example:
[root@deep /]# ssh -l gmourani deep.openna.com
gmourani@deep.openna.com’s password:
Last login: Tue Oct 19 1999 18:13:00 -0400 from deep.openna.com
No mail.
[gmourani@deep gmourani]$
Where <login_name> is the name you use to connect to the ssh server and <hostname> is
the remote address (you can use IP address here) of your ssh server.
434](https://image.slidesharecdn.com/securingoptimizinglinuxthehackingsolutionv-131209075405-phpapp02/85/Securing-Optimizing-Linux-the-Hacking-Solution-v-3-0-434-320.jpg)
![OpenSSH 1
CHAPTER 6
scp
The scp (Secure Copy) utility copies files from the local system to a remote system or vice versa,
or even between two remote systems using the scp command.
•
To copy files from remote to local system, use the following commands:
[root@deep /]# su gmourani
[gmourani@deep /]$ scp -p <login_name@hostname>:/dir/for/file
localdir/to/filelocation
For example:
[gmourani@deep /]$ scp -p gmourani@mail:/etc/test1 /tmp
Enter passphrase for RSA key 'gmourani@mail.openna.com':
test1
|
2 KB |
2.0 kB/s | ETA: 00:00:00 | 100%
•
To copy files from local to remote system, use the following commands:
[root@deep /]# su gmourani
[gmourani@deep /]$ scp -p localdir/to/filelocation
<username@hostname>:/dir/for/file
For example:
[gmourani@deep /]$ scp -p /usr/bin/test2 gmourani@mail:/var/tmp
gmourani@mail's password:
test2
|
7 KB |
7.9 kB/s | ETA: 00:00:00 | 100%
The “-p” option indicates that the modification and access times, as well as modes of
the source file, should be preserved on the copy. Usually this is desirable. Please check the
chapter related to backups in this book for more information about other possible uses of SSH
technology with Linux.
WARNING:
Changing your pass-phrase
You can change the pass-phrase at any time by using the -p option of ssh-keygen.
•
To change the pass-phrase, use the following commands:
[root@deep /]# su gmourani
[gmourani@deep /]$ ssh-keygen -p
Enter file in which the key is (/home/gmourani/.ssh/id_rsa):
Enter old passphrase:
Key has comment '/home/gmourani/.ssh/id_rsa'
Enter new passphrase (empty for no passphrase):
Enter same passphrase again:
Your identification has been saved with the new passphrase.
Further documentation
For more details, there are several manual pages about OpenSSH that you can read:
$
$
$
$
$
$
$
man ssh (1)
man ssh [slogin] (1)
man ssh-add (1)
man ssh-agent (1)
man ssh-keygen (1)
man sshd (8)
sftp-server (8)
- OpenSSH secure shell client (remote login program).
- OpenSSH secure shell client (remote login program).
- Adds identities for the authentication agent.
- Authentication agent.
- Authentication key generation.
- Secure shell daemon.
- SFTP server subsystem.
435](https://image.slidesharecdn.com/securingoptimizinglinuxthehackingsolutionv-131209075405-phpapp02/85/Securing-Optimizing-Linux-the-Hacking-Solution-v-3-0-435-320.jpg)


![Sudo 1
CHAPTER 7
Pristine source
If you don’t use the RPM package to install this program, it will be difficult for you to locate all the
files installed onto the system if you want to update the package in the future. To solve this
problem, it’s a good idea to make a list of files on the system before you install Sudo, and then
one afterwards, and then compare them using the diff utility to find out what files were placed
where.
•
Simply run the following command before installing the software:
[root@deep root]# find /* > Sudo1
•
•
And the following one after you install the software:
[root@deep root]# find /* > Sudo2
Then use this command to get a list of what changed:
[root@deep root]# diff Sudo1 Sudo2 > Sudo-Installed
Compiling - Optimizing & Installing Sudo
Below are the steps that you must make to configure, compile and optimize the Sudo software
before installing it on your system. First off, we install the program as user 'root' so as to avoid
any authorization problems.
Step 1
Once you get the program from the main software site you must copy it to the /var/tmp
directory and change to this location before expanding the archive.
•
This can be done with the following commands:
[root@deep /]# cp sudo-version.tar.gz /var/tmp/
[root@deep /]# cd /var/tmp/
[root@deep tmp]# tar xzpf sudo-version.tar.gz
Step 2
Next, move into the newly created Sudo source directory and perform the following steps to
configure and optimize the software for your system.
•
To move into the newly created Sudo source directory use the command:
[root@deep tmp]# cd sudo-1.6.6/
•
To configure and optimize Sudo use the following compilation lines:
CFLAGS="-O2 -march=i686 -funroll-loops"; export CFLAGS
./configure
--prefix=/usr
--sbindir=/usr/sbin
--with-logging=syslog
--with-logfac=authpriv
--with-pam
--with-env-editor
--with-ignore-dot
--with-tty-tickets
--disable-root-mailer
--disable-root-sudo
--disable-path-info
--with-mail-if-noperms
--with-mailsubject="*** Sudo SECURITY information for %h ***"
440](https://image.slidesharecdn.com/securingoptimizinglinuxthehackingsolutionv-131209075405-phpapp02/85/Securing-Optimizing-Linux-the-Hacking-Solution-v-3-0-440-320.jpg)
![Sudo 1
CHAPTER 7
This tells Sudo to set itself up for this particular configuration setup with:
-
-
Log sudo messages via syslog.
The syslog facility to log with is authpriv.
Enable PAM support.
Use the environment variable EDITOR for visudo.
Ignore '.' in the PATH.
Use a different ticket file for each user/tty combo.
Don't run the mailer as root, run as the user since it’s safer.
Don't allow root to run sudo command.
Print 'command not allowed' instead of 'command not found'.
Send mail to sysadmin if user not allowed to runs command.
Change subject of sudo mail result.
Step 3
Now, we must make a list of all files on the system before installing the software, and one
afterwards, then compare them using the diff utility to find out what files are placed where and
finally we install the Sudo software:
[root@deep
[root@deep
[root@deep
[root@deep
[root@deep
[root@deep
[root@deep
[root@deep
[root@deep
[root@deep
[root@deep
sudo-1.6.6]# make
sudo-1.6.6]# cd
root]# find /* > Sudo1
root]# cd /var/tmp/sudo-1.6.6/
sudo-1.6.6]# make install
sudo-1.6.6]# strip /usr/bin/sudo
sudo-1.6.6]# strip /usr/sbin/visudo
sudo-1.6.6]# mkdir –p –m0700 /var/run/sudo
sudo-1.6.6]# cd
root]# find /* > Sudo2
root]# diff Sudo1 Sudo2 > Sudo-Installed
The above commands will configure the software to ensure your system has the necessary
libraries to successfully compile the package, compile all source files into executable binaries,
and then install the binaries and any supporting files into the appropriate locations.
Step 4
Once the configuration, optimization, compilation, and installation of the Sudo software have
been accomplished, we can free up some disk space by deleting the program tar archive and the
related source directory since they are no longer needed.
•
To delete Sudo and its related source directory, use the following commands:
[root@deep /]# cd /var/tmp/
[root@deep tmp]# rm -rf sudo-version/
[root@deep tmp]# rm -f sudo-version.tar.gz
441](https://image.slidesharecdn.com/securingoptimizinglinuxthehackingsolutionv-131209075405-phpapp02/85/Securing-Optimizing-Linux-the-Hacking-Solution-v-3-0-441-320.jpg)
![Sudo 1
CHAPTER 7
This tells the sudoers file to set itself up for this particular configuration with:
Defaults
rootpw
With sudo, certain configuration options may be changed from their default values at runtime via
one or more “Default_Entry” options defined in the sudoers file. This is what we do here. In
our case, we inform sudo with the “Defaults rootpw” option that we want it to prompt any
allowed user who wants to sudo to super-user “root” to enter the “root” password instead of
the password of the invoking user.
By default sudo asks for the users password instead of super-user password when someone
wants to sudo to “root” user. Because in this configuration file we want to allow full “root”
access for users that are members of the “wheel” group and because we trust these users, we
decide to change the default sudo setting and ask for “root” password before having access to
“root” privilege on the server.
This setting is useful when you make secure remote connections on the server with SSH software
and want to sudo to “root” user.
root
ALL=(ALL) ALL
Here we inform sudo that the super-user “root” can run anything as any user on the server. This
option is required for the software to work or there is no need to use sudo. The “ALL=(ALL)
ALL” parameter means that everything is allowed for the super-user “root”.
%wheel
ALL=(ALL) ALL
Here we allow every user who is a member of the group “wheel” to run all commands as superuser “root” on the system. This is the equivalence of what we achieve with the PAM security
feature, but in a most efficient and secure way.
Step 2
Once the sudoers file has been configured, it is time to add some users who will be allowed to
sudo to “root” account.
•
If you want to make, for example, the user “sysadmin” a member of the “wheel” group,
and thus be able to sudo to “root”, use the following command:
[root@deep /]# usermod -G10 sysadmin
This means “G” is a list of supplementary groups that the user is also a member of. “10” is the
numeric value of the user’s ID “wheel”, and “sysadmin” is the user we want to add to the
“wheel” group. Use the same command above for all users on your system you want to be able
to sudo to “root” account.
443](https://image.slidesharecdn.com/securingoptimizinglinuxthehackingsolutionv-131209075405-phpapp02/85/Securing-Optimizing-Linux-the-Hacking-Solution-v-3-0-443-320.jpg)
![Sudo 1
CHAPTER 7
/etc/pam.d/sudo: The Sudo PAM Support Configuration File
For better security of Sudo, we have compiled it to use the PAM mechanism for password
authentication.
Step 1
To be able to use this feature, we must create the /etc/pam.d/sudo file and add the following
parameters inside it.
•
Create the sudo file (touch /etc/pam.d/sudo) and add the following lines:
#%PAM-1.0
auth
account
password
session
required
required
required
required
/lib/security/pam_stack.so
/lib/security/pam_stack.so
/lib/security/pam_stack.so
/lib/security/pam_stack.so
service=system-auth
service=system-auth
service=system-auth
service=system-auth
Step2
Now, set the permissions of the sudo file to be (0640/-rw-r-----) and owned by the superuser ‘root’ for security reasons.
•
To change the permissions and ownership of the sudo file, use the commands:
[root@deep /]# chmod 640 /etc/pam.d/sudo
[root@deep /]# chown 0.0 /etc/pam.d/sudo
A more complex sudoers configuration file
For those who want to have complete control on who can use the “root” account on the server
when there are many users with shell access doing different tasks, here is the sudoers
configuration file to go with. As you’ll see it is more complex and covers some basic definitions.
It is important to understand how the sudo policy works. To be as clear as possible, I will simply
say that when you allow full access to user with the “ALL” definition, you cannot deny other
access or privileges. Therefore, the best way is to allow only what you want user to be able to run
with “root” privilege through the “Cmnd alias specification” part of the configuration file
and use the defined aliases rules under the “User privilege specification” part of the
configuration file. Here is a working sudoers configuration file to better understand what I mean.
•
Edit the sudoers file (visudo) and set your needs. Below is what we recommend you
use for servers that have many users with shell access:
# /etc/sudoers: OpenNA, Inc. (last updated 2002 Apr 19)
# This file MUST be edited with the 'visudo' command as root.
# User alias specification
User_Alias
FULLTIME_USERS = sysadmin, gmourani
User_Alias
PARTTIME_USERS = zeljko, mary
# Cmnd alias specification
Cmnd_Alias
HTTP = /etc/init.d/httpd, /bin/vi /etc/httpd/*
Cmnd_Alias
FTP = /etc/init.d/proftpd, /bin/vi /etc/proftpd.conf
Cmnd_Alias
SMTP = /etc/init.d/exim, /bin/vi /etc/mail/*
Cmnd_Alias
SQL = /etc/init.d/mysqld, /usr/bin/mysql,
/usr/bin/mysqladmin
Cmnd_Alias
BIND = /etc/init.d/named, /bin/vi /chroot/named/*
444](https://image.slidesharecdn.com/securingoptimizinglinuxthehackingsolutionv-131209075405-phpapp02/85/Securing-Optimizing-Linux-the-Hacking-Solution-v-3-0-444-320.jpg)
![Sudo 1
CHAPTER 7
# Defaults specification
Defaults:FULLTIME_USERS
Defaults:FULLTIME_USERS
rootpw
!lecture
# User privilege specification
# Super-user root can run anything as any user.
root
ALL=(ALL) ALL
# Every users member of the group wheel will be allowed
# to run all commands as super-user root.
%wheel
ALL=(ALL) ALL
# Full time users may run anything but need a password.
FULLTIME_USERS ALL = ALL
# Part time users may administrate httpd, ftpd, smtp, sql, and bind
servers.
PARTTIME_USERS ALL = HTTP, FTP, SMTP, SQL, BIND
This tells the sudoers file to set itself up for this particular configuration with:
User_Alias
User_Alias
FULLTIME_USERS = sysadmin, gmourani
PARTTIME_USERS = zeljko, mary
The “User_Alias” definition lines are used to define local users who may sudo to the “root”
account on the server. The definition works on the following way:
Alias_Type NAME = item1, item2, ...
Where “Alias_Type” is the type of alias to use, in our case, we use “User_Alias” to define
local users aliases on the system. A NAME is a string of uppercase letters, numbers, or
underscores characters ('_'). A NAME must always start with an uppercase letter. You can use as
any name as you like to define the NAME.
In our example, we use “FULLTIME_USERS” to define local users on the system who have full
time access to the server and “PARTTIME_USERS” to define local users on the server who have
part time access to the server for different reason. Item represents usernames to add in each
category separated by [,].
It is important to note that users added to the “User_Alias” definition will be able to sudo
to super-user “root” account even if their names do not appear under the group “wheel”.
NOTE:
Cmnd_Alias
Cmnd_Alias
Cmnd_Alias
Cmnd_Alias
Cmnd_Alias
HTTP
FTP
SMTP
SQL
BIND
=
=
=
=
=
/etc/init.d/httpd, /bin/vi /etc/httpd/*
/etc/init.d/proftpd, /bin/vi /etc/proftpd.conf
/etc/init.d/exim, /bin/vi /etc/mail/*
/etc/init.d/mysqld, /usr/bin/mysql, /usr/bin/mysqladmin
/etc/init.d/named, /bin/vi /chroot/named/*
Here we use another “Alias_Type” definition. This type of alias is used to define commands,
programs, files, and directories that we want to allow certain users to be able to use when issuing
the sudo command on the system. The definition works on the following way:
Alias_Type NAME = item1, item2, ...
445](https://image.slidesharecdn.com/securingoptimizinglinuxthehackingsolutionv-131209075405-phpapp02/85/Securing-Optimizing-Linux-the-Hacking-Solution-v-3-0-445-320.jpg)
![Sudo 1
CHAPTER 7
Where “Alias_Type” is the type of alias to use, in our case, we use “Cmnd_Alias” to define
command aliases on the system. A NAME is a string of uppercase letters, numbers, or
underscores characters ('_'). A NAME must always start with an uppercase letter. You can use any
name you like to define the NAME.
In our example, we use “HTTP, FTP, SMTP, SQL, and BIND” to define command names aliases
associated with the commands we will allow local users to run when issuing the sudo command
on the system. Item represent the commands, files, programs, or directories to add in each
category separated by [,].
Defaults:FULLTIME_USERS
Defaults:FULLTIME_USERS
rootpw
!lecture
With sudo, certain configuration options may be changed from their default values at runtime via
one or more “Default_Entry” options. Again, this is what we do here. In our case, we inform
sudo with the “Defaults:FULLTIME_USERS rootpw” option that we want it to prompt any
users with full time access on the server “FULLTIME_USERS” to enter the “root” password
instead of their own password.
Remember that by default sudo asks for the users password instead of super-user password
when someone wants to sudo to “root”. Because we allow full “root” access for users under
the “FULLTIME_USERS” alias, we decide to change the default sudo setting and ask for the
“root” password before giving access to “root” privileges on the server. This also means that
users under the “PARTTIME_USERS” alias will have to enter their own password and not the
“root” password.
This is a security feature to separate trusted users with full time access on the server from semitrusted users with part time access on the system. Users having part time access could be
students, limited administrators, or anything else that you think about. In this way, users with part
time access do not know the “root” password since they enter their own passwords to get some
“root” privileges and we don’t need to change “root” password every time these users leave
the company.
The second “Default_Entry” option “Defaults:FULLTIME_USERS !lecture”, simply
informs sudo to not send a short lecture message about the policy use of the program to users
with full time access on the server.
FULLTIME_USERS
ALL = ALL
Here we allow every user who is listed in the “FULLTIME_USERS” alias of the configuration file to
run all commands as super-user “root” on the system. This is the equivalence of what we
achieve with the PAM security feature.
PARTTIME_USERS
ALL = HTTP, FTP, SMTP, SQL, BIND
Here we allow every user who is listed in the “PARTTIME_USERS” alias of the configuration file to
only run the specified commands as super-user “root”. These users will be able to edit, run and
restart the specified services and nothing else. Therefore, they only have limited “root” access
on the server to accomplish their tasks.
446](https://image.slidesharecdn.com/securingoptimizinglinuxthehackingsolutionv-131209075405-phpapp02/85/Securing-Optimizing-Linux-the-Hacking-Solution-v-3-0-446-320.jpg)
![Sudo 1
CHAPTER 7
Securing Sudo
This section deals specifically with actions we can take to improve and tighten security under
Sudo. Sudo is very good and well-written software with high security in mind. Once properly
compiled, installed, and configured, there are only some little things that we can do to better
secure it. Most important of all the security measures are already made within the software.
Disabling su access on the server
Once sudo is configured and running on your server, you really don’t need to continue to use ‘su’
to get “root” access on the system. Here, I show you how to disable ‘su’ command to provide
“root” access. The simpler approach will be to remove the SUID bit on the ‘su’ program. In this
way, no one will be able to use it to gain “root” anymore.
•
To remove the SUID bit on the ‘su’ command, use the following command:
[root@deep /]# chmod 0511 /bin/su
Sudo Users Tools
The commands and options listed bellows are some that we use regularly, but many more exist,
and you should check the manual pages and documentation of Sudo for more details.
Running sudo for user with full “root” access
Basically, sudo is used by prepending "sudo" (followed by a space) to your command. It then
prompts you for your personal password or root password depending of the configuration and
then checks the /etc/sudoers configuration file to make sure you have "sudo" permission to
run that command on the server. Sudo runs the command as root (or another user) and logs the
details to syslog. It also logs problems and other invalid uses.
When you have full “root” privileges on the system because you are listed in the sudoers file
as one user with all “root” access right, you can run the sudo command with the -s (shell)
option to become the super-user “root” on the server.
•
To sudo as super-user “root” with shell access, use the following command:
[sysadmin@deep /]# sudo –s
Password:
To be able to use the above command, you should have all “root” access rights in the sudoers
configuration file. Please note that, in this example, you have to enter the super-user “root”
password and not the password of the user “sysadmin”.
447](https://image.slidesharecdn.com/securingoptimizinglinuxthehackingsolutionv-131209075405-phpapp02/85/Securing-Optimizing-Linux-the-Hacking-Solution-v-3-0-447-320.jpg)
![Sudo 1
CHAPTER 7
Running sudo for user with limited “root” access
If you are a user with limited “root” access rights on the server, you cannot use the previous
sudo command to sudo as super-user “root” on the server. Instead, you should prepend the
sudo command with the command you want to run as “root” user. This supposes that
commands you expect to run are listed as allowed commands to use inside the sudoers
configuration file.
•
To sudo as super-user “root” with limited access, use the following command:
[mary@deep /]# sudo /etc/init.d/httpd restart
Password:
The above command will restart the httpd web server daemon on the system even if you are the
user called “mary” because the sudoers file allows you to do it as super-user “root”. Please
note that in this example you have to enter the password of user “mary” and not the password of
the super-user “root”.
Further documentation
For more details, there are some manual pages you can read:
$ man sudoers (5)
$ man sudo (8)
$ man visudo (8)
448
- List of which users may execute what.
- Execute a command as another user.
- Used to edit the sudoers file.](https://image.slidesharecdn.com/securingoptimizinglinuxthehackingsolutionv-131209075405-phpapp02/85/Securing-Optimizing-Linux-the-Hacking-Solution-v-3-0-448-320.jpg)


![sXid 1
CHAPTER 8
Linux sXid
Abstract
SUID/SGID files can be a security hazard. To reduce the risks, we have previously removed the
's' bits from root-owned programs that won't require such privileges (See chapter related to
General System Security), but future and existing files may be set with these ‘s’ bits enabled
without you being notified.
sXid is an all in one suid/sgid monitoring program designed to be run by “cron” on a regular
basis. Basically, it tracks any changes in your s[ug]id files and folders. If there are any new ones,
ones that aren't set any more, or they have changed bits or other modes then it reports the
changes in an easy to read format via email or on the command line. sXid will automate the task
to find all SUID/SGID on your server and report them to you. Once installed you can forget it and
it will do the job for you.
These installation instructions assume
Commands are Unix-compatible.
The source path is /var/tmp (note that other paths are possible, as personal discretion).
Installations were tested on OpenNA Linux & Red Hat Linux 7.3.
All steps in the installation will happen using the super-user account “root”.
Whether kernel recompilation may be required: No
Latest sXid version number is 4.0.2
The procedures given in this chapter are likely to work on all Linux platforms, but we have only
tested it on OpenNA Linux and Red Hat Linux.
Packages
The following is based on information listed by sXid as of 2002/06/24. Please check
ftp://marcus.seva.net/pub/sxid/ regularly for the latest status. We chose to install from source
because it provides the facility to fine tune the installation.
Source code is available from:
sXid Homepage: ftp://marcus.seva.net/pub/sxid/
sXid FTP Site: 137.155.111.51
You must be sure to download: sxid_4.0.2.tar.gz
453](https://image.slidesharecdn.com/securingoptimizinglinuxthehackingsolutionv-131209075405-phpapp02/85/Securing-Optimizing-Linux-the-Hacking-Solution-v-3-0-453-320.jpg)
![sXid 1
CHAPTER 8
Pristine source
If you don’t use the RPM package to install this program, it will be difficult for you to locate all the
files installed onto the system if you want to update the package in the future. To solve this
problem, it’s a good idea to make a list of files on the system before you install sXid, and then
one afterwards, and then compare them using the diff utility to find out what files were placed
where.
•
Simply run the following command before installing the software:
[root@deep root]#
•
•
find /* > sXid1
And the following one after you install the software:
[root@deep root]#
find /* > sXid2
Then use the following command to get a list of what changed:
[root@deep root]#
diff sXid1 sXid2 > sXid-Installed
Compiling - Optimizing & Installing sXid
Below are the steps that you must make to configure, compile and optimize the sXid software
before installing it on your system. First off, we install the program as user 'root' so as to avoid
any authorization problems.
Step 1
Once you get the program from the main software site you must copy it to the /var/tmp
directory and change to this location before expanding the archive.
•
This can be done with the following commands:
[root@deep /]# cp sxid_version.tar.gz /var/tmp/
[root@deep /]# cd /var/tmp/
[root@deep tmp]# tar xzpf sxid_version.tar.gz
Step 2
Now move into the newly created sXid source directory and perform the following steps to
configure and optimize the software for your system.
•
To move into the newly created sXid directory use the following command:
[root@deep tmp]# cd sxid-4.0.2/
•
To configure and optimize sXid use the following compilation lines:
CFLAGS="-O2 -march=i686 -funroll-loops"; export CFLAGS
./configure
--prefix=/usr
--sysconfdir=/etc
--mandir=/usr/share/man
Pay special attention to the compile CFLAGS line above. We optimize sXid for an i686
CPU architecture with the parameter “-march=i686”. Please don’t forget to adjust this CFLAGS
line to reflect your own system.
WARNING:
454](https://image.slidesharecdn.com/securingoptimizinglinuxthehackingsolutionv-131209075405-phpapp02/85/Securing-Optimizing-Linux-the-Hacking-Solution-v-3-0-454-320.jpg)
![sXid 1
CHAPTER 8
Step 3
Now, we must make a list of all files on the system before installing the software, and one
afterwards, then compare them using the diff utility to find out what files are placed where and
finally we install the sXid software:
[root@deep
[root@deep
[root@deep
[root@deep
[root@deep
[root@deep
[root@deep
sXid-4.0.2]# cd
root]# find /* > sXid1
root]# cd /var/tmp/sxid-4.0.2/
sxid-4.0.2]# make install
sxid-4.0.2]# cd
root]# find /* > sXid2
root]# diff sXid1 sXid2 > sXid-Installed
The above commands will configure the software to ensure your system has the necessary
libraries to successfully compile the package, compile all source files into executable binaries,
and then install the binaries and any supporting files into the appropriate locations.
Step 4
Once the configuration, optimization, compilation, and installation of the sXid software have
been accomplished, we can free up some disk space by deleting the program tar archive and the
related source directory since they are no longer needed.
•
To delete sXid and its related source directory, use the following commands:
[root@deep /]# cd /var/tmp/
[root@deep tmp]# rm -rf sxid-version/
[root@deep tmp]# rm -f sxid_version_tar.gz
The rm command as used above will remove all the source files we have used to compile and
install sXid. It will also remove the sXid compressed archive from the /var/tmp directory.
Configuring sXid
After sXid has been built and installed successfully in your system, your next step is to configure
and customize its configuration files to fit your needs.
/etc/sxid.conf: (The sXid Configuration File)
/etc/cron.daily/sxid: (The sXid Cron File)
/etc/sxid.conf: The sXid Configuration File
The configuration file for sXid allows you to set options that modify the operation of the program.
It is well commented and very basic.
Step 1
We must change the default one to fit our requirements and operating system. The text in bold
are the parts of the configuration file that must be customized and adjusted to satisfy our needs.
•
Edit the sxid.conf file (vi /etc/sxid.conf) and set your needs. Below is what we
recommend you.
# Configuration file for sXid
# Note that all directories must be absolute with no trailing /'s
# Where to begin our file search
SEARCH = "/"
455](https://image.slidesharecdn.com/securingoptimizinglinuxthehackingsolutionv-131209075405-phpapp02/85/Securing-Optimizing-Linux-the-Hacking-Solution-v-3-0-455-320.jpg)
![sXid 1
CHAPTER 8
# Which subdirectories to exclude from searching
EXCLUDE = "/proc /mnt /cdrom /floppy"
# Who to send reports to
EMAIL = "root"
# Always send reports, even when there are no changes?
ALWAYS_NOTIFY = "no"
# Where to keep interim logs. This will rotate 'x' number of
# times based on KEEP_LOGS below
LOG_FILE = "/var/log/sxid.log"
# How many logs to keep
KEEP_LOGS = "5"
# Rotate the logs even when there are no changes?
ALWAYS_ROTATE = "no"
# Directories where +s is forbidden (these are searched
# even if not explicitly in SEARCH), EXCLUDE rules apply
FORBIDDEN = "/home /tmp"
# Remove (-s) files found in forbidden directories?
ENFORCE = "yes"
# This implies ALWAYS_NOTIFY. It will send a full list of
# entries along with the changes
LISTALL = "no"
# Ignore entries for directories in these paths
# (this means that only files will be recorded, you
# can effectively ignore all directory entries by
# setting this to "/"). The default is /home since
# some systems have /home g+s.
IGNORE_DIRS = "/home"
#
#
#
#
#
File that contains a list of (each on it's own line)
other files that sxid should monitor. This is useful
for files that aren't +s, but relate to system
integrity (tcpd, inetd, apache...).
EXTRA_LIST = "/etc/sxid.list"
# Mail program. This changes the default compiled in
# mailer for reports. You only need this if you have changed
# it's location and don't want to recompile sxid.
MAIL_PROG = "/bin/mail"
Step 2
Now, for security reasons, change the mode of this file to be 0400.
•
This can be done with the following command:
[root@deep /]# chmod 400 /etc/sxid.conf
456](https://image.slidesharecdn.com/securingoptimizinglinuxthehackingsolutionv-131209075405-phpapp02/85/Securing-Optimizing-Linux-the-Hacking-Solution-v-3-0-456-320.jpg)
![sXid 1
CHAPTER 8
/etc/cron.daily/sxid: The sXid Cron File
The sxid file is a small script executed automatically by the “crond” program of your server
each day to tracks any changes in your s[ug]id files and folders.
Step 1
If there are any new ones, ones that aren't set any more, or they have changed bits or other
modes then it reports the changes. If you intend to automate this task, follow the simple steps
below.
•
Create the sxid script file (touch /etc/cron.daily/sxid) and add the following
lines:
#!/bin/sh
SXID_OPTS=
if [ -x /usr/bin/sxid ]; then
/usr/bin/sxid ${SXID_OPTS}
fi
Step2
Now, make this script executable and change its permissions to be 0510.
•
This can be done with the following command:
[root@deep /]# chmod 510 /etc/cron.daily/sxid
sXid Administrative Tools
After your desired configuration options have been set and the program is running, we can play
with its utility. The sXid software is meant to run as a cronjob. It must run once a day, but busy
shell boxes may want to run it twice a day. You can also run this manually for spot-checking.
•
To run sXid manually, use the command:
[root@deep /]# sxid -k
sXid Vers : 4.0.2
Check run : Thu Apr 25 19:35:36 2002
This host : deep.openna.com
Spotcheck : /root
Excluding : /proc /mnt /cdrom /floppy
Ignore Dirs: /home
Forbidden : /home /tmp
(enforcing removal of s[ug]id bits in forbidden paths)
No changes found
This checks for changes by recursing the current working directory. Log files will not be rotated
and no email sent. All output will go to stdout.
Further documentation
For more details, there are some manual pages you can read:
$ man sxid.conf (5) - Configuration settings for sxid.
$ man sxid (1)
- Check for changes in s[ug]id files and directories.
457](https://image.slidesharecdn.com/securingoptimizinglinuxthehackingsolutionv-131209075405-phpapp02/85/Securing-Optimizing-Linux-the-Hacking-Solution-v-3-0-457-320.jpg)


![LogSentry 1
CHAPTER 9
Pristine source
If you don’t use the RPM package to install this program, it will be difficult for you to locate all the
files installed onto the system if you want to update the package in the future. To solve this
problem, it’s a good idea to make a list of files on the system before you install LogSentry, and
then one afterwards, and then compare them using the diff utility to find out what files were
placed where.
•
Simply run the following command before installing the software:
[root@deep root]# find /* > LogSentry1
•
•
And the following one after you install the software:
[root@deep root]# find /* > LogSentry2
Then use the following command to get a list of what changed:
[root@deep root]# diff LogSentry1 LogSentry2 > LogSentry-Installed
With this procedure, if any upgrade appears, all you have to do is to read the generated list of
what files were added or changed by the program and remove them manually from your system
before installing the new software. In our example above, we use the /root directory of the
system to store all the generated file lists.
Compiling - Optimizing & Installing LogSentry
Below are the steps that you must make to configure, compile and optimize the LogSentry
software before installing it on your system. First off, we install the program as user 'root' so as
to avoid any authorization problems.
Step 1
Once you get the program from the main software site you must copy it to the /var/tmp
directory and change to this location before expanding the archive.
•
This can be done with the following commands:
[root@deep /]# cp logsentry-version.tar.gz /var/tmp/
[root@deep /]# cd /var/tmp/
[root@deep tmp]# tar xzpf logsentry-version.tar.gz
Step 2
In order to check that the version of LogSentry, which you are going to install, is an original and
unmodified one, use the command described below to check its MD5 hashes checksum.
•
To verify the MD5 checksum of LogSentry, use the following command:
[root@deep tmp]# md5sum logsentry-1.1.1.tar.gz
This should yield an output similar to this:
e97c2f096e219e20310c1b80e9e1bc29
logsentry-1.1.1.tar.gz
Now check that this checksum is exactly the same as the one published on the LogSentry
website at the following URL: http://www.psionic.com/downloads/checksums.md5
462](https://image.slidesharecdn.com/securingoptimizinglinuxthehackingsolutionv-131209075405-phpapp02/85/Securing-Optimizing-Linux-the-Hacking-Solution-v-3-0-462-320.jpg)
![LogSentry 1
CHAPTER 9
Step 3
There are some source files to modify before going into the configuration and compilation of the
program; the changes allow us to configure the program for our PATH environment variable under
Linux. Therefore, move into the newly created LogSentry source directory and perform the
following steps to configure and optimize the software for your system.
•
To move into the newly created LogSentry directory use the following command:
[root@deep tmp]# cd logcheck-1.1.1/
Step 4
Here, we have to change default locations of different LogSentry configuration files on the
system. To archive these modifications, we must edit the logcheck.sh script file as follow.
•
Edit the logcheck.sh file and change all of the targeted lines in the order shown below:
a) vi +47 systems/linux/logcheck.sh and change the line:
LOGTAIL=/usr/local/bin/logtail
To read:
LOGTAIL=/usr/bin/logtail
b) vi +55 systems/linux/logcheck.sh and change the line:
TMPDIR=/usr/local/etc/tmp
To read:
TMPDIR=/var/logsentry
c) vi +92 systems/linux/logcheck.sh and change the line:
HACKING_FILE=/usr/local/etc/logcheck.hacking
To read:
HACKING_FILE=/etc/logsentry/hacking
d) vi +101 systems/linux/logcheck.sh and change the line:
VIOLATIONS_FILE=/usr/local/etc/logcheck.violations
To read:
VIOLATIONS_FILE=/etc/logsentry/violations
463](https://image.slidesharecdn.com/securingoptimizinglinuxthehackingsolutionv-131209075405-phpapp02/85/Securing-Optimizing-Linux-the-Hacking-Solution-v-3-0-463-320.jpg)

![LogSentry 1
CHAPTER 9
d) vi +30 Makefile and change the line:
INSTALLDIR_SH = /usr/local/etc
To read:
INSTALLDIR_SH = /usr/sbin
e) vi +30 Makefile and change the line:
TMPDIR = /usr/local/etc/tmp
To read:
TMPDIR = /var/logsentry
Step 6
Now, we must make a list of all files on the system before installing the software, and one
afterwards, then compare them using the diff utility to find out what files are placed where and
finally we install the LogSentry software:
[root@deep
[root@deep
[root@deep
[root@deep
[root@deep
[root@deep
[root@deep
[root@deep
[root@deep
[root@deep
[root@deep
[root@deep
[root@deep
[root@deep
logcheck-1.1.1]# cd
root]# find /* > LogSentry1
root]# cd /var/tmp/logcheck-1.1.1/
logcheck-1.1.1]# mkdir –m0700 /etc/logsentry
logcheck-1.1.1]# make linux
logcheck-1.1.1]# strip /usr/bin/logtail
logcheck-1.1.1]# cd /etc/logsentry/
logsentry]# mv logcheck.hacking hacking
logsentry]# mv logcheck.violations violations
logsentry]# mv logcheck.violations.ignore violations.ignore
logsentry]# mv logcheck.ignore ignore
logsentry]# cd
root]# find /* > LogSentry2
root]# diff LogSentry1 LogSentry2 > LogSentry-Installed
The above commands will configure the software to ensure your system has the necessary
libraries to successfully compile the package, compile all source files into executable binaries,
and then install the binaries and any supporting files into the appropriate locations.
Step 7
Once the configuration, optimization, compilation, and installation of the LogSentry software
have been accomplished, we can free up some disk space by deleting the program tar archive
and the related source directory since they are no longer needed.
•
To delete LogSentry and its related source directory, use the following commands:
[root@deep /]# cd /var/tmp/
[root@deep tmp]# rm -rf logcheck-version/
[root@deep tmp]# rm -f logsentry-version.tar.gz
The rm command as used above will remove all the source files we have used to compile and
install LogSentry. It will also remove the LogSentry compressed archive from the /var/tmp
directory.
465](https://image.slidesharecdn.com/securingoptimizinglinuxthehackingsolutionv-131209075405-phpapp02/85/Securing-Optimizing-Linux-the-Hacking-Solution-v-3-0-465-320.jpg)
![LogSentry 1
CHAPTER 9
Configuring LogSentry
After LogSentry has been built and installed successfully in your system, your next step is to
check its configuration files to see if they fit your needs.
/etc/logsentry/hacking: (The LogSentry Hacking File)
/etc/logsentry/ignore: (The LogSentry Ignore File)
/etc/logsentry/violations: (The LogSentry Violation File)
/etc/logsentry/violations.ignore: (The LogSentry Violation Ignore File)
From the default install, there are no LogSentry configuration files to modify, the default entries
look fine and if you want to make some personal adjustment, all you have to do is to edit the
related LogSentry configuration files located under /etc/logsentry directory.
More information about the operation of each one is contained in the INSTALL file of LogSentry
under its uncompressed source directory.
Although the fact that there is no LogSentry configuration files to change, the last action to
make before using the program is to automate it.
Step 1
Create a file called logsentry under the /etc/cron.daily directory and add the following
lines to set LogSentry to run once per day.
•
To create the logsentry file under /etc/cron.daily directory, type the following
lines in your terminal (as root):
cat <<EOF > /etc/cron.daily/logsentry
#!/bin/sh
# Hourly check Log files for security violations and unusual activity.
/usr/bin/logcheck.sh
EOF
Step 2
Now, make this script executable and change its permissions to be 0510.
•
This can be done with the following commands:
[root@deep /]# chmod 510 /etc/cron.daily/logsentry
Remember, in our configuration and installation, LogSentry does not report anything
via email if it has nothing useful to say.
WARNING:
466](https://image.slidesharecdn.com/securingoptimizinglinuxthehackingsolutionv-131209075405-phpapp02/85/Securing-Optimizing-Linux-the-Hacking-Solution-v-3-0-466-320.jpg)


![HostSentry 2
CHAPTER 0
Prerequisites
HostSentry requires that the listed software below be already installed on your system to be
able to compile successfully. If this is not the case, you must install it from your Linux CD-ROM or
source archive files. Please make sure you have this program installed on your machine before
you proceed with this chapter.
Python, which allows HostSentry to run, must already be installed on your system to
be able to compile and use the HostSentry software.
Pristine source
If you don’t use the RPM package to install this program, it will be difficult for you to locate all the
files installed onto the system if you want to update the package in the future. To solve this
problem, it’s a good idea to make a list of files on the system before you install HostSentry, and
then one afterwards, and then compare them using the diff utility to find out what files were
placed where.
•
Simply run the following command before installing the software:
[root@deep root]# find /* > HostSentry1
•
•
And the following one after you install the software:
[root@deep root]# find /* > HostSentry2
Then use the following command to get a list of what changed:
[root@deep root]# diff HostSentry1 HostSentry2 > HostSentry-Installed
With this procedure, if any upgrade appears, all you have to do is to read the generated list of
what files were added or changed by the program and remove them manually from your system
before installing the new software. In our example above, we use the /root directory of the
system to store all the generated file lists.
Compiling - Optimizing & Installing HostSentry
Below are the steps that you must make to configure, compile and optimize the HostSentry
software before installing it on your system. First off, we install the program as user 'root' so as
to avoid any authorization problems.
Step 1
Once you get the program from the main software site you must copy it to the /var/tmp
directory and change to this location before expanding the archive.
•
This can be done with the following commands:
[root@deep /]# cp hostsentry-version.tar.gz /var/tmp/
[root@deep /]# cd /var/tmp/
[root@deep tmp]# tar xzpf hostsentry-version.tar.gz
470](https://image.slidesharecdn.com/securingoptimizinglinuxthehackingsolutionv-131209075405-phpapp02/85/Securing-Optimizing-Linux-the-Hacking-Solution-v-3-0-470-320.jpg)
![HostSentry 2
CHAPTER 0
Step 2
In order to check that the version of HostSentry, which you are going to install, is an original
and unmodified one, use the command described below to check its MD5 hashes checksum.
•
To verify the MD5 checksum of HostSentry, use the following command:
[root@deep tmp]# md5sum hostsentry-0.02.tar.gz
This should yield an output similar to this:
3de0bbb7d456bb53683de56dfdf98362
hostsentry-0.02.tar.gz
Now check that this checksum is exactly the same as the one published on the HostSentry
website at the following URL: http://www.psionic.com/downloads/checksums.md5
Step 3
There are some source files to modify before going into the configuration and compilation of the
program; the changes allow us to configure the program for our PATH environment variable under
Linux. Therefore, move into the newly created HostSentry source directory and perform the
following steps to configure and optimize the software for your system.
•
To move into the newly created HostSentry directory use the following command:
[root@deep tmp]# cd hostsentry-0.02/
Step 4
First, we have to define directories where we want HostSentry to be installed on our system.
Editing the Makefile script file as follows does this:
•
Edit the Makefile file and change all of the targeted lines in the order shown below:
a) vi +7 Makefile and change the line:
INSTALLDIR = /usr/local/abacus/hostsentry
To read:
INSTALLDIR = /etc/hostsentry
LIBDIR= /usr/lib/hostsentry
b) vi +21 Makefile and change the lines:
@echo "Installing HostSentry in: $(INSTALLDIR)"
install -d -g 0 -o root -m 0700 $(INSTALLDIR)
install -d -g 0 -o root -m 0700 $(INSTALLDIR)/modules
install -g 0 -o root -m 0700 host* $(INSTALLDIR)
install -g 0 -o root -m 0700 module* $(INSTALLDIR)/modules
To read:
install
install
install
install
-d
-d
-m
-m
-m 0700 $(INSTALLDIR)
-m 0700 $(LIBDIR)/modules
0400 host* $(LIBDIR)
0400 module* $(LIBDIR)/modules
471](https://image.slidesharecdn.com/securingoptimizinglinuxthehackingsolutionv-131209075405-phpapp02/85/Securing-Optimizing-Linux-the-Hacking-Solution-v-3-0-471-320.jpg)

![HostSentry 2
CHAPTER 0
•
Edit the moduleMultipleLogins.py file (vi +78 moduleMultipleLogins.py)
and change the line:
allowPath = config.parseToken('MODULE_PATH')
To read:
allowPath = '/etc/hostsentry/'
Step 6
Finally, we have to edit the hostsentry.py file and add a new line at the BEGINNING of the file
to set the environment variable of the python binary for the program to find and use it when it
runs.
•
Edit the hostsentry.py file (vi hostsentry.py) and add the line:
#!/usr/bin/env python
Step 7
Now, we must make a list of all files on the system before installing the software, and one
afterwards, then compare them using the diff utility to find out what files are placed where and
finally we install the HostSentry software:
[root@deep
[root@deep
[root@deep
[root@deep
[root@deep
[root@deep
[root@deep
[root@deep
hostsentry-0.02]# cd
root]# find /* > HostSentry1
root]# cd /var/tmp/hostsentry-0.02/
hostsentry-0.02]# make install
hostsentry-0.02]# mkdir -m0700 /var/hostsentry
logsentry]# cd
root]# find /* > HostSentry2
root]# diff HostSentry1 HostSentry2 > HostSentry-Installed
The above commands will configure the software to ensure your system has the necessary
libraries to successfully compile the package, compile all source files into executable binaries,
and then install the binaries and any supporting files into the appropriate locations.
Step 8
Once the configuration, optimization, compilation, and installation of the HostSentry software
have been accomplished, we can free up some disk space by deleting the program tar archive
and the related source directory since they are no longer needed.
•
To delete HostSentry and its related source directory, use the following commands:
[root@deep /]# cd /var/tmp/
[root@deep tmp]# rm -rf hostsentry-version/
[root@deep tmp]# rm -f hostsentry-version.tar.gz
473](https://image.slidesharecdn.com/securingoptimizinglinuxthehackingsolutionv-131209075405-phpapp02/85/Securing-Optimizing-Linux-the-Hacking-Solution-v-3-0-473-320.jpg)
![HostSentry 2
CHAPTER 0
Configuring HostSentry
After HostSentry has been built and installed successfully in your system, your next step is to
configure and customize its configuration files.
/etc/hostsentry/hostsentry.conf: (The HostSentry Configuration File)
/etc/hostentry/hostsentry.ignore: (The HostSentry Ignore File)
/etc/hostentry/hostsentry.action: (The HostSentry Action File)
/etc/hostentry/hostsentry.modules: (The HostSentry Modules File)
/etc/hostentry/moduleForeignDomain.allow
/etc/hostentry/moduleMultipleLogins.allow
/etc/init.d/hostsentry: (The HostSentry Initialization File)
/etc/hostsentry/hostsentry.conf: The HostSentry Config File
The hostsentry.conf file is the main configuration file for HostSentry. It is in this file that
HostSentry gets all of its information about the way it should run on your system.
Step 1
By default, the hostsentry.conf file does not exist after installation and we have to create it.
•
Create the hostsentry.conf file (touch /etc/hostsentry/hostsentry.conf)
and set your needs. Below is what we recommend you have in your file.
IGNORE_FILE = "/etc/hostsentry/hostsentry.ignore"
ACTION_FILE = "/etc/hostsentry/hostsentry.action"
MODULE_FILE = "/etc/hostsentry/hostsentry.modules"
MODULE_PATH = "/usr/lib/hostsentry/modules"
WTMP_FILE = "/var/log/wtmp"
DB_FILE = "/var/hostsentry/hostsentry.db"
DB_TTY_FILE = "/var/hostsentry/hostsentry.tty.db"
WTMP_FORMAT = "384/8:32/44:32/76:256"
Step2
Now, set the permissions of the hostsentry.conf file to be (0600/-rw-------) and owned
by the super-user ‘root’ for security reasons.
•
To change the permissions and ownership of the hostsentry.conf file, use:
[root@deep /]# chmod 600 /etc/hostsentry/hostsentry.conf
[root@deep /]# chown 0.0 /etc/hostsentry/hostsentry.conf
474](https://image.slidesharecdn.com/securingoptimizinglinuxthehackingsolutionv-131209075405-phpapp02/85/Securing-Optimizing-Linux-the-Hacking-Solution-v-3-0-474-320.jpg)
![HostSentry 2
CHAPTER 0
/etc/hostsentry/hostsentry.ignore: The HostSentry Ignore File
The hostsentry.ignore file contains a list of users you want HostSentry to never process
or never take action against with the modules. This is useful for users such as "ftp" who show
up in wtmp but would cause a large number of false alarms because of the anonymous access. It
is important to note that each user must be placed one per line.
Step 1
By default, the hostsentry.ignore file doesn’t exist after installation and we have to create it.
•
Create the hostsentry.ignore file (touch /etc/hostsentry/hostsentry.ignore)
and put in any user account you want to be ignored if it logs in to the system. Below is
what we recommend you put in the file. By default, we have no users defined.
# Place usernames in this file that you want to ignore (ftp, etc.)
Step2
Now, set the permissions of the hostsentry.ignore file to be (0600/-rw-------) and
owned by the super-user ‘root’ for security reasons.
•
To change the permissions and ownership of the hostsentry.ignore file, use:
[root@deep /]# chmod 600 /etc/hostsentry/hostsentry.ignore
[root@deep /]# chown 0.0 /etc/hostsentry/hostsentry.ignore
/etc/hostsentry/hostsentry.action: The HostSentry Action File
The hostsentry.action file is used to define actions we want HostSentry to take on the
specified module. In our example we inform it to logs, blocks the route connection, blocks the TCP
connection and disables the user access. It seems that this feature is not implemented but we
define and configure it for future version.
Step 1
By default, the hostsentry.action file doesn’t exist after installation, so we have to create it
manually.
•
Create the hostsentry.action file (touch /etc/hostsentry/hostsentry.action)
and add in any action you want to be taken. Below is what we recommend you enter.
moduleFirstLogin=log,blockRoute,blockTCP,disable
Step2
Now, set the permissions of the hostsentry.action file to be (0600/-rw-------) and
owned by the super-user ‘root’ for security reasons.
•
To change the permission mode and ownership of the hostsentry.action file, use:
[root@deep /]# chmod 600 /etc/hostsentry/hostsentry.action
[root@deep /]# chown 0.0 /etc/hostsentry/hostsentry.action
475](https://image.slidesharecdn.com/securingoptimizinglinuxthehackingsolutionv-131209075405-phpapp02/85/Securing-Optimizing-Linux-the-Hacking-Solution-v-3-0-475-320.jpg)
![HostSentry 2
CHAPTER 0
/etc/hostsentry/hostsentry.modules: The HostSentry Modules File
The hostsentry.modules file tells HostSentry what modules to execute on login/logout and
in what order. If you don't want a particular module to run for whatever reason (false alarms, not
interested, etc.) then delete it here.
Step 1
By default, the hostsentry.modules file doesn’t exist after installation, so we have to create it.
•
Create hostsentry.modules file (touch /etc/hostsentry/hostsentry.modules)
and add the following module lines to the file. Below is what we recommend.
moduleLoginLogout
moduleFirstLogin
moduleForeignDomain
moduleMultipleLogins
moduleRhostsCheck
moduleHistoryTruncated
moduleOddDirnames
Step2
Now, set the permissions of the hostsentry.modules file to be (0600/-rw-------) and
owned by the super-user ‘root’ for security reasons.
•
To change the permission and ownership of the hostsentry.modules file, use:
[root@deep /]# chmod 600 /etc/hostsentry/hostsentry.modules
[root@deep /]# chown 0.0 /etc/hostsentry/hostsentry.modules
/etc/hostsentry/moduleForeignDomain.allow
The moduleForeignDomain.allow file is used to list all domains from which we don’t want an
alert to be sent to the administrator when they log in to the system. Every domain listed in this file
will be processed as allowed domains. I recommend you only add your localhost to this file.
Step 1
By default, the moduleForeignDomain.allow file doesn’t exist after installation and we have
to create it.
•
Create the moduleForeignDomain.allow file (touch
/etc/hostsentry/moduleForeignDomain.allow) and add the following line.
:0.0
Step2
Now, set the permissions of the moduleForeignDomain.allow file to be (0600/-rw-------)
and owned by the super-user ‘root’ for security reasons.
•
To change the permission mode and ownership of the moduleForeignDomain.allow
file, use the following commands:
[root@deep /]# chmod 600 /etc/hostsentry/moduleForeignDomain.allow
[root@deep /]# chown 0.0 /etc/hostsentry/moduleForeignDomain.allow
476](https://image.slidesharecdn.com/securingoptimizinglinuxthehackingsolutionv-131209075405-phpapp02/85/Securing-Optimizing-Linux-the-Hacking-Solution-v-3-0-476-320.jpg)
![HostSentry 2
CHAPTER 0
/etc/hostsentry/moduleMultipleLogins.allow
The moduleMultipleLogins.allow file is used to list all hosts from which multiple loggings
are allowed. This mean that all hosts listed in this file will be allowed to make multiple connections
from different place without an alert to be send to the administrator. Again, I recommend you to
only add your localhost to this file as we do below.
Step 1
By default, the moduleMultipleLogins.allow file does not exist after installation; therefore
we have to create it.
•
Create the moduleMultipleLogins.allow file (touch
/etc/hostsentry/moduleMultipleLogins.allow) and add the following line.
Below is what we recommend.
# Place hosts in here you want this module to disregard logins from.
localhost
Step2
Now, set the permissions of the moduleMultipleLogins.allow file to be (0600/-rw-------)
and owned by the super-user ‘root’ for security reasons.
•
To change the permission mode and ownership of the moduleMultipleLogins.allow
file, use the following commands:
[root@deep /]# chmod 600 /etc/hostsentry/moduleMultipleLogins.allow
[root@deep /]# chown 0.0 /etc/hostsentry/moduleMultipleLogins.allow
/etc/init.d/hostsentry: The HostSentry Initialization File
The /etc/init.d/hostsentry script file is responsible to automatically starting and stopping
the HostSentry server on your Linux system.
Please note that the following script is suitable for Linux operating systems that use SystemV. If
you Linux system use some other methods like BSD, you’ll have to adjust the script bellow to
make it work for you.
Step 1
Create the hostsentry script file (touch /etc/init.d/hostsentry) and add the following
lines inside it:
#!/bin/bash
#
#
#
#
#
#
#
#
#
#
#
This shell script takes care of starting and stopping HostSentry.
chkconfig: 345 98 85
description: HostSentry is a host based intrusion detection tool that
performs Login Anomaly Detection (LAD). This tool allows
administrators to spot strange login behavior and quickly
respond to compromised accounts and unusual behavior.
processname: hostsentry
config: /etc/hostsentry/hostsentry.conf
pidfile: /var/run/hostsentry.pid
# Source function library.
. /etc/init.d/functions
477](https://image.slidesharecdn.com/securingoptimizinglinuxthehackingsolutionv-131209075405-phpapp02/85/Securing-Optimizing-Linux-the-Hacking-Solution-v-3-0-477-320.jpg)
![HostSentry 2
CHAPTER 0
# Source networking configuration.
. /etc/sysconfig/network
# Check that networking is up.
[ ${NETWORKING} = "no" ] && exit 0
RETVAL=0
prog="HostSentry"
start() {
if [ -f /var/run/hostsentry.pid ] ; then
pid=`cat /var/run/hostsentry.pid`
if [ "$pid" != "" ] ; then
echo $"HostSentry is already running"
exit 0
fi
fi
echo -n $"Starting $prog: "
cd /usr/lib/hostsentry
daemon python hostsentry.py
RETVAL=$?
echo
echo `ps aux | grep "python hostsentry.py" | cut --delimiter=" " -f 7`
>
/var/run/hostsentry.pid
[ $RETVAL -eq 0 ] && touch /var/lock/subsys/hostsentry
return $RETVAL
}
stop() {
echo -n $"Shutting down $prog: "
cd /usr/lib/hostsentry
killproc python hostsentry.py
RETVAL=$?
echo
[ $RETVAL -eq 0 ] && rm -f /var/lock/subsys/hostsentry && rm -f
/var/run
/hostsentry.pid
return $RETVAL
}
restart() {
stop
start
}
condrestart() {
if [ -f /var/lock/subsys/hostsentry ]; then
restart
fi
}
# See how we were called.
case "$1" in
start)
start
;;
stop)
stop
;;
restart)
restart
478](https://image.slidesharecdn.com/securingoptimizinglinuxthehackingsolutionv-131209075405-phpapp02/85/Securing-Optimizing-Linux-the-Hacking-Solution-v-3-0-478-320.jpg)
![HostSentry 2
CHAPTER 0
;;
condrestart)
condrestart
;;
*)
echo $"Usage: $0 {start|stop|restart|condrestart}"
exit 1
;;
esac
Step 2
Once the /etc/init.d/hostsentry script file has been created, it is important to make it
executable, change its default permissions, create the necessary links and start it. Making this file
executable will allow the system to run it, changing its default permission is to allow only the root
user to change this file for security reason, and creation of the symbolic links will let your system
start the program automatically for you at each system boot.
•
To make this script executable and to change its default permissions, use the commands:
[root@deep /]# chmod 700 /etc/init.d/hostsentry
[root@deep /]# chown 0.0 /etc/init.d/hostsentry
•
To create the symbolic rc.d links for HostSentry, use the following commands:
[root@deep /]# chkconfig --add hostsentry
[root@deep /]# chkconfig --level 345 hostsentry on
•
To start HostSentry software manually, use the following command:
[root@deep /]# /etc/init.d/hostsentry start
Starting HostSentry:
[OK]
479](https://image.slidesharecdn.com/securingoptimizinglinuxthehackingsolutionv-131209075405-phpapp02/85/Securing-Optimizing-Linux-the-Hacking-Solution-v-3-0-479-320.jpg)


![PortSentry 2
CHAPTER 1
Pristine source
If you don’t use the RPM package to install this program, it will be difficult for you to locate all the
files installed onto the system if you want to update the package in the future. To solve this
problem, it’s a good idea to make a list of files on the system before you install PortSentry, and
then one afterwards, and then compare them using the diff utility to find out what files were
placed where.
•
Simply run the following command before installing the software:
[root@deep root]# find /* > PortSentry1
•
•
And the following one after you install the software:
[root@deep root]# find /* > PortSentry2
Then use the following command to get a list of what changed:
[root@deep root]# diff PortSentry1 PortSentry2 > PortSentry-Installed
With this procedure, if any upgrade appears, all you have to do is to read the generated list of
what files were added or changed by the program and remove them manually from your system
before installing the new software. In our example above, we use the /root directory of the
system to store all the generated file lists.
Compiling - Optimizing & Installing PortSentry
Below are the steps that you must make to configure, compile and optimize the PortSentry
software before installing it on your system. First off, we install the program as user 'root' so as
to avoid any authorization problems.
Step 1
Once you get the program from the main software site you must copy it to the /var/tmp
directory and change to this location before expanding the archive.
•
This can be done with the following commands:
[root@deep /]# cp portsentry-version.tar.gz /var/tmp/
[root@deep /]# cd /var/tmp/
[root@deep tmp]# tar xzpf portsentry-version.tar.gz
Step 2
In order to check that the version of PortSentry, which you are going to install, is an original
and unmodified one, use the command described below to check its MD5 hashes checksum.
•
To verify the MD5 checksum of PortSentry, use the following command:
[root@deep tmp]# md5sum portsentry-1.1.tar.gz
This should yield an output similar to this:
782839446b7eca554bb1880ef0882670
portsentry-1.1.tar.gz
Now check that this checksum is exactly the same as the one published on the PortSentry
website at the following URL: http://www.psionic.com/downloads/checksums.md5
484](https://image.slidesharecdn.com/securingoptimizinglinuxthehackingsolutionv-131209075405-phpapp02/85/Securing-Optimizing-Linux-the-Hacking-Solution-v-3-0-484-320.jpg)
![PortSentry 2
CHAPTER 1
Step 3
There are some source files to modify before going into the configuration and compilation of the
program; the changes allow us to configure the program for our PATH environment variable under
Linux. Therefore, move into the newly created PortSentry source directory and perform the
following steps to configure and optimize the software for your system.
•
To move into the newly created PortSentry directory use the following command:
[root@deep tmp]# cd portsentry-1.1/
Step 4
Here, we have to change default locations of different PortSentry configuration files on the
system and add the required optimization FLAGS for our CPU architecture. To make these
modifications, we must edit the Makefile script file as follows.
•
Edit the Makefile file and change all of the targeted lines in the order shown below:
a) vi +29 Makefile and change the line:
CFLAGS = -O -Wall
To read:
CFLAGS = -O2 -march=i686 -funroll-loops -Wall
b) vi +40 Makefile and change the lines:
INSTALLDIR = /usr/local/psionic
CHILDDIR=/portsentry
To read:
INSTALLDIR = /usr/sbin
CONFIGDIR = /etc/portsentry
c) vi +71 Makefile and change the line:
@if [ ! -d $(INSTALLDIR) ]; then /bin/mkdir $(INSTALLDIR); fi
To read:
@if [ ! -d $(INSTALLDIR) ]; then /bin/mkdir -p $(INSTALLDIR); fi
d) vi +73 Makefile and change the lines:
@if [ "$(INSTALLDIR)" = "/usr/local/psionic" ]; then /bin/chmod 700 $(INSTALLDIR) ; fi
@echo "Creating portsentry directory $(INSTALLDIR)$(CHILDDIR)"
@if [ ! -d $(INSTALLDIR)$(CHILDDIR) ]; then /bin/mkdir $(INSTALLDIR)$(CHILDDIR); fi
To read:
@if [ "$(INSTALLDIR)" = "/usr/sbin" ]; then /bin/chmod 700 $(INSTALLDIR) ; fi
@echo "Creating portsentry directory $(CONFIGDIR)"
@if [ ! -d $(CONFIGDIR) ]; then /bin/mkdir -p $(CONFIGDIR); fi
485](https://image.slidesharecdn.com/securingoptimizinglinuxthehackingsolutionv-131209075405-phpapp02/85/Securing-Optimizing-Linux-the-Hacking-Solution-v-3-0-485-320.jpg)

![PortSentry 2
CHAPTER 1
Step 5
The second file that we will modify is the portsentry_config.h header file. In this file, we will
change the default install location of the configuration file for PortSentry.
•
Edit the portsentry_config.h file (vi +32 portsentry_config.h) and change
the following line:
#define CONFIG_FILE "/usr/local/psionic/portsentry/portsentry.conf"
To read:
#define CONFIG_FILE "/etc/portsentry/portsentry.conf"
Step 6
Now, we must make a list of all files on the system before installing the software, and one
afterwards, then compare them using the diff utility to find out what files are placed where and
finally we install the PortSentry software:
[root@deep
[root@deep
[root@deep
[root@deep
[root@deep
[root@deep
[root@deep
[root@deep
[root@deep
[root@deep
portsentry-1.1]# cd
root]# find /* > PortSentry1
root]# cd /var/tmp/portsentry-1.1/
portsentry-1.1]# make linux
portsentry-1.1]# make install
portsentry-1.1]# strip /usr/sbin/portsentry
portsentry-1.1]# mkdir -m0700 /var/portsentry
portsentry-1.1]# cd
root]# find /* > PortSentry2
root]# diff PortSentry1 PortSentry2 > PortSentry-Installed
The above commands will configure the software to ensure your system has the necessary
libraries to successfully compile the package, compile all source files into executable binaries,
and then install the binaries and any supporting files into the appropriate locations.
Step 7
Once the configuration, optimization, compilation, and installation of the PortSentry software
have been accomplished, we can free up some disk space by deleting the program tar archive
and the related source directory since they are no longer needed.
•
To delete PortSentry and its related source directory, use the following commands:
[root@deep /]# cd /var/tmp/
[root@deep tmp]# rm -rf portsentry-version/
[root@deep tmp]# rm -f portsentry-version.tar.gz
Configuring PortSentry
After PortSentry has been built and installed successfully on your system, your next step is to
configure and customize its configuration files to fit your needs.
/etc/portsentry/portsentry.conf: (The PortSentry Configuration File)
/etc/portsentry/portsentry.ignore: (The PortSentry Ignore File)
/etc/portsentry/portsentry.modes: (The PortSentry Modes File)
/etc/init.d/portsentry: (The PortSentry Initialization File)
487](https://image.slidesharecdn.com/securingoptimizinglinuxthehackingsolutionv-131209075405-phpapp02/85/Securing-Optimizing-Linux-the-Hacking-Solution-v-3-0-487-320.jpg)

![PortSentry 2
CHAPTER 1
Step2
Now, set the permissions of the portsentry.modes file to be (0600/-rw-------) and owned
by the super-user ‘root’ for security reasons.
•
To change the permission mode and ownership of the portsentry.modes file, use:
[root@deep /]# chmod 600 /etc/portsentry/portsentry.modes
[root@deep /]# chown 0.0 /etc/portsentry/portsentry.modes
/etc/init.d/portsentry: The PortSentry Initialization File
The /etc/init.d/portsentry script file is responsible to automatically starting and stopping
the PortSentry server on your Linux system.
Please note that the following script is suitable for Linux operating systems that use SystemV. If
you Linux system use some other methods like BSD, you’ll have to adjust the script bellow to
make it work for you.
Step 1
Create the portsentry script file (touch /etc/init.d/portsentry) and add the following
lines inside it:
#!/bin/bash
#
#
#
#
#
#
#
#
#
#
#
This shell script takes care of starting and stopping the Port Scan Detector.
chkconfig: 345 98 05
description: PortSentry Port Scan Detector is part of the Abacus Project
suite of tools. The Abacus Project is an initiative to release
low-maintenance, generic, and reliable host based intrusion
detection software to the Internet community.
processname: portsentry
config: /etc/portsentry/portsentry.conf
pidfile: /var/run/portsentry.pid
# Source function library.
. /etc/rc.d/init.d/functions
# Source networking configuration.
. /etc/sysconfig/network
# Check that networking is up.
[ ${NETWORKING} = "no" ] && exit 0
RETVAL=0
prog="PortSentry"
start() {
SENTRYDIR=/etc/portsentry
if [ -s $SENTRYDIR/portsentry.modes ] ; then
modes=`cut -d "#" -f 1 $SENTRYDIR/portsentry.modes`
else
modes="tcp udp"
fi
for i in $modes ; do
action "Starting $prog -$i: " /usr/sbin/portsentry -$i
RETVAL=$?
492](https://image.slidesharecdn.com/securingoptimizinglinuxthehackingsolutionv-131209075405-phpapp02/85/Securing-Optimizing-Linux-the-Hacking-Solution-v-3-0-492-320.jpg)
![PortSentry 2
CHAPTER 1
done
echo
[ $RETVAL = 0 ] && touch /var/lock/subsys/portsentry
return $RETVAL
}
stop() {
echo -n "Shutting down $prog: "
killproc portsentry
RETVAL=$?
echo
[ $RETVAL = 0 ] && rm -f /var/lock/subsys/portsentry
return $RETVAL
}
# See how we were called.
case "$1" in
start)
start
;;
stop)
stop
;;
restart|reload)
stop
start
RETVAL=$?
;;
condrestart)
[ -f /var/lock/subsys/portsentry ] && restart || :
;;
status)
status portsentry
;;
*)
echo "Usage: portsentry {start|stop|restart|reload|condrestart|status}"
exit 1
esac
Step 2
Once the /etc/init.d/portsentry script file has been created, it is important to make it
executable, change its default permissions, create the necessary links and start it. Making this file
executable will allow the system to run it, changing its default permission is to allow only the root
user to change this file for security reasons, and creation of the symbolic links to start the
program automatically for you at each system boot.
•
•
To make this script executable and to change its default permissions, use the command:
[root@deep /]# chmod 700 /etc/init.d/portsentry
[root@deep /]# chown 0.0 /etc/init.d/portsentry
To create the symbolic rc.d links for PortSentry, use the following command:
[root@deep /]# chkconfig --add portsentry
[root@deep /]# chkconfig --level 345 portsentry on
•
To start PortSentry software manually, use the following command:
[root@deep /]# /etc/init.d/portsentry start
Starting PortSentry:
[OK]
493](https://image.slidesharecdn.com/securingoptimizinglinuxthehackingsolutionv-131209075405-phpapp02/85/Securing-Optimizing-Linux-the-Hacking-Solution-v-3-0-493-320.jpg)
![PortSentry 2
CHAPTER 1
Removing hosts that have been blocked by PortSentry
When PortSentry want to blocks attackers it uses the “route” command of Linux to do it.
Every host that has been blocked by PortSentry will appear under the ‘route” command.
Below, I show you how to remove hosts that have been blocked by PortSentry from your
system.
Step 1
We have to use the “route” command to list which hosts are presently blocked by the program.
The “route” command also lists other important information about your network routing but we
use it in this example to get the list of blocked hosts and to unlock them from the system.
•
To list which hosts are presently blocked by PortSentry, use the command:
[root@deep /]# route
Kernel IP routing table
Destination Gateway
www.hack.com –
207.35.78.0 *
127.0.0.0
*
default
rt.openna.c
Genmask
255.255.255.255
255.255.255.224
255.0.0.0
0.0.0.0
Flags
!H
U
U
UG
Metric
0
0
0
0
Ref
–
0
0
0
Use
0
0
0
0
Iface
eth0
lo
eth0
In the above example, we can see that “www.hack.com” is listed into our routing table as a
domain that has been blocked by PortSentry because it tried to scan our system. The “-”
string inform us about the fact that this host is locked. Every host in the routing table with this
string “-” is marked as blocked by the system.
Step2
Now that we know about the host that has been blocked by PortSentry, we can decide to
remove it from the list of blocked hosts on our system.
•
To remove the blocked host in question, use the following command:
[root@deep /]# route del –host www.hack.com reject
The above command will remove www.hack.com from the list of blocked hosts in the routing table
of our system. The option “del” in the “route” command is what makes it possible to remove the
host from the list. Your have to use the above command for any additional hosts that you want to
remove from the routing table.
Step 3
Finally, we have to edit the portsentry.history file and remove the line corresponding to
www.hack.com from the file. This is important for PortSentry to be able to add the site into the
list of blocked host in the event that the corresponding host tries to scan your system again.
•
Edit the portsentry.history file and remove the line corresponding to the host:
[root@deep /]# vi /var/portsentry/portsentry.history
1020371099 - 05/02/2002 16:24:59 Host: 1.2.3.4/1.2.3.4 Port: 80 TCP Blocked
494](https://image.slidesharecdn.com/securingoptimizinglinuxthehackingsolutionv-131209075405-phpapp02/85/Securing-Optimizing-Linux-the-Hacking-Solution-v-3-0-494-320.jpg)


![Snort 2
CHAPTER 2
Packages
The following is based on information listed by Snort as of 2002/07/08. Please check
http://www.snort.org/ regularly for the latest status. We chose to install from source because it
provides the facility to fine tune the installation.
Source code is available from:
Snort Homepage: http://www.snort.org/
You must be sure to download: snort-1.8.7.tar.gz
Prerequisites
Snort requires that the listed software below be already installed on your system to be able to
compile successfully. If this is not the case, you must install it from your Linux CD-ROM or source
archive files. Please make sure you have this program installed on your machine before you
proceed with this chapter.
Libpcap, which is used extensively by Snort, must already be installed on your system.
Tcpdump, which allows some additional features with Snort.
Pristine source
If you don’t use the RPM package to install this program, it will be difficult for you to locate all the
files installed onto the system if you want to update the package in the future. To solve this
problem, it’s a good idea to make a list of files on the system before you install Snort, and then
one afterwards, and then compare them using the diff utility to find out what files were placed
where.
•
Simply run the following command before installing the software:
[root@deep root]# find /* > Snort1
•
And the following one after you install the software:
[root@deep root]# find /* > Snort2
•
Then use the following command to get a list of what changed:
[root@deep root]# diff Snort1 Snort2 > Snort-Installed
With this procedure, if any upgrade appears, all you have to do is to read the generated list of
what files were added or changed by the program and remove them manually from your system
before installing the new software. In our example above, we use the /root directory of the
system to store all the generated file lists.
498](https://image.slidesharecdn.com/securingoptimizinglinuxthehackingsolutionv-131209075405-phpapp02/85/Securing-Optimizing-Linux-the-Hacking-Solution-v-3-0-498-320.jpg)
![Snort 2
CHAPTER 2
Compiling - Optimizing & Installing Snort
Below are the steps that you must make to configure, compile and optimize the Snort software
before installing it on your system. First off, we install the program as user 'root' so as to avoid
any authorization problems.
Step 1
Once you get the program from the main software site you must copy it to the /var/tmp
directory and change to this location before expanding the archive.
•
This can be done with the following commands:
[root@deep /]# cp snort-version.tar.gz /var/tmp/
[root@deep /]# cd /var/tmp/
[root@deep tmp]# tar xzpf snort-version.tar.gz
Step 2
In order to check that the version of Snort, which you are going to install, is an original and
unmodified one, use the command described below to check its MD5 hashes checksum.
•
To verify the MD5 checksum of Snort, use the following command:
[root@deep tmp]# md5sum snort-1.8.7.tar.gz
This should yield an output similar to this:
29c81d0bc243edb21ba4ab33ee80457e
snort-1.8.7.tar.gz
Now check that this checksum is exactly the same as the one published on the Snort website at
the following URL: http://www.snort.org/dl/snort-1.8.7.tar.gz.md5
Step 3
Snort needs a UID and GID to properly run on the system but this UID/GID cannot run as
super-user root; therefore we must create a special user with no shell privileges on the system for
running Snort daemon.
•
To create this special Snort user on OpenNA Linux, use the following command:
[root@deep tmp]# groupadd -g 69 snort > /dev/null 2>&1 || :
[root@deep tmp]# useradd -c "Snort NIDS" -d /var/log/snort -g 69 -s
/bin/false -u 69 snort > /dev/null 2>&1 || :
•
To create this special Snort user on Red Hat Linux, use the following command:
[root@deep tmp]# groupadd -g 69 snort > /dev/null 2>&1 || :
[root@deep tmp]# useradd -u 69 -g 69 -s /bin/false -M -r -d
/var/log/snort snort > /dev/null 2>&1 || :
The above command will create a null account, with no password, no valid shell, no files ownednothing but a UID and a GID for the program. Remember that Snort daemon does not need to
have a shell account on the server.
499](https://image.slidesharecdn.com/securingoptimizinglinuxthehackingsolutionv-131209075405-phpapp02/85/Securing-Optimizing-Linux-the-Hacking-Solution-v-3-0-499-320.jpg)
![Snort 2
CHAPTER 2
Step 4
Now, edit the shells file (vi /etc/shells) and add a non-existent shell name
“/bin/false”, which is the one we used in the passwd command above.
[root@deep tmp]# vi /etc/shells
/bin/bash2
/bin/bash
/bin/sh
/bin/false This is our added no-existent shell
Step 5
Next, move into the newly created Snort source directory and perform the following steps to
configure and optimize the software for your system.
•
To move into the newly created Snort directory use the following command:
[root@deep tmp]# cd snort-1.8.7/
•
To configure and optimize Snort use the following compilation lines:
CFLAGS="-O2 -march=i686 -funroll-loops"; export CFLAGS
./configure
--prefix=/usr
--sysconfdir=/etc
--localstatedir=/var
--mandir=/usr/share/man
--with-openssl
Step 6
Now, we must make a list of all files on the system before installing the software, and one
afterwards, then compare them using the diff utility to find out what files are placed where and
finally we install the Snort software:
[root@deep
[root@deep
[root@deep
[root@deep
[root@deep
[root@deep
[root@deep
[root@deep
[root@deep
[root@deep
[root@deep
[root@deep
[root@deep
[root@deep
[root@deep
snort-1.8.7]# make
snort-1.8.7]# cd
root]# find /* > Snort1
root]# cd /var/tmp/snort-1.8.7/
snort-1.8.7]# make install
snort-1.8.7]# mkdir -p /var/log/snort
snort-1.8.7]# mkdir -p /etc/snort
snort-1.8.7]# chown -R snort.snort /var/log/snort/
snort-1.8.7]# install classification.config /etc/snort/
snort-1.8.7]# install snort.conf *.rules /etc/snort/
snort-1.8.7]# chmod 0644 /etc/snort/*
snort-1.8.7]# strip /usr/bin/snort
snort-1.8.7]# cd
root]# find /* > Snort2
root]# diff Snort1 Snort2 > Snort-Installed
The above commands will configure the software to ensure your system has the necessary
libraries to successfully compile the package, compile all source files into executable binaries,
and then install the binaries and any supporting files into the appropriate locations.
500](https://image.slidesharecdn.com/securingoptimizinglinuxthehackingsolutionv-131209075405-phpapp02/85/Securing-Optimizing-Linux-the-Hacking-Solution-v-3-0-500-320.jpg)
![Snort 2
CHAPTER 2
Step 7
Once the configuration, optimization, compilation, and installation of the Snort software have
been accomplished, we can free up some disk space by deleting the program tar archive and the
related source directory since they are no longer needed.
•
To delete Snort and its related source directory, use the following commands:
[root@deep /]# cd /var/tmp/
[root@deep tmp]# rm -rf snort-version/
[root@deep tmp]# rm -f snort-version.tar.gz
Configuring Snort
After Snort has been built and installed successfully in your system, your next step is to
configure and customize its configuration files to fit your needs.
/etc/snort/snort.conf: (The Snort Configuration File)
/etc/init.d/snort: (The Snort Initialization File)
/etc/snort/snort.conf: The Snort Config File
The snort.conf file is the main configuration file for Snort. It is in this file that Snort gets all
of its startup information and the way it should run on your system. You can edit it to specify your
network variables, preprocessors parameters, output plugging to use and Snort rules files.
The Snort configuration file is divided into four different sections. The first section is used to
define network variables, the second section is used to configure the preprocessor parameters
that Snort should use, the third section is used to configure output plugging to activate, and the
last section is used to enable specific Snort rule set. Below, we will explain each section and
how you should use them to configure Snort for your server.
•
Edit the snort.conf file (vi /etc/snort/snort.conf) and set your needs. Below
is what we recommend you.
var HOME_NET $eth0_ADDRESS
var EXTERNAL_NET any
var SMTP $HOME_NET
var HTTP_SERVERS $HOME_NET
var SQL_SERVERS $HOME_NET
var DNS_SERVERS $HOME_NET
var RULE_PATH ./
preprocessor frag2
preprocessor stream4: detect_scans,detect_state_problems
preprocessor stream4_reassemble: both,ports all
preprocessor http_decode: 80
preprocessor rpc_decode: 111 32771
preprocessor bo
preprocessor telnet_decode
preprocessor portscan: $HOME_NET 4 3 portscan.log
preprocessor portscan-ignorehosts: 207.35.78.40 207.35.78.41
output alert_syslog: LOG_AUTH LOG_ALERT
include classification.config
This tells the snort.conf file to set itself up for this particular configuration with:
501](https://image.slidesharecdn.com/securingoptimizinglinuxthehackingsolutionv-131209075405-phpapp02/85/Securing-Optimizing-Linux-the-Hacking-Solution-v-3-0-501-320.jpg)


![Snort 2
CHAPTER 2
/etc/init.d/snort: The Snort Initialization File
The /etc/init.d/snort script file is responsible to automatically starting and stopping the
Snort server on your Linux system. Please note that the following script is suitable for Linux
operating systems that use SystemV. If you Linux system use some other methods like BSD,
you’ll have to adjust the script bellow to make it work for you.
Step 1
Create the snort script file (touch /etc/init.d/snort) and add the following lines inside it:
#!/bin/bash
# This shell script takes care of starting and stopping the snort IDS daemon.
#
# chkconfig: 2345 40 60
# description: Snort is a lightweight network intrusion detection tool that
#
currently detects more than 1100 host and network
#
vulnerabilities, portscans, backdoors, and more.
# Source function library.
. /etc/init.d/functions
# Source networking configuration.
. /etc/sysconfig/network
# Check that networking is up.
[ ${NETWORKING} = "no" ] && exit 0
# Specify your network interface here
INTERFACE=eth0
RETVAL=0
prog="Snort"
start() {
echo -n $"Starting $prog: "
daemon /usr/bin/snort -A fast -u snort -g snort -b -s -z -d -D
-i $INTERFACE -c /etc/snort/snort.conf
RETVAL=$?
echo
[ $RETVAL = 0 ] && touch /var/lock/subsys/snort
return $RETVAL
}
stop() {
echo -n $"Shutting down $prog: "
killproc snort
RETVAL=$?
echo
[ $RETVAL = 0 ] && rm -f /var/lock/subsys/snort
return $RETVAL
}
# See how we were called.
case "$1" in
start)
start
;;
stop)
stop
;;
506](https://image.slidesharecdn.com/securingoptimizinglinuxthehackingsolutionv-131209075405-phpapp02/85/Securing-Optimizing-Linux-the-Hacking-Solution-v-3-0-506-320.jpg)
![Snort 2
CHAPTER 2
status)
status snort
;;
restart)
stop
start
;;
condrestart)
[ -f /var/lock/subsys/snort ] && restart
;;
*)
echo $"Usage: $prog {start|stop|status|restart|condrestart}"
exit 1
esac
exit $RETVAL
Step 2
Once the /etc/init.d/snort script file has been created, it is important to make it
executable, change its default permissions, create the necessary links and start it. Making this file
executable will allow the system to run it, changing its default permission to allow only the root
user to change this file for security reasons, and creation of the symbolic links will let the process
control initialization of Linux start the program automatically for you at each system boot.
•
To make this script executable and to change its default permissions, use the command:
[root@deep /]# chmod 700 /etc/init.d/snort
[root@deep /]# chown 0.0 /etc/init.d/snort
•
To create the symbolic rc.d links for Snort, use the following command:
[root@deep /]# chkconfig --add snort
[root@deep /]# chkconfig --level 2345 snort on
•
To start Snort software manually, use the following command:
[root@deep /]# /etc/init.d/snort start
Starting Snort:
[OK]
Running Snort in a chroot jail
This section applies only if you want to run Snort in chroot jail environment. To do it, we need to
create the required skeleton environment and copy necessary files into this chroot jail. Below are
the steps to follow if you want to run Snort with chroot jail support.
The main benefit of a chroot jail is that the jail will limit the portion of the file system the daemon
can see to the root directory of the jail. Additionally, since the jail only needs to support Snort,
the programs available in the jail can be extremely limited. Most importantly, there is no need for
setuid-root programs, which can be used to gain root access and break out of the jail.
507](https://image.slidesharecdn.com/securingoptimizinglinuxthehackingsolutionv-131209075405-phpapp02/85/Securing-Optimizing-Linux-the-Hacking-Solution-v-3-0-507-320.jpg)
![Snort 2
CHAPTER 2
Necessary steps to run Snort in a chroot jail:
What you're essentially doing is creating a skeleton root file system with just enough components
necessary (files, directories) to allow UNIX to do a chroot when Snort starts. The procedures to
run Snort in chroot jail are really easy to accomplish as follows.
Step 1
First, we have to create all the necessary chrooted environment subdirectories where we will
move Snort files and directories.
•
Use the following command to create all the necessary chroot subdirectories.
[root@deep /]# mkdir -p /chroot/snort/etc/snort
[root@deep /]# mkdir -p /chroot/snort/var/log/snort
[root@deep /]# chown -R snort.snort /chroot/snort/var/log/snort
Step 2
Now, it is time to move the required Snort files to the related subdirectories in the chroot area for
Snort to work. We can copy these files to the chroot jail but it’s better to move them to avoid
unnecessary duplication of Snort files on the server.
•
Use the following commands to move the require files into the chroot area.
[root@deep /]# mv /etc/snort/* /chroot/snort/etc/snort/
[root@deep /]# chmod 0644 /chroot/snort/etc/snort/*
Step 3
Once the Snort files have been moved to the chroot location, we can remove the old Snort
directories from the system since they are no longer required.
•
This can be done with the following commands.
[root@deep /]# rm -rf /etc/snort/
[root@deep /]# rm -rf /var/log/snort/
Step 4
Next, we have to recreate a new snort initialization script file which starts Snort in the chroot
environment. Please note that the following script is suitable for Linux operating systems that use
SystemV. If you Linux system use some other method like BSD, you’ll have to adjust the script
below to make it work for you. The only difference with the previous Snort initialization script file
is that we use the “-t” option of Snort to specify the chroot location.
Edit the snort script file (vi /etc/init.d/snort) and add the following lines inside it:
#!/bin/bash
# This shell script takes care of starting and stopping the snort IDS daemon.
#
# chkconfig: 2345 40 60
# description: Snort is a lightweight network intrusion detection tool that
#
currently detects more than 1100 host and network
#
vulnerabilities, portscans, backdoors, and more.
# Source function library.
. /etc/init.d/functions
# Source networking configuration.
508](https://image.slidesharecdn.com/securingoptimizinglinuxthehackingsolutionv-131209075405-phpapp02/85/Securing-Optimizing-Linux-the-Hacking-Solution-v-3-0-508-320.jpg)
![Snort 2
CHAPTER 2
. /etc/sysconfig/network
# Check that networking is up.
[ ${NETWORKING} = "no" ] && exit 0
# Specify your network interface here
INTERFACE=eth0
RETVAL=0
prog="Snort"
start() {
echo -n $"Starting $prog: "
daemon /usr/bin/snort -A fast -u snort -g snort -b -s -z -d -D
-i $INTERFACE -c /etc/snort/snort.conf -t /chroot/snort/
RETVAL=$?
echo
[ $RETVAL = 0 ] && touch /var/lock/subsys/snort
return $RETVAL
}
stop() {
echo -n $"Shutting down $prog: "
killproc snort
RETVAL=$?
echo
[ $RETVAL = 0 ] && rm -f /var/lock/subsys/snort
return $RETVAL
}
# See how we were called.
case "$1" in
start)
start
;;
stop)
stop
;;
status)
status snort
;;
restart)
stop
start
;;
condrestart)
[ -f /var/lock/subsys/snort ] && restart
;;
*)
echo $"Usage: $prog {start|stop|status|restart|condrestart}"
exit 1
esac
exit $RETVAL
509](https://image.slidesharecdn.com/securingoptimizinglinuxthehackingsolutionv-131209075405-phpapp02/85/Securing-Optimizing-Linux-the-Hacking-Solution-v-3-0-509-320.jpg)
![Snort 2
CHAPTER 2
Step 5
Finally, we must test the new chrooted jail configuration of our Snort program.
•
Start the new chrooted jail Snort with the following command:
[root@deep /]# /etc/init.d/snort start
Starting Snort:
•
[OK]
If you don't get any errors, do a ps ax | grep snort and see if we're running:
[root@deep /]# ps ax | grep snort
16295 ? R
0:38 /usr/bin/snort -A fast -u snort -g snort -b -s -z -d
If so, lets check to make sure it's chrooted by picking its process number and doing ls -la
/proc/that_process_number/root/.
[root@deep /]# ls -la /proc/16295/root/
If you see something like:
total 4
drwxr-xr-x
drwxr-xr-x
drwxr-xr-x
drwxr-xr-x
4
5
3
3
root
root
root
root
root
root
root
root
4096
4096
4096
4096
May
May
May
May
7
7
7
7
19:10
19:12
19:12
19:12
./
../
etc/
var/
Congratulations! Your Snort in a chroot jail is working.
Further documentation
For more details, there is one manual page about Snort that you should read:
$ man snort (8)
510
- Open source network intrusion detection system.](https://image.slidesharecdn.com/securingoptimizinglinuxthehackingsolutionv-131209075405-phpapp02/85/Securing-Optimizing-Linux-the-Hacking-Solution-v-3-0-510-320.jpg)


![Tripwire 2
CHAPTER 3
Pristine source
If you don’t use the RPM package to install this program, it will be difficult for you to locate all the
files installed onto the system if you want to update the package in the future. To solve this
problem, it’s a good idea to make a list of files on the system before you install Tripwire, and
then one afterwards, and then compare them using the diff utility to find out what files were
placed where.
•
Simply run the following command before installing the software:
[root@deep root]# find /* > Tripwire1
•
•
And the following one after you install the software:
[root@deep root]# find /* > Tripwire2
Then use the following command to get a list of what changed:
[root@deep root]# diff Tripwire1 Tripwire2 > Tripwire-Installed
With this procedure, if any upgrade appears, all you have to do is to read the generated list of
what files were added or changed by the program and remove them manually from your system
before installing the new software. In our example above, we use the /root directory of the
system to store all the generated file lists.
Compiling - Optimizing & Installing Tripwire
Below are the steps that you must make to configure, compile and optimize the Tripwire
software before installing it on your system. First off, we install the program as user 'root' so as
to avoid any authorization problems.
Step 1
Once you get the program from the main software site you must copy it to the /var/tmp
directory and change to this location before expanding the archive.
•
This can be done with the following commands:
[root@deep /]# cp tripwire-version.tar.gz /var/tmp/
[root@deep /]# cd /var/tmp/
[root@deep tmp]# tar xzpf tripwire-version.tar.gz
Step 2
There are some source files to modify before going into the configuration and compilation of the
program; the changes allow us to fix many bugs with Tripwire. Therefore, move into the newly
created Tripwire source directory and perform the following steps to configure and optimize the
software for your system.
•
To move into the newly created Tripwire directory use the following command:
[root@deep tmp]# cd tripwire-2.3.1-2/
514](https://image.slidesharecdn.com/securingoptimizinglinuxthehackingsolutionv-131209075405-phpapp02/85/Securing-Optimizing-Linux-the-Hacking-Solution-v-3-0-514-320.jpg)
![Tripwire 2
CHAPTER 3
Step 3
The first source file to modify is called “mailmessage.cpp”.
•
Edit the mailmessage.cpp file (vi +244 src/tripwire/mailmessage.cpp) and
change:
const TCHAR* szFormat = _T("%a %d %b %Y %H:%M:%S %z");
To read:
const TCHAR* szFormat = _T("%a, %d %b %Y %H:%M:%S %z");
Step 4
The second file is called “platform.h” and we have to edit it and add a new line as follows.
•
Edit the platform.h file (vi +294 src/core/platform.h) and change the line:
#define USES_FHS
IS_LINUX
To read:
#define USE_FHS
IS_LINUX
Step 5
The last file to modify is very important for Linux systems with GCC version 3; which should be the
default compiler for most Linux system now. The modifications are important to allow Tripwire
to compile with GCC v3. There is one problem, the modifications are too big to be listed in a book
and we have to retrieve it from the Internet as a patch file and patch our sources code.
The patch is available from the OpenNA website at the following URL:
http://www.openna.com/products/books/securing-optimizing-linux/3rdedition/index.htm
Please, download the patch and patch your Tripwire source codes as follow:
•
To patch your Tripwire source codes, use the command:
[root@deep /]# cp tripwire-gcc3.patch /var/tmp/
[root@deep /]# cd /var/tmp/tripwire-2.3.1-2/
[root@deep tripwire-2.3.1-2]# patch -p1 < ../tripwire-gcc3.patch
515](https://image.slidesharecdn.com/securingoptimizinglinuxthehackingsolutionv-131209075405-phpapp02/85/Securing-Optimizing-Linux-the-Hacking-Solution-v-3-0-515-320.jpg)
![Tripwire 2
CHAPTER 3
Step 6
Now, we must make a list of all files on the system before installing the software, and one
afterwards, then compare them using the diff utility to find out what files are placed where and
finally we install the Tripwire software:
[root@deep
[root@deep
[root@deep
[root@deep
[root@deep
[root@deep
[root@deep
[root@deep
[root@deep
[root@deep
[root@deep
[root@deep
[root@deep
[root@deep
[root@deep
[root@deep
[root@deep
[root@deep
[root@deep
[root@deep
[root@deep
[root@deep
tripwire-2.3.1-2]# cd src/
src]# rm -rf STLport*
src]# touch STLport_r STLport_d
src]# export CXXFLAGS="-O2 -march=i686 -funroll-loops"
src]# make release
src]# cd
root]# find /* > Tripwire1
root]# cd /var/tmp/tripwire-2.3.1-2/bin/i686-pc-linux_r/
i686-pc-linux_r]# install -m0500 siggen /usr/sbin/
i686-pc-linux_r]# install -m0500 tripwire /usr/sbin/
i686-pc-linux_r]# install -m0500 twadmin /usr/sbin/
i686-pc-linux_r]# install -m0500 twprint /usr/sbin/
i686-pc-linux_r]# cd ../../man/
man]# install -m0440 man4/*.4 /usr/share/man/man4/
man]# install -m0440 man5/*.5 /usr/share/man/man5/
man]# install -m0440 man8/*.8 /usr/share/man/man8/
man]# mkdir -m0700 /etc/tripwire
man]# mkdir -p /var/lib/tripwire/report
man]# chmod -R 0700 /var/lib/tripwire/
man]# cd
root]# find /* > Tripwire2
root]# diff Tripwire1 Tripwire2 > Tripwire-Installed
The above commands will configure the software to ensure your system has the necessary
libraries to successfully compile the package, compile all source files into executable binaries,
and then install the binaries and any supporting files into the appropriate locations.
Step 7
Once the configuration, optimization, compilation, and installation of the Tripwire software have
been accomplished, we can free up some disk space by deleting the program tar archive and the
related source directory since they are no longer needed.
•
To delete Tripwire and its related source directory, use the following commands:
[root@deep /]# cd /var/tmp/
[root@deep tmp]# rm -rf tripwire-version/
[root@deep tmp]# rm -f tripwire-version.tar.gz
The rm command as used above will remove all the source files we have used to compile and
install Tripwire. It will also remove the Tripwire compressed archive from the /var/tmp
directory.
516](https://image.slidesharecdn.com/securingoptimizinglinuxthehackingsolutionv-131209075405-phpapp02/85/Securing-Optimizing-Linux-the-Hacking-Solution-v-3-0-516-320.jpg)
![Tripwire 2
CHAPTER 3
Configuring Tripwire
After Tripwire has been built and installed successfully in your system, your next step is to
configure and customize its configuration files and policy file to fit your needs.
/etc/tripwire/twcfg.txt: (The Tripwire Configuration File)
/etc/tripwire/twpol.txt: (The Tripwire Policy File)
/etc/tripwire/twinstall.sh: (The Tripwire Cryptographic File)
/etc/cron.weekly/tripwire.cron: (The Tripwire Cron File)
/etc/tripwire/twcfg.txt: The Tripwire Configuration File
The twcfg.txt file is a small Tripwire configuration file used by the program the first time you
run it to get information about locations of different files and the way Tripwire runs and reports
on the integrity of the system. It stores system-specific information, such as the location of
Tripwire data files. In general, we use this file ONE time and REMOVE it from the server once
Tripwire is configured.
Step 1
By default, the twcfg.txt file do not exist after installation, we have to create it as follow.
•
Create the twcfg.txt file (touch /etc/tripwire/twcfg.txt) and add the
following lines inside the file. Below is what we recommend you.
ROOT
POLFILE
DBFILE
REPORTFILE
SITEKEYFILE
LOCALKEYFILE
EDITOR
LATEPROMPTING
LOOSEDIRECTORYCHECKING
MAILNOVIOLATIONS
EMAILREPORTLEVEL
REPORTLEVEL
MAILMETHOD
SYSLOGREPORTING
MAILPROGRAM
=/usr/sbin
=/etc/tripwire/tw.pol
=/var/lib/tripwire/$(HOSTNAME).twd
=/var/lib/tripwire/report/$(HOSTNAME)-$(DATE).twr
=/etc/tripwire/site.key
=/etc/tripwire/$(HOSTNAME)-local.key
=/bin/vi
=true
=true
=false
=3
=3
=SENDMAIL
=true
=/usr/sbin/sendmail -oi -t
Step2
Now, set the permissions of the twcfg.txt file to be (0640/-rw-r-----) and owned by the
super-user ‘root’ for security reasons.
•
To change the permission mode and ownership of the twcfg.txt file, use:
[root@deep /]# chmod 640 /etc/tripwire/twcfg.txt
[root@deep /]# chown 0.0 /etc/tripwire/twcfg.txt
517](https://image.slidesharecdn.com/securingoptimizinglinuxthehackingsolutionv-131209075405-phpapp02/85/Securing-Optimizing-Linux-the-Hacking-Solution-v-3-0-517-320.jpg)
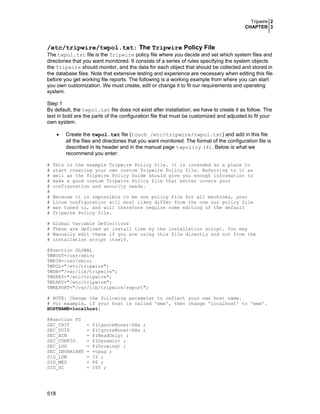
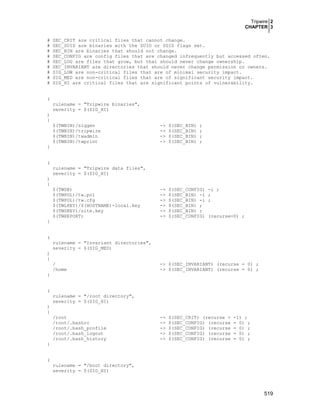
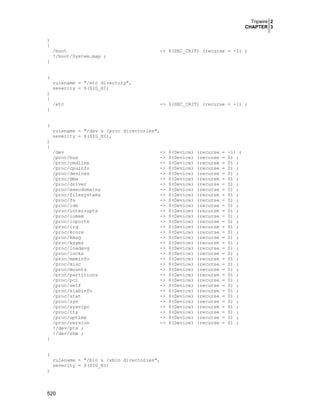

![Tripwire 2
CHAPTER 3
(
rulename = "/chroot directory",
severity = $(SIG_HI)
)
{
}
/chroot
-> $(SEC_CRIT) (recurse = -1) ;
Step2
Now, set the permissions of the twpol.txt file to be (0640/-rw-r-----) and owned by the
super-user ‘root’ for security reasons.
•
To change the permission mode and ownership of the twpol.txt file, use:
[root@deep /]# chmod 640 /etc/tripwire/twpol.txt
[root@deep /]# chown 0.0 /etc/tripwire/twpol.txt
Please, add to the above policy file all files, binaries, directories that you want the software
to monitor for you. Remove any files, binaries, directories that you don’t want the software to
monitor for you and don’t send emails to the mailing list if you receive error messages about the
fact that some files, binaries, directories don’t exist on your system. Instead, review your policy
file and make the changes related to the error that you received, because in most cases, this is
why you have this kind of errors messages. Finally, reads the twpolicy manual page for more
information on the parameters of this policy file.
NOTE:
/etc/tripwire/twinstall.sh: The Tripwire Cryptographic File
The twinstall.sh file is a script file used by Tripwire to configure, install and generate
cryptographic keys used by Tripwire during operation and verification.
Step 1
This script file asks you the passpharse that you want to run with Tripwire as well as other
operations related to the Tripwire database generation and policies. By default, the
twinstall.sh file does not exist after the installation; we have to create it as follows.
•
Create the twinstall.sh file (touch /etc/tripwire/twinstall.sh) and add the
following lines inside the file.
#!/bin/sh
HOST_NAME='localhost'
if uname -n > /dev/null 2> /dev/null ; then
HOST_NAME=`uname -n`
fi
# Site Passphrase variable
TW_SITE_PASS=""
# Complete path to site key
SITE_KEY="/etc/tripwire/site.key"
# Local Passphrase variable
TW_LOCAL_PASS=""
# Complete path to local key
522](https://image.slidesharecdn.com/securingoptimizinglinuxthehackingsolutionv-131209075405-phpapp02/85/Securing-Optimizing-Linux-the-Hacking-Solution-v-3-0-522-320.jpg)
![Tripwire 2
CHAPTER 3
LOCAL_KEY="/etc/tripwire/${HOST_NAME}-local.key"
# If clobber==true, overwrite files; if false, do not overwrite files.
CLOBBER="false"
# If prompt==true, ask for confirmation before continuing with install.
PROMPT="true"
# Name of twadmin executeable
TWADMIN="twadmin"
# Path to twadmin executeable
TWADMPATH=@sbindir@
# Path to configuration directory
CONF_PATH="/etc/tripwire"
# Name of clear text policy file
TXT_POL=$CONF_PATH/twpol.txt
# Name of clear text configuration file
TXT_CFG=$CONF_PATH/twcfg.txt
# Name of encrypted configuration file
CONFIG_FILE=$CONF_PATH/tw.cfg
# Path of the final Tripwire policy file (signed)
SIGNED_POL=`grep POLFILE $TXT_CFG | sed -e 's/^.*=(.*)/1/'`
if [ -z "$TW_SITE_PASS" ] || [ -z "$TW_LOCAL_PASS" ]; then
cat << END_OF_TEXT
---------------------------------------------The Tripwire site and local passphrases are used to
sign a variety of files, such as the configuration,
policy, and database files.
Passphrases should be at least 8 characters in length
and contain both letters and numbers.
See the Tripwire manual for more information.
END_OF_TEXT
fi
echo
echo "----------------------------------------------"
echo "Creating key files..."
if [ "$CLOBBER" = "true" ] && [ "$PROMPT" = "false" ] && [ -f "$SITE_KEY" ] ;
then
rm -f "$SITE_KEY"
fi
if [ -f "$SITE_KEY" ] && [ "$CLOBBER" = "false" ] ; then
echo "The site key file "$SITE_KEY""
echo 'exists and will not be overwritten.'
else
cmdargs="--generate-keys --site-keyfile "$SITE_KEY""
if [ -n "$TW_SITE_PASS" ] ; then
cmdargs="$cmdargs --site-passphrase "$TW_SITE_PASS""
fi
eval ""$TWADMPATH/$TWADMIN" $cmdargs"
if [ $? -ne 0 ] ; then
523](https://image.slidesharecdn.com/securingoptimizinglinuxthehackingsolutionv-131209075405-phpapp02/85/Securing-Optimizing-Linux-the-Hacking-Solution-v-3-0-523-320.jpg)
![Tripwire 2
CHAPTER 3
echo "Error: site key generation failed"
exit 1
else chmod 640 "$SITE_KEY"
fi
fi
if [ "$CLOBBER" = "true" ] && [ "$PROMPT" = "false" ] && [ -f "$LOCAL_KEY" ] ;
then
rm -f "$LOCAL_KEY"
fi
if [ -f "$LOCAL_KEY" ] && [ "$CLOBBER" = "false" ] ; then
echo "The site key file "$LOCAL_KEY""
echo 'exists and will not be overwritten.'
else
cmdargs="--generate-keys --local-keyfile "$LOCAL_KEY""
if [ -n "$TW_LOCAL_PASS" ] ; then
cmdargs="$cmdargs --local-passphrase "$TW_LOCAL_PASS""
fi
eval ""$TWADMPATH/$TWADMIN" $cmdargs"
if [ $? -ne 0 ] ; then
echo "Error: local key generation failed"
exit 1
else chmod 640 "$LOCAL_KEY"
fi
fi
echo
echo "----------------------------------------------"
echo "Signing configuration file..."
if [ "$CLOBBER" = "false" ] && [ -s "$CONFIG_FILE" ] ; then
backup="${CONFIG_FILE}.$$.bak"
echo "Backing up $CONFIG_FILE"
echo "
to $backup"
`mv "$CONFIG_FILE" "$backup"`
if [ $? -ne 0 ] ; then
echo "Error: backup of configuration file failed."
exit 1
fi
fi
cmdargs="--create-cfgfile"
cmdargs="$cmdargs --cfgfile "$CONFIG_FILE""
cmdargs="$cmdargs --site-keyfile "$SITE_KEY""
if [ -n "$TW_SITE_PASS" ] ; then
cmdargs="$cmdargs --site-passphrase "$TW_SITE_PASS""
fi
eval ""$TWADMPATH/$TWADMIN" $cmdargs "$TXT_CFG""
if [ $? -ne 0 ] ; then
echo "Error: signing of configuration file failed."
exit 1
fi
# Set the rights properly
chmod 640 "$CONFIG_FILE"
cat << END_OF_TEXT
A clear-text version of the Tripwire configuration file
$TXT_CFG
has been preserved for your inspection. It is recommended
524](https://image.slidesharecdn.com/securingoptimizinglinuxthehackingsolutionv-131209075405-phpapp02/85/Securing-Optimizing-Linux-the-Hacking-Solution-v-3-0-524-320.jpg)
![Tripwire 2
CHAPTER 3
that you delete this file manually after you have examined it.
END_OF_TEXT
echo
echo "----------------------------------------------"
echo "Signing policy file..."
if [ "$CLOBBER" = "false" ] && [ -s "$POLICY_FILE" ] ; then
backup="${POLICY_FILE}.$$.bak"
echo "Backing up $POLICY_FILE"
echo "
to $backup"
mv "$POLICY_FILE" "$backup"
if [ $? -ne 0 ] ; then
echo "Error: backup of policy file failed."
exit 1
fi
fi
cmdargs="--create-polfile"
cmdargs="$cmdargs --cfgfile "$CONFIG_FILE""
cmdargs="$cmdargs --site-keyfile "$SITE_KEY""
if [ -n "$TW_SITE_PASS" ] ; then
cmdargs="$cmdargs --site-passphrase "$TW_SITE_PASS""
fi
eval ""$TWADMPATH/$TWADMIN" $cmdargs "$TXT_POL""
if [ $? -ne 0 ] ; then
echo "Error: signing of policy file failed."
exit 1
fi
# Set the proper rights on the newly signed policy file.
chmod 0640 "$SIGNED_POL"
cat << END_OF_TEXT
A clear-text version of the Tripwire policy file
$TXT_POL
has been preserved for your inspection. This implements
a minimal policy, intended only to test essential
Tripwire functionality. You should edit the policy file
to describe your system, and then use twadmin to generate
a new signed copy of the Tripwire policy.
END_OF_TEXT
Step 2
Now, set the permissions of the twinstall.sh file to be (0500/---x------) and owned by
the super-user ‘root’ for security reasons.
•
This procedure can be accomplished with the following command:
[root@deep /]# chmod 500 /etc/tripwire/twinstall.sh
[root@deep /]# chown 0.0 /etc/tripwire/twinstall.sh
The above script file can also be retrieved from the following URL:
http://www.openna.com/products/books/securing-optimizing-linux/3rdedition/index.htm
NOTE:
525](https://image.slidesharecdn.com/securingoptimizinglinuxthehackingsolutionv-131209075405-phpapp02/85/Securing-Optimizing-Linux-the-Hacking-Solution-v-3-0-525-320.jpg)
![Tripwire 2
CHAPTER 3
/etc/cron.weekly/tripwire.cron: The Tripwire Cron File
The tripwire.cron file is a small script executed automatically by the crond program each
week to scan your hard disk for possible changes to files or directories and mail the results to the
system administrator.
Step 1
This script will automate the procedure of integrity checking for you. If you want to automate this
task, follow the simple steps below.
•
Create the tripwire.cron script file (touch /etc/cron.weekly/tripwire.cron)
and add the following lines:
#!/bin/sh
HOST_NAME=`uname -n`
if [ ! -e /var/lib/tripwire/${HOST_NAME}.twd ] ; then
echo "****
Error: Tripwire database for ${HOST_NAME} not found.
****"
echo "**** Run "/etc/tripwire/twinstall.sh" and/or "tripwire --init". ****"
else
test -f /etc/tripwire/tw.cfg && /usr/sbin/tripwire --check
fi
Step 2
Now, set the permissions of the tripwire.cron file to be (0500/---x------) and owned by
the super-user ‘root’ for security reasons.
•
This procedure can be accomplished with the following command:
[root@deep /]# chmod 500 /etc/cron.weekly/tripwire.cron
[root@deep /]# chown 0.0 /etc/cron.weekly/tripwire.cron
Running Tripwire for the first time
Once all the files are installed and configured on your server, it’s time to run Tripwire to
generate the cryptography key, passphrases and database files. These procedures should be
made the first time you install the software and ONLY the first time.
Step 1
Here we begin by running the twinstall.sh script file which will generate the cryptography
keys and will ask us to enter our passphrase (password) which is required each time we want to
update and accept Tripwire integrity reports.
•
To run the twinstall.sh file use the following command:
[root@deep /]# /etc/tripwire/twinstall.sh
---------------------------------------------The Tripwire site and local passphrases are used to
sign a variety of files, such as the configuration,
policy, and database files.
Passphrases should be at least 8 characters in length
and contain both letters and numbers.
See the Tripwire manual for more information.
----------------------------------------------
526](https://image.slidesharecdn.com/securingoptimizinglinuxthehackingsolutionv-131209075405-phpapp02/85/Securing-Optimizing-Linux-the-Hacking-Solution-v-3-0-526-320.jpg)
![Tripwire 2
CHAPTER 3
Creating key files...
(When selecting a passphrase, keep in mind that good passphrases
typically have upper and lower case letters, digits and punctuation
marks, and are at least 8 characters in length.)
Enter the site keyfile passphrase: Your site keyfile passphrase
Verify the site keyfile passphrase: Your site keyfile passphrse again
Generating key (this may take several minutes)...Key generation complete.
(When selecting a passphrase, keep in mind that good passphrases
typically have upper and lower case letters, digits and punctuation
marks, and are at least 8 characters in length.)
Enter the local keyfile passphrase: Your local keyfile passphrase
Verify the local keyfile passphrase: Your local keyfile passphrase again
Generating key (this may take several minutes)...Key generation complete.
---------------------------------------------Signing configuration file...
Please enter your site passphrase: Your site passphrase
Wrote configuration file: /etc/tripwire/tw.cfg
A clear-text version of the Tripwire configuration file
/etc/tripwire/twcfg.txt
has been preserved for your inspection. It is recommended
that you delete this file manually after you have examined it.
---------------------------------------------Signing policy file...
Please enter your site passphrase: Your site passphrase
Wrote policy file: /etc/tripwire/tw.pol
A clear-text version of the Tripwire policy file
/etc/tripwire/twpol.txt
has been preserved for your inspection. This implements
a minimal policy, intended only to test essential
Tripwire functionality. You should edit the policy file
to describe your system, and then use twadmin to generate
a new signed copy of the Tripwire policy
Step 2
Once our passphrase keyfiles have been generated, it’s time to run Tripwire in its’ initialization
mode. The initialization mode will create the initial Tripwire database files based on what
information has been provided inside the twpol.txt file. Tripwire must have a database to
compare against, so we first create the file information database. This action will create a file
called “tw.db_[hostname]” in the directory you specified to hold your databases (where
[hostname] will be replaced with your machine hostname).
•
To run the Tripwire in initialization mode, use the following command:
[root@deep /]# tripwire --init
Parsing policy file: /etc/tripwire/tw.pol
Generating the database...
*** Processing Unix File System ***
Please enter your local passphrase:
Wrote database file: /var/lib/tripwire/deep.twd
The database was successfully generated.
527](https://image.slidesharecdn.com/securingoptimizinglinuxthehackingsolutionv-131209075405-phpapp02/85/Securing-Optimizing-Linux-the-Hacking-Solution-v-3-0-527-320.jpg)
![Tripwire 2
CHAPTER 3
Initialization of the database Tripwire uses should be done manually because the key
used to sign the database should be different for each system.
NOTE:
Step 3
Finally, if you have not received any kind of error message, then you can safety remove the
twcfg.txt and twpol.txt files from your system since they are no longer needed and it
would be a security risk to keep these files on your server.
•
To remove the files from your system, use the following commands:
[root@deep /]# rm -f /etc/tripwire/twcfg.txt
[root@deep /]# rm -f /etc/tripwire/twpol.txt
You have to remove the files from your server ONLY if you are sure that the initialization of
the databases has been completed without any errors. Otherwise you should keep these files and
regenerate a new database once all the errors have been fixed inside the twpol.txt file, since
in many cases errors come from twpol.txt file having some lines referring to files or directories
that do not exist in your system.
NOTE:
Securing Tripwire
It is highly recommended that the database (tw.db_[hostname]) file of Tripwire be moved
someplace (e.g. floppy) where it cannot be modified. This is important because data from
Tripwire is only as trustworthy as its database.
It is also recommended that you make a hardcopy printout of the database contents right away. In
the event that you become suspicious of the integrity of the database, you will be able to
manually compare information against this hardcopy.
Tripwire Administrative Tools
The commands listed below are some of the most used of this software, but many more exist.
Check the Tripwire manual pages for more details.
Running Tripwire in Interactive Checking Mode:
In “Interactive Checking Mode” feature, Tripwire verifies files or directories that have been
added, deleted, or changed from the original database and ask the user whether the database
entry should be updated. This mode is the most convenient way of keeping your database up-todate, but it requires that the user be "at the console". If you want to use this mode, then follow the
simple step below.
Once the file information database of Tripwire has been created, we can now run Tripwire in
“Interactive Checking Mode”. This mode will prompt the user for whether or not each changed
entry on the system should be updated to reflect the current state of the file.
•
To run Tripwire in Interactive Checking Mode, use the following command:
[root@deep /]# tripwire --check --interactive
Parsing policy file: /etc/tripwire/tw.pol
*** Processing Unix File System ***
Performing integrity check...
528](https://image.slidesharecdn.com/securingoptimizinglinuxthehackingsolutionv-131209075405-phpapp02/85/Securing-Optimizing-Linux-the-Hacking-Solution-v-3-0-528-320.jpg)


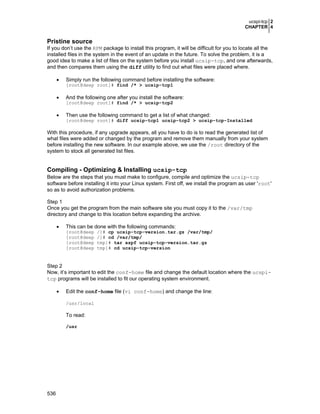


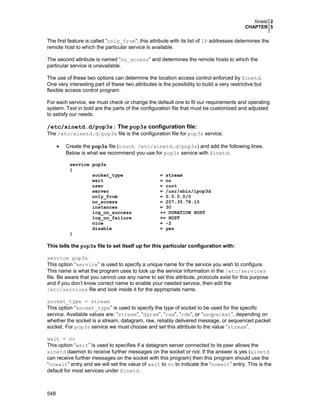

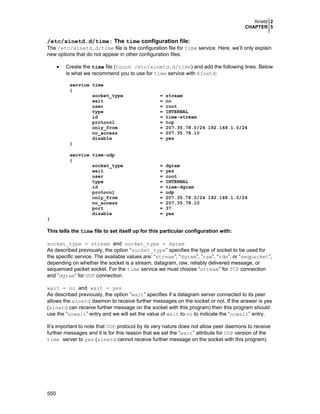
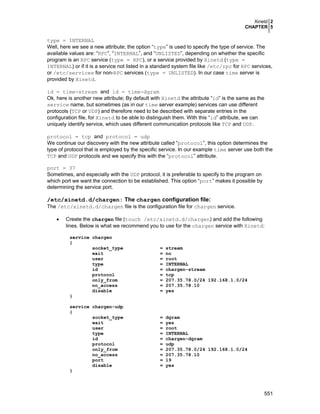
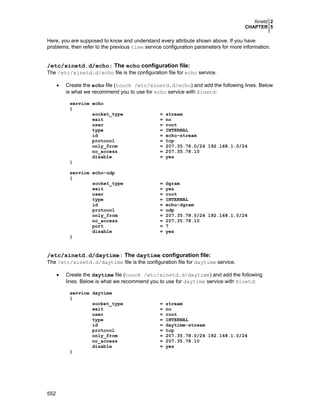
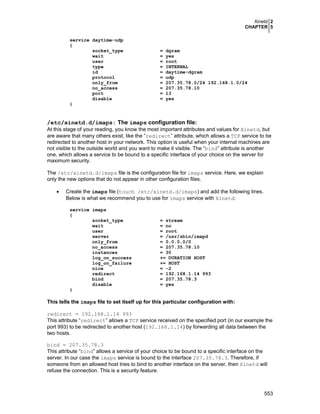
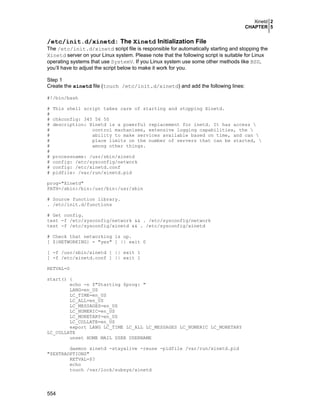
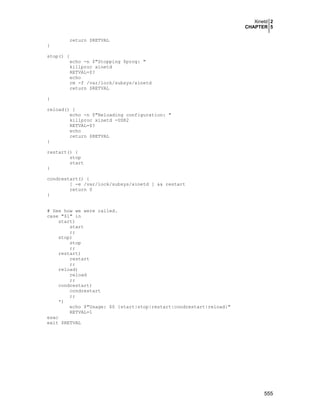


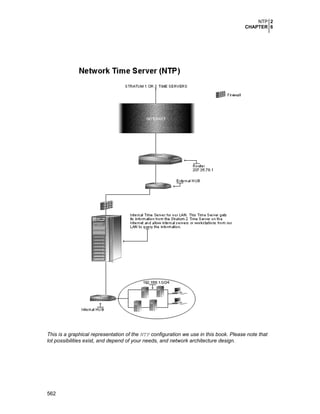
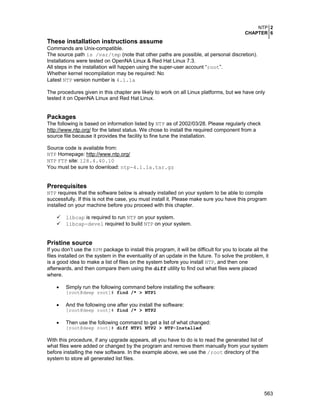
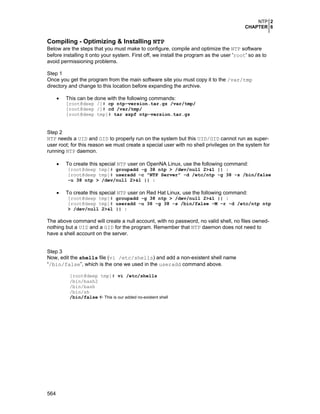
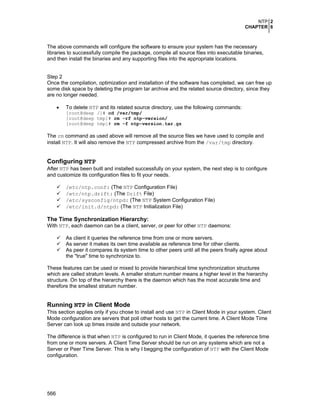
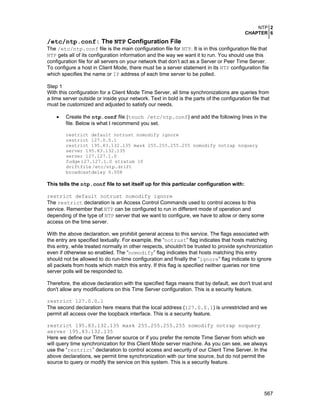
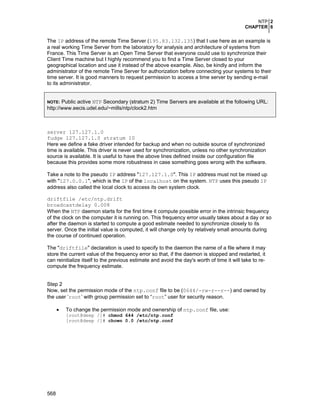
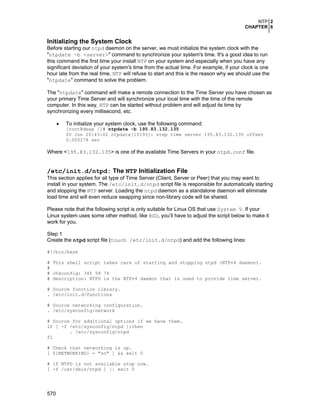
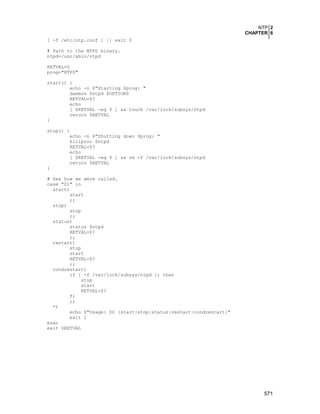
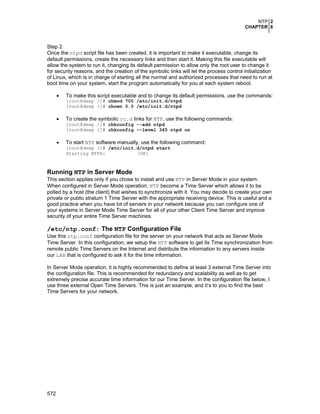
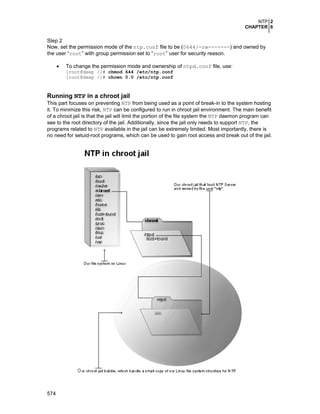


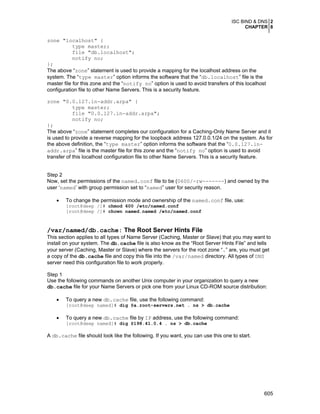
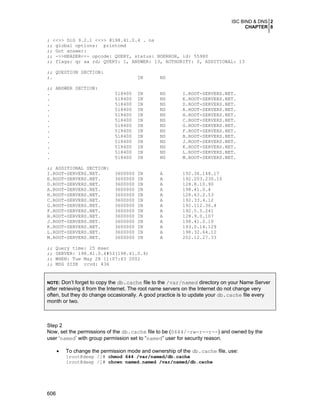
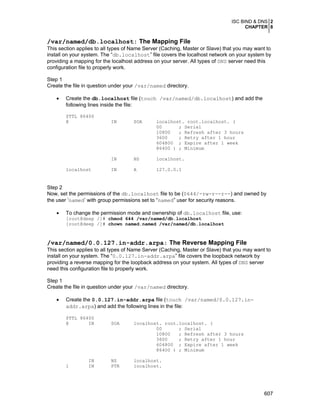
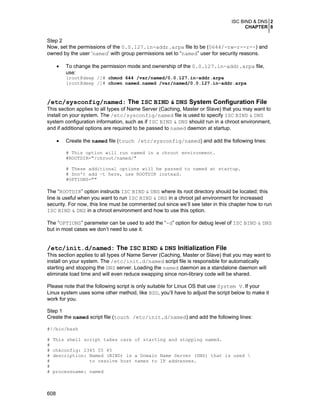
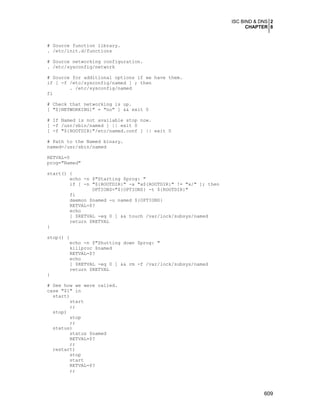
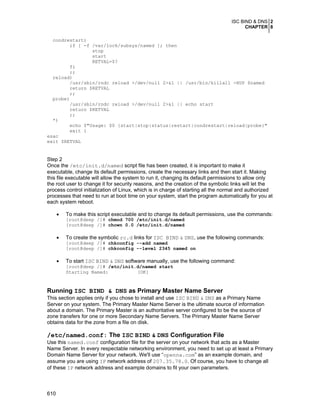
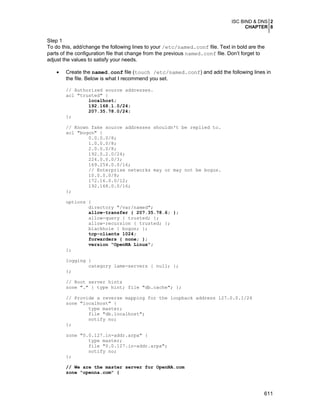


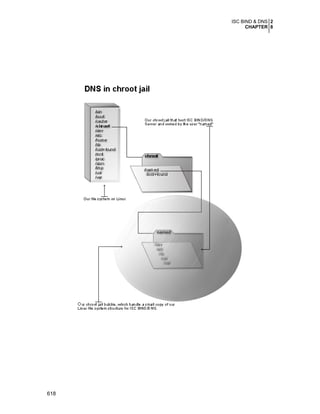
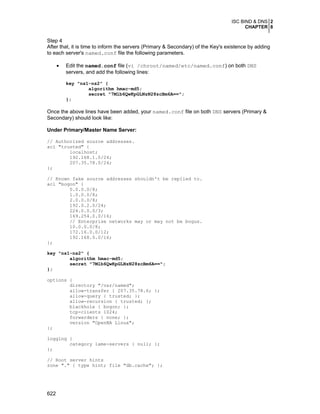
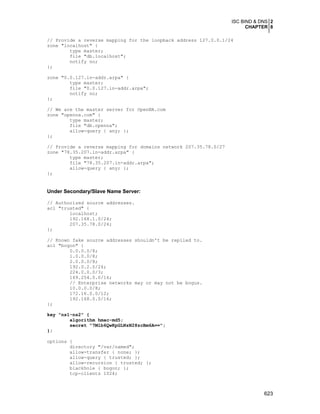
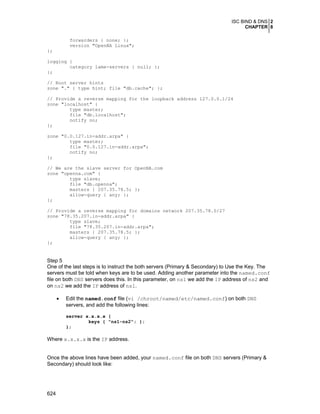

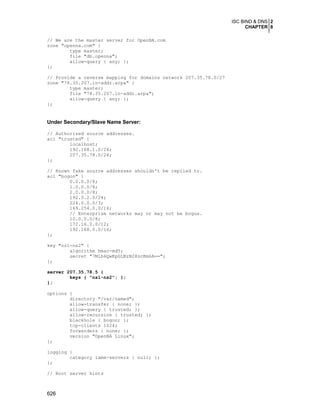
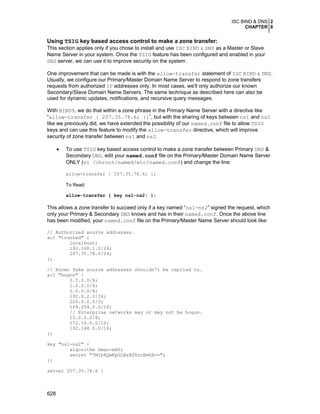

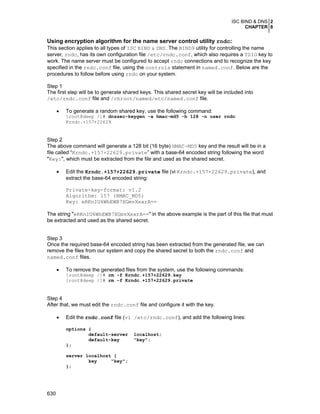
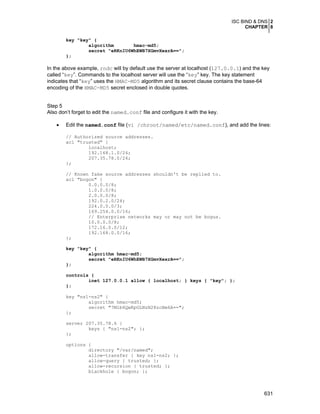
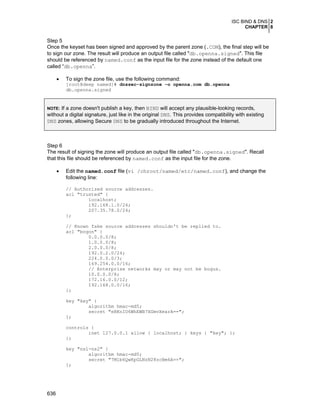


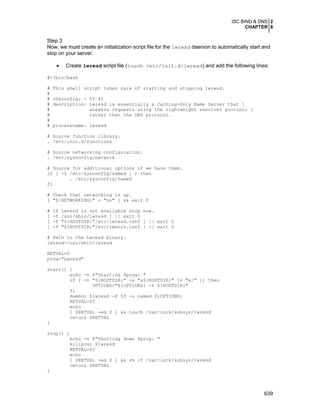
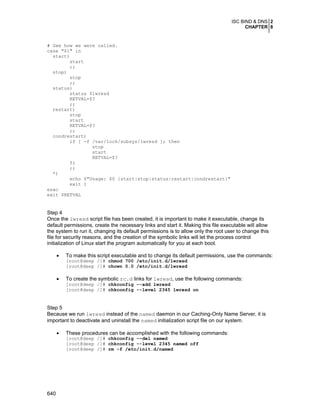
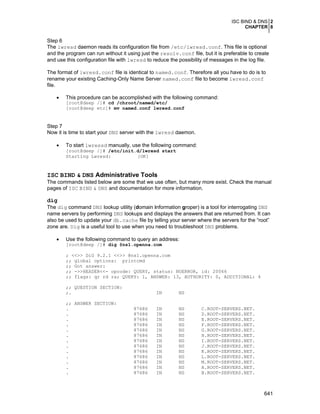


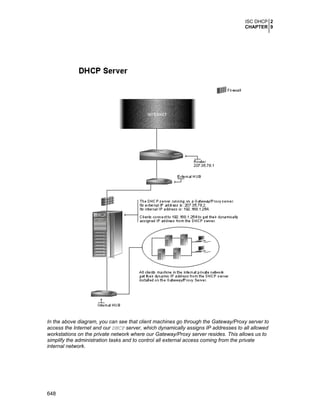


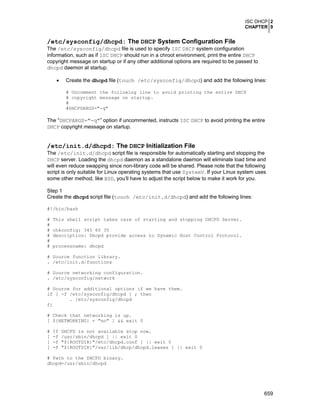
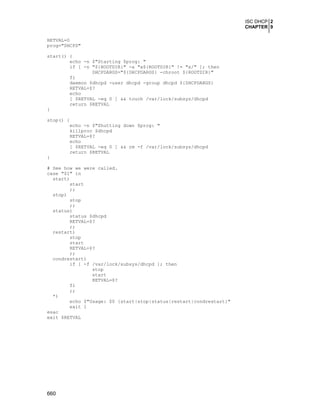
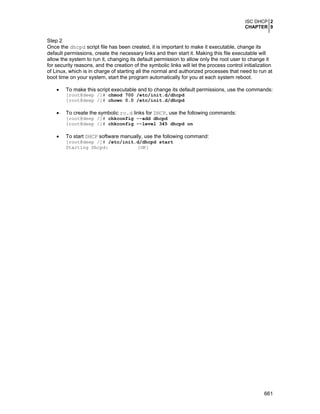
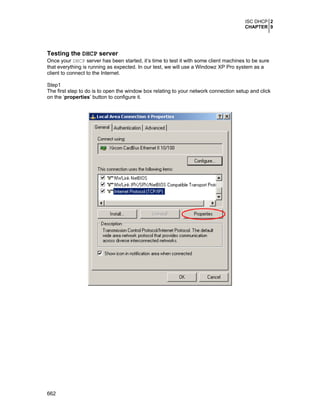
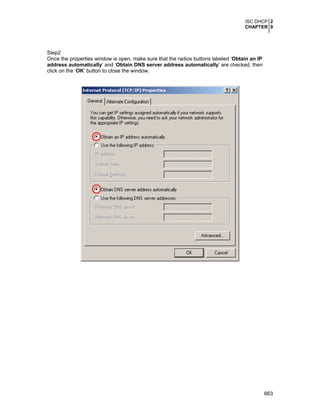
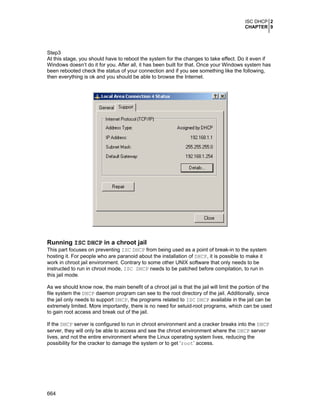

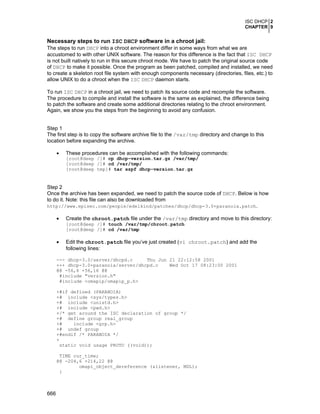
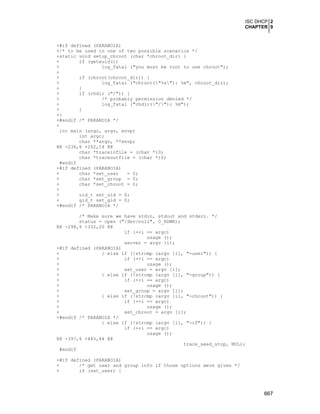
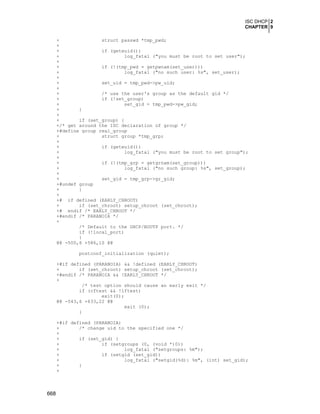
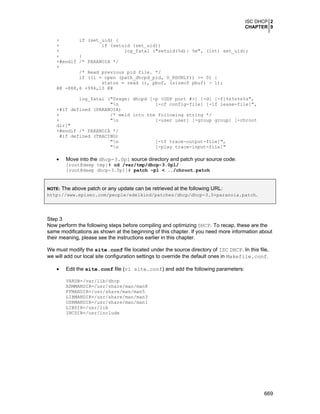

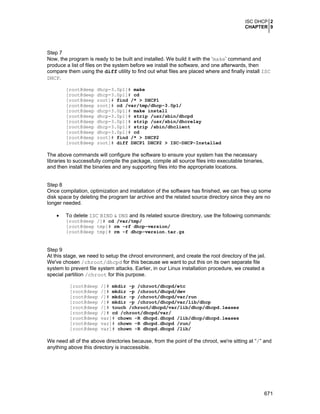
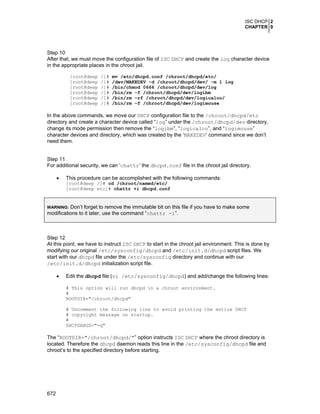
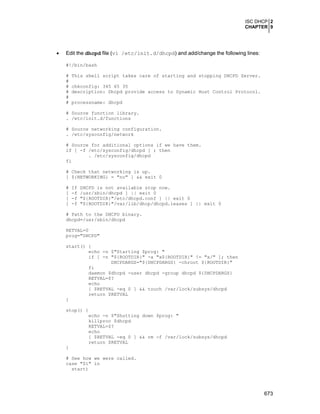
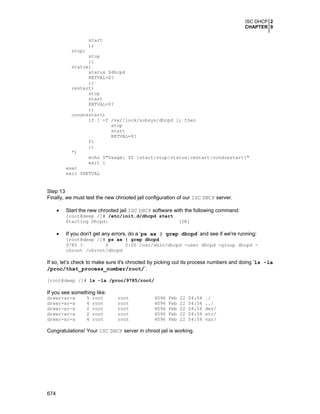
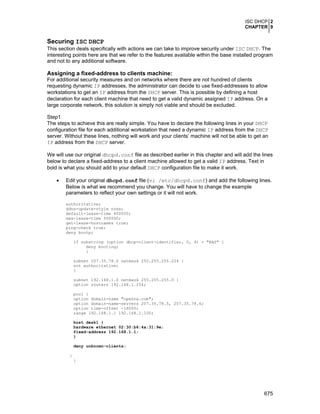
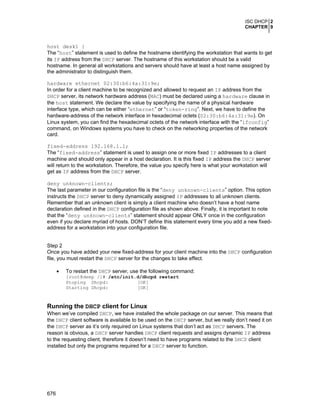


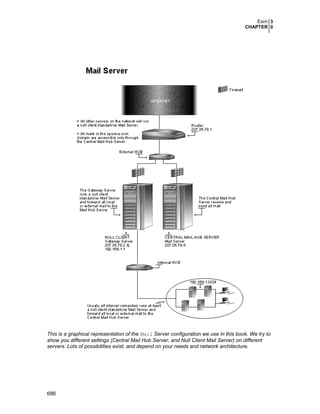
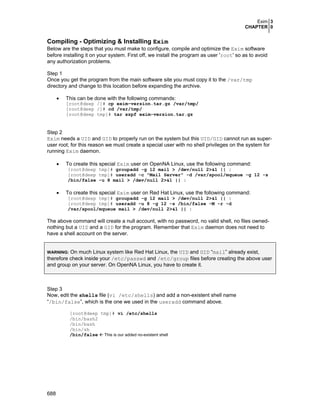

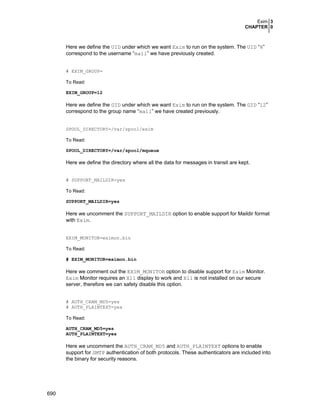
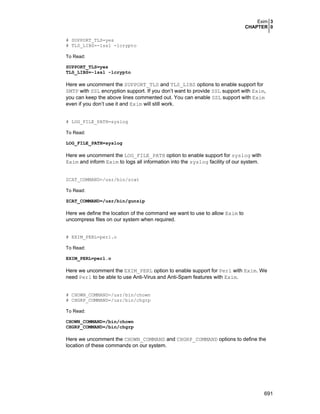
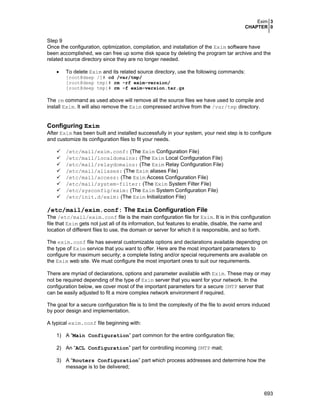
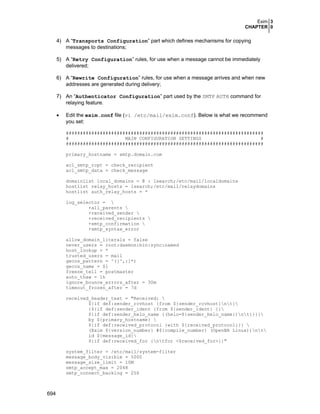
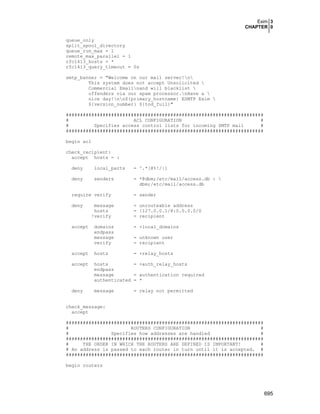


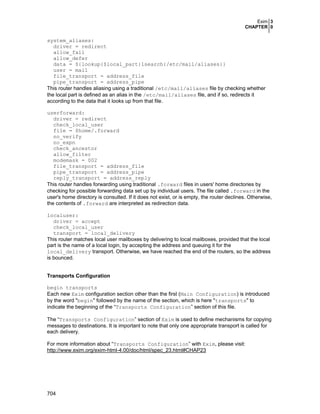
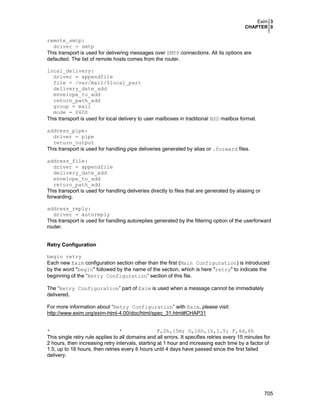

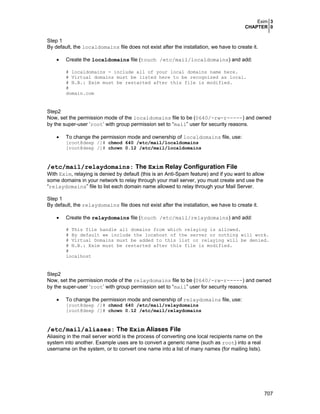
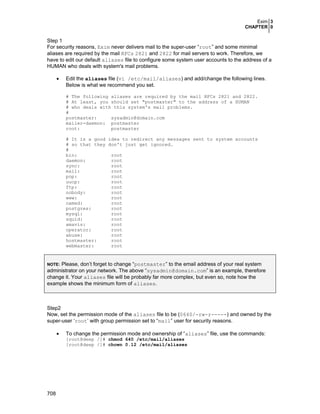

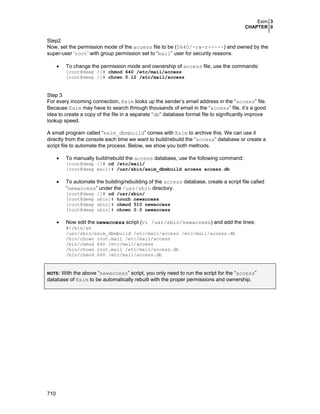
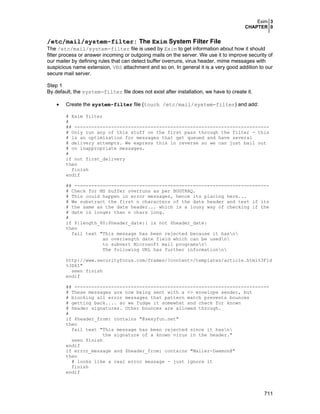
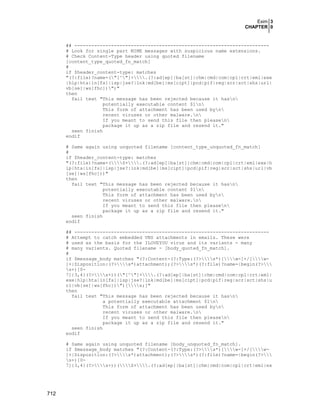
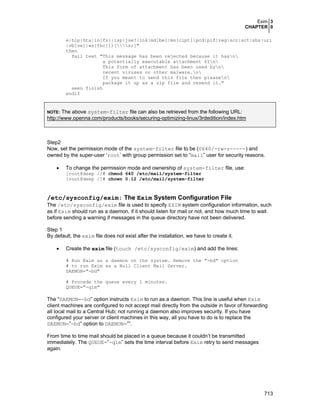
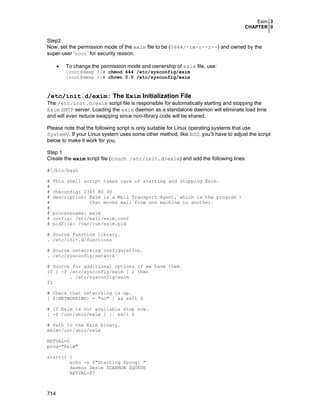
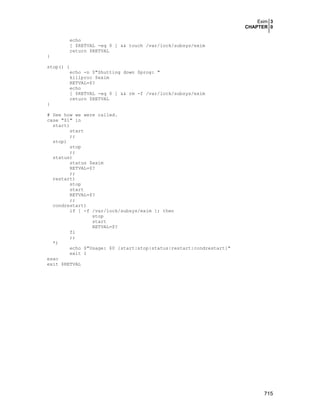
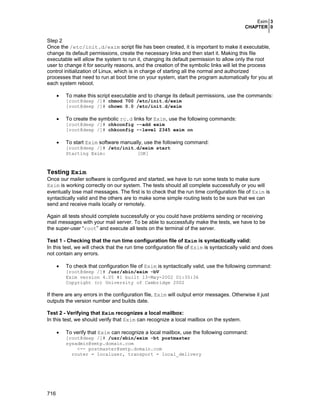
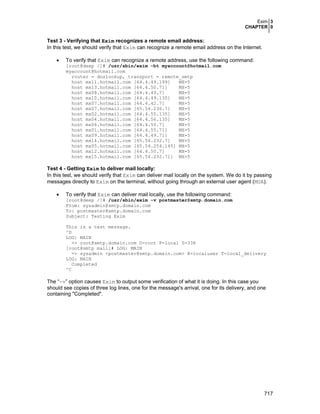


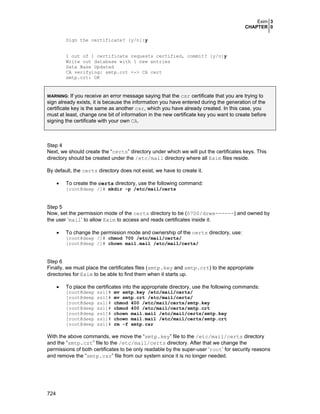
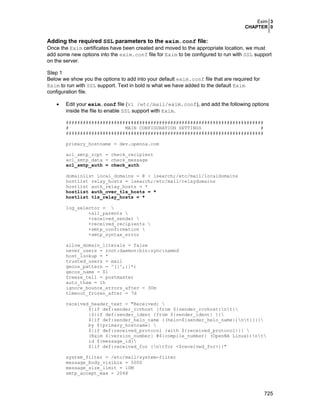
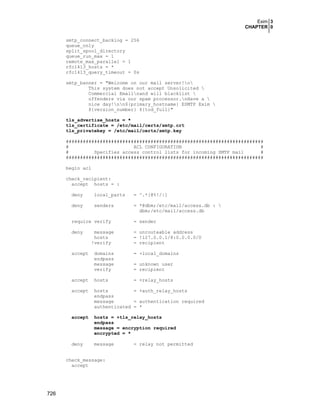
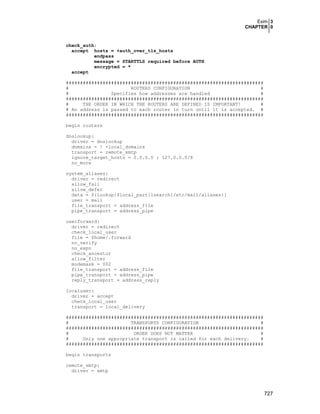
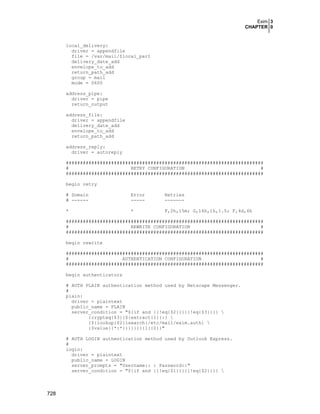
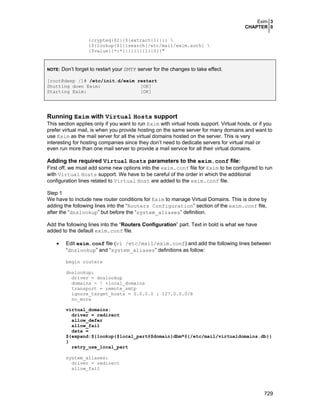
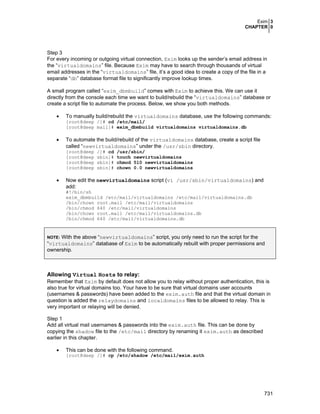
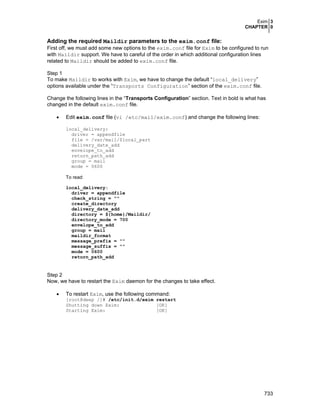

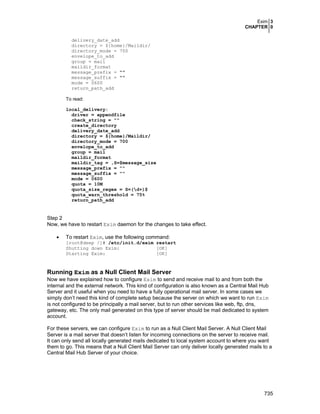


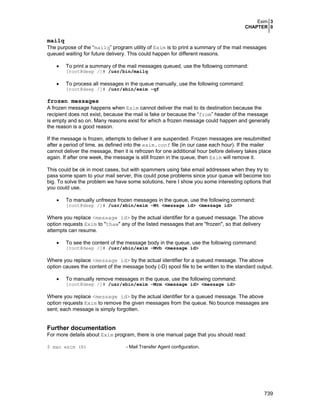


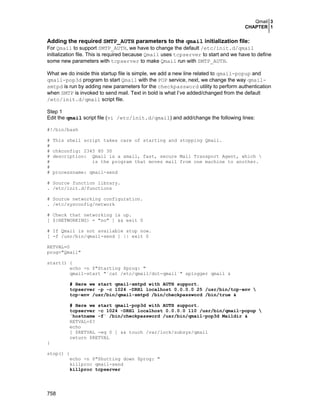
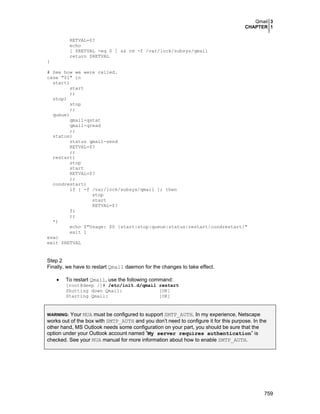
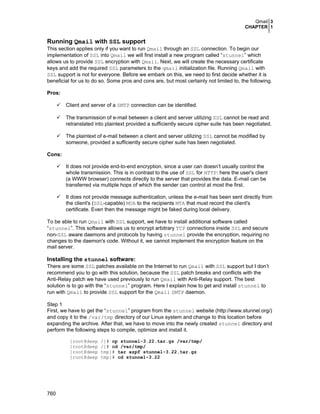
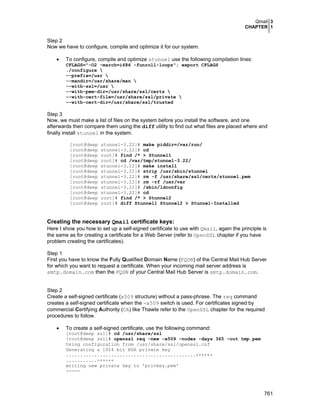
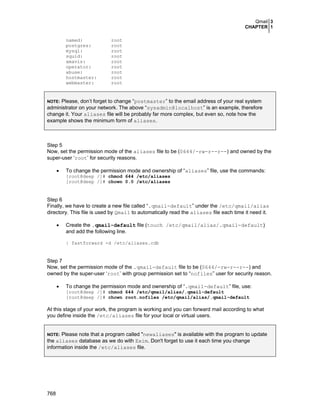


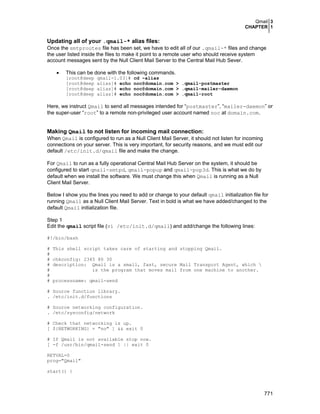


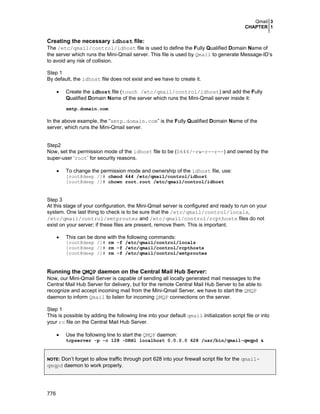
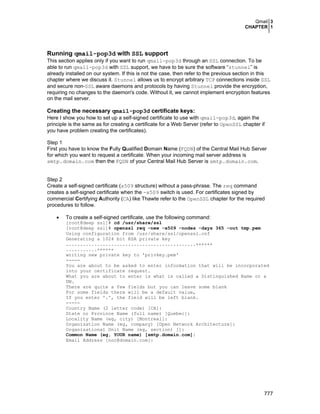
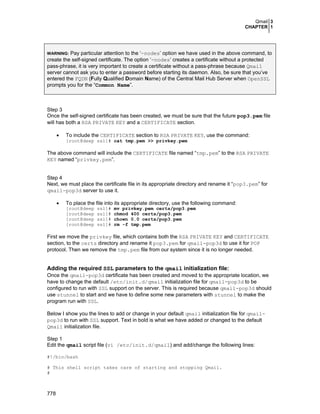
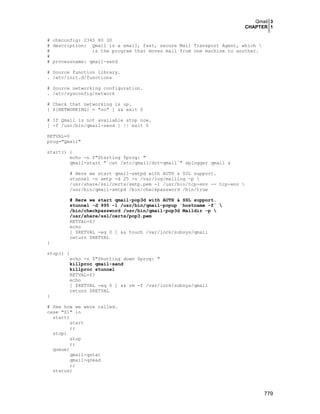
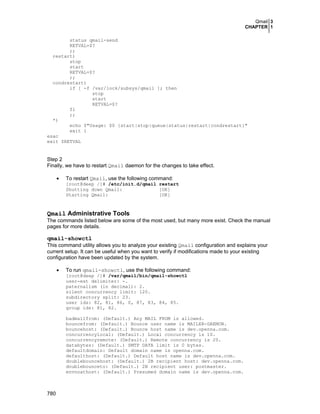


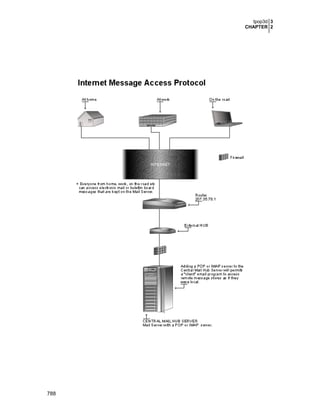


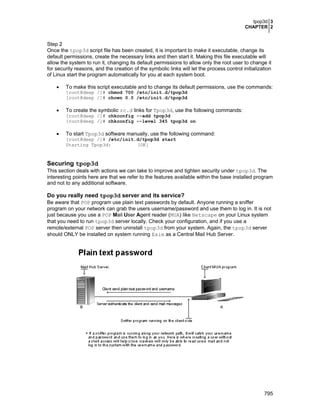
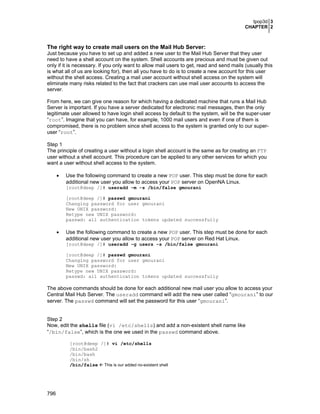


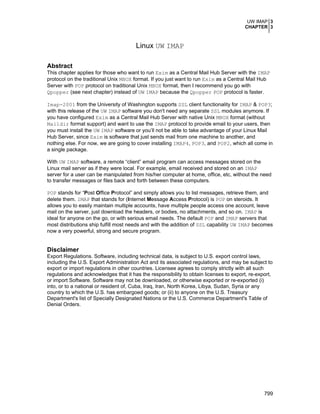


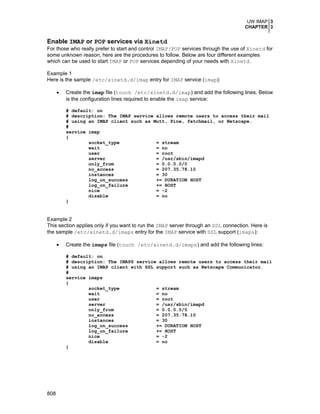
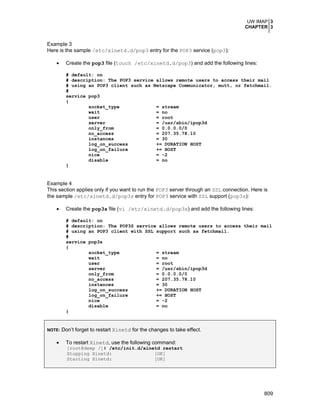
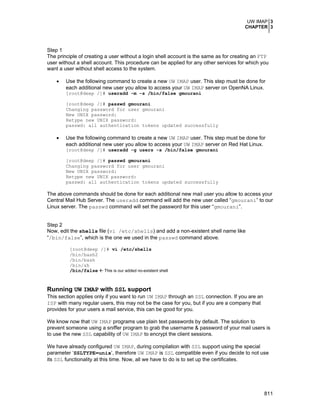
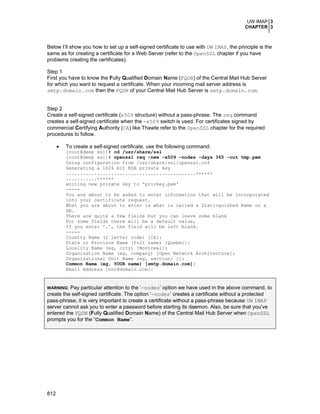
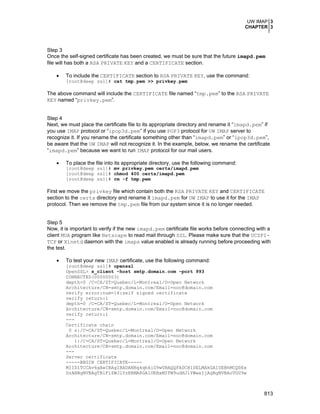
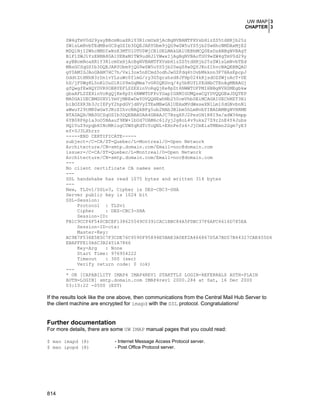


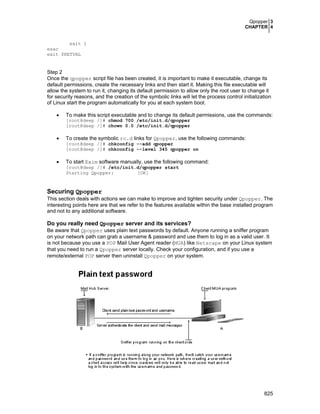
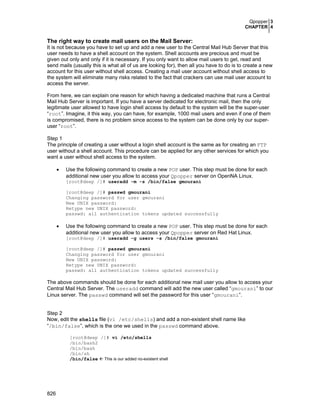
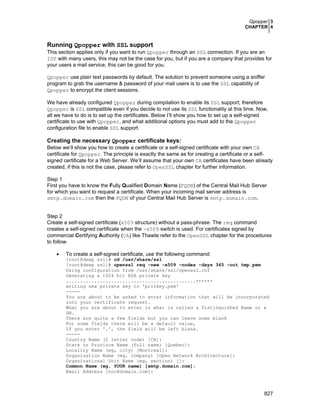
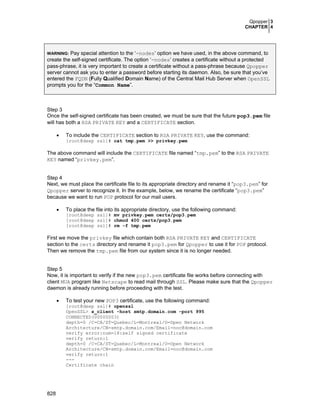
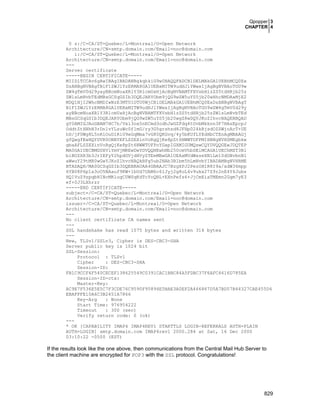


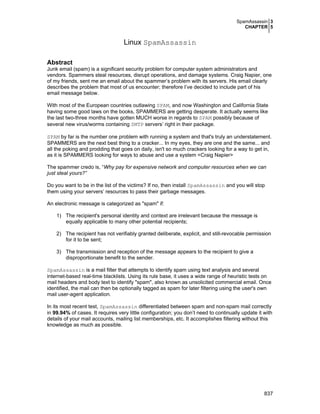


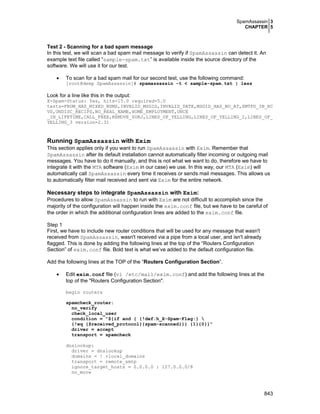


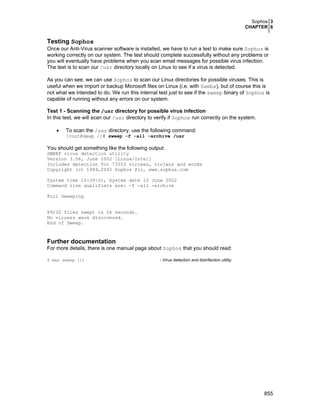


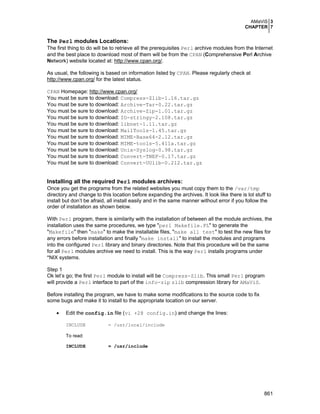


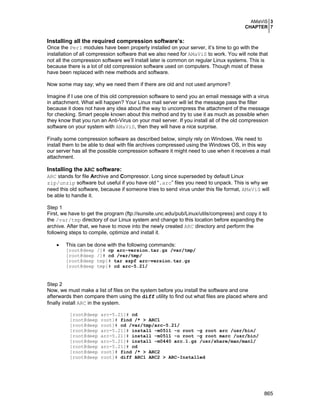
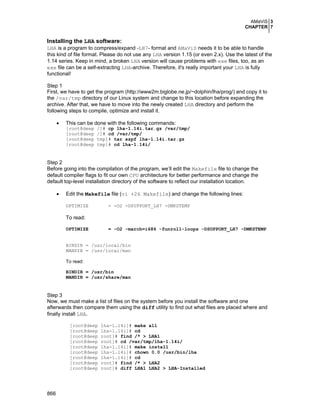
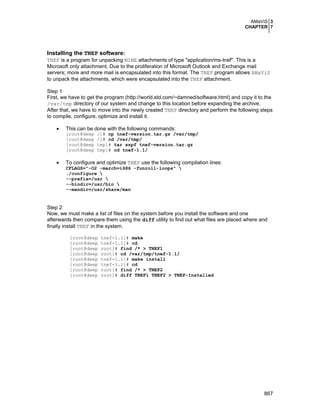
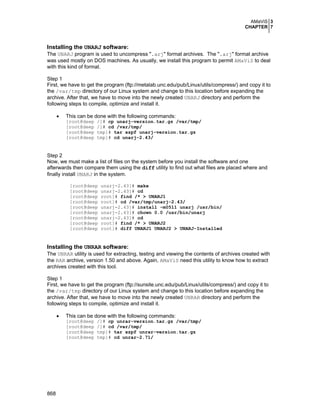

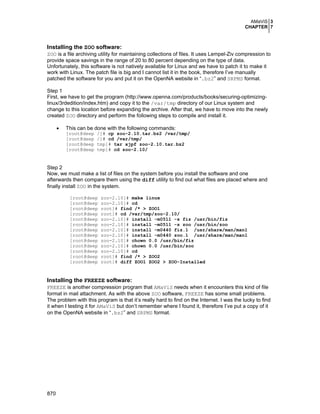
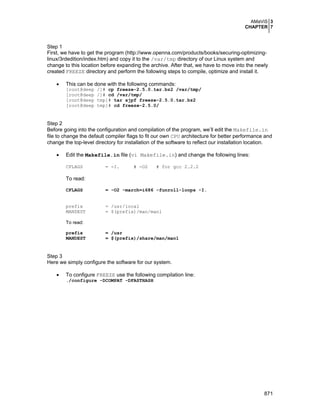

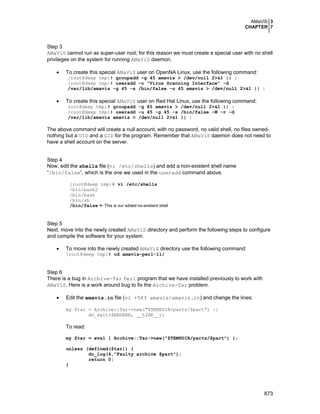
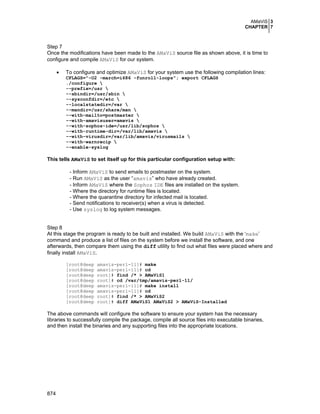
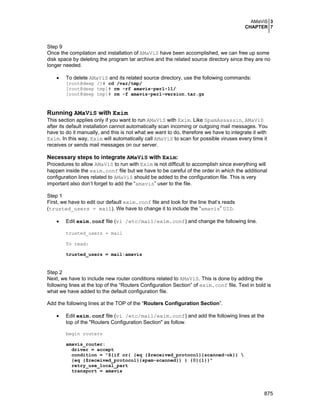
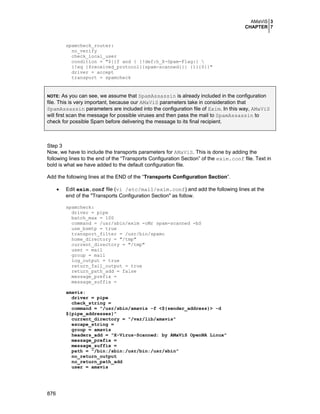


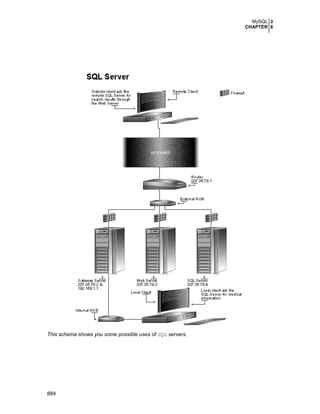

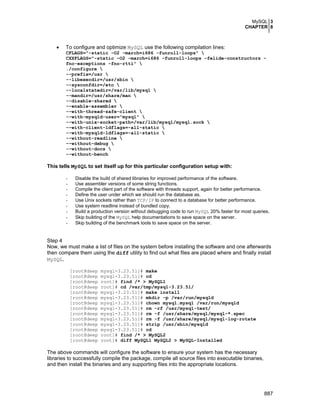
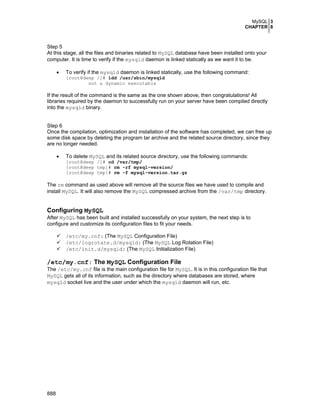

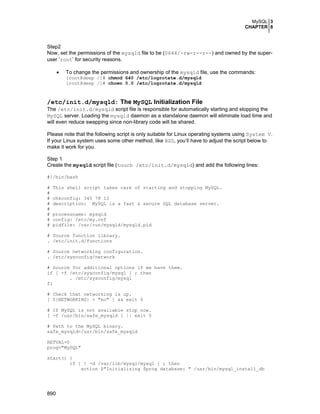
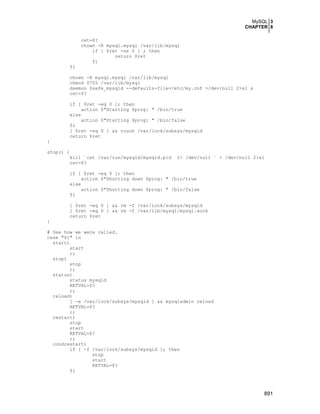


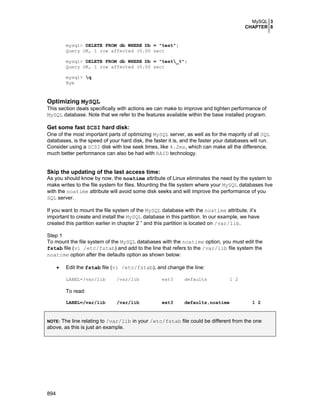
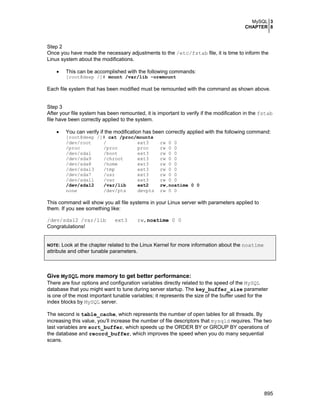
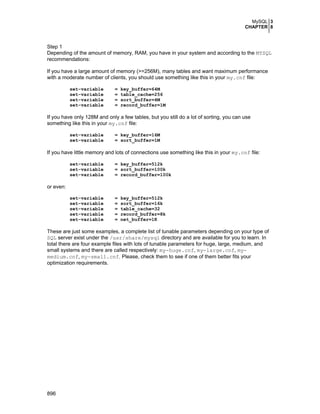
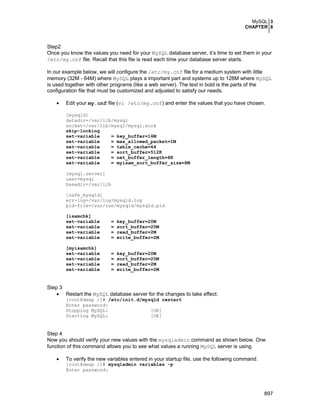


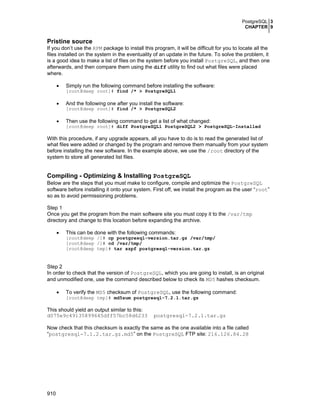
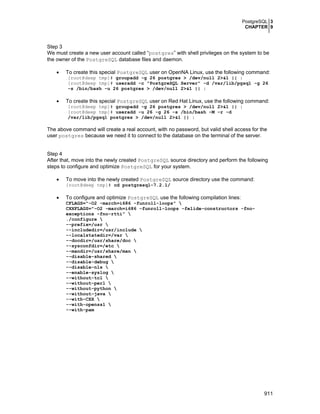
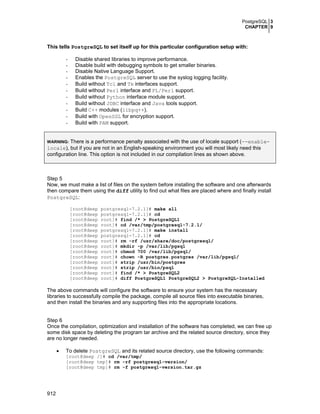
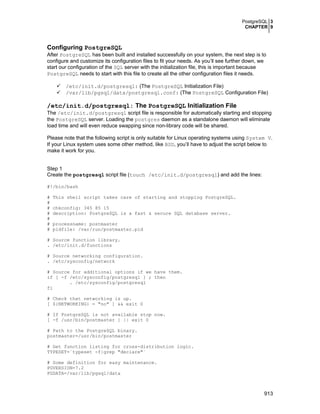
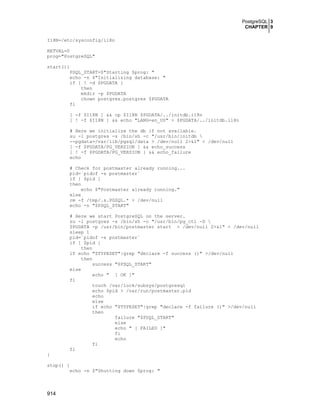
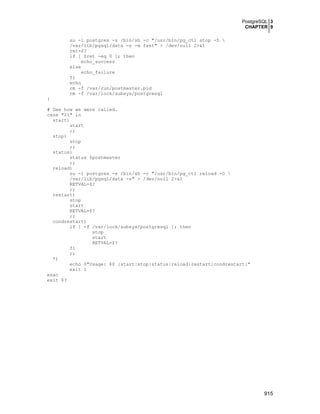
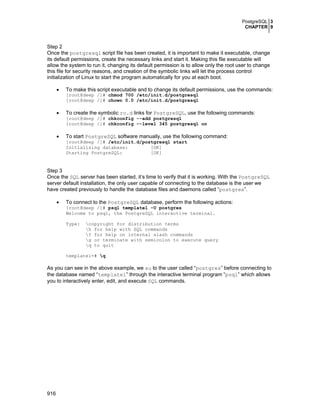
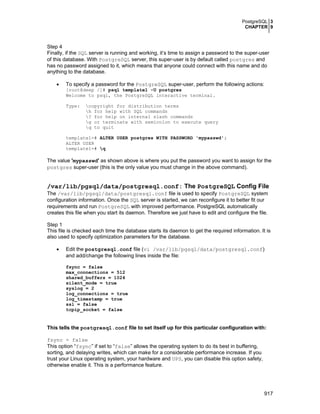
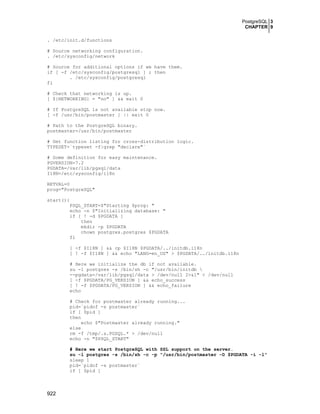
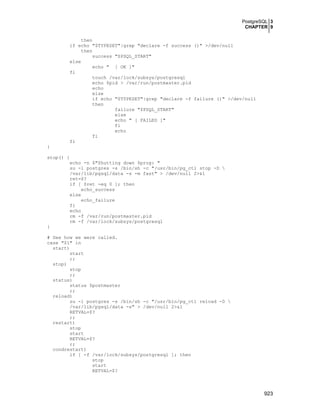
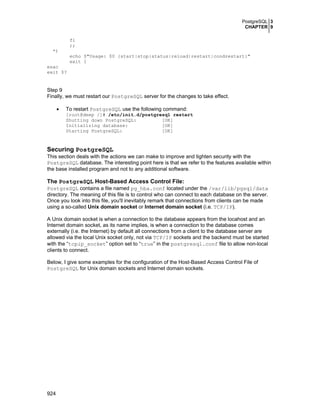


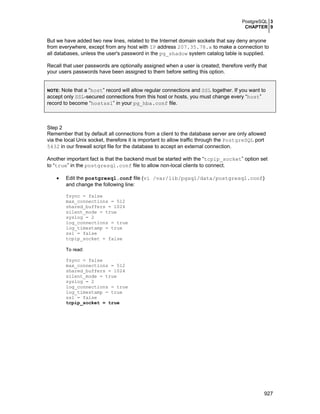
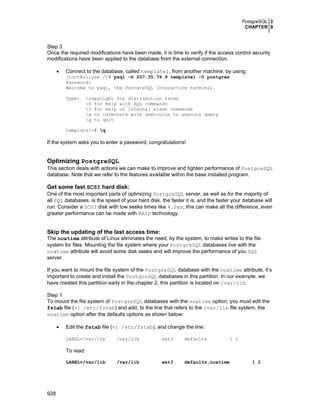
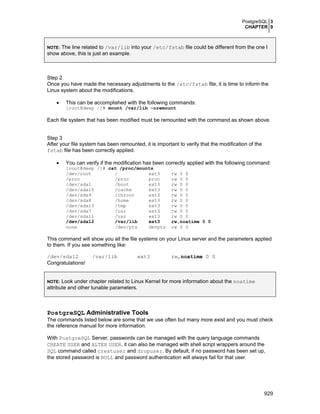

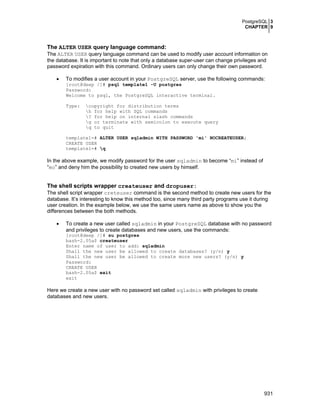
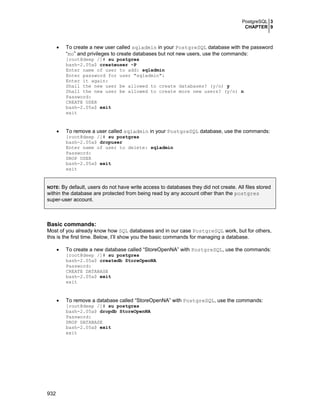


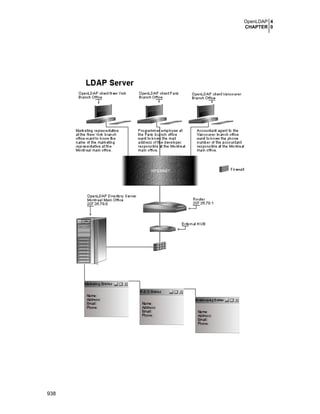


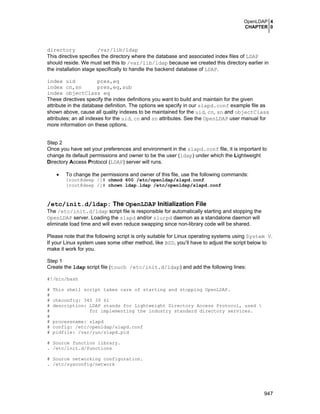
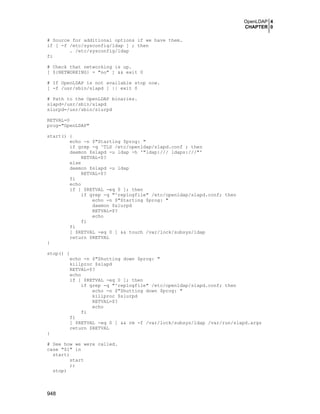
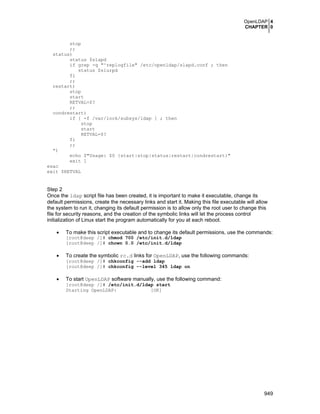
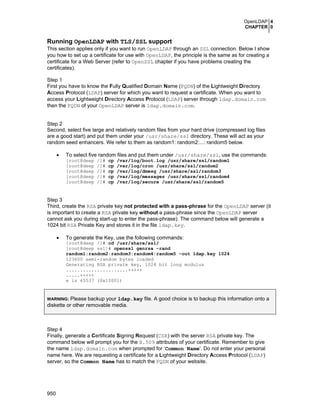
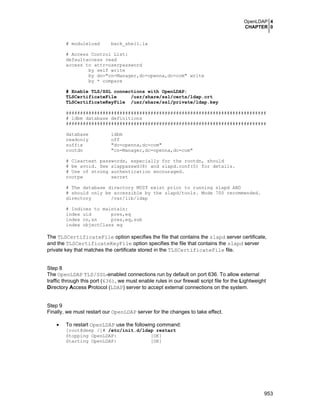
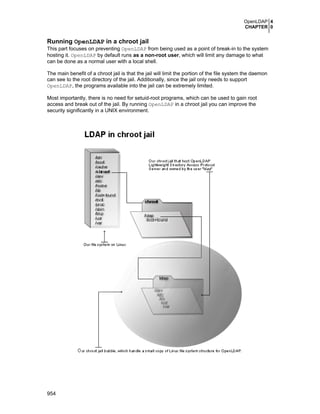
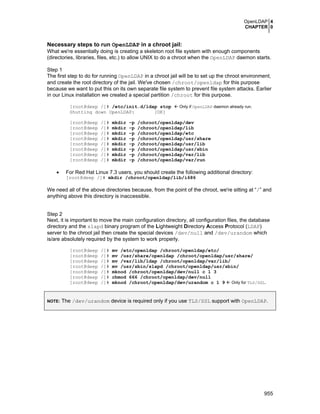
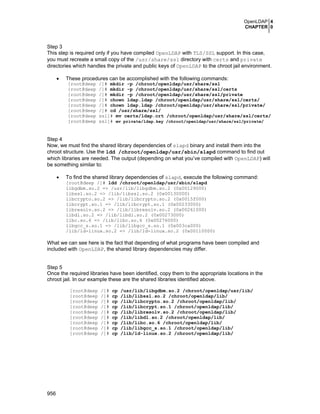
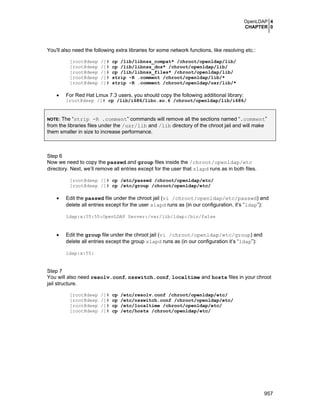
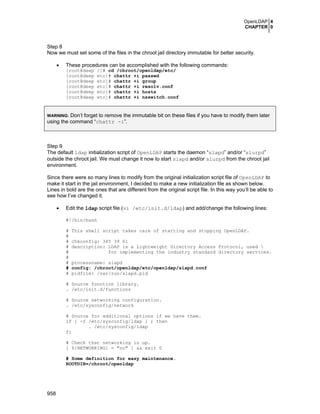
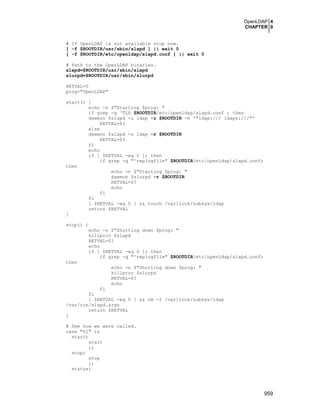
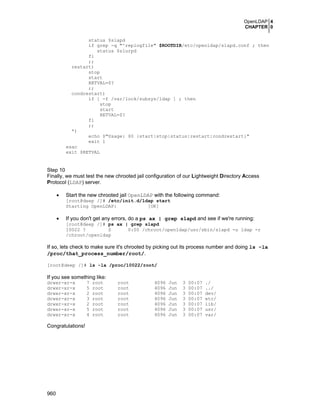
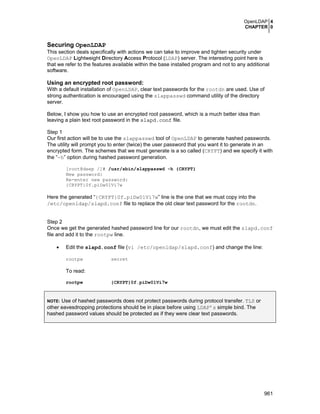
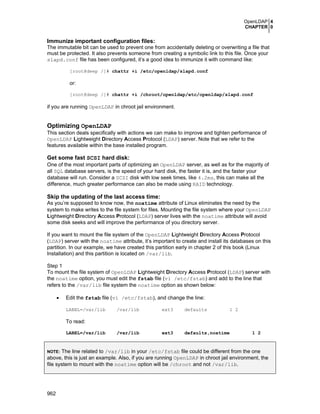


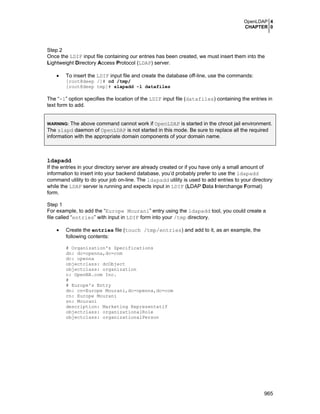
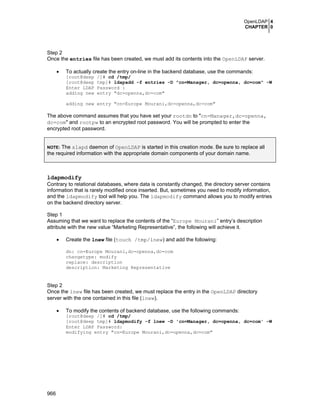
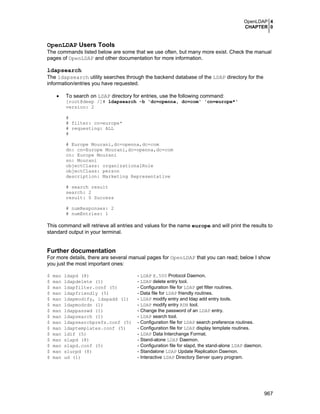


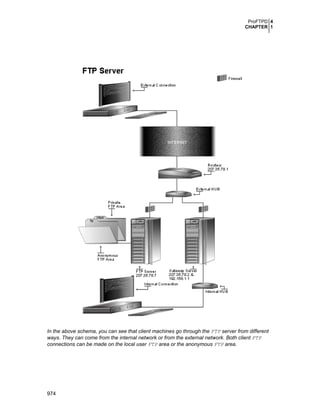

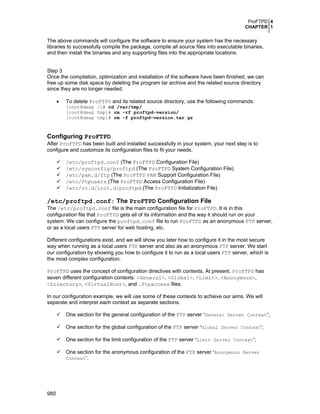
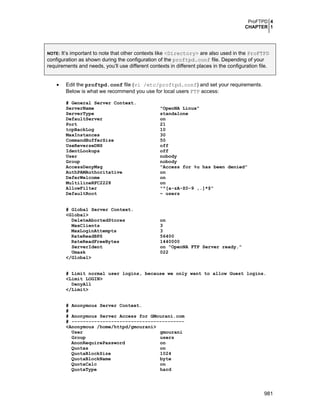
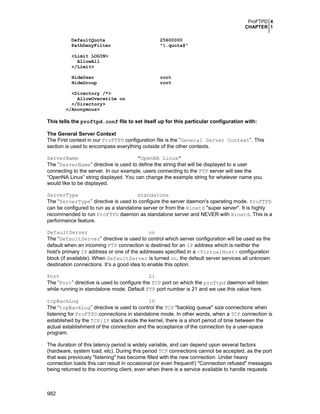


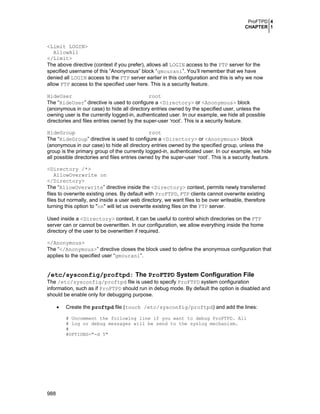

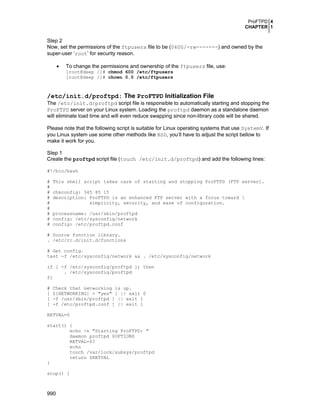
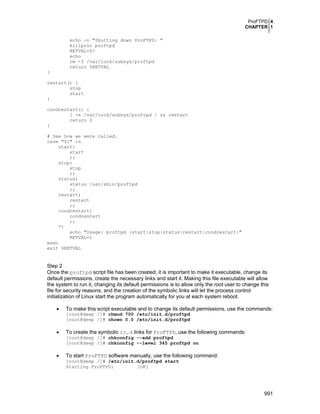
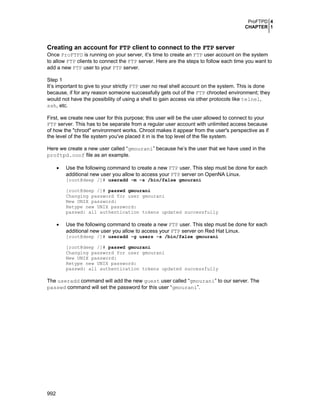
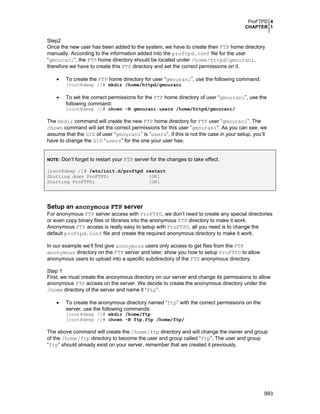
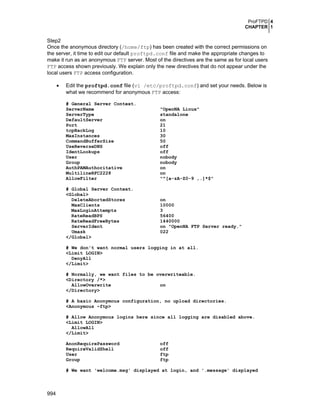
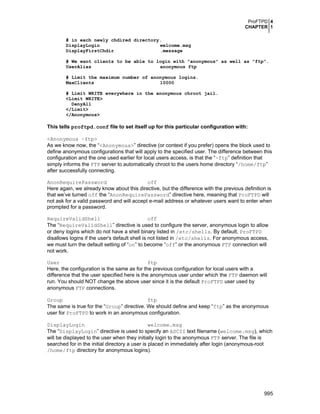
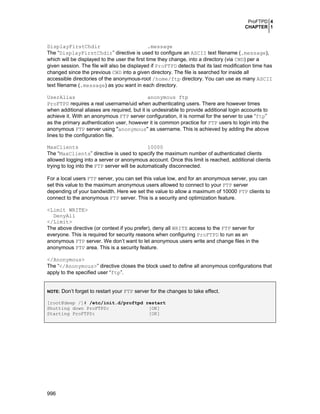
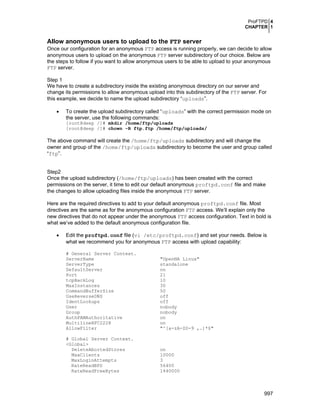

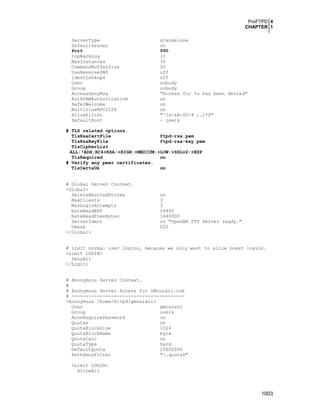
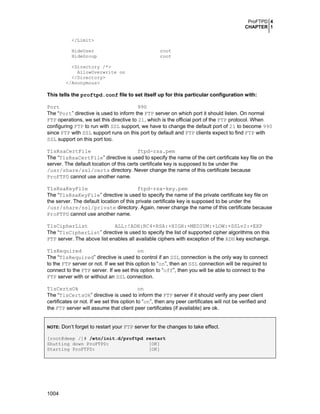
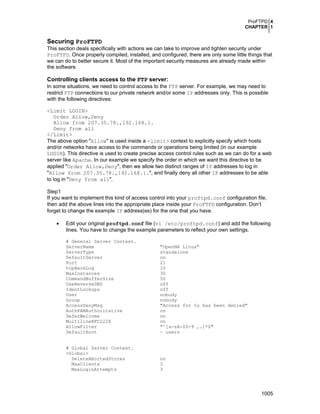
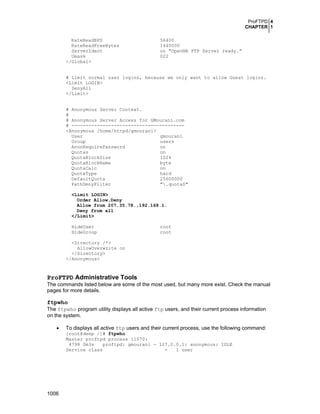


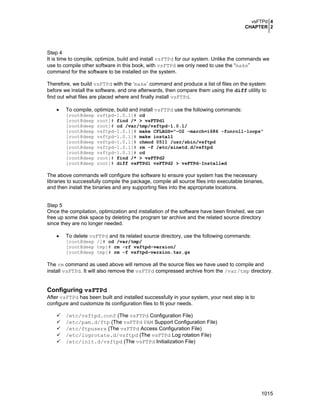
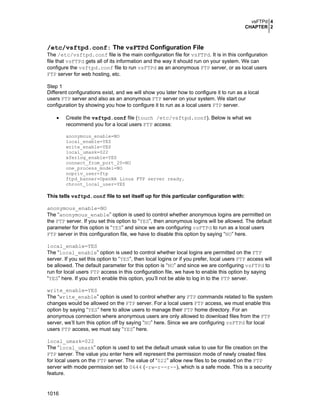
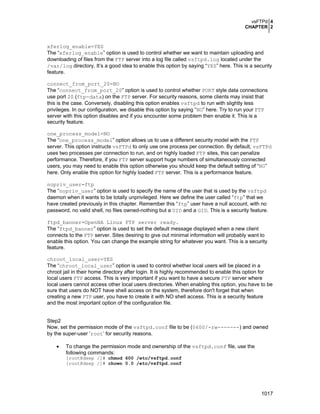

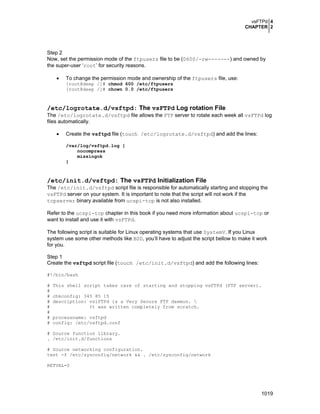
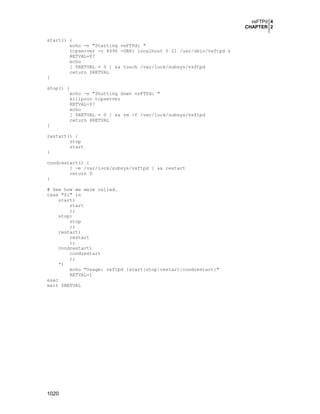
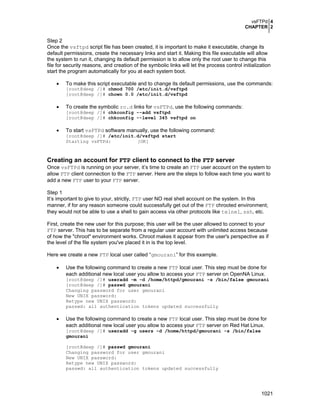
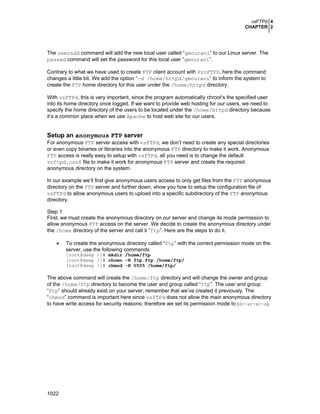

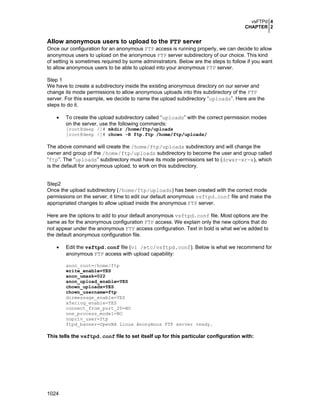


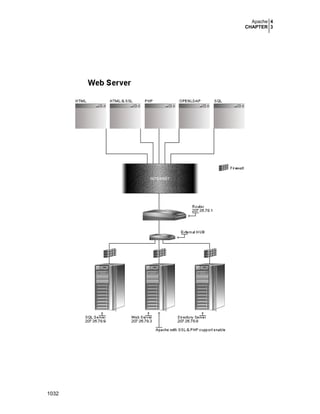


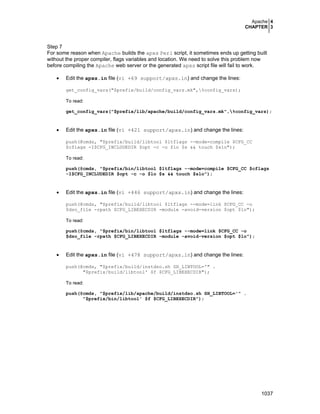
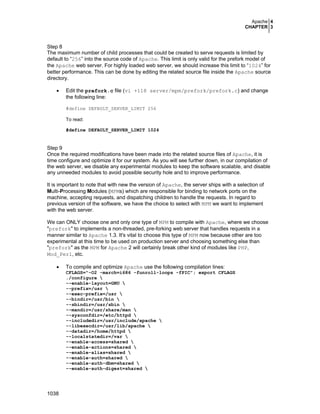

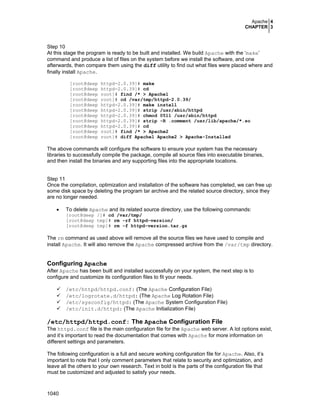
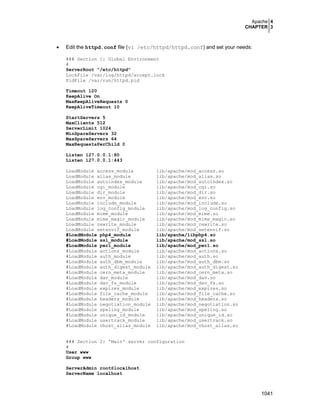

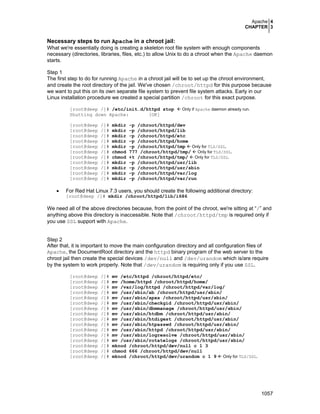
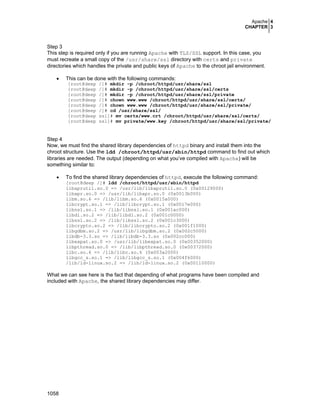
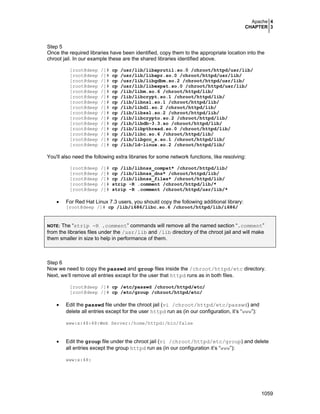
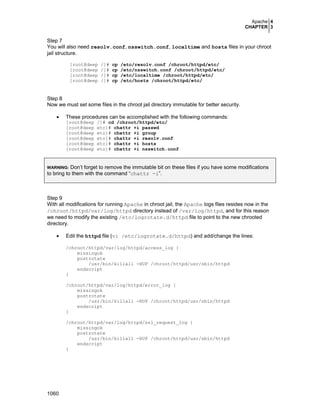
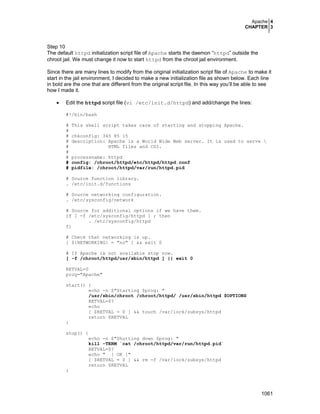
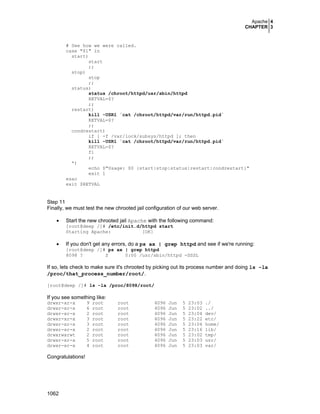


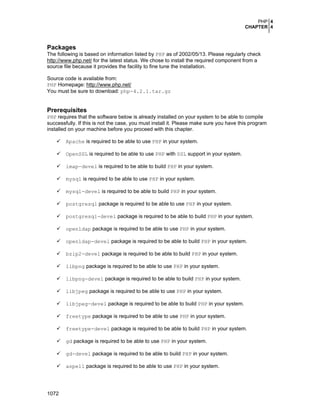
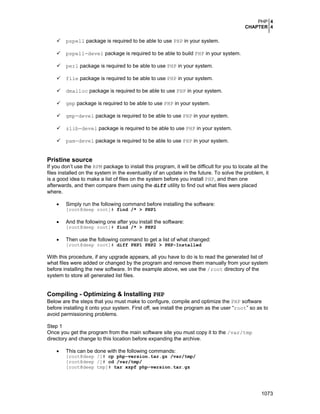
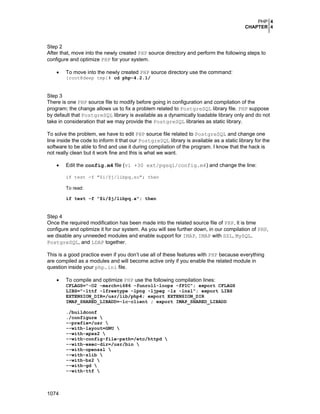
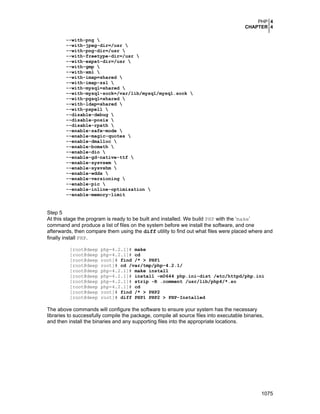


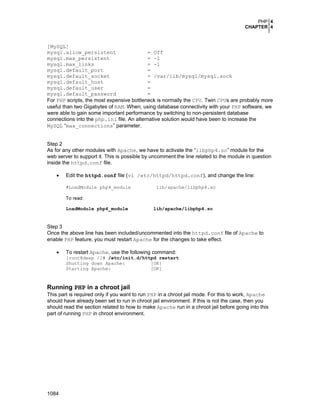
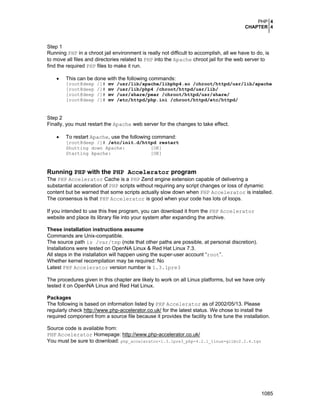
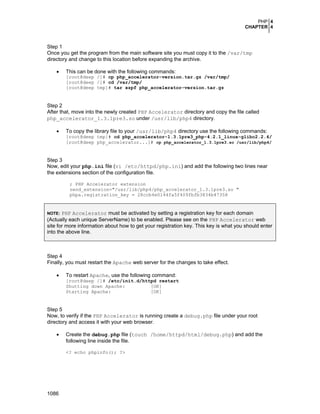


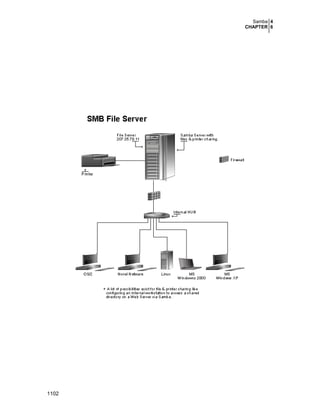
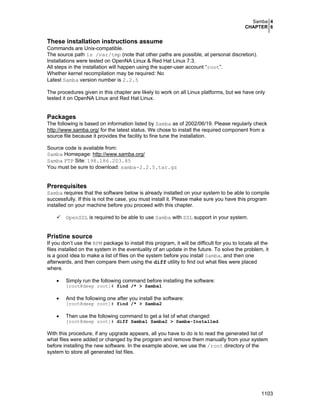
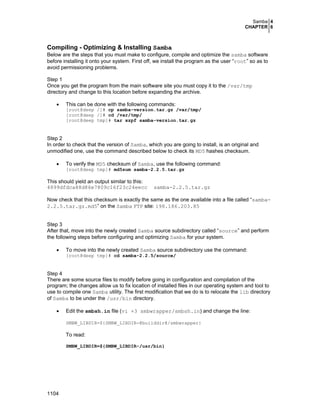
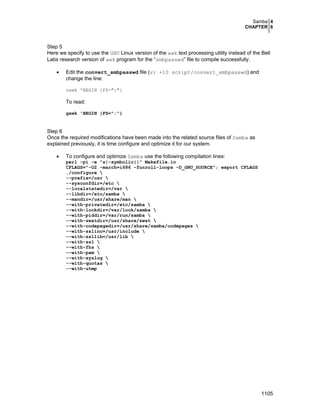
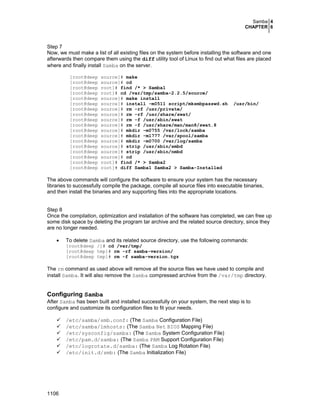
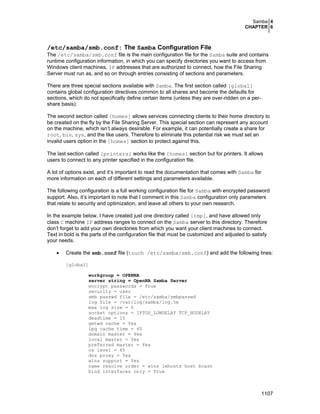
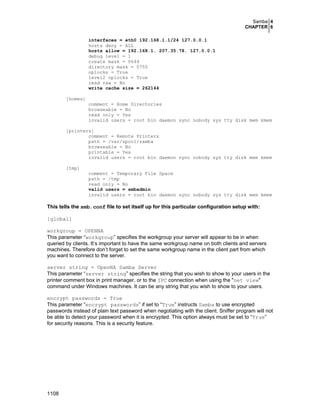


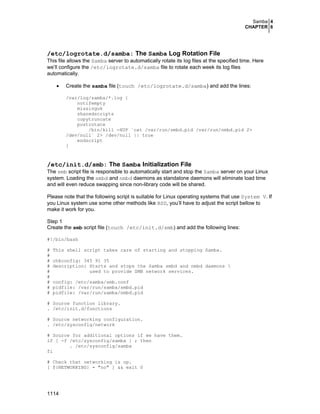
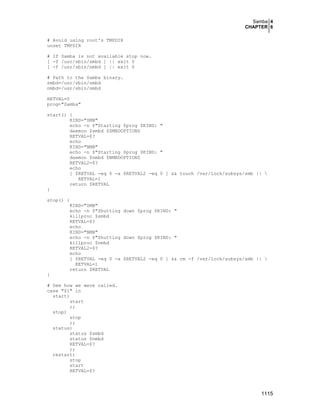
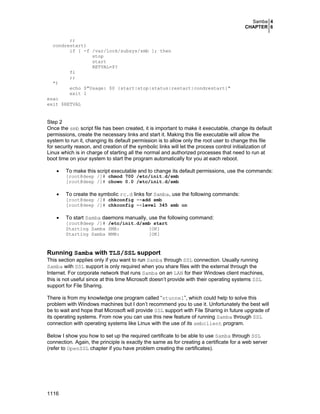
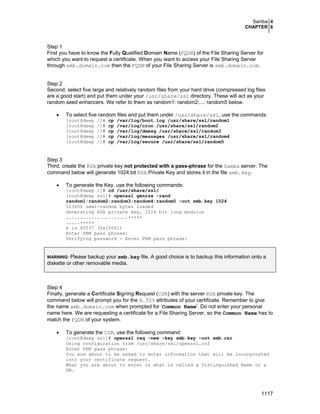


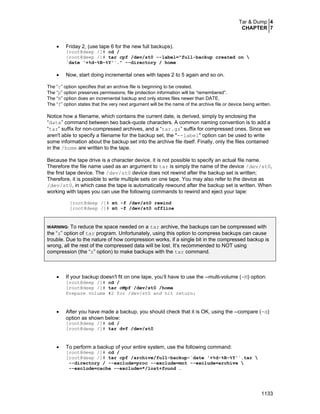
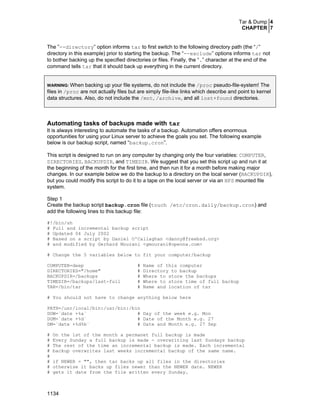

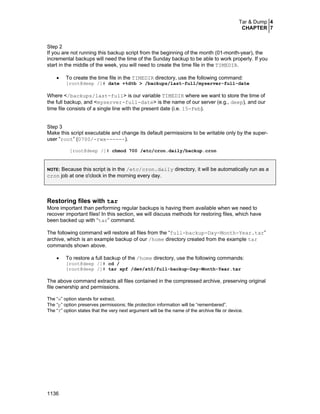
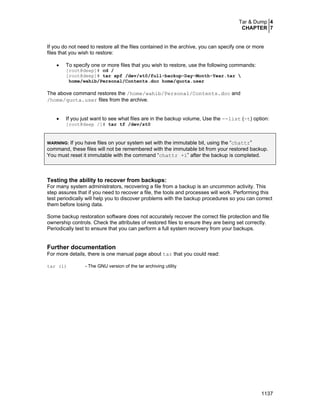


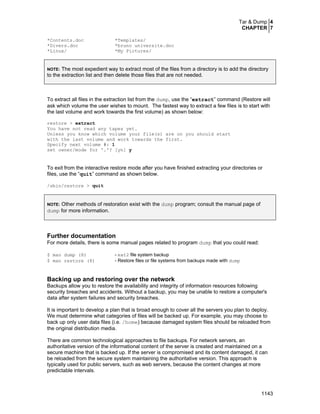

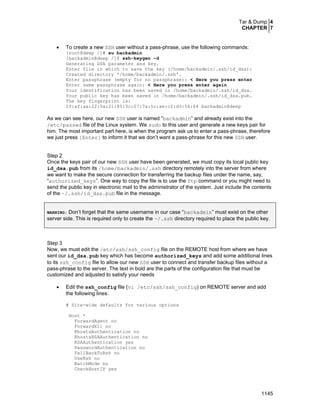
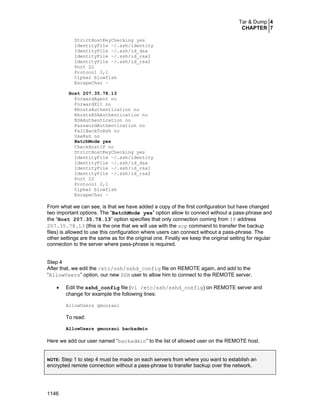


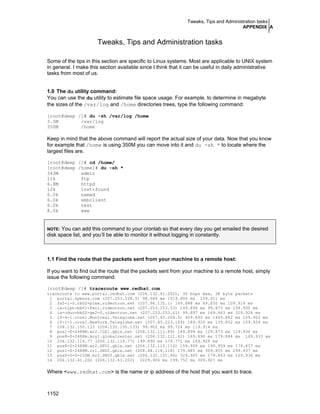
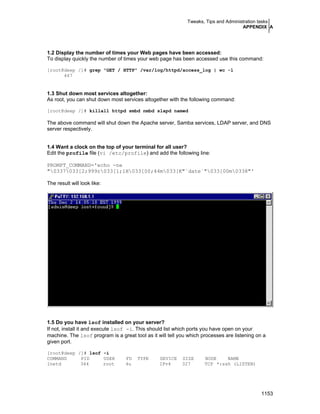
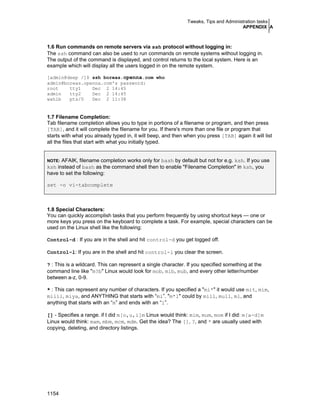


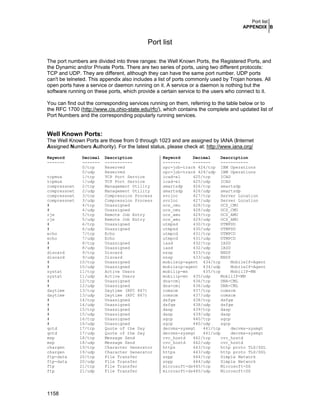


The document is a detailed guide titled 'Securing and Optimizing Linux: The Hacking Solution' by Gerhard Mourani, covering various aspects of Linux system setup and security. It includes installation instructions, security measures, network management, and protocols, with an emphasis on practical implementation and optimization. The publication comprises multiple chapters that address topics from file management to email protocols, providing a comprehensive resource for Linux administrators.


![Introducing JPCERT/CC's activity for securing IPv6 gears [APRICOT 2015]](https://cdn.slidesharecdn.com/ss_thumbnails/ipv6-security-programfinal1425344757-150302191631-conversion-gate01-thumbnail.jpg?width=640&height=640&fit=bounds)