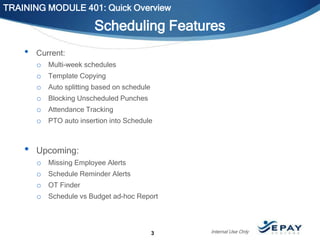
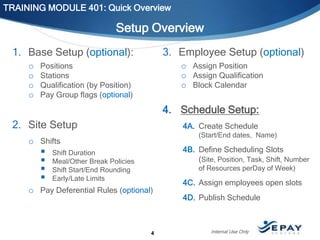
EPAY Systems: Scheduling Training
TRAINING MODULE 401: Quick Overview (15 minutes)
TRAINING MODULE 402: Managing Schedules (15 minutes)
TRAINING MODULE 403: Optional Features Setup (15 minutes)
* Include additional time after each training module for Q & A

1

Internal Use Only
TRAINING MODULE 401:
Quick Overview

Features covered in this segment:
o Scheduling Features
o Setup Overview

o Creating Schedules
o Defining Scheduling Slots
o Assigning Employees
o Publishing Schedules

Internal Use Only
TRAINING MODULE 401: Quick Overview

Scheduling Features
•

Current:
o Multi-week schedules
o Template Copying
o Auto splitting based on schedule
o Blocking Unscheduled Punches
o Attendance Tracking
o PTO auto insertion into Schedule

•

Upcoming:
o
o
o
o

Missing Employee Alerts
Schedule Reminder Alerts

OT Finder
Schedule vs Budget ad-hoc Report

3

Internal Use Only
TRAINING MODULE 401: Quick Overview

Setup Overview
3. Employee Setup (optional)

1. Base Setup (optional):
o
o
o
o

o Assign Position
o Assign Qualification
o Block Calendar

Positions
Stations
Qualification (by Position)
Pay Group flags (optional)

4. Schedule Setup:
2. Site Setup

4A. Create Schedule
(Start/End dates, Name)

o Shifts






4B. Define Scheduling Slots
(Site, Position, Task, Shift, Number

Shift Duration
Meal/Other Break Policies
Shift Start/End Rounding
Early/Late Limits

of Resources perDay of Week)

o Pay Deferential Rules (optional)

4

4C. Assign employees open slots
4D. Publish Schedule

Internal Use Only
TRAINING MODULE 401: Quick Overview

4A. Create a Schedule
From Desktop select Shift & Schedules

1.

Select Site

2.

Click “Add New
Schedule” Button

3.

Edit Schedule Name

4.

Select Schedule Date Range
(12 weeks max)

5.

Save Changes

Internal Use Only
TRAINING MODULE 401: Quick Overview

4B. Define Scheduling Slots
1.

Click “Add New” link

2.

Select: Shift, Post, Task, Station (optional)

3.

Enter number of employees needed for each day of week

4.

Save Changes

Internal Use Only
TRAINING MODULE 401: Quick Overview

4C. Assign employees open slots
1.

Click “Assign” link

2.

Assign in the employee to Open slots. Notice, employee availability is diplayed

3.

Click “Save Changes” button

Internal Use Only
TRAINING MODULE 401: Quick Overview

4C. Assign employees open slots
•

Got to Employee Schedules Tab view resource assignments.
Filter by
o Employee
o
o
o

Task

Station
Shift

Internal Use Only
TRAINING MODULE 401: Quick Overview

4C. Assign employees open slots
You can edit schedules from Employee Schedules view
1. Click on a filled slot to view its detail
2. You can change employee’s schedule
3. Reassign employee’s shift
4. Reassign employee’s task
5. Remove employee from the time slot

Internal Use Only
TRAINING MODULE 401: Quick Overview

4D. Publish Schedule
1.

Add and fill more scheduling
slots

2.

Checkmark “Publish”

3.

Click “Save Changes” button

4.

Notice the published week is
highlighted in GREEN

Internal Use Only
TRAINING MODULE 401: Quick Overview

4D. Publish Schedule
Published Schedule perform the following:
i.

Schedule is exposed to Employee (on WebPunch)

ii.

Schedule Tracker and Attendance forms are enabled

iii.

Auto-split and Unscheduled Punch blocking is enabled

Internal Use Only
Q&A

Internal Use Only
TRAINING MODULE 402:
Managing Schedules

Features covered in this segment:
o Copying Schedules
o Attendance Report

o Schedule Tracker

Internal Use Only
TRAINING MODULE 402: Managing Schedules

Copying Schedules

•

You can create schedules by copying from a predefined
template or from previous week:

•
•

You can extend an existing schedule by 12 weeks

•

You can copy from a weekly template to one or more
weeks.

You can copy from previous week with or without
employees assigned

Internal Use Only
TRAINING MODULE 402: Managing Schedules

Copying From Previous Week
From Desktop select Shift & Schedules

1.

Select Site

2.

Select your
schedule

3.

Extend your schedule date

Internal Use Only
TRAINING MODULE 402: Managing Schedules

Copying From Previous Week
4.

Select a new date range

5.

Click on “Fetch Plans
From” dropbox and select
copying from Previous Week
with or without resources

6.

Click Copy button

7.

New Schedule appears

Internal Use Only
TRAINING MODULE 402: Managing Schedules

Copying From Template
From Desktop select Shift & Schedules

1.

Select Site

2.

Select your
schedule

3.

Extend your schedule date

Internal Use Only
TRAINING MODULE 402: Managing Schedules

Copying From Template
4.

Select a new date range

5.

Click on “Fetch Plans
From” dropbox and select
copying from Template with or
without resources

6.

Click Copy button

7.

Select template

8.

Select copying ranage

9.

Apply the template

10.

New Schedule appears

Internal Use Only
TRAINING MODULE 402: Managing Schedules

Attendance Report
From Desktop select Timesheets

1.

Click “Attendance Report” link

Internal Use Only
TRAINING MODULE 402: Managing Schedules

Schedule Tracker
From Desktop select Timesheets

1.

Click “Weekly Schedule Tracker” link

2.

You can reassign employees in past and future time slots

Internal Use Only
Q&A

Internal Use Only
TRAINING MODULE 403:
Optional Features Setup

Features covered in this segment:
o Employee Qualifications
o Employee Block Calendar
o Auto-Splitting Based on Schedule
o Blocking Out-of-Schedule Punches
o Using Stations
o Shift Scheduling

o Budgeting from Schedules
o Scheduling Imports
Internal Use Only
TRAINING MODULE 403: Optional Features Setup

Define Qualifications
From Desktop select Shift & Schedules

1.

Click “Qualification Search” link

2.

You add/edit qualification

3.

You can assign qualifications to one or many posts
Internal Use Only
TRAINING MODULE 403: Optional Features Setup

Assign Qualifications
From Desktop select Employees

1.

Select Employee

2.

Click Qualification Tab: Assign pertinent Qualification to an employee. Employees
with valid qualifications will be listed during resource assignments in schedules.

Internal Use Only
TRAINING MODULE 403: Optional Features Setup

Employee Block Calendar
From Desktop select Employees

1.

Select Employee

2.

Click Block Calendar Tab: Define time-blocks that employee is not available for
scheduling. Blocked times are displayed during resource assignments in schedules.

Internal Use Only
TRAINING MODULE 403: Optional Features Setup

Auto-Splitting Based on Schedule

Process Overview
1. Enable Auto-Splitting in Pay Group Page
2. Define shifts for each splitting time block
3. Define schedules
4. Publish schedules

Internal Use Only
TRAINING MODULE 403: Optional Features Setup

Auto Splitting Timecards Based on Schedule
1. Enable Pay Group flags to auto splitting based on schedule

2. Define shifts for each splitting time block

Internal Use Only
TRAINING MODULE 403: Optional Features Setup

Auto Splitting Timecards Based on Schedule
3. Define Schedule and Assign Resources

4. Publish Schedule

Internal Use Only
TRAINING MODULE 403: Optional Features Setup

Auto Splitting Timecards Based on Schedule
Employee punches IN/OUT once and the Time is splitted
according to the schedule:

Internal Use Only
TRAINING MODULE 403: Optional Features Setup

Blocking Out-of-Schedule Punches

Process Overview
1. Enable Block Scheduling Exception in Pay Group Page
2. Define shifts for each splitting time block
3. Define schedules
4. Publish schedules

Internal Use Only
TRAINING MODULE 403: Optional Features Setup

Auto Splitting Timecards Based on Schedule
1. Enable Block Scheduling Exception flag in Pay Group

2. Define Shift Exception Limits

3. Designated Employee’s punches outside of this limit requires
approval. Punch must arrive from Time devices. Web Time
Entry is automatically approved.

Internal Use Only
TRAINING MODULE 403: Optional Features Setup

Using Stations

i.

From Desktop select Stations

ii.

Create Stations by Site

iii.

Select Stations in during Scheduling Time Slot setup

Internal Use Only
TRAINING MODULE 403: Optional Features Setup

Shift Scheduling
Allow employee’s default shift to change based on their time or day of
arrival

•
•

A new Shift-Schedule tab under the Site Profile page
The employee’s time is modified based on their Shift
o Meal Break Rules/Other Break Rules
o Shift Exceptions
o Shift Min/Max

Internal Use Only
Q&A

Internal Use Only
Upcoming Education
•

New Time & Attendance Technologies for Tracking the Mobile
Workforce Webinars. May 30: 10:00 cst

•

California Wage & Hour Labor Law--Avoiding Common Pitfalls with a
Distributed Workforce. June 26: 12:00 cst

•

How to Avoid Costly Wage & Hour Pitfalls for Healthcare Employers
with a Distributed Workforce. Sept 25: 12:00 cst

•

How to Avoid Costly Wage & Hour Pitfalls for Employers in the
Hospitality Industry. Nov 6: 12:00 cst

Register at www.EPAYsystems.com

35

Internal Use Only
Customer Follow Contest!

• Follow what is going on at EPAY
•

Systems on Twitter and/or
LinkedIn and be entered for a
chance to win a new iPad Mini!

Learn more at
http://www.epaysystems.com/customersocial-media-contest/

Connect with EPAY:
o LinkedIn – follow our company
page at EPAY Systems
o Twitter -- @EPAYsystems

36

Internal Use Only

EPAY Systems Scheduling Training

  • 1.
    EPAY Systems: SchedulingTraining TRAINING MODULE 401: Quick Overview (15 minutes) TRAINING MODULE 402: Managing Schedules (15 minutes) TRAINING MODULE 403: Optional Features Setup (15 minutes) * Include additional time after each training module for Q & A 1 Internal Use Only
  • 2.
    TRAINING MODULE 401: QuickOverview Features covered in this segment: o Scheduling Features o Setup Overview o Creating Schedules o Defining Scheduling Slots o Assigning Employees o Publishing Schedules Internal Use Only
  • 3.
    TRAINING MODULE 401:Quick Overview Scheduling Features • Current: o Multi-week schedules o Template Copying o Auto splitting based on schedule o Blocking Unscheduled Punches o Attendance Tracking o PTO auto insertion into Schedule • Upcoming: o o o o Missing Employee Alerts Schedule Reminder Alerts OT Finder Schedule vs Budget ad-hoc Report 3 Internal Use Only
  • 4.
    TRAINING MODULE 401:Quick Overview Setup Overview 3. Employee Setup (optional) 1. Base Setup (optional): o o o o o Assign Position o Assign Qualification o Block Calendar Positions Stations Qualification (by Position) Pay Group flags (optional) 4. Schedule Setup: 2. Site Setup 4A. Create Schedule (Start/End dates, Name) o Shifts     4B. Define Scheduling Slots (Site, Position, Task, Shift, Number Shift Duration Meal/Other Break Policies Shift Start/End Rounding Early/Late Limits of Resources perDay of Week) o Pay Deferential Rules (optional) 4 4C. Assign employees open slots 4D. Publish Schedule Internal Use Only
  • 5.
    TRAINING MODULE 401:Quick Overview 4A. Create a Schedule From Desktop select Shift & Schedules 1. Select Site 2. Click “Add New Schedule” Button 3. Edit Schedule Name 4. Select Schedule Date Range (12 weeks max) 5. Save Changes Internal Use Only
  • 6.
    TRAINING MODULE 401:Quick Overview 4B. Define Scheduling Slots 1. Click “Add New” link 2. Select: Shift, Post, Task, Station (optional) 3. Enter number of employees needed for each day of week 4. Save Changes Internal Use Only
  • 7.
    TRAINING MODULE 401:Quick Overview 4C. Assign employees open slots 1. Click “Assign” link 2. Assign in the employee to Open slots. Notice, employee availability is diplayed 3. Click “Save Changes” button Internal Use Only
  • 8.
    TRAINING MODULE 401:Quick Overview 4C. Assign employees open slots • Got to Employee Schedules Tab view resource assignments. Filter by o Employee o o o Task Station Shift Internal Use Only
  • 9.
    TRAINING MODULE 401:Quick Overview 4C. Assign employees open slots You can edit schedules from Employee Schedules view 1. Click on a filled slot to view its detail 2. You can change employee’s schedule 3. Reassign employee’s shift 4. Reassign employee’s task 5. Remove employee from the time slot Internal Use Only
  • 10.
    TRAINING MODULE 401:Quick Overview 4D. Publish Schedule 1. Add and fill more scheduling slots 2. Checkmark “Publish” 3. Click “Save Changes” button 4. Notice the published week is highlighted in GREEN Internal Use Only
  • 11.
    TRAINING MODULE 401:Quick Overview 4D. Publish Schedule Published Schedule perform the following: i. Schedule is exposed to Employee (on WebPunch) ii. Schedule Tracker and Attendance forms are enabled iii. Auto-split and Unscheduled Punch blocking is enabled Internal Use Only
  • 12.
  • 13.
    TRAINING MODULE 402: ManagingSchedules Features covered in this segment: o Copying Schedules o Attendance Report o Schedule Tracker Internal Use Only
  • 14.
    TRAINING MODULE 402:Managing Schedules Copying Schedules • You can create schedules by copying from a predefined template or from previous week: • • You can extend an existing schedule by 12 weeks • You can copy from a weekly template to one or more weeks. You can copy from previous week with or without employees assigned Internal Use Only
  • 15.
    TRAINING MODULE 402:Managing Schedules Copying From Previous Week From Desktop select Shift & Schedules 1. Select Site 2. Select your schedule 3. Extend your schedule date Internal Use Only
  • 16.
    TRAINING MODULE 402:Managing Schedules Copying From Previous Week 4. Select a new date range 5. Click on “Fetch Plans From” dropbox and select copying from Previous Week with or without resources 6. Click Copy button 7. New Schedule appears Internal Use Only
  • 17.
    TRAINING MODULE 402:Managing Schedules Copying From Template From Desktop select Shift & Schedules 1. Select Site 2. Select your schedule 3. Extend your schedule date Internal Use Only
  • 18.
    TRAINING MODULE 402:Managing Schedules Copying From Template 4. Select a new date range 5. Click on “Fetch Plans From” dropbox and select copying from Template with or without resources 6. Click Copy button 7. Select template 8. Select copying ranage 9. Apply the template 10. New Schedule appears Internal Use Only
  • 19.
    TRAINING MODULE 402:Managing Schedules Attendance Report From Desktop select Timesheets 1. Click “Attendance Report” link Internal Use Only
  • 20.
    TRAINING MODULE 402:Managing Schedules Schedule Tracker From Desktop select Timesheets 1. Click “Weekly Schedule Tracker” link 2. You can reassign employees in past and future time slots Internal Use Only
  • 21.
  • 22.
    TRAINING MODULE 403: OptionalFeatures Setup Features covered in this segment: o Employee Qualifications o Employee Block Calendar o Auto-Splitting Based on Schedule o Blocking Out-of-Schedule Punches o Using Stations o Shift Scheduling o Budgeting from Schedules o Scheduling Imports Internal Use Only
  • 23.
    TRAINING MODULE 403:Optional Features Setup Define Qualifications From Desktop select Shift & Schedules 1. Click “Qualification Search” link 2. You add/edit qualification 3. You can assign qualifications to one or many posts Internal Use Only
  • 24.
    TRAINING MODULE 403:Optional Features Setup Assign Qualifications From Desktop select Employees 1. Select Employee 2. Click Qualification Tab: Assign pertinent Qualification to an employee. Employees with valid qualifications will be listed during resource assignments in schedules. Internal Use Only
  • 25.
    TRAINING MODULE 403:Optional Features Setup Employee Block Calendar From Desktop select Employees 1. Select Employee 2. Click Block Calendar Tab: Define time-blocks that employee is not available for scheduling. Blocked times are displayed during resource assignments in schedules. Internal Use Only
  • 26.
    TRAINING MODULE 403:Optional Features Setup Auto-Splitting Based on Schedule Process Overview 1. Enable Auto-Splitting in Pay Group Page 2. Define shifts for each splitting time block 3. Define schedules 4. Publish schedules Internal Use Only
  • 27.
    TRAINING MODULE 403:Optional Features Setup Auto Splitting Timecards Based on Schedule 1. Enable Pay Group flags to auto splitting based on schedule 2. Define shifts for each splitting time block Internal Use Only
  • 28.
    TRAINING MODULE 403:Optional Features Setup Auto Splitting Timecards Based on Schedule 3. Define Schedule and Assign Resources 4. Publish Schedule Internal Use Only
  • 29.
    TRAINING MODULE 403:Optional Features Setup Auto Splitting Timecards Based on Schedule Employee punches IN/OUT once and the Time is splitted according to the schedule: Internal Use Only
  • 30.
    TRAINING MODULE 403:Optional Features Setup Blocking Out-of-Schedule Punches Process Overview 1. Enable Block Scheduling Exception in Pay Group Page 2. Define shifts for each splitting time block 3. Define schedules 4. Publish schedules Internal Use Only
  • 31.
    TRAINING MODULE 403:Optional Features Setup Auto Splitting Timecards Based on Schedule 1. Enable Block Scheduling Exception flag in Pay Group 2. Define Shift Exception Limits 3. Designated Employee’s punches outside of this limit requires approval. Punch must arrive from Time devices. Web Time Entry is automatically approved. Internal Use Only
  • 32.
    TRAINING MODULE 403:Optional Features Setup Using Stations i. From Desktop select Stations ii. Create Stations by Site iii. Select Stations in during Scheduling Time Slot setup Internal Use Only
  • 33.
    TRAINING MODULE 403:Optional Features Setup Shift Scheduling Allow employee’s default shift to change based on their time or day of arrival • • A new Shift-Schedule tab under the Site Profile page The employee’s time is modified based on their Shift o Meal Break Rules/Other Break Rules o Shift Exceptions o Shift Min/Max Internal Use Only
  • 34.
  • 35.
    Upcoming Education • New Time& Attendance Technologies for Tracking the Mobile Workforce Webinars. May 30: 10:00 cst • California Wage & Hour Labor Law--Avoiding Common Pitfalls with a Distributed Workforce. June 26: 12:00 cst • How to Avoid Costly Wage & Hour Pitfalls for Healthcare Employers with a Distributed Workforce. Sept 25: 12:00 cst • How to Avoid Costly Wage & Hour Pitfalls for Employers in the Hospitality Industry. Nov 6: 12:00 cst Register at www.EPAYsystems.com 35 Internal Use Only
  • 36.
    Customer Follow Contest! •Follow what is going on at EPAY • Systems on Twitter and/or LinkedIn and be entered for a chance to win a new iPad Mini! Learn more at http://www.epaysystems.com/customersocial-media-contest/ Connect with EPAY: o LinkedIn – follow our company page at EPAY Systems o Twitter -- @EPAYsystems 36 Internal Use Only