Roksanna Wasiunec is an art major focusing on computer graphics and photography. This portfolio contains examples of her:
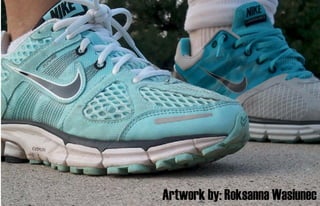
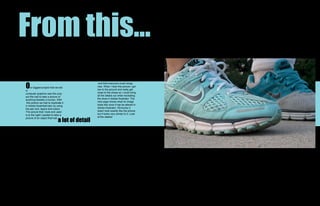
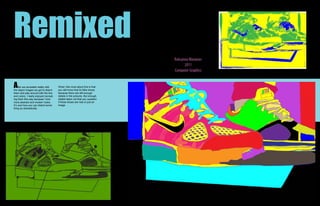
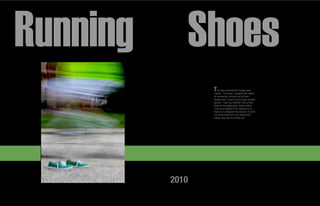
1) Computer graphics work recreating photographs in Adobe Illustrator like a close up photo of Nike shoes titled "Nike's on Them Feet".
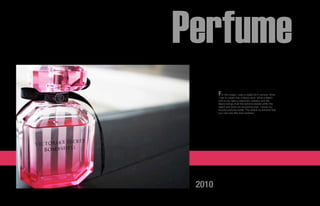
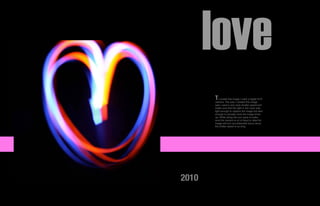
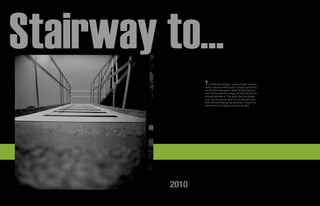
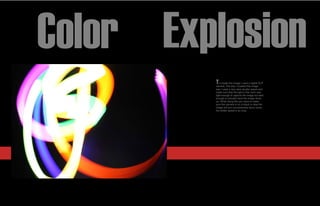
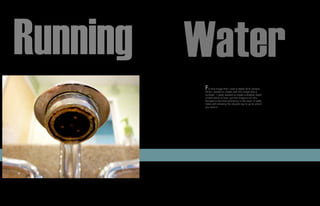
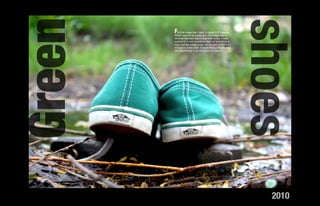
2) Photography projects including macro shots, images exploring motion with slow shutter speeds, and photos investigating contrasts.
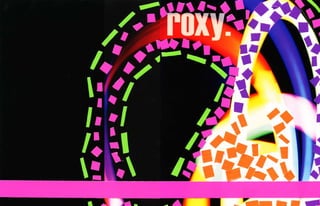
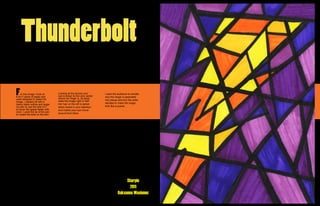
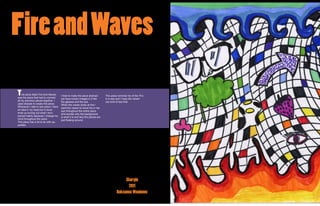
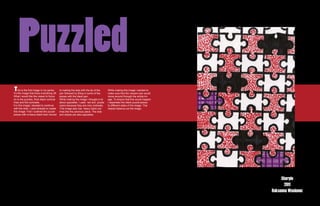
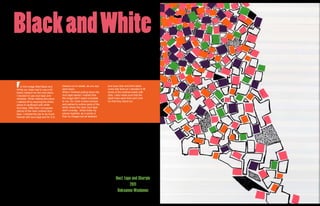
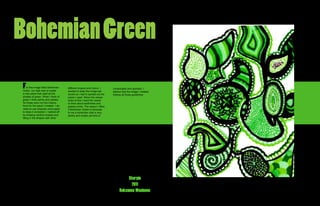
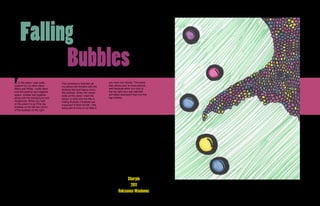
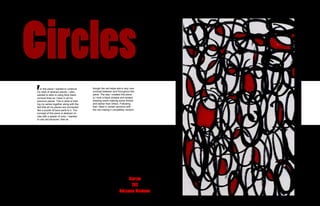
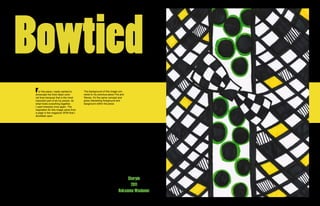
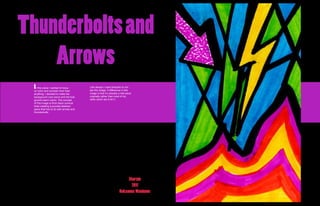
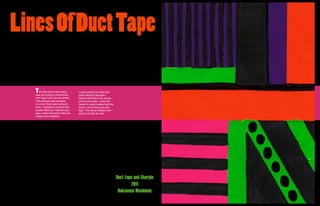
3) Major seminar pieces using materials like sharpies, duct tape, and tape to create abstract puzzling images connected as a series exploring themes of opposites. The pieces are meant to make the viewer question the images and move their eyes throughout.
This document discusses the author's favorite project of the semester where they drew shapes based on a photograph. The author chose a picture of a New Orleans streetcar that they took. They used Adobe Illustrator and outlined shapes with color to capture the image. They wanted the viewer to understand the layers and overlapping shapes used to compose the piece. The author enjoyed having control over their picture selection and approach. They found shaping details like reflections challenging but adding more over time made the piece better.
This document summarizes an experimental photography project. The student created three images exploring ideas of urban environments and reflections. For the first image, they superimposed two photos of skateboards onto a building to symbolize skateboarders' freedom. They were happy with realizing this initial idea. The second image showed a building reflection in water turned upside down to portray reflections as a colorful other world. Weak points included tree branches hard to select. The student felt the images fulfilled the brief of being experimental and having an urban theme.
This document summarizes Oliver Georgiou's experimental photography project. It includes annotations and evaluations of three images: one featuring a skateboard blended into a building's architecture, one showing a building reflection with one half in color and the other in black and white, and one depicting stars and clouds on a building and path at night titled "Bring an Umbrella." Oliver aimed to portray different levels of urbanization through these images and utilized techniques like multiple exposures and color/brightness adjustments. He analyzes how well each image fulfills his intentions and how they could be improved, discussing formal elements and technical qualities.
- The document summarizes a photography student's process of researching techniques, creating a portfolio, and developing a final exhibition focused on abstract and macro photography.
- Key strengths of the exhibition included compelling editing that encouraged closer examination of photos and high resolution capturing detail. Weaknesses included lack of a unified theme and inability to take truly macro photos without a macro lens.
- While the exhibition did not fully match the original plan due to unavailable equipment and changes during the process, the student was still pleased with highlights like a photo combining a peacock feather and face.
This document provides an overview and development process for a game environment art project titled "Late Night." The artist was inspired by neo-noir films, TV shows, and games. They researched these influences and created mood boards. Concepts developed included a reimagined lunch counter setting. Production involved blocking out the scene, creating materials and lighting, modeling assets, and applying post-processing effects to achieve the desired neo-noir visual style. The artist focused on showcasing skills in art direction, lighting, materials, and presentation within technical constraints for their portfolio piece.
1) The document discusses different experimental photography styles including out of focus images, movement, reflections, and photo montages.
2) For out of focus images, the photographer took blurry photos of books in the library to showcase the blurry outlines and popping colors. For movement photos, long shutter speeds captured blurred images of people walking.
3) Reflection photos were captured at angles to show reflected scenes. The best photo montage combined scattered individual photos to create a rough collage-like finished image.
The document describes the process of creating a map and background for a game project. It discusses using Photoshop to create a map with land and ocean areas, adding effects like glow and textures. It then discusses using Unity to build a 3D landscape using terrain tools and textures from the asset store. The document notes challenges with directional cameras and adding trees in Unity. It also describes creating concept art characters by sketching and scanning them in, and focusing on fantasy elements. The background was made in Photoshop with details like a bridge and floating island, using layers and Steampunk elements. Lighting and textures were explored in Unreal to understand perspectives and properly cast shadows to make objects look natural.
This document is a production log for a student named Amy Brockbank who is creating a digital graphic for a computer game called "Project A" for their Creative Media Production course. Over the course of several dates, Amy gathered images to create a background, traced photos of herself and additional images to create game characters and environments, and designed packaging for the game cover and back. The final piece places the game title "Project A" above a character and robots on a post-apocalyptic cityscape background.
The document discusses various types of animations and animation techniques. It describes banner ads which appear on websites like YouTube to advertise products. It also discusses interactive animations on websites like the Nike custom shoe creator. It explains linear animations that loop continuously versus interactive animations. Additional topics covered include flick books, GIF files, the animation process, persistence of vision, stop motion, frame rates, vector vs raster animation, and using Flash software to create animations.
This document provides a tutorial for using Photoshop to create dynamic distortion effects. The tutorial uses a photo of a basketball player as an example. It describes steps to isolate the subject from the background using the pen tool, import it onto a new canvas, and adjust colors and lighting. Layers are used to add a textured background and shadow. Brush tools are demonstrated to create the effect of the subject melting or distorting into colorful paint strokes. The overall goal is to convey a sense of movement and fragmentation through these Photoshop techniques.
- The document discusses several experimental photography techniques: long exposure, tilt shift, panoplanets, and provides examples of each.
- Long exposure uses a slow shutter speed to distort subjects with light trails. Tilt shift uses a tilt shift lens to blur the top and bottom of an image to change perspective. Panoplanets are images stitched together in post to create a warped panoramic effect.
- The techniques can be used for both film and digital photography. Long exposure has traditionally been used but remains popular today. Tilt shift and panoplanets are examples of techniques enabled by new technology.
The document is a reflective journal discussing work on creating pixel animations and a demo level for a video game. Some key points:
- The author practiced creating pixel prince and princess animations using Dino Pixel but was unsatisfied with the outcomes.
- Successes included ideas for a prince's cape and planning animations beforehand. Less successful aspects were uneven pixel placement and rushing parts.
- Later work focused on the demo level background in Pixilart. Successes included new animation tools and color schemes. Difficulties included layer organization and redoing frames.
- Current work adds a walking prince animation and icons. The author is happy with progress but finds some tasks time
The document provides an evaluation of the photographer's experimental photography project. It describes the process of taking photos of a model dressed in flowing clothing in natural outdoor settings [1]. The photos were edited in Photoshop to achieve a surreal, dream-like quality by altering colors, exposures, and adding layers of additional scenes and a star filter [2]. A final image was created by combining multiple photos using layers, including an image of the model looking over a bank and another of her sleeping on a tree [3]. The photographer was happy with achieving their goal of creating surreal images that transport the viewer into the human subconscious.
The artist Rocío Montoya uses both traditional and non-traditional techniques in her work. She takes photographs and then manipulates them using handmade collages as well as digital editing. Her aim is to convey perceptions of nature through aesthetic experiences. The artist Matthew Brandt uses a traditional technique by submerging printed photographs in water from the locations depicted to degrade the images. Ellen Hoverkamp uses the non-traditional technique of scanner photography to create collages of plants with a black background.
The document outlines an experimental photography project involving double exposure, zoom burst, and post-production techniques. The student plans to create double exposures by merging two contrasting images, and zoom burst photos exploring different camera settings. They will require a DSLR camera and locations in York and Leeds. A schedule is provided detailing planned shoots on specific dates with intended subjects and equipment. Contact sheets are included showing initial results.
The document provides an evaluation of the student's photography project. It summarizes the key aspects of the project including the technical and aesthetic qualities of the images, the skills learned, and the production process. The student aimed to show how technology influences art through glitching, repetition, and pixelation effects in their images of everyday urban scenes. They struggled with some technical aspects like blurry photos but learned new editing skills in Photoshop. The evaluation reflects on what they achieved and possibilities for future improvement.
After proposing a project on experimental photography, the document summarizes Jordanne Thorpe's process for three images. Thorpe took outdoor photos of a model in light, flowing clothing near a river to portray a dreamlike state. Edits in Photoshop included adjusting lighting to seem surreal, combining images, and adding a star filter. The first image shows the model looking over a bank and sleeping on bark. Unnatural eye colors were added. The second landscape image was edited and combined with stars over rolling hills. Overall, Thorpe is pleased with translating the planned dream-like theme into the final composite images.
Tesfah Watkins-Scott created a production log to document the process of designing a poster for their silent film. They researched conventions of silent film posters and captions to design a background. Images from the film were edited to black and white and placed on the poster. The logo, title, and credits were designed using fonts matching the genre. Changes were made to improve elements like character images and the production logo. The final poster effectively portrayed the film's story and genre within the constraints of a silent film aesthetic.
The document describes the process of designing a digipak album cover and inserts. Key steps included:
1) Editing a globe photograph for the front cover, including straightening, adding text, and applying a sepia tone.
2) Choosing a globe photograph for the back cover and editing out glare, adding song text over a semi-transparent rectangle, and applying design elements like the artist's website.
3) Editing photographs for the interior spreads, including adding door frames linking images, candles, picture frames, and a pocket indicator.
4) Assembling the completed digipak design.
The document describes the process of designing a digipak album cover and inserts. Key steps included:
1) Editing a globe photograph for the front cover, including straightening, adding text, and applying a sepia tone.
2) Choosing a globe photograph for the back cover and editing out glare, adding song text over a semi-transparent rectangle, and applying design elements like the artist's website.
3) Editing photographs for the interior spreads, including adding door frames linking images, candles, picture frames, and a pocket indicator.
4) Assembling the completed digipak design and flipping layers so it could be printed and assembled properly.
The document provides details on the production process for creating visual effects scenes combining elements from Mass Effect and Star Wars. Key points include:
- Importing and editing 3D models, then animating them and adding lighting/textures to create scenes like a Mass Effect relay and ships battling Reapers.
- Facing challenges getting textures to work properly and UV maps to import correctly, requiring restarting scenes.
- Creating a scene inside the relay's portal showing Star Destroyers and Reapers clashing, then adding camera movement.
- Continuing to refine scenes by adding particles, lights, camera movements and other effects to make the scenes feel more alive and cinematic.
The document summarizes the student's experimental photography assignments exploring photomontage techniques. For the first image, the student manipulated brightness, saturation, and added a blue stroke around layered images of a map. They found this abstract approach most successful. The second image aimed to emulate David Hockney's style by layering corridor photos and editing colors. For the third, the student created a Hockney-inspired grid with individual square manipulations like opacity and overlays. Overall, the assignments explored locations through photomontage, with influences from Hockney, to fulfill the theme of discovery through experimental photography.
Hannah Sewell experimented with experimental photography techniques like blurring and movement. For blurring, she found that an aperture of F9 created the best balance of blur and focus. She used blurring to highlight lights and give images a mystical quality. For movement photos, she used a fast shutter speed of F10 to capture both moving and still subjects, creating a ghostly effect. Her favorite image used these techniques to show a variety of movements among people, with some transparent and others with defined outlines. Overall, her images successfully captured lights, movement, and abstract qualities through experimental techniques.
The document summarizes several experimental photography techniques explored by the author, including:
1. Out of focus photography, where the author explored blurring images to merge colors and create abstract effects.
2. Movement photography, where the author used slow shutter speeds to capture movement, such as two figures in one shot.
3. Montage photography, where the author was inspired by David Hockney's collage work and created their own montages by combining multiple close-up images.
4. Reflection photography, where the author experimented with capturing reflections in surfaces like mirrors and windows.
The document describes an experiment with multiple exposure photography. The photographer took an original image of a temple and applied a lomography effect to give it a darkened style. They then tried double exposing the image to make cracks appear in the building as if it had deteriorated over time. They realized overlay and soft light effects could be used to add elements to the darkened cloud areas as well. The finished image is shown using a storm cloud found online overlaid on the temple image. Another image shows cracks stretched across a building with different layer styles tested before deciding on overlay. Overall the photographer was happy with the results and says they will provide step-by-step instructions for how the finished effect was achieved.
This document defines key design principles for photography including shape, lines, texture, color, balance, gradient, repetition, pattern, contrast, dominance, proportion, unity, negative space, rule of thirds, and visual center. Each principle is defined in one sentence. The document provides essential definitions of common photographic composition and design elements.
The document discusses various design elements and principles including:
- Lines, shapes, forms, color, texture, depth, light, motion, mass, tone, value, space, balance, emphasis, proportion, unity, contrast, harmony, proximity.
It provides definitions and examples for each element/principle, such as the three types of shapes (natural, geometric, abstract), how size and overlapping can illustrate depth, and the different types of balance (symmetrical, asymmetrical, radial).
This document defines and explains various graphic design elements and principles, Photoshop tools and file formats. It discusses different types of lines, colors, values, shapes and textures that are basic graphic design elements. It then explains principles such as movement, balance, emphasis and unity. It also covers color properties including hue, chroma, tint/tone/shade, RGB, CMYK and color gamut. Additionally, it defines typography terminology like legibility, fonts, letter/word/line spacing and contrast. Lastly, it lists common file formats and provides brief descriptions of important Photoshop tools like layers, selection tools, and brush tool.
This document lists various design projects and the software used to create them. It includes flyers made with Illustrator and Photoshop using found images, print advertisements and beer labels made with InDesign and Photoshop combining hand drawn and found elements, a fact book cover layout in InDesign and Photoshop, and additional print advertisements and flyers created in InDesign and Photoshop incorporating found images.
Elements & Principles of Art Design PowerPointemurfield
The document outlines the elements and principles of art design. The elements are the basic parts that make up a work of art, including line, form, space, texture, shape, and color. The principles are concepts that affect the content and message, such as emphasis, movement, unity, rhythm, contrast, and variety. Elements structure the work and carry the message, while principles impact how the elements are used.
The document discusses several principles of composition including proportion, scale, balance, harmony, unity and variety, rhythm, and emphasis. It defines each principle and provides examples to illustrate different types of balance, such as symmetrical balance seen in Georgia O'Keeffe's painting "Oriental Poppies" and radial balance shown in a rose window's spiral pattern. Visual puzzles are also included asking the reader to find specified numbers of items or interpret images in different ways.
The document describes two experiments conducted by Sumiah Rose to practice pixel animation. In the first experiment, she created a ninja girl character but struggled to animate the legs walking realistically. In the second experiment, she focused on animating a stick figure walking by copying a step-by-step template, though the animation was still imperfect. She reflected that stripping animation down to basics helped her focus on the walking motion, and adding a simple moving background was a good first step towards more complex animations for her video game project.
The document provides a reflection on the student's work over 5 weeks creating assets for an animated film project. In week 1, they designed a poster in Photoshop using tools like the brush and smudge tools. In week 2, they created sand dunes and camera animation in Blender for an opening sequence. Archive footage was added in Premiere Pro. In week 3, narration was recorded and 2D animation was done in Photoshop and Adobe Animate. A t-shirt design promoting the film was made in Photoshop for week 4. Week 5 involved creating 3D driving scenes and a character in Blender.
Jack Henderson summarizes his film production process. He began by creating a shot list to plan out his project. During filming, he had to change his idea from a short film to a horror movie intro due to lacking enough content. In editing, he experimented with effects like warp stabilizer to add an unnatural feel. He also incorporated some stock footage and royalty-free music and audio clips. Overall, the planning process helped manage his time and the experimentation with effects during editing helped create atmosphere and tension for the horror genre.
The document summarizes the process of creating a game from start to finish over multiple sessions. It describes creating the background, character, animations, and sound effects. Key details include using pixel art to draw the background and character, adding layers for realism, struggling most with drawing the character, feeling surprised by own progress in animating, and importing some sound effects while making others in BeepBox. The process concluded by ordering all screens, adding sound, and exporting the final game.
Movement photography uses two techniques: keeping the camera still to capture movement blur, requiring a slow shutter speed; or moving the camera itself. The proper shutter speed depends on the moving subject and available light. The author took photos of stationary objects like a keyboard by moving the camera, but the quality suffered from time constraints and inexperience. Future attempts will focus on more interesting subjects with better planning.
The document discusses the process of creating a glitch photography image using techniques like the shear tool to separate elements and guide the eye, with the final image conveying an 80s aesthetic through manipulations like shearing and adding text. While some clarity was lost shrinking the subject, the final image would work well as a background or poster due to retaining clarity compared to other edited images.
The student created a photography exhibition exploring portrait and macro genres. They began by researching inspiration online and practicing different photography techniques outdoors. Images were edited in Photoshop, including using the auto color and HDR toning tools. The exhibition included portraits and close-up macro shots that were well received by peers. Feedback was positive about the quality of images and editing, though some noted the macro shots did not fully fit the portrait theme. Overall the project expanded the student's photography skills and knowledge of genres.
The document summarizes a production diary for creating concert visuals and other print products for a music artist. Over several days, the creator worked on animations, an album cover, zine, and other items. For the album cover, they edited photos, added 3D and lighting effects to create curtains and eyes. They also worked on a zine, creating collage-style covers and articles about the artist's albums. The diary details the creative process and problem-solving for each project element.
The document provides a production log for creating various 3D models and animations using basic primitive shapes in 3Ds Max. It summarizes the process of:
1) Creating a basic bedroom using only cubes and cuboids to furnish, including adding details like an open wardrobe door and a messy bed.
2) Animating a walking loop for a cube-shaped character, including adding swaying body movements and arm swinging to make it more realistic.
3) Modeling a penguin character out of primitive shapes like pyramids and oiltanks, and animating it with wing flapping, beak opening, and waddling movements.
4) Attempting to model a proportionate
The document describes three experiments Jack conducted related to creating animated games. In the first experiment, Jack animated a character moving and a score changing colors. In the second, Jack animated a bike moving along a track and a star changing colors. Issues arose from flipping the bike. In the third, Jack animated moving clouds and a shark to practice background animation. Reflections note elements Jack may include in the final product like moving backgrounds and a shark game, and that the experiments helped develop skills but need improvement for the final product.
Leah Ellis reflects on her process of creating animated frames for a production. She started by drawing line art and scanning it to add color in Photoshop using a tutorial. She found animating changing word sizes in Photoshop difficult and had to use AfterEffects instead. Later, she improved an explosion scene by adding many colored splashes instead of just flying objects. She also continued using layer masks, which she found easier than drawing colors. On another day, her scanner broke so she had to hand draw images to scan later, but it was fixed before the images could be lost. She finished scenes of a character flying and watching a village from a distance to show his assassin personality.
The student created a photography exhibition to showcase different techniques they learned. They began by researching inspiration online and practicing various photography genres. They focused on portraits but also included macros. The student used Canon DSLR cameras, tripods, and editing software to produce high quality images. Through the project, the student learned new editing skills like HDR toning and evaluating their work. They were pleased with capturing interpretations of other photographers and improving their skills, but would spend more time planning and trying another genre for future projects.
The document describes several experiments the author conducted using various digital tools to edit images, create animations, and work with sound.
In the first example, the author describes editing a photo of the Maldives by increasing saturation to make the water and trees more vibrant, and adding shadow to make the sky darker.
In the second example, the author experiments with adding glow, bevel, and emboss effects to text in Photoshop to make the font stand out against different colored backgrounds.
The third example discusses using BeepBox to create background music for a video game by layering different repetitive sounds into a pattern.
Subsequent examples describe creating pixel art using different apps, making basic anim
The student created 3D driving scenes in Blender for their film project. They created a desert environment using a noise texture on a plane mesh to simulate sand dunes. They duplicated the plane many times to build out the landscape. The student imported a human model and gave it a skin material with subsurface scattering to look more realistic. They worked on animating a fight scene between the protagonist and an antagonist character named Bellathon.
The document provides a reflection on the student's work creating animations and 3D scenes for their FM2 Production project over 5 weeks. In week 1, they created a poster in Photoshop using tools like the brush and smudge tools. In week 2, they animated sand dunes in Blender and added archive footage in Premiere Pro. In week 3, they recorded narration in Audition and added scrolling text in Premiere. They also referenced video to animate characters in Photoshop. In week 4, they designed a t-shirt for their film using threshold effects. In week 5, they textured planes in Blender to create a desert environment and imported 3D models to animate fighting scenes.
The document provides a reflection on the student's work over 5 weeks creating assets for an opening film sequence. In week 1, they created poster artwork in Photoshop using tools like the brush and smudge tools. In week 2, they modeled sand dunes and animated the camera in Blender. Archive footage was added in Premiere Pro. Week 3 involved recording narration in Audition and animating a character using video reference. A scrolling text was added in Premiere Pro. In week 4, the student designed a t-shirt using threshold effects and merging layers in Photoshop. Week 5 saw the creation of 3D driving scenes in Blender, including modeling a character and desert environment.
The document describes the development of the author's camera and editing skills over the course of creating a film trailer. It discusses learning about different camera angles and settings. It also talks about focusing more on shot composition and background elements as skills improved. Photoshop was used to create effects like reflections and lights for the magazine cover and poster. Various digital tools like Photoshop, Vegas Movie Studio, and Wordpress were used at different stages of the project.
Matthew Evans conducted two experiments to practice and improve his 3D modeling skills in Blender. In the first experiment, he created a rural scene with grass, trees, a cabin, and car to learn techniques like composition, modeling assets, and adding volumetric fog. In the second experiment, he used Blender's A.N.T. Landscape plugin to quickly model a canyon environment and added water to learn landscape creation and realistic water shading. Both experiments helped him develop new skills to incorporate better landscapes and environments into his final project.
The document discusses the improvements the author has made from their preliminary task to their full opening sequence product. They learned to use mise-en-scene better to establish the setting. While props were limited, they paid more attention to costumes, makeup, and removing unnecessary objects from shots. Lighting and sound were also improved to build tension and match the narrative. Editing skills in Sony Vegas grew, allowing color correction, brightness adjustments, and motion effects.
Chloe Smith took several experimental photography projects exploring reflection, blur, movement, and photo montages. For reflections, she achieved ghostly images in manual focus of stairwell lights. She found blurring images made them look like paintings. Using slow shutter speeds on a tripod, she captured moving figures transparently. For montages, she took overlapping photos and merged them, finding taking multiple rows created neater composites. Her favorite used brightness, vibrancy, and looked like individual photos were stuck together to cover a large scene.
This tutorial offers a step-by-step guide on how to effectively use Pinterest. It covers the basics such as account creation and navigation, as well as advanced techniques including creating eye-catching pins and optimizing your profile. The tutorial also explores collaboration and networking on the platform. With visual illustrations and clear instructions, this tutorial will equip you with the skills to navigate Pinterest confidently and achieve your goals.
Fashionista Chic Couture Maze & Coloring Adventures is a coloring and activity book filled with many maze games and coloring activities designed to delight and engage young fashion enthusiasts. Each page offers a unique blend of fashion-themed mazes and stylish illustrations to color, inspiring creativity and problem-solving skills in children.
This document announces the winners of the 2024 Youth Poster Contest organized by MATFORCE. It lists the grand prize and age category winners for grades K-6, 7-12, and individual age groups from 5 years old to 18 years old.
Boudoir photography, a genre that captures intimate and sensual images of individuals, has experienced significant transformation over the years, particularly in New York City (NYC). Known for its diversity and vibrant arts scene, NYC has been a hub for the evolution of various art forms, including boudoir photography. This article delves into the historical background, cultural significance, technological advancements, and the contemporary landscape of boudoir photography in NYC.
The cherry: beauty, softness, its heart-shaped plastic has inspired artists since Antiquity. Cherries and strawberries were considered the fruits of paradise and thus represented the souls of men.
2. Table Of Contents About the artist
Part 1.......... Computer Graphics Work
Part 2.......... Photography
Part 3.......... Major Seminar Work
*view my blog* H i my name is Roksanna Wasiunec, most call me
Roxy. I an art major here at SXU. I am going down
*purchase my magazine*
the graphs design route. I would like my focus to be
mainly photography. This is a portfolio of my pho-
tography, assignments from my computer graphics
class and Major Seminar class.
4. From this...
O
and that everyone could recog-
ur biggest project that we did nize. When I took this picture I got
in low to the ground and really get
computer graphics was this proj- close to the shoes so I could bring
ect.We had to take a picture of all the details out while recreating
anything besides a human. With the shoe in Adobe Illustrator. The
this picture we had to duplicate it next page shows what he image
in Adobe Illustrstart:ator by using looks like once it has be altered in
the pen tool, layers and colors. Adobe Illustrator. Obvioulsy it
The picture that I took and used does’t look exactly like the picture
is to the right.I wanted to take a but it looks very similar to it. Look
a lot of detail
picture of an object that had at the details!
5. ...To This
W
because you can be sloppy to
hen I was finally done this a certain extent at first than get
is what the project looked like. I more detailed and careful when
you get more to the foreground of
Nike’s On Them Feet
call it Nike’s on Them Feet. The
picture right above the final was the picture. To top off the picture
a picture of how the image came and add a more realistic effect,
together. What made it possible I put a gradient layer on certain
was working in layers. What you parts of the shoes to make them
would do is layer or put down the look even more 3 dimensional.
stuff the furthest back first and
keep adding on top of it. This
technique works really well
6. Remixed
Roksanna Wasiunec
2011
Computer Graphics
A fter we recreated reality with
the object images we got to distort
What I like most about this is that
you still know that its Nike shoes
them and play around with the line because there are still enough
and colors. I really enjoyed recreat- details in the pictures. But enough
ing them this way because I love details taken out that you question
more abstract and modern looks. if these shoes are real or just an
It’s cool how you can distort some- image.
thing so dramatically.
8. Perfume
For thiscreate was a Macro shot. What a Macro
image I used a digital SLR camera. What
I had to
shot is you take a stationary onbeject and the
Macro brings ot all the extreme details within the
object and blurs out everything else. I chose my
favorite perfume bottle. The details so extreme that
you cam see little dust particles.
2010
9. Running Shoes
T he idea behind this image was
motion. The way I created the effect
of someone running out of their
shoes was I used a very slow shutter
speed. I had my brother ride a bike
behind the stationary shoes while
I set up a digital SLR camera on a
tripod an snapped the picture. It took
a couple tries but I am extremely
happy the way it turned out.
2010
10. love
T o create this image I used a digital SLR
camera. The way I created this image
was I used a very slow shutter speed and
made sure that the light in the room was
light enough to capture the image but dark
enough to actually have the image show
up. While doing this you have to make
sure the camera is on a tripod or else the
image will turn out extremely blurry since
the shitter speed is so long.
2010
11. Stairway to...
T o create this image I used a Holga camera. I
really enjoyed working with a holga camera for
the first time because I liked the fact that you
don’t know what the image will look like till you
actually develop it. The wayI shot this image
was I got to ground level on my stomach and
shot the strairway going upwards. I enjoy how
the blurred out edges tuned out as well.
2010
12. Color Explosion
T o create this image I used a digital SLR
camera. The way I created this image
was I used a very slow shutter speed and
made sure that the light in the room was
light enough to capture the image but dark
enough to actually have the image show
up. While doing this you have to make
sure the camera is on a tripod or else the
image will turn out extremely blurry since
the shitter speed is so long.
13. Running Water
For this imagetothat I used a digital SLRwas a
camera.
What I wanted create with this image
contrast . I really wanted to create a shallow depth
of field which is how I got the image to be very
focused in the front and blurry in the back. It really
helps with allowing the viewers eye to go to where
you want it.
14. Green
shoes
For this imagetothat I used a digital SLRwas a
camera.
What I wanted create with this image
contrast between nature and man-made. I really
wanted to create a shallow depth of field which is
how I got the image to be very focused in the front
and blurry in the back. It really helps with allowing
the viewers eye to go to where you want it.
2010
16. Thunderbolt
F or this image I took an
8.5x11 piece of paper and
Looking at the picture your
eye is drawn to the very center
where her finger is. its sepa-
I want the audience to wonder
why the image is seperated
used sharpies to make this into pieces and why the artist
image. I started off with a rates the image right in half.
Her hair on the left is darker decided to make the image
heavy black outline and angle
my pen to use the side of it which draws in your attention look like a puzzle.
to cover the space faster with and makes your eye mover
color. I used the tip of the pen around from there.
to create the dots on the skin.
Sharpie
2011
Roksanna Wasiunec
17. Fire and Waves
T his piece titled Fire And Waves
was the piece that had to connect
I tried to make the piece abstract This piece reminds me of the 70’s
yet have known images in it like in a way and I hope the viewer
all my previous pieces together. I the glasses and the eye. can kind of see that.
used sharpie to create this piece. When the viewer looks at this I
Whenever I start a new piece I have want the viewer to move his or her
an idea in my head but it never eye throughout the entire piece
ends up turning out what I envi- and wonder why the background
sioned mainly because I change my is what it is and why the pieces are
mind throughout the piece. just floating around.
This piece has a lot to do with op-
posites.
Sharpie
2011
Roksanna Wasiunec
18. Puzzled
T his is the first image in my series. to making the dots with the tip of the While making this image i wanted to
It’s the image that kicks everything off. pen followed by filling in some of the make sure that the viewers eye would
What i would like the viewer to focus pieces with the black pen. move around through the whole im-
on is the puzzles, thick black comical While making this image i thought a lot age. To ensure that this would happen
lines and the contrasts. about opposites. I used red and purple I separated the black puzzle pieces
For this image i decided to continue colors because they are nice contrasts. to different sides of the image. This
with the dots. I used sharpie to create This image also has heavy black out- helped balance out the image.
this image. First I outlined the puzzle lines like the previous piece. The dots
pieces with a heavy black than moved and stripes are also opposites.
Sharpie
2011
Roksanna Wasiunec
19. Black and White
F or this image titled Black and
White our class had to use a dif-
dissolve so to speak, as you eye
went down.
and have dots and thick black
comic-like lines so I decided to fill
ferent medium for the next piece. When I finished putting down the some of the outlined areas with
I decided to use duct tape and duct tape pieces I noticed that dots. I also made sure that the
sharpies. While making this piece the image didn’t seem complete black lines were thick and vivid.
I started off by layering the entire to me. So I took a black sharpie So that they stand out .
piece of cardboard with white and started to outline parts of the
duct tape. After that I cut square white where the neon duct tape
pieces of the neon colored duct didn’t overlap. What holds my
tape. I wanted the top to be much pieces together, as a series is
heavier with duct tape and for it to that my images are all abstract
Duct tape and Sharpie
2011
Roksanna Wasiunec
20. Bohemian Green
F or this image tilted Bohemian
Green, our task was to create
different shapes and colors. I
wanted to keep the image bal-
complicated and sporadic. I
believe that the image I created
a new piece that used all the anced so I had to spread out the follows all those guidelines.
shades of green. When I think of colors I used. When the viewer
green I think earthy and paisley. looks at this I want the viewer
So those were my two inspira- to think about earthiness and
tions for the piece I created. I de- paisley prints. The reason I titled
cided to use sharpies once again it Bohemian Green is because
to keep it consistent. I started off to me a bohemian look is very
by drawing random shapes and earthy and simple yet kind of
filling in the shapes with other
Sharpie
2011
Roksanna Wasiunec
21. Falling
Bubbles
F or this piece i was really
inspired by my other piece
The consistancy between all you have not noticed. This piece
also allows your to move around
my pieces still remains with the
Black and White. i really liked abstract feel and heavy comic- well because when you look at
how the positive and negative like outlines. When the viewer the top right your eye naturally
space worked well together looks at this piece I want the will follow downward than into the
along with the background and viewer to think why the title is big bubbles.
foreground. When you look Falling Bubbles if bubbles are
at this piece it’s as if the big supposed to float not fall. I like
bubbles on the left are infront using alot of irony in my titles if
of the bubbles on the right.
Sharpie
2011
Roksanna Wasiunec
22. Circles
For this piece I wanted to continue though the red helps add a very nice
contrast between and throughout the
my style of abstract pieces. I also
wanted to stick to using thick black piece. The way i created this piece
comical lines as I have in all my is I took a black sharpie and strated
previous pieces. This is what is hold- drawing swirls makinig some thicker
ing my series together along with the and darker than others. Following
fact that all my pieces are connected that I filled in certain sections with
like a puzzle of have parts to it. The the red making it completely random.
concept of this piece is abstract cir-
cles with a splash of color. I wanted
to use red because I feel as
Sharpie
2011
Roksanna Wasiunec
23. Bowtied
For this piecethick black comi-to
I really wanted The background of this image con-
nects to my previous peice Fire and
showcase the
cal lines because that is the most Waves. It’s the same concept and
important part of all my pieces. Its gives interesting foreground and
what holds everything together. bacground within the piece.
I used sharpies once again, The
inspiration for this image came from
a page in the magazine SPIN that I
stumbled upon.
Sharpie
2011
Roksanna Wasiunec
24. Thunderbolts and
Arrows
In this piece I wanted to focus Like always I used sharpies to cre-
ate this image. A difference in this
on color and contrast more than
anything. I decided to make the image is that it’s actually a 4x6 piece
background cool colors and the fore- originally rather than most of my
ground warm colors. The concept other which are 8.5x11.
of this image is thick black comical
lines creating a puzzled abstract
piece that has to do with arrows and
thunderbolts.
Sharpie
2011
Roksanna Wasiunec
25. Lines Of Duct Tape
T he idea behind this piece I really wanted to make this
was me trying to connect the piece abstract because I
duct tape more into the series. believe that that is my strong
I like always used sharpies point as an artist. I want the
to create thick black comical veiwer to really realize that this
lines. I wanted to continue the piece is more than just duct
puzzle effect so I had the duct tape. This piece creates inter-
tape create lines that make the esting contrast as well.
image come together.
Duct tape and Sharpie
2011
Roksanna Wasiunec