Downloaded 22 times

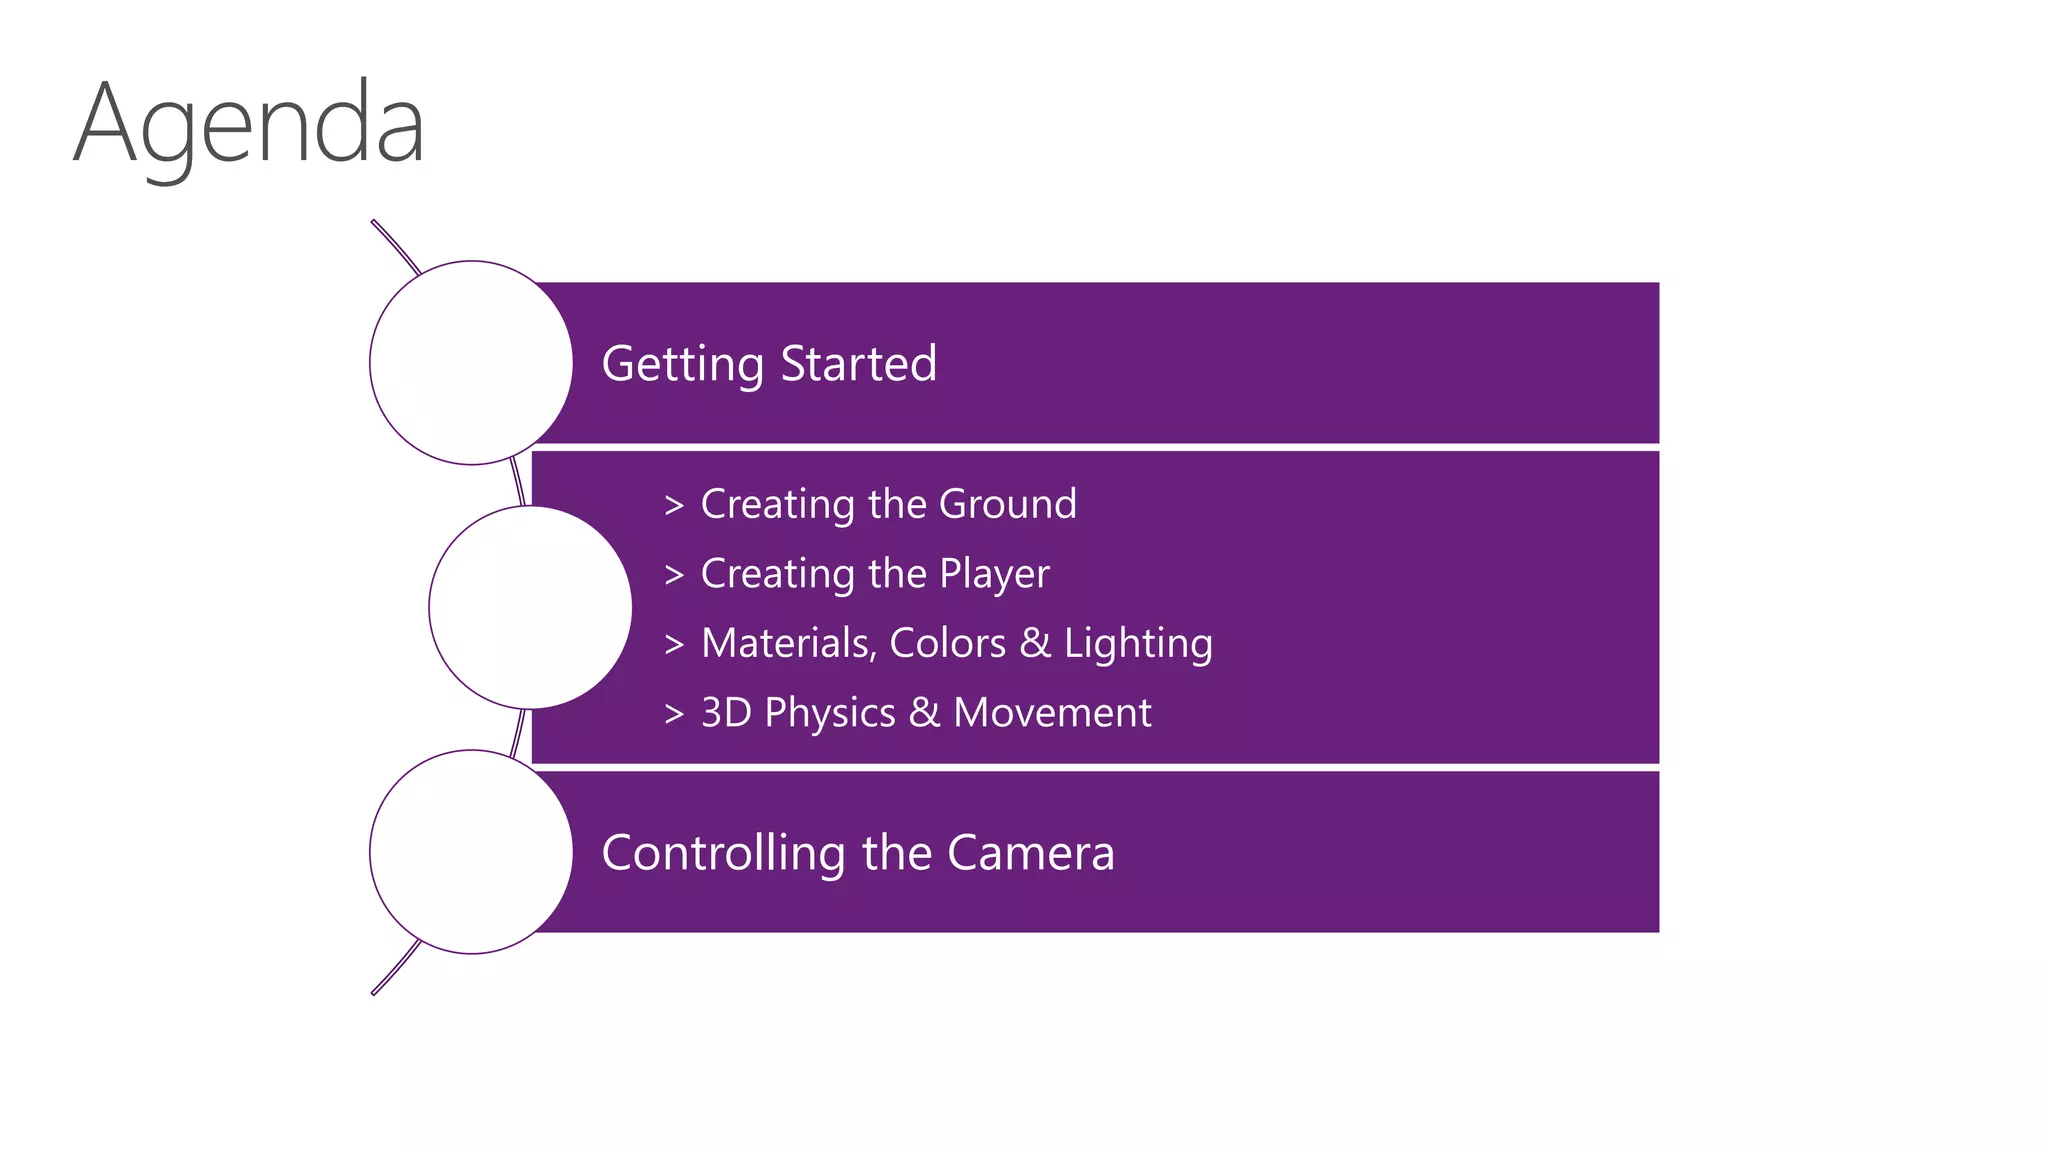

![Select 3D (not 2D) Click [Create project]](https://image.slidesharecdn.com/unity5-rollerball-part01-shahedchowdhuri-150615013801-lva1-app6892/75/Rollerball-1-of-2-6-2048.jpg)
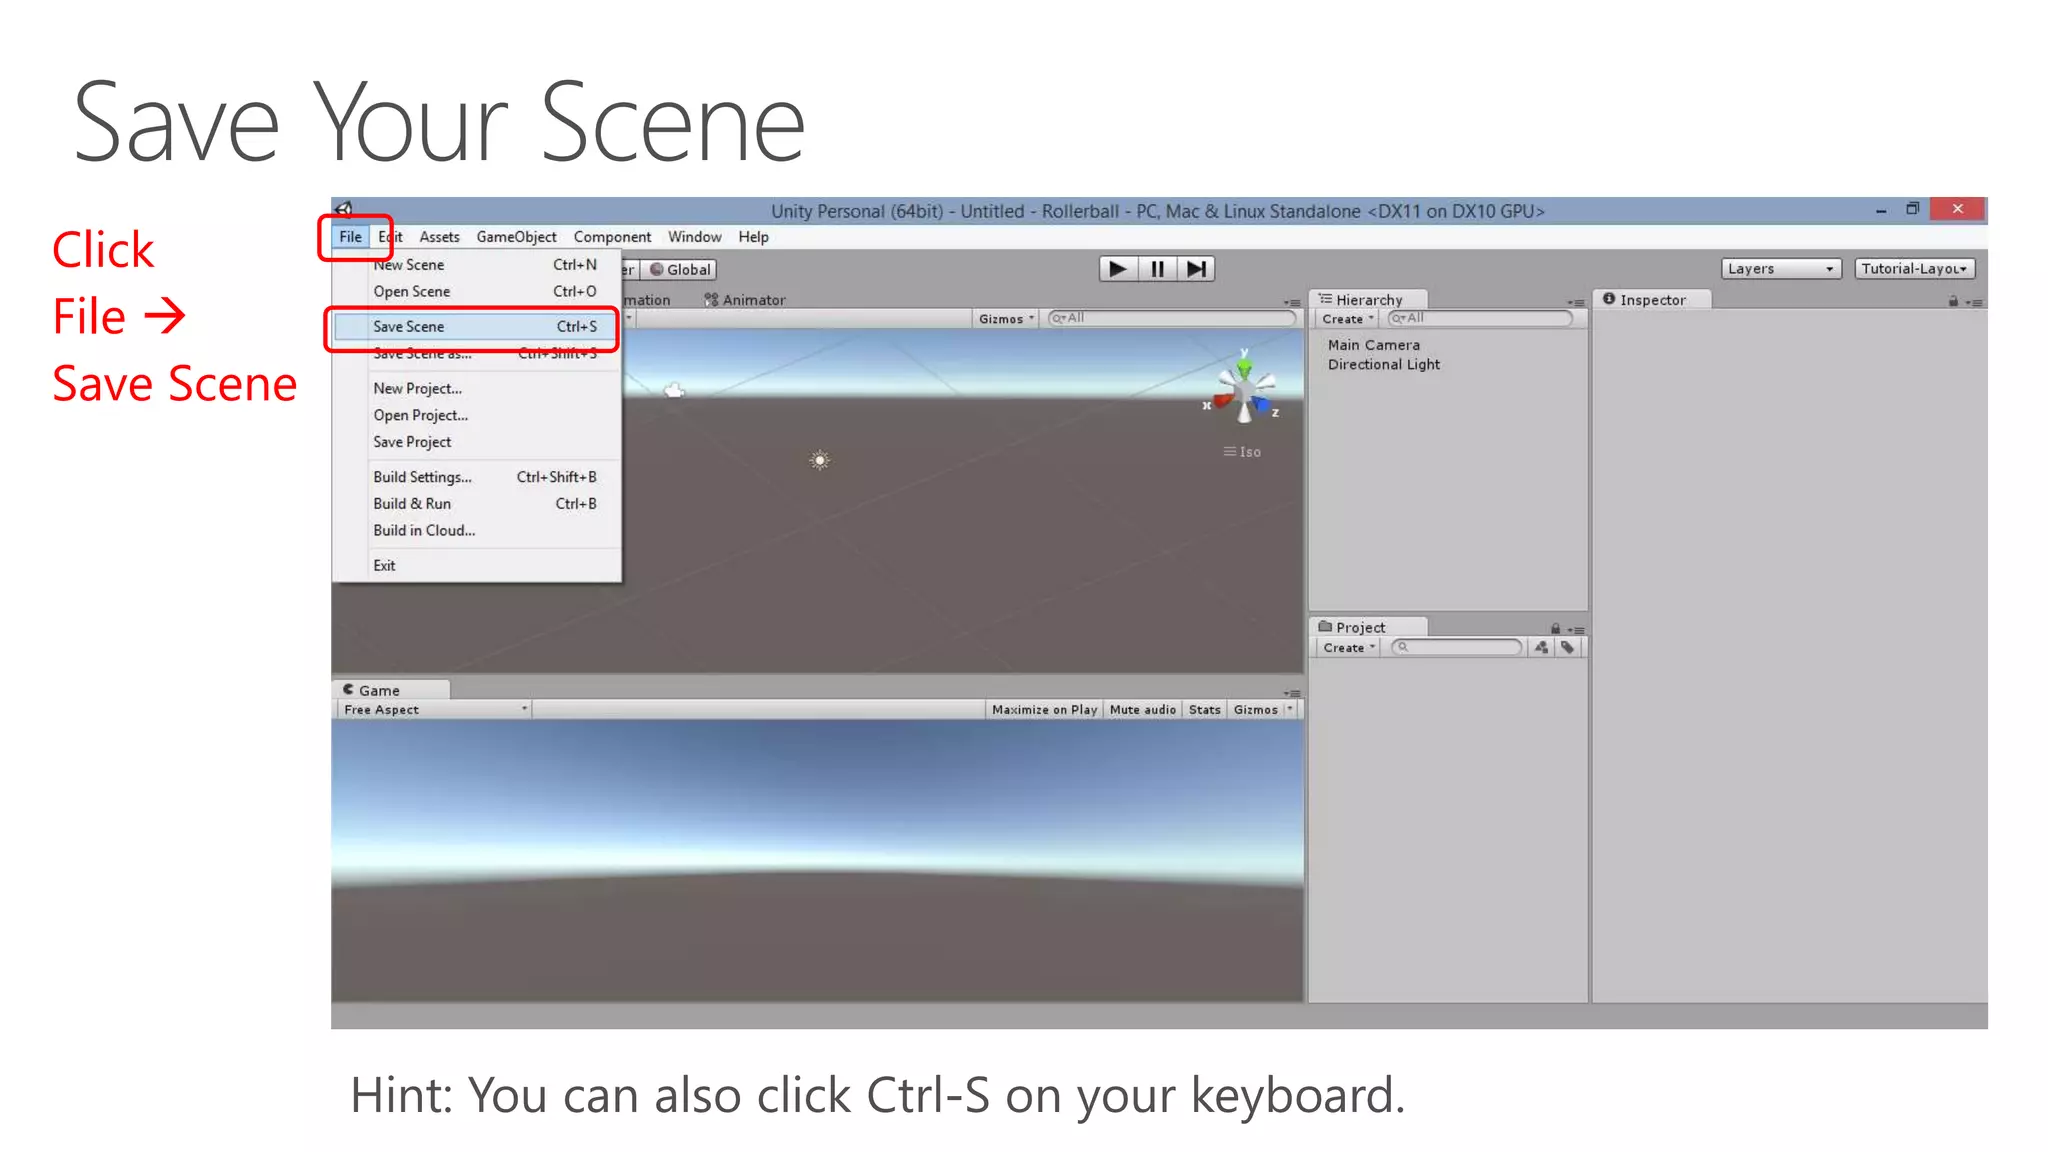
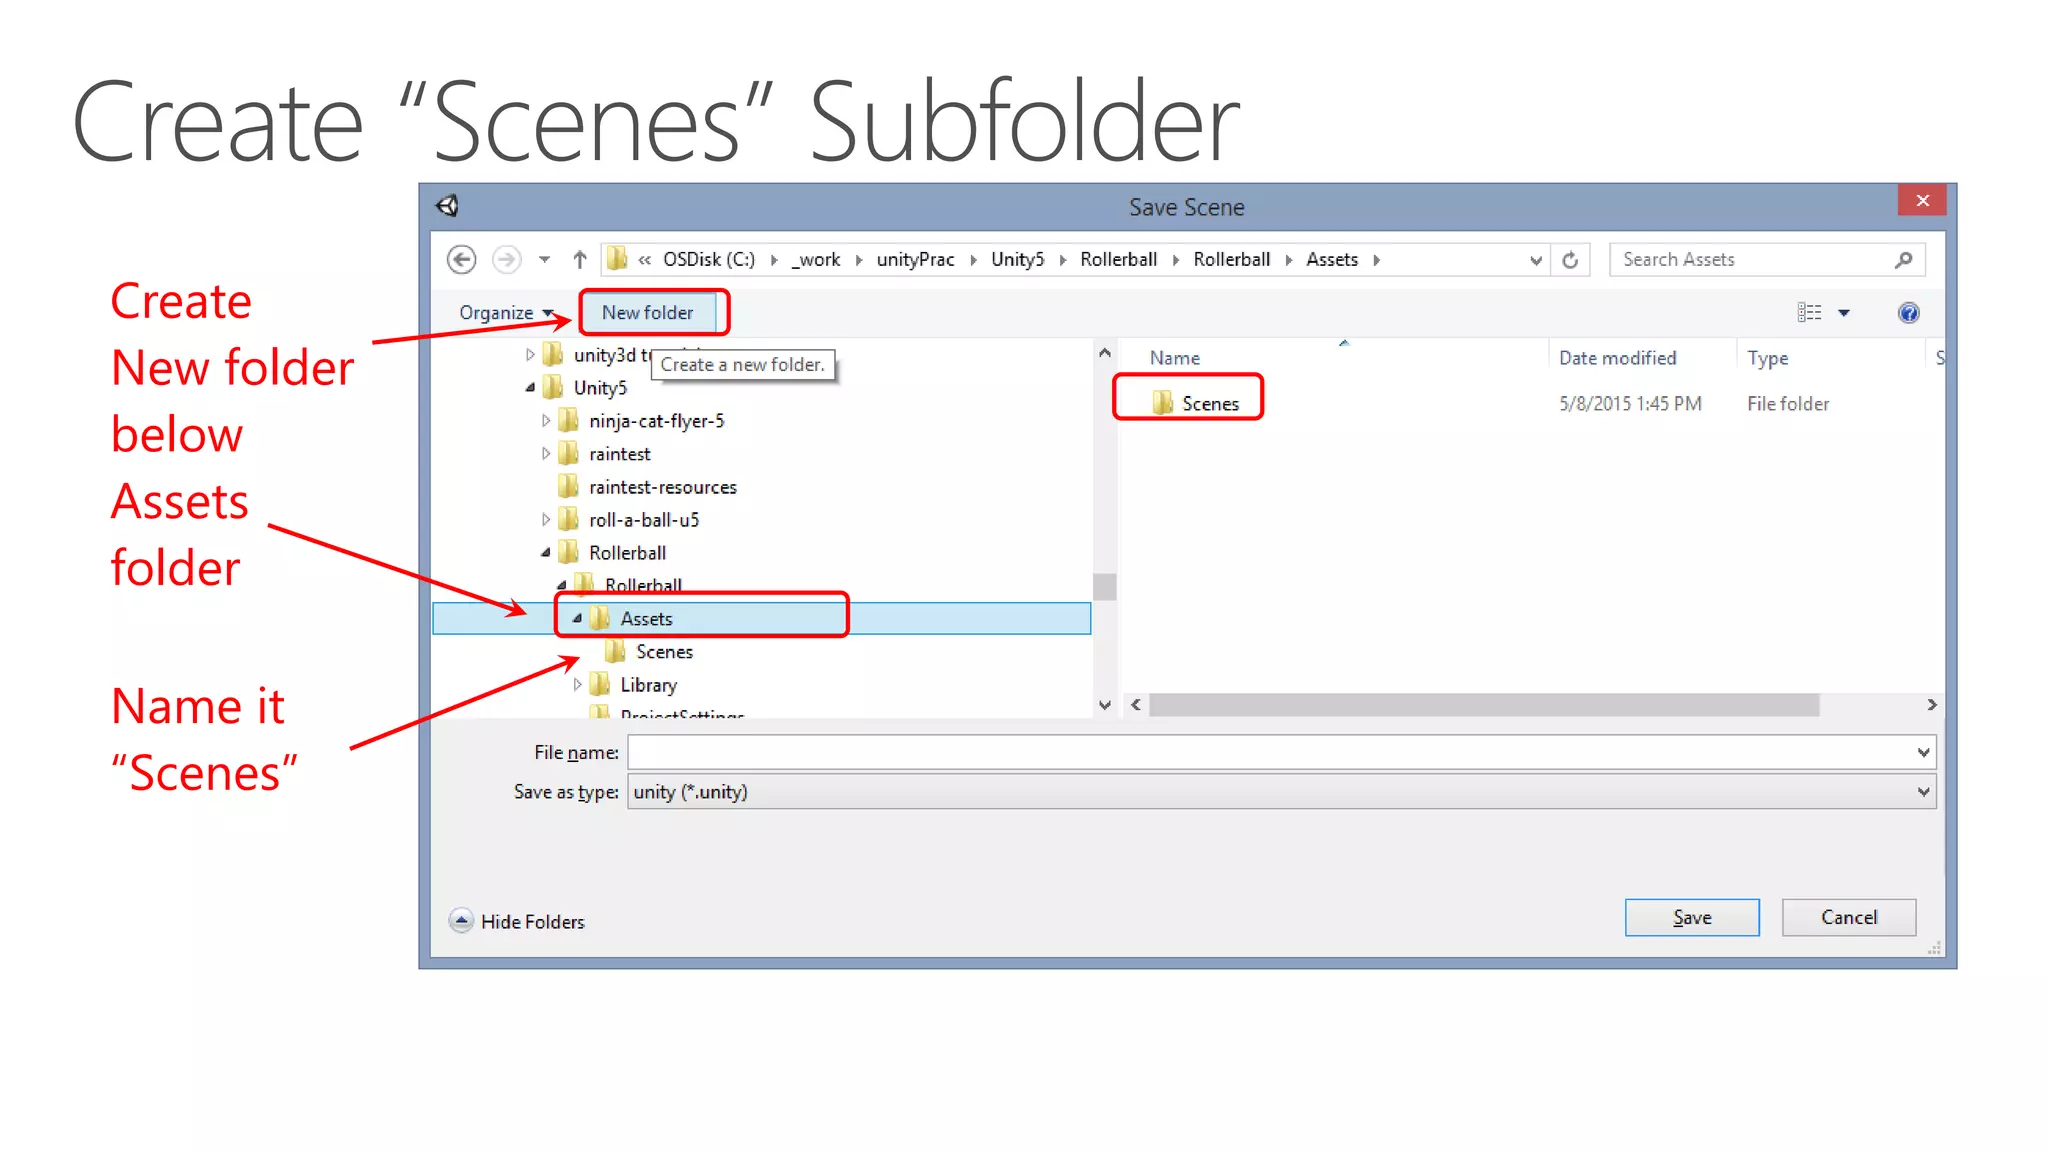
![, then click [Save]… Name your scene “PlayingField.unity”
Inside
“Scenes”
Subfolder…](https://image.slidesharecdn.com/unity5-rollerball-part01-shahedchowdhuri-150615013801-lva1-app6892/75/Rollerball-1-of-2-10-2048.jpg)

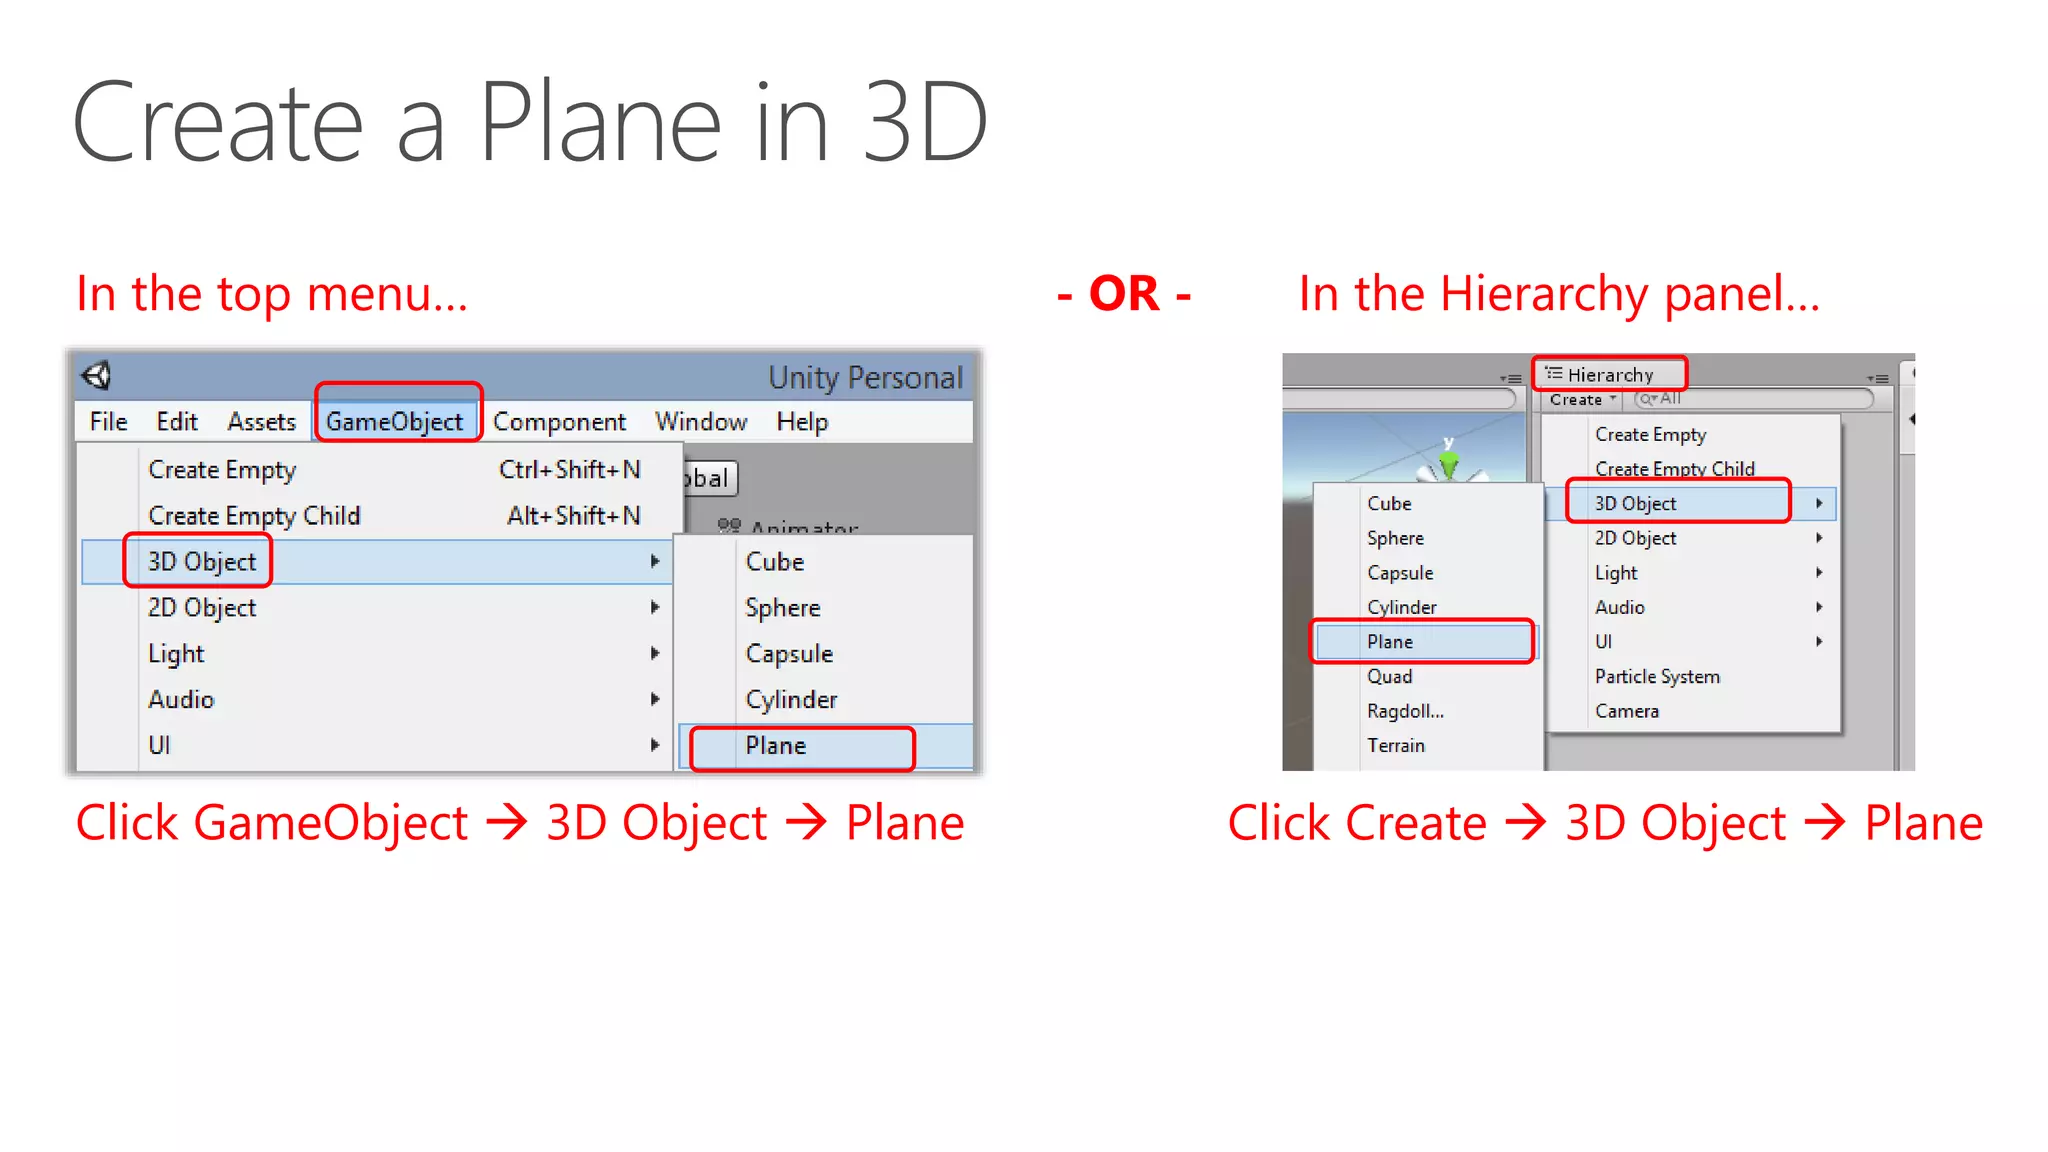


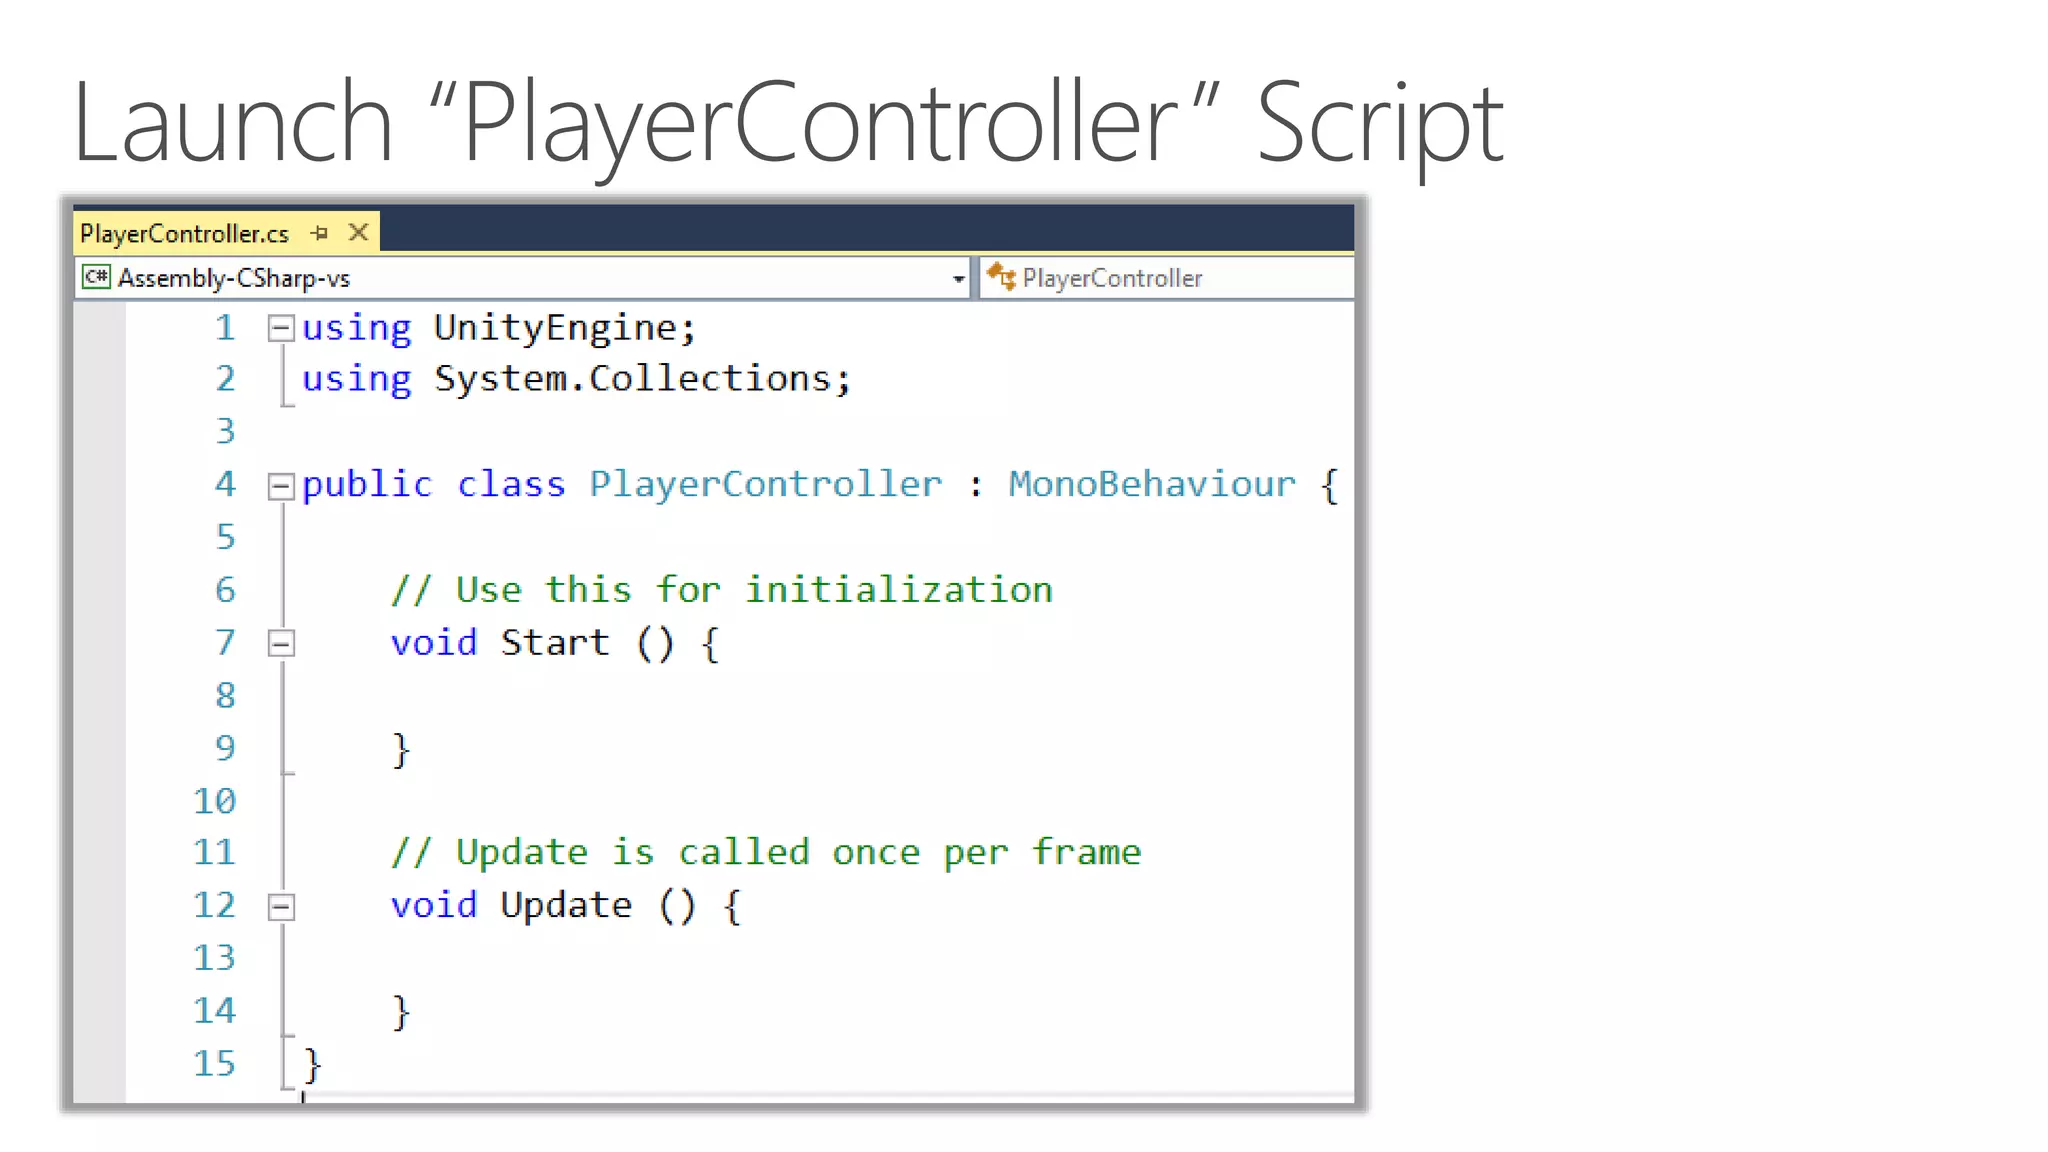
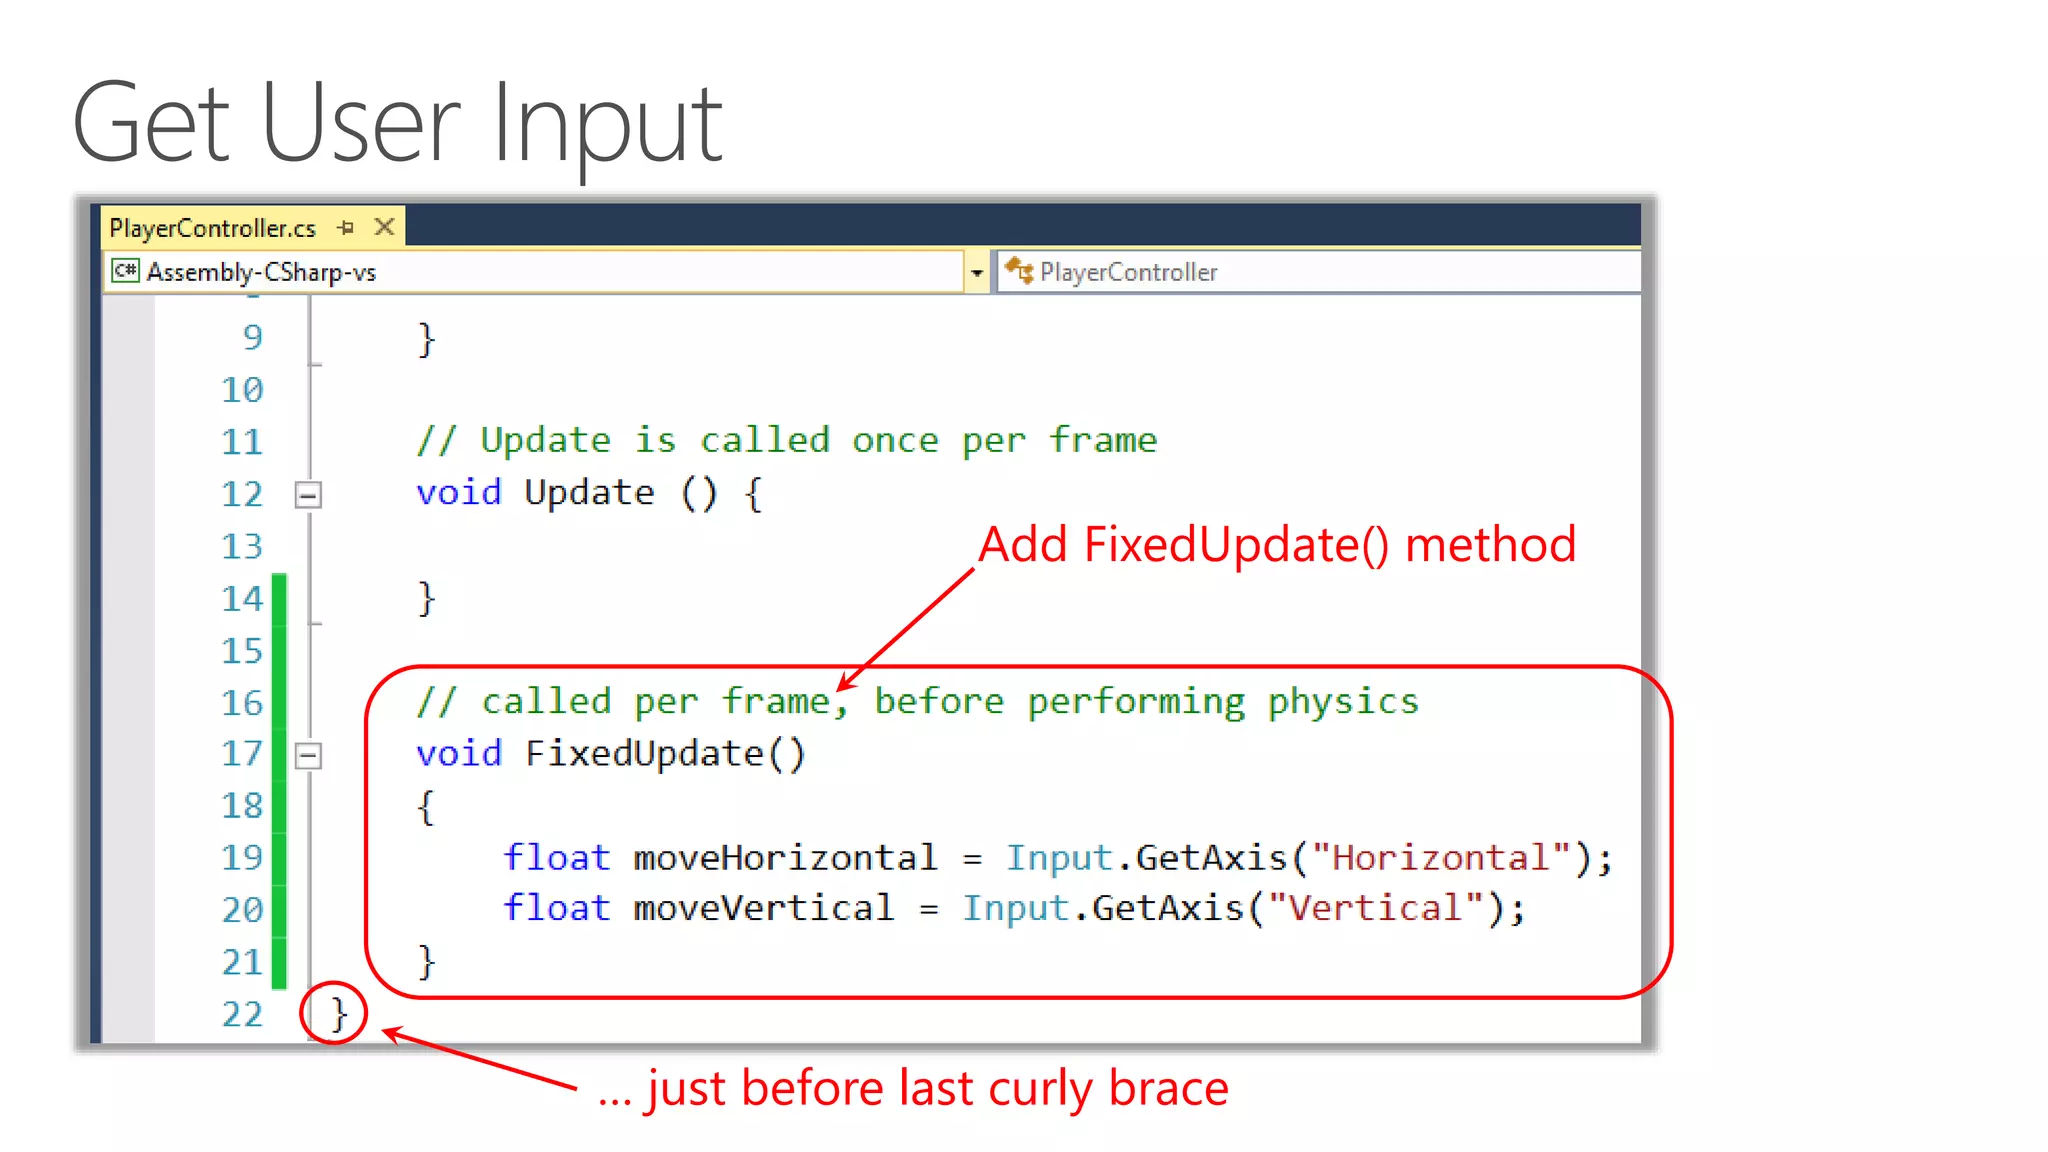
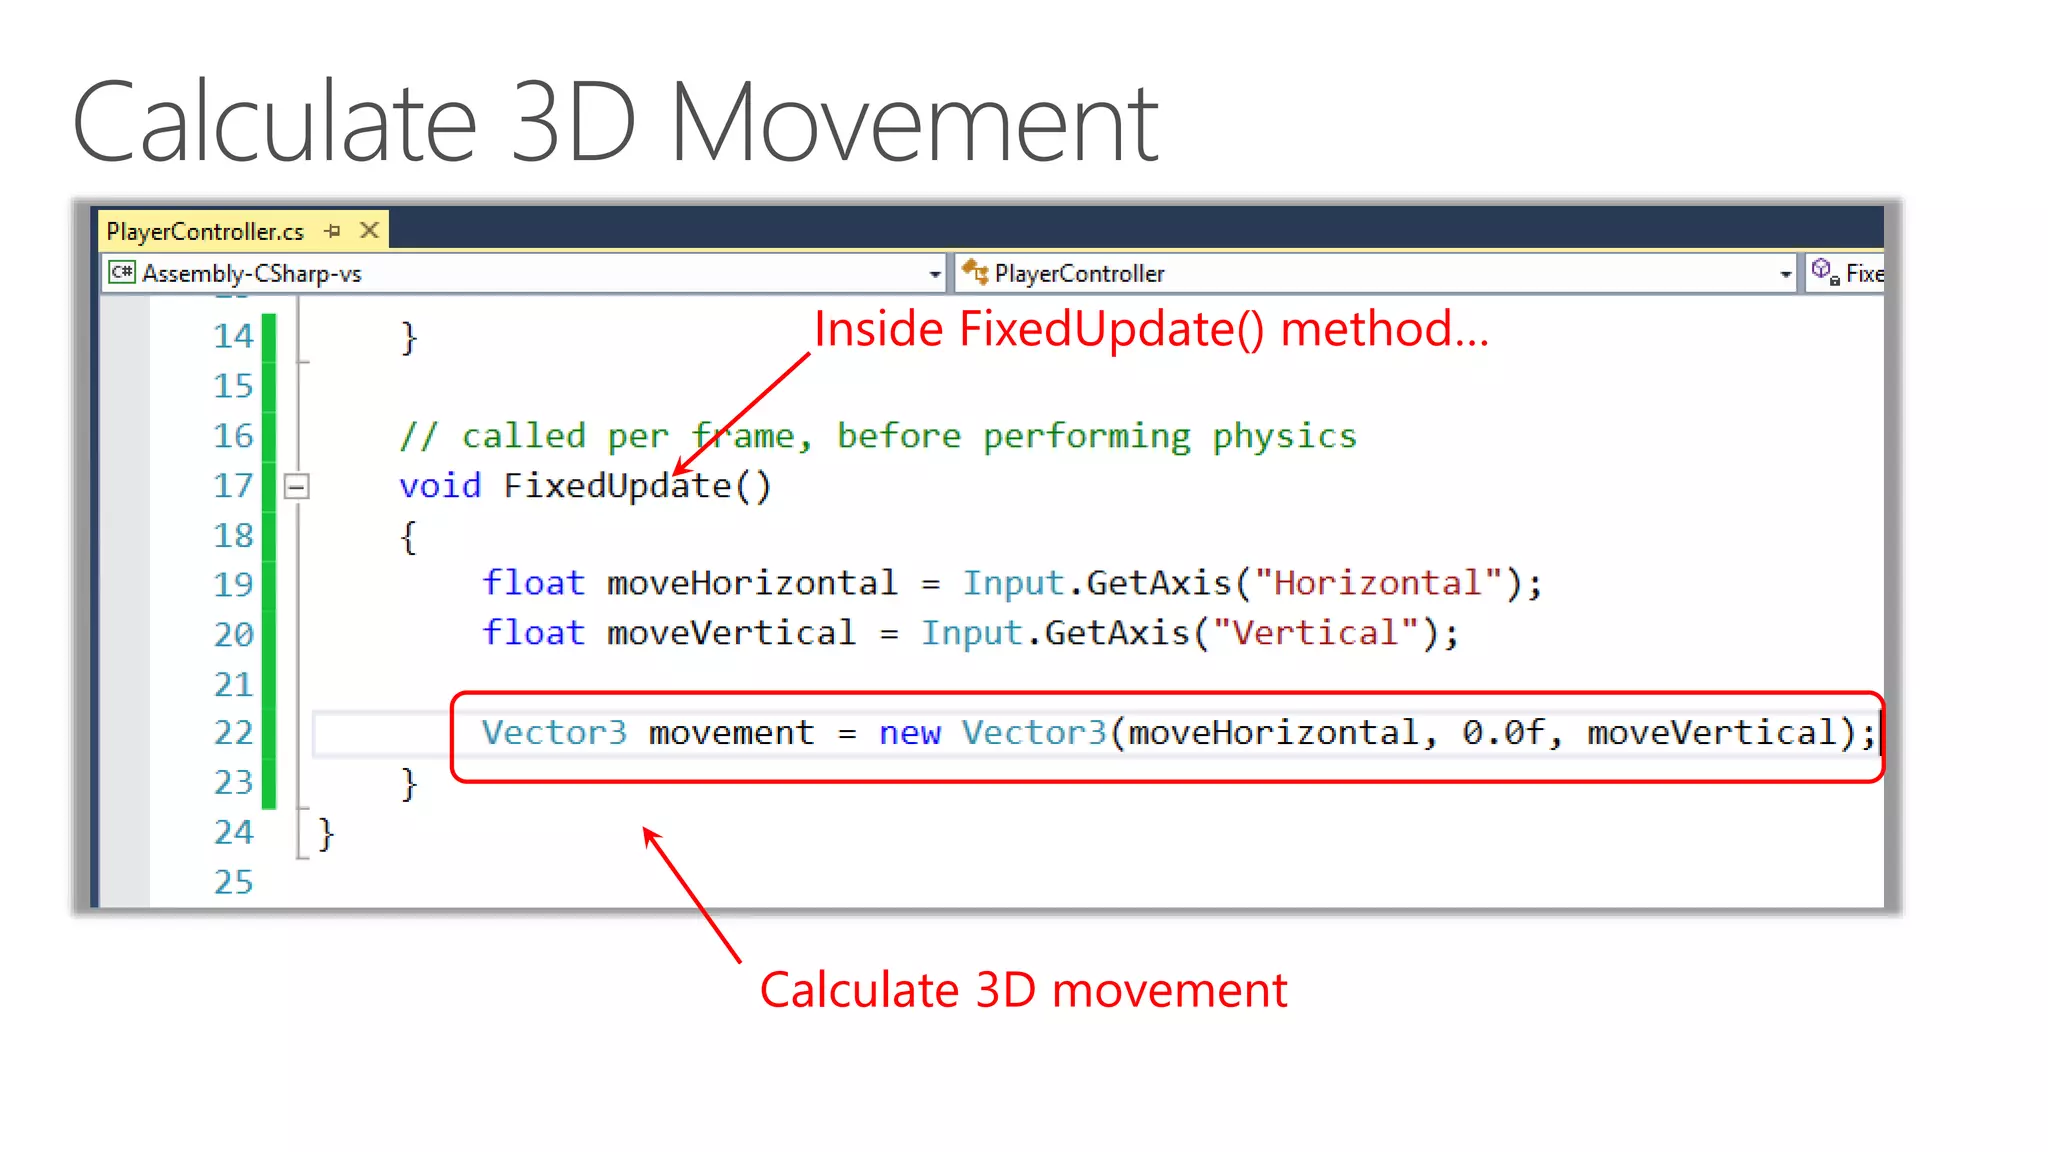
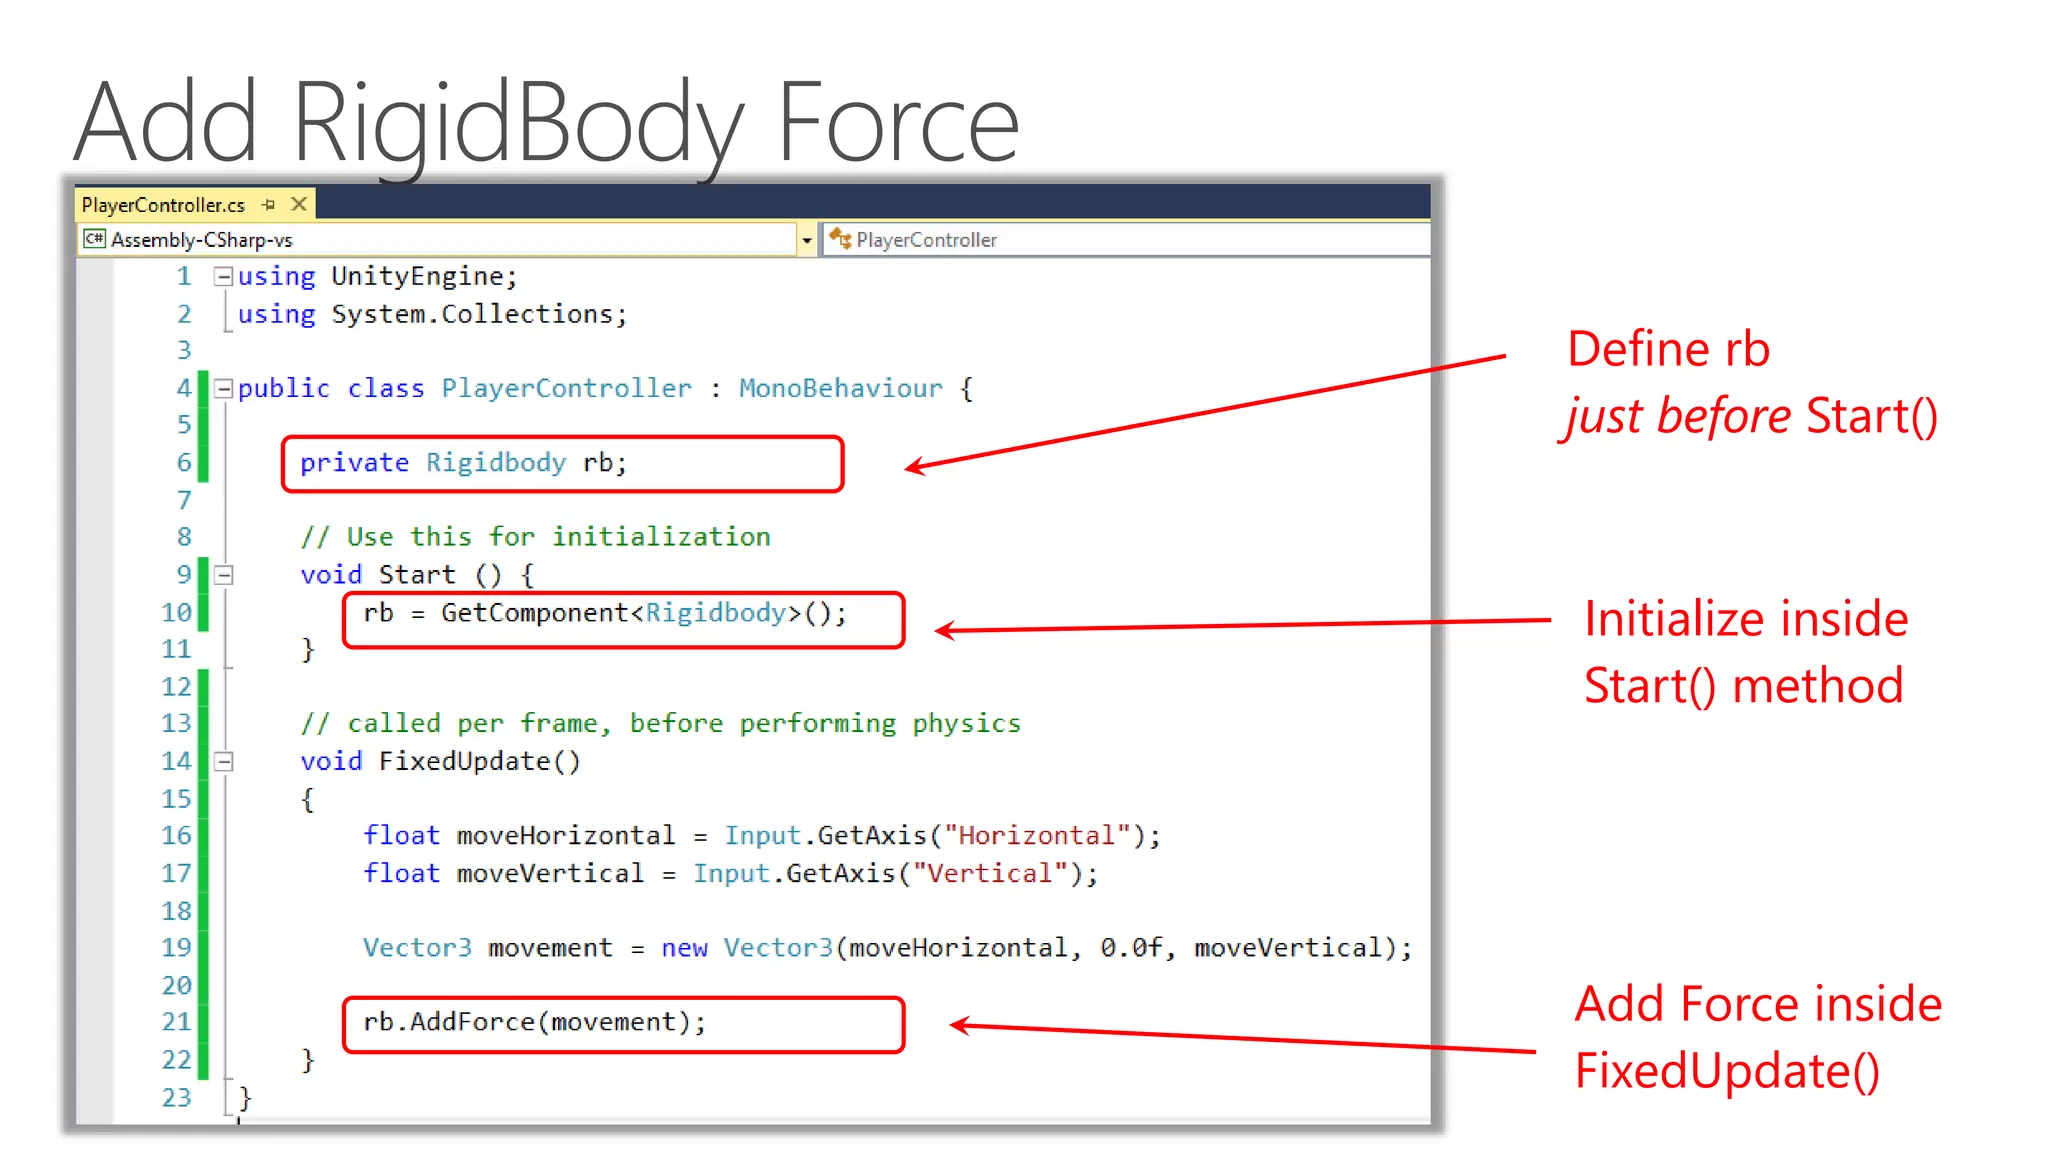
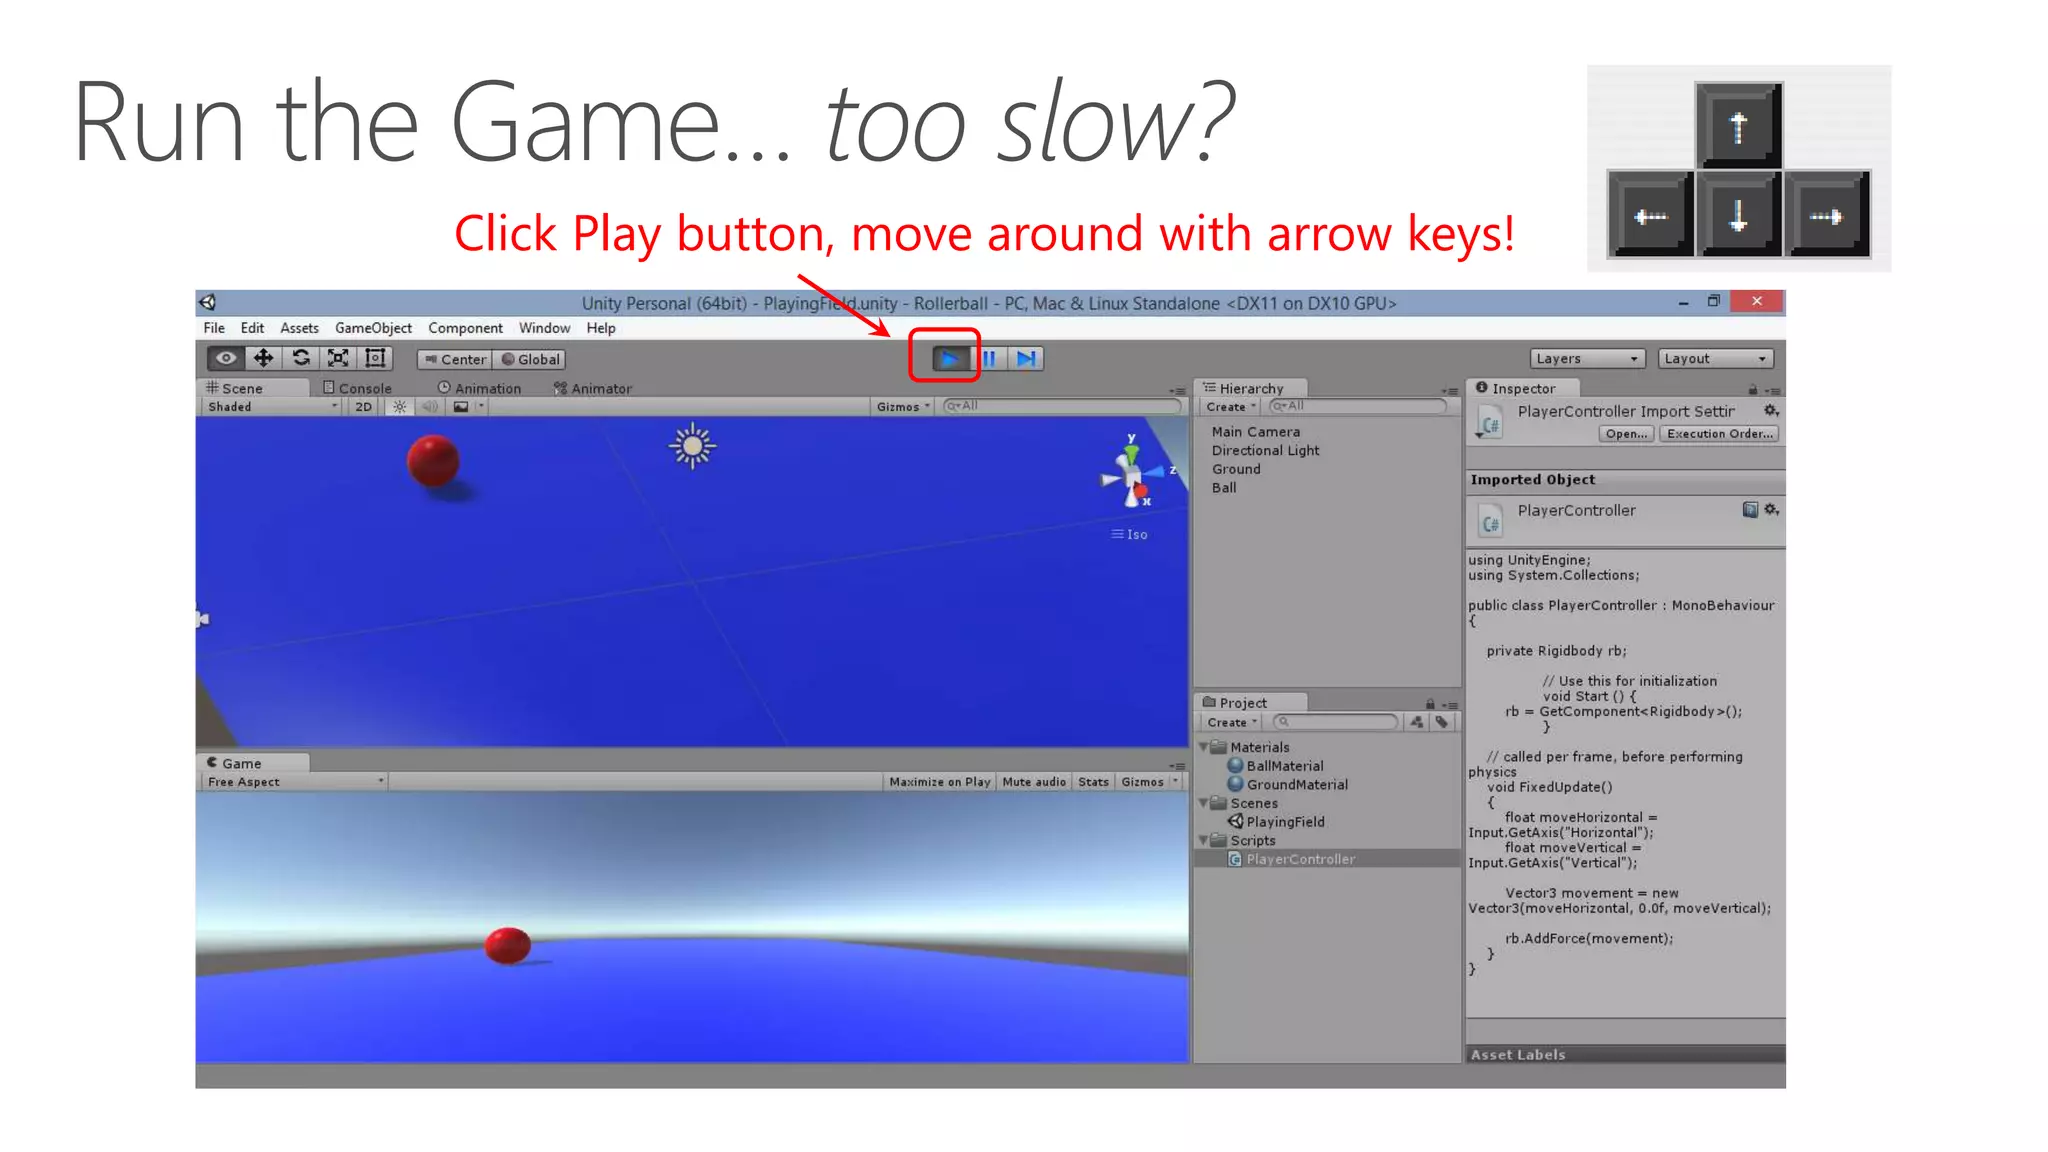
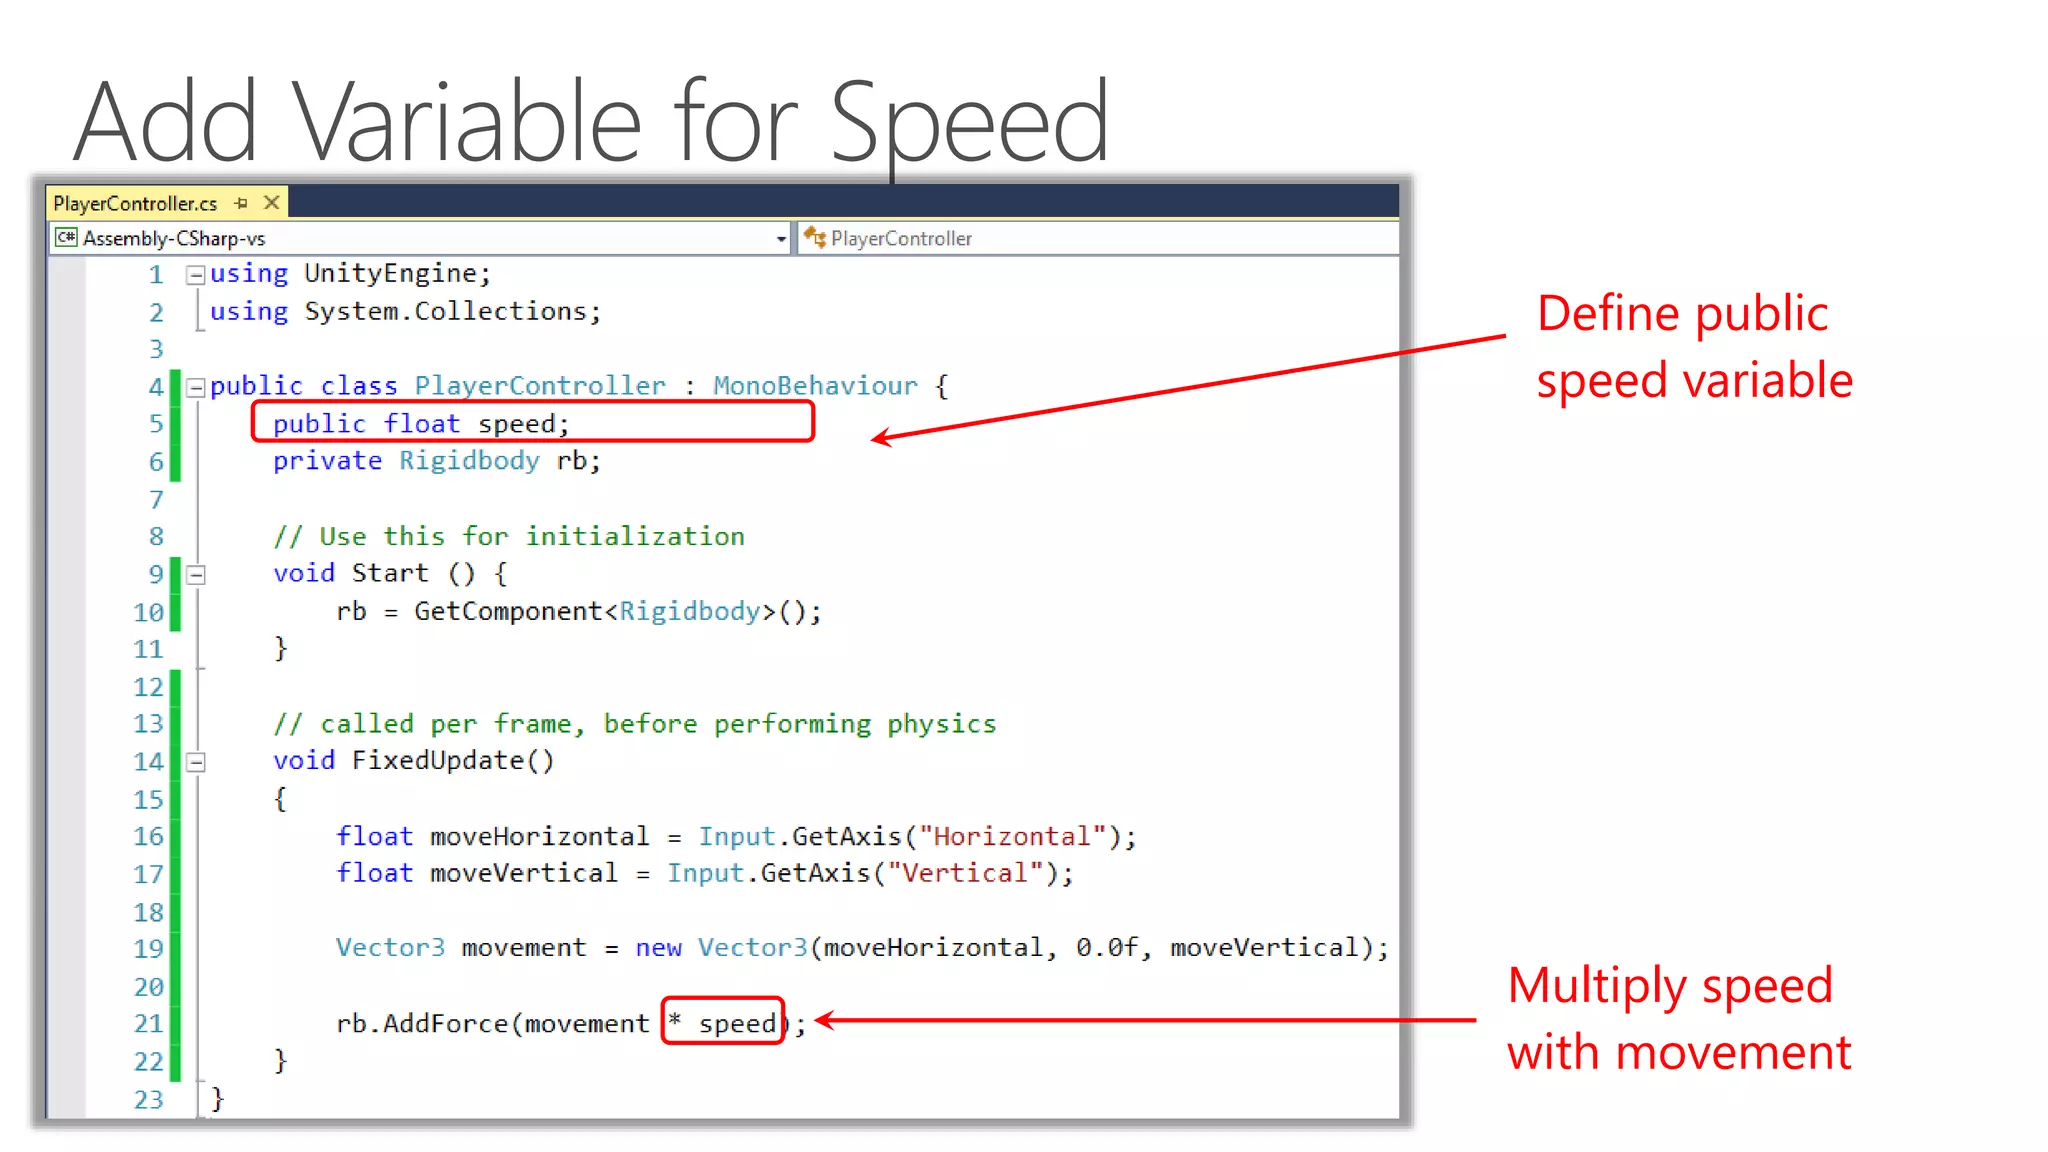
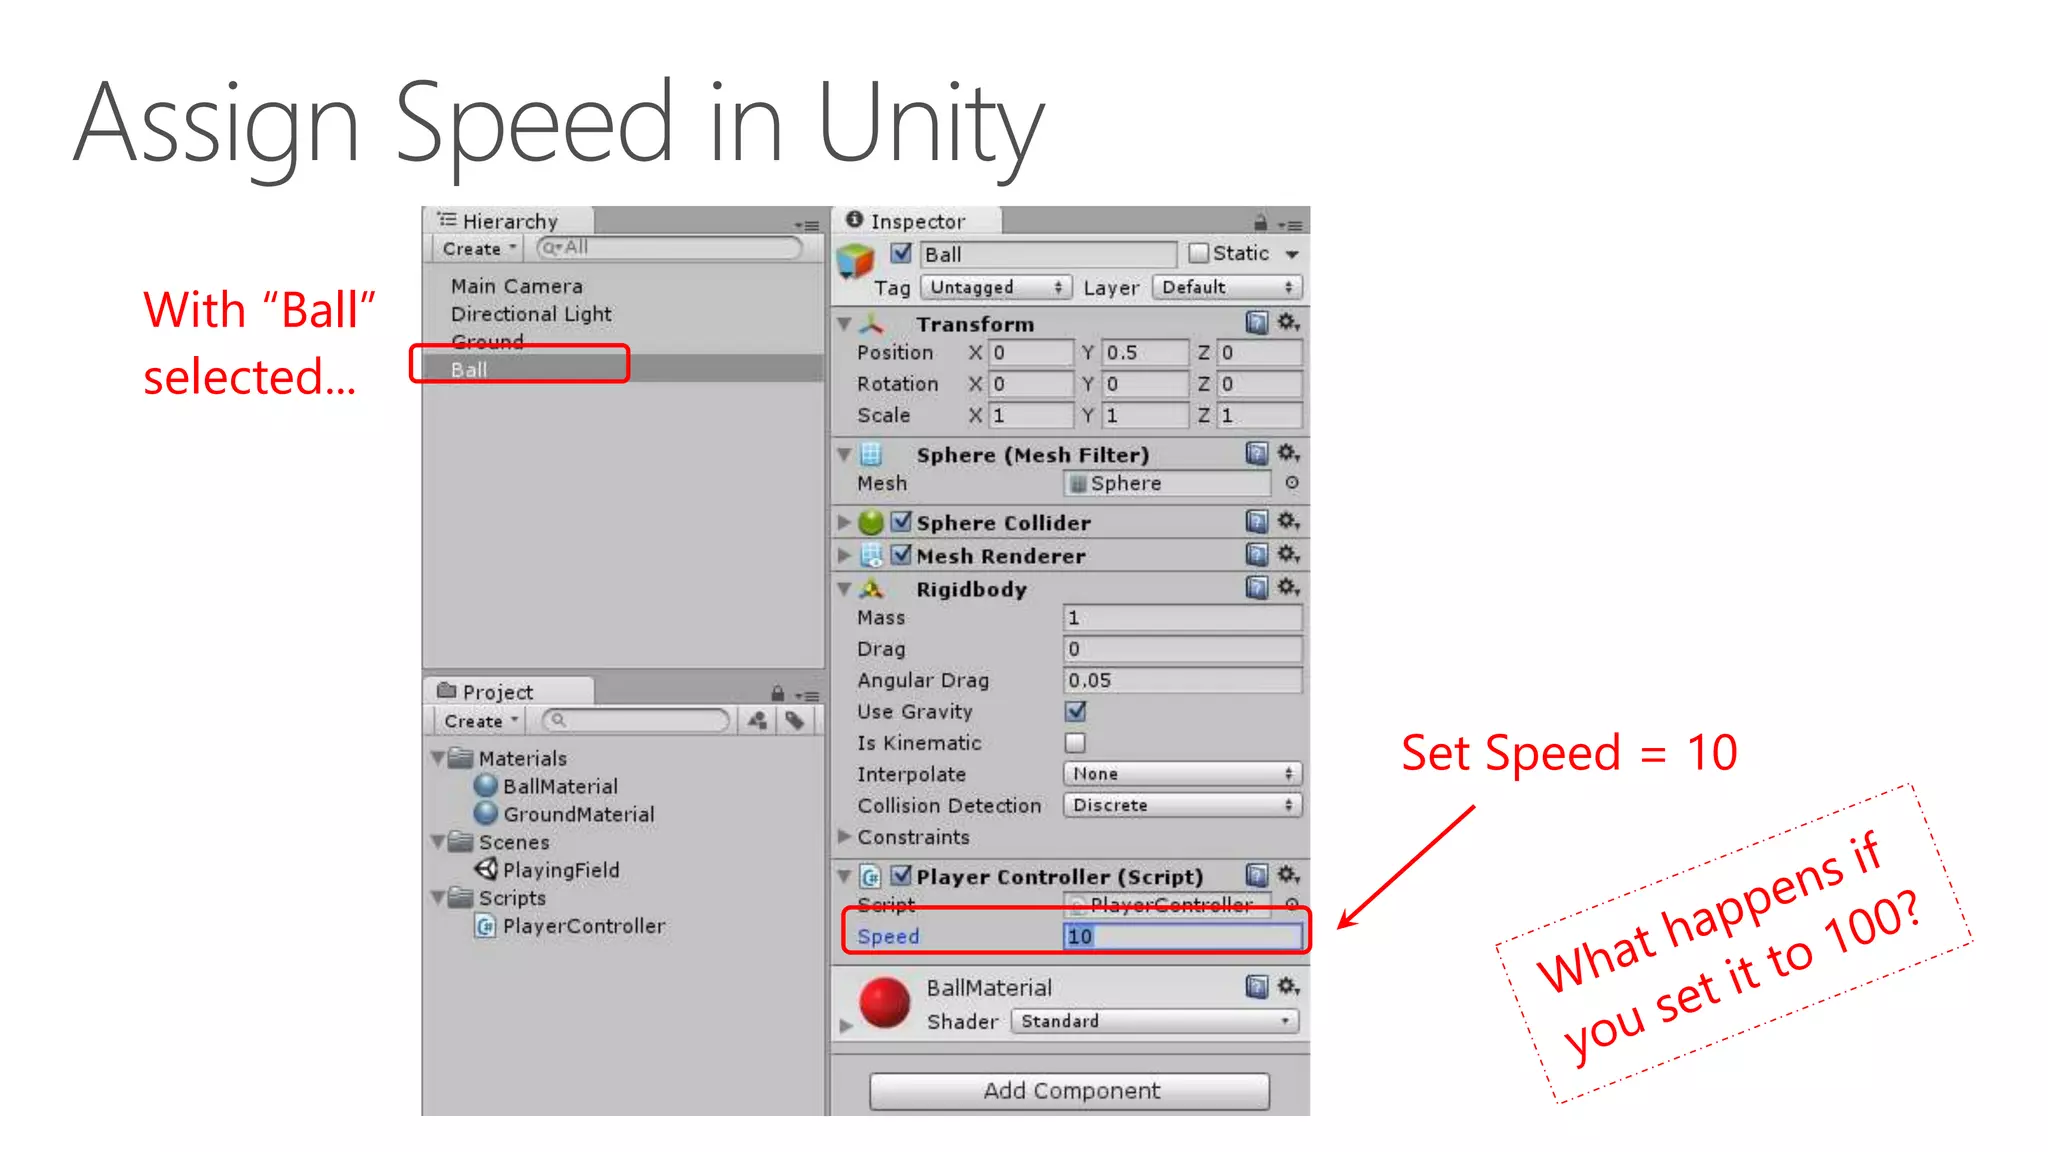
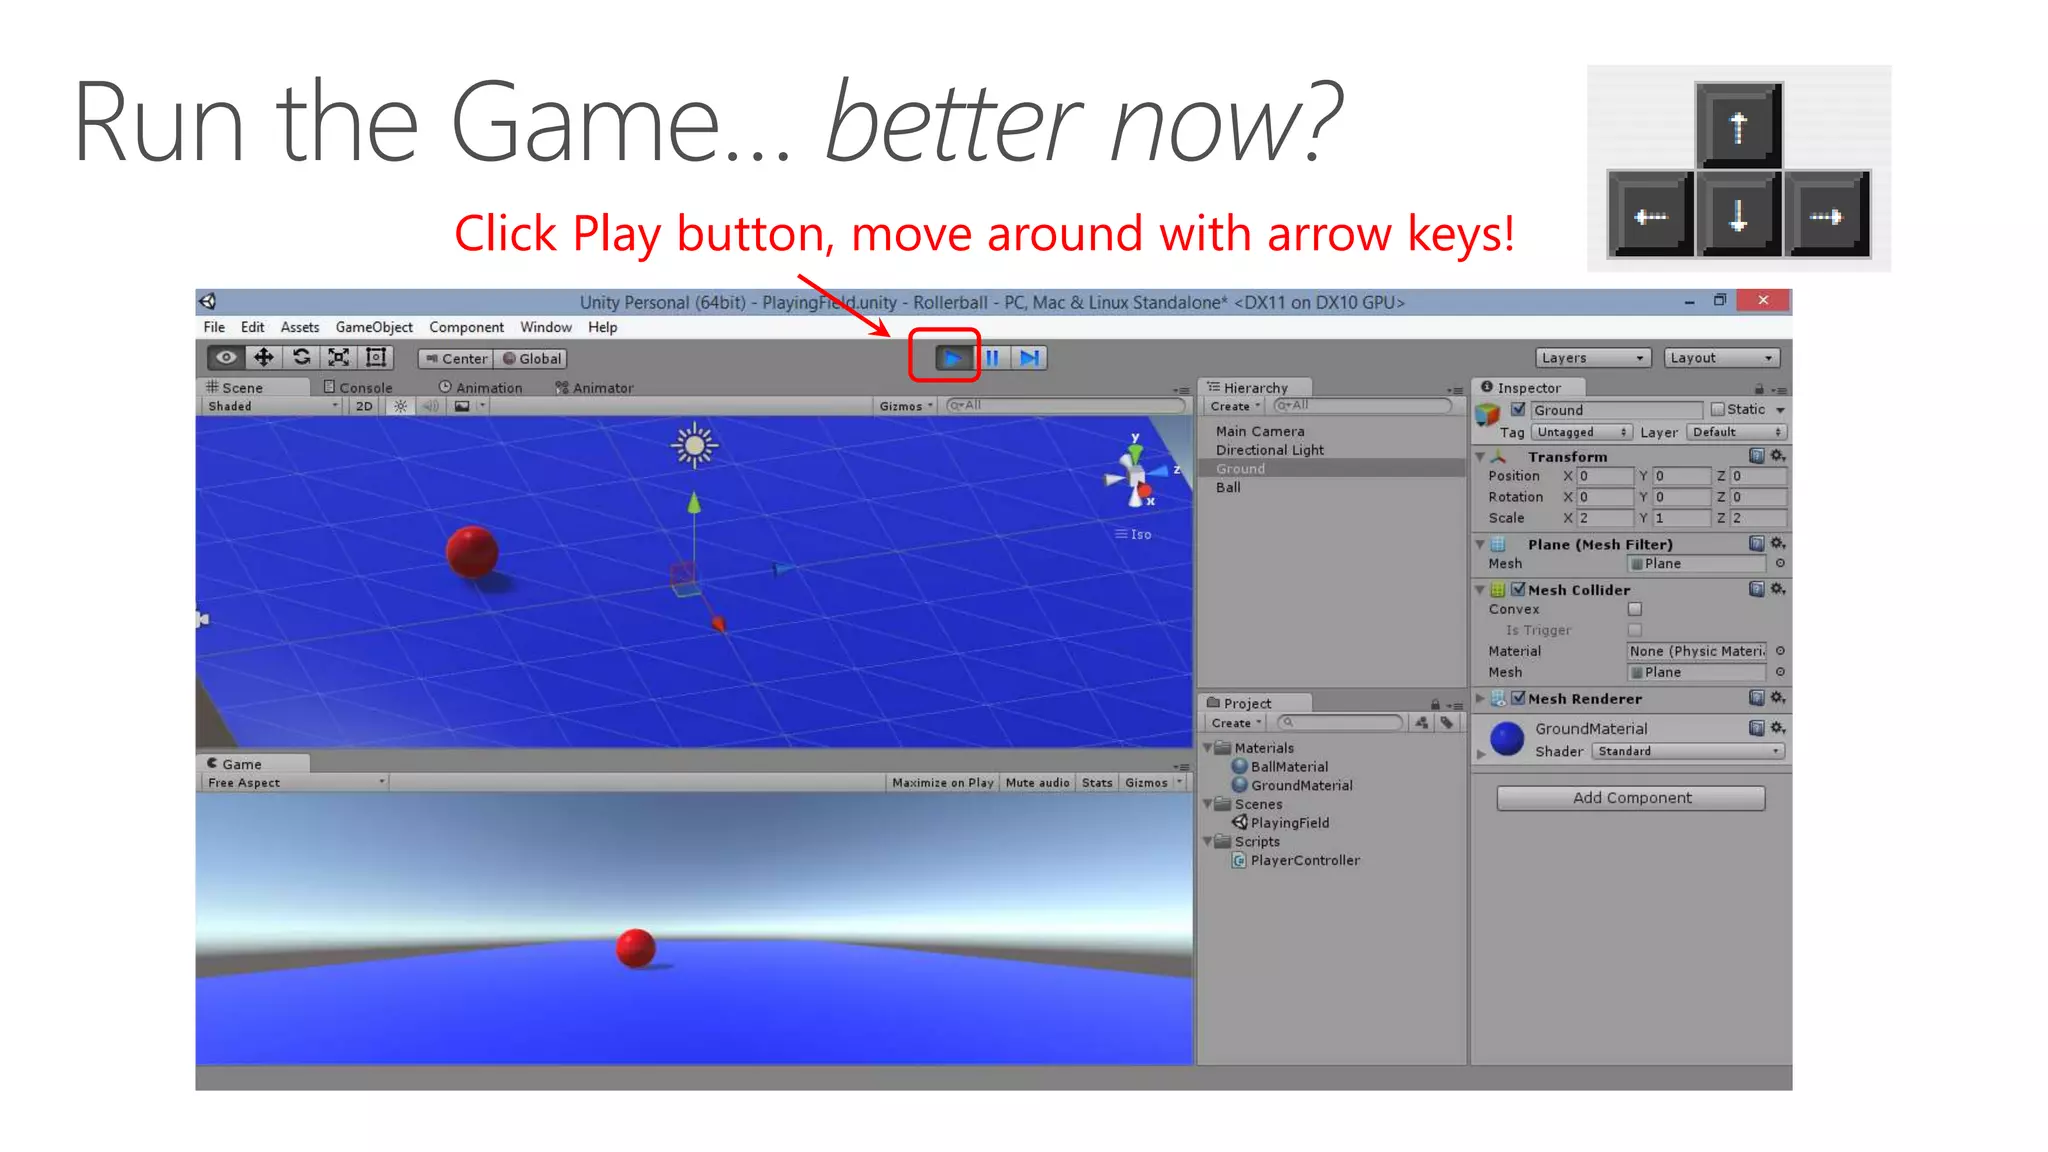

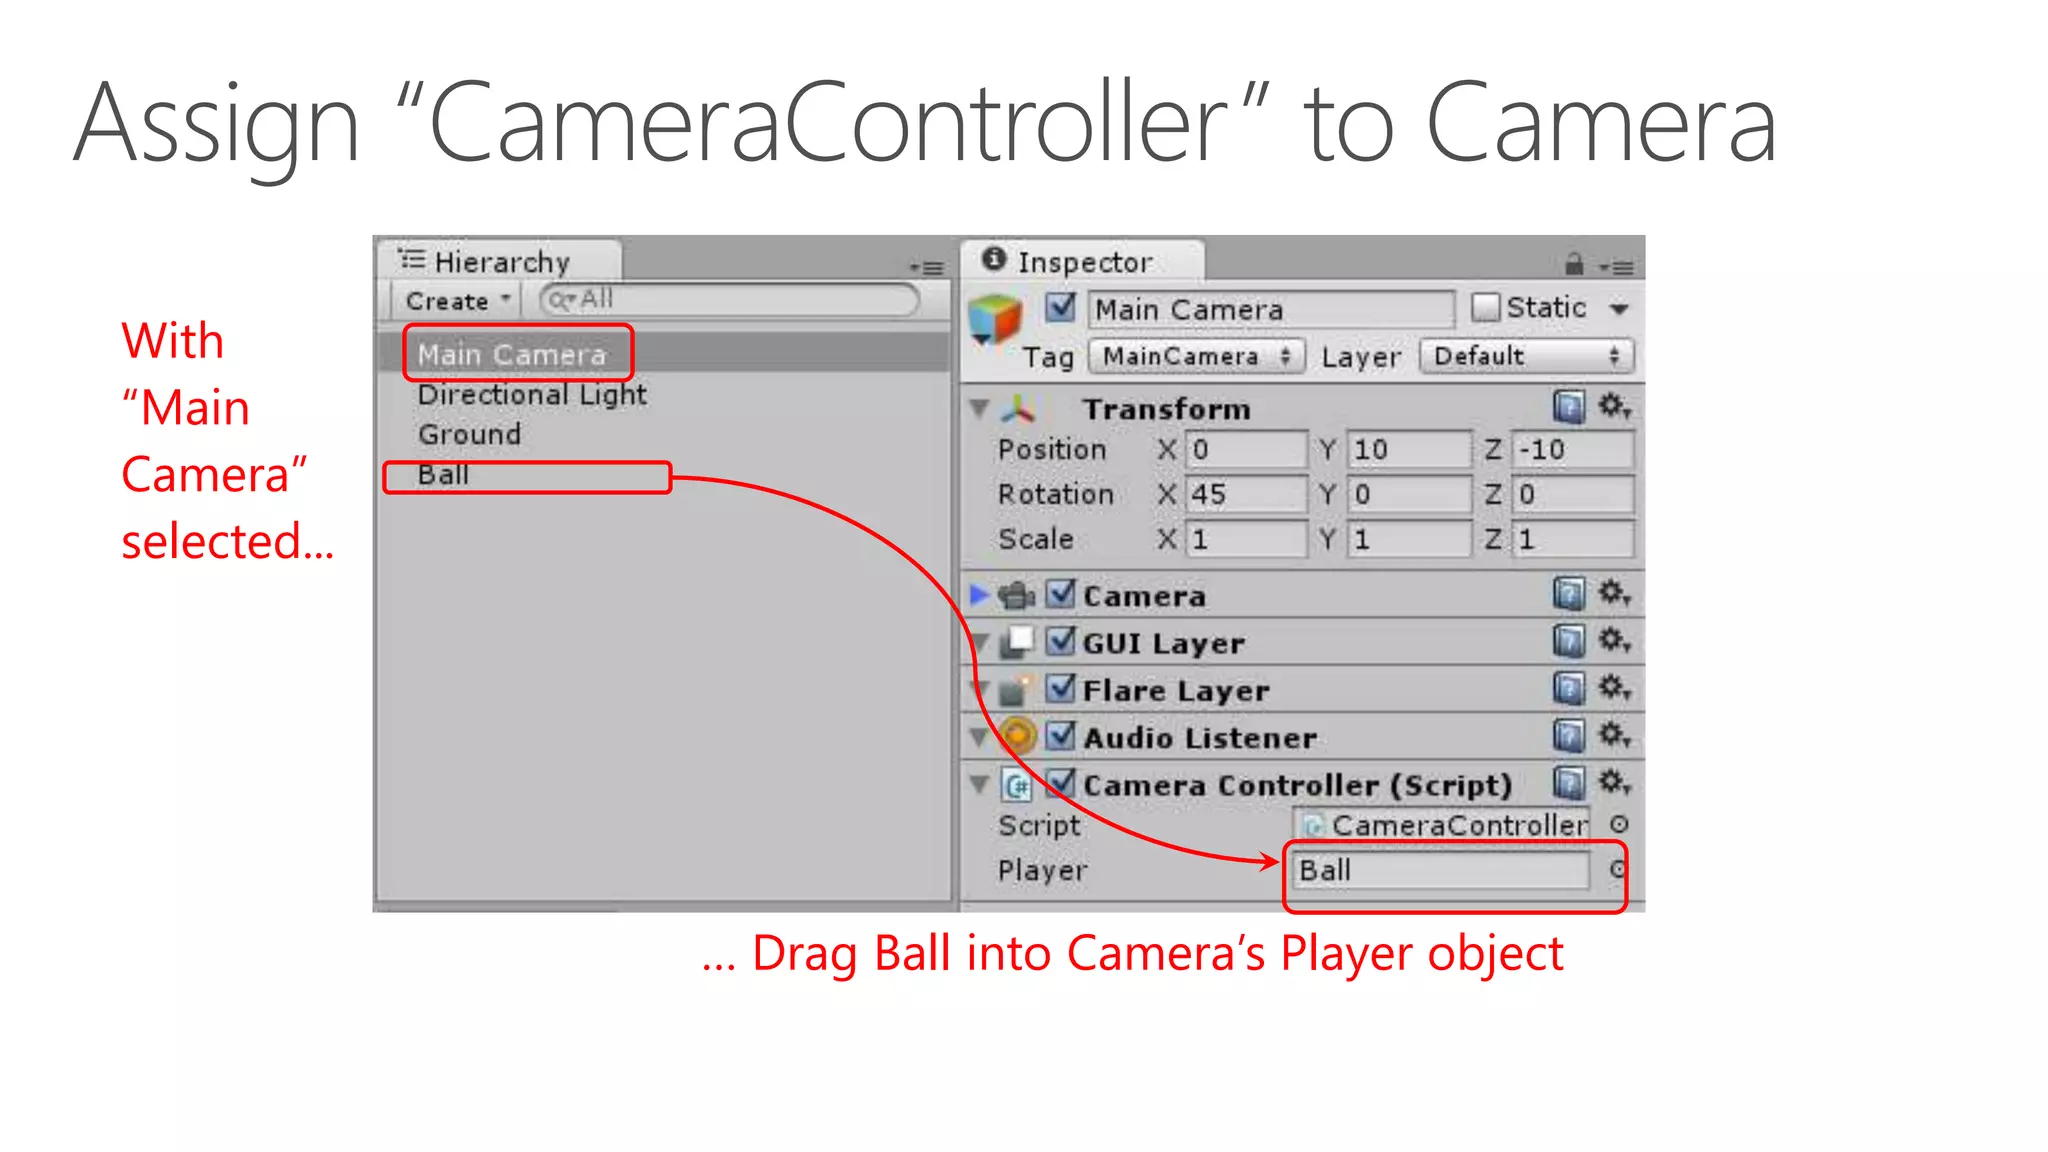
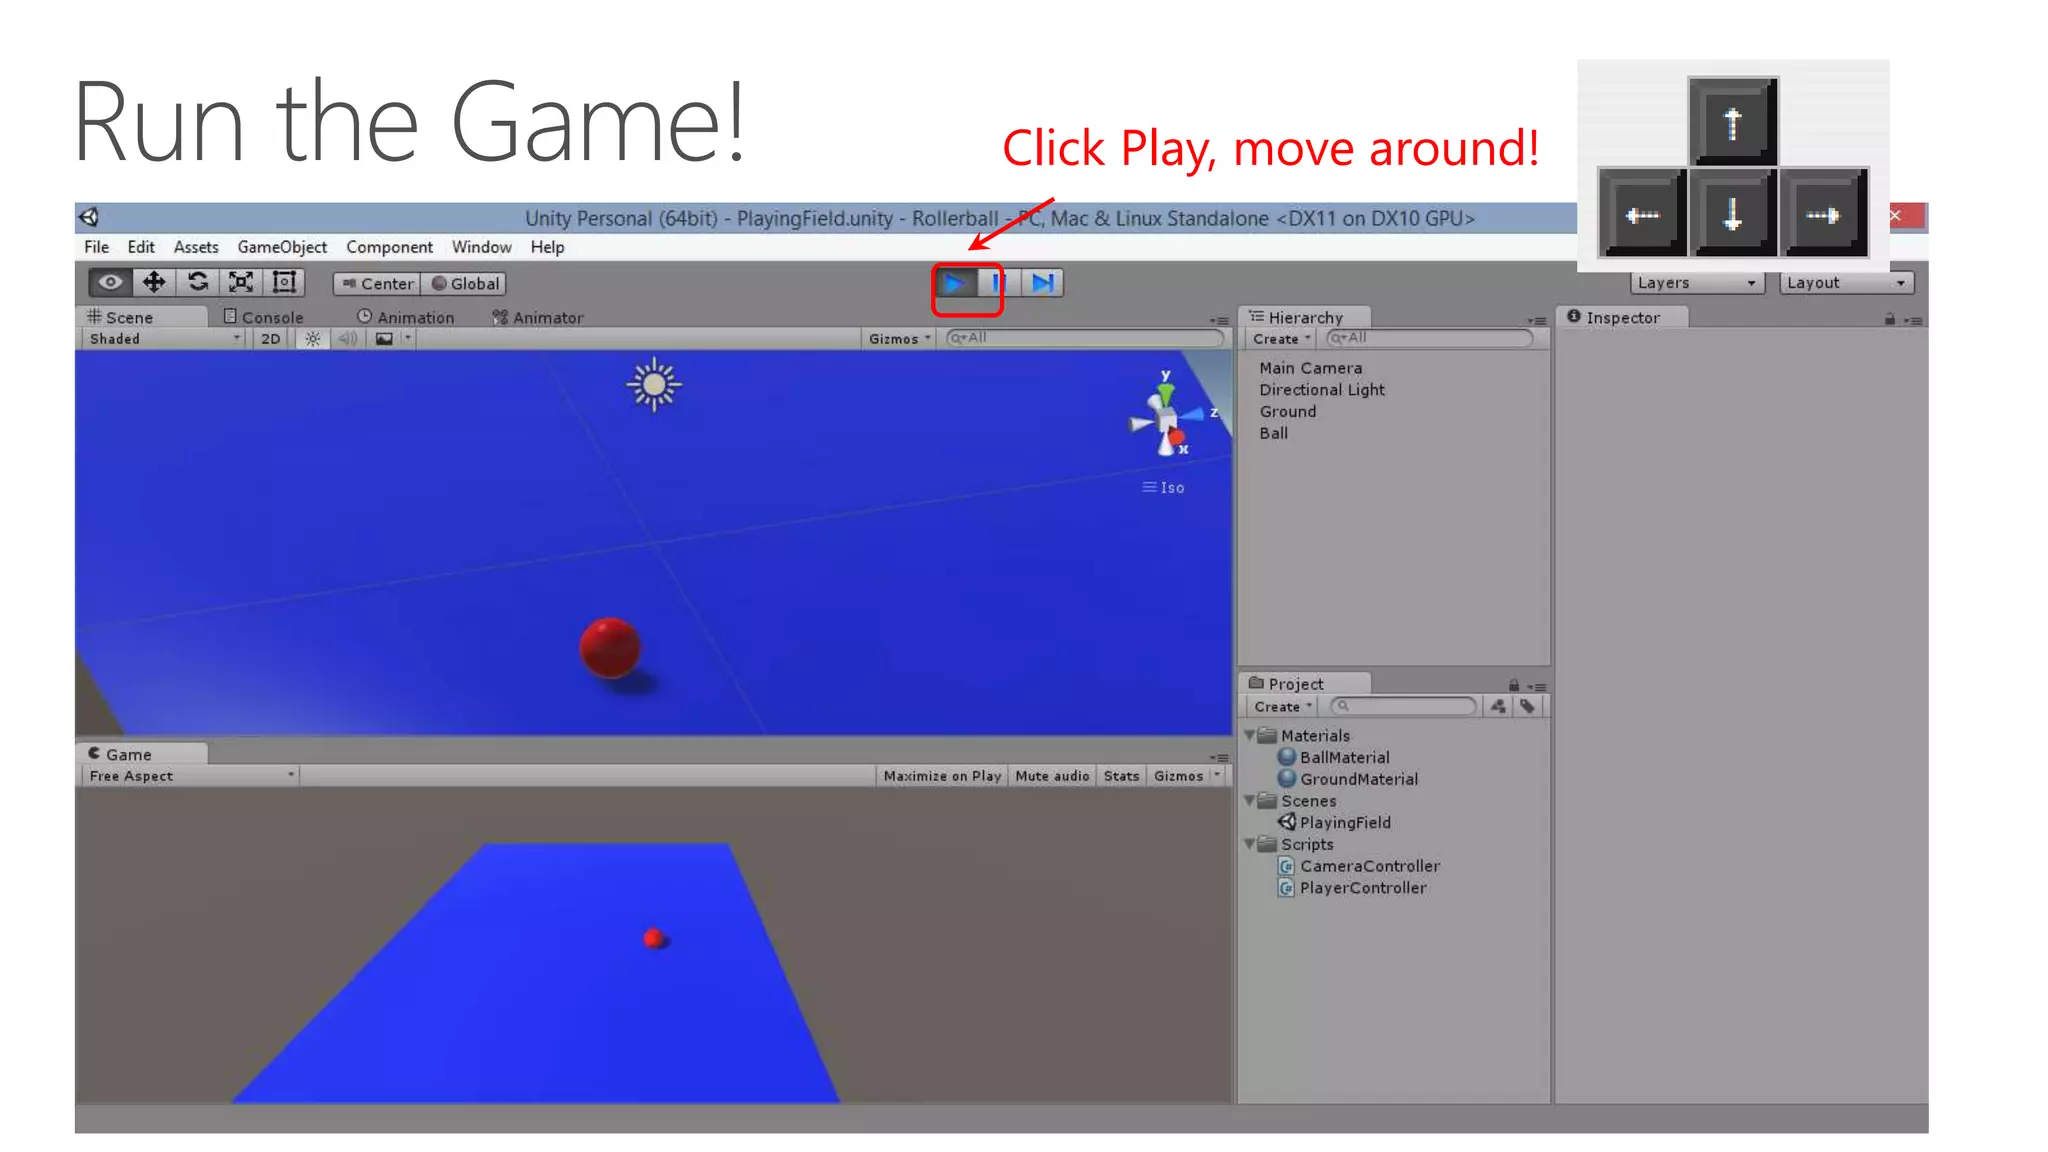


This document provides a step-by-step guide to creating a simple 3D game using Unity, focusing on setting up the game environment by creating the ground and the player object. It includes instructions on managing project files, manipulating 3D objects, and applying materials and lighting. The document also covers scripting for player movement and camera control, culminating in testing the game functionality.


![Vibe Coding vs. Spec-Driven Development [Free Meetup]](https://cdn.slidesharecdn.com/ss_thumbnails/vibecodingvsspecdrivendevelopment-251209105622-43f455e7-thumbnail.jpg?width=640&height=640&fit=bounds)


