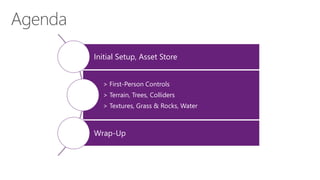
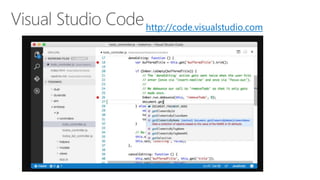
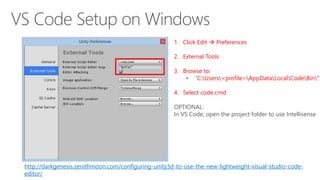
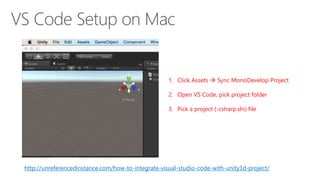
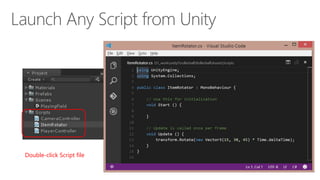
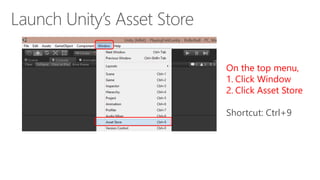
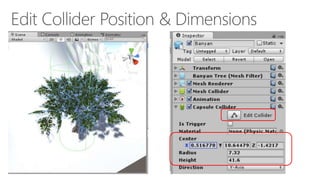
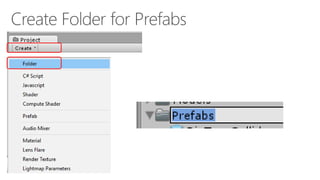
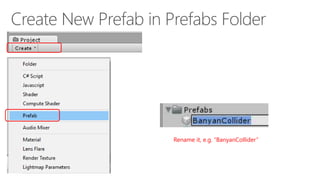
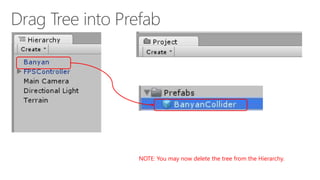
First-person controls, terrain & environment
@shahedC
WakeUpAndCode.com
Initial Setup, Asset Store
> First-Person Controls
> Terrain, Trees, Colliders
> Textures, Grass & Rocks, Water
Wrap-Up
Click Edit  Preferences
Under External Tools, select your Script Editor
e.g. MonoDevelop or Visual Studio
Tip: Browse for devenv.exe in your Program Files folder if you don’t see Visual Studio
"C:Program Files (x86)Microsoft Visual Studio 12.0Common7IDEdevenv.exe"
http://code.visualstudio.com
http://darkgenesis.zenithmoon.com/configuring-unity3d-to-use-the-new-lightweight-visual-studio-code-
editor/
1. Click Edit  Preferences
2. External Tools
3. Browse to:
• “C:Users<profile>AppDataLocalCodeBin”
4. Select code.cmd
OPTIONAL:
In VS Code, open the project folder to use Intellisense
http://unreferencedinstance.com/how-to-integrate-visual-studio-code-with-unity3d-project/
1. Click Assets  Sync MonoDevelop Project
2. Open VS Code, pick project folder
3. Pick a project (-csharp.sln) file
Double-click Script file
On the top menu,
1. Click View
2. Click Theme
3. Choose a theme:
• Light Theme
• Dark Theme
• High Contrast Theme
On the top menu,
1. Click Window
2. Click Asset Store
Shortcut: Ctrl+9
Verify that
you’re logged in.
Scroll down
for top charts
Click on
Top Free
(below
Top Paid)
Initial Setup, Asset Store
> First-Person Controls
> Terrain, Trees, Colliders
> Textures, Grass & Rocks, Water
Wrap-Up
… choose 3D, then click “Create project”
Name your project…
Click File  New Project…
From top menu, click GameObject  3D Object  Plane
Click Assets  Import Package  Characters
Import All!
In the Project Panel,
Open the following:
• Standard Assets
• Characters
• FirstPersonCharacter
• Prefabs
• FPSController
Click Play button, move with arrow keys
Notice
FPSController
in Hierachy
Locate FirstPersonController script under:
/Assets/Standard Assets/Characters/FirstPersonCharacter/Scripts/
From top menu, click GameObject  3D Object  Terrain
Click Play button, move with arrow keys
In the Terrain’s Inspector window, click Edit Trees  Add Tree
In the Add Tree dialog, click the tiny circle, then choose a tree, e.g. Banyan
Click the Add button to confirm.
Click “Mass Place Trees, then click Place to confirm
Too Small!
In the
Project panel,
click the Prefab
for the tree you
selected,
e.g. Banyan
Enter a larger
Scale Factor
e.g. 1
Click Apply to
update all trees!
From Project panel, drag any tree prefab to the Scene
Path: /Assets/Terrain Assets/Trees Ambient-Occlusion/
With the tree selected in the Hierarchy, click Add Component  Physics  Capsule Collider in the Inspector panel
Rename it, e.g. “BanyanCollider”
NOTE: You may now delete the tree from the Hierarchy.
1. Click “Place Trees” tool in Inspector with Terrain selected in Hierarchy
2. Click Edit Trees… to Add Tree (prefab with collider)
3. Mass Place Trees!
3 2
1
Click Assets  Import Package  Environment
Import All!
1. Click “Paint Texture” tool
2. Click Edit Textures…
3. Click Add Texture…
1
2
3
1. Click Select button
2. Choose a Texture, e.g. SandAlbedo
3. Click Add
1
2
3
1. Click Select button
2. Choose another Texture, e.g. Mud Rocky Albedo and Mud Rocky Normal
3. Click Add
1
2
3
With new Texture selected, drag mouse cursor along terrain to apply it.
1. Click Select button
2. Choose another Texture, e.g. Grassy Hill Albedo
3. Click Add
1
2
3
With new Texture selected, drag mouse cursor along terrain to apply it.
1. Click “Paint Details” tool
2. Click Edit Details…
3. Click Add Grass Texture…
1
2
3
1. Click icon next to Detail Texture
2. Choose a Grass Texture, e.g. Grass Hill Albedo
3. Click Add
1
2
3
1. Click “Paint Details” tool
2. Click Edit Details…
3. Click Add Detail Mesh…
1
2
3
1. Click icon next to Detail Texture
2. Choose a Rock Texture, e.g. Rock Mesh
3. Update color and change Render Mode (Vertex Lit)
4. Click Add
1 2
4
3
With Grass/Rock selected, drag mouse cursor along terrain to apply each.
1. Drag
RockMesh into
Scene.
2. Rename it in
Hierachy.
3. Create empty
Prefab, and
drag rock into
it.
1
2
3
With the rock selected in the Hierarchy, click Add Component  Physics  Capsule Collider in the Inspector panel
Initial Setup, Asset Store
> First-Person Controls
> Terrain, Trees, Colliders
> Textures, Grass & Rocks, Water
Wrap-Up
http://1drv.ms/1TUMufE
Drag “bazooka” prefab into “FirstPersonCharacter”
(just below FPSController)
Adjust Position:
X, Y and Z values
Adjust Position:
X, Y and Z values
http://facebook.com/groups/UnityIndieDevs
http://WakeUpAndCode.com/unity
http://facebook.com/groups/XboxOneIndieDevs
http://WakeUpAndCode.com/xb1
Email: shchowd@microsoft.com  Twitter: @shahedC
Initial Setup, Asset Store
> First-Person Controls
> Terrain, Trees, Colliders
> Textures, Grass & Rocks, Water
Wrap-Up

Unity 5: First-Person Tutorial

Editor's Notes

  • #2 Title Page: Game Development with Unity 5 and C# Windows  Web  Xbox  Mobile  … and more! By Shahed Chowdhuri Technical Evangelist Blog: WakeUpAndCode.com Twitter: @shahedC
  • #3 Agenda
  • #16 Agenda
  • #78 Agenda
  • #85 For more info: Xbox One Indie Devs: http://facebook.com/groups/XboxOneIndieDevs http://WakeUpAndCode.com/xb1 Unity Indie Devs: http://facebook.com/groups/UnityIndieDevs http://WakeUpAndCode.com/unity Construct2 Devs: https://www.facebook.com/groups/construct2devs
  • #86 Contact Microsoft email: shchowd@microsoft.com Personal Twitter: @shahedC Dev Blog: WakeUpAndCode.com
  • #87 Agenda