


![VIRTUALIZATION WITH IBM RATIONAL INTEGRATION TESTER
13.3 Using tags
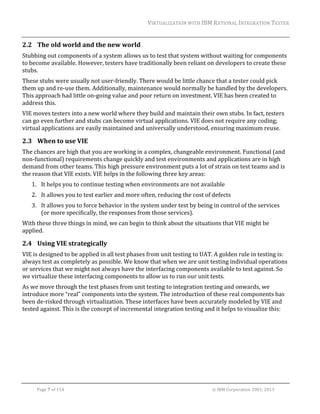
As seen above, tags can be given values when they are created. Test tags can also be given new
values during the execution of a test or stub. This will usually be done on the Store tab of a test
action; in that case, the tag is referenced simply by its name.
To retrieve the value of a tag, you will need to surround the tag name with two percentage signs
(%%) at each end. This means that you can store a value in a tag called myTag simply by referring to
its name, myTag, but to retrieve the value of that tag, you will need to refer to it as %%myTag%%.
Some features of Rational Integration Tester use ECMA Script. In most cases, a tag can be
referenced within a script through its name, which would give you myTag, if you kept using the
previous example. However, there are exceptions to this. If your tag name clashes with a reserved
word or variable, then you will not be able to use the tag name without causing confusion. Similarly,
if you have a hierarchy of tags, with an example tag of MYTAGS/tag1, the forward slash character
would cause confusion within a script. In these cases, you can refer to the tag using, for example,
tags["myTag"] or tags["MYTAGS/tag1"].
13.4 Exercise: Creating and using a tag
So far, every example we have looked at has used static data. We will now see how we can use
dynamic data within our own stubs by using tags. We will create a new stub that will return a hotel
for any city, using that city’s name.
1. Within the Test Factory, create a new stub by right‐clicking the getHotels operation, and
clicking New > Stubs > Stub using MEP. Call the stub taggedCity.
2. We will only have the single event for this stub. As before, make sure the Event column is set
to getHotels.
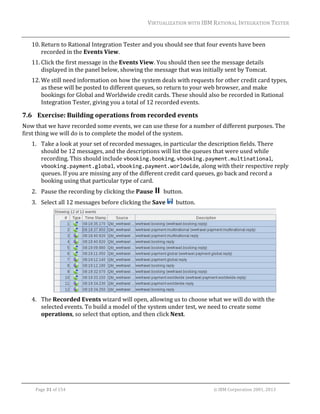
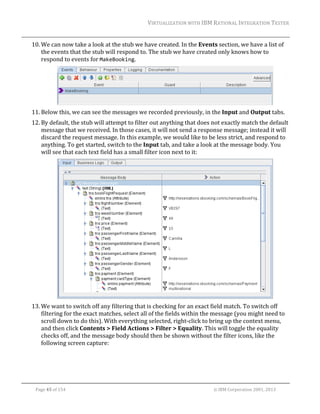
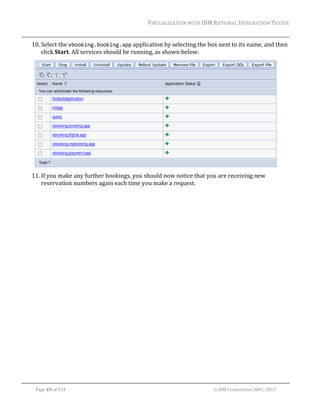
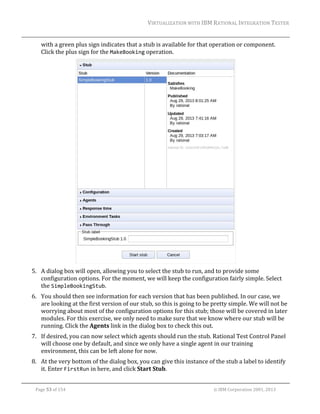
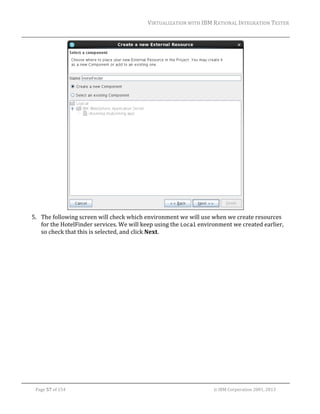
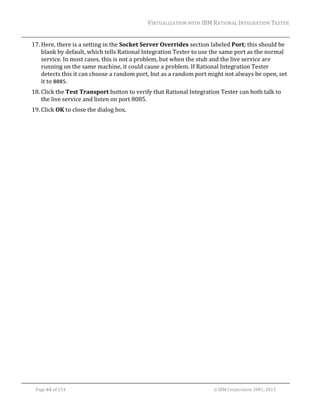
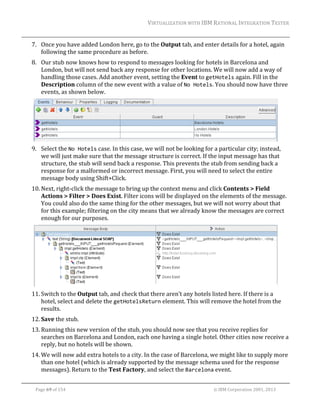
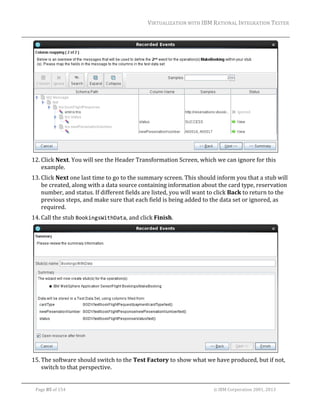
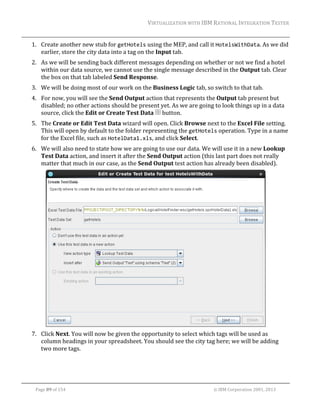
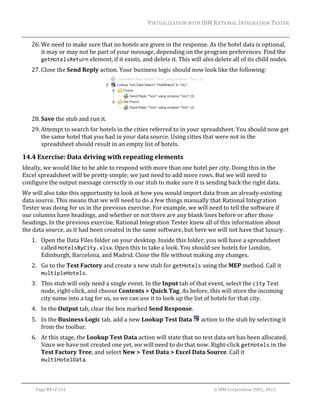
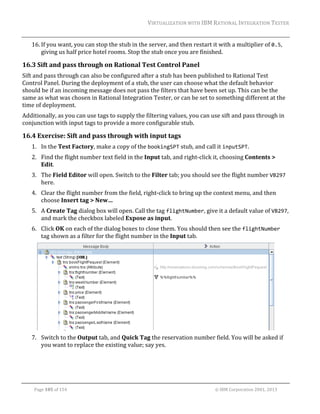
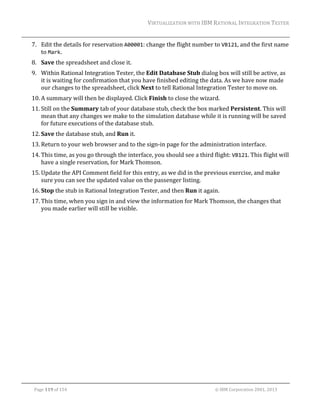
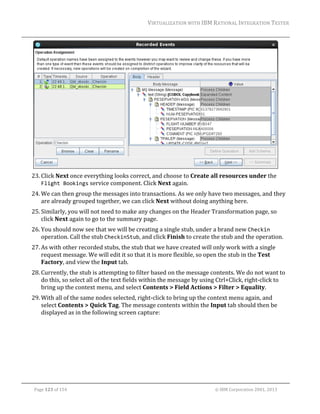
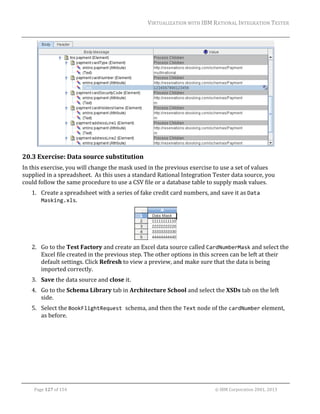
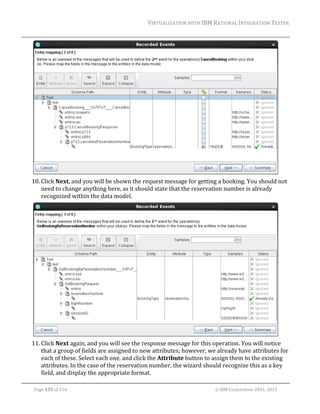
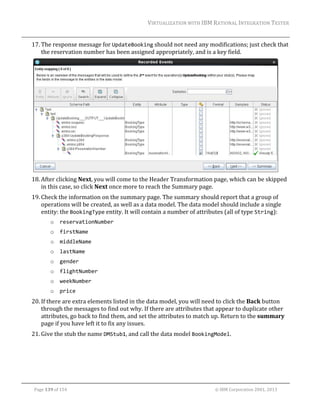
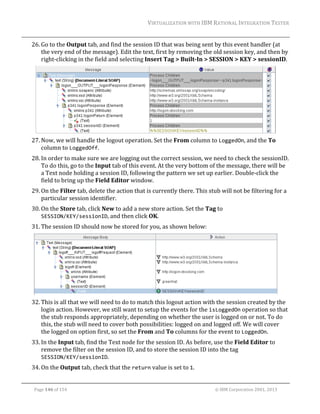
3. In the Input tab find the city element, and select the Text node. Right‐click to bring up the
menu, and then click Contents > Quick Tag. This will update the message body like so:
4. Notice the icon next to the word city in the Action column. This lets us know that we will
be storing the value in the city field into a tag called city, which we can then reuse later on.
5. Now select the Output tab. This will not have a hotel listed in it, as hotels are optional
elements according to the message schema, so add one by right‐clicking the
getHotelsResponse element and clicking Add Child > getHotelsReturn in the context
menu.
6. Locate the name element within getHotelsReturn. The text field for this is currently blank.
We will edit this so that the user sees “cityname Hotel” here. To do this, double‐click the text
field so that you can edit it. Type in %%city%% Hotel . The percentage signs tell Rational
Integration Tester that we are retrieving a value from a tag named city at this stage.
Page 77 of 154 © IBM Corporation 2001, 2013](https://image.slidesharecdn.com/rit8-140221045018-phpapp02/85/Rit-8-5-0-virtualization-training-student-s-guide-79-320.jpg)
![VIRTUALIZATION WITH IBM RATIONAL INTEGRATION TESTER
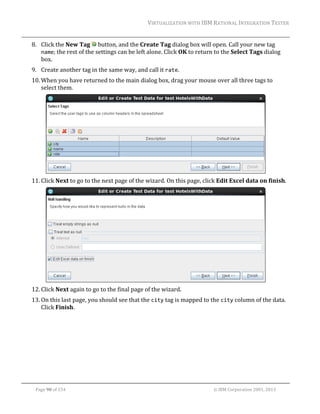
7. Give the hotel a rate of 150.
8. Save the stub, and switch to the Test Lab. Check that you have stopped any other stubs that
might have been running previously.
9. Run the stub, and search for hotels in any city. You should always receive a response that
the local hotel has a room available.
10. Stop the stub once you are finished.
13.5 Scripting
Now that you have got the ability to use simple variables, you might want to manipulate those
variables. While it is possible to create a large variety of stubs without writing any scripts, you
might come across situations where a script would be the quickest way of creating the stub that you
require. Rational Integration Tester provides the ability for you to use ECMAScript. You might know
ECMAScript under the name JavaScript, which is an implementation of ECMAScript.
This training guide will not go into any depth around ECMAScript itself; many references are
already available. While you will see a few simple examples that use ECMAScript, the scripts
involved are very simple, and should be possible for anyone with a basic understanding of
programming or scripting to comprehend.
Scripts can be executed in a variety of places. For this example, we will use the Function action. You
will see other examples later on, including the use of scripts within a guard, later in this module.
Before you get started, though, it is important to note that tags are referenced differently within a
script. In many cases, a tag can be referred to by its name, both when reading from the tag and
when writing to a tag. In some cases, however, the tag name might cause a problem; for example, if
the tag name clashes with a reserved word, variable name, or function name. Tag names can also
cause problems if they are in the form MYTEST/mytag, because the forward slash (/) character
would be interpreted as the division operator. In those cases, you can refer to the tag in the form
tags["myTag"] or tags["MYTEST/myTag"], as appropriate.
13.6 Exercise: Stubbing addNumbers
In this example, you will create a stub for the addNumbers service that will perform the addition
requested by the client, using a simple script.
1. If you have the addNumbers example included in your current project, proceed to step 2.
Otherwise, make sure that the addNumbers server is currently running, then synchronize
with the WSDL for that service, at http://localhost:8088/addNumbers?wsdl . Stop the
service after synchronizing.
Page 78 of 154 © IBM Corporation 2001, 2013](https://image.slidesharecdn.com/rit8-140221045018-phpapp02/85/Rit-8-5-0-virtualization-training-student-s-guide-80-320.jpg)
![VIRTUALIZATION WITH IBM RATIONAL INTEGRATION TESTER
2. Create a new stub for the Addition operation, using the MEP.
3. On the Input tab, quick tag both the arg0 and arg1 text nodes to save them both into tags.
4. On the Output tab, quick tag the return text node.
5. You now have three tags: the two inputs, and the one output. Adding the two numbers
together into the output is fairly simple. To get started, switch to the Business Logic tab.
6. Add a new Function action, and move it so that it occurs before the Send Output action that
was already there.
7. Open the Function action, and on the Function tab, enter the script:
tags["return"] = parseInt(arg0, 10) + parseInt(arg1, 10)
Note that the tag for the return value uses the tags["return"] format because the word
return is a reserved word in ECMAScript; if you just used return on its own, it would be
interpreted as that reserved word, and would cause an error. The parseInt function is used
for both arguments to make sure that they are treated as integers; the ECMAScript language
is dynamically typed, so a number could be treated as a number or as a string, depending on
the context. If your variables were treated as strings, then 4 + 4 would give you 44, joining
the two strings, rather than the desired answer of 8. Using the parseInt function avoids the
possibility of this happening. Note that the second parameter of that function describes the
base number system, so in this case the numbers are treated as decimal numbers rather
than, for example, hexadecimal.
8. Close the Function action, Save the stub, and Run it.
9. Use the AddNumbers client to connect to the stub and add two numbers. You should find
that you are able to add a pair of numbers and get the correct response from your stub.
13.7 Guards
By tagging incoming data, we can also implement extra filtering on any incoming messages.
Previously, we have been able to filter incoming data by looking at a single field. For example, you
previously created a stub that provided results for a search for hotels in Barcelona. We could also
filter based on multiple fields, as long as the data in those fields is independent; for example, we
could filter for searches in Barcelona on the 23rd of January. However, if we needed to look at the
relationship of data between different fields (or between fields in the message and a data model
used by the stub), we would need to take a different approach.
A guard allows us to provide more complex filtering, rather than just looking at the values inside
each field one by one. It might filter data by running a short script that performs comparisons or
calculations. It might also provide filtering by comparing incoming data to data held within a data
model, or even just marking the event handler as the default to use if no other filters allow the
incoming message to pass.
So if we need to make sure that multiple fields in a message relate to each other correctly, we can
tag those fields in the input message of an event, and add a short script that will verify that
relationship. For example, if we receive a message containing an order, it might be useful to check
that the prices of all items add up to the stated total, or that a field stating the amount of tax has
Page 79 of 154 © IBM Corporation 2001, 2013](https://image.slidesharecdn.com/rit8-140221045018-phpapp02/85/Rit-8-5-0-virtualization-training-student-s-guide-81-320.jpg)
![VIRTUALIZATION WITH IBM RATIONAL INTEGRATION TESTER
been calculated correctly. Depending on whether or not these conditions have been satisfied, we
might treat incoming data in different ways.
13.8 Exercise: Using guards
In this exercise, we will extend the previous example so that we can send back one of two
alternative responses. If the user makes a request for a hotel in any city, we will send back the
original response, as long as the start date of the booking comes before the end date. If the request
uses the right format, but has invalid dates, we will simply send back a response with no hotels
listed.
Note: This exercise uses dates in a day/month/year format. If you attempt the exercise using dates
in the form of month/day/year, you might encounter errors.
1. Make a copy of the taggedCity stub, and call it hotelGuards.
2. Within your new stub, select the single event that is present. Click the Clone button to make
a copy of this event.
3. Make sure you have selected the event at the top of the list. Edit the Description field to say
Valid Input.
4. We will use the Valid Input event to cover the case where we have completely valid input:
a city, and a start date that comes before the end date. Within the Input tab for this event,
quick tag each of the city, from, and to text fields.
5. Set the Guard for the event to Expression. The Input tab will now contain a Guard section.
6. Make sure the scripting language is set to ECMAScript, and enter the script:
tags["from"] < tags["to"]
This will compare the dates. If the from date is then less than the to date (i.e., the from date
comes before the to date) then we will pass the guard, and so the filter, sending back a
message with a hotel.
7. For the second event, enter Invalid Dates in the Description field.
Page 80 of 154 © IBM Corporation 2001, 2013](https://image.slidesharecdn.com/rit8-140221045018-phpapp02/85/Rit-8-5-0-virtualization-training-student-s-guide-82-320.jpg)


![VIRTUALIZATION WITH IBM RATIONAL INTEGRATION TESTER
7. Return to the Events tab.
8. We can now set a timer. As we want to set a timer that will log the user out after a period of
time, the best place to start will be the logon event, so select that.
9. To start a timer, we will need to add some of our own custom logic, so go to the Business
Logic tab of this event, and add a new Function action by right‐clicking below the existing
Send Output test action and selecting New > General > Function.
10. Double‐click the Function action to edit it. Make sure that you are looking at the Function
tab, and that the drop‐down menu directly underneath is set to ECMAScript.
11. Type in the following code:
logoffTimer.scheduleTimerEvent("timerID", tags["SESSION/KEY/sessionID"], 30,
java.util.concurrent.TimeUnit.SECONDS)
12. We will analyze this, so we understand what we are doing. The first parameter is the
identifier that we are giving the timer, so that we can cancel it or reset it later on if required.
Second, we have used the sessionID tag. The second parameter will be given back to the
stub when the timer runs out. We have put the sessionID in here, so that we know which
session to log out at that time. The third and fourth parameters specify how long the timer
should run for; in our case, this will be 30 seconds.
13. You might have spotted a problem with this: the fact that we have hardcoded the identifier
for the timer means that we are not going to be able to set timers for multiple users. If we
reset the timer using the same identifier when another user logs on, the current timer will be
lost. We will modify this so that we can use multiple timers, by using the sessionID as the
identifier. This will give you the following:
logoffTimer.scheduleTimerEvent(tags["SESSION/KEY/sessionID"],
tags["SESSION/KEY/sessionID"], 30, java.util.concurrent.TimeUnit.SECONDS)
Page 150 of 154 © IBM Corporation 2001, 2013](https://image.slidesharecdn.com/rit8-140221045018-phpapp02/85/Rit-8-5-0-virtualization-training-student-s-guide-152-320.jpg)
![VIRTUALIZATION WITH IBM RATIONAL INTEGRATION TESTER
14. Click OK to close the Function action. Drag the Function action so that it is the middle
action shown in the Business Logic of the stub. It will need to be after the Create Session
action, or else we will not have a value for the sessionID tag to provide to the timer.
15. Next, we will need to have something to act on the timer. We are going to add a new event
handler to the stub to do this, so Add a new event.
16. In the Event column, you will need to choose what to respond to. If you click in this column
for your new event, you will see the three operations that you had in your stub; you will also
see the logoffTimer behaviour with its own submenu. Click the single option available in
that submenu, onTimerEvent.
17. We will also need to set the From State and To State columns. As the timer should take us
from the LoggedOn state to the LoggedOff state, set the From State column to LoggedOn, and
the To State column to LoggedOff.
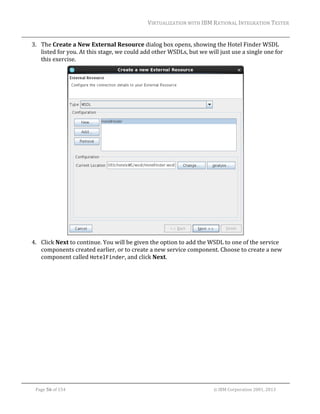
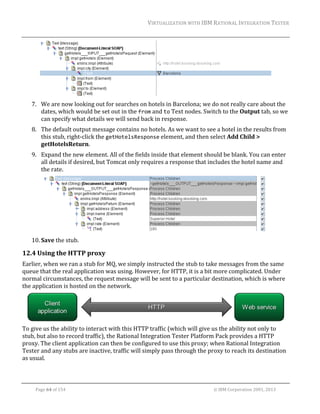
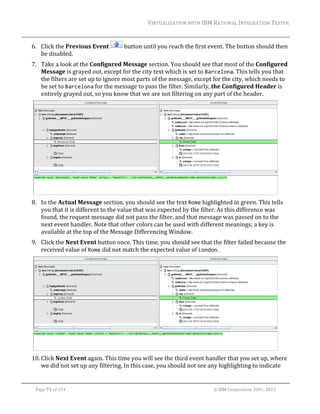
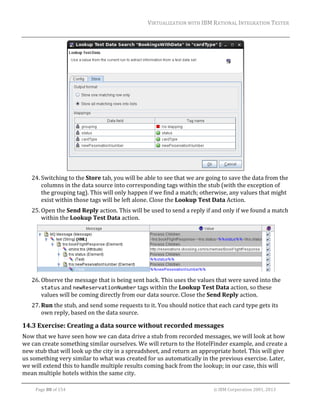
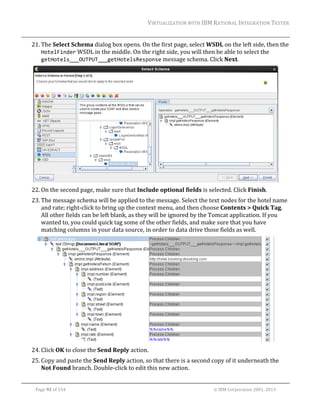
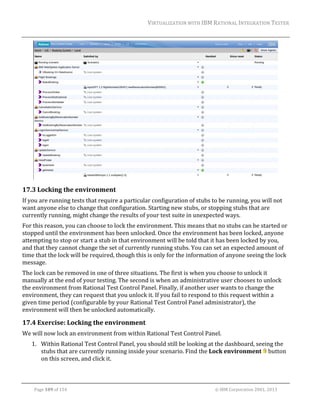
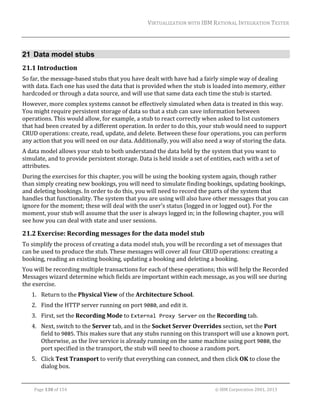
18. Finally, we will need to check which session we are logging out. To do this, go to the Input
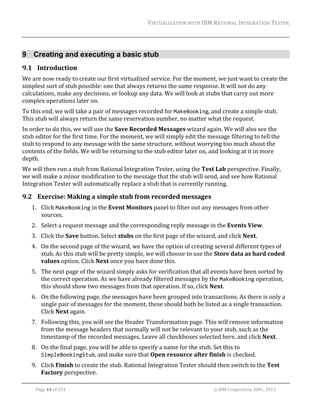
tab of the event. You will notice that the onTimerEvent callback will generate a short
message for us. The parameter field in this message will hold the sessionID, as this is what
we put into the parameter field when we started the timer.
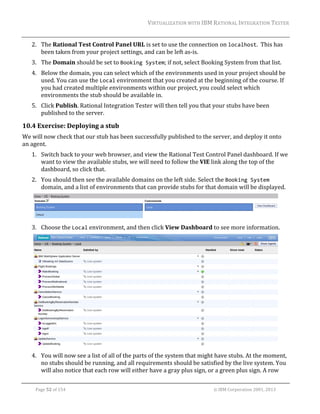
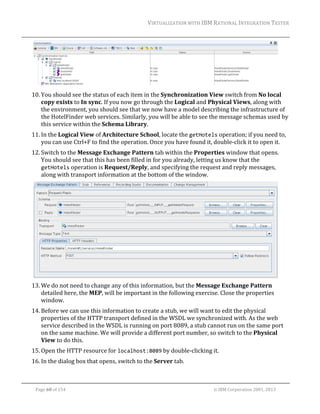
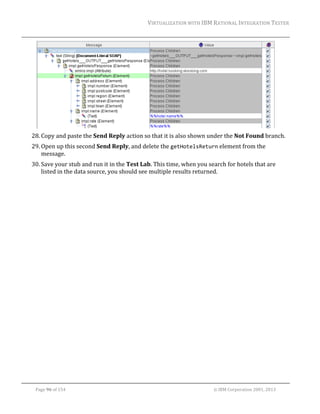
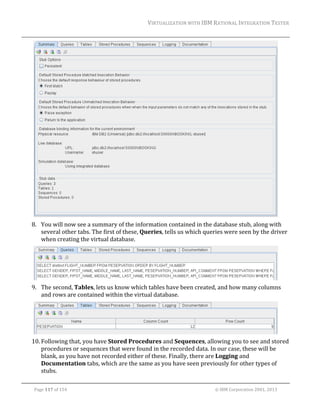
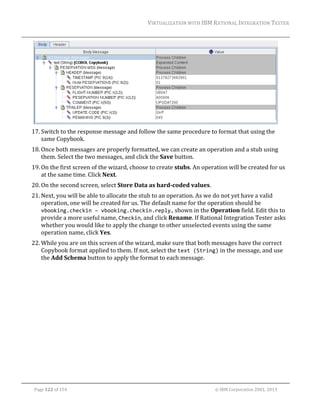
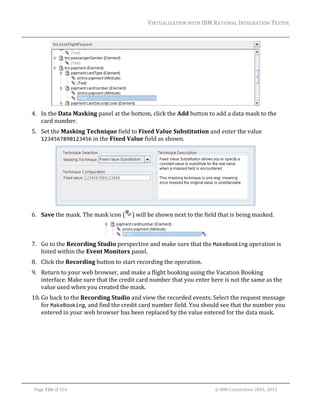
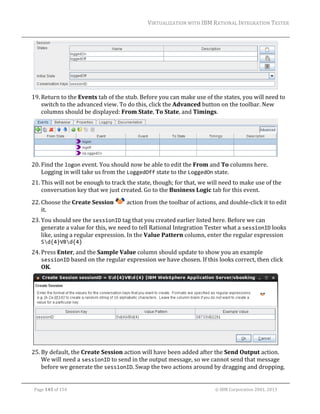
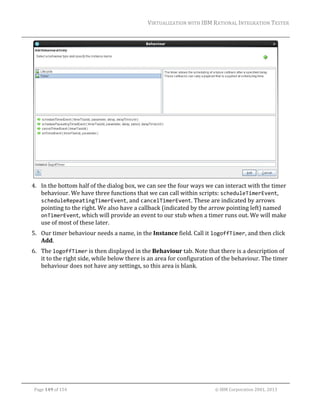
19. Double‐click the parameter to bring up the Field Editor, and go to the Store tab of that
dialog box.
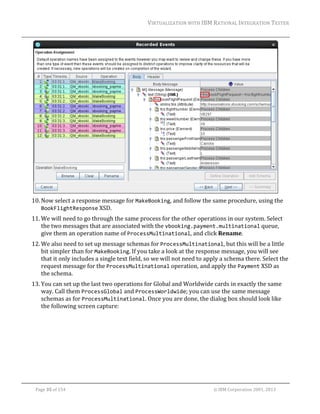
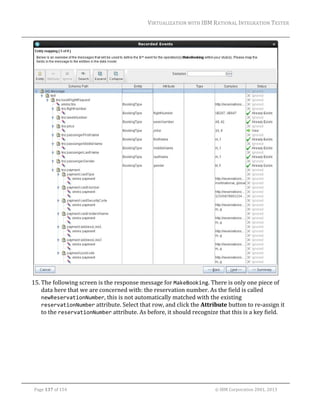
20. Click New to add a new Store action, and set the tag to SESSION/KEY/sessionID. Click OK
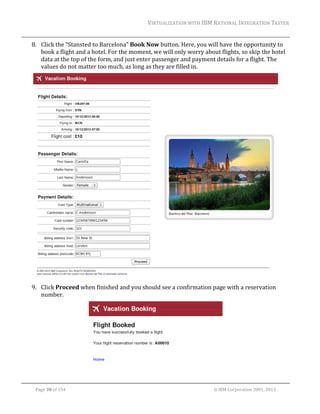
once you are done. The Input tab should now look like the following screen capture:
21. We have now done the bare minimum in order to use the timer behaviour to automatically
log out a user, but we will develop this a bit further. If a user logs out, we should probably
cancel the timer. To do this, open up the logoff event, and go to the Business Logic for that
event.
22. Add a new function action as we did before, with the following script:
logoffTimer.cancelTimerEvent(tags["SESSION/KEY/sessionID"])
23. Click OK to close the Function action. In this case, it should not matter too much if we cancel
the timer before or after we send the logout response message.
Page 151 of 154 © IBM Corporation 2001, 2013](https://image.slidesharecdn.com/rit8-140221045018-phpapp02/85/Rit-8-5-0-virtualization-training-student-s-guide-153-320.jpg)


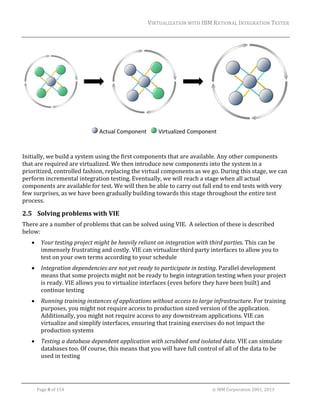
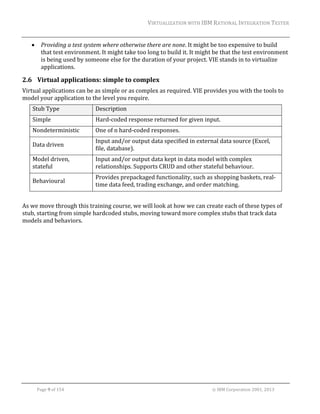
This document discusses using virtualized applications for testing with IBM Rational Integration Tester. It introduces the concept of virtualizing components that are unavailable for testing purposes. When components of a system under test are missing or need to behave differently, virtual services can be created to replace them. This allows testing to continue without waiting for real components. Rational Integration Tester provides tools to record messages and traffic from a system and then create virtual replacements or "stubs" that simulate the behavior of unavailable components. The training exercises in the document demonstrate how to create virtual services and databases using recorded messages and traffic in Rational Integration Tester.