Download to read offline
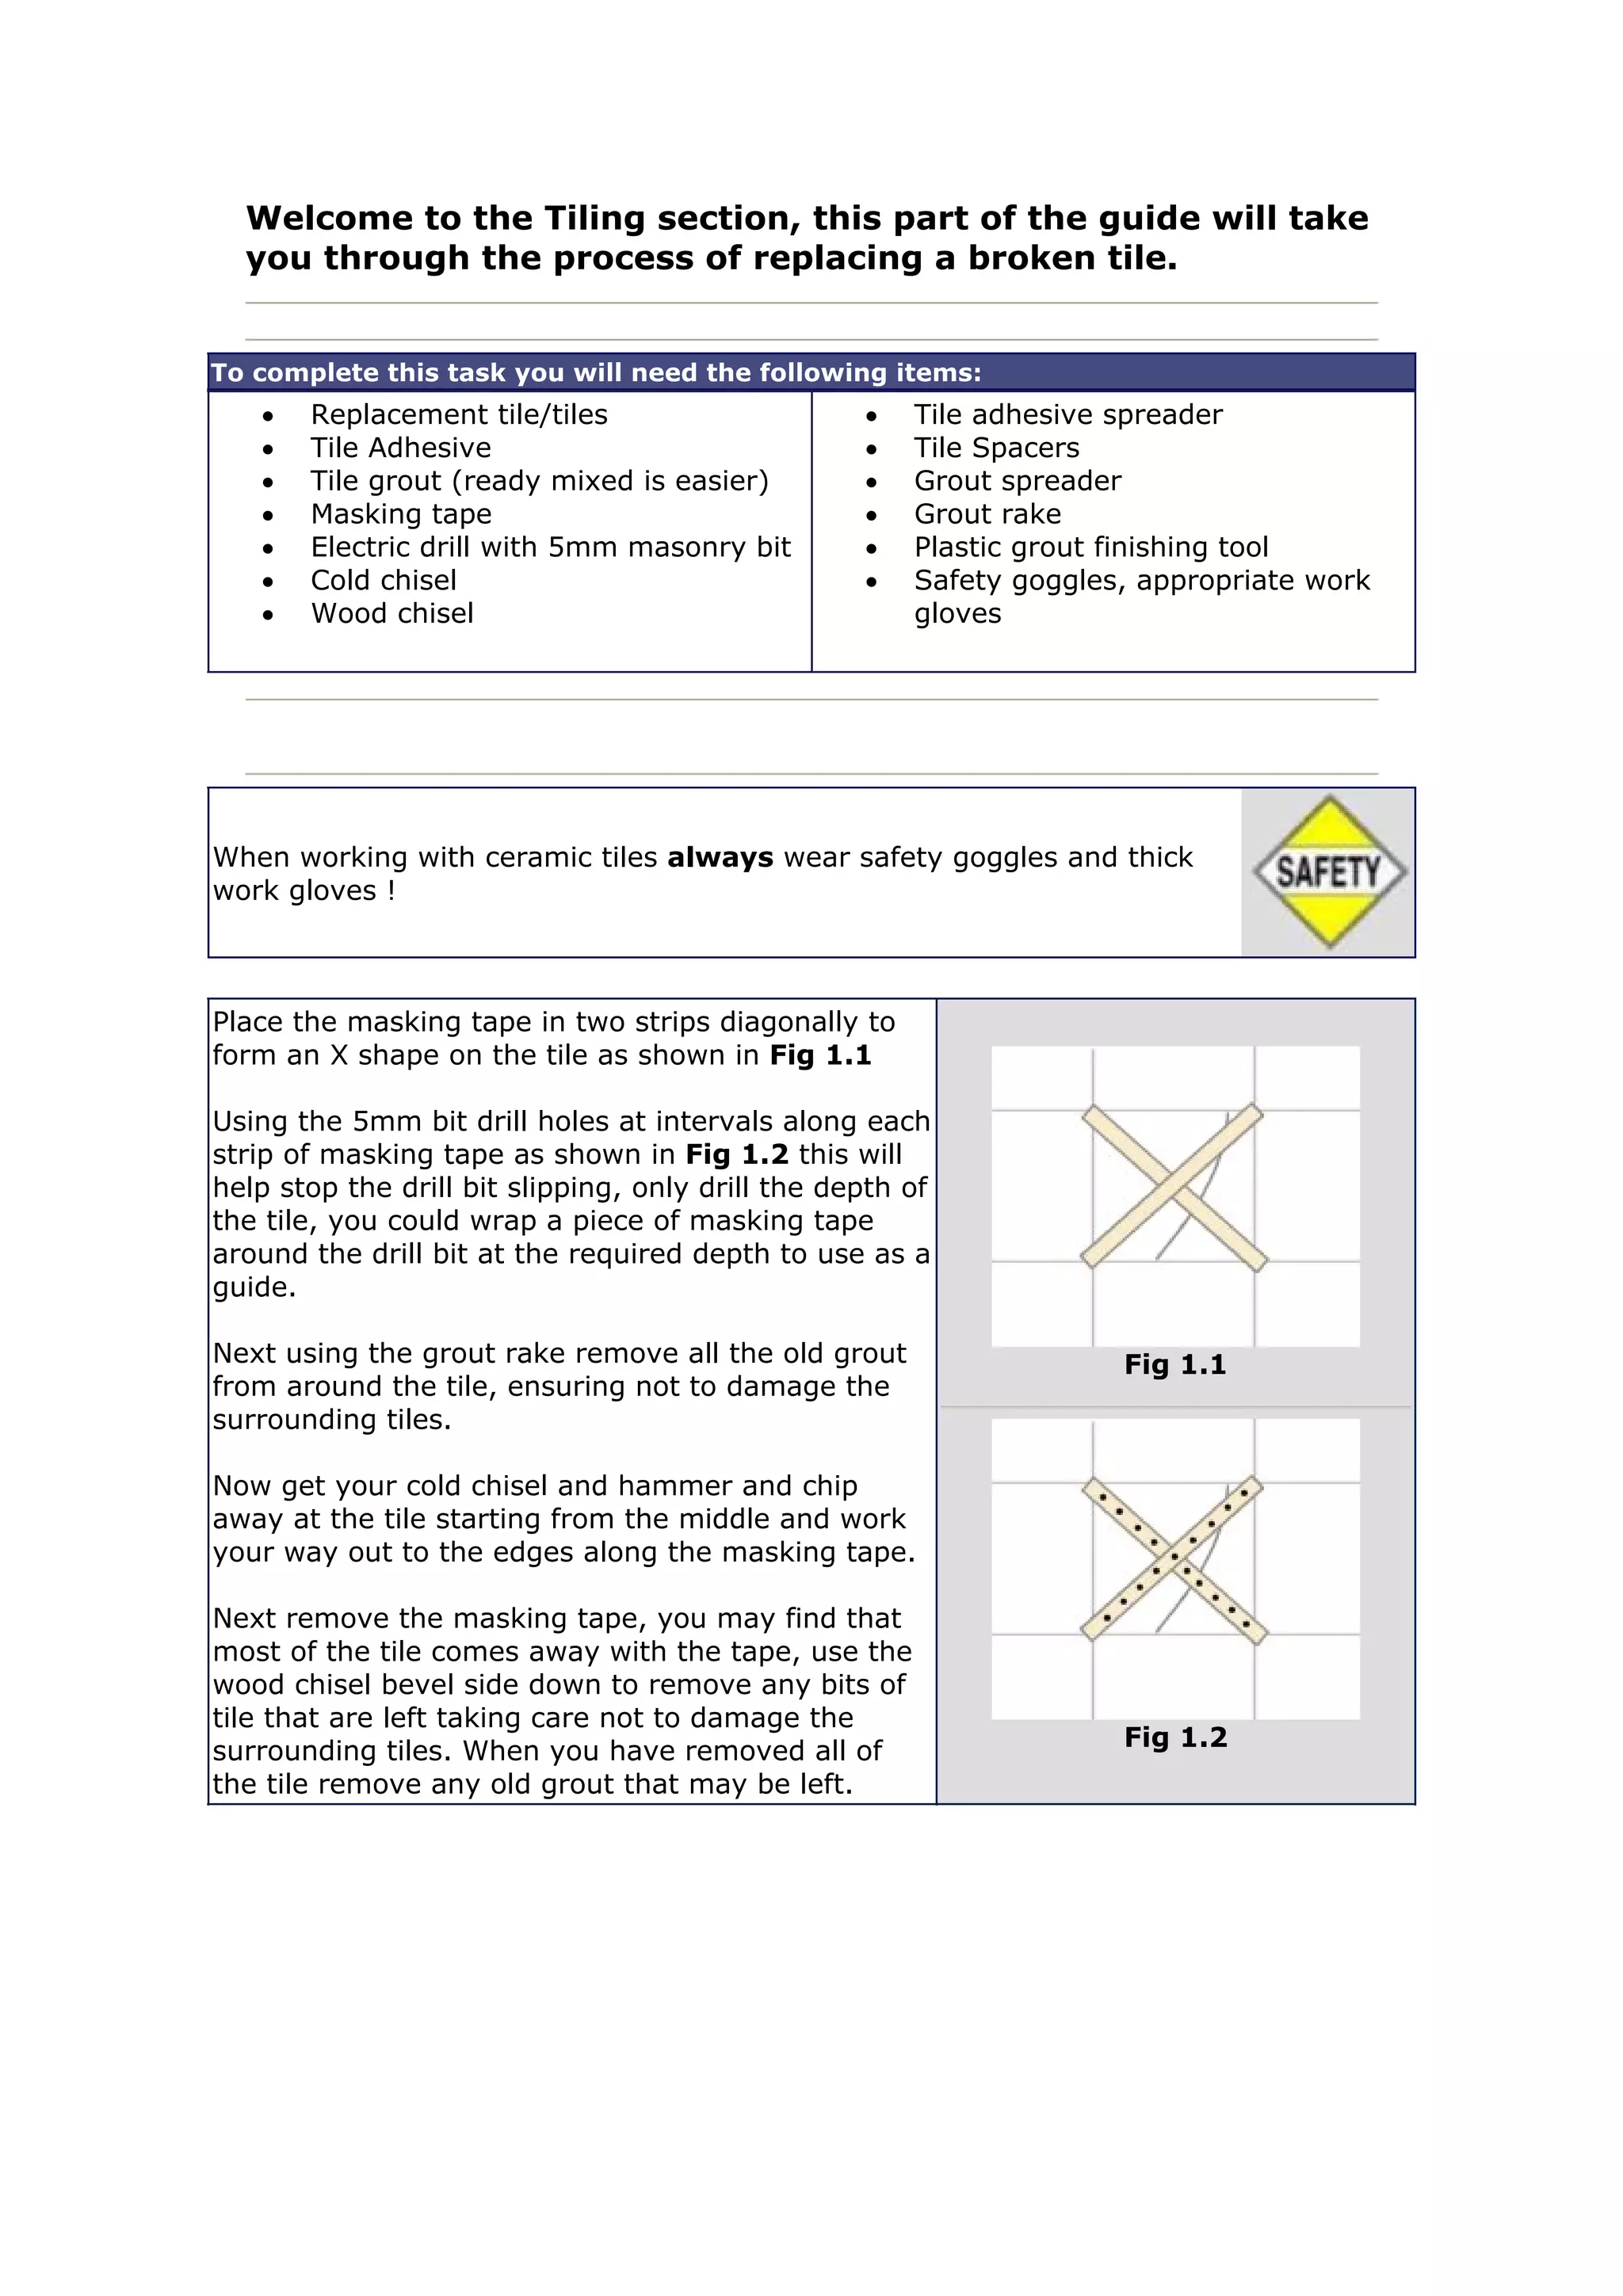
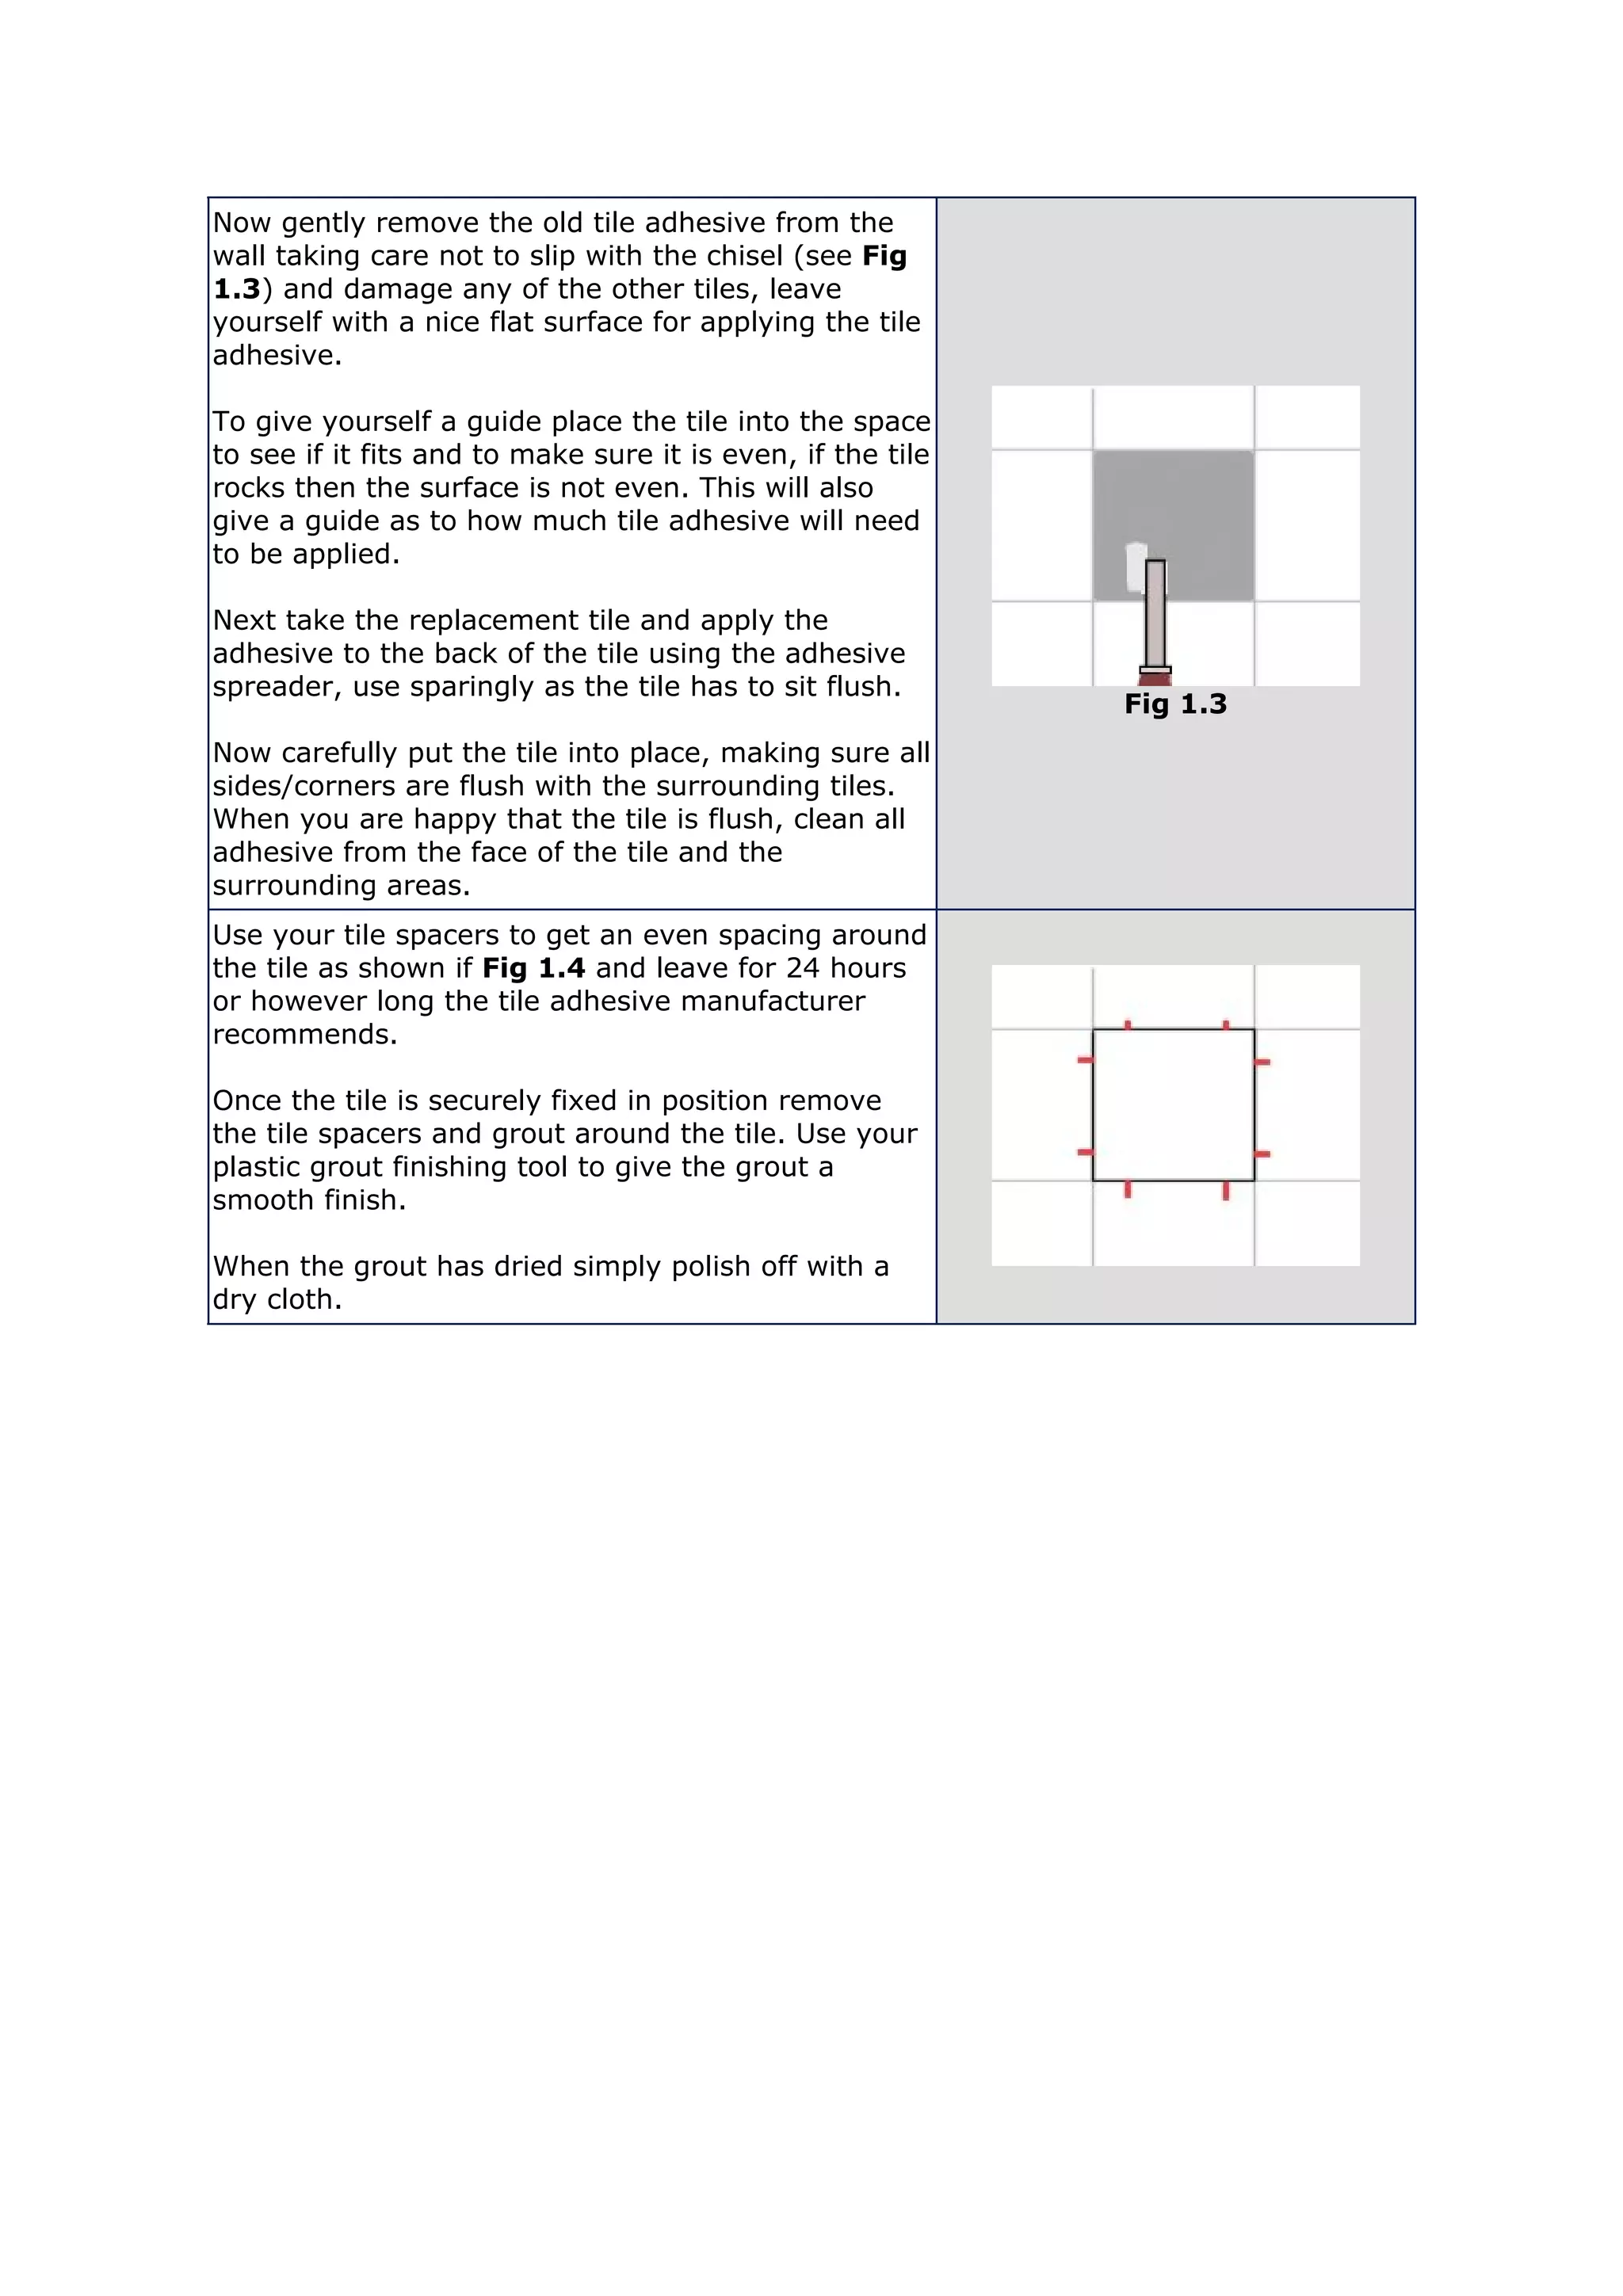

This document provides instructions for replacing a broken tile, including the necessary tools and steps to complete the task. The steps are to: prepare the area by removing the old tile and grout; apply tile adhesive to the replacement tile and wall surface; place the new tile and use spacers; allow the adhesive to dry; apply grout and smooth with a tool; and polish the dried grout. Safety equipment like goggles and gloves should be worn when working with ceramic tiles.


