Download to read offline


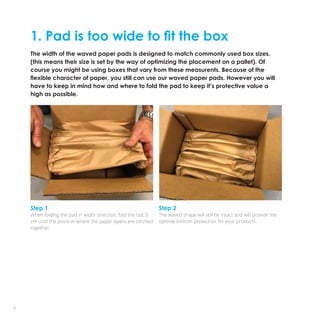

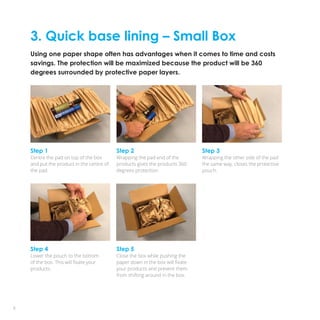
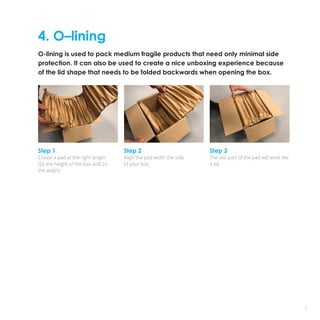
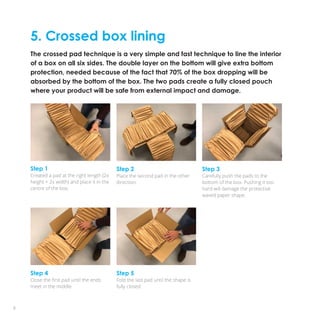


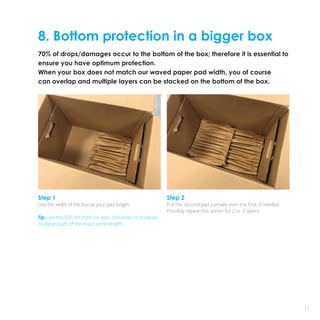
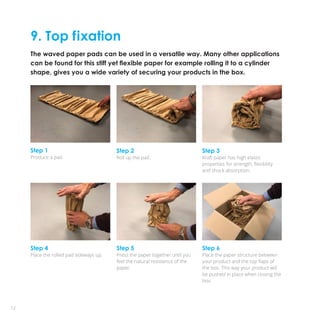

This document provides instructions for using waved paper pads from Ranpak for various packaging solutions. It describes 9 different packaging methods for lining boxes to protect products from damage during shipping using the pads. The methods include folding pads to fit boxes of different sizes, creating extra bottom protection, quick base lining of small boxes, O-lining boxes, crossed box lining, bottom and side lining of large boxes, box lining large boxes using multiple pads, providing bottom protection in large boxes, and creating rolled pads for top fixation of products in boxes.