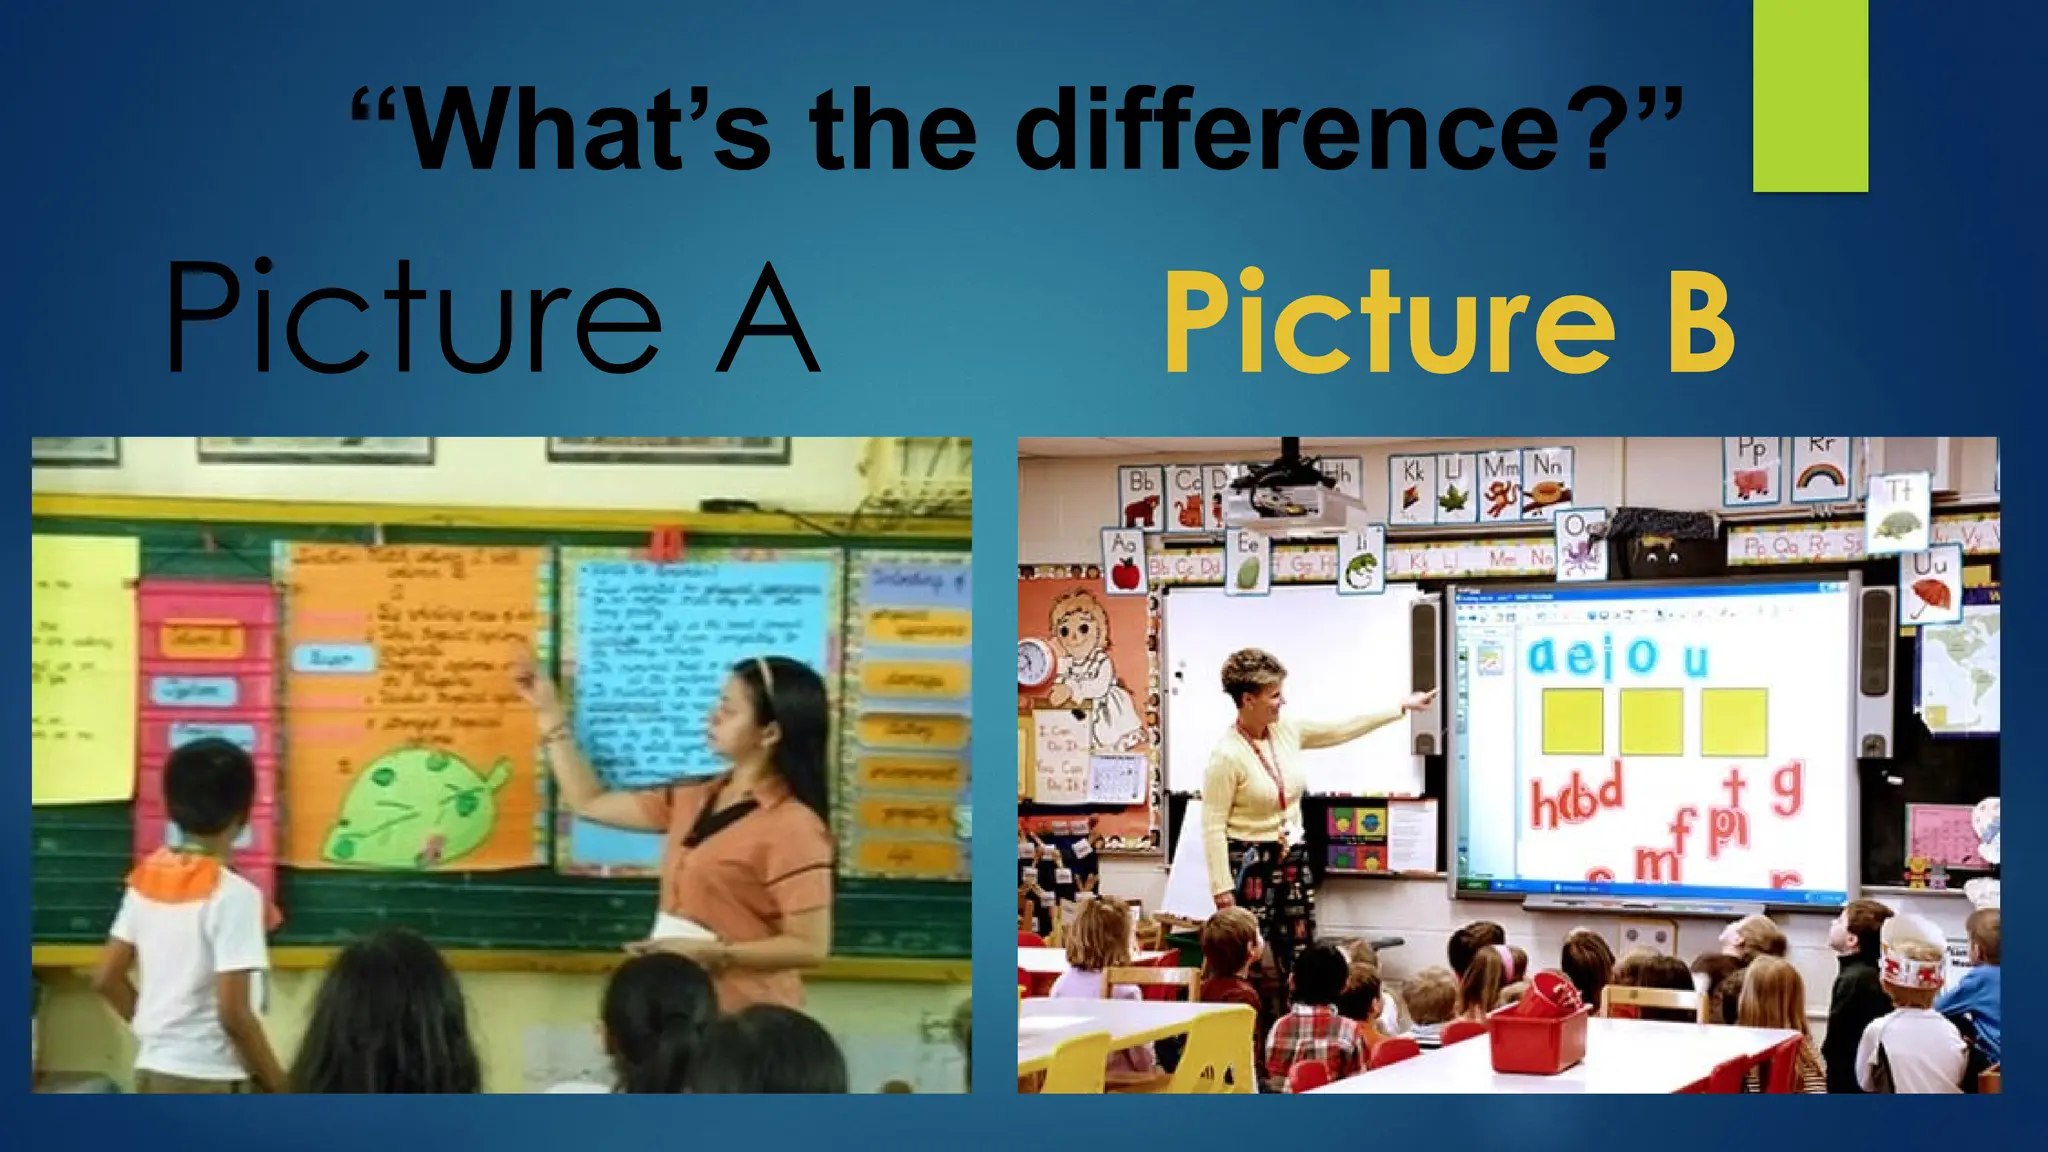
1. What isyour observation about the two pictures?
2. Which one do you prefer? Why?
3. What are the Advantage and disadvantage of Picture
A?
4. What are the Advantage and disadvantage of Picture
B?
5. Which one do you prefer to follow Picture A or B? Why?
Guided Questions:
4.
PowerPoint files arecalled PRESENTATION.
Whenever you start a new project in
PowerPoint, you'll need to create a new
presentation, which can either be blank or
from a template.
Microsoft PowerPoint (or simply PowerPoint) is
a presentation program, created by Robert
Gaskins and Dennis Austin at a software
company named Forethought, Inc. It was
released on April 20, 1987
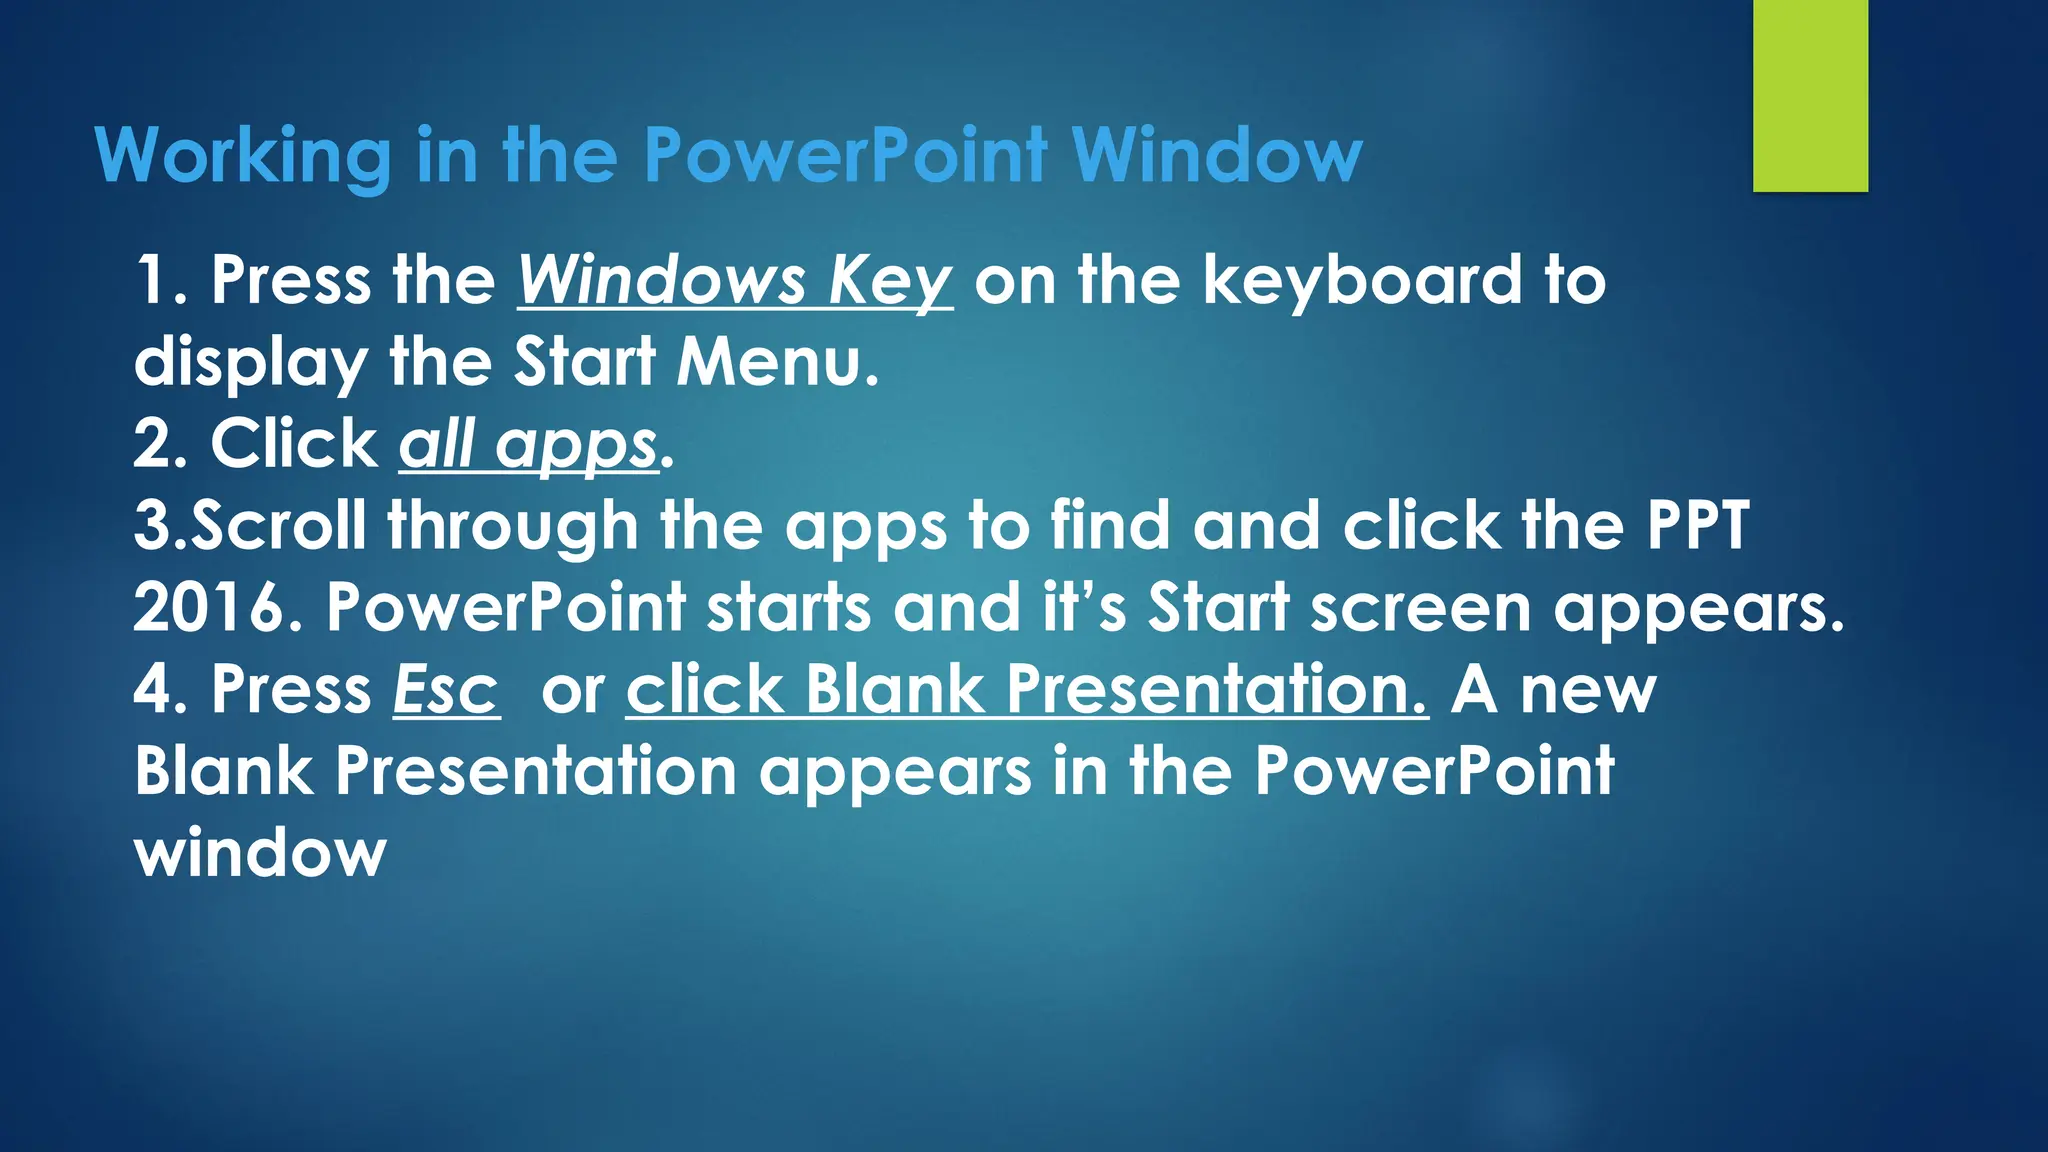
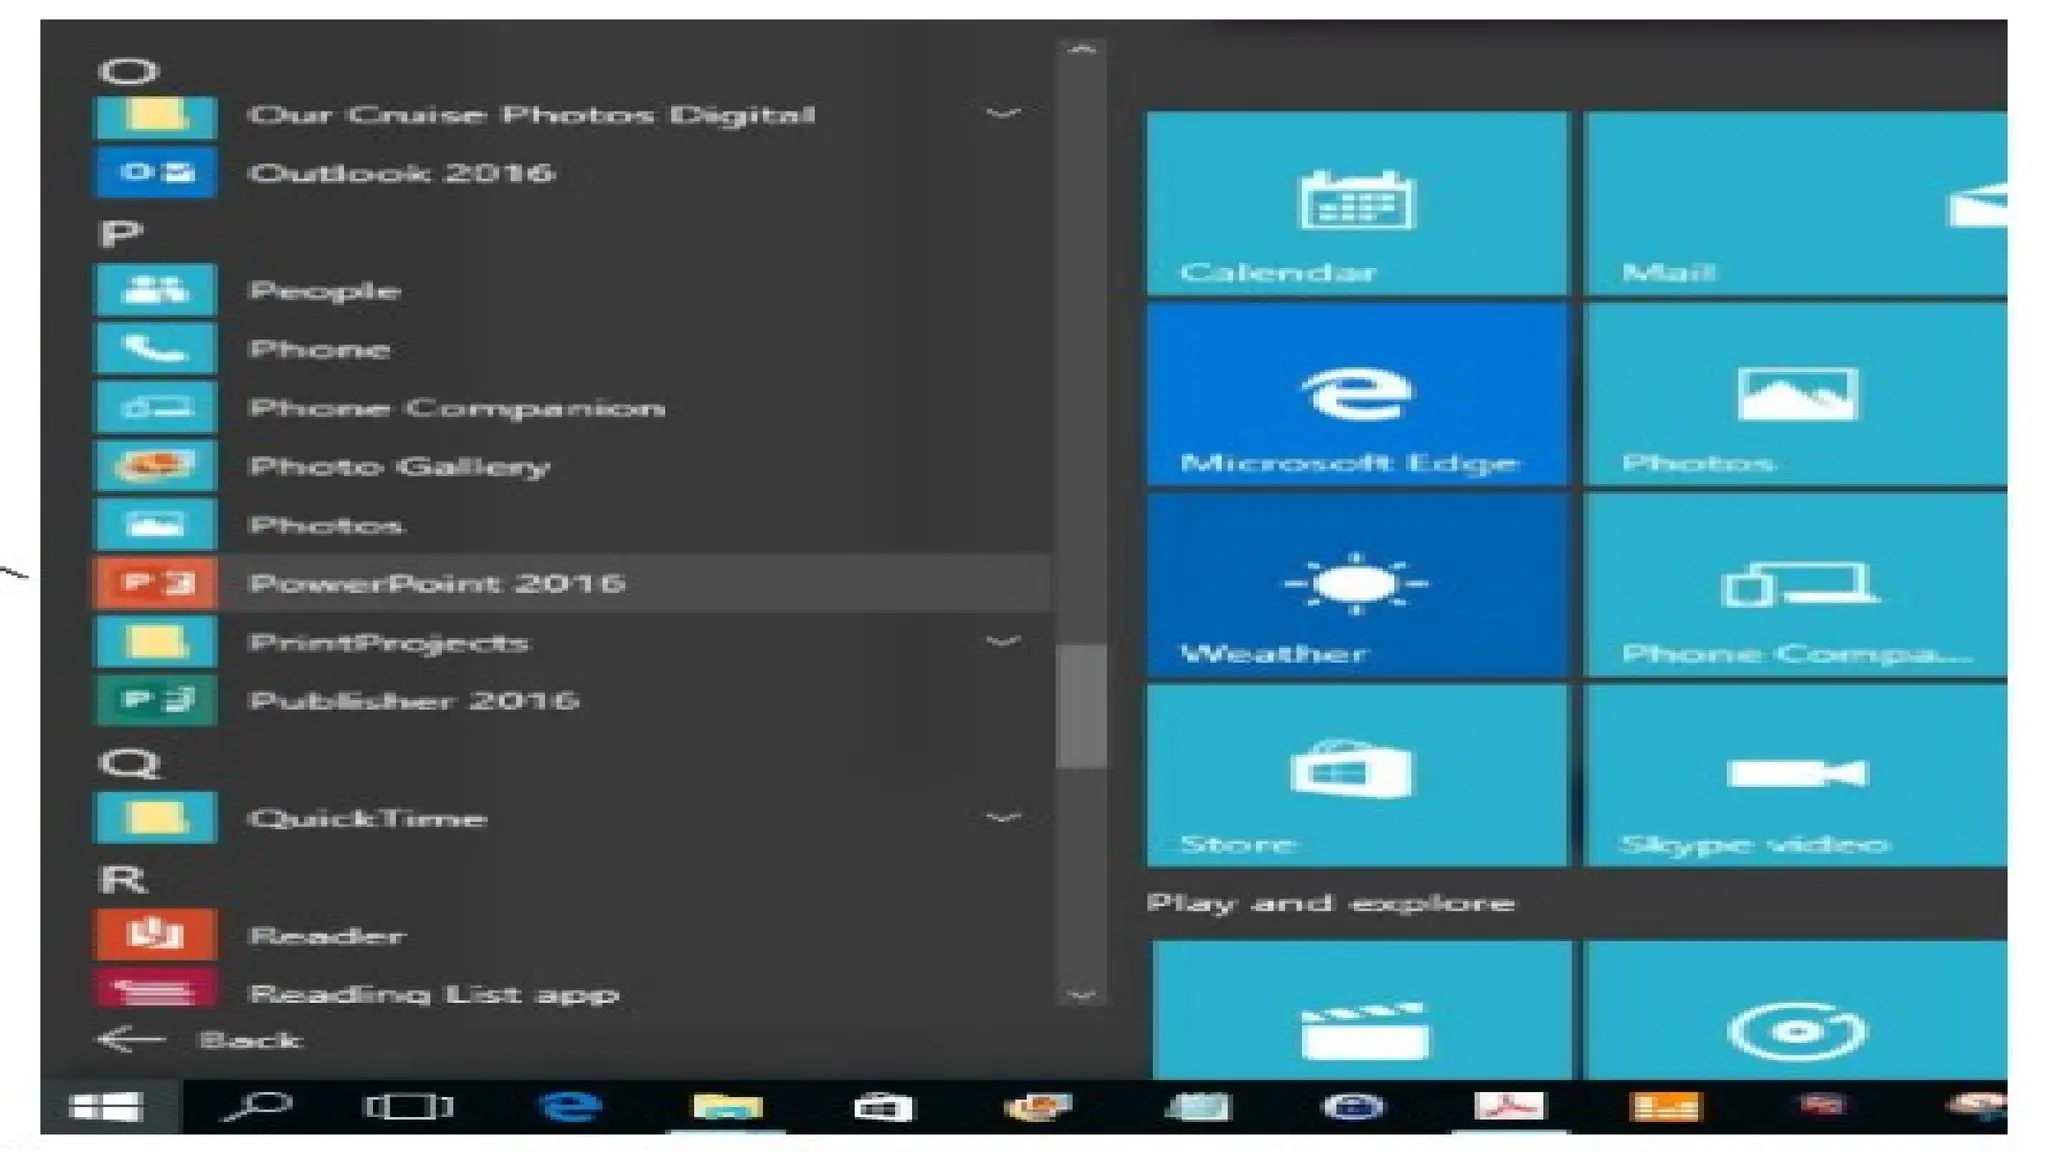
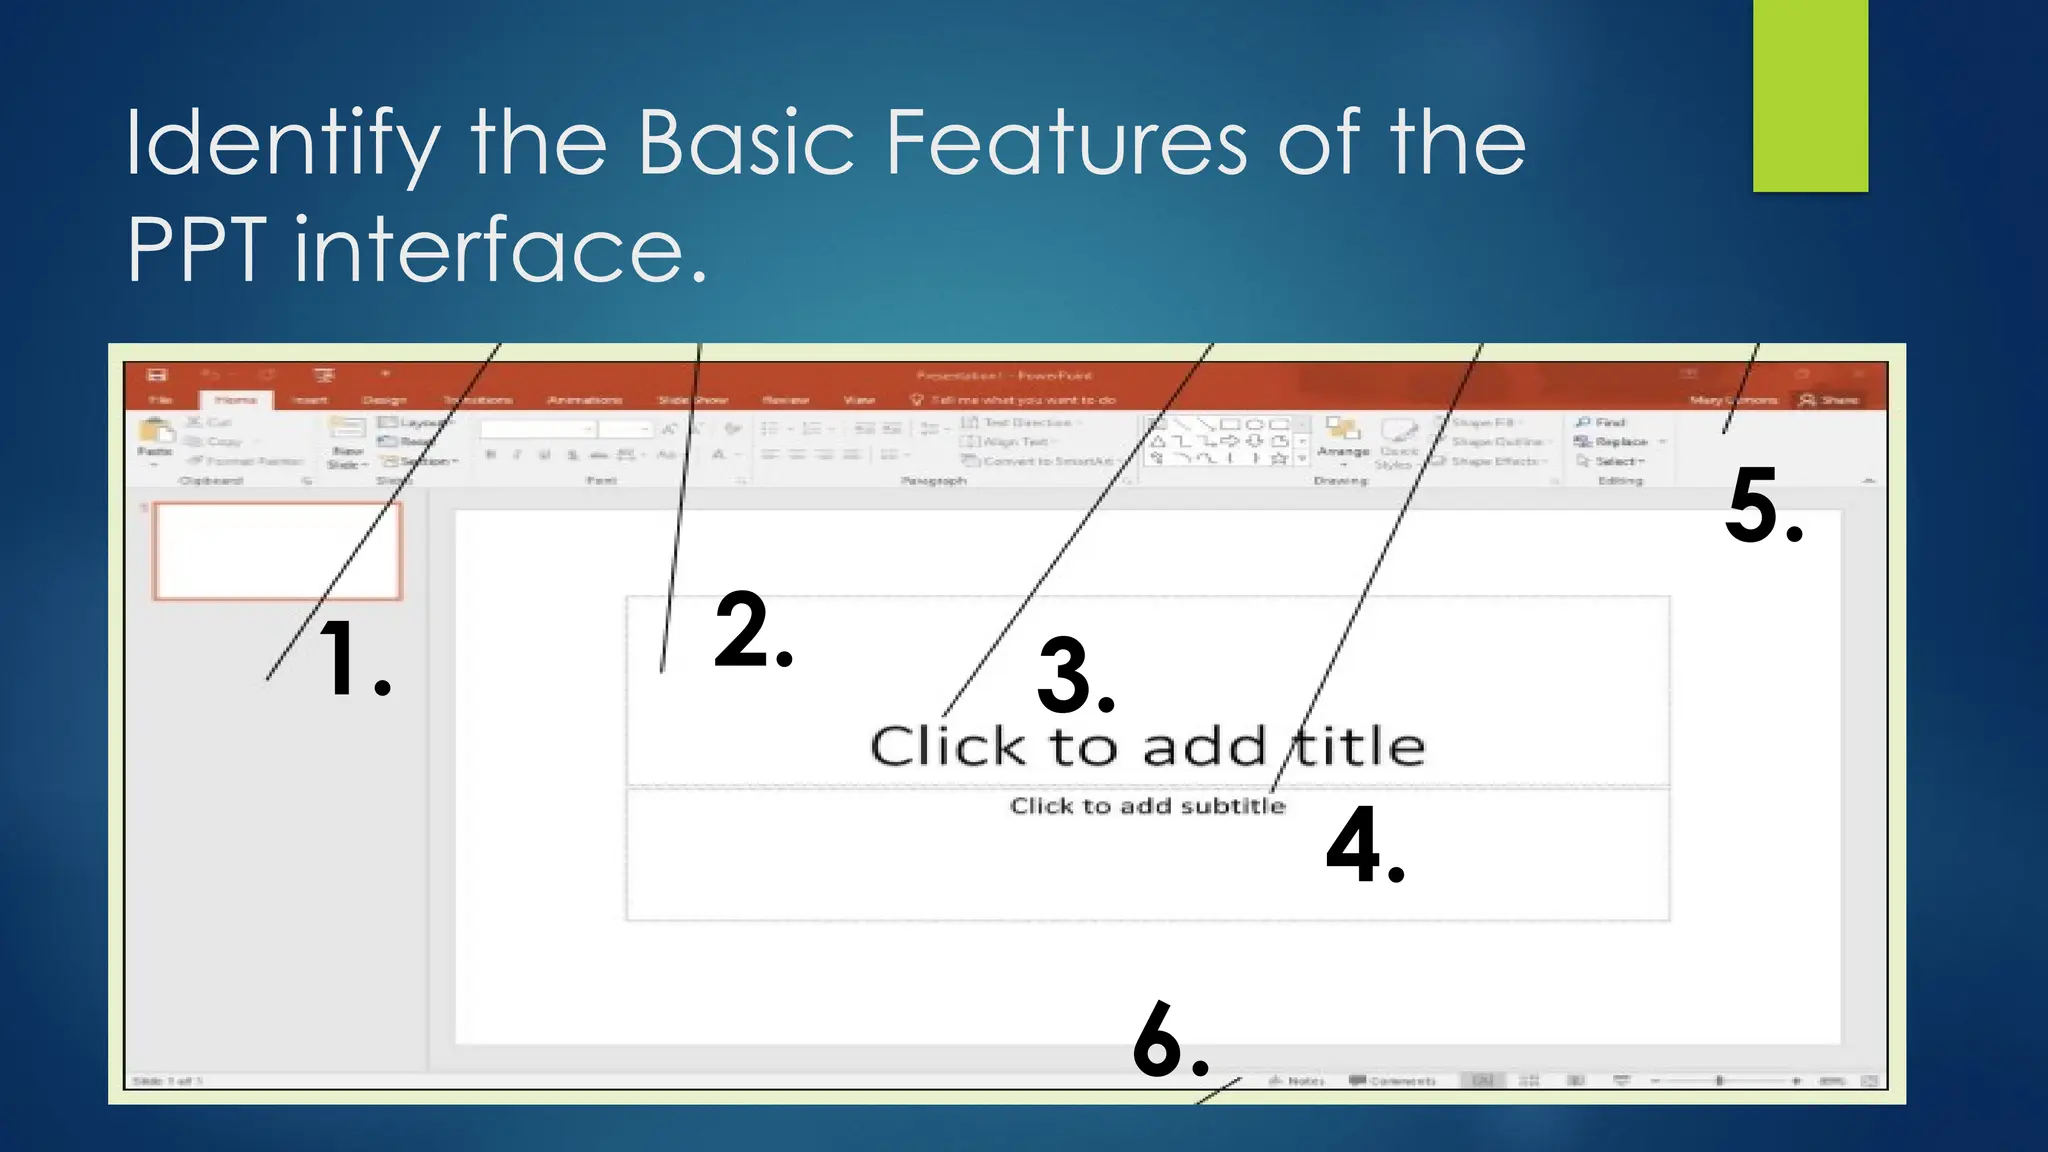
Working in thePowerPoint Window
1. Press the Windows Key on the keyboard to
display the Start Menu.
2. Click all apps.
3.Scroll through the apps to find and click the PPT
2016. PowerPoint starts and it’s Start screen appears.
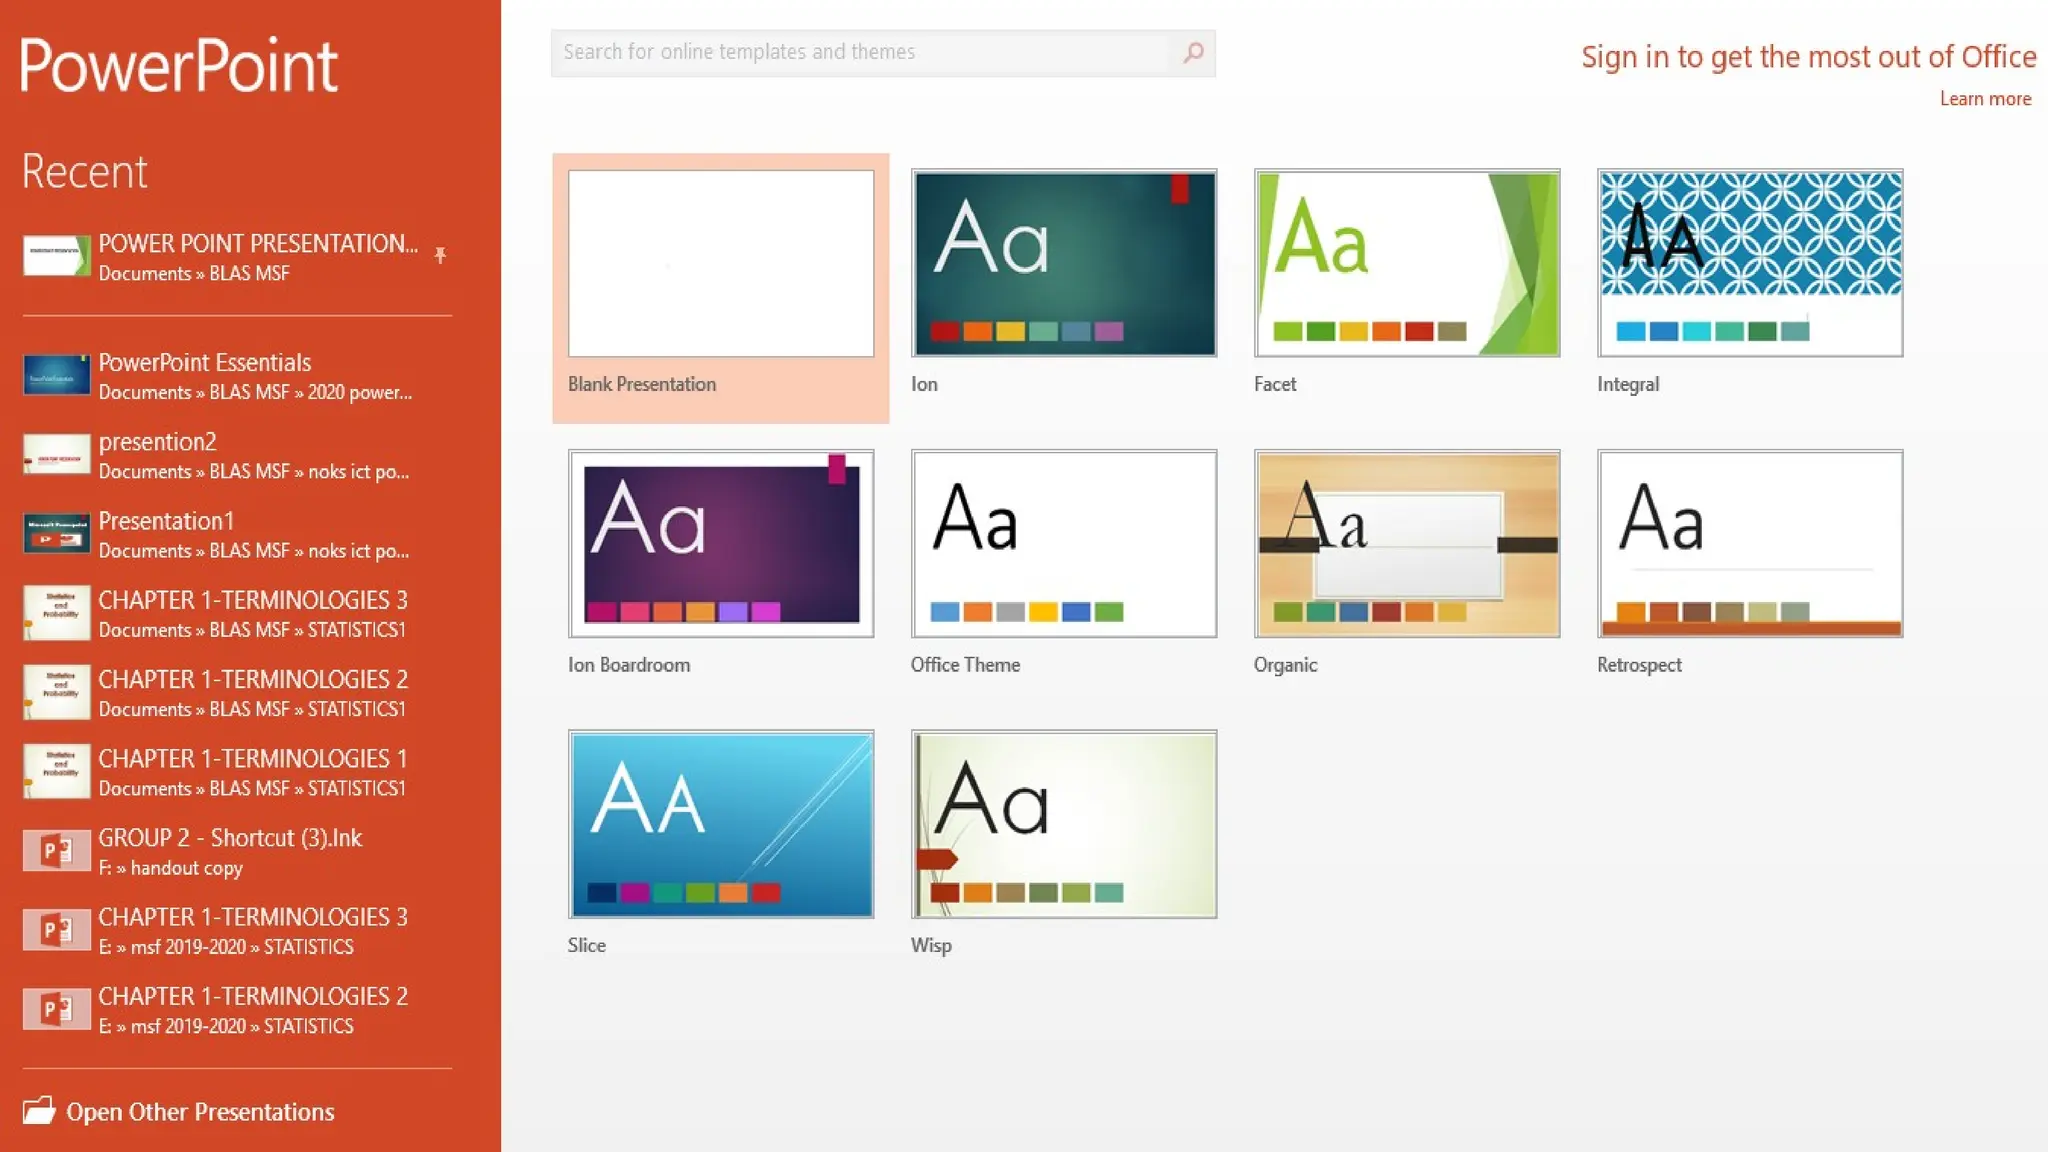
4. Press Esc or click Blank Presentation. A new
Blank Presentation appears in the PowerPoint
window
10.
Selecting a Toolsand
Commands
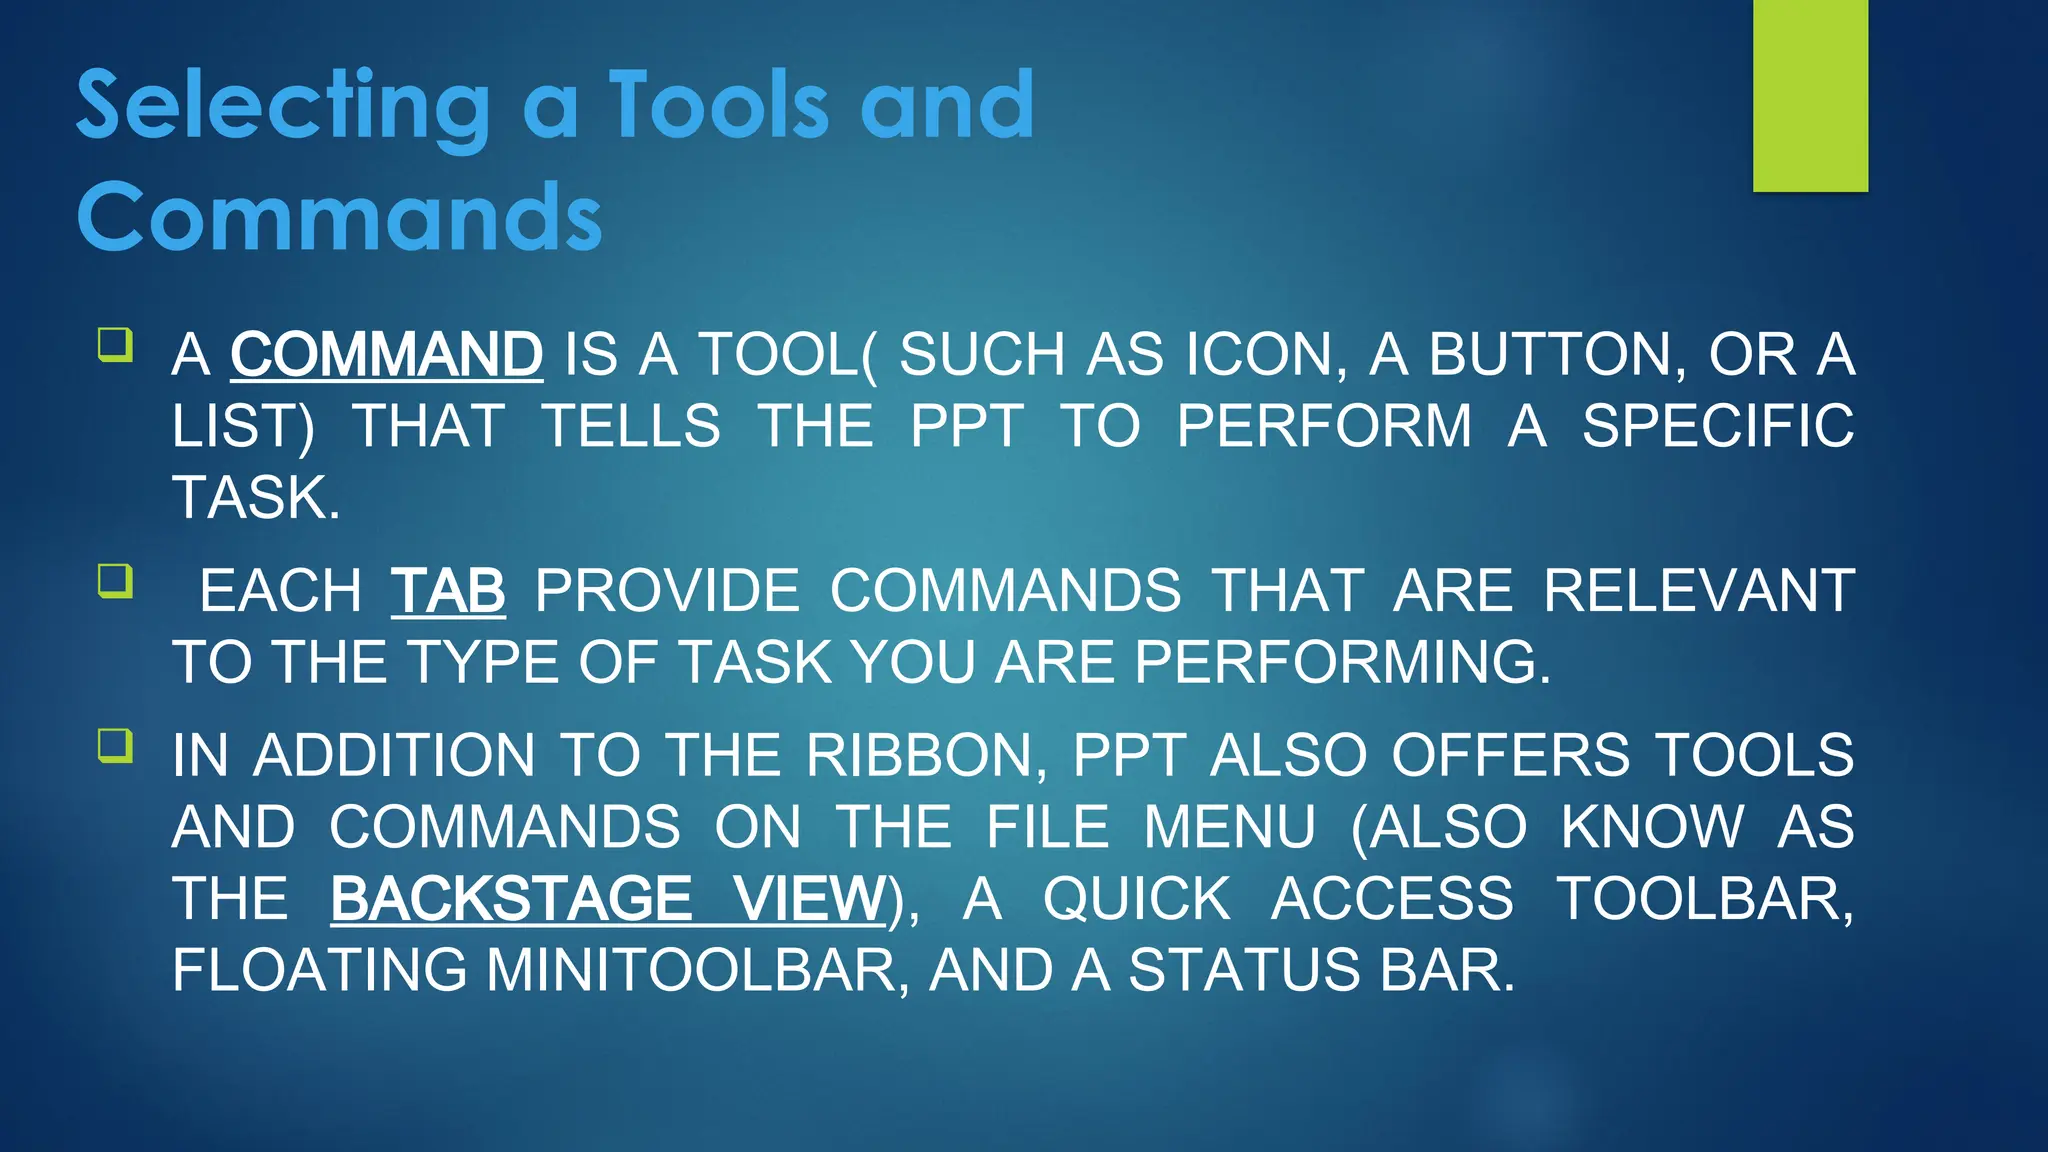
A COMMAND IS A TOOL( SUCH AS ICON, A BUTTON, OR A
LIST) THAT TELLS THE PPT TO PERFORM A SPECIFIC
TASK.
EACH TAB PROVIDE COMMANDS THAT ARE RELEVANT
TO THE TYPE OF TASK YOU ARE PERFORMING.
IN ADDITION TO THE RIBBON, PPT ALSO OFFERS TOOLS
AND COMMANDS ON THE FILE MENU (ALSO KNOW AS
THE BACKSTAGE VIEW), A QUICK ACCESS TOOLBAR,
FLOATING MINITOOLBAR, AND A STATUS BAR.
11.
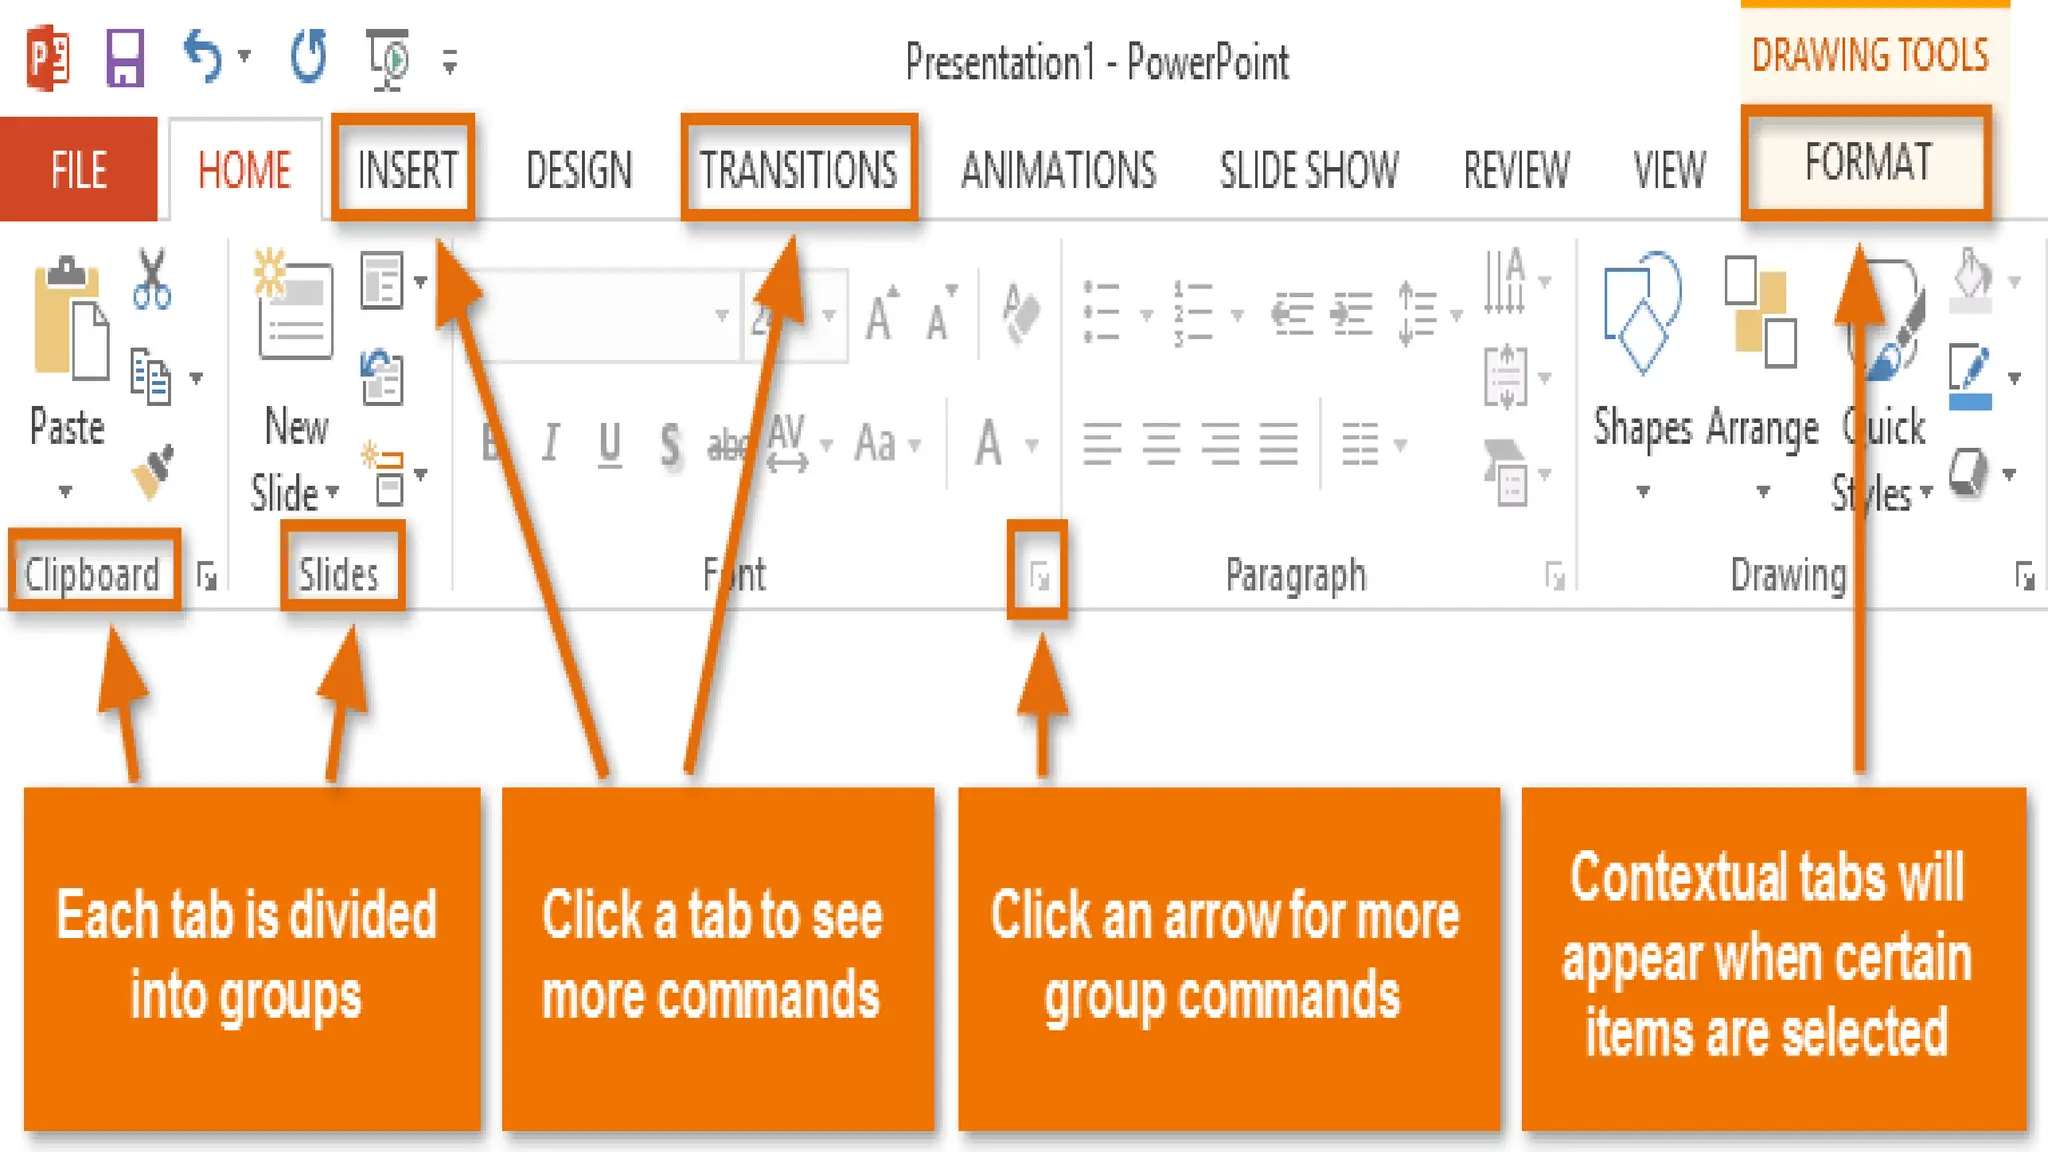
Using Ribbon
TheRibbon is divided into tabs, and each tab contains several groups of
related commands
On the Ribbon, some command groups feature a tool called a DIALOG
BOX LAUNCHER- a small arrow in the group’s lower right corner. You can
click the dialog box to open without accepting any changes you may
have it.
Some of the Ribbon’s tools have small, downward pointing arrows next to
them. These arrows called DROP-DOWN ARROWS; When you click one, a
drop down list opens, displaying options you choose( such as List of fonts).
If you need more space on your screen, you can minimize (hide) the
Ribbon by double clicking the active tab. To restore the Ribbon, double
click the active tab again.
15.
Exercise
q
Use of Ribbons.Get ready, the new, blank presentation
the is still open from the first exercise in this lesson.
q
1.Look at a Ribbon. Note that each tab contains
several groups of related commands. By default, the
Home tab is active.
2. Click the design tab to make it active. The group
of commands change.
3. Click the Home tab.
4. On the slide, click anywhere in the text Click to
add Title. The text disappears and the blinking insertion
point appears.
16.
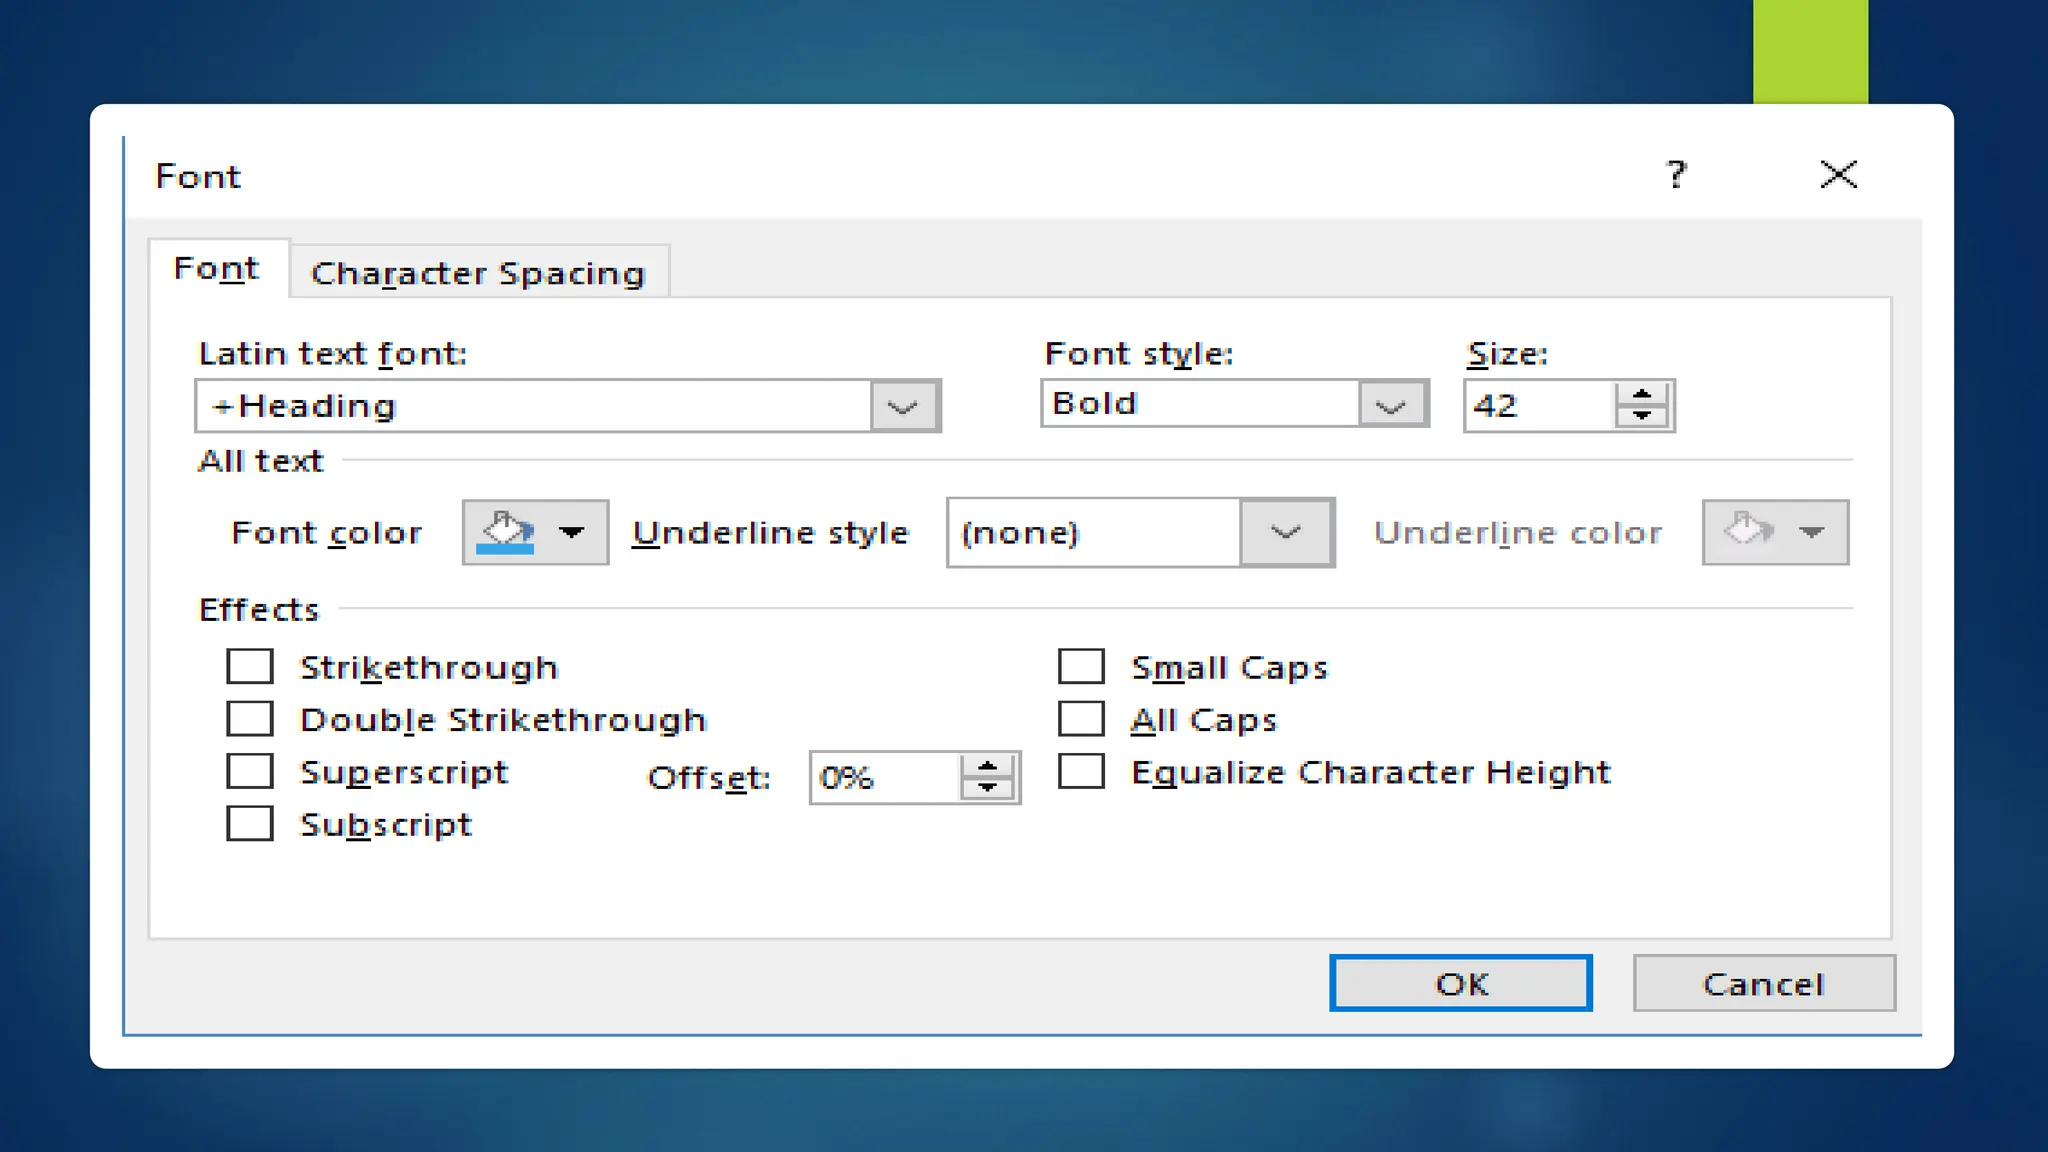
5. In thelower- right corner of the Font group, click
the DIALOG BOX LAUNCHER ( the small box with
diagonal, downward-pointing arrow. Clicking this button
opens the Font dialog box. Click the cancel to close the
dialog box.
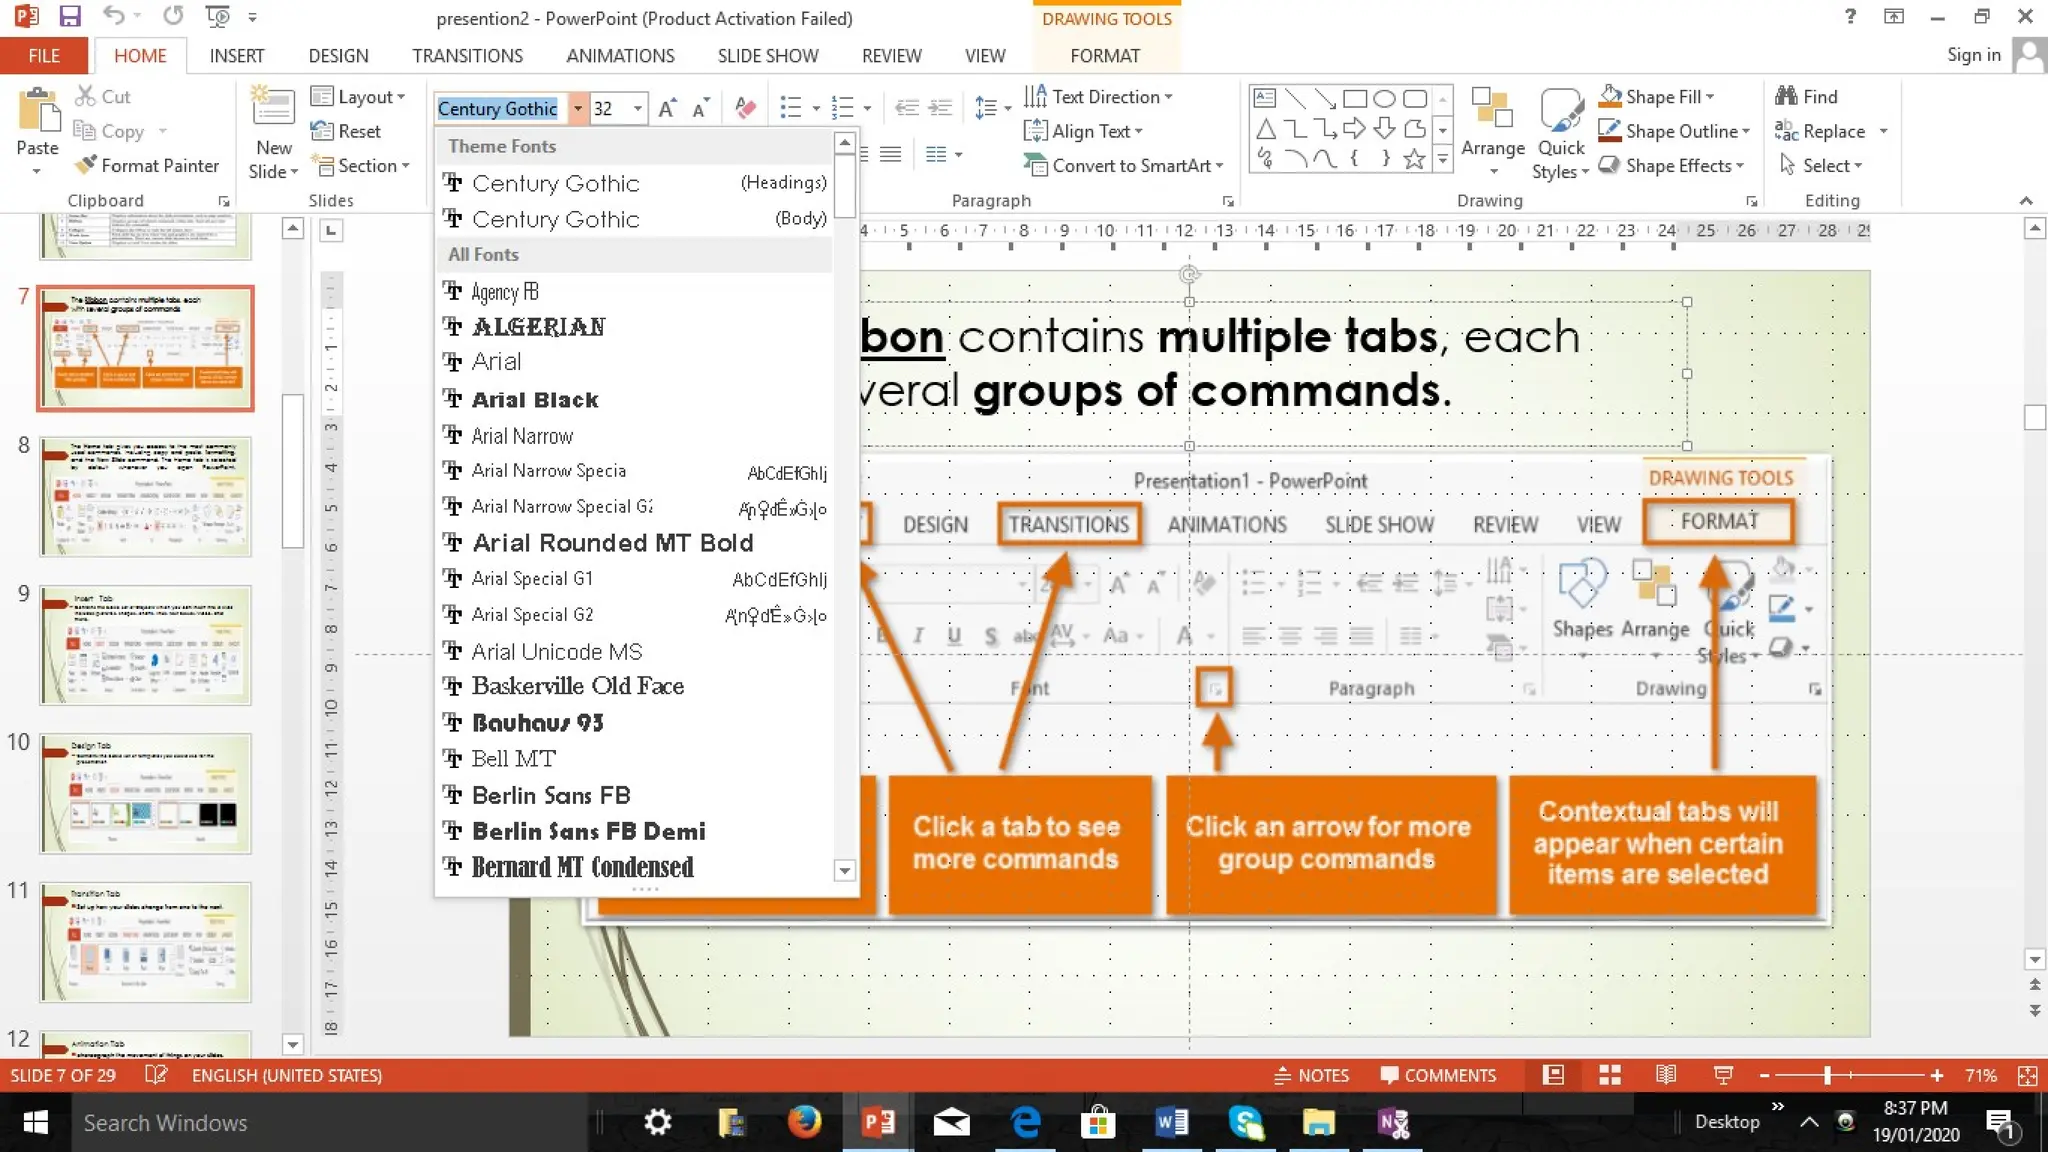
6. In the Font group, click the Font list drop down
arrow. A dropdown list appear. This list shows all the fonts
that are currently available for use.
7. Click the drop down arrow to close the list.
8. Double click the home tab. This action collapse
the Ribbon, hiding the groups of commands but leaving
the tabs’ name visible to screen.
9. Double click the home tab again to redisplay the
17.
Using Backstage View
TheFile Tab is not a regular
tab; instead of displaying the Ribbon
Command, it displays the backstage
view. Each command you select along
the left side of the backstage view, the
screen displays a different dialog box or
page options and commands In the
right panel.
19.
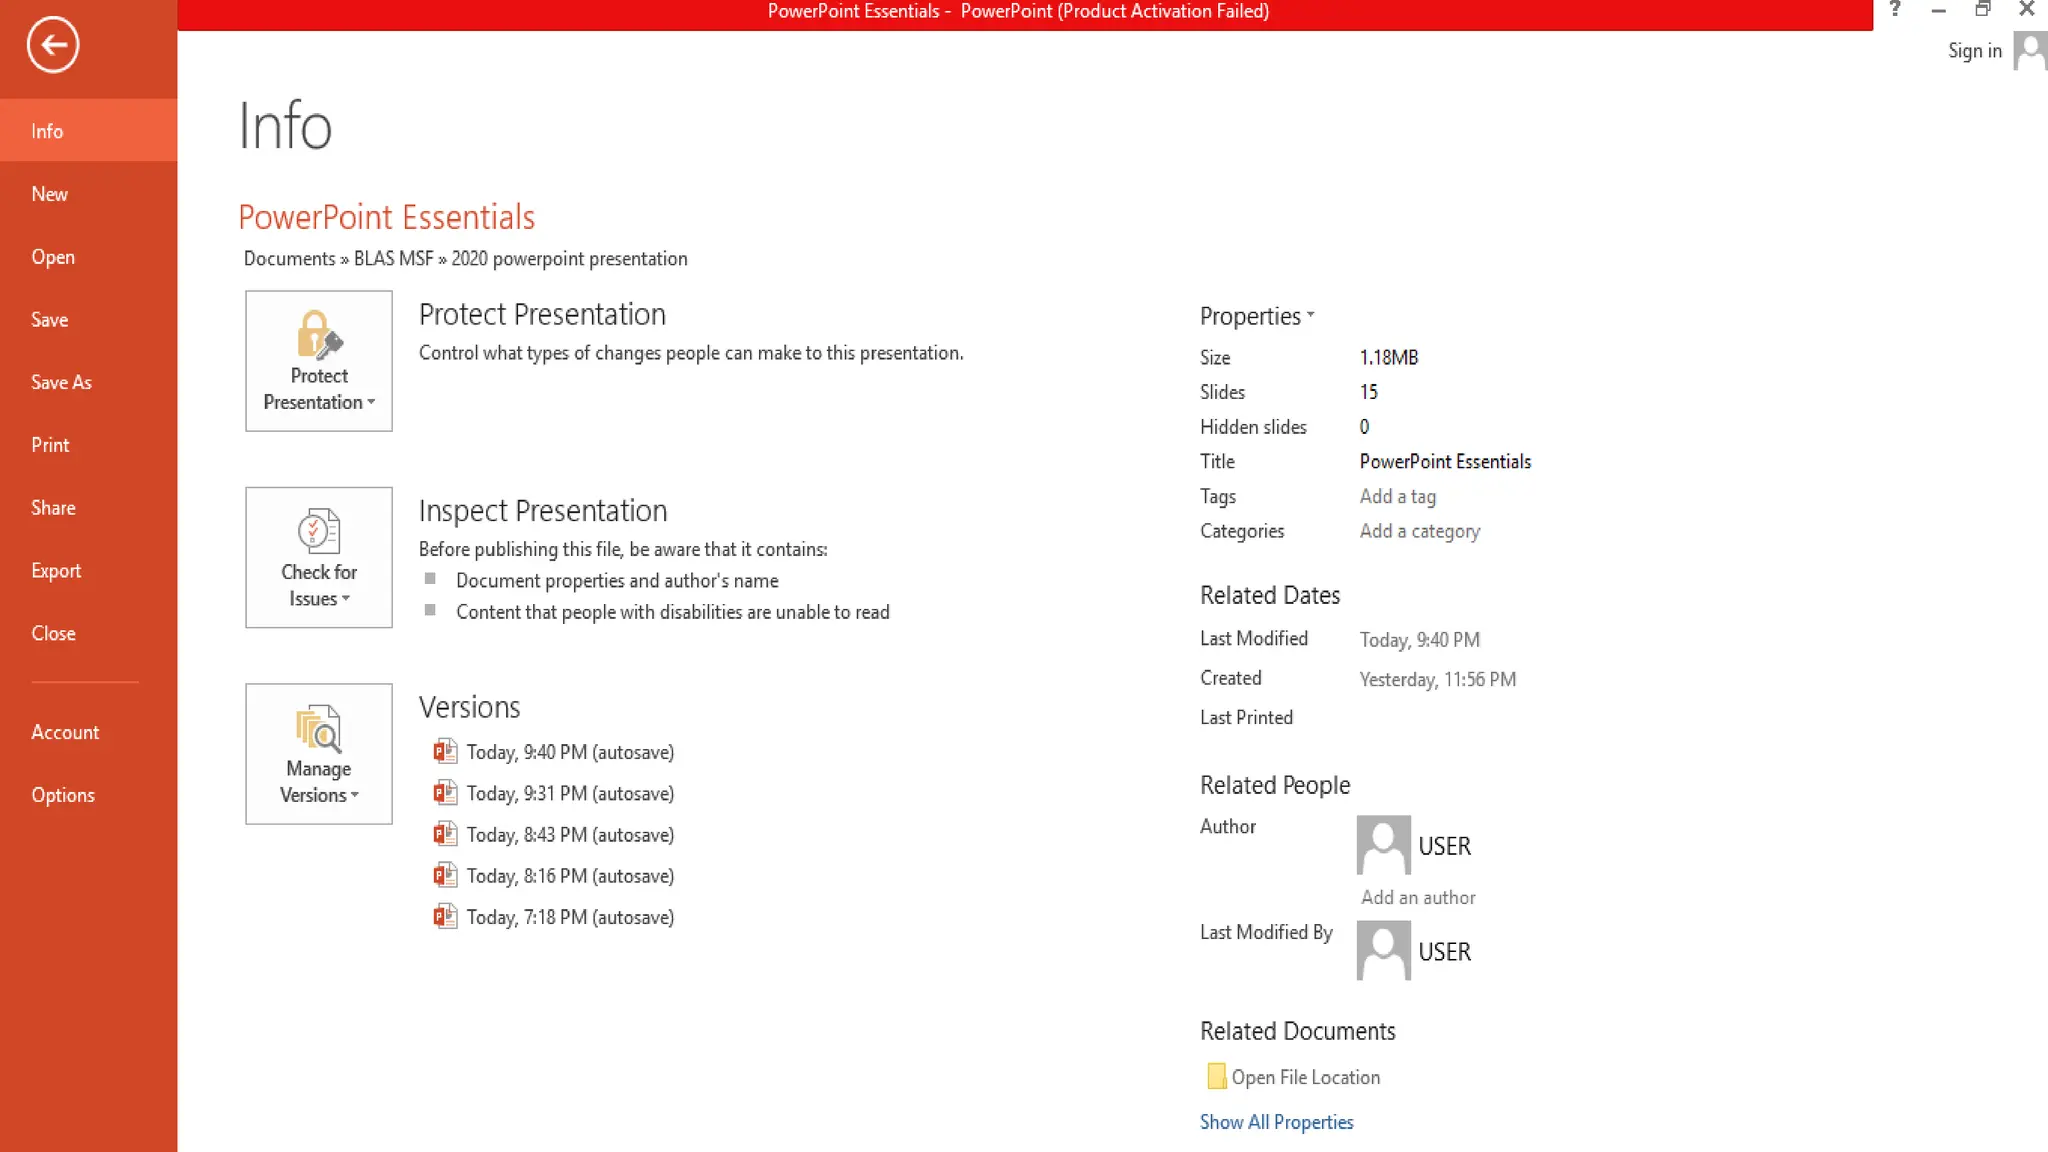
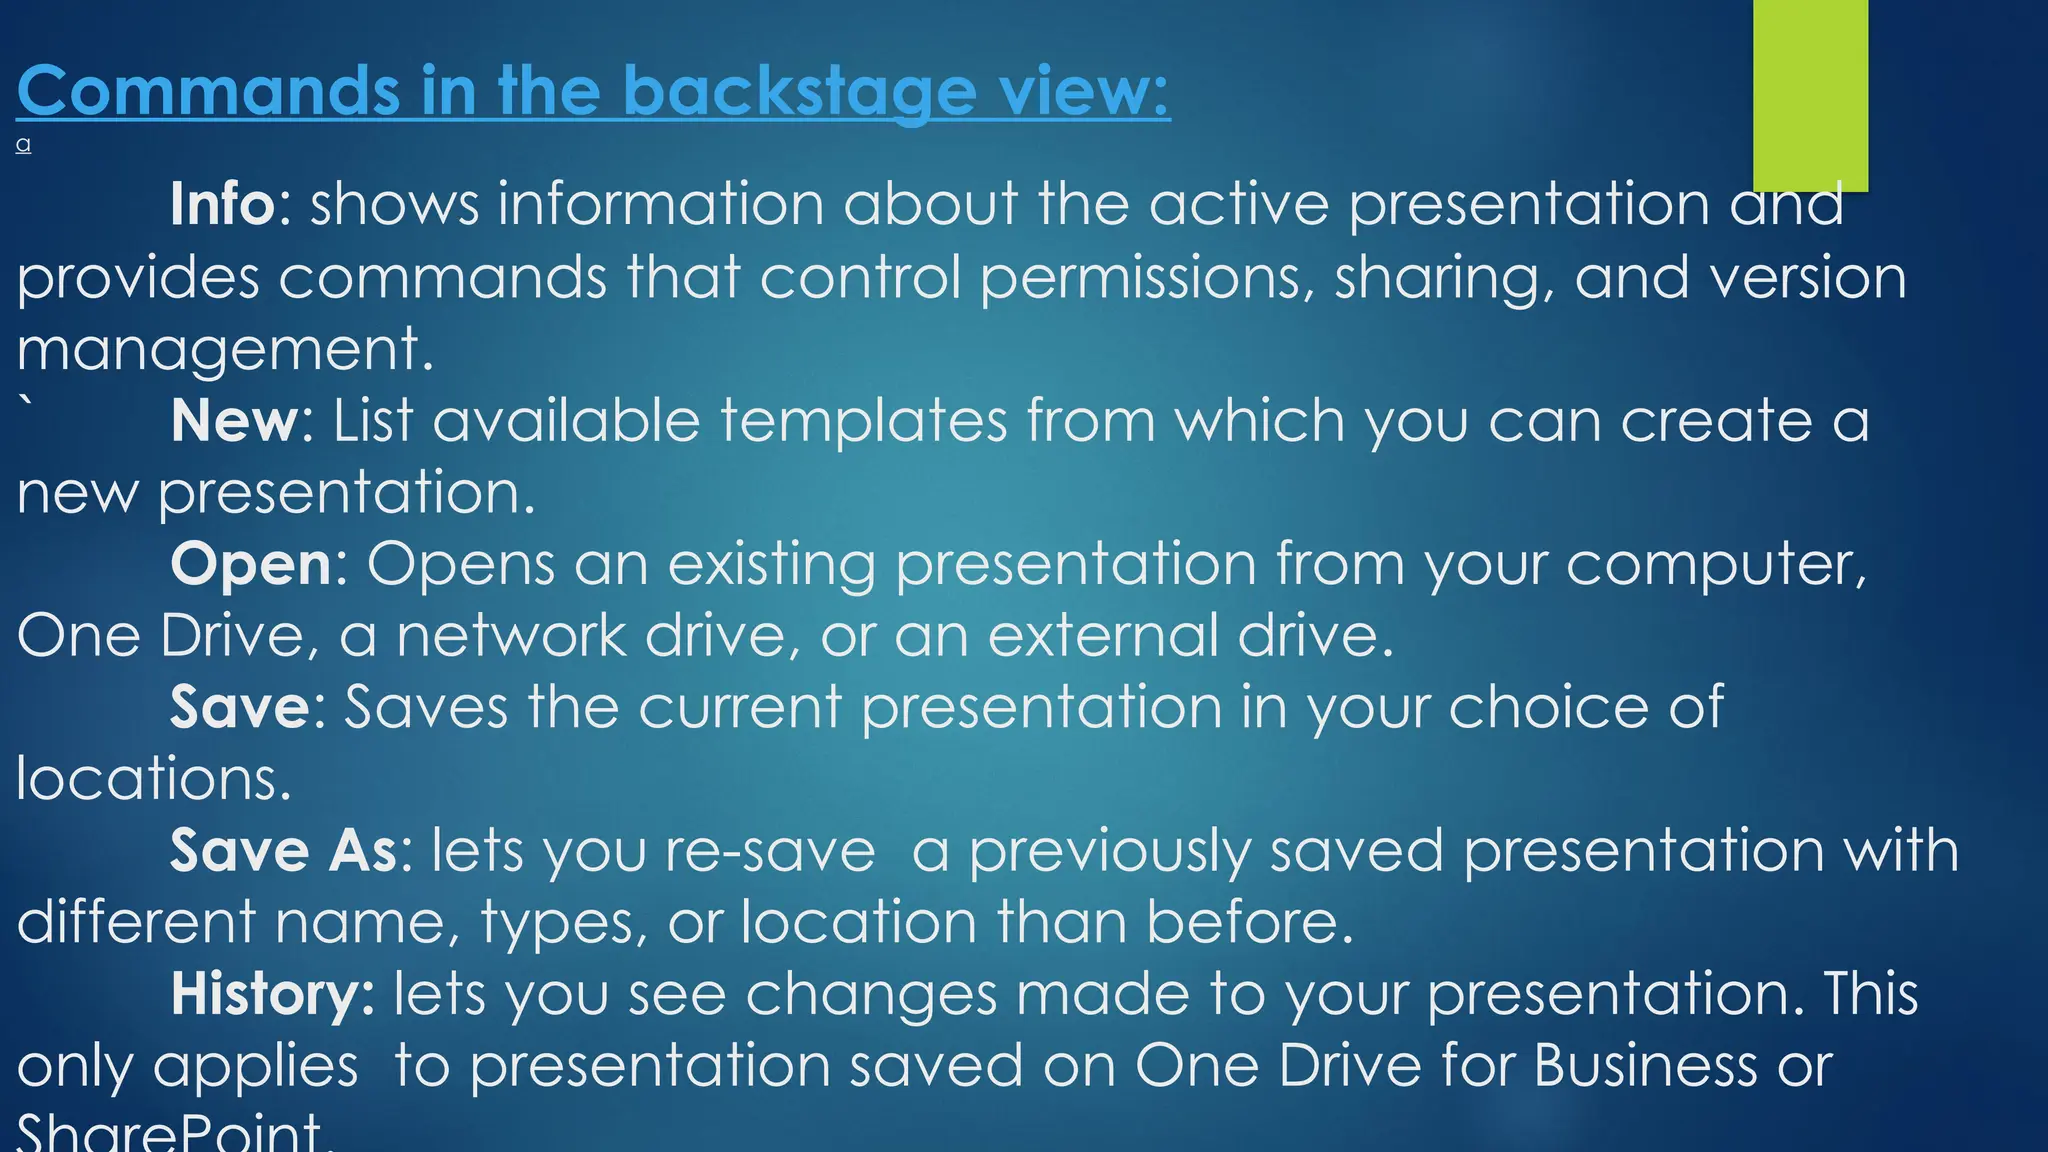
Commands in thebackstage view:
a
Info: shows information about the active presentation and
provides commands that control permissions, sharing, and version
management.
` New: List available templates from which you can create a
new presentation.
Open: Opens an existing presentation from your computer,
One Drive, a network drive, or an external drive.
Save: Saves the current presentation in your choice of
locations.
Save As: lets you re-save a previously saved presentation with
different name, types, or location than before.
History: lets you see changes made to your presentation. This
only applies to presentation saved on One Drive for Business or
20.
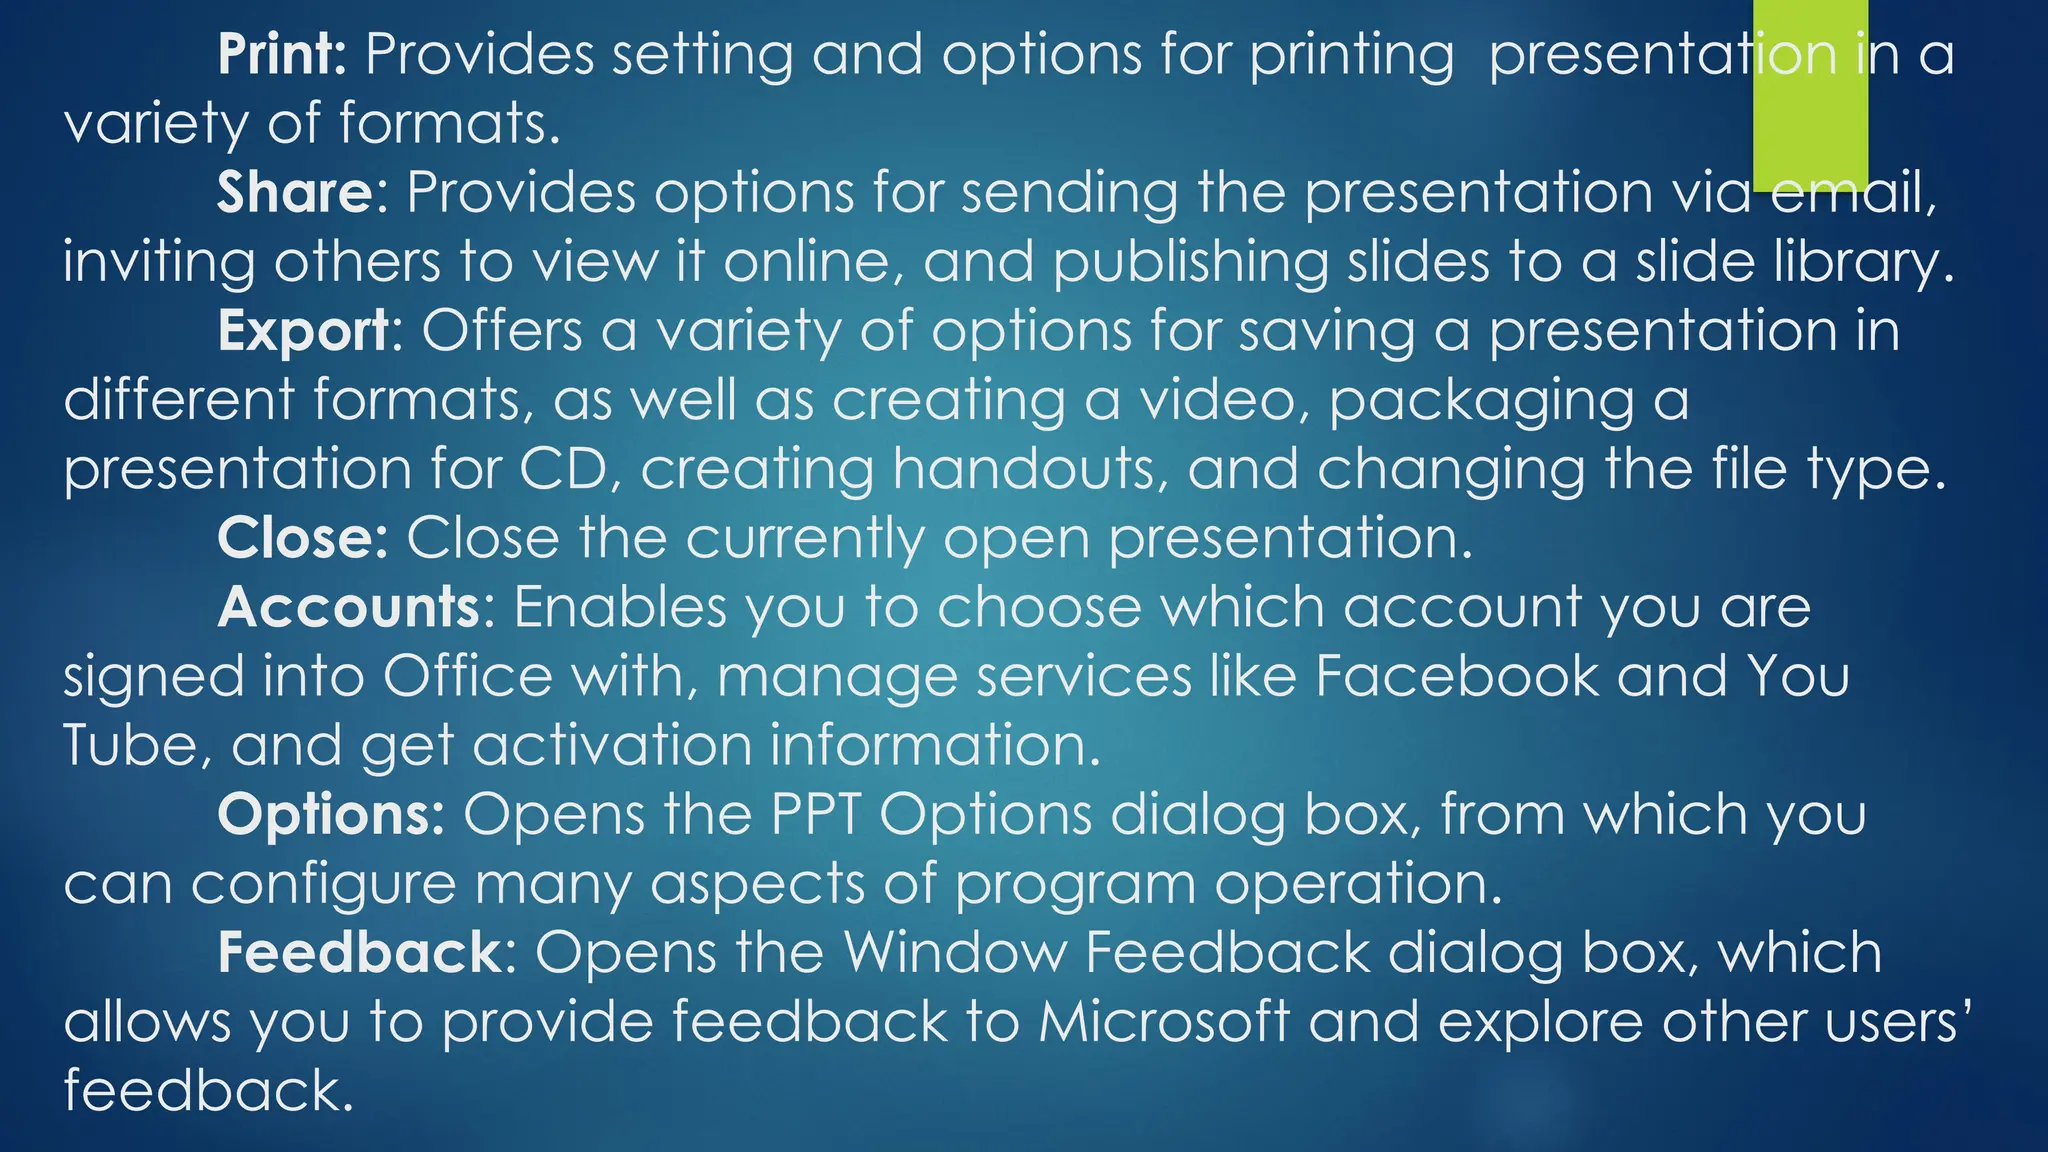
Print: Provides settingand options for printing presentation in a
variety of formats.
Share: Provides options for sending the presentation via email,
inviting others to view it online, and publishing slides to a slide library.
Export: Offers a variety of options for saving a presentation in
different formats, as well as creating a video, packaging a
presentation for CD, creating handouts, and changing the file type.
Close: Close the currently open presentation.
Accounts: Enables you to choose which account you are
signed into Office with, manage services like Facebook and You
Tube, and get activation information.
Options: Opens the PPT Options dialog box, from which you
can configure many aspects of program operation.
Feedback: Opens the Window Feedback dialog box, which
allows you to provide feedback to Microsoft and explore other users’
feedback.
21.
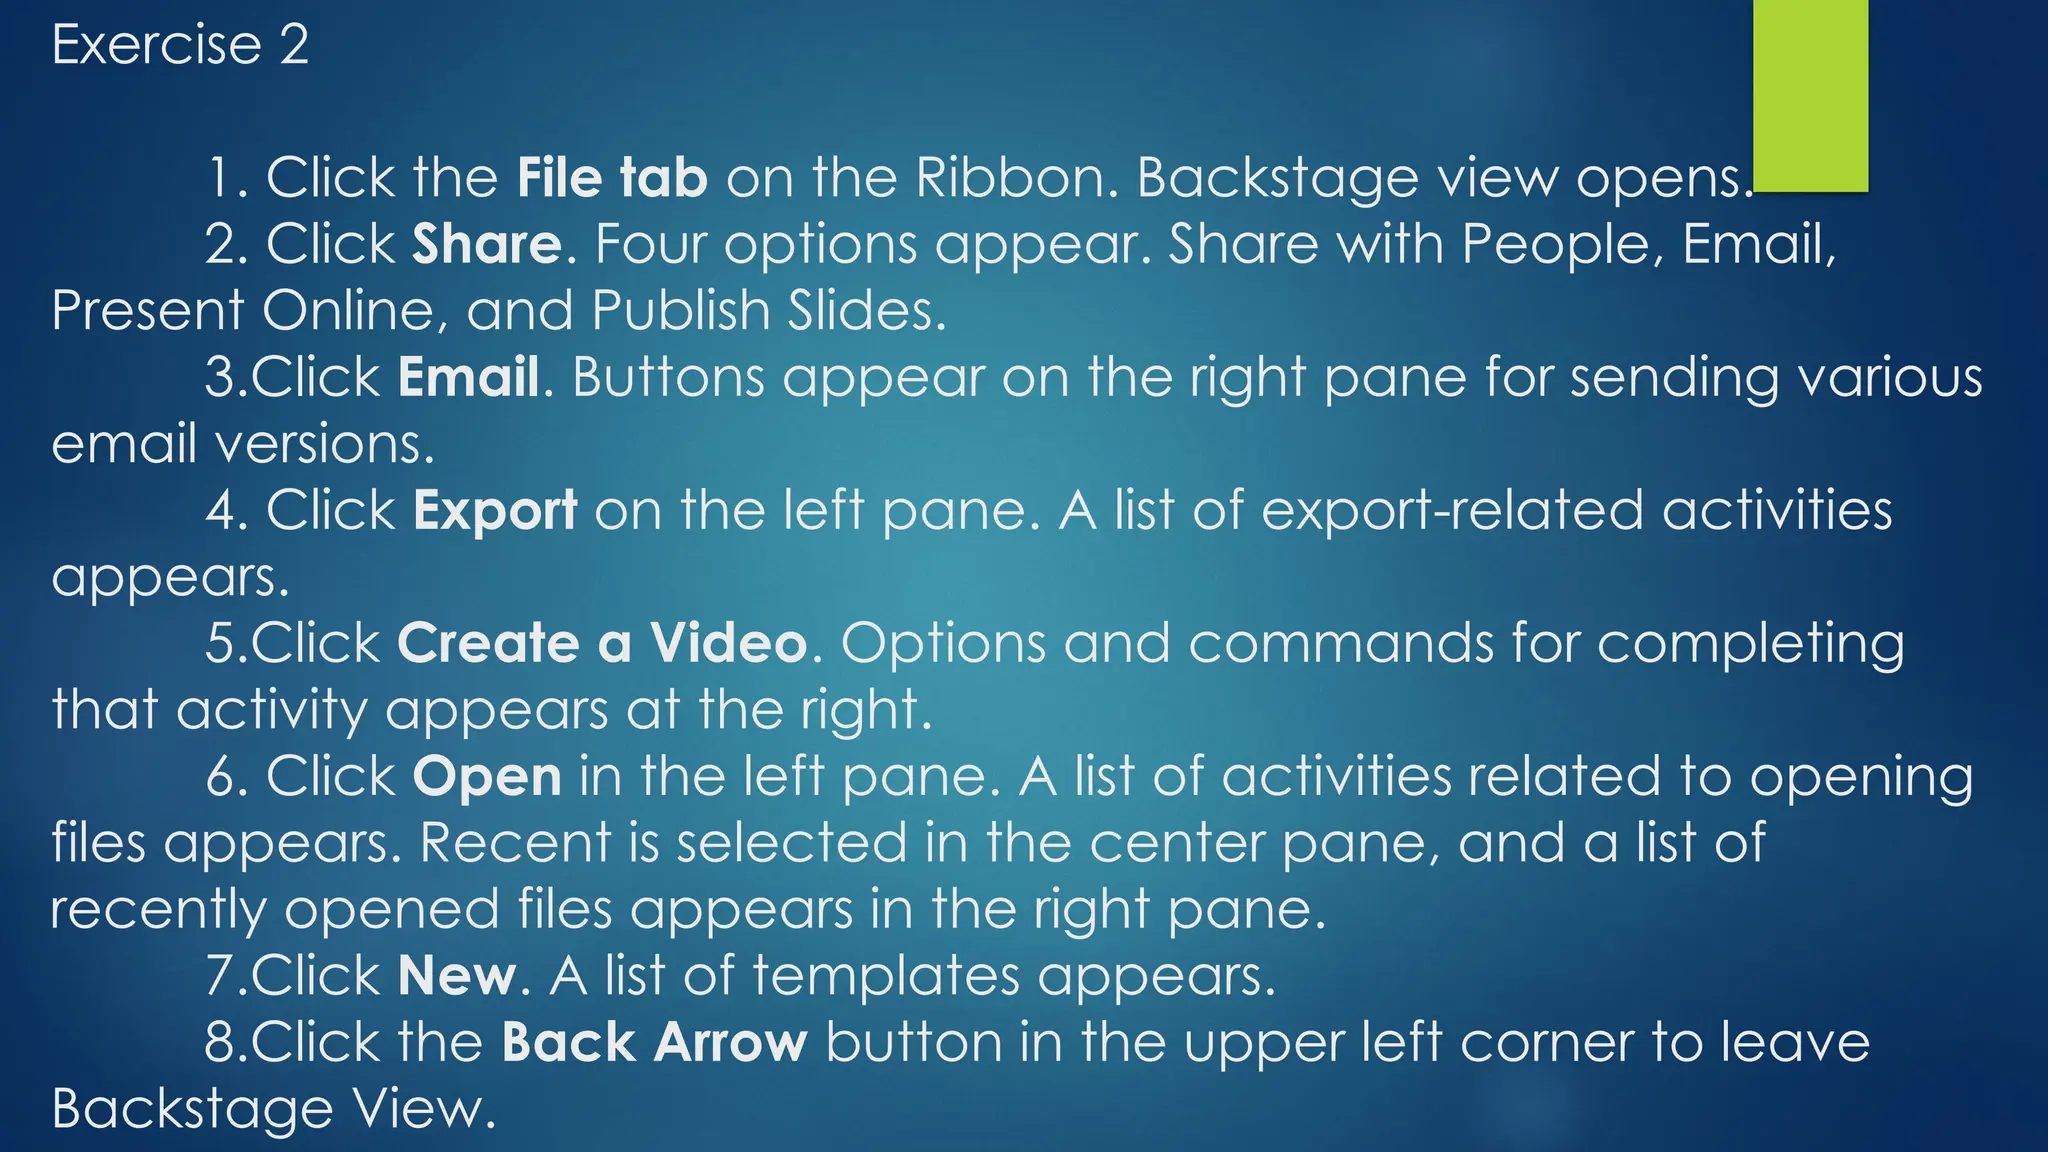
Exercise 2
1. Clickthe File tab on the Ribbon. Backstage view opens.
2. Click Share. Four options appear. Share with People, Email,
Present Online, and Publish Slides.
3.Click Email. Buttons appear on the right pane for sending various
email versions.
4. Click Export on the left pane. A list of export-related activities
appears.
5.Click Create a Video. Options and commands for completing
that activity appears at the right.
6. Click Open in the left pane. A list of activities related to opening
files appears. Recent is selected in the center pane, and a list of
recently opened files appears in the right pane.
7.Click New. A list of templates appears.
8.Click the Back Arrow button in the upper left corner to leave
Backstage View.
22.
Use ofTools and Commands
Opening a Power Point
Backstage View
23.
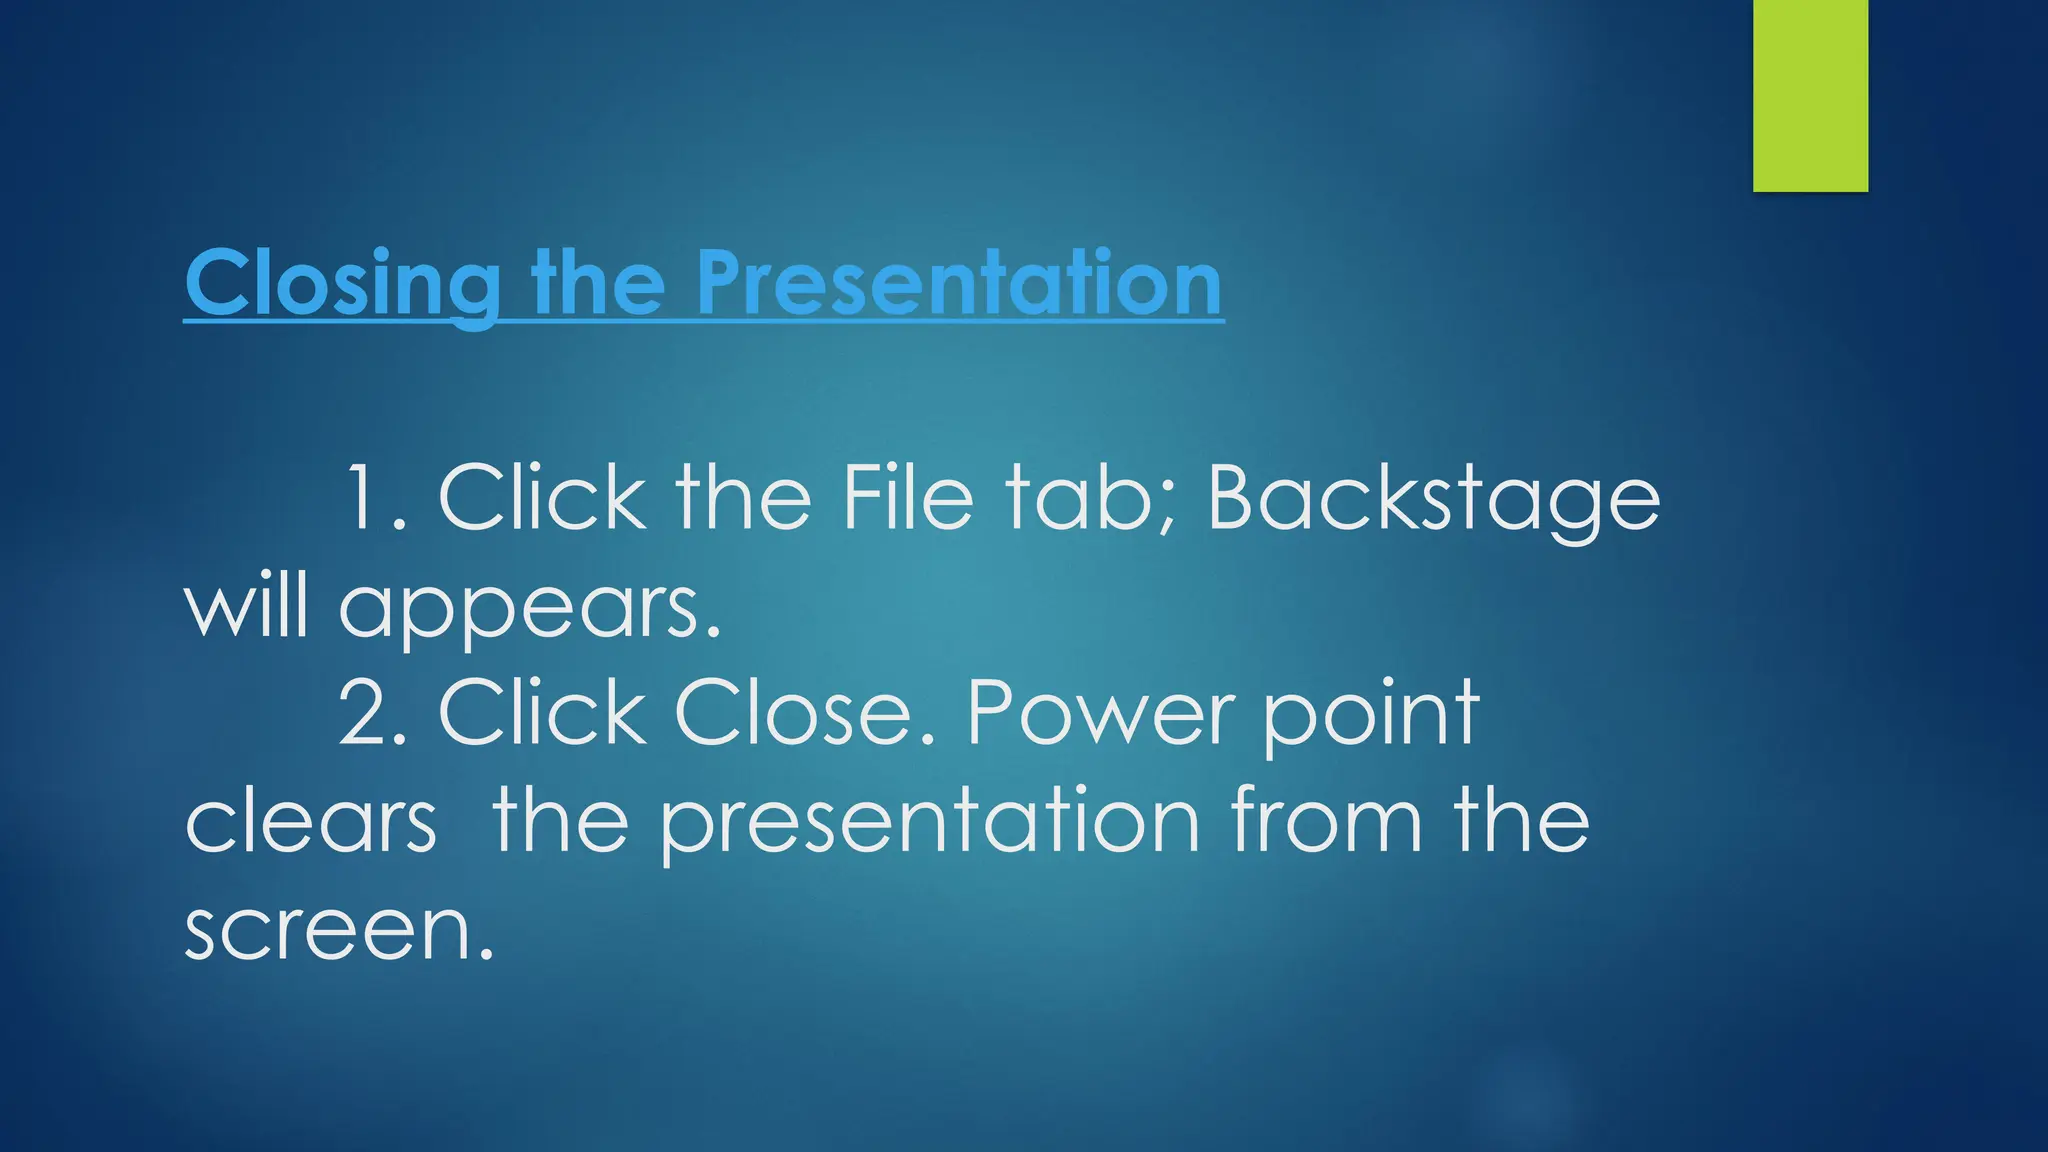
Closing the Presentation
1.Click the File tab; Backstage
will appears.
2. Click Close. Power point
clears the presentation from the
screen.
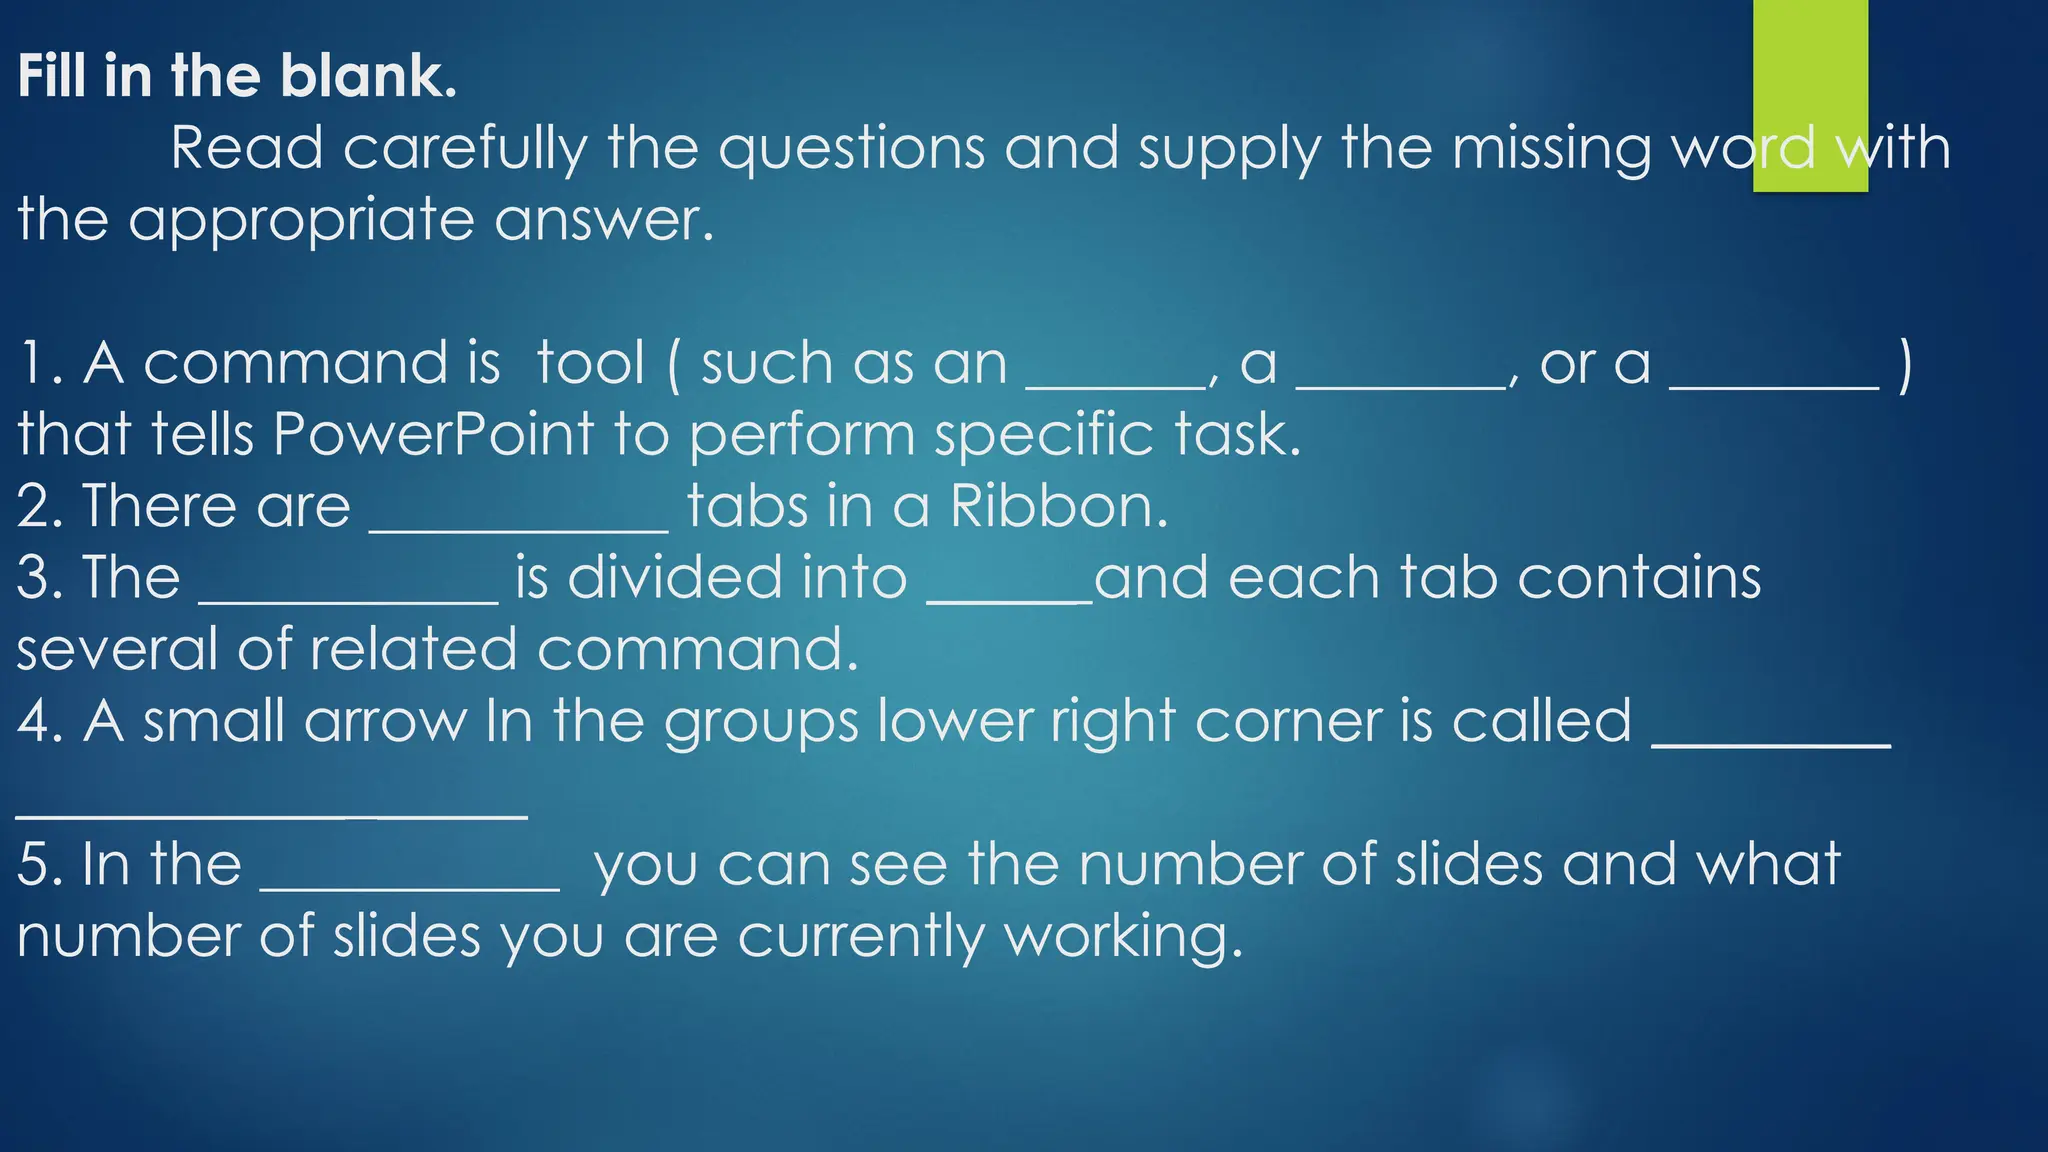
Fill in theblank.
Read carefully the questions and supply the missing word with
the appropriate answer.
1. A command is tool ( such as an ______, a _______, or a _______ )
that tells PowerPoint to perform specific task.
2. There are __________ tabs in a Ribbon.
3. The __________ is divided into _____ and each tab contains
several of related command.
4. A small arrow In the groups lower right corner is called ________
___________ _____
5. In the __________ you can see the number of slides and what
number of slides you are currently working.
27.
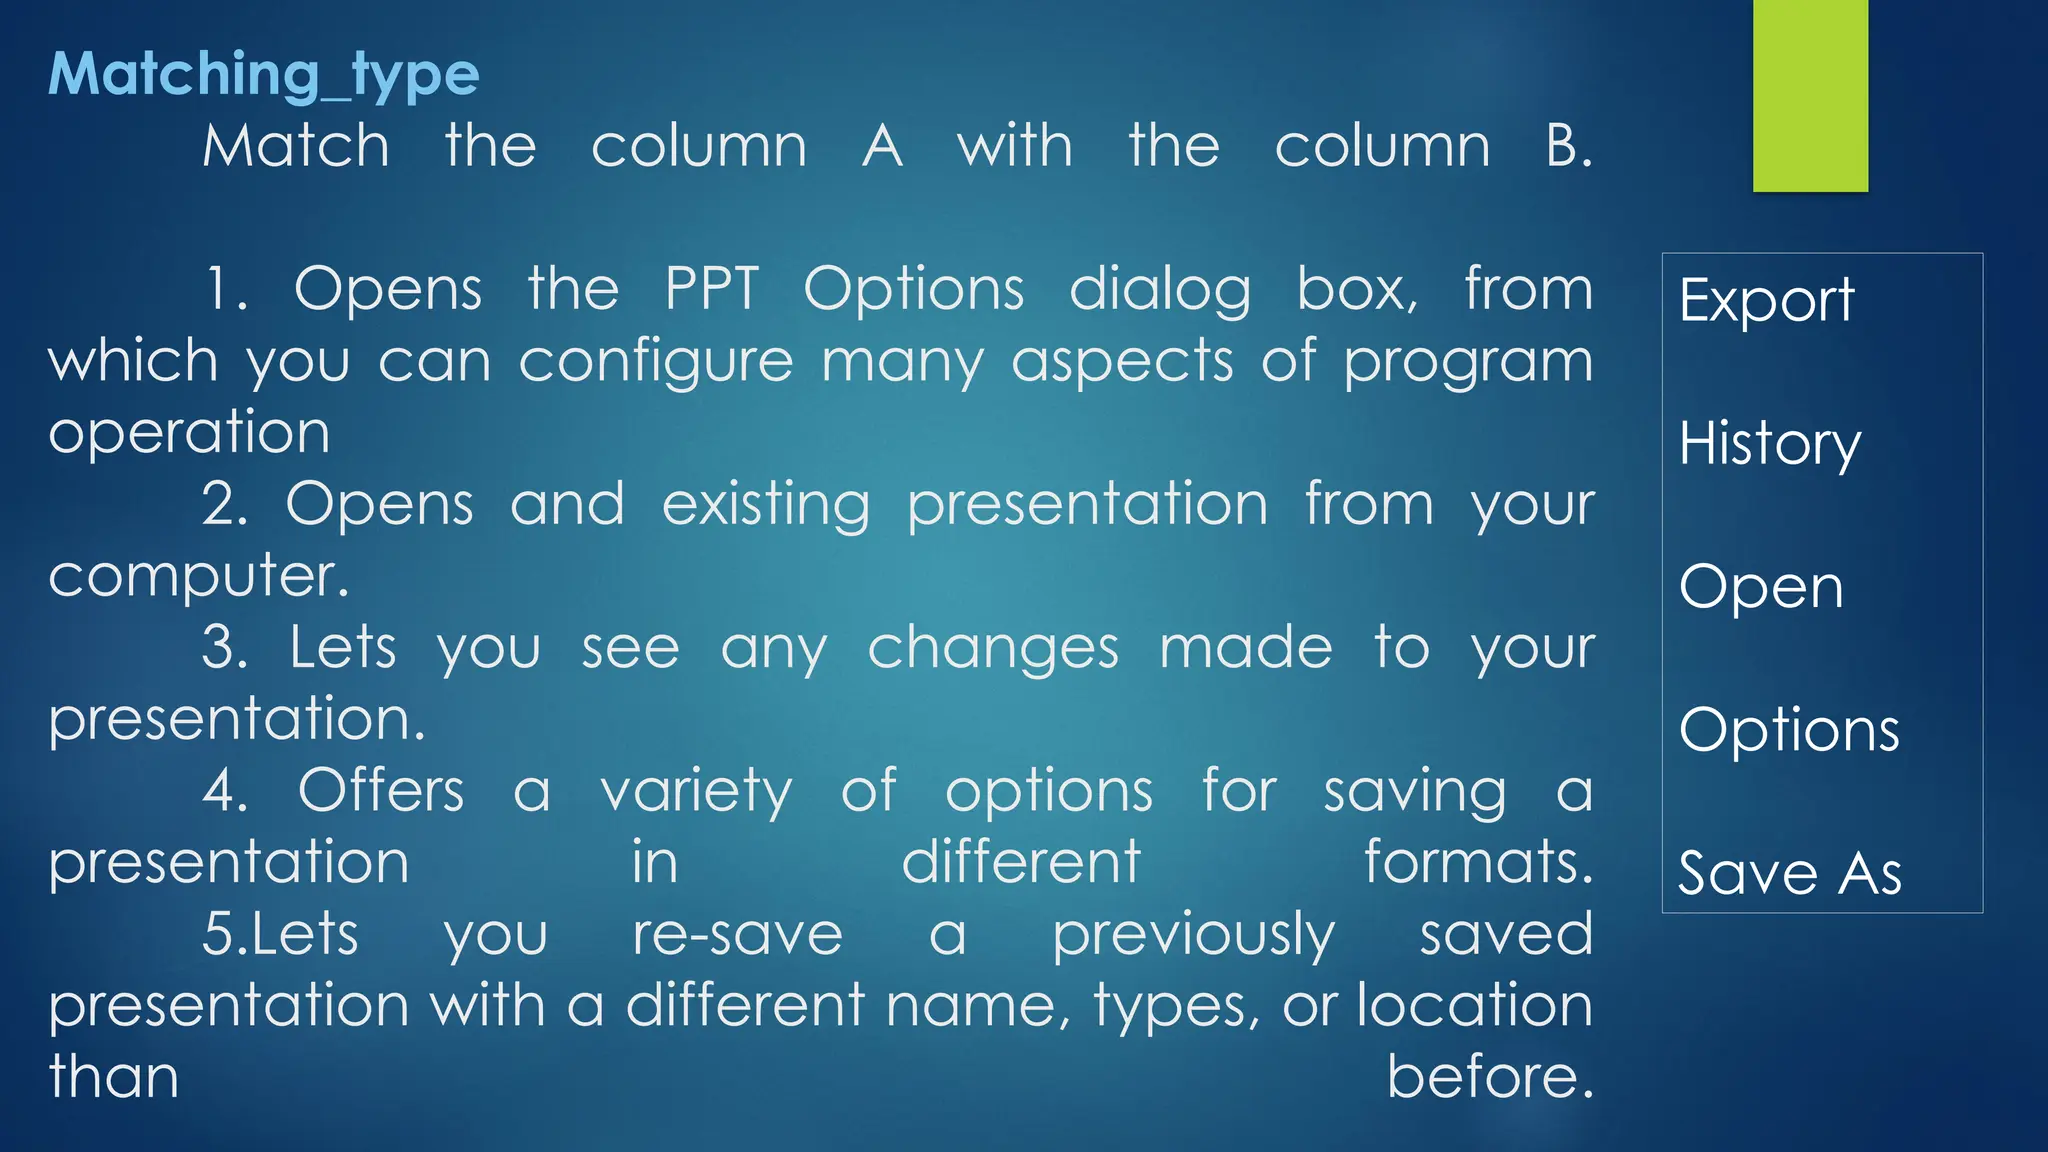
Matching_type
Match the columnA with the column B.
1. Opens the PPT Options dialog box, from
which you can configure many aspects of program
operation
2. Opens and existing presentation from your
computer.
3. Lets you see any changes made to your
presentation.
4. Offers a variety of options for saving a
presentation in different formats.
5.Lets you re-save a previously saved
presentation with a different name, types, or location
than before.
Export
History
Open
Options
Save As