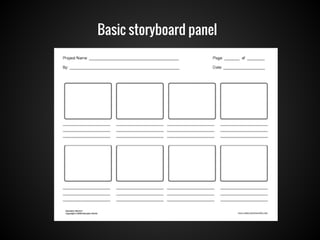
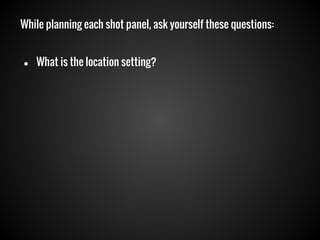
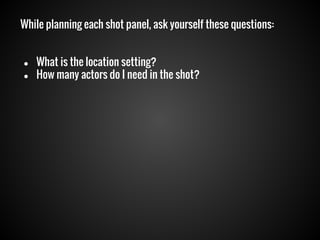
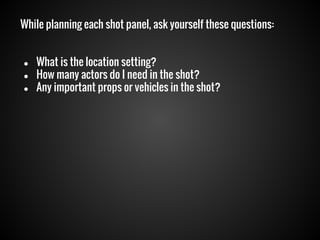
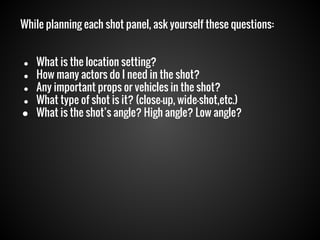
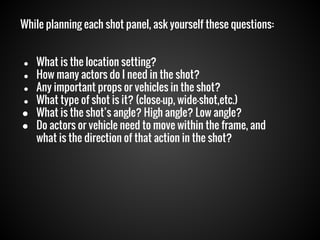
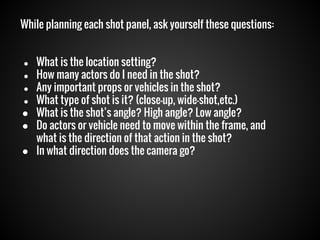
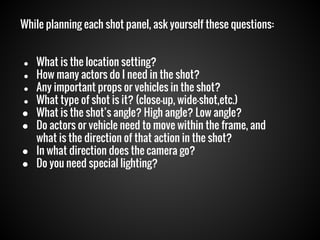
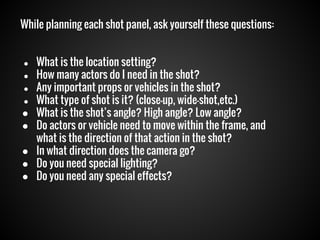
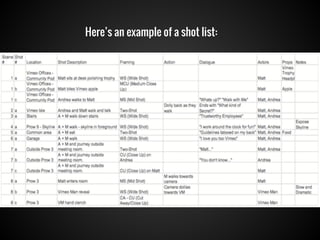
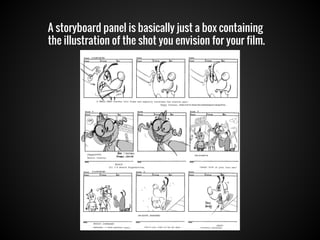
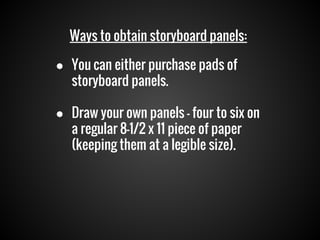
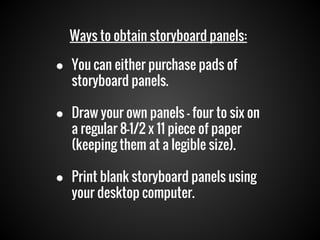
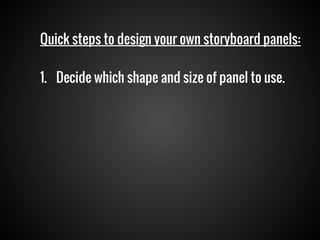
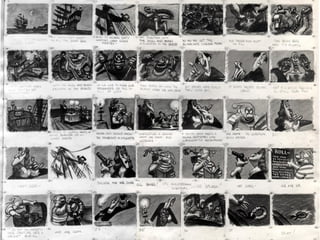
This document provides guidance on creating storyboards for films. It discusses breaking down a script into shots, evaluating each shot by considering location, actors, props, shot type, angle, movement, lighting and effects. The author recommends creating a shot list and then constructing storyboard panels by drawing illustrations of each shot along with descriptive text. Key steps include choosing a panel size and shape, adding a border, and including a description box below each illustration panel. The overall process helps visualize the film and plan shots before production.
Pick and Roll Offense: Options for the Ball ScreenerStuHartenstein
Pick and Roll Offense: Options for the Screener
1. Screen placement on the floor
2. Options out of the Pick and Roll for the Screener
3. Suggestions for personnel in the Ball Screen Offense
Pick and Roll Offense: Options for the Ball ScreenerStuHartenstein
Pick and Roll Offense: Options for the Screener
1. Screen placement on the floor
2. Options out of the Pick and Roll for the Screener
3. Suggestions for personnel in the Ball Screen Offense
Film Language: Camera angles and shot size introduction for Film Studies. Als...Ian Moreno-Melgar
A long PDF that has been used to introduce GCSE Film Students to the complicated process of identifying and explaining the use of camera shot sizes and angles. This is a fairly detailed series of slides which I have used in school for a couple of classes now. As it is a PDF the clips do not play but where possible I've labelled what the film is. Similarly, as it was designed to be used in lessons the overall 'structure' is somewhat disjointed and is missing slides that includes answers or ideas that were discussed in lessons. In order to help where possible, I've included large versions of worksheets so that these can be clipped and printed out if necessary. Many thanks for taking a look and please feel free to take a look at my other uploads as you will find plenty there on other aspects of Film Studies.
Welcome to the Program Your Destiny course. In this course, we will be learning the technology of personal transformation, neuroassociative conditioning (NAC) as pioneered by Tony Robbins. NAC is used to deprogram negative neuroassociations that are causing approach avoidance and instead reprogram yourself with positive neuroassociations that lead to being approach automatic. In doing so, you change your destiny, moving towards unlocking the hypersocial self within, the true self free from fear and operating from a place of personal power and love.
https://bit.ly/BabeSideDoll4u Babeside is a company that specializes in creating handcrafted reborn dolls. These dolls are designed to be incredibly lifelike, with realistic skin tones and hair, and they have become increasingly popular among collectors and those who use them for therapeutic purposes. At Babeside, we believe that our reborn dolls can provide comfort and healing to anyone who needs it.
The Healing Power of Babeside's Handcrafted Creations
Our reborn dolls are more than just beautiful pieces of art - they can also help alleviate stress, anxiety, depression, and other mental health conditions. Studies have shown that holding or cuddling a soft object like a stuffed animal or a reborn doll can release oxytocin, which is often referred to as the "love hormone." This hormone helps us feel calm and relaxed, reducing feelings of stress and anxiety.
In addition to their physical benefits, reborn dolls can also offer emotional support. For many people, having something to care for and nurture can bring a sense of purpose and fulfillment. Reborn dolls can also serve as a reminder of happy memories or loved ones who have passed away.
8. ● Break down the screenplay into shots.
Shot: a film sequence photographed continuously by one camera.
● Figure out what you want the shots to
entail.
9. ● Break down the screenplay into shots.
Shot: a film sequence photographed continuously by one camera.
● Figure out what you want the shots to
entail.
● Transform ideas into storyboard panels.
13. While planning each shot panel, ask yourself these questions:
●
What is the location setting?
14. While planning each shot panel, ask yourself these questions:
●
●
What is the location setting?
How many actors do I need in the shot?
15. While planning each shot panel, ask yourself these questions:
●
●
●
What is the location setting?
How many actors do I need in the shot?
Any important props or vehicles in the shot?
16. While planning each shot panel, ask yourself these questions:
●
●
●
●
What is the location setting?
How many actors do I need in the shot?
Any important props or vehicles in the shot?
What type of shot is it? (close-up, wide-shot,etc.)
17. While planning each shot panel, ask yourself these questions:
What is the location setting?
● How many actors do I need in the shot?
● Any important props or vehicles in the shot?
● What type of shot is it? (close-up, wide-shot,etc.)
● What is the shot’s angle? High angle? Low angle?
●
18. While planning each shot panel, ask yourself these questions:
What is the location setting?
● How many actors do I need in the shot?
● Any important props or vehicles in the shot?
● What type of shot is it? (close-up, wide-shot,etc.)
● What is the shot’s angle? High angle? Low angle?
● Do actors or vehicle need to move within the frame, and
what is the direction of that action in the shot?
●
19. While planning each shot panel, ask yourself these questions:
What is the location setting?
● How many actors do I need in the shot?
● Any important props or vehicles in the shot?
● What type of shot is it? (close-up, wide-shot,etc.)
● What is the shot’s angle? High angle? Low angle?
● Do actors or vehicle need to move within the frame, and
what is the direction of that action in the shot?
● In what direction does the camera go?
●
20. While planning each shot panel, ask yourself these questions:
●
●
●
●
●
●
●
●
What is the location setting?
How many actors do I need in the shot?
Any important props or vehicles in the shot?
What type of shot is it? (close-up, wide-shot,etc.)
What is the shot’s angle? High angle? Low angle?
Do actors or vehicle need to move within the frame, and
what is the direction of that action in the shot?
In what direction does the camera go?
Do you need special lighting?
21. While planning each shot panel, ask yourself these questions:
●
●
●
●
●
●
●
●
●
What is the location setting?
How many actors do I need in the shot?
Any important props or vehicles in the shot?
What type of shot is it? (close-up, wide-shot,etc.)
What is the shot’s angle? High angle? Low angle?
Do actors or vehicle need to move within the frame, and
what is the direction of that action in the shot?
In what direction does the camera go?
Do you need special lighting?
Do you need any special effects?
23. ● Decide whether you want to storyboard every shot or just
the ones that require special planning, like action or
special effects.
24. ● Decide whether you want to storyboard every shot or just
the ones that require special planning, like action or
special effects.
● If you want to keep a certain style throughout the film like
low angles, special lenses, or a certain lighting style (for
example, shadows) then you may want to storyboard every
shot.
25. ● Decide whether you want to storyboard every shot or just
the ones that require special planning, like action or
special effects.
● If you want to keep a certain style throughout the film like
low angles, special lenses, or a certain lighting style (for
example, shadows) then you may want to storyboard every
shot.
● If you only want to storyboard certain scenes that may
require special planning keep a shot list of all the events
or scenes that jump out at you so that you can translate
them into separate storyboard panels.
30. Ways to obtain storyboard panels:
● You can either purchase pads of
storyboard panels.
31. Ways to obtain storyboard panels:
● You can either purchase pads of
storyboard panels.
● Draw your own panels — four to six on
a regular 8-1/2 x 11 piece of paper
(keeping them at a legible size).
32. Ways to obtain storyboard panels:
● You can either purchase pads of
storyboard panels.
● Draw your own panels — four to six on
a regular 8-1/2 x 11 piece of paper
(keeping them at a legible size).
● Print blank storyboard panels using
your desktop computer.
34. Quick steps to design your own storyboard panels:
1. Decide which shape and size of panel to use.
35. Quick steps to design your own storyboard panels:
1. Decide which shape and size of panel to use.
● A television storyboard panel resembles a square, only
slightly wider.
36. Quick steps to design your own storyboard panels:
1. Decide which shape and size of panel to use.
● A television storyboard panel resembles a square, only
slightly wider.
● Theatrical feature-film storyboards are rectangular in
shape, almost twice as wide as a television screen.
37. 2. Draw the shape of the panel and add a thick
black border (approximately 1/2 inch in width)
around the square or rectangle.
38. 2. Draw the shape of the panel and add a thick
black border (approximately 1/2 inch in width)
around the square or rectangle.
● Placing a border around each panel helps you to see
each panel as a definitive separate shot, and
subliminally creates the illusion of a TV or darkened
theater around your shot, giving you an idea of what
that individual image will look like.
39. 3. Lastly, create a description panel by
drawing a 1-inch empty box just below the
bottom of the frame panel
40. 3. Lastly, create a description panel by
drawing a 1-inch empty box just below the
bottom of the frame panel
● Use this box to write down important information
that describes in detail what the illustration doesn't
show or enhances what is drawn in the frame above.
For example, include any important dialogue, camera
directions, scene numbers, or special-effects
instructions.