Pop-Up Coastal Protection
•
24 likes•3,513 views

A presentation allowing students to develop a pop-up coastline with coastal protection features. Images courtesy of Ian Murray, www.geographyphotos.com
![[object Object],[object Object],[object Object],[object Object],[object Object],[object Object],[object Object],[object Object],[object Object]](data:image/gif;base64,R0lGODlhAQABAIAAAAAAAP///yH5BAEAAAAALAAAAAABAAEAAAIBRAA7)
Recommended
More Related Content
Similar to Pop-Up Coastal Protection
Similar to Pop-Up Coastal Protection (20)
More from TonyCassidy
More from TonyCassidy (20)
Recently uploaded
Recently uploaded (20)
Pop-Up Coastal Protection
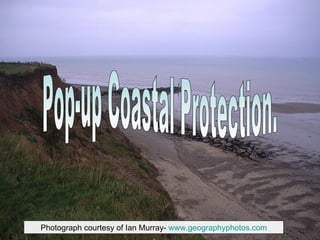
- 1. Photograph courtesy of Ian Murray- www.geographyphotos.com Pop-up Coastal Protection.
- 3. 1 Make sure your template is this way.
- 4. 2 Using a green crayon, shade what will become the tops of your cliffs.
- 5. 3 In the first section of your diagram, draw a couple of rows of boulders. These are sometimes called rock armour!
- 6. 4 In the second section, draw a black/grey rectangle, this represents a sea wall.
- 7. 5 These are cages filled with rocks. In the third section of your diagram, draw a line of gabions.
- 8. 6 Our cliffs are clay, they are less resistant, prone to erosion and hence slumping. Shade your cliffs brown.
- 9. 7 Neatly score the triangle shape in the fourth section of your diagram.
- 10. 8 Fold down the scored triangle shape and draw on the following. This is a groyne, it stops the process of Long Shore Drift, allowing a beach to form in front of the cliff.
- 11. 9 Shade in a beach and the sea. Make sure the beach is much larger before the groyne.
- 12. 10 Using a ruler, fold along the black lines that run the length of the template. Do this on both sides of the template.
- 13. 11 Your template should now stand!
- 14. 12 Put the following numbers on your template. 1 2 3 4 5 6 Draw a red line to represent the direction of Long Shore Drift.
- 15. 13 Slightly bend your groyne at both ends so that it stands freely. Glue the end nearest to the sea.
- 16. 14 Open a double page of your book. Using two tiny bits of sellotape, practice positioning your model. The green cliff tops should be central over the spine of the book.
- 17. 15 Practice closing your book. Make sure the model folds neatly. When you have found the right position for the model. Glue it down. Use the glue sparingly!
- 18. 16 Close your book.
- 19. 17 Congratulations! Additional Baywatch babes can then be added!
- 20. 20 Finally, Add the title ‘Coastal protection’ to your model pages. Using the worksheet- Match the images and descriptions on the worksheet, to the numbers on your model.