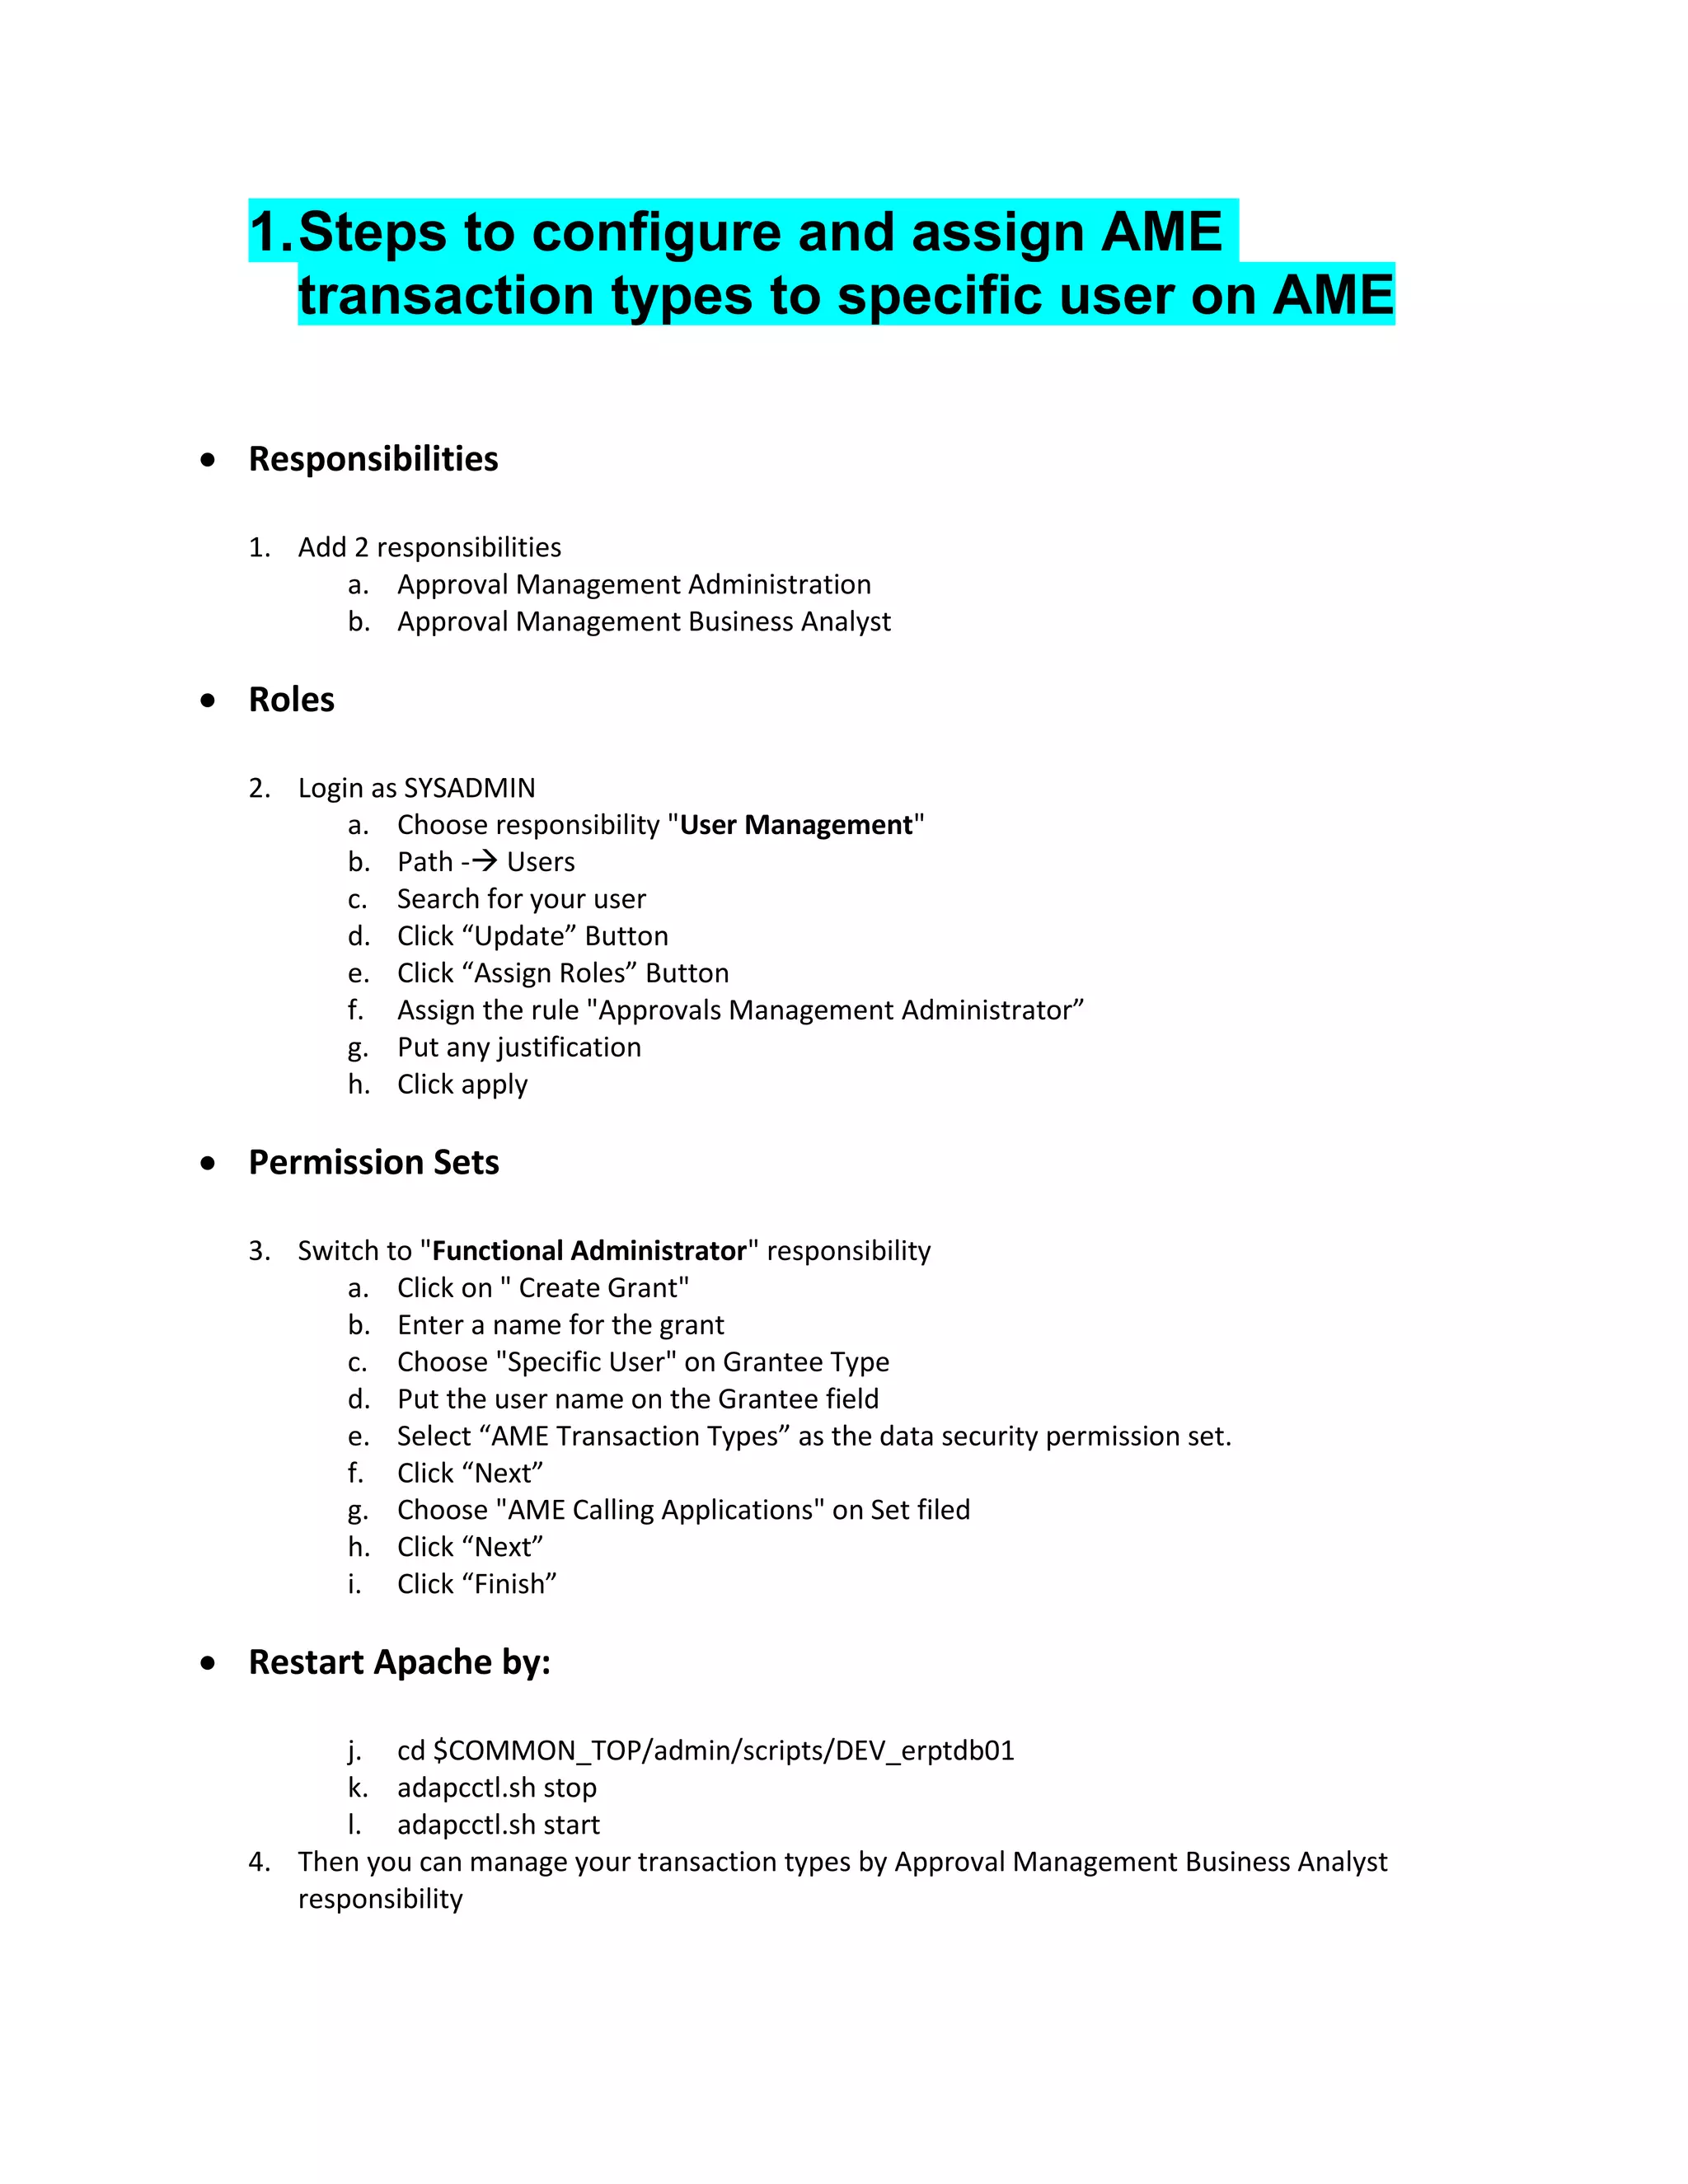
Downloaded 275 times

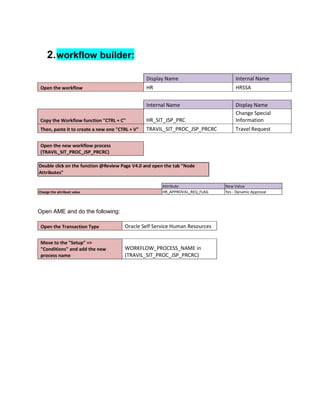
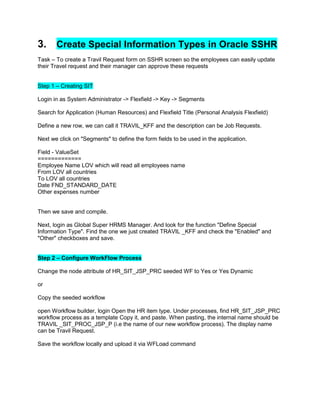
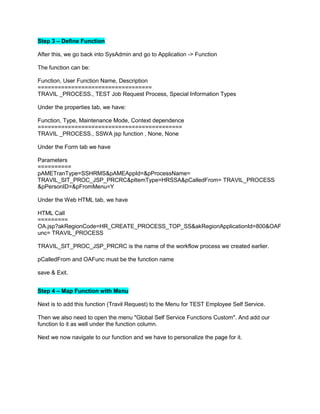

1. Steps are outlined to create a travel request special information type (SIT) in Oracle SSHR including defining the SIT, configuring a workflow process, defining a function, mapping the function to a menu, and personalizing the request form. 2. AME rules are then set up to route the customized travel request SIT through the new workflow process for approval.


![Getting Started with Apache Spark: Big Data Made Simple [Free Meetup]](https://cdn.slidesharecdn.com/ss_thumbnails/apachesparkgettingstarted-260203175547-8361bcc3-thumbnail.jpg?width=640&height=640&fit=bounds)


