The document provides tips for taking night portraits including using a tripod, night portrait mode, high ISO settings, flash techniques, ambient lighting, blurred backgrounds, keeping still or moving during long exposures, playing with color and creating unique bokeh effects. Night portraits work best with some ambient light and these techniques can help capture dramatic, unusual photos at night.
Detailing the three aspects of exposure; ISO, Aperture and Shutter Speed as well as their effects and how you can use this knowledge in your photography!
The exposure triangle in photography is definitely not a triangle with an eye in it. This guide will walk you through the triangle, and how it is fundamental for every photographer - https://xlightphotography.com/exposure-triangle-photography/
Understanding Camera Exposure, Aperture, ISO & Shutter SpeedRahat Kazmi
This tutorial has been put together to help new photographers to have understanding of basic DSLR functions so that they can start capturing professional looking images.
If this tutorial has been helpful, please Like our pages to support us and don't forget to share this with others.
Deviprasad Goenka Management college of Media Studies
http://www.dgmcms.org.in/
Subject: photography
Lesson 7 : Studio Lighting
Faculty Name: Partha Pratim Samanta
Basic Lighting in Photography: Tips for Indoor Photography Cameta Camera
If you want to improve your photography, you've got to know how to master light. In this presentation, we offer a lesson on basic lighting in photography. Get tips for enhancing natural light and using your flash, and learn about other options for lighting your scenes - for perfectly lit photos, every time.
Basic Photography Workshop
Part I:
• What is Photography? (General definition)
• Why would you choose Photography?
• Types of Photography
• Tools of Photography
• Physical appearance of a DSLR
• Lens (Short overview)
Part II:
• Exposure
• How to manipulate exposure
• Aperture
• Shutter Speed
• ISO
• Mode dials (Short Overview)
• Composition and its Types
• Demonstration
Just started with flash photography? No idea how to carry on? Here are a few slides on the basics of lighting in photography. Full guide - http://xlightphotography.com/photography-lighting-basics/
Deviprasad Goenka Management college of Media Studies
http://www.dgmcms.org.in/
Subject:Photography
Lesson 1:Types of Lens , Mega Pixel , Image Quality .
Faculty Name: Partha Pratim Samanta
Photography 102: Mastering Your DSLR CameraJason Kirby
Photography 102: Is taught by Jason Kirby, owner of The Right Light Photography in San Diego. This powerpoint walks you through the understanding of exposure and the relationship between aperture, shutter speed and ISO.
This short course was presented by Muhannad Abu-Ghdaib on March 17, 2010, in KAUST, through the support of KAUST Photography Club.
If you have any questions, do not hesitate to contact the instructor by email on: muhannad.ghdaib@kaust.edu.sa
Lendinero is a company you can trust. Lendinero helps small businesses access capital by providing a low friction process. We have prepared this packet for new customers to assure that we can gain your vote of confidence when obtaining a business loan. Literally, all of our clients have increased return on investment by utilizing our funding channels. When selecting a business loan, Lendinero is your number one choice.
Membincangkan komponen-komponen yang akan dinilai di dalam ujian amali ini dan memfokuskan pergerakan lokomotor dan bukan lokomotor serta 5 pergerakan memanipulatif alatan.
Someone has to take photos on your campus, and it looks like it's you. Too bad it's not really your thing. But with a few simple tips, it can be.
This session will delve into the basics of good photography, from composition to exposure to how to use whatever equipment you can beg, borrow, or steal to get the job done. We'll get into the exposure triangle in case you have a fancy-schmancy camera available, but we'll spend a lot more time talking about what to shoot and how to frame it. What makes a good photo? What is this "journalistic style" branding thing that University Marketing is talking about? What’s wrong with people mugging for the camera? And why is that tree growing out of your chancellor’s head?
We’ll talk about those cameras you carry with you all the time (hint: they're on your phone) and maybe take a quick look at cataloging and toning your photos with Adobe Lightroom.
If you’re a seasoned photographer or an avid hobbyist, you might want to find a session on Yik Yak or web design or making accessible pdfs. But if you want to put some life into the photos you use on your website and in marketing materials, this is for you.
Low light photography tips and tricks - Media DesignsMedia Designs
The perfect moments don’t pause to wait for perfect lighting and in fact, sometimes dark scenes make for amazing images. These low light photography tips will help you improve your images using your DSLR.
Environmental portrait article from Amateur PhotographerSteve Morgan
Asked by Amateur Photographer to write and illustrate an article on producing top quality location portraits describing the skills and equipment preferred when shooting environmental portariture.
Twitter
Facebook
Google+
Pinterest
Fashion photographers go through a lot of things when they are shooting with high-end fashion models and brands. As we all know, photography is not an easy job but when practiced right you can make every impossible thing, possible. Fashion photography is an art which when practiced right, can turn into something very beautiful and worth watching.
Flash photography for beginners. 4 tutorials with tips to get started.Janique Goff Madison
In this article, we will guide you through the basics of getting started with the Profoto A1X to create natural looking images with flash. We’ll take you all the way through the basics of how to set your camera Startpage /Profoto stories / and flash, to create soft and hard light, how to direct it for dierent purposes and finally how to use gels in a creative way.
Improve your skills thanks to these Landscape photography Tips. Learn which are the most important ca,era settings. Learn how to compose your landscape picture in an dynamic and attention-grabbing way. Plus a personal tip that will make you think!
Explore the multifaceted world of Muntadher Saleh, an Iraqi polymath renowned for his expertise in visual art, writing, design, and pharmacy. This SlideShare delves into his innovative contributions across various disciplines, showcasing his unique ability to blend traditional themes with modern aesthetics. Learn about his impactful artworks, thought-provoking literary pieces, and his vision as a Neo-Pop artist dedicated to raising awareness about Iraq's cultural heritage. Discover why Muntadher Saleh is celebrated as "The Last Polymath" and how his multidisciplinary talents continue to inspire and influence.
Hadj Ounis's most notable work is his sculpture titled "Metamorphosis." This piece showcases Ounis's mastery of form and texture, as he seamlessly combines metal and wood to create a dynamic and visually striking composition. The juxtaposition of the two materials creates a sense of tension and harmony, inviting viewers to contemplate the relationship between nature and industry.
2137ad Merindol Colony Interiors where refugee try to build a seemengly norm...luforfor
This are the interiors of the Merindol Colony in 2137ad after the Climate Change Collapse and the Apocalipse Wars. Merindol is a small Colony in the Italian Alps where there are around 4000 humans. The Colony values mainly around meritocracy and selection by effort.
2137ad - Characters that live in Merindol and are at the center of main storiesluforfor
Kurgan is a russian expatriate that is secretly in love with Sonia Contado. Henry is a british soldier that took refuge in Merindol Colony in 2137ad. He is the lover of Sonia Contado.
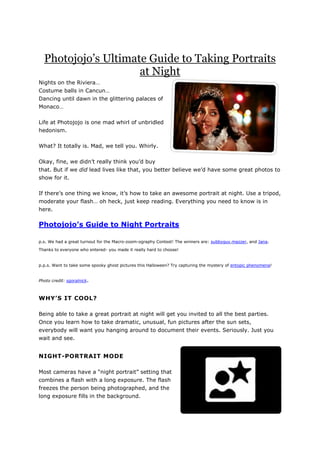
1. Photojojo’s Ultimate Guide to Taking Portraits
at Night
Nights on the Riviera…
Costume balls in Cancun…
Dancing until dawn in the glittering palaces of
Monaco…
Life at Photojojo is one mad whirl of unbridled
hedonism.
What? It totally is. Mad, we tell you. Whirly.
Okay, fine, we didn’t really think you’d buy
that. But if we did lead lives like that, you better believe we’d have some great photos to
show for it.
If there’s one thing we know, it’s how to take an awesome portrait at night. Use a tripod,
moderate your flash… oh heck, just keep reading. Everything you need to know is in
here.
Photojojo’s Guide to Night Portraits
p.s. We had a great turnout for the Macro-zoom-ography Contest! The winners are: subbyguy,mazzer, and Jana.
Thanks to everyone who entered- you made it really hard to choose!
p.p.s. Want to take some spooky ghost pictures this Halloween? Try capturing the mystery of entopic phenomena!
Photo credit: sgoralnick.
WHY’S IT COOL?
Being able to take a great portrait at night will get you invited to all the best parties.
Once you learn how to take dramatic, unusual, fun pictures after the sun sets,
everybody will want you hanging around to document their events. Seriously. Just you
wait and see.
NIGHT-PORTRAIT MODE
Most cameras have a “night portrait” setting that
combines a flash with a long exposure. The flash
freezes the person being photographed, and the
long exposure fills in the background.
2. Night portrait mode is the best place to start experimenting.
Usually the flash fires first, but some cameras have the option for rear-sync flash as well
(firing the flash at the end of the exposure). Play around and see what you like best.
HIGH ISO
High ISO settings (400, 800, 1600) allow you to
use shorter exposure times in lower light
conditions. If you have a high enough ISO, you can
use ambient light instead of a flash.
For film users, this means using 800 or 1600 speed
film instead of your usual 100 or 200. For digital
users, it means adjusting your camera to use a
higher ISO setting (the numbers correspond to film
ISO numbers).
The problem with high ISOs is “noise”: speckly or grainy-looking photos, especially
noticeable in areas of smooth color. Sometimes graininess looks great, sometimes it
looks awful- it depends on the mood and style of the photo.
You can test your camera’s performance at high ISO settings
by taking the same picture at each different ISO number and
comparing the results. Then decide what level of graininess is
acceptable, and at what point you go ahead and use flash.
USING THE FLASH
Flash is great when it’s used right. The key is not to overdo it
and wash the person out.
If your camera has a built-in flash, dial the intensity down 1 or
2 stops. If you can’t change the intensity, cover it with a translucent piece of paper (wax
paper or gum wrappers work well) or use a flash diffuser.
If you have a separate flash unit, point it skywards and use a bounce card to cast a more
flattering light on your subject.
LIGHTING
“Night” portraits are actually more effective when
there is some ambient light. Shoot just after
sunset, or use the glow from streetlights and neon
to cast some light on your subject.
3. Ambient light is much more effective than flash alone, and if you have enough of it, you
can forgo the flash altogether.
BACKGROUND
Use a wide aperture (4.5 or lower) to blur the area behind your
subject. Soft, indistinct colored lights make for great
backgrounds. Make sure they’re blurry enough that they don’t
draw attention away from the person.
And hey, don’t forget composition! Just because it’s dark out
doesn’t mean you have to revert to the standard head-on
portrait pose. Use the background, change your angle, move
around until you see something really great.
HOLD STILL
Keeping the camera steady is a big part of night photography.
Use a tripod or rest the camera on a stable object,
like a table. Even bracing yourself against a wall
while hand-holding the camera makes a difference.
Have your subject hold still too. You’ll find that
people tend to relax or move after the flash fires.
But if you’re in night portrait mode, the exposure
may still be going. Ask the person to freeze until
the shutter clicks closed.
DON’T HOLD STILL
OK, yeah, we just said not to move, but we don’t always
practice what we preach.
You can get surprisingly great results in night portrait mode by
snapping a picture and continuing to move while the exposure
finishes. Light trails, ghostly people, random patterns of color:
it’s pretty great.
Try moving the camera while the person holds still, then try
holding the camera still while they move. See what results you like better. This
technique works particularly well when there are streetlights or neon signs in the
background.
HOLD SORT OF STILL
4. This one’s really freaky:
Set the camera up on a tripod.
Have the person pose before pressing the
shutter button.
As soon as the flash fires, have the person
change position and freeze for the rest of
the exposure.
Try giving the person two heads, or four arms, or whatever else you can think of. Create
your own sideshow!
COLOR
The color of night portraits tends to be a bit odd.
The night portrait default setting white balances for
the flash. That means the longer fill exposure
tends to be very warm, especially indoors.
Play with your camera’s white balance. The
tungsten setting will give you a blue cast outdoors,
and the daylight setting will give you a yellow cast
indoors.
If you want to play with it even more, use image editing software to emphasize or add
color casts, or even make the image look cross-processed.
BOKEH
“Bokeh” means the parts of your photo that aren’t in focus. We
like those parts.
A quirk of physics dictates that unfocused points of light in a
photograph take on the shape of the aperture. You canmake a
lens hood with a specially-shaped aperture (a heart, for
example) and turn all the points of light into that shape.
It’s really easy, super cheap, and lends an unexpected “how-
did-you-do-that?” touch to night photos. Make any shape you
want: stars, ghosts, butterflies. You can even buy specially-
shaped hole punches at craft stores.
DO MORE!