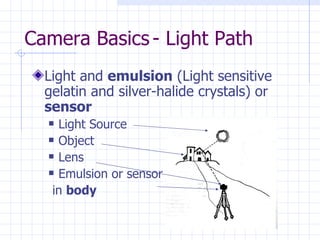
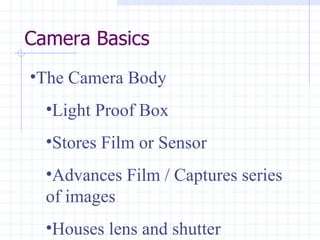
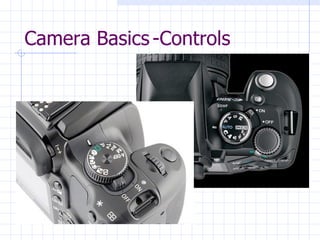
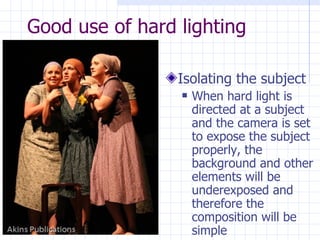
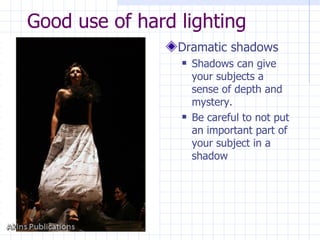
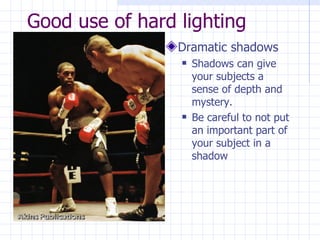
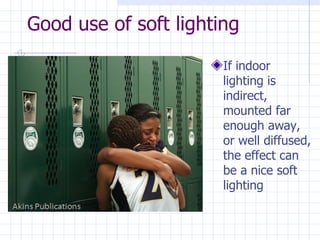
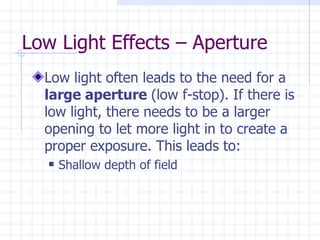
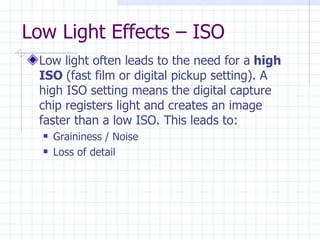
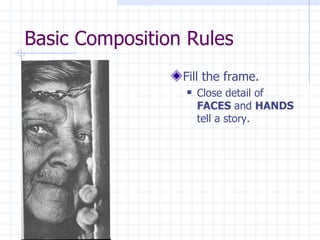
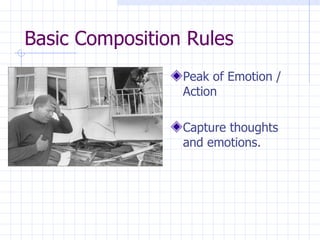
Camera Basics - Light Path Light and  emulsion  (Light sensitive gelatin and silver-halide crystals) or  sensor Light Source Object Lens Emulsion or sensor in  body
Camera Basics  The Camera Body Light Proof Box Stores Film or Sensor Advances Film / Captures series of images Houses lens and shutter
Camera Basics - Body
Camera Basics -Controls
Camera Basics - The Shutter The shutter is a small sliding door like object that opens and closes to allow exposure for an exact amount of time. Controls time that light hits sensor. Is read according to reciprocal seconds. (2 = 1/2 second) Fast shutter speed (high number) used for high light and stop action. Slow shutter speed used for low light and still shots.
Camera Basics - The Shutter AS A GENERAL RULE, TO AVOID BLURRING, NEVER SHOOT BELOW “60”.
Camera Basics The Lens- Quantity of light The  aperture  (lens opening) can be opened or closed to allow enough light to reach the film. A small aperture (or F-stop) is needed for bright light.  A large aperture is needed for dim light. The larger the F-stop, the smaller the lens opening F 1.4 F 2 F 2.8 F 4 F 5.6 F 8 F 11 F 16 F 22
Camera Basics The Lens- Depth of Field The distance between the closest and farthest parts of a picture that are reasonably sharp. Determined by: aperture size Focus distance Focal length of lens
Camera Basics  - ISO Controls the sensitivity of the sensor. High ISO = High Numbers (800 +) Necessary for low light / high action Low ISO = Low Numbers (200 -) Best for high light situations
Understanding Light Quality Quantity Direction
Light Quality (Hard vs. Soft) Hard light  is caused by direct, intense light hitting the subject It creates distinct  shadows  and  hot spots While it is often not desired because it can cause loss of detail and distracting areas that are over or under exposed, when used properly, it can have a dramatic effect.
Good use of hard lighting Isolating the subject When hard light is directed at a subject and the camera is set to expose the subject properly, the background and other elements will be underexposed and therefore the composition will be simple
Good use of hard lighting Dramatic shadows Shadows can give your subjects a sense of depth and mystery. Be careful to not put an important part of your subject in a shadow
What Causes Hard Lighting Direct sunlight On a cloudless day In the morning, long shadows will be cast from the East At noon, short shadows will be cast from above In the afternoon, long shadows will be cast from the West Strong, direct light from bare bulbs Hard light will travel in a straight line and fan out from bare bulbs Direct flashes (YUCK)
Light Quality (Hard vs. Soft) Soft Light  is created by indirect or diffused light hitting the subject Soft light tends to wrap around a subject and cause no hard shadows It is often used by photographers to show the full details of a subject and to achieve good, even exposure
Good use of soft lighting Soft lighting can be found outside If it is a cloudy, overcast day, there will be nice soft light everywhere Also, a photographer can shoot with the entire subject in a large shadow such as one cast by a building
Good use of soft lighting If indoor lighting is indirect, mounted far enough away, or well diffused, the effect can be a nice soft lighting
Light Quantity (Low and High) In order to achieve a proper exposure, a camera must be set or set itself to compensate for the level of light entering the lens.  Light quantity therefore affects  aperture size ,  shutter speed , and  ISO,  settings, all of which affect the final look of the image
Low Light Effects – Shutter Speed Low light often leads to the need for  long exposures  (slow shutter speed). If there is low light, the shutter has to stay open longer to create a proper exposure.This leads to: Blurred action Light source burn in
Good use of blur Panning -  If you are forced to shoot action at a low shutter speed, choose one moving object, and move the camera with the object. When done properly, this will “freeze” the main object while everything else is blurred, leading to an interesting sense of movement.
Good use of burn in Halo effect –  If the shutter is open a long time, any light source in the frame will appear to glow or radiate. Properly positioning these lights can actually add to the interest of the photo, or it can destroy it.
Good use of burn in Leading Light Lines –  If the shutter is open a long time, any light source in the frame will appear to glow or radiate in streaks. Properly positioning these streaks can lead to a dynamic photo.
Low Light Effects – Aperture Low light often leads to the need for a  large aperture  (low f-stop). If there is low light, there needs to be a larger opening to let more light in to create a proper exposure. This leads to: Shallow depth of field
Good use of shallow depth of field Selective focus -  A shallow depth of field means that only a very small area in front of the lens will be in focus. As long as you focus is on the right thing, this can actually be an advantage as it greatly simplifies the image.
Low Light Effects – ISO Low light often leads to the need for a  high ISO  (fast film or digital pickup setting). A high ISO setting means the digital capture chip registers light and creates an image faster than a low ISO. This leads to: Graininess / Noise Loss of detail
Light Direction Effects Light From Above – Common indoors and during mid-day outdoors. Has “normal lighting” effect. Light from below – Unusual. Has “spooky” effect. Light from side – Common in front of windows, at in early morning and sunset.Can have interesting effects, but watch the shadows. Light from front – Common with flash. Has “deer in headlights” , washed out effect. Light from back – Very common when people stand in front of windows. Leads to silhouette if there is not enough light bouncing off of front.
Back Lighting While usually avoided because of loss of detail, silhouettes can make a dramatic impact. Here the photographer metered the glowing video screen properly leading to the person in the foreground being drastically under exposed.
Rim Lighting -Back lighting done right If the shot is properly metered and there is enough light bouncing off of the subject, light from the back can define the edges Exposure should be metered very close to the subject and locked before moving away, or shot should be bracketed until right exposure is found. Avoid getting the light source directly in the frame.
Photojournalism Composition Which of these shots is better and why? A B
Photojournalism The art and technique of telling a story or reporting timely events by use of pictures and words. Not Posed Not Staged Must have human subject or angle Follows composition rules
Basic Composition Rules Fill the frame. Close detail of  FACES  and  HANDS  tell a story.
Basic Composition Rules Get  candid  shots NO POSED PICTURES  NO PICTURES WHERE SUBJECT IS LOOKING AT CAMERA
Basic Composition Rules Peak of Emotion / Action Capture thoughts and emotions.

Accent Photos 101

  • 1.
    Camera Basics -Light Path Light and emulsion (Light sensitive gelatin and silver-halide crystals) or sensor Light Source Object Lens Emulsion or sensor in body
  • 2.
    Camera Basics The Camera Body Light Proof Box Stores Film or Sensor Advances Film / Captures series of images Houses lens and shutter
  • 3.
  • 4.
  • 5.
    Camera Basics -The Shutter The shutter is a small sliding door like object that opens and closes to allow exposure for an exact amount of time. Controls time that light hits sensor. Is read according to reciprocal seconds. (2 = 1/2 second) Fast shutter speed (high number) used for high light and stop action. Slow shutter speed used for low light and still shots.
  • 6.
    Camera Basics -The Shutter AS A GENERAL RULE, TO AVOID BLURRING, NEVER SHOOT BELOW “60”.
  • 7.
    Camera Basics TheLens- Quantity of light The aperture (lens opening) can be opened or closed to allow enough light to reach the film. A small aperture (or F-stop) is needed for bright light. A large aperture is needed for dim light. The larger the F-stop, the smaller the lens opening F 1.4 F 2 F 2.8 F 4 F 5.6 F 8 F 11 F 16 F 22
  • 8.
    Camera Basics TheLens- Depth of Field The distance between the closest and farthest parts of a picture that are reasonably sharp. Determined by: aperture size Focus distance Focal length of lens
  • 9.
    Camera Basics - ISO Controls the sensitivity of the sensor. High ISO = High Numbers (800 +) Necessary for low light / high action Low ISO = Low Numbers (200 -) Best for high light situations
  • 10.
    Understanding Light QualityQuantity Direction
  • 11.
    Light Quality (Hardvs. Soft) Hard light is caused by direct, intense light hitting the subject It creates distinct shadows and hot spots While it is often not desired because it can cause loss of detail and distracting areas that are over or under exposed, when used properly, it can have a dramatic effect.
  • 12.
    Good use ofhard lighting Isolating the subject When hard light is directed at a subject and the camera is set to expose the subject properly, the background and other elements will be underexposed and therefore the composition will be simple
  • 13.
    Good use ofhard lighting Dramatic shadows Shadows can give your subjects a sense of depth and mystery. Be careful to not put an important part of your subject in a shadow
  • 14.
    Good use ofhard lighting Dramatic shadows Shadows can give your subjects a sense of depth and mystery. Be careful to not put an important part of your subject in a shadow
  • 15.
    What Causes HardLighting Direct sunlight On a cloudless day In the morning, long shadows will be cast from the East At noon, short shadows will be cast from above In the afternoon, long shadows will be cast from the West Strong, direct light from bare bulbs Hard light will travel in a straight line and fan out from bare bulbs Direct flashes (YUCK)
  • 16.
    Light Quality (Hardvs. Soft) Soft Light is created by indirect or diffused light hitting the subject Soft light tends to wrap around a subject and cause no hard shadows It is often used by photographers to show the full details of a subject and to achieve good, even exposure
  • 17.
    Good use ofsoft lighting Soft lighting can be found outside If it is a cloudy, overcast day, there will be nice soft light everywhere Also, a photographer can shoot with the entire subject in a large shadow such as one cast by a building
  • 18.
    Good use ofsoft lighting If indoor lighting is indirect, mounted far enough away, or well diffused, the effect can be a nice soft lighting
  • 19.
    Light Quantity (Lowand High) In order to achieve a proper exposure, a camera must be set or set itself to compensate for the level of light entering the lens. Light quantity therefore affects aperture size , shutter speed , and ISO, settings, all of which affect the final look of the image
  • 20.
    Low Light Effects– Shutter Speed Low light often leads to the need for long exposures (slow shutter speed). If there is low light, the shutter has to stay open longer to create a proper exposure.This leads to: Blurred action Light source burn in
  • 21.
    Good use ofblur Panning - If you are forced to shoot action at a low shutter speed, choose one moving object, and move the camera with the object. When done properly, this will “freeze” the main object while everything else is blurred, leading to an interesting sense of movement.
  • 22.
    Good use ofburn in Halo effect – If the shutter is open a long time, any light source in the frame will appear to glow or radiate. Properly positioning these lights can actually add to the interest of the photo, or it can destroy it.
  • 23.
    Good use ofburn in Leading Light Lines – If the shutter is open a long time, any light source in the frame will appear to glow or radiate in streaks. Properly positioning these streaks can lead to a dynamic photo.
  • 24.
    Low Light Effects– Aperture Low light often leads to the need for a large aperture (low f-stop). If there is low light, there needs to be a larger opening to let more light in to create a proper exposure. This leads to: Shallow depth of field
  • 25.
    Good use ofshallow depth of field Selective focus - A shallow depth of field means that only a very small area in front of the lens will be in focus. As long as you focus is on the right thing, this can actually be an advantage as it greatly simplifies the image.
  • 26.
    Low Light Effects– ISO Low light often leads to the need for a high ISO (fast film or digital pickup setting). A high ISO setting means the digital capture chip registers light and creates an image faster than a low ISO. This leads to: Graininess / Noise Loss of detail
  • 27.
    Light Direction EffectsLight From Above – Common indoors and during mid-day outdoors. Has “normal lighting” effect. Light from below – Unusual. Has “spooky” effect. Light from side – Common in front of windows, at in early morning and sunset.Can have interesting effects, but watch the shadows. Light from front – Common with flash. Has “deer in headlights” , washed out effect. Light from back – Very common when people stand in front of windows. Leads to silhouette if there is not enough light bouncing off of front.
  • 28.
    Back Lighting Whileusually avoided because of loss of detail, silhouettes can make a dramatic impact. Here the photographer metered the glowing video screen properly leading to the person in the foreground being drastically under exposed.
  • 29.
    Rim Lighting -Backlighting done right If the shot is properly metered and there is enough light bouncing off of the subject, light from the back can define the edges Exposure should be metered very close to the subject and locked before moving away, or shot should be bracketed until right exposure is found. Avoid getting the light source directly in the frame.
  • 30.
    Photojournalism Composition Whichof these shots is better and why? A B
  • 31.
    Photojournalism The artand technique of telling a story or reporting timely events by use of pictures and words. Not Posed Not Staged Must have human subject or angle Follows composition rules
  • 32.
    Basic Composition RulesFill the frame. Close detail of FACES and HANDS tell a story.
  • 33.
    Basic Composition RulesGet candid shots NO POSED PICTURES NO PICTURES WHERE SUBJECT IS LOOKING AT CAMERA
  • 34.
    Basic Composition RulesPeak of Emotion / Action Capture thoughts and emotions.