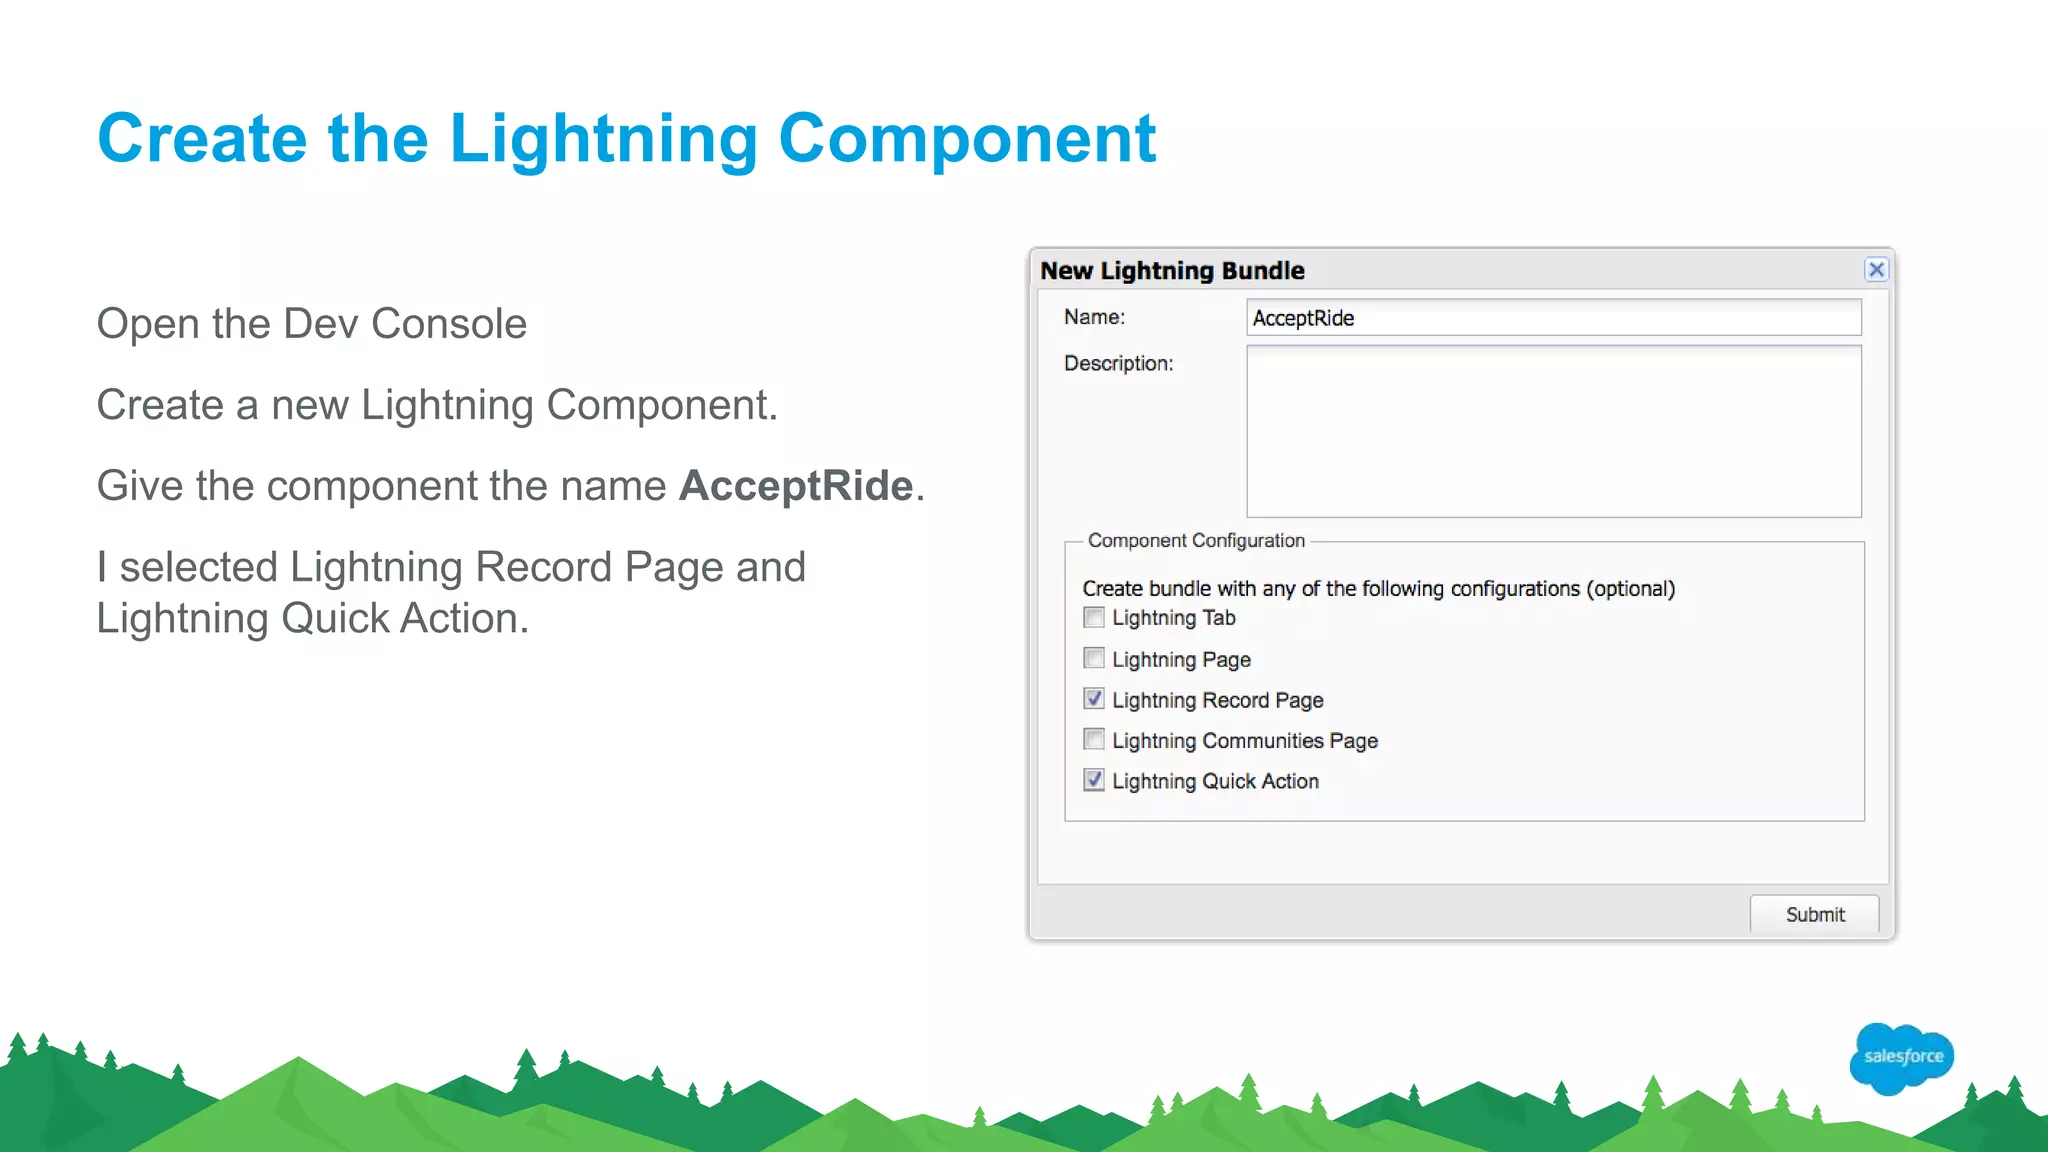
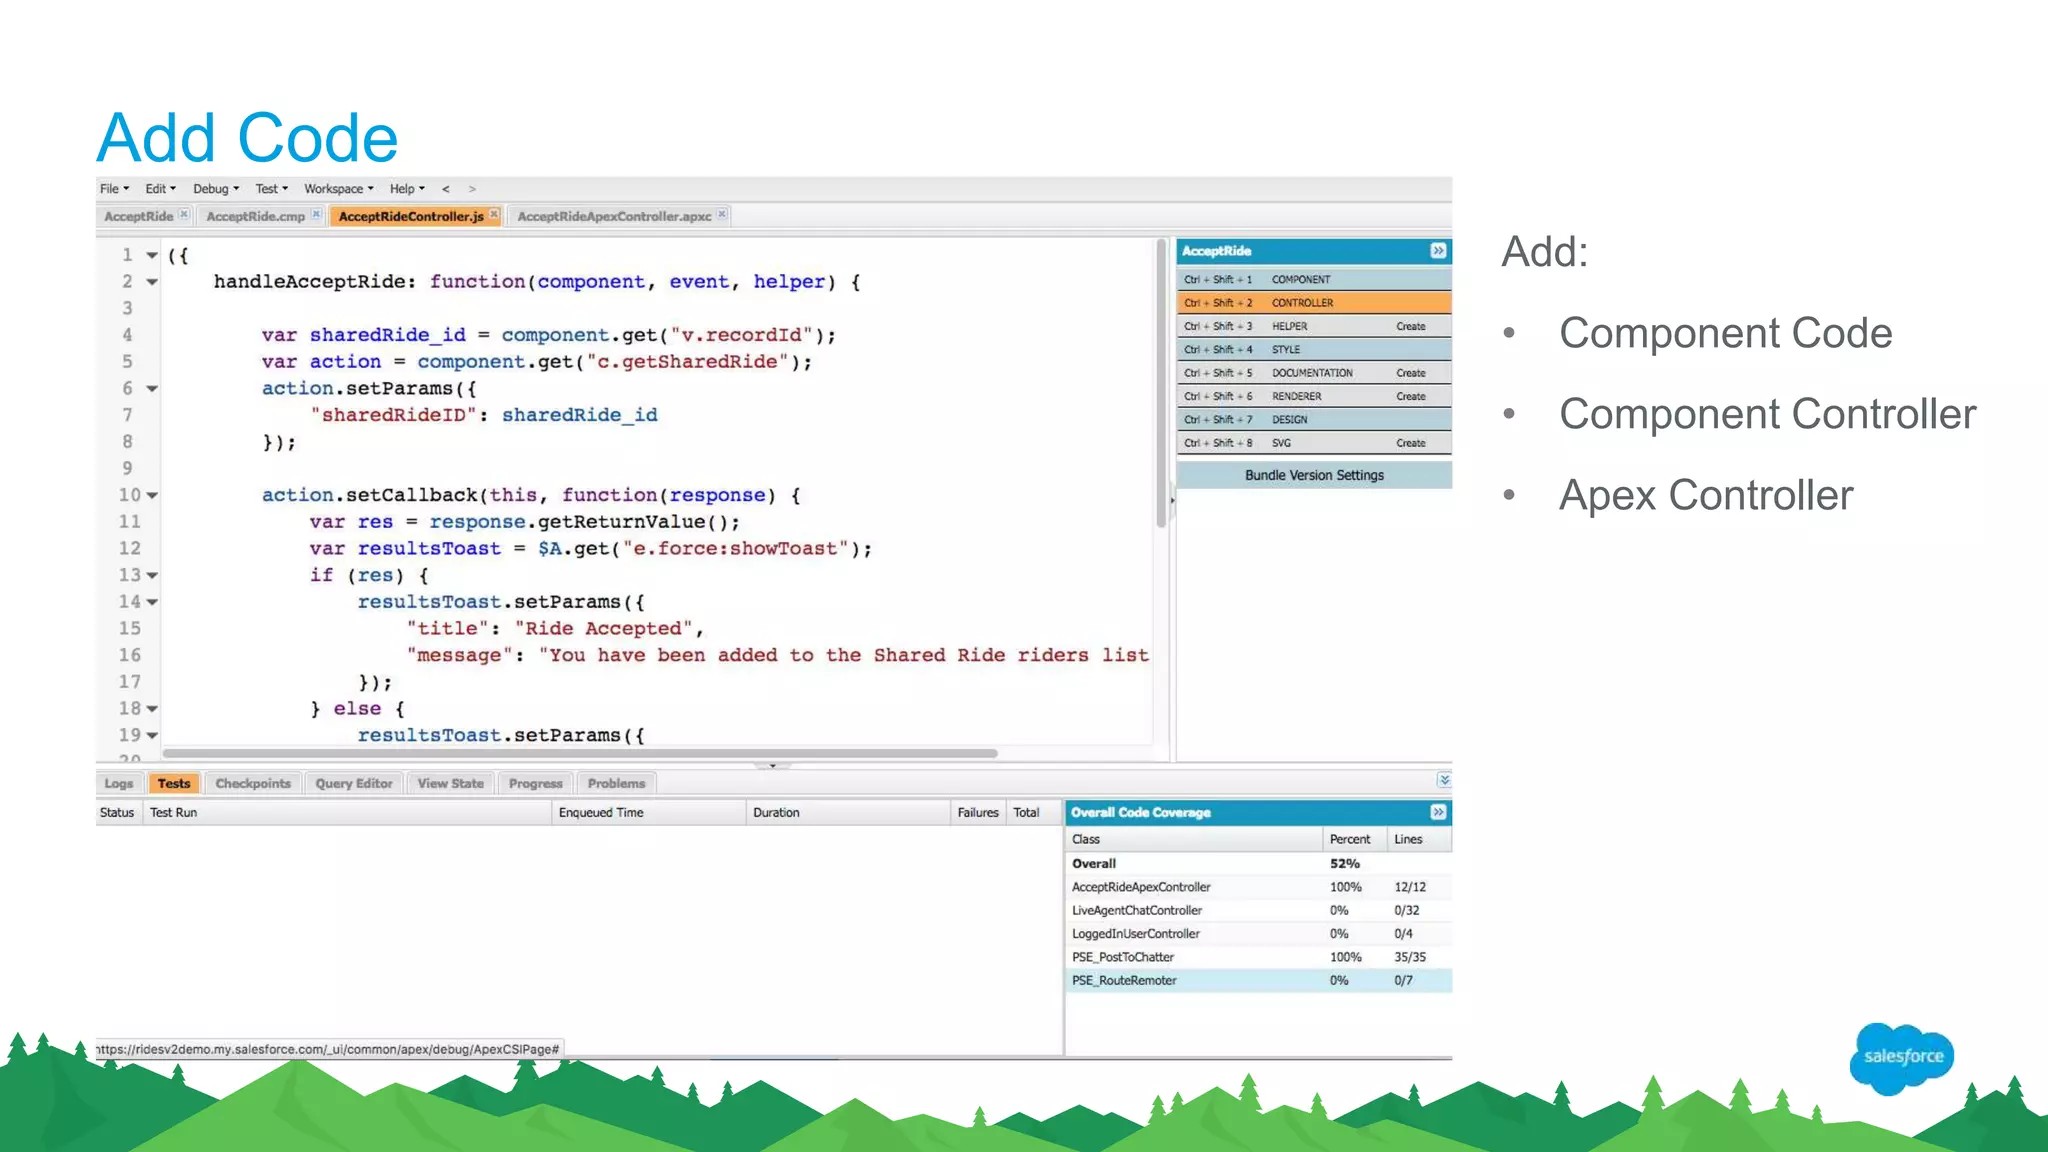
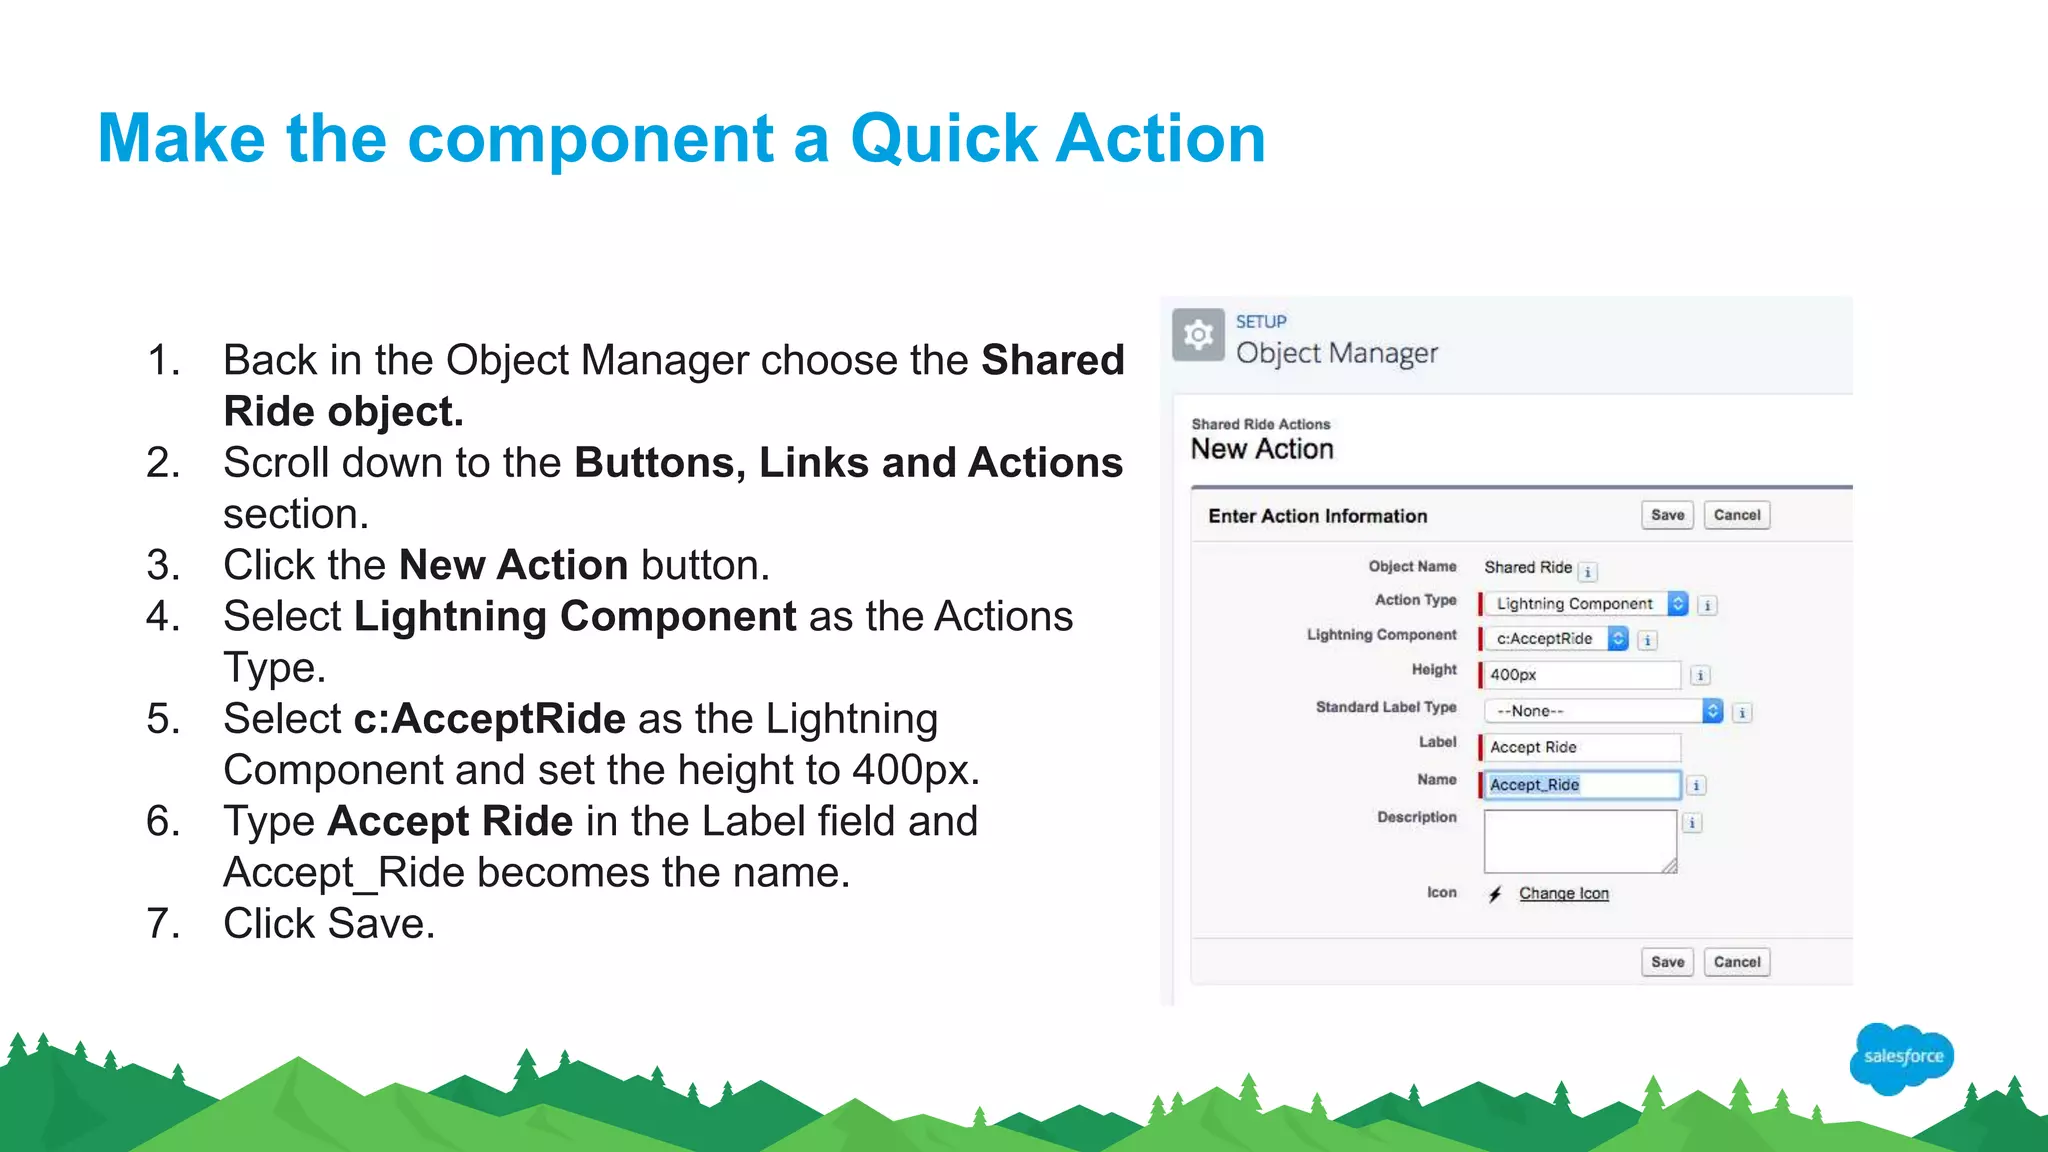
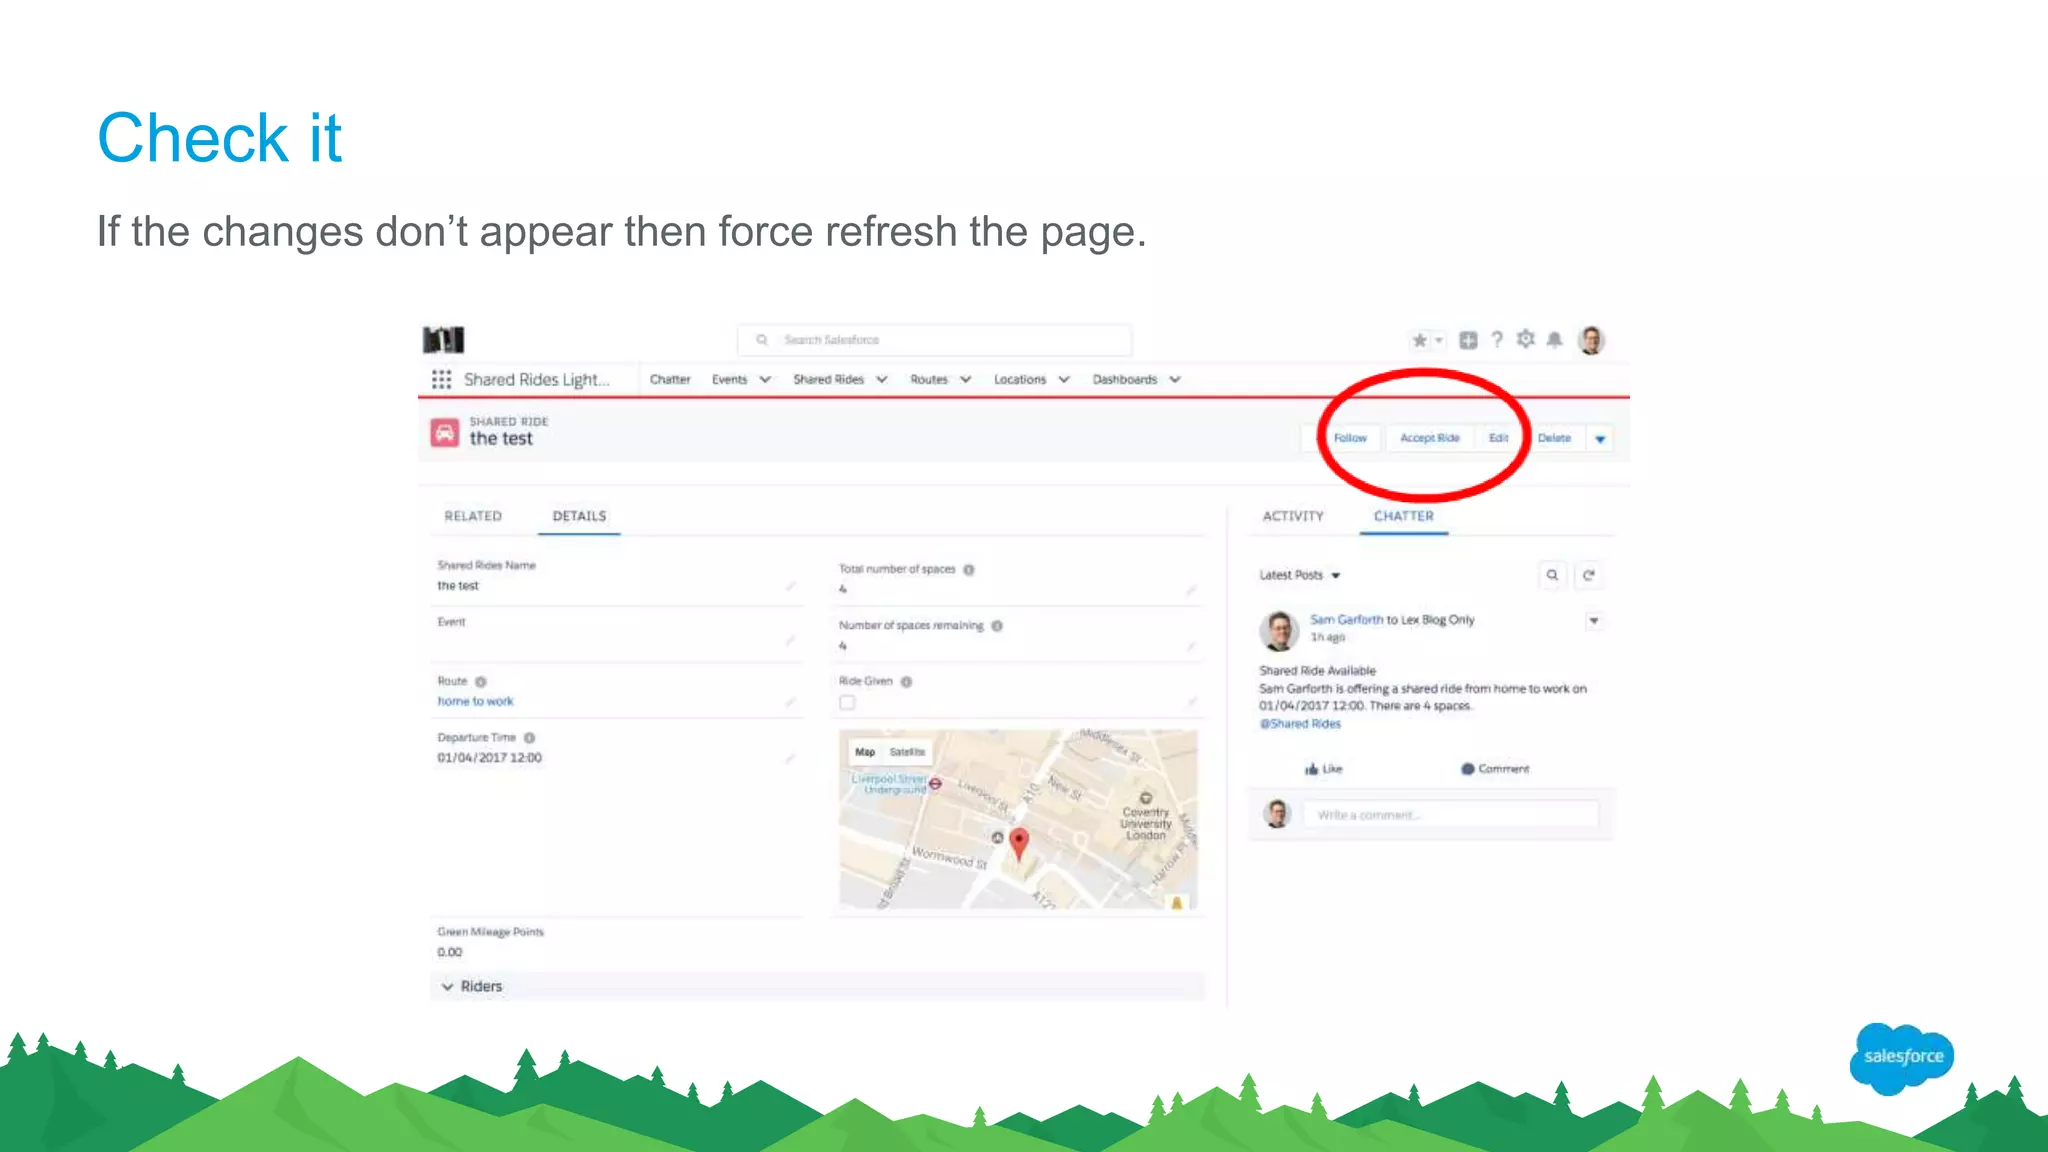
Downloaded 24 times


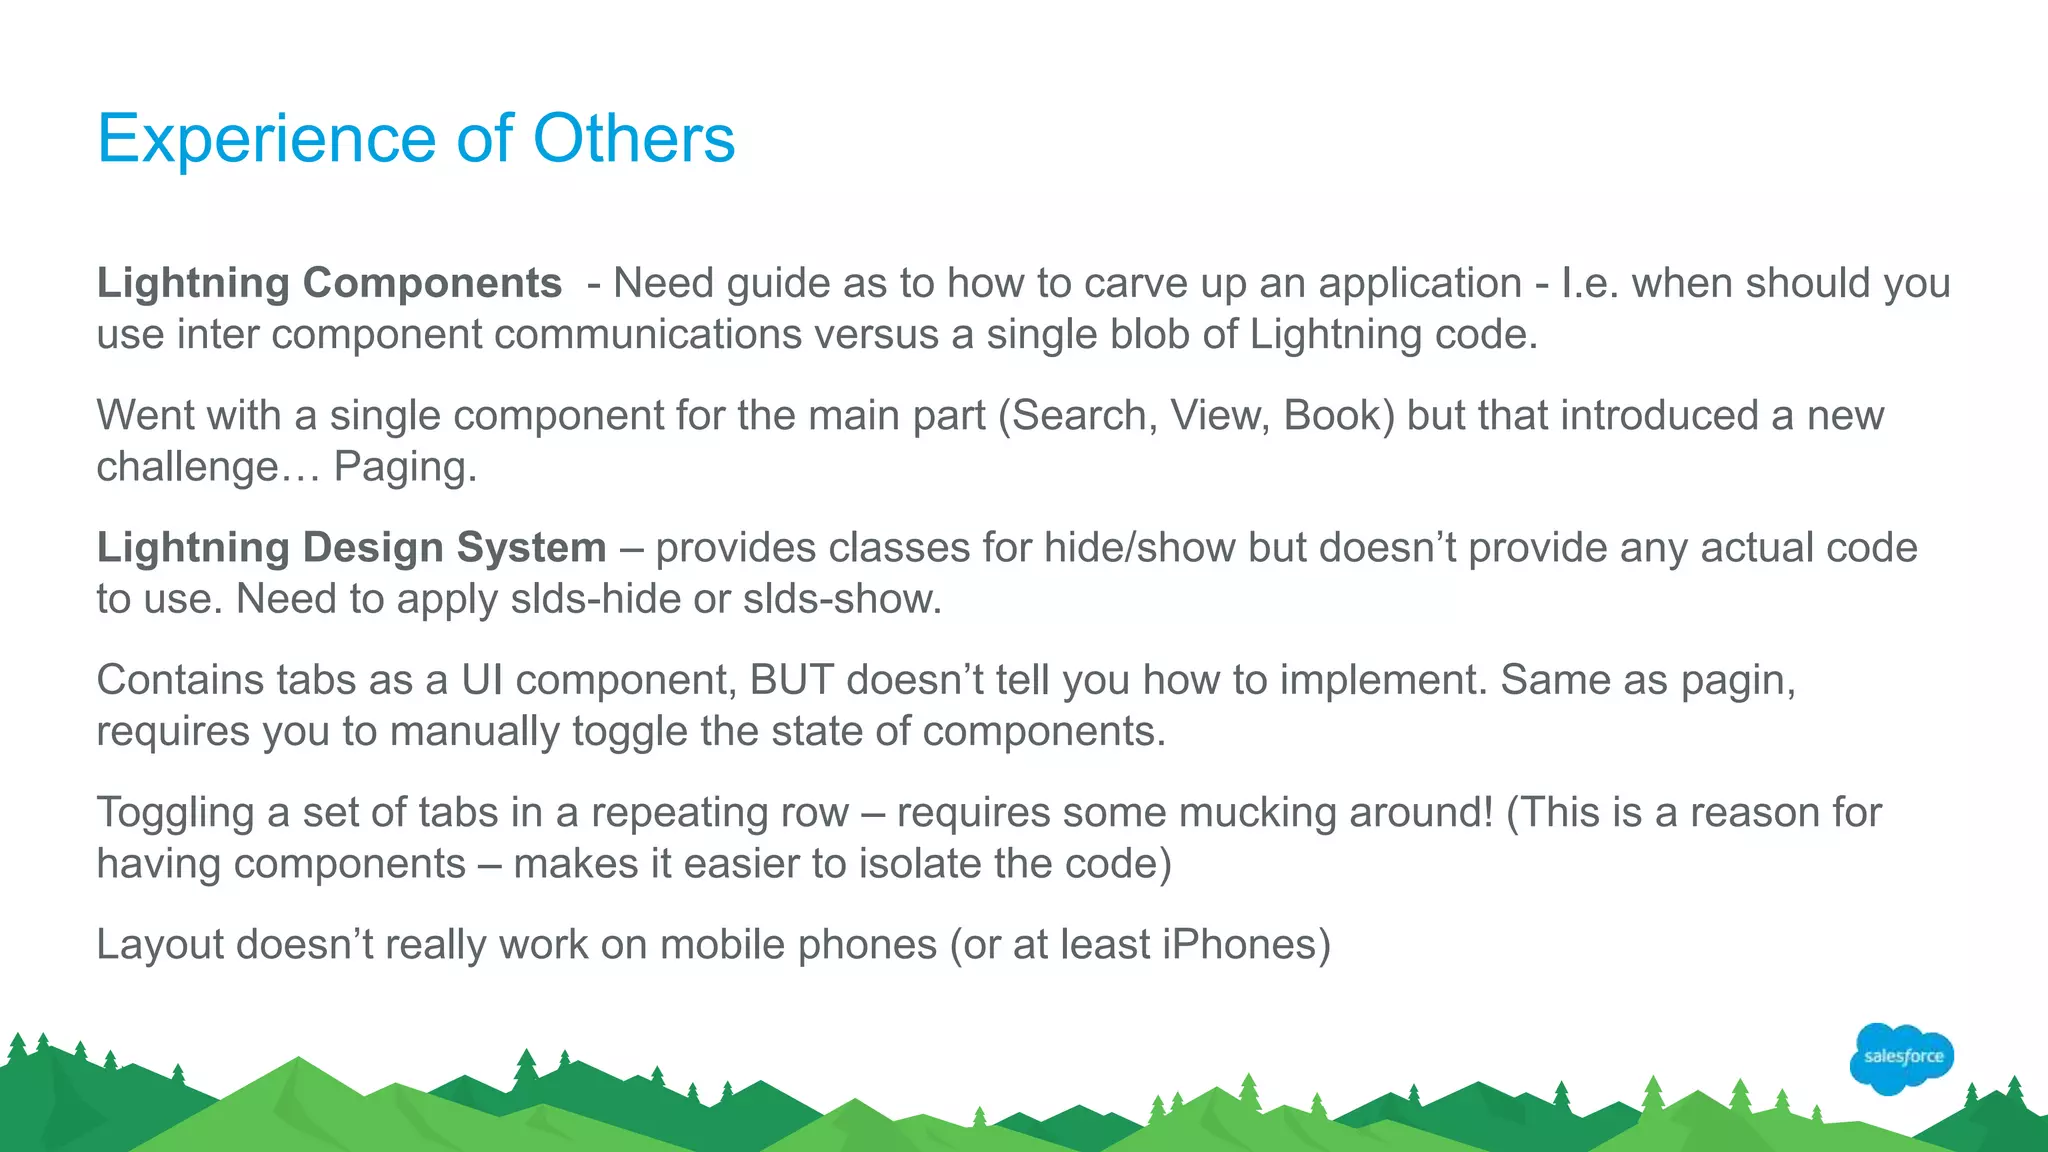
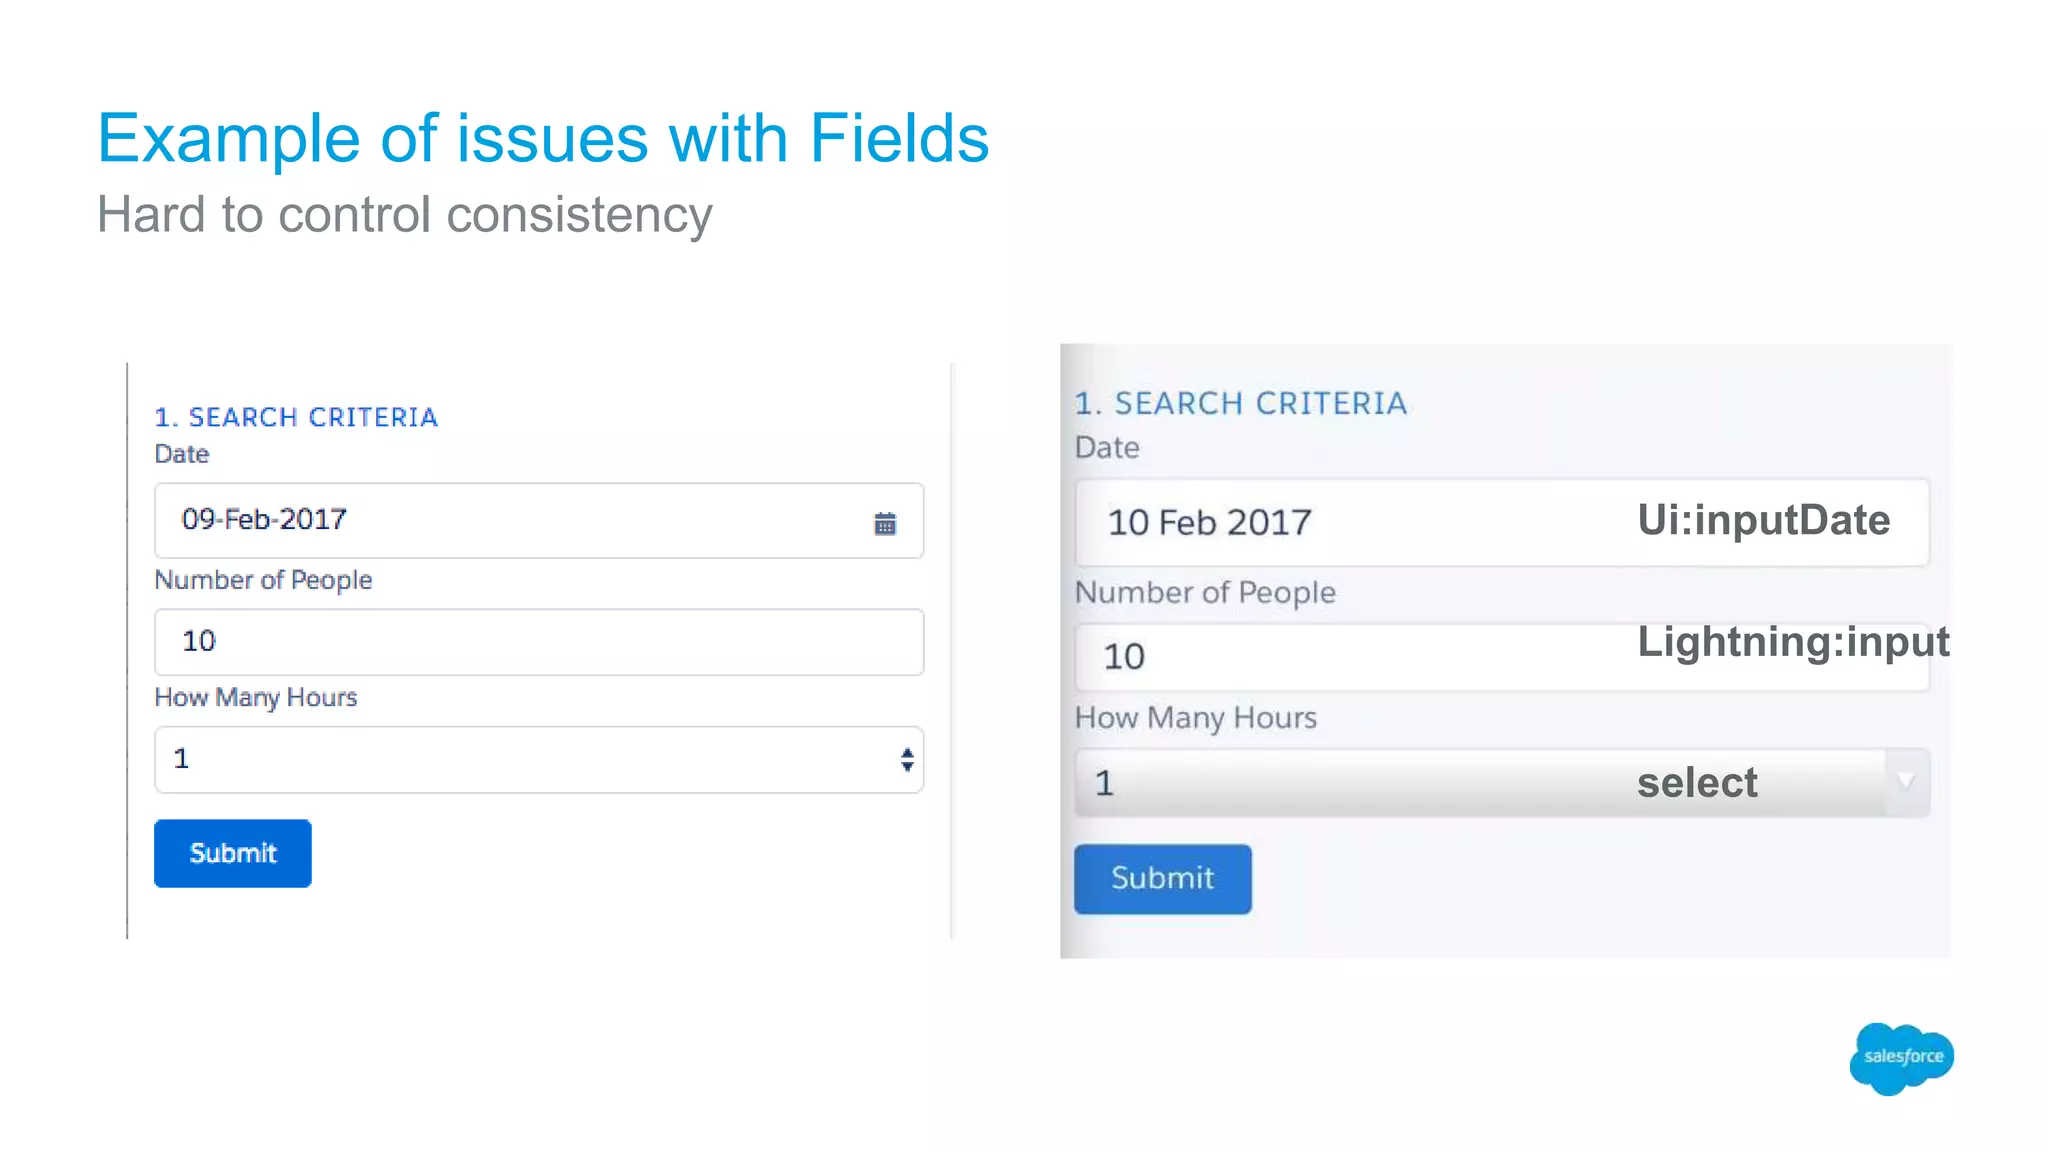
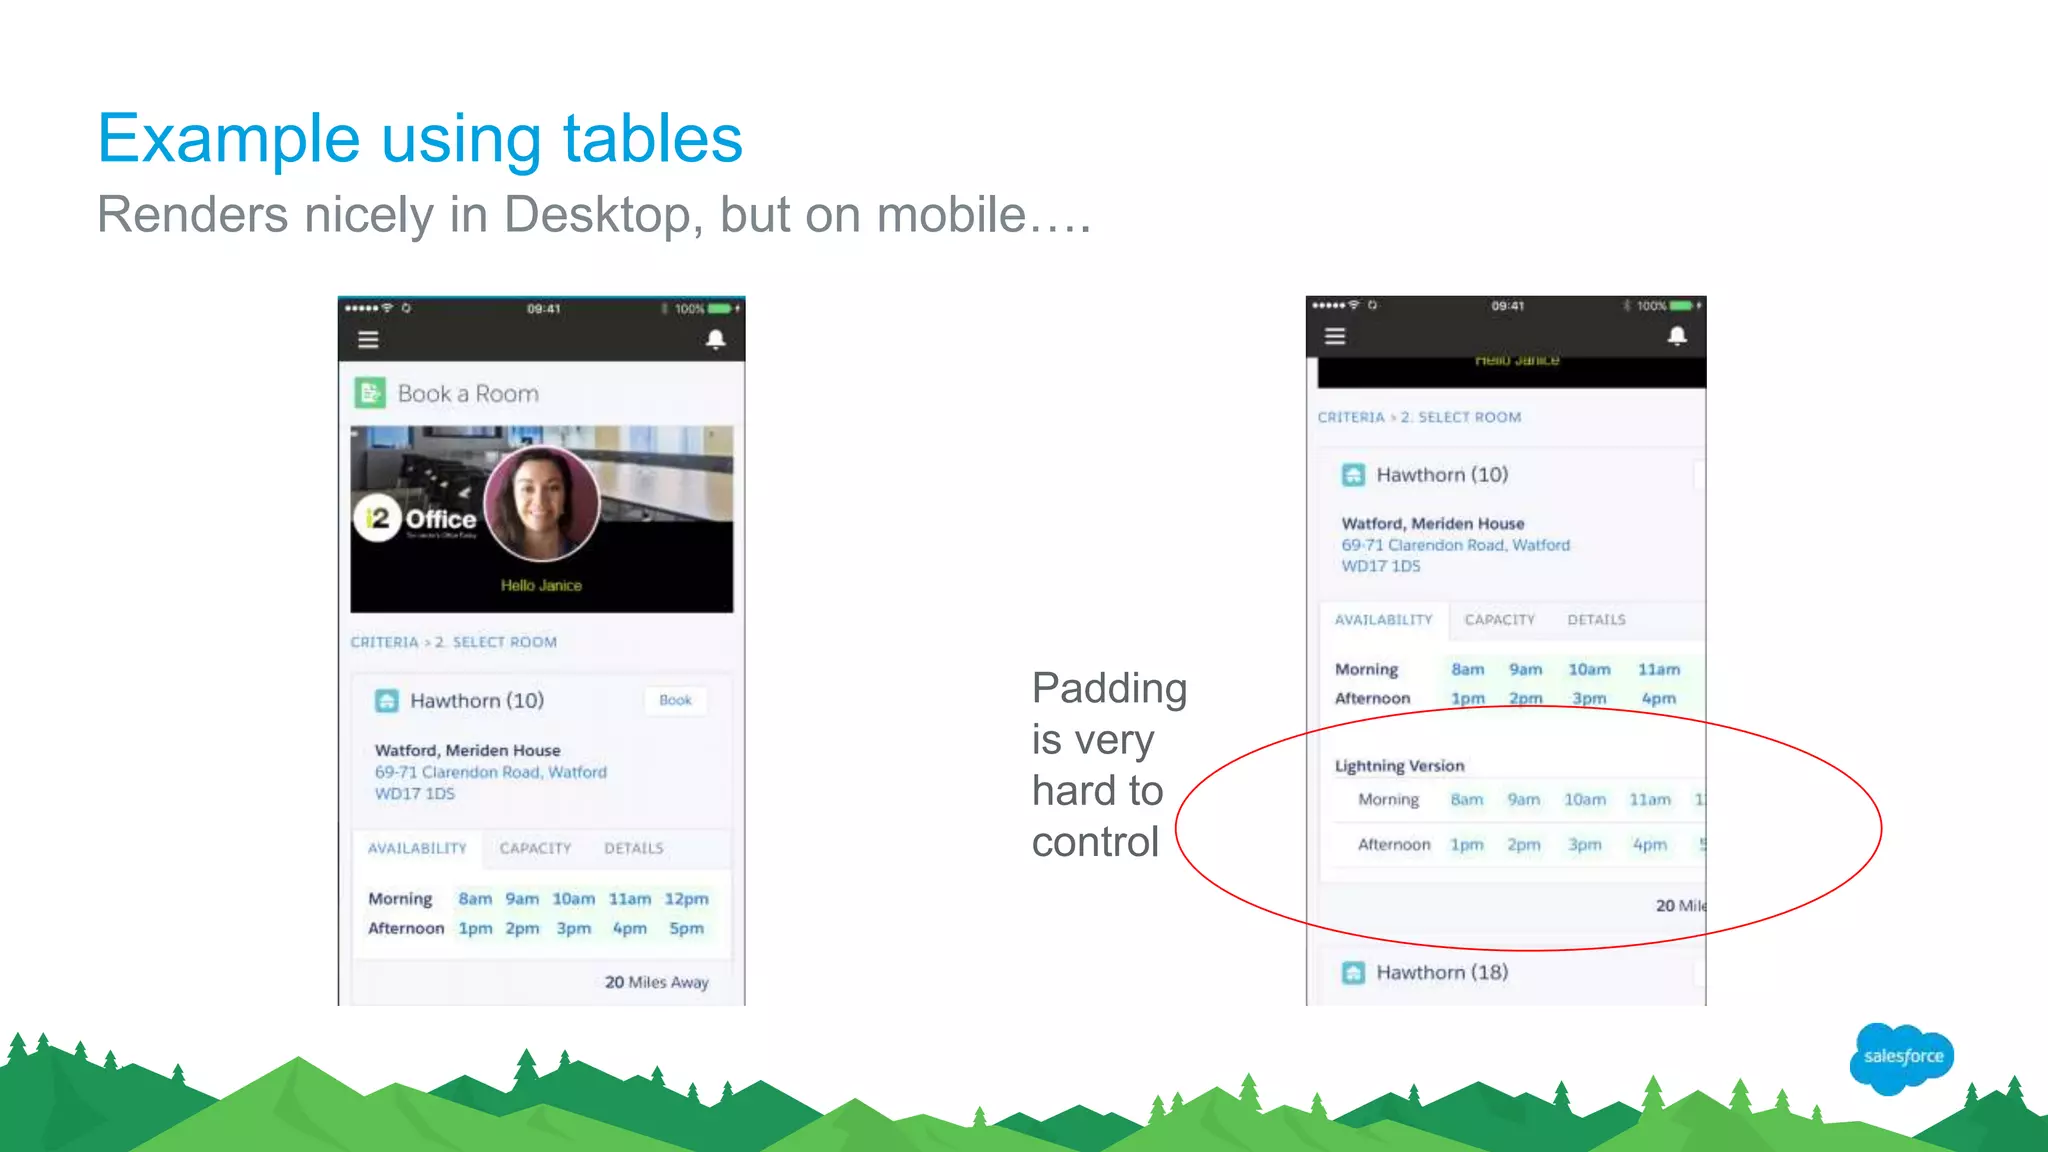
![Layout Issues
Had to use table , tr , td to achieve layout.
(Slds-form does not seem to cater for read
only)
Had to change 8am to 08.00 to stop iOS from
auto inserting a calendar link!
Toggling the radio button doesn’t provide any
guidance on how to retrieve values
[Minor issue, cannot click 08.00 or 13.00 on
mobile device]](https://image.slidesharecdn.com/migratingtolightningpersonalexperiencesamgarforth-170509090527/75/Migrating-to-Salesforce-Lightning-A-Personal-Experience-Presented-to-EA-Forum-by-Sam-Garforth-27-2048.jpg)
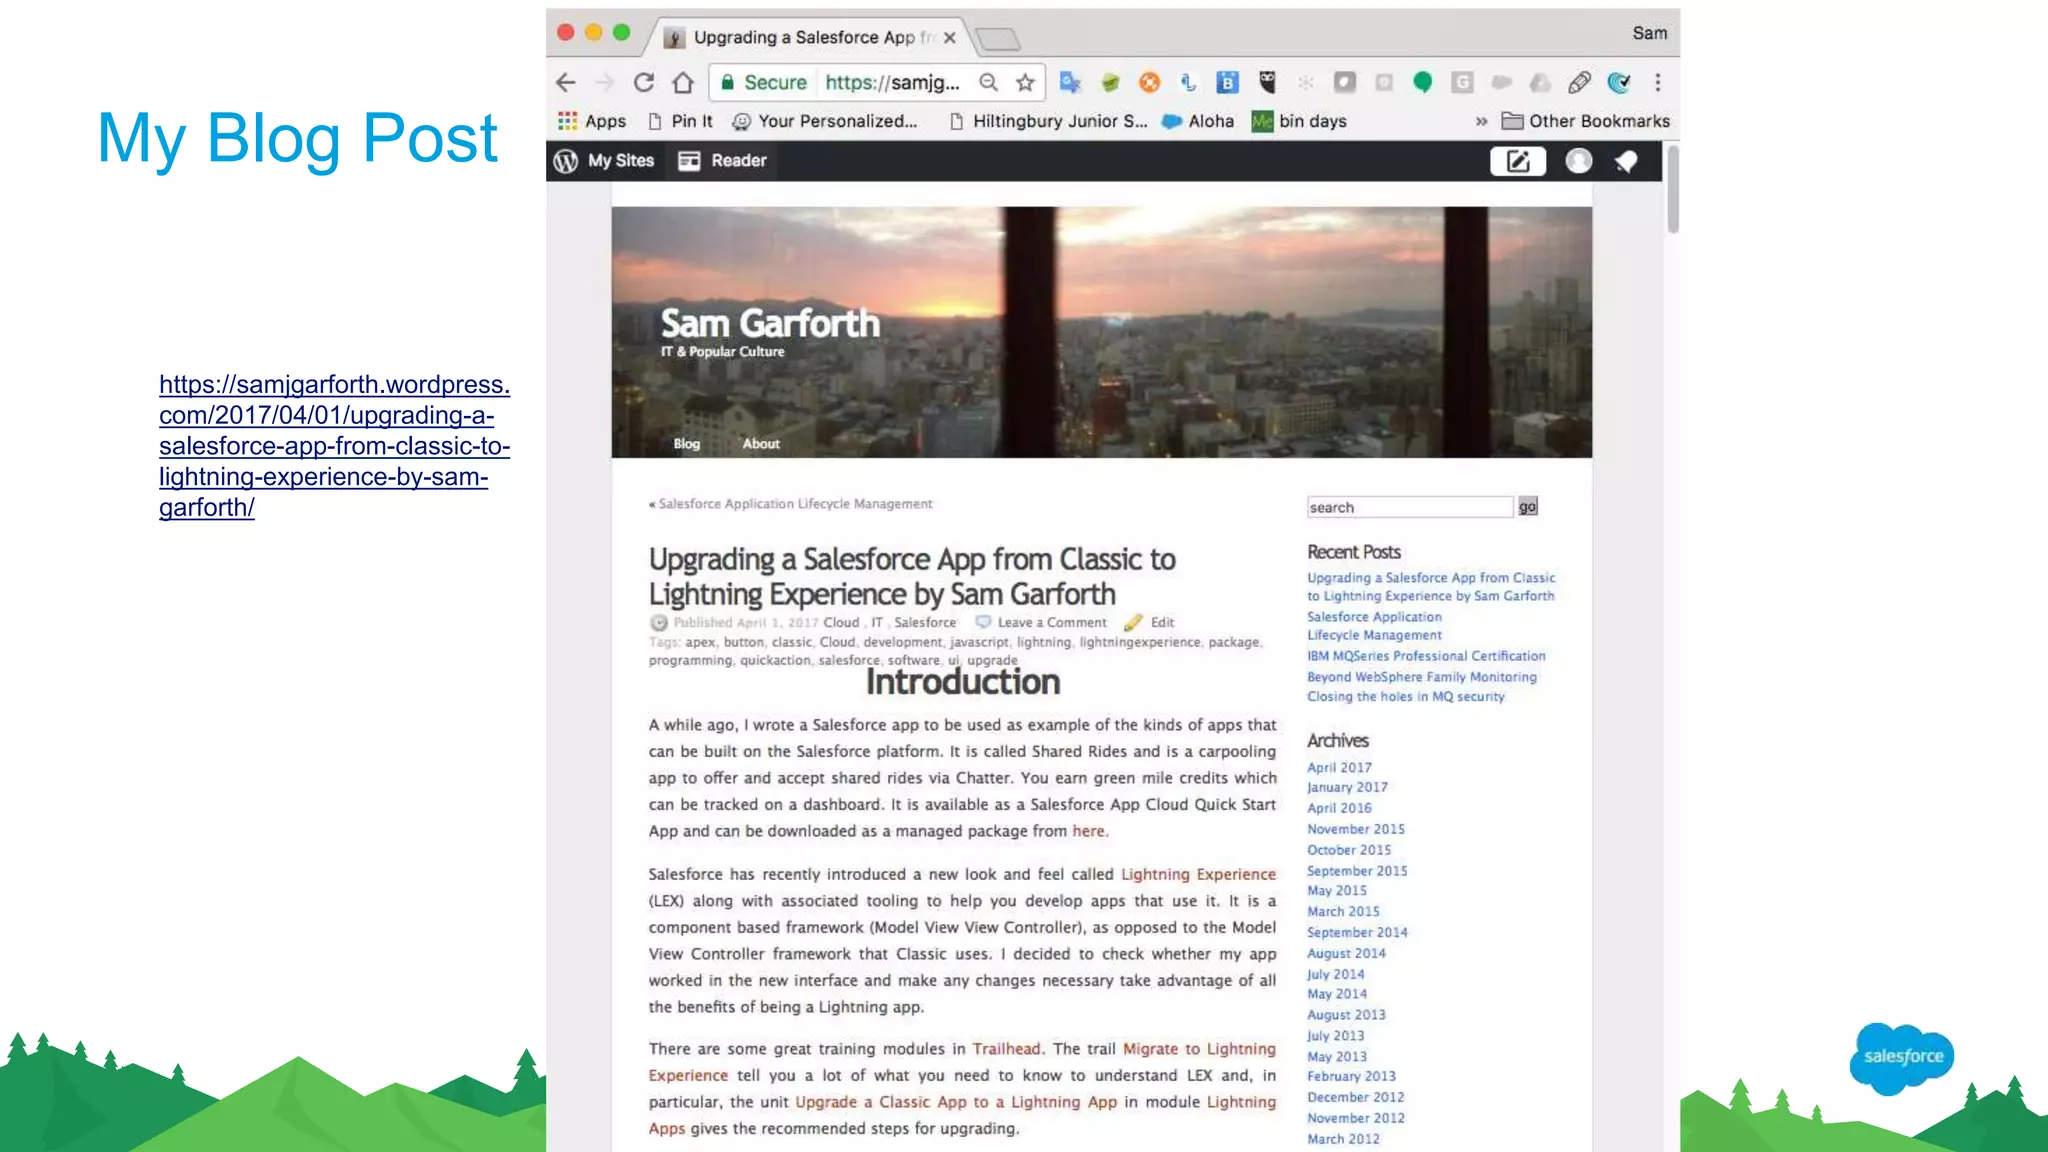
![• Adding a Visualforce page to the Lightning Experience
• Adding Salesforce Lightning Design System to a Visualforce
page
• Using Salesforce Lightning Design System markup
• Using a Visualforce page in a Lightning Experience page
• Creating a Lightning Component
• Converting a Visualforce page to a Lightning Component
• Building a Quick Prospect component [this is how JavaScript
buttons can be replaced]
• Making a Lightning Component Context-aware
• Leveraging Lightning Data Services in a Lightning Component
Set of really useful guides
and information on how to
perform several standard
design tasks.
Learning Lightning
(https://github.com/garazi/LightningNowWorkshop)](https://image.slidesharecdn.com/migratingtolightningpersonalexperiencesamgarforth-170509090527/75/Migrating-to-Salesforce-Lightning-A-Personal-Experience-Presented-to-EA-Forum-by-Sam-Garforth-28-2048.jpg)

The document details the author's personal experience migrating a shared rides app to Salesforce Lightning Experience, highlighting key steps such as creating a new org, upgrading the app, and removing irrelevant features. It emphasizes the need for separate management of classic and lightning versions of the app and discusses the creation of a lightning component to replace a JavaScript button. The author also shares challenges faced with UI consistency, mobile layout issues, and the use of the Salesforce Lightning Design System during the migration process.


![Vibe Coding vs. Spec-Driven Development [Free Meetup]](https://cdn.slidesharecdn.com/ss_thumbnails/vibecodingvsspecdrivendevelopment-251209105622-43f455e7-thumbnail.jpg?width=640&height=640&fit=bounds)


