
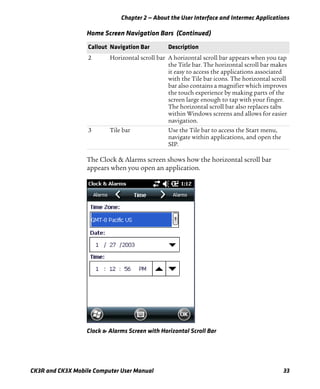
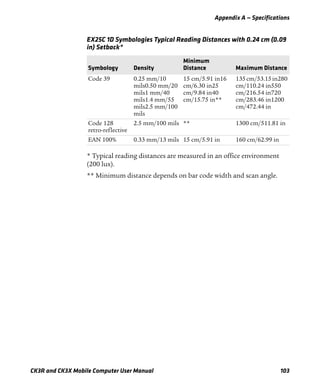
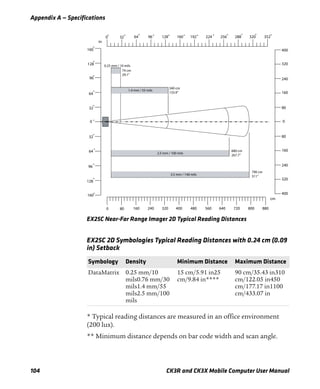
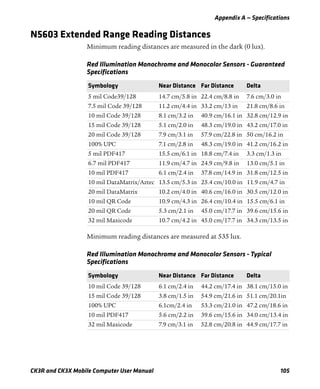
Download to read offline


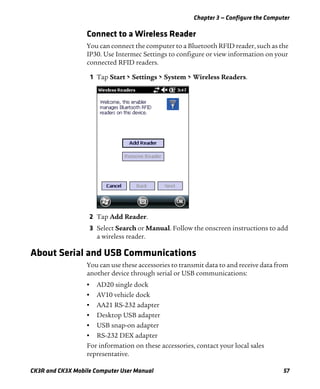


![Appendix C — Keypads and Keystrokes
124 CK3R and CK3X Mobile Computer User Manual
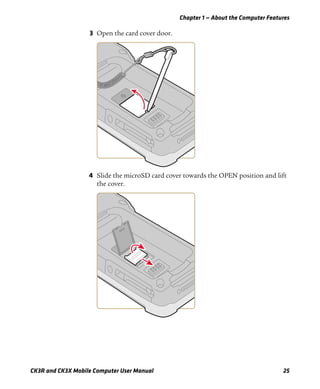
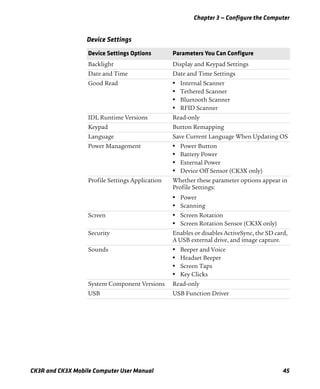
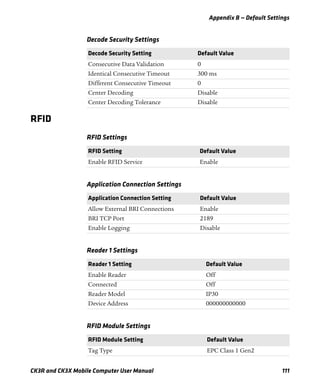
Caps Lock
Field Exit
Up Arrow
Down Arrow
Left Arrow
Right Arrow
Control
Alt
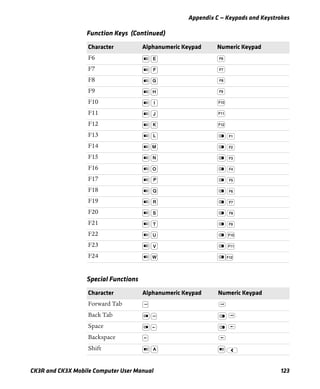
Special Functions (Continued)
Character Alphanumeric Keypad Numeric Keypad
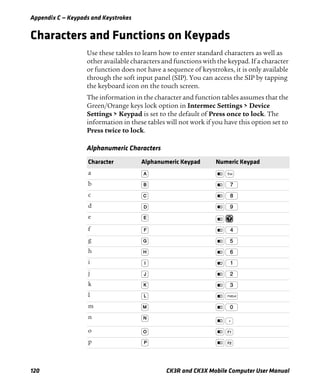
Depending on your computer model, some of the following characters
or functions will not be printed on the keypad.
Other Available Characters and Functions
Character or
Function Alphanumeric Keypad Numeric Keypad
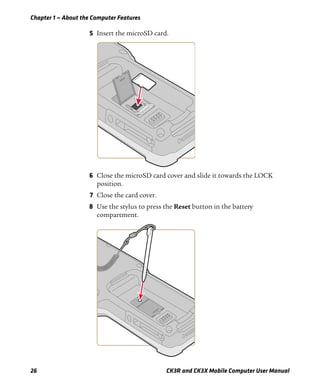
!
@
#
$
%
^
&
*
(
)
_ [Enter]
| [Enter]
:](https://image.slidesharecdn.com/ck3rck3xug-160427225758/85/Manual-Ck3-honeywell-www-codeprint-com-br-138-320.jpg)
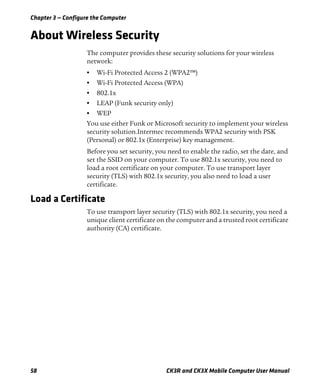
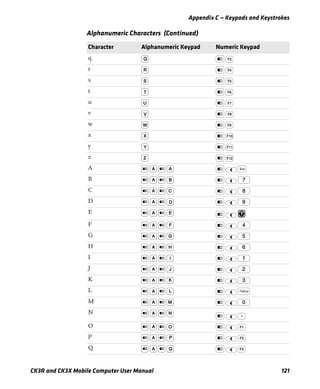
![Appendix C — Keypads and Keystrokes
CK3R and CK3X Mobile Computer User Manual 125
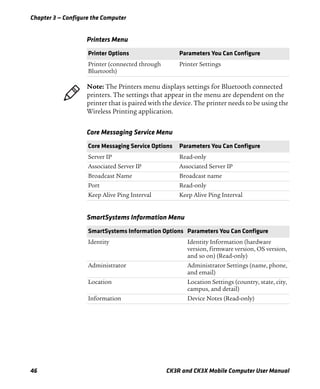
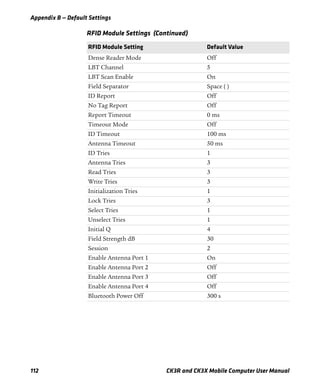
?
;
/
- [Enter]
[Enter]
= N/A
‘ N/A
+ N/A
[ N/A
.
] N/A
, N/A
‘ N/A
“ N/A
Volume Down
OK
Volume Up
Soft Key 1
Soft Key 2
Other Available Characters and Functions (Continued)
Character or
Function Alphanumeric Keypad Numeric Keypad
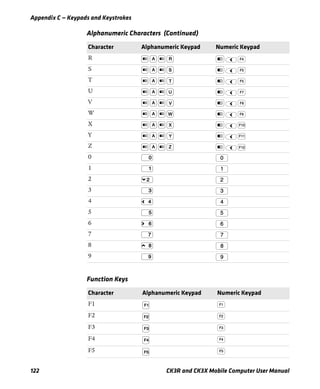
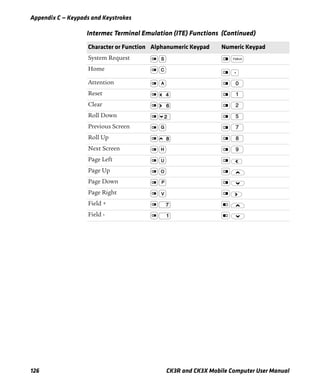
The following ITE functions are only operational when you are using
the ITE application.
Intermec Terminal Emulation (ITE) Functions
Character or Function Alphanumeric Keypad Numeric Keypad
Field Exit](https://image.slidesharecdn.com/ck3rck3xug-160427225758/85/Manual-Ck3-honeywell-www-codeprint-com-br-139-320.jpg)

The document is a user manual for the CK3R and CK3X mobile computers produced by Intermec by Honeywell, detailing operational and service information. It includes safety information, product specifications, battery management, and instructions on configuring features and using applications. Additionally, it provides change logs for updates and outlines copyright and trademark information related to the included software and hardware.


