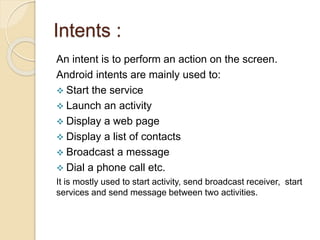
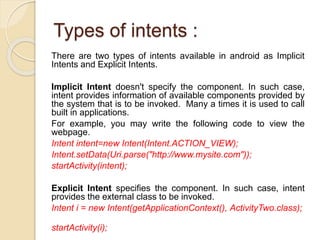
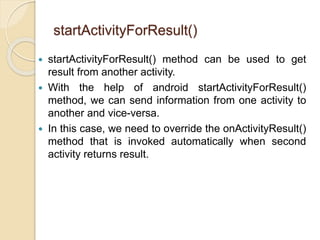
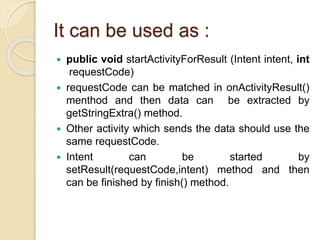
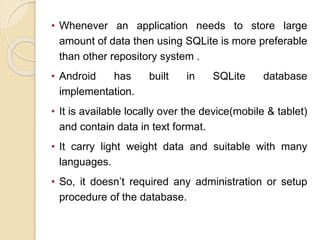
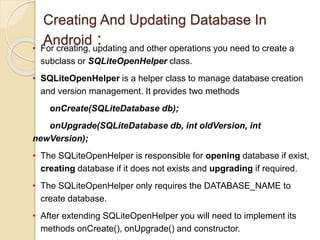
This document provides an overview of intents, activities, broadcast receivers, and services in Android mobile application development. It defines intents as actions that can be performed, such as starting an activity or service. It describes the two types of intents - implicit and explicit. It also covers the lifecycles of activities and broadcast receivers, and distinguishes between started and bound services. Examples are provided for creating applications that use intents, activities, broadcast receivers, and services.


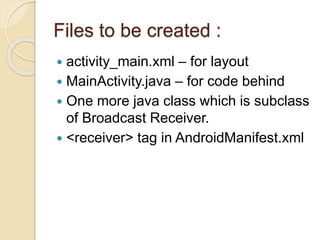


![Insert, Read, Delete & Update
Operation In SqLite:
• To perform insert, read, delete, update operation there are two different ways:
1) Write parameterized queries (Recommended) with the help of ContentValues
object.
2) Write raw queries
• Parameterized Queries: These are those queries which are performed using
inbuilt functions to insert, read, delete or update data. These operation related
functions are provided in SQLiteDatabase class.
• Raw Queries: These are simple sql queries similar to other databases like
MySql, SqlServer etc, In this case user will have to write query as text and
passed the query string in rawQuery(String sql,String [] selectionArgs) or
execSQL(String sql,Object [] bindArgs) method to perform operations.
• Android documentation don’t recommend to use raw queries to perform insert,
read, update, delete operations, always use SQLiteDatabase class’s insert,
query, update, delete functions.](https://image.slidesharecdn.com/madunit5-240228071751-20252c6d/85/MAD-Unit-5-pptxxxxxxxxxxxxxxxxxxxxxxxxxx-75-320.jpg)

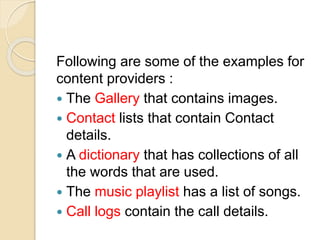
![ Raw Query example :
public void insertItem(Item item)
{
String query = "INSERT INTO " + ItemTable.NAME + " VALUES (0,?,?)";
SQLiteDatabase db = getWritableDatabase();
db.execSQL(query, new String[]{item.name, item.description});
db.close(); }](https://image.slidesharecdn.com/madunit5-240228071751-20252c6d/85/MAD-Unit-5-pptxxxxxxxxxxxxxxxxxxxxxxxxxx-77-320.jpg)
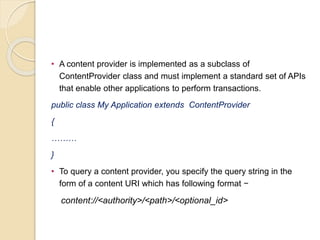
![SQLiteDatabase db=getReadableDatabase();
Cursor cursor =db.rawQuery("select
user_name from users where mobile=? and
password=?",new String[]{mobile,password});](https://image.slidesharecdn.com/madunit5-240228071751-20252c6d/85/MAD-Unit-5-pptxxxxxxxxxxxxxxxxxxxxxxxxxx-78-320.jpg)