Downloaded 349 times


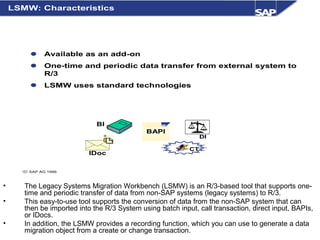
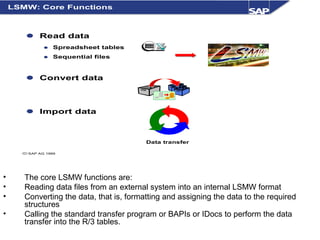
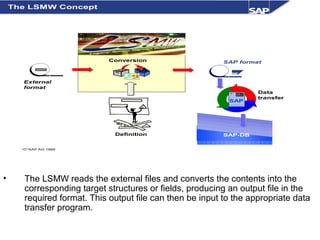
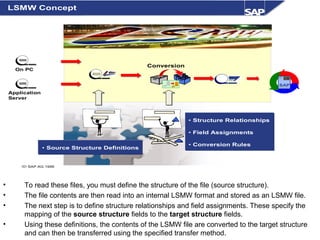
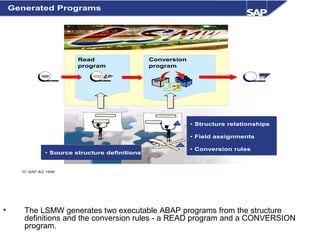
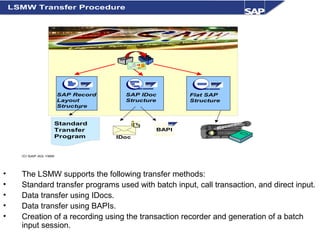
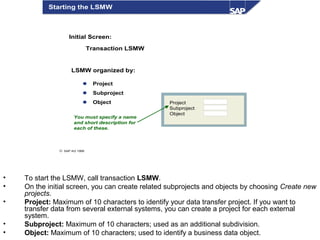

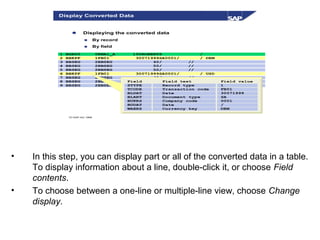
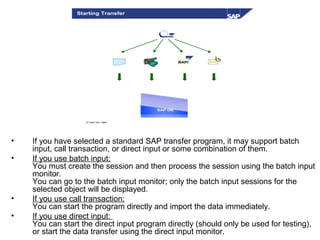

The LSMW (Legacy System Migration Workbench) is a tool that supports one-time and periodic transfer of data from non-SAP systems to an SAP R/3 system. It provides a simple interface for transferring data with little to no coding required. The LSMW reads external data files, converts the data to the appropriate SAP format based on defined rules, and imports the converted data into SAP using standard transfer methods like batch input, BAPIs, or IDocs. The main steps in using the LSMW are defining source and target structures, mapping source fields to targets, reading and converting the data, and importing it into SAP.


![20260201 [FOSDEM] gomodjail - library sandboxing for Go modules.pdf](https://cdn.slidesharecdn.com/ss_thumbnails/20260201fosdemgomodjail-librarysandboxingforgomodules-260201225659-76609ec4-thumbnail.jpg?width=640&height=640&fit=bounds)


