Download to read offline

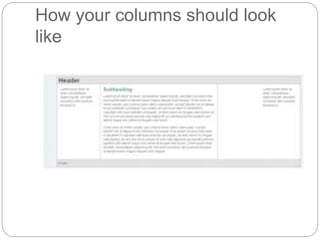
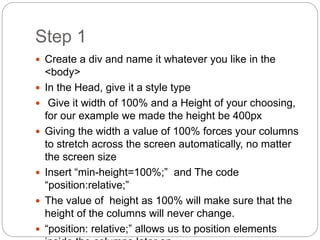
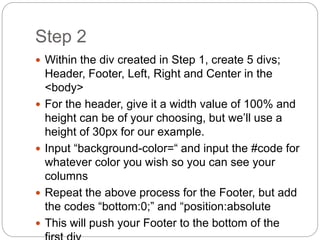
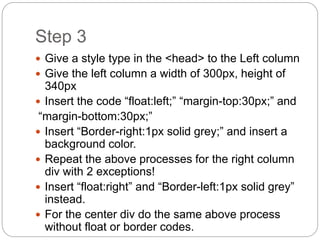
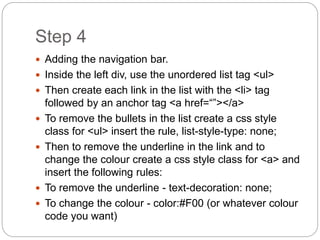
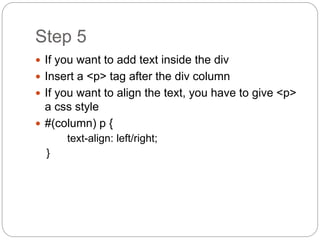
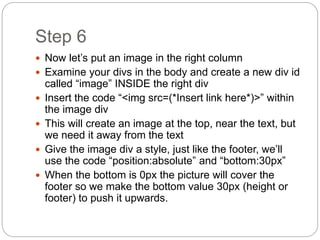

This document provides a 7 step process for creating a 3 column liquid layout in CSS. The steps include: creating divs for the header, footer, left column, right column and center column; adding styles like width, height, borders and floats to position the columns; inserting a vertical navigation bar in the left column; adding text and images to the columns; and adding a background image to the body. Precise CSS code is provided for each step to style and position the columns, navigation, text, images and background properly.