
Download to read offline


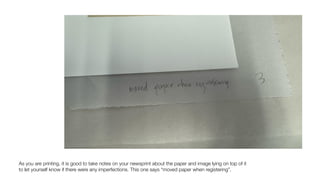


This document provides detailed instructions for preparing and operating a printing press, including setting up tools, inking plates, and executing the printing process. Key steps involve ensuring proper alignment, setting pressure, and cleaning tools between prints to maintain quality. Additionally, it emphasizes the importance of documenting print order and imperfections, as well as proper cleanup techniques after printing.


