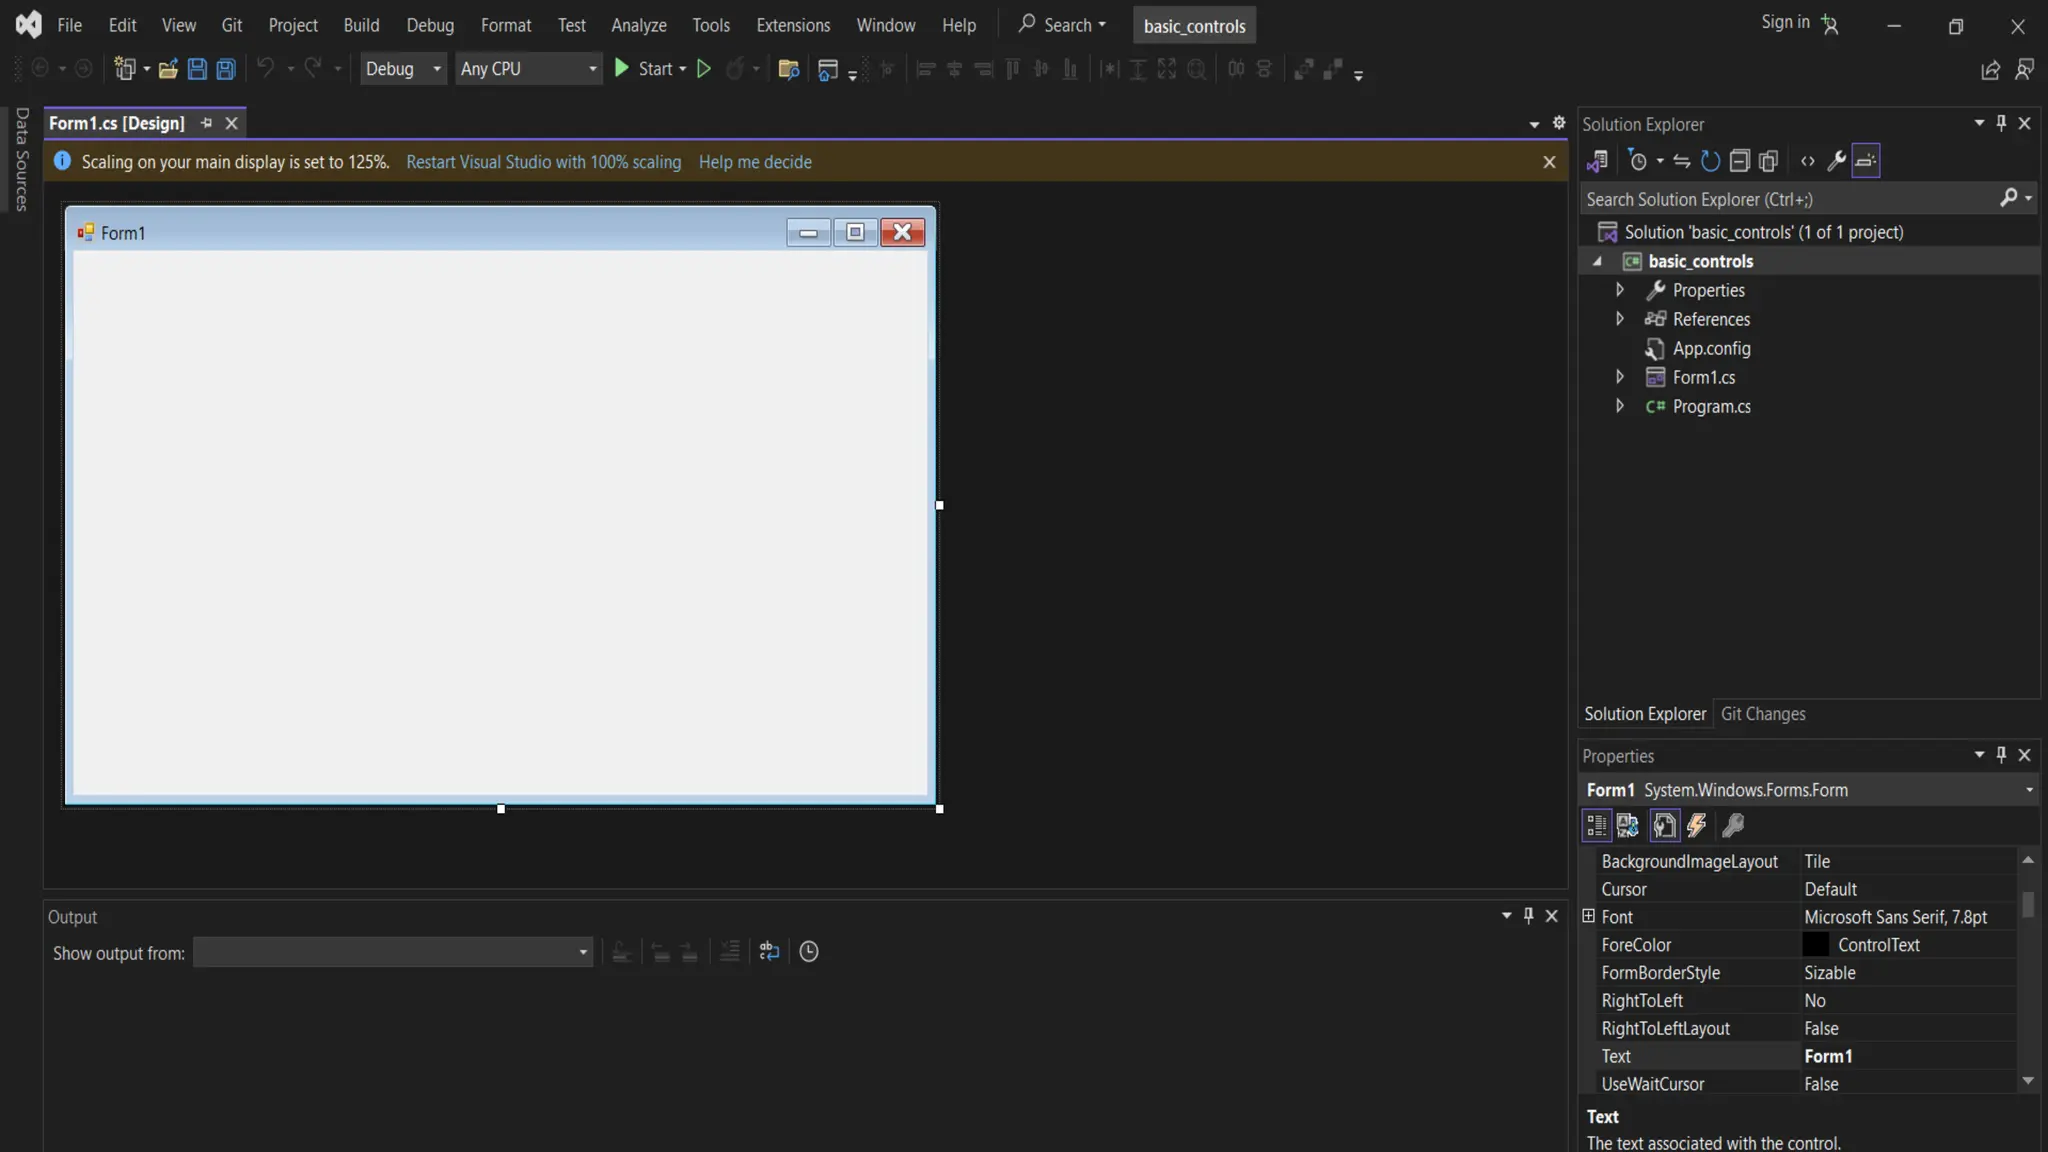
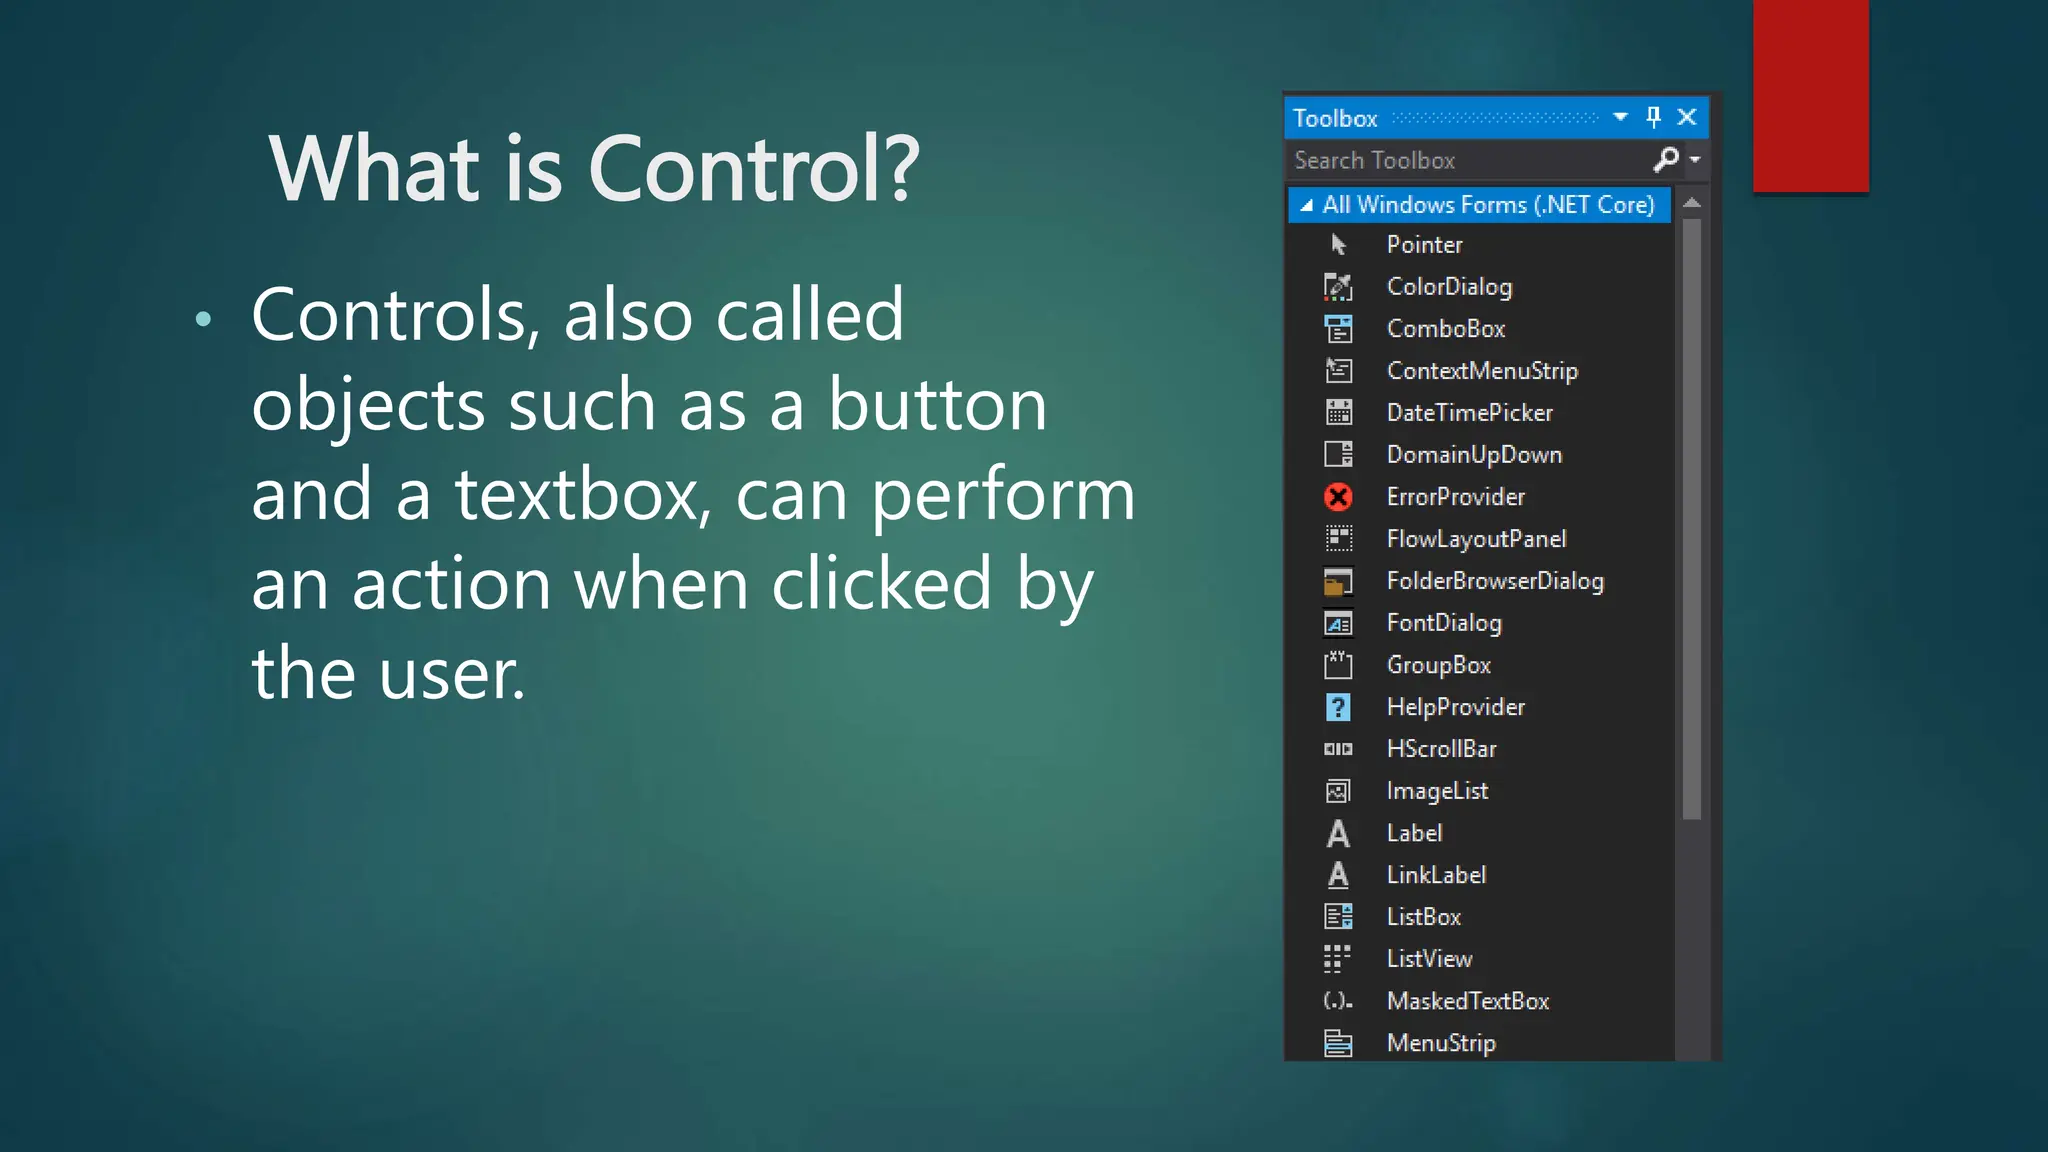
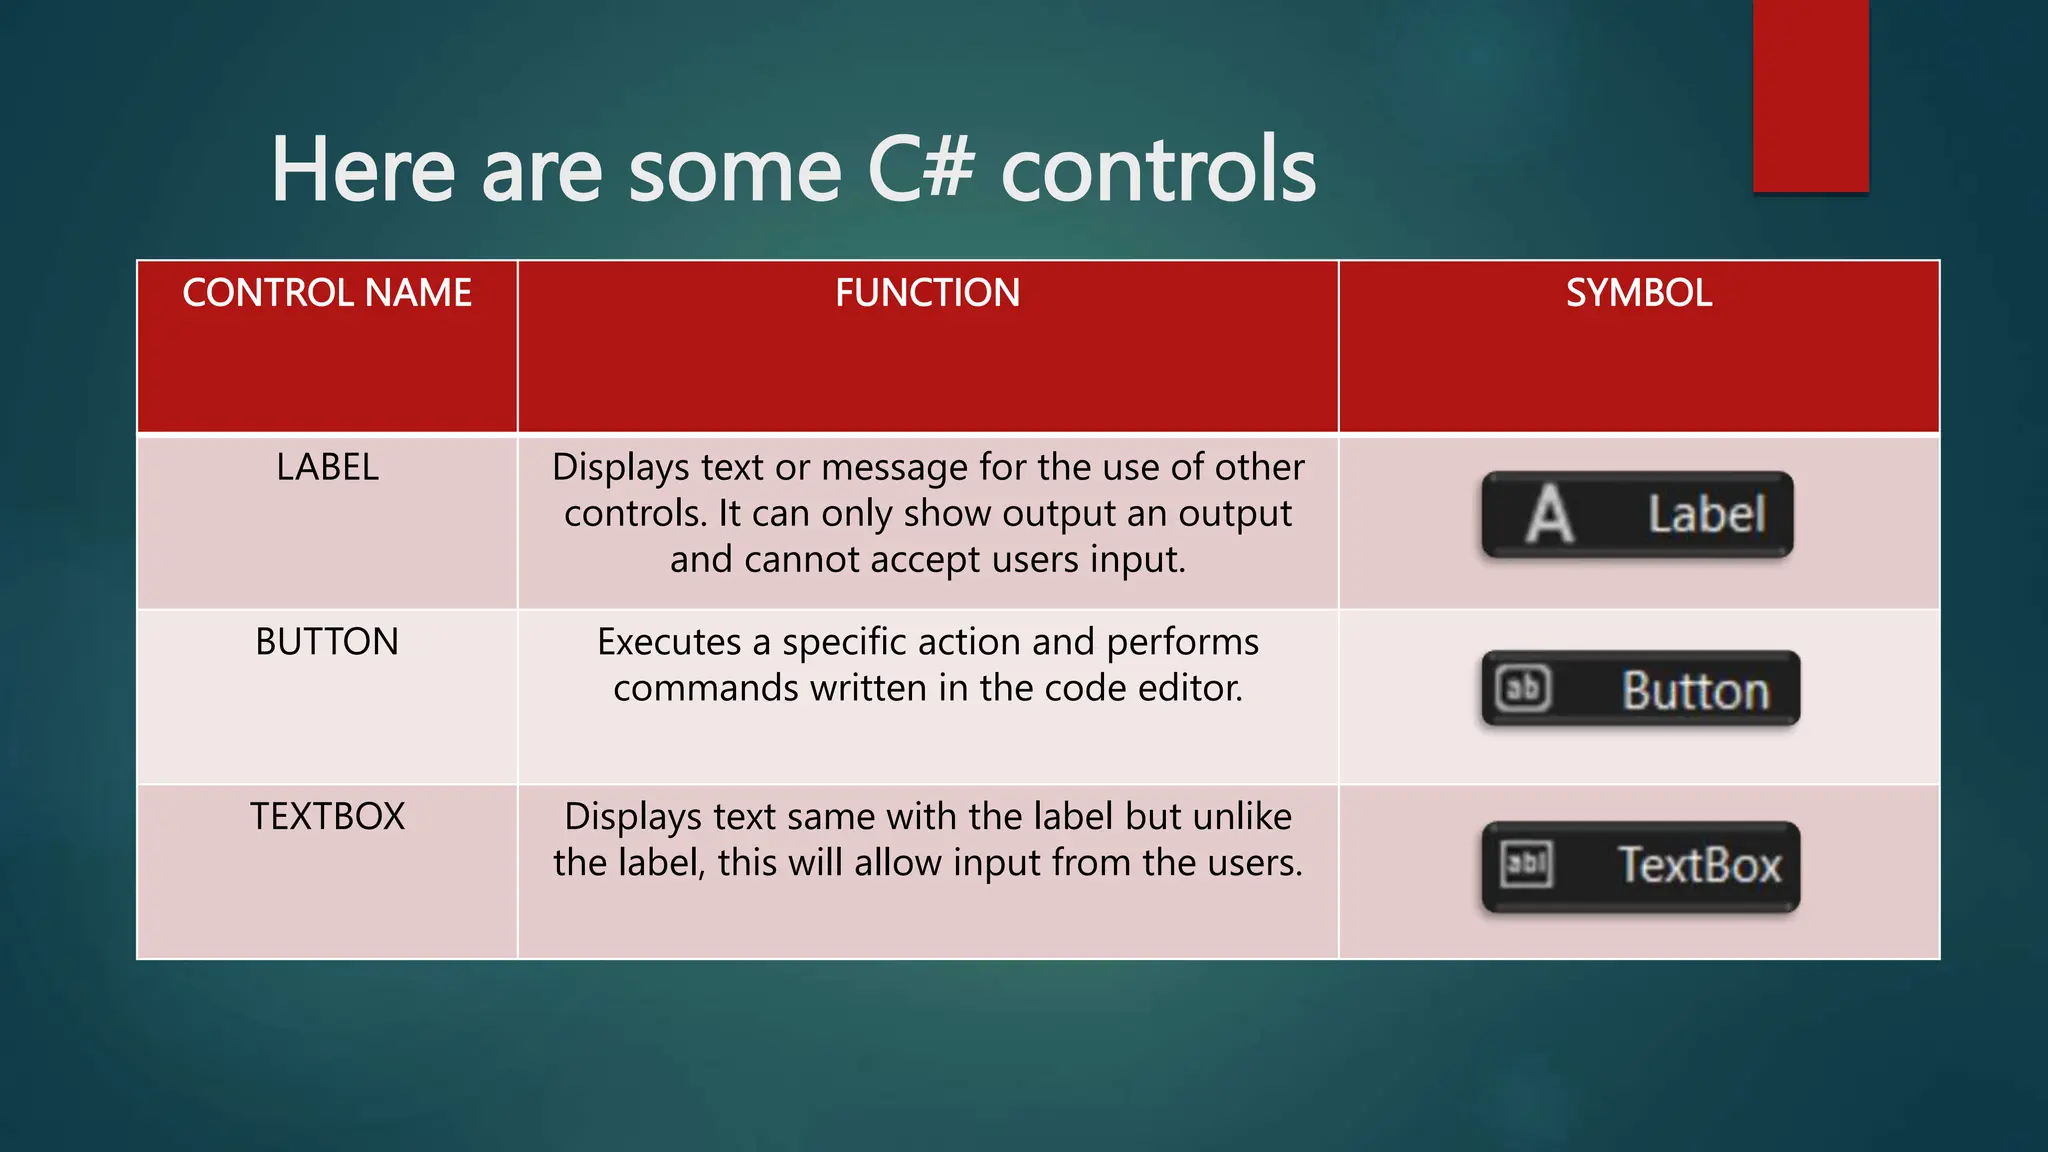
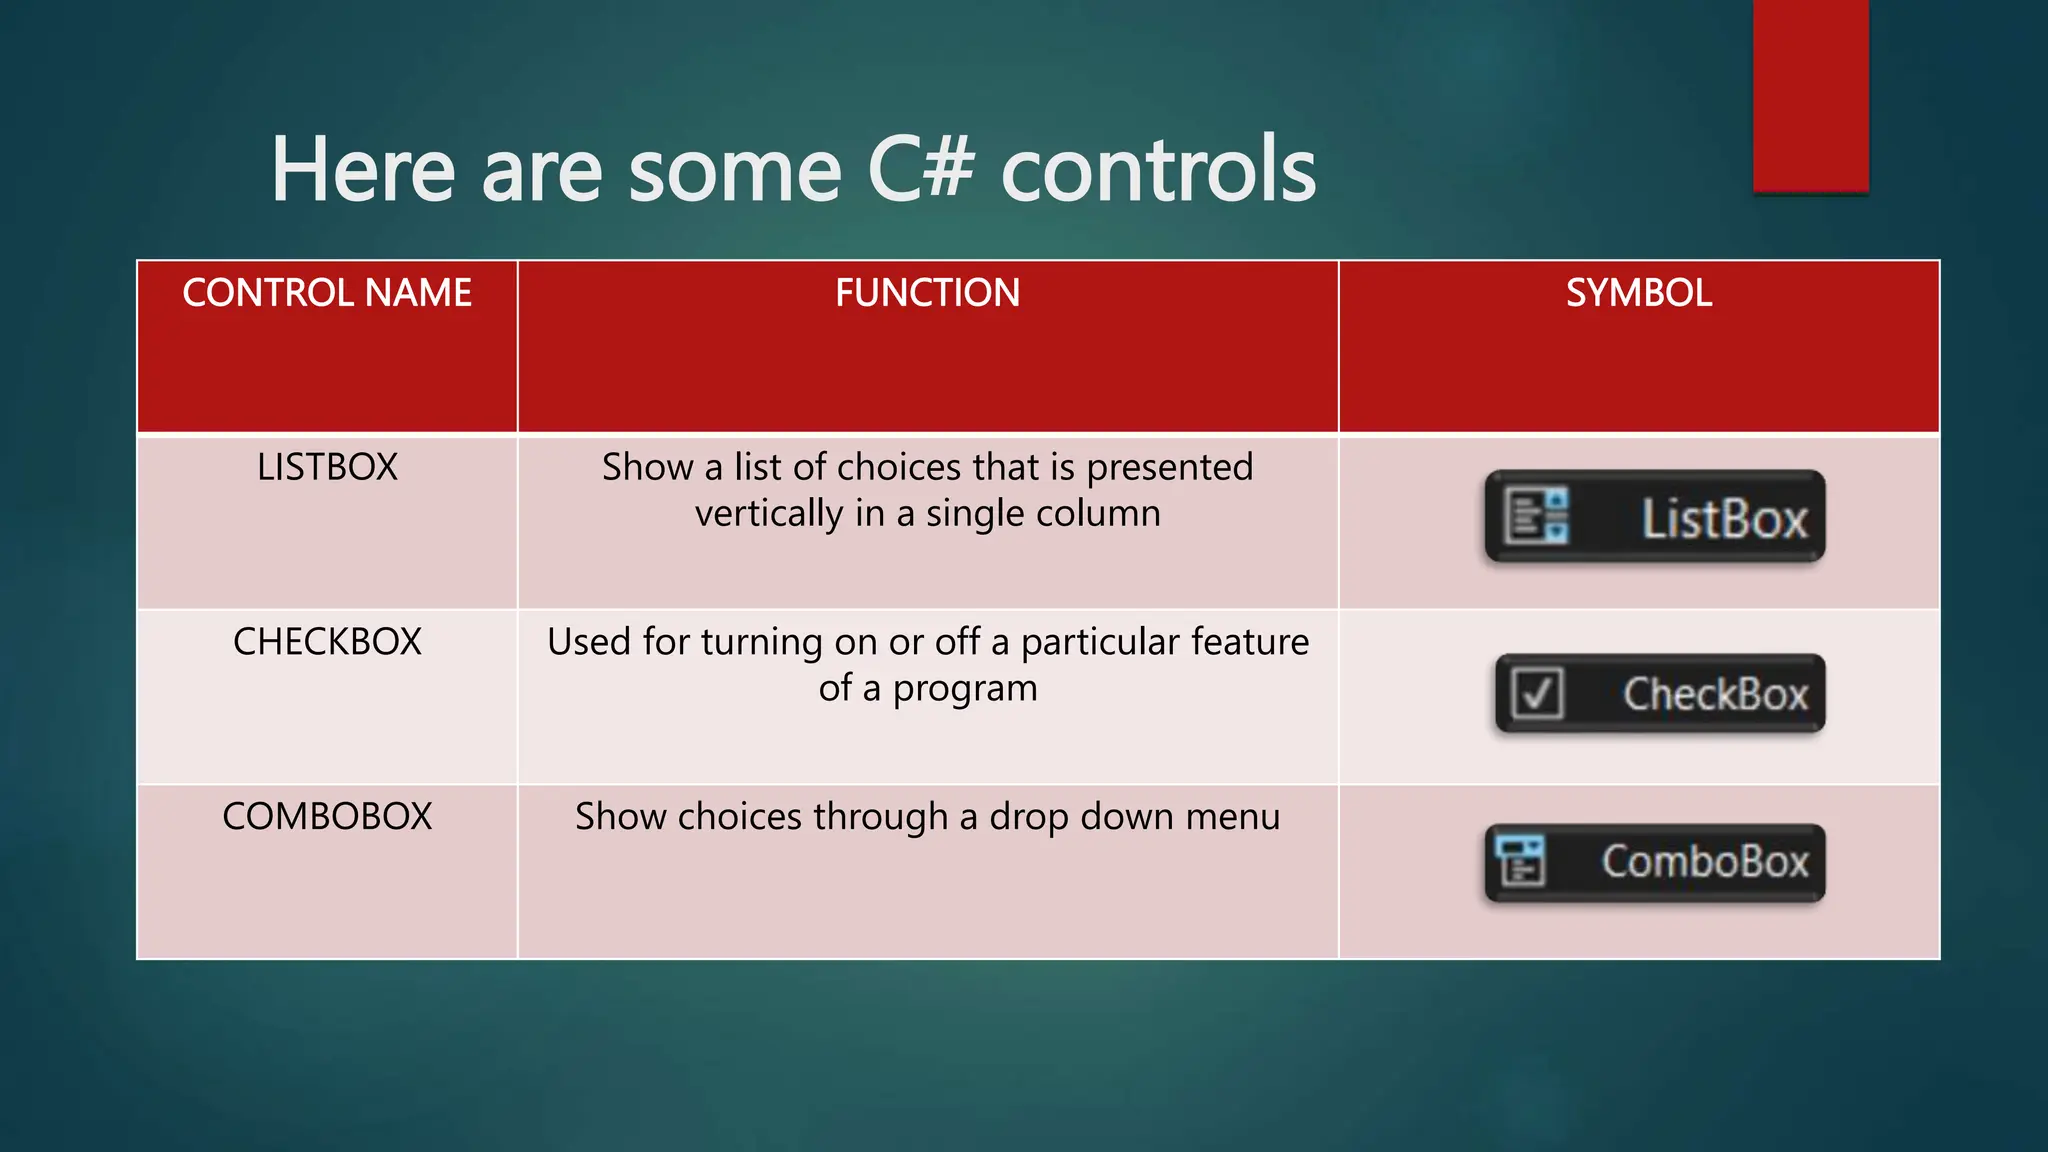
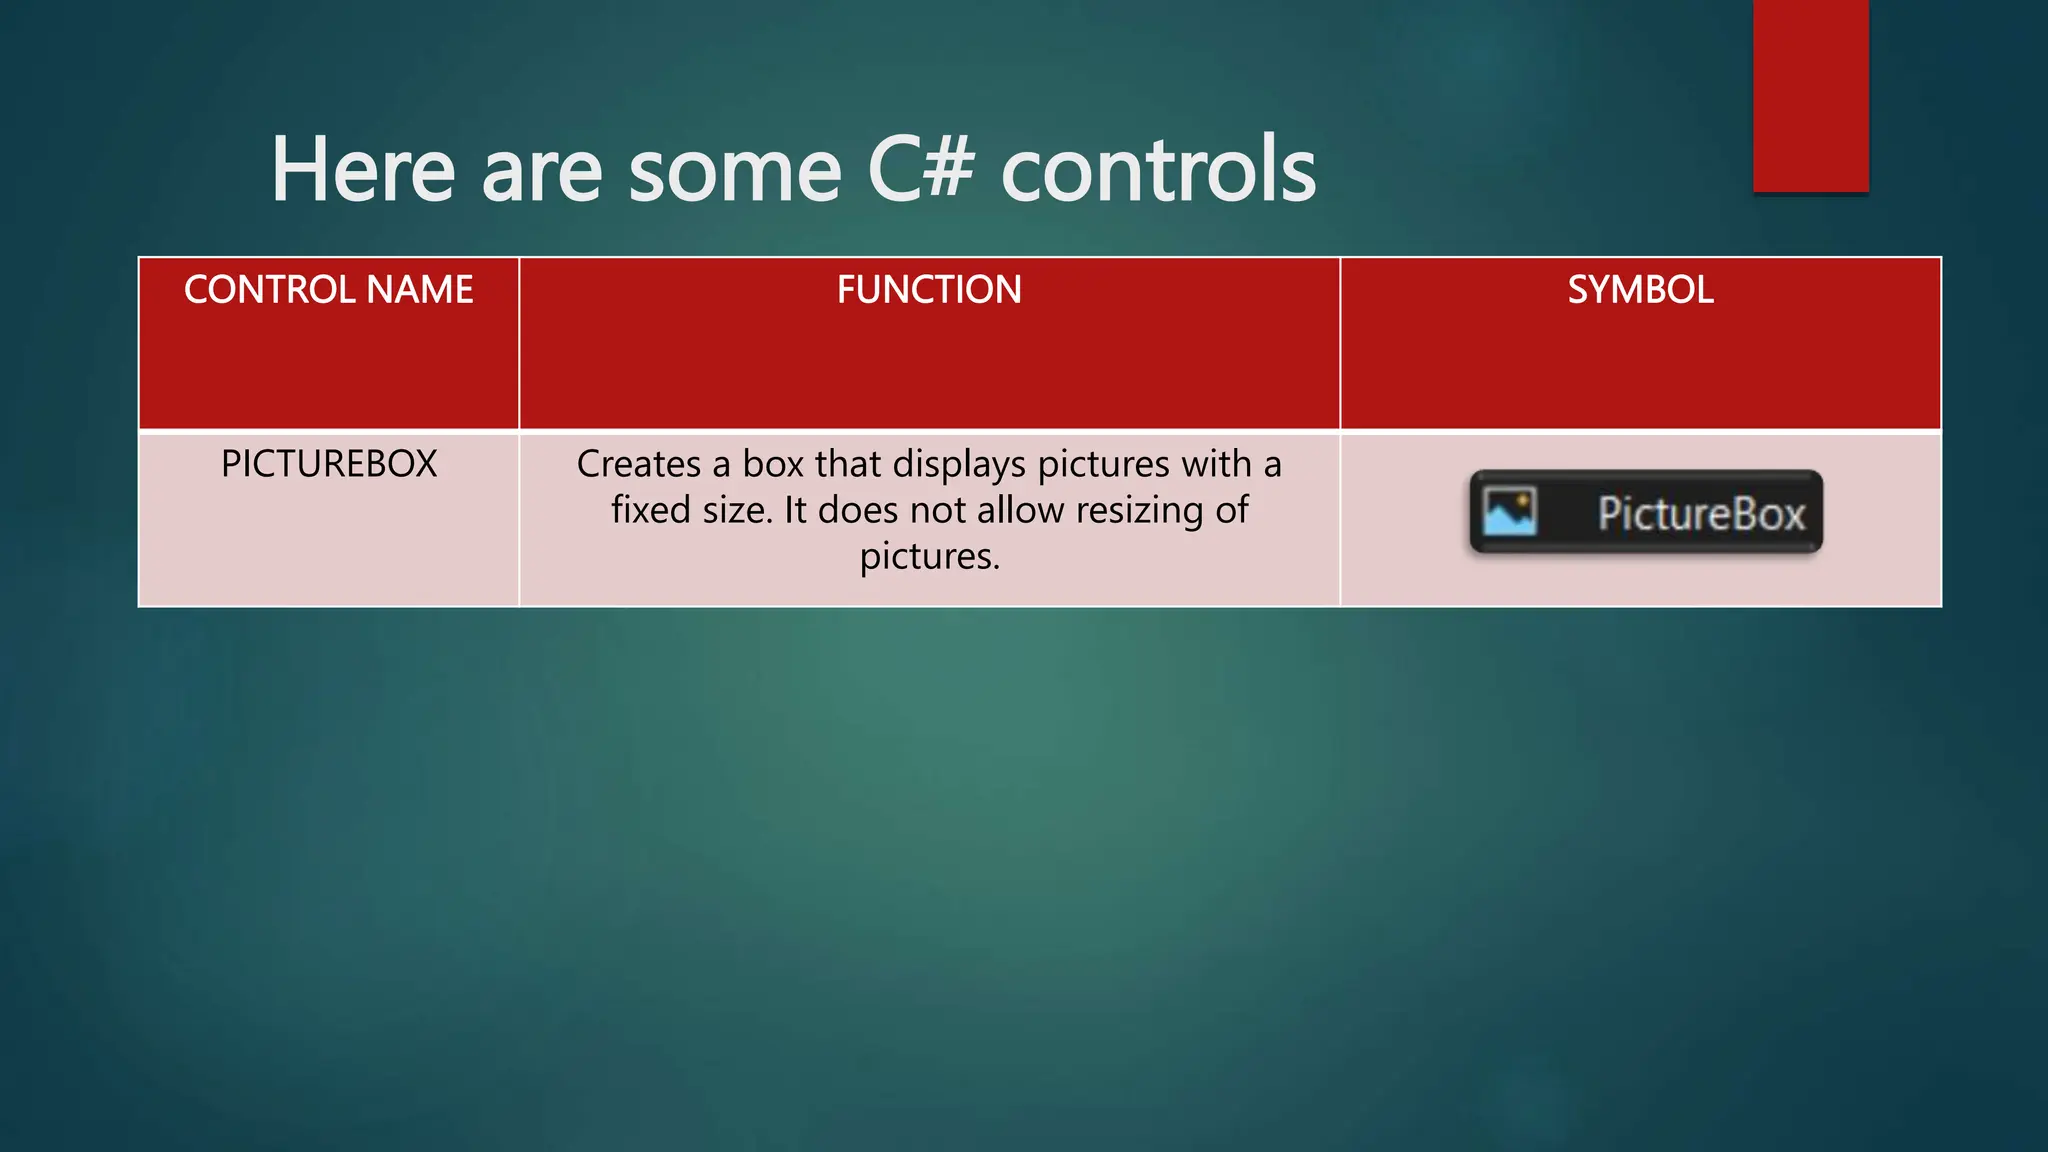
Building Windows
Form Application
LESSON 9:
Prepared by: Ms. Liezeth O. Mesa
The C# Windows Form Application
Environment
In creating a Windows-based program,
you will design and layout different
controls on the user interface.
The windows form is an important part in
developing any windows-based
application because it is where you design
the layout of the application.
Four Steps in Creating WFA
1. Create the interface.
2. Set the properties for the controls.
3. Write the code.
4. Test the code.
To add controls on the form, do
either the following:
• Double-click the control in the toolbox. This
places the control with a default height and
width in the center form.
• Click once on the form in the toolbox, then
move your mouse to the position on the form
where you want to begin drawing the control.
To add code in control, do these:
• Double-click the control. The code editor will
appear.
• Type in the code needed for the control.
LET’S work it out!
Activity 9.1: Create your first windows
forms application
Page 118 - 120
What is Control?
• Controls, also called
objects such as a button
and a textbox, can perform
an action when clicked by
the user.
Here are some C# controls
CONTROL NAME FUNCTION SYMBOL
LABEL Displays text or message for the use of other
controls. It can only show output an output
and cannot accept users input.
BUTTON Executes a specific action and performs
commands written in the code editor.
TEXTBOX Displays text same with the label but unlike
the label, this will allow input from the users.
Here are some C# controls
CONTROL NAME FUNCTION SYMBOL
LISTBOX Show a list of choices that is presented
vertically in a single column
CHECKBOX Used for turning on or off a particular feature
of a program
COMBOBOX Show choices through a drop down menu
Here are some C# controls
CONTROL NAME FUNCTION SYMBOL
PICTUREBOX Creates a box that displays pictures with a
fixed size. It does not allow resizing of
pictures.
Naming Convention
• In naming a control in C#, the following are also
observed and followed:
1. It should not start with number.
2. The underscore symbol can only be used.
3. It must not include a space or a blank.
PREFIX OBJECT TYPE
cbo combo box
chk checkbox
cmd button
frm form
lbl label
lst list box
mnu menu
opt option button
pic picture box
shp shape
txt textbox
NOTE: we use the following Prefix in changing the properties
(NAME) of each control.
Example:
txtNum1 as
name/code
The button and textbox control
• To understand more about the Button and Textbox
controls, here is a sample program called my
calculator.
Let’s try Activity 9.2
Page 123-127
THANK YOU! ;)
Naming Convention
• In addition, the following are recommended:
1. Start each word with capital letters. For example:
FirstName and MyFirstName.
2. Use verb for function and method names. For
Example: AddNewRecord or CloseMenu.
3. Use prefix “I”, in declaring the name for interface,
followed by a noun or a noun phrase.

lesson-9-Building-Windows-Form-Application.pptx

  • 1.
    Building Windows Form Application LESSON9: Prepared by: Ms. Liezeth O. Mesa
  • 2.
    The C# WindowsForm Application Environment In creating a Windows-based program, you will design and layout different controls on the user interface. The windows form is an important part in developing any windows-based application because it is where you design the layout of the application.
  • 4.
    Four Steps inCreating WFA 1. Create the interface. 2. Set the properties for the controls. 3. Write the code. 4. Test the code.
  • 5.
    To add controlson the form, do either the following: • Double-click the control in the toolbox. This places the control with a default height and width in the center form. • Click once on the form in the toolbox, then move your mouse to the position on the form where you want to begin drawing the control.
  • 6.
    To add codein control, do these: • Double-click the control. The code editor will appear. • Type in the code needed for the control.
  • 7.
    LET’S work itout! Activity 9.1: Create your first windows forms application Page 118 - 120
  • 8.
    What is Control? •Controls, also called objects such as a button and a textbox, can perform an action when clicked by the user.
  • 9.
    Here are someC# controls CONTROL NAME FUNCTION SYMBOL LABEL Displays text or message for the use of other controls. It can only show output an output and cannot accept users input. BUTTON Executes a specific action and performs commands written in the code editor. TEXTBOX Displays text same with the label but unlike the label, this will allow input from the users.
  • 10.
    Here are someC# controls CONTROL NAME FUNCTION SYMBOL LISTBOX Show a list of choices that is presented vertically in a single column CHECKBOX Used for turning on or off a particular feature of a program COMBOBOX Show choices through a drop down menu
  • 11.
    Here are someC# controls CONTROL NAME FUNCTION SYMBOL PICTUREBOX Creates a box that displays pictures with a fixed size. It does not allow resizing of pictures.
  • 12.
    Naming Convention • Innaming a control in C#, the following are also observed and followed: 1. It should not start with number. 2. The underscore symbol can only be used. 3. It must not include a space or a blank.
  • 13.
    PREFIX OBJECT TYPE cbocombo box chk checkbox cmd button frm form lbl label lst list box mnu menu opt option button pic picture box shp shape txt textbox NOTE: we use the following Prefix in changing the properties (NAME) of each control. Example: txtNum1 as name/code
  • 14.
    The button andtextbox control • To understand more about the Button and Textbox controls, here is a sample program called my calculator. Let’s try Activity 9.2 Page 123-127
  • 15.
  • 16.
    Naming Convention • Inaddition, the following are recommended: 1. Start each word with capital letters. For example: FirstName and MyFirstName. 2. Use verb for function and method names. For Example: AddNewRecord or CloseMenu. 3. Use prefix “I”, in declaring the name for interface, followed by a noun or a noun phrase.