This document provides an overview of app design principles for Android, including:
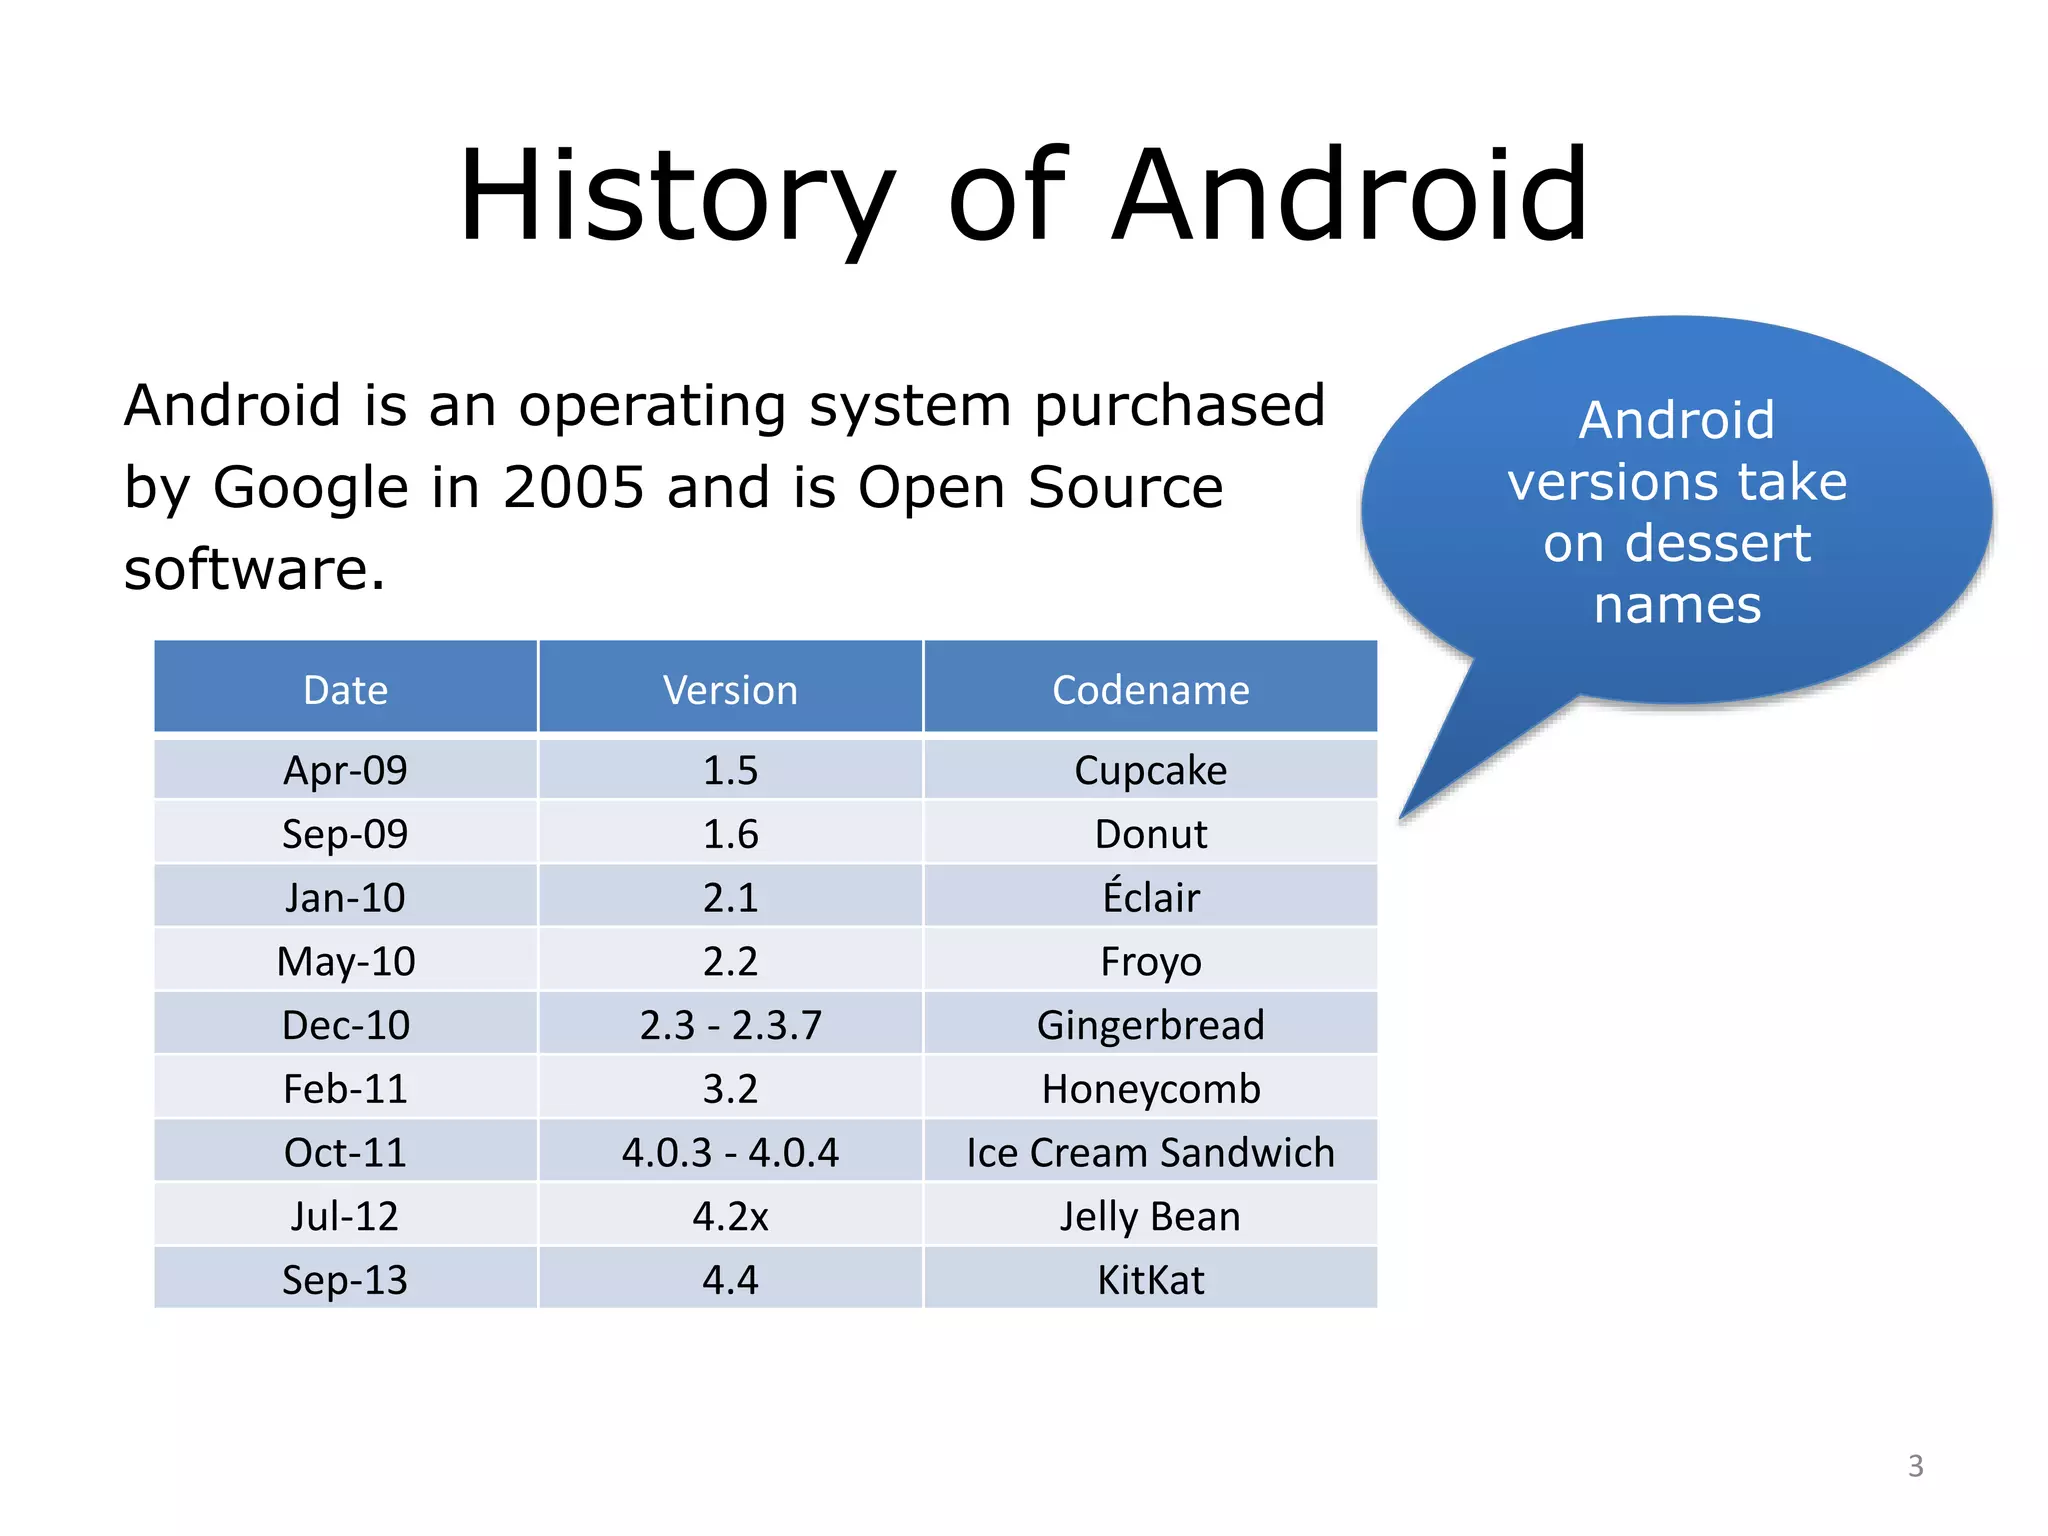
- A brief history of Android versions from 2009 to present.
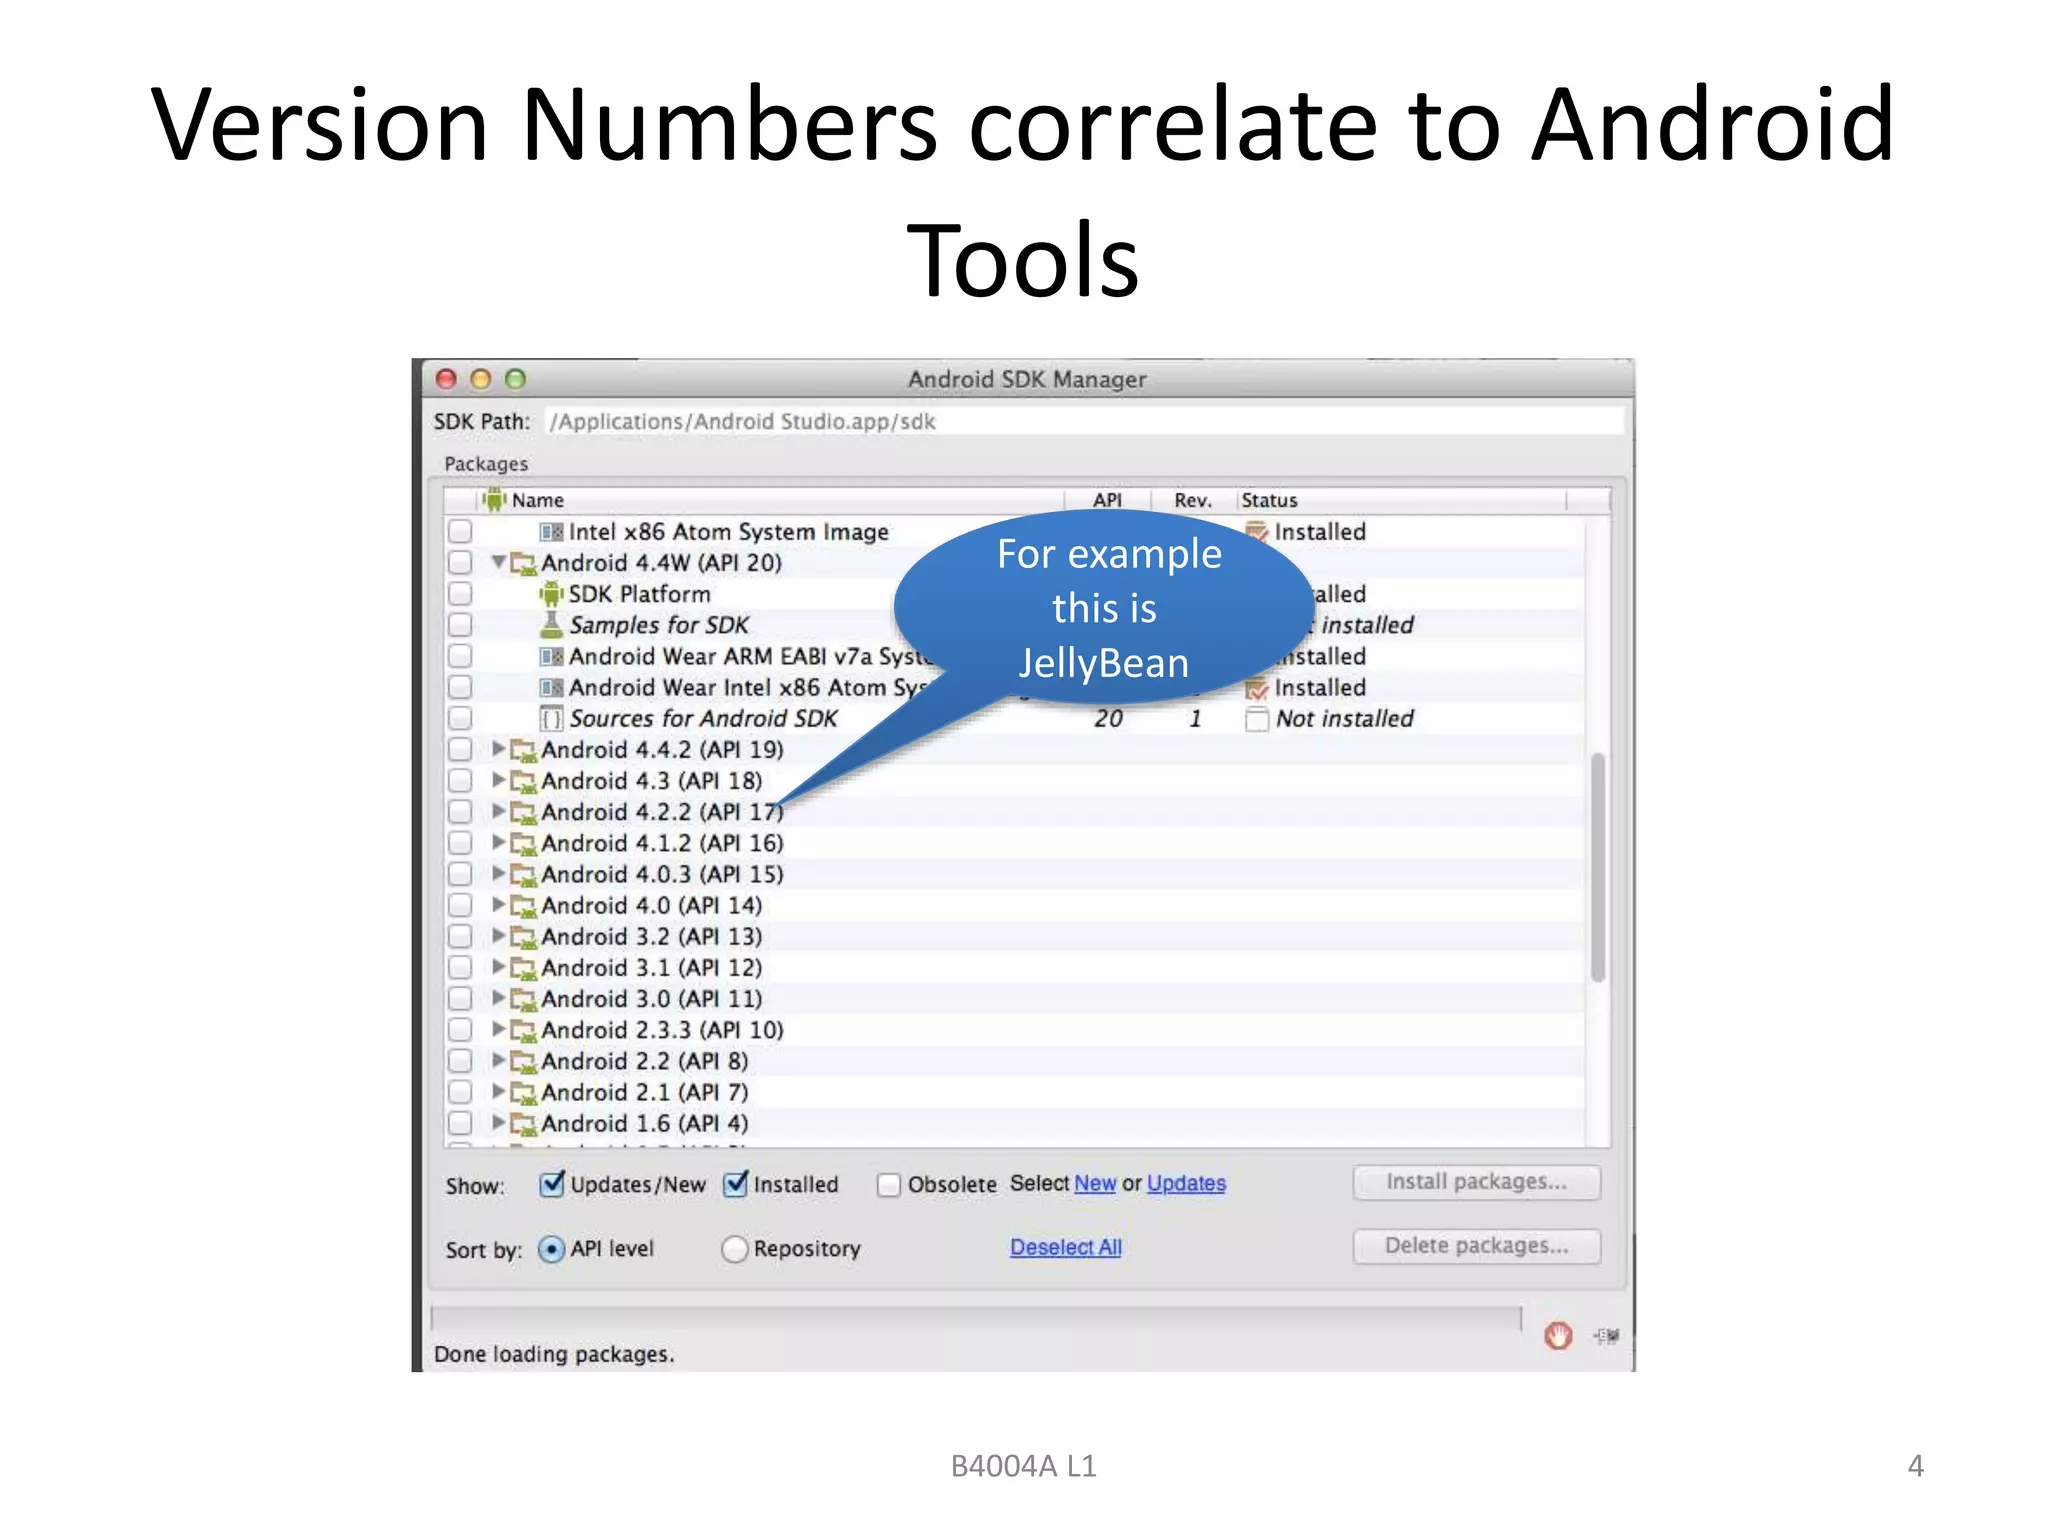
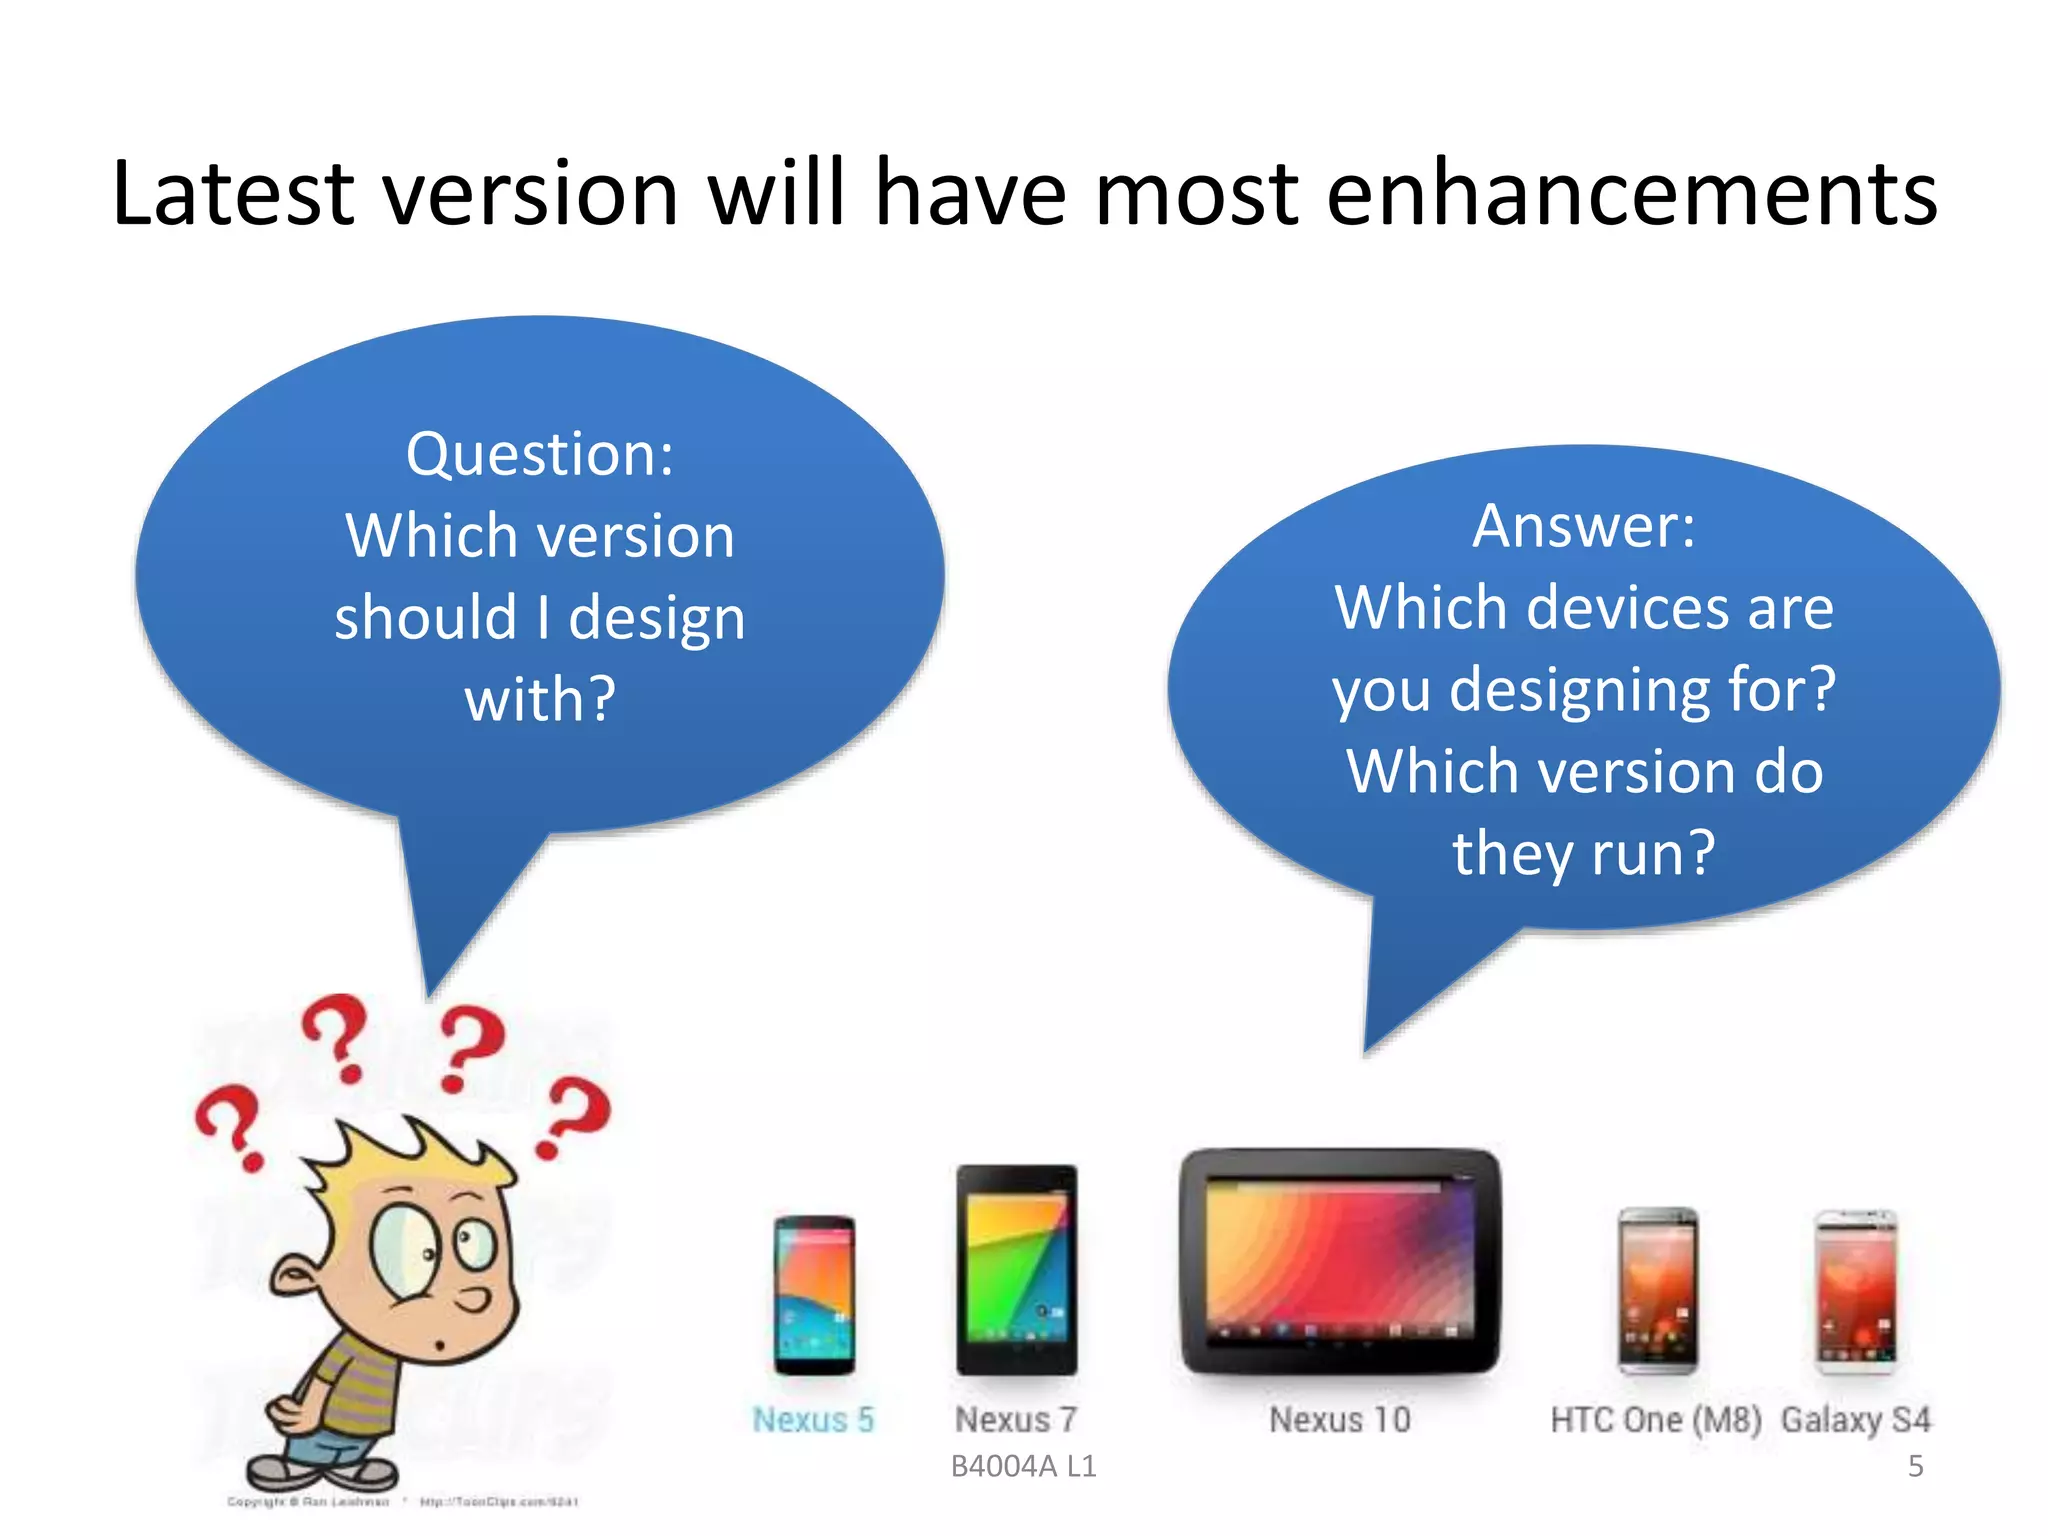
- How to choose which Android version to design for based on the target devices.
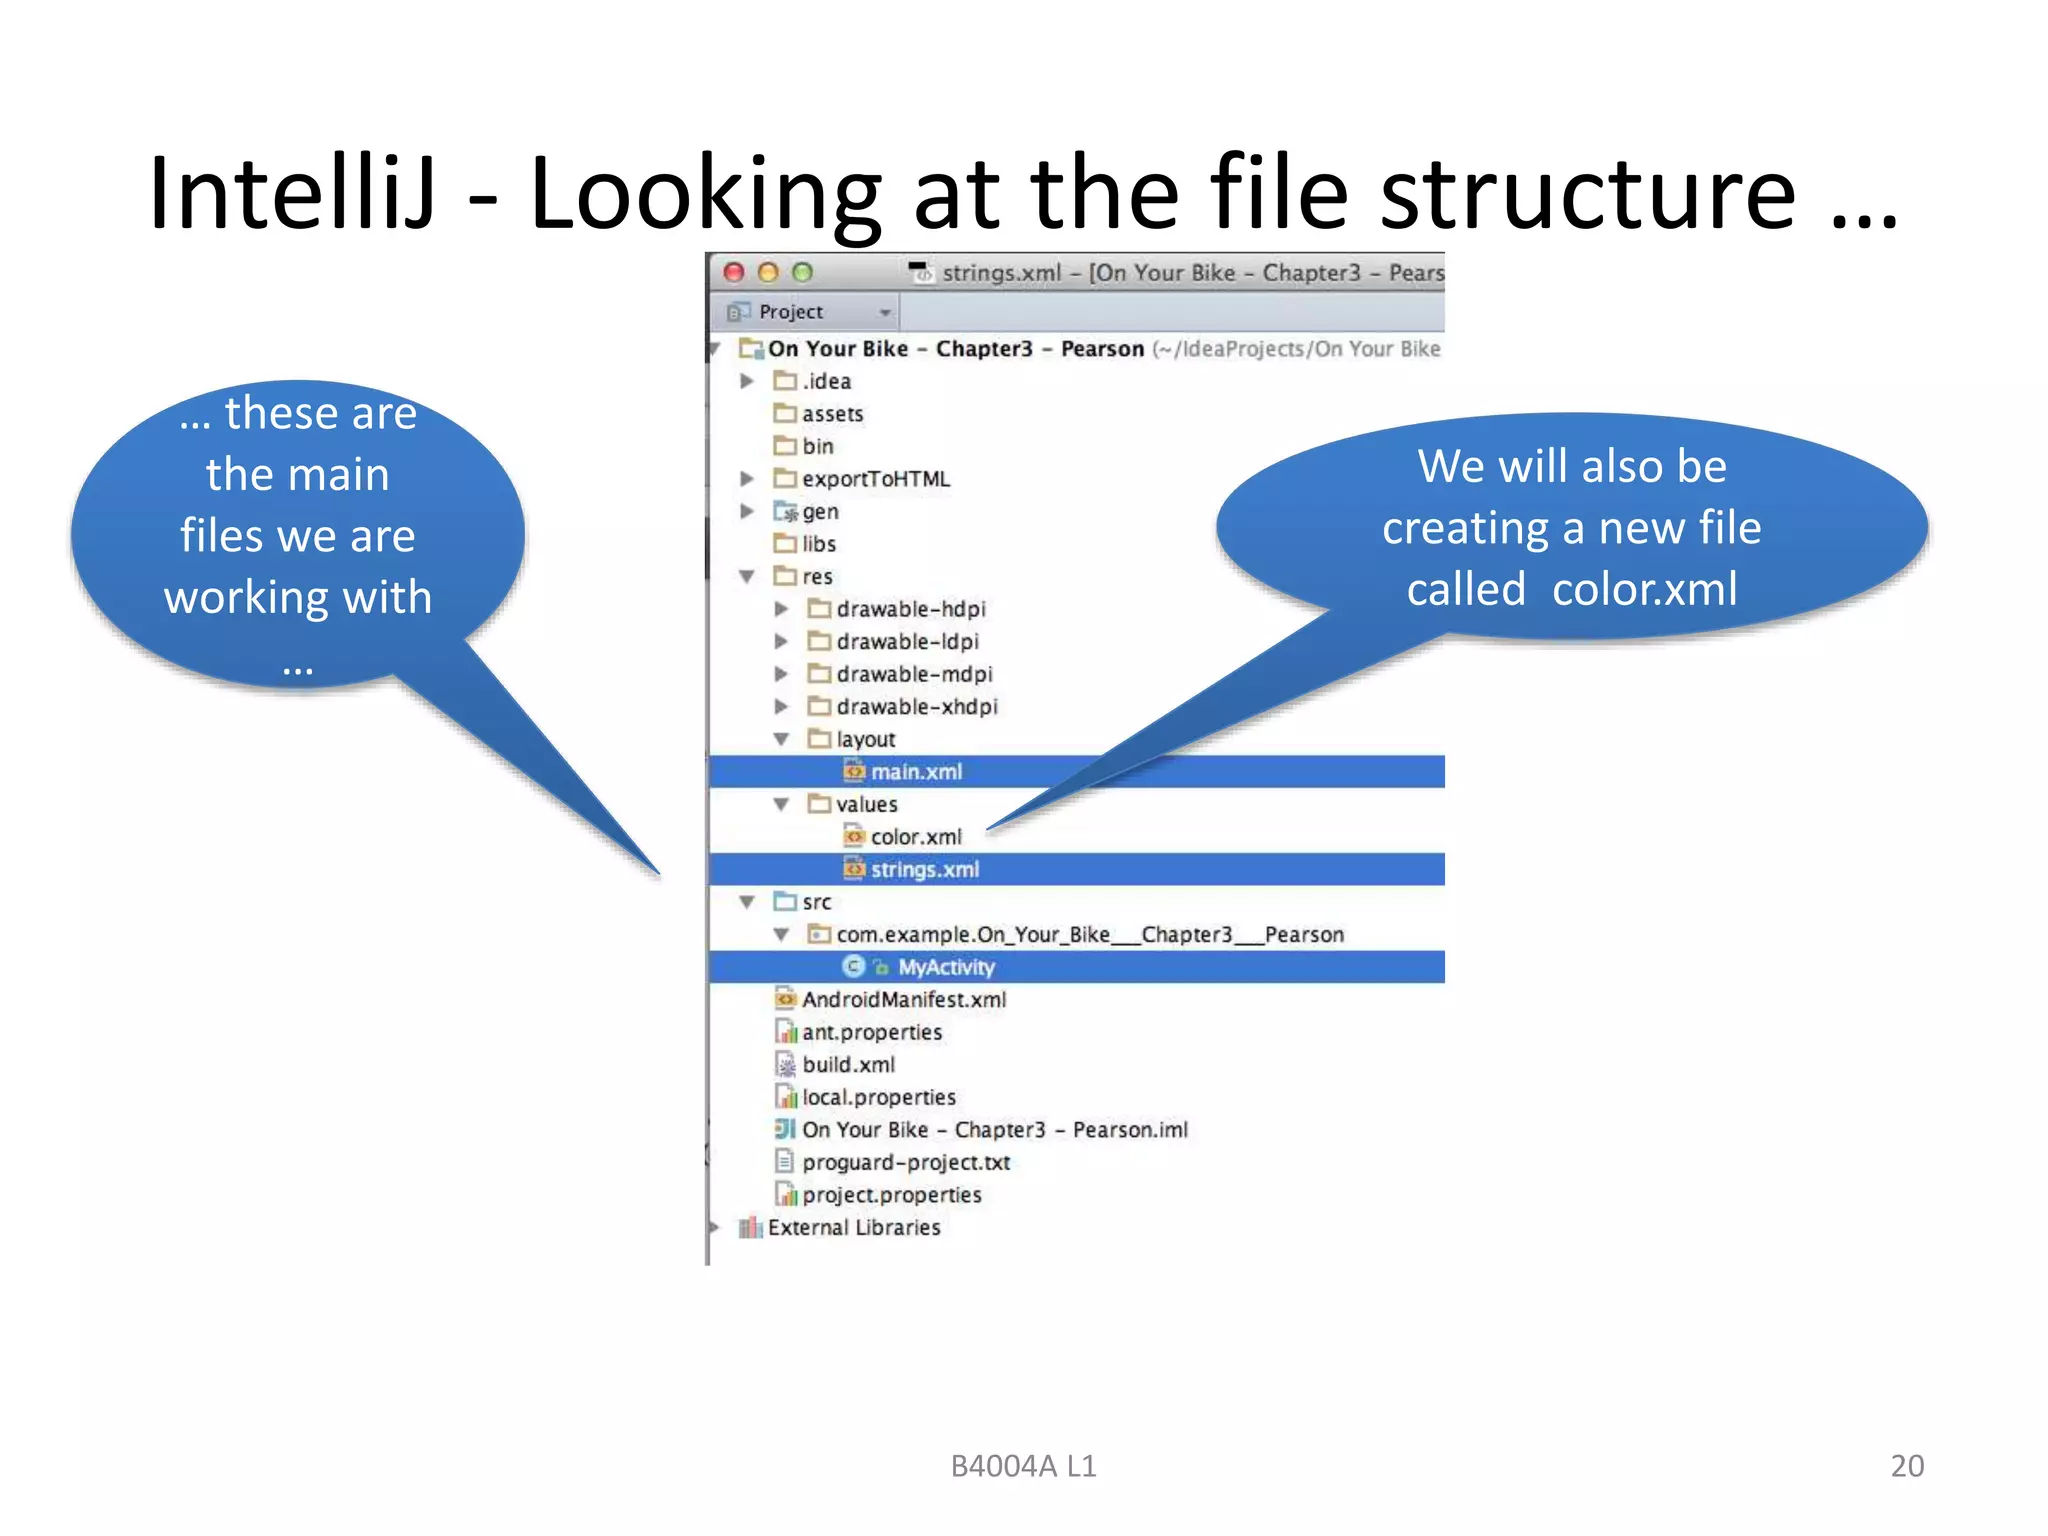
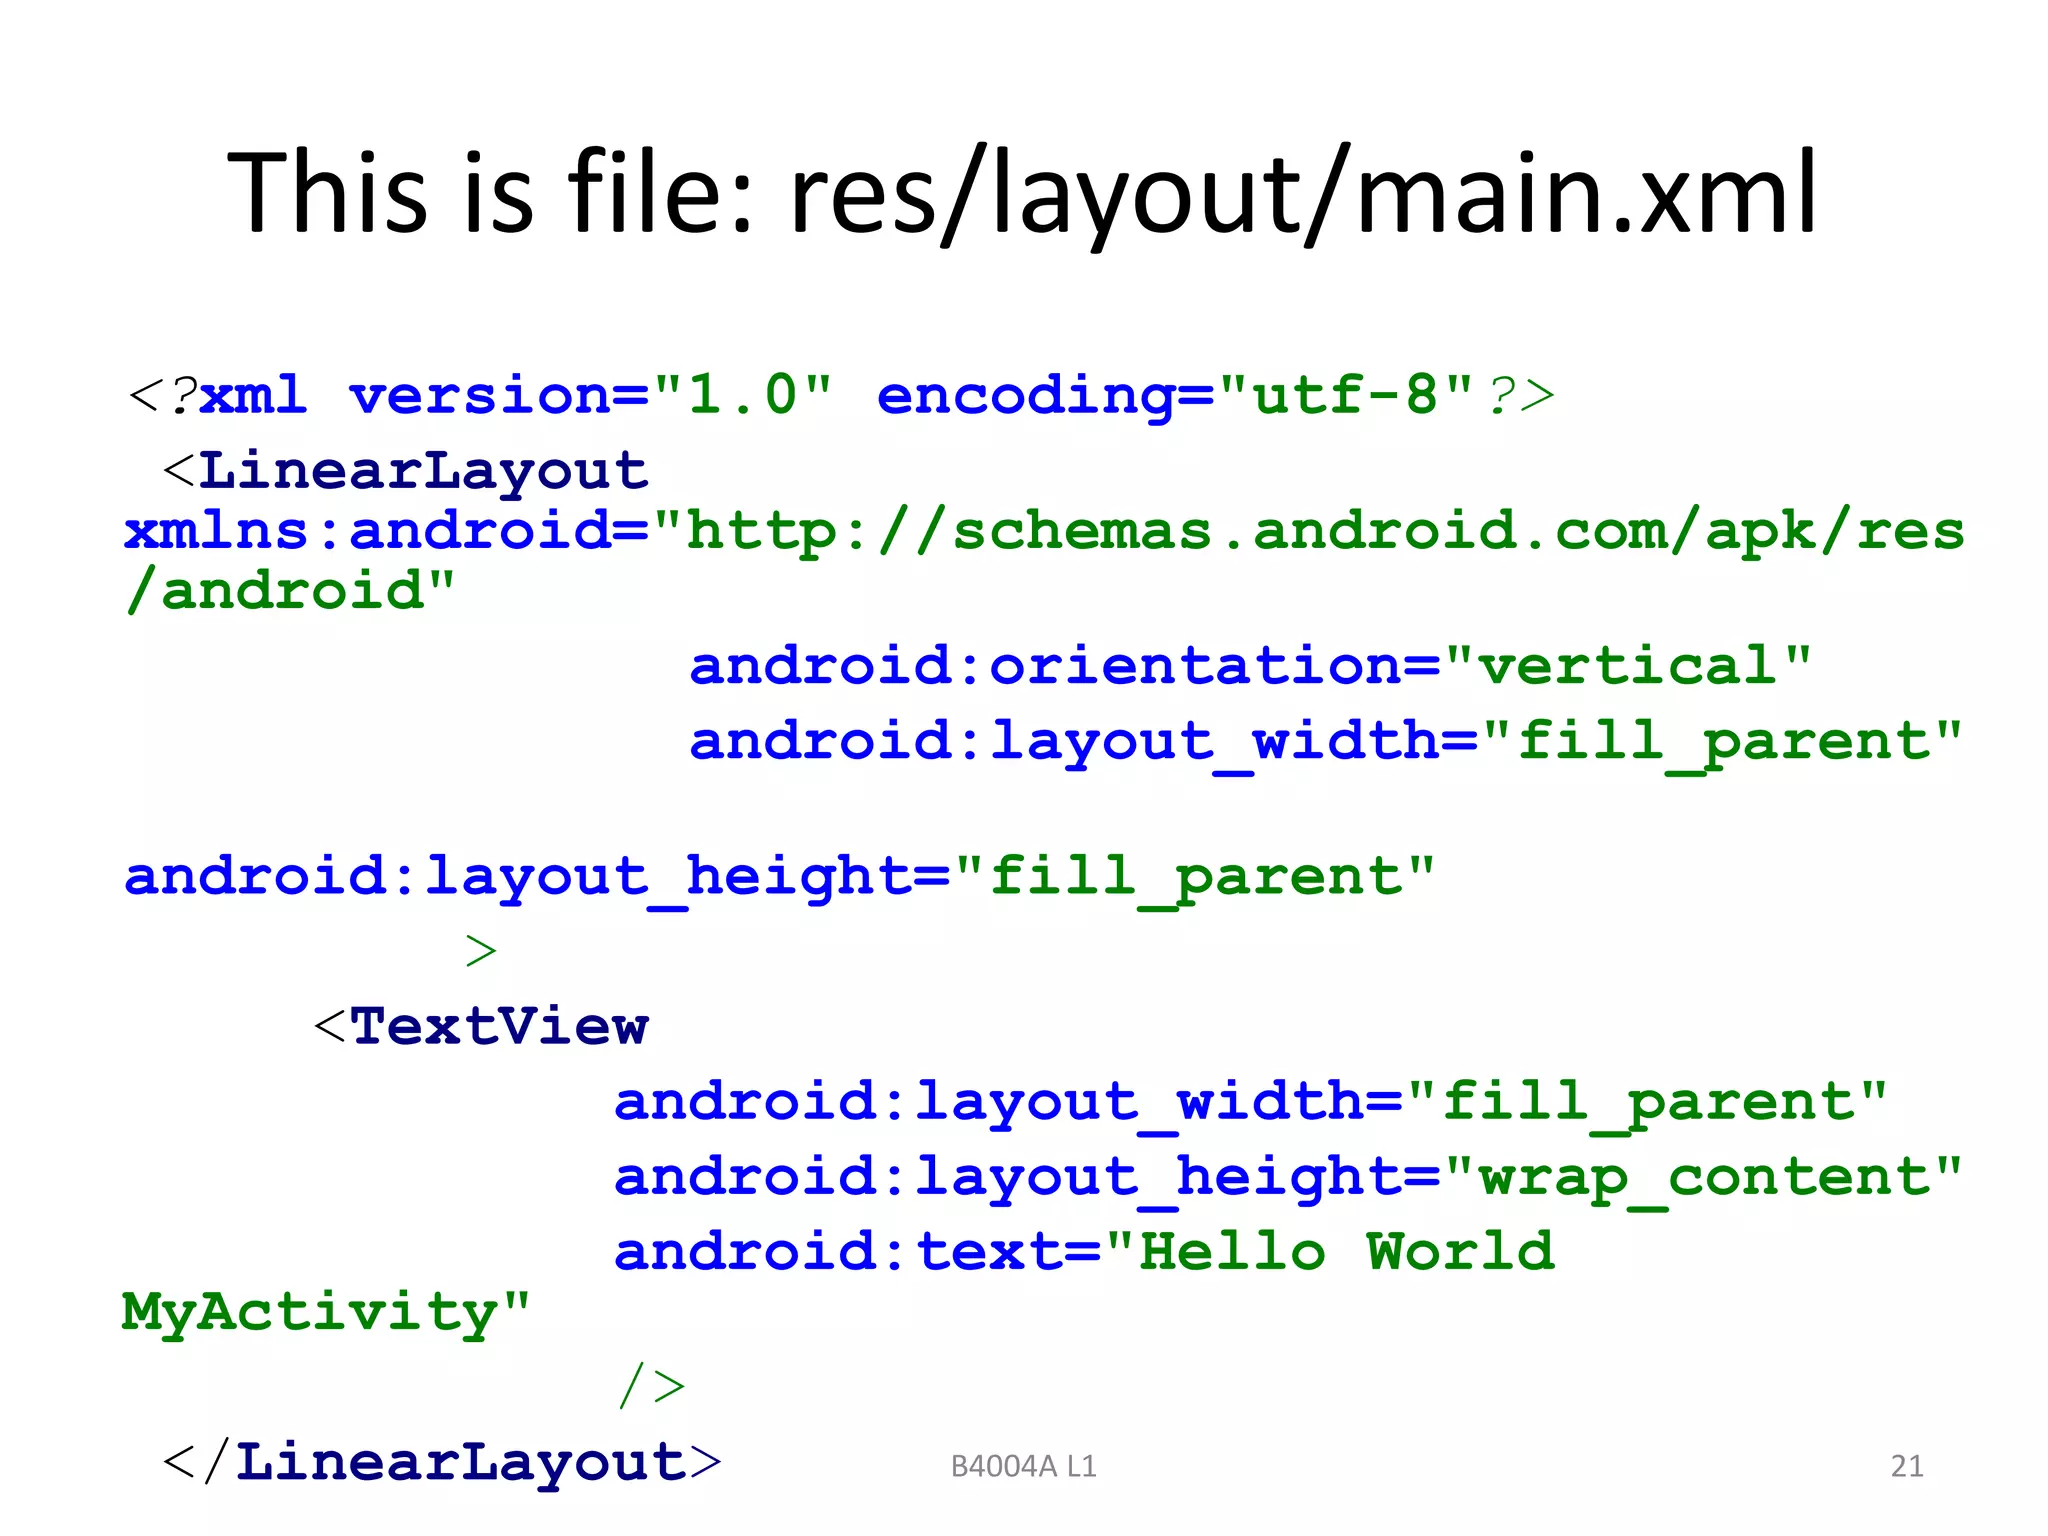
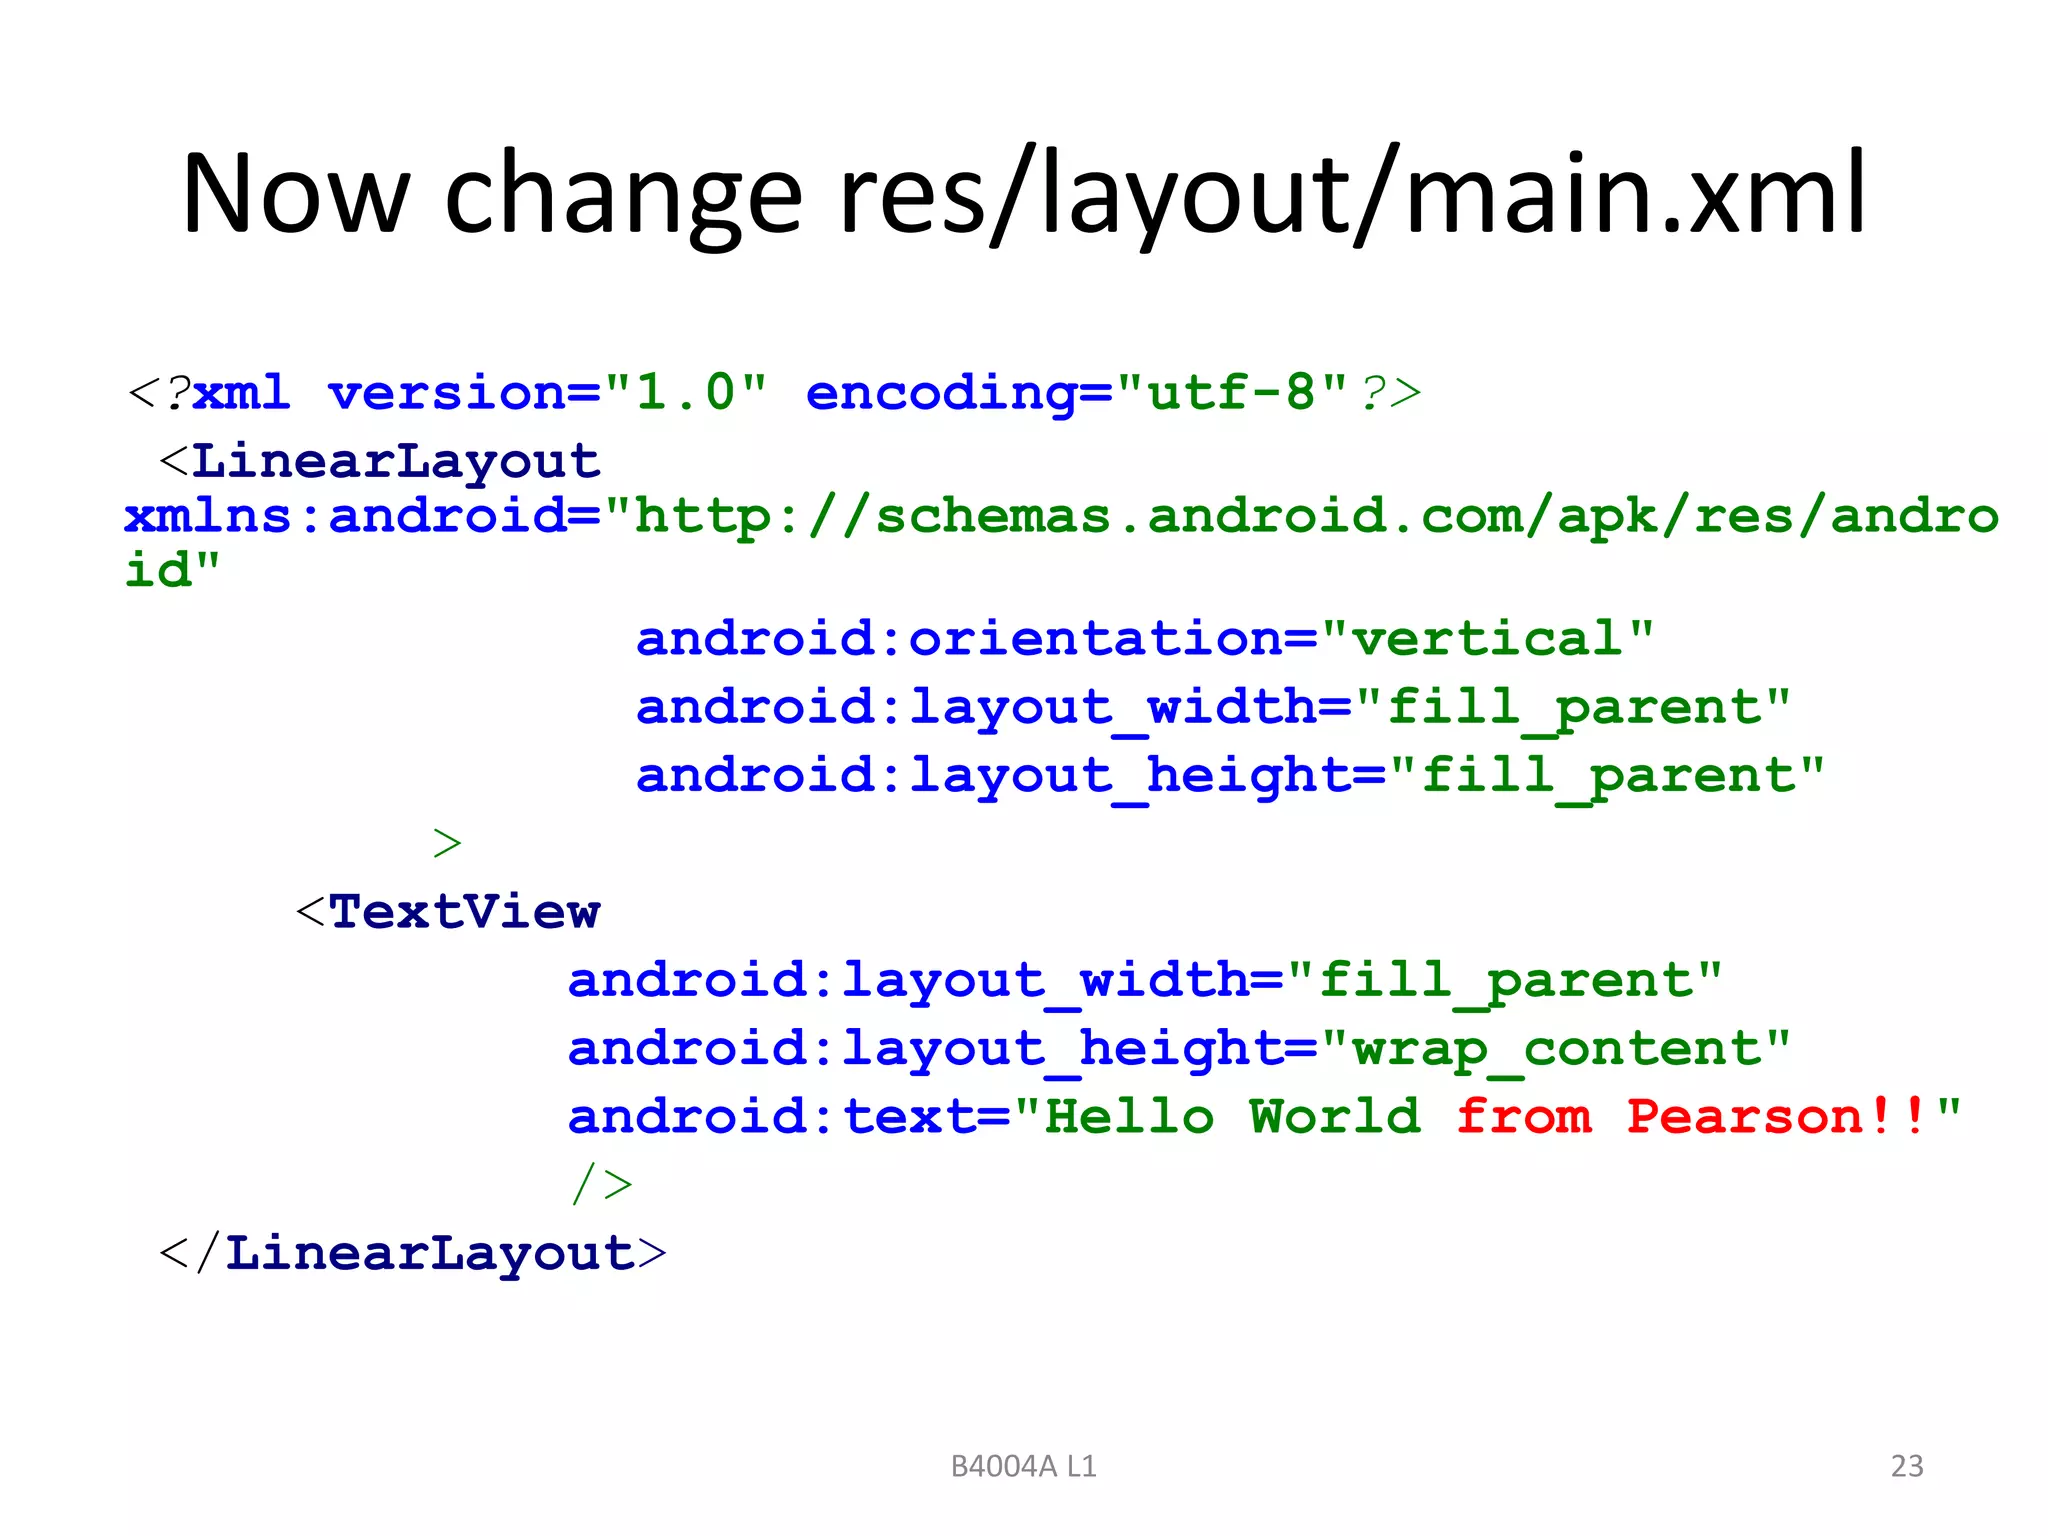
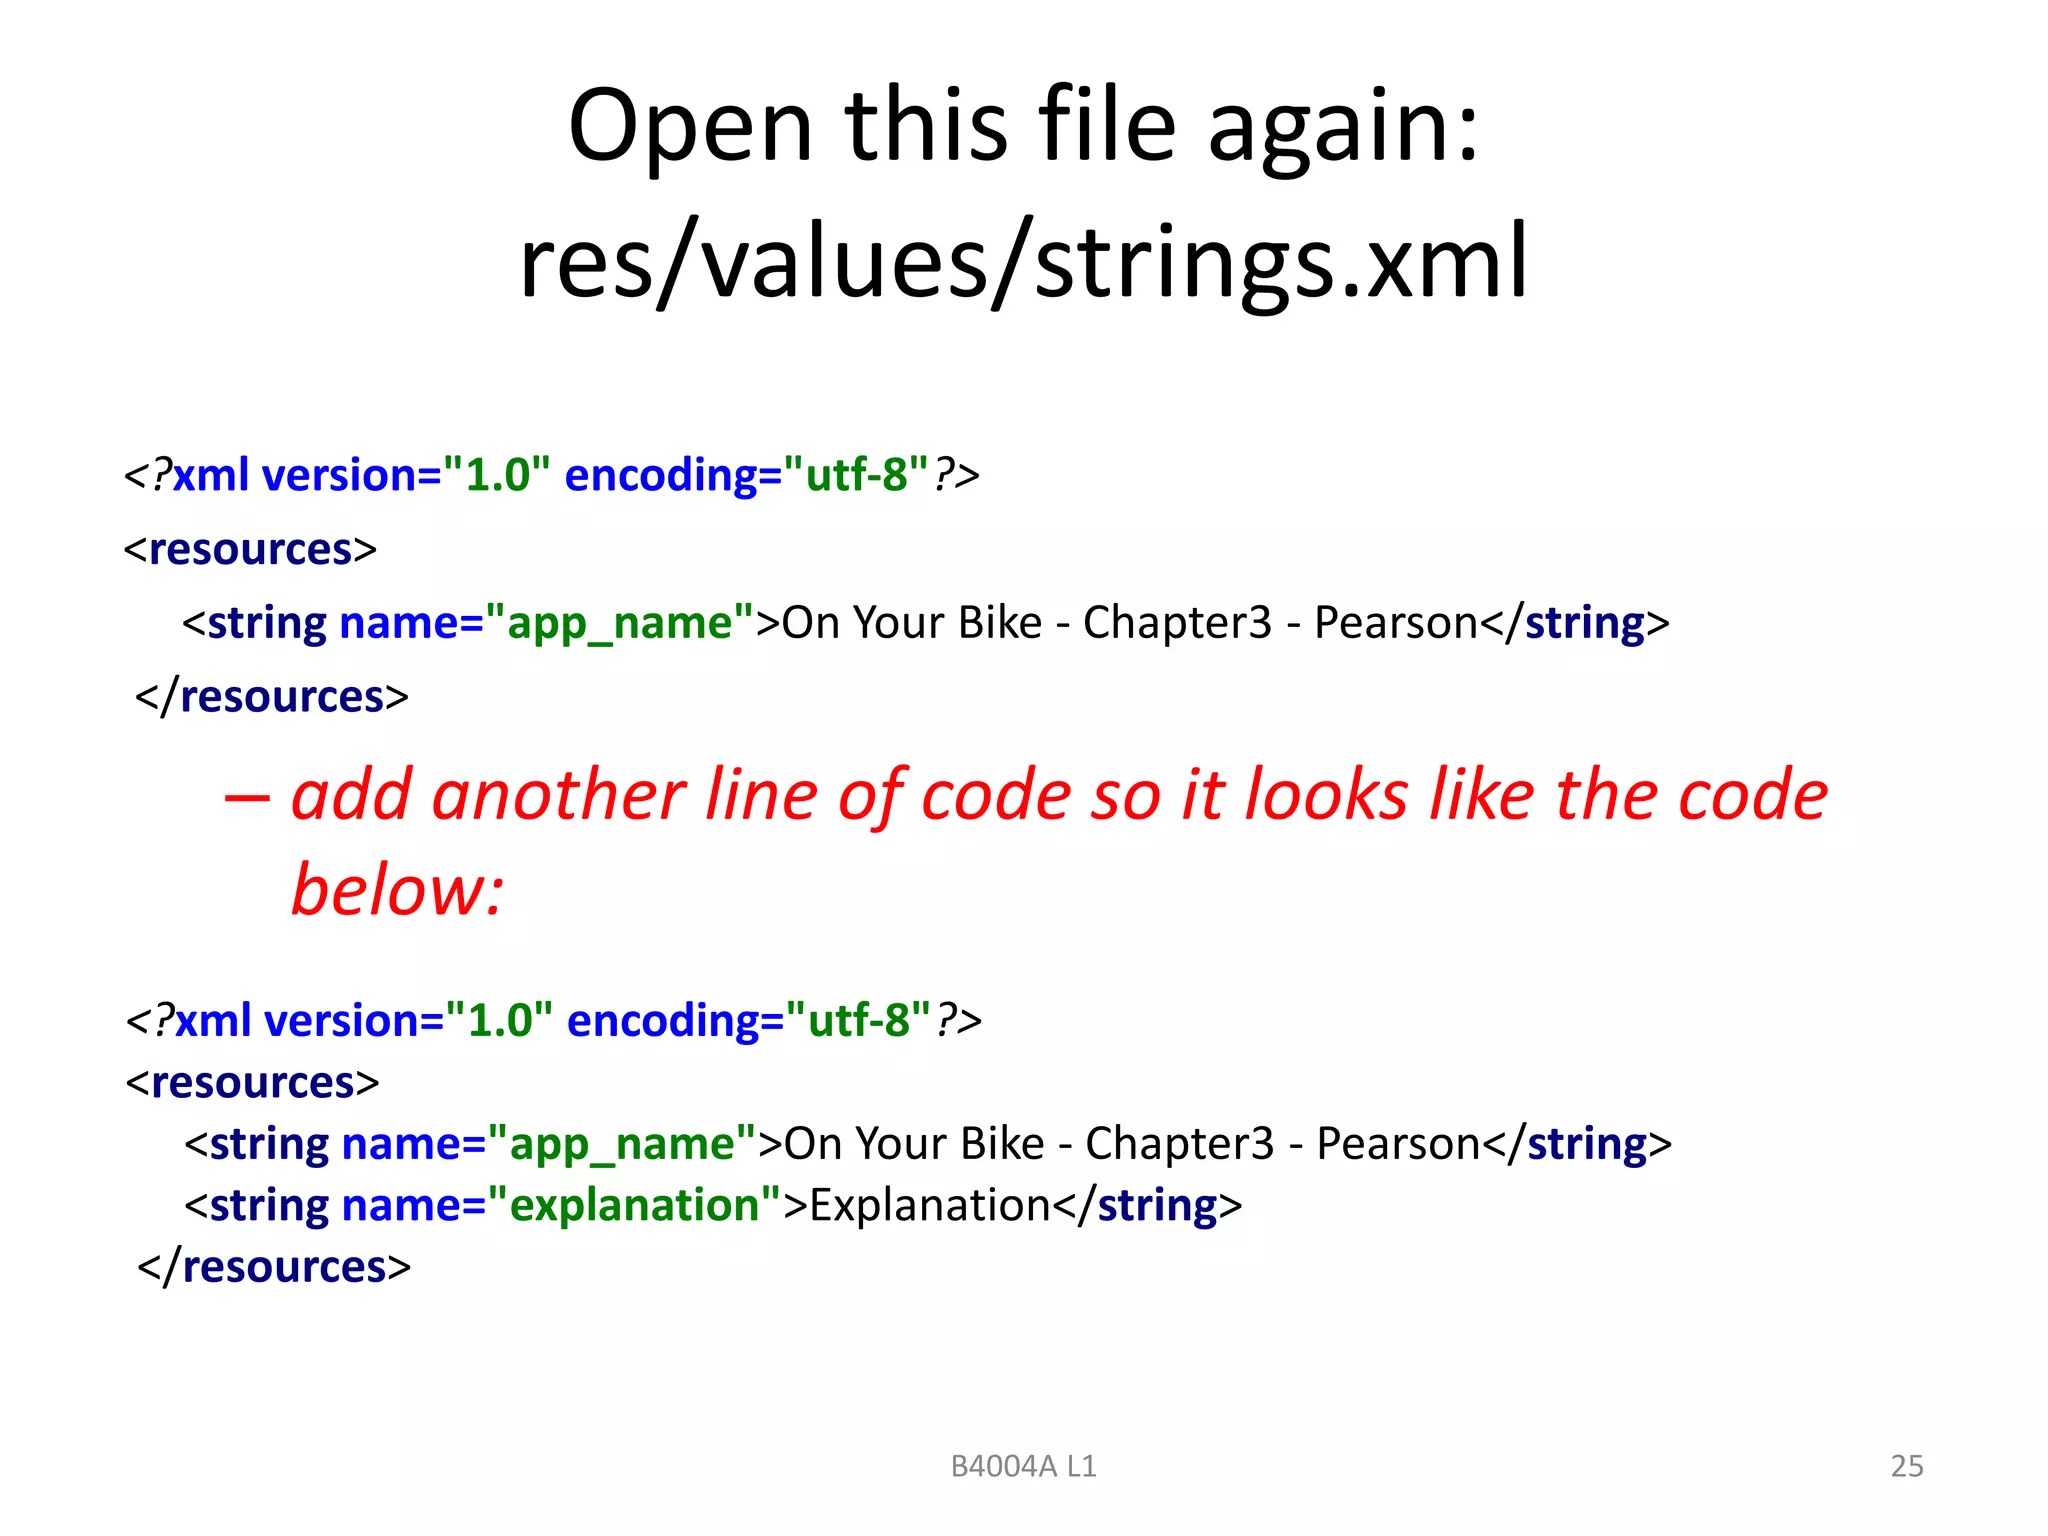
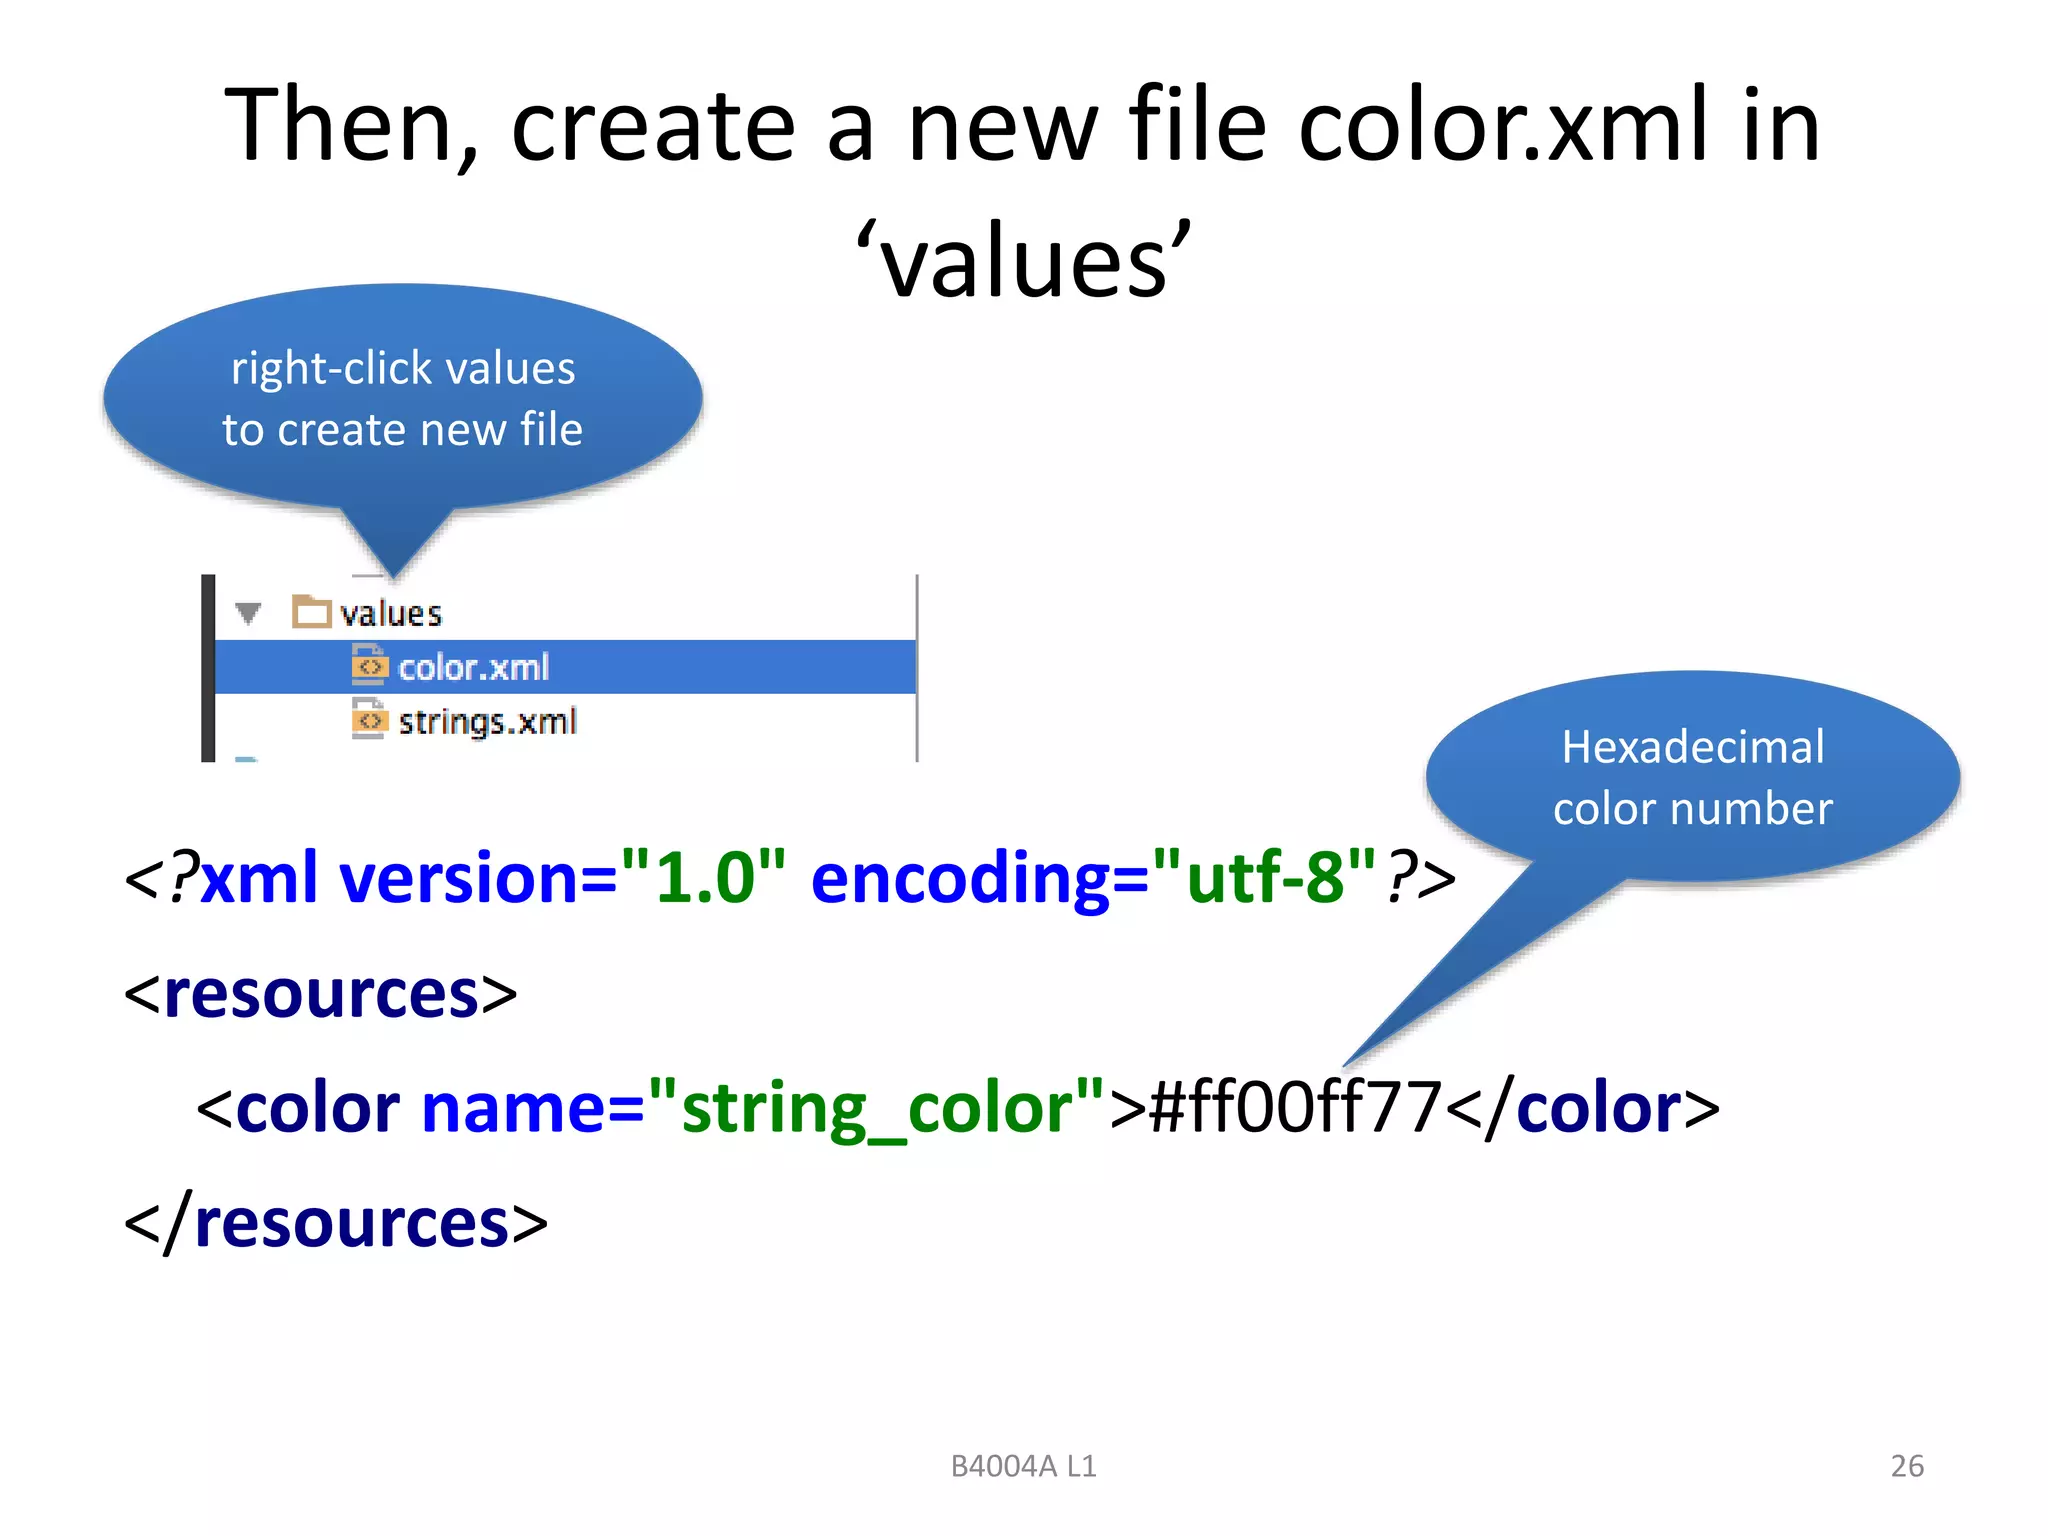
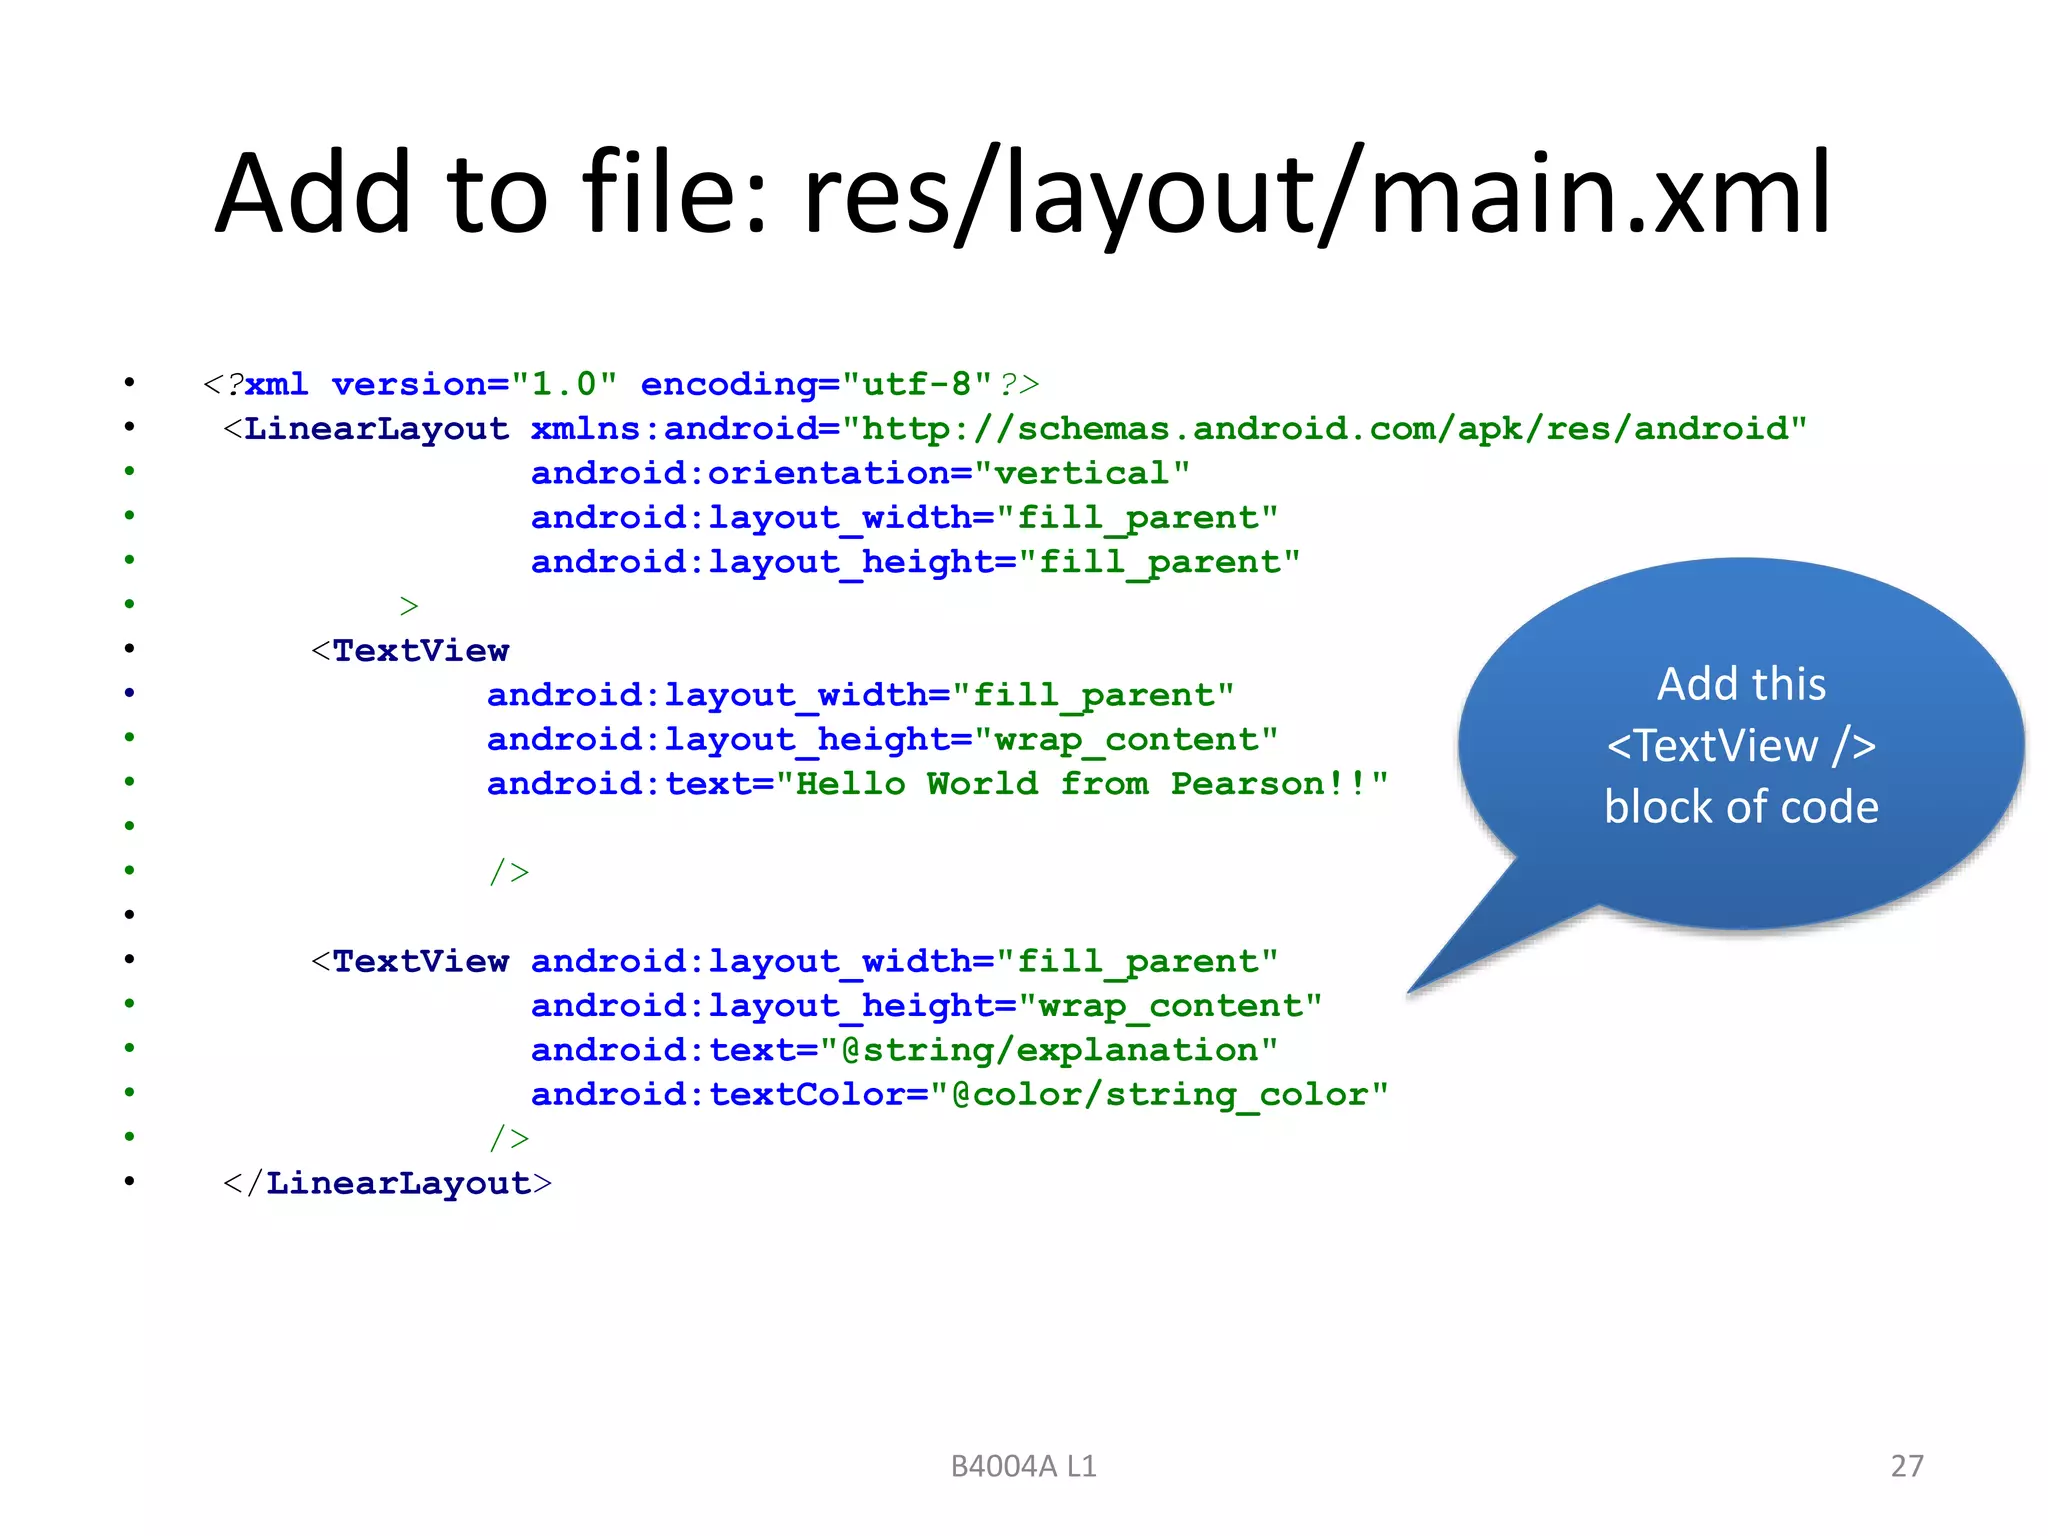
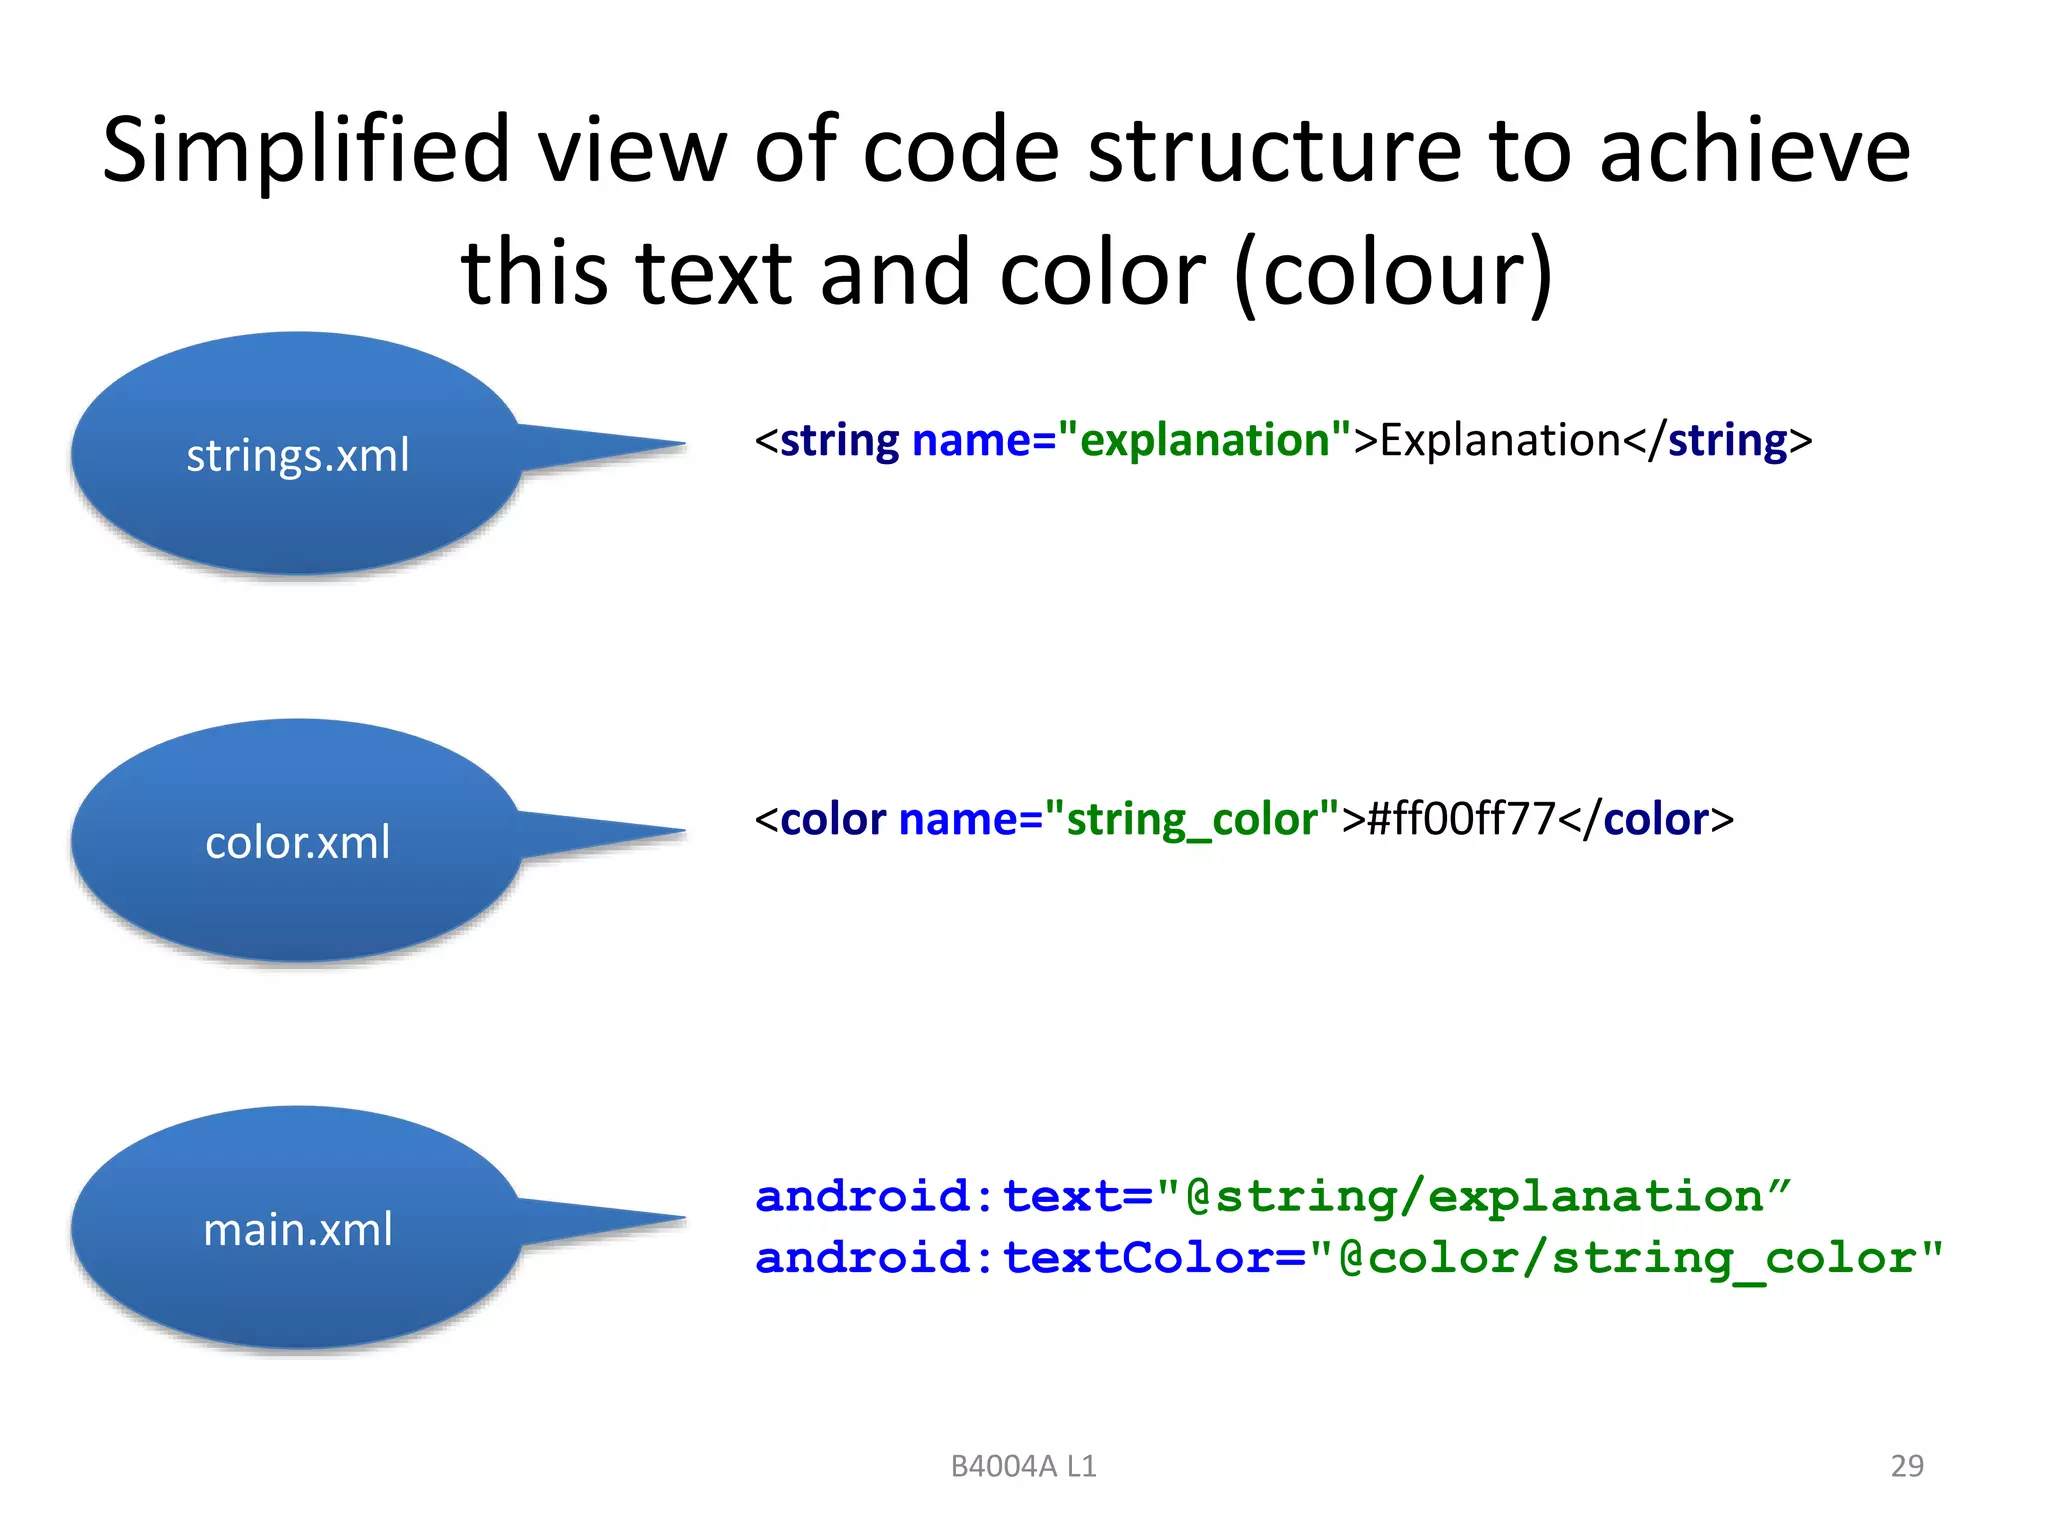
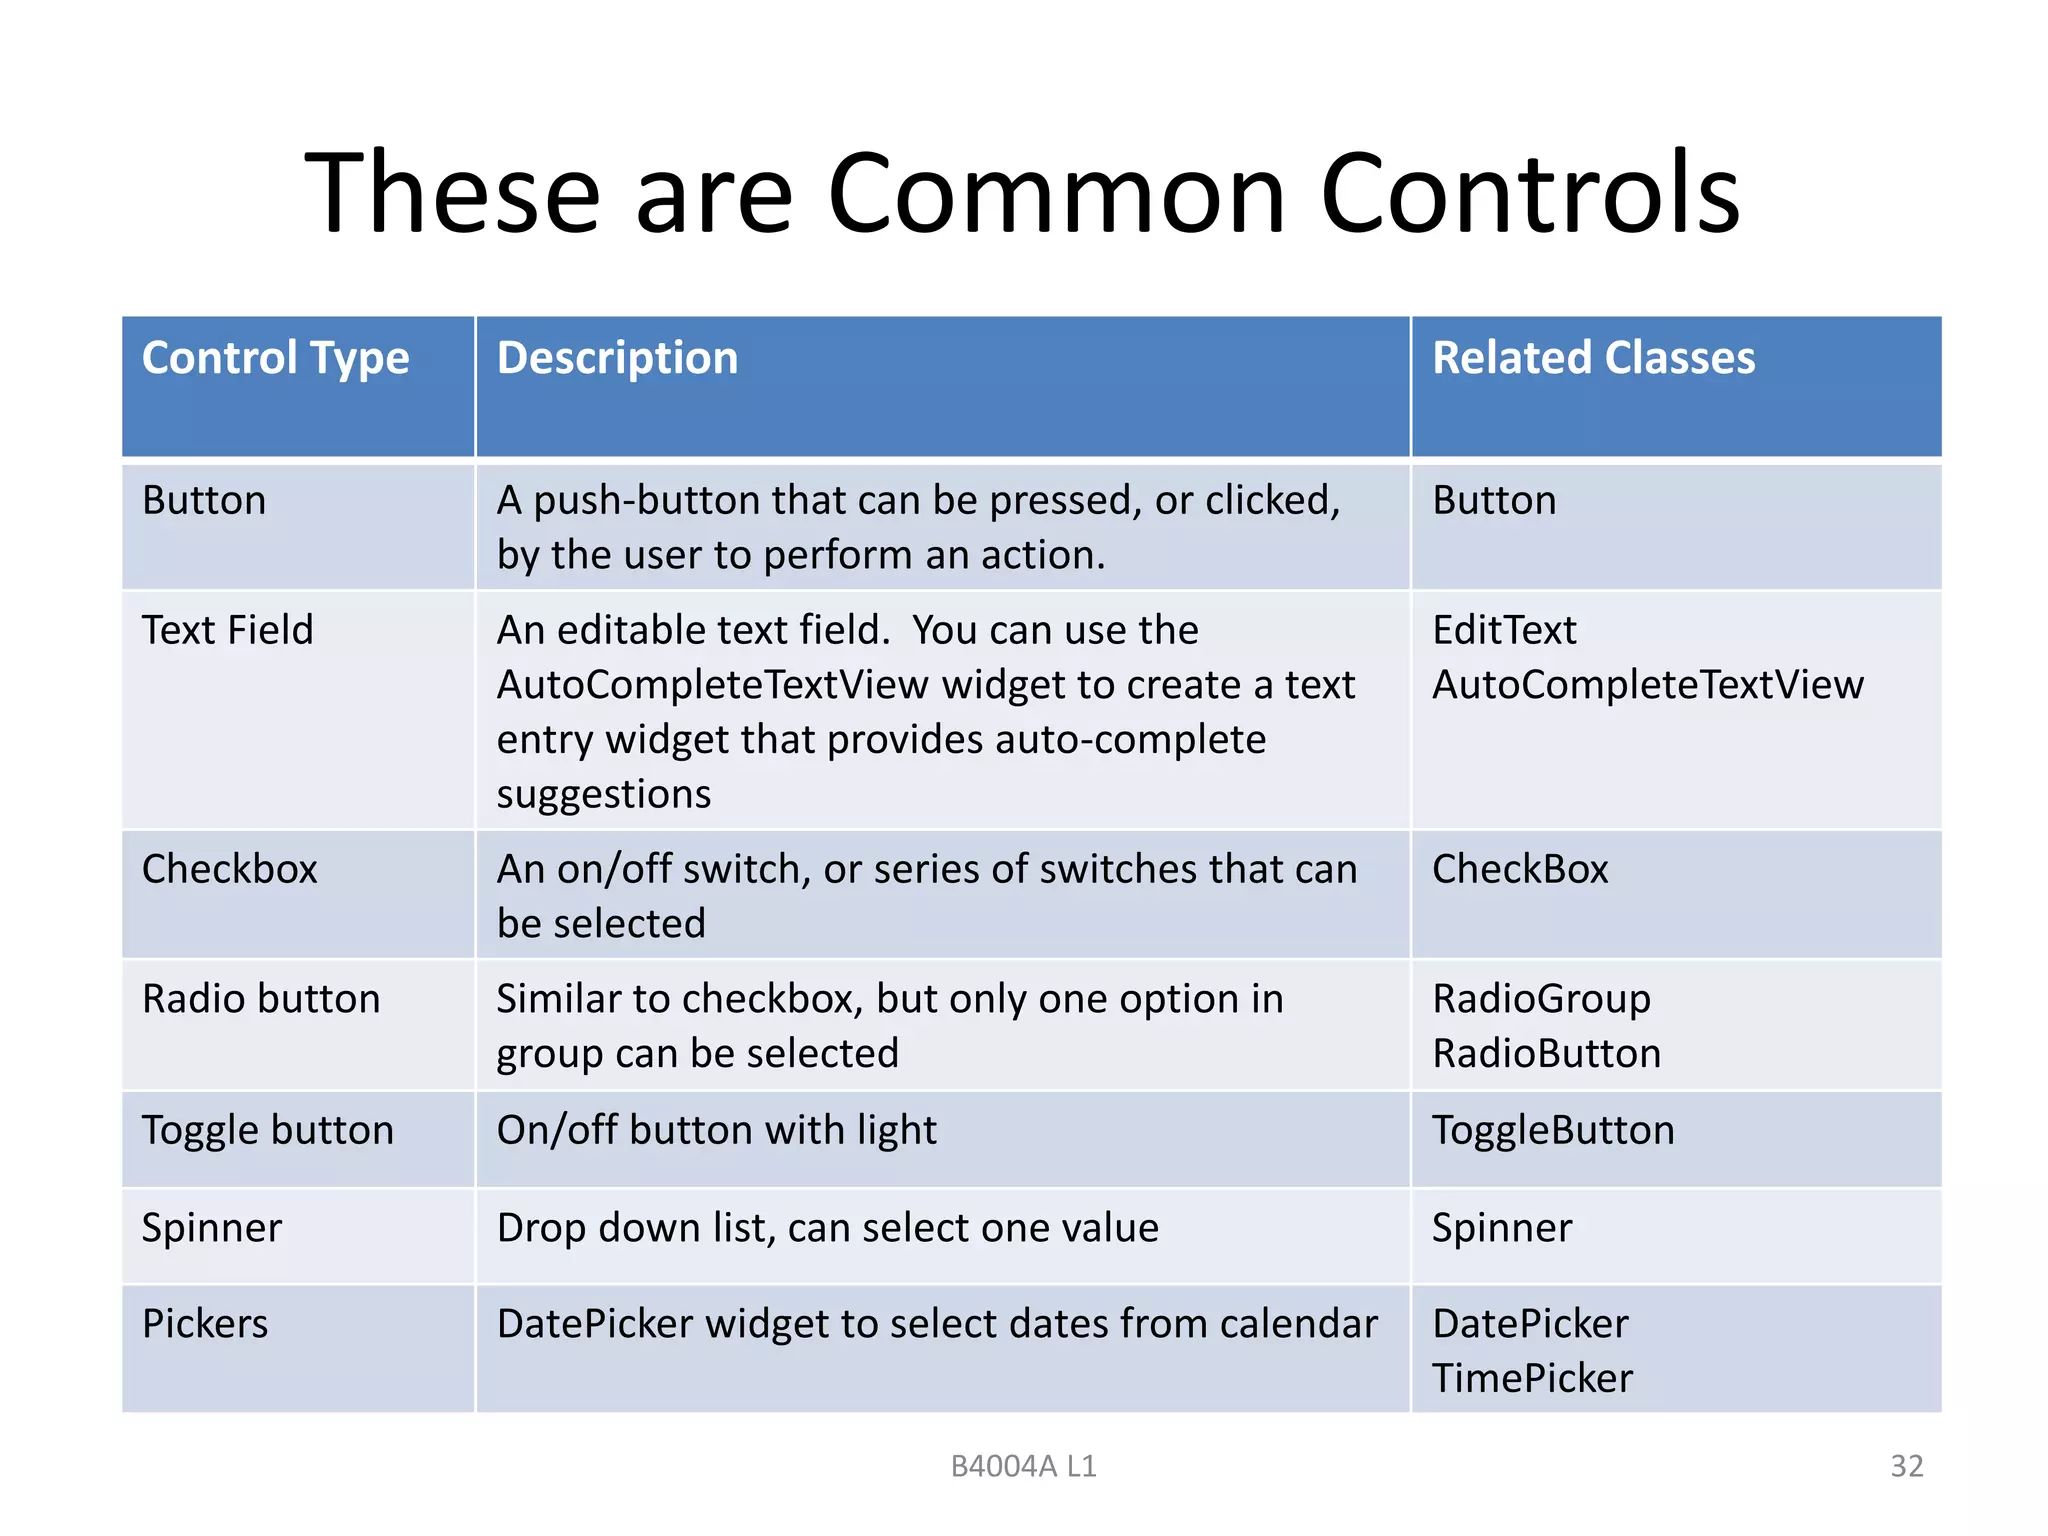
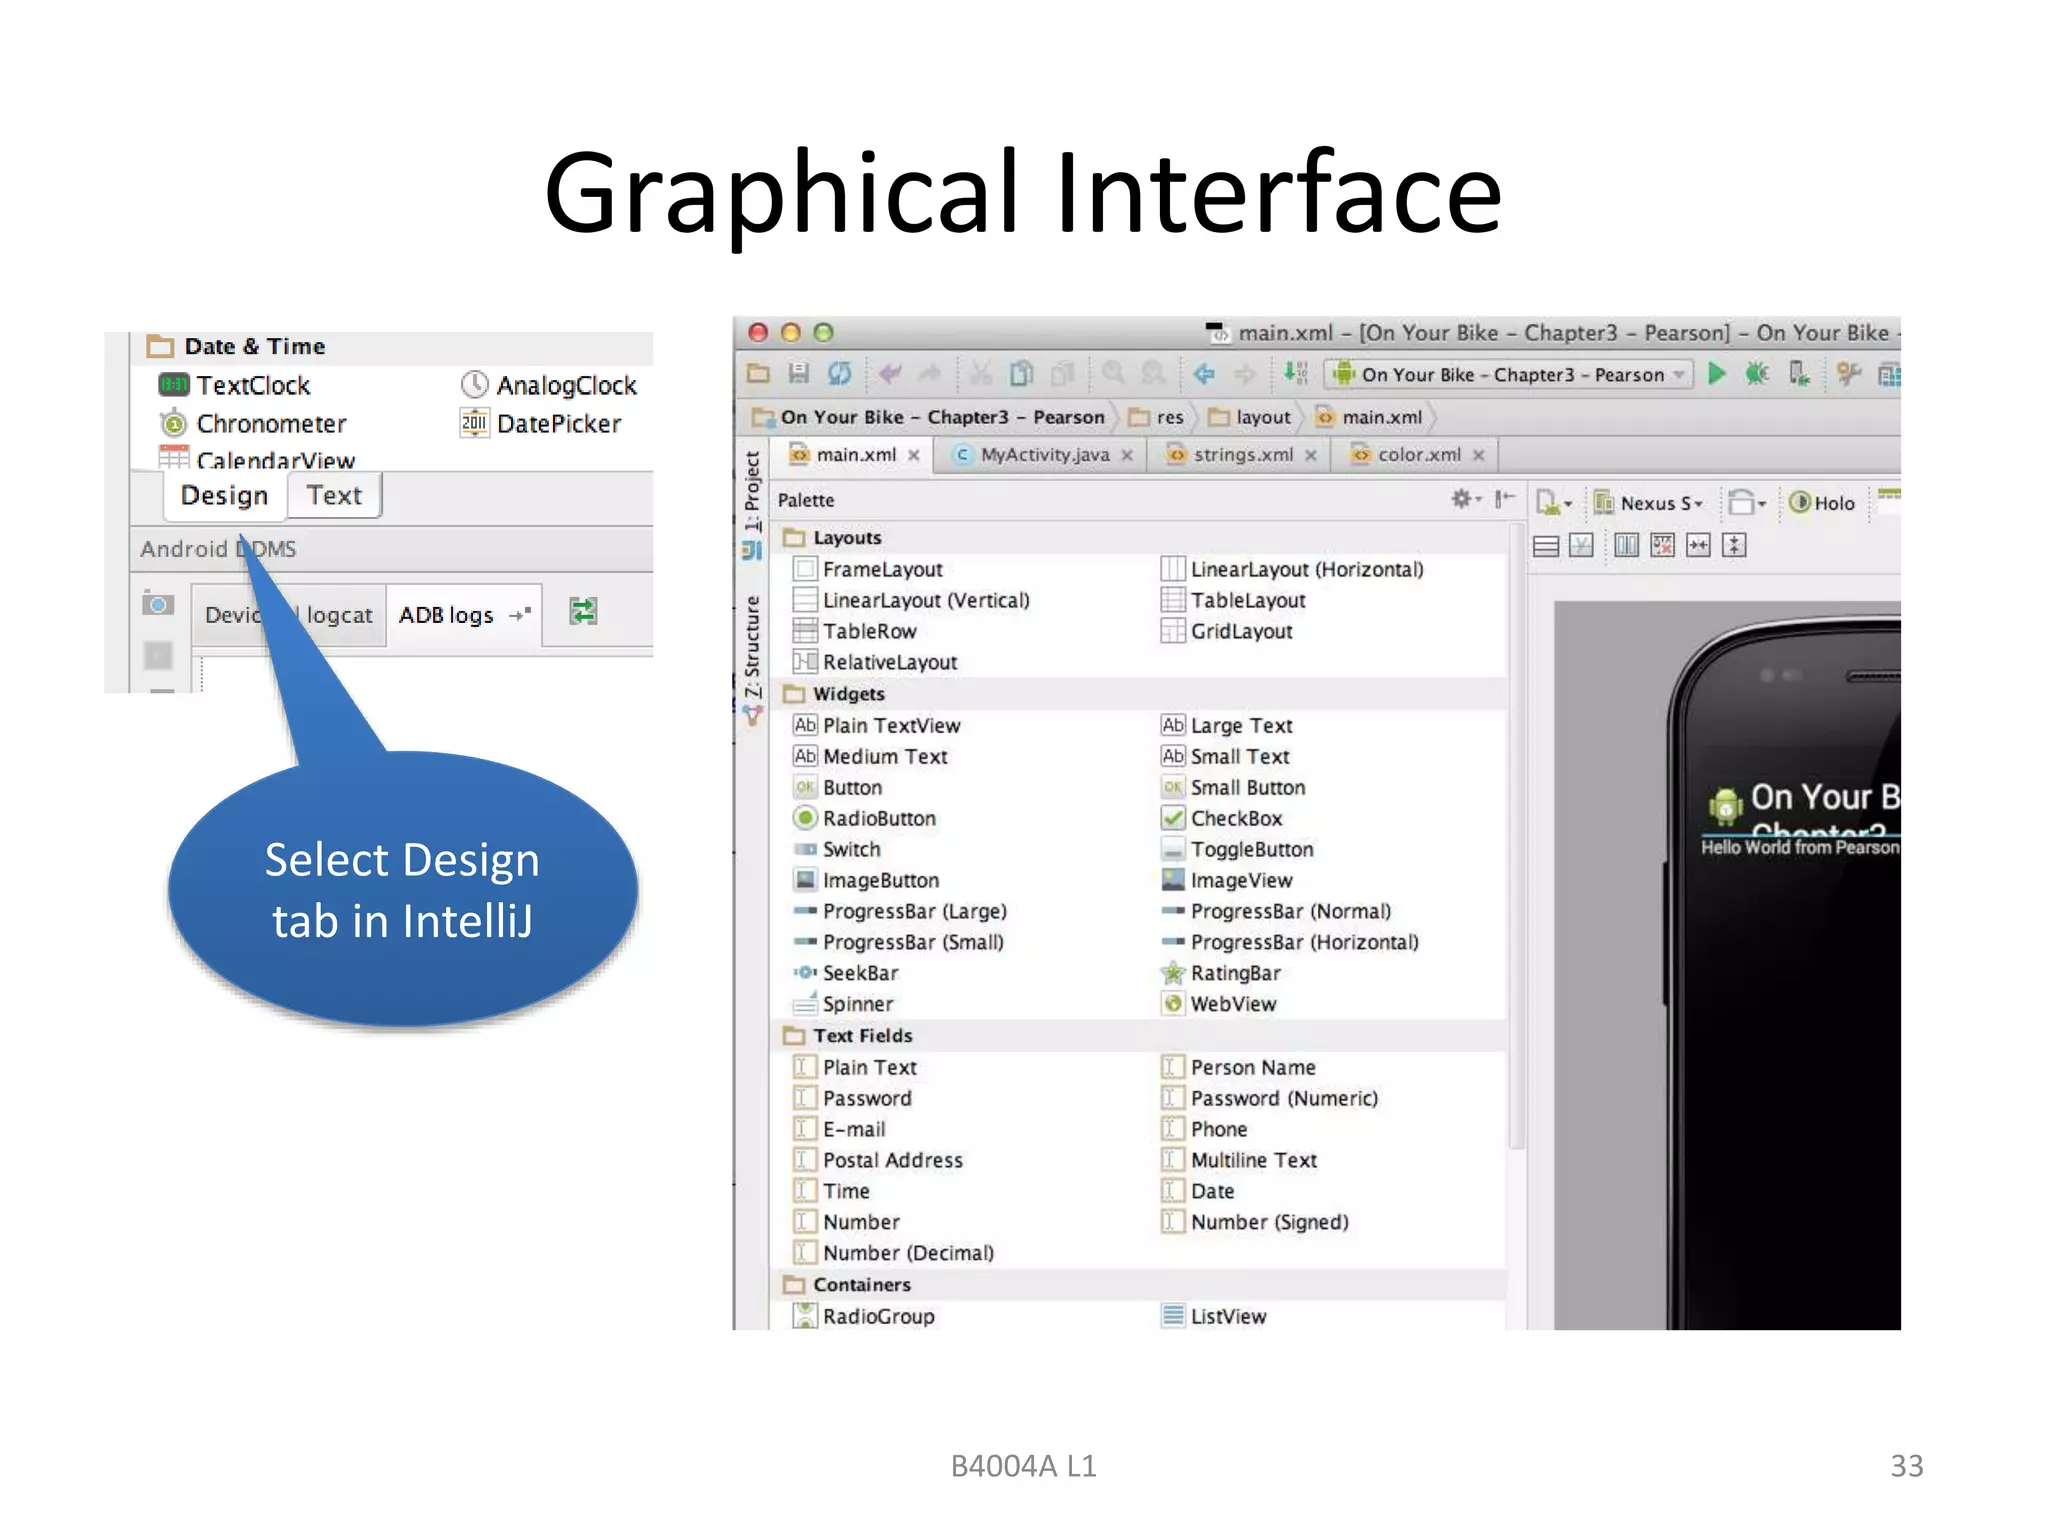
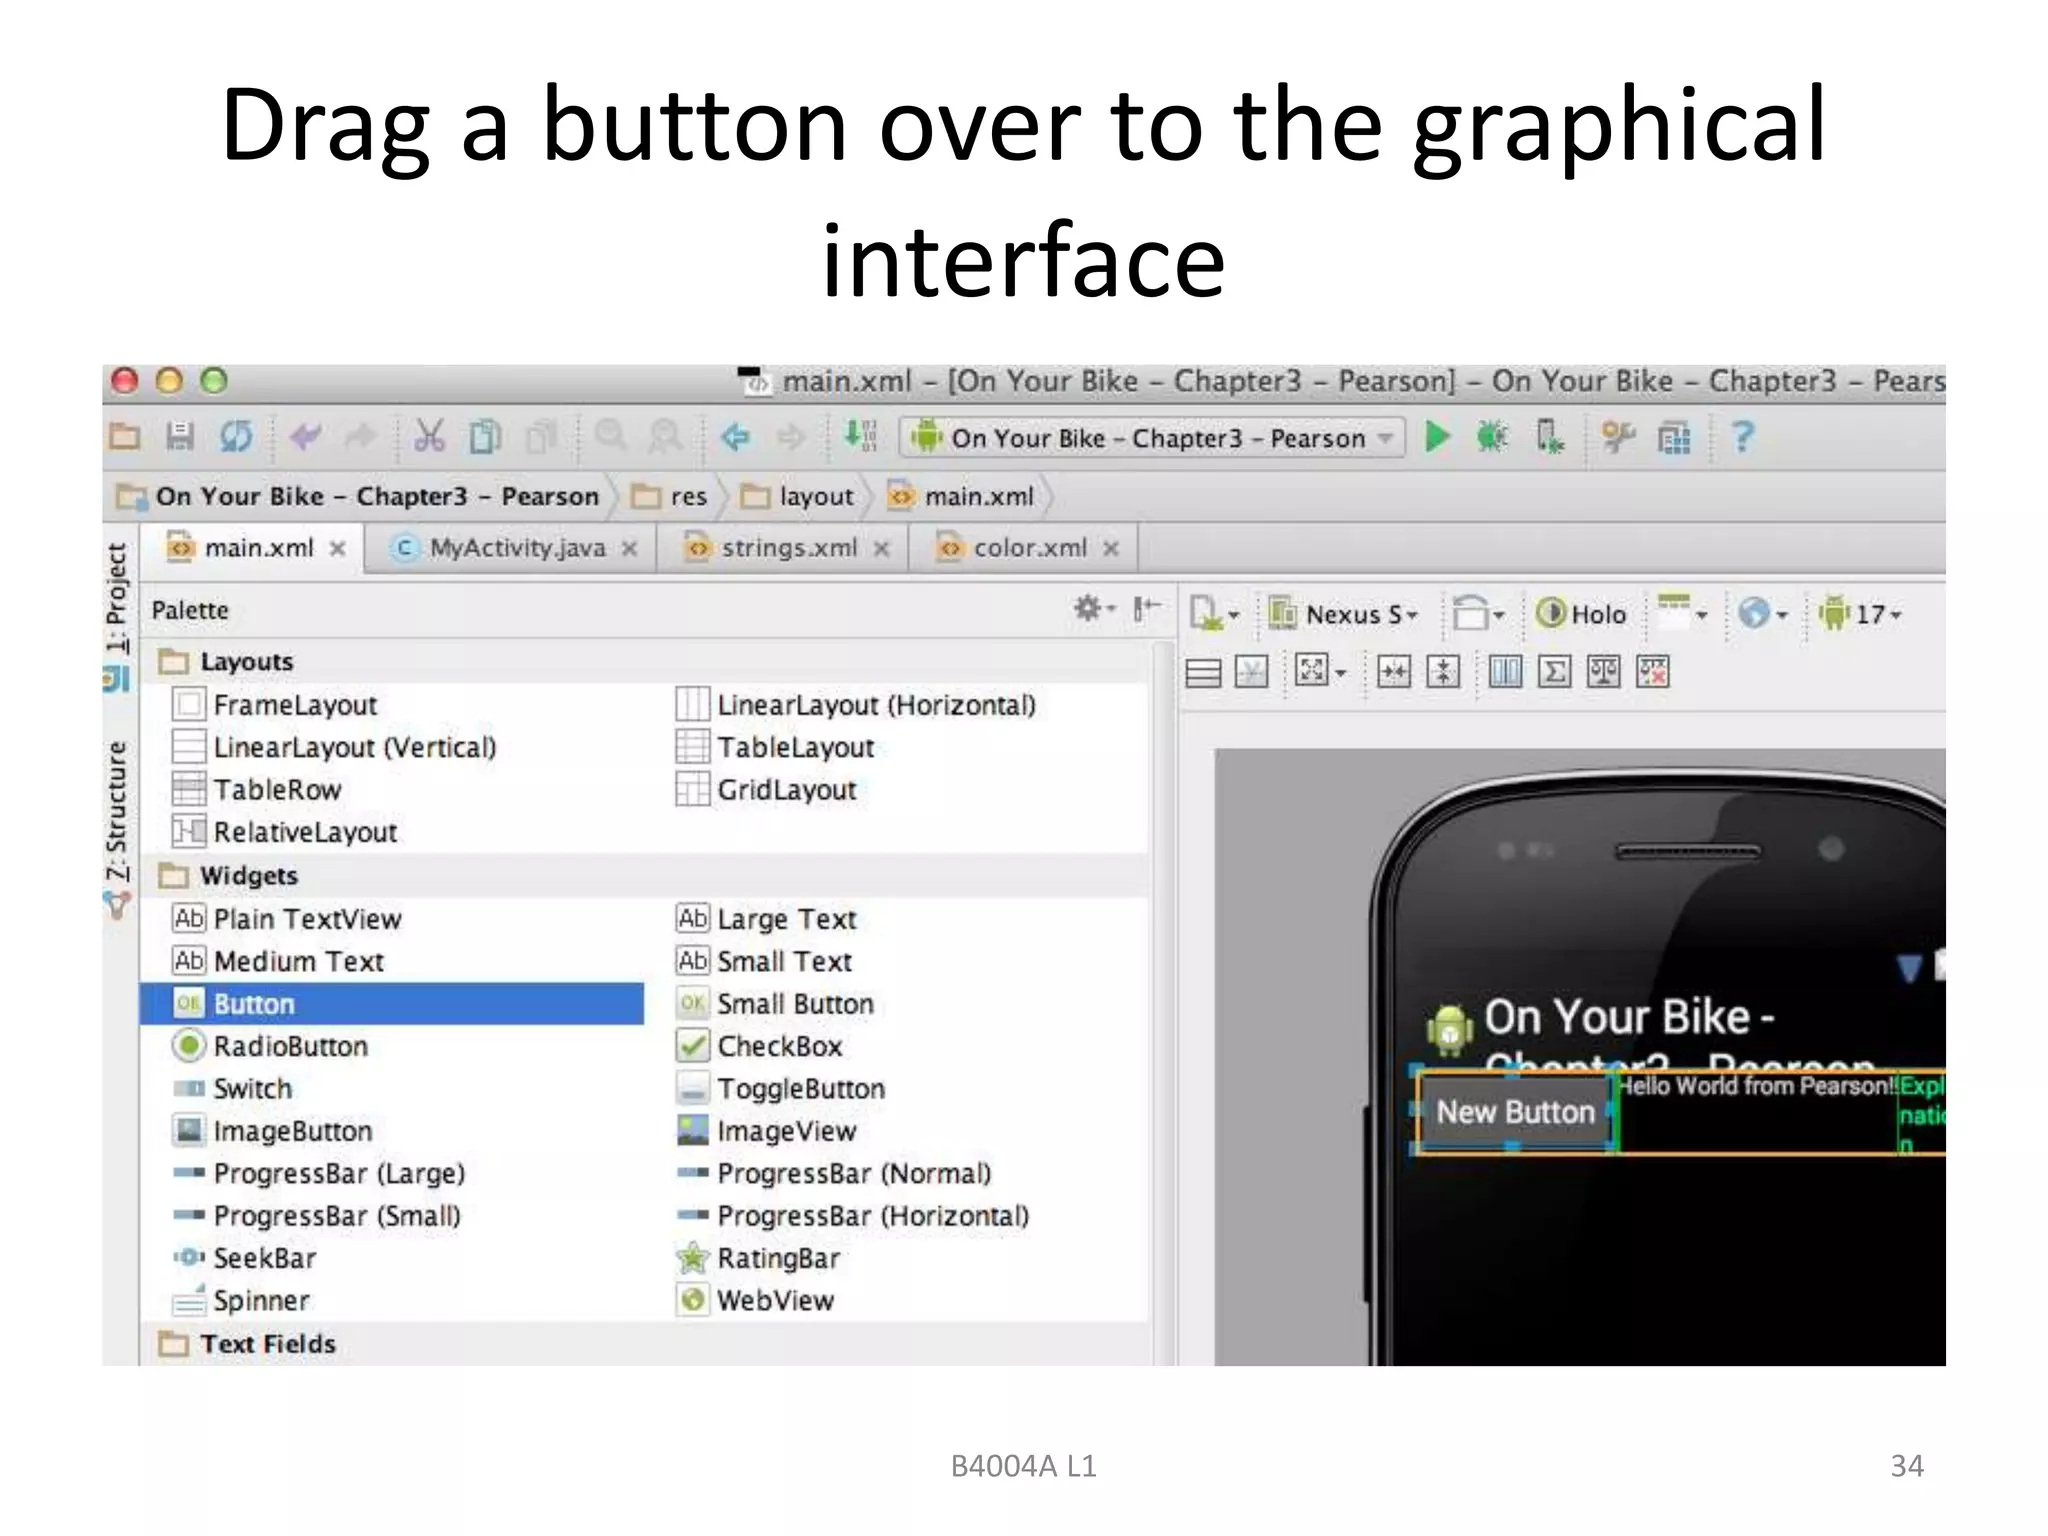
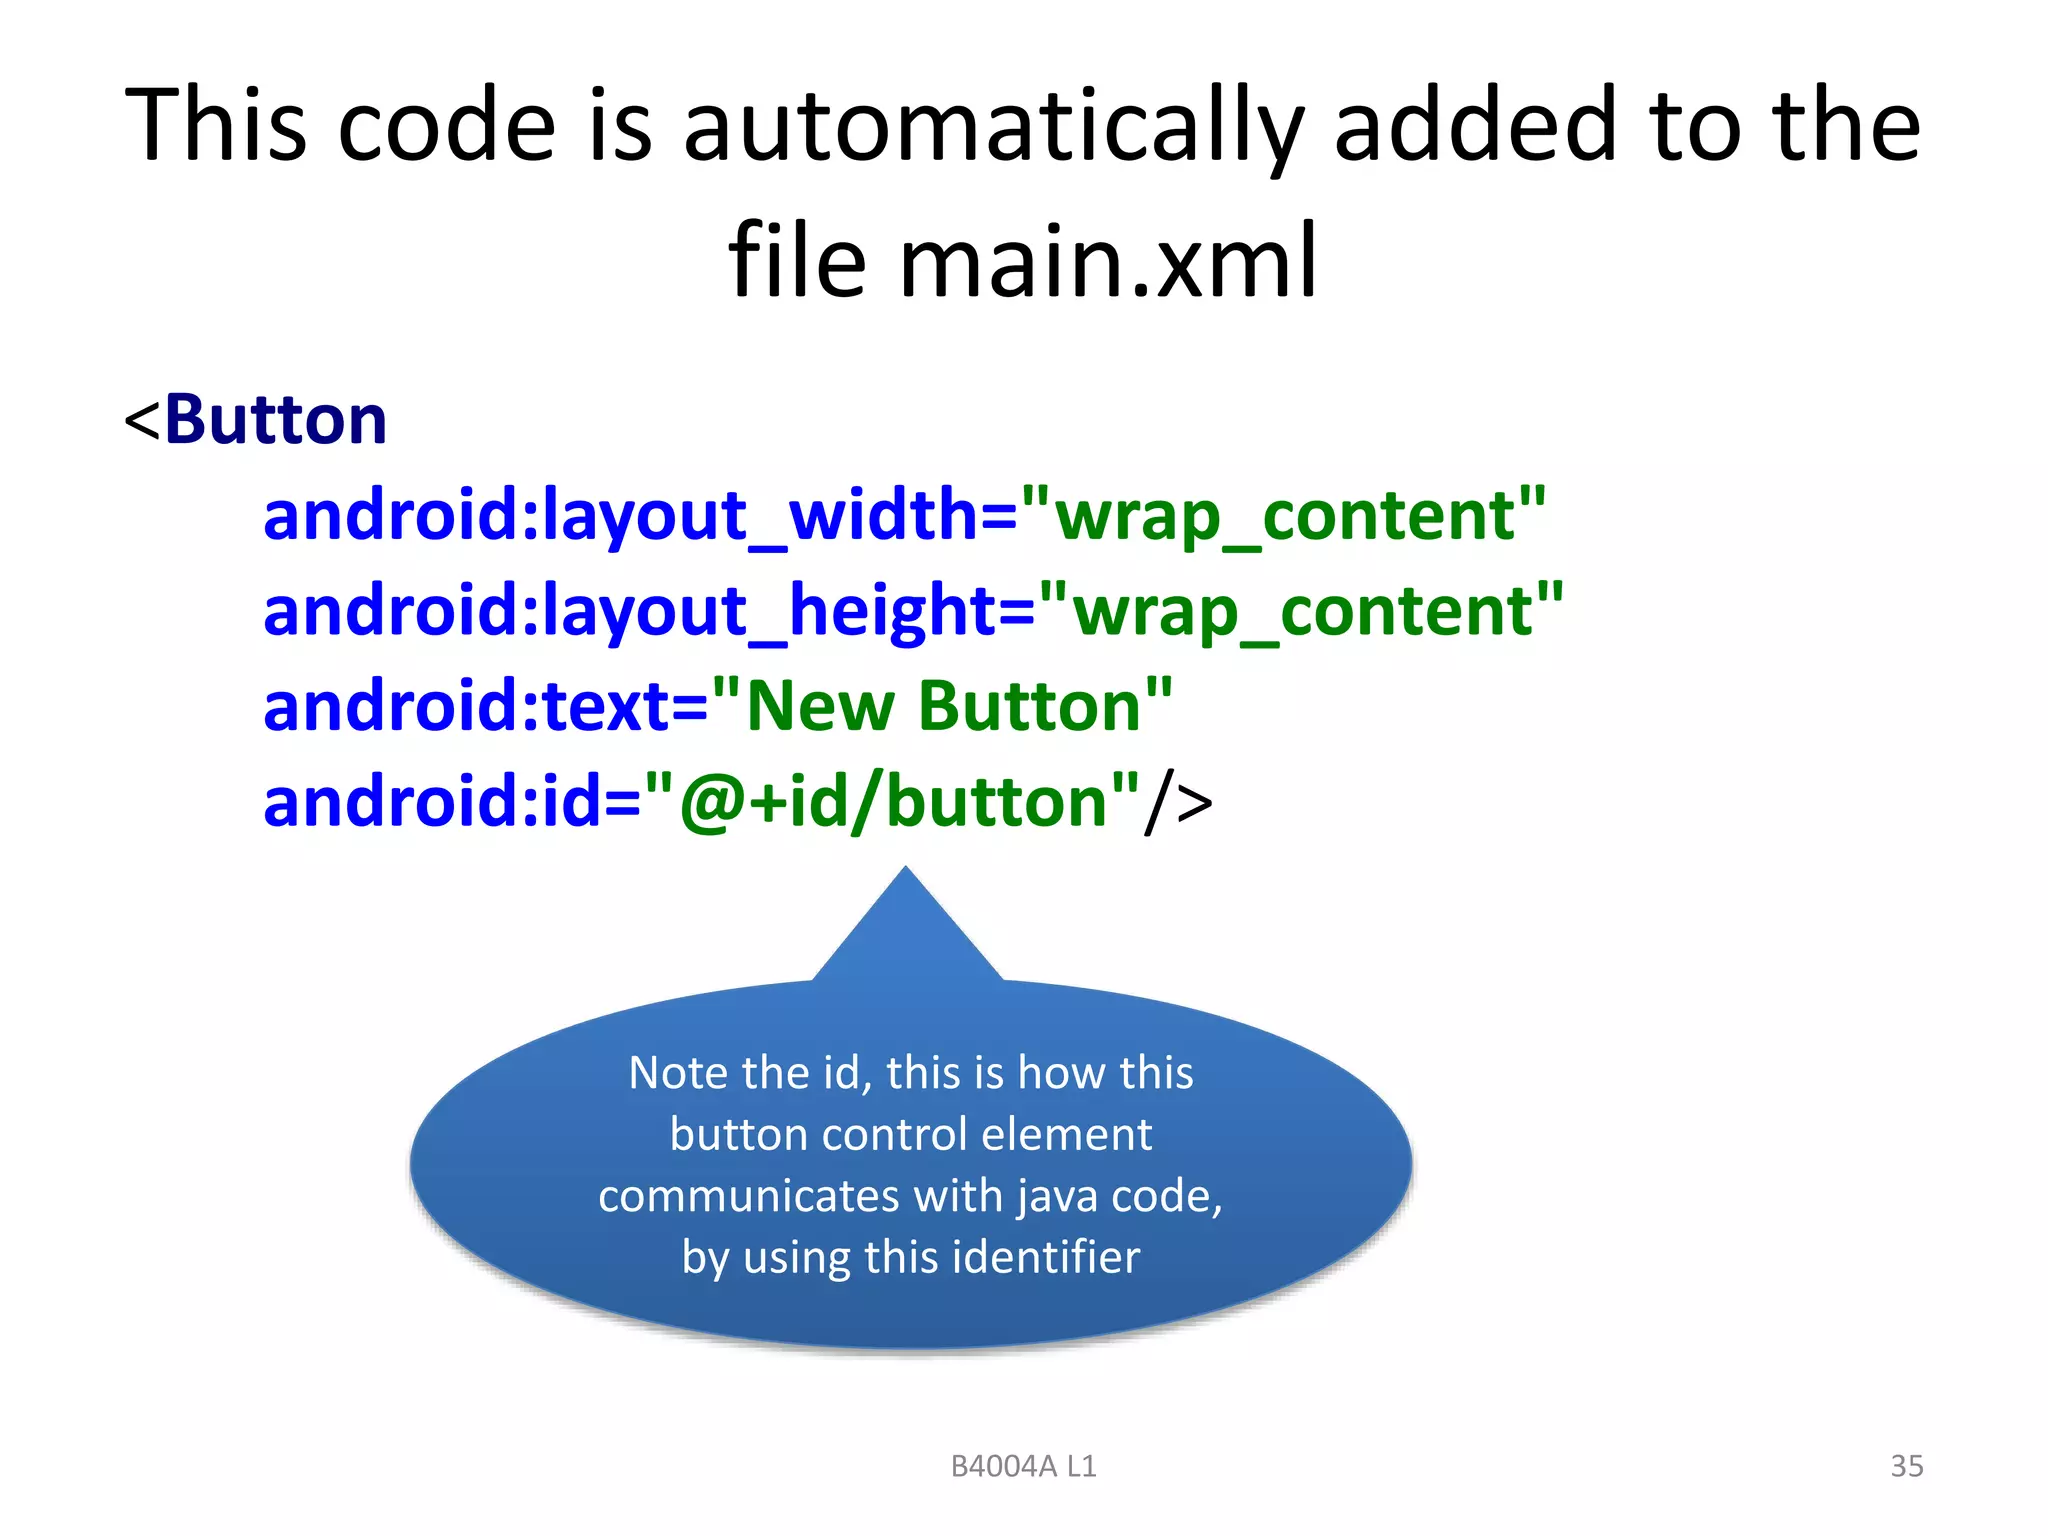
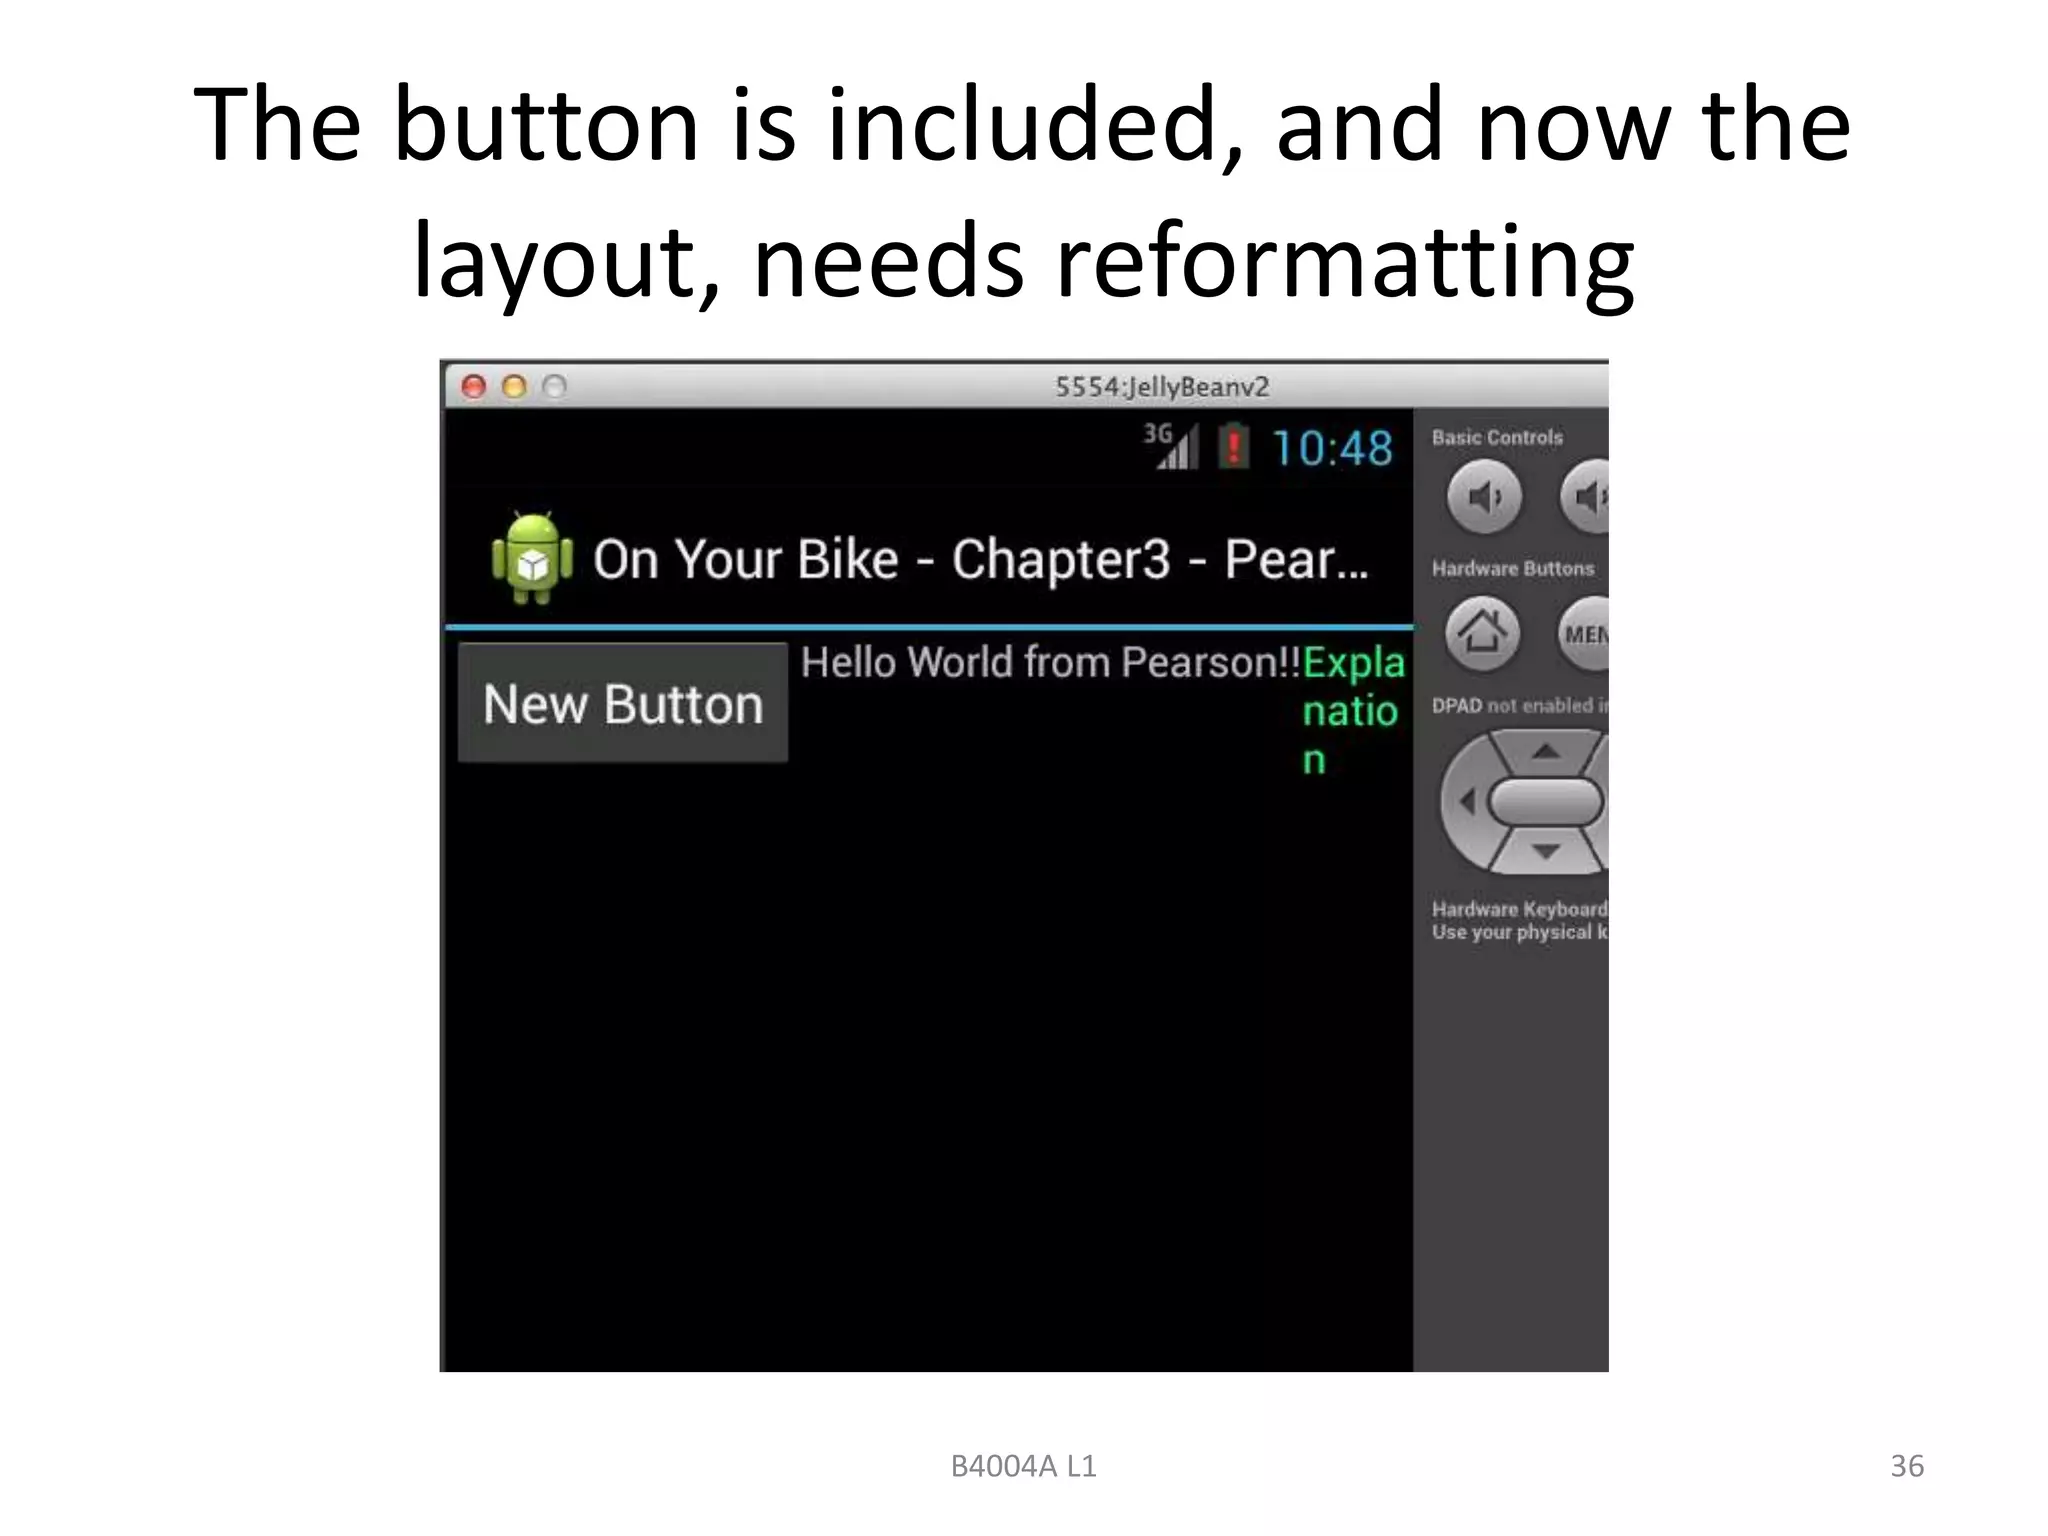
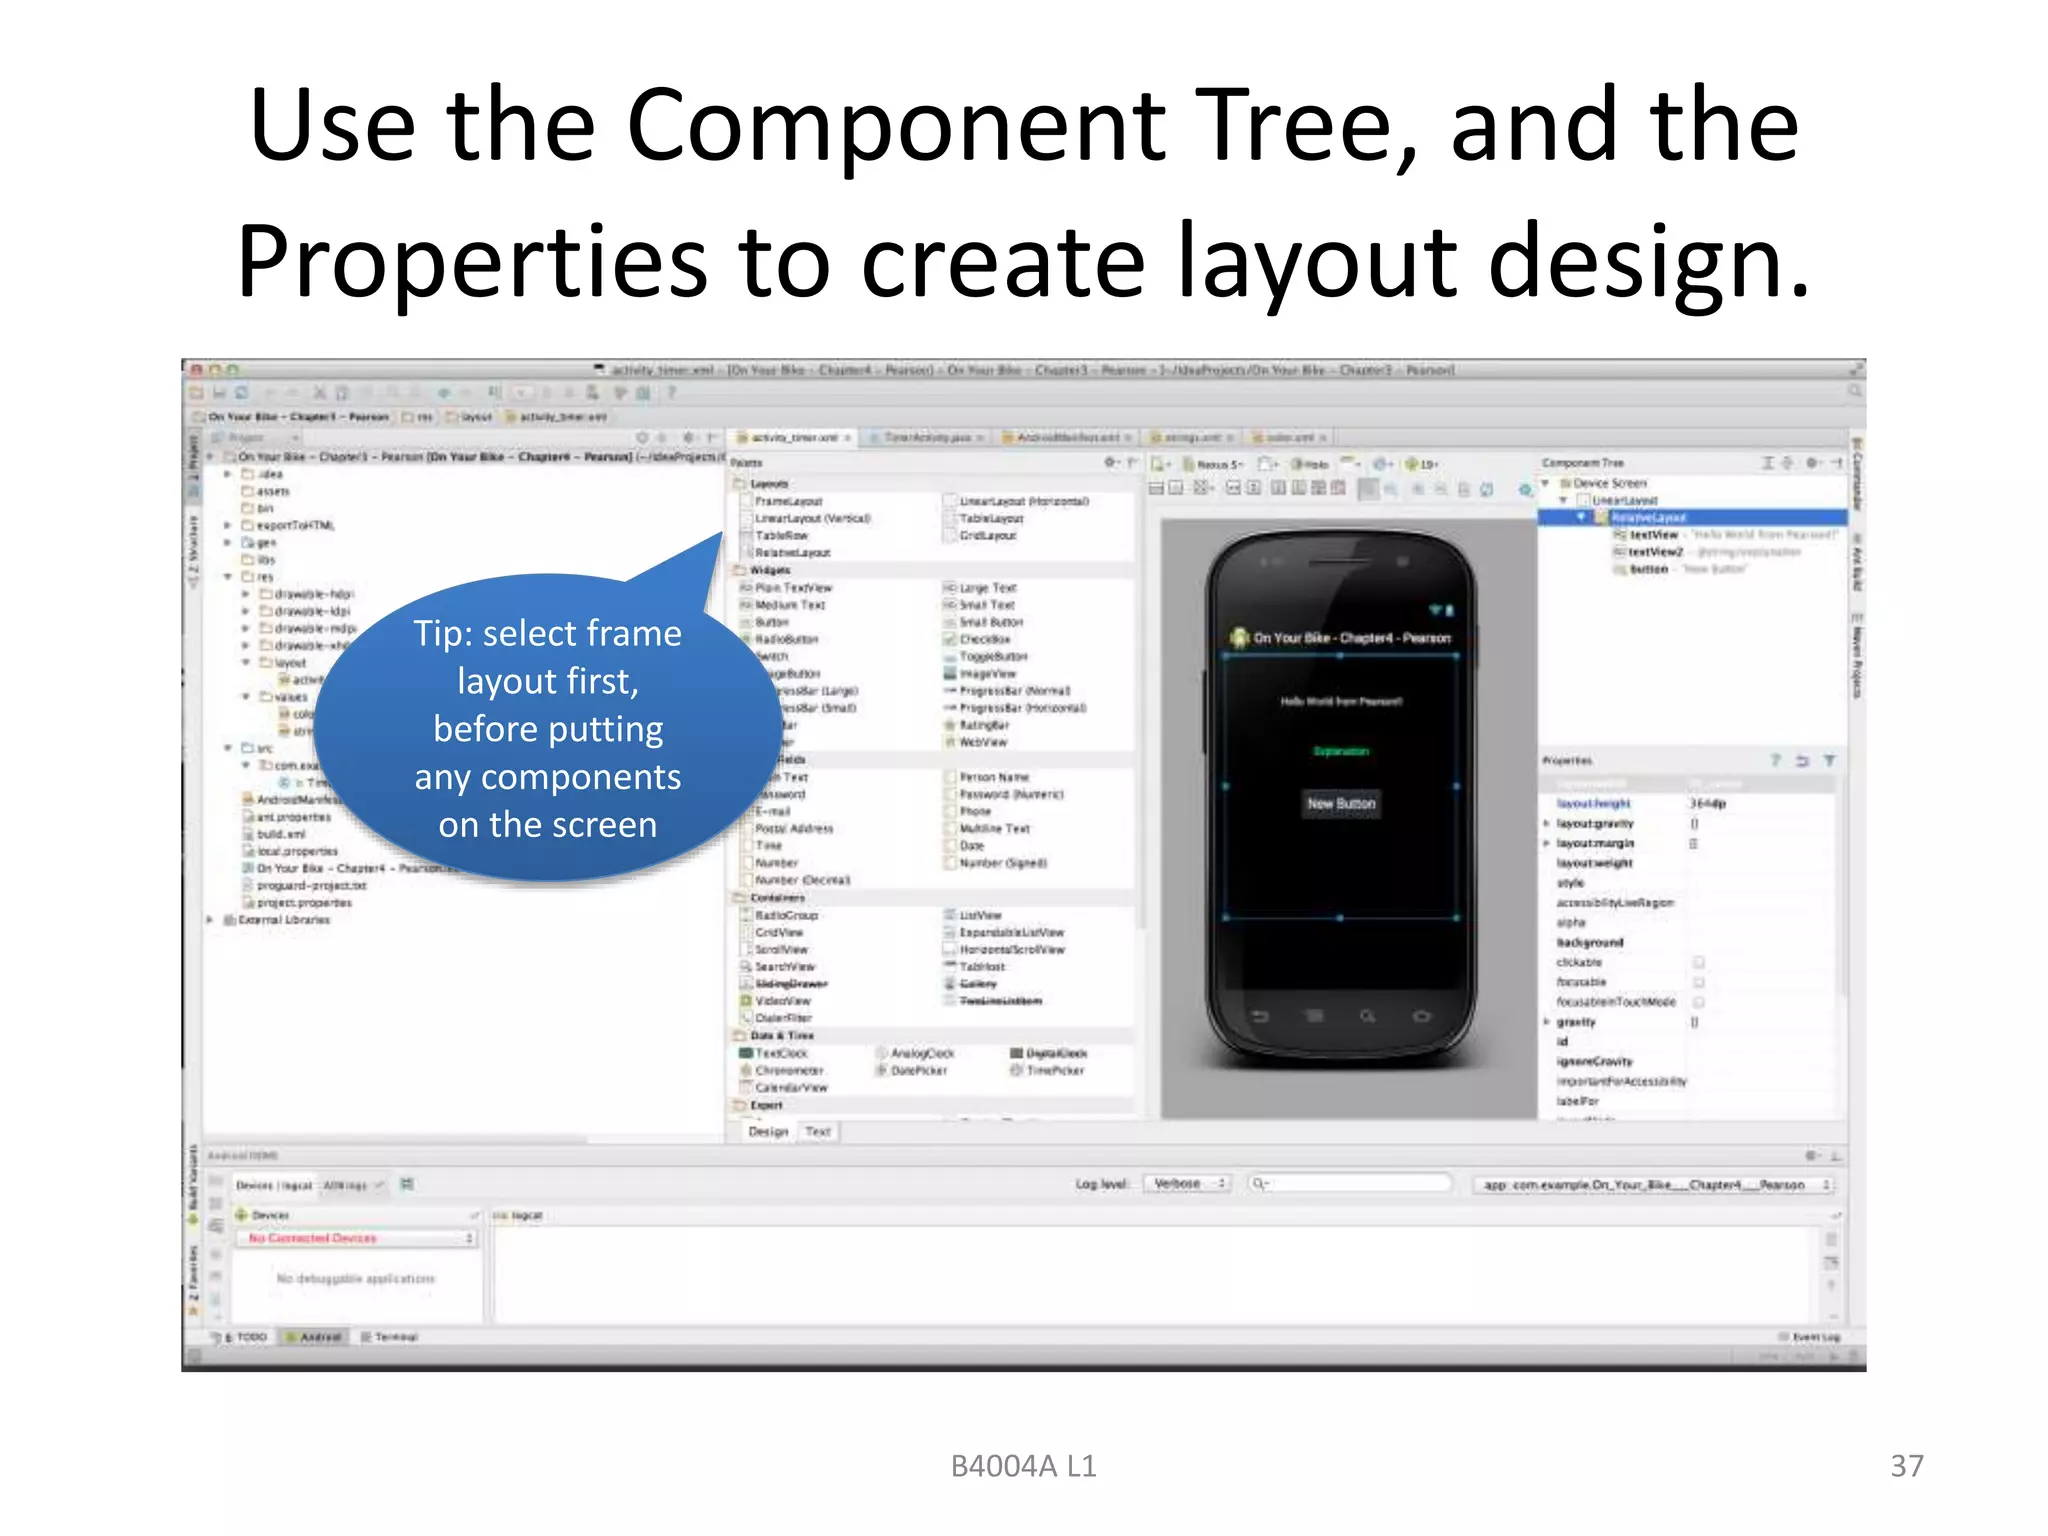
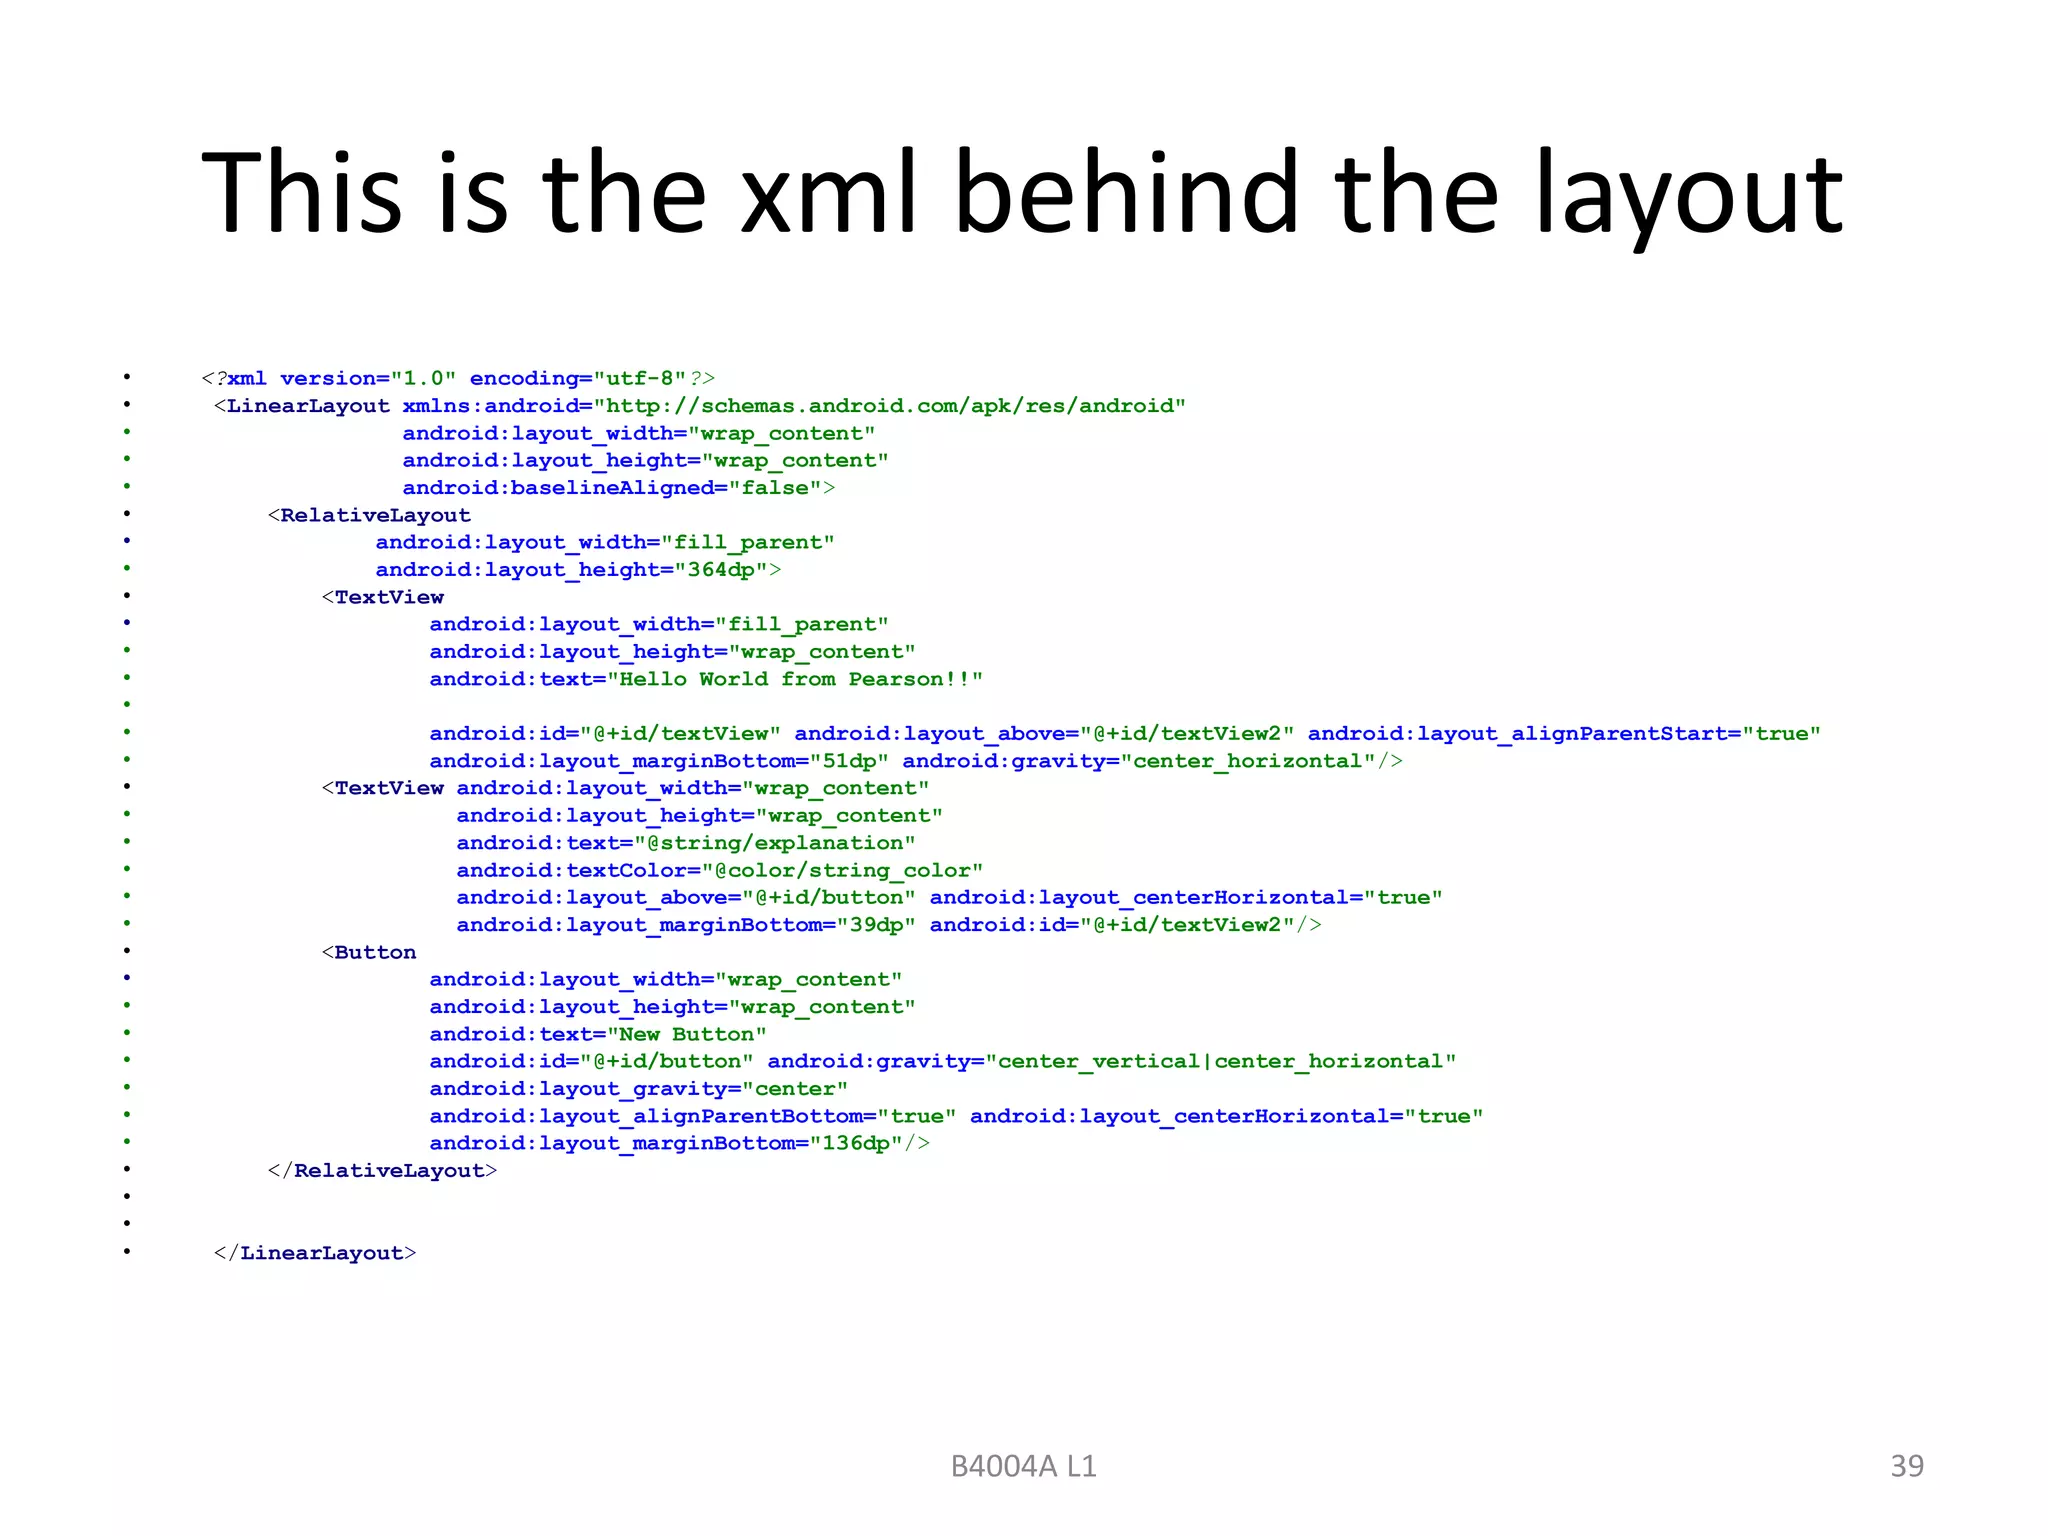
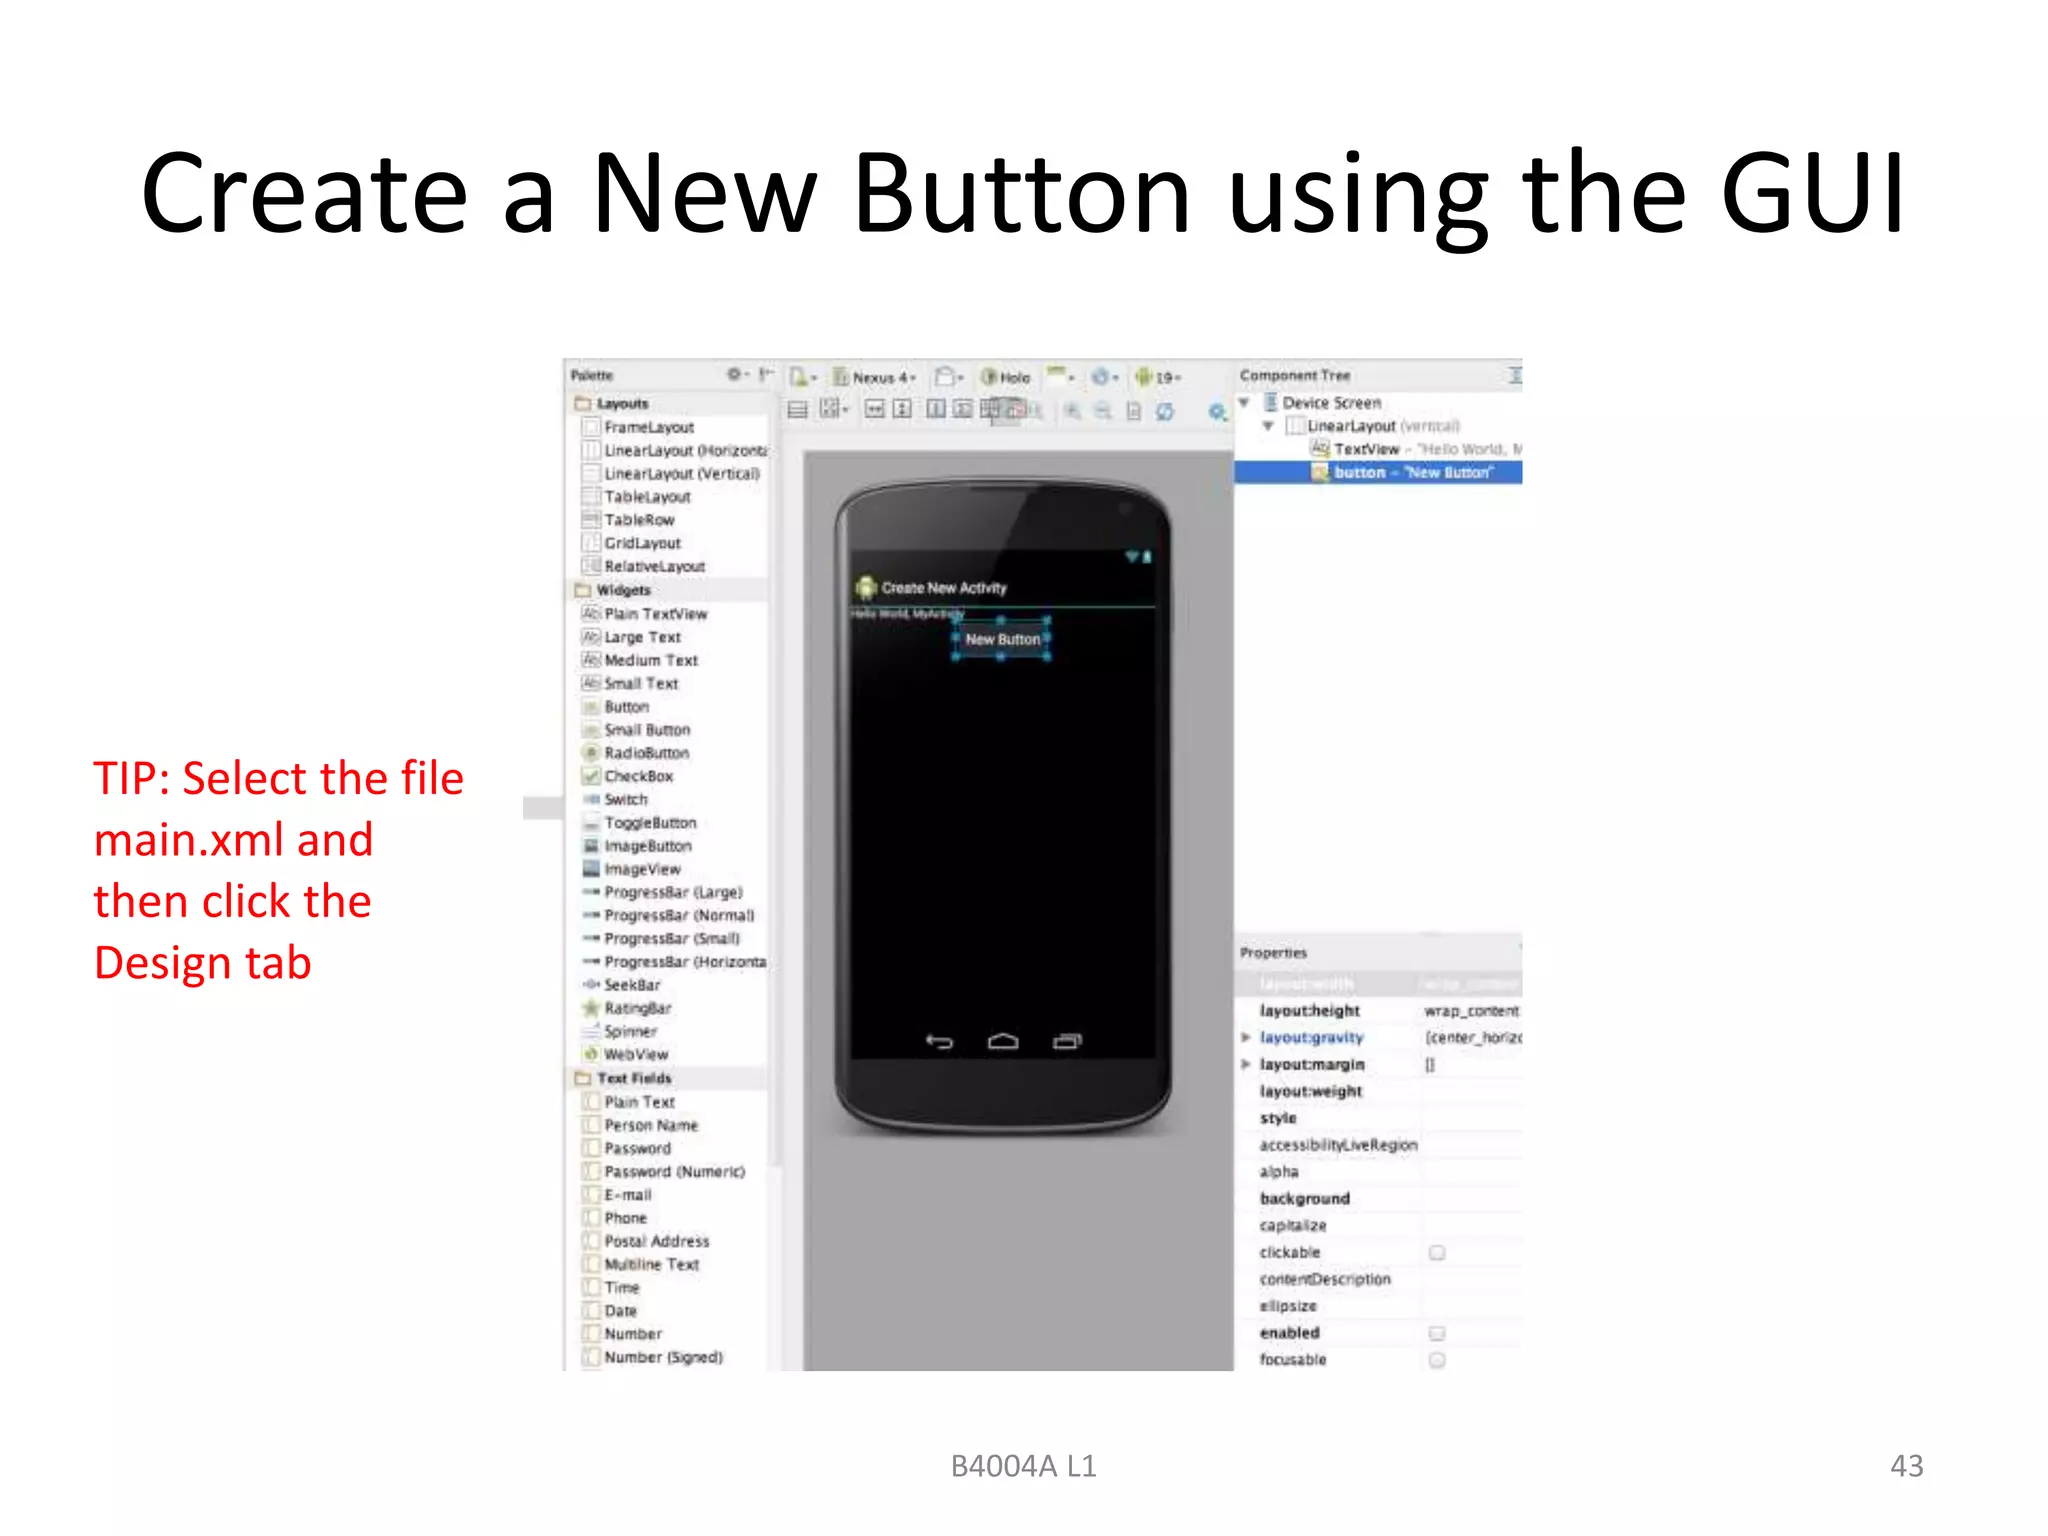
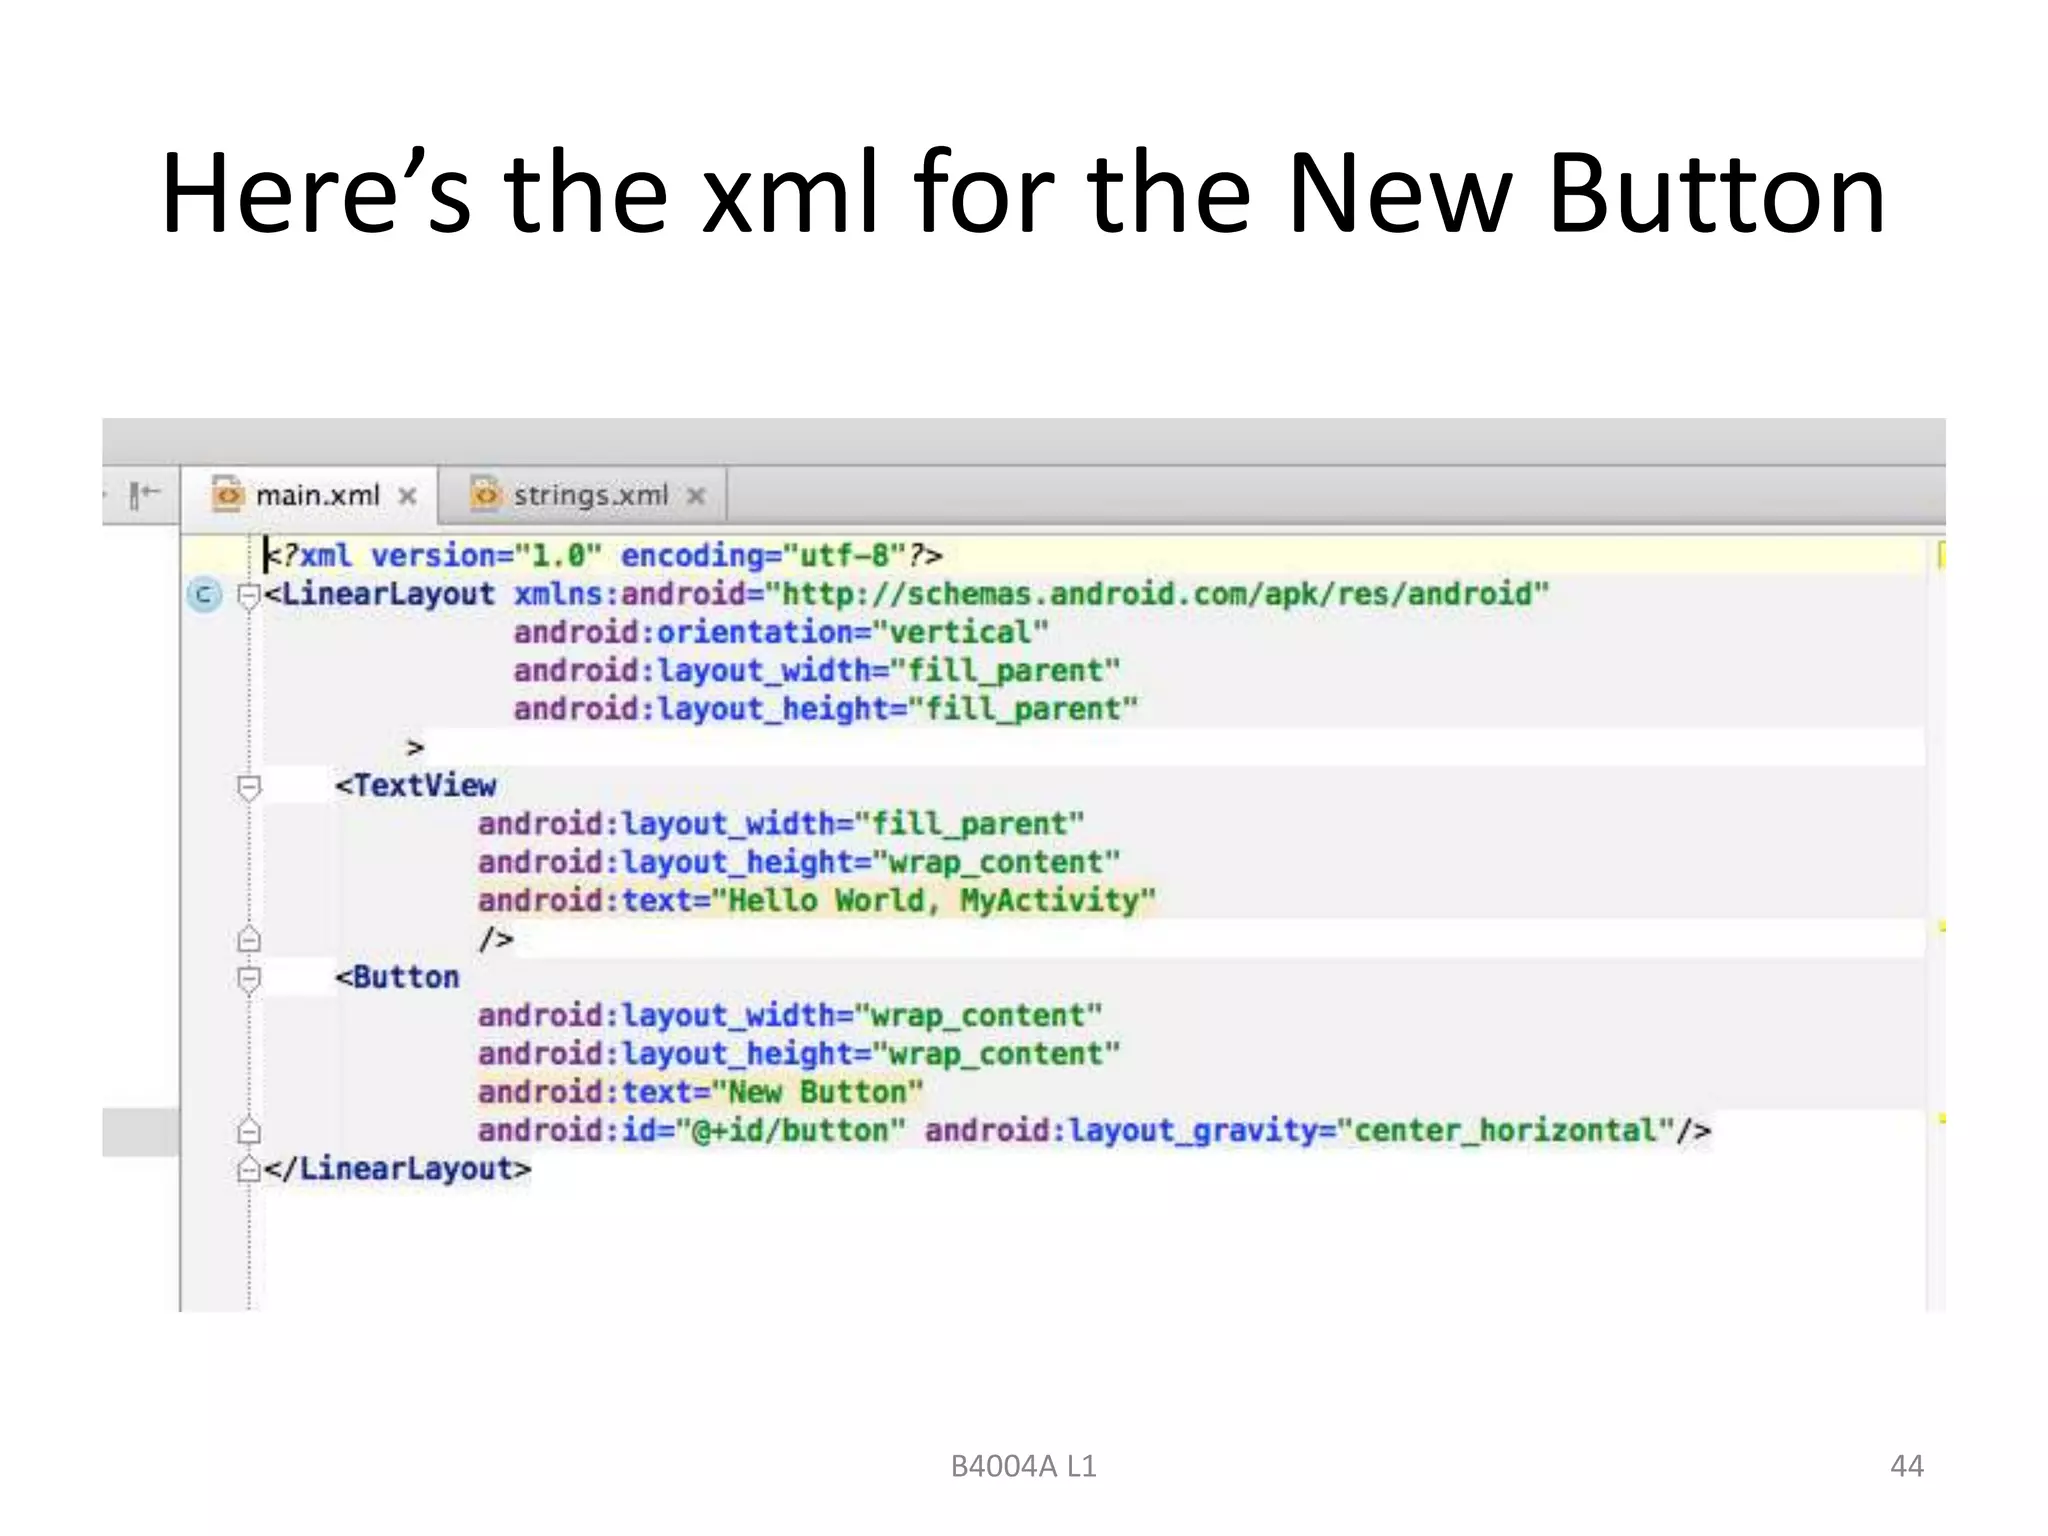
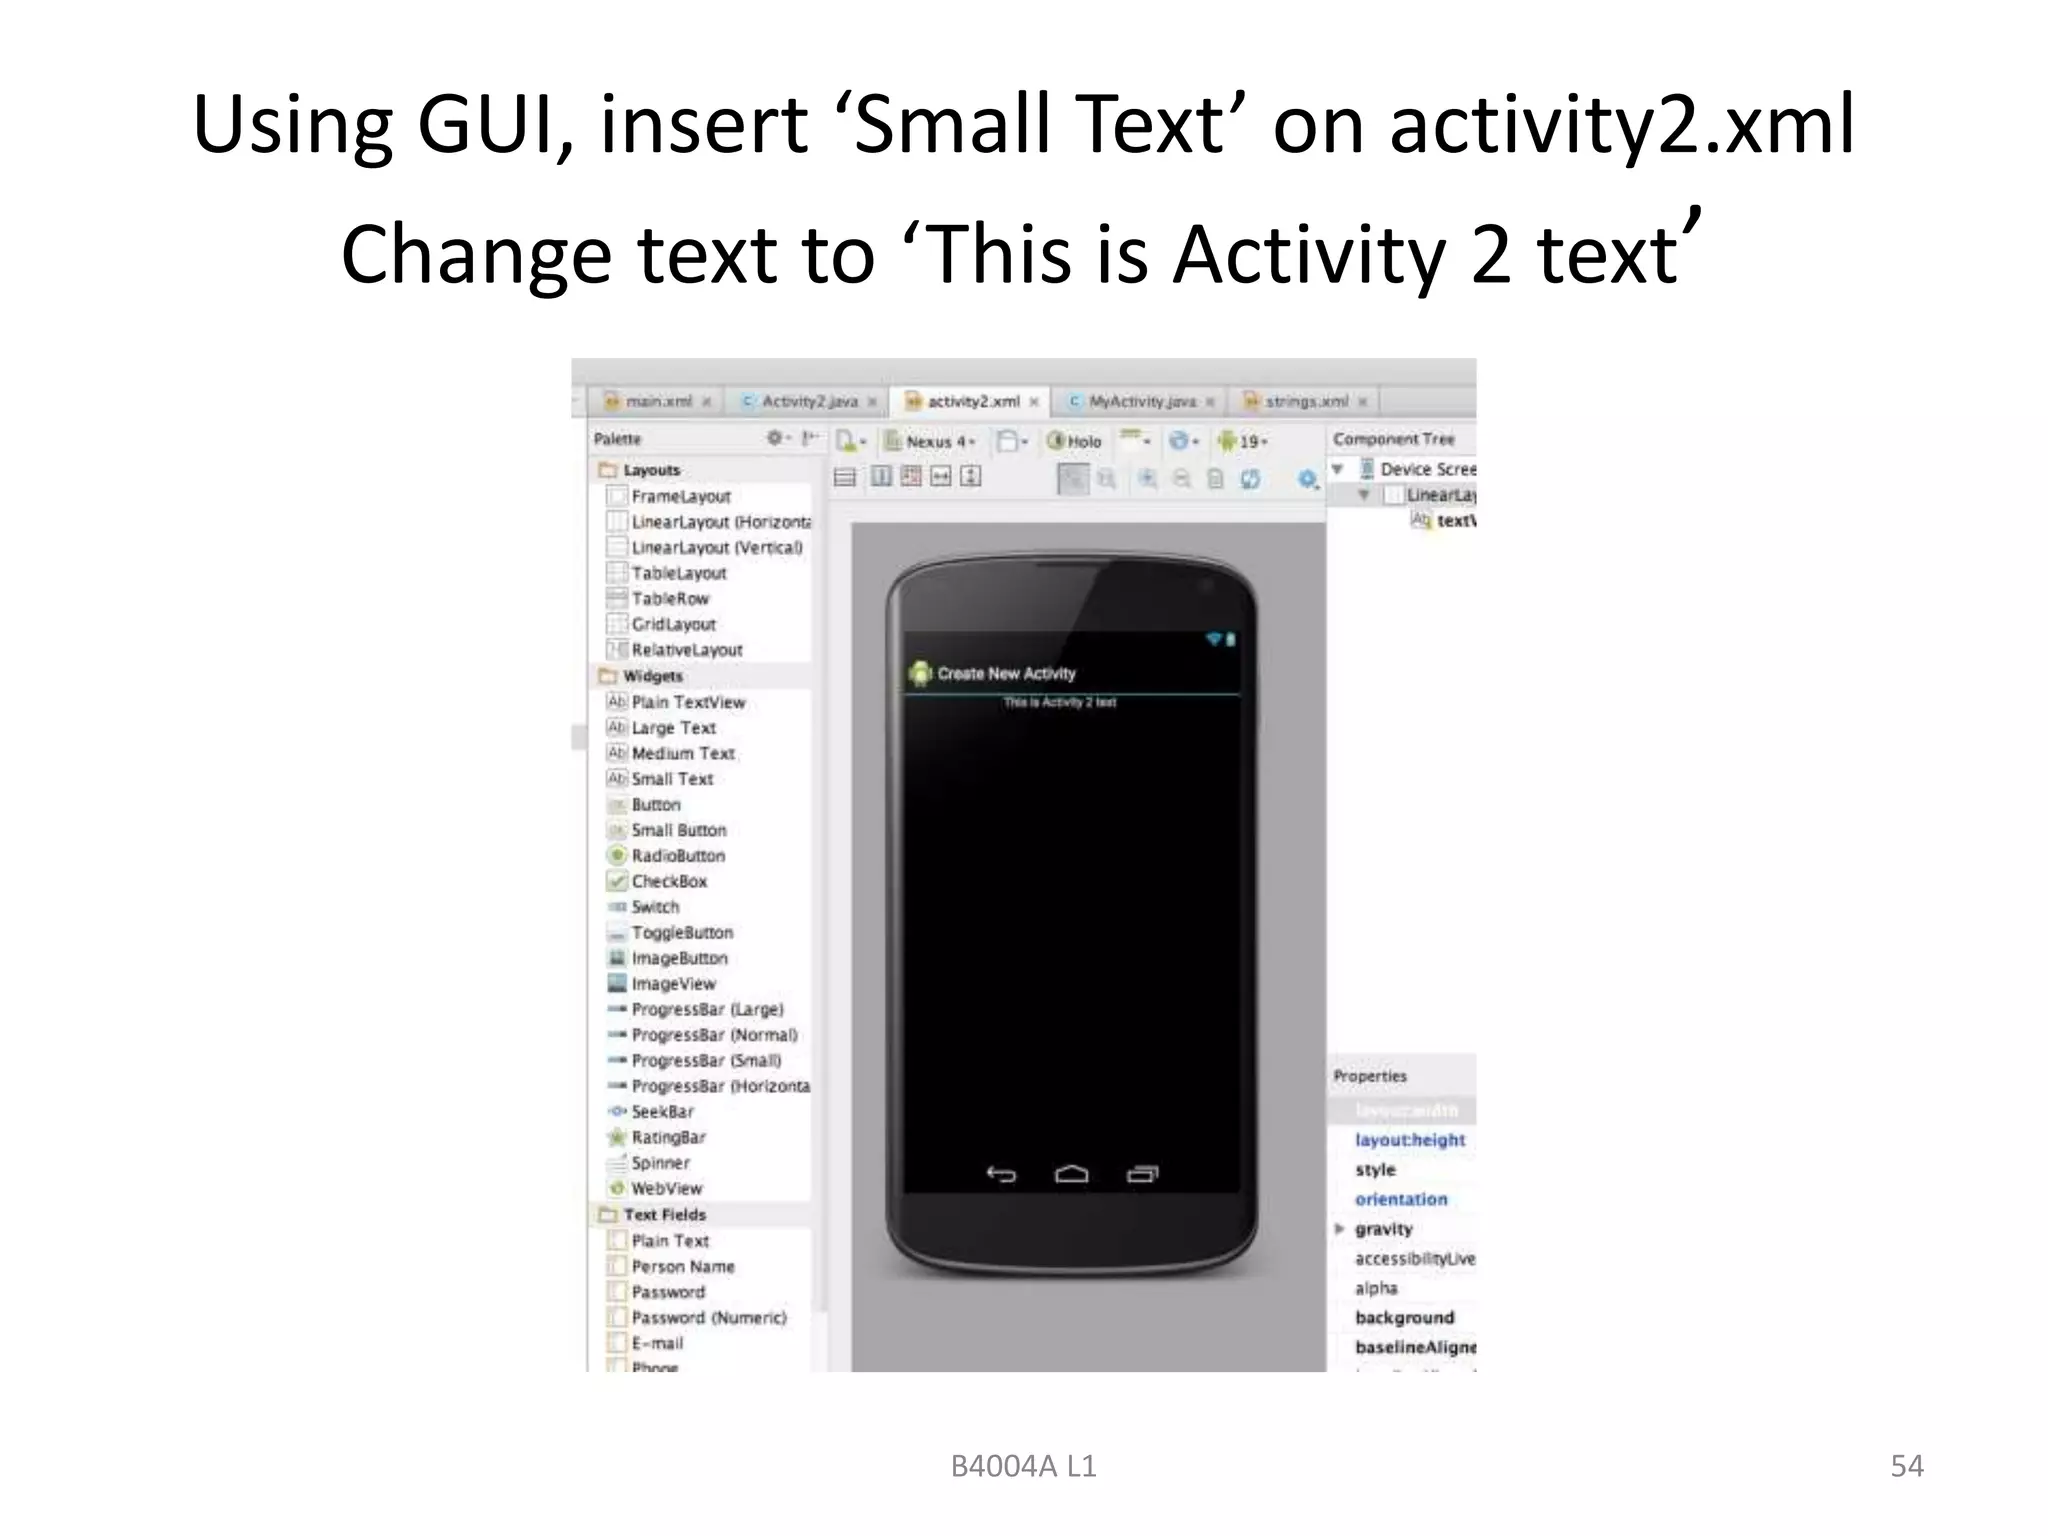
- An introduction to common UI controls in Android like buttons, text fields, checkboxes and how to add them via XML layout files.
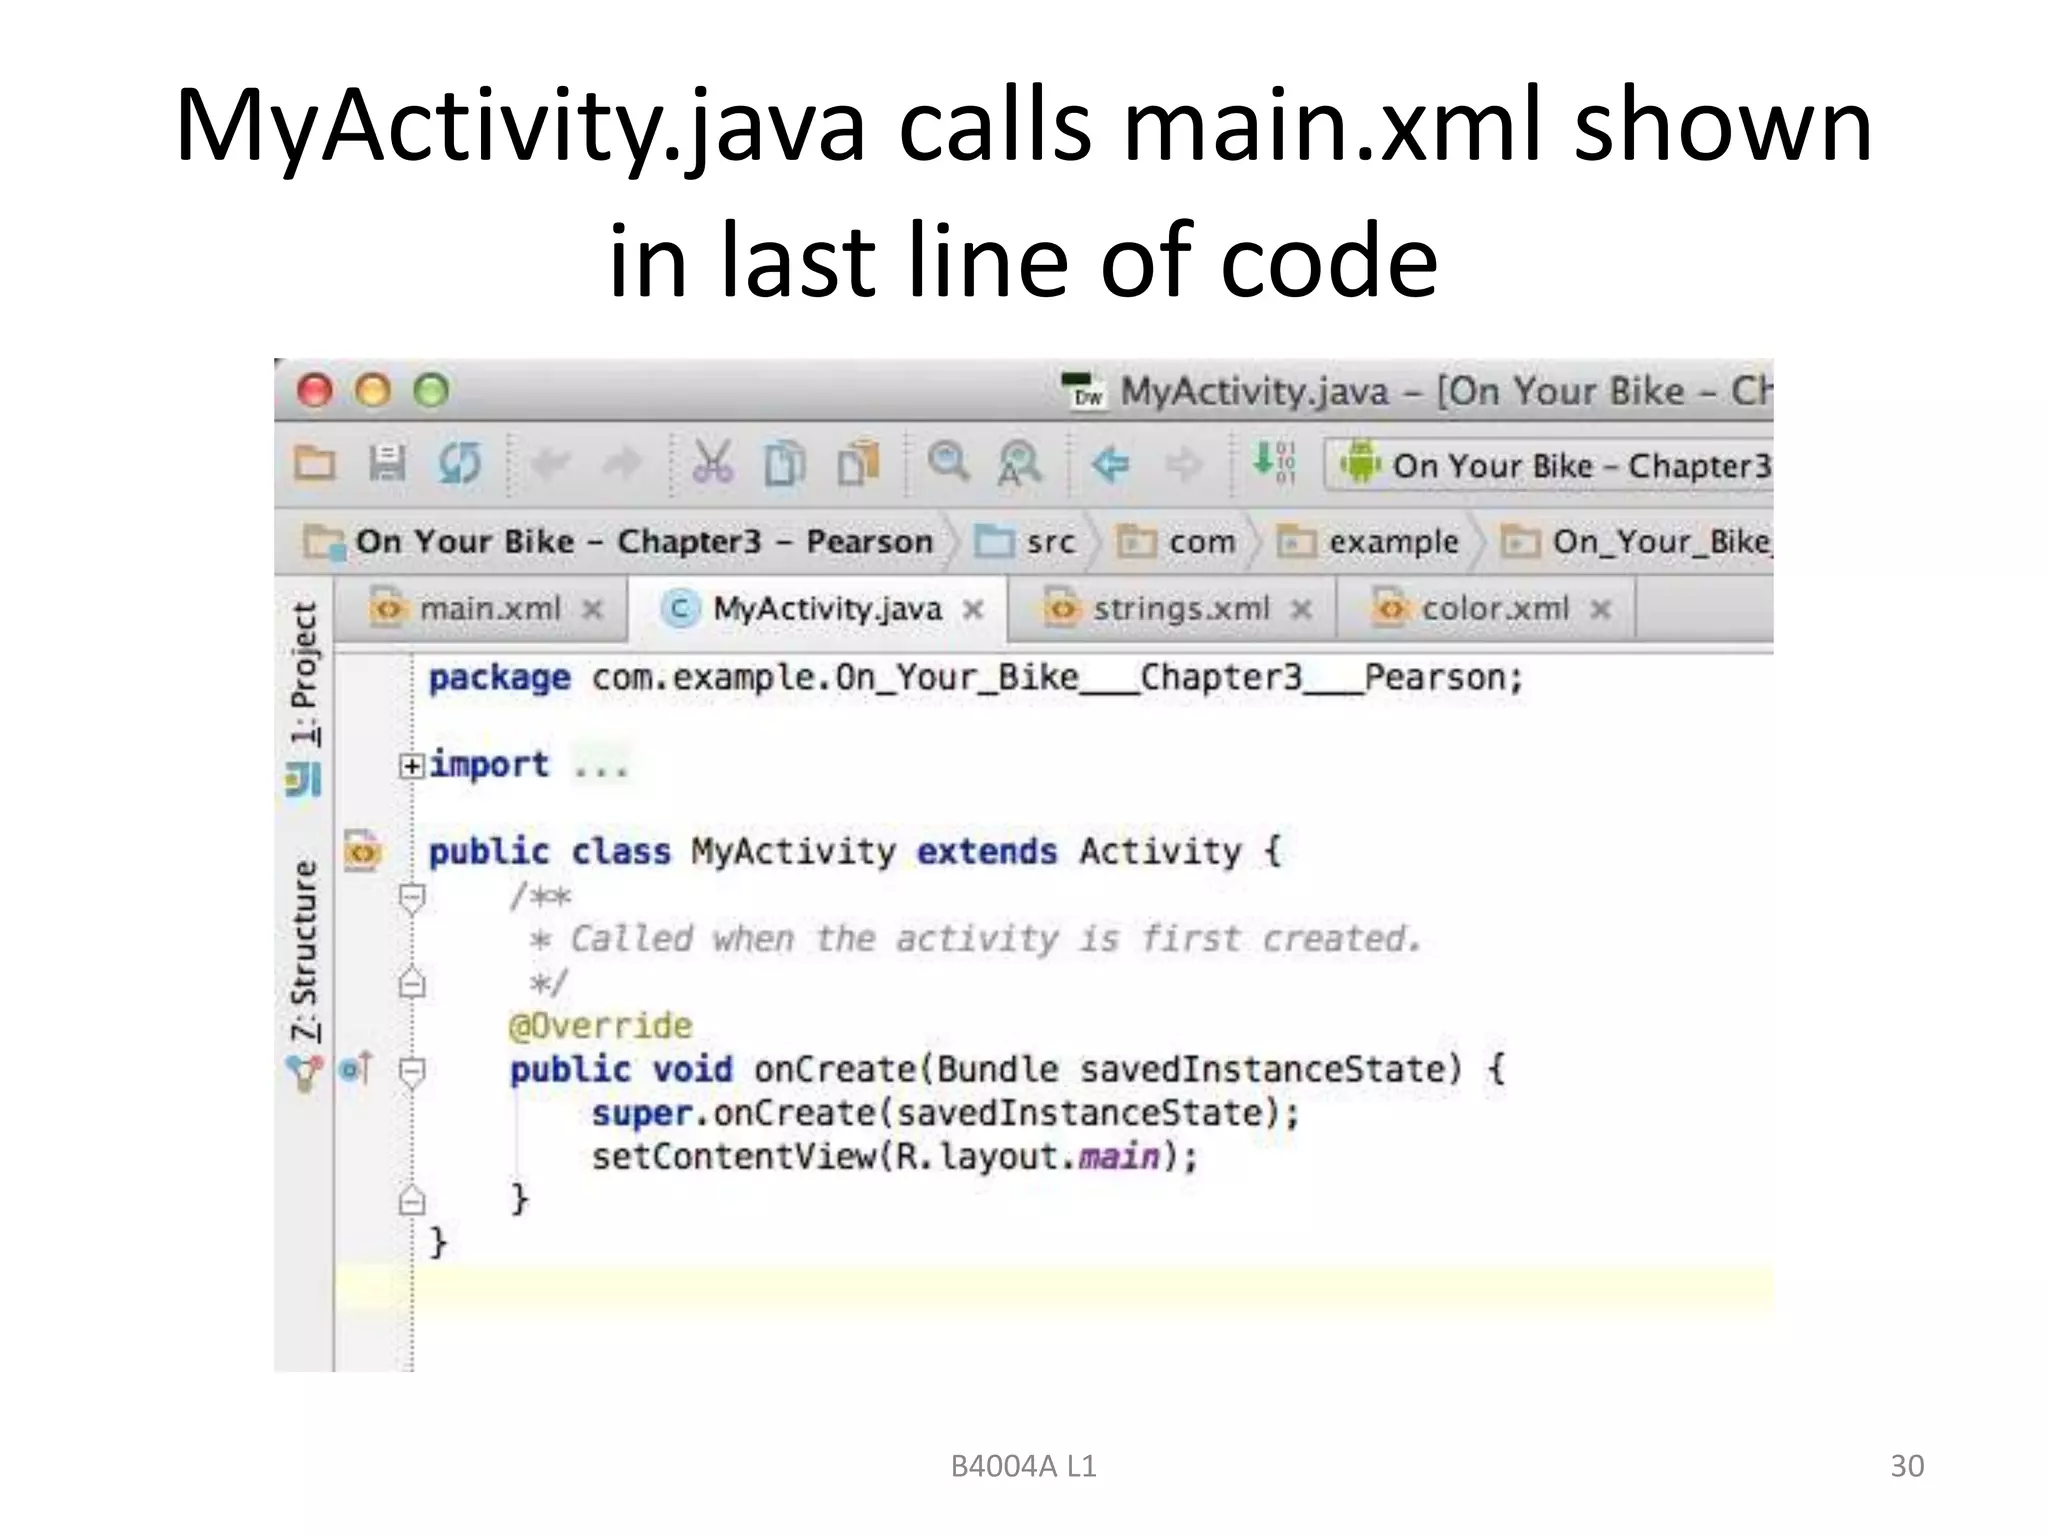
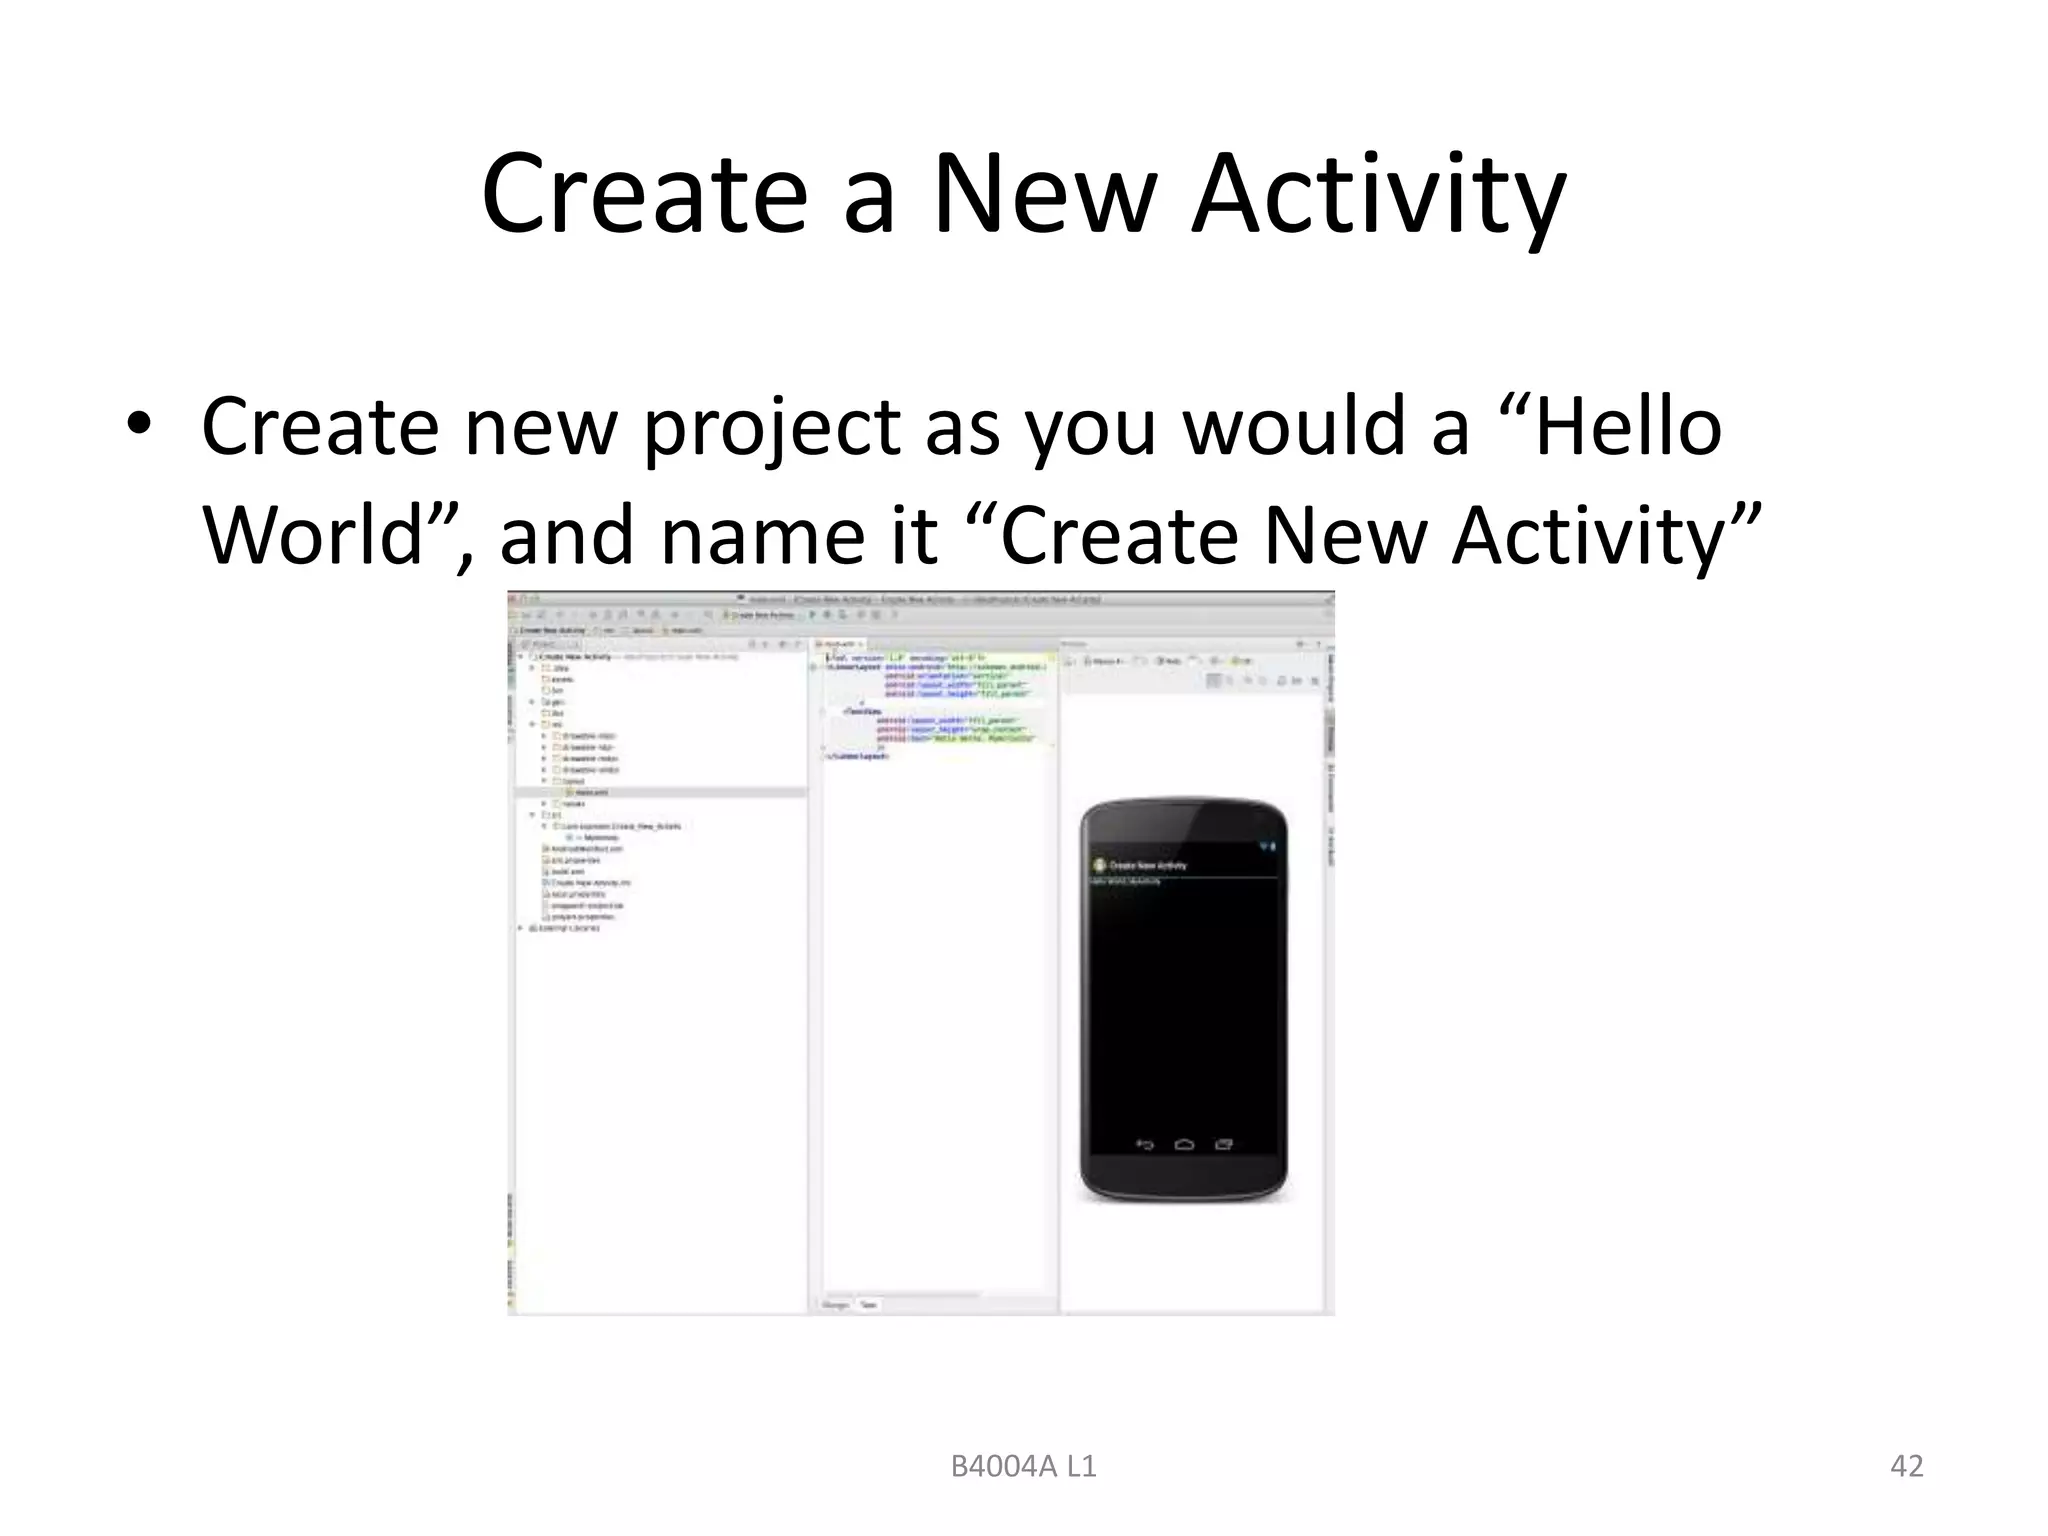
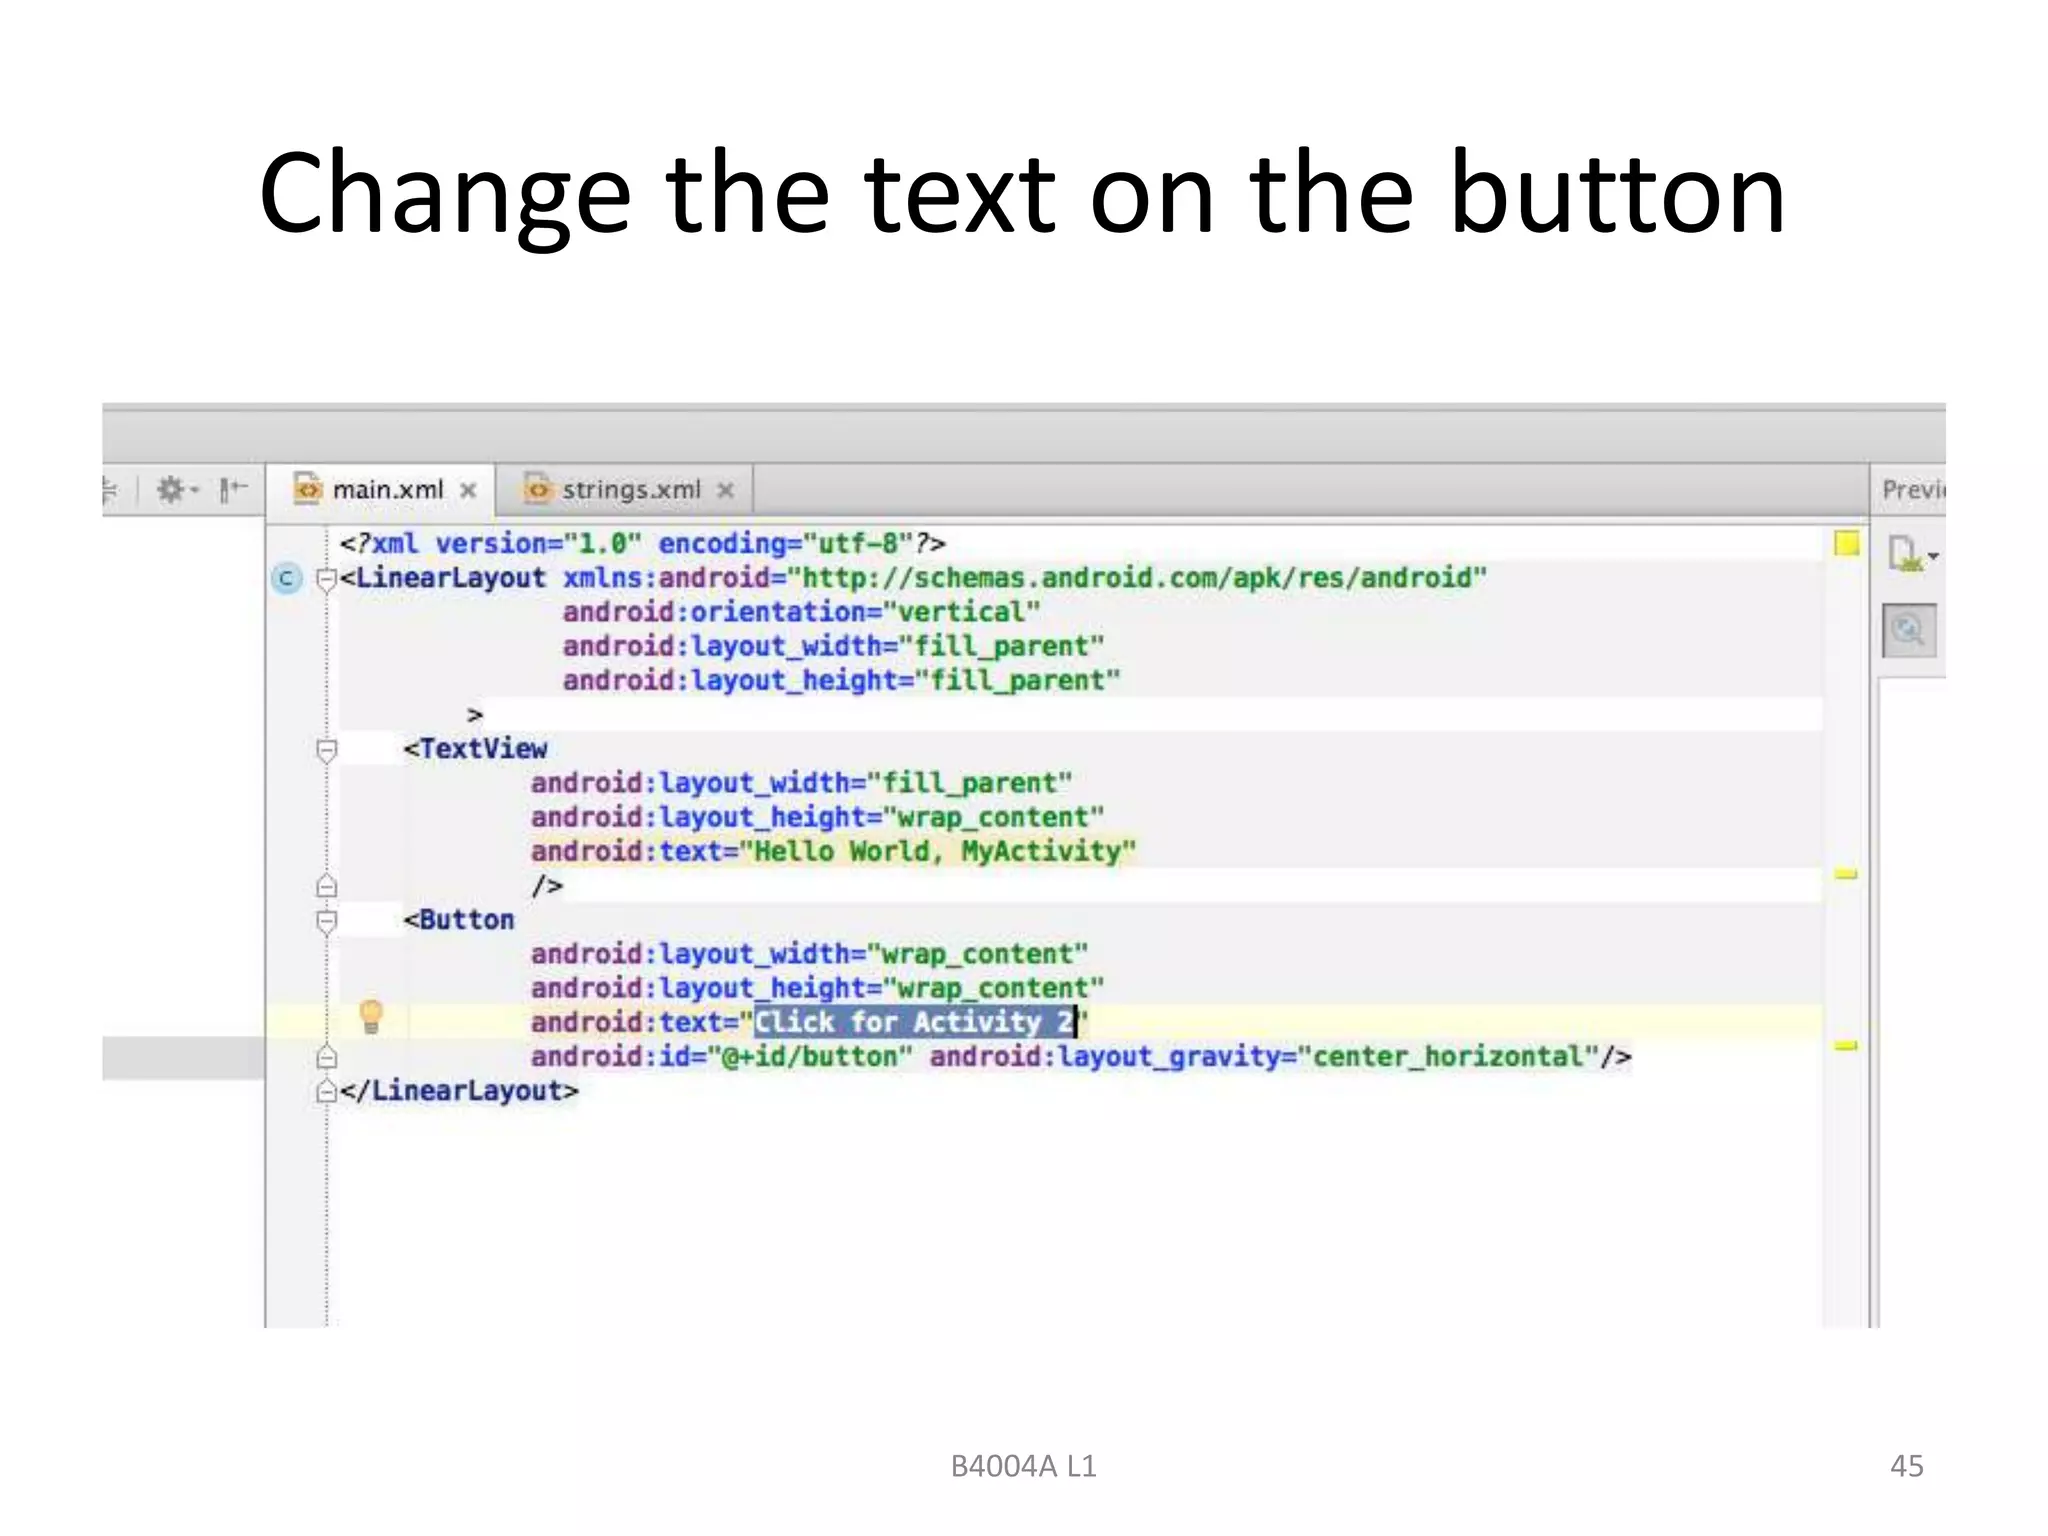
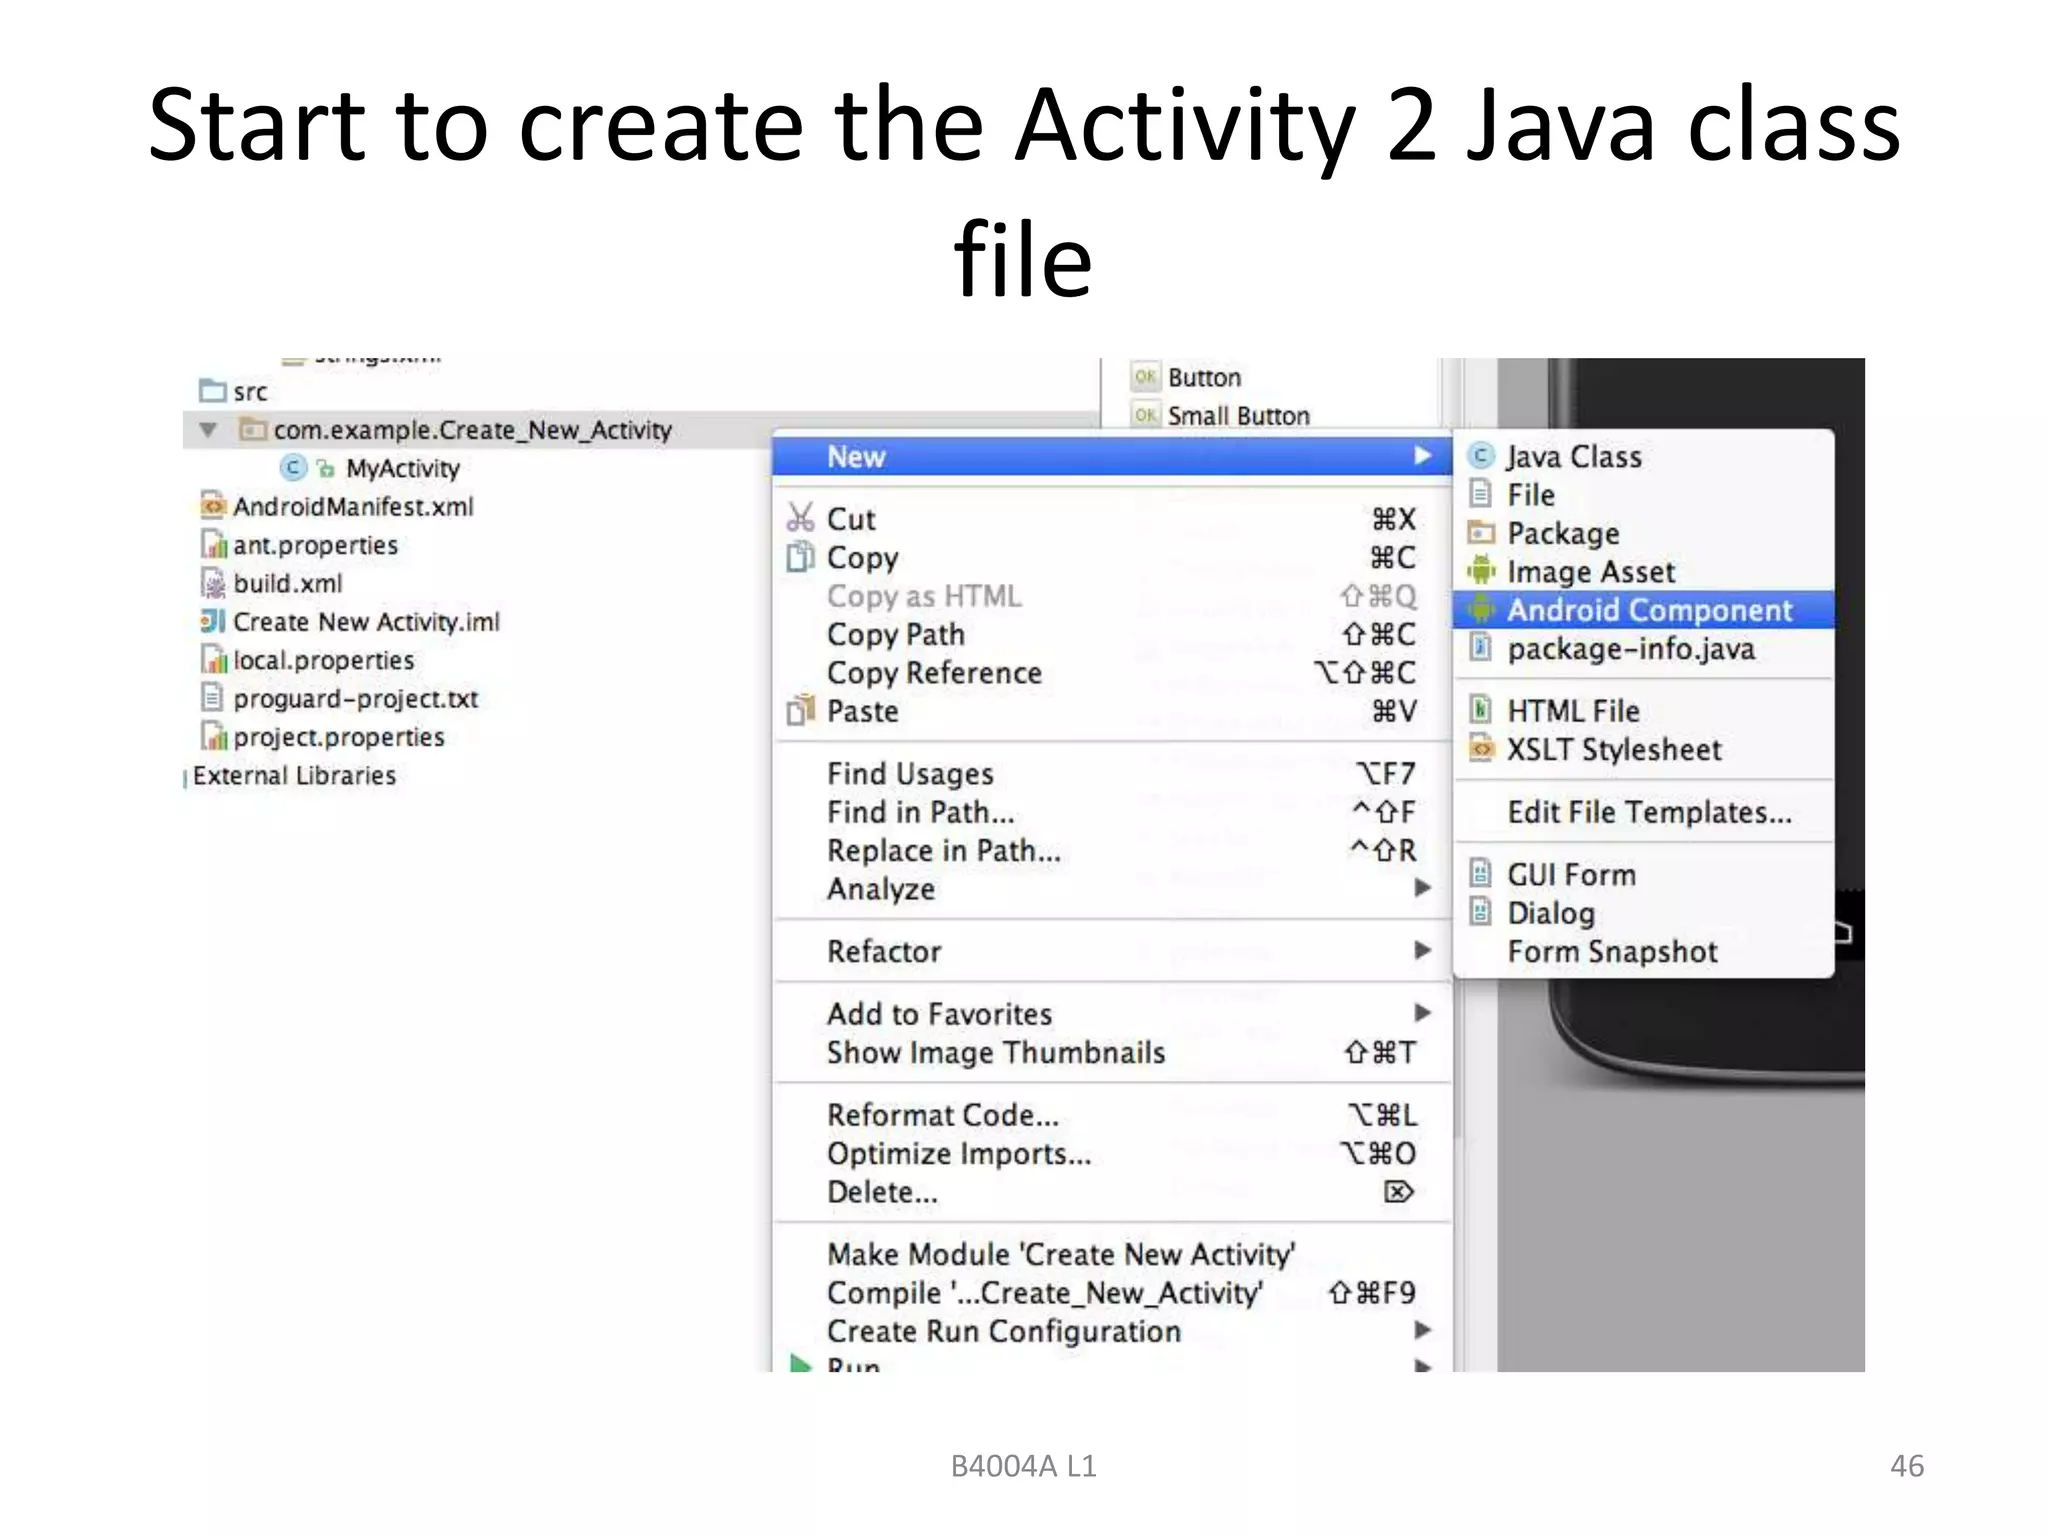
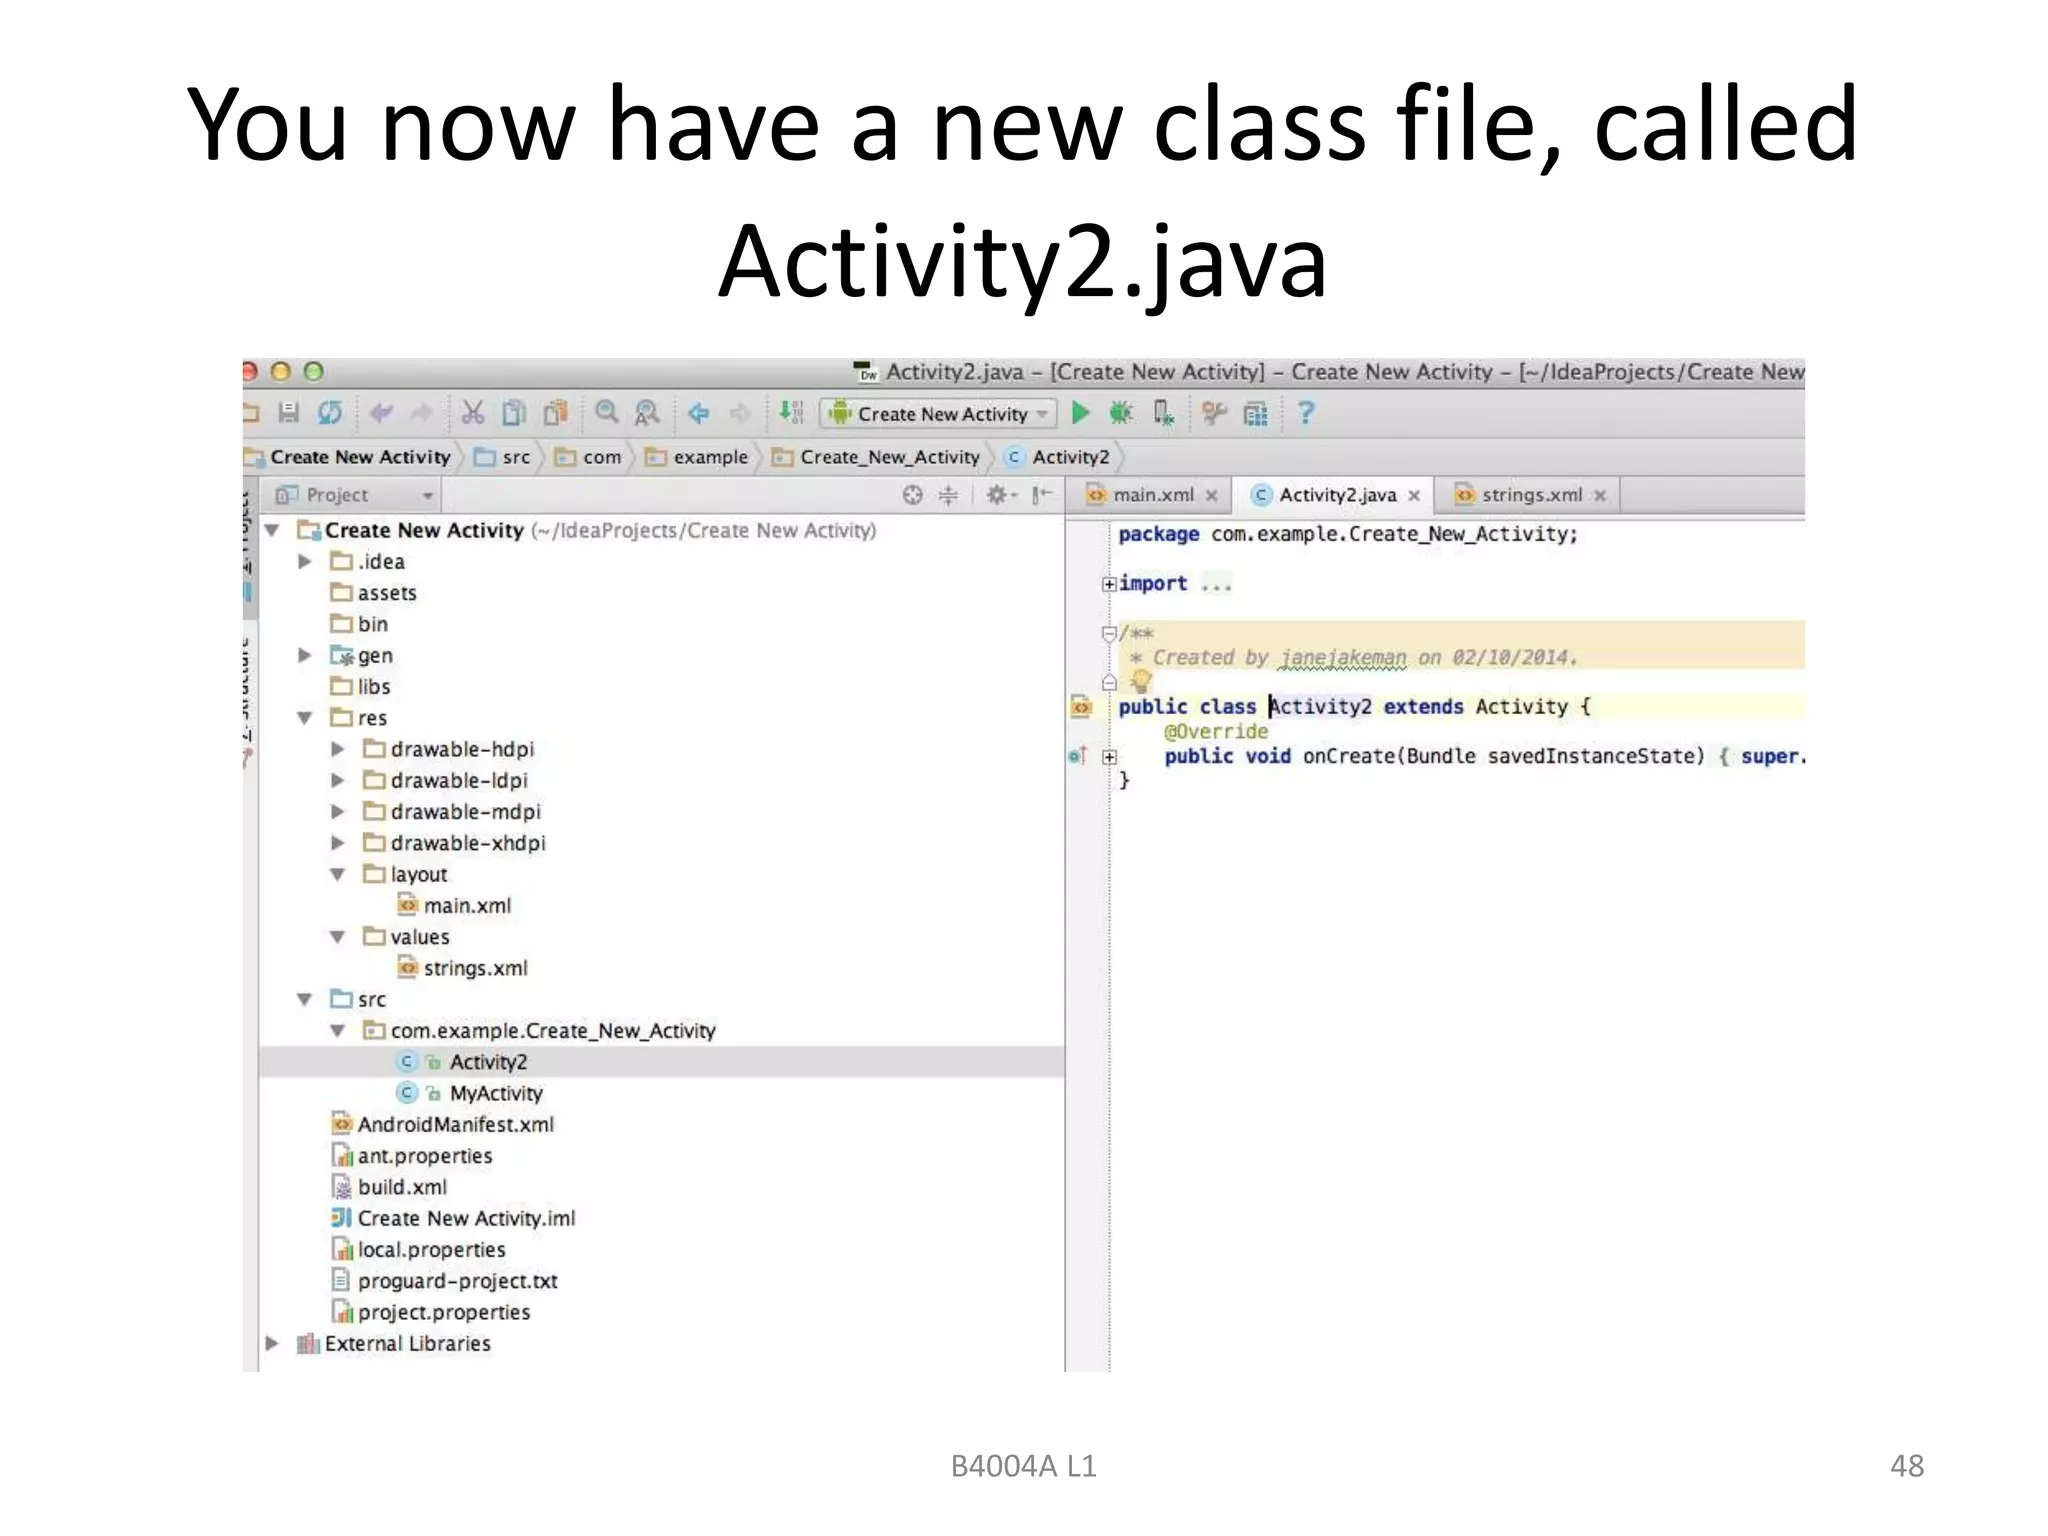
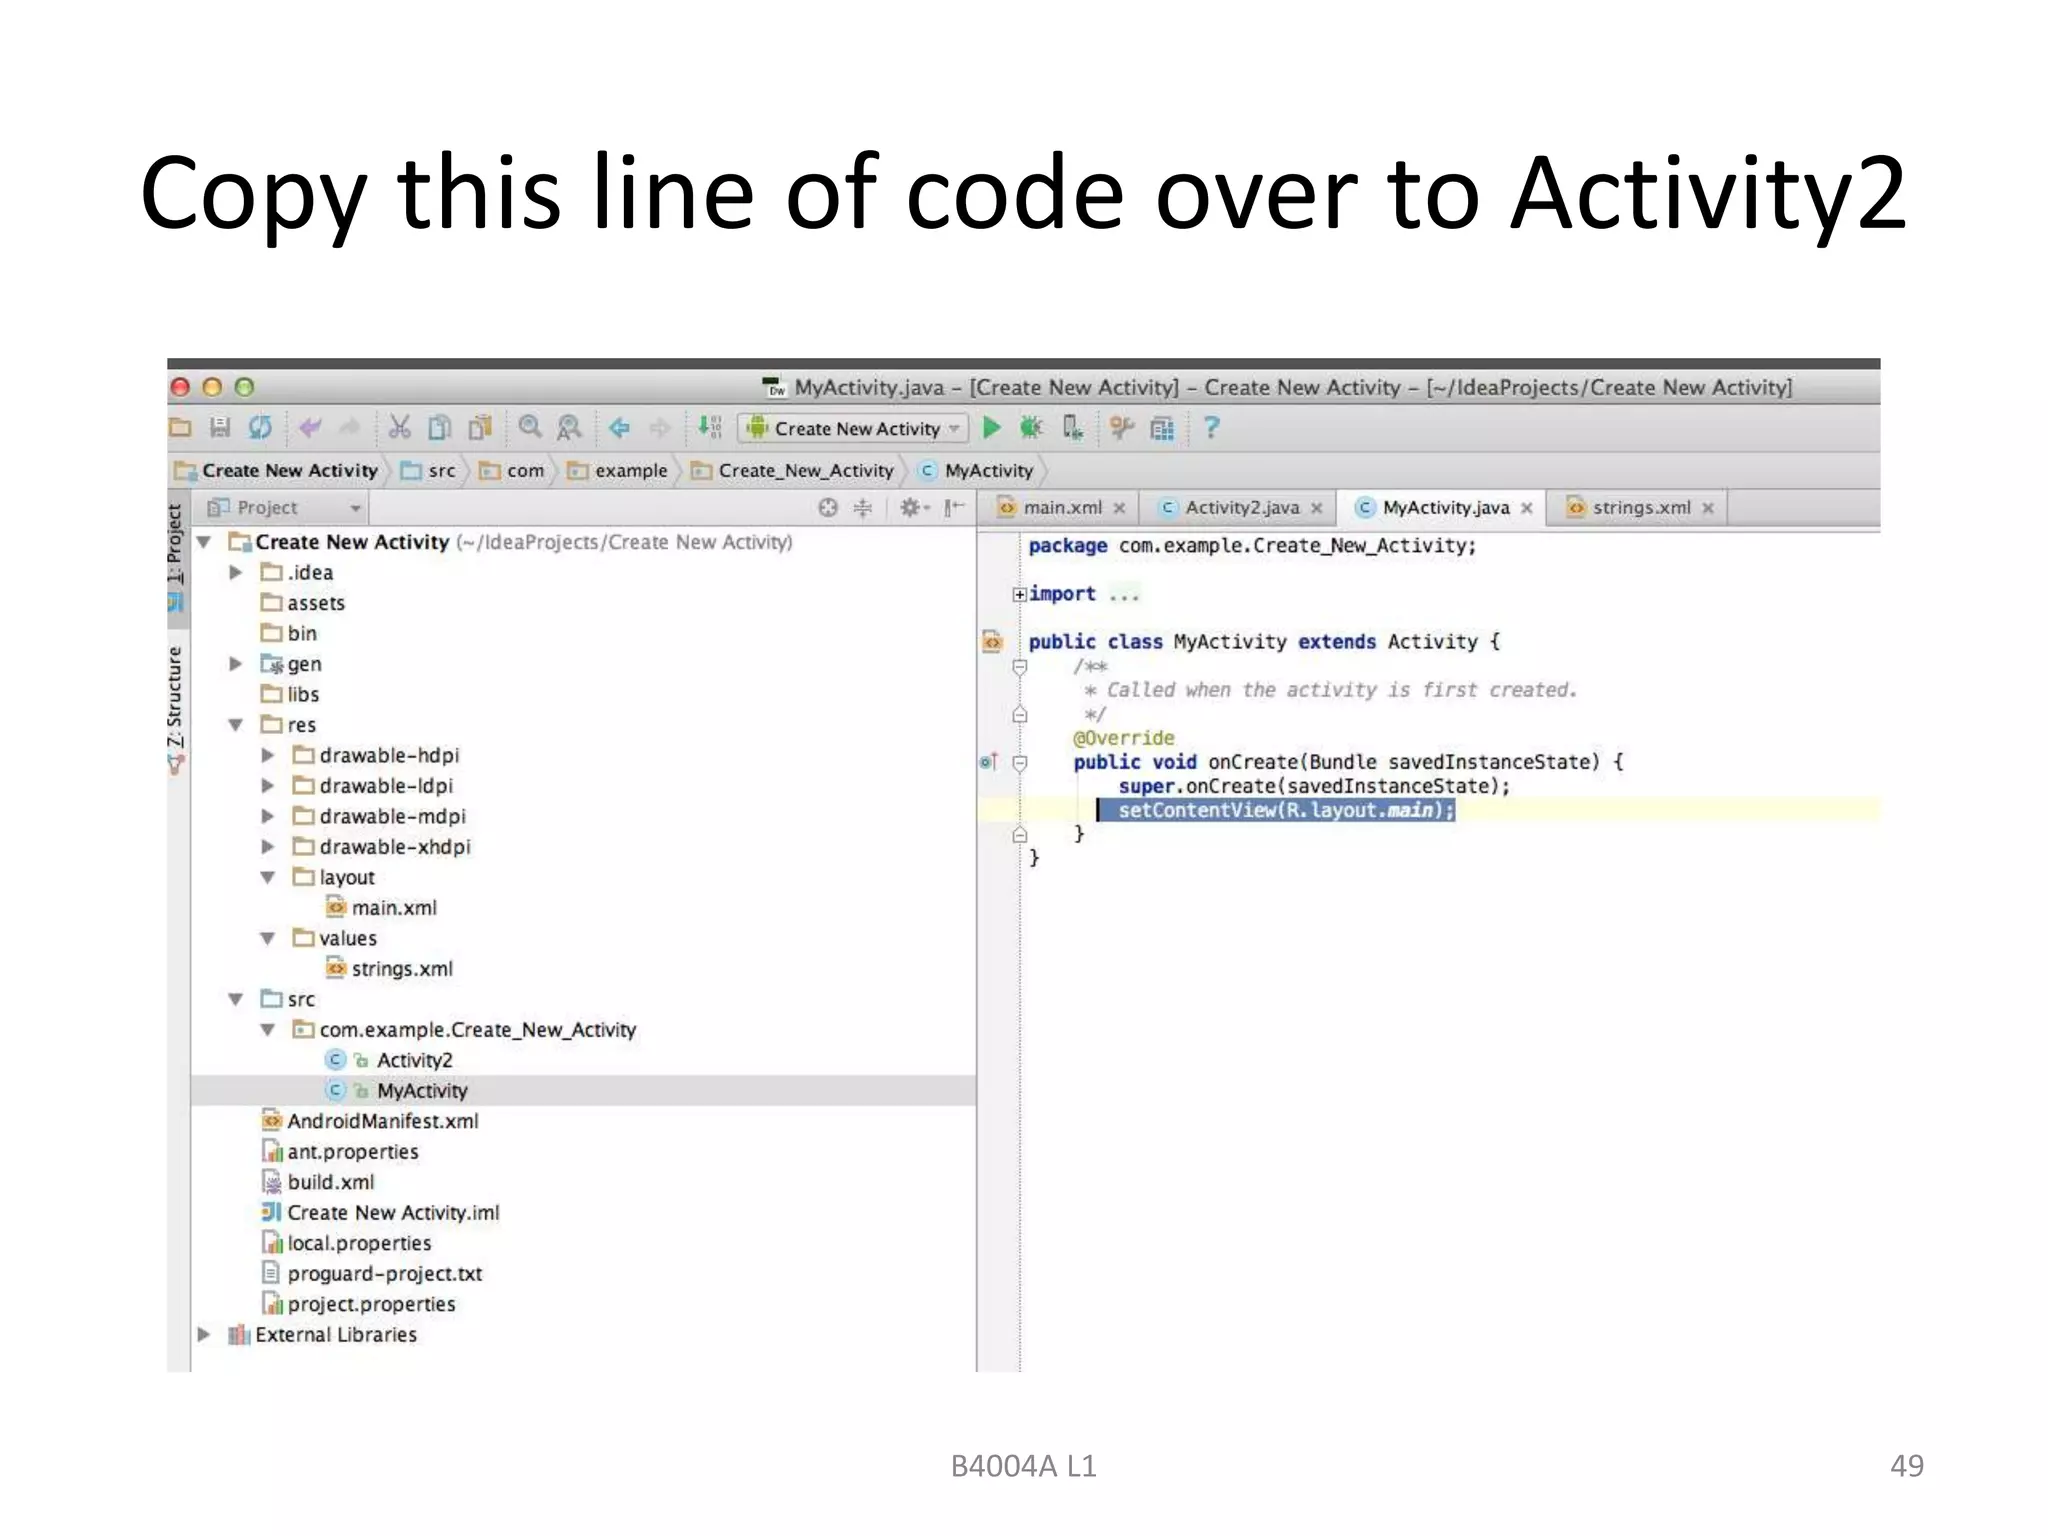
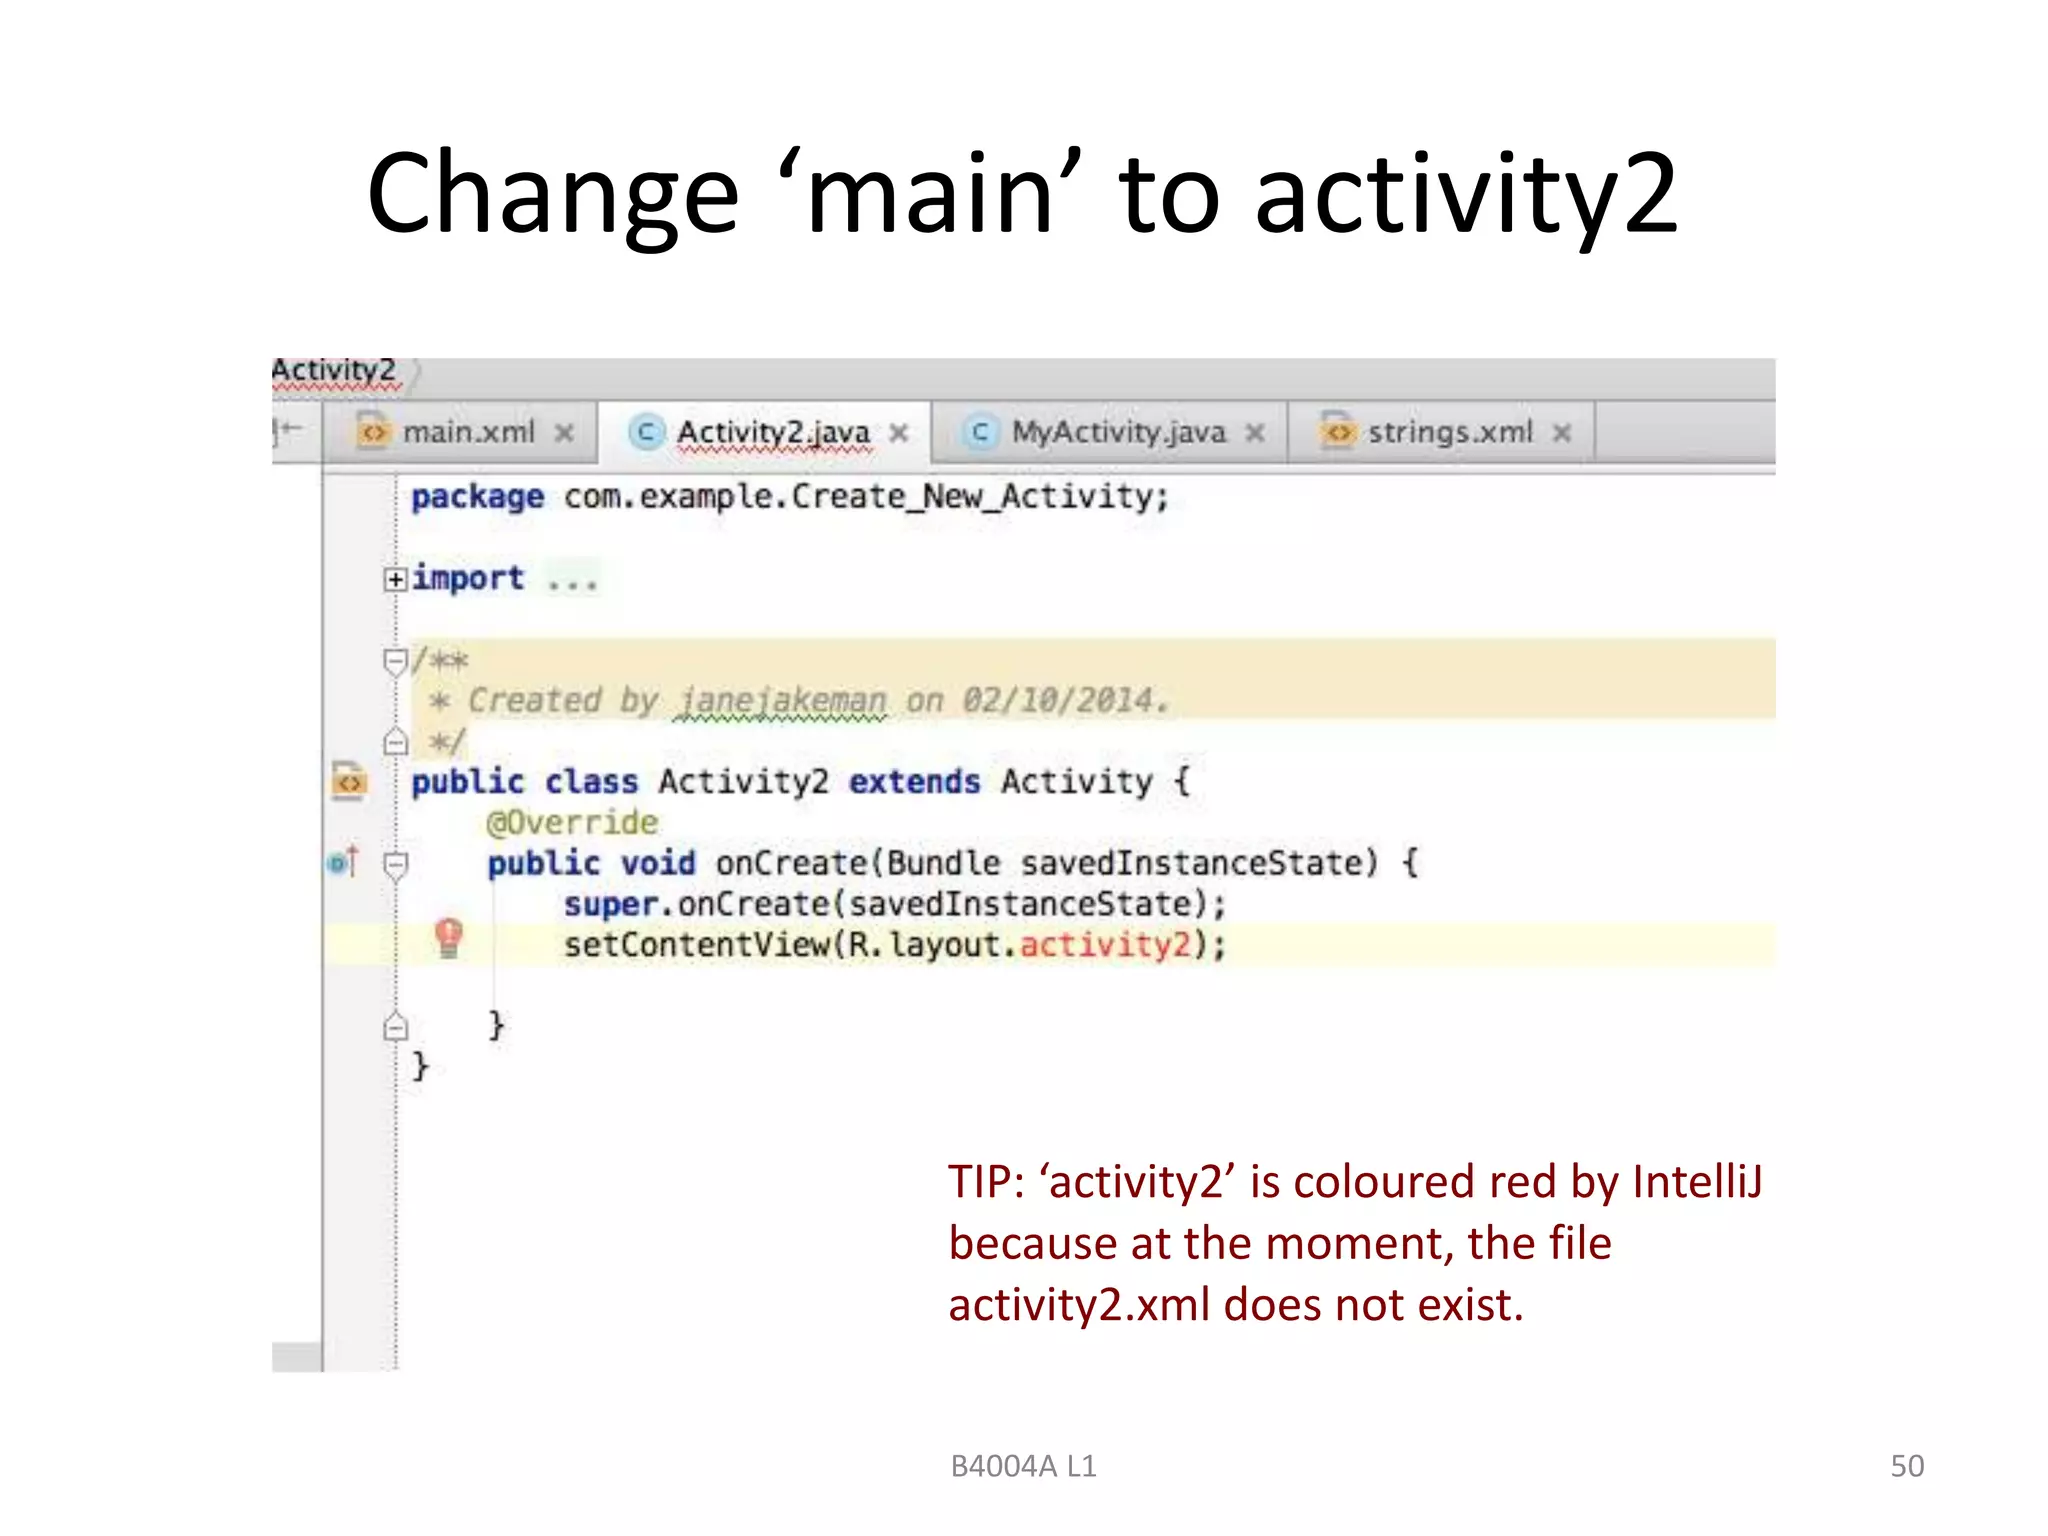
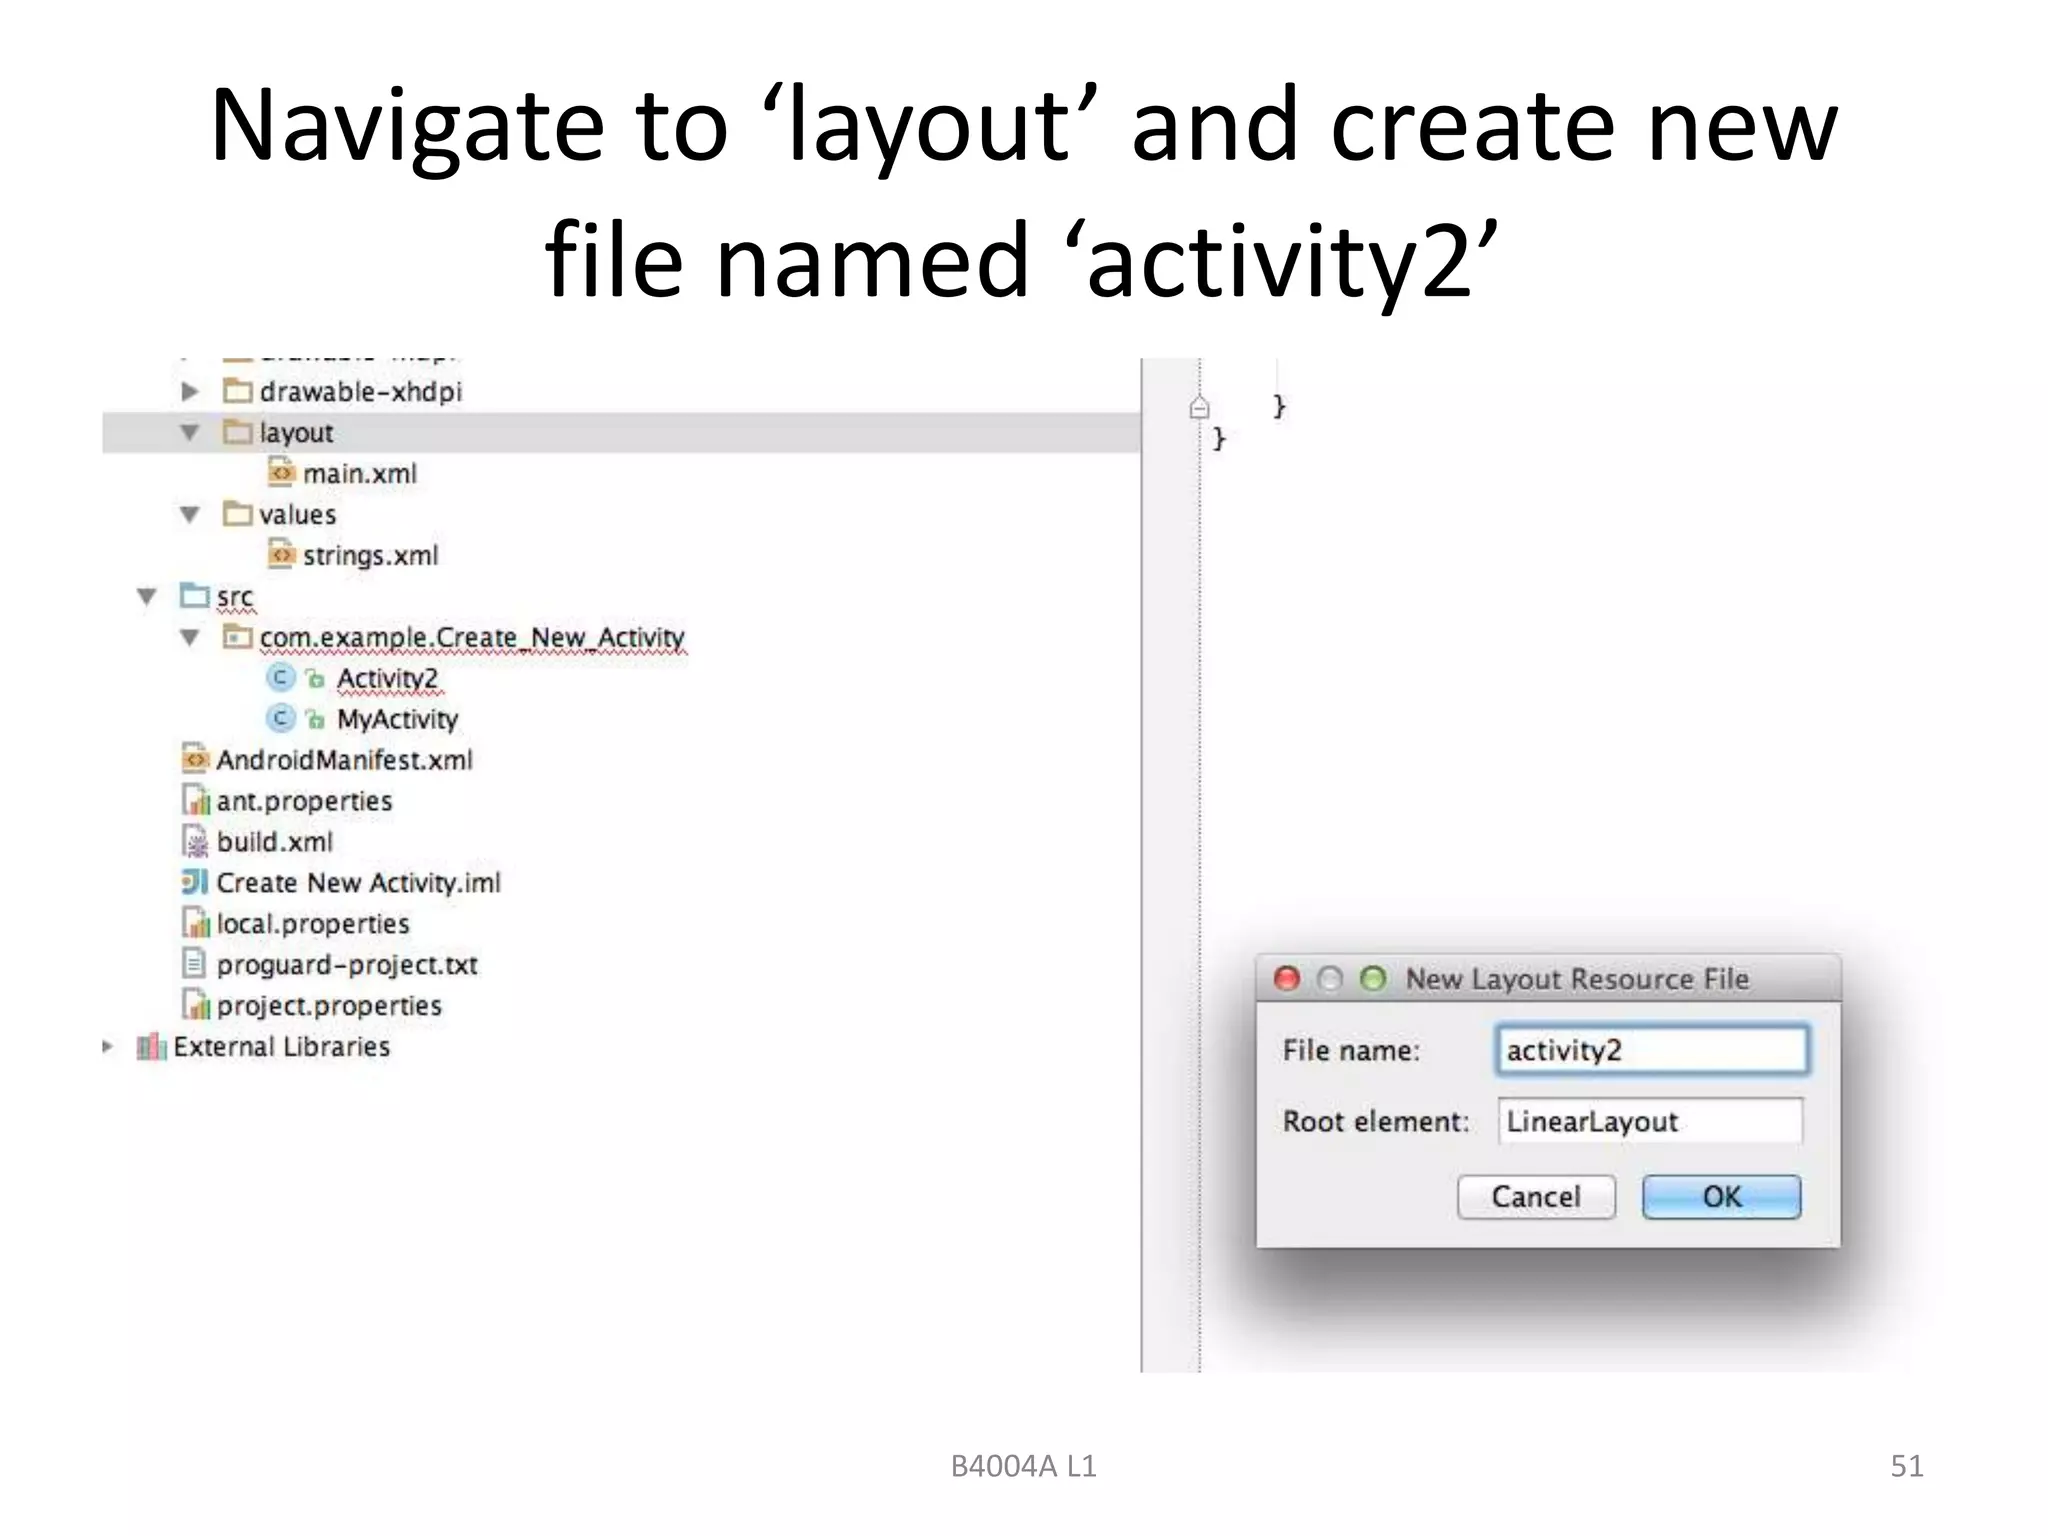
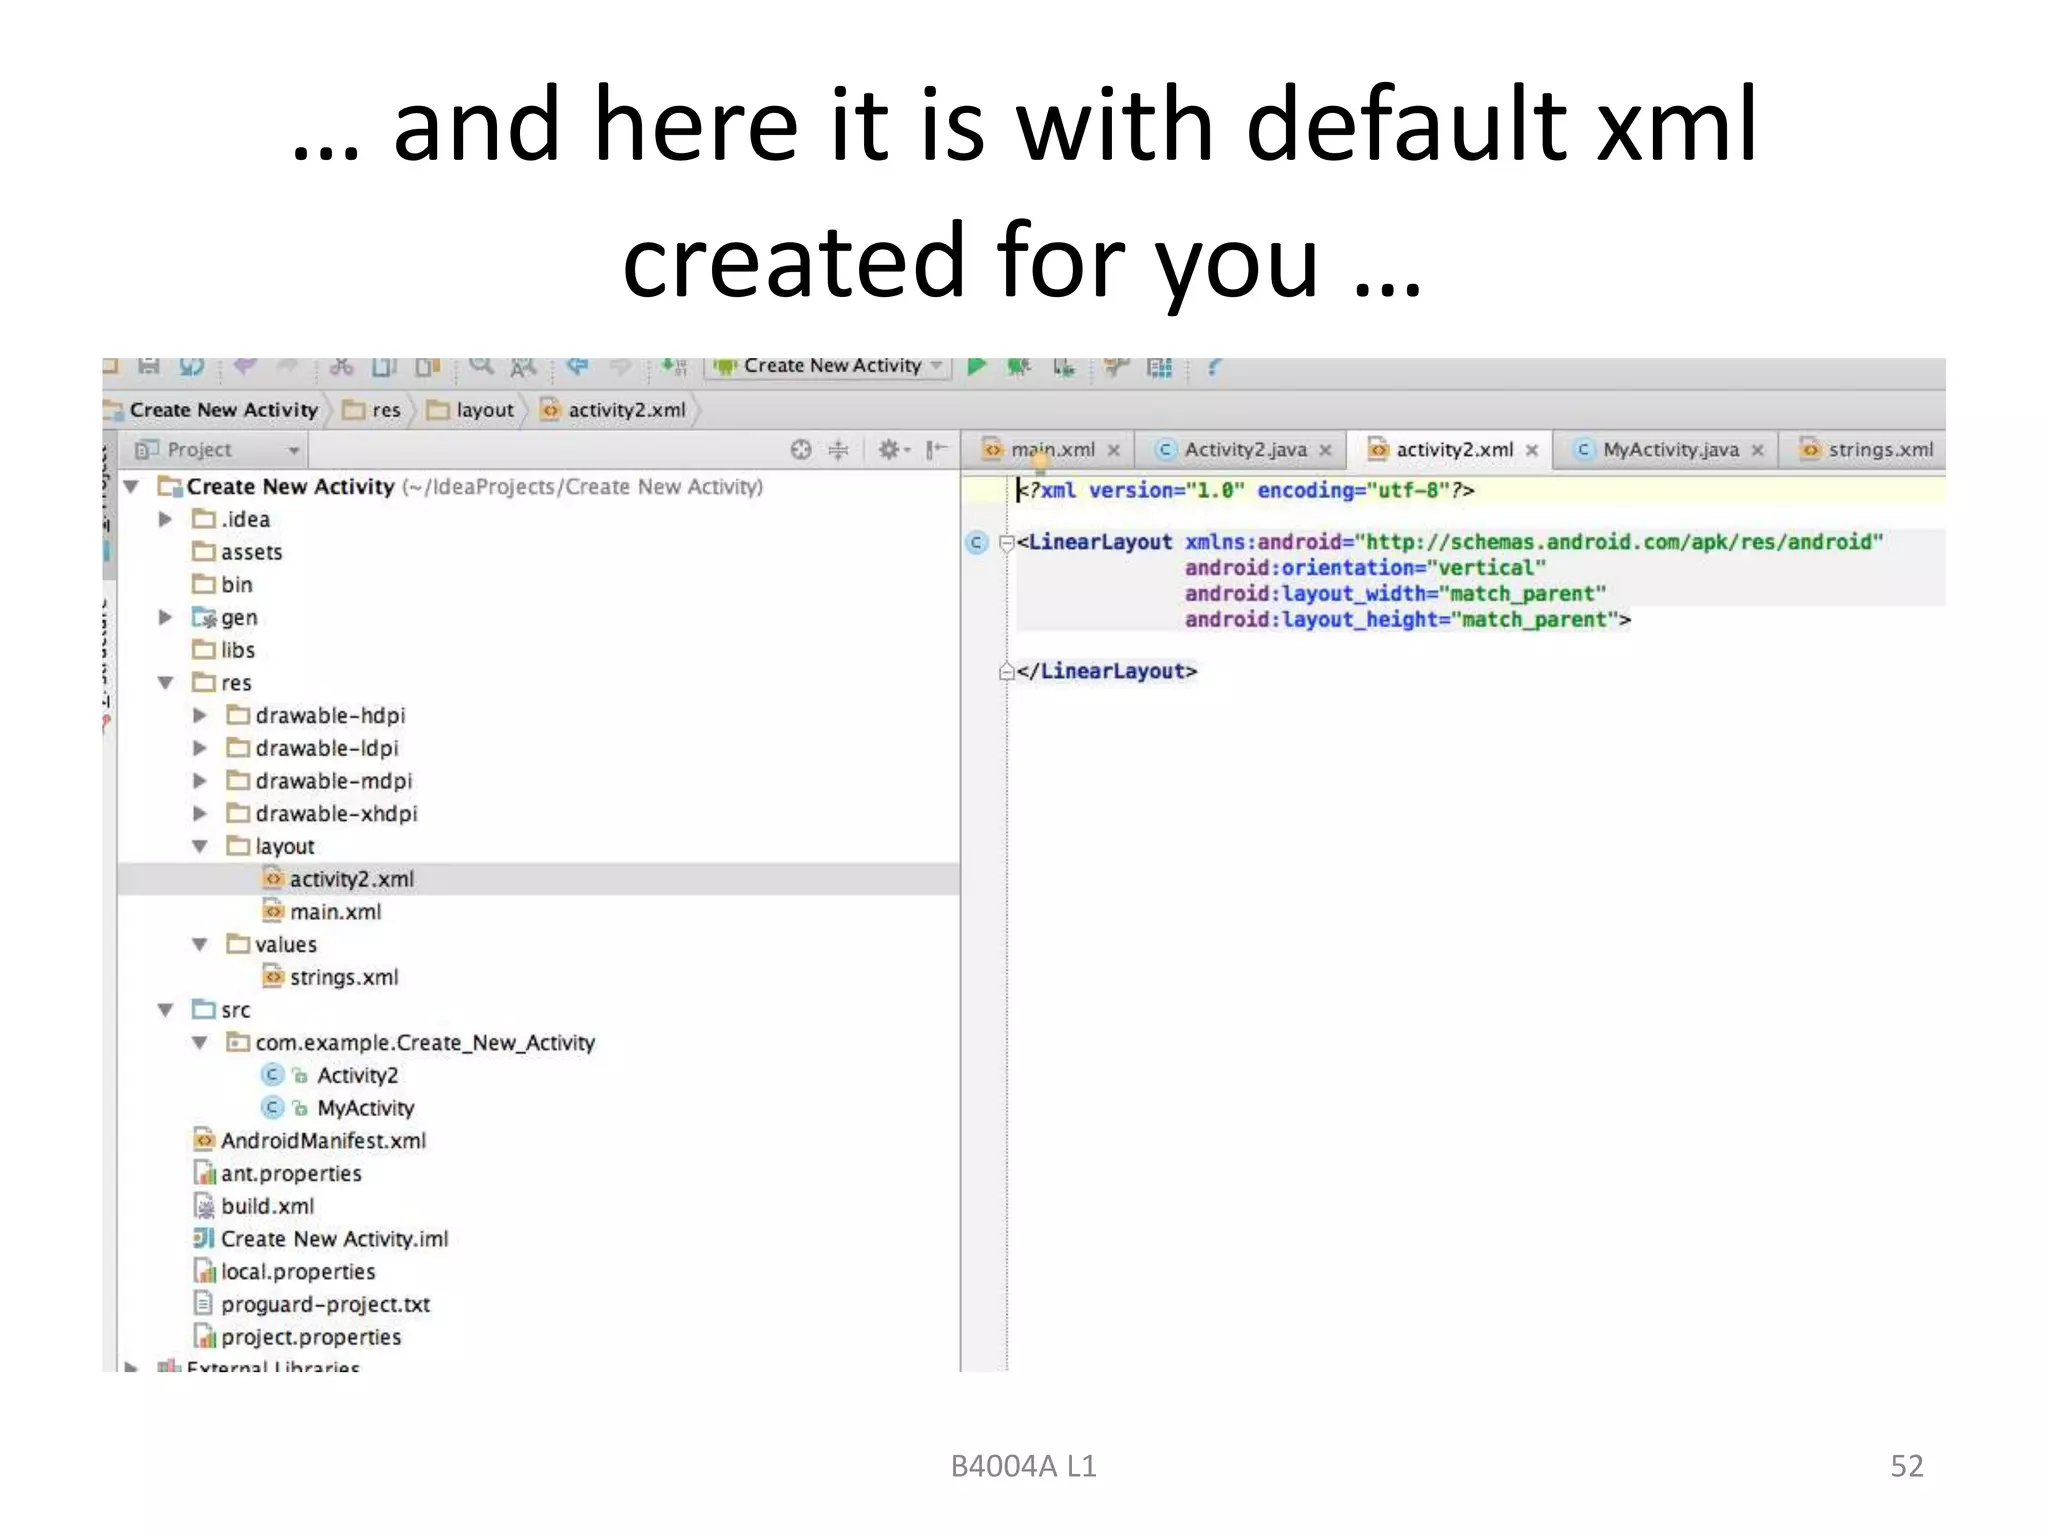
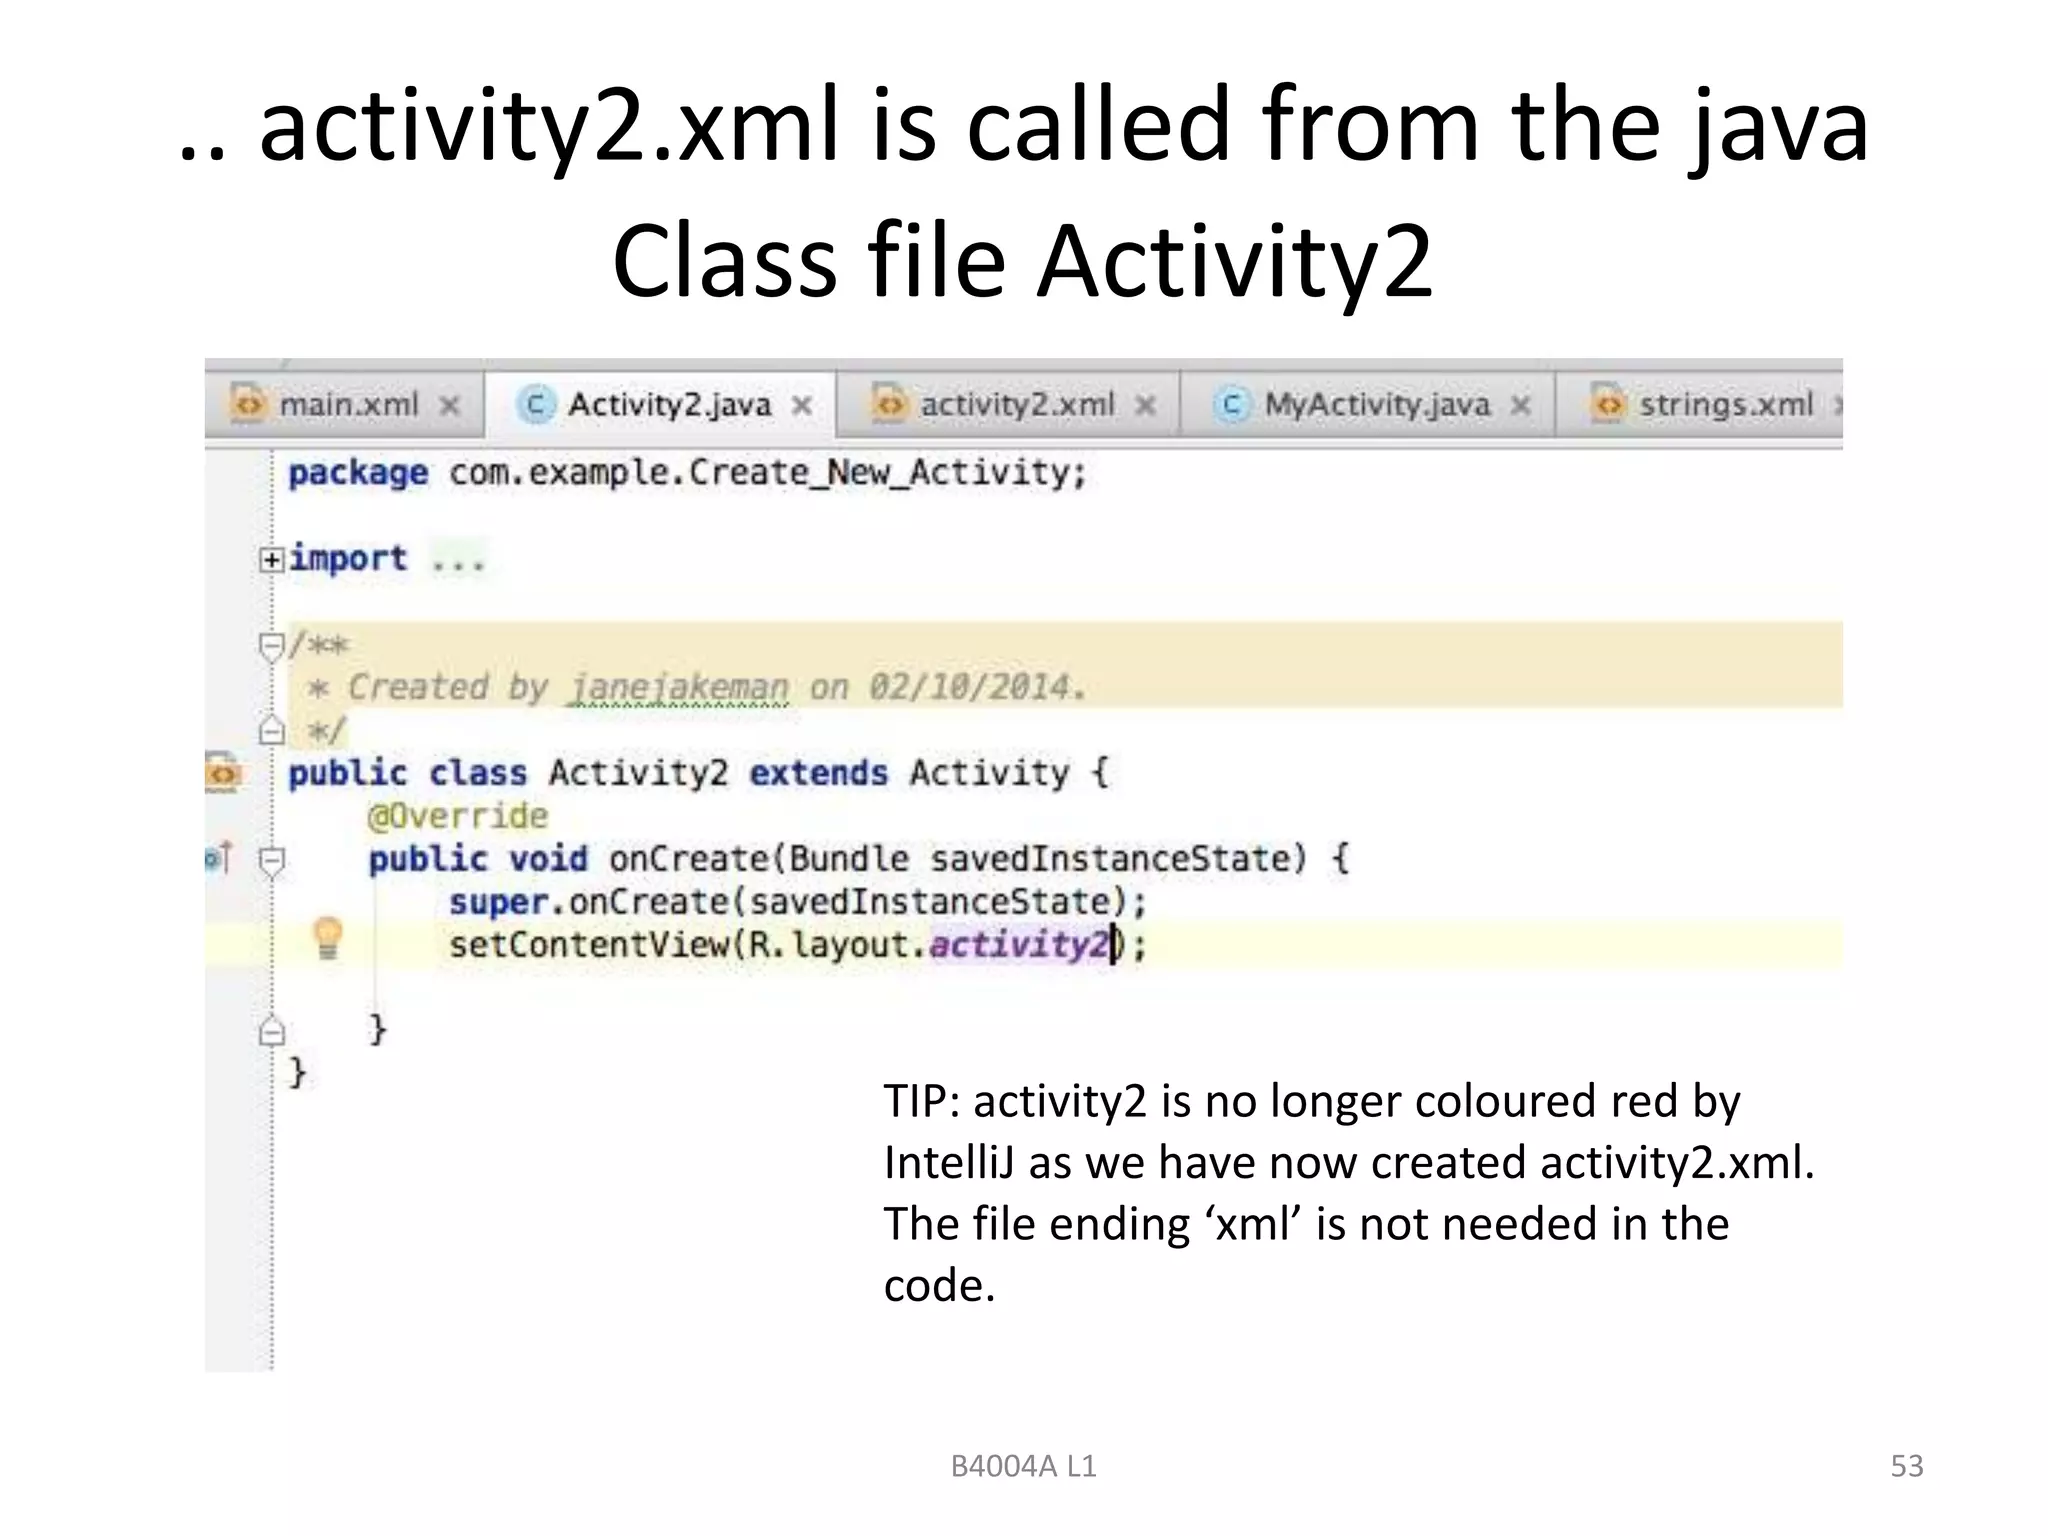
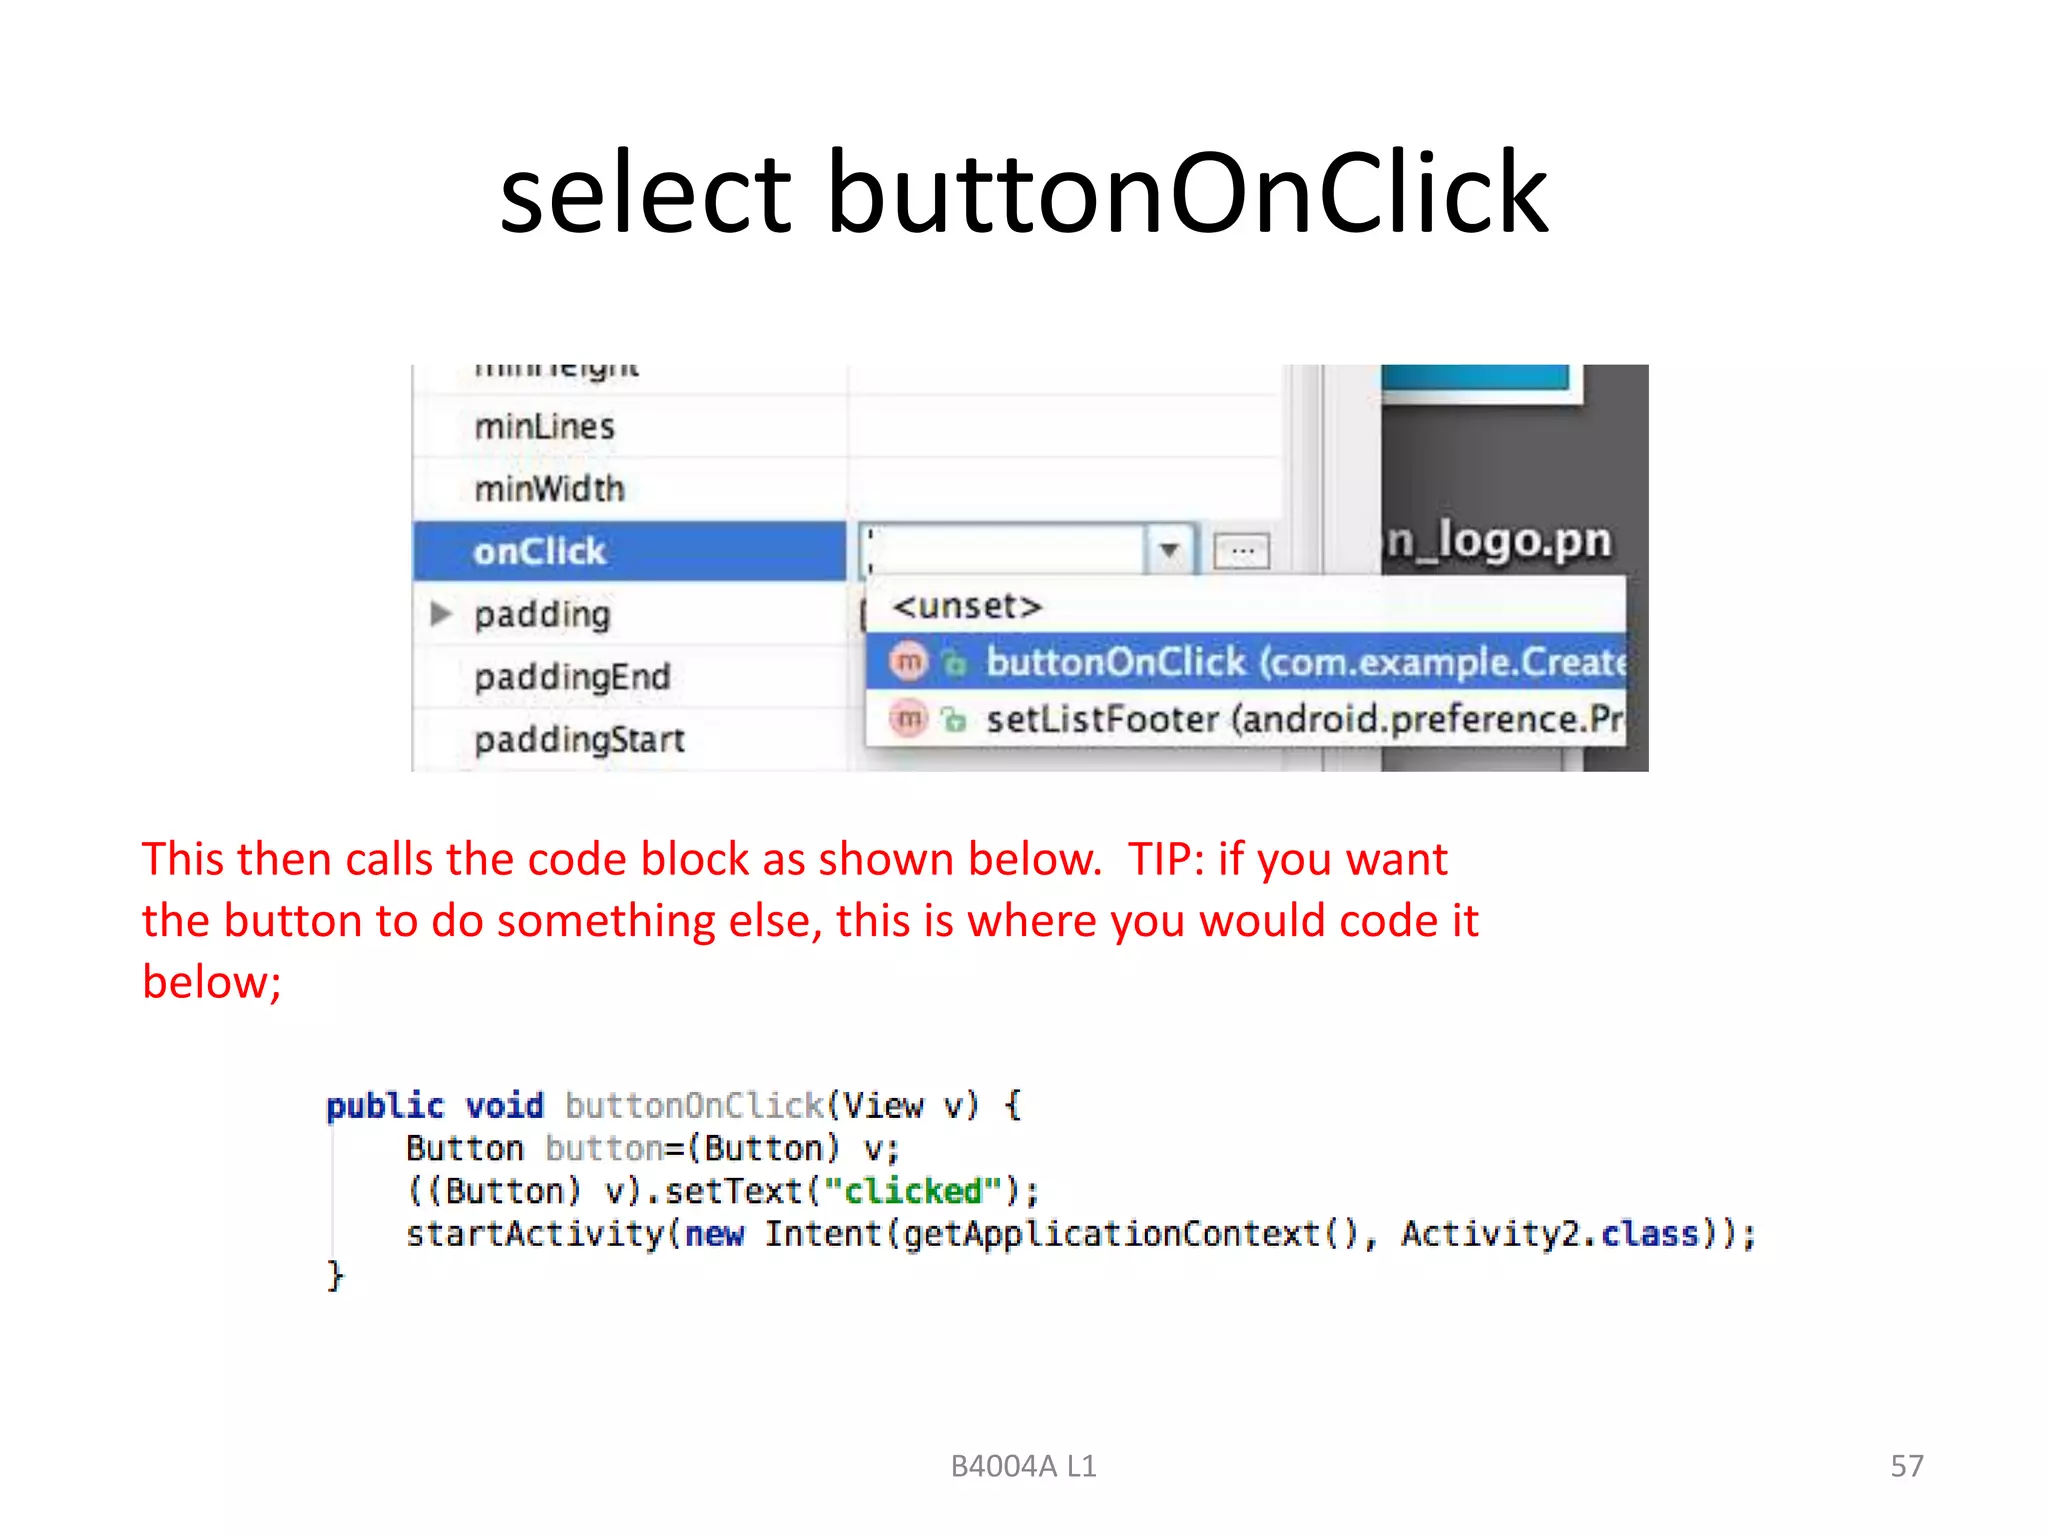
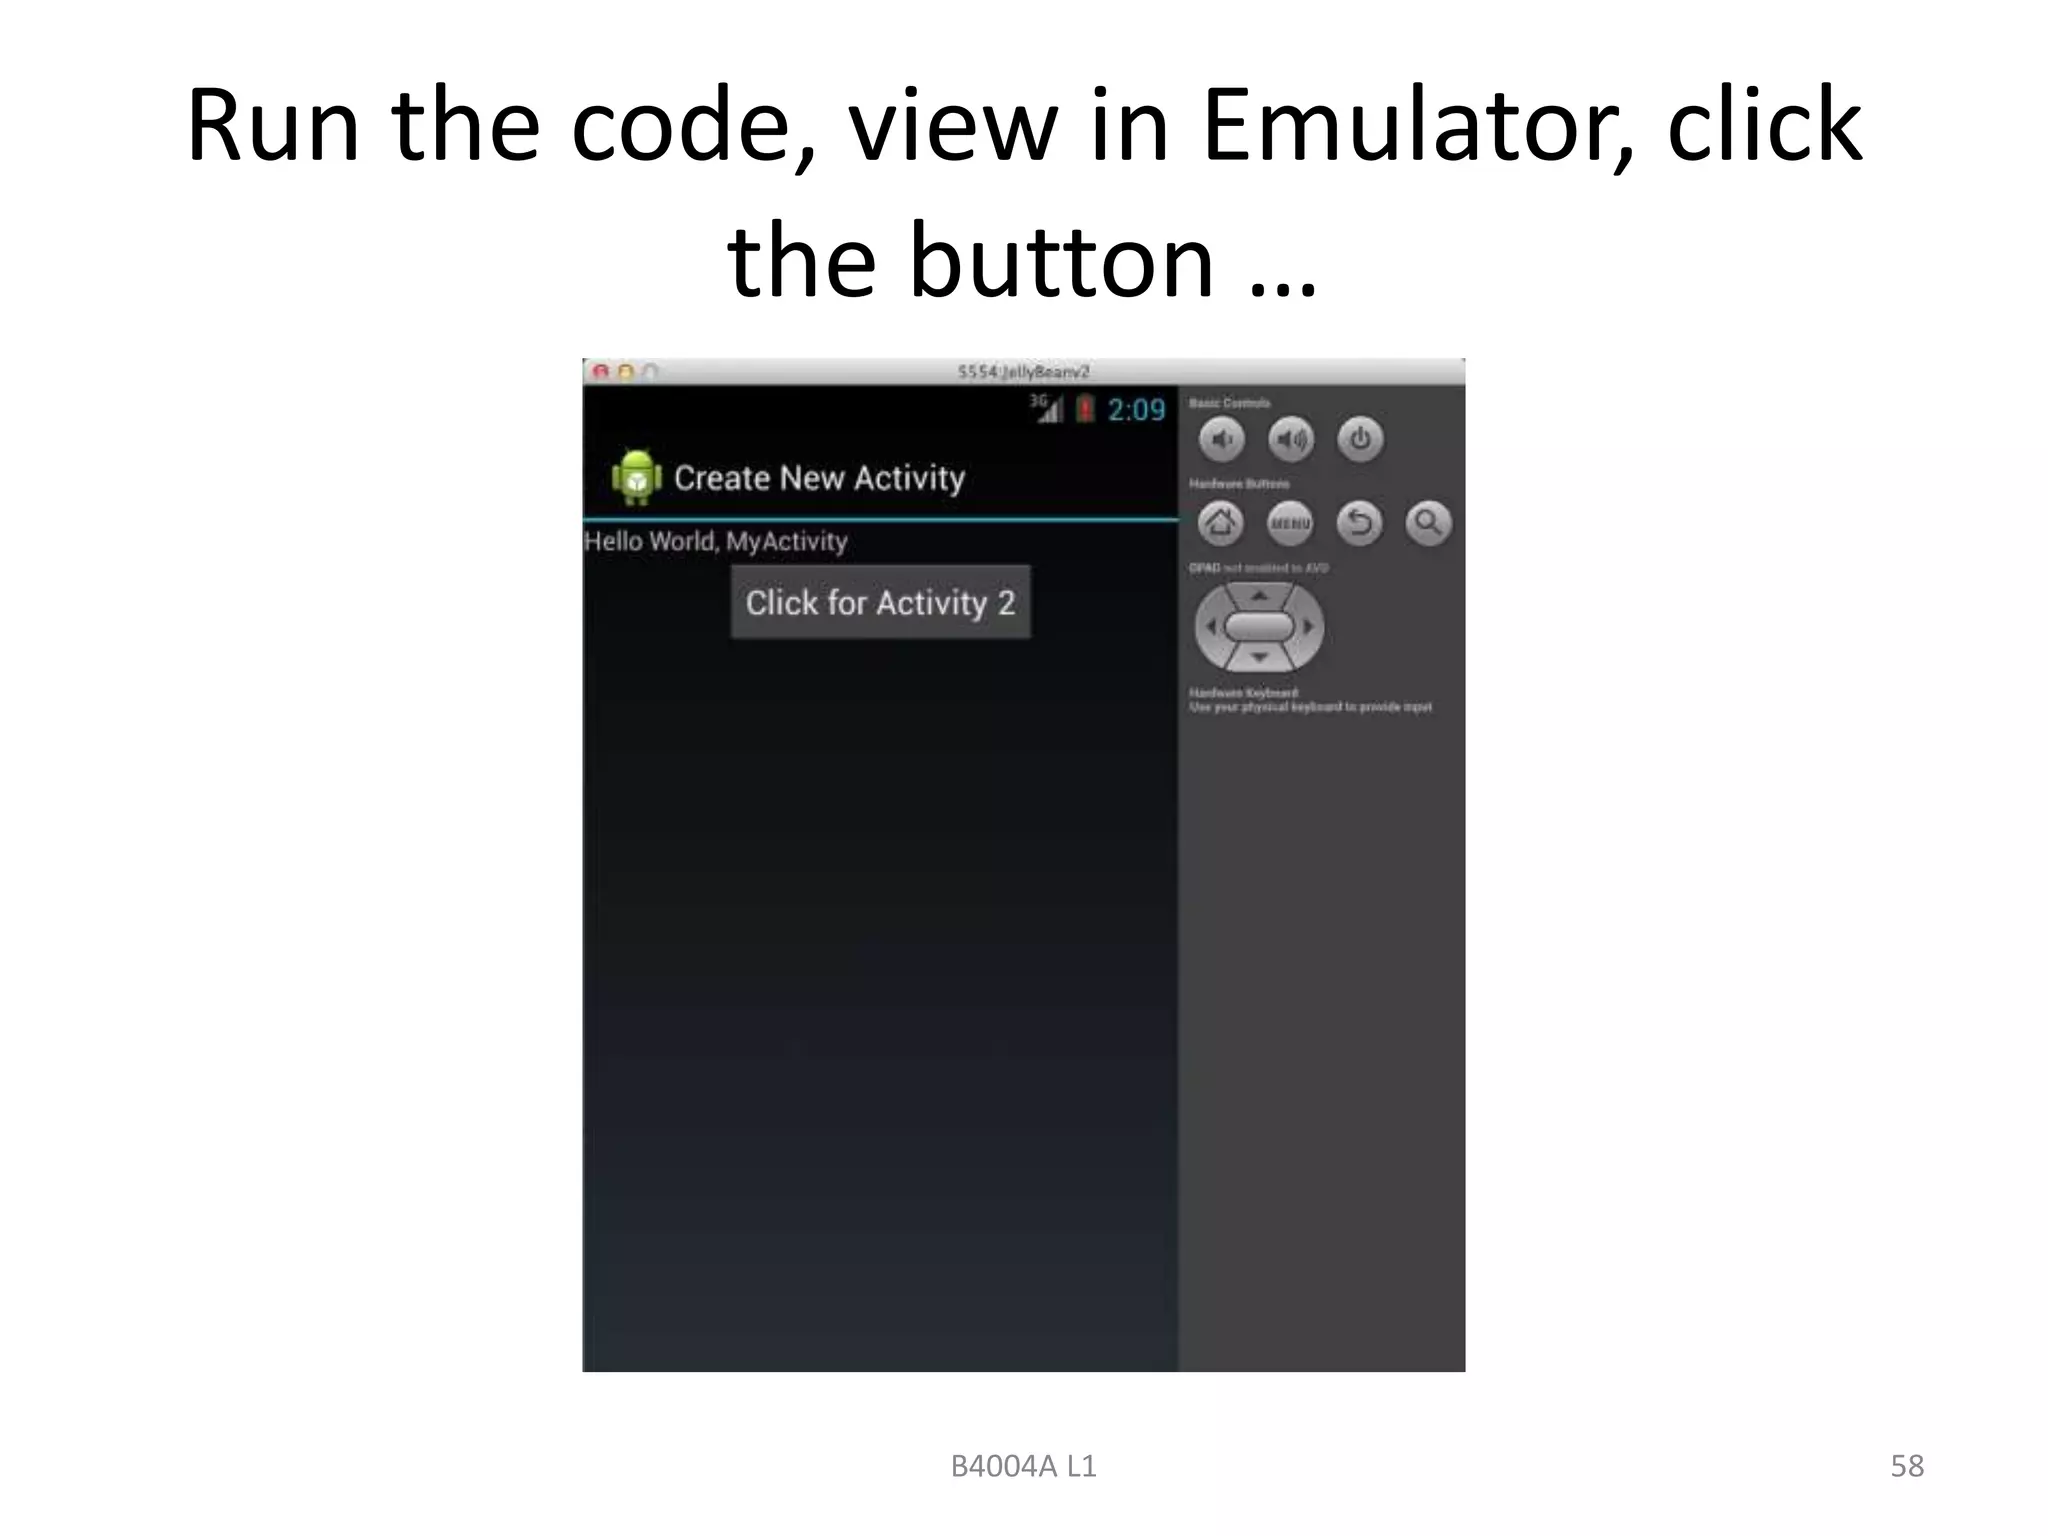
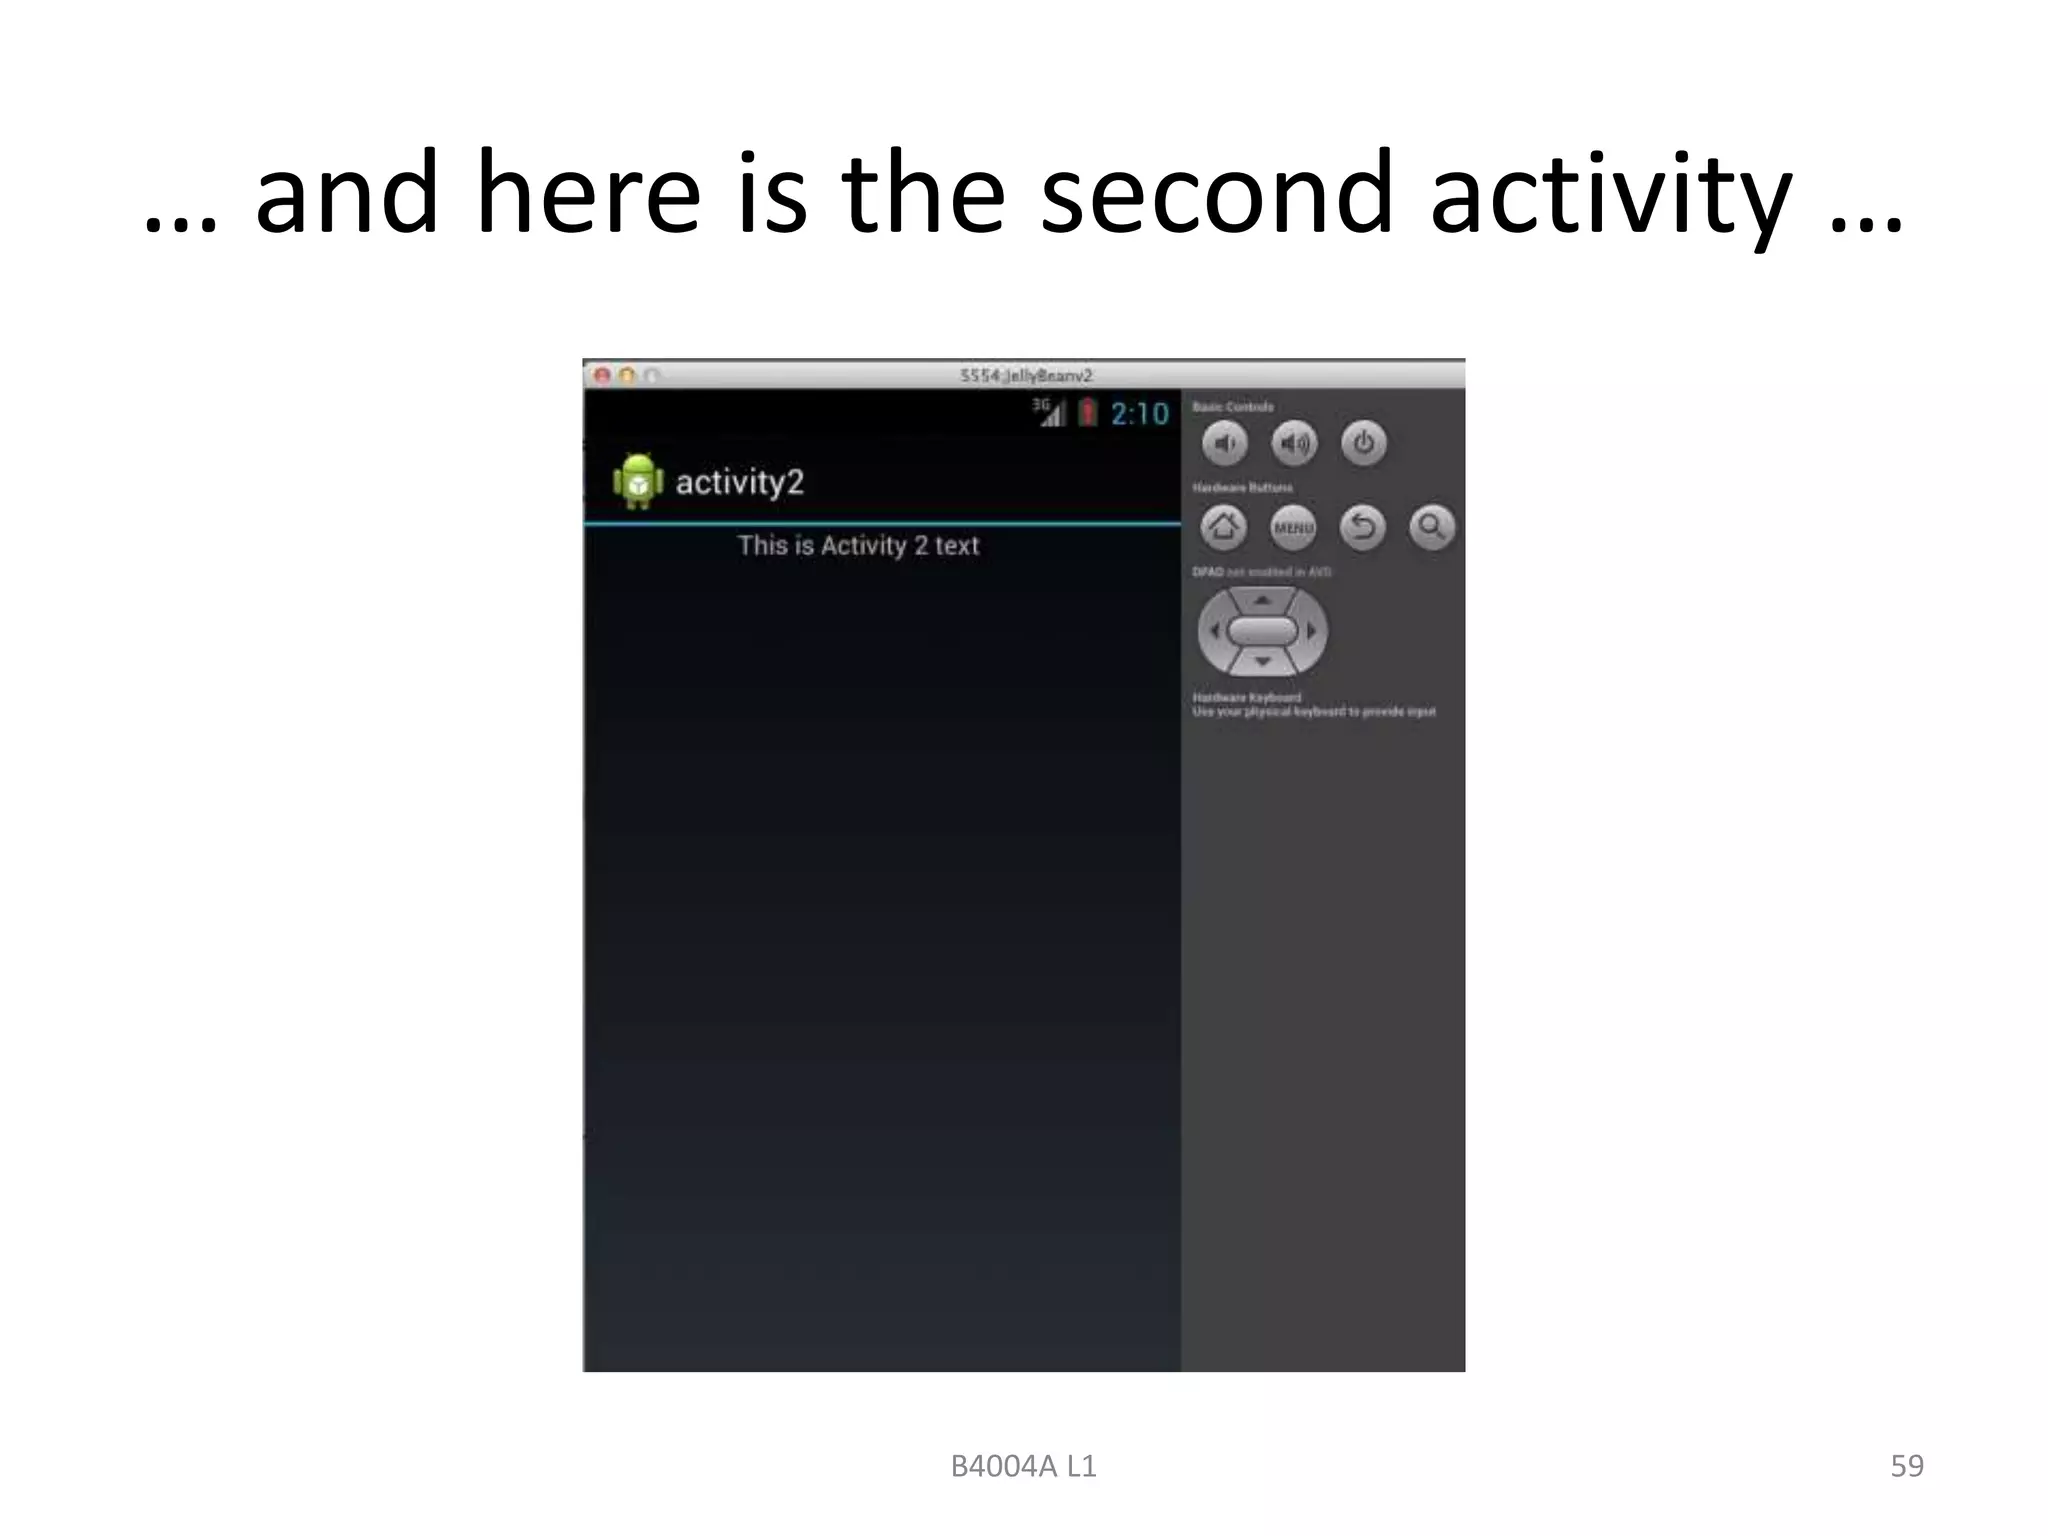
- How to create a new activity class and link a button to call another activity.
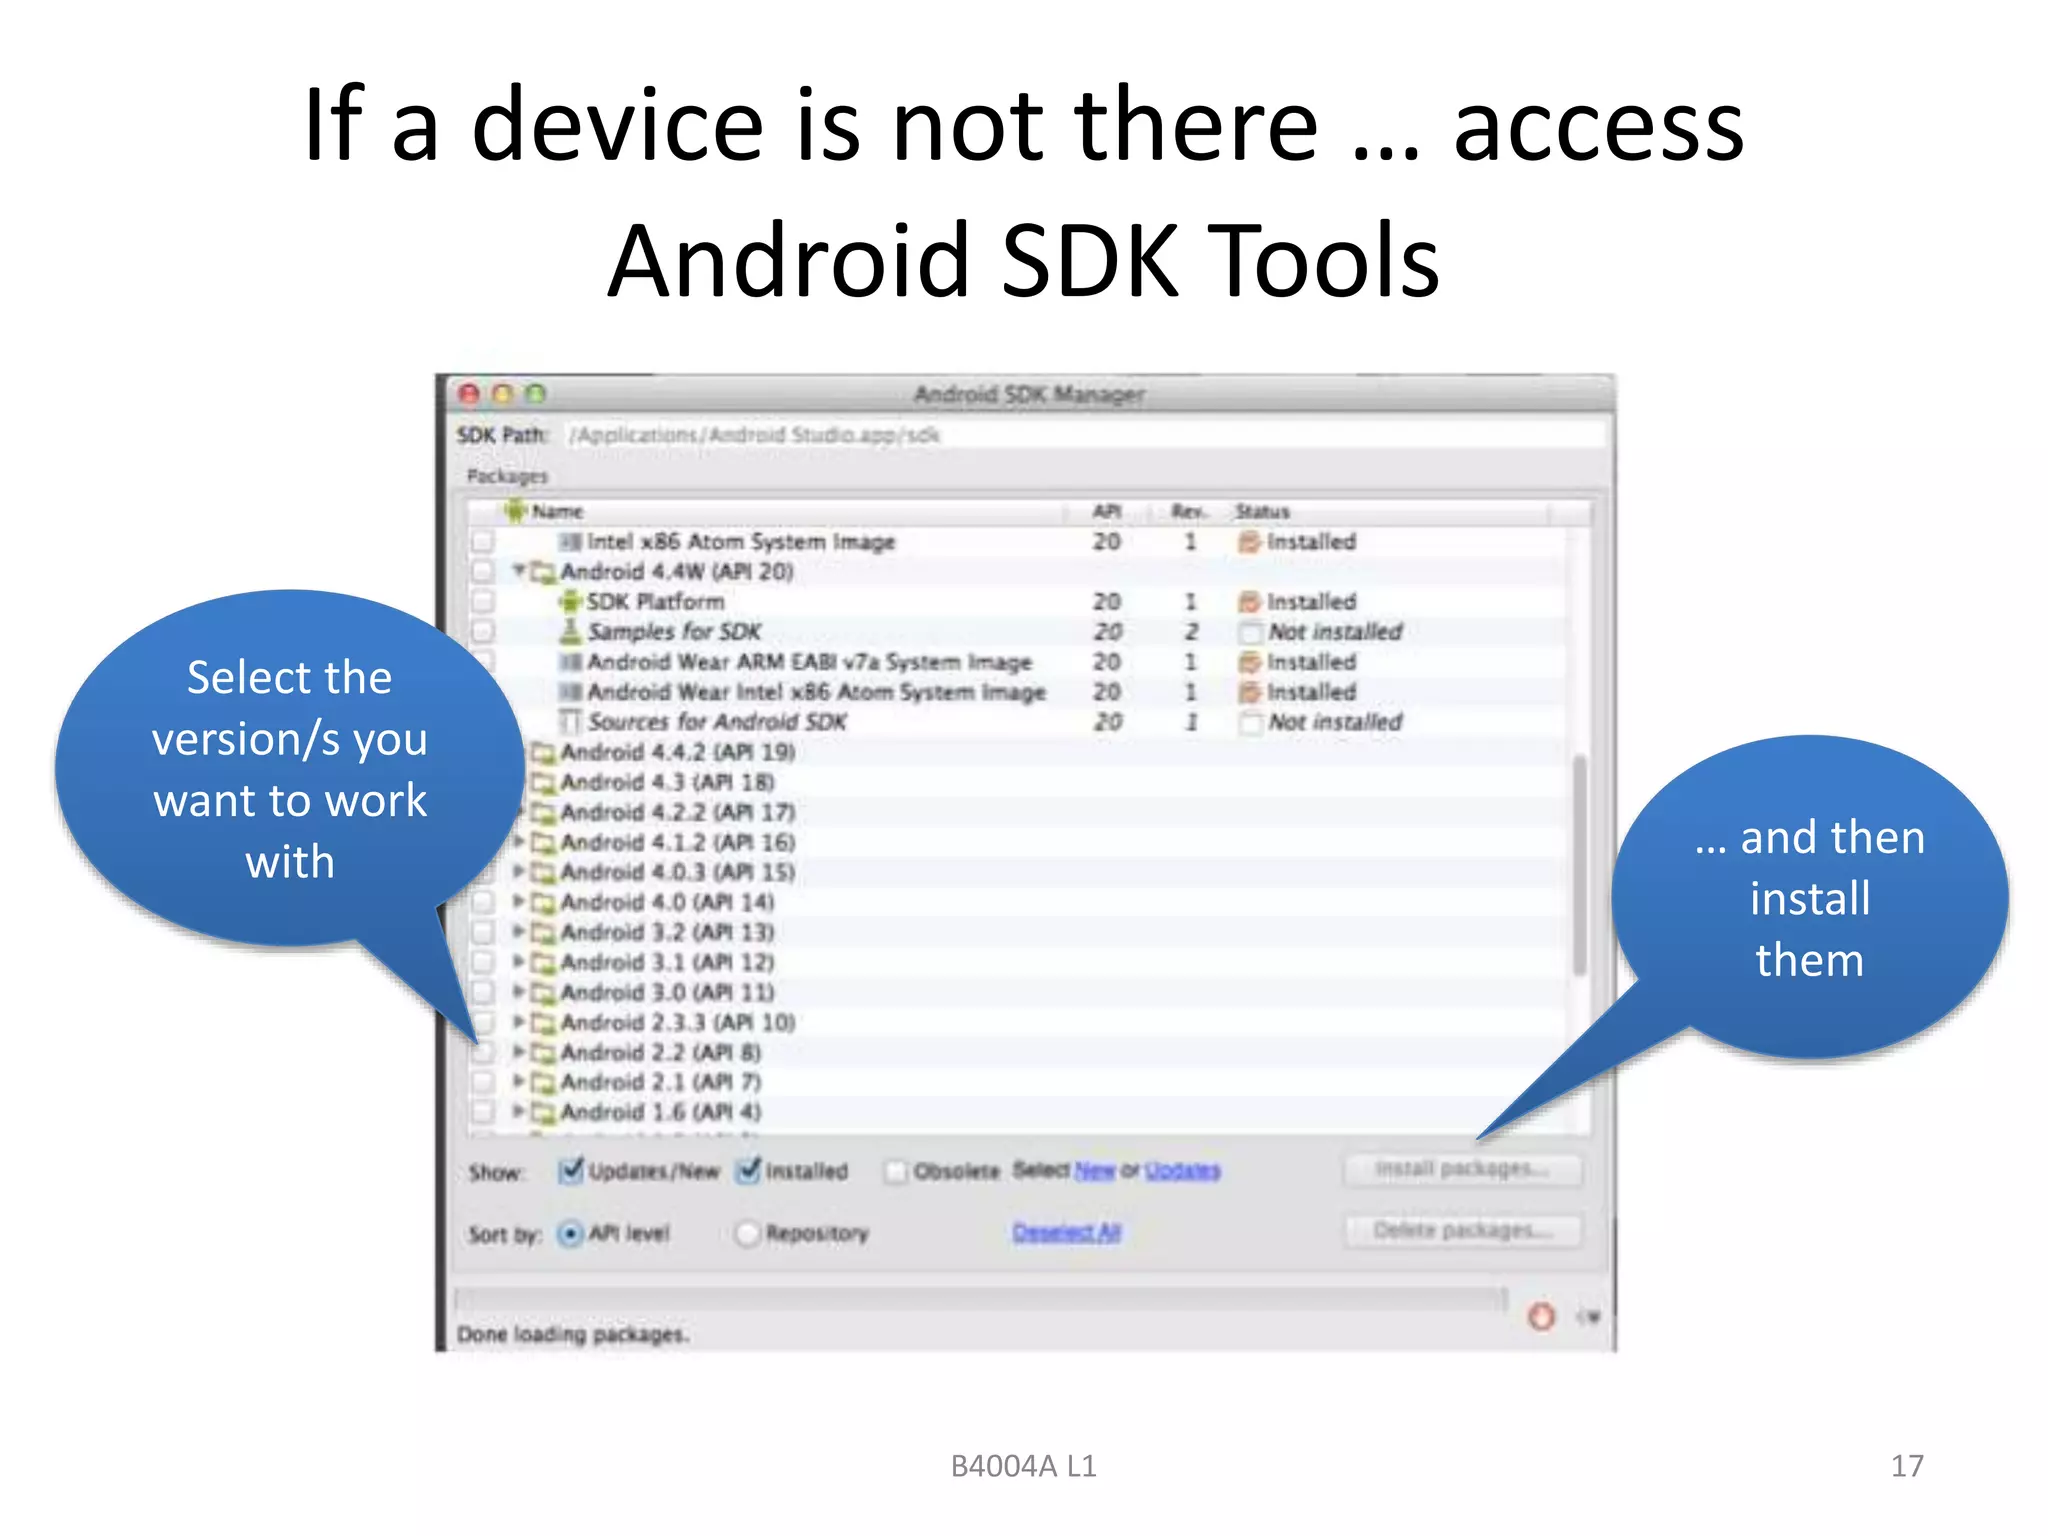
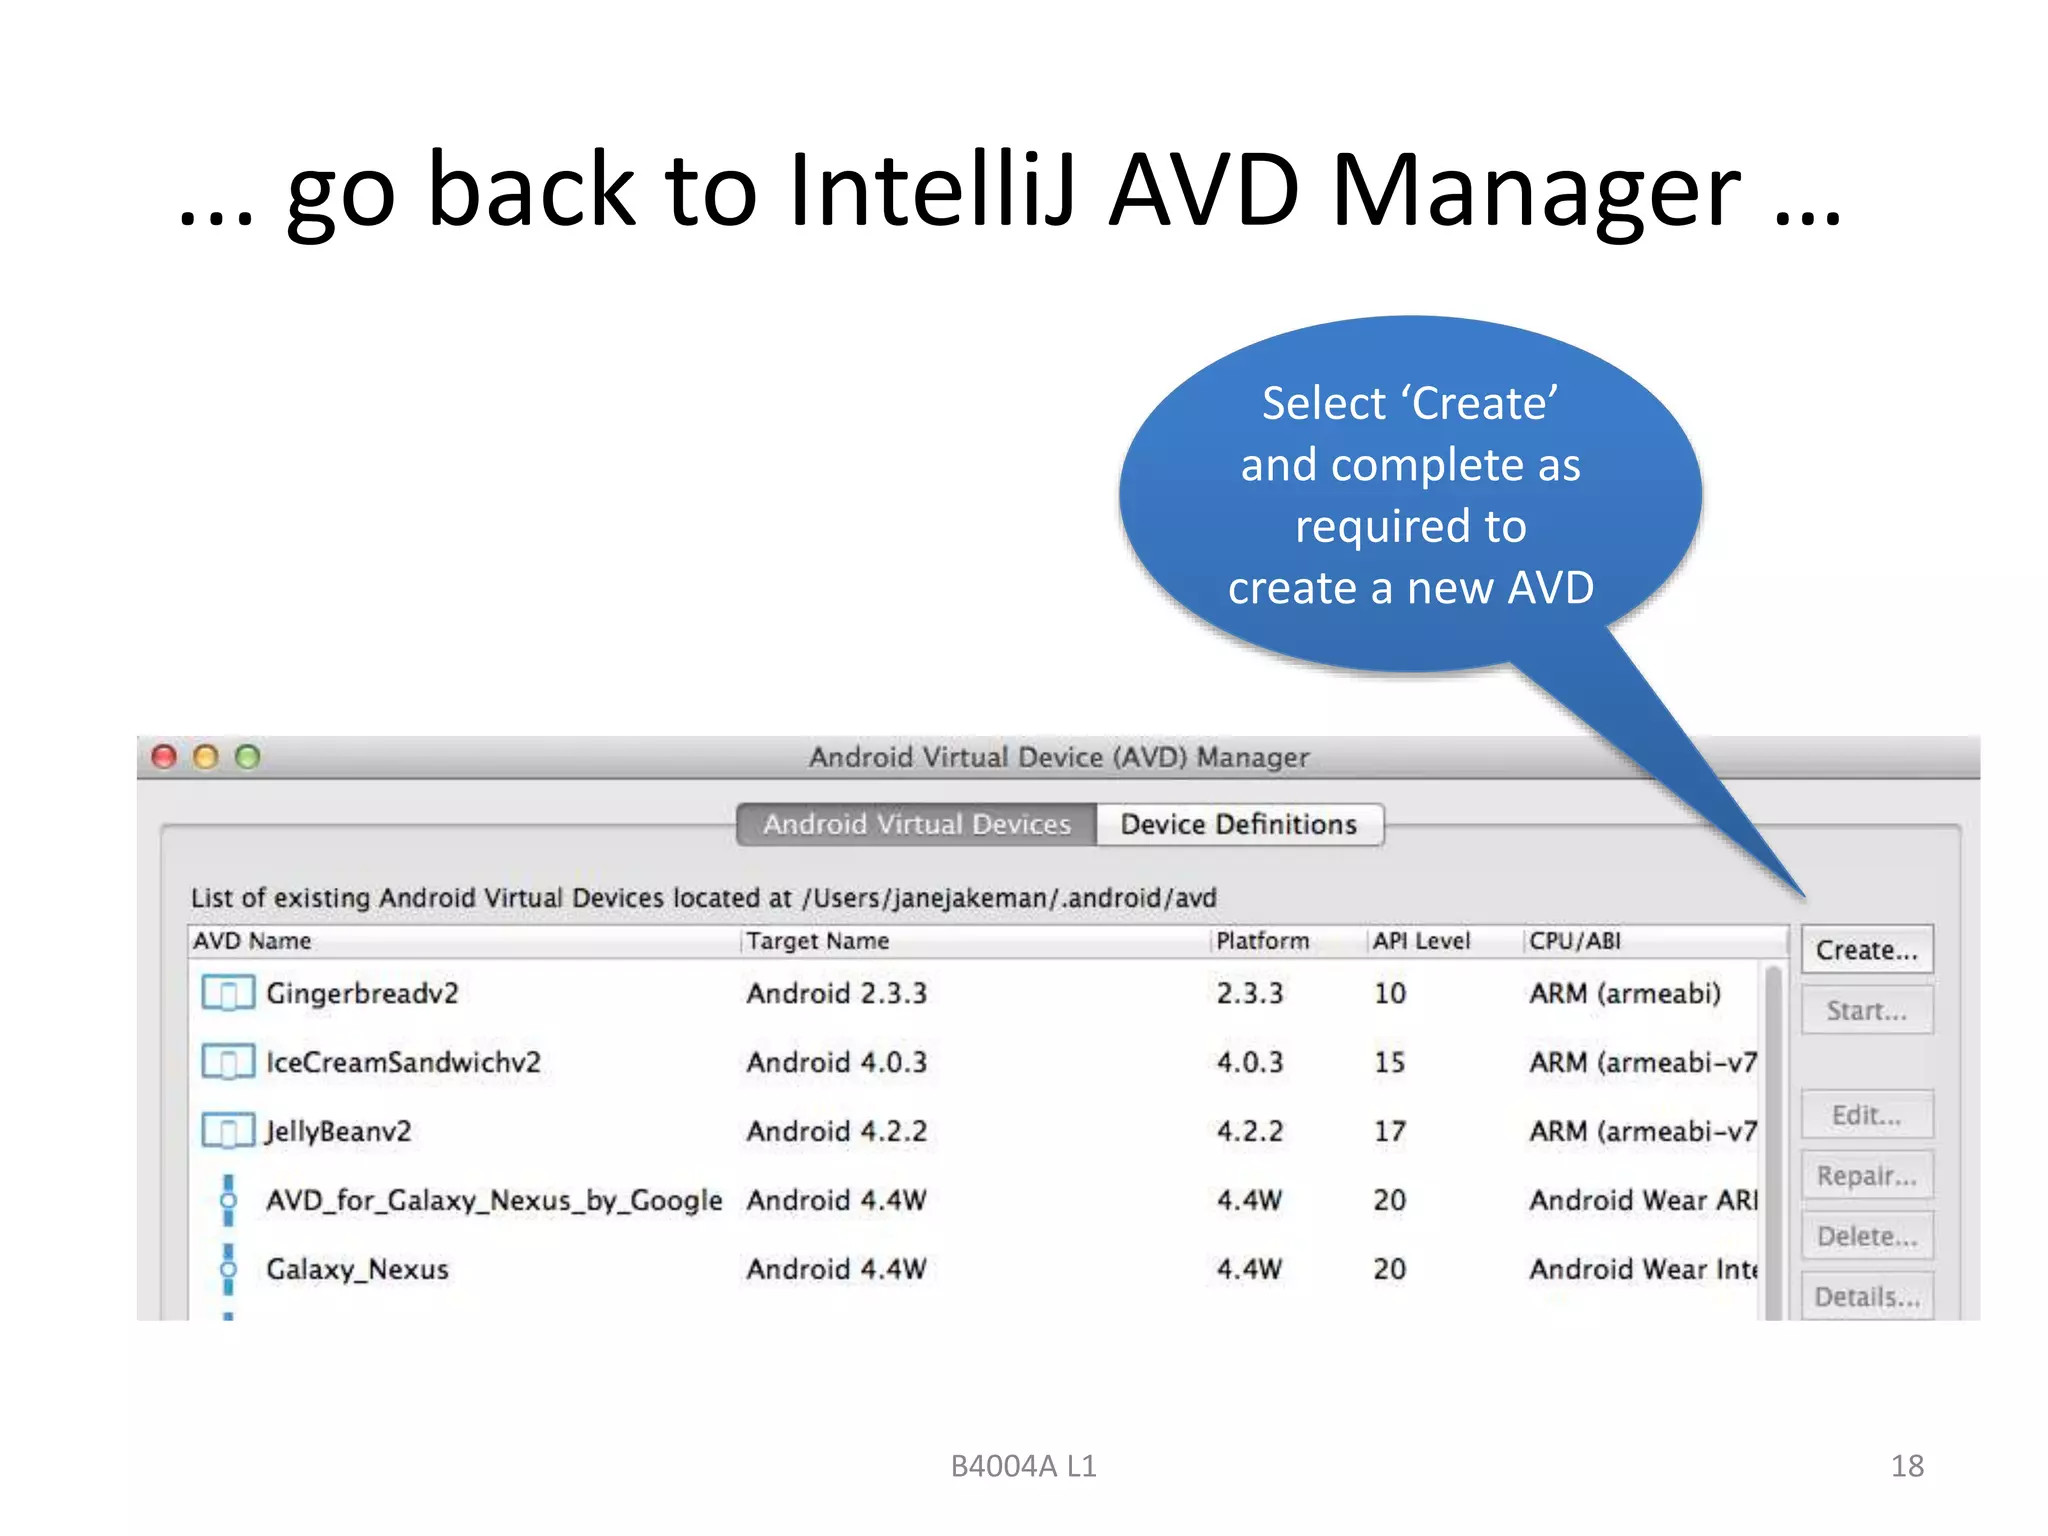
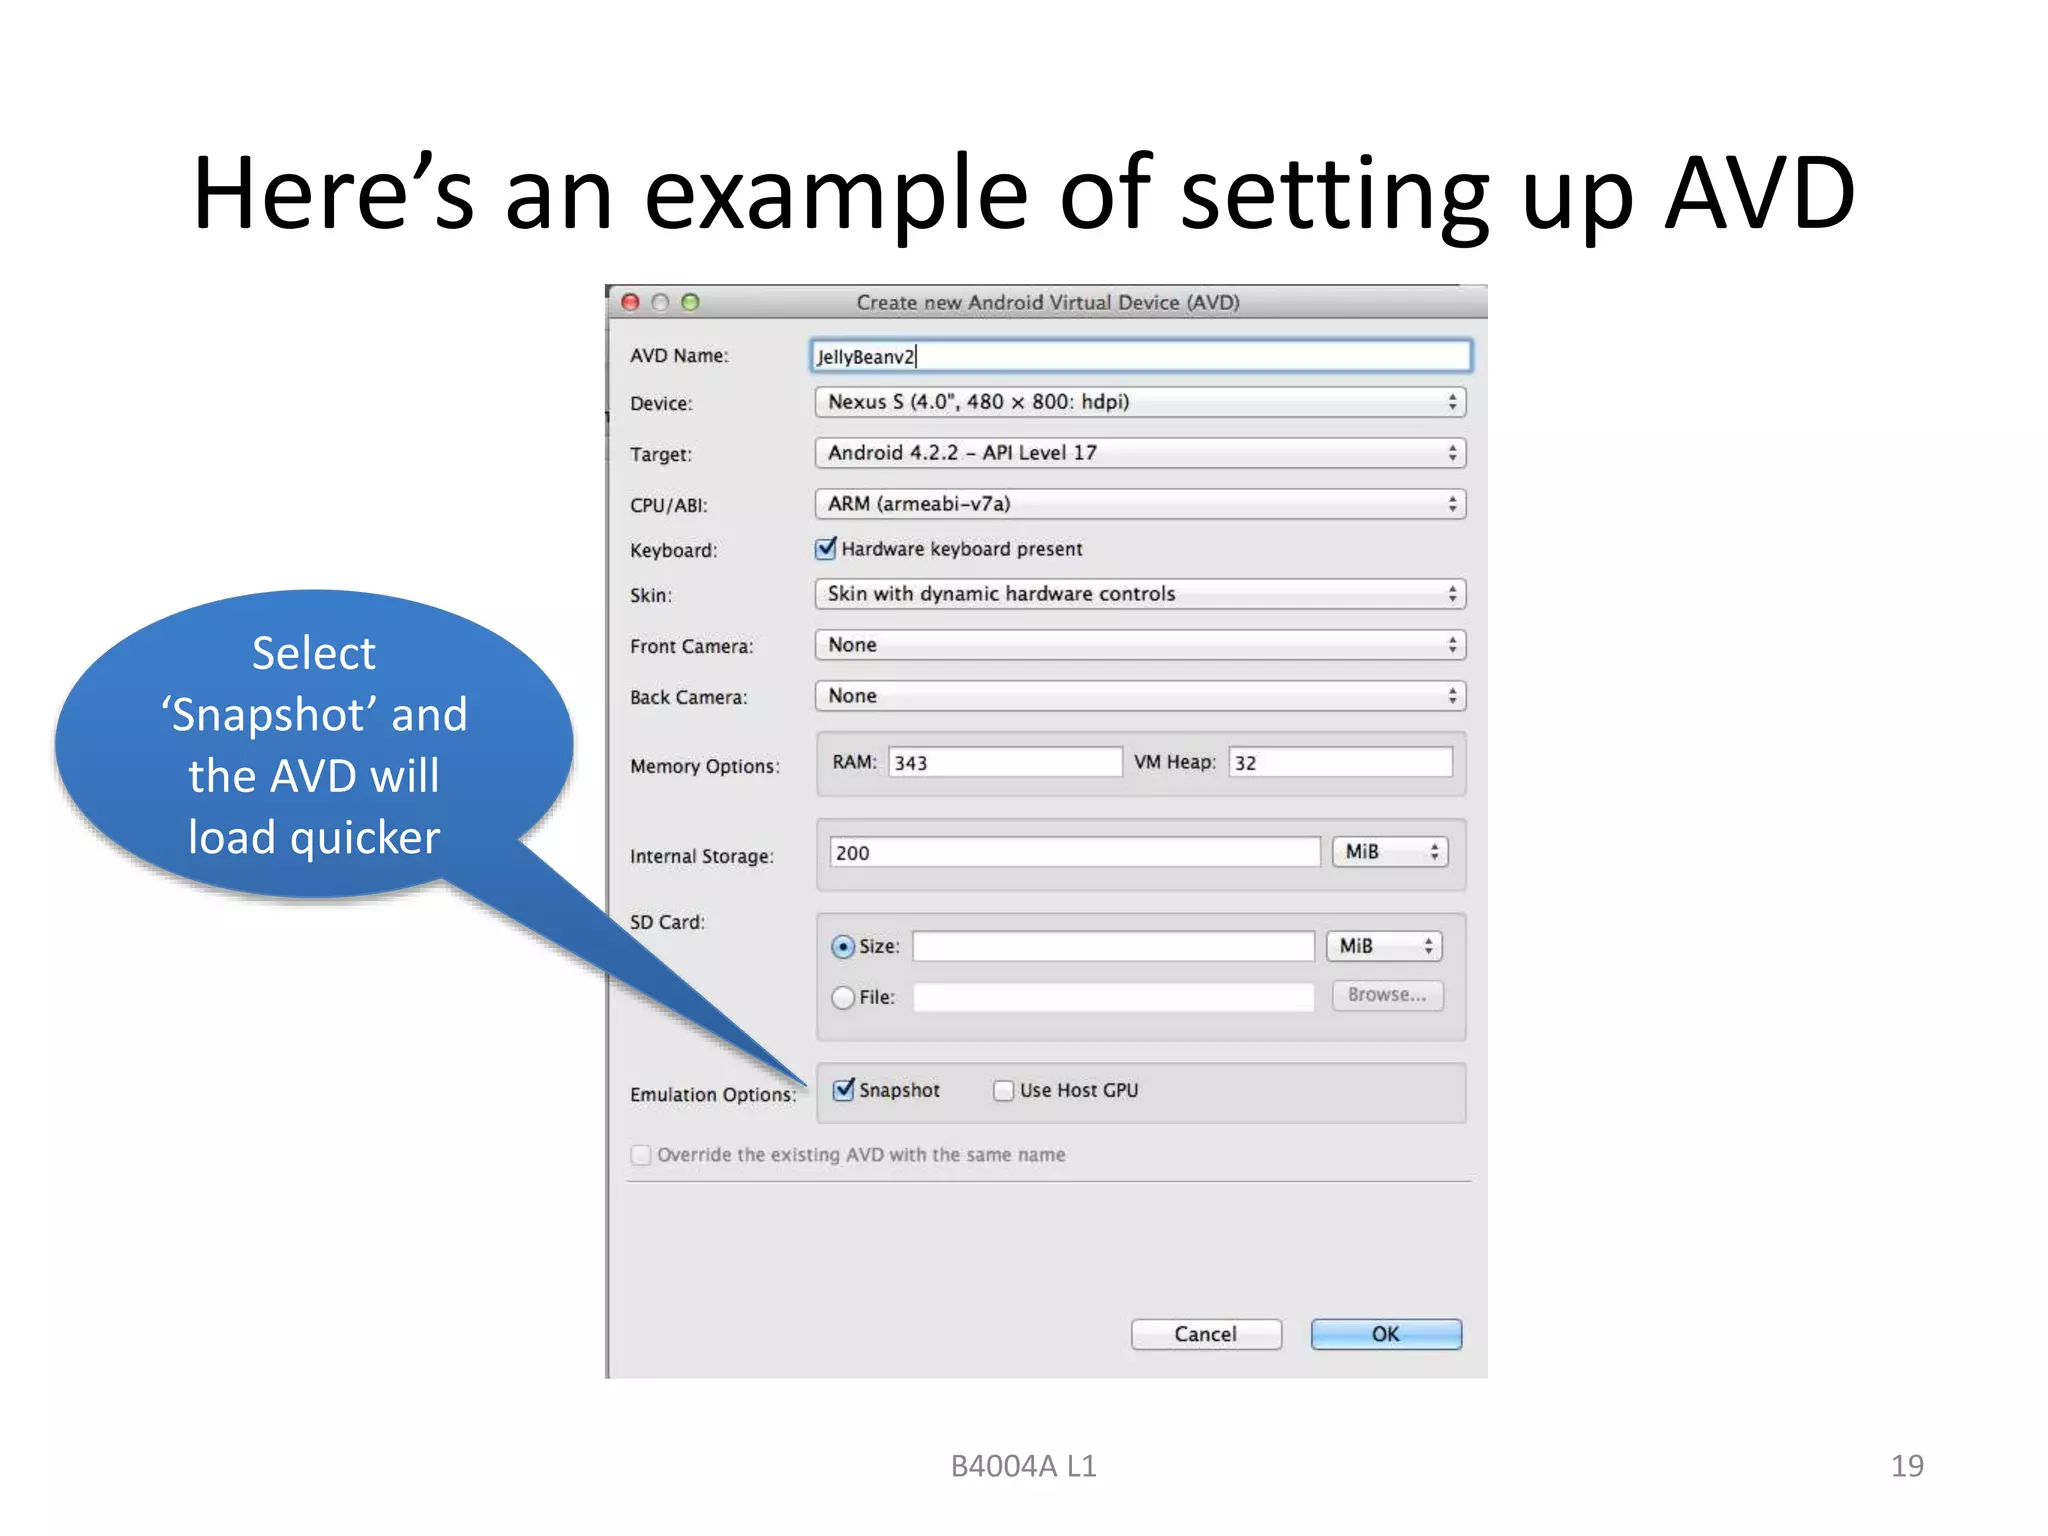
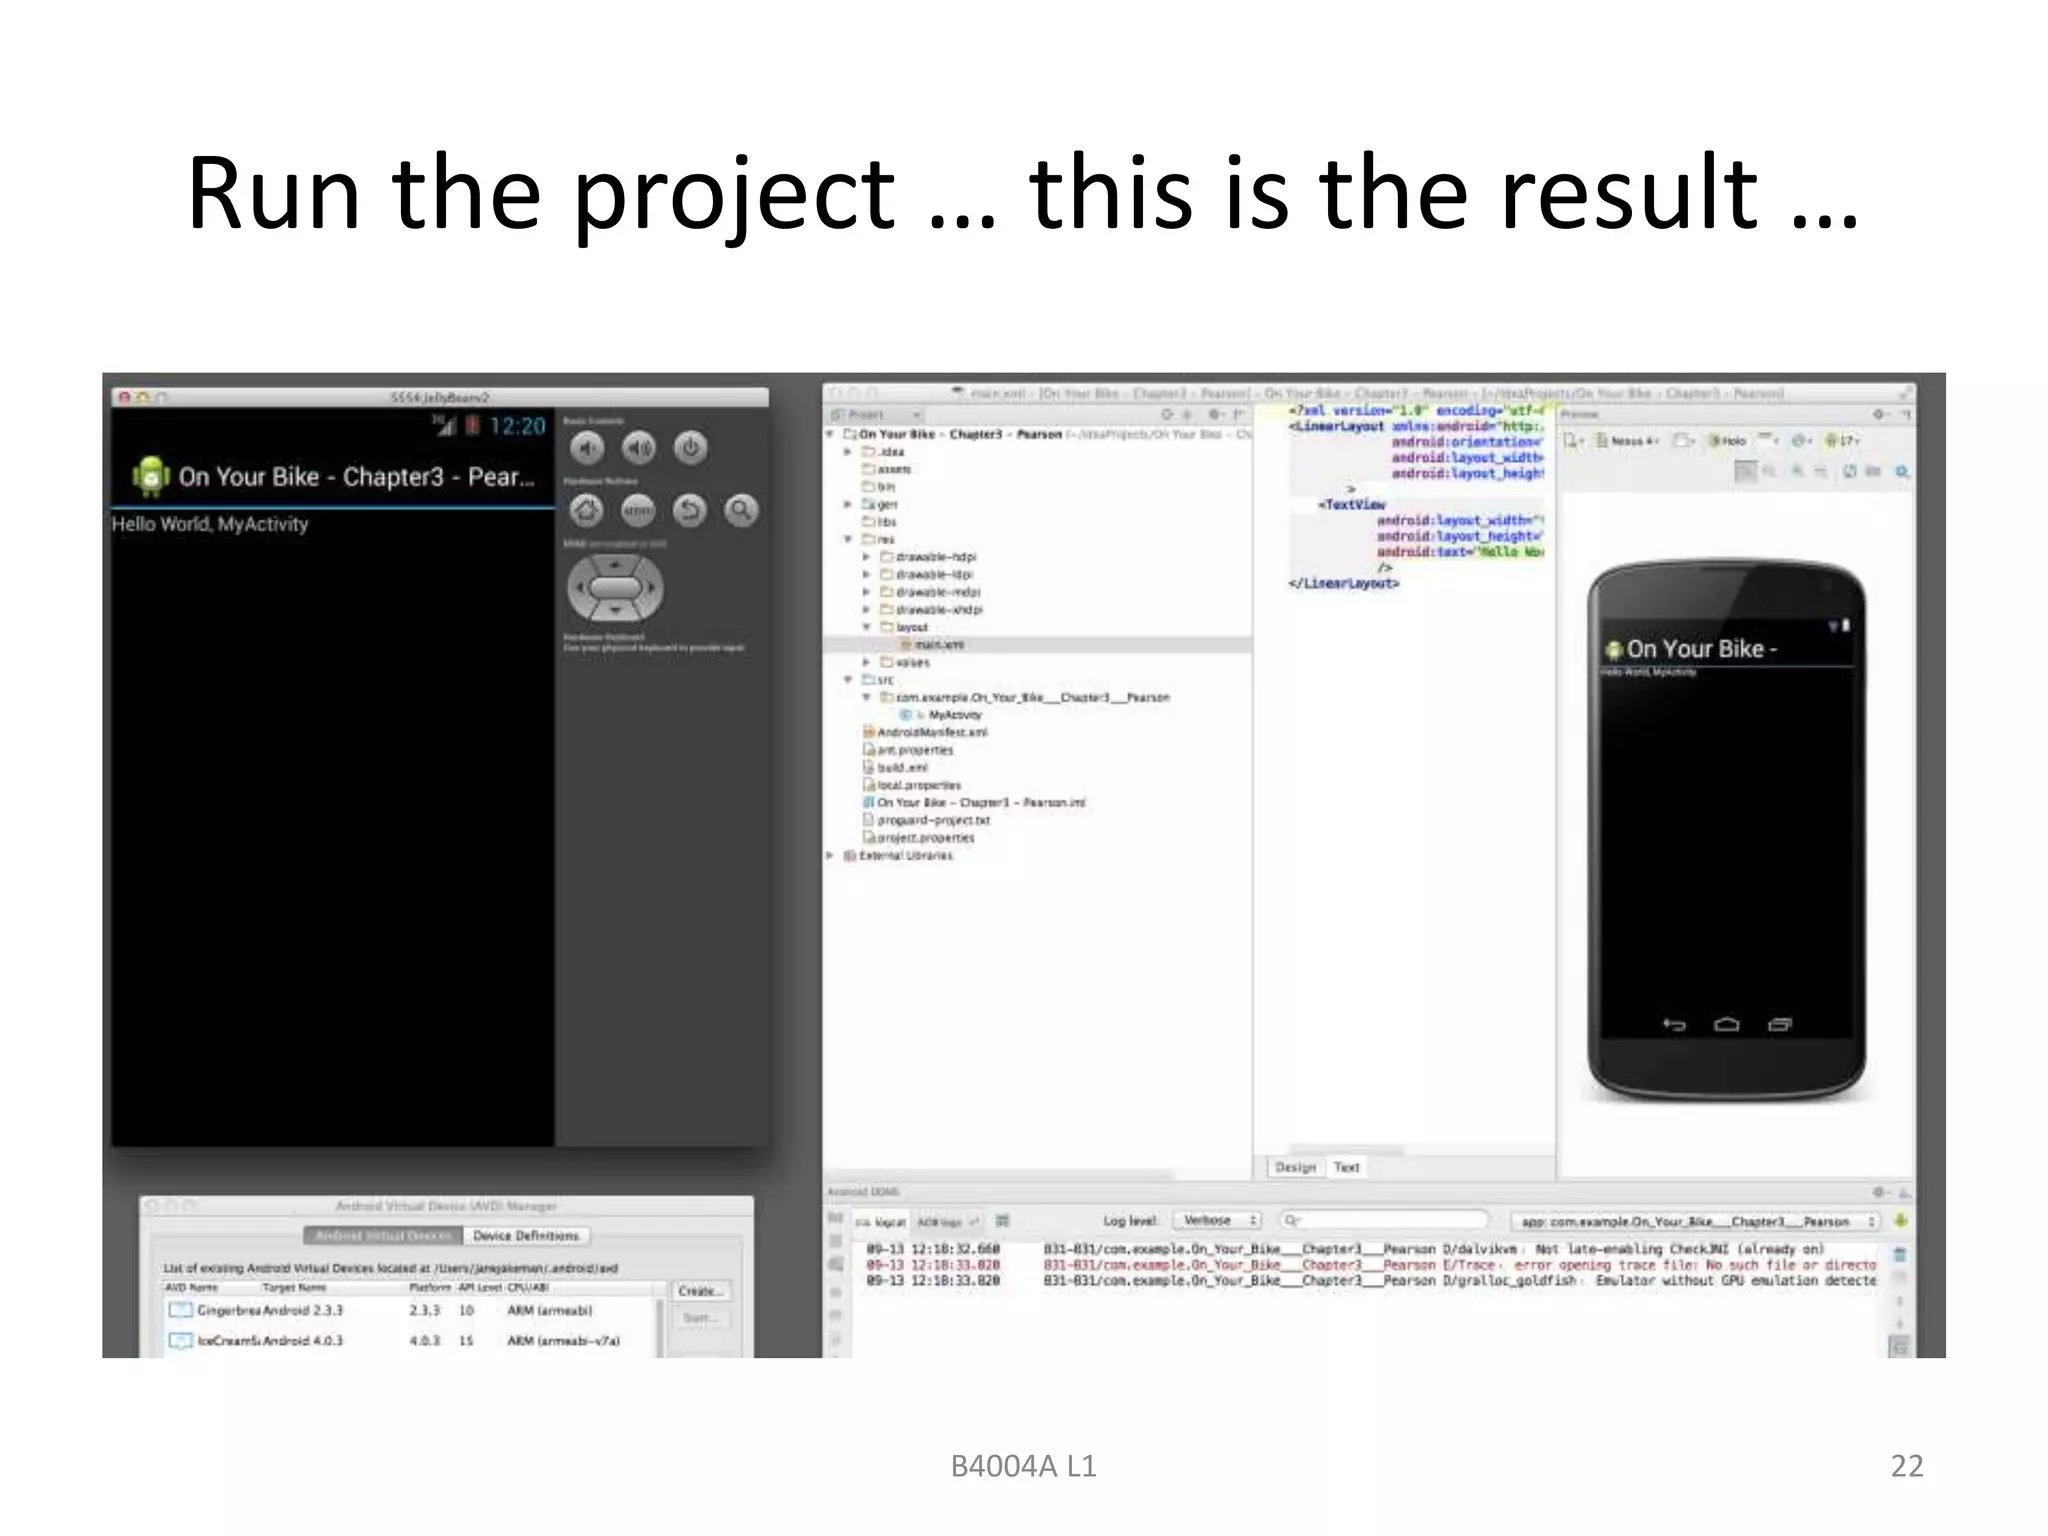
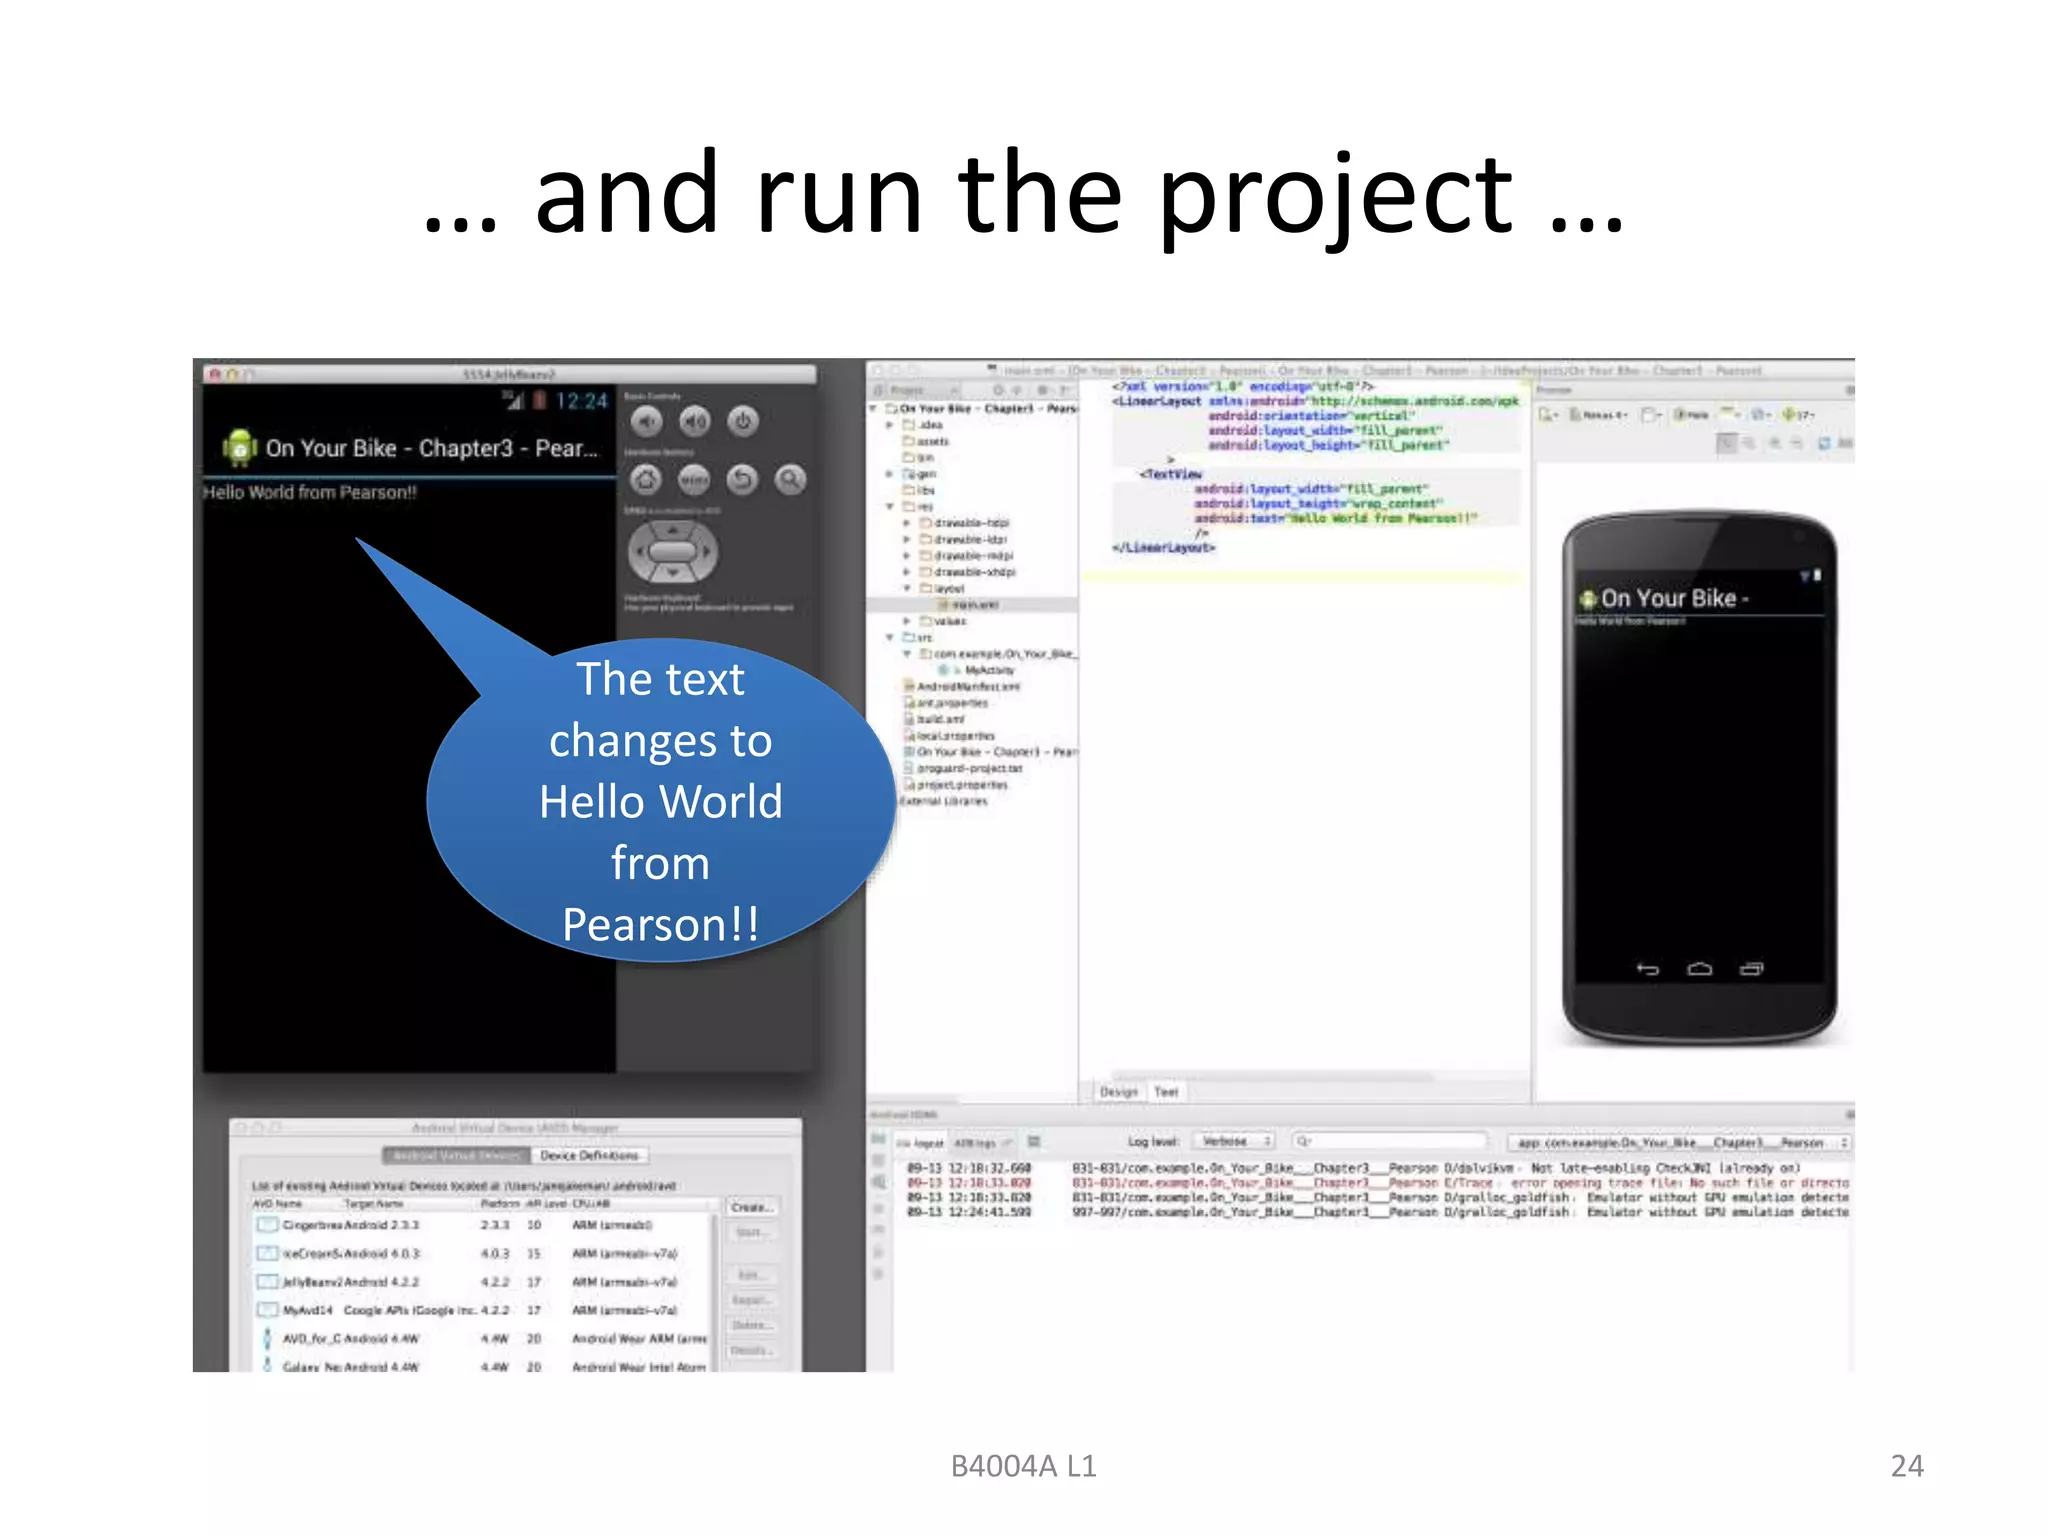
The document demonstrates setting up an emulator and creating a simple app with two activities and a button to switch between them for learning purposes. It provides resources for further reading on Android layouts.