Downloaded 150 times


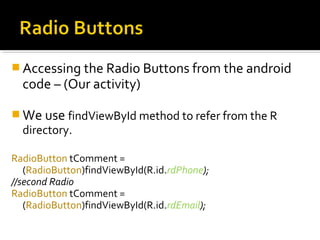


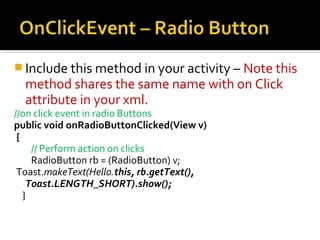
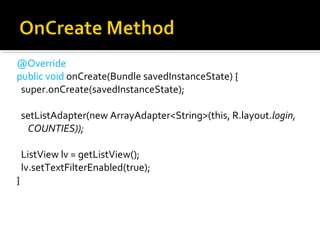
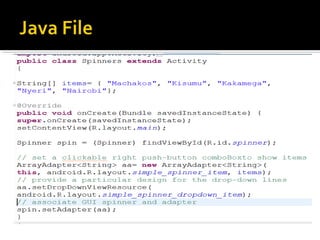
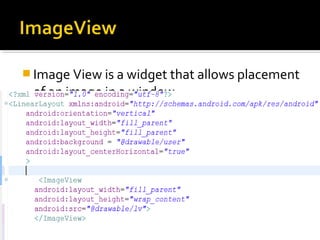
![//Include this string array after the onCreate
method
static final String[] COUNTIES = new String[]
{
“Nairobi", “Kakamega", “Kisii", “Nakuru",
“Laikipia",“Bungoma", “Eldoret", “Kwale“
};](https://image.slidesharecdn.com/costechmobilebootcamp3understandinguiinandroid-131023052105-phpapp01/85/Android-Bootcamp-Tanzania-understanding-ui-in_android-55-320.jpg)


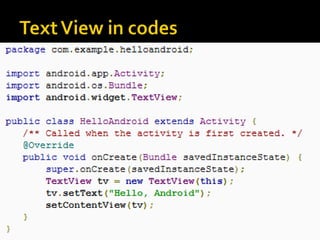
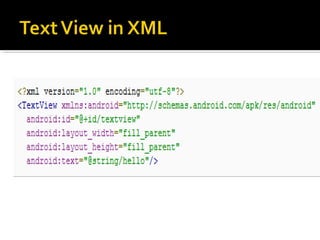
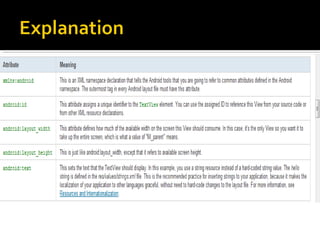
The document provides a comprehensive guide on setting up and using the Android SDK with Eclipse, detailing steps to create an Android project, define UI components such as activities, resource files, and various UI elements like text views, buttons, and spinners. Key concepts like the importance of the onCreate() method, resource referencing, and event handling for UI components are also covered. Additionally, it explains how to utilize drawable resources and provides code examples for implementing different interactive features in Android applications.