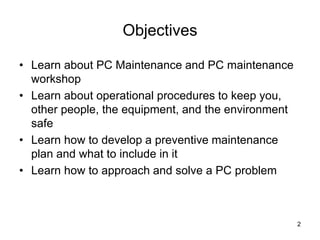
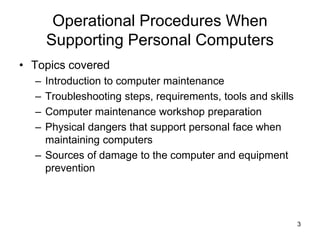
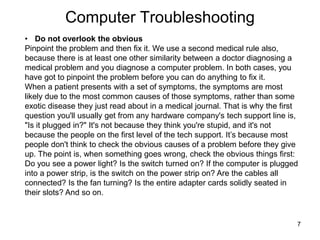
A+ Guide to Hardware:
Managing, Maintaining, and
Troubleshooting, 5e
Chapter 9
PC Maintenance and Troubleshooting
Strategies
2
Objectives
• Learn about PC Maintenance and PC maintenance
workshop
• Learn about operational procedures to keep you,
other people, the equipment, and the environment
safe
• Learn how to develop a preventive maintenance
plan and what to include in it
• Learn how to approach and solve a PC problem
3
Operational Procedures When
Supporting Personal Computers
• Topics covered
– Introduction to computer maintenance
– Troubleshooting steps, requirements, tools and skills
– Computer maintenance workshop preparation
– Physical dangers that support personal face when
maintaining computers
– Sources of damage to the computer and equipment
prevention
4
Introduction to Computer Maintenance
Computer Maintenance
– Computer Maintenance is basically the same as any other type
of maintenance; it includes a set of operations that makes the
computer functions properly, runs faster, more efficiently and
crashes less than one that has not been maintained
These operations are:
– Repairing the computer: fix and replace the faulty component.
– Preventing and cleaning the computer components: a set of
services or procedures performed to keep the computer in good
working condition and maintain it for a longer life.
– Upgrading the computer: replace an existing software or
hardware with a newer version.
– Troubleshooting: process of identifying a computer problem,
tracing the error and fixing it. Begins at outside of the system and
moves inwards.
5
Computer Troubleshooting
Effective Troubleshooting Requirements:
• Finding hardware problems and fixing them is easy. To
do effective troubleshooting you need the following:
– Good knowledge of PC.
– Good testing and fixing tools.
– Good reasoning skills.
6
Computer Troubleshooting
Troubleshooting Reasoning Skills:
There are, in fact, just six rules you need to know
to be able to troubleshoot not just computers, but almost
anything. They are also called Six Golden Rules:
• Do no harm
Avoid rushing, stop and think. Suppose for example that your system just
crashed. You are working hard against a deadline, trying to get a report
finished, and you haven’t saved your file for at least half an hour. You are in
a rush, so the first thing you want to do is rebooting, which is wrong. The
first thing you should do is nothing. In this case, the smartest thing to do is
to grab a pen and write down anything that shows on the screen then think
about the problem.
7
Computer Troubleshooting
• Do not overlook the obvious
Pinpoint the problem and then fix it. We use a second medical rule also,
because there is at least one other similarity between a doctor diagnosing a
medical problem and you diagnose a computer problem. In both cases, you
have got to pinpoint the problem before you can do anything to fix it.
When a patient presents with a set of symptoms, the symptoms are most
likely due to the most common causes of those symptoms, rather than some
exotic disease they just read about in a medical journal. That is why the first
question you'll usually get from any hardware company's tech support line is,
"Is it plugged in?" It's not because they think you're stupid, and it's not
because the people on the first level of the tech support. It’s because most
people don't think to check the obvious causes of a problem before they give
up. The point is, when something goes wrong, check the obvious things first:
Do you see a power light? Is the switch turned on? If the computer is plugged
into a power strip, is the switch on the power strip on? Are the cables all
connected? Is the fan turning? Is the entire adapter cards solidly seated in
their slots? And so on.
8
Computer Troubleshooting
• Do any part you can
When faced with problem you don't understand do any part of it you do
understand then step back and look at the problem again.
So start solving the problem with any thing you know. And in the more likely
event that you don't solve the problem immediately from doing the parts you
understand, the results of whatever you do may give you an idea about what
to do next. If not, at least you will know that you have done what you can,
before giving up and handing the job over to someone else.
• Simplify
The simpler you can make your system the fewer things you need to look
when tracing a problem. If you can test for a problem without Microsoft
running, for example, you do not have to consider a software conflict in
Windows as the source of the problem. If you can’t test without Microsoft
Windows running, you can at least close all programs that are not necessary,
which eliminates those programs from the equation. If you can remove other
hardware plugged into your system's ports, you can eliminate that hardware
as the source of the problem.
9
Computer Troubleshooting
And if you can remove some adapter cards from your computer, you have that
many fewer adapter cards to consider as possible sources of the problem.
The point is that the more you can simplify the system you're testing, the
fewer things you have to look at to find the problem.
• Bracket.
There is enough overlap between simplifying and bracketing that it's hard to
draw a sharp distinction between them. Bracketing is most easily understood
in context of a game we'll call Guess the Number. Suppose you have a
printing problem, for example. At the risk of oversimplifying, there are five
possible sources of the problem: The software you're printing from, the printer
driver (the software that tells Windows how to print with the particular printer),
the computer hardware, the cable, and the printer. Run the printer's self test. If
the printer works then the problem lies somewhere between the application
program and the connector on the printer. If it doesn't work, the problem is in
the printer itself, and you can look at things like whether it has any ink or toner
left.
10
Computer Troubleshooting
(Or paper. Remember Rule 2: Don't overlook the obvious.) Either way, you've
bracketed the problem and have fewer things to look at. Bracketing overlaps
with simplifying, because one of the ways to bracket a problem is to simplify
your system. With a printing problem, for example, if the printer is plugged
into some other hardware, one bracketing step you'll want to try is to remove
the other device, which also simplifies the system. In much the same way,
when you simplify your system, you may find that a problem disappears in
which case you've effectively bracketed the problem by showing it's related to
whatever you eliminated. You can then add things back to help pinpoint the
item that's causing the problem. Whether you get to this point by thinking
about simplifying your system or thinking about bracketing the problem,
however, doesn't matter. What matters is that you get there.
11
Computer Troubleshooting
• Swap out
Swapping out doesn't overlap with simplifying, but it certainly overlaps with
bracketing a problem. The idea behind swapping out is simple. Suppose you
have two flashlights. One works; the other doesn't. The problem with the one
that doesn't work could be bad batteries or a bad bulb. Swap the batteries and
see what happens. If the problem goes with the batteries to the second
flashlight, you need new batteries. If the problem stays with the same
flashlight only, you need a new bulb. If both flashlights now have a problem,
you need new batteries and a new bulb.
The swapping out overlaps with bracketing, because sometimes the only way
to bracket a problem is to swap out some pieces. Returning to printer
problems, for example, swapping printers will tell you if the problem goes with
the printer or with the rest of the system, which in turn helps you bracket the
problem. And swapping cables is the easiest way to decide whether you have
a problem with the cable. Whether you think of what you're doing as swapping
out or as bracketing doesn't matter, as long as you get around to swapping
the cables.
12
Computer Troubleshooting
Troubleshooting Steps:
What are the steps a technician should follow in order
to solve a computer problem? How to troubleshoot a
PC problem?
• Approach the problem first as an investigator and
discoverer
– Do not compound the problem
– Ask questions until problem source understood
– Positive attitude
•Use a systematic method to solve a problem
13
How to Troubleshoot a PC Problem
• Troubleshooting steps
– Gather information, Interview the user and back up
data before changes are made
– Examine the system, watch up boot up procedure,
analyze the problem, make an initial determination
– Test theory
– After problem source determined
• Plan what to do to fix the problem and then fix it
– Verify problem is fixed and system works
• Take preventive measures to make sure problem does
not happen again
– Document activities, outcomes, and knowledge
learned
14
Figure 9-1 General
approach to problem
solving. Courtesy: Course
Technology/Cengage
Learning
15
Step 1: Interview the User and Back Up
Data
• Beginning of troubleshooting situation
– Gather information, Interview user
• Can you please describe the problem, including error
messages, failures, and what you see or hear?
• What changes have recently been made to the
system?
• Is there important data on the system that is not backed
up?
• Can you show me how to reproduce the problem?
– Ask more penetrating questions to obtain all
information to help solve the problem
16
Step 1: Interview the User and Back Up
Data (cont’d.)
– Back up any important data
• Risks with the data must be the user’s decision
• Have user verify all important data safely backed up
17
Step 2: Examine the System, Watch Boot
up Procedure and Make Your Best Guess
• Steps to form a best guess (best theory) and test it
– Reproduce the problem and observe what the user
described
– Watch boot up sequence
• What is boot up? Bootstrapping is the process of
starting up a computer from a halted or powered-down
condition. When the computer is switched on, it
activates the memory-resident code, which resides on
the CPU board. The normal facilities of the operating
system are not available at this stage and the computer
must pull itself up by its own boot-straps so to speak.
This procedure therefore is often referred to as
bootstrapping, also known as cold boot.
18
Step 2: Examine the System, Watch Boot Up
Procedure and Make Your Best Guess
Types of boot up
• Cold boot up: system started from off condition when
power applied, and this is performed by turning on the
power switch.
• Warm boot up: Refers to restarting a computer that
is already turned on via the operating system it returns
the computer to its initial state. A warm boot is
sometimes necessary when a program encounters an
error from which it cannot recover. On PCs, you can
perform a warm boot by pressing the Control, Alt, and
Delete keys simultaneously, Reset button, Restart or
F9. Also called a soft boot.
19
Step 2: Examine the System, Watch Boot Up
Procedure and Make Your Best Guess
Bootup Main Operations:
Booting the PC includes a set of the following
operations.
1. POST: The POST is a built-in diagnostic program that
checks your hardware to ensure that everything is
present and functioning properly.
2. Initialization: BIOS places starting values in system’s
various intelligent devices.
3. BIOS load Operating System (OS) on the active
partition.
20
Step 2: Examine the System, Watch Boot Up
Procedure and Make Your Best Guess
Bootup Steps:
Carefully observing the steps of a boot-up procedure
can reveal a great deal about the nature of problems in
a system. Faulty areas can be included or excluded
from possible causes of errors during the boot-up
process.
•The observable actions of a working system’s cold boot
procedure are listed as follows as their order of
occurrence; for warm boot up steps 1 – 4 are bypassed:
1.When power is applied, the power-supply fan activates.
2.The keyboard lights flash as the rest of the system components
are being reset.
A+ Guide to Hardware modified by Dr. Feda AlShahwan 21
Step 2: Examine the System, Watch Boot Up
Procedure and Make Your Best Guess
3. A Basic Input Output System (BIOS) message displays on the
monitor.
4. A memory test flickers on the monitor.
5. The floppy disk drive access light comes on briefly.
6. The hard disk drive access light comes on briefly.
7. The system beeps, indicating that it has completed its Power-
On Self-Tests and initialization process.
8. The floppy disk drive access light comes on briefly before
switching to the hard drive. At this point, the BIOS is looking for
additional instructions (boot information), first from the floppy
drive and then from the hard drive (assuming the CMOS setup
is configured for this sequence).
9. For Windows machines, the Starting Windows message
appears onscreen.
22
Step 2: Examine the System, Watch Boot Up
Procedure and Make Your Best Guess
• Memorize the order of the series of observable events that occur
during the normal (DOS) boot up. If a section of the computer is
defective, you will observe just some (or possibly none) of these
events. By knowing the sections of the computer involved in
each step, you can suspect the section that is causing the
problem.
• For instance, it is illogical to replace the floppy disk drive (step 5)
when a memory test (step 4) has not been displayed on the
monitor.
• Therefore, when a failure occurs, you can eliminate components
as a possible cause of the error by observing the number of
steps the system completes in the preceding list. You can
eliminate those subsystems associated with steps successfully
completed. Focus your efforts only on those sections responsible
for the symptom. When that symptom is cleared, the computer
should progress to another step.
23
Step 2: Examine the System, Watch Boot
up Procedure and Make Your Best Guess
– Decide if the problem is hardware or software related
– Make a best guess of problem source
• Search resources for ideas and tips if necessary
Identifying the source of problem
• A functional computer system is composed of two major parts: the
system's hardware and the software that controls it. These two
elements are so closely related that it is often difficult to determine
which part might be the cause of a given problem. Therefore, one of
the earliest steps in troubleshooting a computer problem (or any
other programmable system problem) is to determine whether the
problem is due to a hardware failure or to faulty programming.
24
Step 2: Examine the System, Watch Boot
up Procedure and Make Your Best Guess
Identifying the source of problem (cont.)
• In PCs, you can use a significant event that occurs during the boot-
up process as a key to begin separating hardware problems from
software problems: the single beep most PCs produce between the
end of the POST and the beginning of OS load process (step 7 in
the preceding list). Errors that occur, or are displayed, before this
beep indicate that a hardware problem of some type exists. This
conclusion should be easy to understand because up to this time,
only the BIOS and the basic system hardware have been active.
The operating system side does not come into play until after the
beep occurs.
• If the system produces an error message (such as "The System Has
Detected Unstable RAM at Location x") or a beep code before the
beep, for example, the system has found a problem with the RAM
hardware. In this case, a bad memory device is indicated.
25
Step 2: Examine the System, Watch Boot
up Procedure and Make Your Best Guess
Identifying the source of problem (cont.)
• You can still group errors that occur before the beep into two distinct
categories: configuration/ setup errors and hardware failures.
– Configuration Problems: You can trace most of all problems that occur
in computer systems back to configuration settings.
– A special category of problems tends to occur whenever a new
hardware option is added to the system, or when the system is used for
the very first time. These problems are called configuration problems, or
setup problems, and result from mismatches between the system's
programmed configuration, held in CMOS memory, and the actual
equipment installed in the system.
– This mismatch also can be between the system's CMOS configuration
settings and the option's hardware jumper or switch settings.
26
Step 2: Examine the System, Watch Boot
up Procedure and Make Your Best Guess
CMOS Setup Utility and Plug and Play
• In most newer systems, the BIOS and operating system use Plug
and Play (PnP) techniques to detect new hardware that has been
installed in the system. These components work with the device to
allocate system resources for the device. In some situations, the
PnP logic cannot resolve all the system's resource needs and a
configuration error occurs. In these cases, you must manually
resolve the configuration problem.
• Configuration problems occur with some software packages when
first installed. The user must enter certain parameters into the
program to match its capabilities to the system's actual configuration
using CMOS setup utility. These configuration settings are
established through the startup software in the ROM BIOS. If these
parameters are set incorrectly, the software cannot direct the
system's hardware properly and an error occurs.
27
Step 2: Examine the System, Watch Boot
up Procedure and Make Your Best Guess
• Normally, you need to run the system's CMOS Setup utility in these
three situations:
1. When the system is first constructed.
2. If it becomes necessary to replace the CMOS backup battery on the
system board.
3. Whenever a new or different option is added to the system (such as
a hard drive, floppy drive, or video display).
28
Step 3: Test Your Theory
• Examples where Steps 3, 4, and 5 go very fast
– Video does not work
• Suspect loose cables or monitor not turned on
• Check video cable connection and discover it’s loose
• Screw video cable to the connection
– Corrupted spreadsheets
• Watch user save a file
• Discover user is saving files in a wrong format
• Step the user through saving the file correctly
• Verify others can open the file
• Explain to the user which format to use
29
Figure 9-2 Search manufacturer Web sites for help with a
hardware or software product. Courtesy: Course
Technology/Cengage Learning
30
Step 3: Test Your Theory (cont’d.)
• Examples of Step 3 which include testing an
incorrect guess
– CD drive won’t read a CD, suspect CD scratched
• Disc looks fine upon inspection
• Next guess: CD drive not recognized by Windows
• Device Manager reporting drive errors
• Next guess: corrupt drivers
– System refuses to boot and gives hard drive not
found message
• Internal cable connections solid
• Next guess: power supply not supplying power to the
drive
31
Step 3: Test Your Theory (cont’d.)
• Examples of Step 3 with a correct guess, move on
toward Step 4 to plan a solution
– Corrupted Word files
• Eliminate several simple causes
• Guess bad hard drive
• Event Viewer shows write errors to the drive
• Bad drive theory confirmed
• Will need to replace drive
32
Step 3: Test Your Theory (cont’d.)
• Examples of Step 3 with a correct guess, move on
toward Step 4 to plan a solution (cont’d.)
– Video does not work
• Check cables, power, and monitor settings
• Exchange video cable with known good one
• Guess a bad monitor: move monitor to a working PC
and it still does not work
• Try a good monitor on the first PC: works fine
• Bad monitor confirmed
• Plan to purchase new monitor
33
Step 3: Test Your Theory (cont’d.)
• As testing of guesses proceeds, keep in mind the
following rules:
– Use the six troubleshooting skills
– Divide and conquer (Bracketing)
– Become a researcher
– Write things down
– Don not overlook the obvious or assume the worst
– Reboot and start over
34
Step 4: Plan Your Solution and Then
Fix the Problem
• Some solutions are expensive and time consuming
• Carefully consider what will be done and the order
35
Step 4: Plan Your Solution and Then
Fix the Problem (cont’d.)
• Steps to plan a solution and fix the problem:
– Consider different solutions
• Select the least invasive one
– If hardware needs replacing:
• Select a replacement part compatible with the system
– Before installing a new part
• Determine what works and does not work
• Provides starting point
– Install the new part
36
Step 5: Verify the Fix and Take
Preventive Action
• Checks:
– Try reaching the Internet, use the printer, and burning
a CD
– Have user check everything and verify the job was
completed satisfactorily
• If a problem is found return to Step 2
– After verification consider how problem could have
been prevented
• Instruct the user to do what is appropriate to prevent
future problems
37
Step 6: Document What Happened
• Good documentation helps the technician:
– Take knowledge learned into next troubleshooting
situation
– Train others
– Develop effective preventive maintenance plans
– Satisfy any audits or customer or employer queries
about your work
38
Figure 9-3 Service call report form
Courtesy: Course Technology/Cengage Learning
39
Stay Safe and Keep Components Safe
Safety Tips: User
• Turn off power
• Do not get inside monitors and power supplies because
they contain capacitors that store and hold charges even
after they are turned off.
• Certain components such as resistors and vacuum tubes
get hot give them time to cool before touching them.
• Avoid chemical burns
• Managing cables
– Avoid trip hazard, cables that can cause people to trip
– Use cable or cord cover
– Nail or screw to floor
• Sharp edges in and around case
40
Stay Safe and Keep Components Safe
(cont’d.)
• Proper use of cleaning pads and solutions
– Most contain flammable and poisonous materials
• Keep away from skin and eyes
Figure 9-4 Cleaning solutions
and pads. Courtesy: Course
Technology/Cengage Learning
41
Stay Safe and Keep Components Safe
(cont’d.)
• Proper use of cleaning pads and solutions (cont’d.)
– Accidental exposure procedures
• View Material Safety Data Sheet (MSDS)
• Know company reporting policies
Figure 9-5 Each chemical you use
should have available a material
safety data sheet. Courtesy: Course
Technology/Cengage Learning
42
Stay Safe and Keep Components Safe
(cont’d.)
• Heavy equipment that can hurt a technician’s
back
• How to Lift heavy objects?
– Put on a cart
– Guidelines
• Balance the load when lifting
• Stand close to the object with feet apart
• Keep back straight, bend knees, and grip the load
• Lift with legs, arms, and shoulders
• Keep load close to body and avoid twisting
• Put the object down by keeping back straight and
lowering object by bending knees
– Ask for help if necessary
43
Stay Safe and Keep Components Safe
Safety Tips: Components
• Unplug immediately the PC when damaged
physically, exposed to water, moisture, or
electrical shorts
• Handle boards by edges and avoid touching
silver or gold contacts because oil from your
fingers can create an insulating layer and
degrade electrical signals
• Keep magnets away from the computer
• No liquids, jewelers or metallic objects that
conduct electricity
• Do not move or jar computer when on
• Do not smoke around the computer
• Do not leave PC turned off for weeks or
months
• Do not block air vents on the case or monitor
Figure 9-6 For optimum airflow,
don’t leave empty expansion slots
and bays uncovered. Courtesy:
Course Technology/Cengage
Learning
44
Stay Safe and Keep Components Safe
• Guidelines (cont’d.)
– Use keyboard covers in dirty environments
– Avoid high humidity around hard drives
– Use BIOS setup to disable ability to write to the hard
dive boot sector
– Keep private data under lock and key
– Protect storage media from direct sunlight, heat, and
extreme cold
– Protect electrical equipment from power surges
– Protect system from the Electro Static Discharge
(ESD)
45
Electro Static Discharge
What is ESD?
• Electro Static Discharge
• Electrical charge at rest that suddenly flows and passes between
two objects of dissimilar charges when contacted with each other.
This might cause an electrical short or dielectric breakdown
• Form of result of EMI (Electro Magnetic Interface)
• Static can discharge through computer equipment which are made
of MOS (Metal Oxide Semiconductor) Why? They contain thin metal
oxide material that is conductive and sensitive to ESD (10 volts can
destroy and damage electronic component)
• CPU/ Memory are most sensitive to ESD
46
Electro Static Discharge
Causes of ESD:
• Low humidity.
• Unshielded cables.
• Improper grounding.
• People movement.
How Decrease ESD?
• Increase humidity by using humidifier
• Use shielded cables.
• Good grounding.
• Discharge ESD. How?
– Antistatic wrist strap.
– Antistatic mat.
– Plug PC with switch off and touch the chassis
• Use antistatic sprays.
47
Workshop
• Table to rest the device with the following specifications:
– Flat
– Light color
– Large enough
– Made from wood
• Power receptacles
• Emergency button x.
Note: Plug cable (electricity) has 0.03V sensitivity while light has 0.3V
sensitivity.
• Good lighting
• Lamps
• Magnifying glass: to read small part numbers and to see cracked
wires
• Fire extinguisher
• Tools for troubleshooting
48
Work Shop
Troubleshooting tools
1.Software tools
– Built in (POST)
– Programs (Anti virus – Norton Doctor )
– General purpose diagnostic tools. ( Check it – PC Check)
2.Hardware tools
•Hand tools
– Screw drivers: Open and fasten screws
1- Slotted 2- Philips 3- Torx 4- Nut
– Pliers: Cut wires and cables
– Tweezers: Catch and hold small items
– IC puller: install and uninstall chips
Figure 9-7 Types of screw drivers. Courtesy:
Course Technology/Cengage Learning
49
Workshop
• Organizational Aids
– Parts Organizer
– Notebook
– Masking tape
• ESD tools
– Antistatic wrist strap: an elastic fabric band fits over your wrist
that has a cord attached with a clip on the end. The clip is
connected it to a bare metal part of computer chassis to allow for
a proper electrical ground. In addition, the strap contains a
resistor that prevents electricity from harming the technician
– Antistatic Mat: a conductive mat used in conjunction with the
wrist strap. It has very high resistance to discharge the static
charges slowly
– Antistatic bags: shielded bags used for shipping new
components that protect against an electromagnetic field
50
Workshop
• Testing (diagnostic) tools: Used to test and diagnose the computer
components
• Oscilloscope: Electronic testing equipment used to observe the
electronic signal on its screen, usually as a two-dimensional graph of
one or more electrical potential differences using the vertical or y-axis,
plotted as a function of time (horizontal or x-axis).
Figure 9-8: Oscilloscope
• Post card reader: A card that is placed in one of the PC's expansion
slots and reads the codes generated by the BIOS (during power on) and
displays hexadecimal number on its LED.
51
Workshop
POST card reader is used for troubleshooting computers that do not
startup (monitor and/or speaker). However, it relies on a working BIOS.
Figure 9-9: POST card reader
• Logic probe: A handheld pen like electronic device, with electron on its
tip and wires from the other end (see Figure 1). It is used to indicate the
status of the voltage at specific instance, normally using an LED as the
indicator. Often the LED on the logic probe will use different colors to
indicate different states. A logic probe is a cheap and relatively simple
item of test equipment. It is versatile and very transportable, and it is
also able to provide a quick test for many circuits. However, it is not
nearly as flexible and precise as an oscilloscope
Figure 9-10: Logic Probe
52
Workshop
• Multimeter: It is an electronic handheld measuring instrument that
combines several measurement functions in one unit. It is used to
measure the values of voltage, current, continuity and resistance
• Types of Mutlimeters:
1. Digital (DMM): display digits proportional to the measured value.
– More precise.
– Easier to use and read.
– More reliable to operate error.
2. Analog (VOM): analog instruments are usually based on a micrometer
whose pointer moves over a scale calibrated for all the different
measurements that can be made.
Note: In computers no need to use current function
53
Workshop
How to use Multimeter?
- Select the proper function: Volt power on
Resistance power off
Continuity power off
Steps to measure volt (power on):
- Select the proper function which is voltage (V)
- Select voltage type (AC, DC)
Note : Most measurements in computers are DC voltage
Note : AC measurements: commercial power being applied to the
power supply
Ripple voltage from DC output side of
power supply.
- Set the meter to its highest range to prevent it from damage
- Connect it parallel to the tested components
- After detecting approximate value decrease the range setting to achieve more
accurate reading
- DC reading in PC: +12 & -12 Volt,+5 & -5 Volt and +3.3 Volt
Note: Most multimeters allow for overvoltage protection
54
Workshop
Steps to measure resistance (power off):
- Select the proper function
- Set the meter to its lowest (1K) range to prevent the meter from damage.
- Connect it serial to the tested components.
- After detecting approximate value increase the range setting to achieve more
accurate reading
- Used to test fuse, speakers, cable
- For the speaker:
0 speaker is short-circuit and defective
∞ speaker is open-circuit and defective.
-8 ohms speaker is working properly
- For the cable:
0 tested components are working properly.
∞ tested component is defective
55
Workshop
Steps to measure continuity (power off):
- Select the proper function
- Connect the tested component in parallel
Beep sound component is working.
No beep component is deductive.
56
Personal Computer Preventive
Maintenance
• Prevent computer problems from occurring in the
first place
• PC technicians responsibilities
– Make and implement a preventive maintenance plan
– Create a disaster recovery plan
• Preventive maintenance goals
– Reduce likelihood of events causing PC failures
• Lessen the damage if they do occur
57
Set Up a Method of Documentation
• Create a new computer record book
– Record changes in setup data, problems
experienced, and maintenance performed
– Keep it up to date
– Store it with hardware and software documentation
58
Create a Preventive Maintenance Plan
• Evolves from a history or pattern of malfunctions
within an organization
Table 9-2 Guidelines for developing a PC preventive maintenance plan
59
Table 9-1 Guidelines for
developing a PC
preventive maintenance
plan (continued)
60
Summary
• Introduction to computer maintenance and effective
troubleshooting requirements
• Specifications for computer maintenance workshop
• Operational procedures in the PC support role
– Know physical dangers when maintaining computers
– Know damage sources to computers and equipment
• Preventive maintenance goals
– Reduce likelihood of events causing PC failures
– Lessen damage if they do occur
• PC troubleshooting involves six steps and six golden
rules

introduction to computer maintenance.ppt

  • 1.
    A+ Guide toHardware: Managing, Maintaining, and Troubleshooting, 5e Chapter 9 PC Maintenance and Troubleshooting Strategies
  • 2.
    2 Objectives • Learn aboutPC Maintenance and PC maintenance workshop • Learn about operational procedures to keep you, other people, the equipment, and the environment safe • Learn how to develop a preventive maintenance plan and what to include in it • Learn how to approach and solve a PC problem
  • 3.
    3 Operational Procedures When SupportingPersonal Computers • Topics covered – Introduction to computer maintenance – Troubleshooting steps, requirements, tools and skills – Computer maintenance workshop preparation – Physical dangers that support personal face when maintaining computers – Sources of damage to the computer and equipment prevention
  • 4.
    4 Introduction to ComputerMaintenance Computer Maintenance – Computer Maintenance is basically the same as any other type of maintenance; it includes a set of operations that makes the computer functions properly, runs faster, more efficiently and crashes less than one that has not been maintained These operations are: – Repairing the computer: fix and replace the faulty component. – Preventing and cleaning the computer components: a set of services or procedures performed to keep the computer in good working condition and maintain it for a longer life. – Upgrading the computer: replace an existing software or hardware with a newer version. – Troubleshooting: process of identifying a computer problem, tracing the error and fixing it. Begins at outside of the system and moves inwards.
  • 5.
    5 Computer Troubleshooting Effective TroubleshootingRequirements: • Finding hardware problems and fixing them is easy. To do effective troubleshooting you need the following: – Good knowledge of PC. – Good testing and fixing tools. – Good reasoning skills.
  • 6.
    6 Computer Troubleshooting Troubleshooting ReasoningSkills: There are, in fact, just six rules you need to know to be able to troubleshoot not just computers, but almost anything. They are also called Six Golden Rules: • Do no harm Avoid rushing, stop and think. Suppose for example that your system just crashed. You are working hard against a deadline, trying to get a report finished, and you haven’t saved your file for at least half an hour. You are in a rush, so the first thing you want to do is rebooting, which is wrong. The first thing you should do is nothing. In this case, the smartest thing to do is to grab a pen and write down anything that shows on the screen then think about the problem.
  • 7.
    7 Computer Troubleshooting • Donot overlook the obvious Pinpoint the problem and then fix it. We use a second medical rule also, because there is at least one other similarity between a doctor diagnosing a medical problem and you diagnose a computer problem. In both cases, you have got to pinpoint the problem before you can do anything to fix it. When a patient presents with a set of symptoms, the symptoms are most likely due to the most common causes of those symptoms, rather than some exotic disease they just read about in a medical journal. That is why the first question you'll usually get from any hardware company's tech support line is, "Is it plugged in?" It's not because they think you're stupid, and it's not because the people on the first level of the tech support. It’s because most people don't think to check the obvious causes of a problem before they give up. The point is, when something goes wrong, check the obvious things first: Do you see a power light? Is the switch turned on? If the computer is plugged into a power strip, is the switch on the power strip on? Are the cables all connected? Is the fan turning? Is the entire adapter cards solidly seated in their slots? And so on.
  • 8.
    8 Computer Troubleshooting • Doany part you can When faced with problem you don't understand do any part of it you do understand then step back and look at the problem again. So start solving the problem with any thing you know. And in the more likely event that you don't solve the problem immediately from doing the parts you understand, the results of whatever you do may give you an idea about what to do next. If not, at least you will know that you have done what you can, before giving up and handing the job over to someone else. • Simplify The simpler you can make your system the fewer things you need to look when tracing a problem. If you can test for a problem without Microsoft running, for example, you do not have to consider a software conflict in Windows as the source of the problem. If you can’t test without Microsoft Windows running, you can at least close all programs that are not necessary, which eliminates those programs from the equation. If you can remove other hardware plugged into your system's ports, you can eliminate that hardware as the source of the problem.
  • 9.
    9 Computer Troubleshooting And ifyou can remove some adapter cards from your computer, you have that many fewer adapter cards to consider as possible sources of the problem. The point is that the more you can simplify the system you're testing, the fewer things you have to look at to find the problem. • Bracket. There is enough overlap between simplifying and bracketing that it's hard to draw a sharp distinction between them. Bracketing is most easily understood in context of a game we'll call Guess the Number. Suppose you have a printing problem, for example. At the risk of oversimplifying, there are five possible sources of the problem: The software you're printing from, the printer driver (the software that tells Windows how to print with the particular printer), the computer hardware, the cable, and the printer. Run the printer's self test. If the printer works then the problem lies somewhere between the application program and the connector on the printer. If it doesn't work, the problem is in the printer itself, and you can look at things like whether it has any ink or toner left.
  • 10.
    10 Computer Troubleshooting (Or paper.Remember Rule 2: Don't overlook the obvious.) Either way, you've bracketed the problem and have fewer things to look at. Bracketing overlaps with simplifying, because one of the ways to bracket a problem is to simplify your system. With a printing problem, for example, if the printer is plugged into some other hardware, one bracketing step you'll want to try is to remove the other device, which also simplifies the system. In much the same way, when you simplify your system, you may find that a problem disappears in which case you've effectively bracketed the problem by showing it's related to whatever you eliminated. You can then add things back to help pinpoint the item that's causing the problem. Whether you get to this point by thinking about simplifying your system or thinking about bracketing the problem, however, doesn't matter. What matters is that you get there.
  • 11.
    11 Computer Troubleshooting • Swapout Swapping out doesn't overlap with simplifying, but it certainly overlaps with bracketing a problem. The idea behind swapping out is simple. Suppose you have two flashlights. One works; the other doesn't. The problem with the one that doesn't work could be bad batteries or a bad bulb. Swap the batteries and see what happens. If the problem goes with the batteries to the second flashlight, you need new batteries. If the problem stays with the same flashlight only, you need a new bulb. If both flashlights now have a problem, you need new batteries and a new bulb. The swapping out overlaps with bracketing, because sometimes the only way to bracket a problem is to swap out some pieces. Returning to printer problems, for example, swapping printers will tell you if the problem goes with the printer or with the rest of the system, which in turn helps you bracket the problem. And swapping cables is the easiest way to decide whether you have a problem with the cable. Whether you think of what you're doing as swapping out or as bracketing doesn't matter, as long as you get around to swapping the cables.
  • 12.
    12 Computer Troubleshooting Troubleshooting Steps: Whatare the steps a technician should follow in order to solve a computer problem? How to troubleshoot a PC problem? • Approach the problem first as an investigator and discoverer – Do not compound the problem – Ask questions until problem source understood – Positive attitude •Use a systematic method to solve a problem
  • 13.
    13 How to Troubleshoota PC Problem • Troubleshooting steps – Gather information, Interview the user and back up data before changes are made – Examine the system, watch up boot up procedure, analyze the problem, make an initial determination – Test theory – After problem source determined • Plan what to do to fix the problem and then fix it – Verify problem is fixed and system works • Take preventive measures to make sure problem does not happen again – Document activities, outcomes, and knowledge learned
  • 14.
    14 Figure 9-1 General approachto problem solving. Courtesy: Course Technology/Cengage Learning
  • 15.
    15 Step 1: Interviewthe User and Back Up Data • Beginning of troubleshooting situation – Gather information, Interview user • Can you please describe the problem, including error messages, failures, and what you see or hear? • What changes have recently been made to the system? • Is there important data on the system that is not backed up? • Can you show me how to reproduce the problem? – Ask more penetrating questions to obtain all information to help solve the problem
  • 16.
    16 Step 1: Interviewthe User and Back Up Data (cont’d.) – Back up any important data • Risks with the data must be the user’s decision • Have user verify all important data safely backed up
  • 17.
    17 Step 2: Examinethe System, Watch Boot up Procedure and Make Your Best Guess • Steps to form a best guess (best theory) and test it – Reproduce the problem and observe what the user described – Watch boot up sequence • What is boot up? Bootstrapping is the process of starting up a computer from a halted or powered-down condition. When the computer is switched on, it activates the memory-resident code, which resides on the CPU board. The normal facilities of the operating system are not available at this stage and the computer must pull itself up by its own boot-straps so to speak. This procedure therefore is often referred to as bootstrapping, also known as cold boot.
  • 18.
    18 Step 2: Examinethe System, Watch Boot Up Procedure and Make Your Best Guess Types of boot up • Cold boot up: system started from off condition when power applied, and this is performed by turning on the power switch. • Warm boot up: Refers to restarting a computer that is already turned on via the operating system it returns the computer to its initial state. A warm boot is sometimes necessary when a program encounters an error from which it cannot recover. On PCs, you can perform a warm boot by pressing the Control, Alt, and Delete keys simultaneously, Reset button, Restart or F9. Also called a soft boot.
  • 19.
    19 Step 2: Examinethe System, Watch Boot Up Procedure and Make Your Best Guess Bootup Main Operations: Booting the PC includes a set of the following operations. 1. POST: The POST is a built-in diagnostic program that checks your hardware to ensure that everything is present and functioning properly. 2. Initialization: BIOS places starting values in system’s various intelligent devices. 3. BIOS load Operating System (OS) on the active partition.
  • 20.
    20 Step 2: Examinethe System, Watch Boot Up Procedure and Make Your Best Guess Bootup Steps: Carefully observing the steps of a boot-up procedure can reveal a great deal about the nature of problems in a system. Faulty areas can be included or excluded from possible causes of errors during the boot-up process. •The observable actions of a working system’s cold boot procedure are listed as follows as their order of occurrence; for warm boot up steps 1 – 4 are bypassed: 1.When power is applied, the power-supply fan activates. 2.The keyboard lights flash as the rest of the system components are being reset.
  • 21.
    A+ Guide toHardware modified by Dr. Feda AlShahwan 21 Step 2: Examine the System, Watch Boot Up Procedure and Make Your Best Guess 3. A Basic Input Output System (BIOS) message displays on the monitor. 4. A memory test flickers on the monitor. 5. The floppy disk drive access light comes on briefly. 6. The hard disk drive access light comes on briefly. 7. The system beeps, indicating that it has completed its Power- On Self-Tests and initialization process. 8. The floppy disk drive access light comes on briefly before switching to the hard drive. At this point, the BIOS is looking for additional instructions (boot information), first from the floppy drive and then from the hard drive (assuming the CMOS setup is configured for this sequence). 9. For Windows machines, the Starting Windows message appears onscreen.
  • 22.
    22 Step 2: Examinethe System, Watch Boot Up Procedure and Make Your Best Guess • Memorize the order of the series of observable events that occur during the normal (DOS) boot up. If a section of the computer is defective, you will observe just some (or possibly none) of these events. By knowing the sections of the computer involved in each step, you can suspect the section that is causing the problem. • For instance, it is illogical to replace the floppy disk drive (step 5) when a memory test (step 4) has not been displayed on the monitor. • Therefore, when a failure occurs, you can eliminate components as a possible cause of the error by observing the number of steps the system completes in the preceding list. You can eliminate those subsystems associated with steps successfully completed. Focus your efforts only on those sections responsible for the symptom. When that symptom is cleared, the computer should progress to another step.
  • 23.
    23 Step 2: Examinethe System, Watch Boot up Procedure and Make Your Best Guess – Decide if the problem is hardware or software related – Make a best guess of problem source • Search resources for ideas and tips if necessary Identifying the source of problem • A functional computer system is composed of two major parts: the system's hardware and the software that controls it. These two elements are so closely related that it is often difficult to determine which part might be the cause of a given problem. Therefore, one of the earliest steps in troubleshooting a computer problem (or any other programmable system problem) is to determine whether the problem is due to a hardware failure or to faulty programming.
  • 24.
    24 Step 2: Examinethe System, Watch Boot up Procedure and Make Your Best Guess Identifying the source of problem (cont.) • In PCs, you can use a significant event that occurs during the boot- up process as a key to begin separating hardware problems from software problems: the single beep most PCs produce between the end of the POST and the beginning of OS load process (step 7 in the preceding list). Errors that occur, or are displayed, before this beep indicate that a hardware problem of some type exists. This conclusion should be easy to understand because up to this time, only the BIOS and the basic system hardware have been active. The operating system side does not come into play until after the beep occurs. • If the system produces an error message (such as "The System Has Detected Unstable RAM at Location x") or a beep code before the beep, for example, the system has found a problem with the RAM hardware. In this case, a bad memory device is indicated.
  • 25.
    25 Step 2: Examinethe System, Watch Boot up Procedure and Make Your Best Guess Identifying the source of problem (cont.) • You can still group errors that occur before the beep into two distinct categories: configuration/ setup errors and hardware failures. – Configuration Problems: You can trace most of all problems that occur in computer systems back to configuration settings. – A special category of problems tends to occur whenever a new hardware option is added to the system, or when the system is used for the very first time. These problems are called configuration problems, or setup problems, and result from mismatches between the system's programmed configuration, held in CMOS memory, and the actual equipment installed in the system. – This mismatch also can be between the system's CMOS configuration settings and the option's hardware jumper or switch settings.
  • 26.
    26 Step 2: Examinethe System, Watch Boot up Procedure and Make Your Best Guess CMOS Setup Utility and Plug and Play • In most newer systems, the BIOS and operating system use Plug and Play (PnP) techniques to detect new hardware that has been installed in the system. These components work with the device to allocate system resources for the device. In some situations, the PnP logic cannot resolve all the system's resource needs and a configuration error occurs. In these cases, you must manually resolve the configuration problem. • Configuration problems occur with some software packages when first installed. The user must enter certain parameters into the program to match its capabilities to the system's actual configuration using CMOS setup utility. These configuration settings are established through the startup software in the ROM BIOS. If these parameters are set incorrectly, the software cannot direct the system's hardware properly and an error occurs.
  • 27.
    27 Step 2: Examinethe System, Watch Boot up Procedure and Make Your Best Guess • Normally, you need to run the system's CMOS Setup utility in these three situations: 1. When the system is first constructed. 2. If it becomes necessary to replace the CMOS backup battery on the system board. 3. Whenever a new or different option is added to the system (such as a hard drive, floppy drive, or video display).
  • 28.
    28 Step 3: TestYour Theory • Examples where Steps 3, 4, and 5 go very fast – Video does not work • Suspect loose cables or monitor not turned on • Check video cable connection and discover it’s loose • Screw video cable to the connection – Corrupted spreadsheets • Watch user save a file • Discover user is saving files in a wrong format • Step the user through saving the file correctly • Verify others can open the file • Explain to the user which format to use
  • 29.
    29 Figure 9-2 Searchmanufacturer Web sites for help with a hardware or software product. Courtesy: Course Technology/Cengage Learning
  • 30.
    30 Step 3: TestYour Theory (cont’d.) • Examples of Step 3 which include testing an incorrect guess – CD drive won’t read a CD, suspect CD scratched • Disc looks fine upon inspection • Next guess: CD drive not recognized by Windows • Device Manager reporting drive errors • Next guess: corrupt drivers – System refuses to boot and gives hard drive not found message • Internal cable connections solid • Next guess: power supply not supplying power to the drive
  • 31.
    31 Step 3: TestYour Theory (cont’d.) • Examples of Step 3 with a correct guess, move on toward Step 4 to plan a solution – Corrupted Word files • Eliminate several simple causes • Guess bad hard drive • Event Viewer shows write errors to the drive • Bad drive theory confirmed • Will need to replace drive
  • 32.
    32 Step 3: TestYour Theory (cont’d.) • Examples of Step 3 with a correct guess, move on toward Step 4 to plan a solution (cont’d.) – Video does not work • Check cables, power, and monitor settings • Exchange video cable with known good one • Guess a bad monitor: move monitor to a working PC and it still does not work • Try a good monitor on the first PC: works fine • Bad monitor confirmed • Plan to purchase new monitor
  • 33.
    33 Step 3: TestYour Theory (cont’d.) • As testing of guesses proceeds, keep in mind the following rules: – Use the six troubleshooting skills – Divide and conquer (Bracketing) – Become a researcher – Write things down – Don not overlook the obvious or assume the worst – Reboot and start over
  • 34.
    34 Step 4: PlanYour Solution and Then Fix the Problem • Some solutions are expensive and time consuming • Carefully consider what will be done and the order
  • 35.
    35 Step 4: PlanYour Solution and Then Fix the Problem (cont’d.) • Steps to plan a solution and fix the problem: – Consider different solutions • Select the least invasive one – If hardware needs replacing: • Select a replacement part compatible with the system – Before installing a new part • Determine what works and does not work • Provides starting point – Install the new part
  • 36.
    36 Step 5: Verifythe Fix and Take Preventive Action • Checks: – Try reaching the Internet, use the printer, and burning a CD – Have user check everything and verify the job was completed satisfactorily • If a problem is found return to Step 2 – After verification consider how problem could have been prevented • Instruct the user to do what is appropriate to prevent future problems
  • 37.
    37 Step 6: DocumentWhat Happened • Good documentation helps the technician: – Take knowledge learned into next troubleshooting situation – Train others – Develop effective preventive maintenance plans – Satisfy any audits or customer or employer queries about your work
  • 38.
    38 Figure 9-3 Servicecall report form Courtesy: Course Technology/Cengage Learning
  • 39.
    39 Stay Safe andKeep Components Safe Safety Tips: User • Turn off power • Do not get inside monitors and power supplies because they contain capacitors that store and hold charges even after they are turned off. • Certain components such as resistors and vacuum tubes get hot give them time to cool before touching them. • Avoid chemical burns • Managing cables – Avoid trip hazard, cables that can cause people to trip – Use cable or cord cover – Nail or screw to floor • Sharp edges in and around case
  • 40.
    40 Stay Safe andKeep Components Safe (cont’d.) • Proper use of cleaning pads and solutions – Most contain flammable and poisonous materials • Keep away from skin and eyes Figure 9-4 Cleaning solutions and pads. Courtesy: Course Technology/Cengage Learning
  • 41.
    41 Stay Safe andKeep Components Safe (cont’d.) • Proper use of cleaning pads and solutions (cont’d.) – Accidental exposure procedures • View Material Safety Data Sheet (MSDS) • Know company reporting policies Figure 9-5 Each chemical you use should have available a material safety data sheet. Courtesy: Course Technology/Cengage Learning
  • 42.
    42 Stay Safe andKeep Components Safe (cont’d.) • Heavy equipment that can hurt a technician’s back • How to Lift heavy objects? – Put on a cart – Guidelines • Balance the load when lifting • Stand close to the object with feet apart • Keep back straight, bend knees, and grip the load • Lift with legs, arms, and shoulders • Keep load close to body and avoid twisting • Put the object down by keeping back straight and lowering object by bending knees – Ask for help if necessary
  • 43.
    43 Stay Safe andKeep Components Safe Safety Tips: Components • Unplug immediately the PC when damaged physically, exposed to water, moisture, or electrical shorts • Handle boards by edges and avoid touching silver or gold contacts because oil from your fingers can create an insulating layer and degrade electrical signals • Keep magnets away from the computer • No liquids, jewelers or metallic objects that conduct electricity • Do not move or jar computer when on • Do not smoke around the computer • Do not leave PC turned off for weeks or months • Do not block air vents on the case or monitor Figure 9-6 For optimum airflow, don’t leave empty expansion slots and bays uncovered. Courtesy: Course Technology/Cengage Learning
  • 44.
    44 Stay Safe andKeep Components Safe • Guidelines (cont’d.) – Use keyboard covers in dirty environments – Avoid high humidity around hard drives – Use BIOS setup to disable ability to write to the hard dive boot sector – Keep private data under lock and key – Protect storage media from direct sunlight, heat, and extreme cold – Protect electrical equipment from power surges – Protect system from the Electro Static Discharge (ESD)
  • 45.
    45 Electro Static Discharge Whatis ESD? • Electro Static Discharge • Electrical charge at rest that suddenly flows and passes between two objects of dissimilar charges when contacted with each other. This might cause an electrical short or dielectric breakdown • Form of result of EMI (Electro Magnetic Interface) • Static can discharge through computer equipment which are made of MOS (Metal Oxide Semiconductor) Why? They contain thin metal oxide material that is conductive and sensitive to ESD (10 volts can destroy and damage electronic component) • CPU/ Memory are most sensitive to ESD
  • 46.
    46 Electro Static Discharge Causesof ESD: • Low humidity. • Unshielded cables. • Improper grounding. • People movement. How Decrease ESD? • Increase humidity by using humidifier • Use shielded cables. • Good grounding. • Discharge ESD. How? – Antistatic wrist strap. – Antistatic mat. – Plug PC with switch off and touch the chassis • Use antistatic sprays.
  • 47.
    47 Workshop • Table torest the device with the following specifications: – Flat – Light color – Large enough – Made from wood • Power receptacles • Emergency button x. Note: Plug cable (electricity) has 0.03V sensitivity while light has 0.3V sensitivity. • Good lighting • Lamps • Magnifying glass: to read small part numbers and to see cracked wires • Fire extinguisher • Tools for troubleshooting
  • 48.
    48 Work Shop Troubleshooting tools 1.Softwaretools – Built in (POST) – Programs (Anti virus – Norton Doctor ) – General purpose diagnostic tools. ( Check it – PC Check) 2.Hardware tools •Hand tools – Screw drivers: Open and fasten screws 1- Slotted 2- Philips 3- Torx 4- Nut – Pliers: Cut wires and cables – Tweezers: Catch and hold small items – IC puller: install and uninstall chips Figure 9-7 Types of screw drivers. Courtesy: Course Technology/Cengage Learning
  • 49.
    49 Workshop • Organizational Aids –Parts Organizer – Notebook – Masking tape • ESD tools – Antistatic wrist strap: an elastic fabric band fits over your wrist that has a cord attached with a clip on the end. The clip is connected it to a bare metal part of computer chassis to allow for a proper electrical ground. In addition, the strap contains a resistor that prevents electricity from harming the technician – Antistatic Mat: a conductive mat used in conjunction with the wrist strap. It has very high resistance to discharge the static charges slowly – Antistatic bags: shielded bags used for shipping new components that protect against an electromagnetic field
  • 50.
    50 Workshop • Testing (diagnostic)tools: Used to test and diagnose the computer components • Oscilloscope: Electronic testing equipment used to observe the electronic signal on its screen, usually as a two-dimensional graph of one or more electrical potential differences using the vertical or y-axis, plotted as a function of time (horizontal or x-axis). Figure 9-8: Oscilloscope • Post card reader: A card that is placed in one of the PC's expansion slots and reads the codes generated by the BIOS (during power on) and displays hexadecimal number on its LED.
  • 51.
    51 Workshop POST card readeris used for troubleshooting computers that do not startup (monitor and/or speaker). However, it relies on a working BIOS. Figure 9-9: POST card reader • Logic probe: A handheld pen like electronic device, with electron on its tip and wires from the other end (see Figure 1). It is used to indicate the status of the voltage at specific instance, normally using an LED as the indicator. Often the LED on the logic probe will use different colors to indicate different states. A logic probe is a cheap and relatively simple item of test equipment. It is versatile and very transportable, and it is also able to provide a quick test for many circuits. However, it is not nearly as flexible and precise as an oscilloscope Figure 9-10: Logic Probe
  • 52.
    52 Workshop • Multimeter: Itis an electronic handheld measuring instrument that combines several measurement functions in one unit. It is used to measure the values of voltage, current, continuity and resistance • Types of Mutlimeters: 1. Digital (DMM): display digits proportional to the measured value. – More precise. – Easier to use and read. – More reliable to operate error. 2. Analog (VOM): analog instruments are usually based on a micrometer whose pointer moves over a scale calibrated for all the different measurements that can be made. Note: In computers no need to use current function
  • 53.
    53 Workshop How to useMultimeter? - Select the proper function: Volt power on Resistance power off Continuity power off Steps to measure volt (power on): - Select the proper function which is voltage (V) - Select voltage type (AC, DC) Note : Most measurements in computers are DC voltage Note : AC measurements: commercial power being applied to the power supply Ripple voltage from DC output side of power supply. - Set the meter to its highest range to prevent it from damage - Connect it parallel to the tested components - After detecting approximate value decrease the range setting to achieve more accurate reading - DC reading in PC: +12 & -12 Volt,+5 & -5 Volt and +3.3 Volt Note: Most multimeters allow for overvoltage protection
  • 54.
    54 Workshop Steps to measureresistance (power off): - Select the proper function - Set the meter to its lowest (1K) range to prevent the meter from damage. - Connect it serial to the tested components. - After detecting approximate value increase the range setting to achieve more accurate reading - Used to test fuse, speakers, cable - For the speaker: 0 speaker is short-circuit and defective ∞ speaker is open-circuit and defective. -8 ohms speaker is working properly - For the cable: 0 tested components are working properly. ∞ tested component is defective
  • 55.
    55 Workshop Steps to measurecontinuity (power off): - Select the proper function - Connect the tested component in parallel Beep sound component is working. No beep component is deductive.
  • 56.
    56 Personal Computer Preventive Maintenance •Prevent computer problems from occurring in the first place • PC technicians responsibilities – Make and implement a preventive maintenance plan – Create a disaster recovery plan • Preventive maintenance goals – Reduce likelihood of events causing PC failures • Lessen the damage if they do occur
  • 57.
    57 Set Up aMethod of Documentation • Create a new computer record book – Record changes in setup data, problems experienced, and maintenance performed – Keep it up to date – Store it with hardware and software documentation
  • 58.
    58 Create a PreventiveMaintenance Plan • Evolves from a history or pattern of malfunctions within an organization Table 9-2 Guidelines for developing a PC preventive maintenance plan
  • 59.
    59 Table 9-1 Guidelinesfor developing a PC preventive maintenance plan (continued)
  • 60.
    60 Summary • Introduction tocomputer maintenance and effective troubleshooting requirements • Specifications for computer maintenance workshop • Operational procedures in the PC support role – Know physical dangers when maintaining computers – Know damage sources to computers and equipment • Preventive maintenance goals – Reduce likelihood of events causing PC failures – Lessen damage if they do occur • PC troubleshooting involves six steps and six golden rules