
Recommended
More Related Content
What's hot
What's hot (18)
Similar to Integrating Geothermal Loops into Diaphragm Walls
Similar to Integrating Geothermal Loops into Diaphragm Walls (20)
Integrating Geothermal Loops into Diaphragm Walls
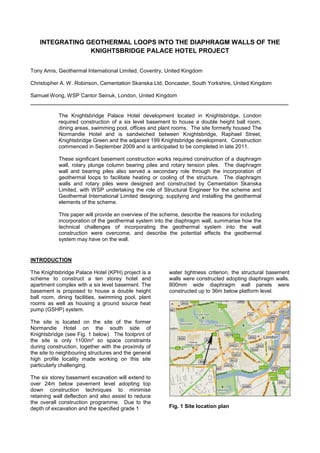
- 1. INTEGRATING GEOTHERMAL LOOPS INTO THE DIAPHRAGM WALLS OF THE KNIGHTSBRIDGE PALACE HOTEL PROJECT Tony Amis, Geothermal International Limited, Coventry, United Kingdom Christopher A. W. Robinson, Cementation Skanska Ltd, Doncaster, South Yorkshire, United Kingdom Samuel Wong, WSP Cantor Seinuk, London, United Kingdom The Knightsbridge Palace Hotel development located in Knightsbridge, London required construction of a six level basement to house a double height ball room, dining areas, swimming pool, offices and plant rooms. The site formerly housed The Normandie Hotel and is sandwiched between Knightsbridge, Raphael Street, Knightsbridge Green and the adjacent 199 Knightsbridge development. Construction commenced in September 2009 and is anticipated to be completed in late 2011. These significant basement construction works required construction of a diaphragm wall, rotary plunge column bearing piles and rotary tension piles. The diaphragm wall and bearing piles also served a secondary role through the incorporation of geothermal loops to facilitate heating or cooling of the structure. The diaphragm walls and rotary piles were designed and constructed by Cementation Skanska Limited, with WSP undertaking the role of Structural Engineer for the scheme and Geothermal International Limited designing, supplying and installing the geothermal elements of the scheme. This paper will provide an overview of the scheme, describe the reasons for including incorporation of the geothermal system into the diaphragm wall, summarise how the technical challenges of incorporating the geothermal system into the wall construction were overcome, and describe the potential effects the geothermal system may have on the wall. INTRODUCTION The Knightsbridge Palace Hotel (KPH) project is a water tightness criterion, the structural basement scheme to construct a ten storey hotel and walls were constructed adopting diaphragm walls. apartment complex with a six level basement. The 800mm wide diaphragm wall panels were basement is proposed to house a double height constructed up to 36m below platform level. ball room, dining facilities, swimming pool, plant rooms as well as housing a ground source heat pump (GSHP) system. The site is located on the site of the former Normandie Hotel on the south side of Knightsbridge (see Fig. 1 below). The footprint of the site is only 1100m² so space constraints during construction, together with the proximity of the site to neighbouring structures and the general high profile locality made working on this site particularly challenging. The six storey basement excavation will extend to over 24m below pavement level adopting top down construction techniques to minimise retaining wall deflection and also assist to reduce the overall construction programme. Due to the depth of excavation and the specified grade 1 Fig. 1 Site location plan
- 2. Construction of the diaphragm wall commenced in September 2009 with the geotechnical elements of the scheme being completed in March 2010. Construction remains underway and is anticipated to be completed during late 2011. This paper will describe the ground conditions, diaphragm wall construction, geothermal requirements of the project and the implications these had on the design and detailing of the diaphragm wall, and the potential effect the geothermal system may have on the basement walls. GROUND CONDITIONS The site investigation undertaken at the site principally comprised cable percussion boreholes. The site geology follows the general sequence:- EGL – 9.00m OD Made ground 9.00 – 4.50m OD Firm silty clay 4.50 – -2.00m OD River Terrace Gravels -2.00 – EOH London Clay (EGL = existing ground level, approx. 12m OD; EOH = End of hole) Equilibrium groundwater level at the site for design was taken as 2.00m OD. The basement was to be designed for a long term groundwater level of 11.00m OD (i.e. a flood level 1m below average existing ground level). The site investigation generally gave the following material descriptions:- Fig. 2 Design borehole profile Made ground: Firm to stiff grey brown clay and silty clay with sub rounded and sub angular gravel and occasional concrete and brick. Silty Clay (Brick earth Clay): Firm to stiff grey and orange mottled silty CLAY, sandy in parts. River Terrace Gravels: Medium dense to dense grey brown fine and medium SAND with some sub-angular to sub- rounded gravel. London Clay: Stiff to hard grey fissured CLAY with traces of dark grey pyritic silt. The design SPT „N‟ values and undrained shear strength profile adopted for design are presented in Figures 3 and 4 below. Fig. 3 SPT „N‟ vs. Level
- 3. damaged during the cutting down operation, installation of reinforcement cage, installation of connecting manifold pipes, supply and return feed to the loop. Fig. 4 Undrained Shear Strength „N‟ vs. Level THE STRUCTURAL ENGINEER‟S PERSPECTIVE. Top Down Construction With 6 levels of basement and 10 levels of superstructure (Fig 5) in a relatively small site, diaphragm wall and plunge column piles together with top down construction method was adopted to meet the tight construction programme. Top Fig 5 3D section showing superstructure and down construction method also minimises the basement through ball room area. ground movement to the surrounding properties which was a major consideration on this project. Plunge column piles Diaphragm walls Plunge column piles involve large diameter piles The 800mm thick diaphragm walls are installed in incorporating steel column sections. Installation of large panels with geothermal loops attached to the these steel sections required specialist plunge outside face of the cage near the external surface. frames to control the position and verticality of the The external cover was increased to maintain steel section when being plunged into the 75mm of cover to the loops. The geothermal loop concrete before it sets. Where geothermal loops diameter is relatively small and thus has no are also incorporated in the piles, the loops are significant effect on the bending and shear installed onto the cage as it is being lowered into capacity of the pile wall. Future penetrations position; the loops have to be secured to ensure through D-wall for incoming and outgoing services the pipes are not snagged during the installation require careful consideration to avoid damaging of the plunge columns. The free ends of the loop the loop. have to be protected until being exposed for connection when the lowest raft is constructed. Capping beams The effective area of the concrete pile is only marginally reduced by the introduction of The top of the Diaphragm wall requires trimming geothermal loops and can be ignored in the and cutting down to receive the reinforced capping capacity calculation. beam. Care is required to ensure the loops are not
- 4. Fig. 6 Diaphragm Wall Panel Layout DIAPHRAGM RETAINING WALL Diaphragm wall panels were constructed using a Diaphragm wall panels were designed for retained crane mounted hydraulic grab with bentonite heights of up to 24.35m. Panel joints incorporated support fluid to maintain panel trench stability, water bars to a depth of 27m. particularly within the Made Ground and River Terrace Gravel deposits. Fig. 7 below shows the hydraulic grab in operation. The grab is mounted The contract specification required the diaphragm on a rotator which enables the grab to be easily wall panels to provide a basement environment of rotated through 180° to maintain panel verticality. Grade 1 to BS8102: 1990 for the basement walls. Given the depths of excavations involved and the The diaphragm wall grab and crane incorporates high water pressure behind the retaining wall, on-board instrumentation which provides both an achieving tight construction tolerances for the instantaneous graphical output of grab and panel diaphragm wall panels was vital. Verticality verticality and also records this data (together with tolerances of better than 1:200 were routinely other relevant information) to form part of the as achieved. Diaphragm wall panels were built record information for each diaphragm wall constructed using C32/40 concrete. panel. A drained cavity liner wall was required to achieve In addition to supporting the basement excavation the final Grade 3 environment required for the and excluding groundwater, the diaphragm walls completed basement. also carried significant vertical superstructure loads. The magnitude of vertical load meant that certain elevations required the diaphragm wall 39 No. 800mm wide diaphragm wall panels were panels to be constructed to deeper toe levels than constructed to form the structural basement walls, was required from consideration of stability alone. as shown on Fig 6 below. The overall length of diaphragm basement wall was approximately 155 linear meters.
- 5. inclusion of additional length of geothermal pipework (or loops). The initial concept for the GSHP pipework to be incorporated within the diaphragm wall panels took the form of slinky pipes. These, as their name suggests, are loops of pipework formed into horizontal loops (see Fig.8 below) orientated in the vertical plane. This configuration is a variation of more typical slinky arrangement often found in GSHP applications which have the form of a curtate cycloid. Fig. 7 Hydraulic Grab for D-wall Construction GROUND SOURCE HEAT REQUIREMENTS OF THE SCHEME Fig. 8 Schematic “slinky” pipe arrangement From an early stage the KPH scheme included a requirement to incorporate ground source heating When the scheme progressed beyond the concept stage, consideration of this form of GSHP / cooling elements within the various geotechnical pipework by the various parties raised significant structures being constructed to support the concerns in terms of system resilience as a result superstructure and retain the ground / exclude of the potential complexity of the pipework groundwater. Whilst GSHP systems have been incorporated into a limited number of diaphragm geometry and the additional connection details which would be required along with creating walls on the continent, this was a first in the UK. significant programme implications compared to One elevation of the basement wall was not potentially simpler alternatives. Both Cementation required to include any GSHP capability since the Skanska Limited (CSL) and Geothermal immediately adjacent property (199 Knightsbridge) International (GI) have a considerable track record has a three level basement car park which would significantly reduce the efficiency of a GSHP installing GSHP pipework into piles of various types (e.g. large diameter rotary piles [constructed system along this elevation. both dry and under bentonite support fluid], CFA piles, driven cast in-situ piles etc.). Taking the The additional depth of diaphragm panel required experience from these previous schemes CSL to support vertical superstructure loads gave additional opportunity to enhance the available and GI working closely together developed a capacity of the proposed GSHP system through solution which maximised the ground sourced heating and cooling potential of the diaphragm
- 6. wall (with geometry etc, determined by the Conductivity Test Box retaining or bearing capacity functions) whilst minimising the impact on reinforcement quantities and potentially deleterious effects on construction quality. Unlike Energy Piles®, which will be surrounded by soil on all faces; Energy Walls™ will have one face permanently partially exposed as the basement; at Knightsbridge Palace Hotel this equated to a basement depth of 20m out of a total wall depth of approximately 25m. The active geothermal loop length installed was 24m, loops being installed 1 m above the founding level of the diaphragm wall to avoid any possible effect on the Fig. 10 Stage One of the Conductivity Test load bearing capability of the wall. The results of this conductivity test supported the conservative values used in the ground loop design. The second stage of the study is due to be undertaken shortly, after excavation of the basement is completed later this year as illustrated in Fig 11. Conductivity Test Box Fig.9 Schematic of Energy Wall™ It is important that geothermal loops within each panel are installed as close as can be practically achieved to the side of the diaphragm wall panel that will remain unexcavated as illustrated in Fig 8. Assessing the effects (of one face being exposed Fig. 11 Stage Two Of The Conductivity Test in this way) on the conductivity values needed to be taken into account within the ground loop The second stage of conductivity testing will then design. A review of available geothermal literature enable GI to compare and assess any reduction in revealed that there were no papers dealing with the conductivity values, and ultimately assess the this effect and thus it was imperative that GI levels of reduction arising from the basement design a scheme using some very conservative excavation that needs to be taken into account conductivity and resistivity values for the loops when designing ground loops within future installed within the diaphragm wall. From an early basements. stage it was GI‟s intention to undertake a two part study into the effects of geothermal loops installed GI and CSL ultimately developed a hybrid ground within basement walls. The first part of the study, loop solution that was the first of its kind in the UK, completed in May 2010, was to undertake a Geothermal loops were installed within both 100 conductivity test prior to excavation of the linear meters of Energy Wall™ and 49No. Energy basement as outlined in Fig 10. Piles® that will ultimately deliver 150kW of peak heating and 150kW of peak cooling to the hotel as illustrated in Fig 12.
- 7. detail of the GSHP pipework through the near face (NF) of the diaphragm wall. The slinky pipes were not to be connected vertically between cage sections, rather the pipework being brought horizontally to a box out at the NF of the reinforcement cage near the top of each cage section such that the pipework tails could be exposed and connected (headered in) at a convenient time following basement excavation. This would have required the vertical position of the pipework box outs to have been vertically co- ordinated with the position of the basement slabs. Fig. 12 Schematic of Energy Wall & Pile Various construction details associated with the Scheme original concept gave CSL & GI significant concerns. The prefabricated mesh arrangement IMPLICATIONS ON DIAPHRAGM WALL and horizontal pipework terminating in fairly large REINFORCEMENT DESIGN AND DETAILING. box outs all lead to additional congestion within the diaphragm wall reinforcement cage which One of the most significant considerations for CSL through structural requirements was already fairly was to ensure that the integration of the GSHP congested. An example of the potential effects system into the diaphragm wall, in whatever form, significant cage congestion can have on would not have any adverse impact on the construction quality is illustrated in Fig. 13 below. construction process and quality of the completed The detailing of cages with a relatively small diaphragm wall panels. One of the principle aperture size can lead to “pillowing” of the factors affecting diaphragm wall panels is to concrete as flow between bars is restricted, rather ensure that the construction process is as than flow being uninhibited and flowing to the continuous as possible, particularly following extremities of the panel excavation. panel excavation and the subsequent bentonite cleaning process. The diaphragm walls were reinforced with pre-fabricated cages in three sections which required splicing together during cage construction. The cage splice zones were located at suitable locations to avoid significant bar congestion in the areas of peak bending moment. The heaviest reinforcement consisted of paired B40 bars at 175mm centres, so attempting to form splices with paired bars of this size would have caused considerable additional difficulty in splicing the cages in a timely manner during panel construction. An additional constraint on splice location was the relatively tight access from Knightsbridge into the site. The access Fig. 13 Concrete quality defects due to restrictions lead to a maximum practicable cage reinforcement cage congestion length of 15m. Complete cages were typically formed from two 15m sections and a 5m section The solution favoured by both CSL and GI was an (including the splice lengths). adaptation of techniques developed for Energy Piles™ constructed under bentonite support fluid. The original slinky pipework concept would have In essence the geothermal loops are site fixed to required GSHP pipework to be prefabricated onto the outside of the far face reinforcement during steel mesh and site fixed to the far face (FF) of the cage placement. The geothermal loops are diaphragm wall. The FF is that face of the fabricated at GI‟s facility in Coventry under factory diaphragm wall panel against the retained soil with controlled conditions. The loops are then the near face (NF) being on the internal basement pressure tested to assure their quality at this stage side of the panel. The GSHP pipework could not of the process. The loops are then coiled ready be pre-fabricated onto the reinforcement cage as for dispatch to site. On site the coiled loops are these are transported on their back (i.e. far face then placed onto a drum arrangement (as shown down) which would have resulted in potentially in Figures 15, 16, and 17 below) to enable the significant damage to the pipework which may not loops to be fed out and fixed onto the have been easily evident unloading / installation reinforcement cage as it is lowered into the of the cages. A further additional potential prepared panel. Generally two loops were difficulty with this solution was the connection installed in each panel (the exception being the
- 8. Fig. 14 Typical reinforcement and geothermal panel construction is undertaken with an absolute loop configuration minimum of delay to maintain a high quality finished product. corner panels and those adjacent to 199 Knightsbridge). Each loop comprises a flow and Once the reinforcement cage was installed to the return line, there therefore being a total of 4 No. correct level, the loops were then pressurised to pipes fixed to the reinforcement cages. test their integrity and ensure that no damage had occurred during the installation process as shown in Figure 18. The pressure was maintained during To accommodate the loops the FF cover was concreting of the panel and held until the following increased and the longitudinal reinforcement day. The level of pressure testing adopted gives arrangement altered such that there was no net the best guarantee of a future system increase in the degree of cage congestion from performance. that detailed for cages not required to accommodate the geothermal loops. Where diaphragm wall panels were deepened to carry vertical loads an additional length of cage was installed to take advantage of the extra geothermal capacity afforded by the geometry. This additional length of cage was detailed to be a light as possible whilst maintaining sufficient robustness for handling and placing operation. The typical cage reinforcement and geothermal loop arrangement is shown in cross section in Fig. 14. The basic method of loop installation adopted had Fig 15 Feeding Geothermal Loop onto been used on previous piling contracts and had Reinforcement Cage been refined to ensure that the panel construction cycle took no longer than if the geothermal loops were not installed. This is critical to ensure that
- 9. Fig 16 Geothermal Loop and Reinforcement Fig 18 Pressure Testing Geothermal Loops Cage Installation Once Reinforcement Cage Installed PROGRAMME IMPLICATIONS OF INSTALLING LOOPS INTO DIAPHRAGM WALL. The installation of a diaphragm wall cage within a completed panel is a slow and careful process even without geothermal loops. The 3 cage sections for each panel meant that considerable time was required to splice cages together. Thus, as long as loops were in position on loop reelers ahead of cage installation, the time required to attach loops to the far face of the cage adequately matched the speed of cage insertion. GI were on hand to assist and undertake flow test and pressure test during preparation for concreting works. Thus geothermal loop work remained a non-critical activity and no additional time was required for this element of works. ANTICIPATED EFFECTS OF PLACING GEOTHERMAL LOOPS IN DIAPHRAGM WALLS AND PILES For the last 10-15 years geothermal loops have been installed within foundation piles and diaphragm walls in Europe with no adverse effects Fig 17 Geothermal Loop and Reinforcement being reported. The UK unfortunately has lagged Cage Installation behind and only in recent years is catching on to the benefits associated with this simple technology.
- 10. Brandl 2006 – reported on several projects across concrete during a winter‟s day. Work currently Austria and concluded that shaft resistance, base continues on site to link up loops in diaphragm pressure and bearing resistance of soil are not wall panels and piles in a similar vein, with good affected by heat absorption and that temperature coordination with the ground worker induced settlement or heave is negligible The secondary usage of the structural element as thermal mass enhances the sustainability Laloui 2006 – Identified that the heating-cooling credential of the development. process of the building foundations induces significant modifications in the soil-structure leading to additional stresses in the piles, decrease of the lateral friction and the possibility of a gap between the pile and the soil Bourne Webb et al 2009 – concluded that temperature change in piles leads to increases and decreases in shaft resistance and axial load. Working stresses in pile should be kept low, and maintain high factor of safety on shaft to withstand heating and cooling loads Temperatures within geothermal loops will range gradually between -1°C and 30°C over a 12 month period as the season changes from winter heating dominant, to summertime cooling dominant. Over a single 24 hour period the ground loop temperature is unlikely to change by anything Fig. 19 Architects‟ impression of completed greater than 8°C, thus the likely effects compared development to the thermal effects imposed on an external façade in spring time, when temperatures can ACKNOWLEDGEMENTS range from below freezing in the morning to a high midday temperature can be considered to be The authors wish to thank Squire and Partners, minimal. the Architect along with all the other members of the professional team and especially the Client CONCLUSIONS Prime Developments Limited for their kind permission to publish this paper. The requirements for the Knightsbridge Palace Hotel development have led to a UK construction REFERENCES first with the successful construction of Energy Walls™ for basement construction (i.e. Bourne Webb, PJ et al (2009) Geotechnique 59 incorporation of geothermal loops within No3 237-248 Energy pile test at Lambeth College, diaphragm wall panels). The wide range of London: geotechnical & thermodynamic aspects expertise and techniques employed by CSL, GI and WSP combined with the close relationships of pile response to heat cycles developed with the Client‟s team have resulted in the construction of a first class project. Good early Laloui, L., Nuth, M. & Vulliet, L. (2006). coordination between all parties enabled the Experimental and numerical investigations of the successful installation of geothermal loops within behaviour of a heat exchanger pile. Int. J. Numer. diaphragm walls and piles with no additional time Anal. Methods Geomech. 30, No. 8, 763–781 being needed to be added to the construction programme. Brandl,H (2006) Geotechnique 56 No 2, 81-122 Energy Foundations and other thermo-active Loop layout within reinforcement cages in both ground structures. Energy Pile™ and Energy Walls® requires careful coordination Careful consideration needs to be made for future penetration requirement for incoming and outgoing services Once operational, daily loop temperature fluctuations will be considerably less than exposed