Download to read offline


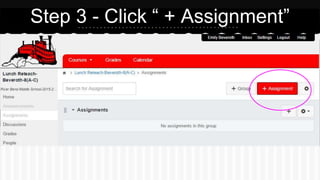
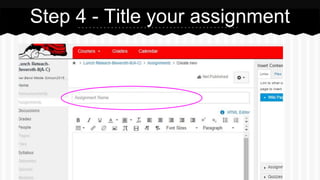


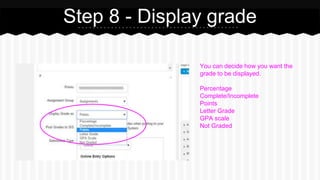


This document provides instructions for creating an assignment in Canvas in 14 steps: 1) Find your class, 2) Click assignments, 3) Click "+ Assignment", 4) Title your assignment, 5) Provide directions, 6) Enter points, 7) Choose an assignment group, 8) Choose how to display grades, 9) Sync to PowerSchool if desired, 10) Choose a submission type like online, 11) Choose an online submission type like file upload, 12) Assign to individuals or groups and add a due date, 13) Save or publish the assignment, and 14) Relax while students complete the assignment.