The document discusses the various media technologies and software the student used throughout their coursework over the year. This included platforms like Premiere Pro, Emaze, YouTube, PowToon, PowerPoint, SlideShare, and Photoshop. The student created blogs, presentations, videos and used these platforms at different stages of their process from research to production and editing. They organized their work on these platforms to showcase it for others.
A Strategic Approach: GenAI in EducationPeter Windle
Artificial Intelligence (AI) technologies such as Generative AI, Image Generators and Large Language Models have had a dramatic impact on teaching, learning and assessment over the past 18 months. The most immediate threat AI posed was to Academic Integrity with Higher Education Institutes (HEIs) focusing their efforts on combating the use of GenAI in assessment. Guidelines were developed for staff and students, policies put in place too. Innovative educators have forged paths in the use of Generative AI for teaching, learning and assessments leading to pockets of transformation springing up across HEIs, often with little or no top-down guidance, support or direction.
This Gasta posits a strategic approach to integrating AI into HEIs to prepare staff, students and the curriculum for an evolving world and workplace. We will highlight the advantages of working with these technologies beyond the realm of teaching, learning and assessment by considering prompt engineering skills, industry impact, curriculum changes, and the need for staff upskilling. In contrast, not engaging strategically with Generative AI poses risks, including falling behind peers, missed opportunities and failing to ensure our graduates remain employable. The rapid evolution of AI technologies necessitates a proactive and strategic approach if we are to remain relevant.
Introduction to AI for Nonprofits with Tapp NetworkTechSoup
Dive into the world of AI! Experts Jon Hill and Tareq Monaur will guide you through AI's role in enhancing nonprofit websites and basic marketing strategies, making it easy to understand and apply.
Welcome to TechSoup New Member Orientation and Q&A (May 2024).pdfTechSoup
In this webinar you will learn how your organization can access TechSoup's wide variety of product discount and donation programs. From hardware to software, we'll give you a tour of the tools available to help your nonprofit with productivity, collaboration, financial management, donor tracking, security, and more.
Instructions for Submissions thorugh G- Classroom.pptxJheel Barad
This presentation provides a briefing on how to upload submissions and documents in Google Classroom. It was prepared as part of an orientation for new Sainik School in-service teacher trainees. As a training officer, my goal is to ensure that you are comfortable and proficient with this essential tool for managing assignments and fostering student engagement.
Francesca Gottschalk - How can education support child empowerment.pptxEduSkills OECD
Francesca Gottschalk from the OECD’s Centre for Educational Research and Innovation presents at the Ask an Expert Webinar: How can education support child empowerment?
2024.06.01 Introducing a competency framework for languag learning materials ...Sandy Millin
http://sandymillin.wordpress.com/iateflwebinar2024
Published classroom materials form the basis of syllabuses, drive teacher professional development, and have a potentially huge influence on learners, teachers and education systems. All teachers also create their own materials, whether a few sentences on a blackboard, a highly-structured fully-realised online course, or anything in between. Despite this, the knowledge and skills needed to create effective language learning materials are rarely part of teacher training, and are mostly learnt by trial and error.
Knowledge and skills frameworks, generally called competency frameworks, for ELT teachers, trainers and managers have existed for a few years now. However, until I created one for my MA dissertation, there wasn’t one drawing together what we need to know and do to be able to effectively produce language learning materials.
This webinar will introduce you to my framework, highlighting the key competencies I identified from my research. It will also show how anybody involved in language teaching (any language, not just English!), teacher training, managing schools or developing language learning materials can benefit from using the framework.
The Roman Empire A Historical Colossus.pdfkaushalkr1407
The Roman Empire, a vast and enduring power, stands as one of history's most remarkable civilizations, leaving an indelible imprint on the world. It emerged from the Roman Republic, transitioning into an imperial powerhouse under the leadership of Augustus Caesar in 27 BCE. This transformation marked the beginning of an era defined by unprecedented territorial expansion, architectural marvels, and profound cultural influence.
The empire's roots lie in the city of Rome, founded, according to legend, by Romulus in 753 BCE. Over centuries, Rome evolved from a small settlement to a formidable republic, characterized by a complex political system with elected officials and checks on power. However, internal strife, class conflicts, and military ambitions paved the way for the end of the Republic. Julius Caesar’s dictatorship and subsequent assassination in 44 BCE created a power vacuum, leading to a civil war. Octavian, later Augustus, emerged victorious, heralding the Roman Empire’s birth.
Under Augustus, the empire experienced the Pax Romana, a 200-year period of relative peace and stability. Augustus reformed the military, established efficient administrative systems, and initiated grand construction projects. The empire's borders expanded, encompassing territories from Britain to Egypt and from Spain to the Euphrates. Roman legions, renowned for their discipline and engineering prowess, secured and maintained these vast territories, building roads, fortifications, and cities that facilitated control and integration.
The Roman Empire’s society was hierarchical, with a rigid class system. At the top were the patricians, wealthy elites who held significant political power. Below them were the plebeians, free citizens with limited political influence, and the vast numbers of slaves who formed the backbone of the economy. The family unit was central, governed by the paterfamilias, the male head who held absolute authority.
Culturally, the Romans were eclectic, absorbing and adapting elements from the civilizations they encountered, particularly the Greeks. Roman art, literature, and philosophy reflected this synthesis, creating a rich cultural tapestry. Latin, the Roman language, became the lingua franca of the Western world, influencing numerous modern languages.
Roman architecture and engineering achievements were monumental. They perfected the arch, vault, and dome, constructing enduring structures like the Colosseum, Pantheon, and aqueducts. These engineering marvels not only showcased Roman ingenuity but also served practical purposes, from public entertainment to water supply.
Unit 8 - Information and Communication Technology (Paper I).pdfThiyagu K
This slides describes the basic concepts of ICT, basics of Email, Emerging Technology and Digital Initiatives in Education. This presentations aligns with the UGC Paper I syllabus.
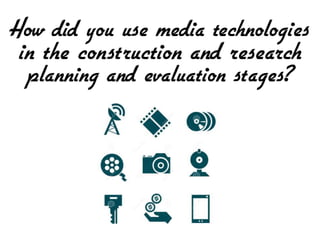
How did you use Media Technologies in the Construction and Research, Planning and Evaluation Stages?
1.
2. Throughout my coursework this year, I have used multiple media
technologies. Premier Pro and Emaze are a couple to name, however
they only act as platforms to the resources available within them.
I used various technologies throughout my process from research to
planning, and production to editing.
3. In order to showcase the work I
completed over the year, I created a
wordpress blog enabling the public to
read and watch through my planning
and research.
I organized my work into categories to
enable myself and the readers to easily
transport through the blog. I chose to
categorize my work into research,
planning, music video, Digipak,
magazine and evaluation. I also included
a home page where all of my work will be
uploaded to as well as the category.
4. Title of Post
Pressing this button allows you to insert a form of media into the blog
post. In the example above I imported a picture of a list I scanned into
the computer
This icon allows
you to change the
date the post is
published on
Allows you to choose
which category the
post will be published
to
5. This is a menu which will appear when creating a post. These
options allow you to edit the post like it would be in a word
document.
(From Left to Right)
Insert Media
Change Layout of Text
Bold Writing
Italic Writing
Bullet Points
Numbered Bullet Points
Insert Link
Insert Quote Marks
Text to Left
Text in Centre
Text to Right
Spell Checker
Insert Read-More Tag
Writing Underlined
Dash
Justify
Text Colour
Paste Text
Clear Formatting
Special Characters
Decrease Indent
Increase Indent
Undo
Redo
6. Emaze is an online presentation platform which allows its users to
create, manage and share their creations. You can create platforms on
various platforms. I created 11 presentations which ranged from
presentations to E-Cards.
When creating my E-Mazes, I used both existing templates and blank
templates.
7. This is an example of how an Emaze is set out. You have many options from
layouts of slides, text, images, shapes and widgets. I inserted numerous images
to include as evidence for my research etc.
8. YouTube is the site I used to upload any videos I created throughout my
coursework. This included PowToons of my research and planning as well
as my final music video. To organize my work for any visitors of my channel
on YouTube I created a playlist specifically for coursework this year. This
year I uploaded 20 videos.
As these videos would be going onto my wordpress blog, I had to copy over
the embed code onto the html version of the blog post creation.
9. When uploading a video onto YouTube you can change how it looks to other
people. I added a description to my videos informing the audience of the
purpose of the video, what is included as well as copyright information. On
numerous videos I changed the thumbnail for a frame which had the title of
the video. This was so that the audience would be able to scan through
search engines and indeed my own channel and recognise the features of
the video.
General details of
video such as
duration and
amount of likes
Thumbnail
options
Description box
Public/Private
option
10. Powtoon is a video creator platform. I used PowToons to showcase my
work more creatively. When creating Powtoons you have the option to
build up your presentation slide after slide, customize an existing
template or start from blank.
11. When creating my Powtoons, there are editing menus on the right
tailored to different areas including layout, background, text, library,
objects, graphs, sounds and images. These enabled me to produce an
engaging video illustrating what I researched or planned.
12. I also integrated in a variety of transitions between each slide in order to
engage the audience more. During the editing process I changed the
lengths of the duration of the text on the screen as well as the overall
length of the slide altogether. Once completed, I exported the Powtoon
onto YouTube and the embedded this onto my wordpress blog.
13. I used PowerPoint to produce a document ready to upload onto
SlideShare. As PowerPoint’s a static slideshow I wanted to create an
attractive presentation. As a result, I imported a font from the website
1001Fonts in order for my work to look more sophisticated.
14. Once I completed developing my presentation on PowerPoint, I then
uploaded my document onto SlideShare. This is a website which creates
slideshows for its users. After I imported it in , I gave it a name,
description and added numerous tags so that a relevant audience could
find it.
The update of Wordpress I was using on my blog did not support the
embedding of SlideShare documents. As a result, when uploading this to
a new blog post I had to import the front image as a JPEG or PNG file and
add a link on the image to the SlideShare.
Title of SlideShare
Description
Privacy Setting
Level of Discoverability on
website
Category of SlideShare
(Education, Fun etc)
Preview of
SlideShare
15. Prezi allowed me to create an interactive presentation including text, images
and YouTube videos. The popular presentation software already has
existing templates with different themes but did also allowed to create my
own from scratch.
16. I often inserted in images from
Google to use as evidence as well as
YouTube Videos. To make this clear
I also introduced highlights, lines
and arrows to ensure that the
evidence supported the correct
point.
When uploading this onto
Wordpress I realised that the
version of Wordpress I was using
would not support the Prezi. As a
result, I screenshot the overall Prezi
and imported this image in as a
JPEG or PNG. I then added the
Prezi’s link onto the image so when
readers click on the image they are
transferred to a new window to read
the Prezi.
17. I used Microsoft Excel as part of the development of my Question 2
Evaluation where I had to show what I learned from my audience feedback.
For this I decided to construct a questionnaire and as a result I collected
data from my findings which I drew up on various graphs via Excel.
To use the software, I transferred the data onto a new document, highlighted
over the data, go onto the insert menu and choose a type of graph.
18. I frequently used Key-Framing
during the editing process as a way
of manually zooming in on the clip.
I changed the position of the clip
(left, right, up, down) as well as its
scale size.
I often edited a static clip of the
band performing in Premier Pro
and manually panned the image.
During my research I found that
the screen is rarely ever still. Below
is a diagram of how I achieved this.
Full Size Clip Clip Re-Sized from Start to Finish Final Clip
19. During my research, I trialled different editing techniques. One I had a
look at was Overlaying. I created 2 mini videos with this technique
however they both involved the same process. This is how I overlaid
my video:
1. Position clips in time with
the music
2. Go onto Effects Control
3. Hover over the Opacity
button and set the blend
mode as ‘Overlay’
4. Select a percentage of
Opacity that you want the
clip to be
20. During my music video, I used the Multi-Cam technique in order to attract
the audience more with a variety of shots. Multi-Cam create the illusion
that the clip has been filmed with multiple angles with multiple cameras,
when in fact the same camera was used to film.
I felt that by performing the Multi-Cam technique my video looked more
professional as I was able to include a variety of camera angles which
engages the audience to the constant change of the subject on screen.
1. Synch all videos in time with the
music
2. Click on the Program Monitor and
onto ‘Multi-Cam
Clip 1 now becomes Camera 1...
3. Play back the clips and press the
number keys on the keyboard
according to which clip you want
where Screenshot from my Overlaying
Video of Ed Sheeran’s Photograph
21. During the narrative aspects of my music video, I altered its colour via
colour grading. To suit the mood of the video (dark) I changed the colour
of the content on screen to a warmer setting. To do this I created black
shadows with blue midtones and highlights. I also lowered the input
level slightly to add to the shadows more.
Before
After
22. I used Adobe Audition when looking through the audio taken from
my Focus Group. I used it to edit the individual audio clips of the
respondents answers.
For instance, I lowered the level of dynamics at the start and end of
clips to prevent any secondary sounds from occurring such as
coughs, other voices and chair movement.
As a result, the audience will be able to easily hear the comments
made by the participants as well s the moderator.
23. I used Adobe Photoshop to edit the content in my Digipak and
Magazine Advertisement- I also used Photoshop to create the title
sequence in my final music video.
I used numerous effects that were available to me such as clones,
erasers, paint bucket and colour correction.
I adjusted my images by changing
their levels of lighting, exposure
and colour balance.
24. In addition to adjustments, I also edited the images look via the icons
below. I used these effects in order to create a ‘slick’ final effect so the
images look more professional- therefore the audience will enjoy them
more. For instance I used the clone tool to obliterate any rubbish
around the amplifier outside as otherwise this would distract the
audience.
Before After
25. In order to retrieve and keep the results from
my focus group, I recorded the interview with a
Roland R5 Recorder. I recorded the interview in
one go and then split the answers and
questions up on the computer.
If I wasn’t to have recorded the event I would
have relied purely on the notes taken during the
focus group. As a result, I would have been
likely to have missed out on points taken by
participants- this could have led to the missing
of important answers. By recording the focus
group I was able to pause and replay points to
ensure that I do not miss out on any important
points.
To gain the highest quality audio I had to set up
the recorder by testing out the frequency
settings- this ensures that when recording the
recorder is aware as to what frequency will be
used- as a result the recorder will not pick up
any unwanted quieter noises.
26. The camera that I used to film with throughout my
coursework this year was the Canon XA20 Camera. To
gain smooth movements with the camera I held the
handle and the screen in order to have control; with
this way I would have more balance and therefore
would not collect any small shakes.
This camera allowed me to zoom in on a subject well
without having a pixel effect. This is because the
camera has a 26.8mm f/1.8-2.8 lens with 20x zoom.
This was helpful when capturing shots of the band
such as the bass drum as I would not have been able
to record far into it in case I got in the way of the
drummer performing.
In addition, to the camera I also filmed with a shot gun
microphone. Although I did not use any of the audio
from the clips in my music video it helped during the
editing process. This is because I was able to synch up
the official audio with the track played during filming.
27. In conclusion, I believe that I used a vast range of media technologies
throughout my coursework. I used a range of equipment, software and
websites to ensure that my work was creative and professional
throughout the processes of planning, researching, production, editing
and evaluation.
In terms of media technologies that I used throughout this year, I used
a variety in each of the stages like planning and editing.
Looking back over my 2 years on this course, I feel that I used media
technologies significantly more effectively this year in comparison to
last year. This is likely down to the experience I have considering the
previous year I had not used any of the technology prior to starting.
With that being said, I feel that last year was a learning curve in
practice for this year as I used the software like Premier Pro much
more effectively by including a majority of the effects available.