Download to read offline


![SIFLESS.EXE
• Now it’s time to take help of SIFLess, [for more info visit Blog]
• Download SIFLess.zip and extract to ~/Sitecore9_Repository/SIF/
• After this run SIFLess.exe and on EZ Mode fill all the field
• Click on test once everything getting green checks, click on Generate button.](https://image.slidesharecdn.com/guidlinessitecore9installation-171212105927/85/Guidlines-sitecore9-installation-14-320.jpg)


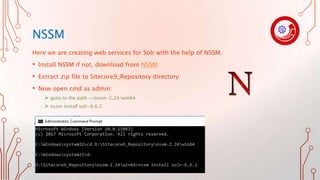
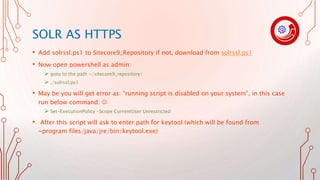
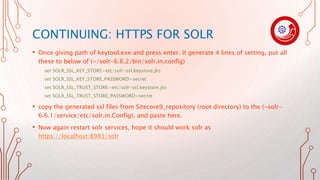
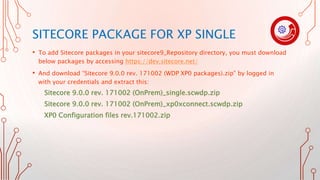
This document provides instructions for installing Sitecore 9, including prerequisites like Windows 10, SQL Server, Solr, .NET Framework, and other tools. It outlines setting up Solr as a Windows service using NSSM and enabling HTTPS for Solr. It also covers installing the Sitecore Install Framework, downloading the necessary Sitecore packages, configuring the packages, and using SIFLess.exe to generate a script to install Sitecore 9 in an automated way.