Download to read offline


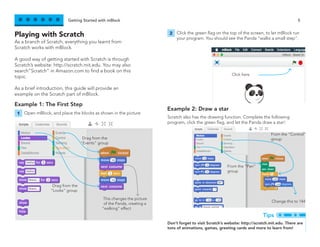


The document provides an overview of mBlock, a programming tool that enables users to control computers and robots through a visual, drag-and-drop interface derived from Scratch. It details the installation process, including compatibility with Windows and Mac, and outlines how to connect and program various Makeblock and Arduino devices using mBlock. Additionally, it includes tips for troubleshooting, connecting via USB or Bluetooth, and writing basic programs for both mBots and Arduino boards.