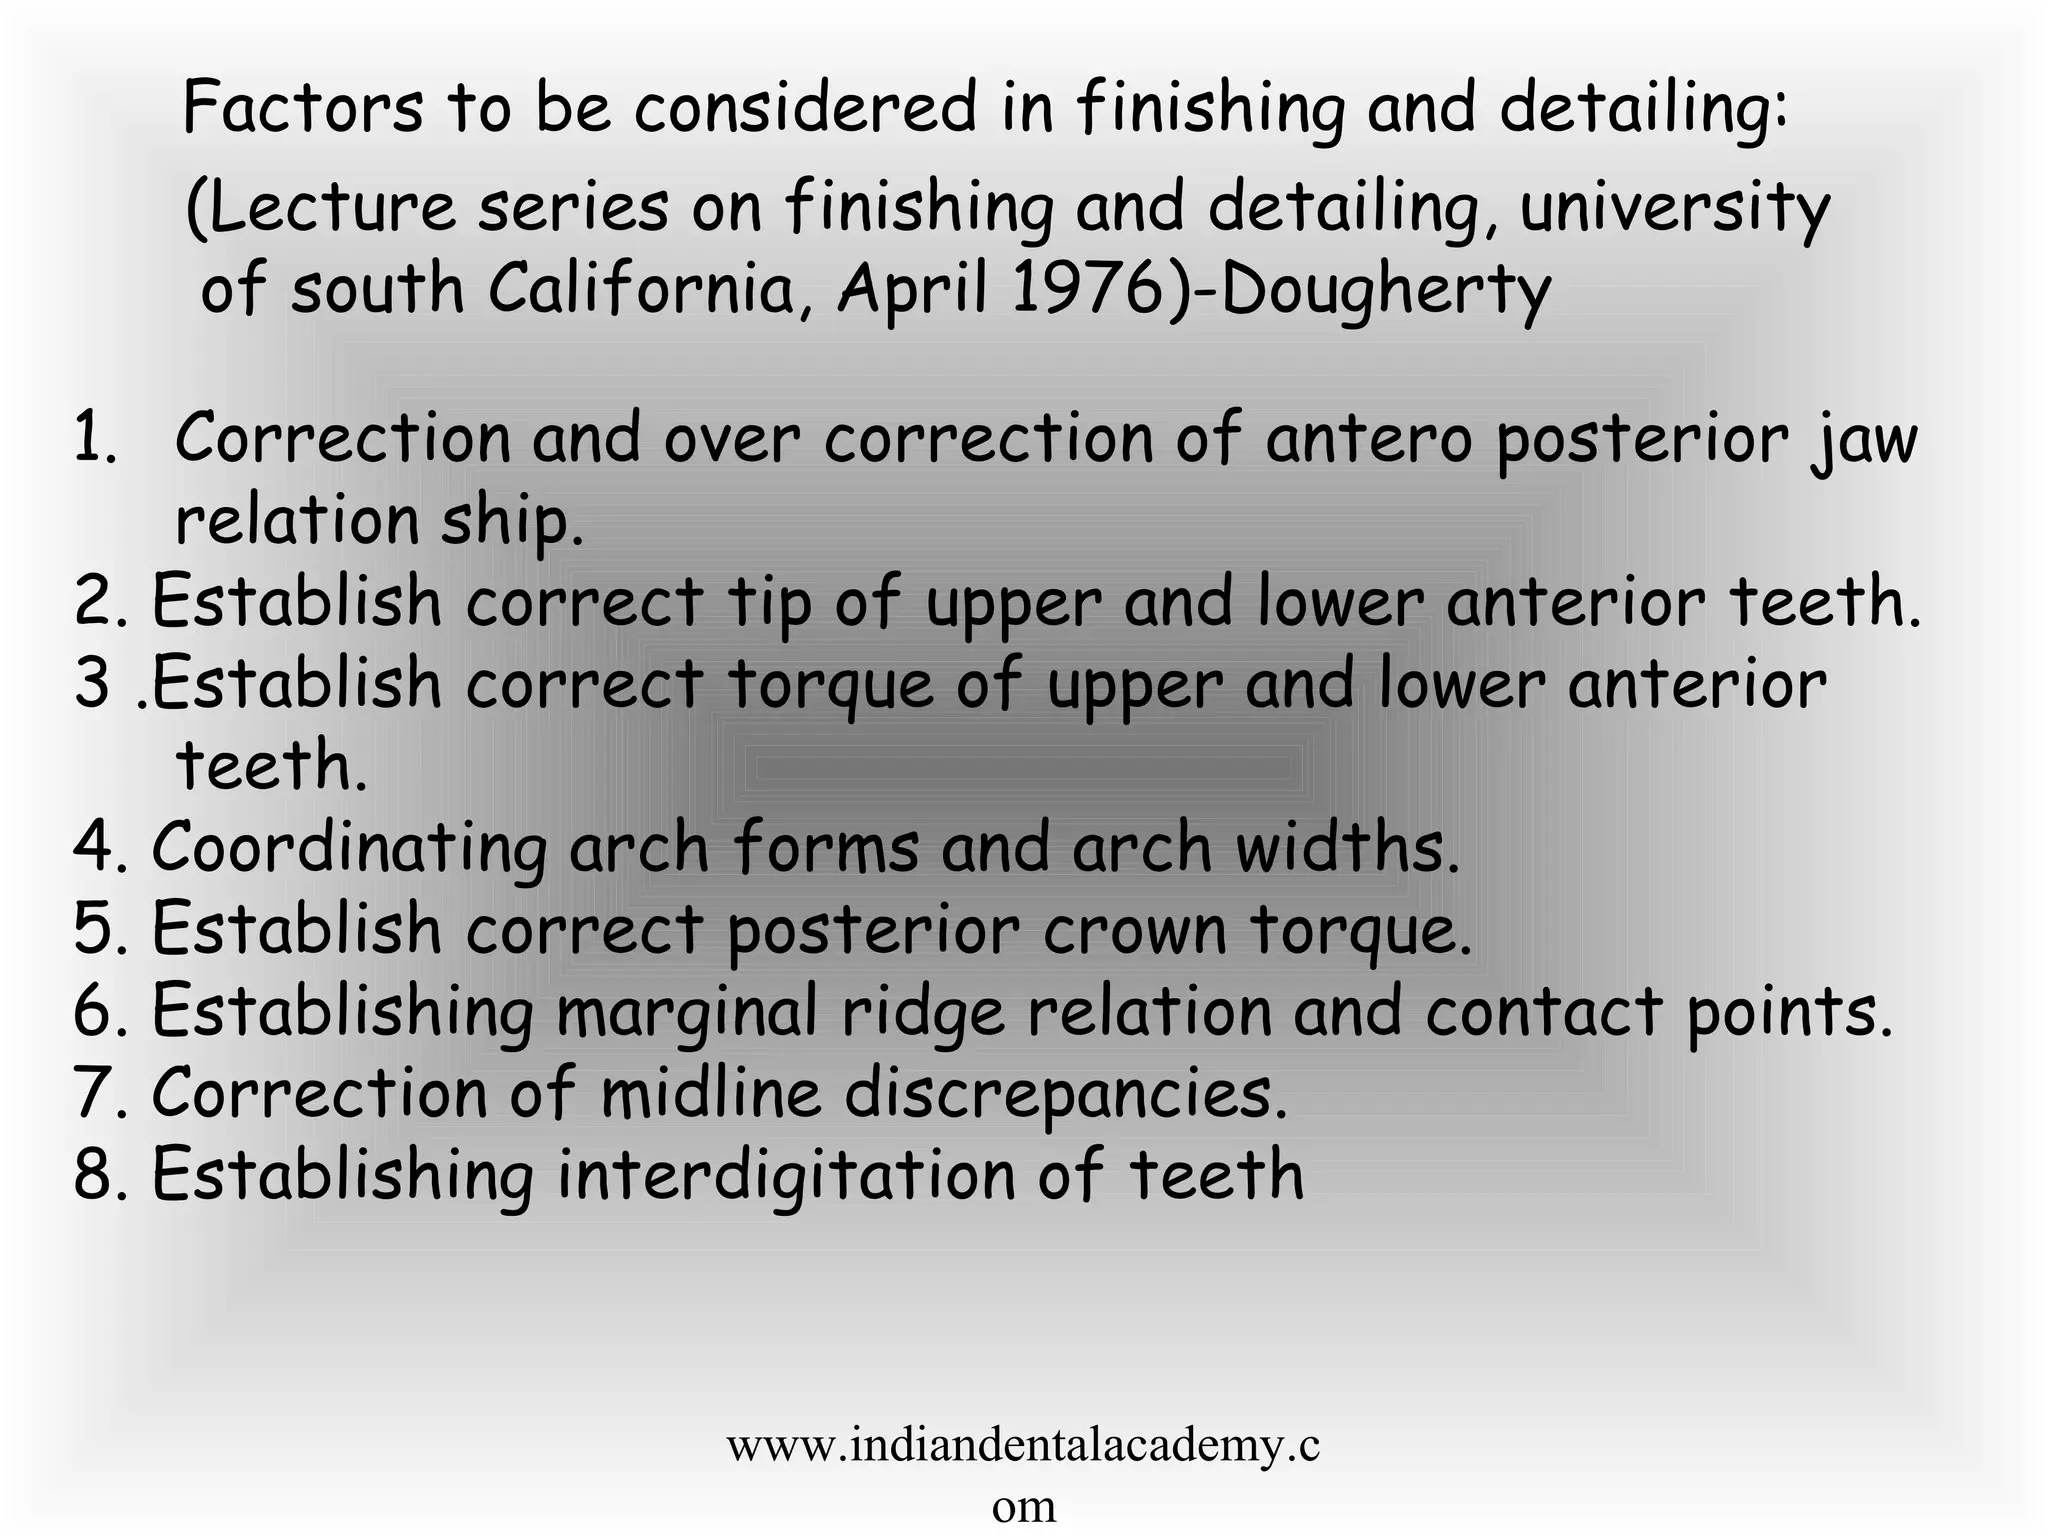
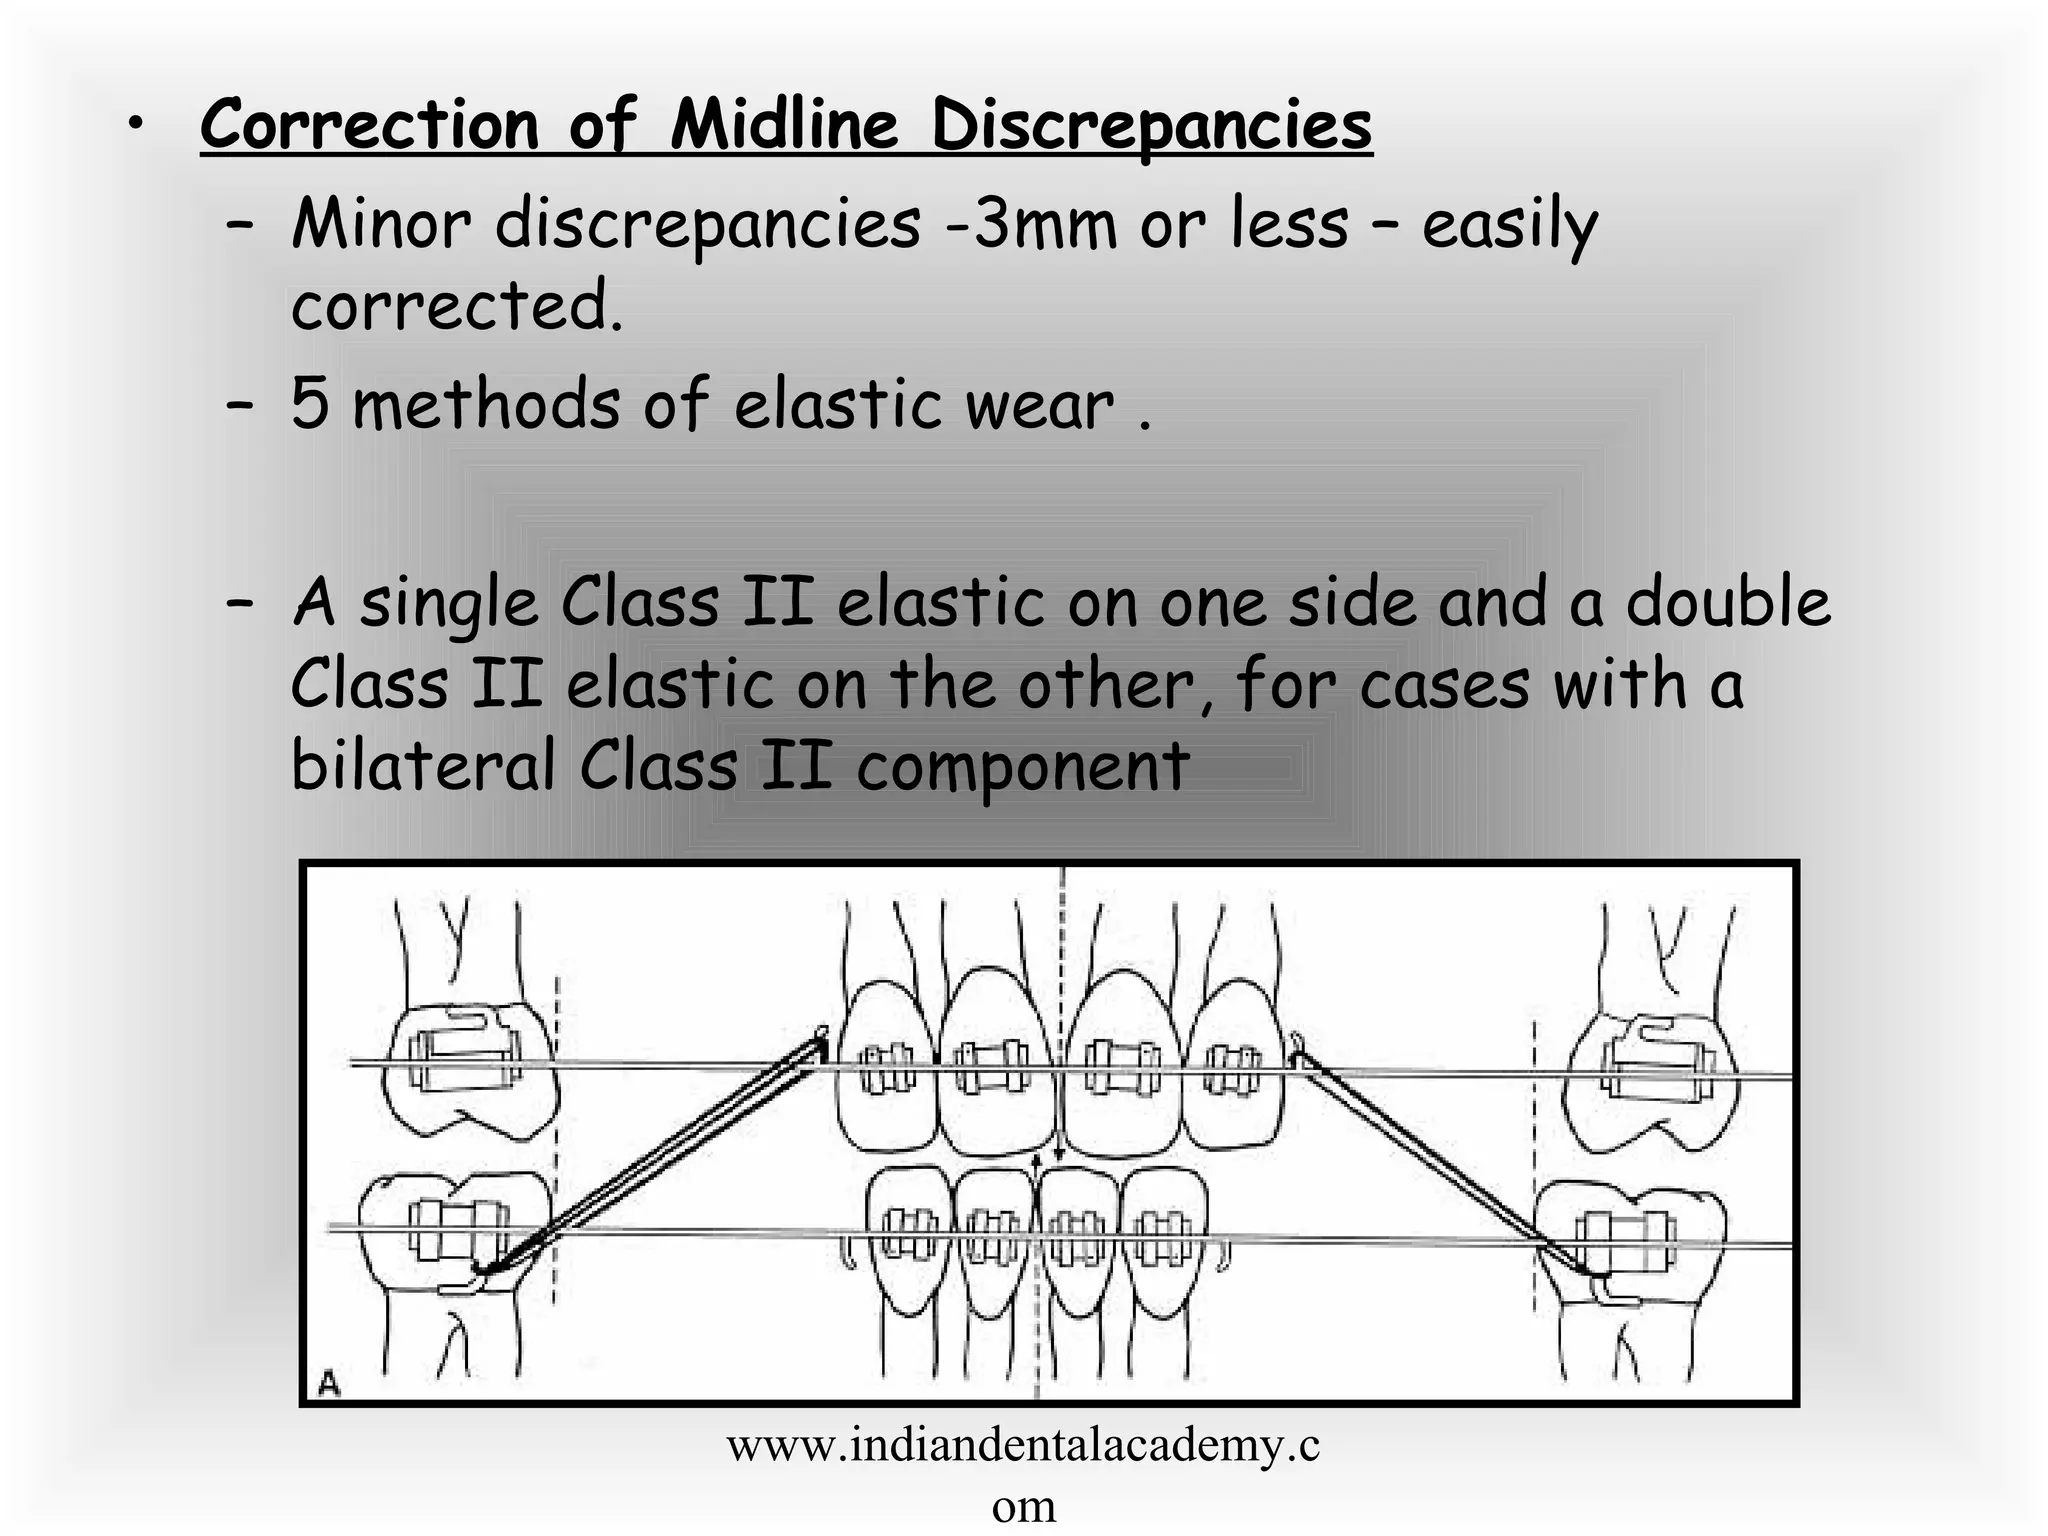
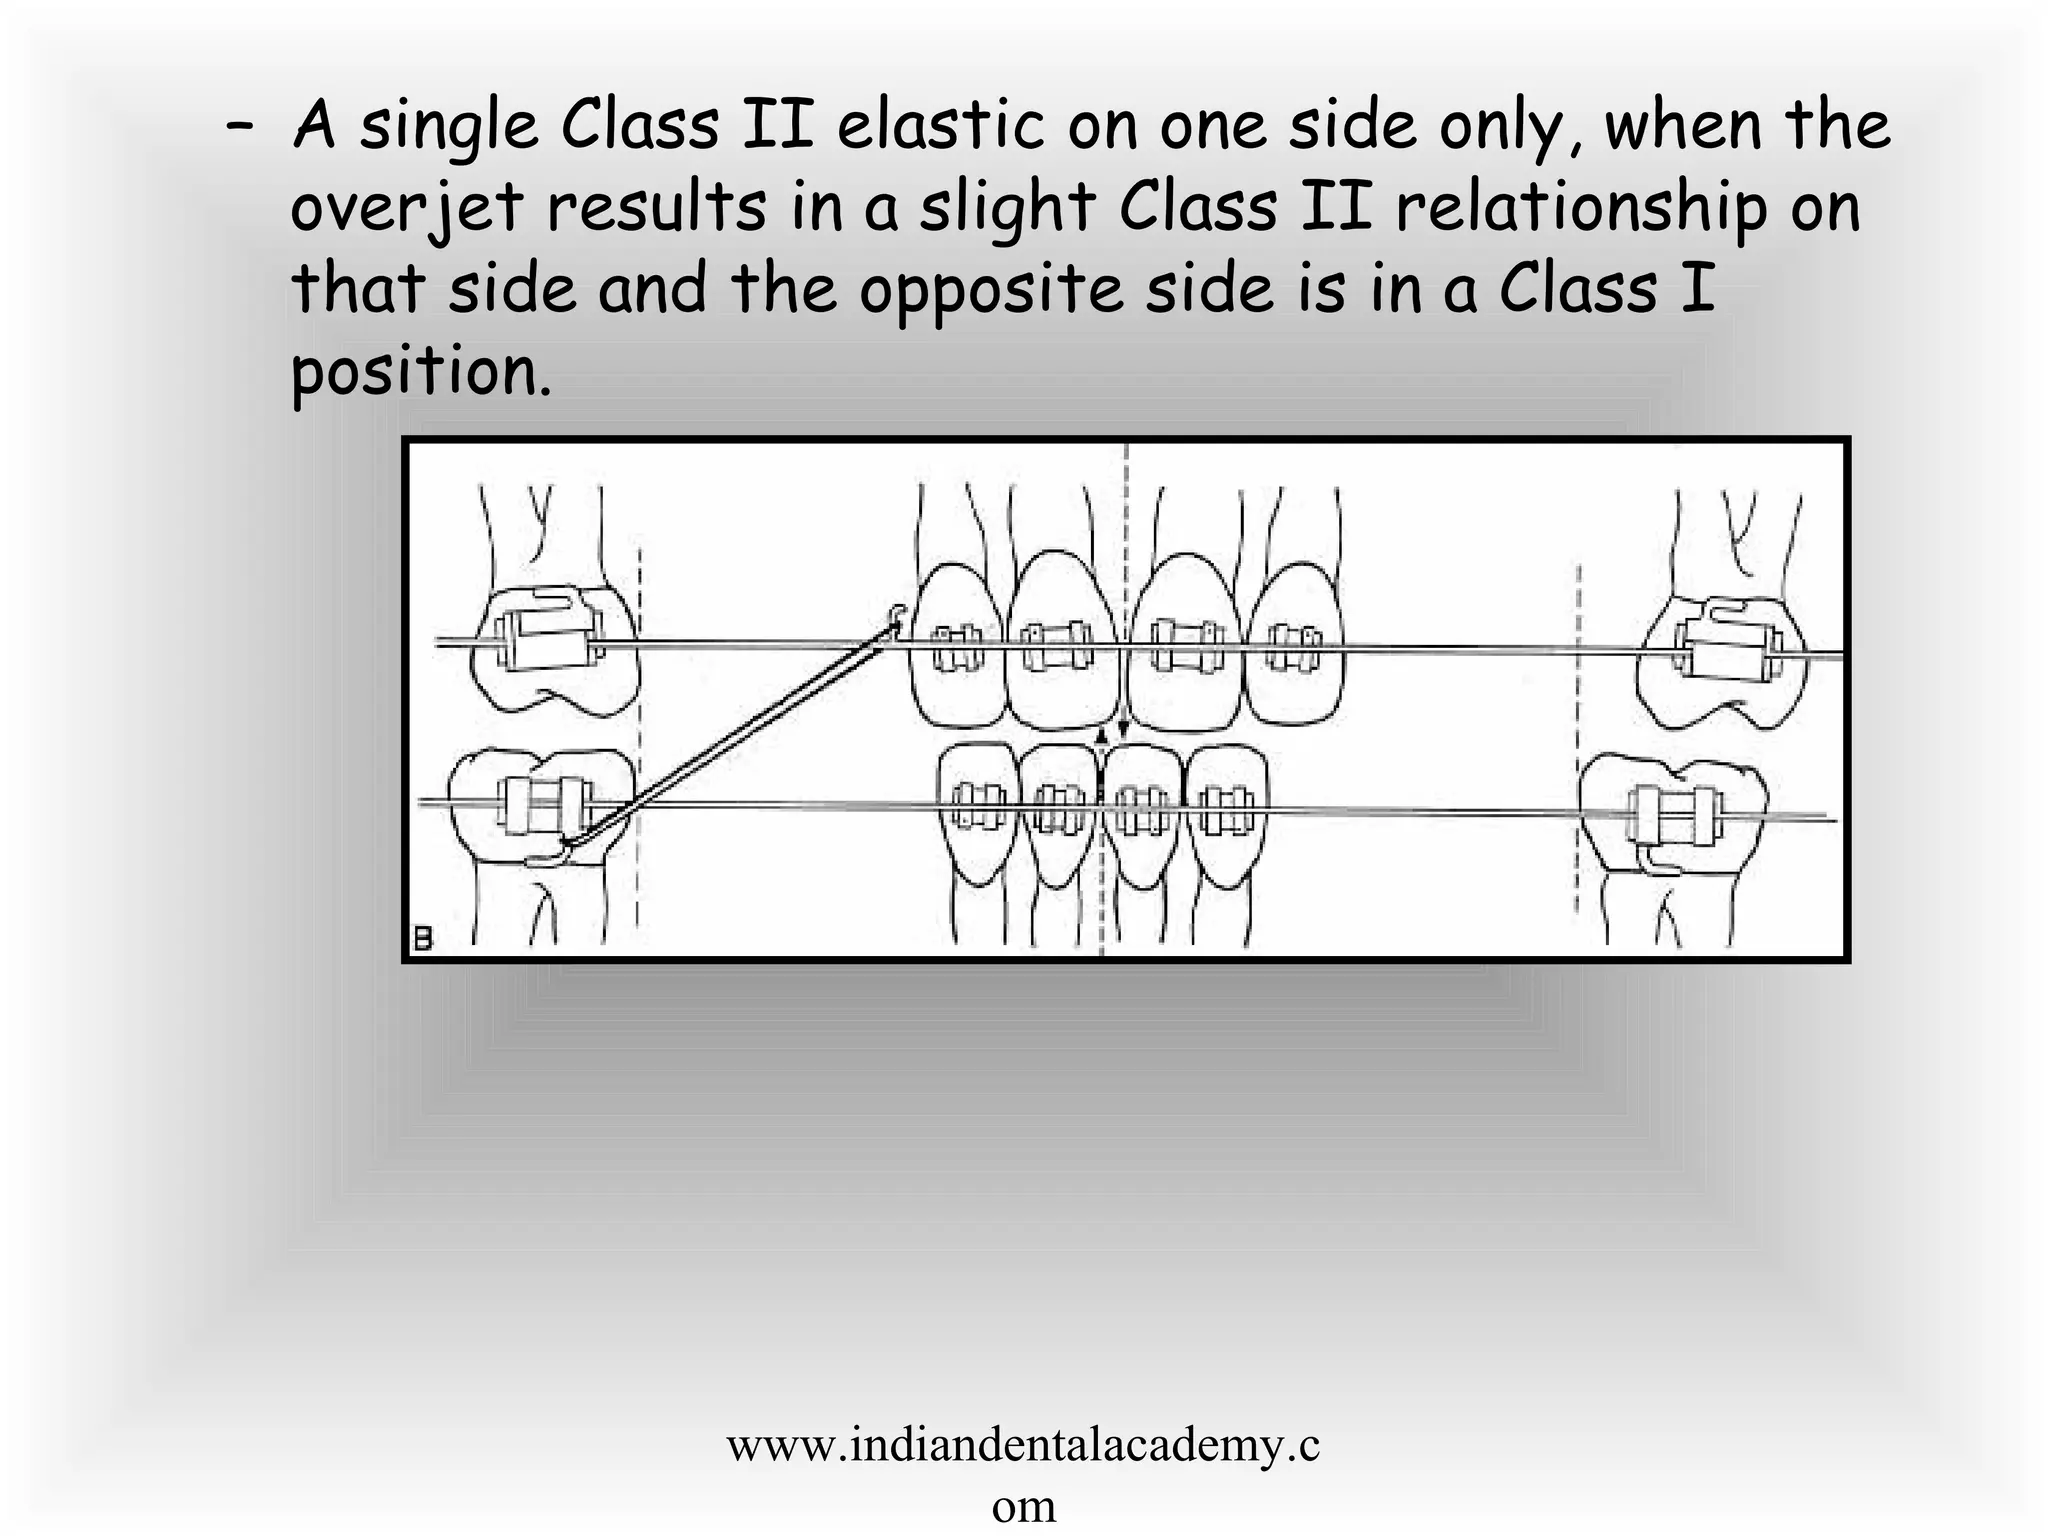
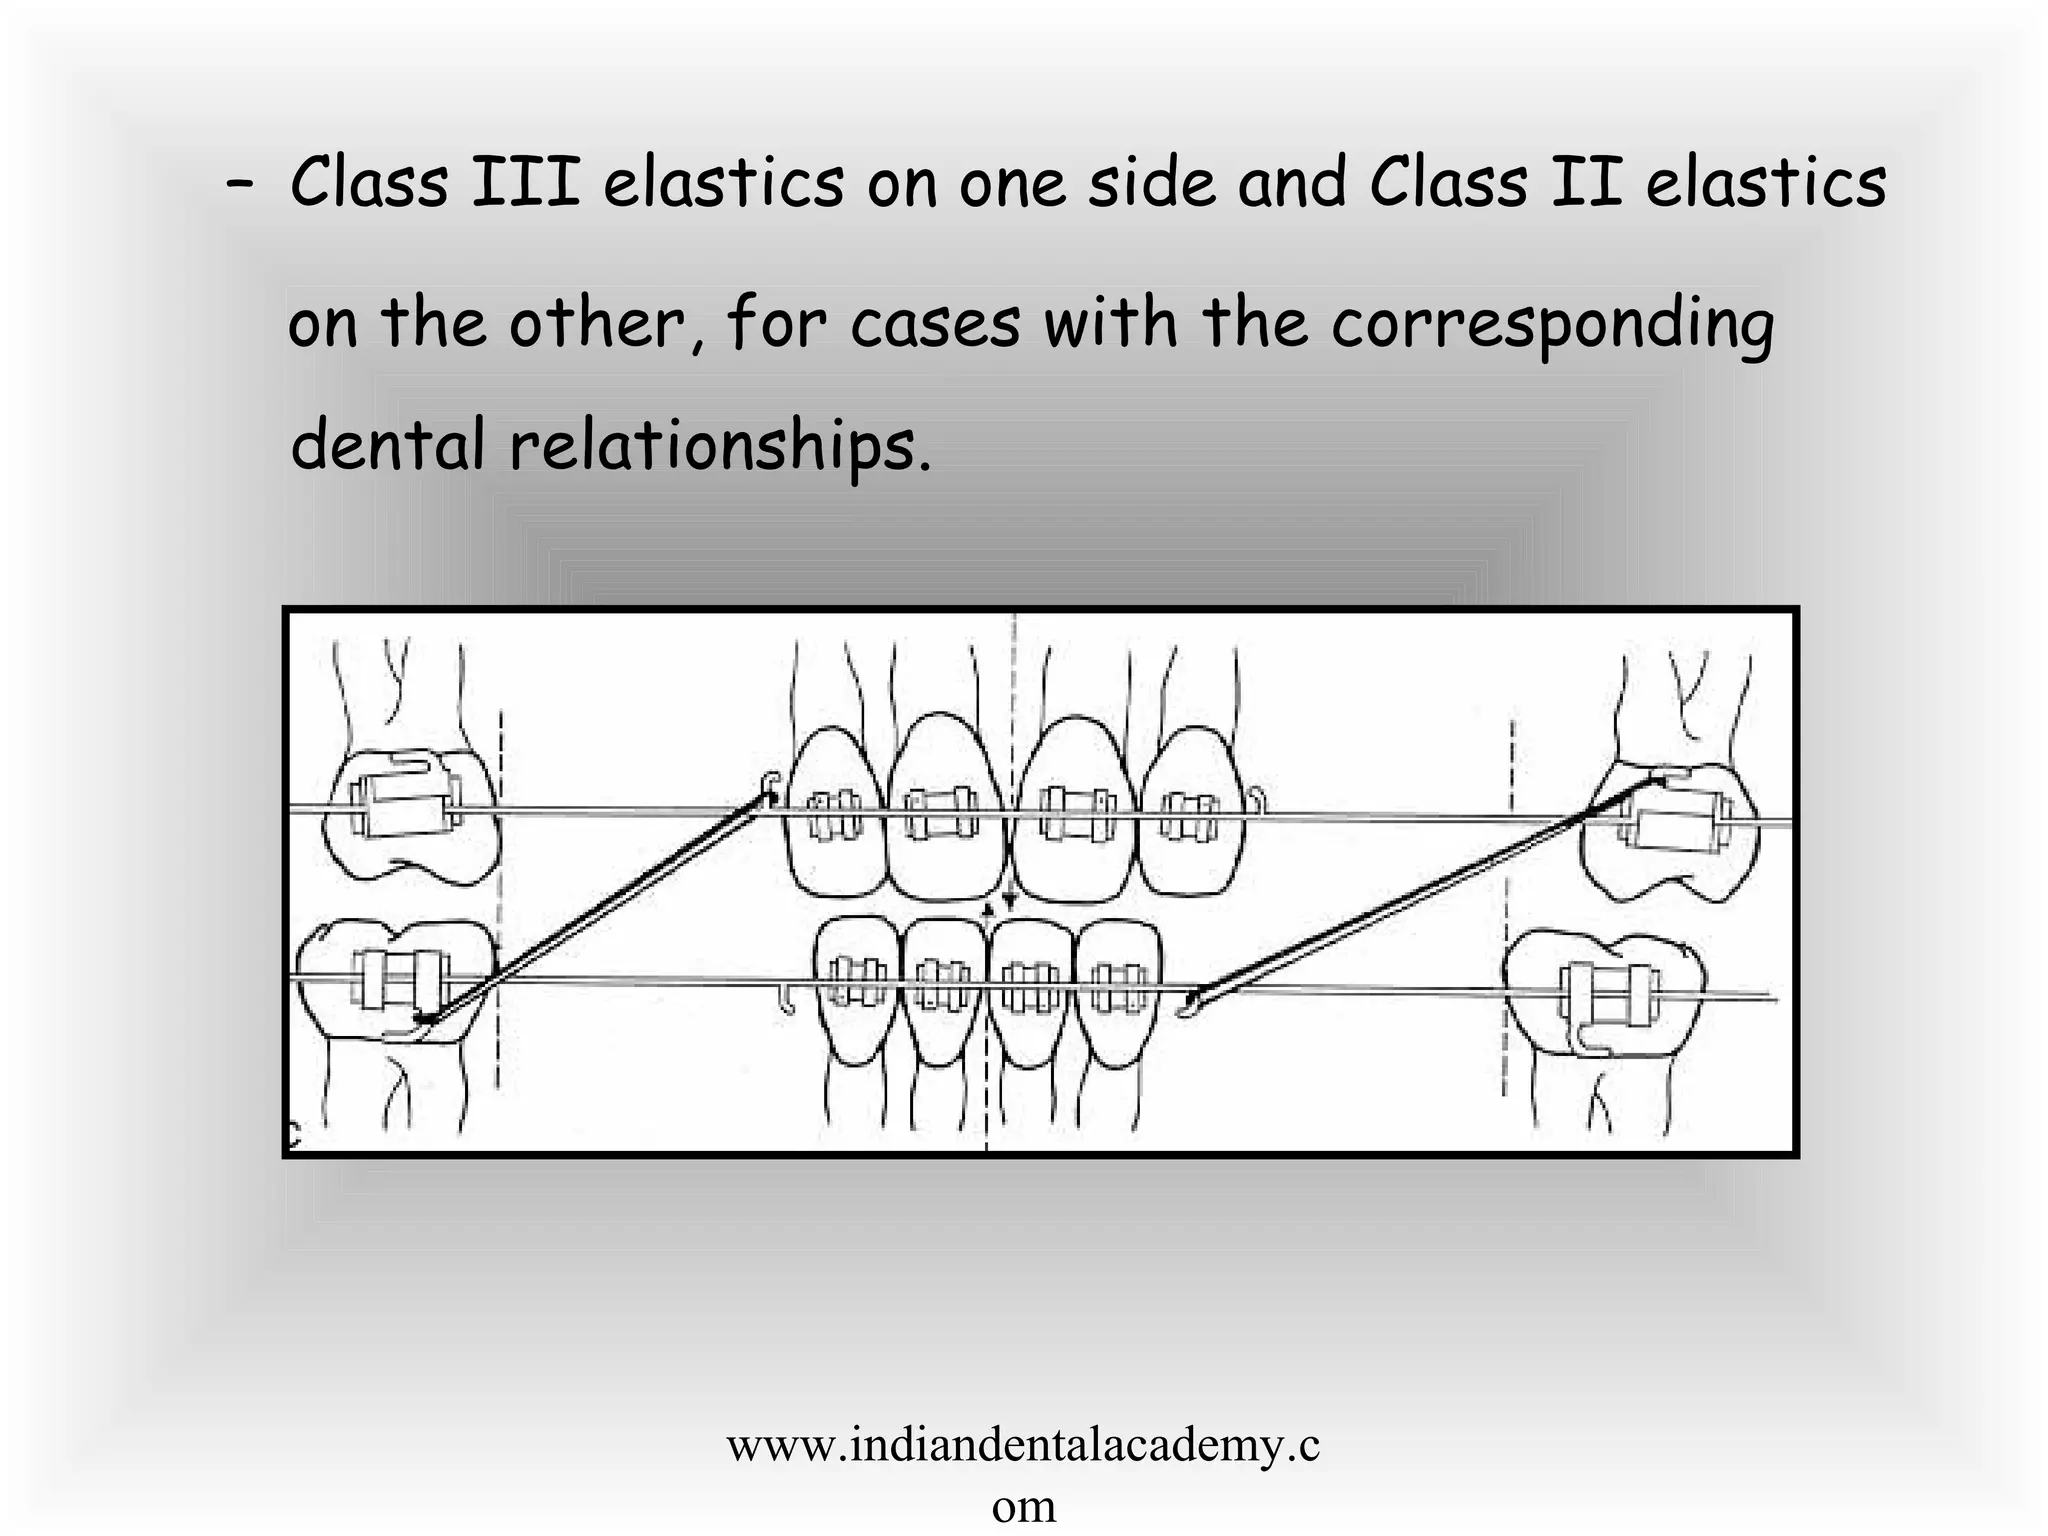
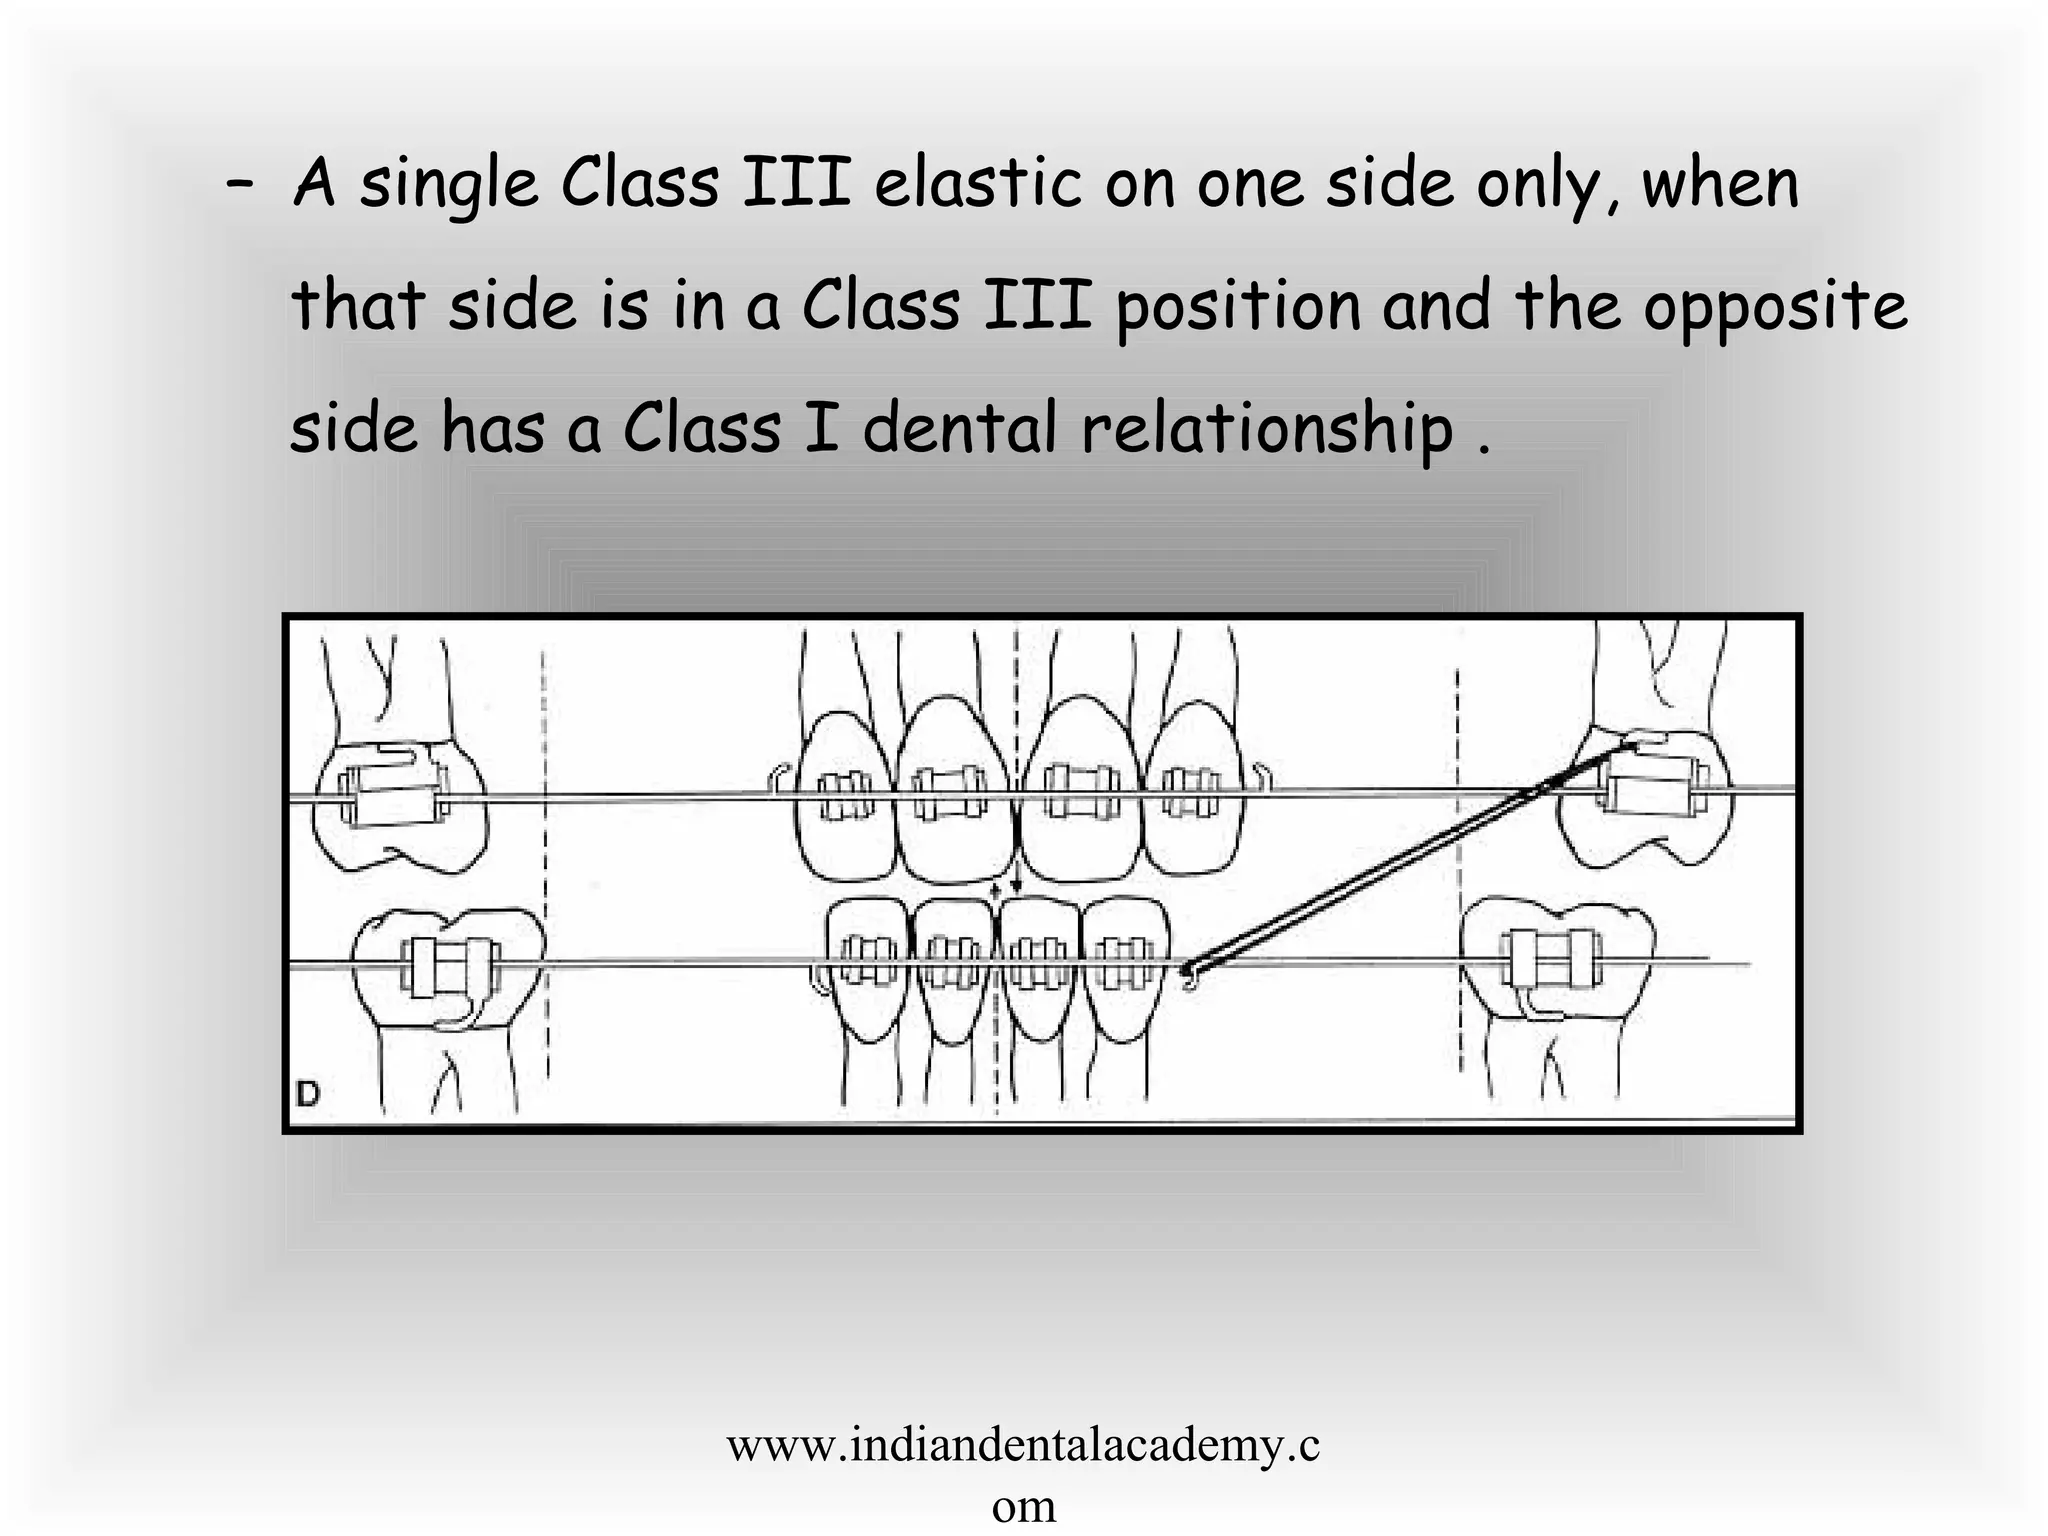
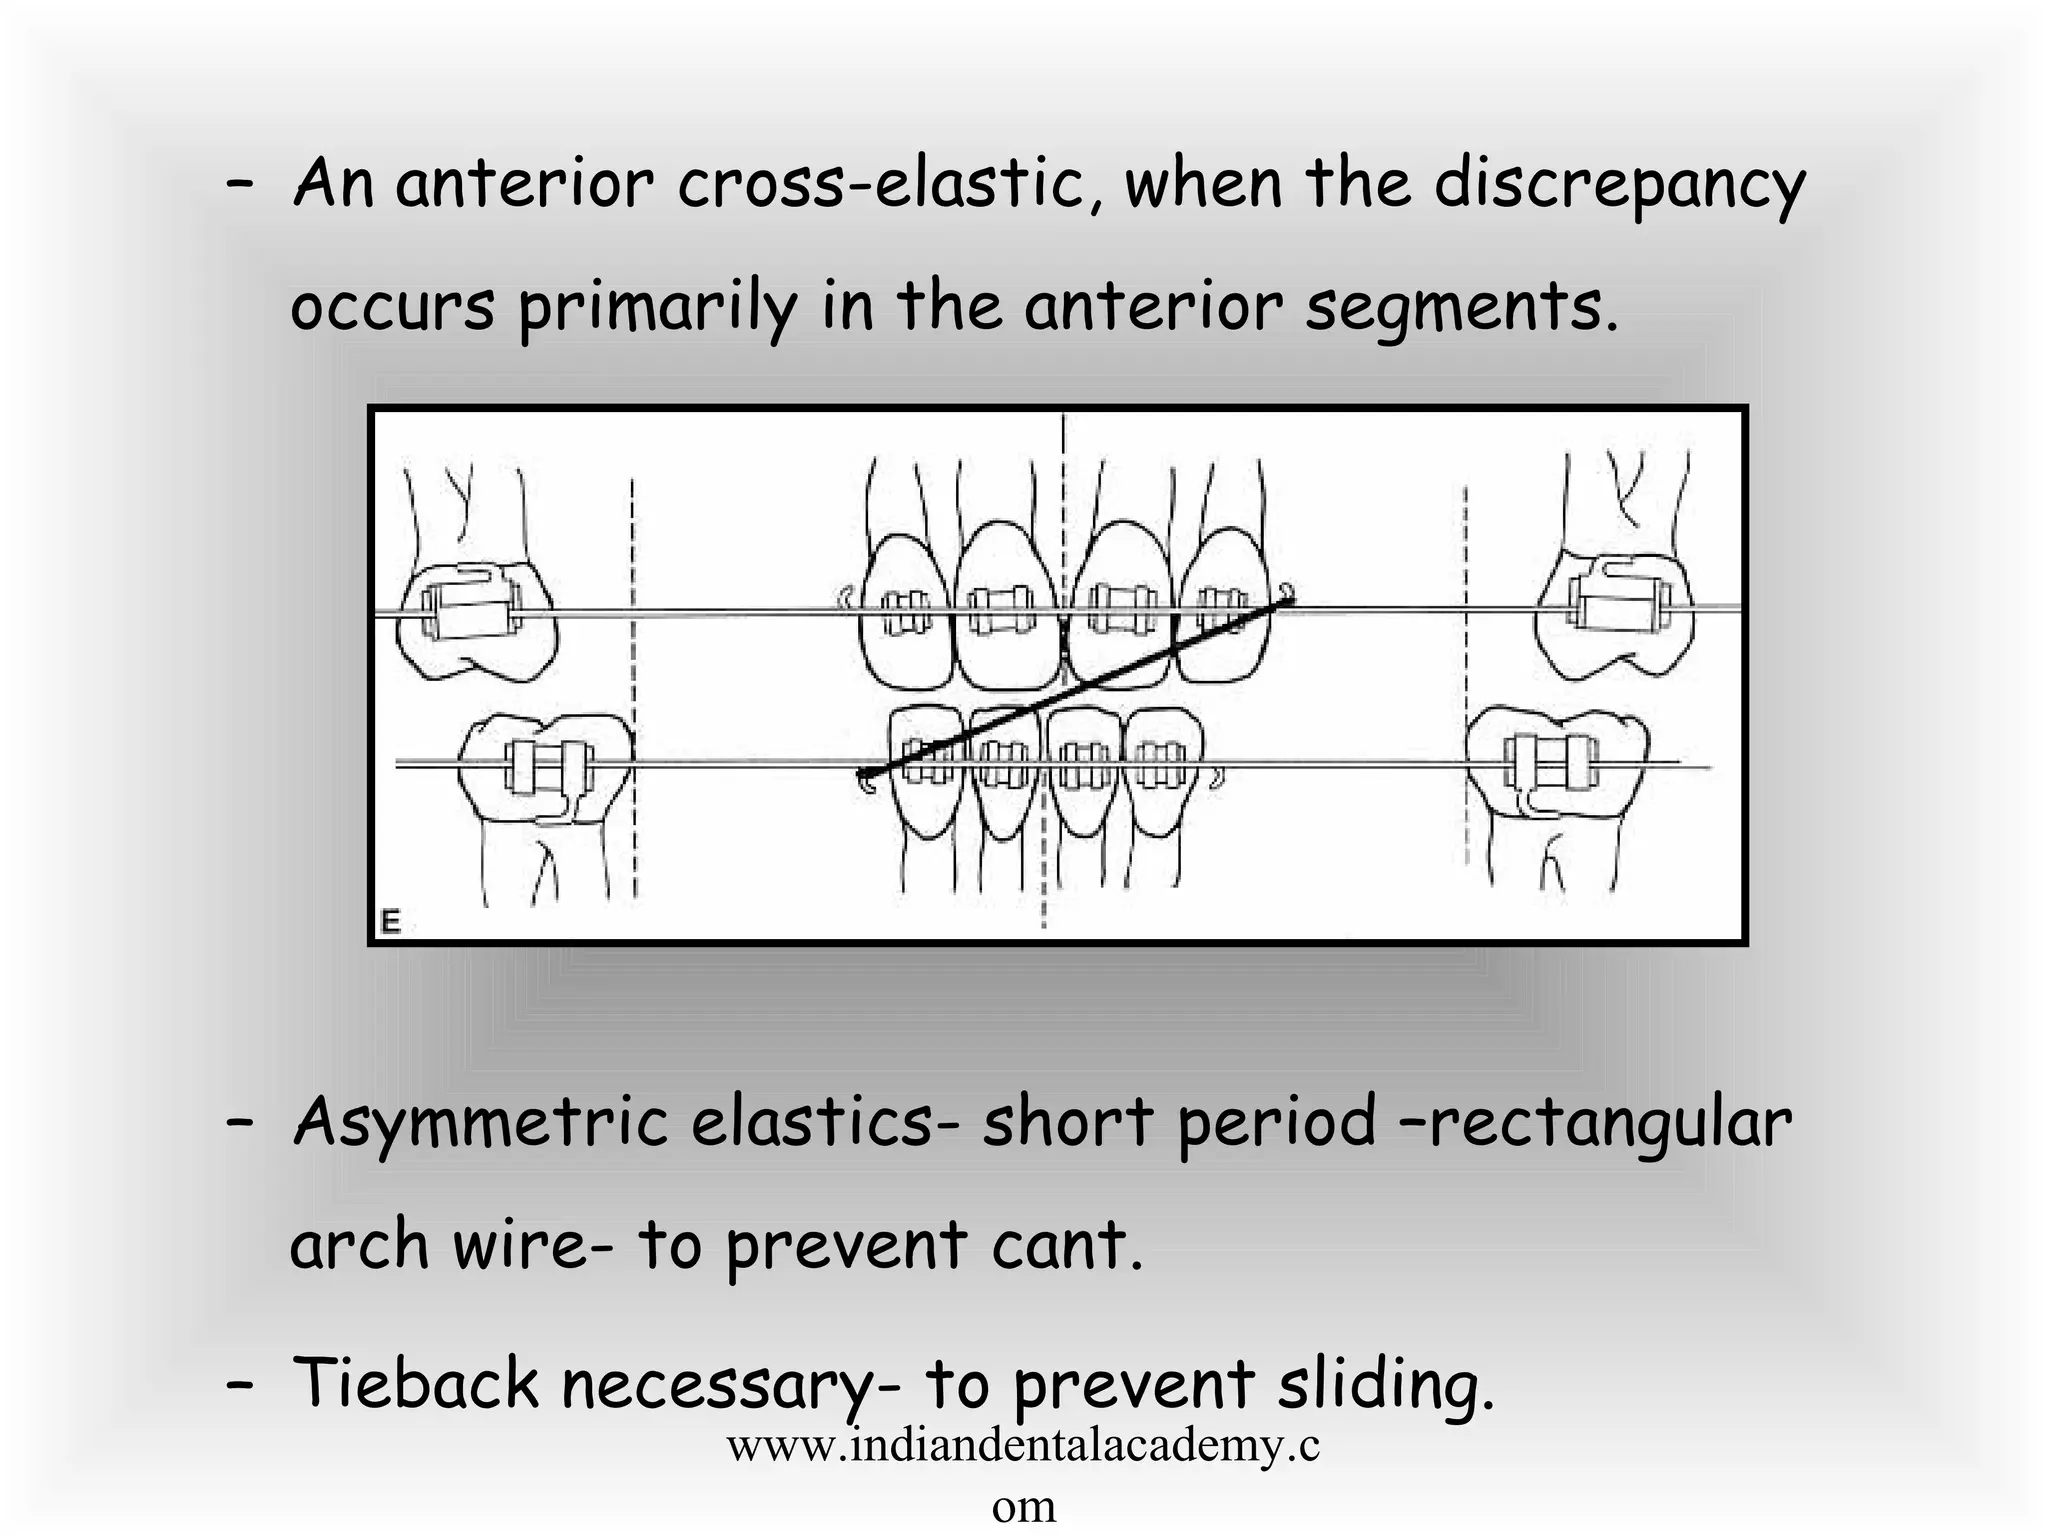
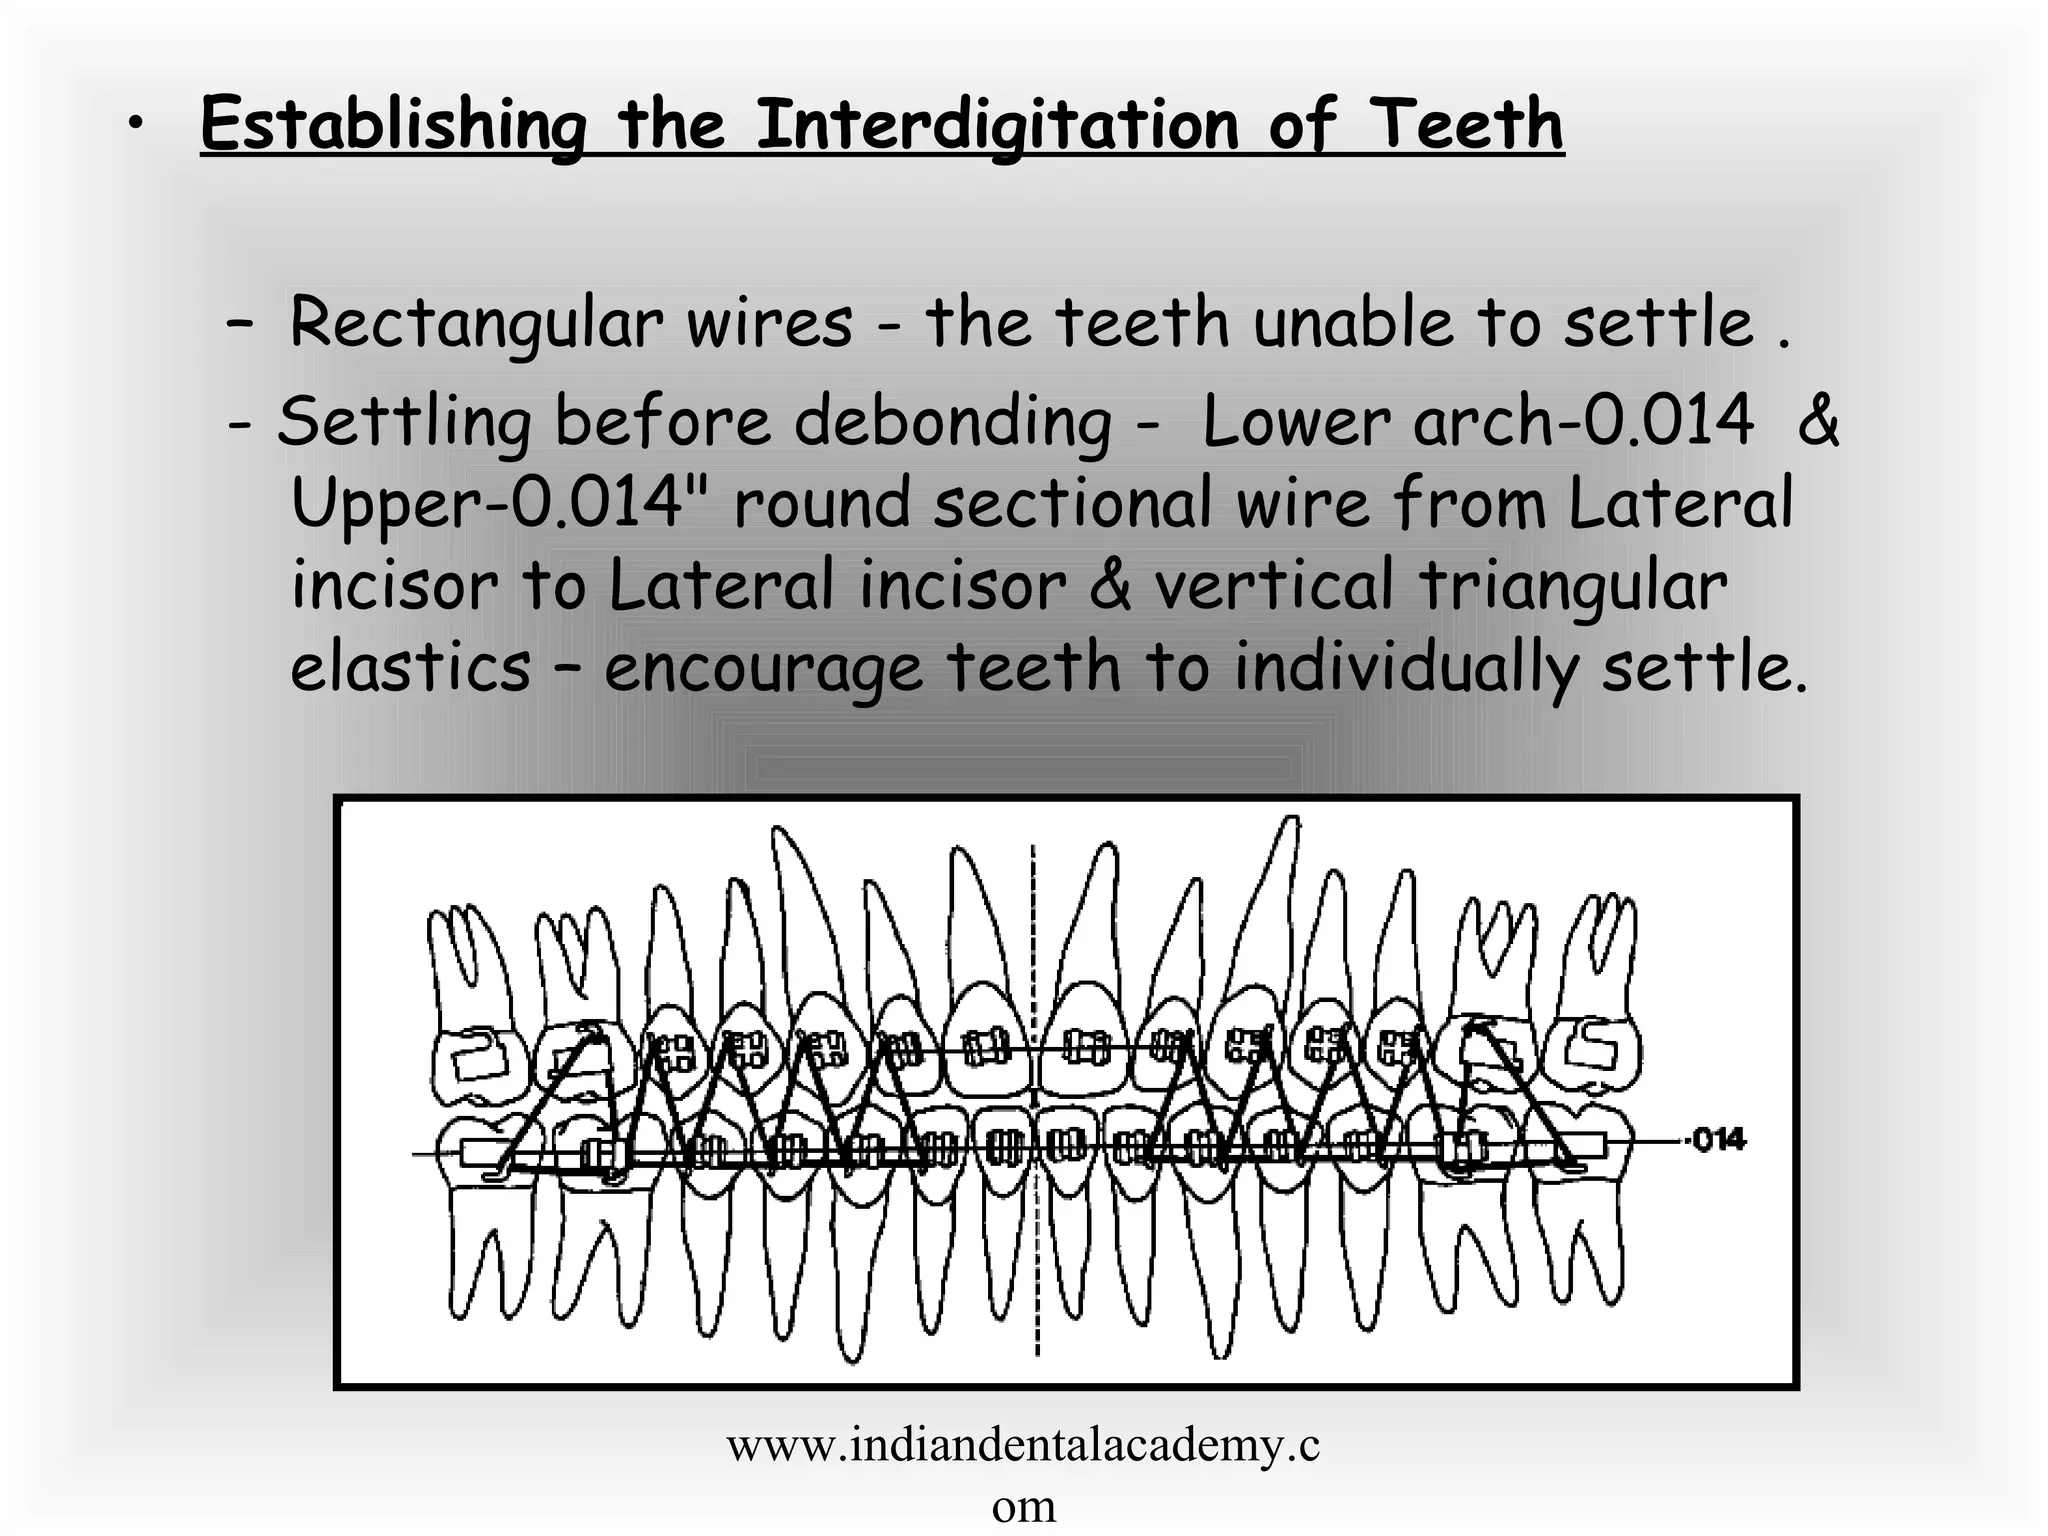
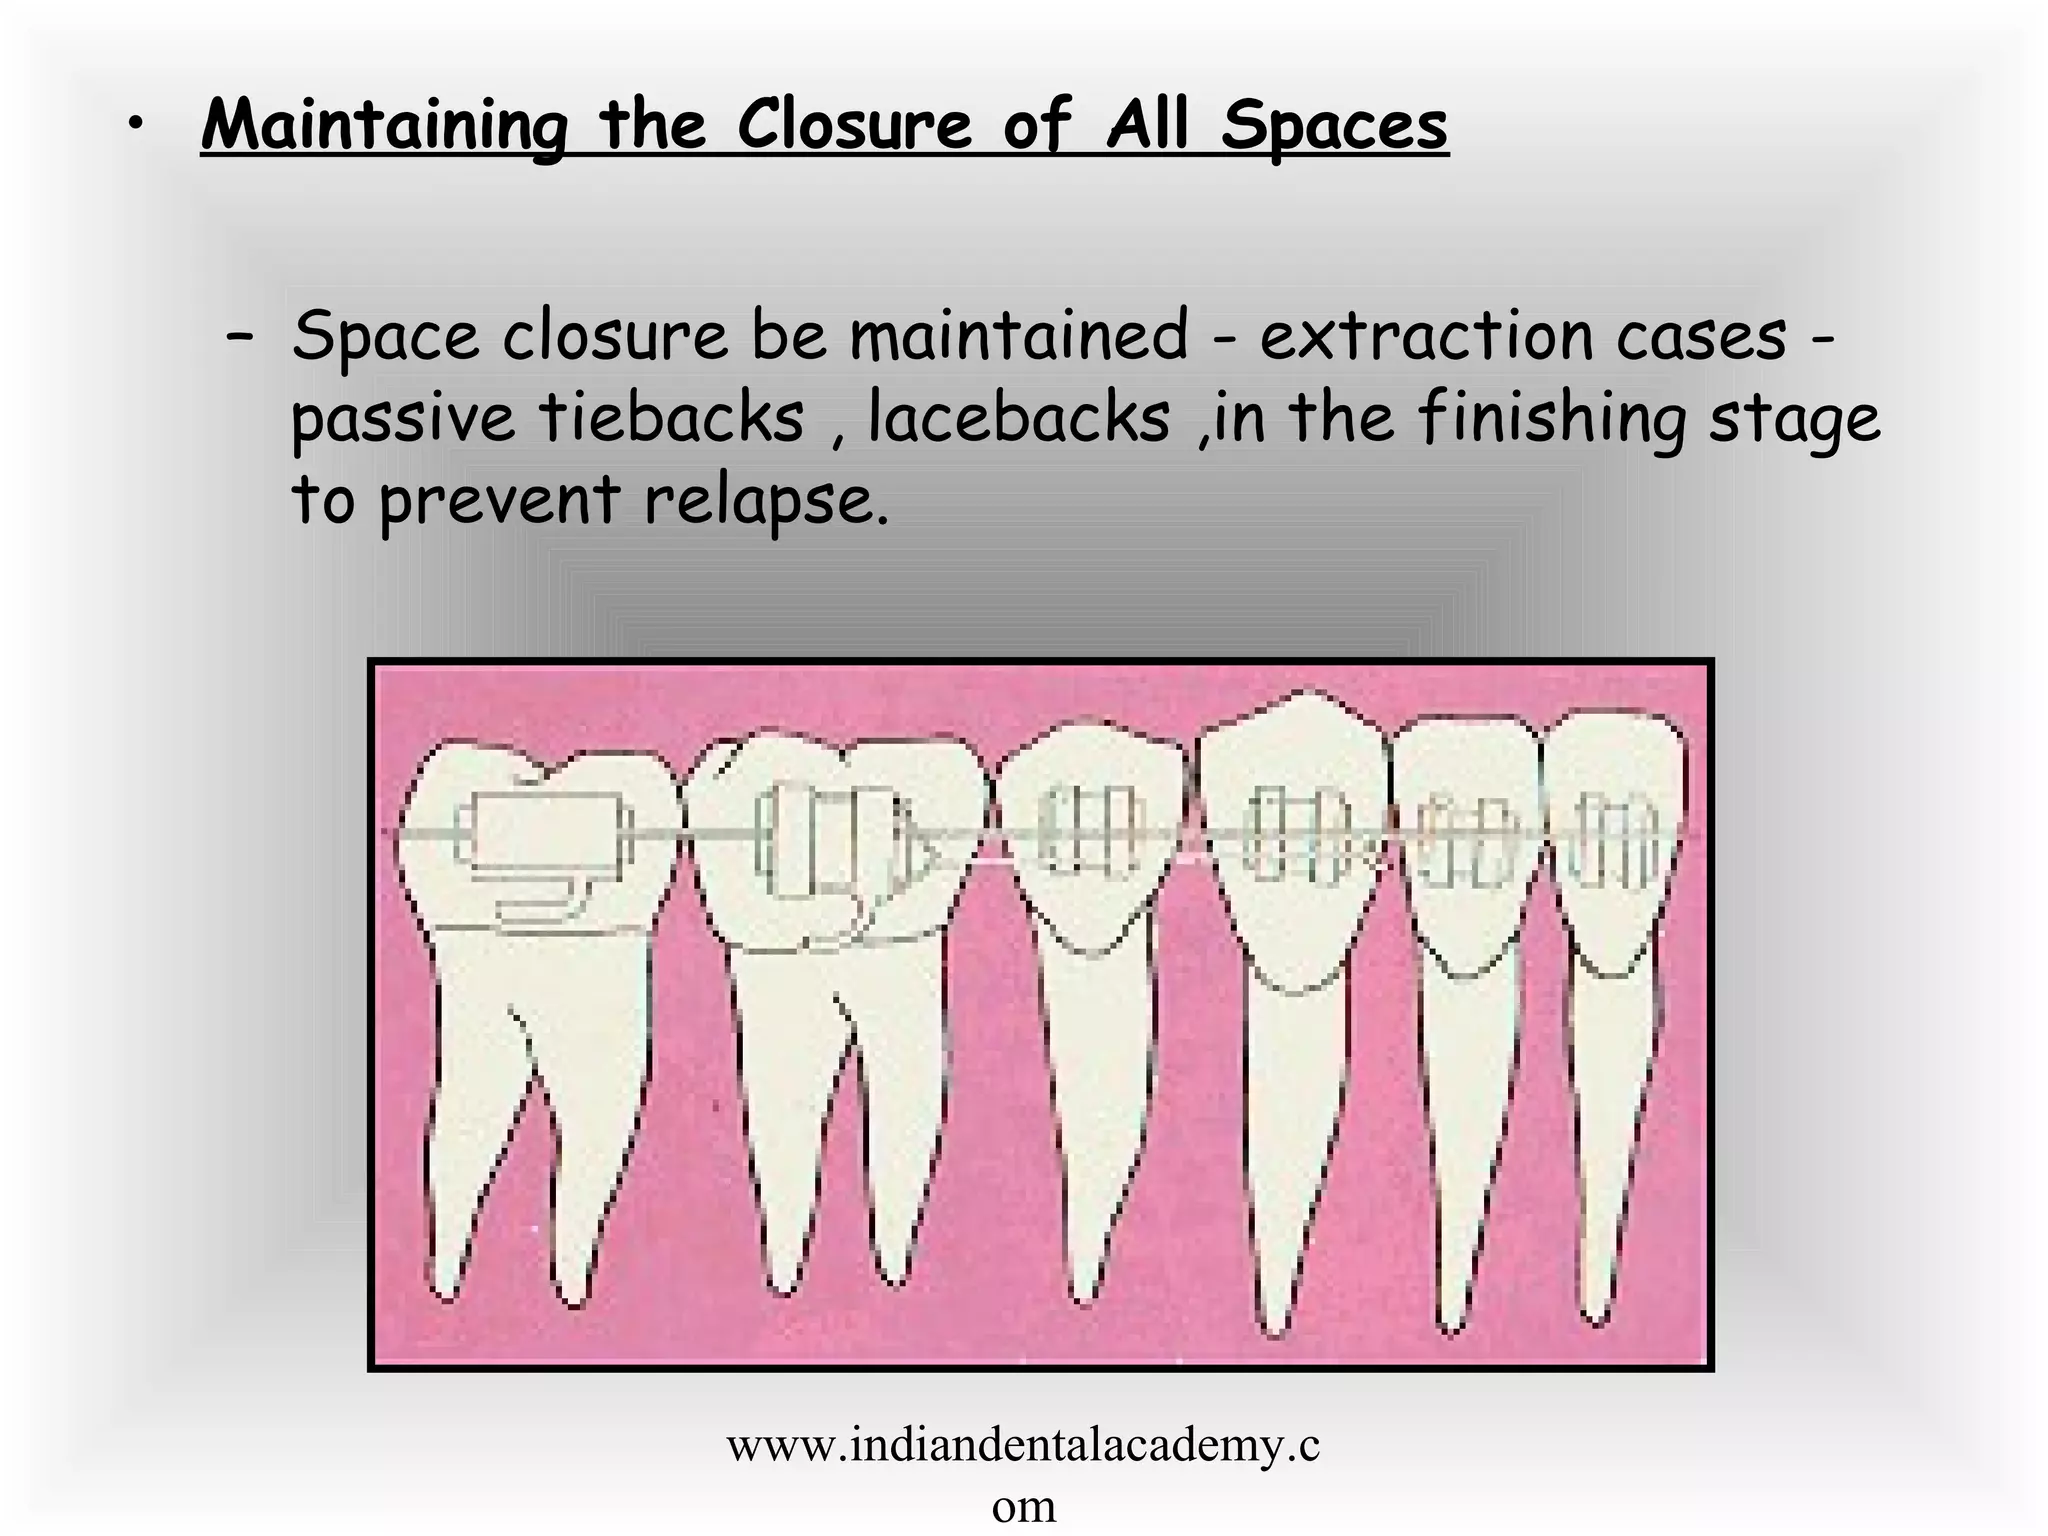
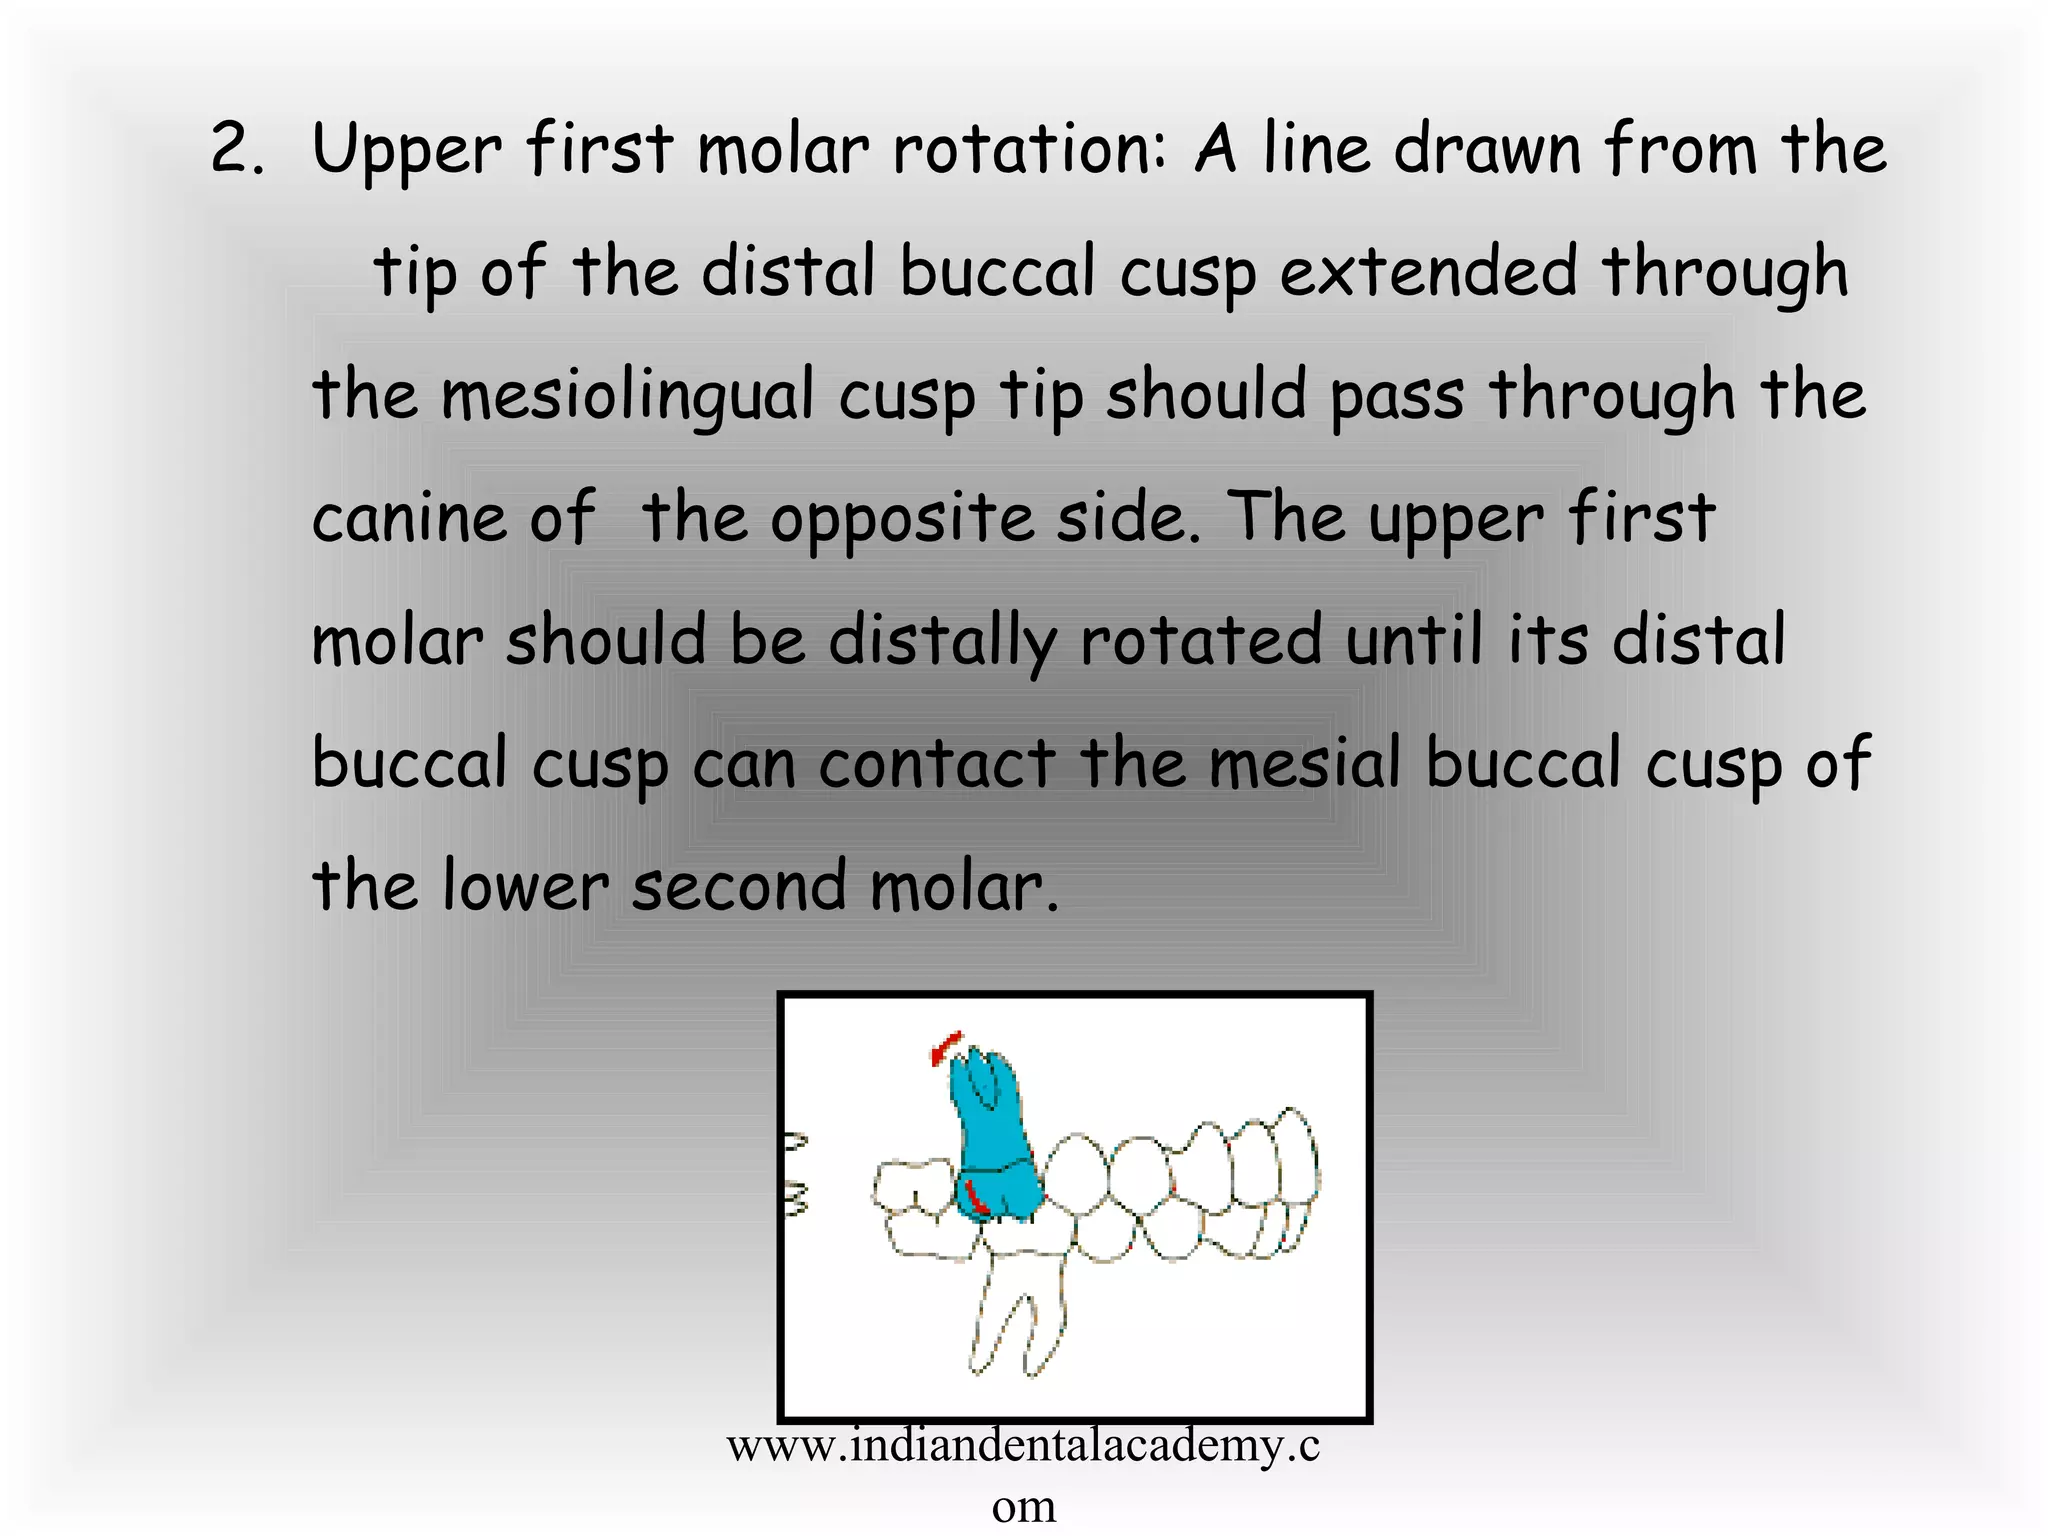
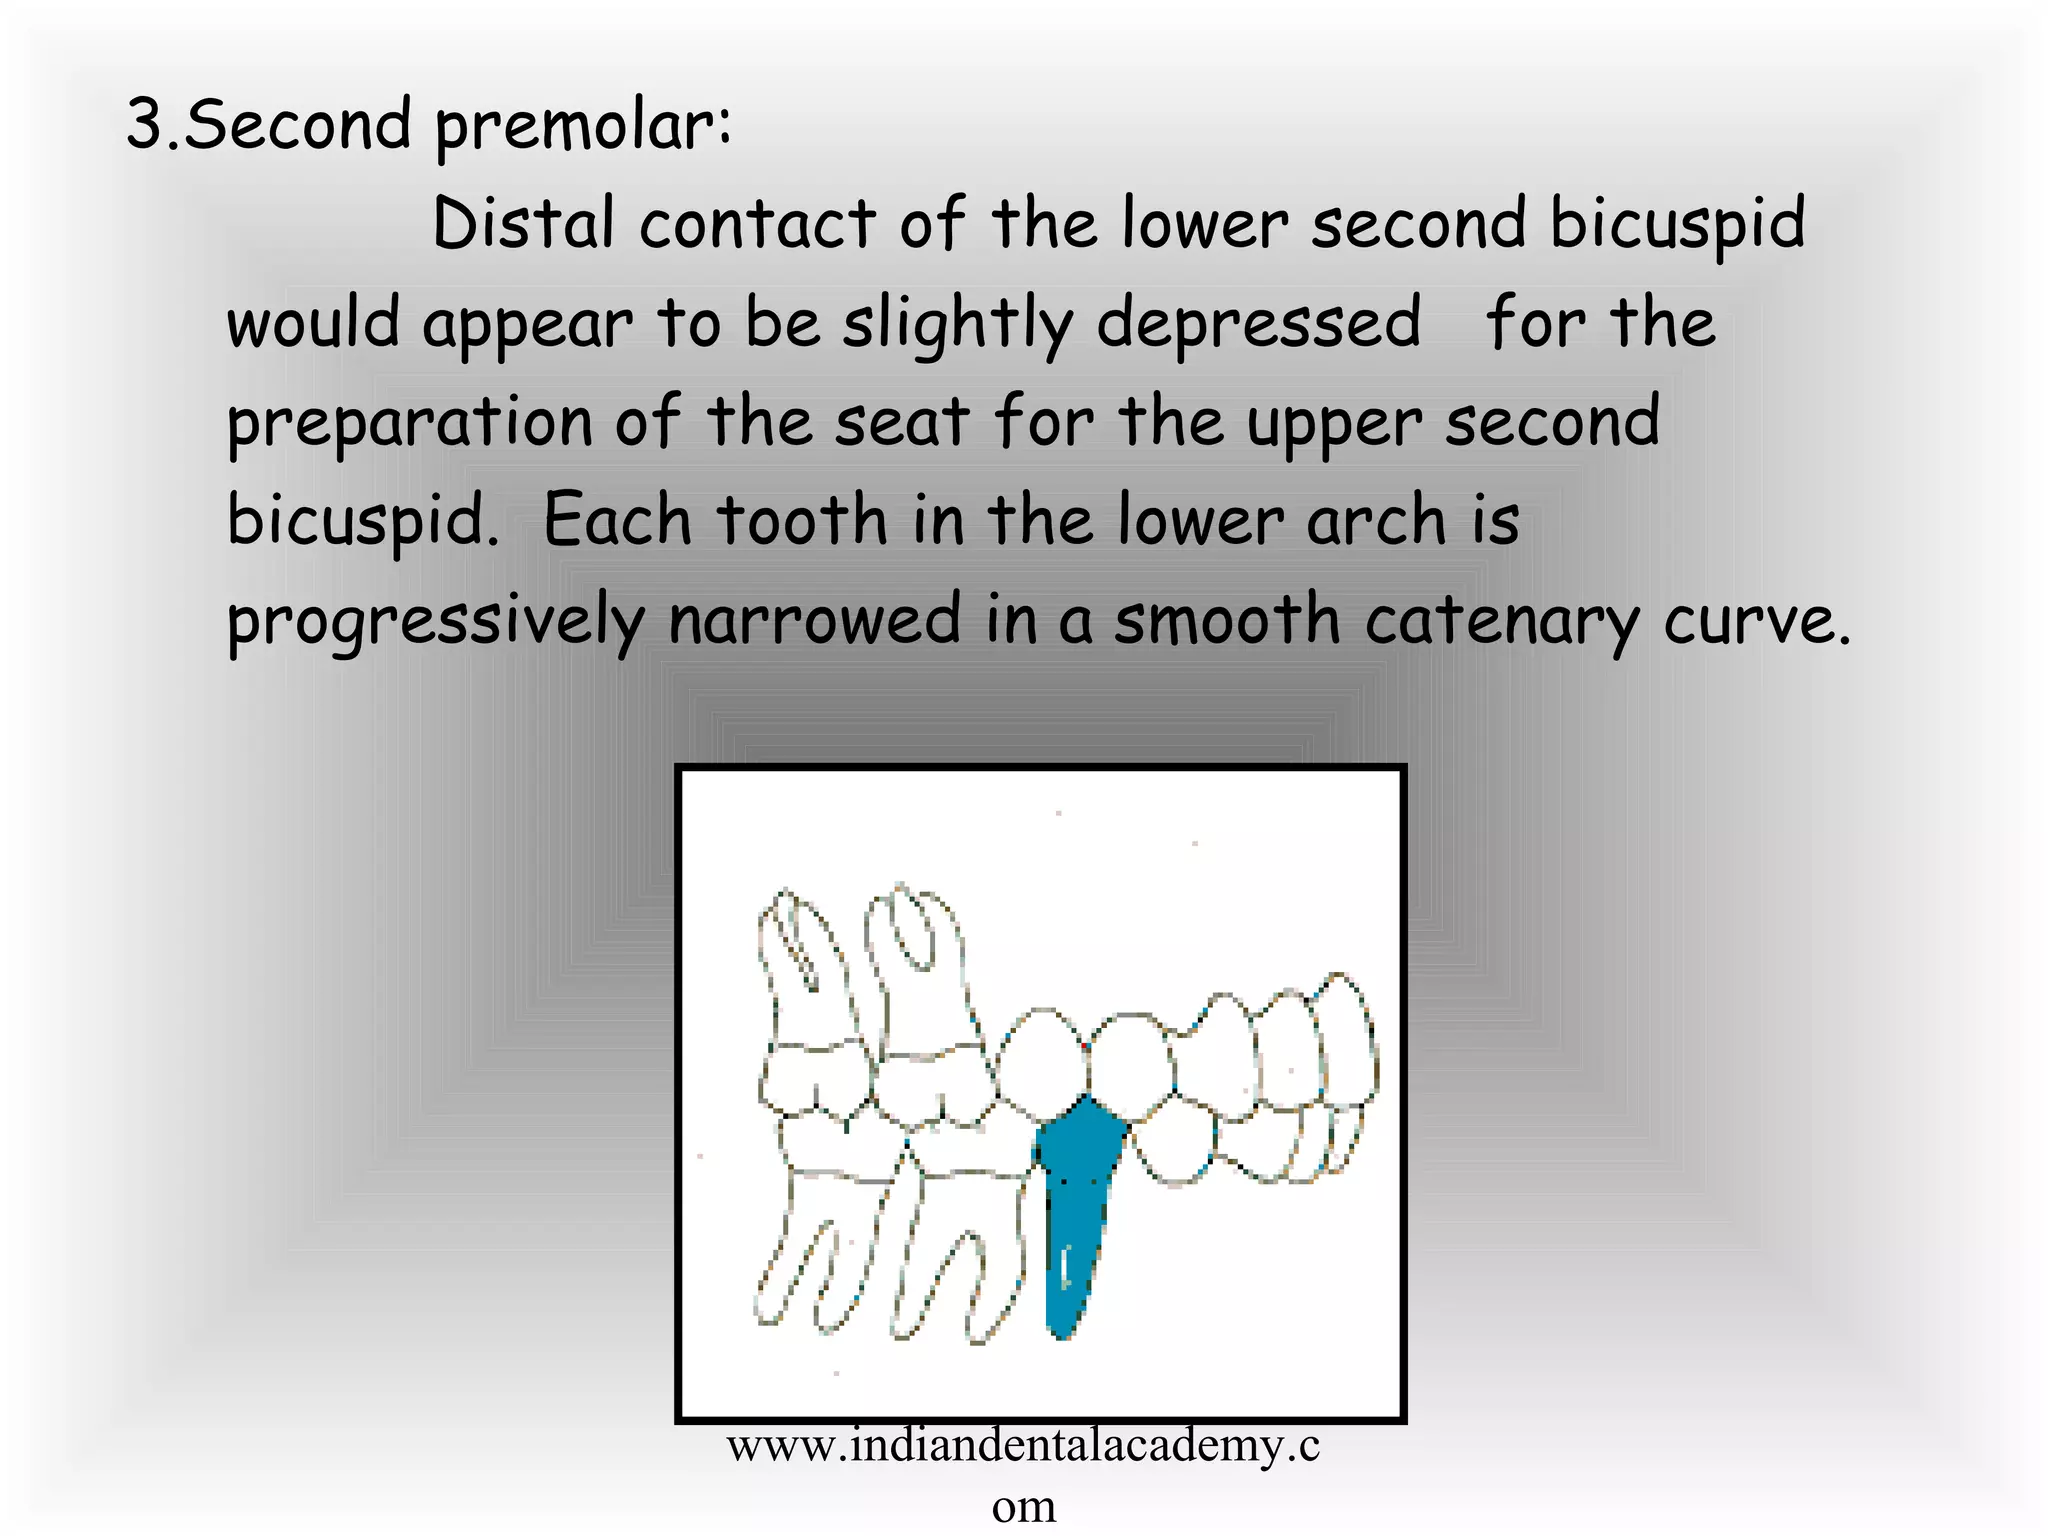
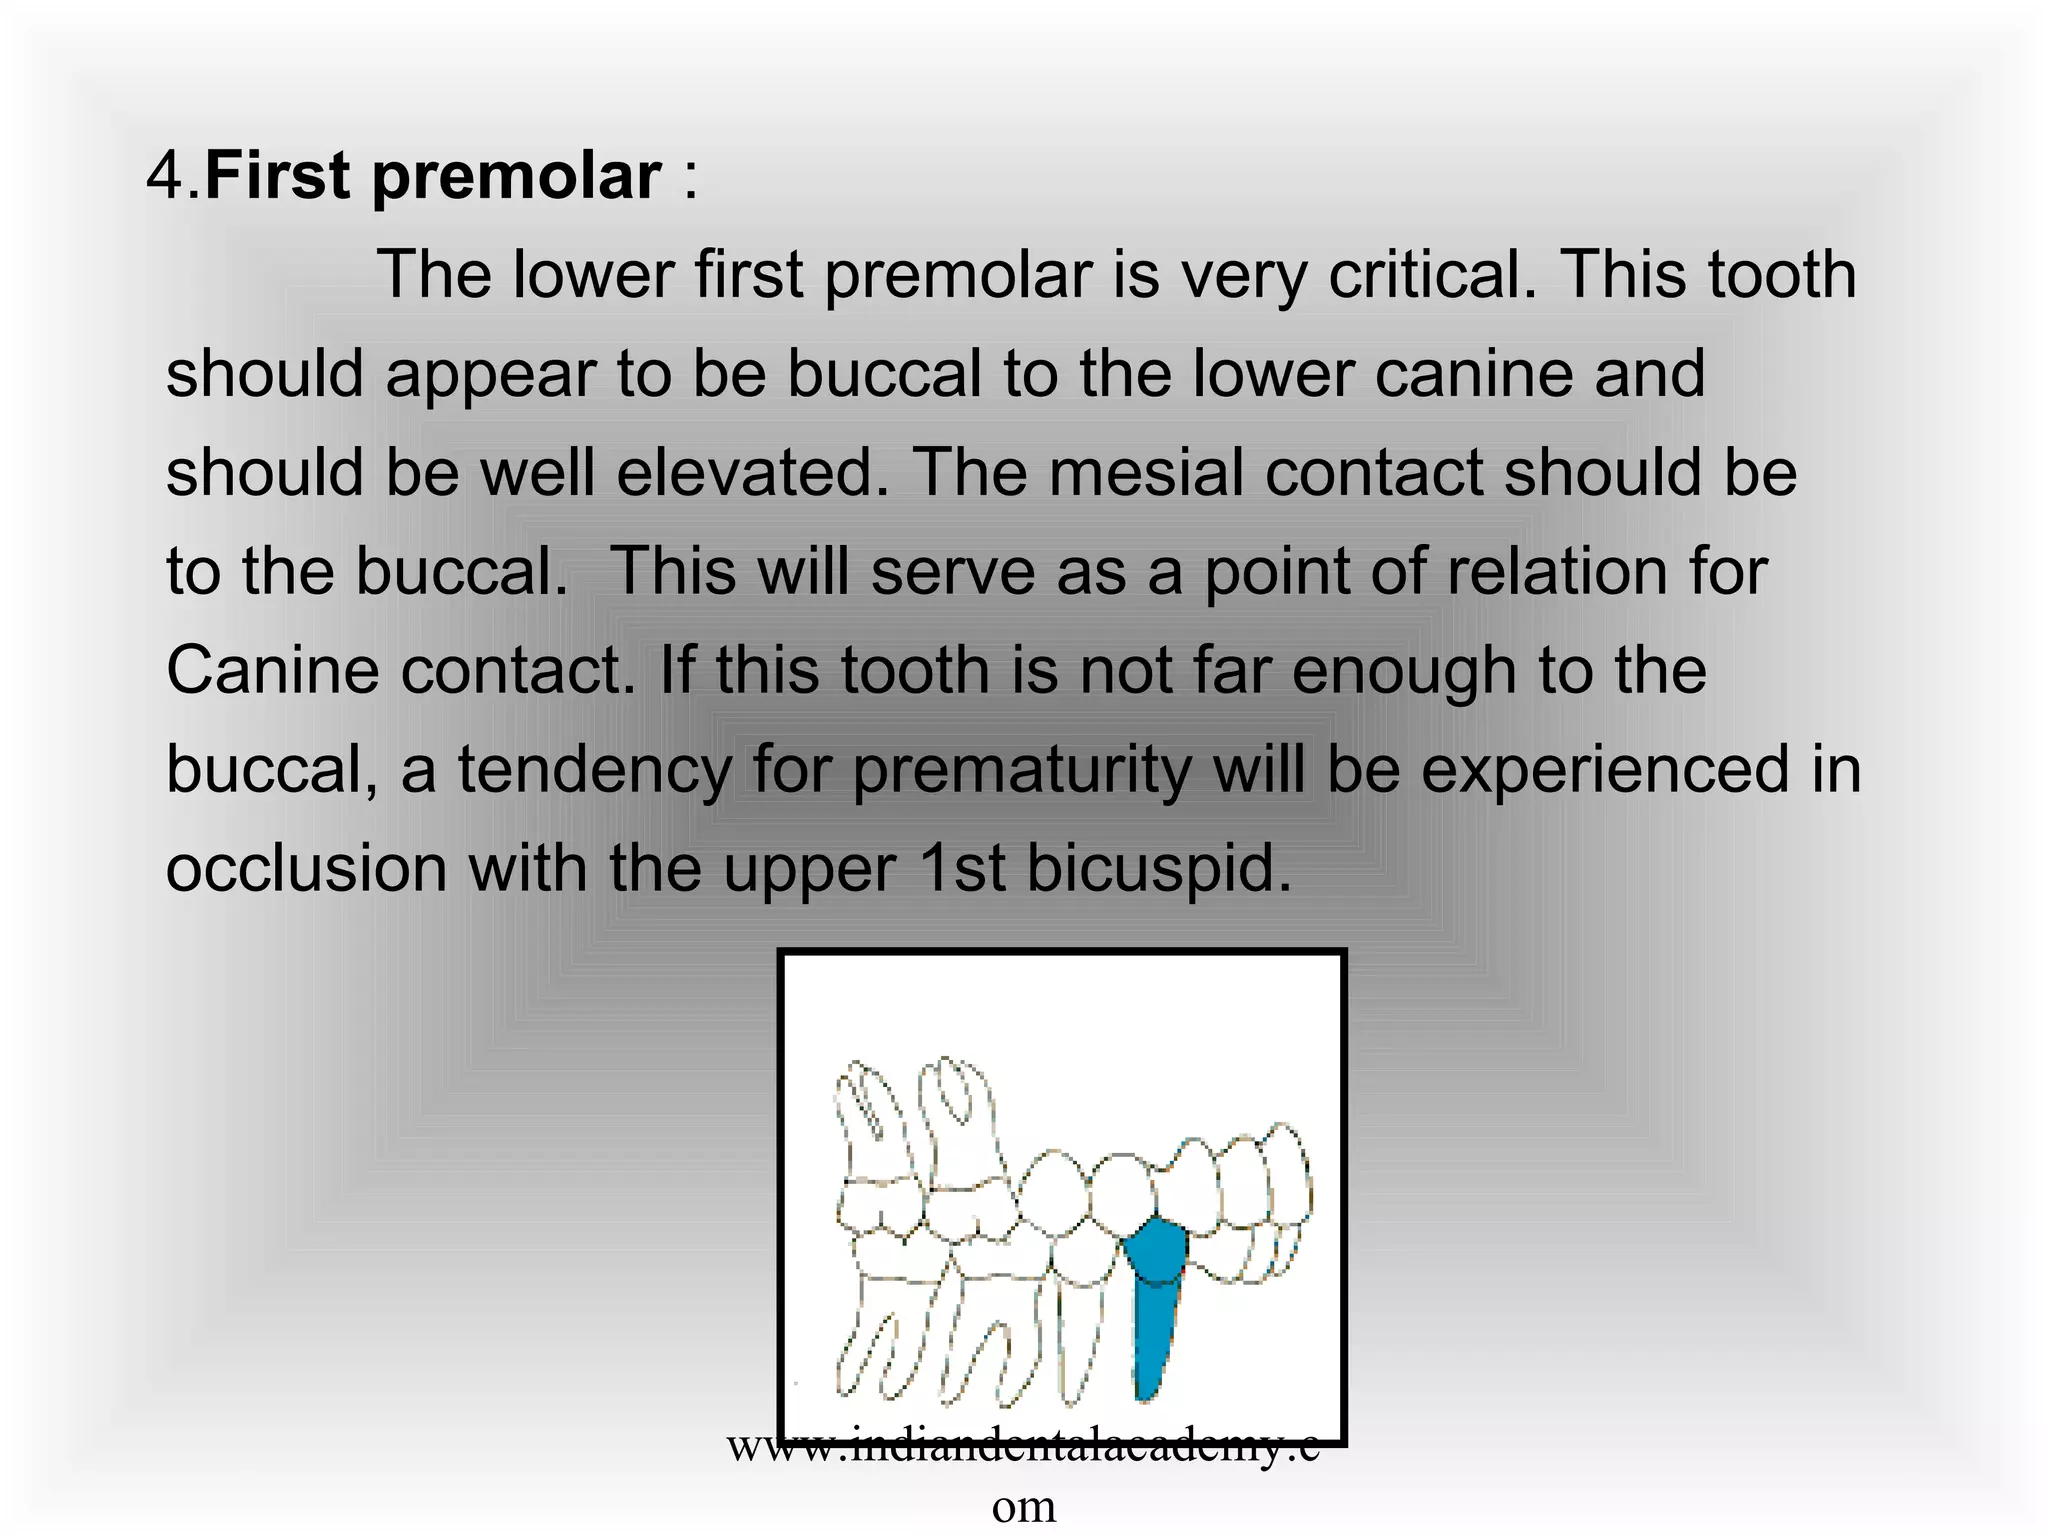
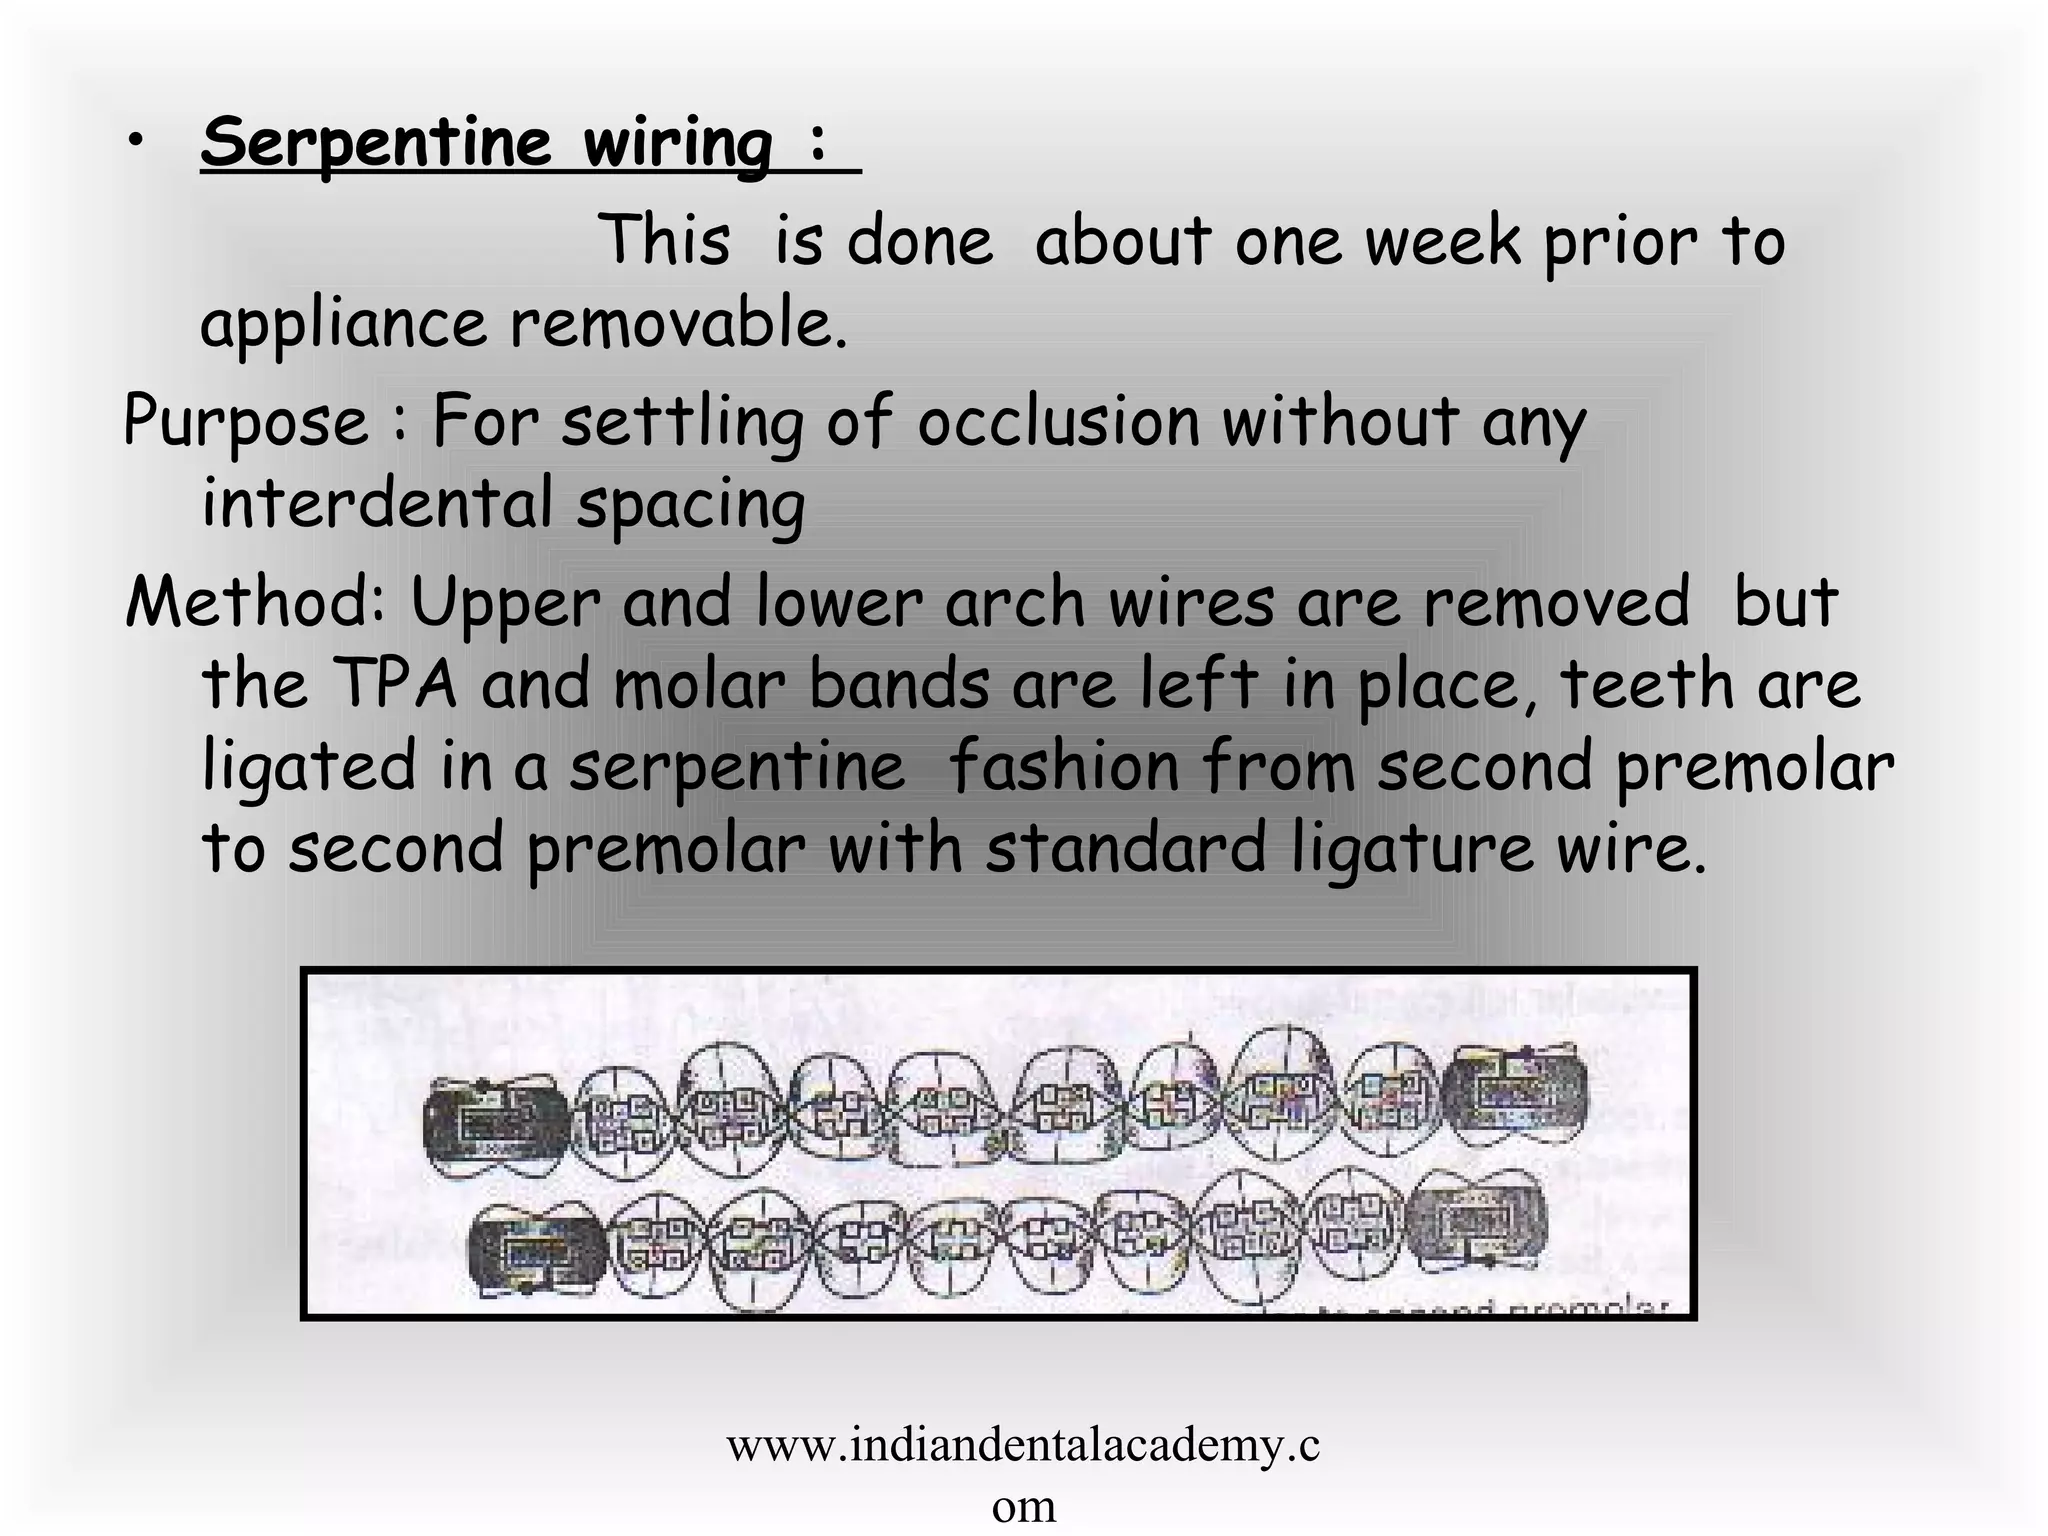
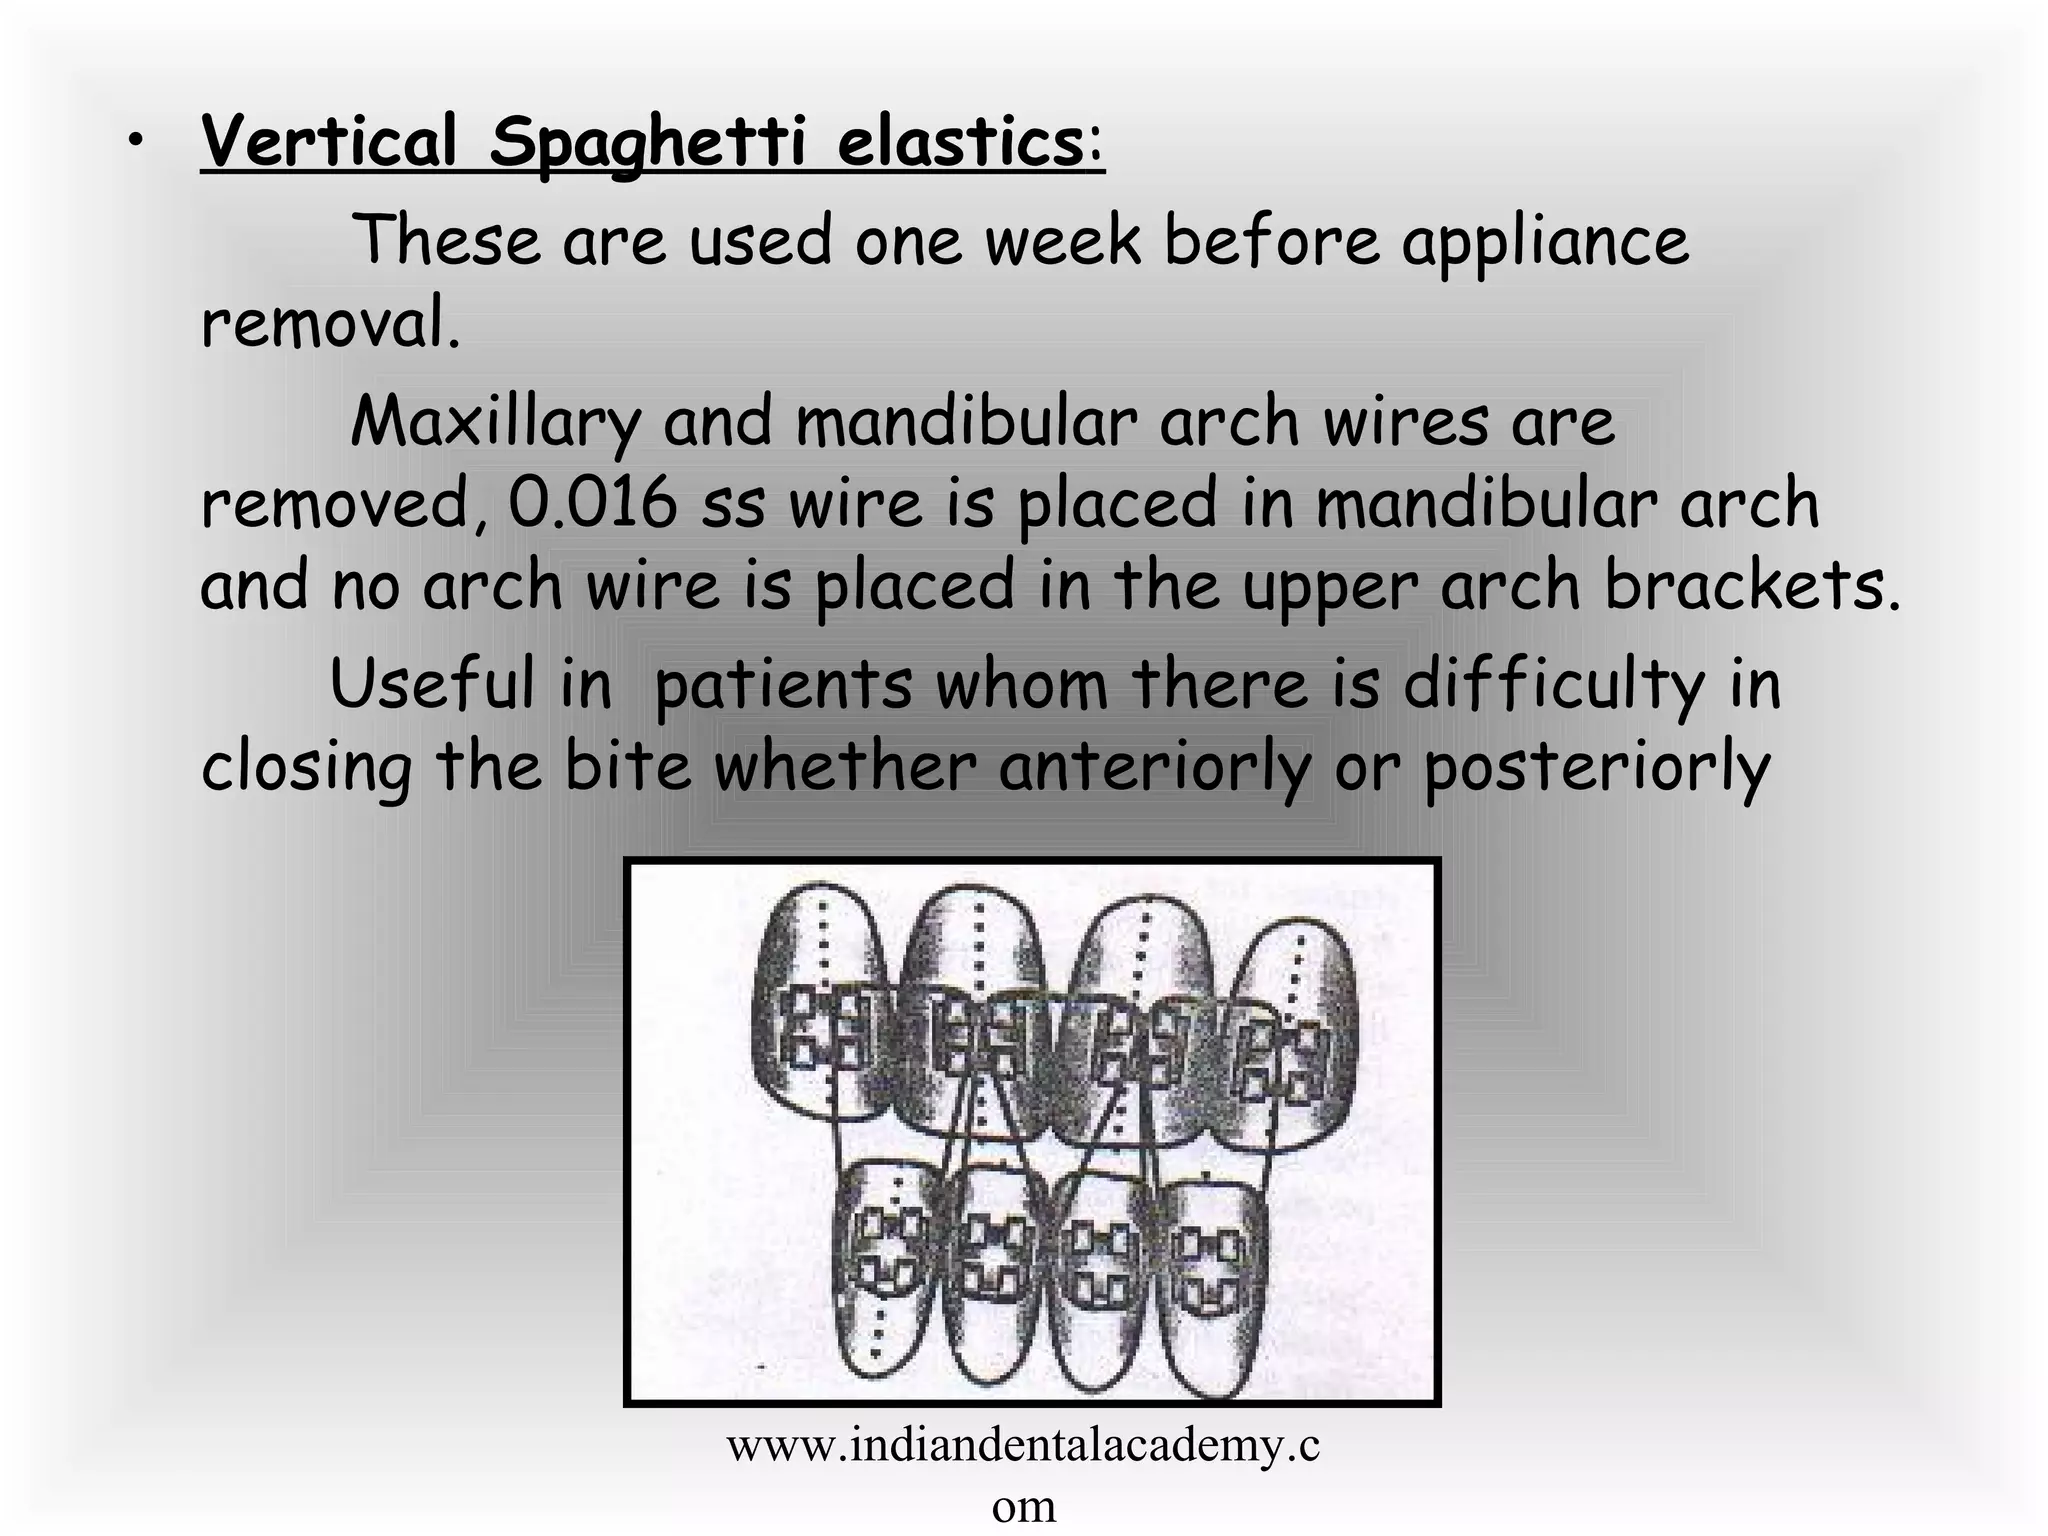
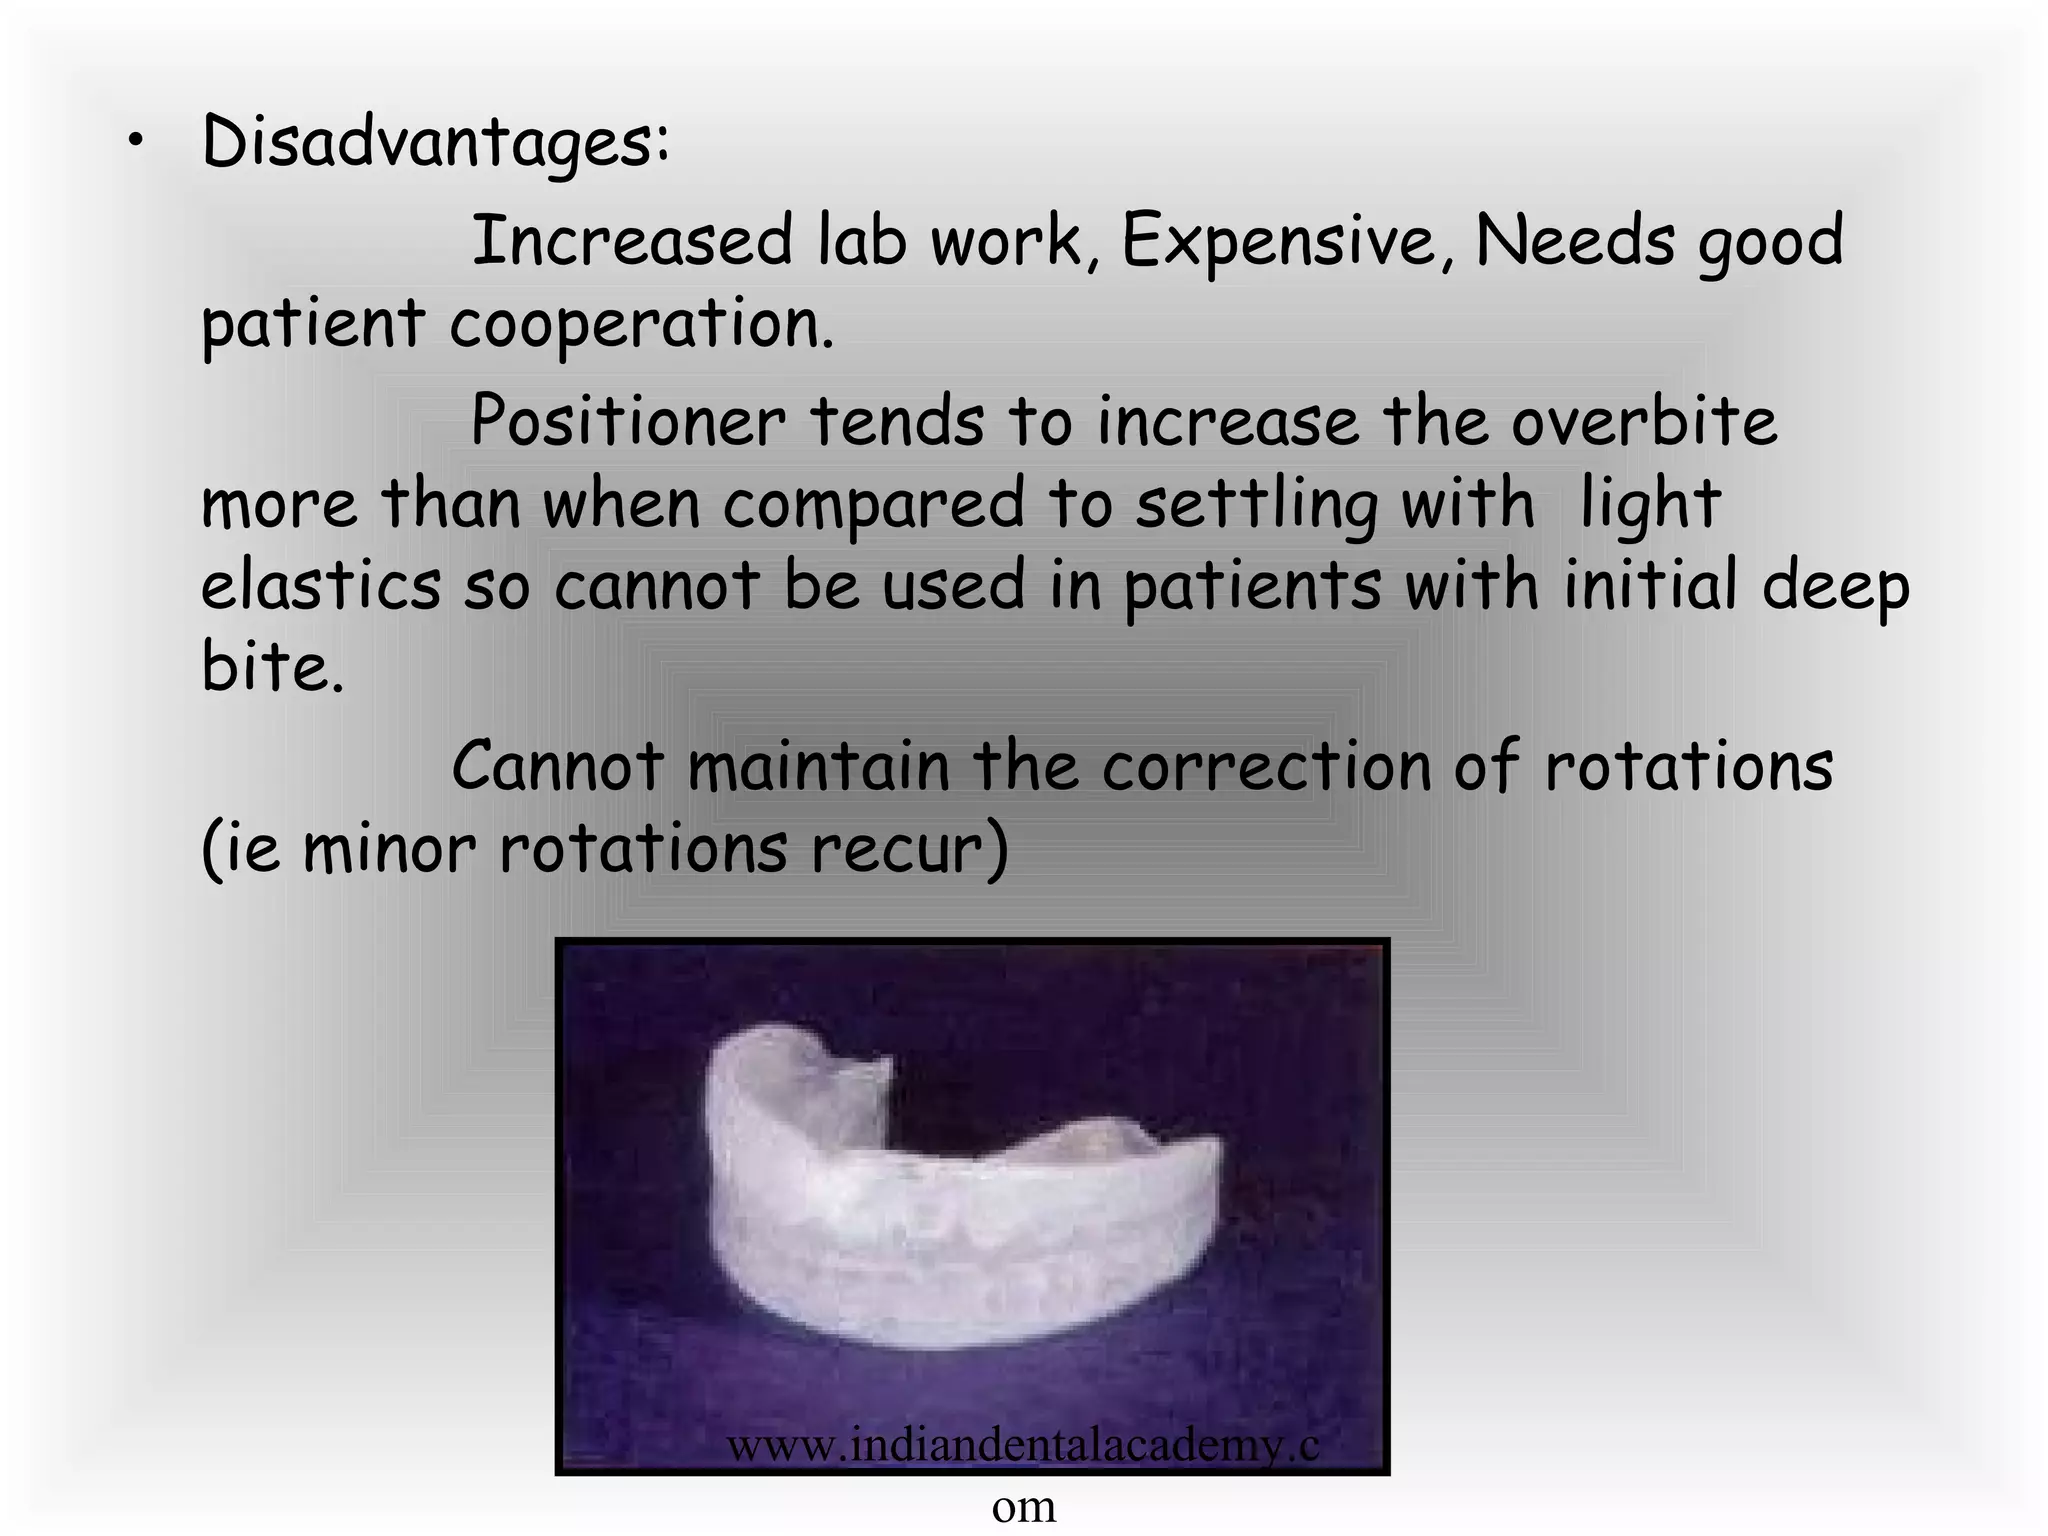
FINISHING AND
DETAILING
IN
P.E.A
www.indiandentalacademy.c
om
FINISHING:
It is the last step, before active
treatment is discontinued, of ensuring that the
teeth and related structures are positioned in such
a way as will lead to a better stability of results,
enhancement of esthetics, optimized functions of
the stomatognathic system and an improvement of
the health of the periodontium.
www.indiandentalacademy.c
om
• DETAILING:
It is the achievement of the ideal
positions of every tooth in the vertical and horizontal
planes with particular reference to the individual in-
out, rotation, tip and torque adjustments.
www.indiandentalacademy.c
om
During the final stage of , it is important to
focus on certain treatment goals. (Systemized
orthodontic treatment mechanics M.B.T)
These goals are:
• Condyles.
• Musculature.
• Six keys
• Ideal functional movements
• Periodontal health.
• Esthetics.
www.indiandentalacademy.c
om
Goals according to American board of
orthodontics-July 2000.
(Systemized orthodontic treatment mechanics M.B.T)
ABO clarified and quantified the goals of
static occlusion by providing a grading system for
study casts and panoramic radiographs.
Emphasis was placed on self assessment of
seven features of dental casts and one feature in the
radiograph.
www.indiandentalacademy.c
om
DENTAL CASTS:
• Tooth alignment
• Marginal ridges
• Bucco lingual inclinations
• Occlusal relationship
• Occlusal contacts
• Overjet
• Interproximal contacts
RADIOGRAPH:
• Root angulation
www.indiandentalacademy.c
om
Six keys to normal occlusion - Andrews:
(AJO 1972)
Key I: Molar relationship
www.indiandentalacademy.c
om
Key II: Crown angulation (tip).
www.indiandentalacademy.c
om
Key III: Crown inclination (labiolingual or buccolingual
inclination).
www.indiandentalacademy.c
om
Key IV: Rotations
www.indiandentalacademy.c
om
Key V: Tight contacts.
www.indiandentalacademy.c
om
Key VI: Occlusal plane
www.indiandentalacademy.c
om
Factors to be considered in finishing and detailing:
(Lecture series on finishing and detailing, university
of south California, April 1976)-Dougherty
1. Correction and over correction of antero posterior jaw
relation ship.
2. Establish correct tip of upper and lower anterior teeth.
3 .Establish correct torque of upper and lower anterior
teeth.
4. Coordinating arch forms and arch widths.
5. Establish correct posterior crown torque.
6. Establishing marginal ridge relation and contact points.
7. Correction of midline discrepancies.
8. Establishing interdigitation of teeth
www.indiandentalacademy.c
om
9. Checking cephalometric objectives.
10. Checking root parallelism.
11. Maintaining closure of all spaces.
12. Evaluating profile and facial esthetics.
13. Checking for TMJ dysfunction's like clicking and
locking.
14. Checking functional movements.
15. Determining of all habits have been corrected.
16. Correction of rotations and overcorrection when
needed.
17. Establishing flat occlusal plane.
www.indiandentalacademy.c
om
• Correction and over correction of antero posterior
jaw relation ship.
- The tip and torque - anterior brackets –
demand for anchorage - upper arch.
- Overcorrection of the Class II case is the
greatest challenge in this area.
- Relapse with the OJ returning and bite deepening–
overcorrection to end to end position and maintain
it with class II elastics for 6-8 wks followed by
settling into ideal class I.
- Profitt and Ricketts- over correction more than 1-
2 mm required.
- M.B.T- over correction in class II- edge to edge.
www.indiandentalacademy.c
om
• Establish correct tip of upper and lower anterior
teeth.
- Tip in face- Eliminates the need for 2nd
-order
bends - treatment more efficient with little
effort.
- 2nd
order bend required when:
- Improper bracket placement relative to the
vertical reference lines of the anterior teeth
- Irregularly shaped anterior teeth -peg
laterals.
- Ant spacing present- advantage- bracket slide as no
arch wire bend.
www.indiandentalacademy.c
om
• Establish correct torque of upper and lower
anterior teeth.
– The anterior torque needs of patients vary - no
single set of bracket torque values can meet the
needs of all the cases .
– Adjust the torque in the upper and lower anterior
segments at various stages of treatment .
– E.g.: over jet correction of Class II case – Torque
frequently lost in Upper anterios and the lower
incisors -angulated forward
– So lingual root Torque in U arch wire and labial
root Torque in L arch wire .
– Ideally these compensations to be done in early
stages of overjet correction and space closure
www.indiandentalacademy.c
om
www.indiandentalacademy.c
om
• Coordinating Arch Widths and Arch form
– Coordination of arch wires - from beginning
through the rectangular wire phase - prevent cross
bites from developing.
– In asymmetry cases -distortion anterior arch
segments in canine regions.
Treated by- Cross-elastics in cuspid areas,
Canting the arch wire in the opposite direction.
www.indiandentalacademy.c
om
• Establishing Correct Posterior Crown Torque
- prevents posterior interference and allows seating
of centric cusps.
– Built in torque- eliminates arch wire wire bends.
– A tendency for upper palatal cusps to be situated
below the occlusal plane- posterior buccal root
torque - rectangular finishing wires.
– In the lower arch, 1st
& 2nd
molars- undesirable
lingual tipping, - buccal crown torque to the
rectangular arch wires.
www.indiandentalacademy.c
om
• Establishing Marginal Ridge Relationships and
Contact Points
– Proper marginal ridge relationship- determined by
bracket height.
– Incorrect bracket height - apparent early .
– Effective to reposition brackets as early as
possible.
– An .014" round wire can be used to step any
improperly positioned brackets.
www.indiandentalacademy.c
om
• Correction of Midline Discrepancies
– Minor discrepancies -3mm or less – easily
corrected.
– 5 methods of elastic wear .
– A single Class II elastic on one side and a double
Class II elastic on the other, for cases with a
bilateral Class II component
www.indiandentalacademy.c
om
– A single Class II elastic on one side only, when the
overjet results in a slight Class II relationship on
that side and the opposite side is in a Class I
position.
www.indiandentalacademy.c
om
– Class III elastics on one side and Class II elastics
on the other, for cases with the corresponding
dental relationships.
www.indiandentalacademy.c
om
– A single Class III elastic on one side only, when
that side is in a Class III position and the opposite
side has a Class I dental relationship .
www.indiandentalacademy.c
om
– An anterior cross-elastic, when the discrepancy
occurs primarily in the anterior segments.
– Asymmetric elastics- short period –rectangular
arch wire- to prevent cant.
– Tieback necessary- to prevent sliding.
www.indiandentalacademy.c
om
• Establishing the Interdigitation of Teeth
– Rectangular wires - the teeth unable to settle .
- Settling before debonding - Lower arch-0.014 &
Upper-0.014" round sectional wire from Lateral
incisor to Lateral incisor & vertical triangular
elastics – encourage teeth to individually settle.
www.indiandentalacademy.c
om
• Checking Cephalometric Objectives
– Progress head films - halfway through treatment -
assessment of anchorage & skeletal, dental
component.
– Final cephalometric head films- 3 or 4 months
before debonding.
– Evaluate the success or failure of treatmenmt
before debonding- tooth positions corrected
before appliance removal.
www.indiandentalacademy.c
om
• Important factors to evaluate with progress and final
cephalometric x-rays include
– AP position of the incisors
– Incisor angulations
– Changes in the occlusal plane
– The degree to which vertical development of the
patient has occurred or restricted
– The success of the correction of horizontal and
skeletal components of the case.
www.indiandentalacademy.c
om
• Checking the Parallelism of Roots
– The tip built into pre adjusted brackets - proper
root paralleling.
– A panoramic x-ray - before debanding to evaluate
root parallelism.
– If crown-root angulation is beyond normal
standards, bracket repositioning or archwire
bending may be required to modify the root
positions.
www.indiandentalacademy.c
om
• Maintaining the Closure of All Spaces
– Space closure be maintained - extraction cases -
passive tiebacks , lacebacks ,in the finishing stage
to prevent relapse.
www.indiandentalacademy.c
om
• Evaluating Facial and Profile Esthetics
– Esthetic evaluation - ongoing process during all
stages of orthodontic treatment.
– A projection of esthetic goals - made as part of
the treatment plan and is monitored clinically and
cephalometrically.
www.indiandentalacademy.c
om
• Checking for TMJ Dysfunctions such as Clicking
and Locking
– Document - TMJ dysfunction prior to treatment,
– Monitor - TMJ dysfunction during treatment. If
problems develop before the development of true
internal derangement –normal TMJ function - re-
established without permanent damage.
– Monitor the patient for symptoms of TMJ
dysfunction during retention.
www.indiandentalacademy.c
om
• Checking Functional Movements
– Before debonding, - checked for interferences
during protrusive movements and lateral
excursions.
– Protrusive-lower eight most anterior teeth make
contact with the upper six most anterior teeth.
– Requires - slight widening of arch form - bicuspid
area,- mesial of the lower bicuspids contacts the
distal of the upper cuspids.
- lateral excursions- the patient should experience
cuspid rise with slight anterior contact and
disocclusion of posterior teeth on both working and
balancing sides. www.indiandentalacademy.c
om
• Determining if All Habits Have Been Corrected
– Habits such as tongue thrusting - been corrected
before the finishing stage .
• Correction of Rotations and Overcorrection
Where Needed
– Most rotations - eliminated before finishing stage.
Any remaining rotations can be corrected during
finishing by one of three methods:
– Rubber rotation wedges under the rectangular
archwire.
– Steiner rotation wedges— these are useful
because they can be placed after the archwire is
in position.
– Lingual elastics—the most effective method.
www.indiandentalacademy.c
om
• Establishing a Relatively Flat Plane of Occlusion
– Reasons for completing cases to a relatively flat
occlusal plane, according to Andrews, -
proper fit of the upper dentition against the lower
dentition.
– Curve of spee left in lower arch the – Lower teeth
occupy less room and increase in OJ.
– Overcorrected in deep bite cases to prevent
relapse. (Zachrisson)
www.indiandentalacademy.c
om
Two rules in finishing treatment: (Contemporary
orthodontics – William. R. Profit, 2nd edition)
1. Inter arch elastics and head gear should be
discontinued , and the rebound from their use
allowed to express itself ,4-8 weeks before the
orthodontic appliances are removed.
2. Teeth to be brought into solid occlusal relationship
without heavy arch wires.
www.indiandentalacademy.c
om
During closing stages of treatment attention is given to
following considerations:
(Systemized orthodontic treatment mechanics M.B.T)
• Horizontal
• Vertical.
• Transverse
• Dynamic
• Cephalometric and Esthetic.
www.indiandentalacademy.c
om
Horizontal considerations:
• Coordination of teeth fit.
• Establishing correct tip of the anterior and posterior
teeth.
• Providing adequate incisor torque.
• Establishing correct posterior torque.
• Management of tooth size discrepancy.
• Controlling rotations.
• Maintaining closure of all spaces.
• Horizontal over correction.
www.indiandentalacademy.c
om
• Coordination of tooth fit:
Coordination of tooth fit in anterior and
posterior areas.
20 % of cases- Ant and Post teeth fit well.
60 % of cases- Mand ant tooth excess.
20 % of cases- Max ant tooth excess.
Mgmnt- Enamel reduction in upper ant.
Difficult - 60 % of cases.
www.indiandentalacademy.c
om
• Establishing correct tip of anterior and posterior
teeth:
Tip is one of the strengths of PEA.
Upper ant brackets - 40° of tip
Lower ant brackets - 6° of tip.
Upper premolar bracket - 2° to 0°
Lower premolar bracket - 2°
www.indiandentalacademy.c
om
Shape of incisor crowns should be assessed during
finishing.
www.indiandentalacademy.c
om
• Providing adequate incisor torque
Torque is the weakness of PEA.
3 factors-
• App 1 mm segment of rectangular wire is placed in
bracket of same dimension
• A full size wire not used – reduces effectiveness of
torque
• Upper and lower anterior torque varies.
Upper- additional palatal root torque
Lower- additional buccal root torque
www.indiandentalacademy.c
om
U.C.I- 10 ° , U.L.I- 7 °, L.I- 5 ° -ADDED
In cases of class I bi-max and class II , add upto
20 ° of palatal root torque in upper arch wire and 10-
15 ° of labial root torque in lower arch wire.
Makes upper ant seg bigger than lower improving
the fit in 60% of cases.
www.indiandentalacademy.c
om
• Establishing correct posterior torque:
Essential - preventing posterior interference and
allowing for seating of centric cusps.
Upper post- need buccal root torque
lower post – need lingual root torque
www.indiandentalacademy.c
om
In 1999, casko and co directors of ABO
defined the relationships between buccal and lingual
cusps of maxillary and mandibular premolars and
molars
Mandibular lingual cusp should be at the same
level or within a millimeter of the same level as
mandibular buccal cusps - permits flat occlusal plane
and good cusp fossae relation ship
Maxillary posterior teeth -palatal cusps of
the first and second molars are generally slightly
longer and extend slightly more occlusally than buccal
cusps
www.indiandentalacademy.c
om
• Management of tooth size discrepancies
Proximal stripping- early stage
Addition of tooth mass
• Controlling rotations:
-an important aspect
-in out compensation built
-correct bracket position
www.indiandentalacademy.c
om
E.g.- 10° rotation in upper molars and 0° rotation
in lowers molars for proper occlusion.
In cases of class I an II, upper premolar brackets
are placed 0.5 mm mesially- buccal cusps of the upper
premolars to rotate distally and palatal cusp more
mesially.
Lower canine brackets slightly to the mesial-
rotates the mesial aspect labially and provides better
contact with the distal aspect of lower lateral incisor.
For any rotated teeth- brackets are placed in the
in the direction of rotation at the beginning of
treatment
www.indiandentalacademy.c
om
Gingival surgery (preferably CSF procedure)
is indicated in patients who has severe anterior
rotations. (Profitt)
CSF procedures are carried 1-4 months
before appliance removal after their alignment.
• Maintaining the closure of all spaces:
www.indiandentalacademy.c
om
• Horizontal over correction
Horizontal over correction of class II and
class III cases- class II elastics or class III elastics
or headgear.
Observed for a period of 6 to 8 weeks –
stable- app removed.
Class II cases- anterior teeth can be brought
to an edge to edge position and held for
approximately 6 to 8 weeks.
Class III case horizontal over correction is
done by 2-3 mm of additional overjet.
www.indiandentalacademy.c
om
Vertical considerations:
• Correct crown lengths , marginal ridge relations and
contact points.
• Final management of curve of spee.
• Correct crown lengths, marginal ridge relations and
contact points:
Correction of vertical crown positions, marginal
relationships and contact points should be completed
during rectangular stage of treatment
Correct these early in treatment than during
finishing stage for better stability.
Therefore correct bracket placement is
essential for achieving these relations.
www.indiandentalacademy.c
om
• Curve of spee:
In low angle cases - level the entire curve of
spee since excess curve of spee makes it difficult or
impossible to complete final space closure in upper
arch
In high angle cases it is important to leave some
curve of spee at the back of the arch to prevent the
risk of open bite.
www.indiandentalacademy.c
om
• Vertical over correction- Deep and open bite cases
Bracket position- 0.5 mm incisally – deep bite
0.5 mm gingivally - open bite
Deep bite- curve of spee leveled- bite opens.
Bite opening curves can also be placed.
Open bite- Tongue position and habits
Positioners used .
Retainer- small hole in the palatal area to
position the tip of tongue.
www.indiandentalacademy.c
om
Transverse considerations:
• Arch form
• Arch coordination
• Transverse overcorrection
• Trans palatal elastics.
• Arch form
Single arch form is used for every patient.
• Arch coordination
Upper and lower arches should be coordinated
right from the early stages- eliminates the cross
bite.
www.indiandentalacademy.c
om
Upper arch wire is 3mm wider anteriorly and
posteriorly than the lower archwire - establish the
correct 3mm of overjet anteriorly and posteriorly.
www.indiandentalacademy.c
om
• Transverse overcorrection:
Narrow maxillary arches should be over
expanded and held in over expanded position for an
extended period of time.
If the expansion is carried at the beginning of
orthodontic treatment, a palatal bar should be placed.
Additional buccal root torque in the arch wire is
beneficial to allow posterior segments to settle
properly.
www.indiandentalacademy.c
om
• Trans palatal elastics ( Buffalo elastics) :
These elastics are some times used for
coordination of the arches at the end of treatment.
These elastics are used to constrict the maxillary
arch by producing trans palatal force on maxillary
arch.
These are attached to ball hooks on the
maxillary first premolar bands. They are prescribed
for night time wear as they interfere with speech.
www.indiandentalacademy.c
om
Dynamic considerations :
• Establishing centric relation and checking functional
movements.
• Checking for TMJ dysfunction
• Establishing centric relation and checking
functional movements:
Necessary to monitor and to reevaluate the
centric relation position of the mandible and
additional corrections done prior to finishing of the
case ( using inter maxillary elastics).
.
www.indiandentalacademy.c
om
Patients with occlusion in a class I position and
with condyles in centric relation, should be checked
for Interferences in protrusive and lateral
excursions.
During protrusive movement lower eight most
anterior teeth make contact with the upper six most
anterior teeth with no posterior contact.
During lateral excursions the patient should
experience cuspid rise with slight anterior contact
and disocclusion of posterior teeth on both working
and balancing sides.
www.indiandentalacademy.c
om
• Checking for TMJ dysfunction:
Document any evidence of TMJ dysfunction
prior to trt and monitored during trt.
Changes to be made during finishing stages:
Anterior position of condyle- headgear or Class II
elastics.
Posterior position of condyle- Cessation of class II
elastics and headgear or use of Class III elatics.
Seated & reasonably centred condyle position – most
beneficial position – apploance removed.
www.indiandentalacademy.c
om
Cephelometric and esthetic considerations:
• Evaluation of cephelometric films:
The most important factors to be evaluated
with the cephelometric head films taken
approximately 3-4 months before debonding. They
are
• Soft tissue profile.
• Antero posterior position of incisors.
• Torque of incisors
• Changes in mandibular plane.
• Success in correcting the horizontal skeletal and
dental components
www.indiandentalacademy.c
om
• Evaluation of esthetic Factors of anterior teeth:
These are analyzed by sitting or standing in
front of the patient.
• Crown lengths of maxillary and mandibular incisors.
• Incisal edge contours
• Axial inclination of all maxillary and mandibular
incisors.
• Midlines( upper ,lower.facial and labial)
• Crown torques.
• Smile line ( rest position and full smile)
• Right -left symmetry of crown shapes and sizes of
gingival marginal levels.
www.indiandentalacademy.c
om
www.indiandentalacademy.c
om
www.indiandentalacademy.c
om
Roth adds his functional requirements to
the Six Keys to normal occlusion :
1. Lower incisors at the +1 to A-Po; for facial esthetics,
for planning anchorage control, and for selection of
mechanotherapy.
2. Tips of the upper incisors 2-2.5mm below the lip
embrasure of the upper and lower lips, when the lips
are closed with no lip strain.
3. No more than 1 mm of attached gingiva showing upon
a full smile.
www.indiandentalacademy.c
om
4. App. 2.5mm overjet-overbite relationship (.0005"
clearance with the lingual surface of the upper
incisor.)
5. A flat occlusal plane, at the end of therapy that
would return to a 1 to 1.5mm curve, at its deepest
point, after appliance removal and settling of the
occlusion
6. A curve of Wilson that would allow seating of centric
cusps, but clearance upon excursions.
www.indiandentalacademy.c
om
7. Lower incisors aligned contact point-to-contact point
with the roots in the same plane, when observed from
the occlusal, and a mesioaxial inclination of 2 degrees.
8. L- 3 crowns angulated mesially 5 degrees, with the
incisal tip 1mm higher than the incisal edge of, the
lateral incisors. The lower cuspids should have a
slightly exaggerated mesial rotation in extraction
cases.
www.indiandentalacademy.c
om
9. The lower bicuspids should be uprighted 1 degree
from their normal mesial inclination and should have a
slight distal rotation (more so on an extraction case).
The contact point should be adjacent to the contact
point on the lower cuspid distal surface.
10. The lower molars should be uprighted 1 degree from
their normal 2-degree mesial inclination, and should
have a slight distal rotation.
www.indiandentalacademy.c
om
.11.The lower buccal segment should have progressive
torque close to Andrews' measurements for
establishing the curve of Wilson, and there should be
no rotations or spaces.
12. The upper 1st molars should have sufficient distal
rotation, mesioaxial inclination, and buccal root
torque, so as to fit with the lower 1st molars,. The
same would follow for the upper 2nd
molars. (14
degrees torque and 0 degrees tip).
www.indiandentalacademy.c
om
13.The upper bicuspids should be uprighted to 0 degrees
from their normal 2-degree mesial inclination, with no
rotation.
14. The U-3 must have its contact points adjacent to
the contact points of the upper bicuspid and lateral
incisor, to establish proper length for cuspid
guidance. ( +11 to +13 degrees of mesial crown tip)
www.indiandentalacademy.c
om
15. The U-2 & U-1 should be almost equal in incisal edge
length, with no more than 0.5mm height differential.
16. There should be no rotations or spaces in the upper
arch, and the buccal segments from the cuspids
distally should have 14 degrees non progressive buccal
root torque.
www.indiandentalacademy.c
om
17. The arch form should be a modified catenary curve
consisting of five separate radii —
One for the front of the arch form, one for
each cuspid-bicuspid area and one for each buccal
segment from the first bicuspid distally.
The widest point of the lower arch would be
at the mesiobuccal cusp of the mandibular first
molars and at the first bicuspids.
The widest point of the maxillary arch would
be at the mesiobuccal cusps of the first molars.
www.indiandentalacademy.c
om
Roth's sequence of finishing
To finish lower arch before the upper arch
1. Lower anteriors at or slightly lingual to the
cephalometric goal.
2. Lower incisor should have divergent roots
3. Lower canines positioned in mesio-axial inclination
with distal root positioning
4. Canine tip 1 mm higher than incisal edge of Lower
incisor.
www.indiandentalacademy.c
om
5. Canine crowns lingually inclined , long axis labio-
axially inclined
6. Lower posteriors uprighted 30
distal from nl mesio-
axial position of 20
7. Lower posteriors rotated slightly distally
8. Leveled curve of spee
www.indiandentalacademy.c
om
Upper arch:
1. Max 6 to have distal rotation with sufficient buccal
root torque to lift the palatal cusp (supporting).
2. Positioning of 6 determines that of 7 from a
rotational standpoint since both are trapezoidal in
shape
3. This facilitates the PM to seat in a class I reln
4. U canines should have sufficient mesio-axial
inclination so that their tips ride on the disto-incisal
inclines of L canine- canine guided occlusion
www.indiandentalacademy.c
om
5. UI positioned to close the space and occupy
sufficient space within their reach
Finishing the upper arch prior to lower makes it
impossible to finish case properly ,for when the
lower arch is corrected one has to move all upper
teeth to get proper relationship of upper arch to
lower arch.
www.indiandentalacademy.c
om
Occlusal check list in Finishing : ( Bio progressive
therapy)-Ricketts
• An occlusal check list including eight areas in each
arch is used in establishing the ideal finishing arch
configuration and individualized tooth rotation in over
treated orthodontic finishing occlusion.
• This check list procedure is used in gaining the final
completed details necessary in accomplishing the
desired finishing objectives.
www.indiandentalacademy.c
om
MAXILLARY ARCH :
1. Width across first and second molars.
2. Distal rotation of first molar so that line drawn
through distobuccal and mesiolingual cusps points to
the distal third of the opposite side cuspid ( in
extraction case mesial of canine)
3. Mesial offset (large) on molar.
4. Mesial rotation of lingual cusp of first bicuspid to
seat in
distal fossa of lower first bicuspid.
5. Premolar offset (2-3mm) to avoid first area of
prematurity.
6. Cuspid brought into contact with lower cuspid and
premolar to establish cuspid rise.
7. Lateral incisor left labial (until retainer) to allow over
treatment of buccal segments; then tucked in.
8. Smooth arc across incisors.www.indiandentalacademy.c
om
• Check list for maxillary arch :
1. Arch width : Arch width should be checked at
first and second molar region. They should be well
expanded to compensate narrowness present at the
beginning of treatment This width increase is
necessary to allow and encourage an improved
torque and function.
www.indiandentalacademy.c
om
2. Upper first molar rotation: A line drawn from the
tip of the distal buccal cusp extended through
the mesiolingual cusp tip should pass through the
canine of the opposite side. The upper first
molar should be distally rotated until its distal
buccal cusp can contact the mesial buccal cusp of
the lower second molar.
www.indiandentalacademy.c
om
3. Upper second bicuspid:
This is considered the key to finishing because
the lower 1st molar and the upper 1st molar both
must be correct before its proper position can be
attained. Care should be exercised to make certain
the distal margin of the upper bicuspid is well occlusal
to the marginal ridge of the upper first molar. The
upper second bicuspid may appear to be slightly
inclined mesially.
www.indiandentalacademy.c
om
4. The upper first bicuspid :
It should be parallel to the occlusal plane
buccolingually. It may also appear to be slightly
distally inclined because the mesial marginal ridge is
lower than the distal marginal ridge.
5. Contour and over treatment of the buccal occlusion:
The upper first bicuspid is offset buccally
from the cupid to avoid the first area of prematurity
with the lower 1st
bicuspid. Class II malocclusions are
over treated by riding up the distal inclines until they
appear to be in a super class I or mild class III
occlusion.
www.indiandentalacademy.c
om
6. Maxillary canines :
Another key tooth in finishing is the upper
canine. The tooth is over treated in the finishing
stages of Class I and Class II malocclusion
corrections. It should be reversed and over
treatment forward toward the Class II side in Class
III malocclusions. In class II over treatment done
such a way that the distal contact is outward and
slight mesial rotation present – tucked back in the
distal during the act of settling.
www.indiandentalacademy.c
om
7. Lateral incisors :
The upper lateral incisor is kept labially. The
upper lateral have to be depressed excessively or
else placed forward in its final position. This forward
position is preferred to the intruded position by the
patient because of the esthetics.
8. Upper central incisors:
Finally the upper centrals contacts are
considered. Upper and lower midlines should be
coincided and the tooth size and mass can be checked
for their final settling potential.
www.indiandentalacademy.c
om
MANDIBULAR ARCH:
1. Arch width across second molars.
2. Distal of first molar rotated lingually until the
distobuccal
cusp approximates mesial sluice way on second molar.
3. Large buccal offset at mesial of first molar.
4. Check inter-bicuspid width for necessary expansion.
5. Proper buccal arch form and contour.
6. Premolar offset to bring it in contact with distal
lingual
incline of upper canine (2-3mm).
7. Mesial of cuspid tucked slightly behind lateral incisor
distal of the cuspid buccal.
8. Over-rotation of incisors; smooth arc.
www.indiandentalacademy.c
om
• Finishing check list in lower arch :
1.Second molar :
Molar width at Lower second molar and check
for uprightness and any rotations. The lower second
molar should be tipped (5 deg )distally during
treatment because it will settle mesially as the
distobuccal cusp of the upper first molar settles into
the lower first and second molar embrasure .
.
www.indiandentalacademy.c
om
2. Mandibular First molar :
First molar distal contact should be at least
1/3 inward from the buccal on the marginal edge of
the second molar. The lower first molar is checked
for uprightness and the mesial is slightly outward in
preparation to accommodate the distal incline of the
upper second bicuspid.
www.indiandentalacademy.c
om
3.Second premolar:
Distal contact of the lower second bicuspid
would appear to be slightly depressed for the
preparation of the seat for the upper second
bicuspid. Each tooth in the lower arch is
progressively narrowed in a smooth catenary curve.
www.indiandentalacademy.c
om
4.First premolar :
The lower first premolar is very critical. This tooth
should appear to be buccal to the lower canine and
should be well elevated. The mesial contact should be
to the buccal. This will serve as a point of relation for
Canine contact. If this tooth is not far enough to the
buccal, a tendency for prematurity will be experienced in
occlusion with the upper 1st bicuspid.
www.indiandentalacademy.c
om
5. Torque consideration:
From the lower 2nd
bicuspid backward
there is progressive lingual crown torque.
6 .Canine :
Canine is critical in mechanical and
proprioceptive function. This tooth is principally to
change arch shape. The typical position produced is a
smooth corner of the catenary curve. In wide arches,
a cuspid eminence is present, but in tapered arches
this tooth is held inwardly on the mesial contact of
the lower first bicuspid, which may rotate forward.
www.indiandentalacademy.c
om
7. Contact of the mesial of canine and the lower lateral:
Distal contact of lateral incisor - overlapped
– mesial ct. pt of canine.
Reasons
• Adjustment of canine labio lingually – no crowding
• Stabilizes the lower lateral
• Canine vertical adjustment during retention.
8. Incisor:
Smooth curve of incisor contacts
completes the lower arch shape.
www.indiandentalacademy.c
om
• Final stage of finishing –Settling
Purpose : Bring all teeth into solid occlusal relationship
before teeth patient the patient is placed in
retention.
How to settle the occlusion : There are 3 ways to
settle the occlusion.
1. By replacing rectangular wires at the very end of
treatment with light round arch wires that provide
some freedom for movement of teeth.
2. With laced vertical elastics after removal of
posterior segments of the arch wires .
3. With the use of tooth positioner.
www.indiandentalacademy.c
om
• Using light round wires Replacing rectangular wires :
This was the original method for settling ,
recommended by Tweed in 1940.
According to him : These light wires must have first
and second order bends as used in rectangular wires.
These light arch wires will quickly settle the teeth
into final occlusion and should remain in place for
only a few weeks at most. vertical elastics are used
only if needed.
Disadvantages : Precise control of anterior teeth is
lost by using light continuous round wires .
www.indiandentalacademy.c
om
Later- During closing stages of treatment much
lighter wires are used since rectangular stainless
steel wires are restrictive for settling of teeth in
closing stages of treatment.
Typically .014 or.016 heat activated Ni-Ti is
used in the lower arch coordinated with upper arch.
In the upper arch a .014 round sectional arch
can be placed from lateral incisor to lateral incisor.
www.indiandentalacademy.c
om
• Elastics :
Elastics for settling are laced around tubes
and brackets .
A typical arrangement is to use light 1/4 -inch
elastics with class II or class III depending on
whether slightly more correction is desired.
These elastics should not remain in place for
more than 2 weeks, one week is usually enough to
accomplish desired settling.
www.indiandentalacademy.c
om
• Settling Elastics:
Elastics with class II pull:
Elastics with class III pull :
www.indiandentalacademy.c
om
These wires can be accompanied by the use of
vertical triangular elastics when settling needs to
occur.
The better the bracket placement the less
elastics need to be used.
It is beneficial to retain all bands and
brackets on the teeth during settling so that if any
unwanted changes occur these can be corrected.
www.indiandentalacademy.c
om
Finishing Elastics in case with open bite : -
triangular elastics:
www.indiandentalacademy.c
om
Variations:
– Cuspids labially displaced – extend sectional wire in
upper ant. seg – to hold them in position.
– Diastemas – areas tied lightly with elastic thread
or ligature wires.
– Teeth extracted – figure of 8 ties –across
extraction sites
– Palatal expansion – small removable palatal plate –
0.018 wires extending interproximally in the
gingival areas
– Moderate to severe Cl II/I,
– upper full arch wire, wire bend back distally.
– Settling longer than 6weeks – lower rect. wire used
www.indiandentalacademy.c
om
• Serpentine wiring :
This is done about one week prior to
appliance removable.
Purpose : For settling of occlusion without any
interdental spacing
Method: Upper and lower arch wires are removed but
the TPA and molar bands are left in place, teeth are
ligated in a serpentine fashion from second premolar
to second premolar with standard ligature wire.
www.indiandentalacademy.c
om
• Vertical Spaghetti elastics:
These are used one week before appliance
removal.
Maxillary and mandibular arch wires are
removed, 0.016 ss wire is placed in mandibular arch
and no arch wire is placed in the upper arch brackets.
Useful in patients whom there is difficulty in
closing the bite whether anteriorly or posteriorly
www.indiandentalacademy.c
om
Positioners for finishing :
An alternative to segmental elastics or light
round arch wires for settling is a rubber or plastic
tooth positioner.
Advantages :
It allows the fixed appliance to be removed
somewhat quickly than otherwise would have been,
therefore some finishing that could have been done
with final arch wires can be left to positioner.
It serves not only to reposition the teeth but
also to massage the gingiva and promote the
inflamed gingiva to rapid return to normal gingival
contours.
www.indiandentalacademy.c
om
• Disadvantages:
Increased lab work, Expensive, Needs good
patient cooperation.
Positioner tends to increase the overbite
more than when compared to settling with light
elastics so cannot be used in patients with initial deep
bite.
Cannot maintain the correction of rotations
(ie minor rotations recur)
www.indiandentalacademy.c
om
• Indications :
1.Gingival condition with more than usual degree of
inflammation and swelling at the end of active
orthodontics.
2.Cases with an open bite tendency ,so that settling by
mild depression rather than elongation of
posterior teeth is needed.
• Contraindications :
Severe malalignment and rotated teeth.
Deep bite tendency
Uncooperative patient.
www.indiandentalacademy.c
om
• Duration of wear:
Positioner should be worn at least 4 hours
during day time and during sleep.
Positioner in a cooperative patient will produce
any changes it is capable of with in 3 weeks, beyond
that time it serves as a retaining devise than a
finishing device.
www.indiandentalacademy.c
om
Duration of finishing and detailing affected by
• Variation in shape and size of patients teeth relative
to average measurements
• Inaccuracies in appliance design
• Inaccuracies in appliance placement
• Failure to allow sufficient time for the bracket to
express itself
• Use of force levels that overpower the appliance
design
www.indiandentalacademy.c
om
www.indiandentalacademy.c
om
www.indiandentalacademy.c
om

Finishing and detailing in Pre adjusted edgewise technique / fixed orthodontics courses

  • 1.
  • 2.
    FINISHING: It is thelast step, before active treatment is discontinued, of ensuring that the teeth and related structures are positioned in such a way as will lead to a better stability of results, enhancement of esthetics, optimized functions of the stomatognathic system and an improvement of the health of the periodontium. www.indiandentalacademy.c om
  • 3.
    • DETAILING: It isthe achievement of the ideal positions of every tooth in the vertical and horizontal planes with particular reference to the individual in- out, rotation, tip and torque adjustments. www.indiandentalacademy.c om
  • 4.
    During the finalstage of , it is important to focus on certain treatment goals. (Systemized orthodontic treatment mechanics M.B.T) These goals are: • Condyles. • Musculature. • Six keys • Ideal functional movements • Periodontal health. • Esthetics. www.indiandentalacademy.c om
  • 5.
    Goals according toAmerican board of orthodontics-July 2000. (Systemized orthodontic treatment mechanics M.B.T) ABO clarified and quantified the goals of static occlusion by providing a grading system for study casts and panoramic radiographs. Emphasis was placed on self assessment of seven features of dental casts and one feature in the radiograph. www.indiandentalacademy.c om
  • 6.
    DENTAL CASTS: • Toothalignment • Marginal ridges • Bucco lingual inclinations • Occlusal relationship • Occlusal contacts • Overjet • Interproximal contacts RADIOGRAPH: • Root angulation www.indiandentalacademy.c om
  • 7.
    Six keys tonormal occlusion - Andrews: (AJO 1972) Key I: Molar relationship www.indiandentalacademy.c om
  • 8.
    Key II: Crownangulation (tip). www.indiandentalacademy.c om
  • 9.
    Key III: Crowninclination (labiolingual or buccolingual inclination). www.indiandentalacademy.c om
  • 10.
  • 11.
    Key V: Tightcontacts. www.indiandentalacademy.c om
  • 12.
    Key VI: Occlusalplane www.indiandentalacademy.c om
  • 13.
    Factors to beconsidered in finishing and detailing: (Lecture series on finishing and detailing, university of south California, April 1976)-Dougherty 1. Correction and over correction of antero posterior jaw relation ship. 2. Establish correct tip of upper and lower anterior teeth. 3 .Establish correct torque of upper and lower anterior teeth. 4. Coordinating arch forms and arch widths. 5. Establish correct posterior crown torque. 6. Establishing marginal ridge relation and contact points. 7. Correction of midline discrepancies. 8. Establishing interdigitation of teeth www.indiandentalacademy.c om
  • 14.
    9. Checking cephalometricobjectives. 10. Checking root parallelism. 11. Maintaining closure of all spaces. 12. Evaluating profile and facial esthetics. 13. Checking for TMJ dysfunction's like clicking and locking. 14. Checking functional movements. 15. Determining of all habits have been corrected. 16. Correction of rotations and overcorrection when needed. 17. Establishing flat occlusal plane. www.indiandentalacademy.c om
  • 15.
    • Correction andover correction of antero posterior jaw relation ship. - The tip and torque - anterior brackets – demand for anchorage - upper arch. - Overcorrection of the Class II case is the greatest challenge in this area. - Relapse with the OJ returning and bite deepening– overcorrection to end to end position and maintain it with class II elastics for 6-8 wks followed by settling into ideal class I. - Profitt and Ricketts- over correction more than 1- 2 mm required. - M.B.T- over correction in class II- edge to edge. www.indiandentalacademy.c om
  • 16.
    • Establish correcttip of upper and lower anterior teeth. - Tip in face- Eliminates the need for 2nd -order bends - treatment more efficient with little effort. - 2nd order bend required when: - Improper bracket placement relative to the vertical reference lines of the anterior teeth - Irregularly shaped anterior teeth -peg laterals. - Ant spacing present- advantage- bracket slide as no arch wire bend. www.indiandentalacademy.c om
  • 17.
    • Establish correcttorque of upper and lower anterior teeth. – The anterior torque needs of patients vary - no single set of bracket torque values can meet the needs of all the cases . – Adjust the torque in the upper and lower anterior segments at various stages of treatment . – E.g.: over jet correction of Class II case – Torque frequently lost in Upper anterios and the lower incisors -angulated forward – So lingual root Torque in U arch wire and labial root Torque in L arch wire . – Ideally these compensations to be done in early stages of overjet correction and space closure www.indiandentalacademy.c om
  • 18.
  • 19.
    • Coordinating ArchWidths and Arch form – Coordination of arch wires - from beginning through the rectangular wire phase - prevent cross bites from developing. – In asymmetry cases -distortion anterior arch segments in canine regions. Treated by- Cross-elastics in cuspid areas, Canting the arch wire in the opposite direction. www.indiandentalacademy.c om
  • 20.
    • Establishing CorrectPosterior Crown Torque - prevents posterior interference and allows seating of centric cusps. – Built in torque- eliminates arch wire wire bends. – A tendency for upper palatal cusps to be situated below the occlusal plane- posterior buccal root torque - rectangular finishing wires. – In the lower arch, 1st & 2nd molars- undesirable lingual tipping, - buccal crown torque to the rectangular arch wires. www.indiandentalacademy.c om
  • 21.
    • Establishing MarginalRidge Relationships and Contact Points – Proper marginal ridge relationship- determined by bracket height. – Incorrect bracket height - apparent early . – Effective to reposition brackets as early as possible. – An .014" round wire can be used to step any improperly positioned brackets. www.indiandentalacademy.c om
  • 22.
    • Correction ofMidline Discrepancies – Minor discrepancies -3mm or less – easily corrected. – 5 methods of elastic wear . – A single Class II elastic on one side and a double Class II elastic on the other, for cases with a bilateral Class II component www.indiandentalacademy.c om
  • 23.
    – A singleClass II elastic on one side only, when the overjet results in a slight Class II relationship on that side and the opposite side is in a Class I position. www.indiandentalacademy.c om
  • 24.
    – Class IIIelastics on one side and Class II elastics on the other, for cases with the corresponding dental relationships. www.indiandentalacademy.c om
  • 25.
    – A singleClass III elastic on one side only, when that side is in a Class III position and the opposite side has a Class I dental relationship . www.indiandentalacademy.c om
  • 26.
    – An anteriorcross-elastic, when the discrepancy occurs primarily in the anterior segments. – Asymmetric elastics- short period –rectangular arch wire- to prevent cant. – Tieback necessary- to prevent sliding. www.indiandentalacademy.c om
  • 27.
    • Establishing theInterdigitation of Teeth – Rectangular wires - the teeth unable to settle . - Settling before debonding - Lower arch-0.014 & Upper-0.014" round sectional wire from Lateral incisor to Lateral incisor & vertical triangular elastics – encourage teeth to individually settle. www.indiandentalacademy.c om
  • 28.
    • Checking CephalometricObjectives – Progress head films - halfway through treatment - assessment of anchorage & skeletal, dental component. – Final cephalometric head films- 3 or 4 months before debonding. – Evaluate the success or failure of treatmenmt before debonding- tooth positions corrected before appliance removal. www.indiandentalacademy.c om
  • 29.
    • Important factorsto evaluate with progress and final cephalometric x-rays include – AP position of the incisors – Incisor angulations – Changes in the occlusal plane – The degree to which vertical development of the patient has occurred or restricted – The success of the correction of horizontal and skeletal components of the case. www.indiandentalacademy.c om
  • 30.
    • Checking theParallelism of Roots – The tip built into pre adjusted brackets - proper root paralleling. – A panoramic x-ray - before debanding to evaluate root parallelism. – If crown-root angulation is beyond normal standards, bracket repositioning or archwire bending may be required to modify the root positions. www.indiandentalacademy.c om
  • 31.
    • Maintaining theClosure of All Spaces – Space closure be maintained - extraction cases - passive tiebacks , lacebacks ,in the finishing stage to prevent relapse. www.indiandentalacademy.c om
  • 32.
    • Evaluating Facialand Profile Esthetics – Esthetic evaluation - ongoing process during all stages of orthodontic treatment. – A projection of esthetic goals - made as part of the treatment plan and is monitored clinically and cephalometrically. www.indiandentalacademy.c om
  • 33.
    • Checking forTMJ Dysfunctions such as Clicking and Locking – Document - TMJ dysfunction prior to treatment, – Monitor - TMJ dysfunction during treatment. If problems develop before the development of true internal derangement –normal TMJ function - re- established without permanent damage. – Monitor the patient for symptoms of TMJ dysfunction during retention. www.indiandentalacademy.c om
  • 34.
    • Checking FunctionalMovements – Before debonding, - checked for interferences during protrusive movements and lateral excursions. – Protrusive-lower eight most anterior teeth make contact with the upper six most anterior teeth. – Requires - slight widening of arch form - bicuspid area,- mesial of the lower bicuspids contacts the distal of the upper cuspids. - lateral excursions- the patient should experience cuspid rise with slight anterior contact and disocclusion of posterior teeth on both working and balancing sides. www.indiandentalacademy.c om
  • 35.
    • Determining ifAll Habits Have Been Corrected – Habits such as tongue thrusting - been corrected before the finishing stage . • Correction of Rotations and Overcorrection Where Needed – Most rotations - eliminated before finishing stage. Any remaining rotations can be corrected during finishing by one of three methods: – Rubber rotation wedges under the rectangular archwire. – Steiner rotation wedges— these are useful because they can be placed after the archwire is in position. – Lingual elastics—the most effective method. www.indiandentalacademy.c om
  • 36.
    • Establishing aRelatively Flat Plane of Occlusion – Reasons for completing cases to a relatively flat occlusal plane, according to Andrews, - proper fit of the upper dentition against the lower dentition. – Curve of spee left in lower arch the – Lower teeth occupy less room and increase in OJ. – Overcorrected in deep bite cases to prevent relapse. (Zachrisson) www.indiandentalacademy.c om
  • 37.
    Two rules infinishing treatment: (Contemporary orthodontics – William. R. Profit, 2nd edition) 1. Inter arch elastics and head gear should be discontinued , and the rebound from their use allowed to express itself ,4-8 weeks before the orthodontic appliances are removed. 2. Teeth to be brought into solid occlusal relationship without heavy arch wires. www.indiandentalacademy.c om
  • 38.
    During closing stagesof treatment attention is given to following considerations: (Systemized orthodontic treatment mechanics M.B.T) • Horizontal • Vertical. • Transverse • Dynamic • Cephalometric and Esthetic. www.indiandentalacademy.c om
  • 39.
    Horizontal considerations: • Coordinationof teeth fit. • Establishing correct tip of the anterior and posterior teeth. • Providing adequate incisor torque. • Establishing correct posterior torque. • Management of tooth size discrepancy. • Controlling rotations. • Maintaining closure of all spaces. • Horizontal over correction. www.indiandentalacademy.c om
  • 40.
    • Coordination oftooth fit: Coordination of tooth fit in anterior and posterior areas. 20 % of cases- Ant and Post teeth fit well. 60 % of cases- Mand ant tooth excess. 20 % of cases- Max ant tooth excess. Mgmnt- Enamel reduction in upper ant. Difficult - 60 % of cases. www.indiandentalacademy.c om
  • 41.
    • Establishing correcttip of anterior and posterior teeth: Tip is one of the strengths of PEA. Upper ant brackets - 40° of tip Lower ant brackets - 6° of tip. Upper premolar bracket - 2° to 0° Lower premolar bracket - 2° www.indiandentalacademy.c om
  • 42.
    Shape of incisorcrowns should be assessed during finishing. www.indiandentalacademy.c om
  • 43.
    • Providing adequateincisor torque Torque is the weakness of PEA. 3 factors- • App 1 mm segment of rectangular wire is placed in bracket of same dimension • A full size wire not used – reduces effectiveness of torque • Upper and lower anterior torque varies. Upper- additional palatal root torque Lower- additional buccal root torque www.indiandentalacademy.c om
  • 44.
    U.C.I- 10 °, U.L.I- 7 °, L.I- 5 ° -ADDED In cases of class I bi-max and class II , add upto 20 ° of palatal root torque in upper arch wire and 10- 15 ° of labial root torque in lower arch wire. Makes upper ant seg bigger than lower improving the fit in 60% of cases. www.indiandentalacademy.c om
  • 45.
    • Establishing correctposterior torque: Essential - preventing posterior interference and allowing for seating of centric cusps. Upper post- need buccal root torque lower post – need lingual root torque www.indiandentalacademy.c om
  • 46.
    In 1999, caskoand co directors of ABO defined the relationships between buccal and lingual cusps of maxillary and mandibular premolars and molars Mandibular lingual cusp should be at the same level or within a millimeter of the same level as mandibular buccal cusps - permits flat occlusal plane and good cusp fossae relation ship Maxillary posterior teeth -palatal cusps of the first and second molars are generally slightly longer and extend slightly more occlusally than buccal cusps www.indiandentalacademy.c om
  • 47.
    • Management oftooth size discrepancies Proximal stripping- early stage Addition of tooth mass • Controlling rotations: -an important aspect -in out compensation built -correct bracket position www.indiandentalacademy.c om
  • 48.
    E.g.- 10° rotationin upper molars and 0° rotation in lowers molars for proper occlusion. In cases of class I an II, upper premolar brackets are placed 0.5 mm mesially- buccal cusps of the upper premolars to rotate distally and palatal cusp more mesially. Lower canine brackets slightly to the mesial- rotates the mesial aspect labially and provides better contact with the distal aspect of lower lateral incisor. For any rotated teeth- brackets are placed in the in the direction of rotation at the beginning of treatment www.indiandentalacademy.c om
  • 49.
    Gingival surgery (preferablyCSF procedure) is indicated in patients who has severe anterior rotations. (Profitt) CSF procedures are carried 1-4 months before appliance removal after their alignment. • Maintaining the closure of all spaces: www.indiandentalacademy.c om
  • 50.
    • Horizontal overcorrection Horizontal over correction of class II and class III cases- class II elastics or class III elastics or headgear. Observed for a period of 6 to 8 weeks – stable- app removed. Class II cases- anterior teeth can be brought to an edge to edge position and held for approximately 6 to 8 weeks. Class III case horizontal over correction is done by 2-3 mm of additional overjet. www.indiandentalacademy.c om
  • 51.
    Vertical considerations: • Correctcrown lengths , marginal ridge relations and contact points. • Final management of curve of spee. • Correct crown lengths, marginal ridge relations and contact points: Correction of vertical crown positions, marginal relationships and contact points should be completed during rectangular stage of treatment Correct these early in treatment than during finishing stage for better stability. Therefore correct bracket placement is essential for achieving these relations. www.indiandentalacademy.c om
  • 52.
    • Curve ofspee: In low angle cases - level the entire curve of spee since excess curve of spee makes it difficult or impossible to complete final space closure in upper arch In high angle cases it is important to leave some curve of spee at the back of the arch to prevent the risk of open bite. www.indiandentalacademy.c om
  • 53.
    • Vertical overcorrection- Deep and open bite cases Bracket position- 0.5 mm incisally – deep bite 0.5 mm gingivally - open bite Deep bite- curve of spee leveled- bite opens. Bite opening curves can also be placed. Open bite- Tongue position and habits Positioners used . Retainer- small hole in the palatal area to position the tip of tongue. www.indiandentalacademy.c om
  • 54.
    Transverse considerations: • Archform • Arch coordination • Transverse overcorrection • Trans palatal elastics. • Arch form Single arch form is used for every patient. • Arch coordination Upper and lower arches should be coordinated right from the early stages- eliminates the cross bite. www.indiandentalacademy.c om
  • 55.
    Upper arch wireis 3mm wider anteriorly and posteriorly than the lower archwire - establish the correct 3mm of overjet anteriorly and posteriorly. www.indiandentalacademy.c om
  • 56.
    • Transverse overcorrection: Narrowmaxillary arches should be over expanded and held in over expanded position for an extended period of time. If the expansion is carried at the beginning of orthodontic treatment, a palatal bar should be placed. Additional buccal root torque in the arch wire is beneficial to allow posterior segments to settle properly. www.indiandentalacademy.c om
  • 57.
    • Trans palatalelastics ( Buffalo elastics) : These elastics are some times used for coordination of the arches at the end of treatment. These elastics are used to constrict the maxillary arch by producing trans palatal force on maxillary arch. These are attached to ball hooks on the maxillary first premolar bands. They are prescribed for night time wear as they interfere with speech. www.indiandentalacademy.c om
  • 58.
    Dynamic considerations : •Establishing centric relation and checking functional movements. • Checking for TMJ dysfunction • Establishing centric relation and checking functional movements: Necessary to monitor and to reevaluate the centric relation position of the mandible and additional corrections done prior to finishing of the case ( using inter maxillary elastics). . www.indiandentalacademy.c om
  • 59.
    Patients with occlusionin a class I position and with condyles in centric relation, should be checked for Interferences in protrusive and lateral excursions. During protrusive movement lower eight most anterior teeth make contact with the upper six most anterior teeth with no posterior contact. During lateral excursions the patient should experience cuspid rise with slight anterior contact and disocclusion of posterior teeth on both working and balancing sides. www.indiandentalacademy.c om
  • 60.
    • Checking forTMJ dysfunction: Document any evidence of TMJ dysfunction prior to trt and monitored during trt. Changes to be made during finishing stages: Anterior position of condyle- headgear or Class II elastics. Posterior position of condyle- Cessation of class II elastics and headgear or use of Class III elatics. Seated & reasonably centred condyle position – most beneficial position – apploance removed. www.indiandentalacademy.c om
  • 61.
    Cephelometric and estheticconsiderations: • Evaluation of cephelometric films: The most important factors to be evaluated with the cephelometric head films taken approximately 3-4 months before debonding. They are • Soft tissue profile. • Antero posterior position of incisors. • Torque of incisors • Changes in mandibular plane. • Success in correcting the horizontal skeletal and dental components www.indiandentalacademy.c om
  • 62.
    • Evaluation ofesthetic Factors of anterior teeth: These are analyzed by sitting or standing in front of the patient. • Crown lengths of maxillary and mandibular incisors. • Incisal edge contours • Axial inclination of all maxillary and mandibular incisors. • Midlines( upper ,lower.facial and labial) • Crown torques. • Smile line ( rest position and full smile) • Right -left symmetry of crown shapes and sizes of gingival marginal levels. www.indiandentalacademy.c om
  • 63.
  • 64.
  • 65.
    Roth adds hisfunctional requirements to the Six Keys to normal occlusion : 1. Lower incisors at the +1 to A-Po; for facial esthetics, for planning anchorage control, and for selection of mechanotherapy. 2. Tips of the upper incisors 2-2.5mm below the lip embrasure of the upper and lower lips, when the lips are closed with no lip strain. 3. No more than 1 mm of attached gingiva showing upon a full smile. www.indiandentalacademy.c om
  • 66.
    4. App. 2.5mmoverjet-overbite relationship (.0005" clearance with the lingual surface of the upper incisor.) 5. A flat occlusal plane, at the end of therapy that would return to a 1 to 1.5mm curve, at its deepest point, after appliance removal and settling of the occlusion 6. A curve of Wilson that would allow seating of centric cusps, but clearance upon excursions. www.indiandentalacademy.c om
  • 67.
    7. Lower incisorsaligned contact point-to-contact point with the roots in the same plane, when observed from the occlusal, and a mesioaxial inclination of 2 degrees. 8. L- 3 crowns angulated mesially 5 degrees, with the incisal tip 1mm higher than the incisal edge of, the lateral incisors. The lower cuspids should have a slightly exaggerated mesial rotation in extraction cases. www.indiandentalacademy.c om
  • 68.
    9. The lowerbicuspids should be uprighted 1 degree from their normal mesial inclination and should have a slight distal rotation (more so on an extraction case). The contact point should be adjacent to the contact point on the lower cuspid distal surface. 10. The lower molars should be uprighted 1 degree from their normal 2-degree mesial inclination, and should have a slight distal rotation. www.indiandentalacademy.c om
  • 69.
    .11.The lower buccalsegment should have progressive torque close to Andrews' measurements for establishing the curve of Wilson, and there should be no rotations or spaces. 12. The upper 1st molars should have sufficient distal rotation, mesioaxial inclination, and buccal root torque, so as to fit with the lower 1st molars,. The same would follow for the upper 2nd molars. (14 degrees torque and 0 degrees tip). www.indiandentalacademy.c om
  • 70.
    13.The upper bicuspidsshould be uprighted to 0 degrees from their normal 2-degree mesial inclination, with no rotation. 14. The U-3 must have its contact points adjacent to the contact points of the upper bicuspid and lateral incisor, to establish proper length for cuspid guidance. ( +11 to +13 degrees of mesial crown tip) www.indiandentalacademy.c om
  • 71.
    15. The U-2& U-1 should be almost equal in incisal edge length, with no more than 0.5mm height differential. 16. There should be no rotations or spaces in the upper arch, and the buccal segments from the cuspids distally should have 14 degrees non progressive buccal root torque. www.indiandentalacademy.c om
  • 72.
    17. The archform should be a modified catenary curve consisting of five separate radii — One for the front of the arch form, one for each cuspid-bicuspid area and one for each buccal segment from the first bicuspid distally. The widest point of the lower arch would be at the mesiobuccal cusp of the mandibular first molars and at the first bicuspids. The widest point of the maxillary arch would be at the mesiobuccal cusps of the first molars. www.indiandentalacademy.c om
  • 73.
    Roth's sequence offinishing To finish lower arch before the upper arch 1. Lower anteriors at or slightly lingual to the cephalometric goal. 2. Lower incisor should have divergent roots 3. Lower canines positioned in mesio-axial inclination with distal root positioning 4. Canine tip 1 mm higher than incisal edge of Lower incisor. www.indiandentalacademy.c om
  • 74.
    5. Canine crownslingually inclined , long axis labio- axially inclined 6. Lower posteriors uprighted 30 distal from nl mesio- axial position of 20 7. Lower posteriors rotated slightly distally 8. Leveled curve of spee www.indiandentalacademy.c om
  • 75.
    Upper arch: 1. Max6 to have distal rotation with sufficient buccal root torque to lift the palatal cusp (supporting). 2. Positioning of 6 determines that of 7 from a rotational standpoint since both are trapezoidal in shape 3. This facilitates the PM to seat in a class I reln 4. U canines should have sufficient mesio-axial inclination so that their tips ride on the disto-incisal inclines of L canine- canine guided occlusion www.indiandentalacademy.c om
  • 76.
    5. UI positionedto close the space and occupy sufficient space within their reach Finishing the upper arch prior to lower makes it impossible to finish case properly ,for when the lower arch is corrected one has to move all upper teeth to get proper relationship of upper arch to lower arch. www.indiandentalacademy.c om
  • 77.
    Occlusal check listin Finishing : ( Bio progressive therapy)-Ricketts • An occlusal check list including eight areas in each arch is used in establishing the ideal finishing arch configuration and individualized tooth rotation in over treated orthodontic finishing occlusion. • This check list procedure is used in gaining the final completed details necessary in accomplishing the desired finishing objectives. www.indiandentalacademy.c om
  • 78.
    MAXILLARY ARCH : 1.Width across first and second molars. 2. Distal rotation of first molar so that line drawn through distobuccal and mesiolingual cusps points to the distal third of the opposite side cuspid ( in extraction case mesial of canine) 3. Mesial offset (large) on molar. 4. Mesial rotation of lingual cusp of first bicuspid to seat in distal fossa of lower first bicuspid. 5. Premolar offset (2-3mm) to avoid first area of prematurity. 6. Cuspid brought into contact with lower cuspid and premolar to establish cuspid rise. 7. Lateral incisor left labial (until retainer) to allow over treatment of buccal segments; then tucked in. 8. Smooth arc across incisors.www.indiandentalacademy.c om
  • 79.
    • Check listfor maxillary arch : 1. Arch width : Arch width should be checked at first and second molar region. They should be well expanded to compensate narrowness present at the beginning of treatment This width increase is necessary to allow and encourage an improved torque and function. www.indiandentalacademy.c om
  • 80.
    2. Upper firstmolar rotation: A line drawn from the tip of the distal buccal cusp extended through the mesiolingual cusp tip should pass through the canine of the opposite side. The upper first molar should be distally rotated until its distal buccal cusp can contact the mesial buccal cusp of the lower second molar. www.indiandentalacademy.c om
  • 81.
    3. Upper secondbicuspid: This is considered the key to finishing because the lower 1st molar and the upper 1st molar both must be correct before its proper position can be attained. Care should be exercised to make certain the distal margin of the upper bicuspid is well occlusal to the marginal ridge of the upper first molar. The upper second bicuspid may appear to be slightly inclined mesially. www.indiandentalacademy.c om
  • 82.
    4. The upperfirst bicuspid : It should be parallel to the occlusal plane buccolingually. It may also appear to be slightly distally inclined because the mesial marginal ridge is lower than the distal marginal ridge. 5. Contour and over treatment of the buccal occlusion: The upper first bicuspid is offset buccally from the cupid to avoid the first area of prematurity with the lower 1st bicuspid. Class II malocclusions are over treated by riding up the distal inclines until they appear to be in a super class I or mild class III occlusion. www.indiandentalacademy.c om
  • 83.
    6. Maxillary canines: Another key tooth in finishing is the upper canine. The tooth is over treated in the finishing stages of Class I and Class II malocclusion corrections. It should be reversed and over treatment forward toward the Class II side in Class III malocclusions. In class II over treatment done such a way that the distal contact is outward and slight mesial rotation present – tucked back in the distal during the act of settling. www.indiandentalacademy.c om
  • 84.
    7. Lateral incisors: The upper lateral incisor is kept labially. The upper lateral have to be depressed excessively or else placed forward in its final position. This forward position is preferred to the intruded position by the patient because of the esthetics. 8. Upper central incisors: Finally the upper centrals contacts are considered. Upper and lower midlines should be coincided and the tooth size and mass can be checked for their final settling potential. www.indiandentalacademy.c om
  • 85.
    MANDIBULAR ARCH: 1. Archwidth across second molars. 2. Distal of first molar rotated lingually until the distobuccal cusp approximates mesial sluice way on second molar. 3. Large buccal offset at mesial of first molar. 4. Check inter-bicuspid width for necessary expansion. 5. Proper buccal arch form and contour. 6. Premolar offset to bring it in contact with distal lingual incline of upper canine (2-3mm). 7. Mesial of cuspid tucked slightly behind lateral incisor distal of the cuspid buccal. 8. Over-rotation of incisors; smooth arc. www.indiandentalacademy.c om
  • 86.
    • Finishing checklist in lower arch : 1.Second molar : Molar width at Lower second molar and check for uprightness and any rotations. The lower second molar should be tipped (5 deg )distally during treatment because it will settle mesially as the distobuccal cusp of the upper first molar settles into the lower first and second molar embrasure . . www.indiandentalacademy.c om
  • 87.
    2. Mandibular Firstmolar : First molar distal contact should be at least 1/3 inward from the buccal on the marginal edge of the second molar. The lower first molar is checked for uprightness and the mesial is slightly outward in preparation to accommodate the distal incline of the upper second bicuspid. www.indiandentalacademy.c om
  • 88.
    3.Second premolar: Distal contactof the lower second bicuspid would appear to be slightly depressed for the preparation of the seat for the upper second bicuspid. Each tooth in the lower arch is progressively narrowed in a smooth catenary curve. www.indiandentalacademy.c om
  • 89.
    4.First premolar : Thelower first premolar is very critical. This tooth should appear to be buccal to the lower canine and should be well elevated. The mesial contact should be to the buccal. This will serve as a point of relation for Canine contact. If this tooth is not far enough to the buccal, a tendency for prematurity will be experienced in occlusion with the upper 1st bicuspid. www.indiandentalacademy.c om
  • 90.
    5. Torque consideration: Fromthe lower 2nd bicuspid backward there is progressive lingual crown torque. 6 .Canine : Canine is critical in mechanical and proprioceptive function. This tooth is principally to change arch shape. The typical position produced is a smooth corner of the catenary curve. In wide arches, a cuspid eminence is present, but in tapered arches this tooth is held inwardly on the mesial contact of the lower first bicuspid, which may rotate forward. www.indiandentalacademy.c om
  • 91.
    7. Contact ofthe mesial of canine and the lower lateral: Distal contact of lateral incisor - overlapped – mesial ct. pt of canine. Reasons • Adjustment of canine labio lingually – no crowding • Stabilizes the lower lateral • Canine vertical adjustment during retention. 8. Incisor: Smooth curve of incisor contacts completes the lower arch shape. www.indiandentalacademy.c om
  • 92.
    • Final stageof finishing –Settling Purpose : Bring all teeth into solid occlusal relationship before teeth patient the patient is placed in retention. How to settle the occlusion : There are 3 ways to settle the occlusion. 1. By replacing rectangular wires at the very end of treatment with light round arch wires that provide some freedom for movement of teeth. 2. With laced vertical elastics after removal of posterior segments of the arch wires . 3. With the use of tooth positioner. www.indiandentalacademy.c om
  • 93.
    • Using lightround wires Replacing rectangular wires : This was the original method for settling , recommended by Tweed in 1940. According to him : These light wires must have first and second order bends as used in rectangular wires. These light arch wires will quickly settle the teeth into final occlusion and should remain in place for only a few weeks at most. vertical elastics are used only if needed. Disadvantages : Precise control of anterior teeth is lost by using light continuous round wires . www.indiandentalacademy.c om
  • 94.
    Later- During closingstages of treatment much lighter wires are used since rectangular stainless steel wires are restrictive for settling of teeth in closing stages of treatment. Typically .014 or.016 heat activated Ni-Ti is used in the lower arch coordinated with upper arch. In the upper arch a .014 round sectional arch can be placed from lateral incisor to lateral incisor. www.indiandentalacademy.c om
  • 95.
    • Elastics : Elasticsfor settling are laced around tubes and brackets . A typical arrangement is to use light 1/4 -inch elastics with class II or class III depending on whether slightly more correction is desired. These elastics should not remain in place for more than 2 weeks, one week is usually enough to accomplish desired settling. www.indiandentalacademy.c om
  • 96.
    • Settling Elastics: Elasticswith class II pull: Elastics with class III pull : www.indiandentalacademy.c om
  • 97.
    These wires canbe accompanied by the use of vertical triangular elastics when settling needs to occur. The better the bracket placement the less elastics need to be used. It is beneficial to retain all bands and brackets on the teeth during settling so that if any unwanted changes occur these can be corrected. www.indiandentalacademy.c om
  • 98.
    Finishing Elastics incase with open bite : - triangular elastics: www.indiandentalacademy.c om
  • 99.
    Variations: – Cuspids labiallydisplaced – extend sectional wire in upper ant. seg – to hold them in position. – Diastemas – areas tied lightly with elastic thread or ligature wires. – Teeth extracted – figure of 8 ties –across extraction sites – Palatal expansion – small removable palatal plate – 0.018 wires extending interproximally in the gingival areas – Moderate to severe Cl II/I, – upper full arch wire, wire bend back distally. – Settling longer than 6weeks – lower rect. wire used www.indiandentalacademy.c om
  • 100.
    • Serpentine wiring: This is done about one week prior to appliance removable. Purpose : For settling of occlusion without any interdental spacing Method: Upper and lower arch wires are removed but the TPA and molar bands are left in place, teeth are ligated in a serpentine fashion from second premolar to second premolar with standard ligature wire. www.indiandentalacademy.c om
  • 101.
    • Vertical Spaghettielastics: These are used one week before appliance removal. Maxillary and mandibular arch wires are removed, 0.016 ss wire is placed in mandibular arch and no arch wire is placed in the upper arch brackets. Useful in patients whom there is difficulty in closing the bite whether anteriorly or posteriorly www.indiandentalacademy.c om
  • 102.
    Positioners for finishing: An alternative to segmental elastics or light round arch wires for settling is a rubber or plastic tooth positioner. Advantages : It allows the fixed appliance to be removed somewhat quickly than otherwise would have been, therefore some finishing that could have been done with final arch wires can be left to positioner. It serves not only to reposition the teeth but also to massage the gingiva and promote the inflamed gingiva to rapid return to normal gingival contours. www.indiandentalacademy.c om
  • 103.
    • Disadvantages: Increased labwork, Expensive, Needs good patient cooperation. Positioner tends to increase the overbite more than when compared to settling with light elastics so cannot be used in patients with initial deep bite. Cannot maintain the correction of rotations (ie minor rotations recur) www.indiandentalacademy.c om
  • 104.
    • Indications : 1.Gingivalcondition with more than usual degree of inflammation and swelling at the end of active orthodontics. 2.Cases with an open bite tendency ,so that settling by mild depression rather than elongation of posterior teeth is needed. • Contraindications : Severe malalignment and rotated teeth. Deep bite tendency Uncooperative patient. www.indiandentalacademy.c om
  • 105.
    • Duration ofwear: Positioner should be worn at least 4 hours during day time and during sleep. Positioner in a cooperative patient will produce any changes it is capable of with in 3 weeks, beyond that time it serves as a retaining devise than a finishing device. www.indiandentalacademy.c om
  • 106.
    Duration of finishingand detailing affected by • Variation in shape and size of patients teeth relative to average measurements • Inaccuracies in appliance design • Inaccuracies in appliance placement • Failure to allow sufficient time for the bracket to express itself • Use of force levels that overpower the appliance design www.indiandentalacademy.c om
  • 107.
  • 108.