Download to read offline


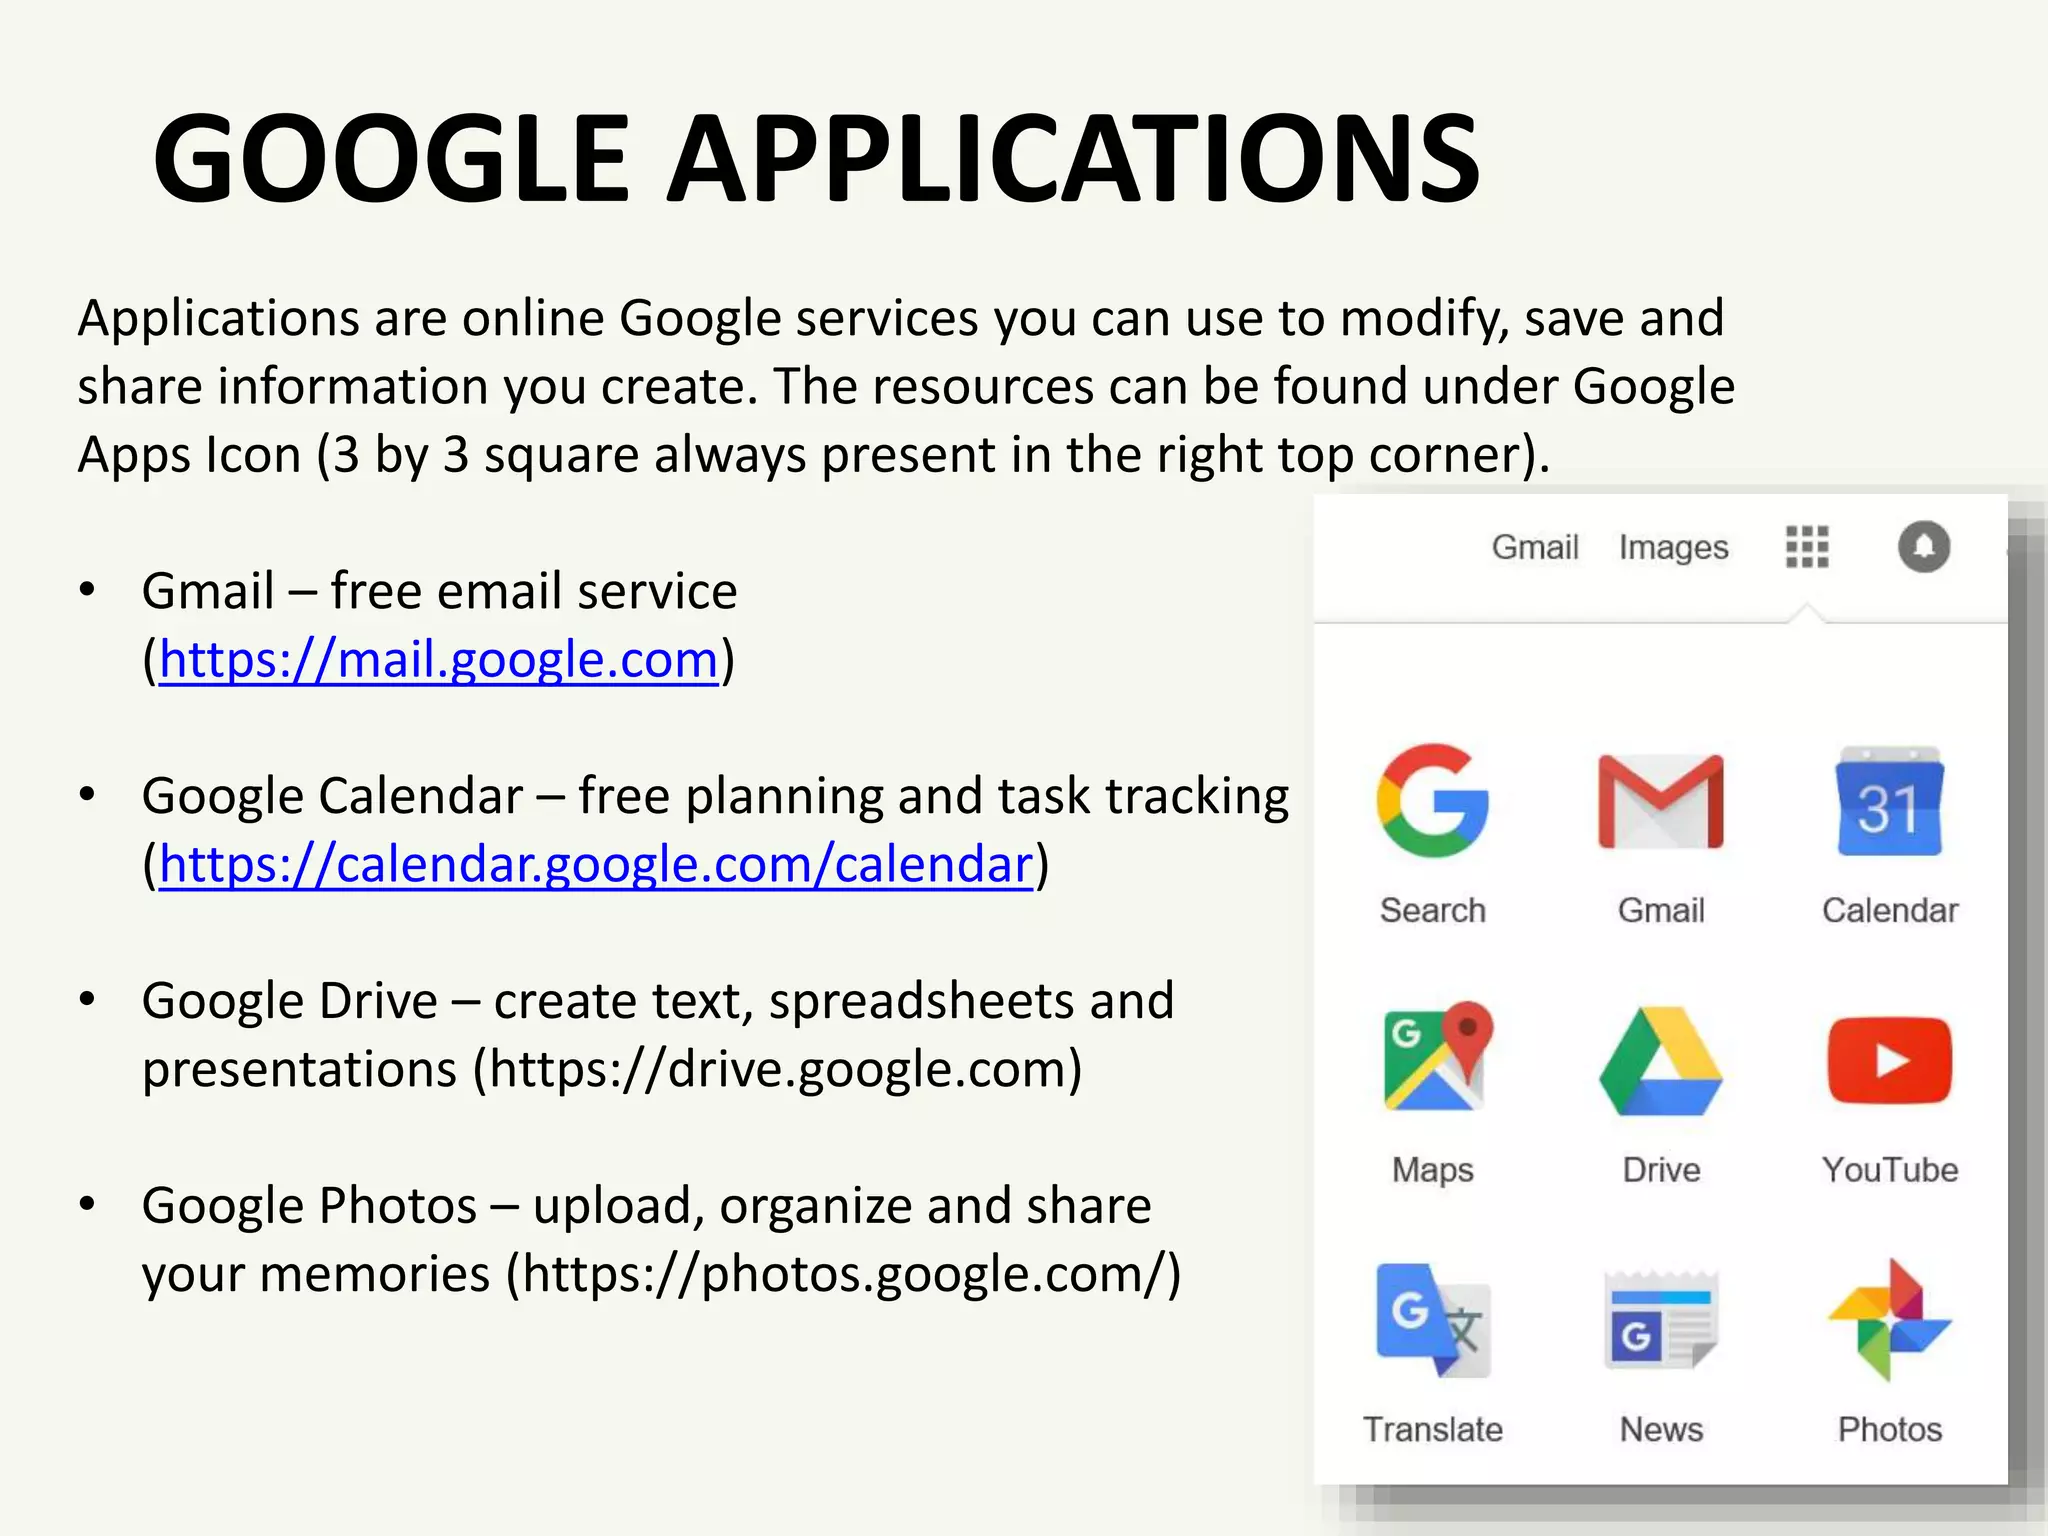


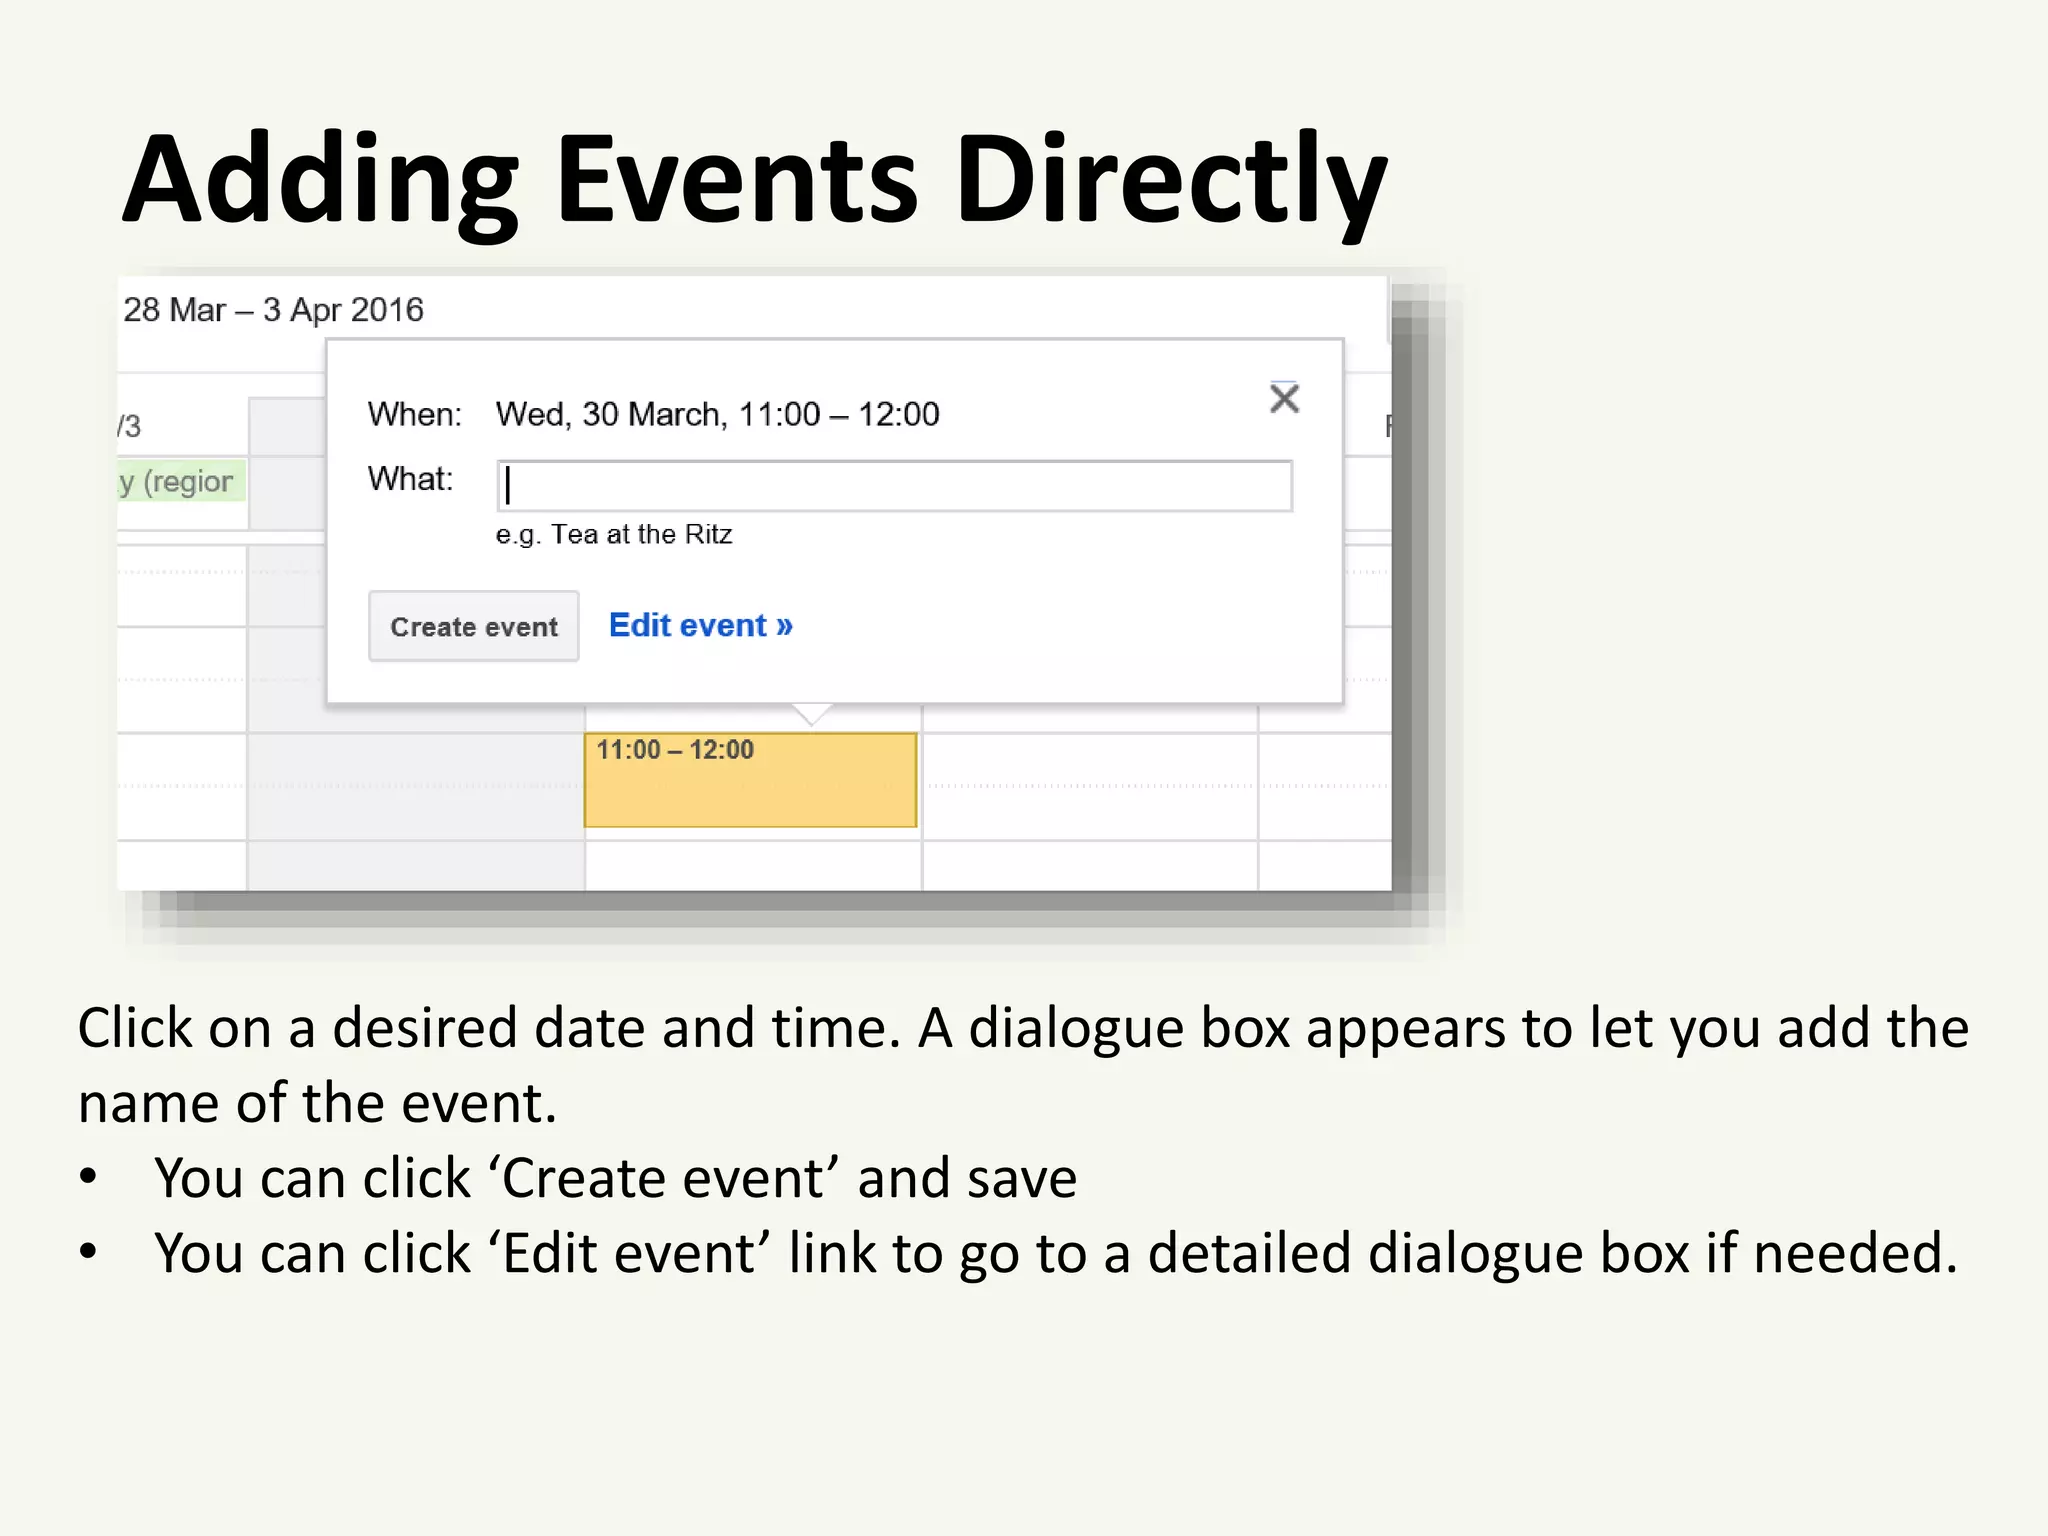


The document provides an overview of various Google services and applications, emphasizing their user-friendly navigation and range of features. It covers tools like Google Calendar for scheduling, Google Drive for document creation and sharing, Google Maps for navigation, and Google Photos for managing images. Additionally, it highlights the importance of usage rights for images and the capabilities of Google Translate for language translation.


![Vibe Coding vs. Spec-Driven Development [Free Meetup]](https://cdn.slidesharecdn.com/ss_thumbnails/vibecodingvsspecdrivendevelopment-251209105622-43f455e7-thumbnail.jpg?width=640&height=640&fit=bounds)


